

zerMATT951's re-assembly thread

 09-05-2011 | 09:04 AM
#93
Thread Starter
Addict
Lifetime Rennlist
Member
Lifetime Rennlist
Member
Joined: Apr 1999
Posts: 2,099
Likes: 0
From: Cowtown, TX
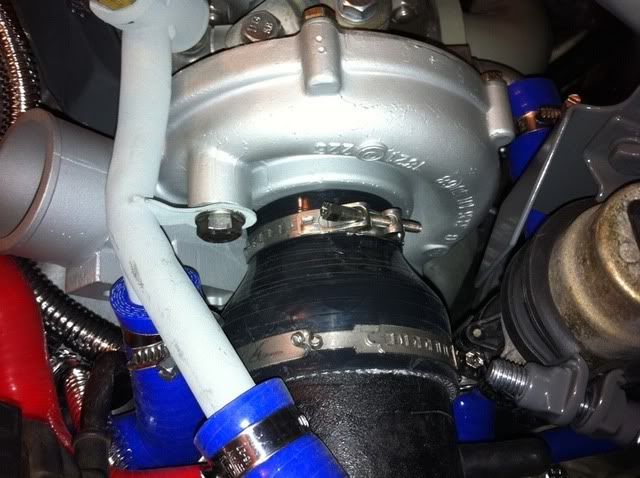
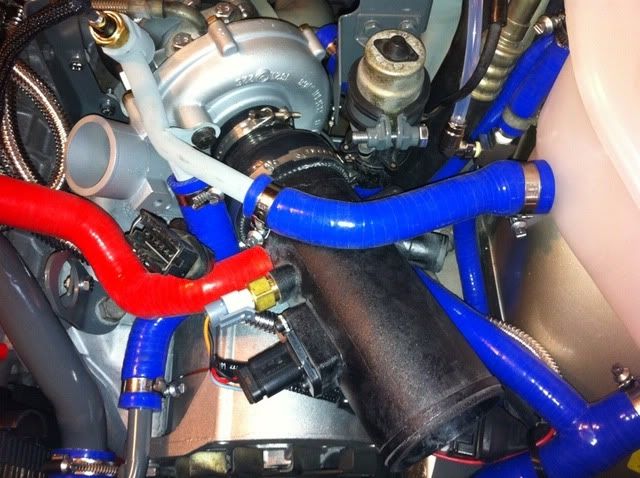
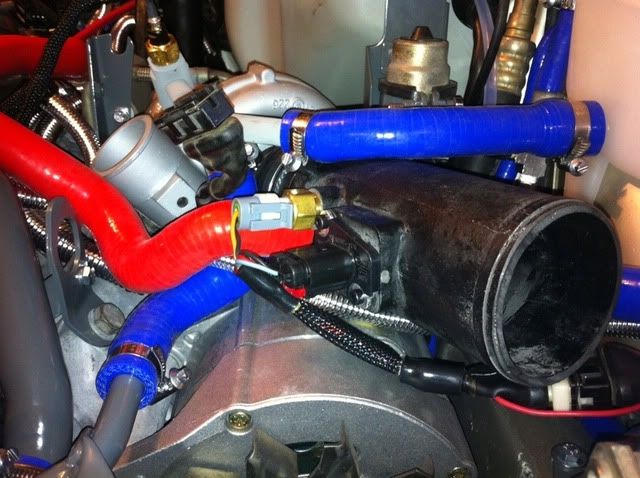
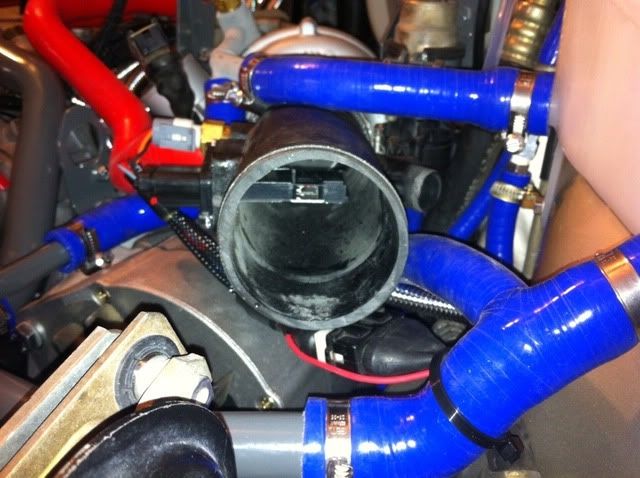
Close-ups of the M-Tune MAF pipe... Please ignore the IAC hose connected to it, I didn't figure that out till later (I really have NO idea what I'm doing).

Last edited by zerMATT951; 09-05-2011 at 09:57 AM.
09-05-2011 | 11:00 AM
#94
Rennlist Member
Joined: Sep 2008
Posts: 779
Likes: 0
From: Northern NJ
I have E-Mailed Dave at LR, though have not received a response.
Since I don't have the 2 designs in my hands together I can't see the possibilities or not.
Your car looks like it's coming along really nice! Beautiful work!
09-05-2011 | 11:47 AM
#95
Thread Starter
Addict
Lifetime Rennlist
Member
Lifetime Rennlist
Member
Joined: Apr 1999
Posts: 2,099
Likes: 0
From: Cowtown, TX
I've wondered the same thing, I'll be watching these mount bolts closely and see what happens. It seems like you could drill and tap a couple more holes for the additional legs, but I've run into so many slow-downs with my re-assembly already, I just want to keep moving at this point. 
Now if I can figure out how to get these damned AN fittings slipped over the braided stainless hoses. The collars seem WAY too small, but I'm sure it's supposed to work... shoving them simply isn't doing the trick, so I'm off to search the forums for hints.
Now if I can figure out how to get these damned AN fittings slipped over the braided stainless hoses. The collars seem WAY too small, but I'm sure it's supposed to work... shoving them simply isn't doing the trick, so I'm off to search the forums for hints.
 09-05-2011 | 05:18 PM
#98
Thread Starter
Addict
Lifetime Rennlist
Member
Lifetime Rennlist
Member
Joined: Apr 1999
Posts: 2,099
Likes: 0
From: Cowtown, TX
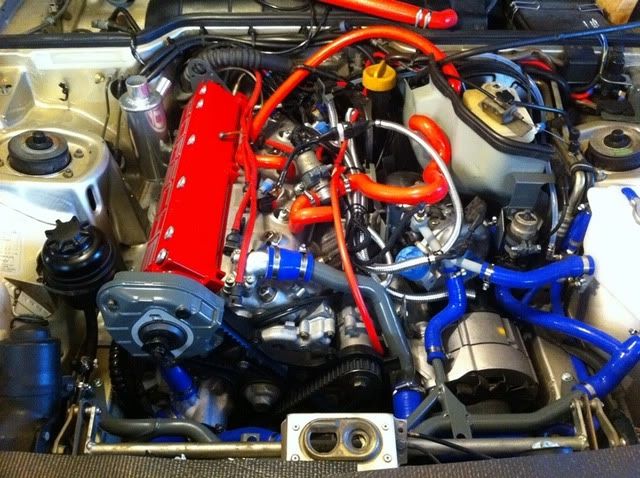
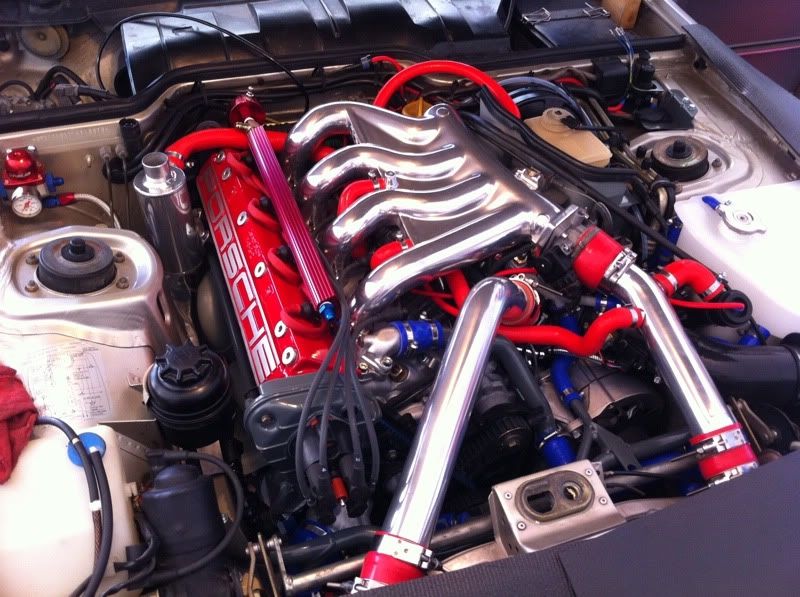
The IC pipes are LR with Jet Hot 1700 Sterling coating (for looks mostly, not for heat). I wanted some "bling" on top, so the manifold, IC pipes, and oil can all match.
Here's a 3PM picture. Just need to make 2 more fuel lines and attach the, then plug all of the new wiring harness wires in at the ECU connectors, drain the fuel tank, install a new fuel pump, and I'll be adding oil and cranking it over. We'll see if that's late tonight or tomorrow morning...
Here's a 3PM picture. Just need to make 2 more fuel lines and attach the, then plug all of the new wiring harness wires in at the ECU connectors, drain the fuel tank, install a new fuel pump, and I'll be adding oil and cranking it over. We'll see if that's late tonight or tomorrow morning...
09-05-2011 | 07:27 PM
#100
Rennlist Member
Joined: Nov 2010
Posts: 1,336
Likes: 0
From: Everett, WA
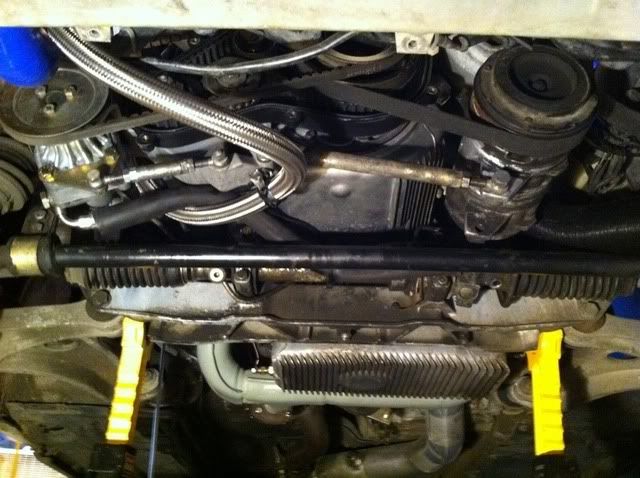
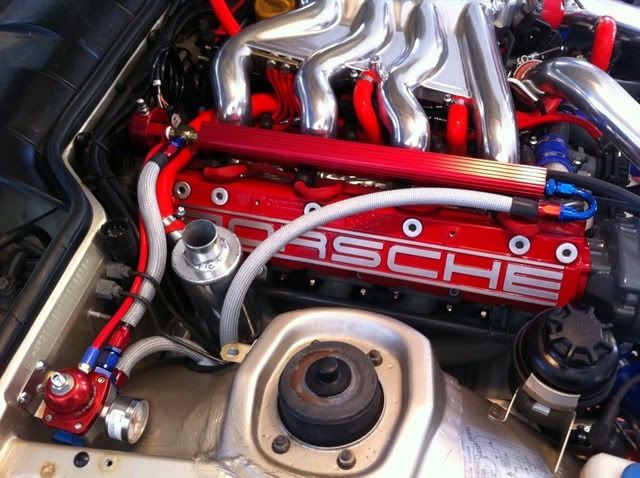
It's looking great!! I just noticed that in the pic below, the braided SS (oil cooler, I'm assuming??) line is touching the PS line... I've heard (never seen, but heard) that if you let a braided SS line rest on a rubber line, it will saw through the rubber line over time.
Also, I had a bunch of trouble priming my oil pump... the method you mentioned earlier works... but only if you pull the oil filter off and shoot compressed air down the dipstick tube until oil comes out of the filter pedestal... then put the filter back on, apply air pressure down the dipstick tube and crank... I spent probably about 10mins trying without that first step and never saw any pressure... tried that trick and it happened instantly!
Good luck!
09-05-2011 | 09:01 PM
#101
Thread Starter
Addict
Lifetime Rennlist
Member
Lifetime Rennlist
Member
Joined: Apr 1999
Posts: 2,099
Likes: 0
From: Cowtown, TX
Also, I had a bunch of trouble priming my oil pump... the method you mentioned earlier works... but only if you pull the oil filter off and shoot compressed air down the dipstick tube until oil comes out of the filter pedestal... then put the filter back on, apply air pressure down the dipstick tube and crank... I spent probably about 10mins trying without that first step and never saw any pressure... tried that trick and it happened instantly!
Thanks!

 09-05-2011 | 09:32 PM
#103
Rennlist Member
Joined: Nov 2010
Posts: 1,336
Likes: 0
From: Everett, WA
Yeah, I don't like the way those hoses ended up. I'll probably put something in-between them to protect the PS line, although it's already inside of a very thick outer protection hose, so I think it would take a very long time to wear through to the real hose.
Hmm... Dave didn't mention that. Maybe he assumes too much when explaining that method. Did you pour oil down into the oil filter housing/hole before you put the filter on? I haven't, but I'm wondering if that might accomplish the same thing that you did by removing the filter for a bit.
Thanks!
Hmm... Dave didn't mention that. Maybe he assumes too much when explaining that method. Did you pour oil down into the oil filter housing/hole before you put the filter on? I haven't, but I'm wondering if that might accomplish the same thing that you did by removing the filter for a bit.
Thanks!
No, I didn't pour oil down the into the filter housing/hole... just filled the car up with cheap oil, a quart of ATF (high in detergent), and a bottle of Lucas break-in additive (basically just ZDDP)... then took the filter off and put air down the dipstick tube until oil started to ooze out of the filter hole... put the filter back on, put air down the dipstick tube and cranked. I got pressure almost instantly.
Your engine bay looks AMAZING! I think mine looks pretty good, and I'm a bit envious!

Good luck! hope she fires right away for you!
09-05-2011 | 11:49 PM
#104
Thread Starter
Addict
Lifetime Rennlist
Member
Lifetime Rennlist
Member
Joined: Apr 1999
Posts: 2,099
Likes: 0
From: Cowtown, TX
After those last pics, I connected the new LR harness wiring at the "central electrical connection" under the hood and broke that stupid little connector into several pieces. I cobbled everything back together with the new wires in place (and the remaining old wires), wrapped electrical tape around everything, and put the little plastic cover back on to cover up the whole mess.
Then I proceed into the car to connect as much of the DME & KLR wiring as I could. I have a little issue in that I pulled two too many wires out a month or two ago - I ended up pulling one solid brown and one solid gray from the DME plut, and I have no idea where they go now. I think the brown wire might go at pin #5, and I think that's where the new LR harness brown wire T's into - but now I also have a brown/yellow wire leftover that also appears to be a ground wire of some sort because the PO tapped in there to ground the air/fuel gauge.
I have absolutely no idea where the solid gray wire goes - I don't have any open pins now. I also need to confirm that the O2 sensor is connected at pin # 23 (green).
Off to search the forums...
Then I proceed into the car to connect as much of the DME & KLR wiring as I could. I have a little issue in that I pulled two too many wires out a month or two ago - I ended up pulling one solid brown and one solid gray from the DME plut, and I have no idea where they go now. I think the brown wire might go at pin #5, and I think that's where the new LR harness brown wire T's into - but now I also have a brown/yellow wire leftover that also appears to be a ground wire of some sort because the PO tapped in there to ground the air/fuel gauge.
I have absolutely no idea where the solid gray wire goes - I don't have any open pins now.
I also need to confirm that the O2 sensor is connected at pin # 23 (green).Off to search the forums...
09-06-2011 | 12:50 AM
#105
Rennlist Member
Joined: Nov 2010
Posts: 1,336
Likes: 0
From: Everett, WA
After those last pics, I connected the new LR harness wiring at the "central electrical connection" under the hood and broke that stupid little connector into several pieces. I cobbled everything back together with the new wires in place (and the remaining old wires), wrapped electrical tape around everything, and put the little plastic cover back on to cover up the whole mess.
fun times!