
zerMATT951's re-assembly thread
 06-05-2011, 03:27 PM
#1
Addict
Lifetime Rennlist
Member
Lifetime Rennlist
Member
Thread Starter
Well guys, I've gone IN as far as I plan to this time around... stopped short of pulling the oil pan b/c the PO had new rod bearings installed just before I bought the car (under 10k miles ago). Now it's time to start putting things back together. The project started as a blown head gasket tear-down about 5 years ago, then a broken bolt and *life* got in the way.
I've been back at it for a couple of months, pulling off more stuff (turbo, balance shaft covers, etc) to do all of the "while you're in there" stuff, plus a bit more. I've collected all of the parts that I think I need, plus lots of upgraded goodies, and just got two huge boxes of stuff back from Jet Hot in OKC on Friday. I spent over an hour unpacking those well-packed boxes yesterday, then worked for a couple more hours, plus a couple of hours this morning. Unfortunately, un-interrupted full weekend days are not an option for me with a demanding 2-year old running around.
So this weekend's progress included drilling & tapping the head for the LR steam vent it, then cleaning up the AOS and installing the LR catch can. I also put the turbo back together so it's in one-piece again.
I'd like to keep this thread open while I put everything back together over the next several weekends as I'm sure I'm going to be asking questions from you folks who have been where I am before and can probably offer some assistance when I get stuck.
I'll post some pictures below so you can see where I am today and what I got done.
Wish me luck!!
Last edited by zerMATT951; 10-22-2011 at 02:33 PM.
 06-05-2011, 03:46 PM
#2
Addict
Lifetime Rennlist
Member
Lifetime Rennlist
Member
Thread Starter
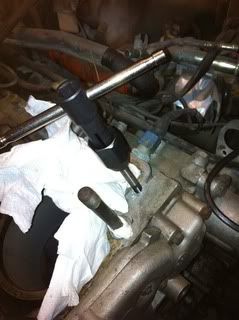
This was the broken water neck bolt that caused me much frustration several years ago and prompted me to park the car for a while. I know now that many people have had this happen, and some just siliconed a bolt head over the hole and moved on... but I didn't want to leave this broken. I finally pulled it out a couple of months ago and started working on the car again:
Plus, this little cutie came along in 2009...

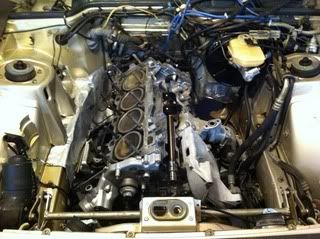
The engine bay got a much needed cleaning
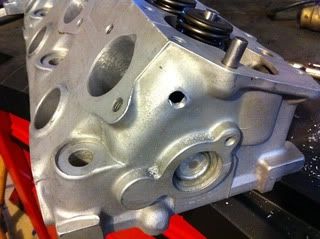
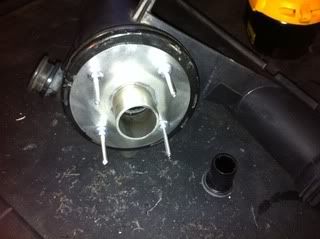
LR steam vent hole
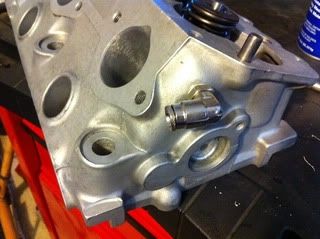
LR steam vent fitting
LR AOS crank case breather hole drilled
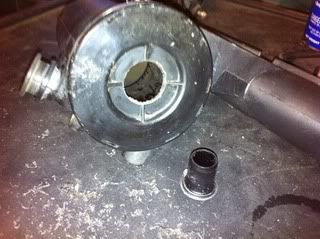
LR AOS crank case breather nipple install
More to come...
Plus, this little cutie came along in 2009...
The engine bay got a much needed cleaning
LR steam vent hole
LR steam vent fitting
LR AOS crank case breather hole drilled
LR AOS crank case breather nipple install
More to come...
 06-05-2011, 06:00 PM
#4
Addict
Lifetime Rennlist
Member
Lifetime Rennlist
Member
Thread Starter
http://www.lindseyracing.com/LR/Parts/STEAMVENT.html
http://www.lindseyracing.com/LR/Parts/BREATHERTANK.html
06-05-2011, 06:22 PM
#5
Addict
Lifetime Rennlist
Member
Lifetime Rennlist
Member
Thread Starter
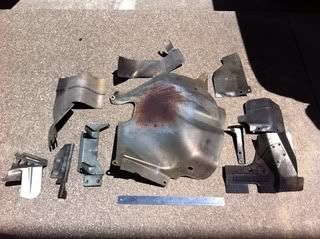
Here are a few of the parts that I took out and decided to get coated. Note that I had the intake mostly polished prior to getting it coated - I didn't think the rough finish would look good with the Sterling 1700 coating:

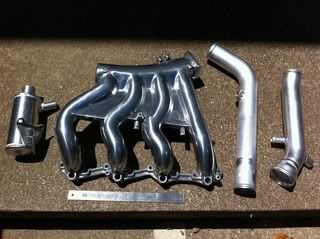
And everything that I sent to Jet Hot that I got back on Friday. Note that the stock headers have been upgraded to SFR Stage I
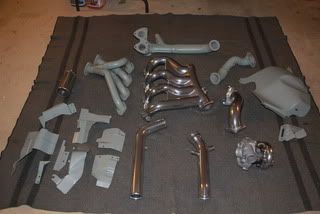
And everything that I sent to Jet Hot that I got back on Friday. Note that the stock headers have been upgraded to SFR Stage I
Last edited by zerMATT951; 06-06-2011 at 12:54 PM.
06-05-2011, 10:20 PM
#6


take care,
Jason


Trending Topics
06-12-2011, 10:59 PM
#9
Addict
Lifetime Rennlist
Member
Lifetime Rennlist
Member
Thread Starter
Made some more progress this weekend, but I am purposefully moving very slowly... I can't remember where most of the little bits go! If anyone has links or photos of the turbo side of the motor with the intake or intake & turbo removed, please let me know where I can look at them :-)
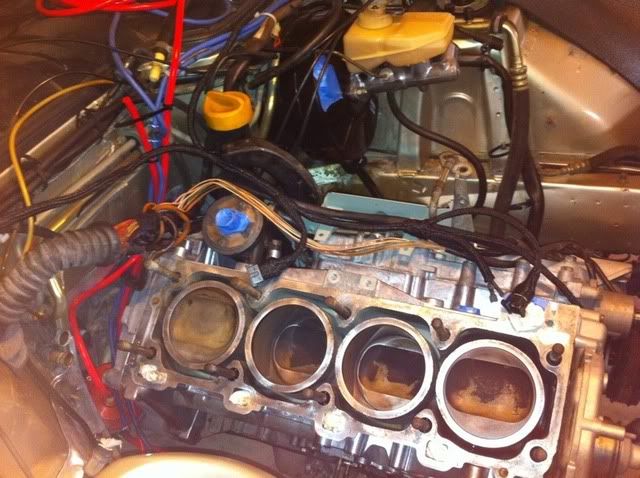
The AOS is now installed, engine ground connected, flywheel sensors replaced, top balance shaft bearings replaced and cover installed. Next I installed the front exhaust section (with new O2 bung), connected the wastegate, and dry-fitted the turbo, down pipe, and half of the crossover (3pc). I realized that I done have a new turbo to crossover gasket, so I stopped here to contemplate next weekend's tasks...
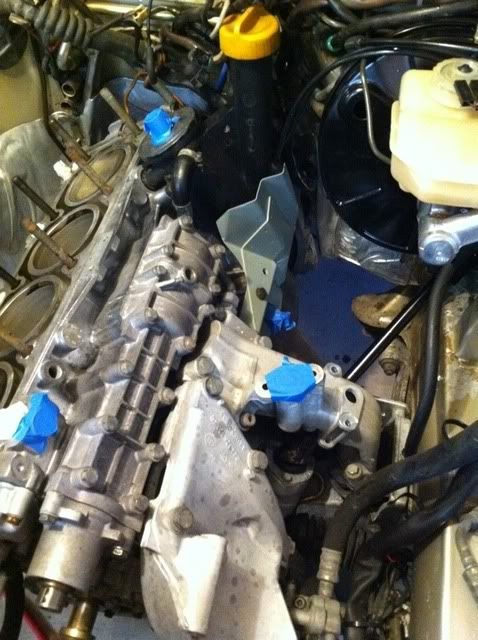

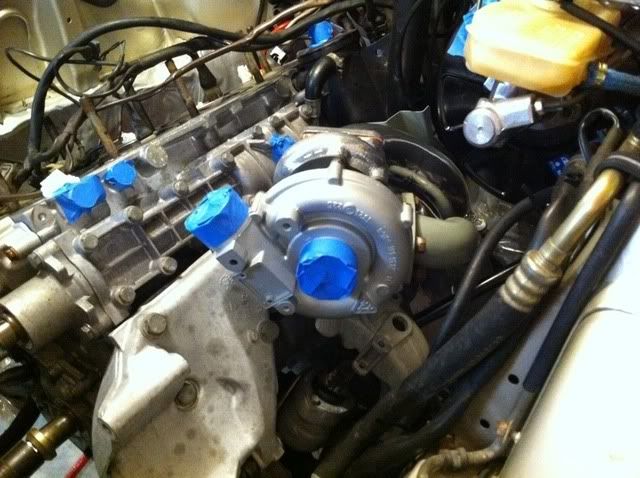
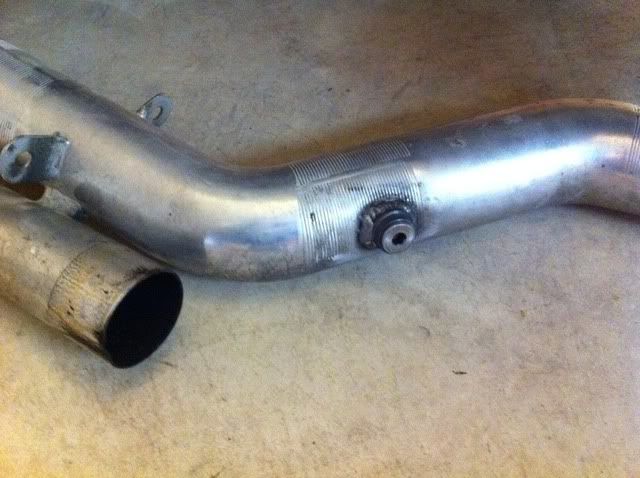
The AOS is now installed, engine ground connected, flywheel sensors replaced, top balance shaft bearings replaced and cover installed. Next I installed the front exhaust section (with new O2 bung), connected the wastegate, and dry-fitted the turbo, down pipe, and half of the crossover (3pc). I realized that I done have a new turbo to crossover gasket, so I stopped here to contemplate next weekend's tasks...
06-18-2011, 11:23 PM
#10
Addict
Lifetime Rennlist
Member
Lifetime Rennlist
Member
Thread Starter
Got some more garage time in today... I decided while installing the turbo-side heat shields and intake manifold brackets that I should start to work on the harness.
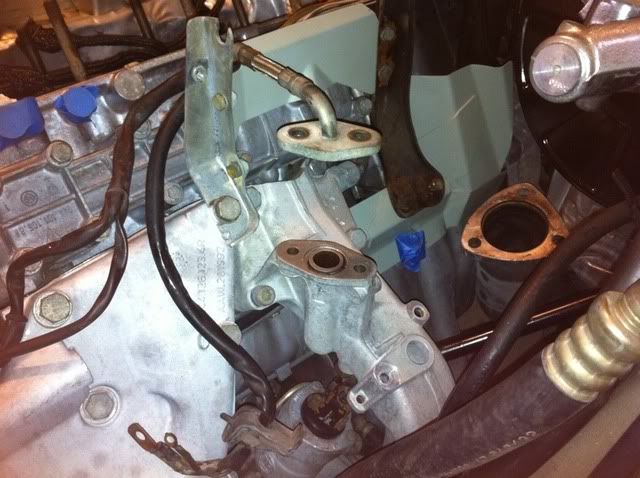
I'll be replacing large chunks of the engine harness with LR upgrades, so it's time to start to lay that out and put a plan together. I'm thinking that I'm beyond going back on that decision now...
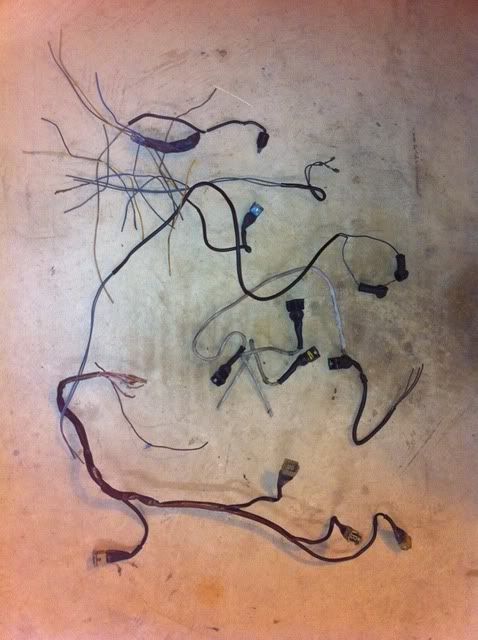
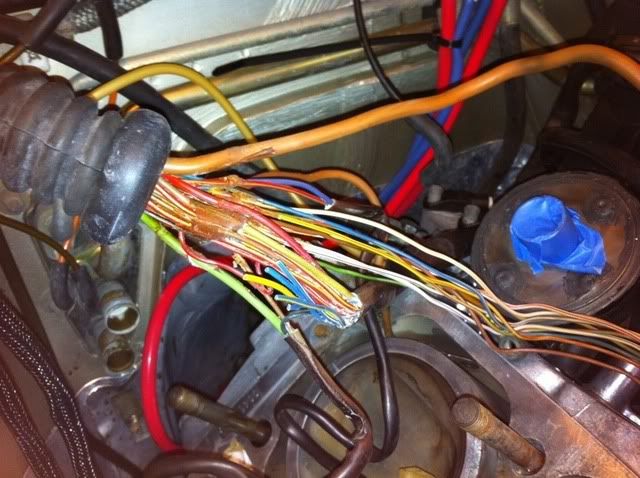
Here is the new sensor harness beside the portion of the factory harness that is staying. The new LR harness handles all sensors but does not replace the MAF or the TPS connectors. There is a separate harness for injectors & knock, and another for reference sensors. The connectors are very nice with an easy-to-push metal release tab.
LR doesn't recommend completely pulling the old unused wires out of the firewall hole, but I've decided that I'm going to yank them anyway so I don't have that many extra wires taking up space for future projects.
I'll be replacing large chunks of the engine harness with LR upgrades, so it's time to start to lay that out and put a plan together. I'm thinking that I'm beyond going back on that decision now...
Here is the new sensor harness beside the portion of the factory harness that is staying. The new LR harness handles all sensors but does not replace the MAF or the TPS connectors. There is a separate harness for injectors & knock, and another for reference sensors. The connectors are very nice with an easy-to-push metal release tab.
LR doesn't recommend completely pulling the old unused wires out of the firewall hole, but I've decided that I'm going to yank them anyway so I don't have that many extra wires taking up space for future projects.
Last edited by zerMATT951; 06-18-2011 at 11:38 PM.
06-19-2011, 10:19 PM
#11
Addict
Lifetime Rennlist
Member
Lifetime Rennlist
Member
Thread Starter
Damn I'm tired of searching for parts in my garage, I'll be ecstatic when this little project is put to bed. I spent over an hour searching for a balance shaft bearing cap washer (early motor) on the floor in my garage because I dropped it at some point, only to spot it when my wife came out to the garage to re-pot a plant and wanted to use my wheeled seat... I rolled it over to her and there was my washer! I was looking under the rear tires because I thought it rolled that direction, but it ended up being 5 feet in front of the car.
This morning was a scavenger hunt for the mount bracket that bolts on with the M8 bolts on the front end of the lower balance shaft. I finally found it with the cam tower propped up to stop oil from dripping out. Sheesh.
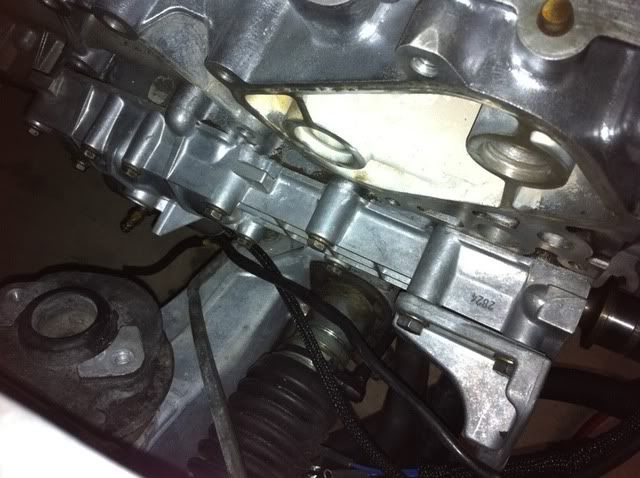
Got the lower balance shaft installed yesterday afternoon then the cover on this morning. Now I'm ready for the oil cooler/filter housing and I can't find the dang OPRV. I don't even remember if mine was one or three piece, but I've looked all over and haven't found anything that looks like it yet. I guess this is where I stop for the weekend.
This morning was a scavenger hunt for the mount bracket that bolts on with the M8 bolts on the front end of the lower balance shaft. I finally found it with the cam tower propped up to stop oil from dripping out. Sheesh.
Got the lower balance shaft installed yesterday afternoon then the cover on this morning. Now I'm ready for the oil cooler/filter housing and I can't find the dang OPRV. I don't even remember if mine was one or three piece, but I've looked all over and haven't found anything that looks like it yet. I guess this is where I stop for the weekend.
06-19-2011, 10:58 PM
#12
Addict
Lifetime Rennlist
Member
Lifetime Rennlist
Member
Thread Starter
Didn't have much time to work after I located that dang bracket, so this is about all I got done before I started looking for the OPRV.
Here's a look at my shop. Installed a/c a couple of years ago and I'm glad I did! It's an old 2-ton unit taken out of an old house to be replaced. It does what I need... I start the morning at 74 and it'll keep my 924 sq ft garage with no insulation that faces south at 78 until late in the day and it's 104 outside!
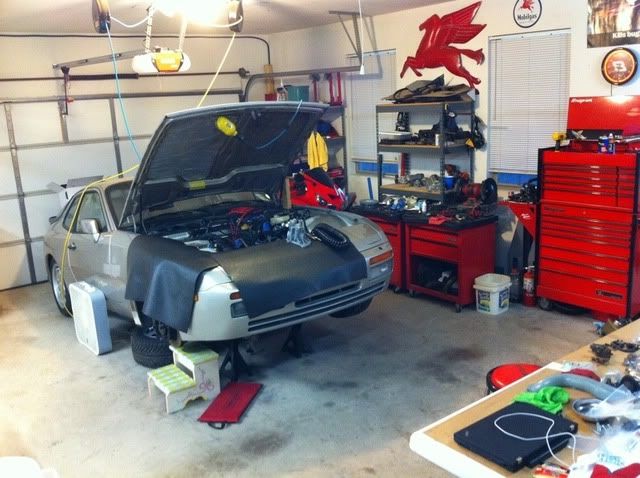
Here's a look at my shop. Installed a/c a couple of years ago and I'm glad I did! It's an old 2-ton unit taken out of an old house to be replaced. It does what I need... I start the morning at 74 and it'll keep my 924 sq ft garage with no insulation that faces south at 78 until late in the day and it's 104 outside!
Last edited by zerMATT951; 06-20-2011 at 12:06 AM.
06-20-2011, 12:13 AM
#15
Basic Sponsor
Rennlist
Site Sponsor
Rennlist
Site Sponsor
where you able to install the oil lines?