
zerMATT951's re-assembly thread

 08-27-2011, 06:21 PM
#63
Rennlist Member
That looks about 500% better than mine does... your casting looks to be better than mine too, the lines above and below the "PORSCHE" vary wildly in thickness on mine, and there are very deep pock-marks all throughout the lettering. I just have to keep telling myself that it's not a concourse car and it looks great if you don't look closely.
It's coming along nicely, you'll be there in no time!
It's coming along nicely, you'll be there in no time!
08-27-2011, 10:01 PM
#64
Addict
Lifetime Rennlist
Member
Lifetime Rennlist
Member
Thread Starter
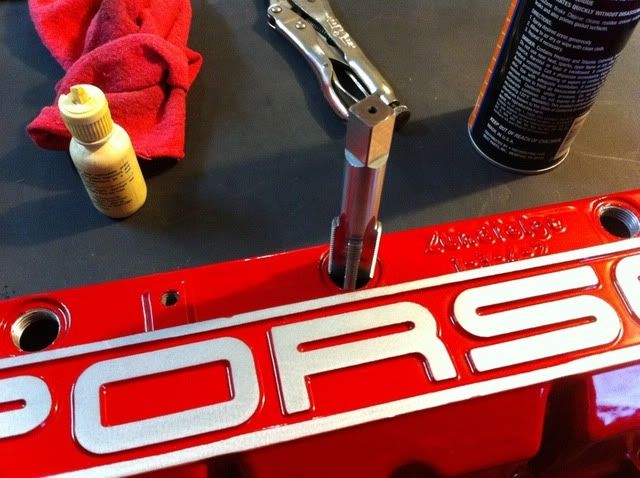
It's there, but it's very light and just on the surface - nowhere near going through the powdercoat.
I must admit that I ran that 80 grit for quite a while after the 50 grit got me down to aluminum. See all that powder on the table? That's aluminum, and there is more on the floor. The straight lines weren't as even as I wanted once I got the aluminum to show, so I just kept grinding. The casting is definitely uneven, and I can still feel it with the sander even after taking off that much material. I haven't put a straight edge on it, but I wouldn't be surprised if there were still significant variations.
I decided to leave some of the 120 grit diagonal lines on it for character, so all I really did with the 220 grit was smooth it off a bit.
That looks about 500% better than mine does... your casting looks to be better than mine too, the lines above and below the "PORSCHE" vary wildly in thickness on mine, and there are very deep pock-marks all throughout the lettering. I just have to keep telling myself that it's not a concourse car and it looks great if you don't look closely.
I decided to leave some of the 120 grit diagonal lines on it for character, so all I really did with the 220 grit was smooth it off a bit.
Last edited by zerMATT951; 08-29-2011 at 12:05 AM.
08-29-2011, 12:02 AM
#65
Addict
Lifetime Rennlist
Member
Lifetime Rennlist
Member
Thread Starter
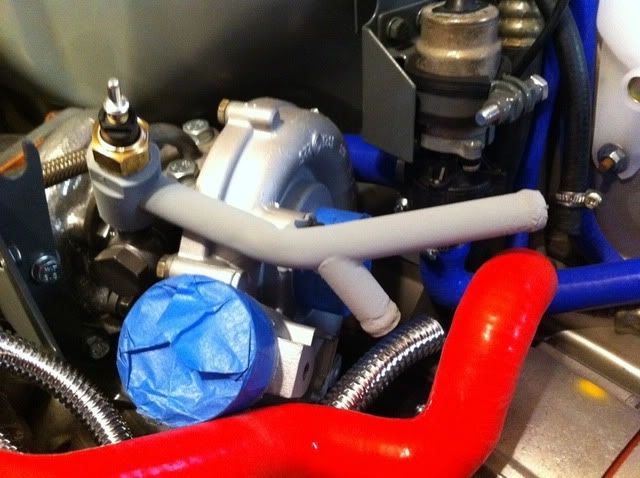
Made some decent progress today. Got the BB heat shield in place (no, I'm not putting that bottom nut on!), then worked with the turbo coolant pump, coolant tank, and some hoses.
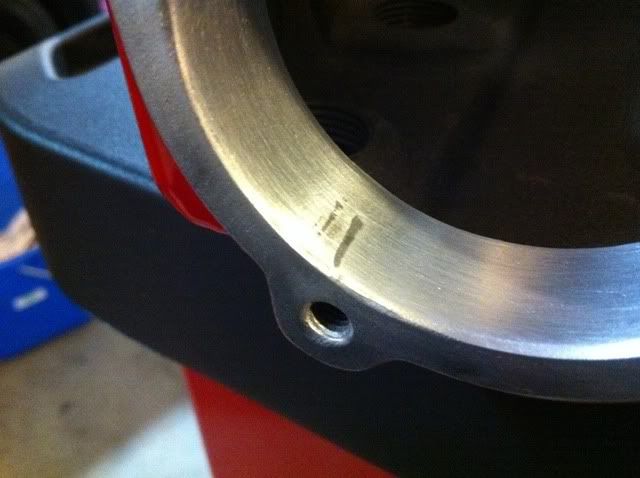
The most disappointing part of the weekend was trying to clean up some of the bead blasting that was done to the cam tower prior to powder coating. They really tore it up... I hope it doesn't tear up my cam or lifters. I tried to smooth those surfaces down with emory cloth, but those internal cam journals are impossible to get to. I also partially stripped one of the access holes by using one of the aluminum plugs to chase the threads... dumb idea. Heading to a friend with a machine shop in the morning in search of a M15 (or 16?) x 1.5mm tap to try to clean up the mess. I need another plug now too.")
And yes, I realize that my color scheme will be somewhat patriotic. I would have preferred to do all red, but with blue AN fittings here and there (oil cooler and fuel), I decided to go with blue for coolant hoses and red for air hoses and wiring. Light gray and silver coatings are Jet Hot ceramic 1700, dark gray is powder coated.

The most disappointing part of the weekend was trying to clean up some of the bead blasting that was done to the cam tower prior to powder coating. They really tore it up... I hope it doesn't tear up my cam or lifters. I tried to smooth those surfaces down with emory cloth, but those internal cam journals are impossible to get to. I also partially stripped one of the access holes by using one of the aluminum plugs to chase the threads... dumb idea. Heading to a friend with a machine shop in the morning in search of a M15 (or 16?) x 1.5mm tap to try to clean up the mess. I need another plug now too.
And yes, I realize that my color scheme will be somewhat patriotic. I would have preferred to do all red, but with blue AN fittings here and there (oil cooler and fuel), I decided to go with blue for coolant hoses and red for air hoses and wiring. Light gray and silver coatings are Jet Hot ceramic 1700, dark gray is powder coated.
08-29-2011, 02:38 AM
#66
Rennlist Member
Looks great, Matt... did you find the silicone lines at the turbo WP to be exceptionally difficult to put on? I got mine on, but sweet zombie jesus were they difficult!
08-29-2011, 01:26 PM
#67
Addict
Lifetime Rennlist
Member
Lifetime Rennlist
Member
Thread Starter
Yes, they were a PITA. I put them on the pump first, then slid them into place and tweaked the angle of the larger front tank hose until it looked ok. That lower elbow is bent sharper than I thought it would be, but it's not kinked, so I'm sure it'll be fine.
Thanks for the help on the cam tower plug. I borrowed a M16x1.5 tap this morning, so that won't be happening again! I had also filled a groove in the front cam housing opening where the timing cover slides in - a chunk of aluminum pulled out when I removed the housing a while back. Some JB weld and some emory cloth did the trick... this port just needs the o-ring to seal against leaks.
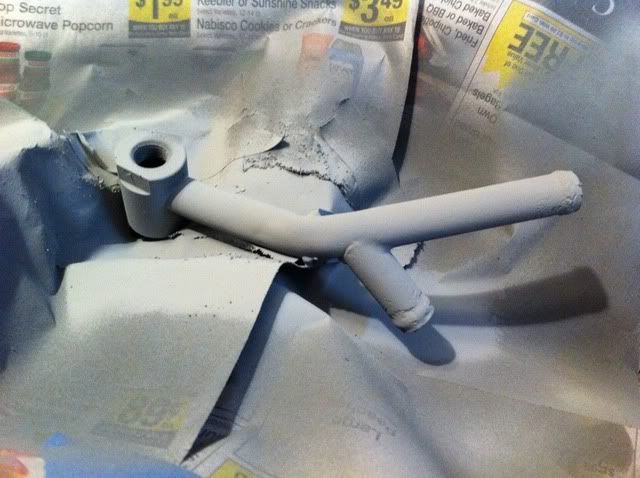
I also found some CRC brand spray-on Zinc-It coating. The result isn't what I expected, but it'll hopefully keep this piece from oxidizing again. Kinda looks like primer... maybe I'm supposed to paint over this? Oh well.
Thanks for the help on the cam tower plug. I borrowed a M16x1.5 tap this morning, so that won't be happening again! I had also filled a groove in the front cam housing opening where the timing cover slides in - a chunk of aluminum pulled out when I removed the housing a while back. Some JB weld and some emory cloth did the trick... this port just needs the o-ring to seal against leaks.
I also found some CRC brand spray-on Zinc-It coating. The result isn't what I expected, but it'll hopefully keep this piece from oxidizing again. Kinda looks like primer... maybe I'm supposed to paint over this? Oh well.
08-29-2011, 03:29 PM
#68
Rennlist Member
It's looking good Matt! I'm just about to head out and drop that plug in the mail. That zinc spray is interesting... it doesn't look bad, but it also doesn't look at all like zinc.
I was looking at your pics and I noticed that the hose I (poorly) traced below is still rubber. FWIW, if you ordered the LR AOS kit, the hose that's supposed to be used for the CV plumbing (#7 in the diagram below) fits and works perfectly there... if anything, it's a bit long. Just thought you might want to know.
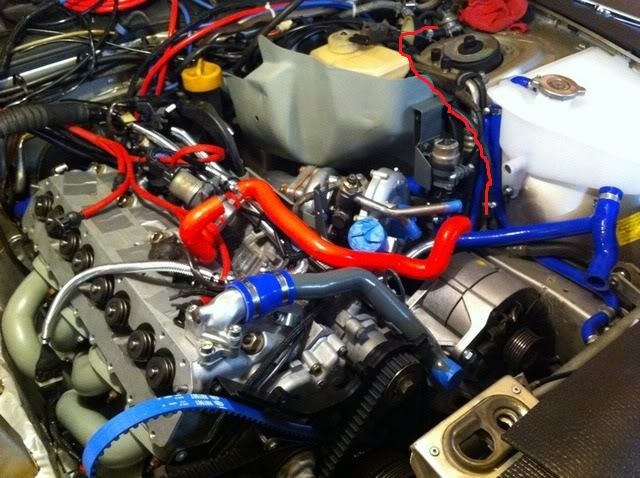
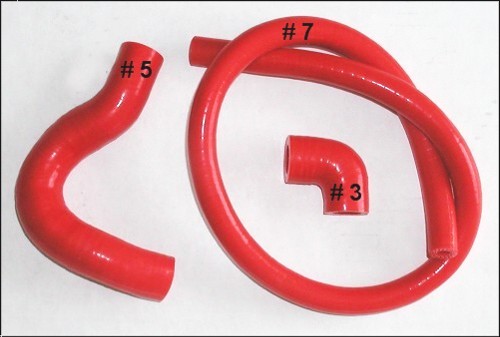
I was looking at your pics and I noticed that the hose I (poorly) traced below is still rubber. FWIW, if you ordered the LR AOS kit, the hose that's supposed to be used for the CV plumbing (#7 in the diagram below) fits and works perfectly there... if anything, it's a bit long. Just thought you might want to know.
08-29-2011, 04:08 PM
#69
Addict
Lifetime Rennlist
Member
Lifetime Rennlist
Member
Thread Starter
Yes, I haven't swapped that yet, and I just noticed the problem with weekend when I was going through my parts inventory. I didn't buy the complete hose kit because I had already bought some hoses, so I didn't get any of that #7 hose, and it looks like there are a few places that can actually be used because it's just a straight nose. I also don't have the little hose that connects to the fuel purge valve. I will be ordering both of those today.
What really pisses me off is that I didn't realize I could replace the turbo oil vent return line that connects to the AOS, and I've already mostly buried that connection. If I thought I could yank that swivel fitting off the steel pipe it's attached to with no working space, I'd be tugging on it right now. That hose is HARD AS A ROCK! Damn. I have the replacement sitting on my workbench right now, but I'm not sure I'm going to replace it until I upgrade the turbo down the road.
I was working on the cam tower this morning and pulled my lifters out of the oil bath they have been sitting in. Unfortunately, they stayed in the cam tower for 5 years before I removed them and put them in the bath, and only two have any "spring" resistance, the rest are hard. I'm going to do some searching now to figure out if I can give them a try, or if I need to ante-up and spend another $450 on 6 new lifters.
Edit: Or do I have that backwards? I'm reading now and it sounds like the hard lifters may be ok... so I may only have to replace they springy ones?
Edit #2: After reading a few posts, I decided to try the compressed air method. The two springy lifters firmed right up... they are going back in... RIGHT NOW!!
Last edited by zerMATT951; 08-29-2011 at 04:30 PM.
08-29-2011, 09:18 PM
#70
Addict
Lifetime Rennlist
Member
Lifetime Rennlist
Member
Thread Starter
Made good progress after all... feel good stuff at least. Got the cam tower on without incident. I was expecting lifters falling and rolling across the floor, but nothing of the sort happened. I had frozen Vaseline ready, and I cut a piece of cardboard to use if I needed to try to hold the lifters in place while I flipped it over. Turns out that the Lucas engine assembly lube did a fine job holding them in place long enough for me to get the pins lined up and the cam tower in place.

08-30-2011, 03:38 AM
#72
Rennlist Member
It's looking great Matt... 
Isn't it amazing how much progress a few things can feel like? I had been planning on firing up last weekend, and had asked Joshua to express my M-Tune to me so I could. Then, on Thursday of last week I looked at the pile-o-parts still littered all over my garage and I called him to let him know that there was no reason to worry about expressing it because there was no chance of firing up. Then Friday happened and I rocked it... in just a few hours I had nothing left to put on except the intake manifold, the sway bar and the PS pump. Kind of kicked myself for canceling the express shipment... Oh well, I'll have it by this weekend, and it gives me time to make sure everything is buttoned up tight.
Just out of curiosity, what's the "compressed air method" for fixing springy lifters?
BTW, are you using studs for your intake manifold? I don't think I've ever seen that...
Also, dropped that plug in the mail today, you should have it by week's end. I hope that paint isn't too hard to clean off.
08-30-2011, 10:14 AM
#73
Addict
Lifetime Rennlist
Member
Lifetime Rennlist
Member
Thread Starter
 .
08-30-2011, 10:20 AM
.
08-30-2011, 10:20 AM
#74
Addict
Lifetime Rennlist
Member
Lifetime Rennlist
Member
Thread Starter
Just out of curiosity, what's the "compressed air method" for fixing springy lifters?
BTW, are you using studs for your intake manifold? I don't think I've ever seen that...
Also, dropped that plug in the mail today, you should have it by week's end. I hope that paint isn't too hard to clean off.
BTW, are you using studs for your intake manifold? I don't think I've ever seen that...
Also, dropped that plug in the mail today, you should have it by week's end. I hope that paint isn't too hard to clean off.
Yes, I'm using the same Saturn torx head studs I used on the exhaust. It's one of those little things that will help hold the intake manifold gaskets in place during install, plus save wear & tear on the aluminum head when I R&R the intake for future work & upgrades (like a turbo!).
Thanks again for the plug. I've got cans of paint thinner and acetone that should do the trick. If not, I have access to a media blaster that should make short work of any paint
 .
.Oh, and I've decided to skip replacing those fuel evaporation lines. I did a few searches, and I've decided that the whole mess is heading for the local landfill.