
So what did you do to your 928 Today......

 04-30-2014, 07:05 PM
#4712
Nordschleife Master
I had read a reference to Cerium Oxide for polishing the windshield. I searched around on Google to find more info.
I made the mistake of going to O'Reilly's, where I got a blank look and zero help, even when they looked it up in their system.
I went to a glass specialist, and they had it on the shelf. $3.59 for a little jar of the powder.
Followed the instructions to make the powder to a paste (mix it with water, duh), used a random orbital buffer and went to town.
It took out a lot of the little pits, and 75% or more of the wiper arc scratches. Huge improvement, especially at night with the reduction of the glare and reflections.
Well worth the effort, and I will probably do it again.
05-03-2014, 04:54 PM
#4713
Chronic Tool Dropper
Lifetime Rennlist
Member
Lifetime Rennlist
Member

Did a walk-through after the recent TB project, and put the main FOE wiring harness clamp back in. The one that's a chore to get to, right behind the right-side timing belt cover. Also discovered one distributor rotor screw that hadn't been tightened. Of course, had to do a little cleaning while I had the hood open; it's really not an obsession. Really!
Drove it yesterday in some pretty hot conditions (mid 90's), and was able to verify that the intake temp switch is indeed functional. With the engine running after the climb up the hill to the house, gauge was a little shy of the third white mark. IR gun showed 190� at the water bridge and the thermostat housing (return from radiator) while the top hose itself showed 205� Funny the water outlet nozzle at the water bridge showed cooler than the hose. Might be a measurement thing with the black rubber vs. the metal. Still nothing to get excited about.
All the fuids and levels look great, no seepage anywhere, so it's ready for the trek north when the schedule there allows.
05-03-2014, 05:12 PM
#4714
Archive Gatekeeper
Rennlist Member
Rennlist Member
Did some sharktuning after putting the stroker back to 'stock'. Man I love this car...
05-03-2014, 11:44 PM
#4716
You can call me Otis
Rennlist Member
Rennlist Member
Join Date: Feb 2013
Location: Terre Haute, Indiana
Posts: 6,662
Likes: 0
Received 10 Likes
on
10 Posts
began putting everything back together after the discovery of the cracked flex plate. I got home late today, but I made the first step. installed the front TT bearing. This is not a full rebuild project, just a temporary bandaid to keep driving, as I will never sell this car a full restore will be put off to a later date.
[IMG] [/IMG]
[IMG]
 [/IMG]
05-04-2014, 10:52 AM
[/IMG]
05-04-2014, 10:52 AM
#4717
Rennlist Member
Join Date: Apr 2010
Location: Kennedale,TX a suburb of DFW
Posts: 1,045
Likes: 0
Received 3 Likes
on
3 Posts
Hey RedRaider1 - that's a very cool 928 DP!
Good to see everyone at Dallas Cars and Coffee. Go back to Jim's pic, that's my blue 928 with the hood up showing the works of Ben and Sean after the powder coat and intake refresh. My motor purrrs along the Texas highways at 85 mph with very low rpm. What a delightful car to drive!
Good to see everyone at Dallas Cars and Coffee. Go back to Jim's pic, that's my blue 928 with the hood up showing the works of Ben and Sean after the powder coat and intake refresh. My motor purrrs along the Texas highways at 85 mph with very low rpm. What a delightful car to drive!
05-04-2014, 01:49 PM
#4719
Instructor
I'm back in a 928 after losing my 84 last October. It's an 89 S4 and the 1st thing did with it was drive her down to Shark ay the Park!!!!
05-05-2014, 02:12 AM
#4721
Rennlist Member

I took my 81 to a car show and saw 4 other 928's. Which is actually a first as usually I am the only 928 driver at these events.
I guess they showed because it was Porsche day
I guess they showed because it was Porsche day
05-06-2014, 06:12 AM
#4722
Rennlist Member
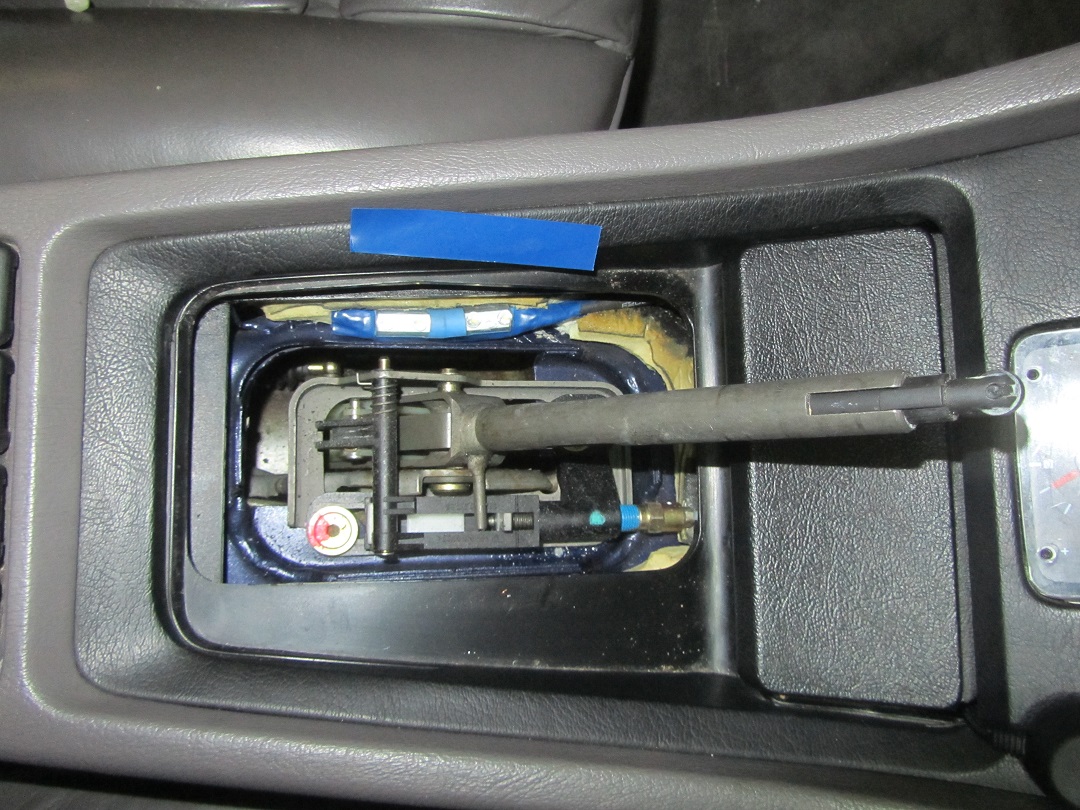
During Sunday actually: followed Shocki's example of adding LED lighting underneath the AT shift indicator cover. Thanks Shocki! 
Perfect place available for it, by just cutting out a little bit of the yellow foam isolation material on the left hand side (note: be very careful when removing the AT shift indicator cover, as there are two locking tabs underneath. Check the WSM for the exact correct instructions on how to remove it, and follow the given steps - otherwise you will break them):
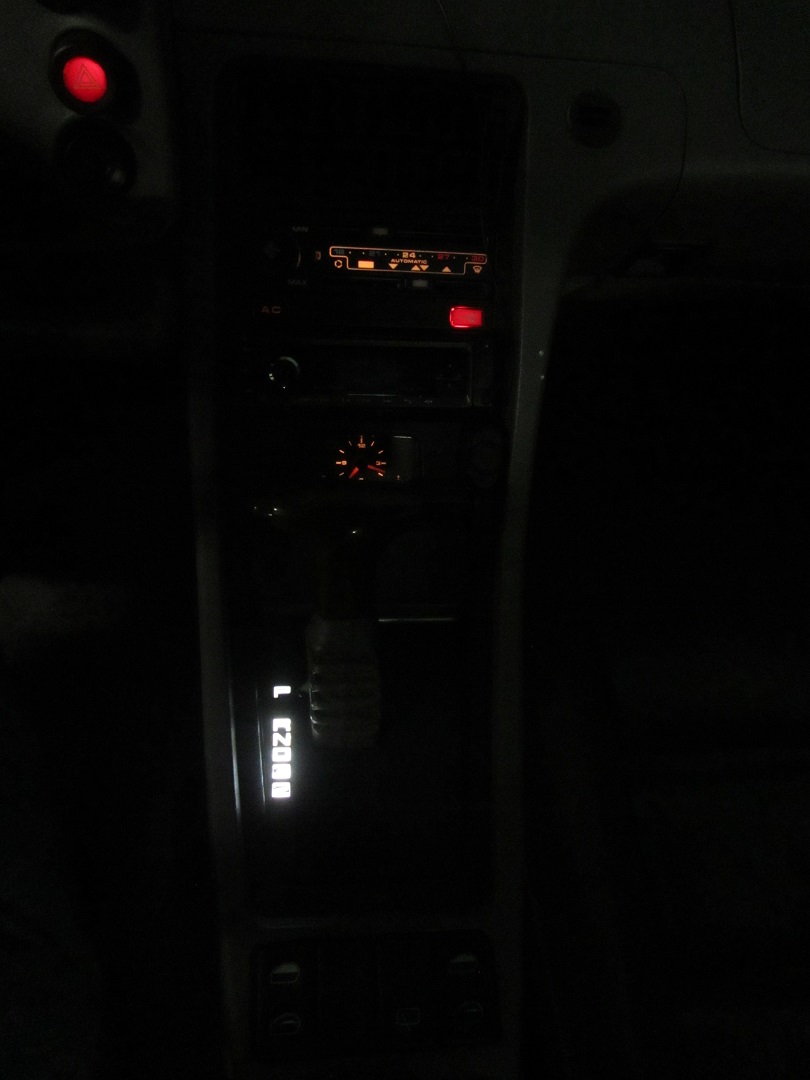
This is how it looks like all connected up (tapped power from the cigar light light connection. More LED conversions to do and come in the near future...):
Perfect place available for it, by just cutting out a little bit of the yellow foam isolation material on the left hand side (note: be very careful when removing the AT shift indicator cover, as there are two locking tabs underneath. Check the WSM for the exact correct instructions on how to remove it, and follow the given steps - otherwise you will break them):
This is how it looks like all connected up (tapped power from the cigar light light connection. More LED conversions to do and come in the near future...):
05-06-2014, 12:10 PM
#4723
Burning Brakes
Completed my drivers door rebuild including fiberglass & resin repair/reinforcement, new bulbs, new wire terminals, Dynomat, new window seals, cleaned push switch and door hinge, new drip panels and moisture barrier, new door panel clips, new speaker and new vinyl, padding and carpet.
05-06-2014, 12:36 PM
#4724
Nordschleife Master
Got the car out of winter hibernation and on the road just a few days ago. After my usual routine for this I noted my fans would not go on even when AC switched. The culprit was a bend and break in the double wire to the passenger side fan at one of the clips. Before getting into diagnostics, I inspected all the hardware in the fan circuit.The original wire harness was as hard as a rock. Spent a good amount of time on a wire rebuild with protection.
05-07-2014, 11:23 PM
#4725
Took Eleonore in to Motor Werkes here in Honolulu. Primary concerns, fuel leak (by tank), as yet unresolved start/idle issue (pre-green wire replacement) and start/single helluva backfire (post green wire).
(FYI: Crank 1.0 after TDC, cam gears on their marks and distributor rotor at #1. All as purchased so happiness is somewhere nearby... I hope.)
Of course Gerard asked about timing belt and a myriad of other prudent items, but I can only hope that (a) his conclusion is similar to mine (replace what should be replaced on a 30 year old 928!) AND (b) that he's willing to do the work. The worst case scenario I need to prepare for is that neither of these are true. (You mainlanders really don't know how lucky you are to have more than one (reliable) shop to go to!)
Me? I just want to have her in better shape (soon) and drive her...