
'82 16V 4.7L Build - OE+ Goal
 09-01-2012, 07:27 PM
#106
Pro
Very nice install of the fans, clean and stealth. Hood pad looks super. Coming to the show and GTG after?
 09-11-2012, 01:39 PM
#107
Pro
Thread Starter
This has been a problem ever since I put the new Alpine head unit in, but never really bothered me as I don't look at it. But it was time to fix it.
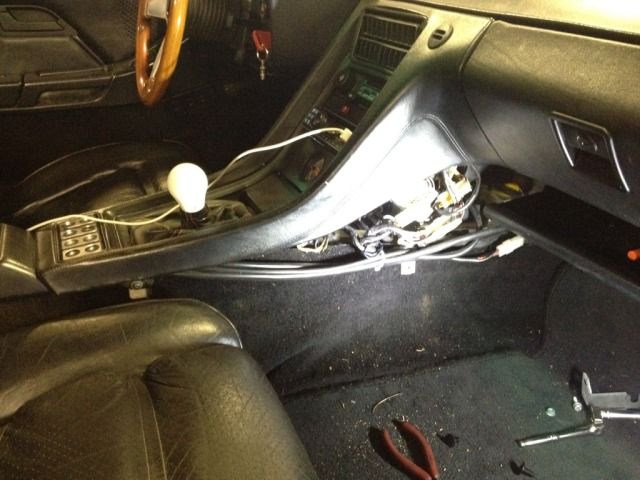
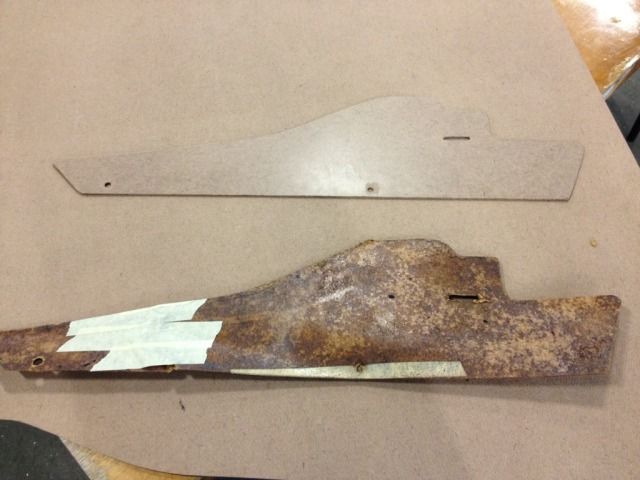
Broken, brittle and missing it's fasteners. ugh. New piece I made to replace it, above.
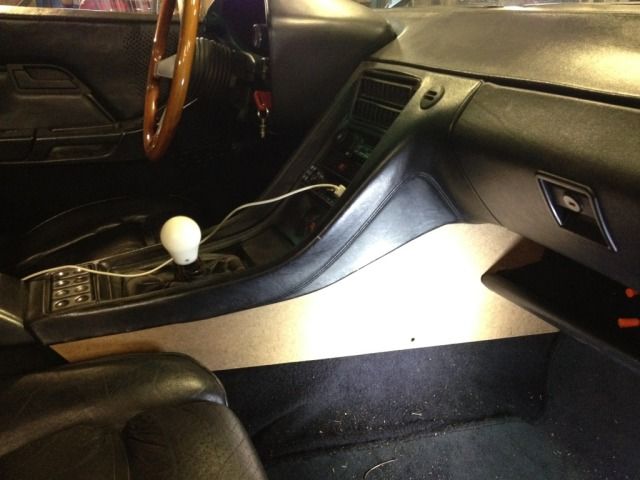
Also picked up some (kinda close-to-matching) fabric to recover the new piece. Should have this finished up tonight.
Also replaced the broken jump post, and installed the cover (that it never had!). As well as replaced the likely original ground strap off the battery. Voltage gauge in the cluster now reads pleasantly, 2 volts higher! One small step forward in fixing the fubar-d electrical on this car.
Removed the fan shroud again and cut two long oval "slots" below the fans in an attempt to get more airflow through the radiator while moving. Fans cool awesomely fast when the car is not in motion. I'll update the pictures of the shroud and wiring when I re-wire with the new HD, and weatherproof 40A relays setup.

Broken, brittle and missing it's fasteners. ugh. New piece I made to replace it, above.
Also picked up some (kinda close-to-matching) fabric to recover the new piece. Should have this finished up tonight.
Also replaced the broken jump post, and installed the cover (that it never had!). As well as replaced the likely original ground strap off the battery. Voltage gauge in the cluster now reads pleasantly, 2 volts higher! One small step forward in fixing the fubar-d electrical on this car.
Removed the fan shroud again and cut two long oval "slots" below the fans in an attempt to get more airflow through the radiator while moving. Fans cool awesomely fast when the car is not in motion. I'll update the pictures of the shroud and wiring when I re-wire with the new HD, and weatherproof 40A relays setup.
09-11-2012, 02:13 PM
#109
Pro
Thread Starter
The board came as an enormous sheet from Home Depot. I'm sure Mr. Feather has a better solution, but this was the closest thing I could find that was similar, tangible and local. Was about $18 for the whole sheet. Had it cut in half before I checked out. And I have enough for a couple other projects on other cars.
 10-13-2012, 05:31 PM
#110
Pro
Thread Starter
Been trying to keep busy, in order to stay motivated.
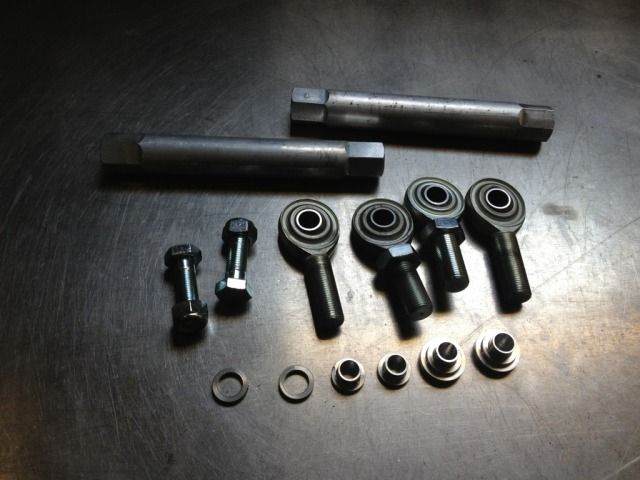
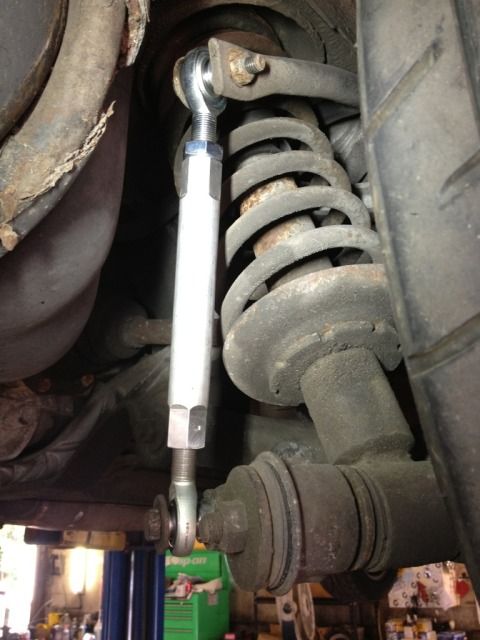
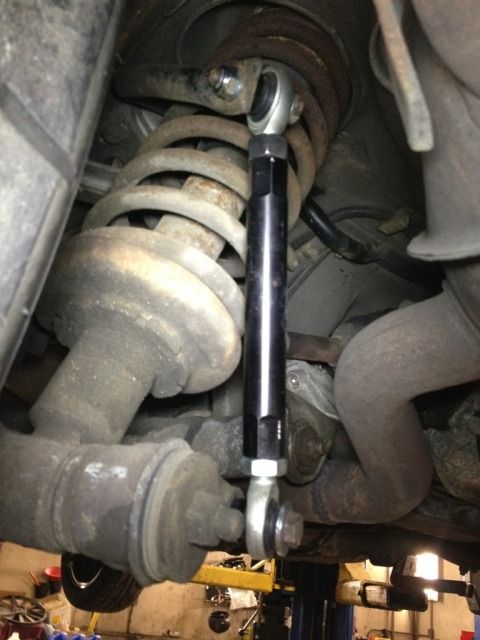
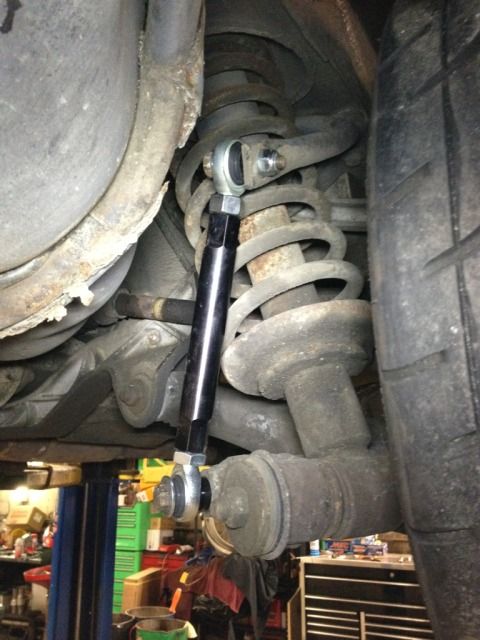
Bought a set of what I believe to be old 928 Motorsport rear swaybar links a while back. Lets just say I was less than impressed with the quality, fit and finish. Had a machinist friend help me out a little with getting them up to what I would have considered par.
As I got them, missing a lock nut for the LH threaded heim, hardware that's the wrong size, and "adapter" bits that didn't fit, and interfered with the range of motion when installed LH threaded end of center sections, not marked or distinguished in any way. Finish on centers looking like they just came from the metal mill. And these were unused, new in original packaging....with no instructions.
Mocked up originally, with old hardware
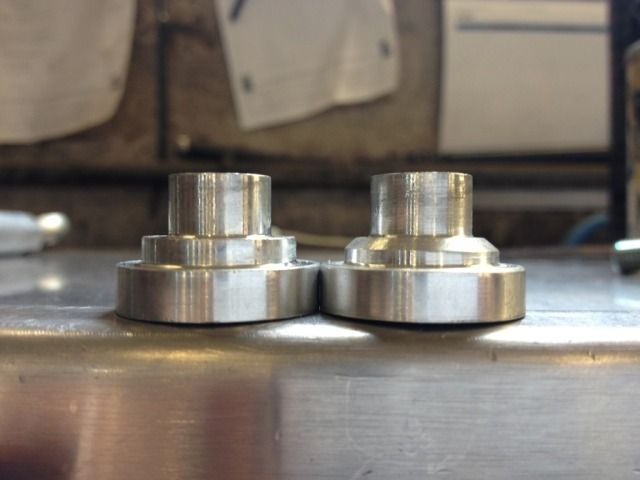
"Adapters" The one on the left is how they(all) came. On the right, (roughly) how they should have been made, as to not interfere with movement.
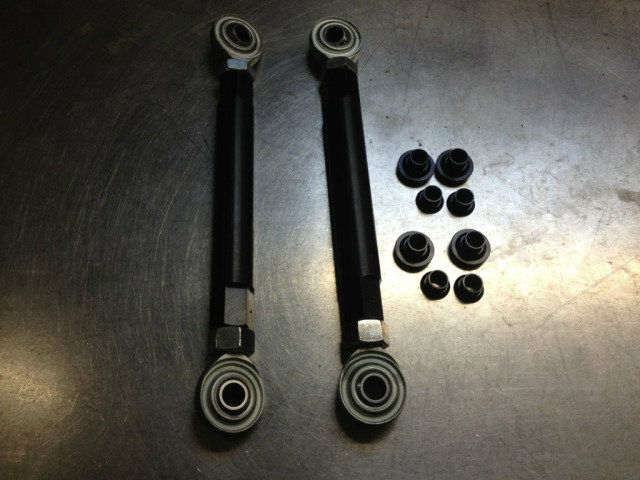
Now how they look, with a SS LH thread lock nut, Stamped "LH" in the LH threaded end, Anodized black centers to prevent corrosion:
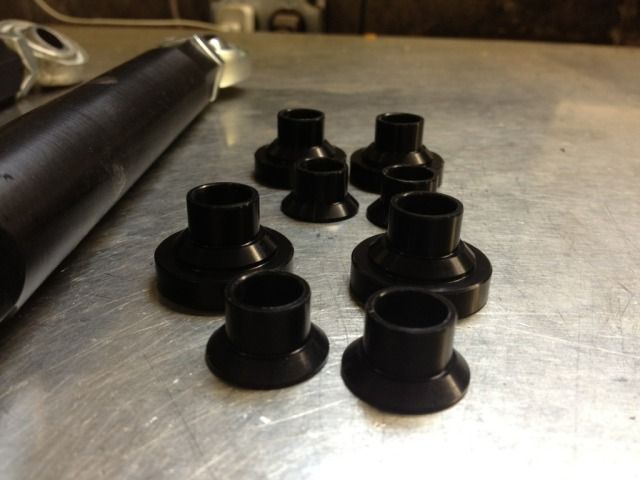
All new black anodized 6061 Billet adapters, with taper to allow for best range of motion. Also, not pictured, are rubber booties that seal both sides of all the heims joints from dust and road debris ( Like These here )
And finished and installed, retaining all the factory hardware, with the exception of some new washers and a nylock nut on the swaybar attachment end.
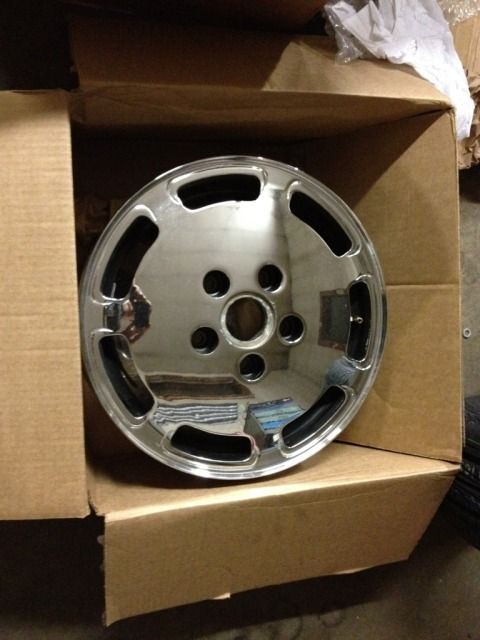
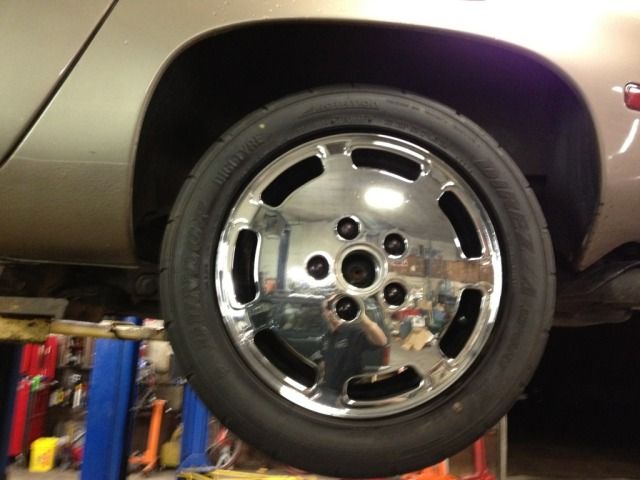
Also picked up a new set of wheels, with a spare! Still awaiting the new center caps...
And in preparation for the matching set of front swaybar links (that I'll be making myself, thank you very much....), and the possible track day or two, gusseted front sway bar brackets. Which, by the way, cost about $7 in supplies and half an hour in installation.
They were then etch-primed, and undercoated with 3 layers of Winzer Brand "EXCEL" undercoating.
Still in the process of ordering exhaust bits...
Bought a set of what I believe to be old 928 Motorsport rear swaybar links a while back. Lets just say I was less than impressed with the quality, fit and finish. Had a machinist friend help me out a little with getting them up to what I would have considered par.
As I got them, missing a lock nut for the LH threaded heim, hardware that's the wrong size, and "adapter" bits that didn't fit, and interfered with the range of motion when installed
LH threaded end of center sections, not marked or distinguished in any way. Finish on centers looking like they just came from the metal mill. And these were unused, new in original packaging....with no instructions.Mocked up originally, with old hardware
"Adapters" The one on the left is how they(all) came. On the right, (roughly) how they should have been made, as to not interfere with movement.
Now how they look, with a SS LH thread lock nut, Stamped "LH" in the LH threaded end, Anodized black centers to prevent corrosion:
All new black anodized 6061 Billet adapters, with taper to allow for best range of motion. Also, not pictured, are rubber booties that seal both sides of all the heims joints from dust and road debris ( Like These here )
And finished and installed, retaining all the factory hardware, with the exception of some new washers and a nylock nut on the swaybar attachment end.
Also picked up a new set of wheels, with a spare! Still awaiting the new center caps...
And in preparation for the matching set of front swaybar links (that I'll be making myself, thank you very much....), and the possible track day or two, gusseted front sway bar brackets. Which, by the way, cost about $7 in supplies and half an hour in installation.
They were then etch-primed, and undercoated with 3 layers of Winzer Brand "EXCEL" undercoating.
Still in the process of ordering exhaust bits...
10-13-2012, 06:37 PM
#111
Pro
What happened to the bronze manhole cover, original wheels?
10-20-2012, 02:23 PM
#113
Pro
Thread Starter
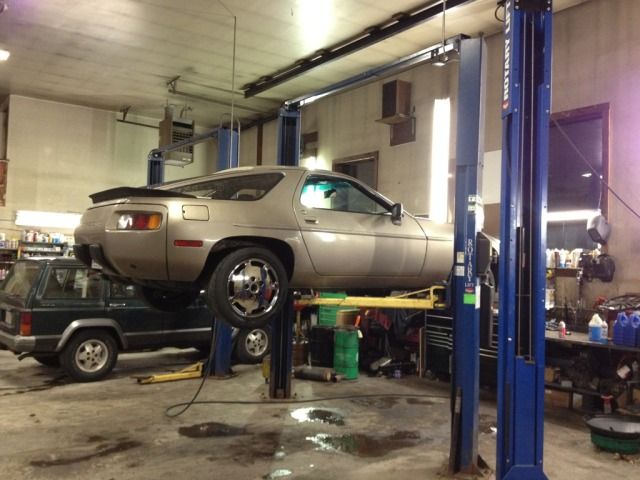
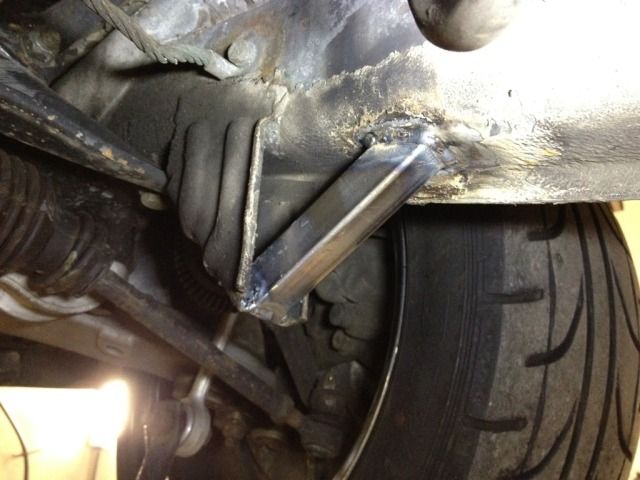
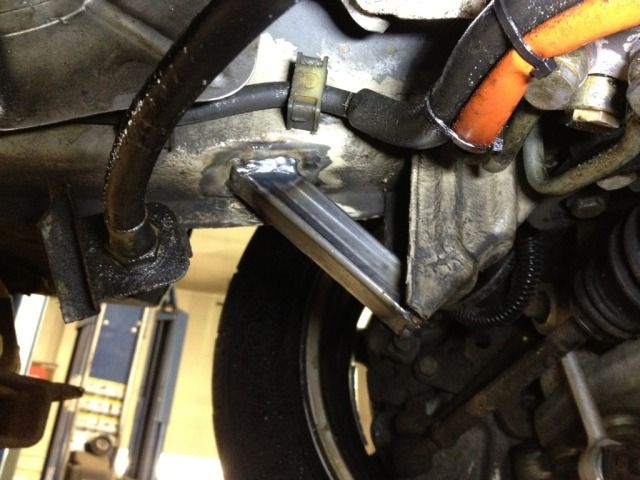
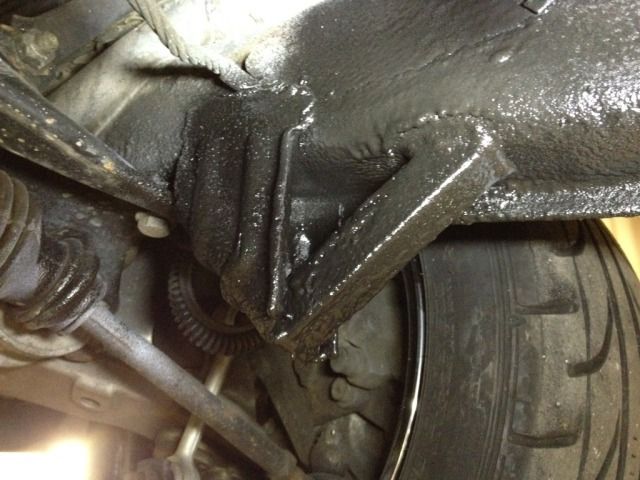
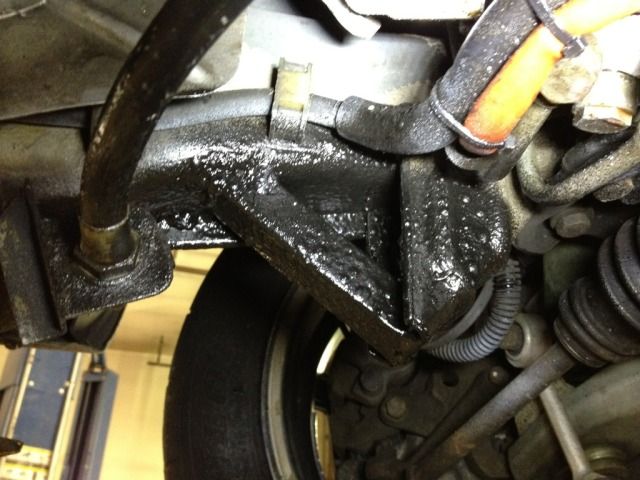
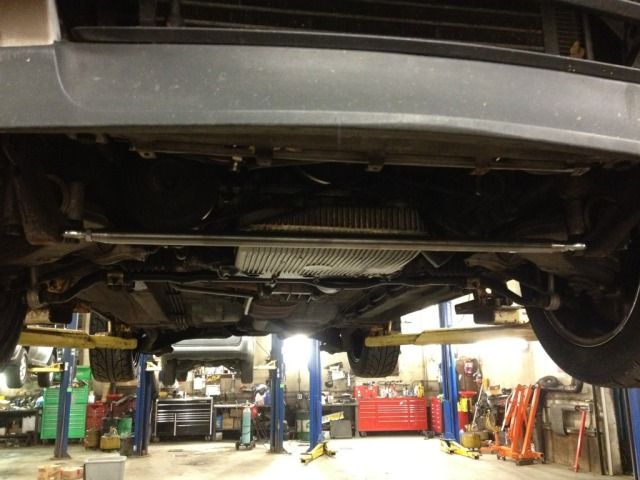
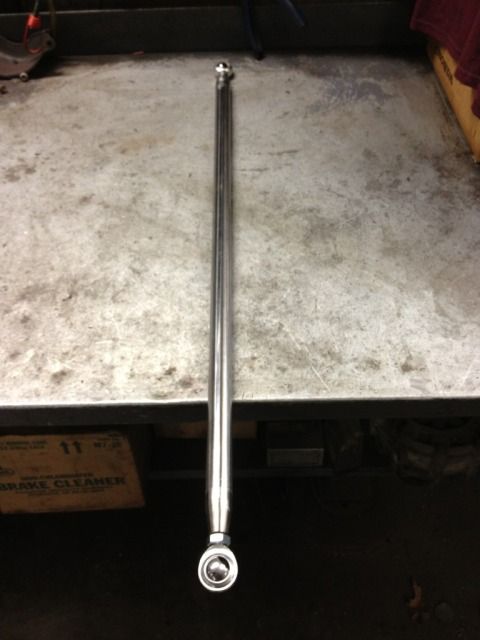
Made up a front lower control arm support. LH & RH threaded tube ends, .120 wall DOM tubing back bored to fit the .065 wall tube ends. This keeps the overall thickness of the tube the same size the whole way through. Military spec 1/2" Hiem joints and lock-nuts. Longer bolts were hard to find and special order, won't be here for a couple days. This mock-up and install of this also made clear just how much lower my motor is sitting on the old shot mounts. So need to address that as well before I can permanently install it. I need to have the bar powder-coated anyways. I had to buy much more of the DOM than I needed so I may be building a triangulated strut bar in the future or could make up another couple of these, if anyone's interested.
Not welded yet, mock-up stage.
Welded and ground flush
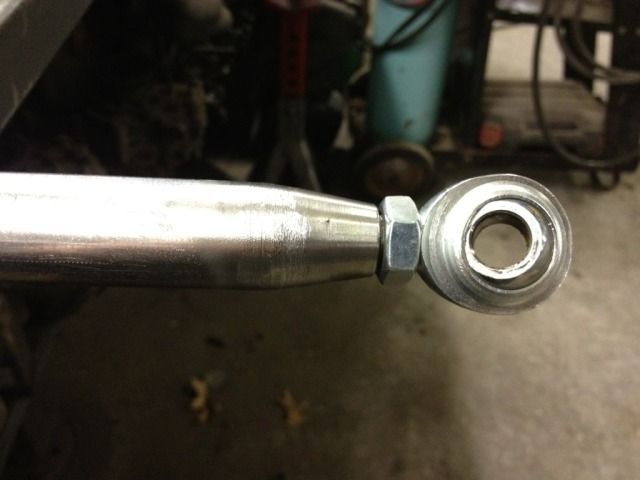
Overall
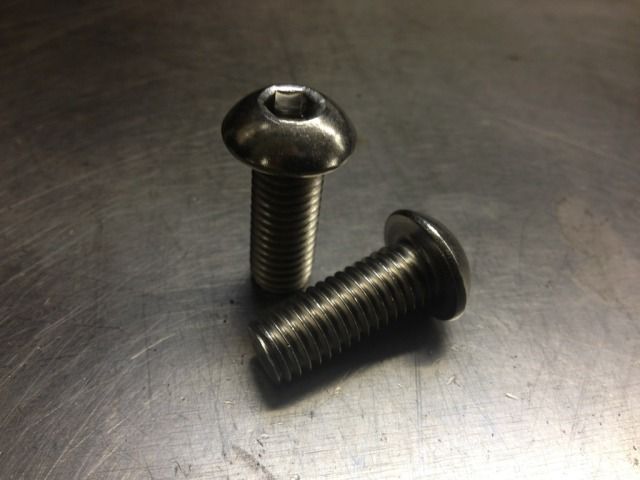
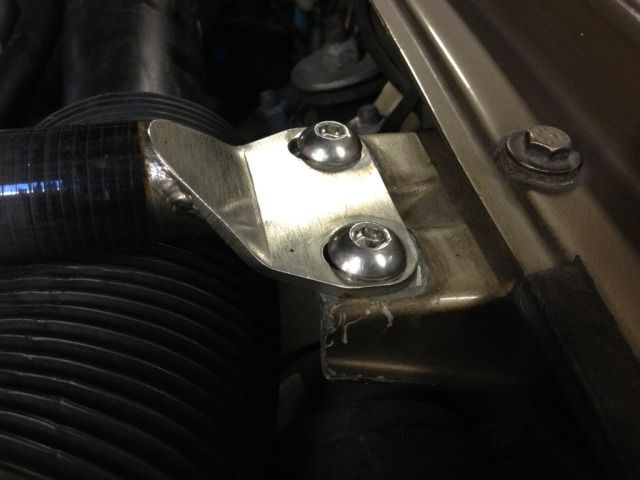
Replaced the (to me) incredibly unsightly stock fender tie bar bolts with some nice 18-8 Stainless button head screws. Also have a bunch more of these than I need. Anyone want a set (4) $7 shipped!?
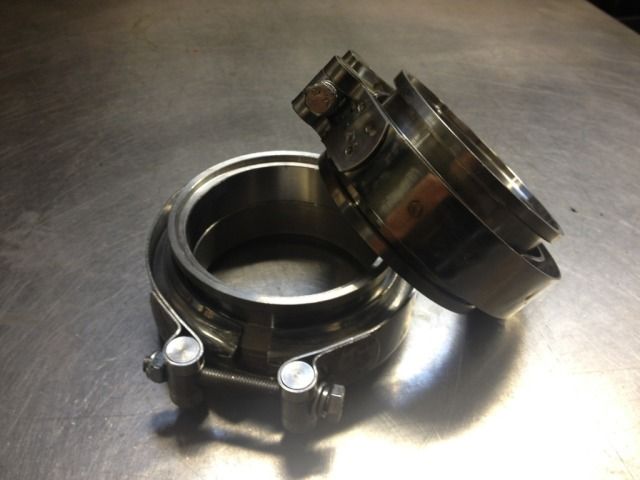
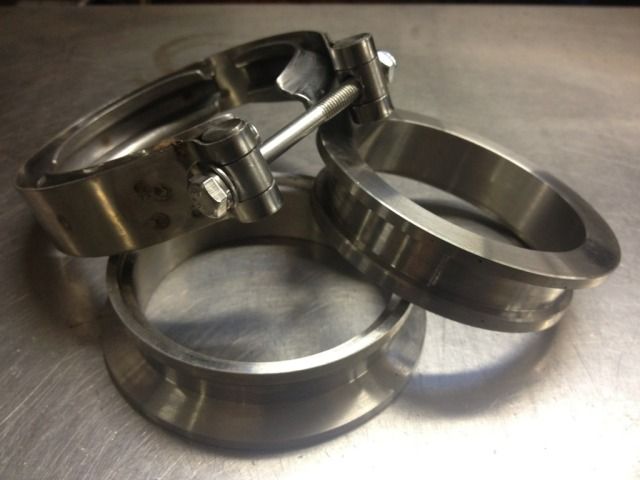
The start of my exhaust supplies started showing up.
3" stainless v-band and clamps.
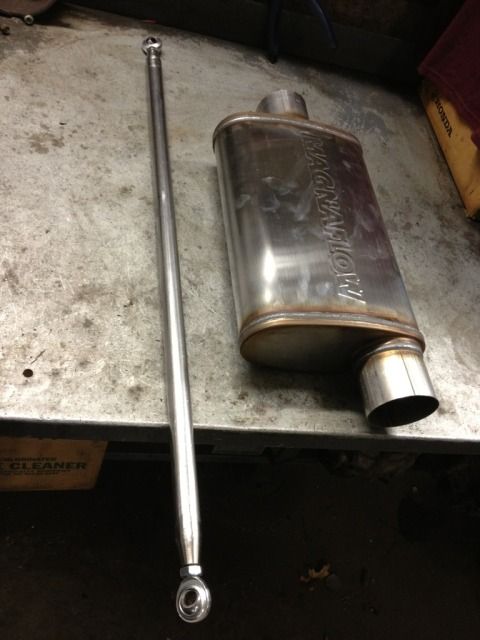
Magnaflow 4x9x14" offset/center. I plan on running this in the stock resonator location, with either another small Magnaflow or Borla in the pumpkin location. I don't want it to obnoxiously loud like most of my exhaust end up. Need to try and keep this a little refined.
Not welded yet, mock-up stage.
Welded and ground flush
Overall
Replaced the (to me) incredibly unsightly stock fender tie bar bolts with some nice 18-8 Stainless button head screws. Also have a bunch more of these than I need. Anyone want a set (4) $7 shipped!?
The start of my exhaust supplies started showing up.
3" stainless v-band and clamps.
Magnaflow 4x9x14" offset/center. I plan on running this in the stock resonator location, with either another small Magnaflow or Borla in the pumpkin location. I don't want it to obnoxiously loud like most of my exhaust end up. Need to try and keep this a little refined.
Last edited by U-928; 10-20-2012 at 06:52 PM.
10-20-2012, 06:57 PM
#114
Pro
Thread Starter
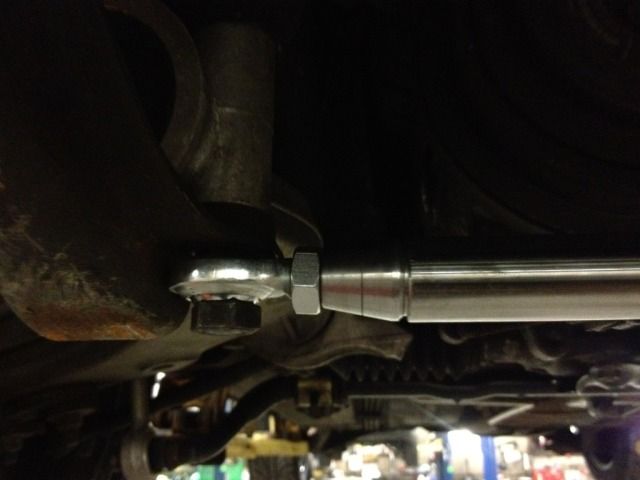
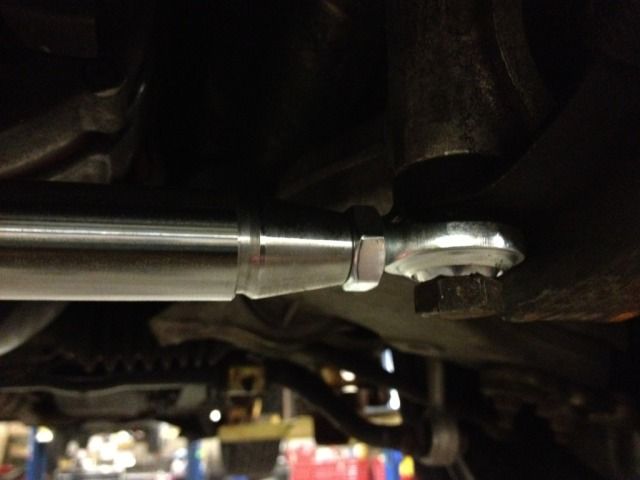
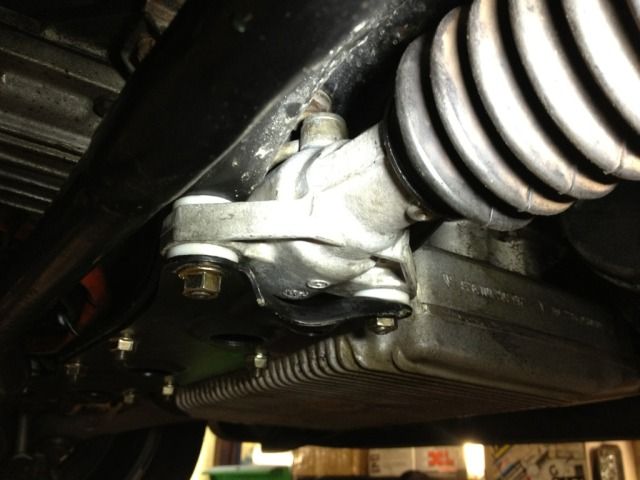
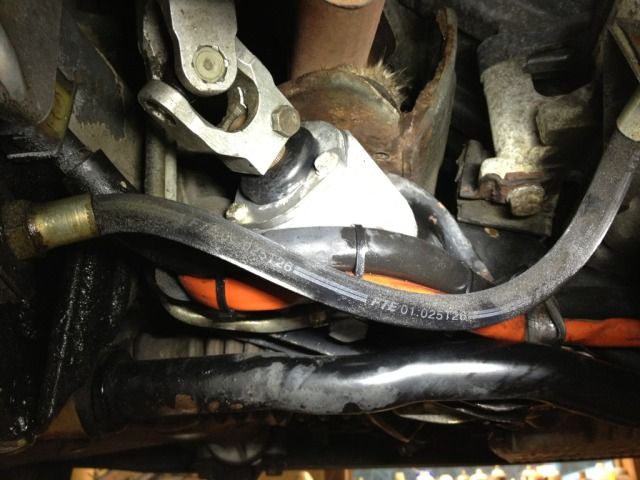
Steering rack #2 replacement complete. Swapped the Delrin mounts over from the old rack to the "new" used S4 rack. Swapped the original tie rods over so my alignment shouldn't be that far off. So far, so good, no leaks!
Also re-bled/flushed the entire brake system to see if in combination with the new pressure sensors, the damn warning will go away.
Also re-bled/flushed the entire brake system to see if in combination with the new pressure sensors, the damn warning will go away.
10-21-2012, 07:56 AM
#116
Pro
Nice work young man, see you next weekend! My friend needs a pumpkin, are you keeping yours?
10-21-2012, 11:33 AM
#117
Pro
Thread Starter
I plan on keeping everything, in the case that it turns out loud and I get hassled for inspection. I want to keep the option of going back to stock. Also, my rear flange has been neutered, someone before me welded in a sleeve, so my exhaust is all one piece from the cat-back.
10-21-2012, 05:47 PM
#120
Pro
Jim,
The only catch is, you have to pick it up in person at our Wilbraham Tech session. That goes for the non- a/c heater hose I have for you as well!
The only catch is, you have to pick it up in person at our Wilbraham Tech session. That goes for the non- a/c heater hose I have for you as well!