
'82 16V 4.7L Build - OE+ Goal
 05-10-2013, 10:23 PM
#136
Pro
Thread Starter
Just back from a drive. What a difference a new 02 sensor makes and it's sooooo nice not having exhaust "sputters" from all the leaks! It's like a new car!
I love this car.
I love this car.

 07-31-2013, 09:00 PM
#139
Pro
Thread Starter
Took the car to have the a/c checked/recharged last week. Was a no-go, leak at the expansion valve. Just finished installing the new one. What a pain in the d*ck. Old very crusty black o-rings, and a date stamp of 10-81 on the old valve. Guess only parts of the system were converted when this car went to 134a. Had to take the hood off to get enough room to move the huge wrenches.
Valve out


Had to remove the 10mm headed bolt that holds the hardlines against the firewall behind the airbox in order to have enough room to pull them out of the valve.
Old vs new


Came with new viton green o-rings.
Had a chance to do this as well, thanks to G8RB8 for the motivation, I had been meaning to do this for a long while now. The nozzles and check valves are off of a 2002 Subaru Outback wagon. Such a satisfying upgrade in performance. Looks didn't change much at all but damn do these work significantly better. Best freebee upgrade yet!
From the Fluidic Washer Nozzle Thread:
I can confirm, that with very minimal modifications, and i mean minimal, they'll fit and function wonderfully on an '82. The bases are damn near identical dimensions. Did some very slight trimming and shaving with a sharp razor blade and they popped right in. Spray pattern isn't too steep, good standing still and also good coverage on windshield while moving.


Passengers Side Pattern - Stationary

Drivers Side Pattern - Stationary
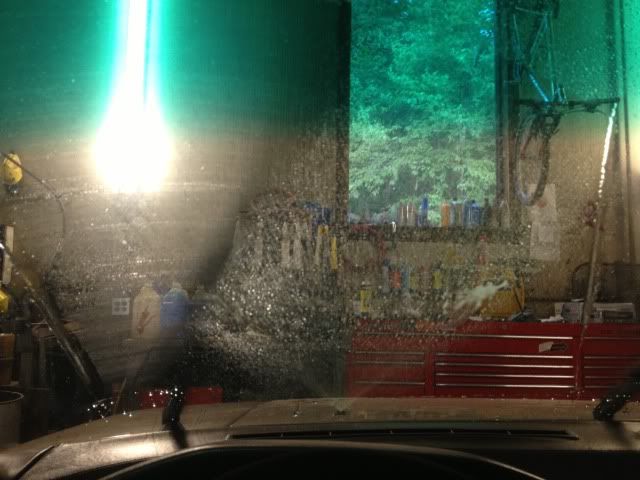
In action:
Valve out
Had to remove the 10mm headed bolt that holds the hardlines against the firewall behind the airbox in order to have enough room to pull them out of the valve.
Old vs new
Came with new viton green o-rings.
Had a chance to do this as well, thanks to G8RB8 for the motivation, I had been meaning to do this for a long while now. The nozzles and check valves are off of a 2002 Subaru Outback wagon. Such a satisfying upgrade in performance. Looks didn't change much at all but damn do these work significantly better. Best freebee upgrade yet!
From the Fluidic Washer Nozzle Thread:
I can confirm, that with very minimal modifications, and i mean minimal, they'll fit and function wonderfully on an '82. The bases are damn near identical dimensions. Did some very slight trimming and shaving with a sharp razor blade and they popped right in. Spray pattern isn't too steep, good standing still and also good coverage on windshield while moving.
Passengers Side Pattern - Stationary
Drivers Side Pattern - Stationary
In action:
11-10-2013, 06:14 PM
#140
Pro
Thread Starter
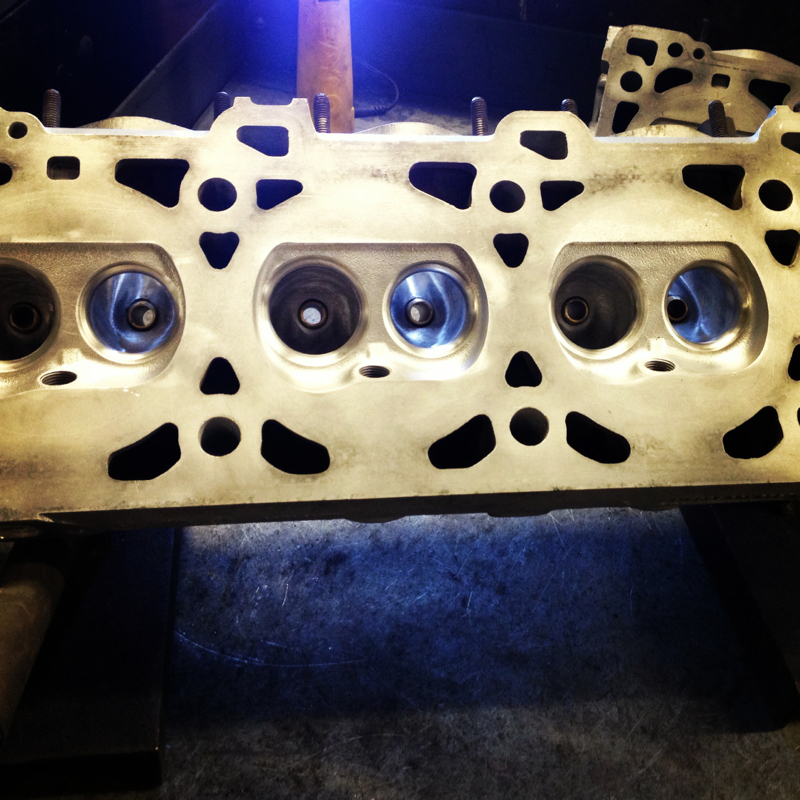
Got some motivation to finish the 4.7 so started working on finishing the portwork on the heads. All the exhaust ports on both heads are finished and in final finish. They're all nearly identical and once new guides are in, I think you'd have a hard time telling them all apart (which is good!)
Have intake ports from stock to do on one head, and final bowl work on the other head intake ports to finish, then back to the machine shop for new guides and reassembly. Maybe ill have this motor back assembled this winter. (Gasp!)
Have intake ports from stock to do on one head, and final bowl work on the other head intake ports to finish, then back to the machine shop for new guides and reassembly. Maybe ill have this motor back assembled this winter. (Gasp!)
01-25-2014, 08:52 PM
#141
Pro
Thread Starter
Just a couple updated pictures of the port work since I now have the re-assembled heads back from the machine shop. Been a long time coming and it's exciting to be able to get this motor back in one piece.
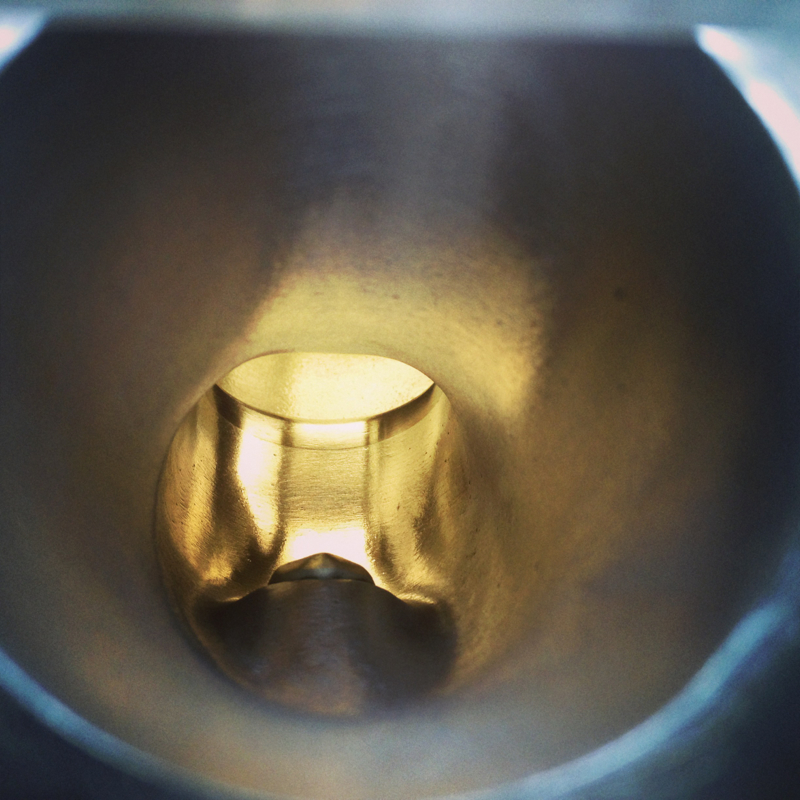
Raw finish of intake ports, showing the "bump" and machining marks on the short-side (bottom) radius of the port, where it turns onto the back side of the valve and into the cylinder.

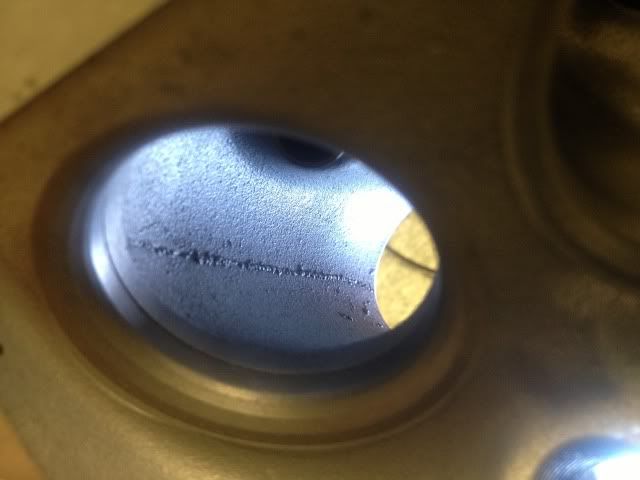
On the left side now, in this picture
First step, removing the lip and blending it back into the port.

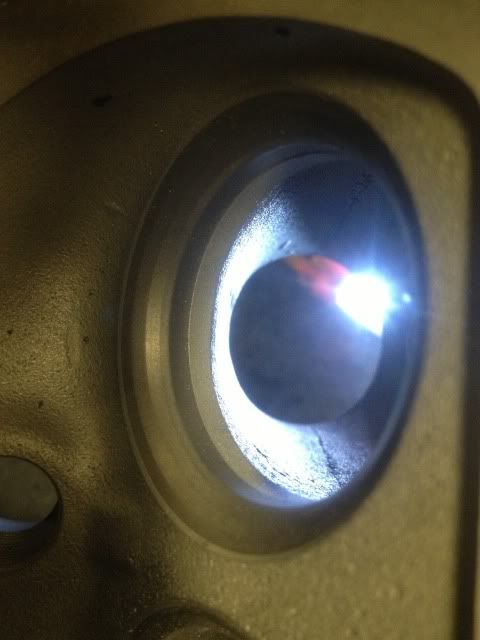
Raw finish of the inlet bowl

And after hours of smoothing and blending. This it the final finish, @ 120 grit it's not polished, still rough enough (in my experience) to not cause adverse affects with fuel "puddling"

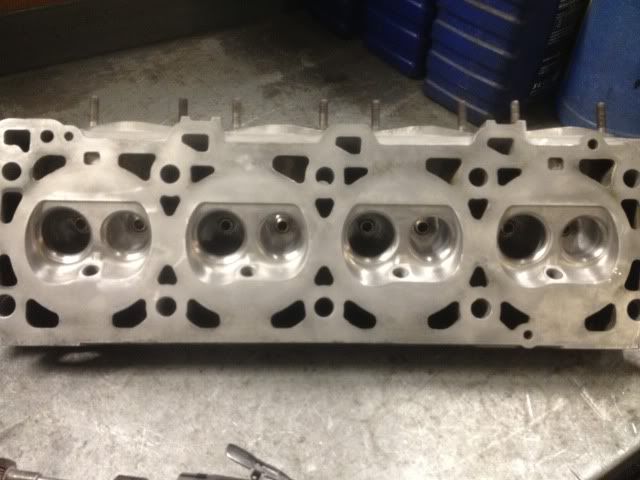
Workstation, with the first finished head aside so I could match all the ports evenly.


The finished one, with polished combustion chambers. No material removal, just smoothing of sharp edges around the valve seats and a cross buff fine finish. Aids in keeping oil/carbon deposits (of which there was substantial, on the motor when originally taken apart) to a minimum.
And freshened up, back from the machine shop, with all new exhaust guides. Intake's didn't need to be replaced, so they remain OE.
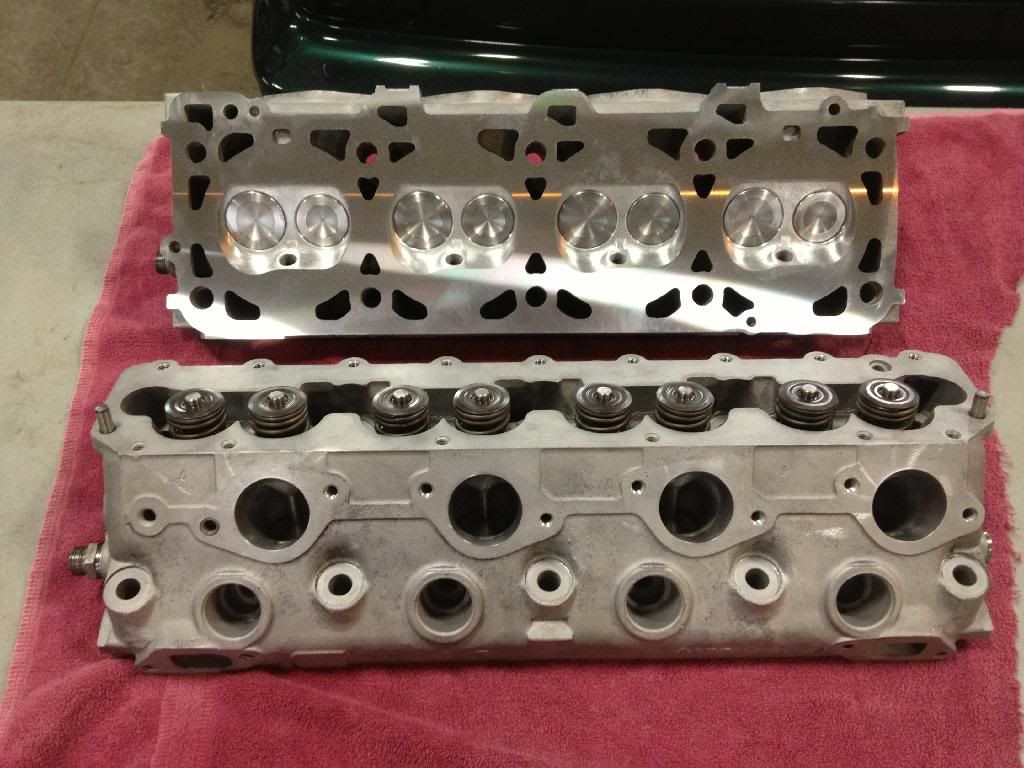
Intake port final diameter all (8) are within .25mm of each other, so not perfect, but I'm not going to loose sleep over it.

Same goes with the exhaust all within .25mm of each other.

Both intake and exhaust final sizes are *just* under the corresponding gasket dimensions. So shouldn't have any flow disruption by the gaskets. The exhaust's have some wiggle room, and I have debated on pinning them so they don't move. But that depends on how I end up putting the motor in the car.
Raw finish of intake ports, showing the "bump" and machining marks on the short-side (bottom) radius of the port, where it turns onto the back side of the valve and into the cylinder.
On the left side now, in this picture
First step, removing the lip and blending it back into the port.
Raw finish of the inlet bowl
And after hours of smoothing and blending. This it the final finish, @ 120 grit it's not polished, still rough enough (in my experience) to not cause adverse affects with fuel "puddling"
Workstation, with the first finished head aside so I could match all the ports evenly.
The finished one, with polished combustion chambers. No material removal, just smoothing of sharp edges around the valve seats and a cross buff fine finish. Aids in keeping oil/carbon deposits (of which there was substantial, on the motor when originally taken apart) to a minimum.
And freshened up, back from the machine shop, with all new exhaust guides. Intake's didn't need to be replaced, so they remain OE.
Intake port final diameter all (8) are within .25mm of each other, so not perfect, but I'm not going to loose sleep over it.
Same goes with the exhaust all within .25mm of each other.
Both intake and exhaust final sizes are *just* under the corresponding gasket dimensions. So shouldn't have any flow disruption by the gaskets. The exhaust's have some wiggle room, and I have debated on pinning them so they don't move. But that depends on how I end up putting the motor in the car.
01-09-2015, 12:42 PM
#142
Rennlist Member
A year with no updates?! Common Jeremy your slipping 
