
'82 16V 4.7L Build - OE+ Goal
 04-23-2011, 04:36 PM
#31
Pro
Thread Starter
Correct.
I plan on ditching the airpump, mechanical fan, front y-pipe and cat (to be replaced with a stainless manifold-back exhaust that I'll build). The 4.7 will be Poken tensioned and equipped with one of Ed's epic water pumps. Also have a Bosch re-manufactured set of injectors to go on it.
Still debating on cam carrier and intake plenum powder coat color(s).
Weather or not I re-ring and bearing this motor will be decided when I get the heads off and take a peek at the bores.
 04-25-2011, 09:29 PM
#32
Pro
Thread Starter
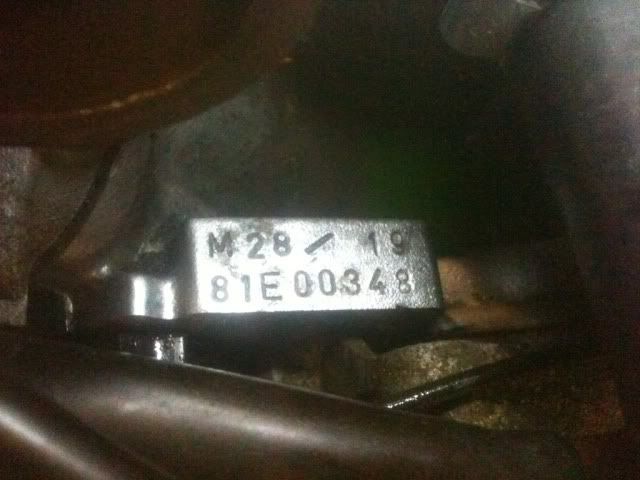
So I've stripped the motor. Cam carriers and heads are off. Top end looks good.
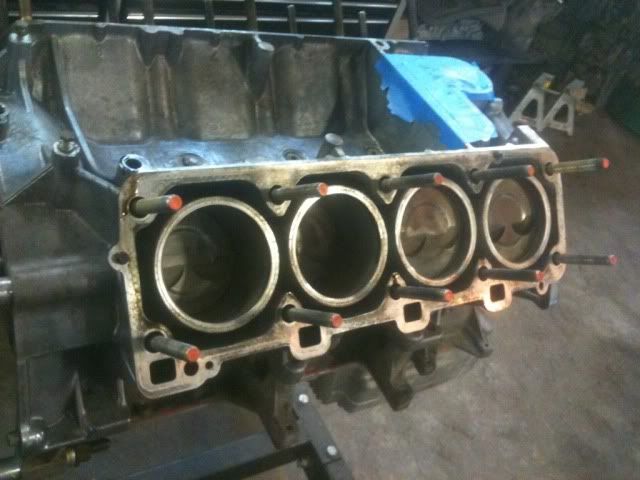
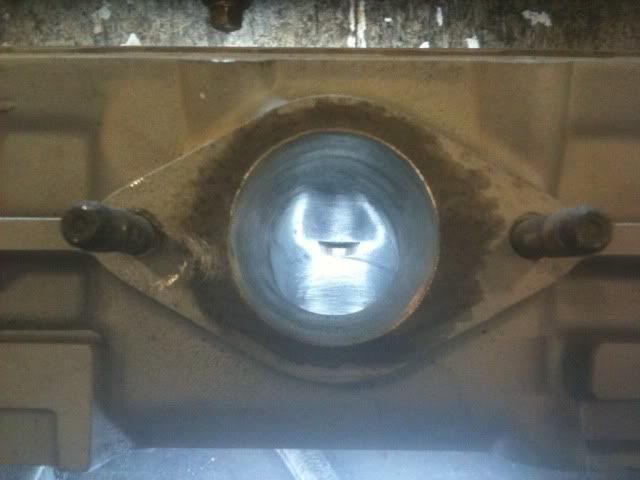
Bottom end....not so much. It seems as though (somehow) the right side cylinder bank accumulated some fluid, and for an unknown amount of time said fluid sat on top of the pistons. There's now what looks like hard water stains on the cylinder walls. Especially bad on cyl. #4. No vertical scratches, but this other stuff has me concerned. As soon as I can get my good camera, I'll try and get some pictures up. Need second, third and fourth opinions from those of you that know more about these motors than I do. Really hoping I didn't just buy an expensive coffee table.
Bottom end....not so much. It seems as though (somehow) the right side cylinder bank accumulated some fluid, and for an unknown amount of time said fluid sat on top of the pistons. There's now what looks like hard water stains on the cylinder walls. Especially bad on cyl. #4. No vertical scratches, but this other stuff has me concerned. As soon as I can get my good camera, I'll try and get some pictures up. Need second, third and fourth opinions from those of you that know more about these motors than I do. Really hoping I didn't just buy an expensive coffee table.
05-10-2011, 07:24 PM
#33
Pro
Thread Starter
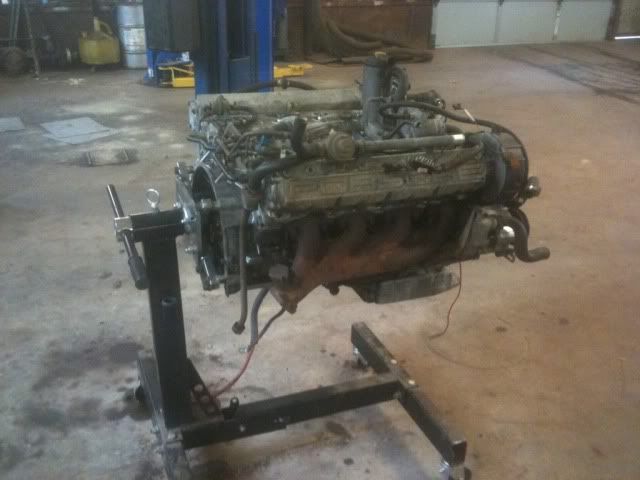
Fresh off the truck from picking the motor up:

Motor is back from machinist, bottom should be ok. Heads are now stripped, tanked, and media-blasted. All nice and clean!
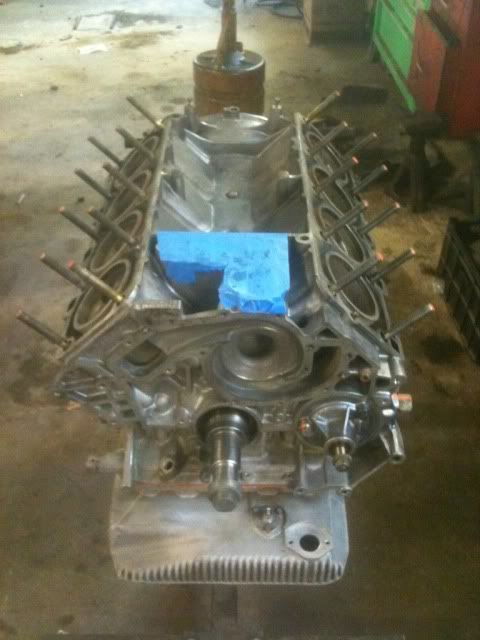

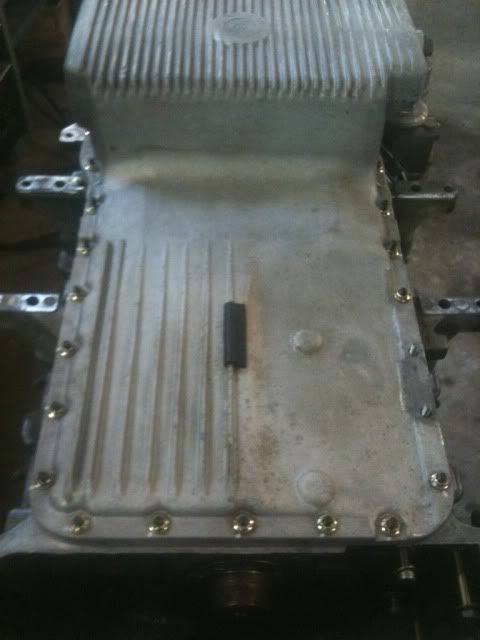
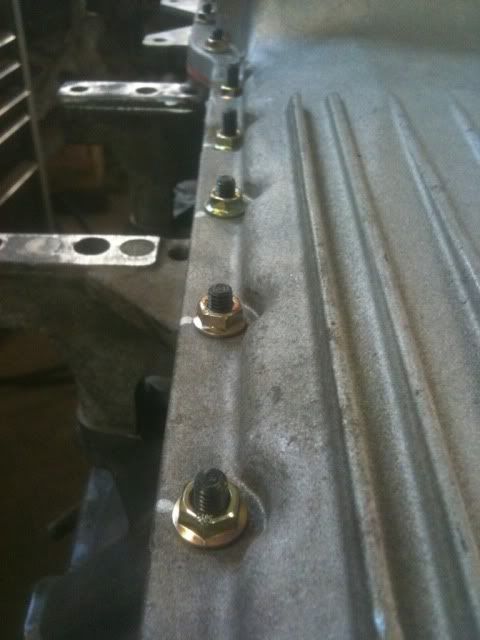
Silicone oil pan gasket, studs and lock nuts installed.
I've started the port-work on the exhaust side already. Port matching to the exhaust gasket (1 5/8"), blended 1.5" into the port. Smoothed and "rounded" the short radius. Factory port leaves a very sharp transition off the back of the valve into the mouth of the port. Also the sort radius has a very "flat" shape to it when blending into the rest of the port, so the sides were blended into a more round, smooth transition. This is hard to describe, but the end result should be much better. I had to order larger porting supplies, as the things I have in my stock are for much smaller cylinder head ports.
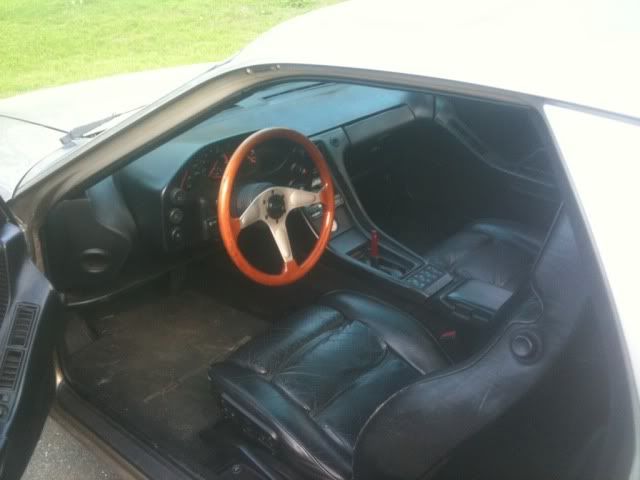
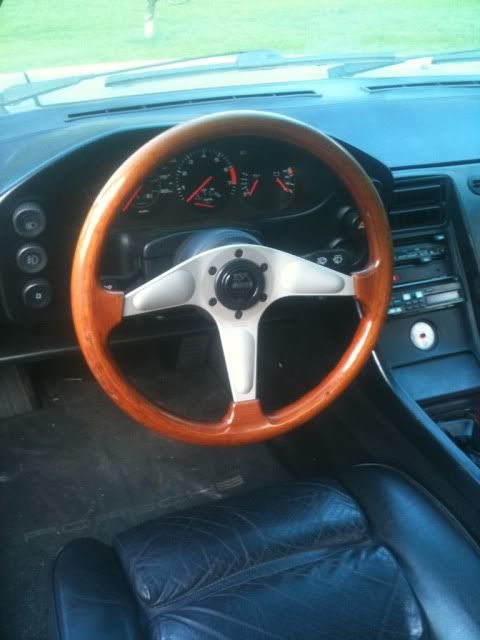
Momo steering wheel finally arrived from Taiwan. Adapter came a couple days ago, and the whole deal is now on the car. So nice to not have that factory wheel in there any more.
A new shift **** and adapter are also on the way. Still working on a shift boot replacement.
New steel lower ball joints and all the associated parts are ordered and should be here by the end of the week.
Motor is back from machinist, bottom should be ok. Heads are now stripped, tanked, and media-blasted. All nice and clean!
Silicone oil pan gasket, studs and lock nuts installed.
I've started the port-work on the exhaust side already. Port matching to the exhaust gasket (1 5/8"), blended 1.5" into the port. Smoothed and "rounded" the short radius. Factory port leaves a very sharp transition off the back of the valve into the mouth of the port. Also the sort radius has a very "flat" shape to it when blending into the rest of the port, so the sides were blended into a more round, smooth transition. This is hard to describe, but the end result should be much better. I had to order larger porting supplies, as the things I have in my stock are for much smaller cylinder head ports.
Momo steering wheel finally arrived from Taiwan. Adapter came a couple days ago, and the whole deal is now on the car. So nice to not have that factory wheel in there any more.
A new shift **** and adapter are also on the way. Still working on a shift boot replacement.
New steel lower ball joints and all the associated parts are ordered and should be here by the end of the week.
05-10-2011, 08:27 PM
#34
Pro
Look'n good my man.
06-13-2011, 01:14 AM
#36
Pro
Thread Starter
Bit the bullet, oil leak was too much. Had to do something about it, and the second motor build is (oh duh) getting more involved than I initially anticipated.
Replaced the O.P.G. of the motor in the car, with the cork gasket that was supplied in my engine kit. It otherwise would have gone unused, as a silicone one is on the "new" motor.
Spent a hefty time cleaning and de-greasing everything I took off for the job as well.
Repaired some wires missing insulation to the starter.
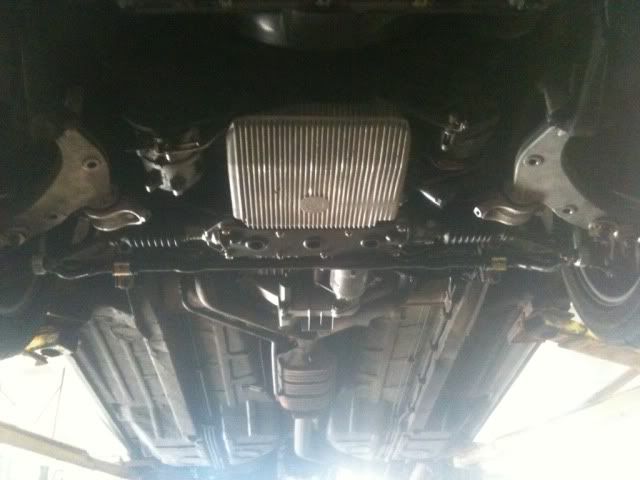
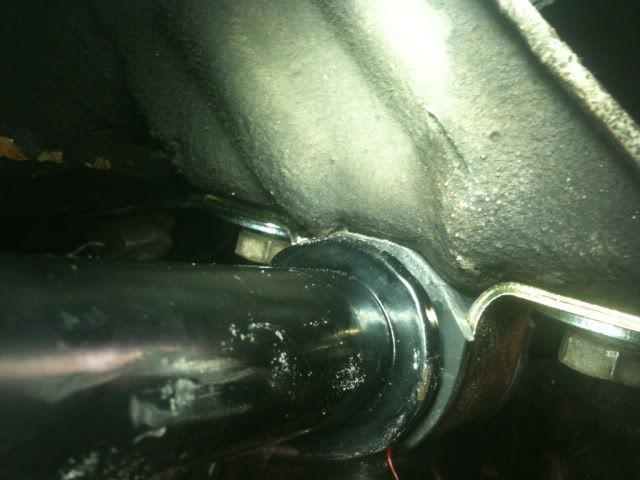
Replaced steering rack bushings with Delrin ones from Roger. Fit was 100% perfect. Two of the bushings on the rack really gave me hell. Found that the steering rack leaks, and is a re-manufactured unit. A rebuild kit is on the 'to-buy' list for this week. As well as new rack boots. When this reman rack was installed, it was installed and aligned with too much right turn-in. Noted by the large missing section of undercoating on the RF inner wheel-well. Rack also missing a plug for the rack centering tool's hole. Found proper threaded bolt, cut to shorter length and installed with copper o-ring. Re-centered the steering rack and steering wheel to match.
Replaced the original aluminum ball joints with the updated style steel ones, with all new corresponding eccentrics. Originally I was just going to use the original lower strut mounts, but after reading through PET, I've changed my mind and will be ordering new "clamps" for the now updated steel ball joints. I dislike knowing that they are not the "correct" ones for what's on there. The geometry of the updated mounts is different, and for a reason. Porsche made it that way, so that's the way it will be. No half-***-ing on my cars.
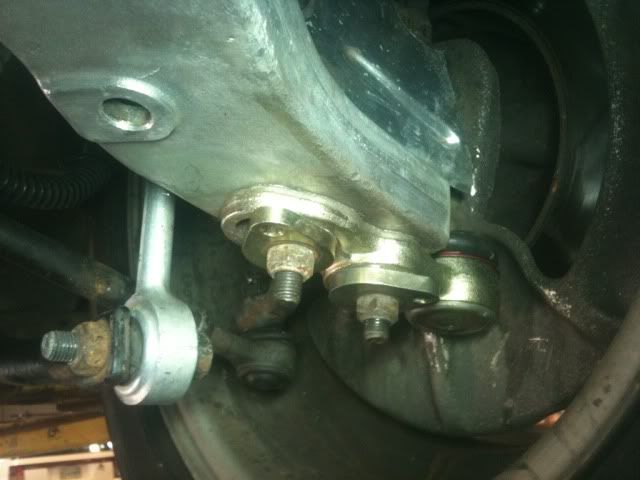
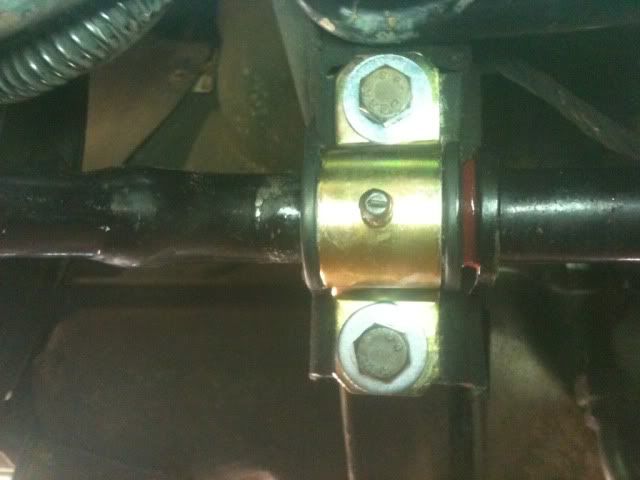
Found that somewhere along the life of this car, the sway bar links were installed incorrectly. They were upside-down, consequently tweaking the bar in the bushings. Remedied the end link situation. New bushings will also be ordered this week. May also order some rod ends and trunnion bars to make my own adjustable links, for the front and rear.
Also took this time to inspect my clutch, to determine if it would need to be replaced when I do the motor. Seems to have a good amount of meat left. Did however find that the t.o. bearing is in self-destruct mode. Will need to be replaced. Also the upper cup on the release arm is m.i.a. Ordering that as well.
Still to tackle: 928 motorsport front shift linkage cup, and delrin inserts for the rear joint.
Replaced the O.P.G. of the motor in the car, with the cork gasket that was supplied in my engine kit. It otherwise would have gone unused, as a silicone one is on the "new" motor.
Spent a hefty time cleaning and de-greasing everything I took off for the job as well.
Repaired some wires missing insulation to the starter.
Replaced steering rack bushings with Delrin ones from Roger. Fit was 100% perfect. Two of the bushings on the rack really gave me hell. Found that the steering rack leaks, and is a re-manufactured unit. A rebuild kit is on the 'to-buy' list for this week. As well as new rack boots. When this reman rack was installed, it was installed and aligned with too much right turn-in. Noted by the large missing section of undercoating on the RF inner wheel-well. Rack also missing a plug for the rack centering tool's hole. Found proper threaded bolt, cut to shorter length and installed with copper o-ring. Re-centered the steering rack and steering wheel to match.
Replaced the original aluminum ball joints with the updated style steel ones, with all new corresponding eccentrics. Originally I was just going to use the original lower strut mounts, but after reading through PET, I've changed my mind and will be ordering new "clamps" for the now updated steel ball joints. I dislike knowing that they are not the "correct" ones for what's on there. The geometry of the updated mounts is different, and for a reason. Porsche made it that way, so that's the way it will be. No half-***-ing on my cars.
Found that somewhere along the life of this car, the sway bar links were installed incorrectly. They were upside-down, consequently tweaking the bar in the bushings. Remedied the end link situation. New bushings will also be ordered this week. May also order some rod ends and trunnion bars to make my own adjustable links, for the front and rear.
Also took this time to inspect my clutch, to determine if it would need to be replaced when I do the motor. Seems to have a good amount of meat left. Did however find that the t.o. bearing is in self-destruct mode. Will need to be replaced. Also the upper cup on the release arm is m.i.a. Ordering that as well.
Still to tackle: 928 motorsport front shift linkage cup, and delrin inserts for the rear joint.
Last edited by U-928; 06-17-2011 at 10:57 AM. Reason: Pictures!
06-13-2011, 02:11 AM
#37
Team Owner
Nice project you have there and your really into it , knee deep in the hoopla.
Keep Em flying!
You might also consider replacing the shifter with Colins new shifter it removes the front shift rod all together, Roger sells these..
For the clutch also replace the pilot bearing,
dont forget to add the 3mm wire spacers to the PP standoffs this will keep the PP loaded and make it possible to remove/ install the release arm from the bushing/ ball,
and also remove the TOB from the PP
For the rack if your reseal doesnt work,
then I suggest to get a rebuilt one from 928 INTL I have installed 4 of them and all were perfect,
also when you remove the right rack boot look and see if the steering stop is fitted to the rack,
if this part is missing then the wheels can be turned into the fenderwell
I noticed on one of the pictures where you fitted the studs into the block for the oilpan, you should notice that there are a few of the holes where the pan surface is indented this is for clearance for the cross member and the starter I would suggest to cut the studs off so they are close to flush with the nuts otherwise you may have them rubbing hitting either the Xmember or the starter when you go to fit them.
When you fit the oil fill tube to the block use Hondabond on the O ring and sealing area, this should prevent oil leaks down the road
Good luck with your project.
06-13-2011, 06:50 AM
#38
Pro
Jeremy, I'm doing the rack bushings from Roger this week, any advice/helpful hints on removing the old ones?
06-13-2011, 11:35 AM
#39
Pro
Thread Starter
For the rack if your reseal doesnt work, then I suggest to get a rebuilt one from 928 INTL I have installed 4 of them and all were perfect, also when you remove the right rack boot look and see if the steering stop is fitted to the rack, if this part is missing then the wheels can be turned into the fenderwell.
06-14-2011, 09:06 PM
#40
Pro
Thread Starter
Just finished installing new steering rack boots, left and right sides. Not a bad job, especially since you can sneak them over the tie rod ends!
Also rebuilt the upper ball joints with the kit from 928 Motorsports. Letting epoxy cure over night, will grease them tomorrow.

May remove the steering rack again tomorrow so I can pull the input shaft cover and seal to see if I can read a part number off of it and get a replacement. It's the only seal leaking and not worth the $85 kit if i really only need one seal.
Also rebuilt the upper ball joints with the kit from 928 Motorsports. Letting epoxy cure over night, will grease them tomorrow.
May remove the steering rack again tomorrow so I can pull the input shaft cover and seal to see if I can read a part number off of it and get a replacement. It's the only seal leaking and not worth the $85 kit if i really only need one seal.
Last edited by U-928; 06-17-2011 at 10:56 AM. Reason: Pictures!
06-14-2011, 10:09 PM
#41
Rennlist Member

Great work you are doing all around!
 06-14-2011, 10:15 PM
#42
Pro
Thread Starter
 06-17-2011, 10:55 AM
#43
Pro
Thread Starter
Water pump came back from Ed. Looks great! And the rack tool will come in handy when I go get the car aligned.
Replaced the oil soaked and bloated sway bar links with the PN# 9.5163 grease-able universal kit from energysuspensionparts.com. Basically a direct fit, I shaved the corners off of the back sides to fit in between the bumps on the mounts on the body a little tighter. Work great, quiet so far, and they have grease fittings. Was ultimately cheaper than buying OE bushings, even with shipping. $20!
Finishing up the other cylinder head, and then prepping parts for powder coat.
06-17-2011, 01:17 PM
#44
Pro
When the time comes, I'll go with the Porkentensioner as well, just hate to lose the warning light.
Keep up the good work Jeremy.
06-17-2011, 02:58 PM
#45
Pro
Thread Starter
Didn't need to remove the rack, there was enough room to get the old rubber bushings out (just). The two piece Delrin bushings a perfect fit. Steering response so precise you can't believe it.
When the time comes, I'll go with the Porkentensioner as well, just hate to lose the warning light.
Keep up the good work Jeremy.
When the time comes, I'll go with the Porkentensioner as well, just hate to lose the warning light.
Keep up the good work Jeremy.