When you click on links to various merchants on this site and make a purchase, this can result in this site earning a commission. Affiliate programs and affiliations include, but are not limited to, the eBay Partner Network.
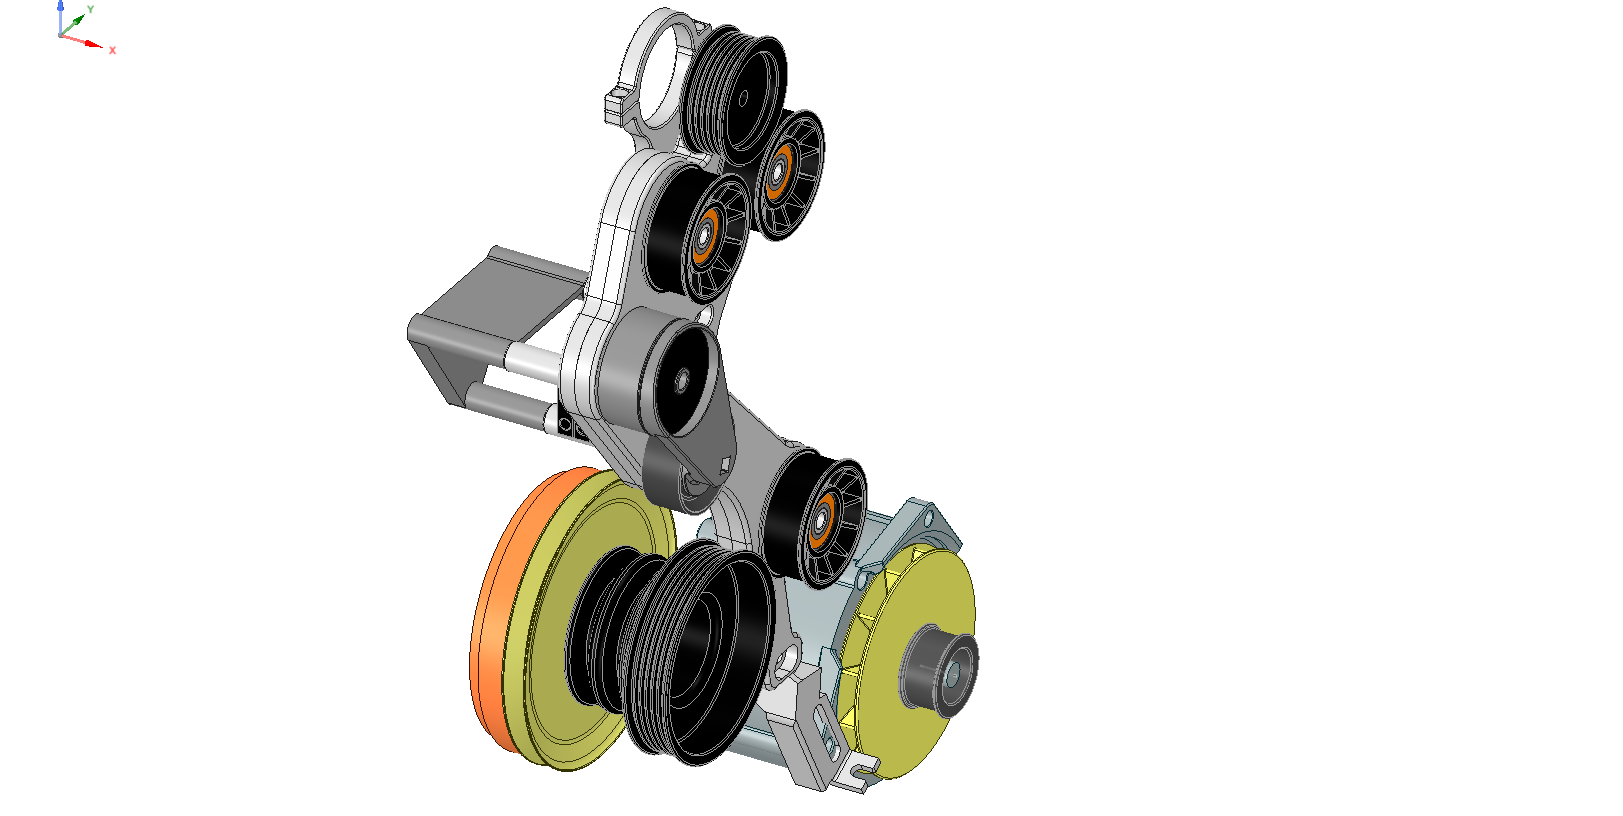
I now know a lot more about pulley design than I ever expected.... spent the better part of the evening looking into best design practices for belt and pulley design. The result is a nice custom crank pulley configuration that will allow running a dedicated supercharger belt. I was able to get a full 16 ribs in the general drive section of the pulley, so there will be a 6-rib belt for the alternator as stock, another for the power steering, and I have a 4-rib available for running a crankcase vacuum pump if necessary.
I am hoping the pulley ends up being affordable. I was able to delete some of the other more expensive design features in the bracket to try and offset the cost.
This is the route I wanted to go originally, but got cold feet with the potential expense of the pulley. As always Louie pointed me back in the right direction.
Went back and redesigned the tensioner system again over the weekend. I finally decided not to move the supercharger belt closer to the motor like I originally planned. I really wanted to make a dedicated supercharger belt system, but really didnt like holding it captive behind the alternator and power steering. Plus, it leaves the smog pump drive open for a vacuum pump if it becomes necessary.
Instead, I designed the bracket with a modular lower pulley in mid. I plan on making a billet crank pulley that can use the Metco supercharger drive rings. The 6.55" looks to be the perfect combination with an off-the-shelf 2.75" supercharger pulley and 2.5" alternator pulley.
It needs another evening of tweaking and re-thinking some of the hardware choices for reduced machining costs, but it should be ready to go to the shop before the end of the week.
Originally Posted by hans14914
I now know a lot more about pulley design than I ever expected.... spent the better part of the evening looking into best design practices for belt and pulley design. The result is a nice custom crank pulley configuration that will allow running a dedicated supercharger belt. I was able to get a full 16 ribs in the general drive section of the pulley, so there will be a 6-rib belt for the alternator as stock, another for the power steering, and I have a 4-rib available for running a crankcase vacuum pump if necessary.
I am hoping the pulley ends up being affordable. I was able to delete some of the other more expensive design features in the bracket to try and offset the cost.
This is the route I wanted to go originally, but got cold feet with the potential expense of the pulley. As always Louie pointed me back in the right direction.
Hans,
Great job! It's always better to do it right in the first place rather than fixing it later.
Great looking work Hans. Im impressed with your work, and what impresses me more is the willingness to put your work out in a public forum, and accept people's advice and improve in your work based on that advice.
I guess its twinscrew progress day! Upgrade parts from two different peopl.
I got a "will not exceed" number from a very reputable pulley manufacturer, so we are good to go on custom hard coated twin-screw crank pulleys. I wont have the firm numbers till later in the week, but have already given a verbal on the custom jaws necessary to make these large pulleys.
With the help of Colin Jensan we got the last bits of the installation completed and on the road for its tuning run. We did the LH board mod to correct the classic intermittent fuel pump switching problem, we installed the SuperMAF, and Colin's vacuum pump driven PCV system, then buttoned it all up.
With the benefit of Colin's wizardry with the SharkTuner II we set out to re-map the engine control systems. We drained the old fuel and topped it with new 94 (R+M)/2 octane gas. After an hour of various cruise condition checks and map modifications we did a number of acceleration pulls to get the final ignition and fueling maps set into the PEMS chips. I didn't realize how far from the stock maps we would end up!! We pulled 10-12 degrees of timing out of parts of the EZK map to get past some bad knock counts near the top end at WOT.
Once we got finished we did a few full acceleration runs to watch the mixture and knock information through the shifts at WOT. AMAZING! This thing sees the full 8 lb of boost from the moment you hit it, right through to redline through every gear, though we never made it to the 3-4 shift due to speed considerations.
Now just a few loose ends to tie up, Hans' fan system to acquire and install, and the suspension to re-adjust and align, and I'n ready to go to jail!!
Ready to go, with Darien's air filter installed. Thanks buddy!
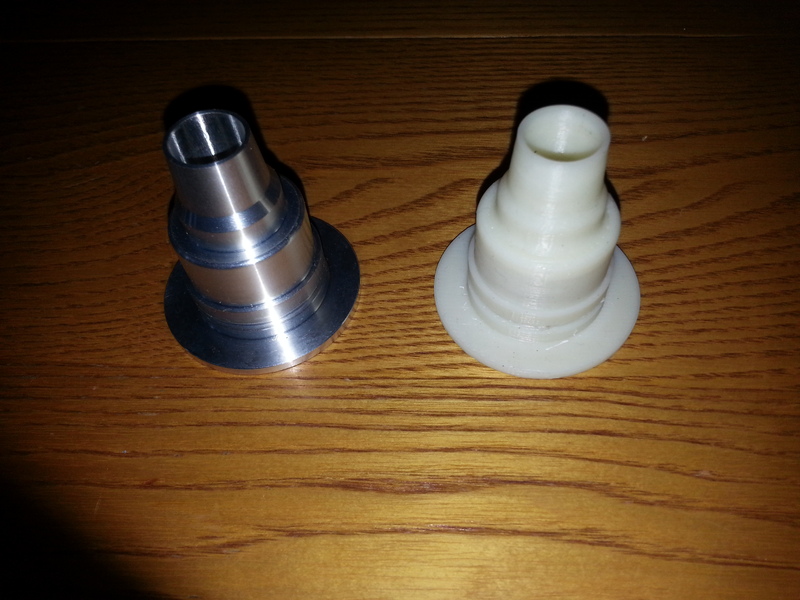
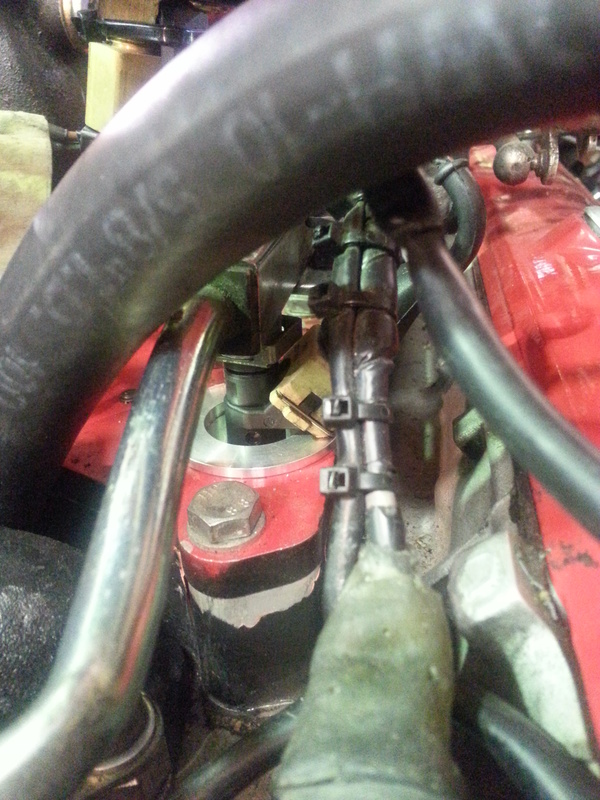
I still have one set of these injector bushings for anyone wanting to replace the rubber gland seals in the Andy Keel manifold. Viton o-rings for manifold-to-bushing seal are included. $200.00 for a set of 10.
These bushings will accept the OEM style injectors or the DEKA IV (pencil style) injectors.
3D printed prototype and production unit.
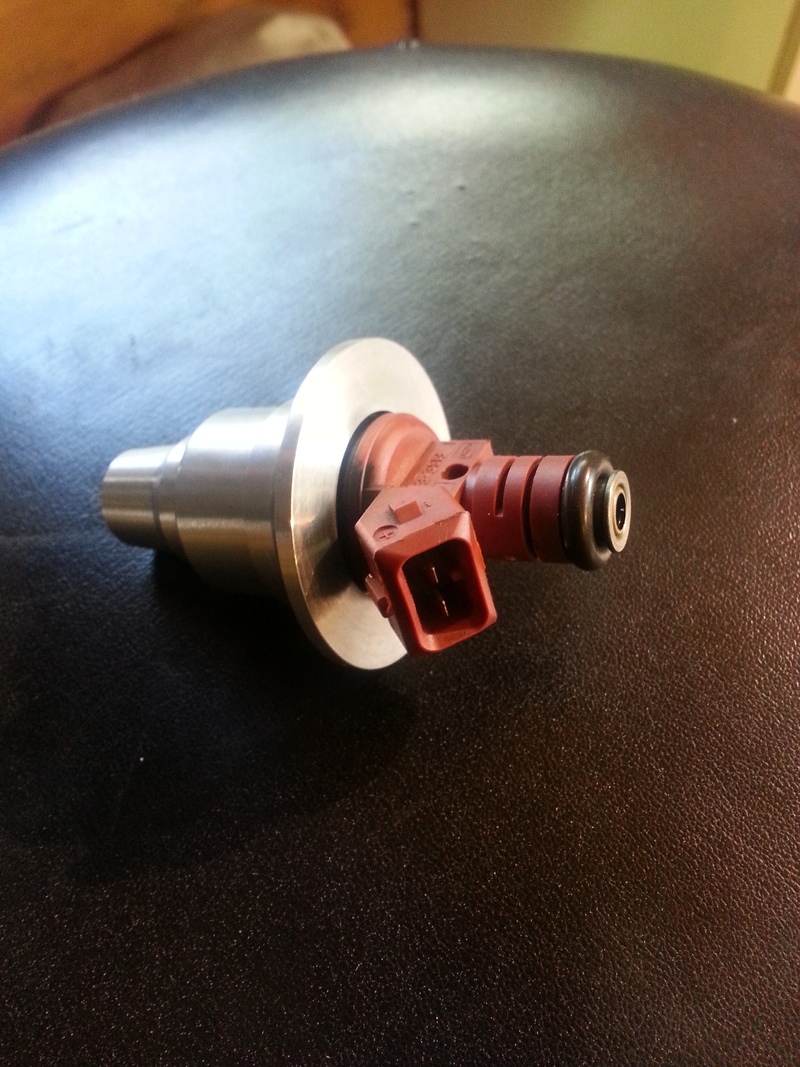
OEM Bosch-style 24 lb injector in the bushing.
DEKA IV (pencil style) injector as installed in my car.
Congrats Brian...you are now officially Screwed Have fun with that beast and and keep us posted!
Originally Posted by BrianG
Finally!
With the help of Colin Jensan we got the last bits of the installation completed and on the road for its tuning run. We did the LH board mod to correct the classic intermittent fuel pump switching problem, we installed the SuperMAF, and Colin's vacuum pump driven PCV system, then buttoned it all up.
With the benefit of Colin's wizardry with the SharkTuner II we set out to re-map the engine control systems. We drained the old fuel and topped it with new 94 (R+M)/2 octane gas. After an hour of various cruise condition checks and map modifications we did a number of acceleration pulls to get the final ignition and fueling maps set into the PEMS chips. I didn't realize how far from the stock maps we would end up!! We pulled 10-12 degrees of timing out of parts of the EZK map to get past some bad knock counts near the top end at WOT.
Once we got finished we did a few full acceleration runs to watch the mixture and knock information through the shifts at WOT. AMAZING! This thing sees the full 8 lb of boost from the moment you hit it, right through to redline through every gear, though we never made it to the 3-4 shift due to speed considerations.
Now just a few loose ends to tie up, Hans' fan system to acquire and install, and the suspension to re-adjust and align, and I'n ready to go to jail!!
Ready to go, with Darien's air filter installed. Thanks buddy!
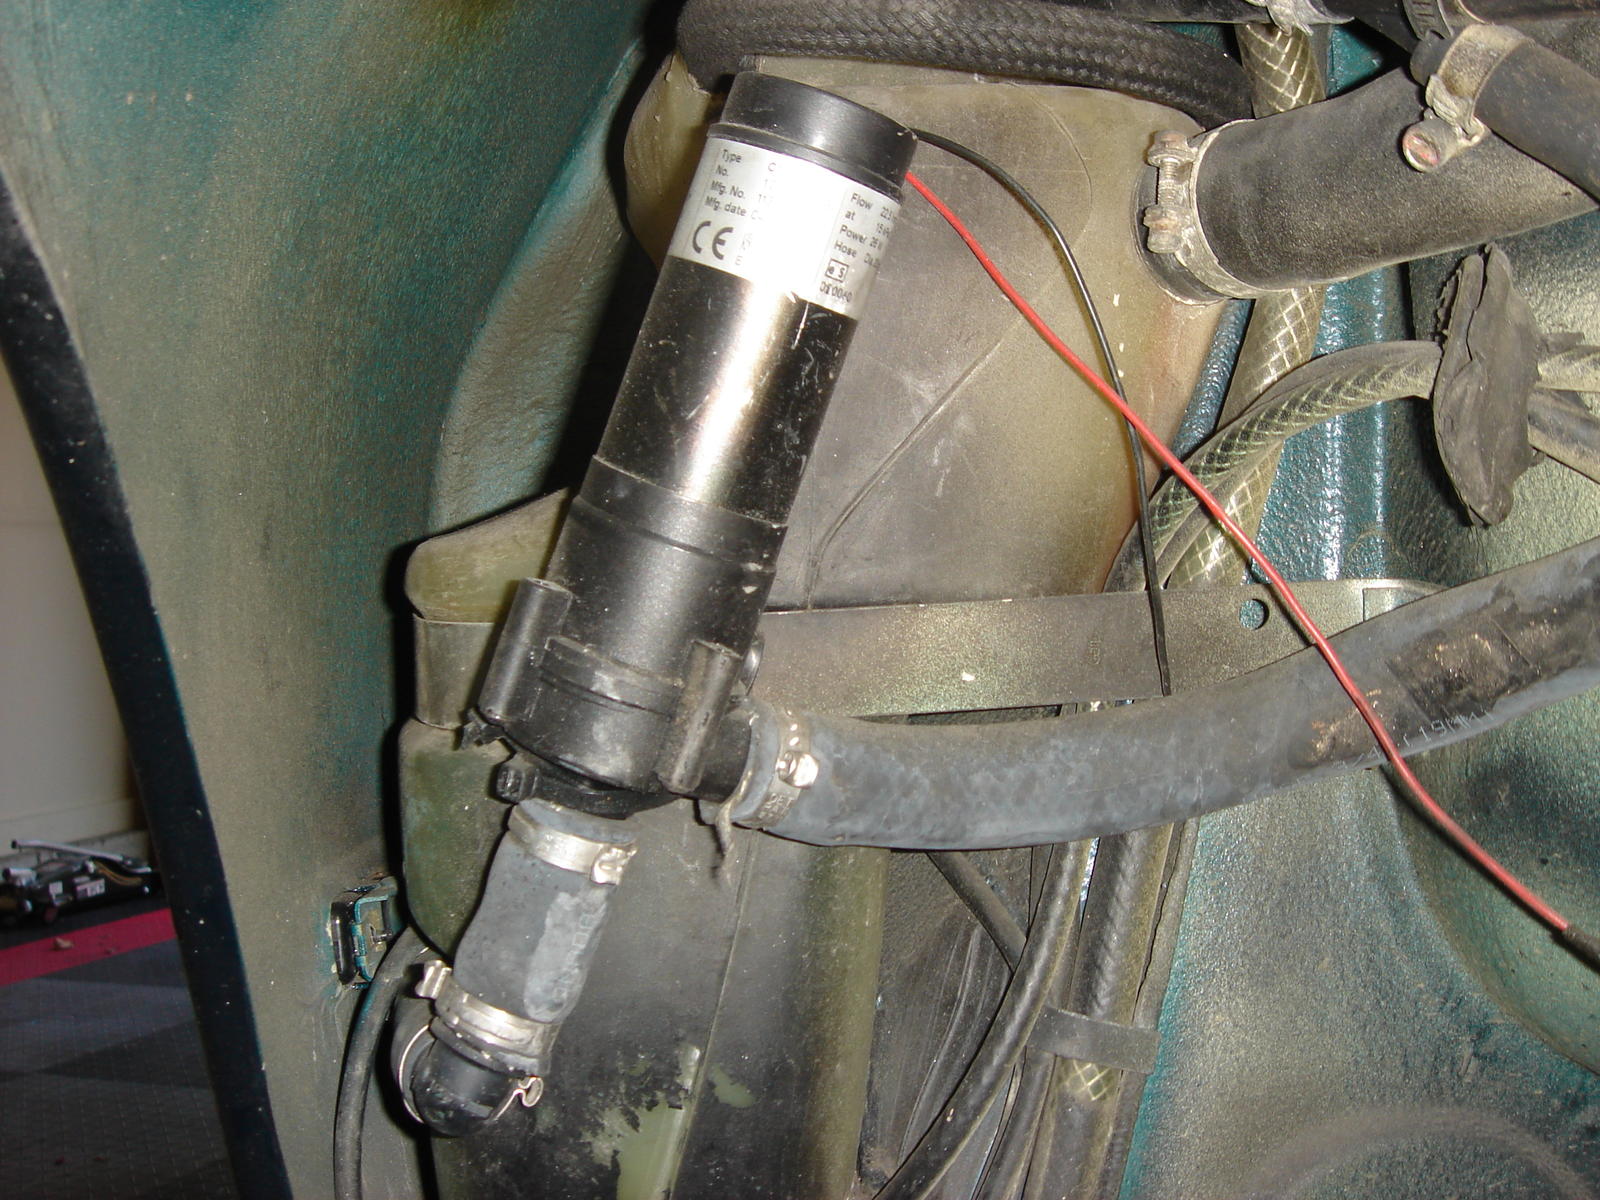
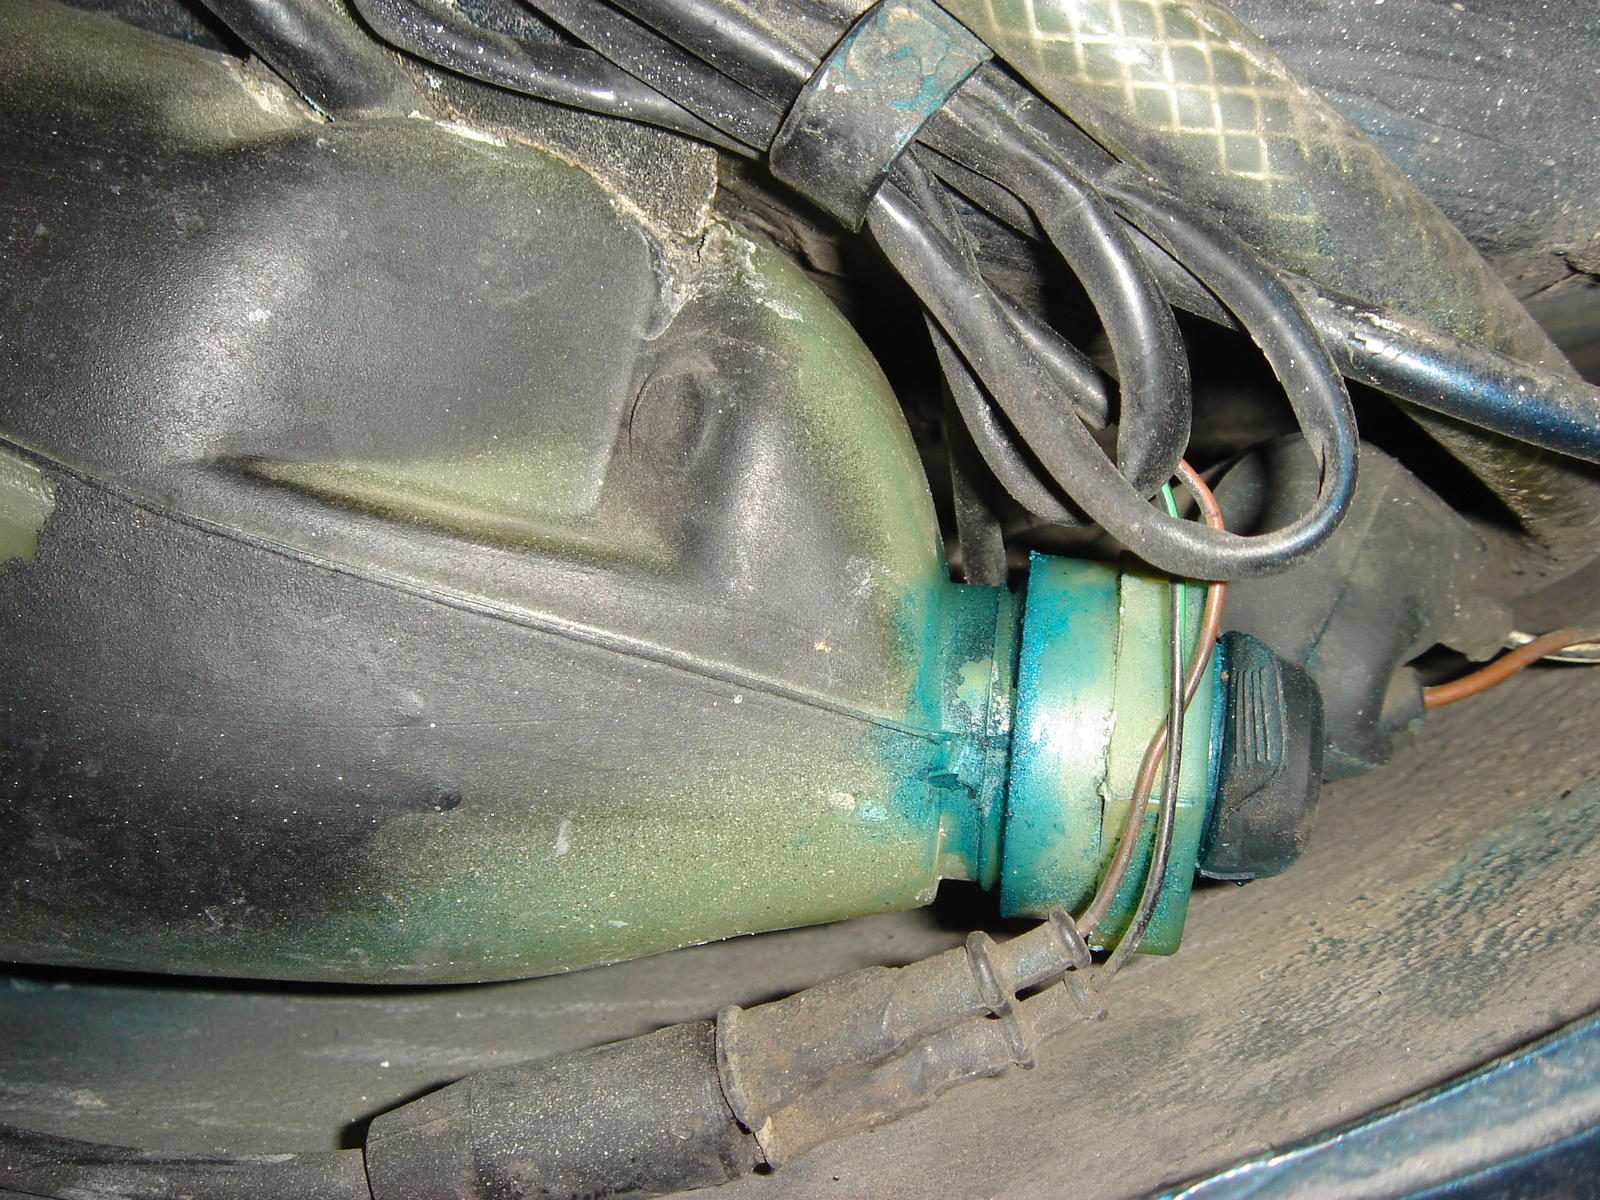
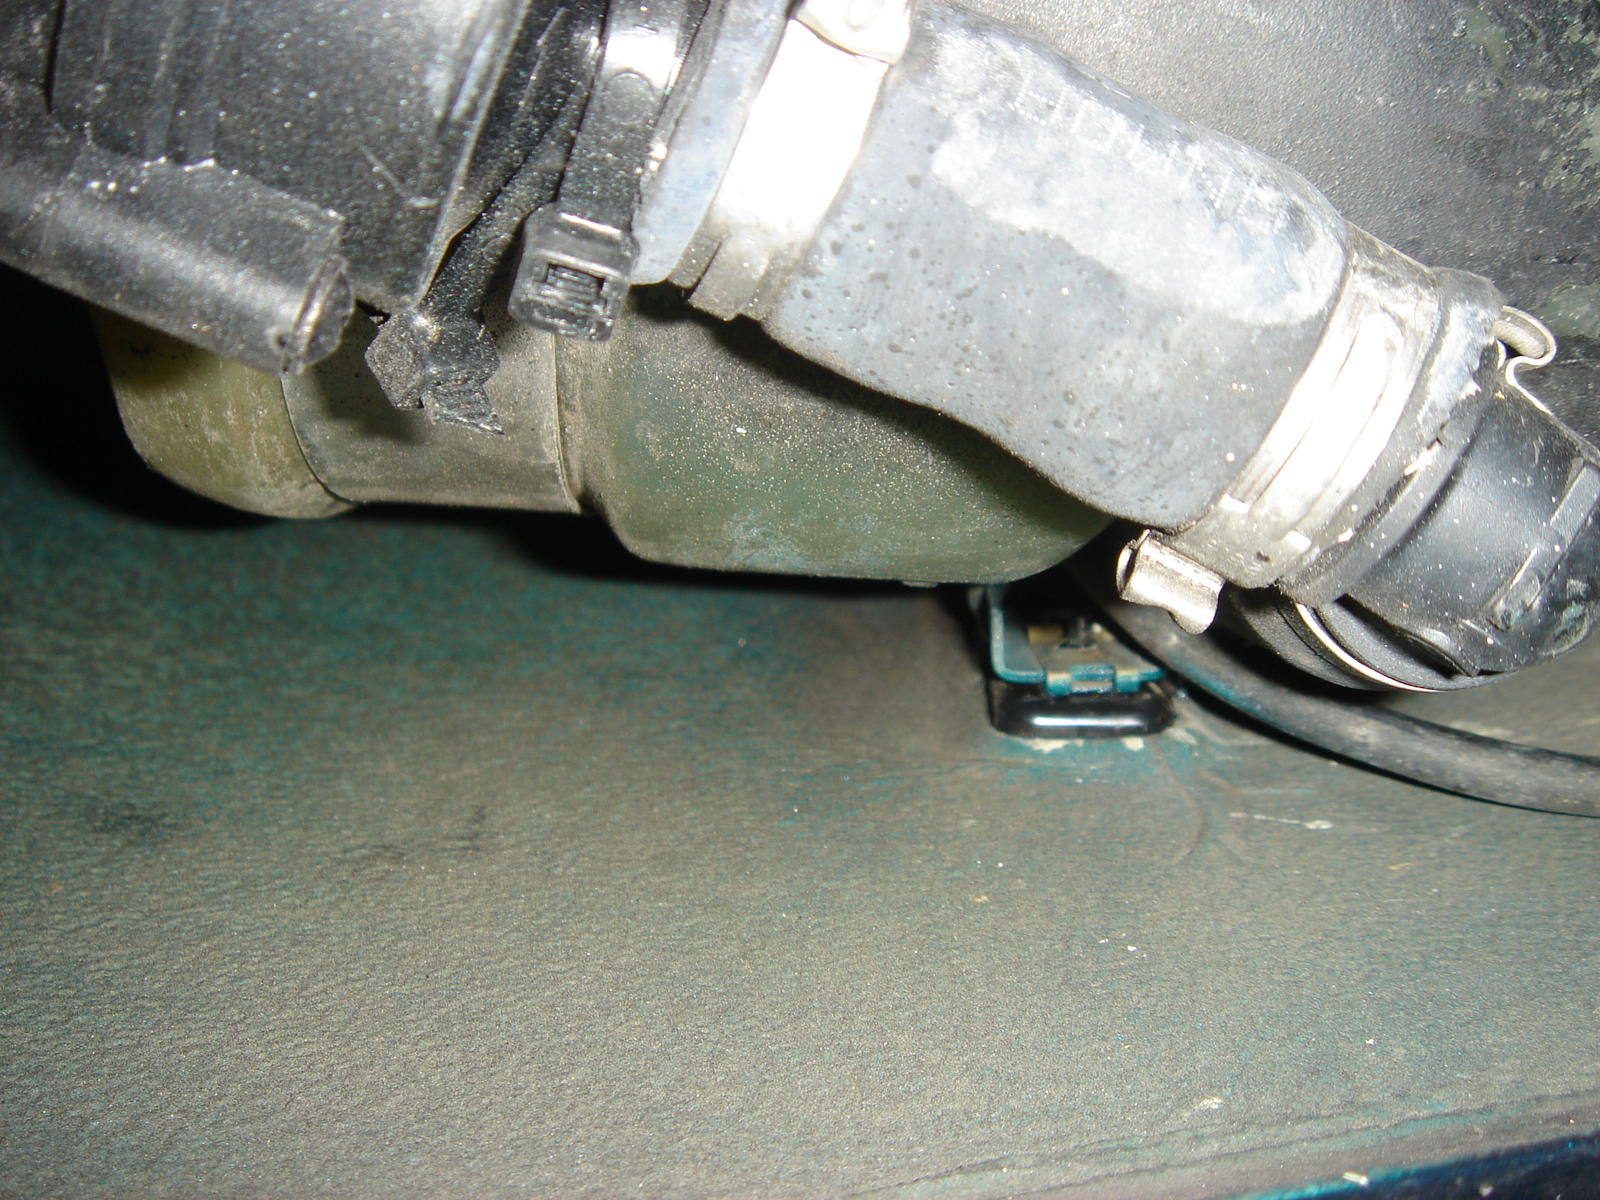
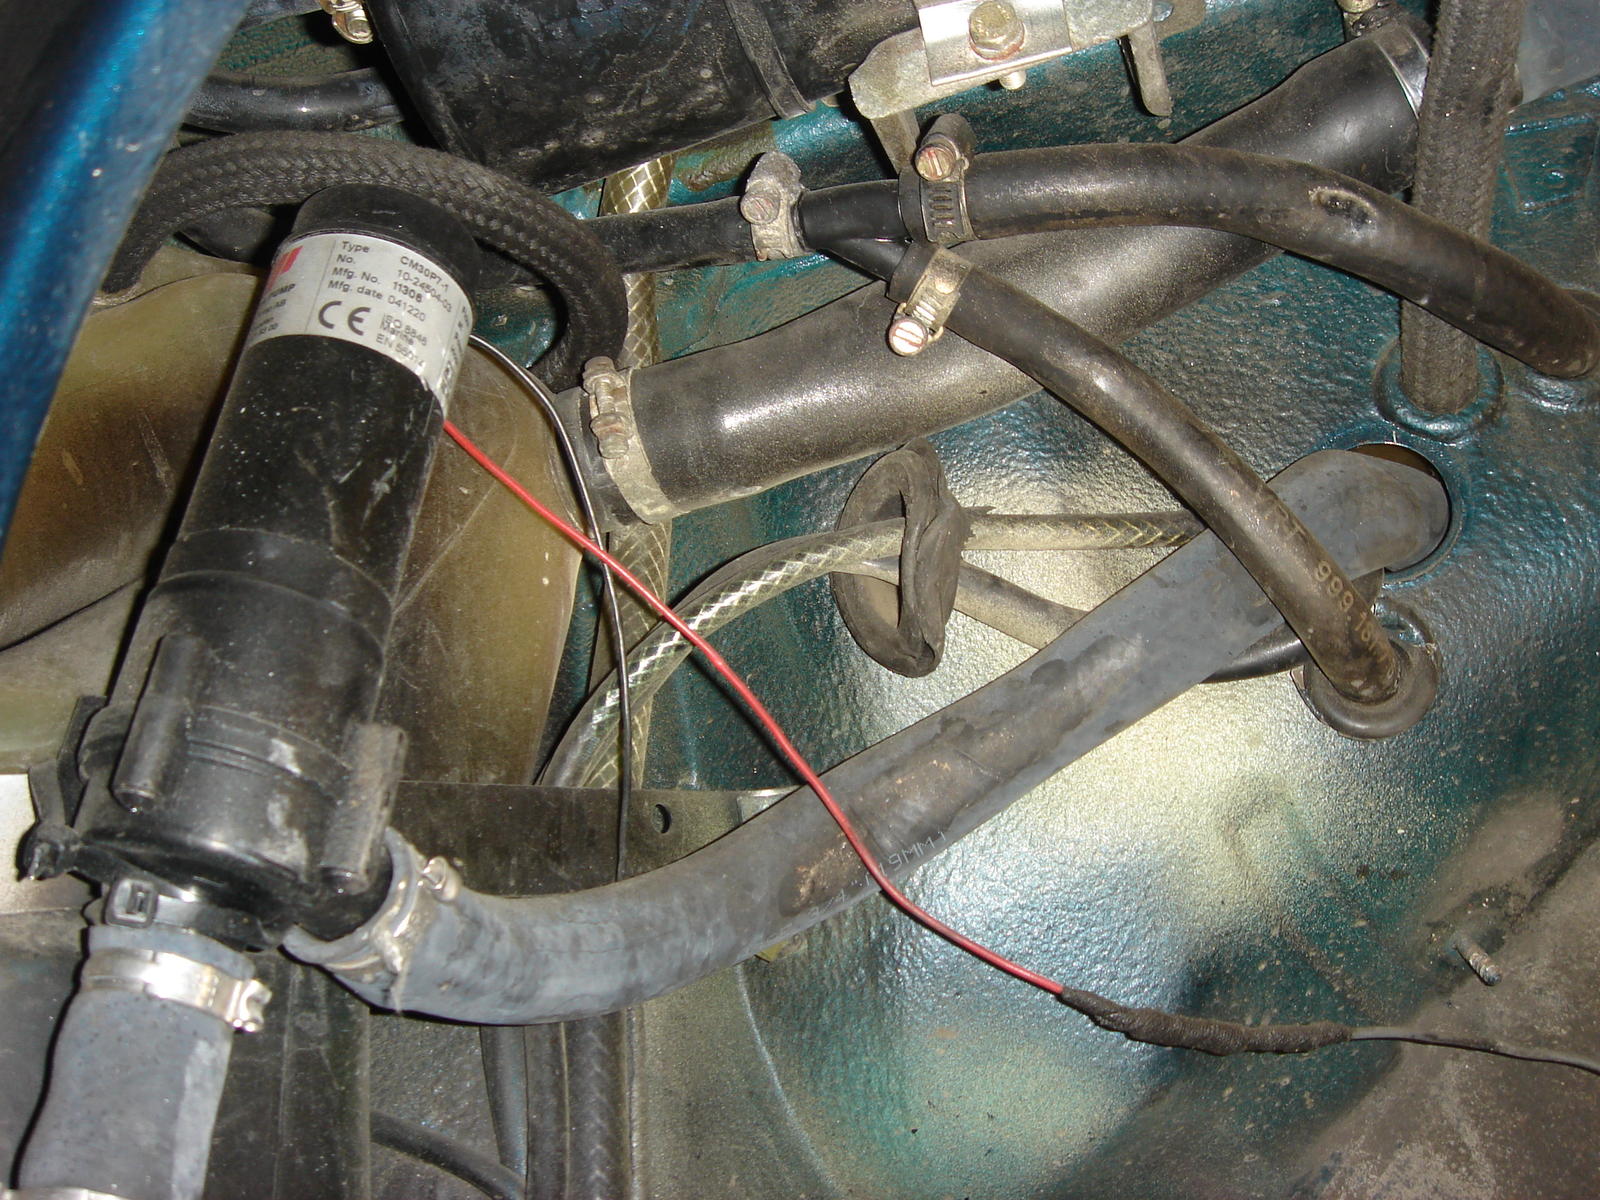
I am having trouble with the intercooler coolant circulation pump. The one Andy supplied doesn't fit in the space behind the front wheel well because my ROW car has the side marker light back there and the housing is in the way.
I had placed it in front of the wheel well but if/when the pump looses its prime, it won't suck coolant over the wheel well.
Any ideas for an alternative pump that either will fit behind the wheel well, or that will pull coolant over the wheel well if it looses its prime?
Brian,
I got a '91 ROW with Andy's kit installed. The intercooler circulation pump is located at the back part of the right wheel well. As to the exact orientation, I don't recall. I might have a chance to pull the wheel and liner to get some pictures this weekend. I'll be in touch.
Regards,
Brent

 02-26-2015, 03:52 PM


 Have fun with that beast and and keep us posted!