When you click on links to various merchants on this site and make a purchase, this can result in this site earning a commission. Affiliate programs and affiliations include, but are not limited to, the eBay Partner Network.
Usually when there's pressure in the crankcase and blowing oil, it's indicative of excessive blowby. The pressure has to go somewhere and it's thru the seals and fittings.
Hopefully it's not the case for your engine though.
Perhaps you can rig up a pressure guage to measure the crankcase pressure to rule that out.
How would I test for that? Isn't blowby caused by combustion pressure getting past the rings and into the crankcase? and if so, wouldn't that mean compression in that or those cylinders would be compromised? The compression test I did looked good with all cylinders between 150-160. Would a leak down test be more telling and if so, how is one of those performed? I believe I have to get each cylinder to TDC, pressurize them and then see what the leakage rate is. Is that correct?
I had another thought here. If you look at the way the current crankcase ventilation and oil recovery system is setup, the crankcase vent gasses should separate from the oil with the gas escaping out the vent to atmosphere and the condensed oil flowing back into the driver's side cam tower via the 90 degree fitting.
It just occurred to me that the two plugs that are fouling 5 & 7 are on the same side that this oil return line is on. Is it possible that it's the oil being returned this way that's fouling those plugs, or at least the #5 plug. Seems with this theory that 6 would also get fouled, and it isn't, but maybe the air flow inside the cam tower moves the oil to the left and right.
The new AOS setup will route the returning oil back to the pan instead of to the cam tower. Might that keep these plugs cleaner?
I'm also thinking that instead of splitting just the crankcase vent line that maybe I'll run that directly into one of the AOS ports and run vent lines from the two cam towers into the other AOS input line or would ports on the cam towers create vacuum as opposed to pressure as I don't want to suck any of the stainless mesh in the AOS that helps to separate the oil into the cam tower.
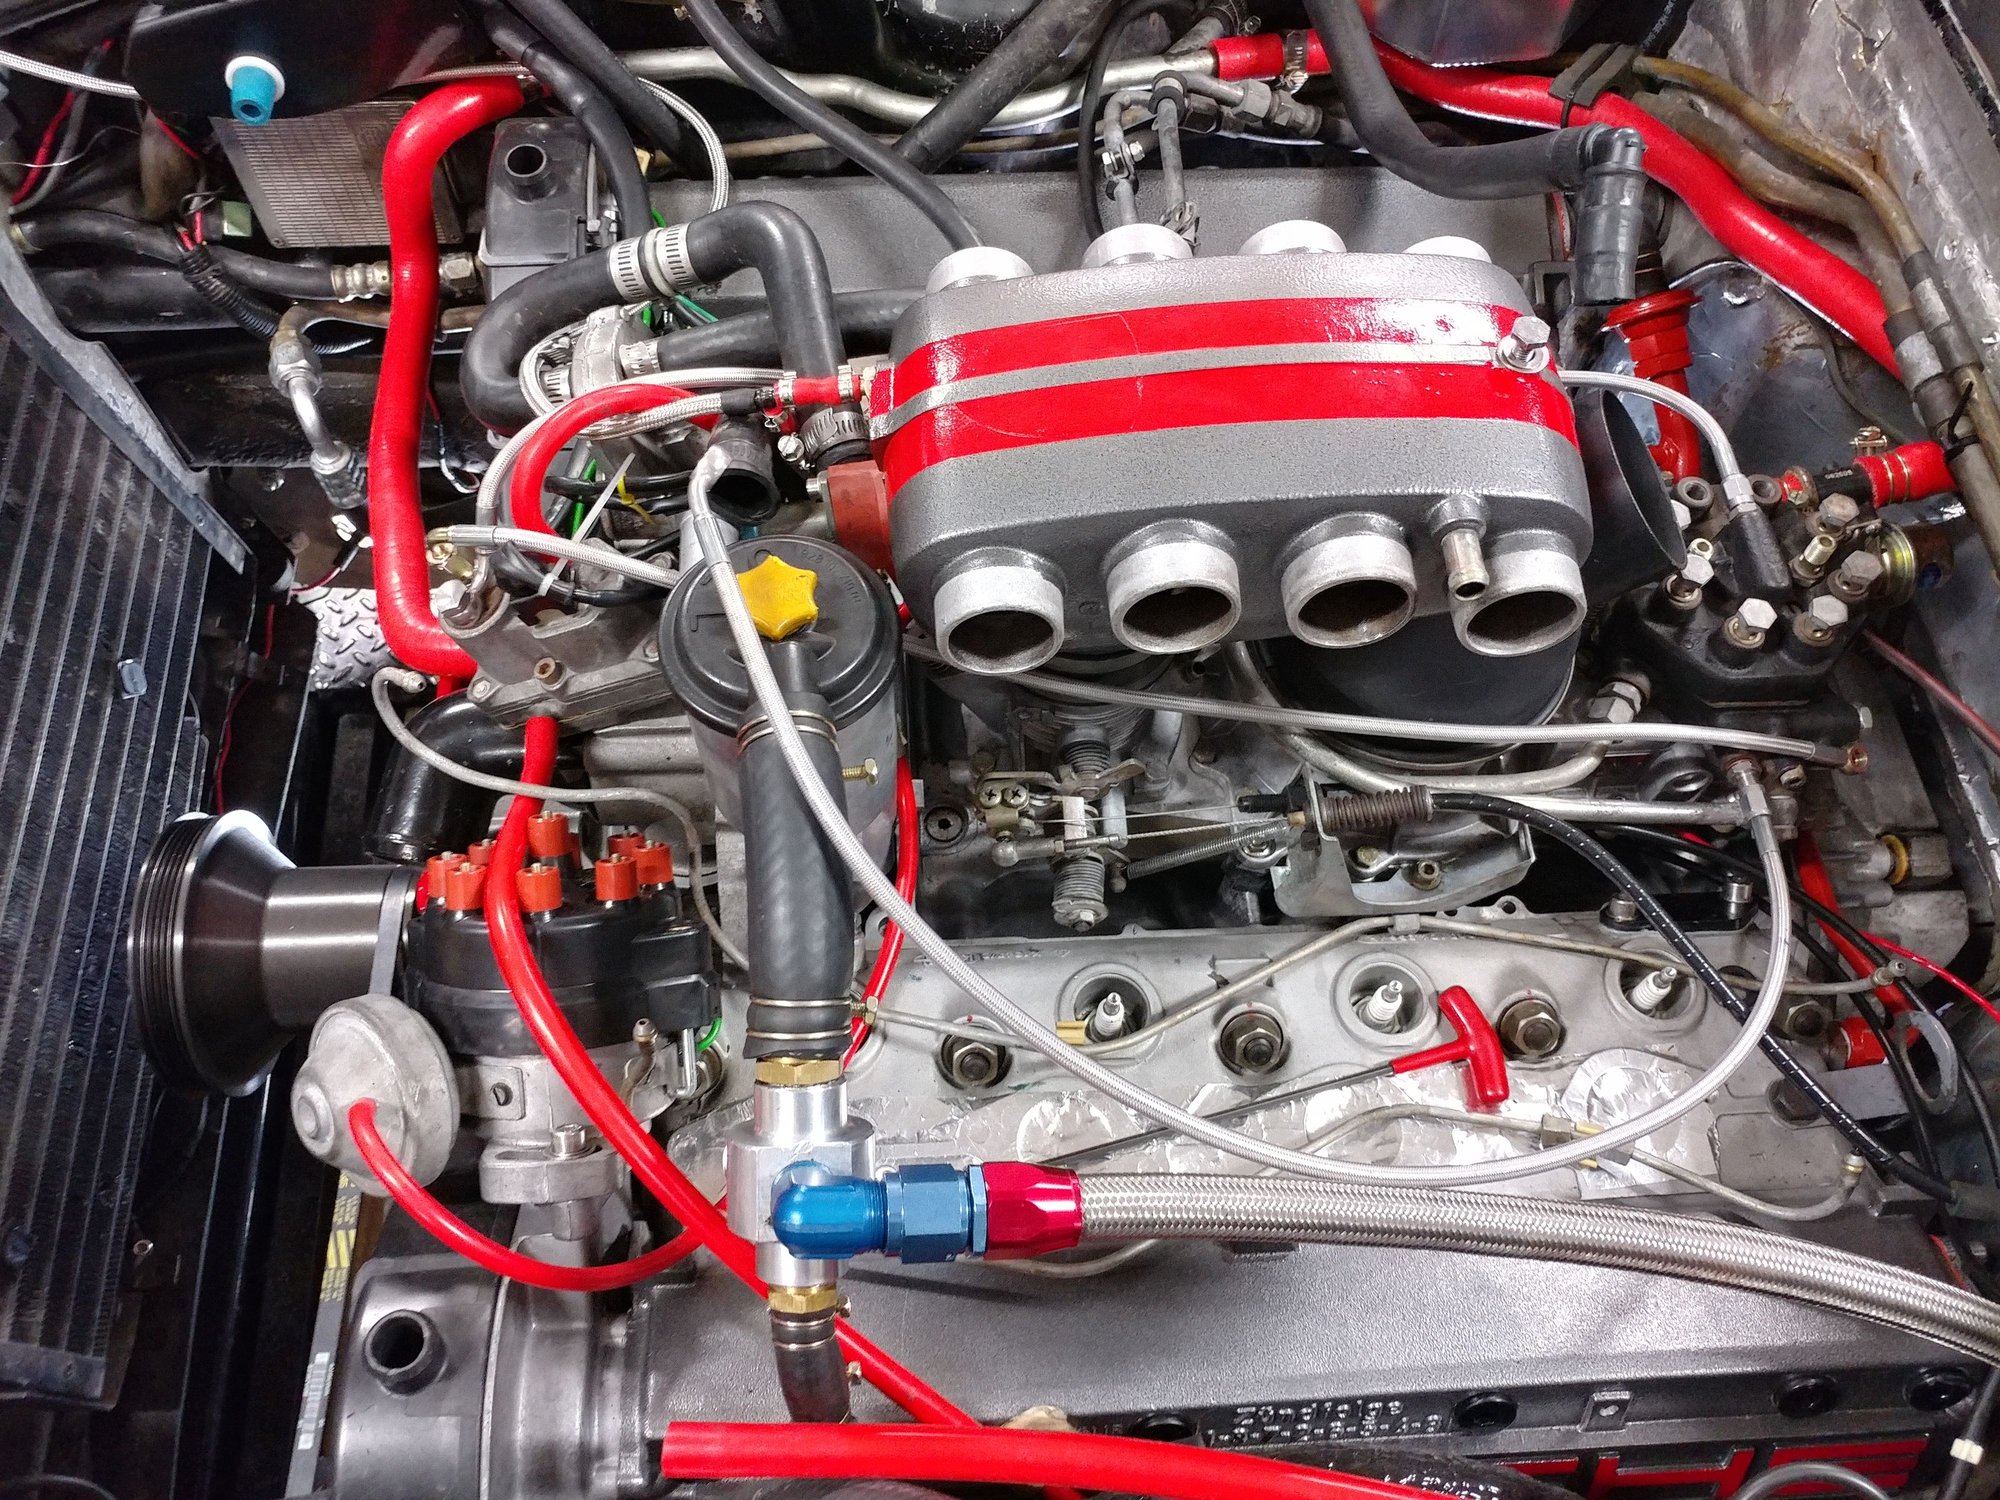
Current venting setup looks like this.
Also, am I better off running the crankcase vent line that goes into the passenger side of the oil fill assembly directly to the AOS and capping off that port on the oil fill assembly, or running it into the oil fill assembly as it is now and then sending the output line from the other side of the oil fill assembly to the AOS? I'm wondering if I'm just recirculating some of the pressure coming from the crankcase vent line to the oil pan via the oil fill assembly the way it is now.
How would I test for that? Isn't blowby caused by combustion pressure getting past the rings and into the crankcase? and if so, wouldn't that mean compression in that or those cylinders would be compromised? The compression test I did looked good with all cylinders between 150-160. Would a leak down test be more telling and if so, how is one of those performed? I believe I have to get each cylinder to TDC, pressurize them and then see what the leakage rate is. Is that correct?
Any other tests I can do?
Thanks.
Hi Pete,
You can measure crankcase pressure by putting a Mityvac pressure gauge in the dipstick hole. The rest, I don;t know about, but I did this on my car.
Good luck,
Dave
for what i know, every engine has blowby and with a supercharger it only get's worse. Sure on engines of 30 years old� Seen it on so many BMW's �.. myself , i had a supercharger installed on a BMW 850i with only 6 /7 PSI boost to see the sump gasket leaking �. a lot ! ( and i'm not alone, others had the same problem )�. instead of "gambling" with new gaskets, i installed a Moroso vacuum pump ( belt driven ) and a catch tank . Works perfect � instead of oil leaks it just suck air in now.
PS Catch tank is a "big" one , with a air/oil separator as used with dry sumps tanks. There i can drain the "milky" residue of oil/water condens... bit of oil is not bad , even needed to lubricate the pump.
I don't go in high vacuum as dragsters use to do for HP gain� there you can affect oil pressure and needs special adaptions. I dialed it in at 100 gr engine vacuum , just enough to keep sump at vac and no more oil leaks. My race shop tryed it at high vac for rally cars and there's even danger of sucking in oil seals !!
Last edited by belgiumbarry; 08-08-2019 at 09:26 PM.
Over the past few weeks, I removed the water bridge and oil fill assembly and reinstalled them with sealant instead of gaskets this time. Not using gaskets on the sides of the water bridge will allow the center fitting with the large o-ring to sit deeper in the opening. I test fit it with gaskets and without and with the gaskets, I can actually rock it back and forth slightly. Without gaskets, the bottom circle of the water bridge rests on the machined lip in the female housing and it doesn't rock at all. I also added a little sealant around this lip and around the o-ring before I assembled it.
For the oil fill assembly, I've now installed Carl's 928MS Oil Control Baaffle Plate and put those assemblies together with gasket sealant as well. My previous oil leak in this area was coming out between the gasket above Han's oil control baffle and the base of the oil fill housing. The gasket used there was an OEM one. Because the water bridge is a little lower now (no gaskets) and I've added height to the oil fill assembly with the addition of Carl's baffle plate, I wanted to make sure the oil fill assembly wasn't interfering with the water bridge not seating correctly and using only sealant as the gasket between the pieces, there is no interference.
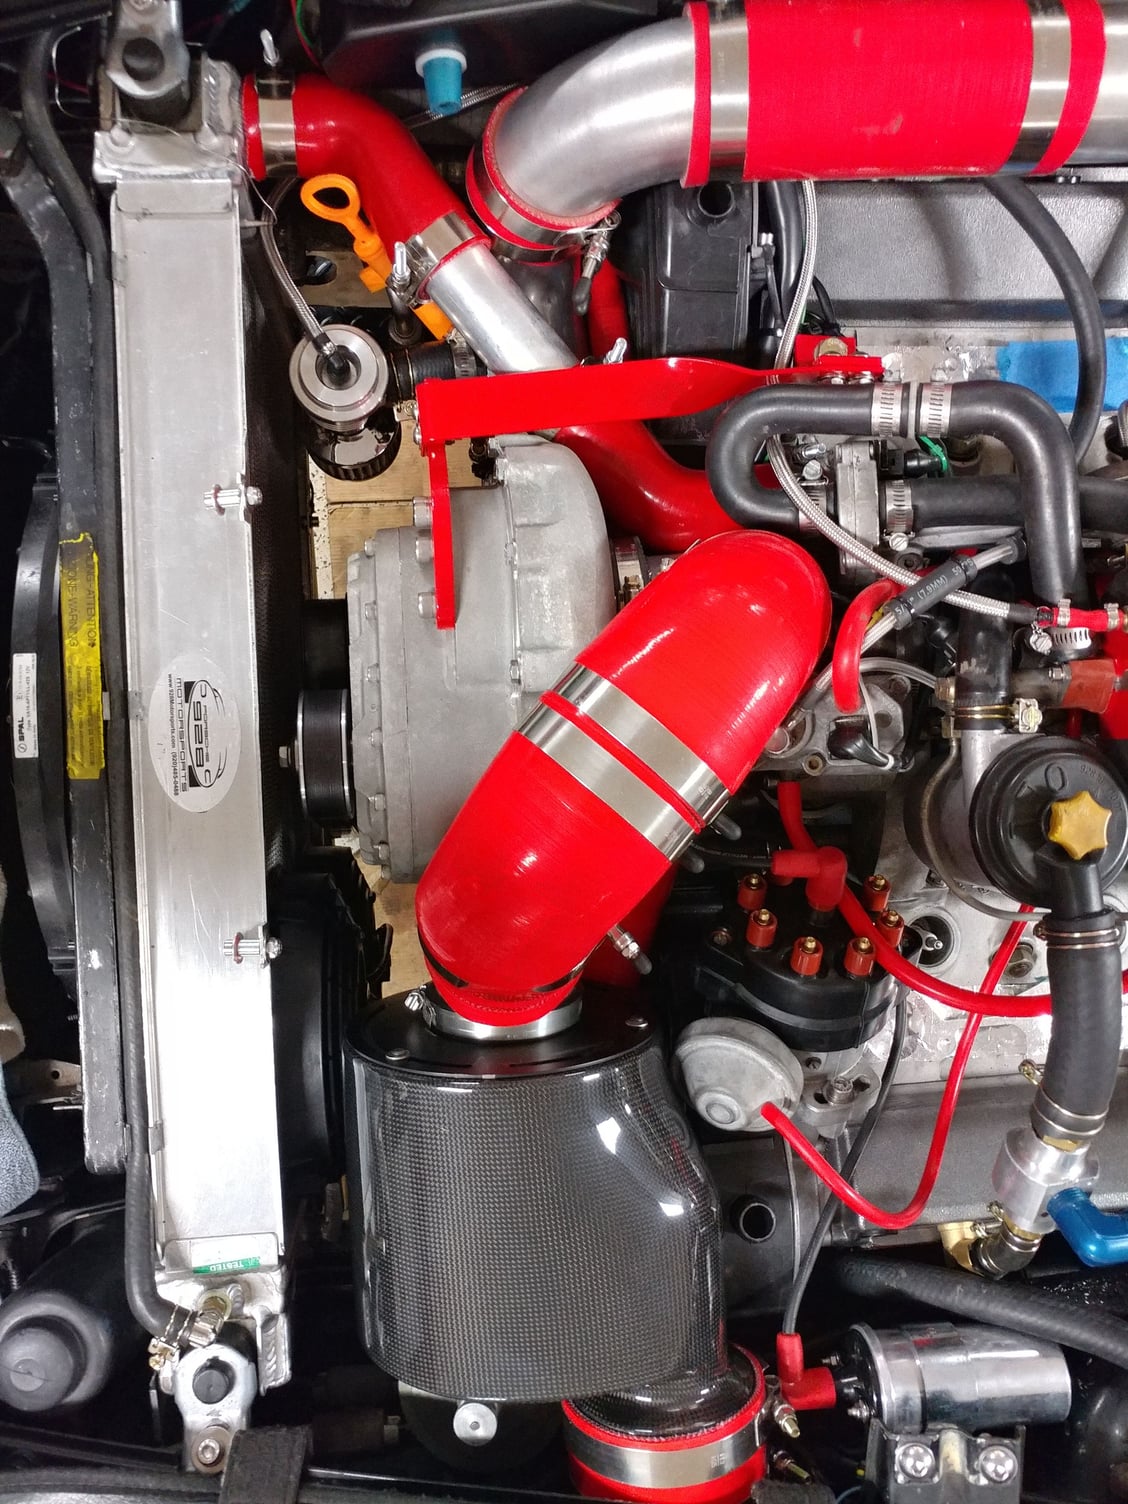
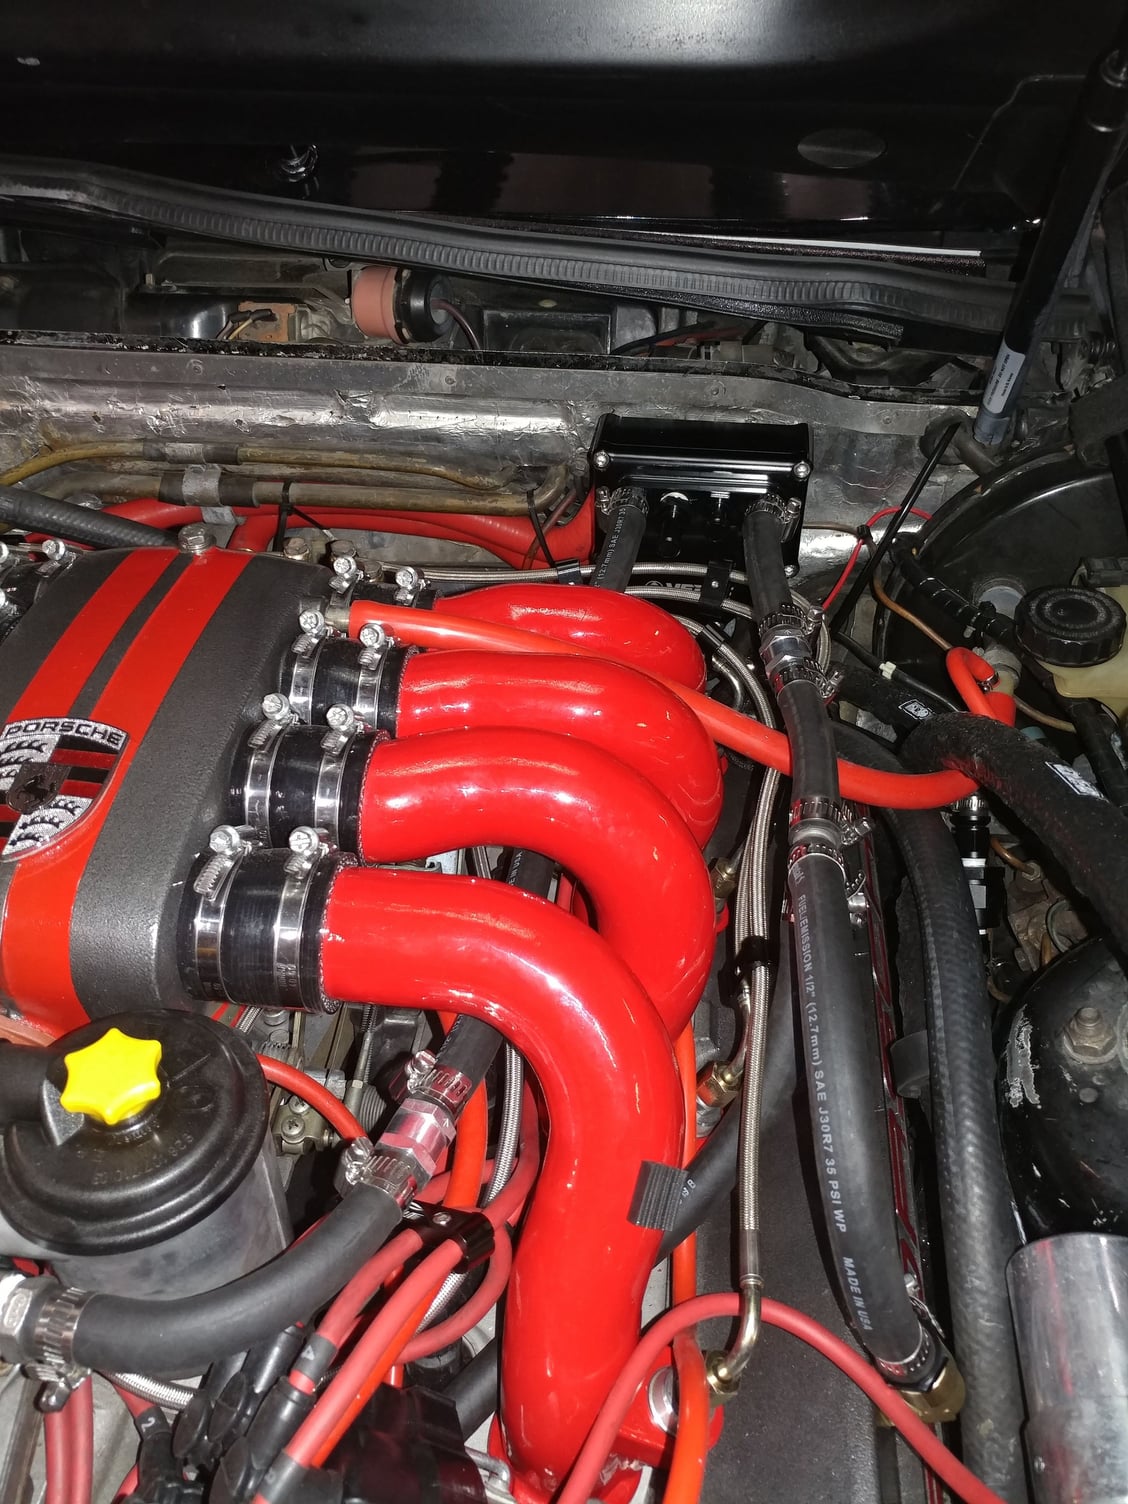
I then continued on with the installation of the Verus AOS and all that remains is to run the vent outlets to atmosphere, but because of the hose turns, needed to pickup a couple springs to slip inside so the hoses make a nice bend instead of kinking and narrowing.
Captions for the photos are below each picture
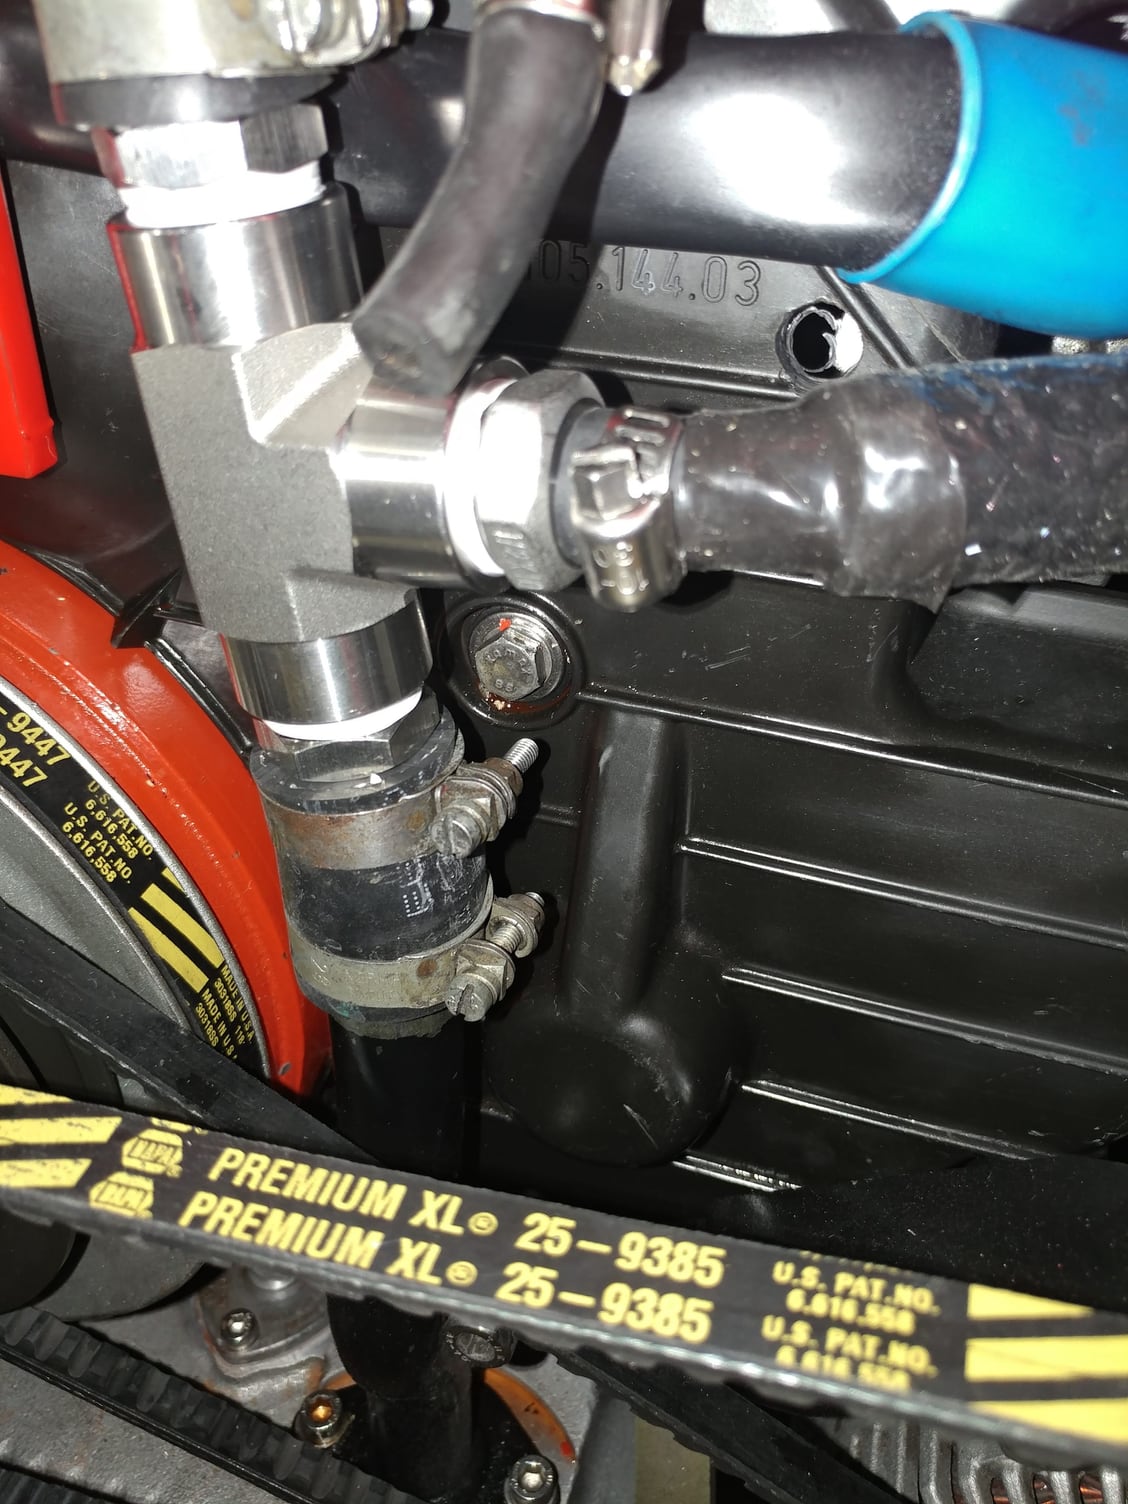
Passenger Side Cam Tower Vent connection
Driver's side Cam Tower vent. This one and the one from the passenger side Y together and then enter one input port of the dual chamber AOS. The metal connector is a one-way check valve to make sure none of the stainless mess separation media in the AOS can be sucked back into one of the cam towers. These hoses should have pressure all the time and never vacuum, but better safe than sorry.
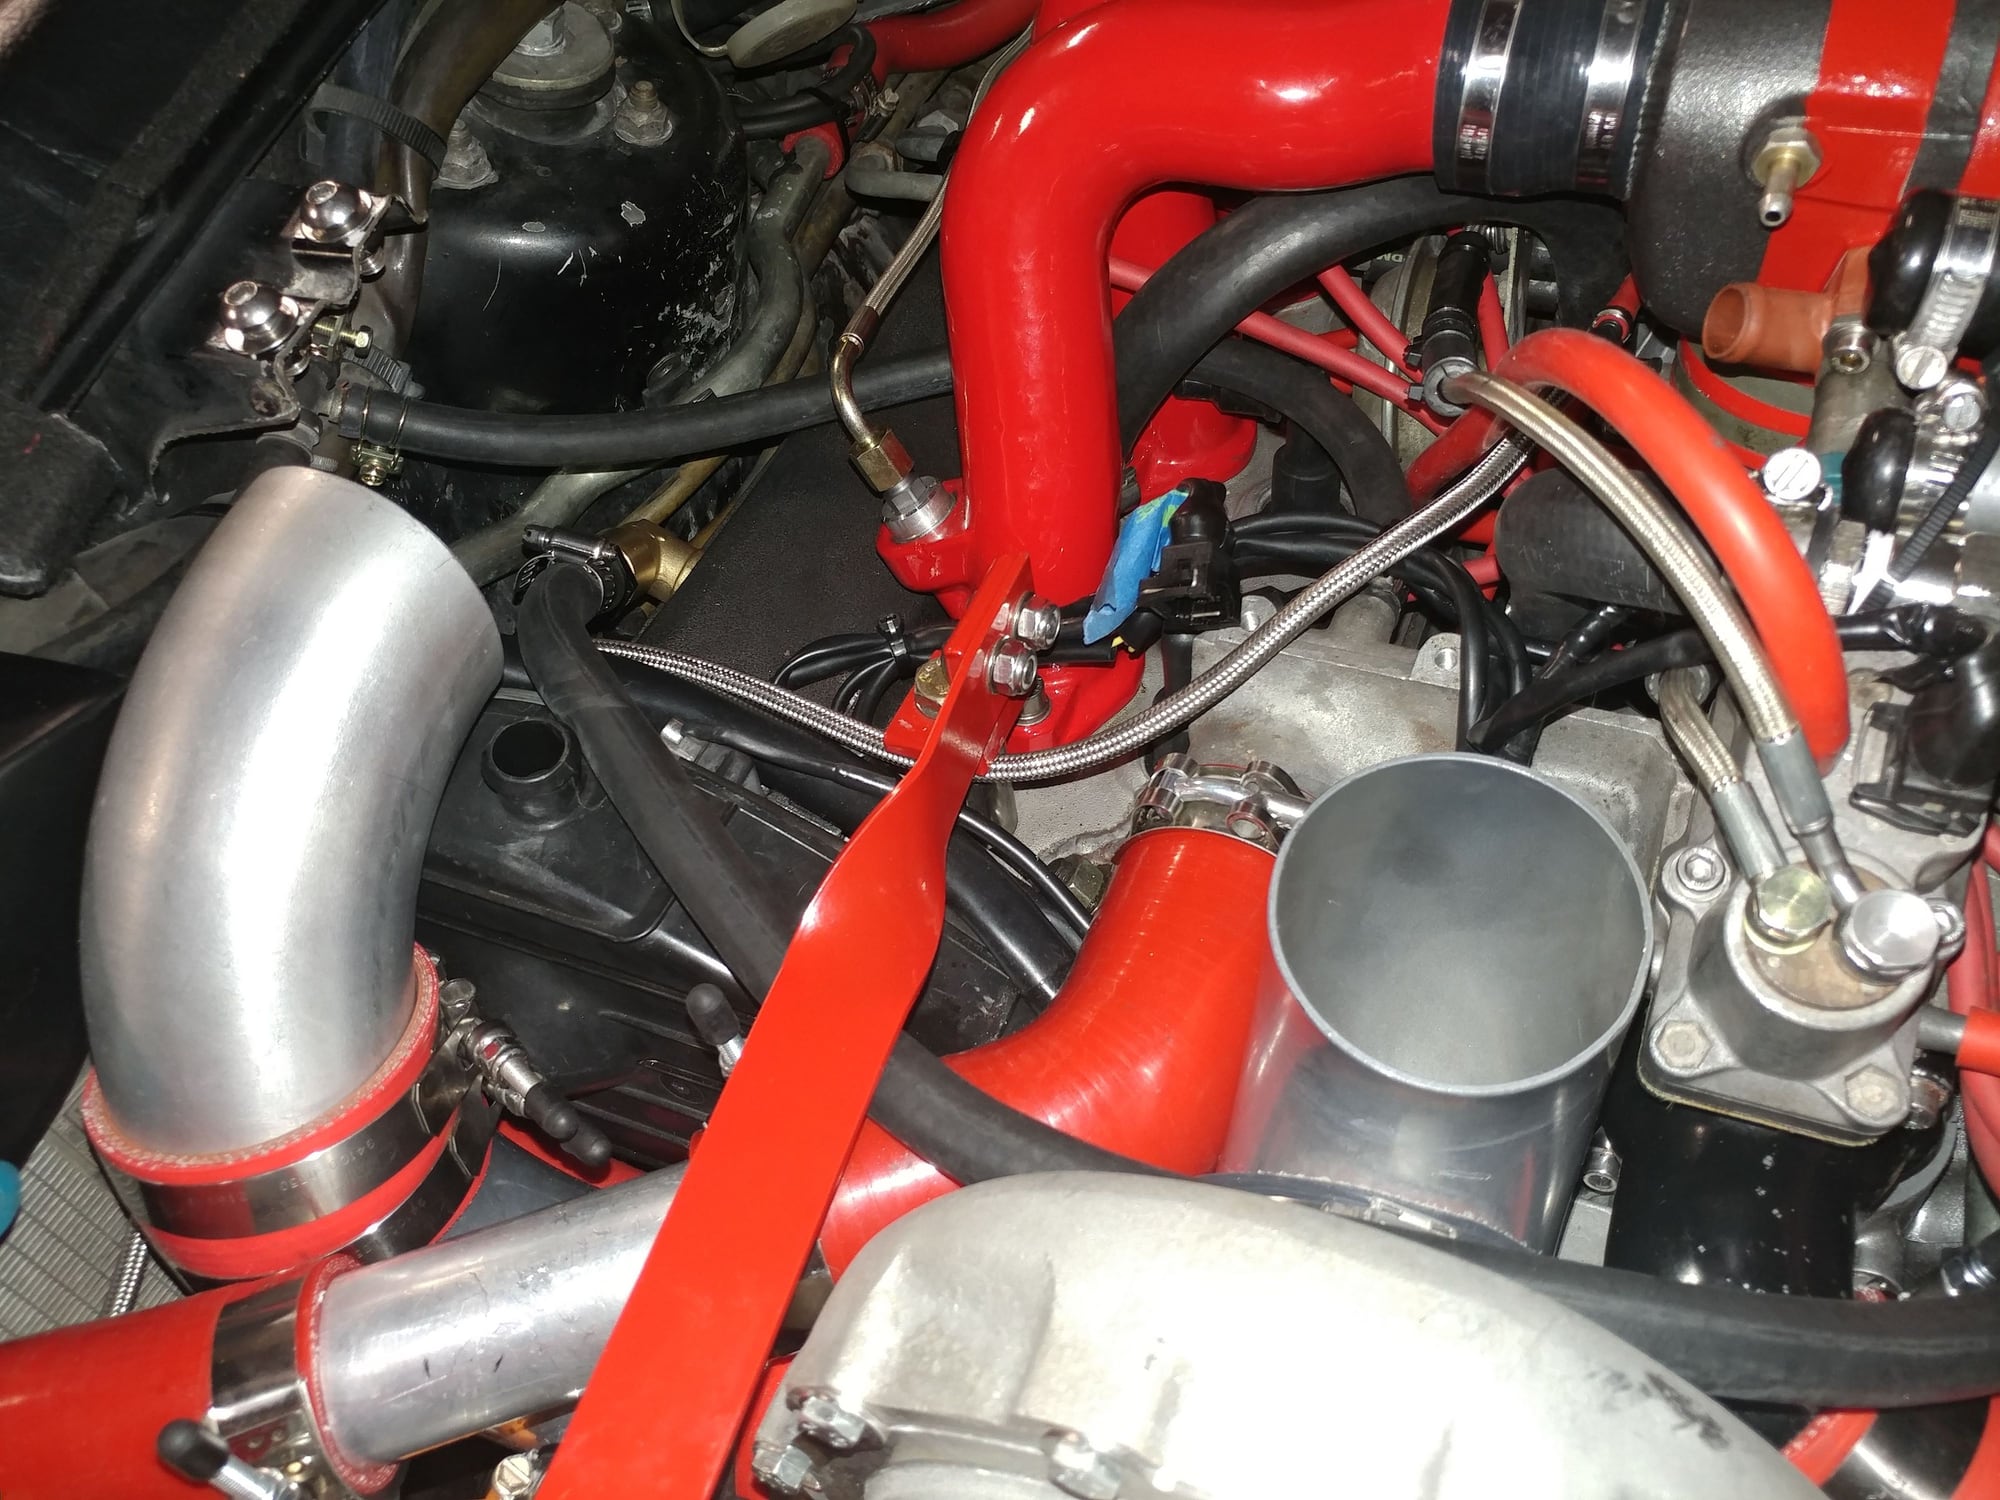
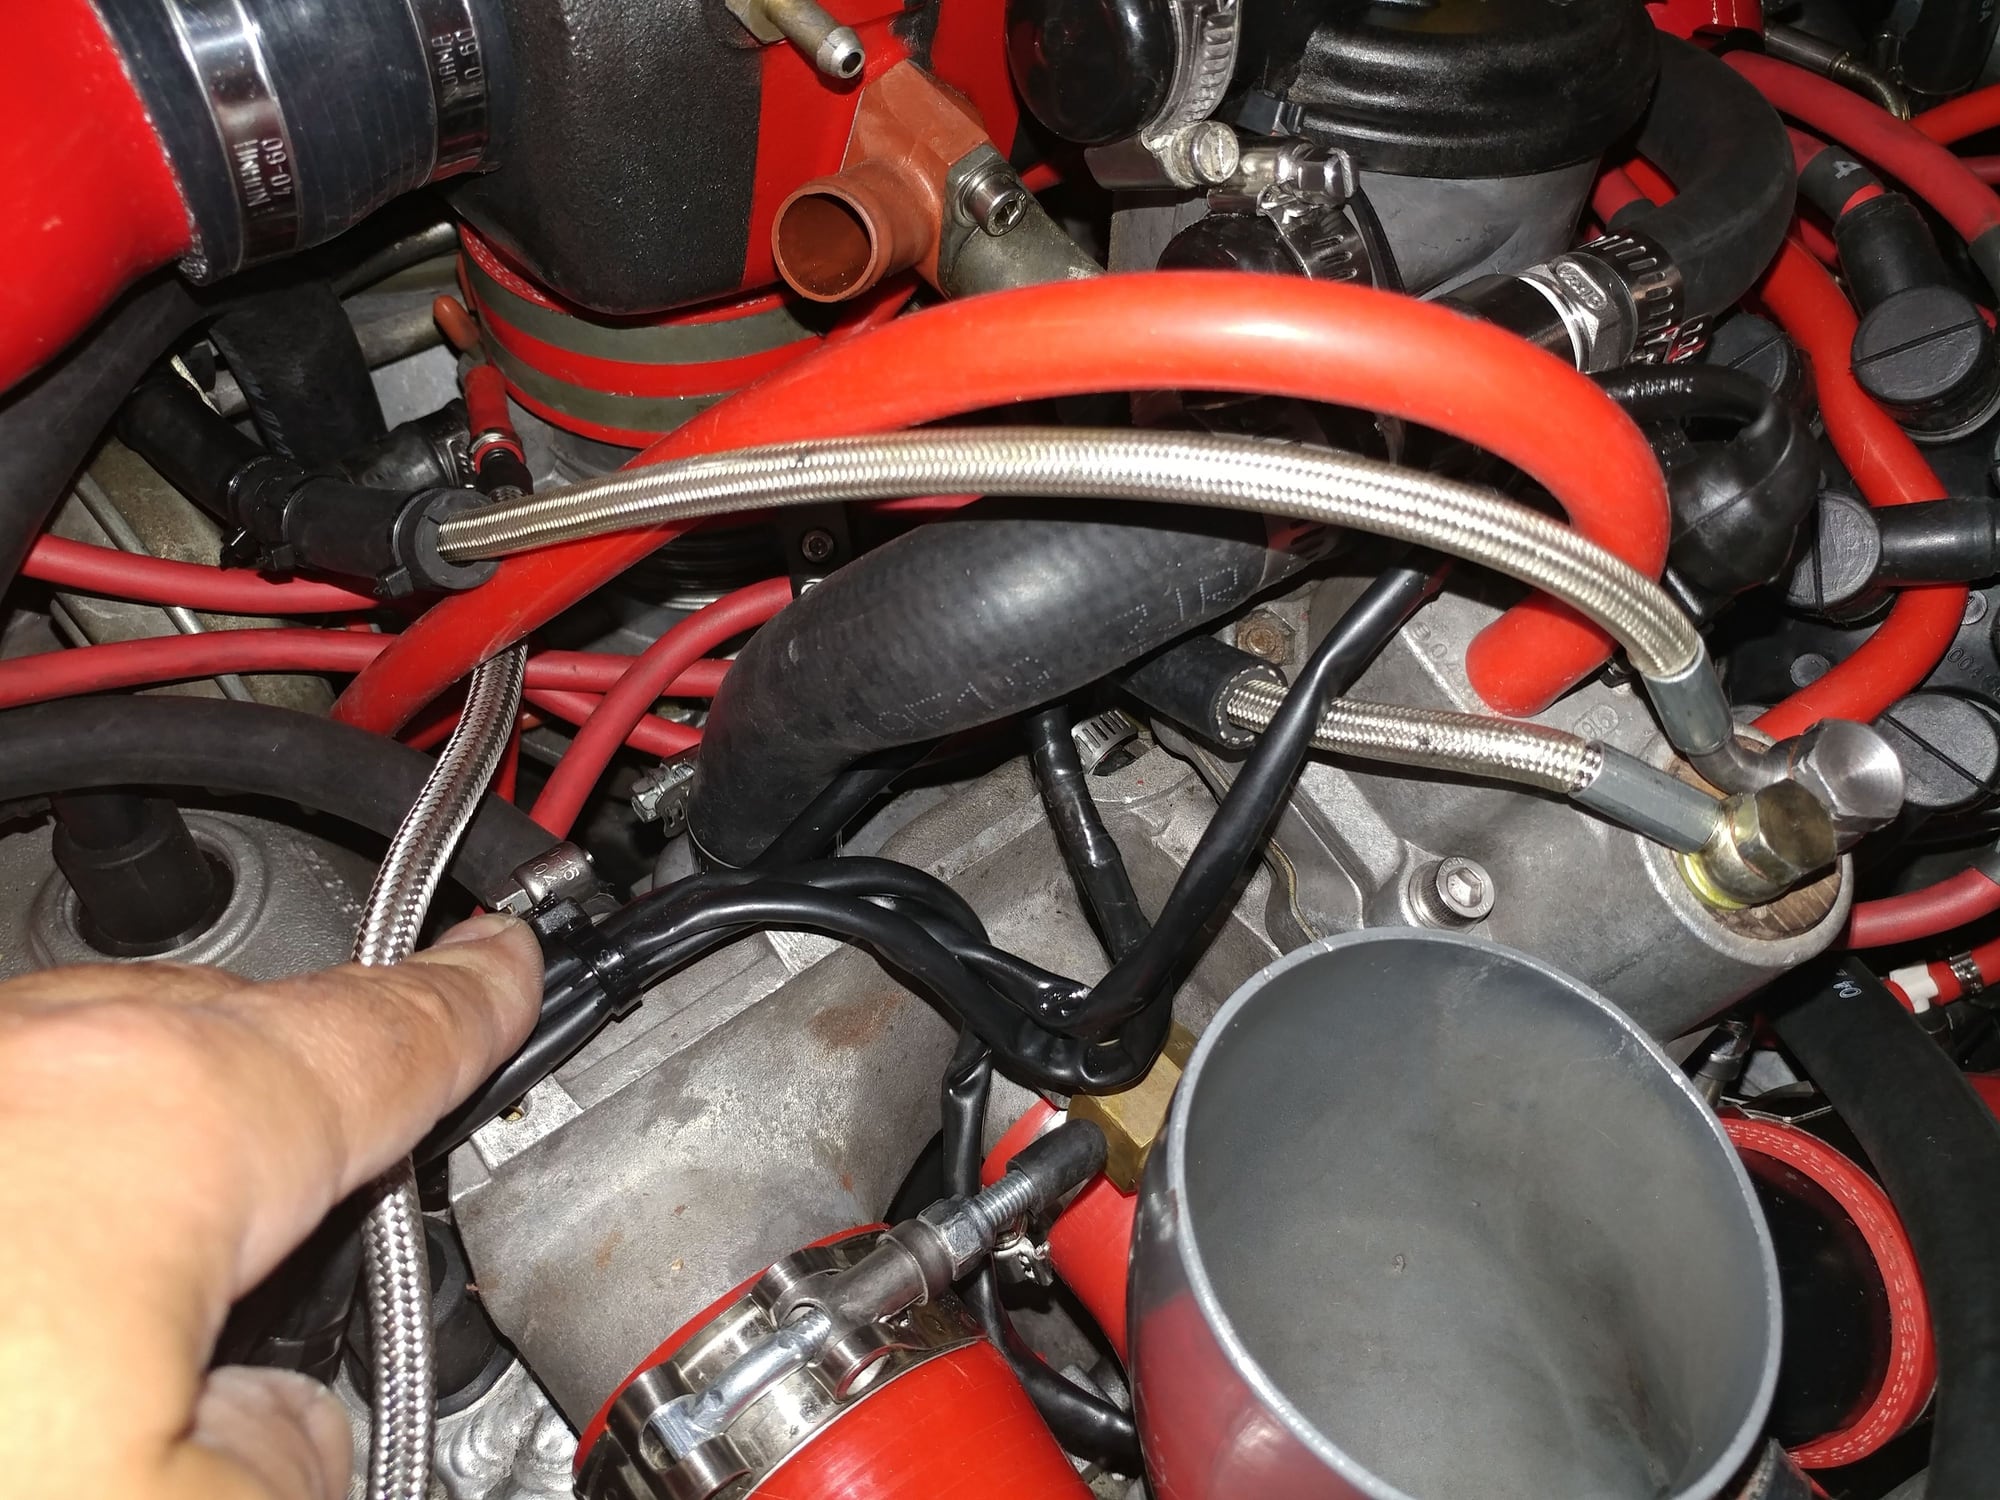
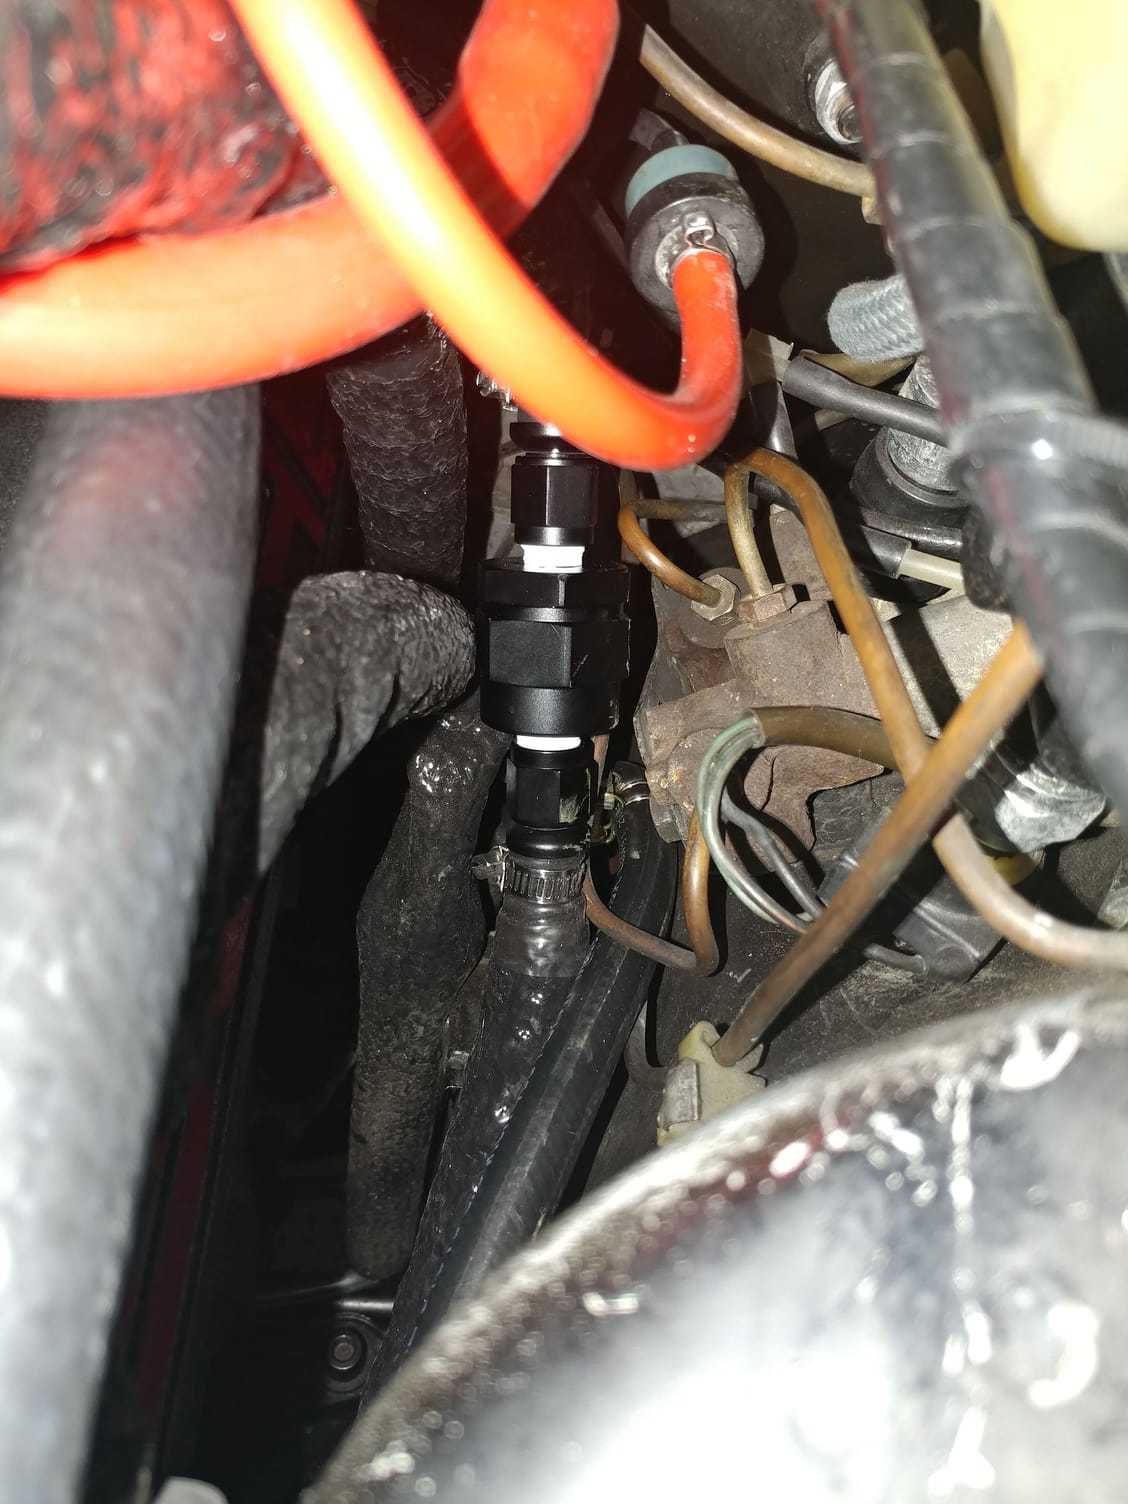
Crankcase Vent line. This now wraps around the front of the oil fill assembly instead of connecting to it. I was concerned that the pressure coming from that hose was just recycling back into the oiling system and adding more pressure so now the vent line is completely separate and I capped off both the inlet and outlet ports from the oil fill cap.
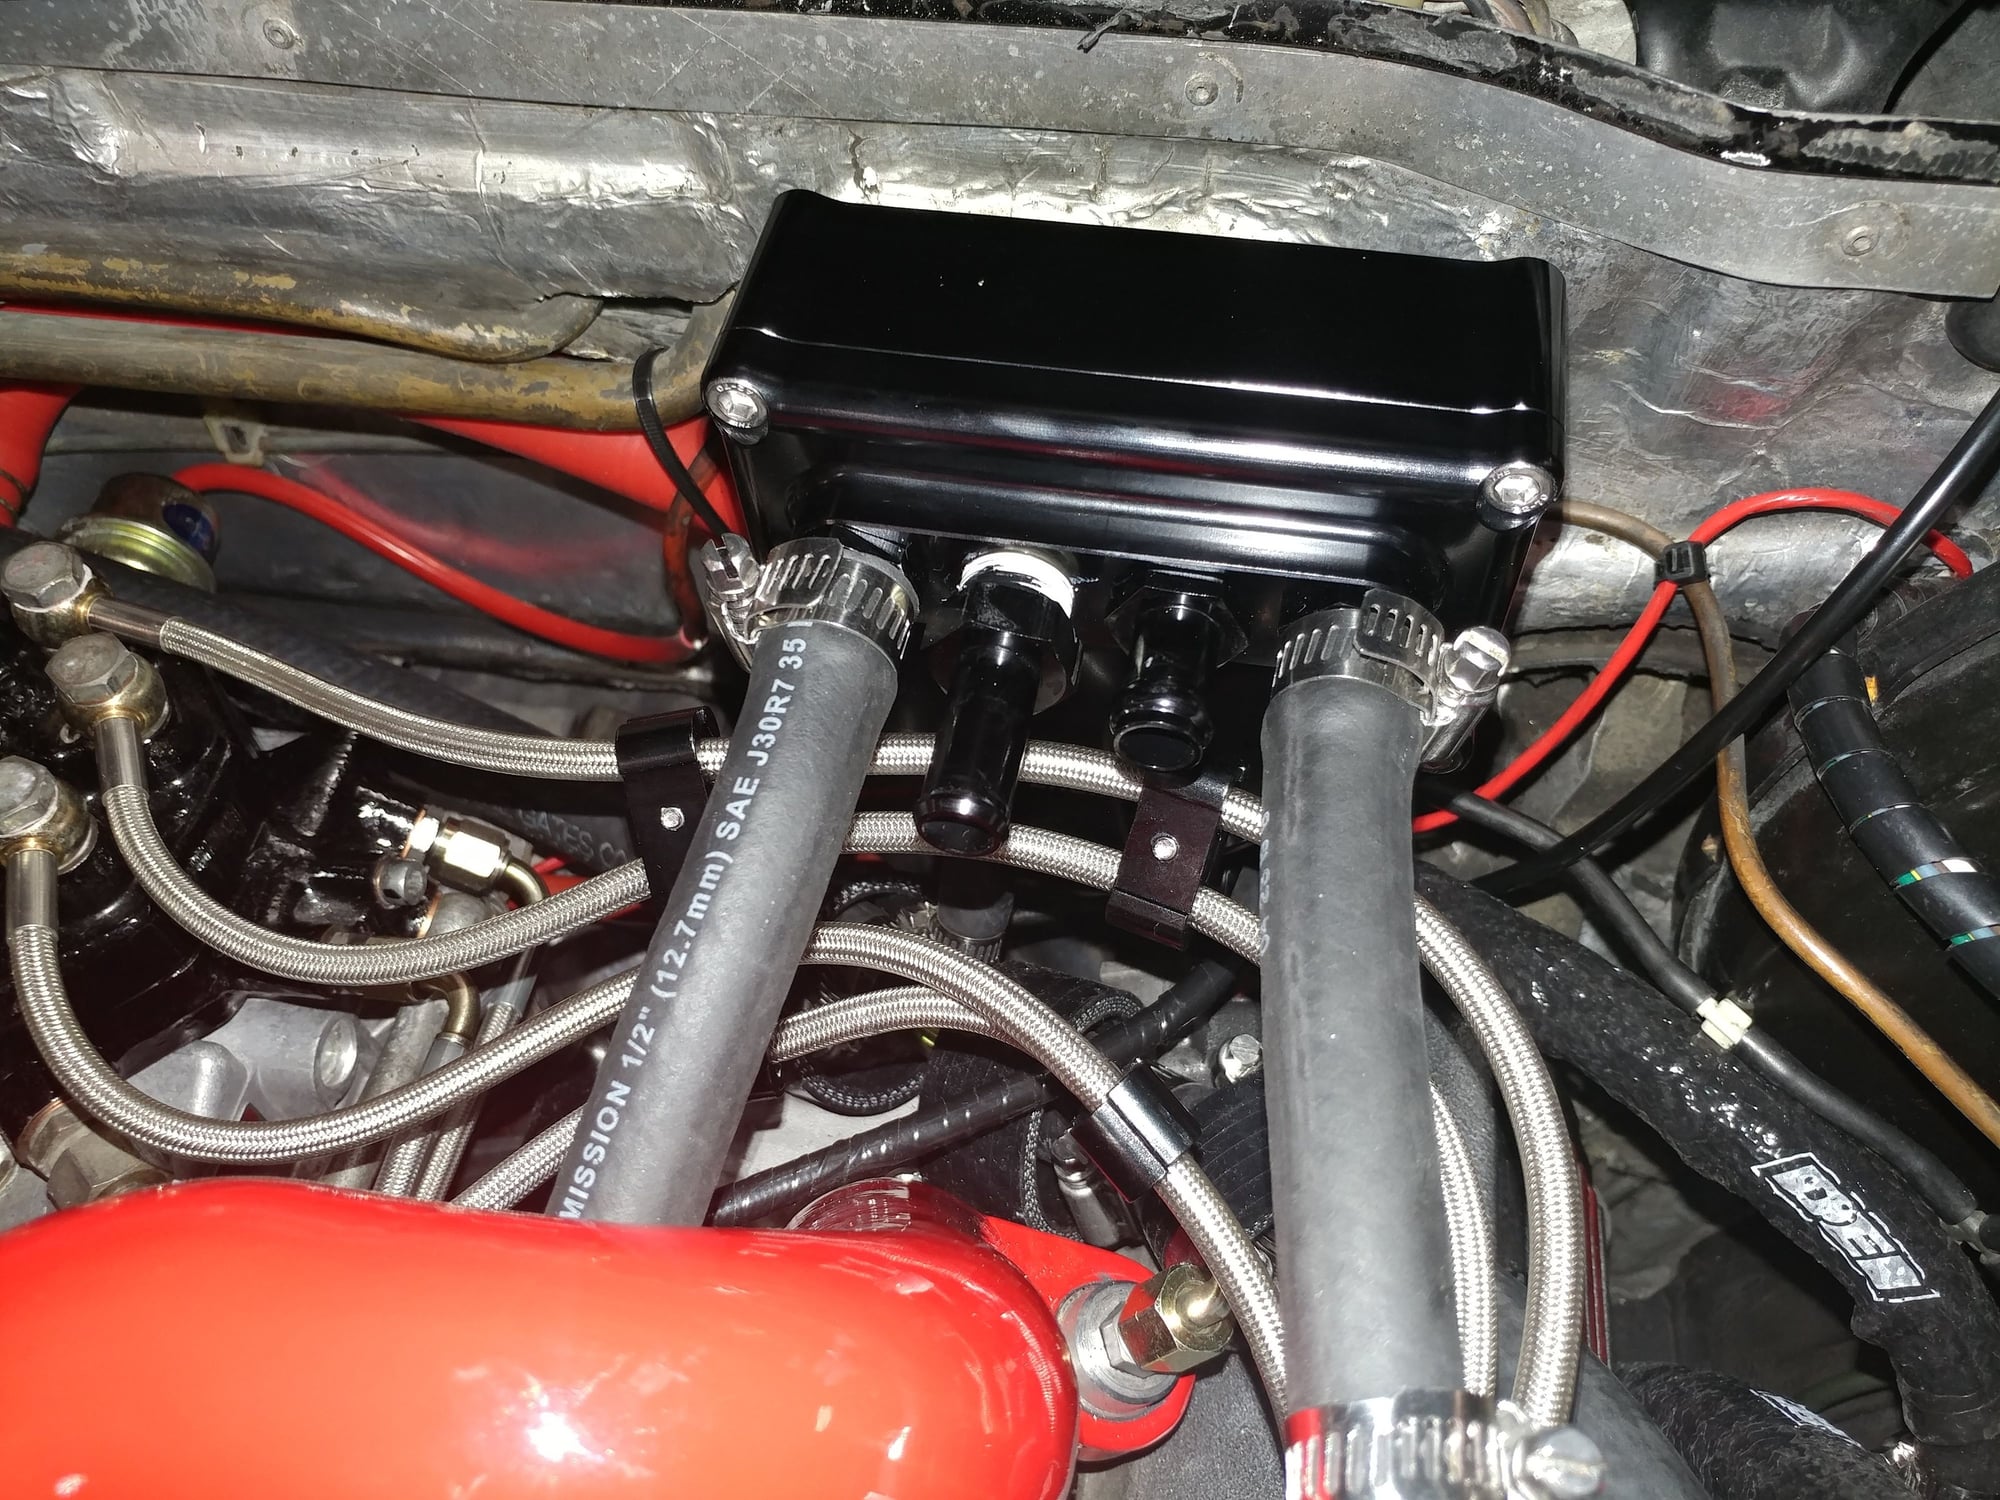
This is the crankcase vent line wrapping around the oil fill housing then running under the spider legs and into the other inlet of the dual chamber AOS. There's a 1-way check valve in this line too.
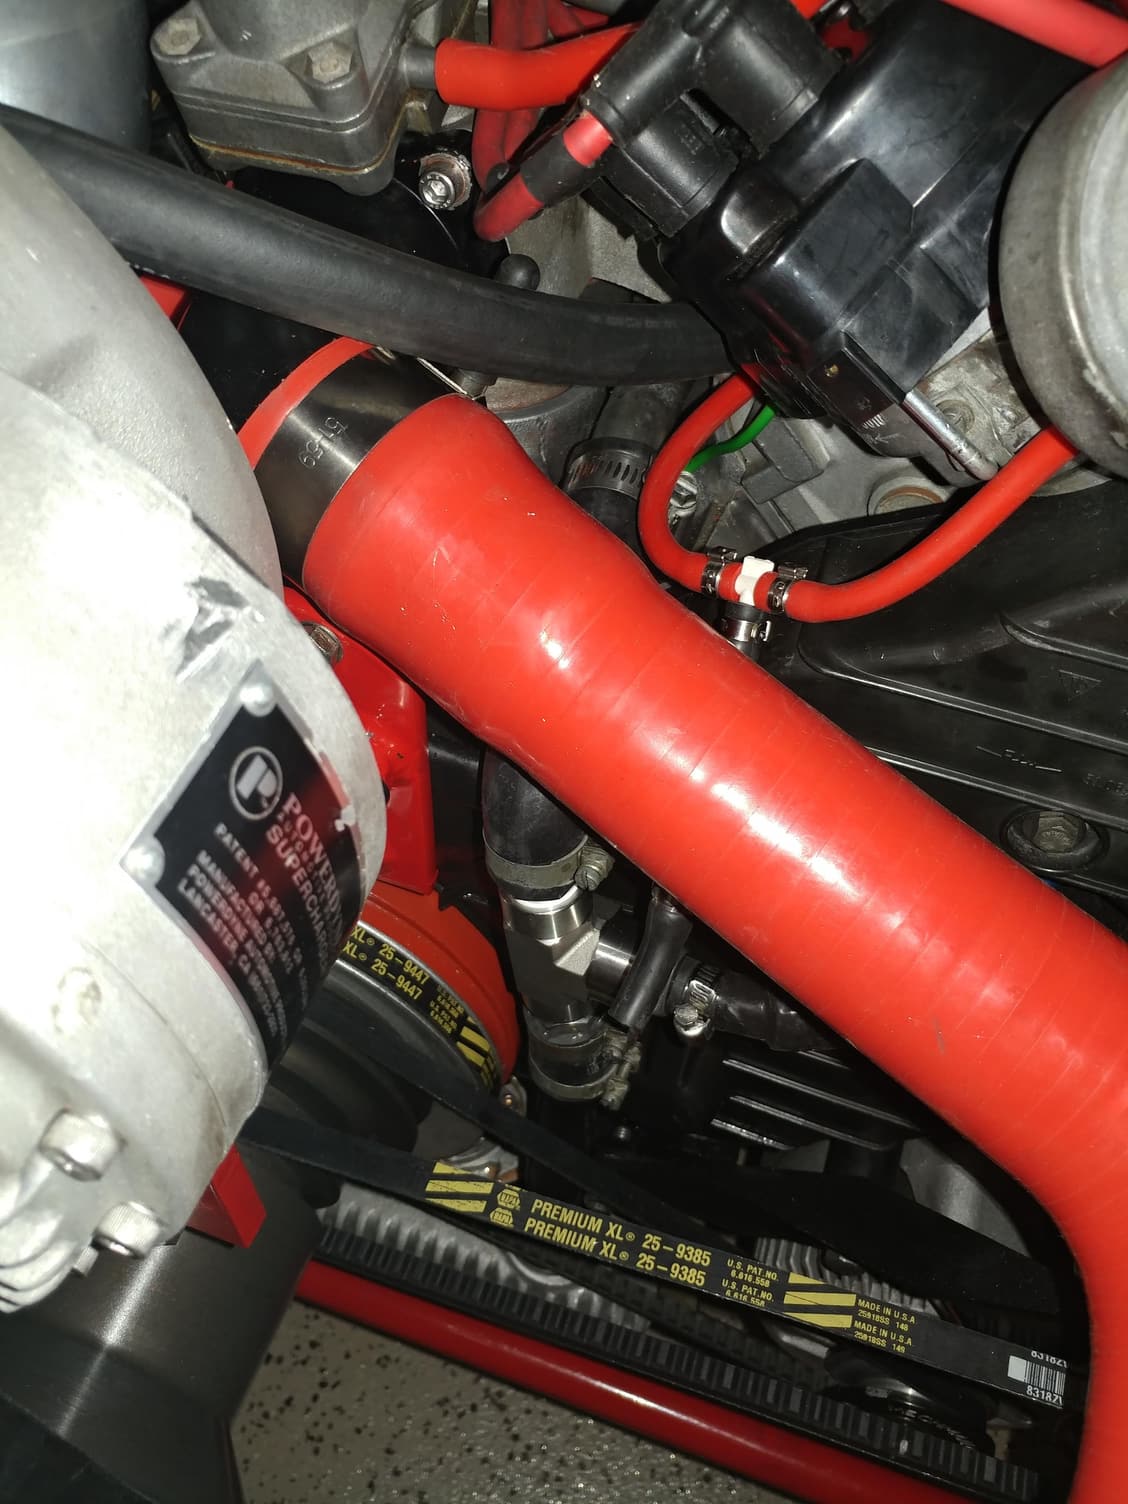
Here is the AOS mounted on the fire wall with both lines installed into the inlets for each chamber
Running underneath the AOS is the line from my heat exchanger to my intercooler for the supercharger. I added 2 Ts to this line with hoses that run to the rear chamber on the AOS. What this does is allow the hot intercooler fluid to heat the AOS so the oil that gets separated doesn't congeal when it's cold and clog up the oil drain line. This fluid compartment is machined as a separate chamber in the AOS so no risk of contamination back into the oiling system.
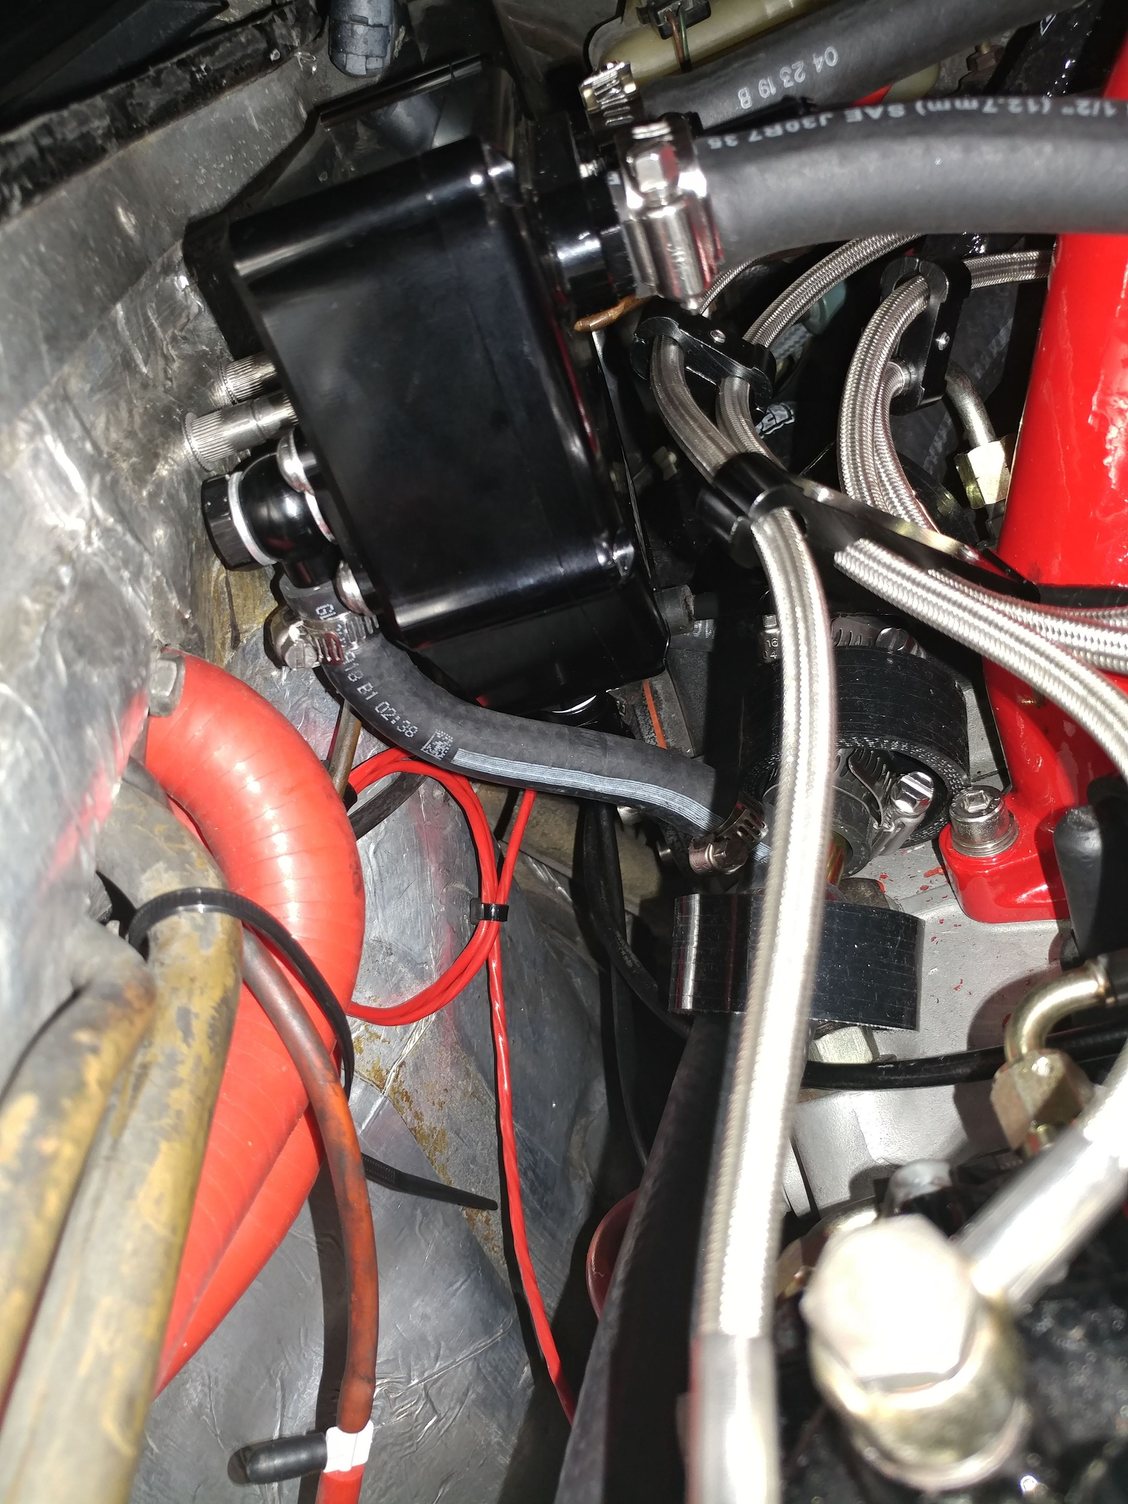
Coming out the bottom of the AOS is a 90 degree curved elbow that is the drain port. This is where the separated oil exits and runs back to the oil pan. This picture shows the 1-way check valve that came with the AOS drain kit so when there is positive pressure in the oiling system, it closes off and doesn't let that back feed into the AOS. When the car is turned off, that oil will use gravity to drain the line back to the oil pan.
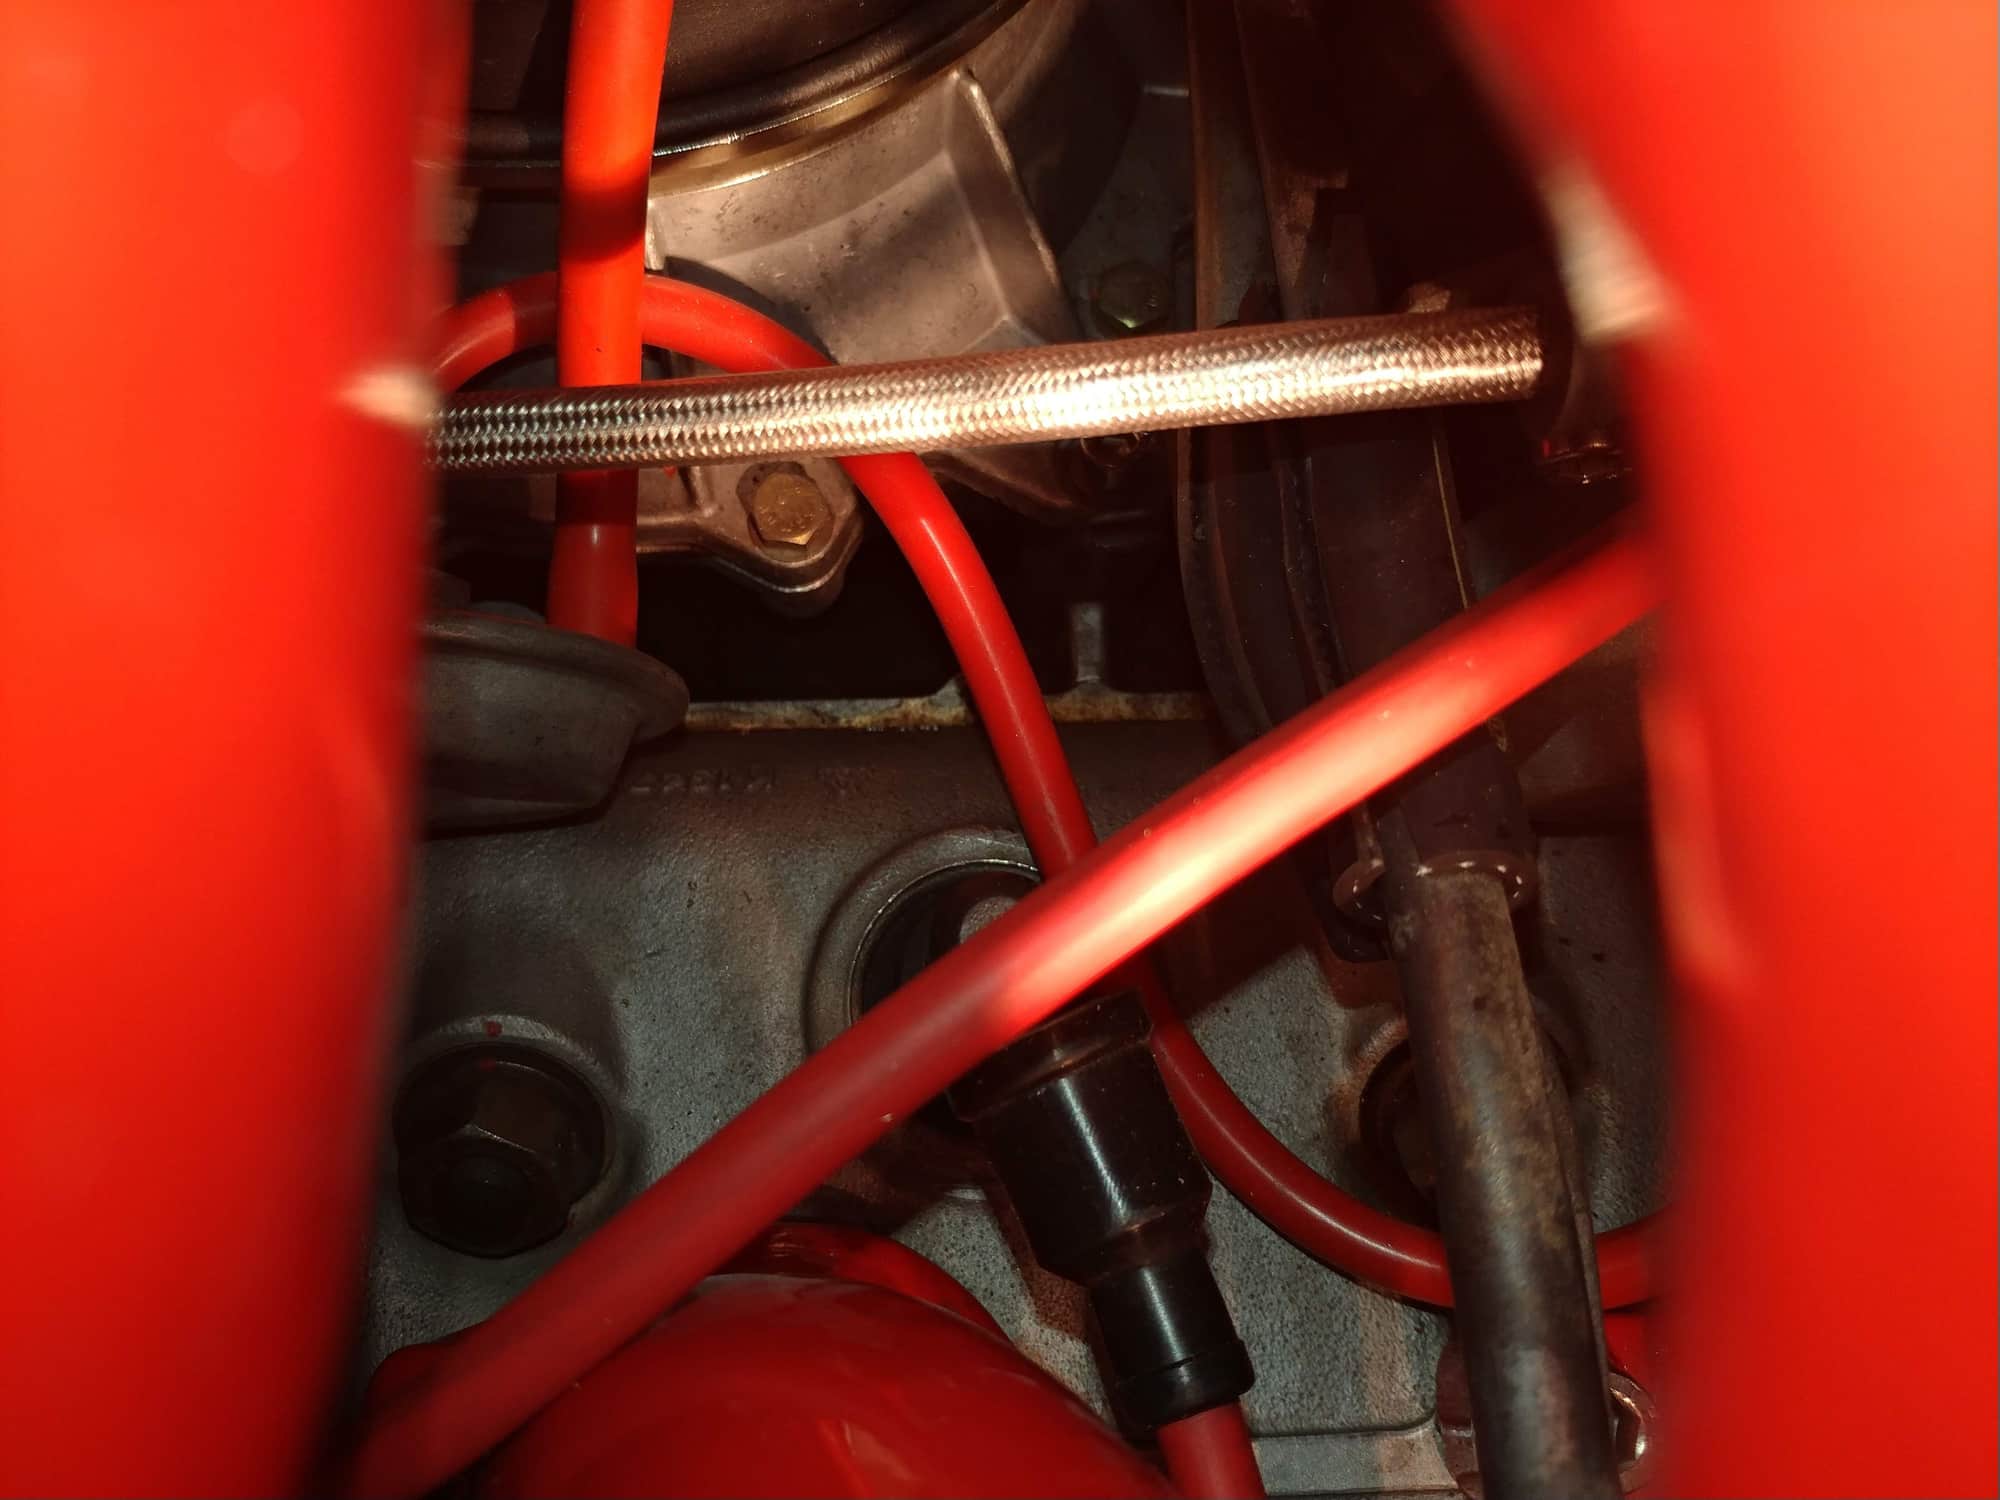
Here's a close-up of the drain fitting. It's tied into the line from the oil fill chamber down the front of the engine into the oil pan. The drain line is the 90 degree fitting coming in from the side.
Here's a wider angle view.
The atmosphere vent lines will be connected to the two outlet ports from the AOS, Y'd together to a single vent line that runs down the drivers side engine compartment wall near the power steering hoses. Because both the oil drain line and the atmosphere vent line will be in the same area as the driver's side header, I fire-sleeved both those lines with DEI Fire Sleeve to keep the heat away from the rubber lines. I also used about an 8" leftover piece on the passenger side Cam Tower vent line where it lays across the backside of the supercharger.
The only thought I had after writing this post was that if I'm producing a fair amount of oil, the check valve for the drain line might be too close to the AOS and I may need to relocate it closer to the connection back to the oil pan so I can use the capacity of the drain hose upstream of the check valve to capture the separated oil.
For those of you who know what you're doing, does this seem like it's going to work properly as I envisioned it would or would you change parts of how it's done. Thanks.
Your installation is very workman-like and correct. Whether it will work or not is up to that Air-Oil separator you have installed. I am not familiar with that model and I'm a little concerned how good it can be at what it is supposed to do in such a small package. If it works - that'd be great, as the AOS's that currently work well are all really big. I's love to hear that there is a smaller alternative on the market that works.
Have you ever put a boost gauge on the dipstick tube and driven the car? This would tell us whether there is a wee bit of boost in the crankcase or a whole lot of it...
Carl, thanks for the confirmation on the install - glad I don't have to do a lot of replumbing at this stage.
No, I've not measured crankcase pressure at the dip stick. That's difficult for me to do since I have a dipstick extender installed onto my dipstick so I can easily check the oil around the supercharger.
If it works, I'm assuming I'll get no to very little oil out of the atmosphere vent line from the AOS exit ports. If it doesn't, then I'll see oil coming out like I was previously, correct?
If it works, I'm assuming I'll get no to very little oil out of the atmosphere vent line from the AOS exit ports. If it doesn't, then I'll see oil coming out like I was previously, correct?
Correct. I would think that the it will be somewhere in-between. I think you are likely to see some improvement, but not a completely oil-less emission. It will be up to you to decide whether it is good enough.
Well, now I think I'm officially screwed. Was buttoning up the AOS install with the vent lines, went to refill the cooling system using my AirLift and the first time it pulled vacuum to 20 which is borderline on the gauge for a proper full refill, but wouldn't go further. Shutting of the valve, it wasn't holding vacuum, but this sometimes happens when you can't get a good seal at the reservoir so I proceeded anyway and it still pulled most of the coolant from the bucket. Pulled vacuum a second time to try and finish the job and this time it only got to 10 on the gauge and I could hear air leaking from somewhere in the motor. Got my pressure tester and pressurized the cooling system to 10 and the engine valley started to fill with coolant again, but this time, it wasn't coming from the front water bridge. I couldn't detect where the coolant stream was coming from. Checked the rear HVAC fitting and opposite side block off plates and those bolts could've been tighter but the plate and fitting were dry around them.
Then I saw it.
This is coolant leaking between the head and the block, right?
So another blown head gasket? What's odd is that this is on Passenger side, which is the opposite one to the side where I had the 2 plugs getting fouled (that was #s 5 & 7) and this leak is between 2 and 3. Could this be what was causing excessive crankcase pressure and causing my other issues?
If that's what this is, I'm sad to say I'm probably done with this car for a while and will just put it away until looking at it stops making me cry.
If this is something simpler than that to correct, then please let me know. Kevin Berez, are you looking for an engine rebuild project to do in your spare time? If so, shoot me an email and let me know what you'd charge to take it apart and put it back together, but it's unlikely I have the funds to proceed with that project currently.
May have jumped the gun on the prognosis.
I thought maybe the vacuum diaphragm in the photo was blocking my view of the fitting that feeds the heater core and that it was leaking and running along that ridge, so I removed the diaphragm and repressurized a little, and it wasn't coming from there, but was wet in the same spot again. Then looking further right, I saw coolant running around the #1 spark plug boot so there's definitely a leak at that water bridge fitting I put together with silicone but no gasket, so I have to take the water bridge off again and use gaskets, and then see where I am on the next test.
Can I test the system without coolant and listen for air leaks or is it not the same as pressurizing with coolant.
Pete if I read this correctly I would suggest you drain the block then remove the hoses to the WB then remove the WB
take out the fat rubber seal then set the WB on your engine an use a flashlight to see what the gaps are at each head
if the heads have been cut then the angle has changed at the WB mating surface
use a feeler gauge to determine the gaps
if your careful you can surface the WB mating surface to meet the head
put some sticky on a 180 grit paper onto a flat surface an work the surface angle so each side is fitting flat then use a gasket with with some RTV
If you can tell which edge is leaking you could shave a gasket to match the gap. Removing metal is irreversible - go too far and you're forked.
If you are going to shave the water bridge I would suggest getting a 1/2" thick piece of tempered glass, wrap the 180 grit around it and work the water bridge back and forth. This is same thing I do for 85-86 oil fillers that leak. Better control.


 08-08-2019, 05:33 PM