When you click on links to various merchants on this site and make a purchase, this can result in this site earning a commission. Affiliate programs and affiliations include, but are not limited to, the eBay Partner Network.
I think the starter is grounded through the mating surface of the lower bellhousing cover. I'm not sure if the bolts will be able to pass enough current. If you have a weak or no crank situation I will bet that is why and the powder coating will have to be sanded off that area.
I ground the powdercoat off of the inner flange since my hi-torque tarter housing also makes a little contact on part of it. I also thread chased the powder out of the mounting holes. We'll try that and see if we get a good strong crank, or if I need to remove some of the coating from the mounting face of the bell housing too.
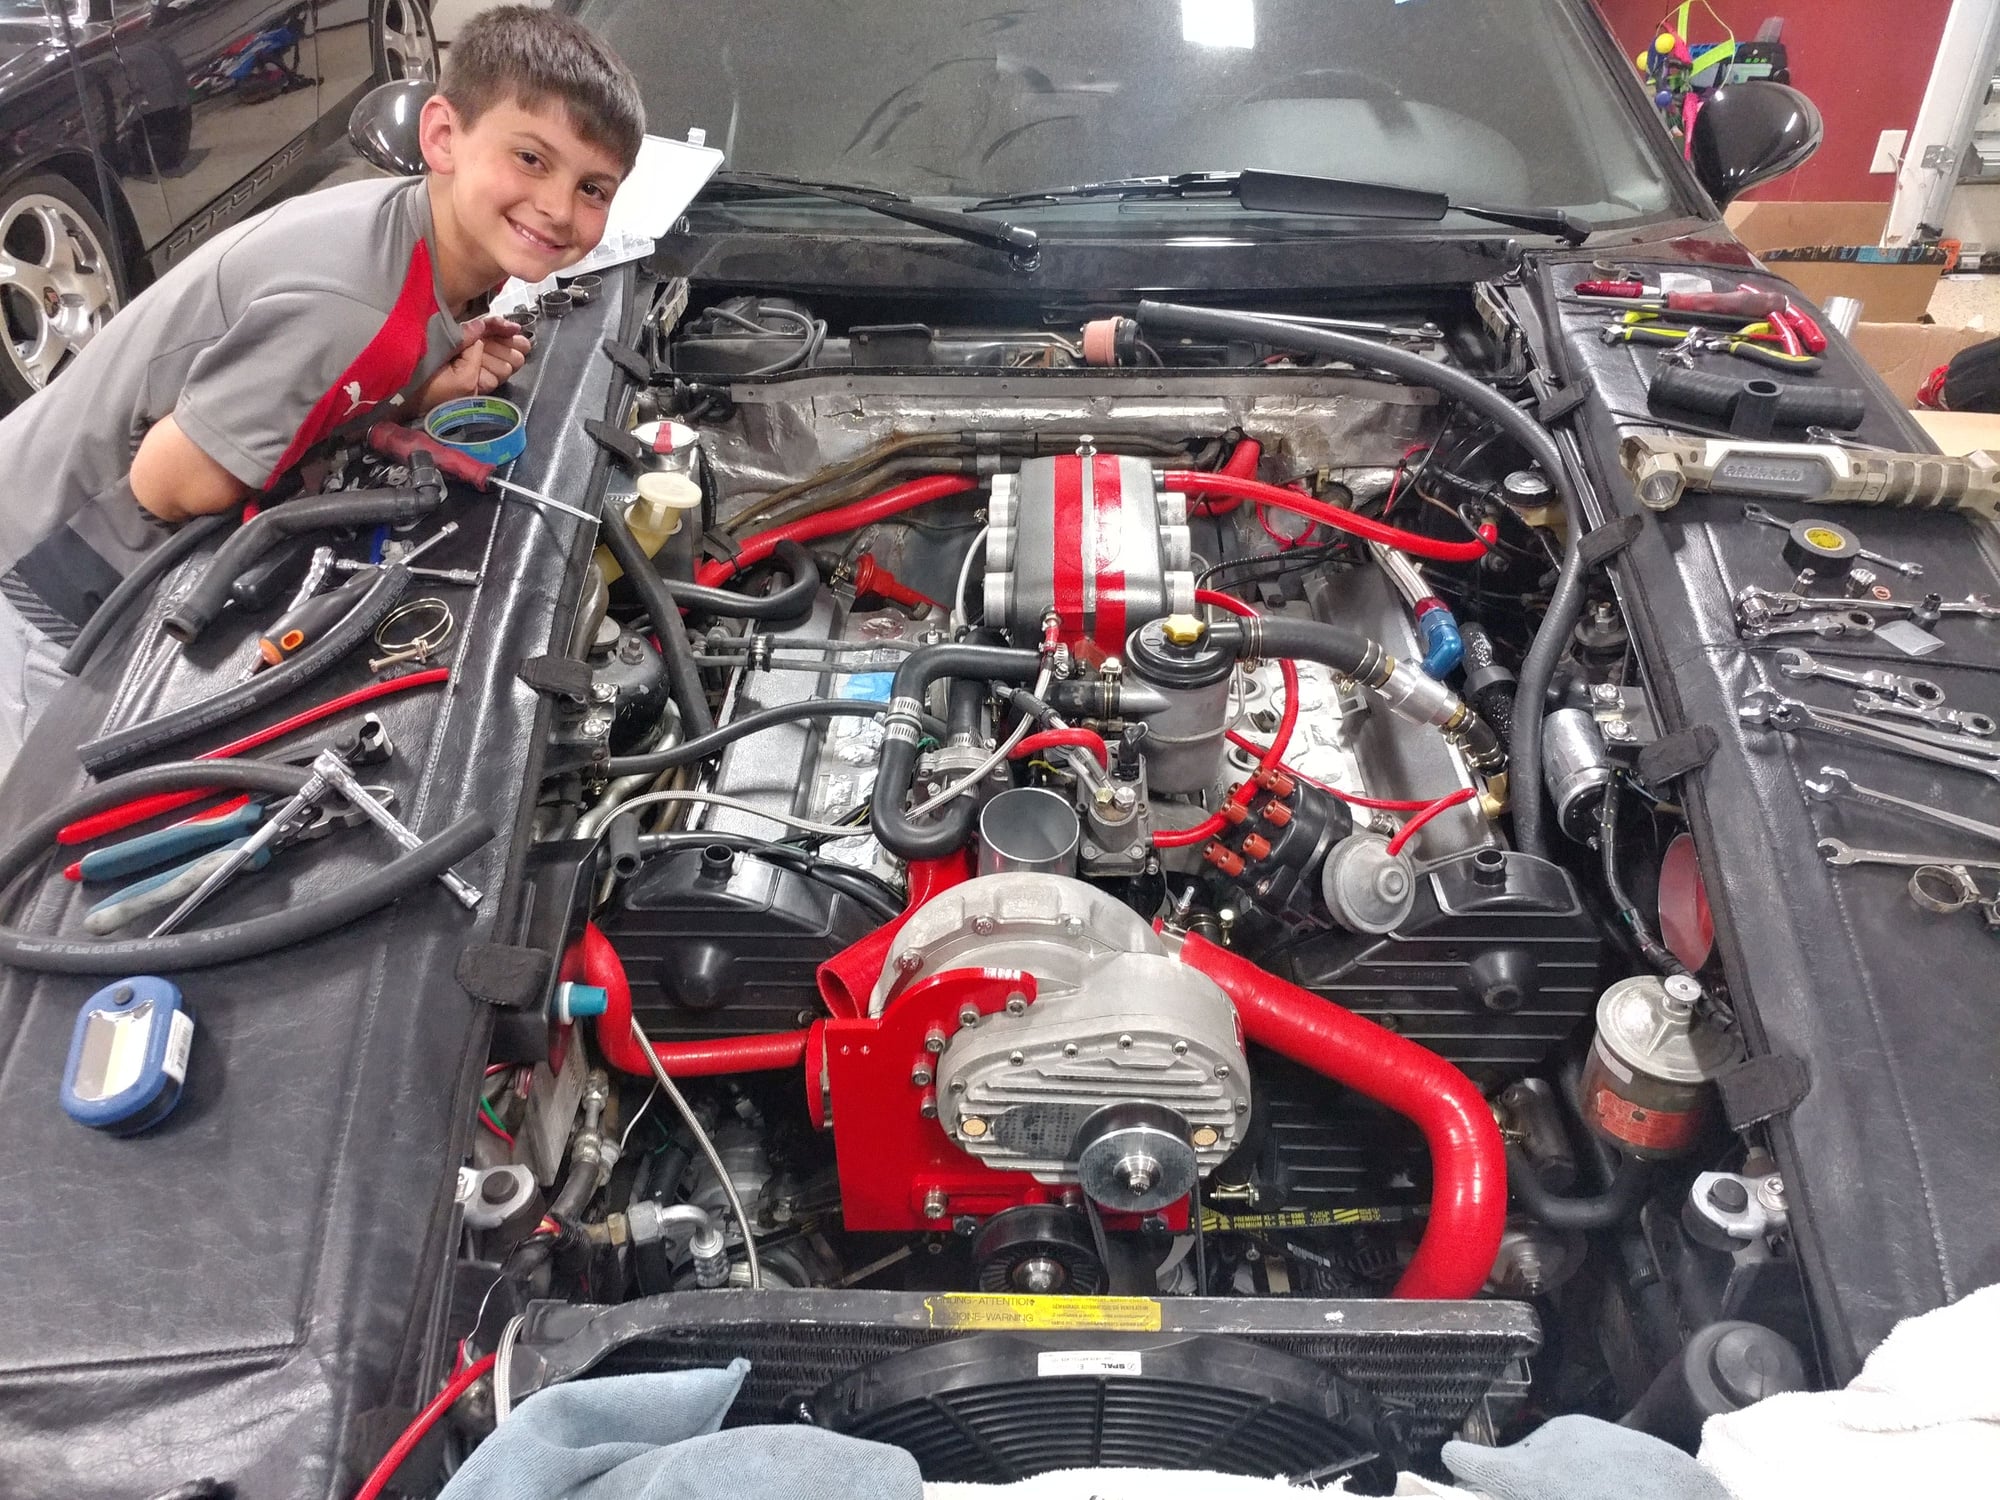
Working on hanging all the accessories today. Power steering pump and alternator are in place. Moving on to the PS lines and reservoir, then the a/c compressor, then might do a wake boarding run witb the kids before diving back in after dinner.
Do the teeth on the flywheel look worn, or is it just the picture?
I think it's the picture. I've never had a problem with the starter slipping or anything like that, but take a look. Here's are pics of the flywheel when it was out of the car.
Installed a new clutch slave cylinder and Greg Brown pressure line for it
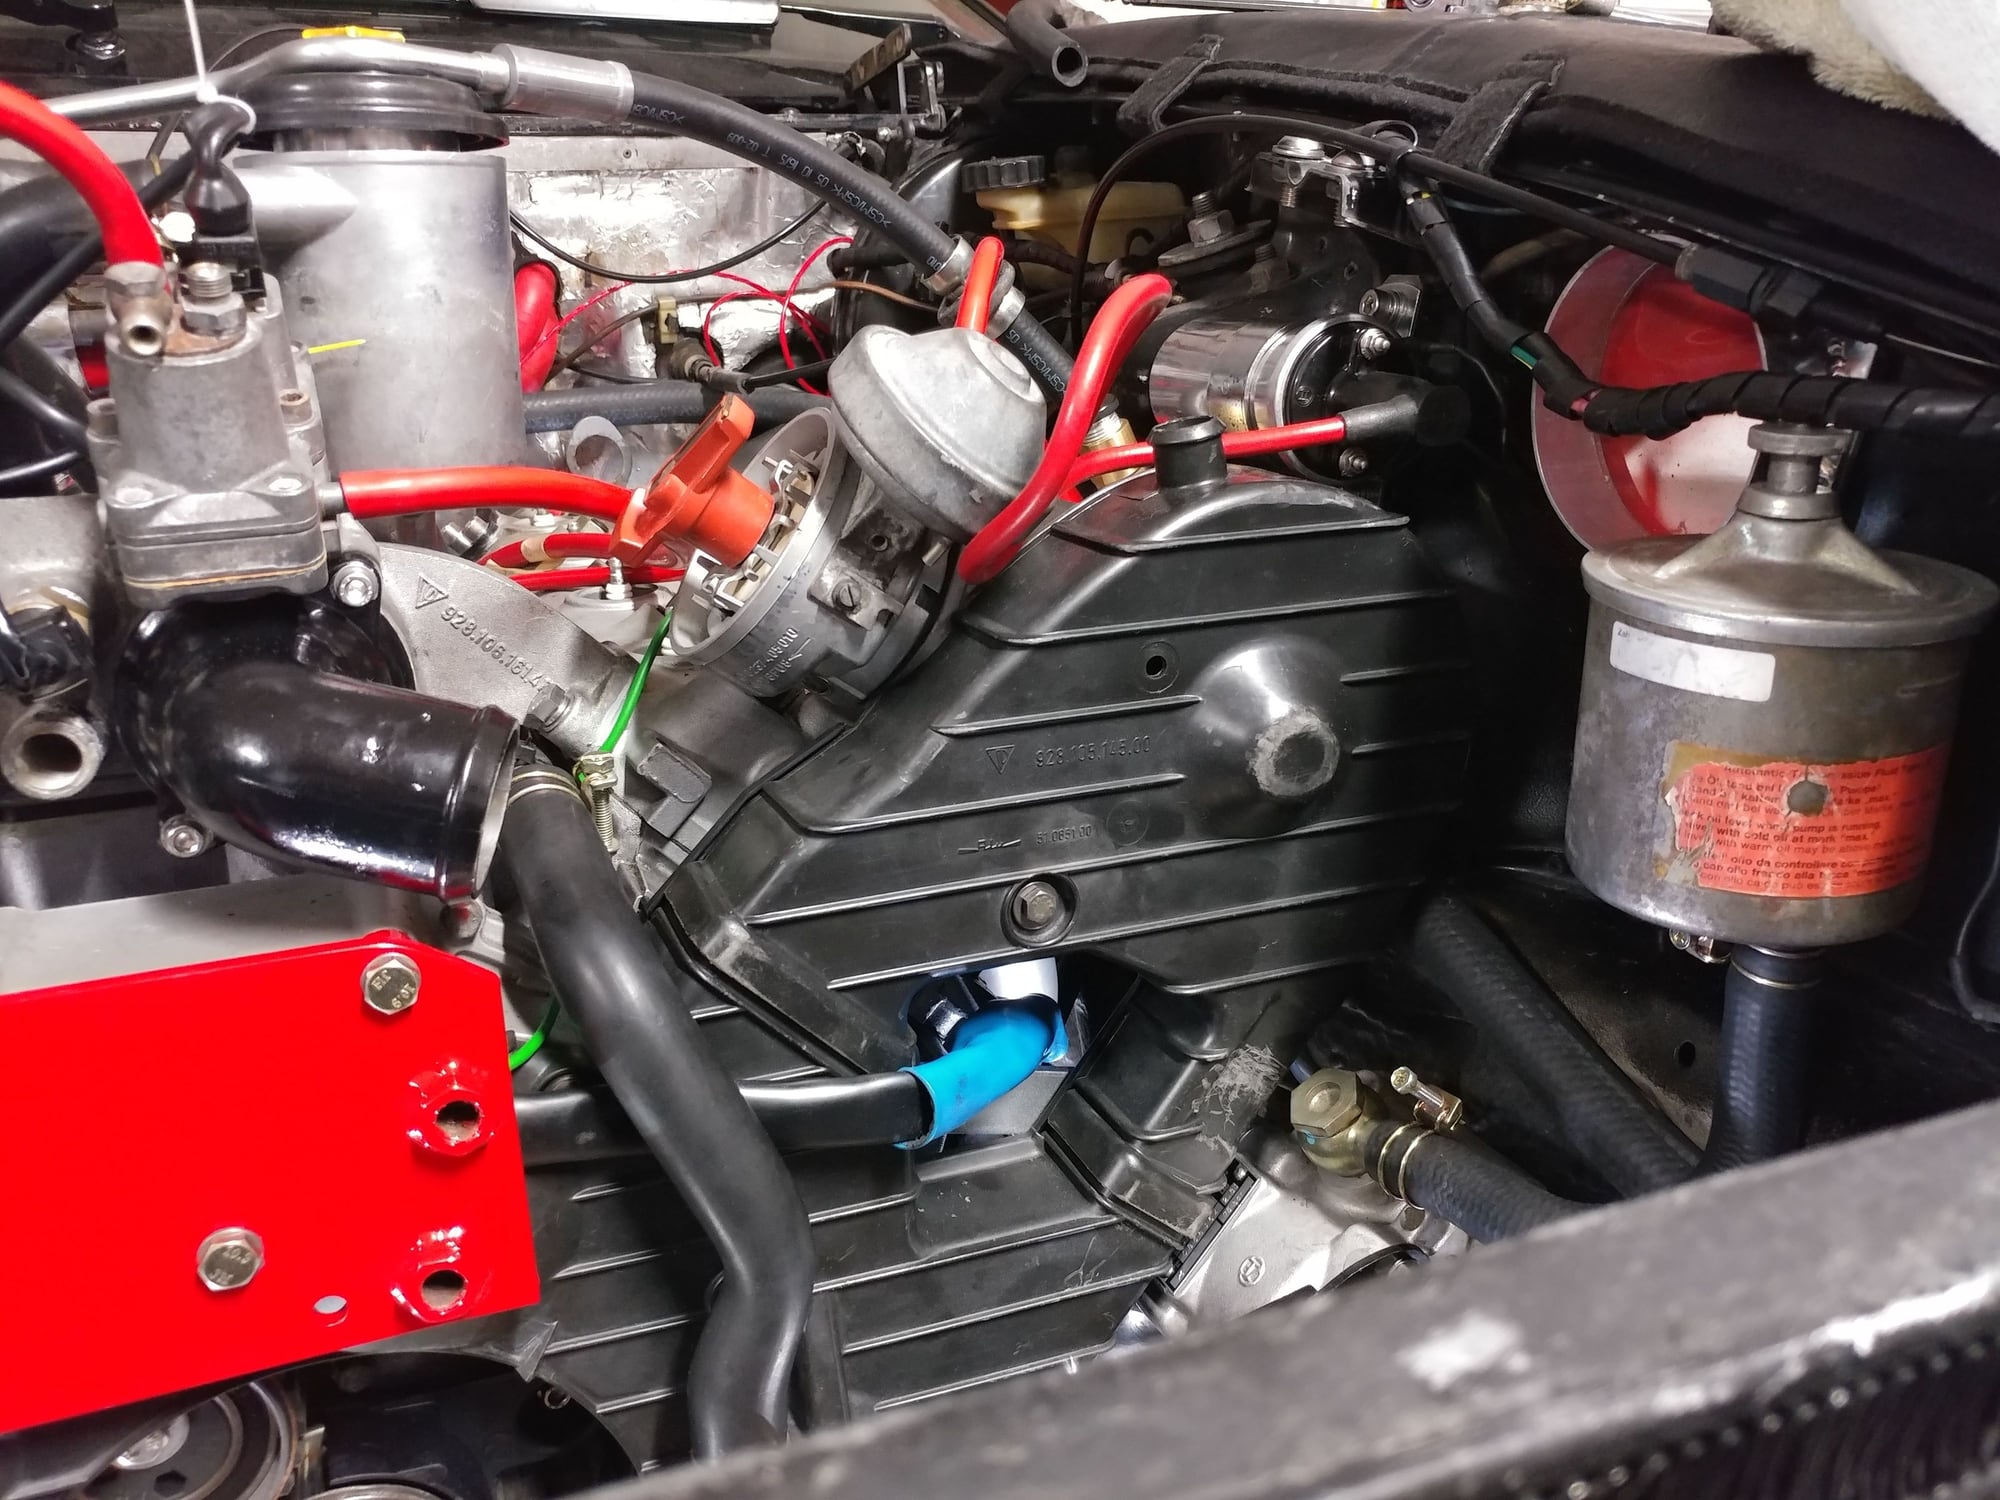
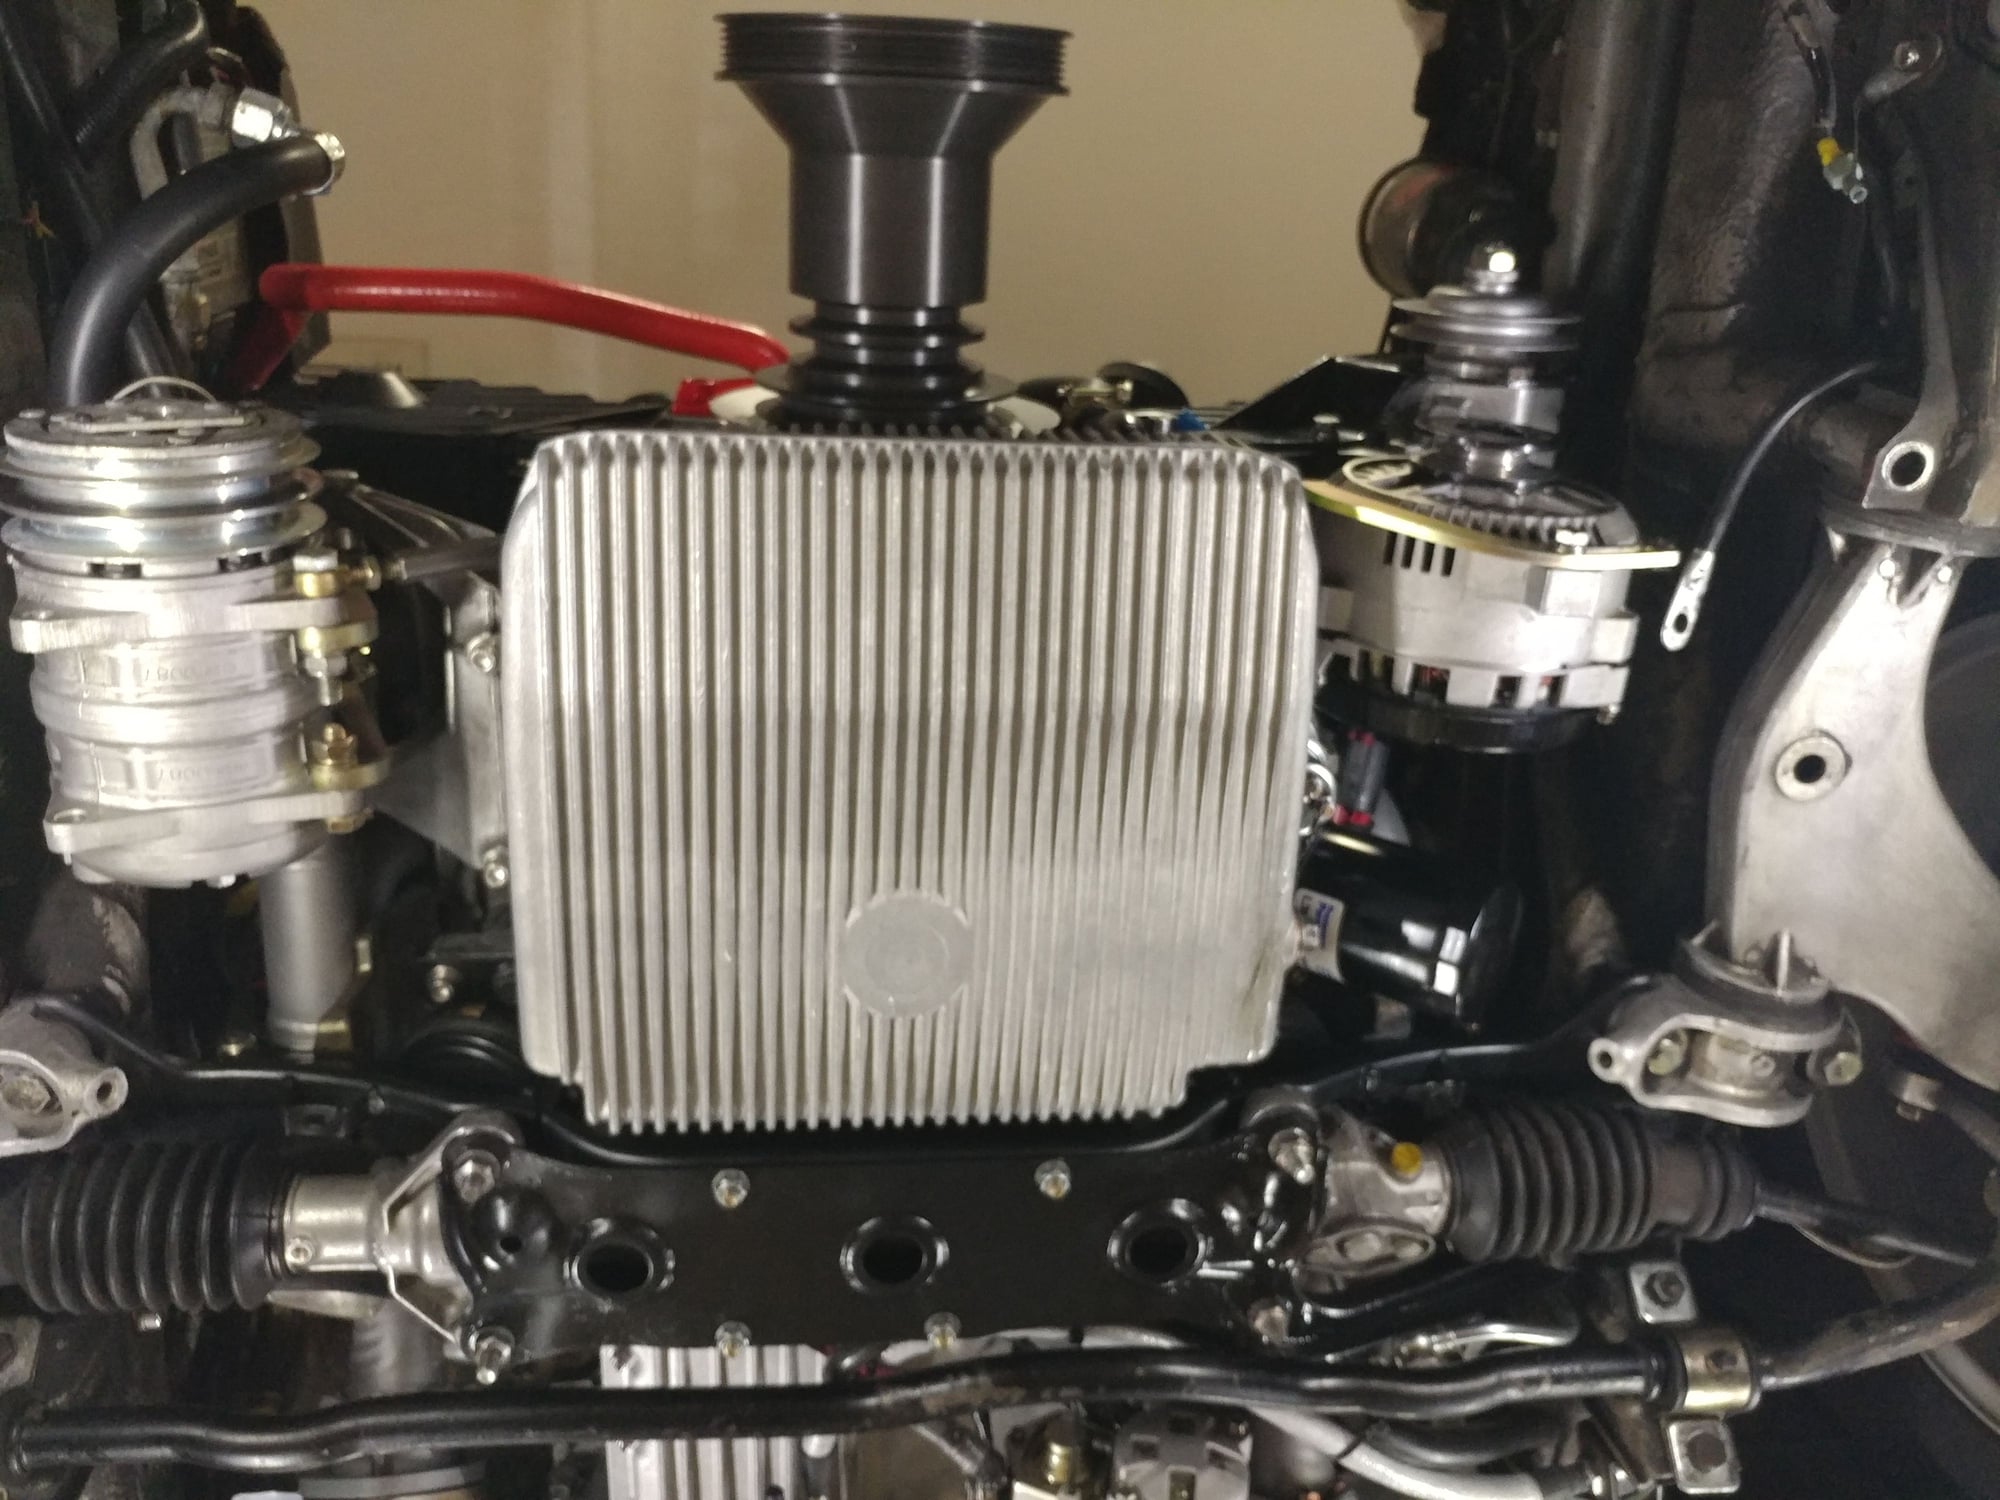
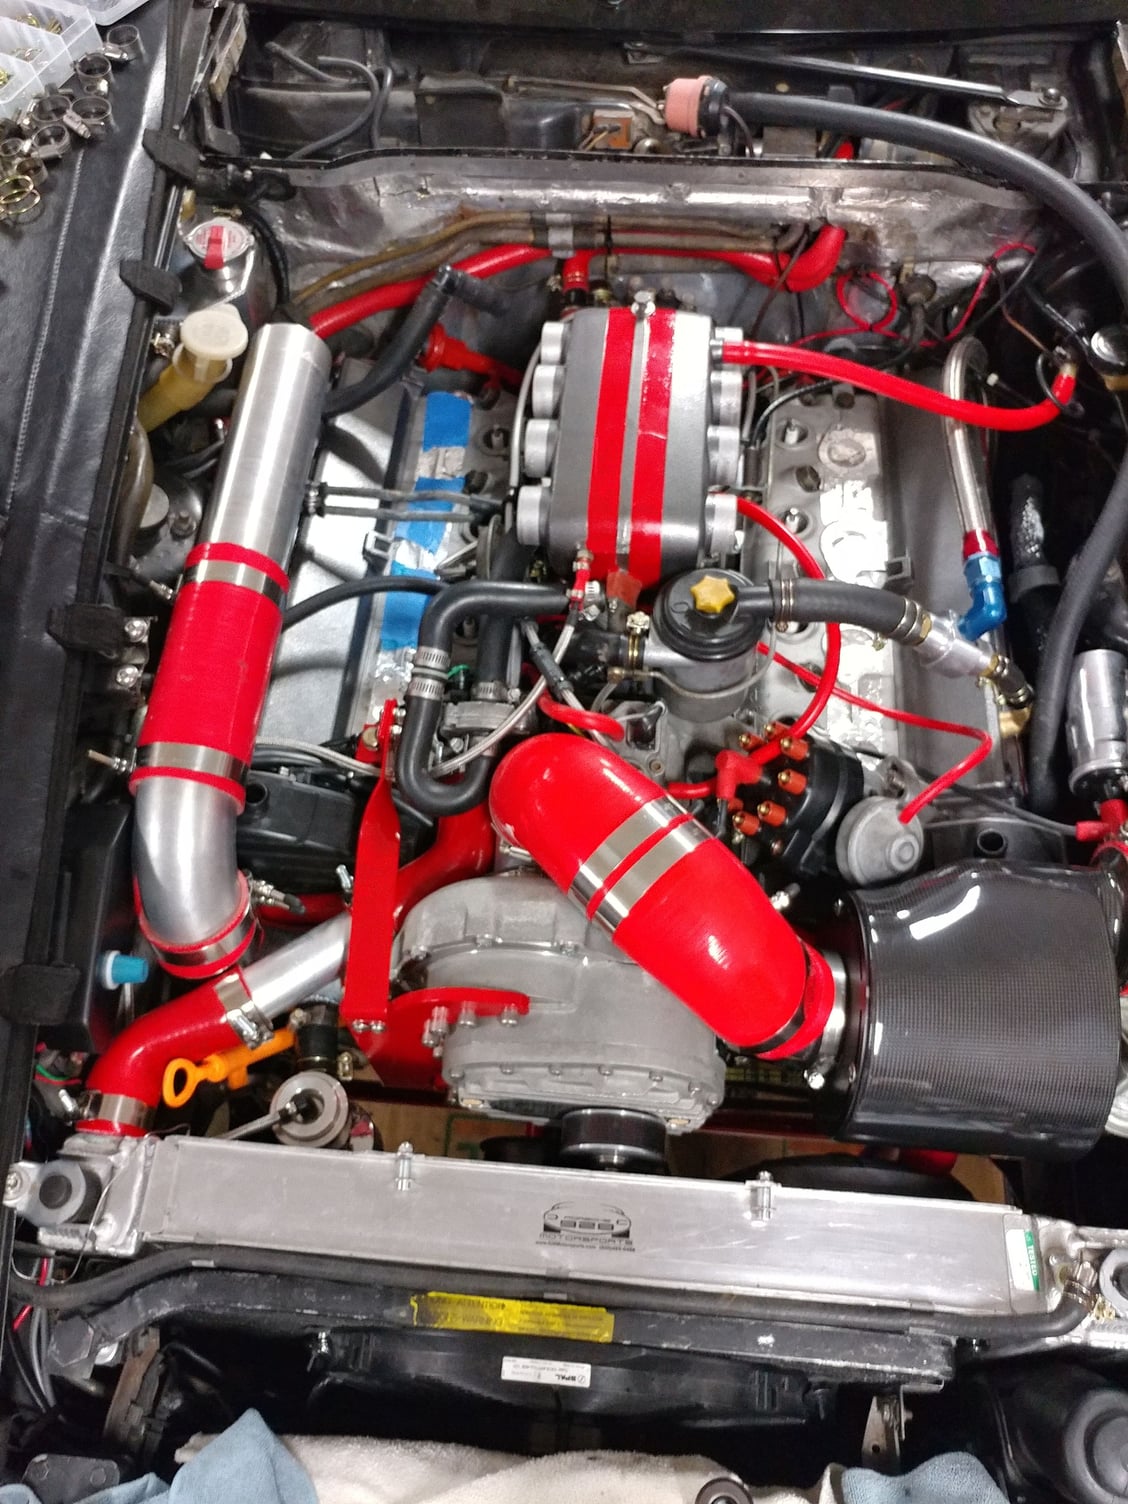
Mounted the supercharger mounting plate and started routing some of the wires and plugged in a few things
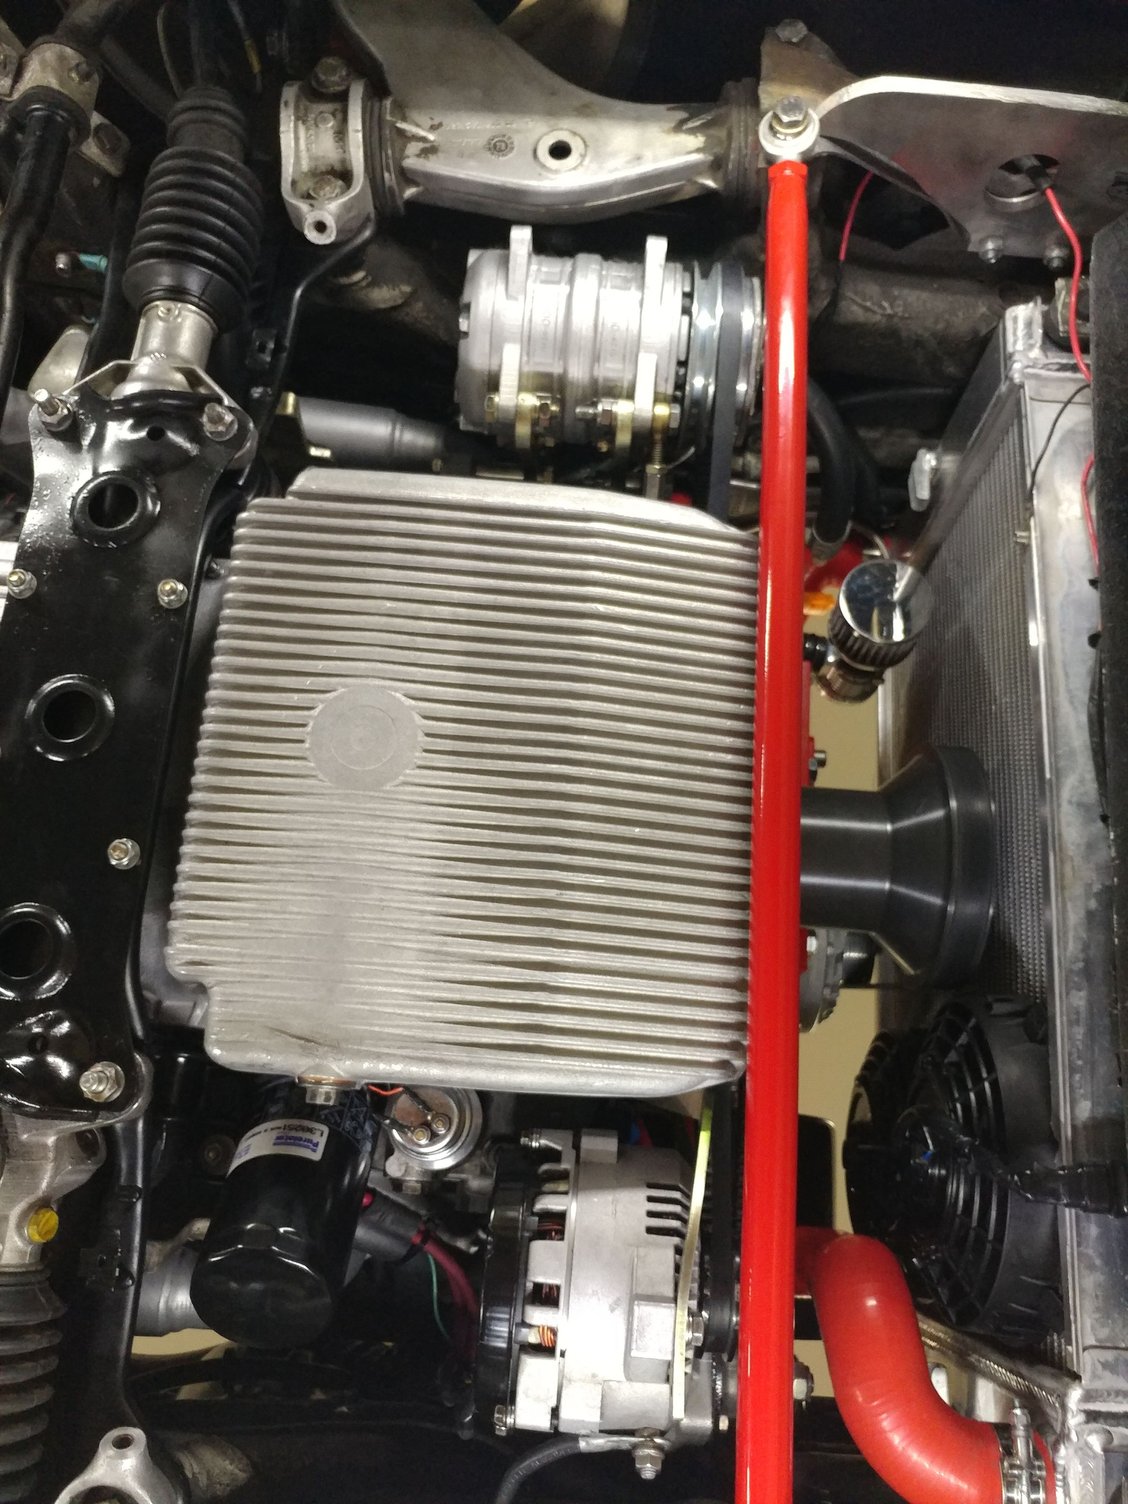
Mounted the A/C compressor
I"m not doing any belts until the end so I can leave the crank pulleys off and have more space to work on the front of the motor.
Also realized that in buying replacements for my aged power steering lines, that I bought two presure lines of different types - one has the banjo fittings and both ends and the other has the banjo fitting at the rack end and male threaded fitting for the pump at the other end which is the one I need, but I don't have a return line so Roger is working on that tomorrow. Unfortunately for me, the line in did the DEI Firesleeving to is the dual banjo one, so I'll be adding this brand new line with fire sleeving to my parts for sale thread when I'm done with this project. I've ordered another DEI kit to do the proper line that is already installed in the car, but it's coming back out again
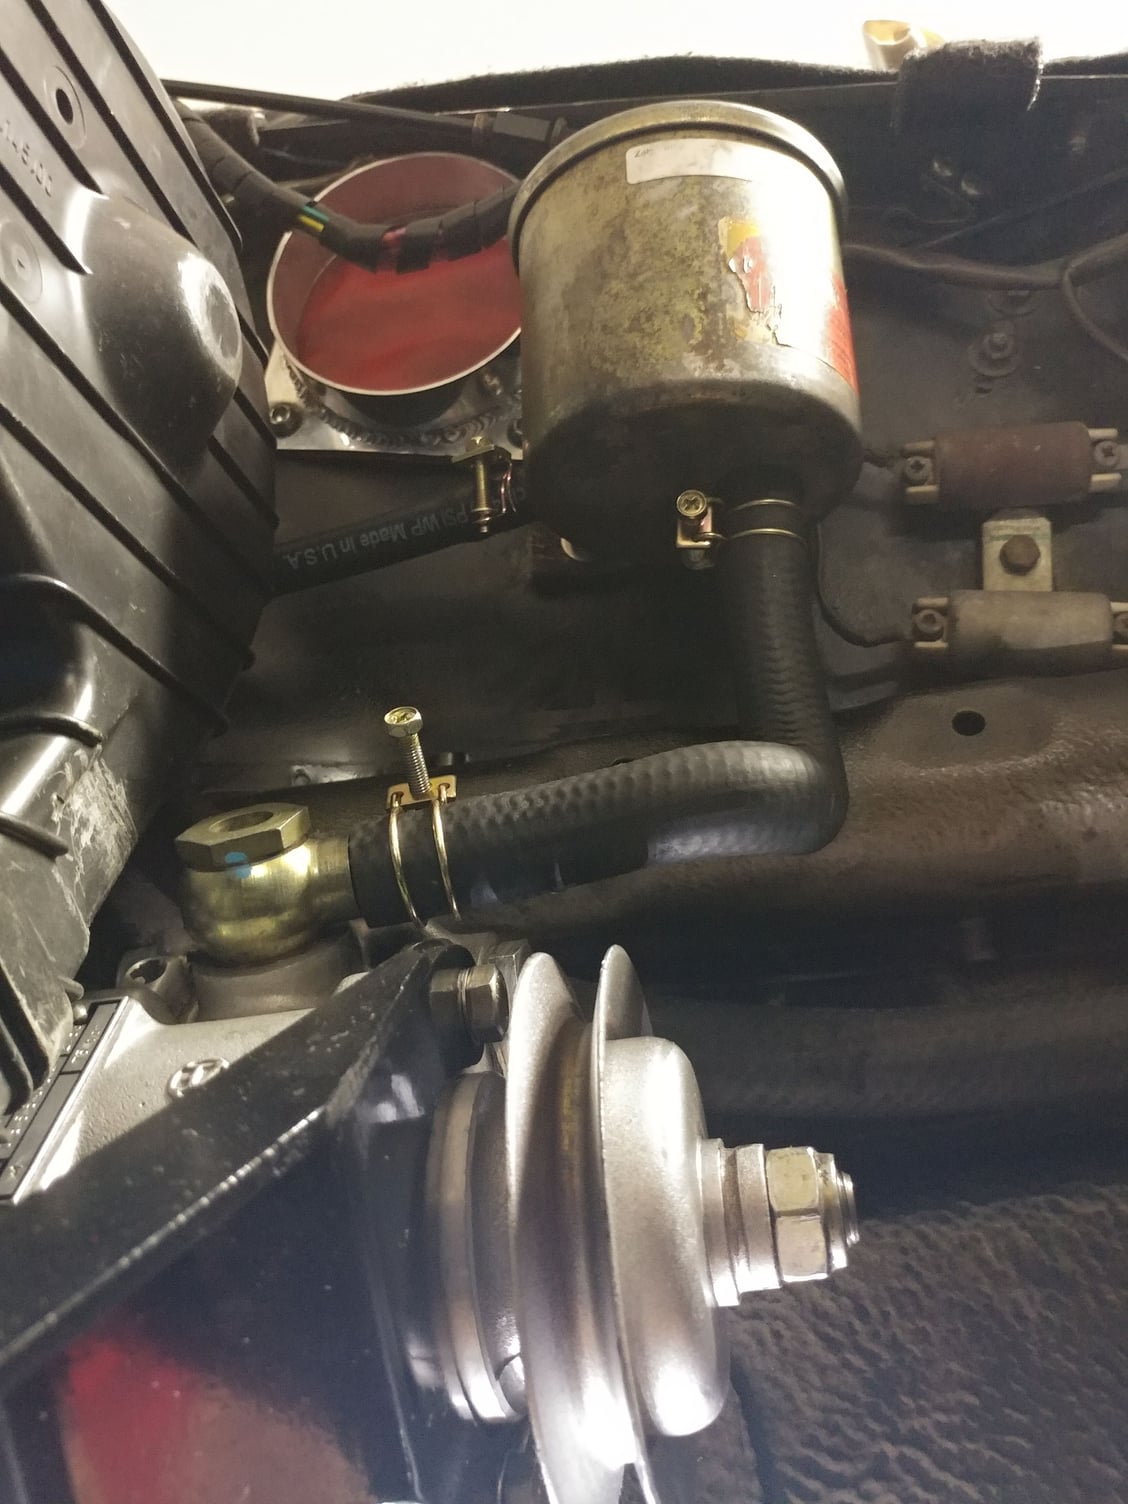
the power steering reservoir and connected it to the pump with a new supply hose,
Scraped the crappy looking labels off the high performance silver coil and polished it a bit, then installed that
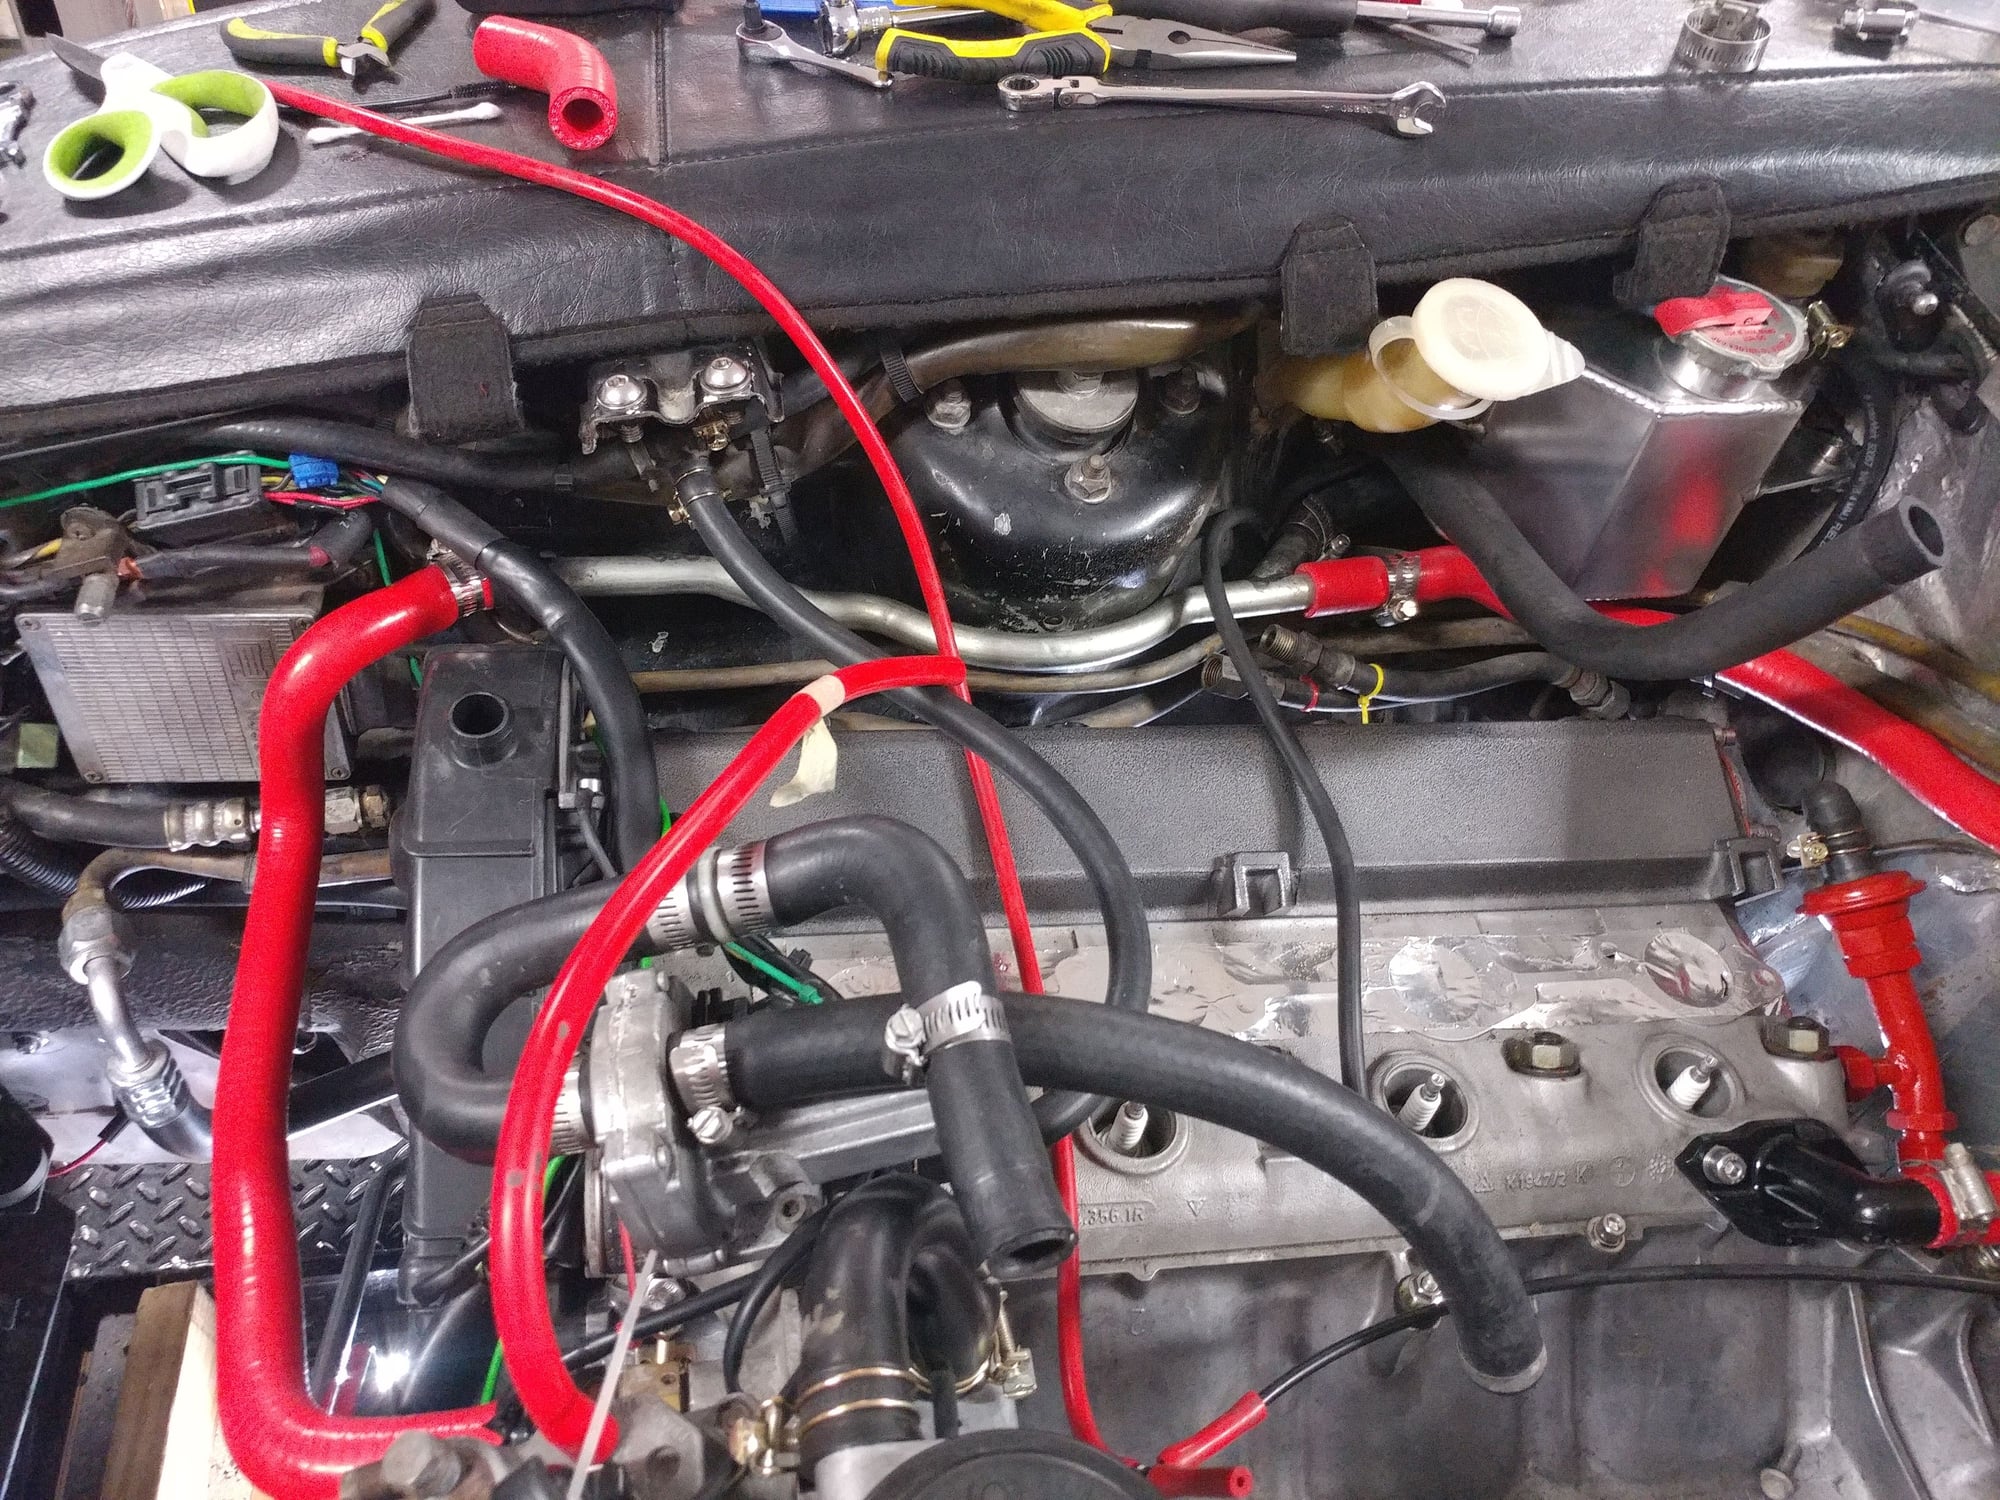
Took out the coolant reservoir to clean it out. Tested the coolant level sensor for continuity with the float in both the up and down positions and got nothing. Does the sensor need to be submerged to successfully test it or should it have had continuity between the top terminals with the float in one position or the other?
Started reconnecting some coolant lines like the one under the reservoir that goes to the supercharger intercooler
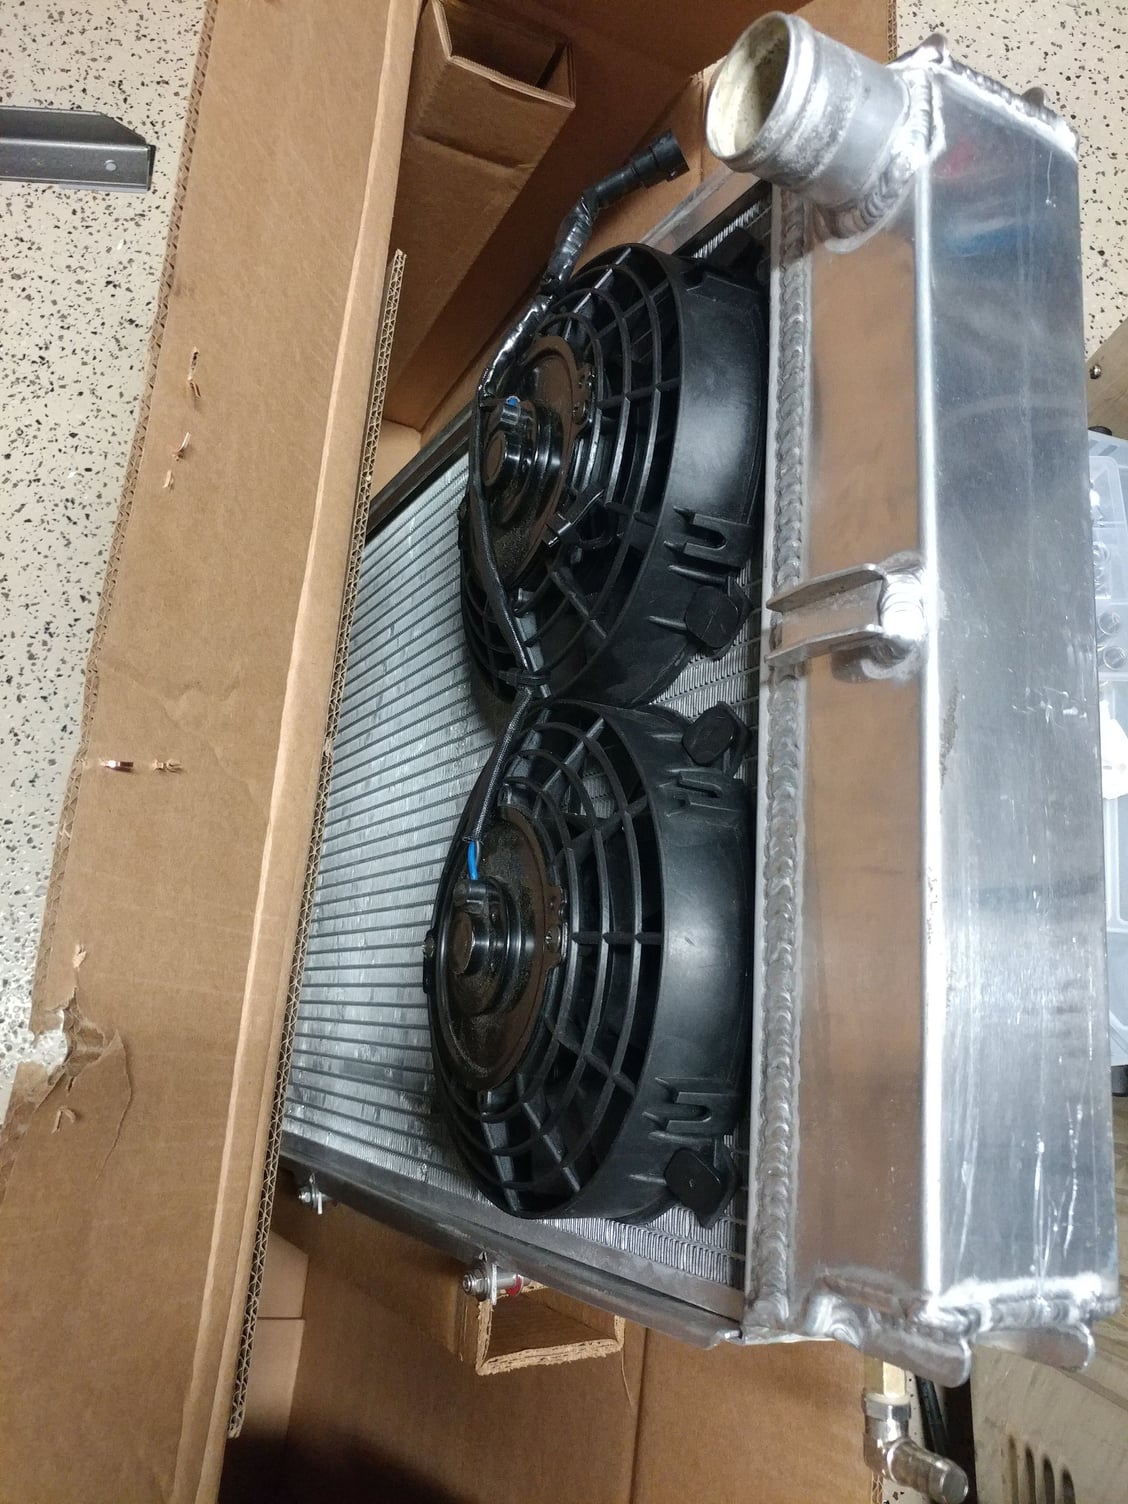
Reattached the dual electric fans to the aluminum radiator. Had a tube leaking and had to send it off for repair, and they didn't want any accessories on it. Straightened all the, crooked fins too for maximum airflow through and cooling effect. Radiator won't go back in until close to last to leave more room to work.
Returned from a business trip tonight and got a couple things done.
Polished and reinstalled the coolant reservoir with the new level sensor. It tests the same as the one I removed so either they're both bad or probably both good and they only work when sitting in fluid.
Connected the coolant hoses associated with the reservoir, the Y Pipe along the side of the engine bay and the front smaller diameter coolant hose.
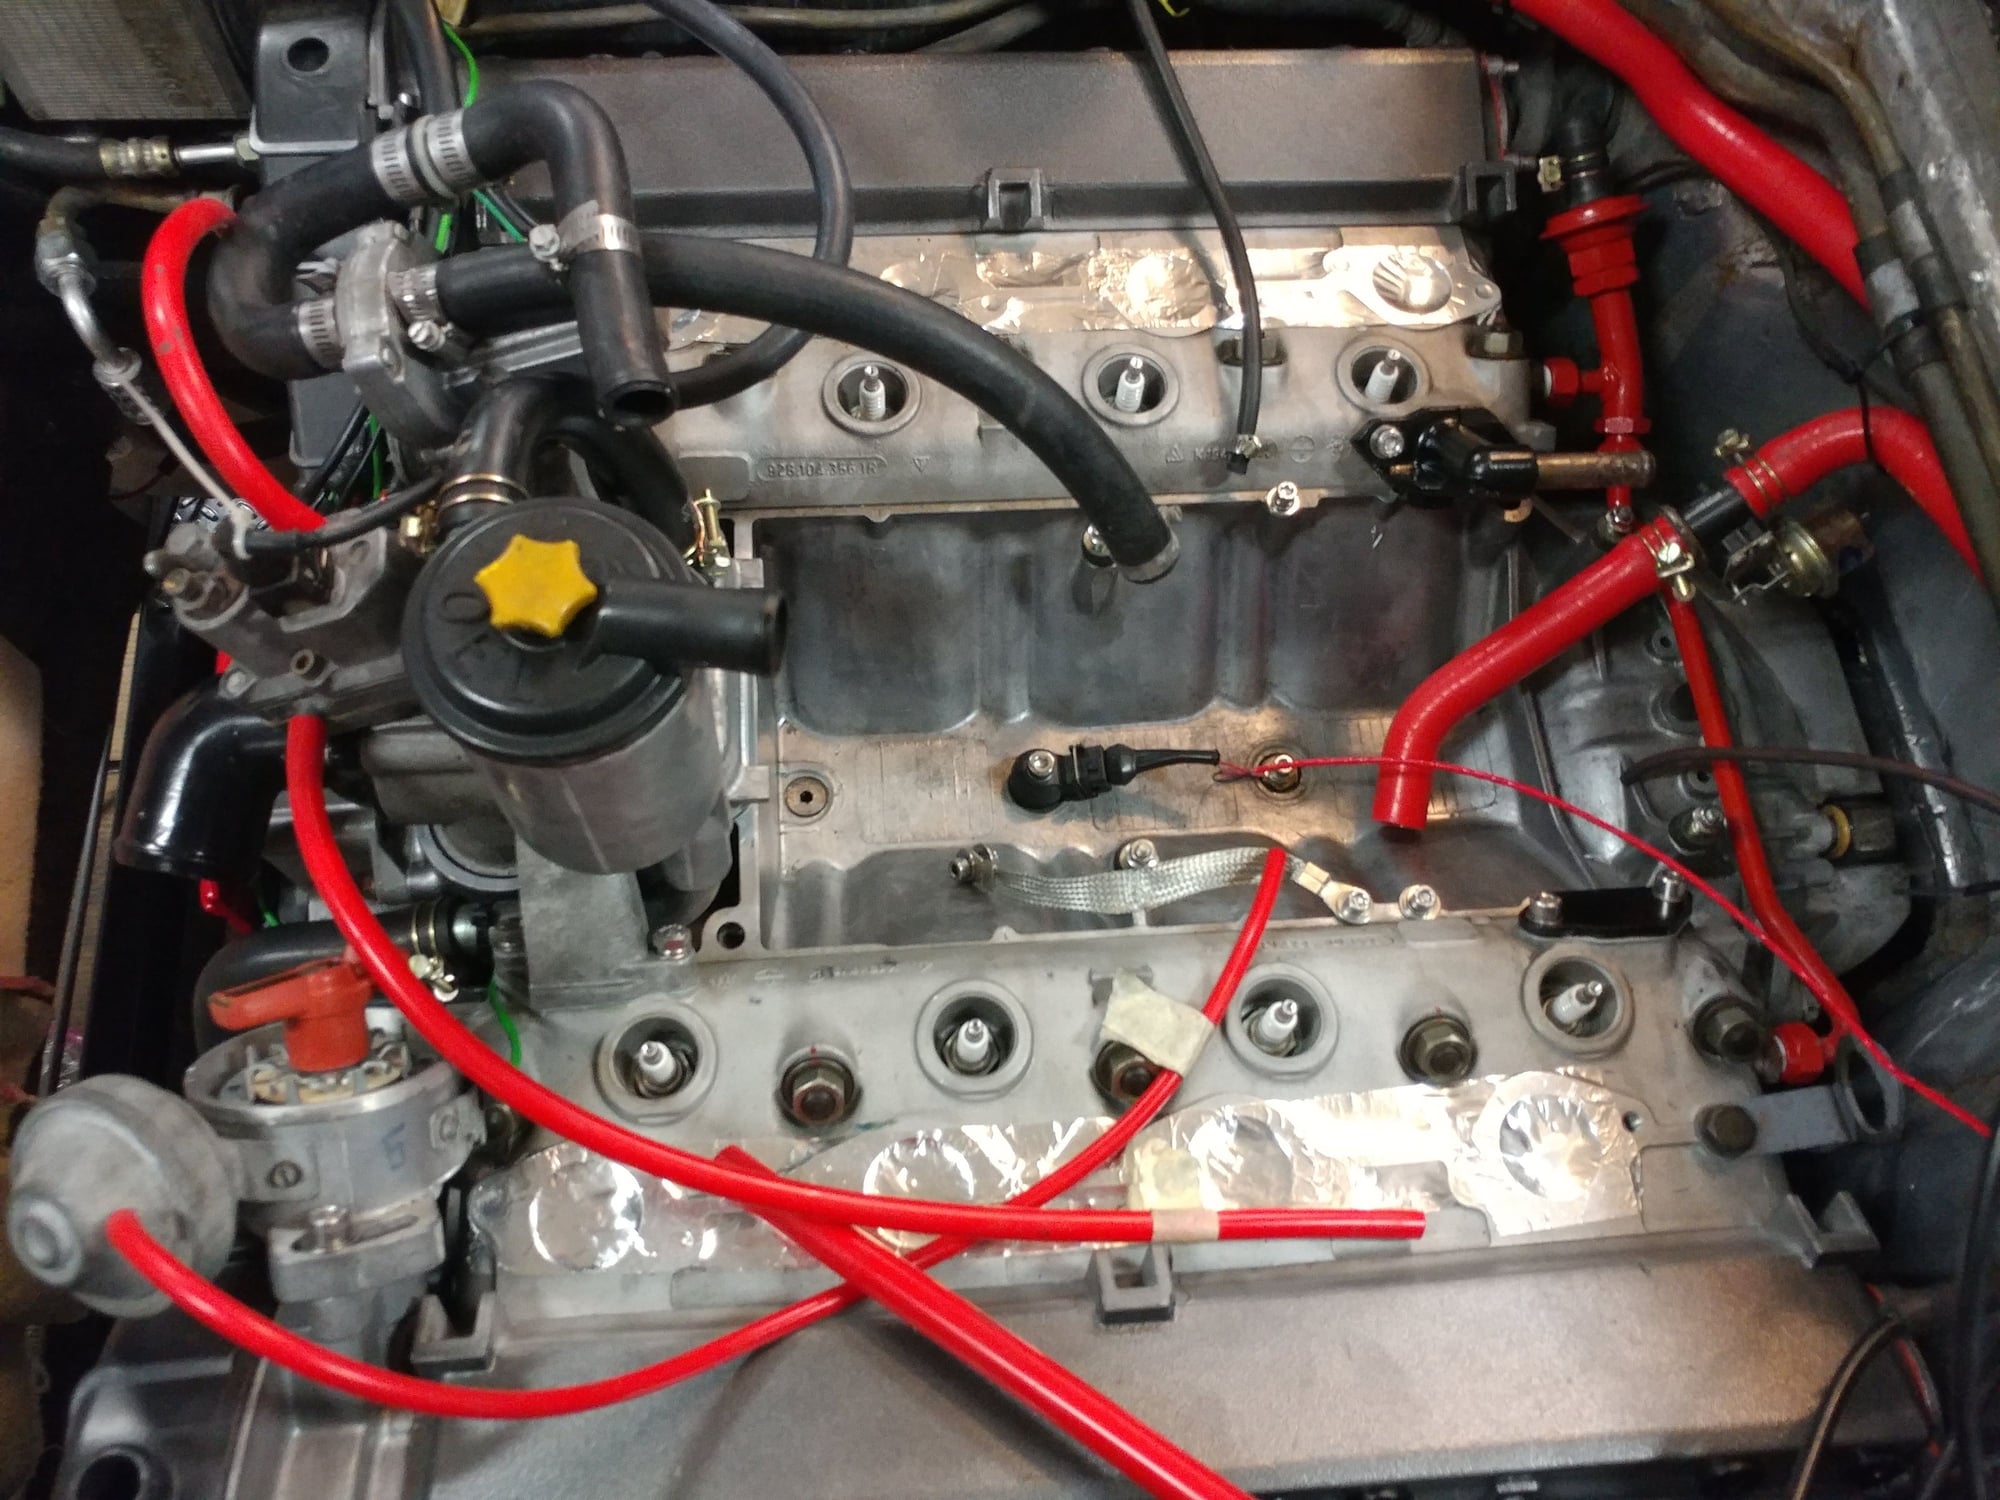
Installed the crankcase ventilation system
Checked and adjusted the distributor position with the motor at TDC and have it pointing directly to the #1 contact on the cap. Installed new rotor and new Bosch cap.
Had a pretty productive day today, mostly under the car.
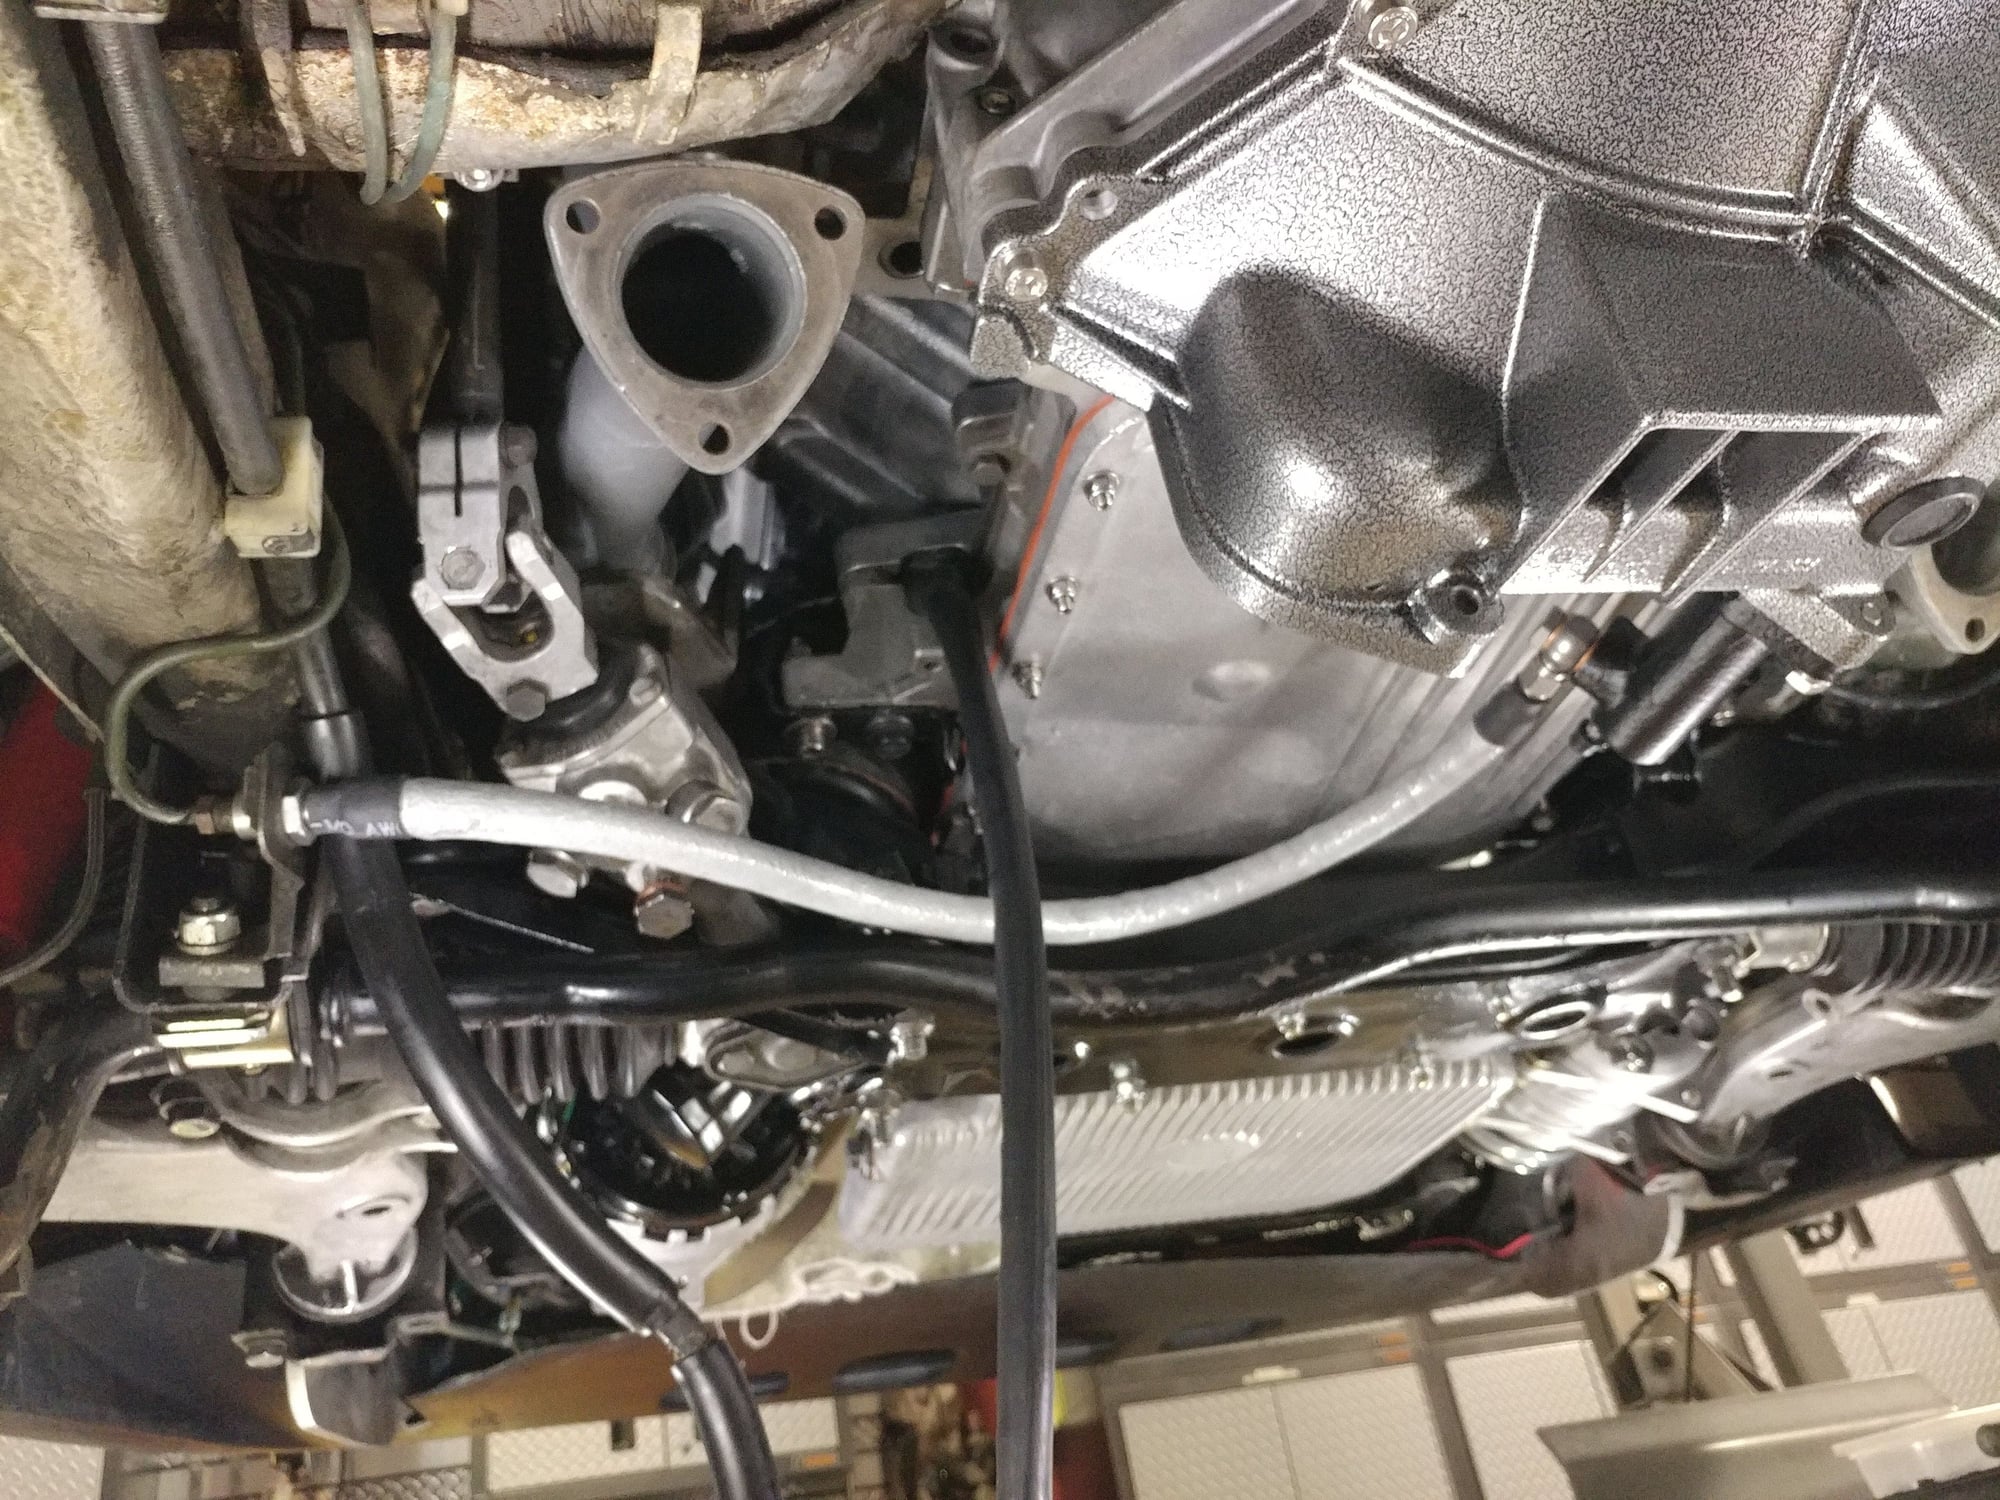
Front bell housing and pulleys are installed and torqued to 218 ft lbs.
Reinstalled the clutch slave cylinder after having to take it loose to install the flywheel lock to torque the crank bolt, then pressurized the brake system with my Motive pressure bleeder and bled the new slave cylinder. Clutch feels super smooth now.
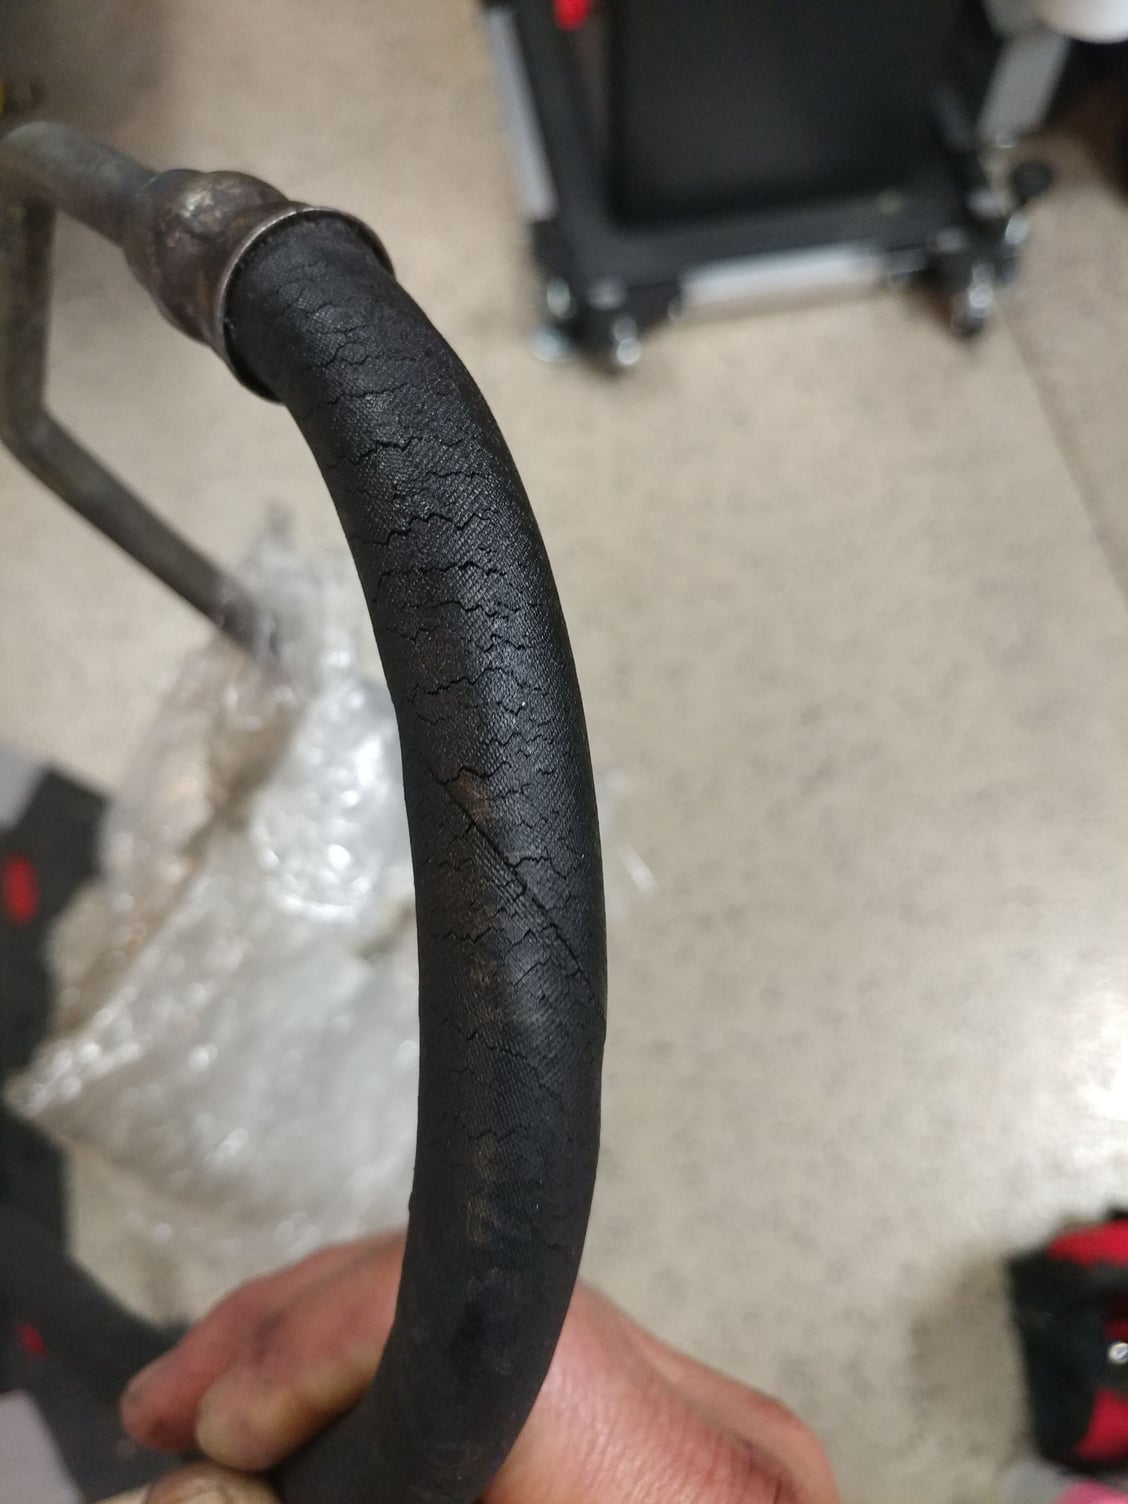
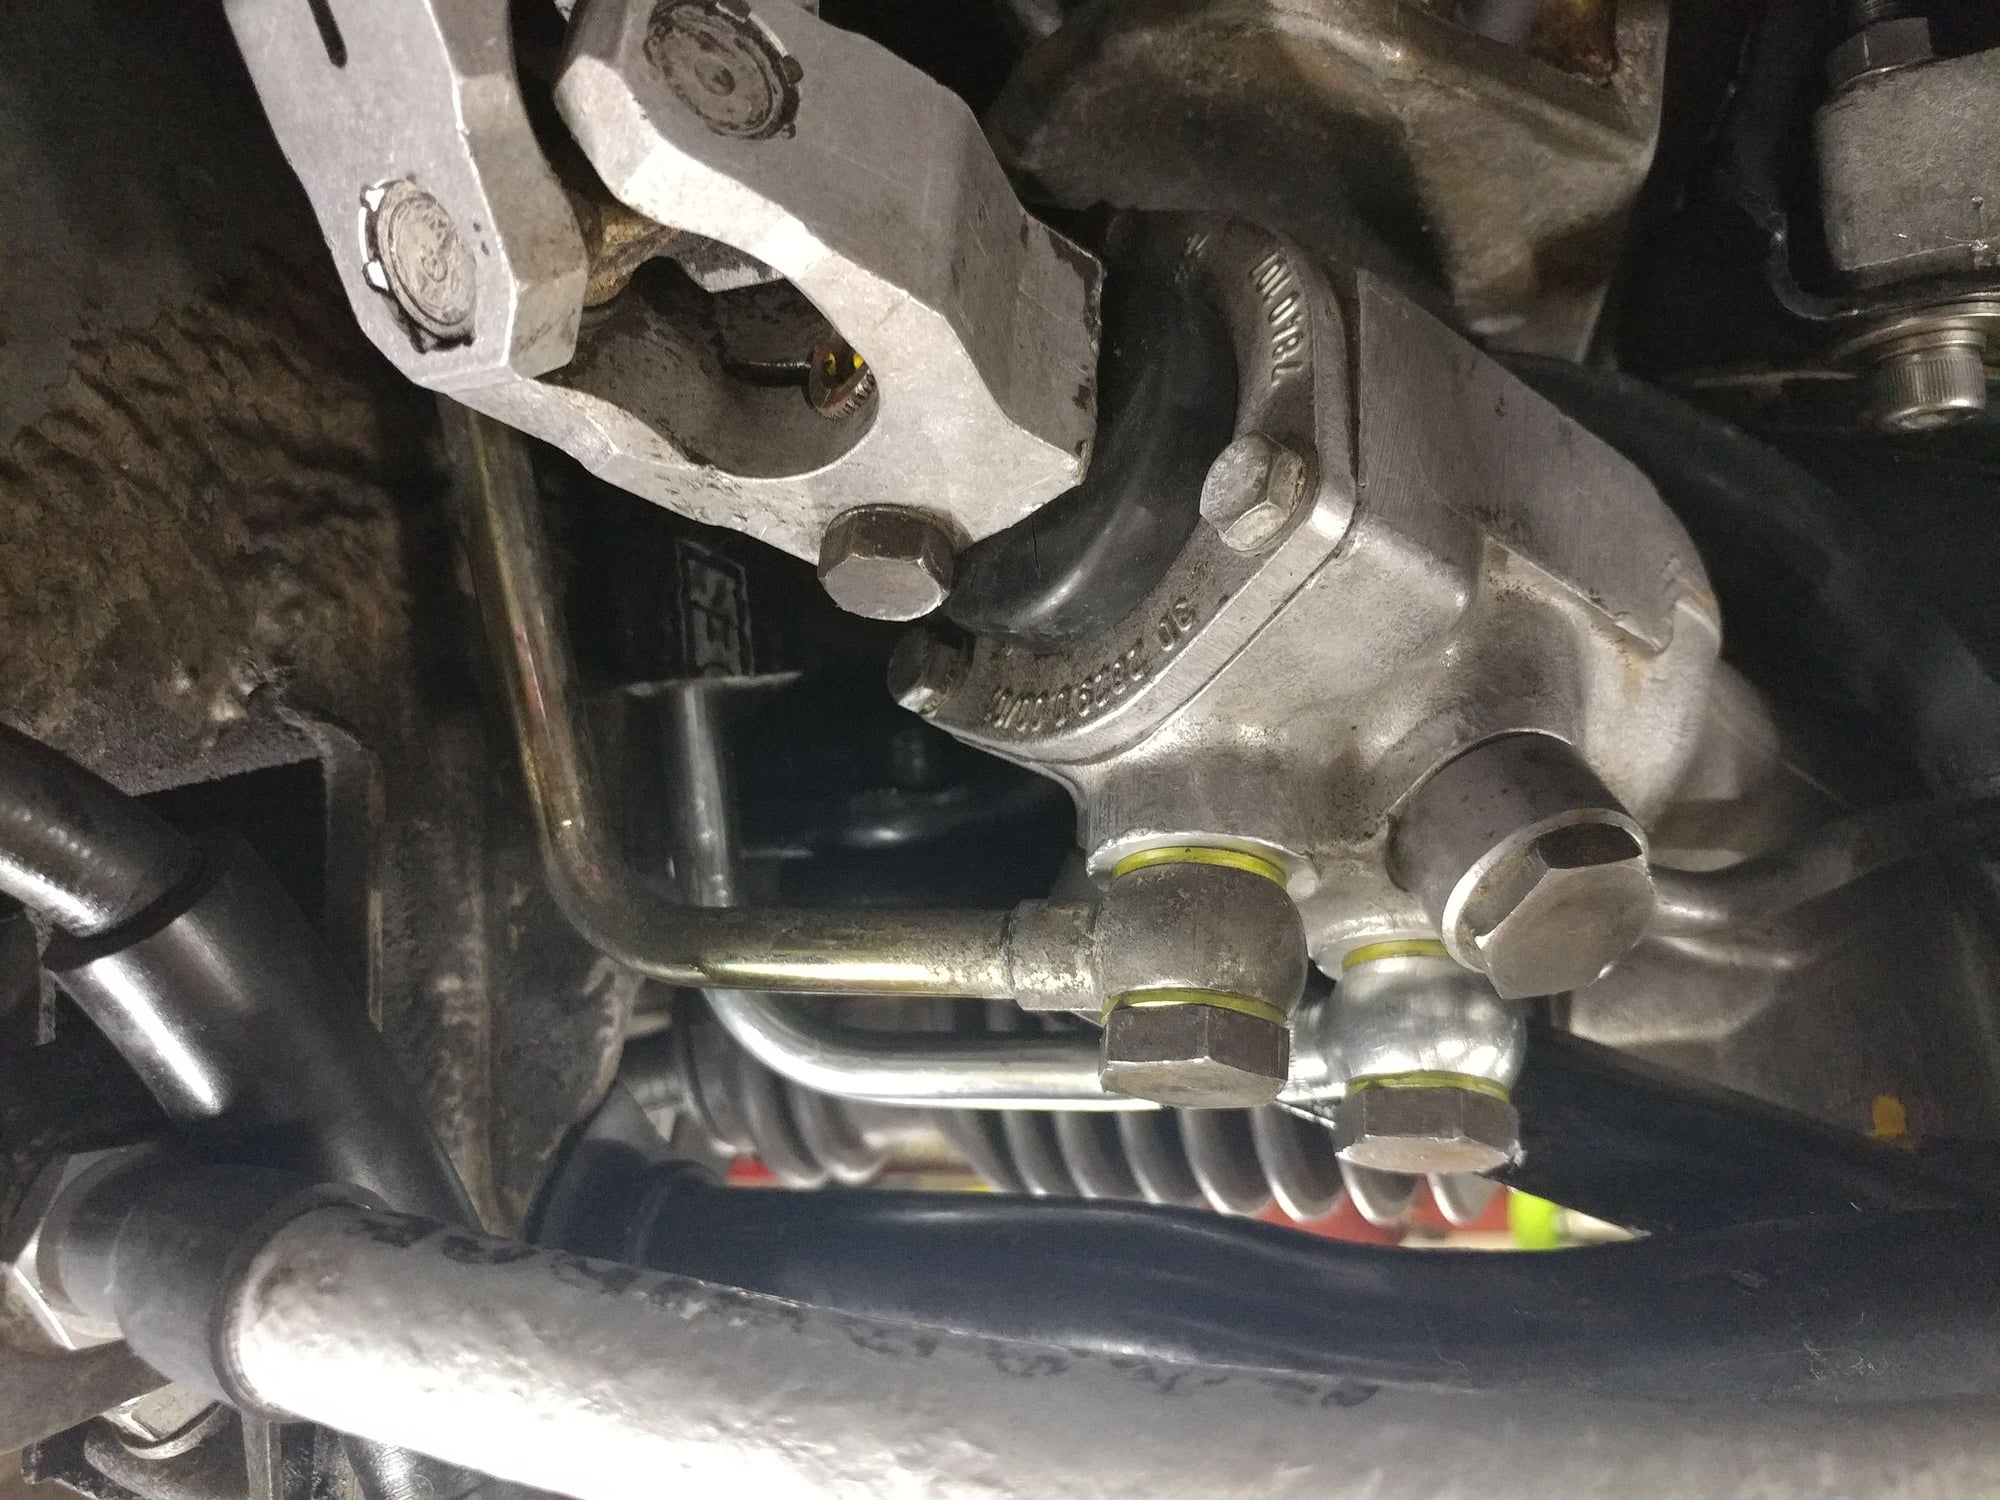
Fire sleeved the correct power steering hose and installed it at both ends. Ran the sleeving down to the last 90 degree bend and left it open so in the event of a leak or burst, it can escape it the bottom away from the heat rather than burst the sleeve. Also received the emergency eBay PS return line Roger helped me source, since a new one from Germany was delayed, but unfortunately, it wasn't as represented in the auction photos and the rubber was cracking. Without any other options and the SITM deadline fast approaching, I used a tubing Cutter to cut the line just below the metal to rubber junction and installed some high pressure hose (just in case), even though this is the low pressure return line, then installed that one into the car too. All the lines are connected to the pump, rack, and reservoir, but I haven't filled the reservoir yet, just in case something needs to come apart again.
Installed the starter and connected the wiring.
Connected the wiring to the alternator.
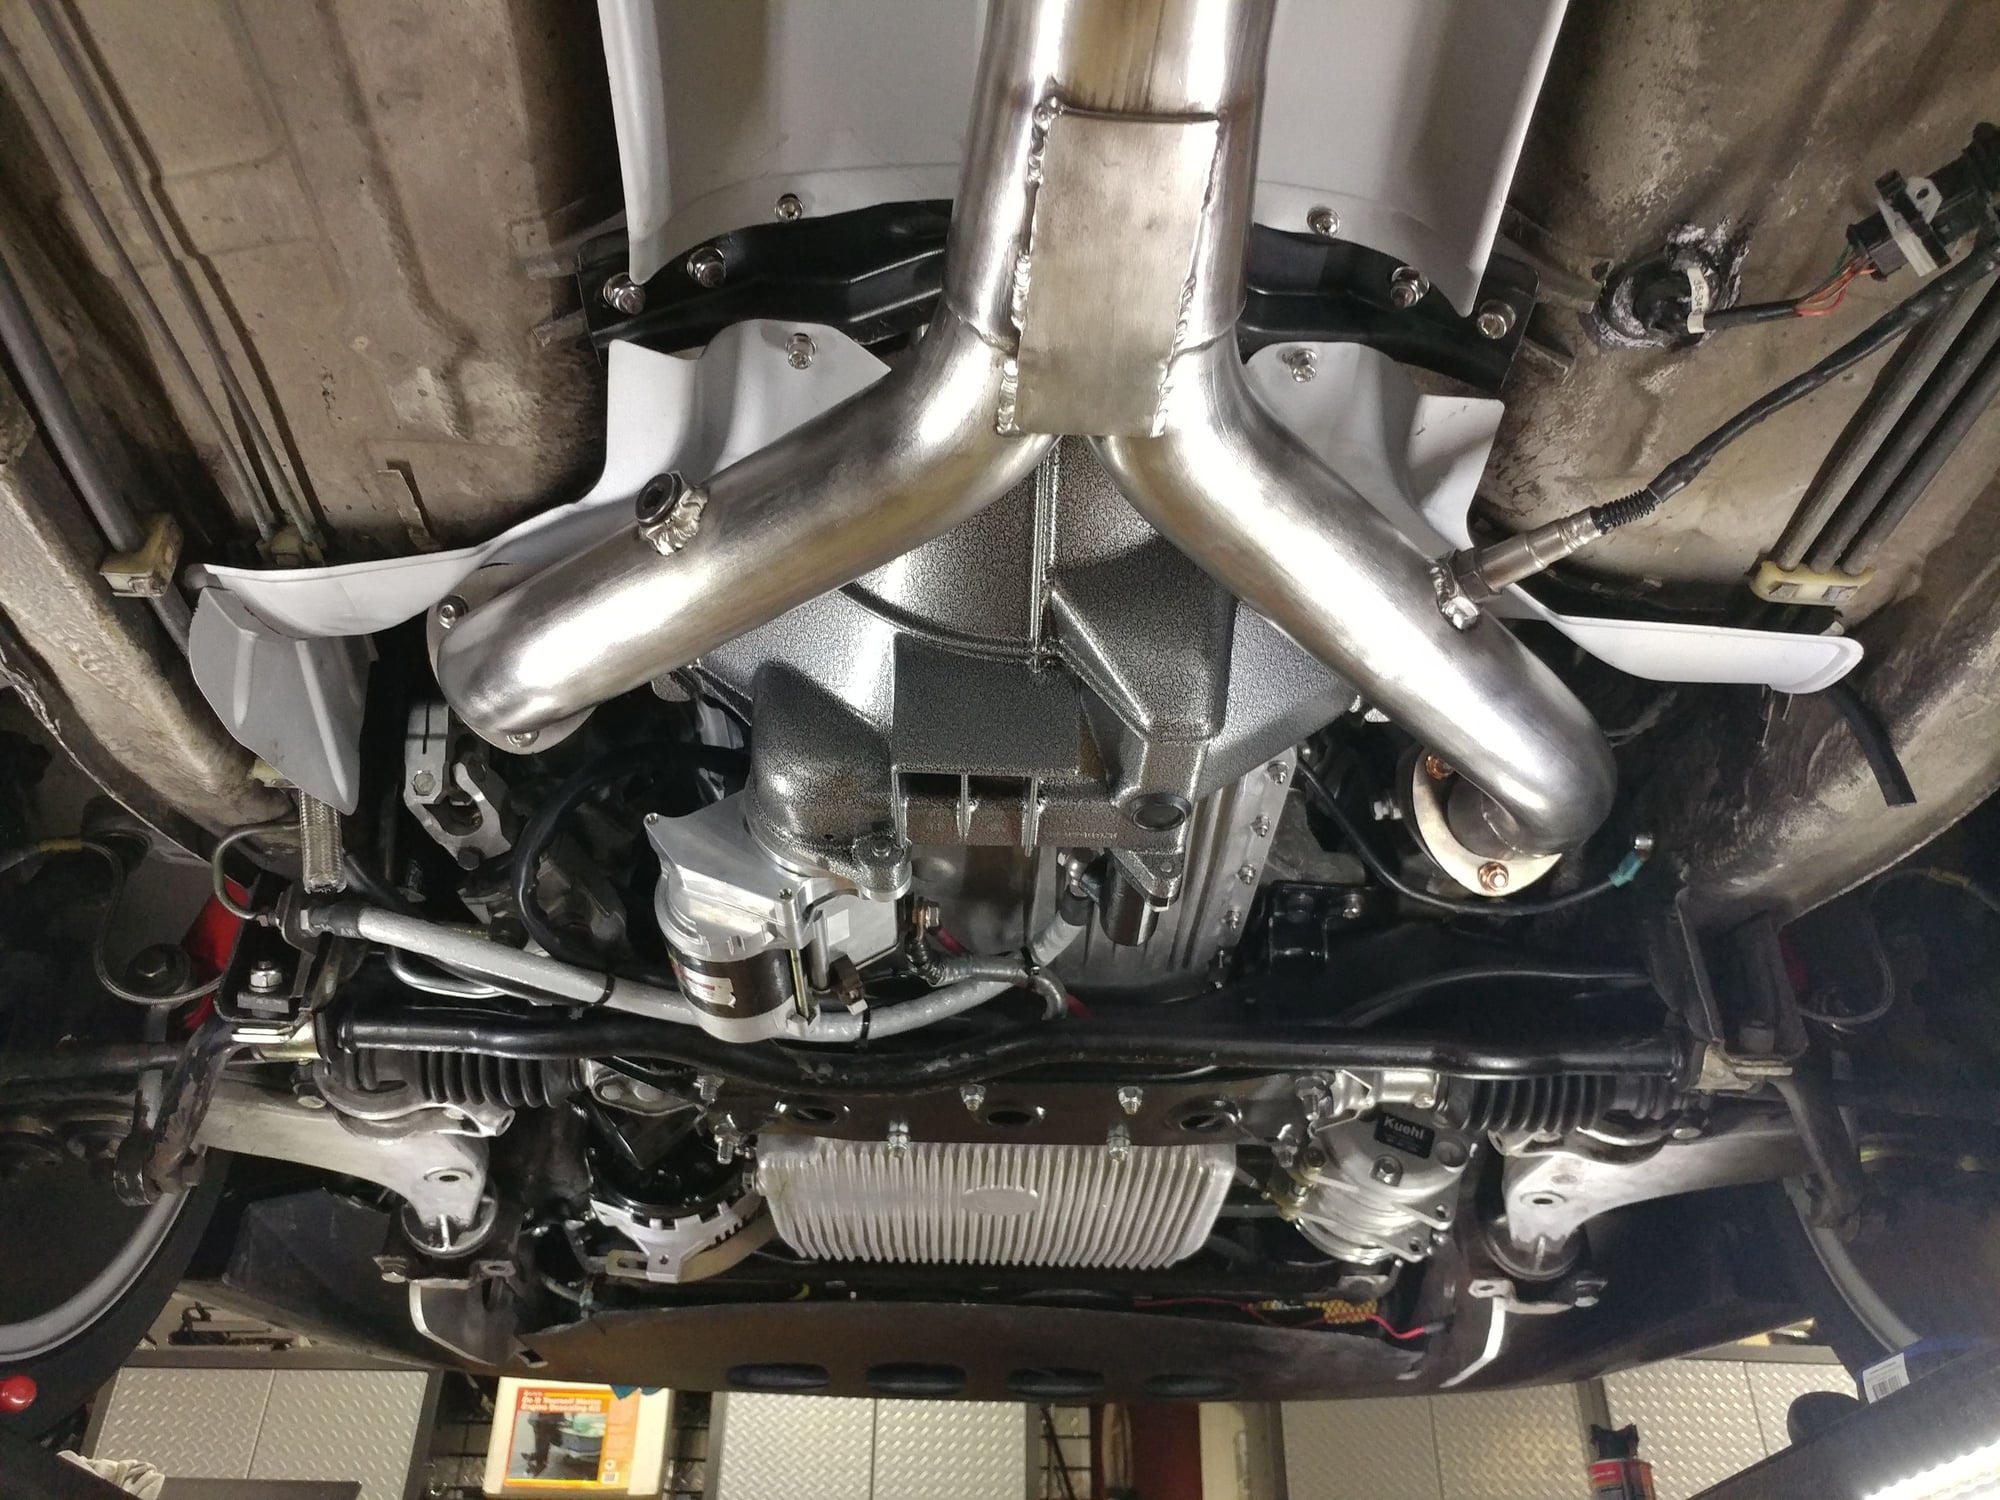
Installed the painted exhaust heat shields, the polished Y-pipe, and the adapter for the SS round tube headers I bought. I don't think this one was made correctly as the holes in the two flanges are indexed slightly relative to each other, yet were too close to allow for two sets of bolts or nuts to meet in the center of the adapter. I put it on the drill press and made the holes larger by a couple of sizes, which then let me pass long bolts through the Y-pipe flange, the adapter, and the header flange to tighten all of them together. It's the only way I could figure out how to make it work.
Tomorrow I'm hoping to get a good bit of the up top work done, like the fuel injection, supercharger, intake, etc so I can then start tuning later this weekend or early next week.
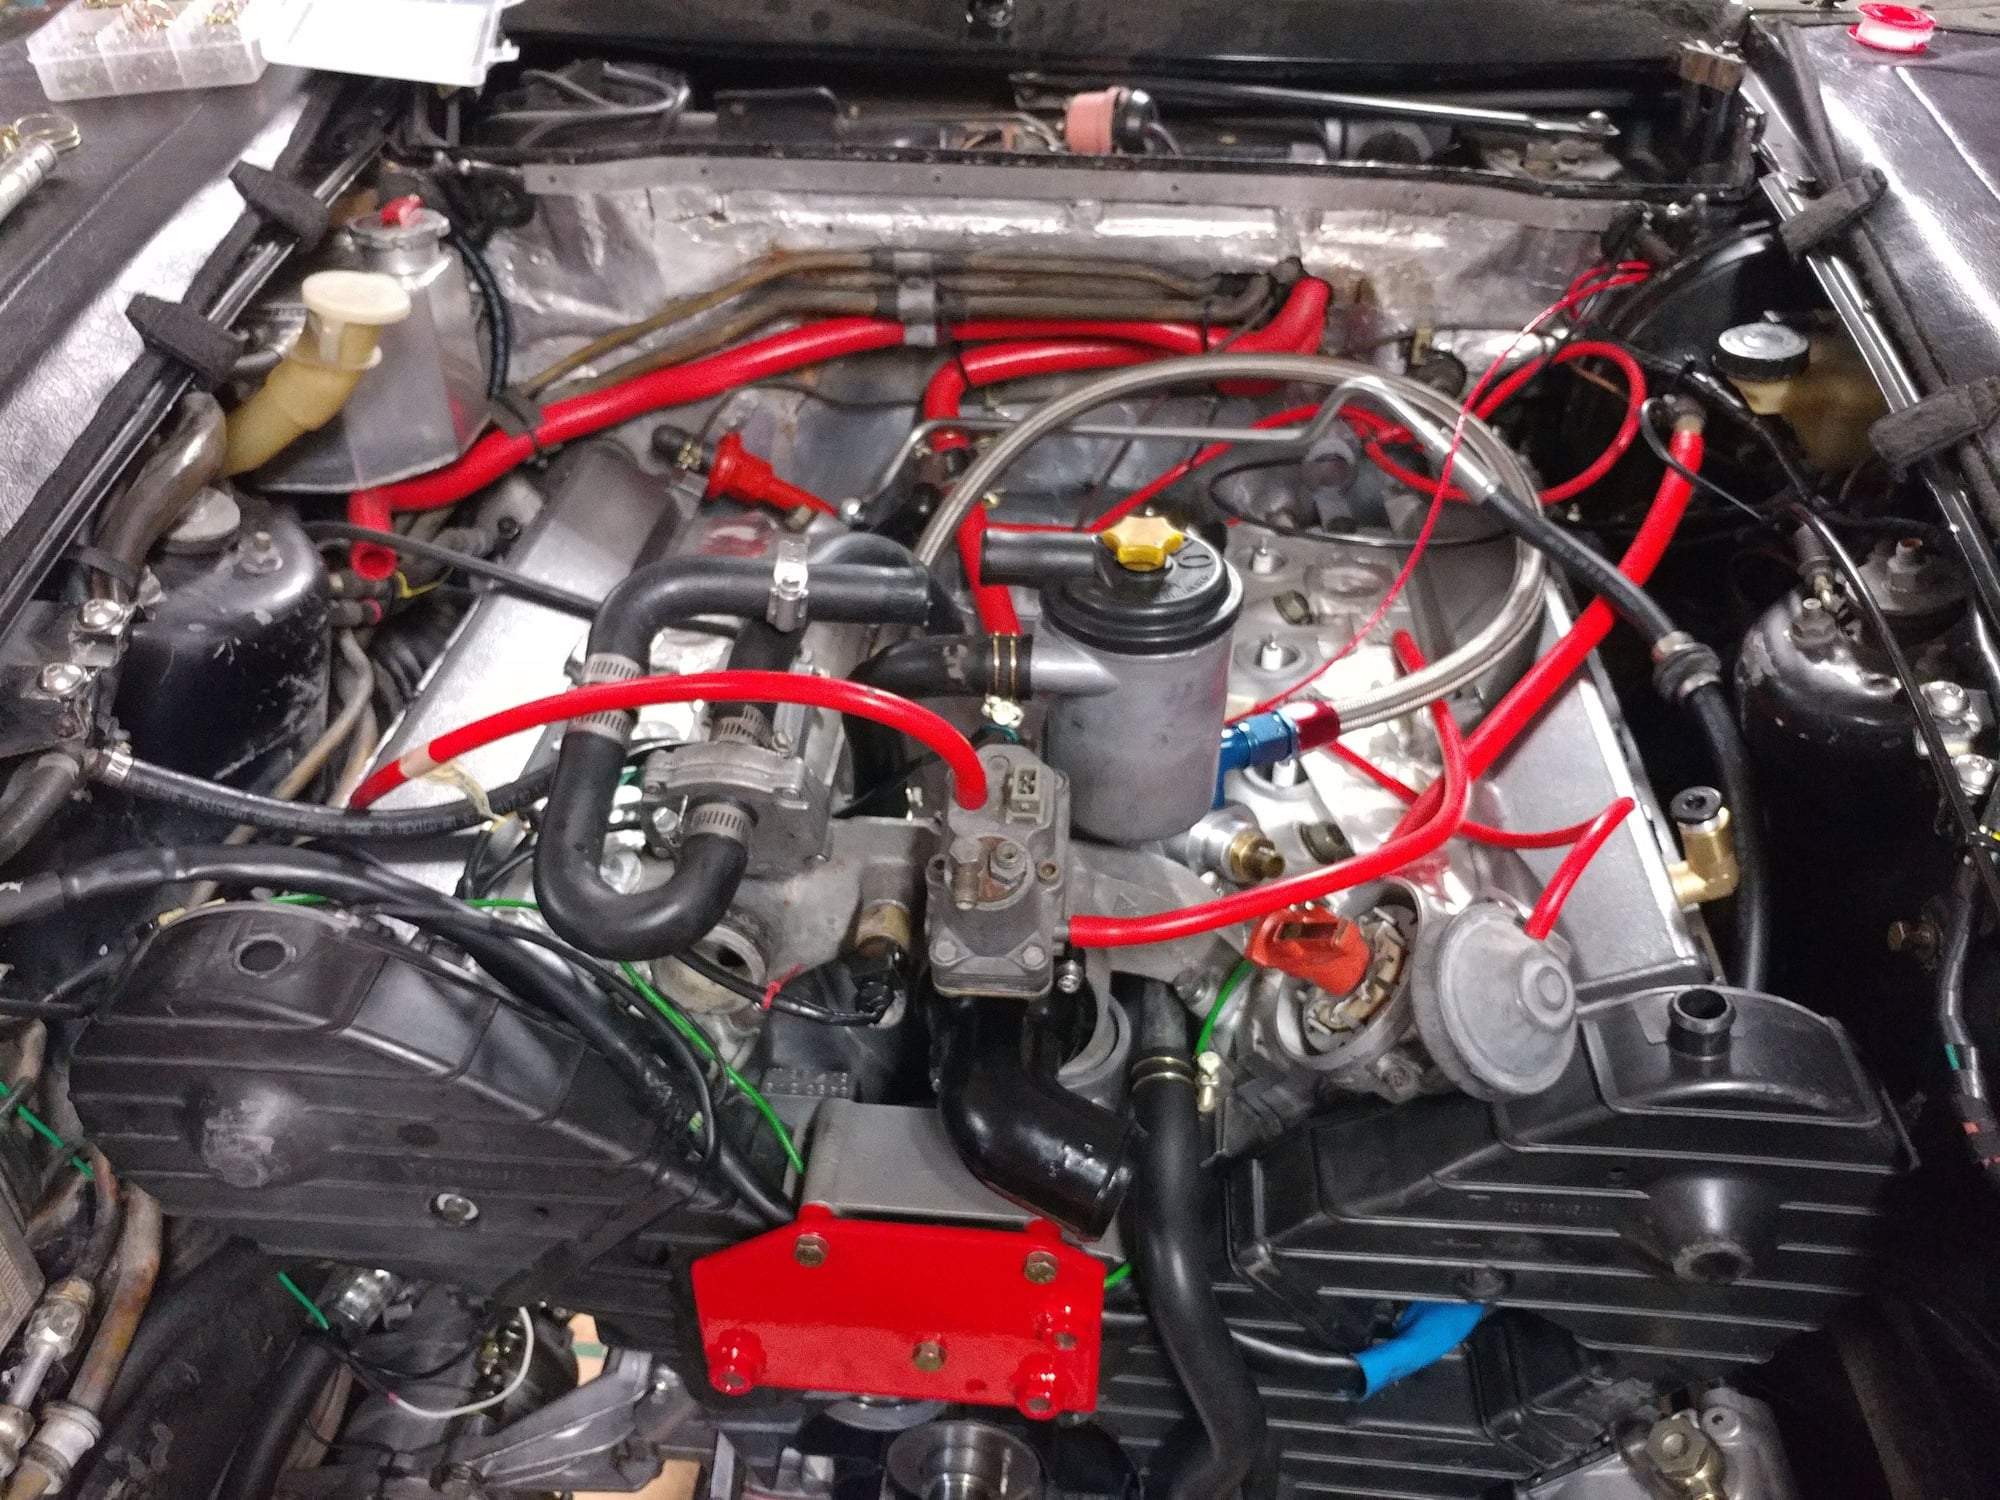
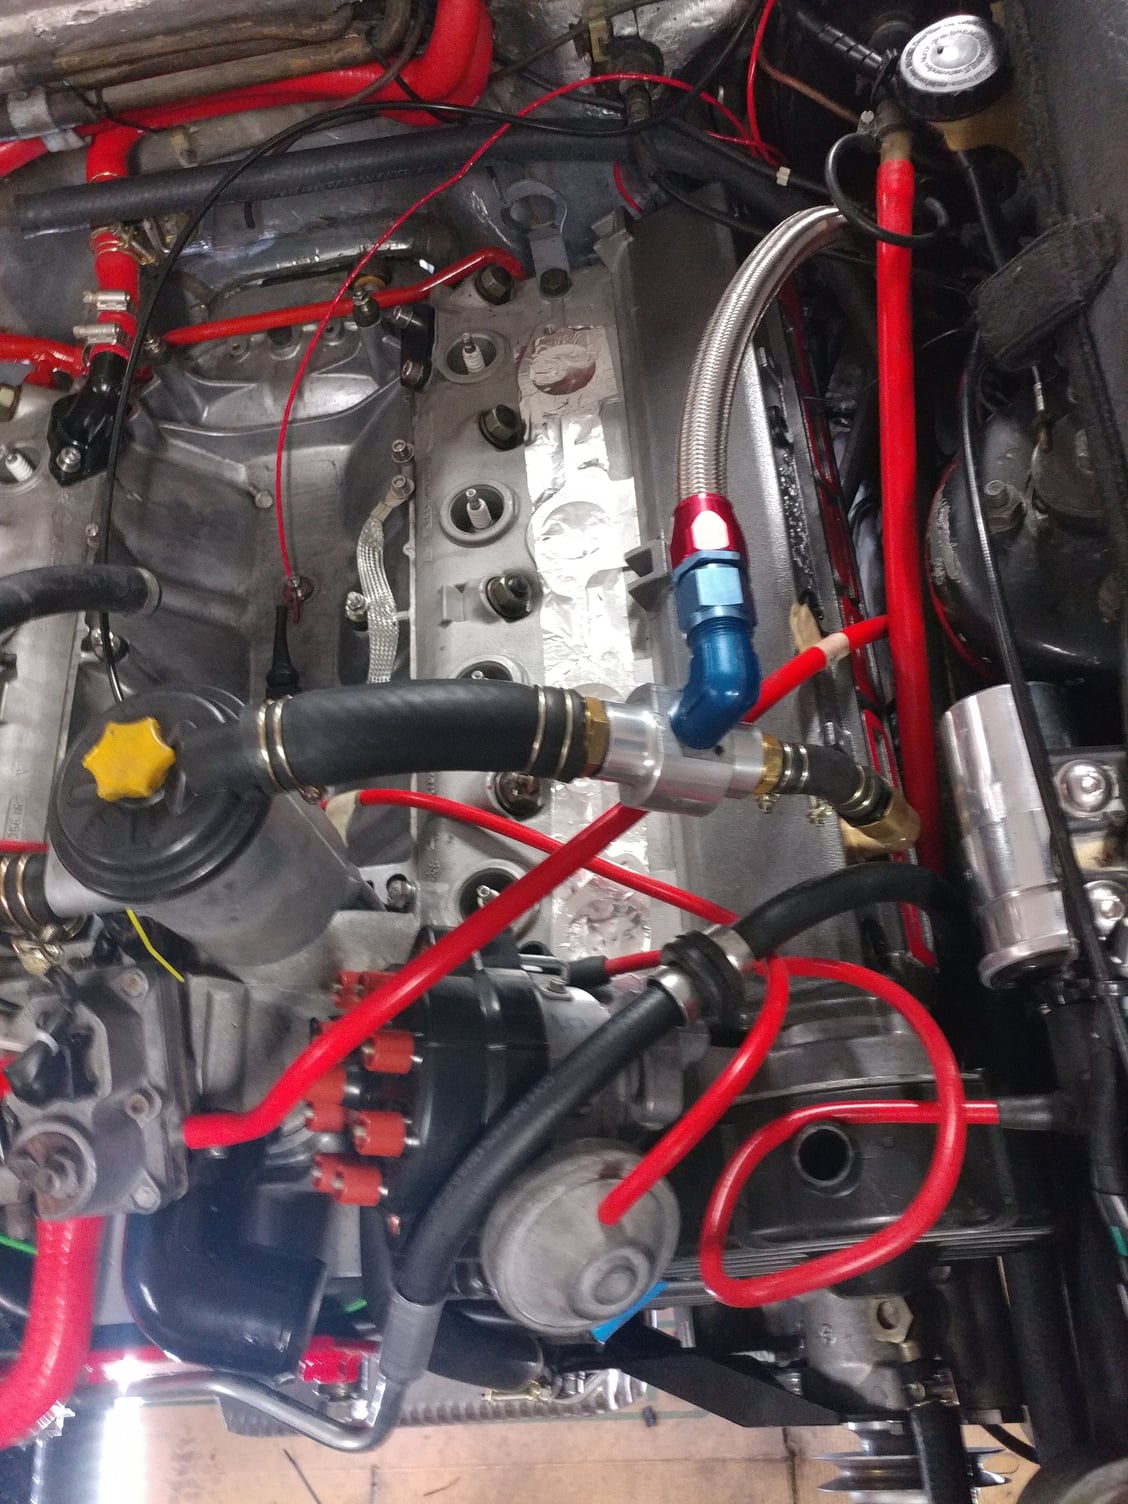
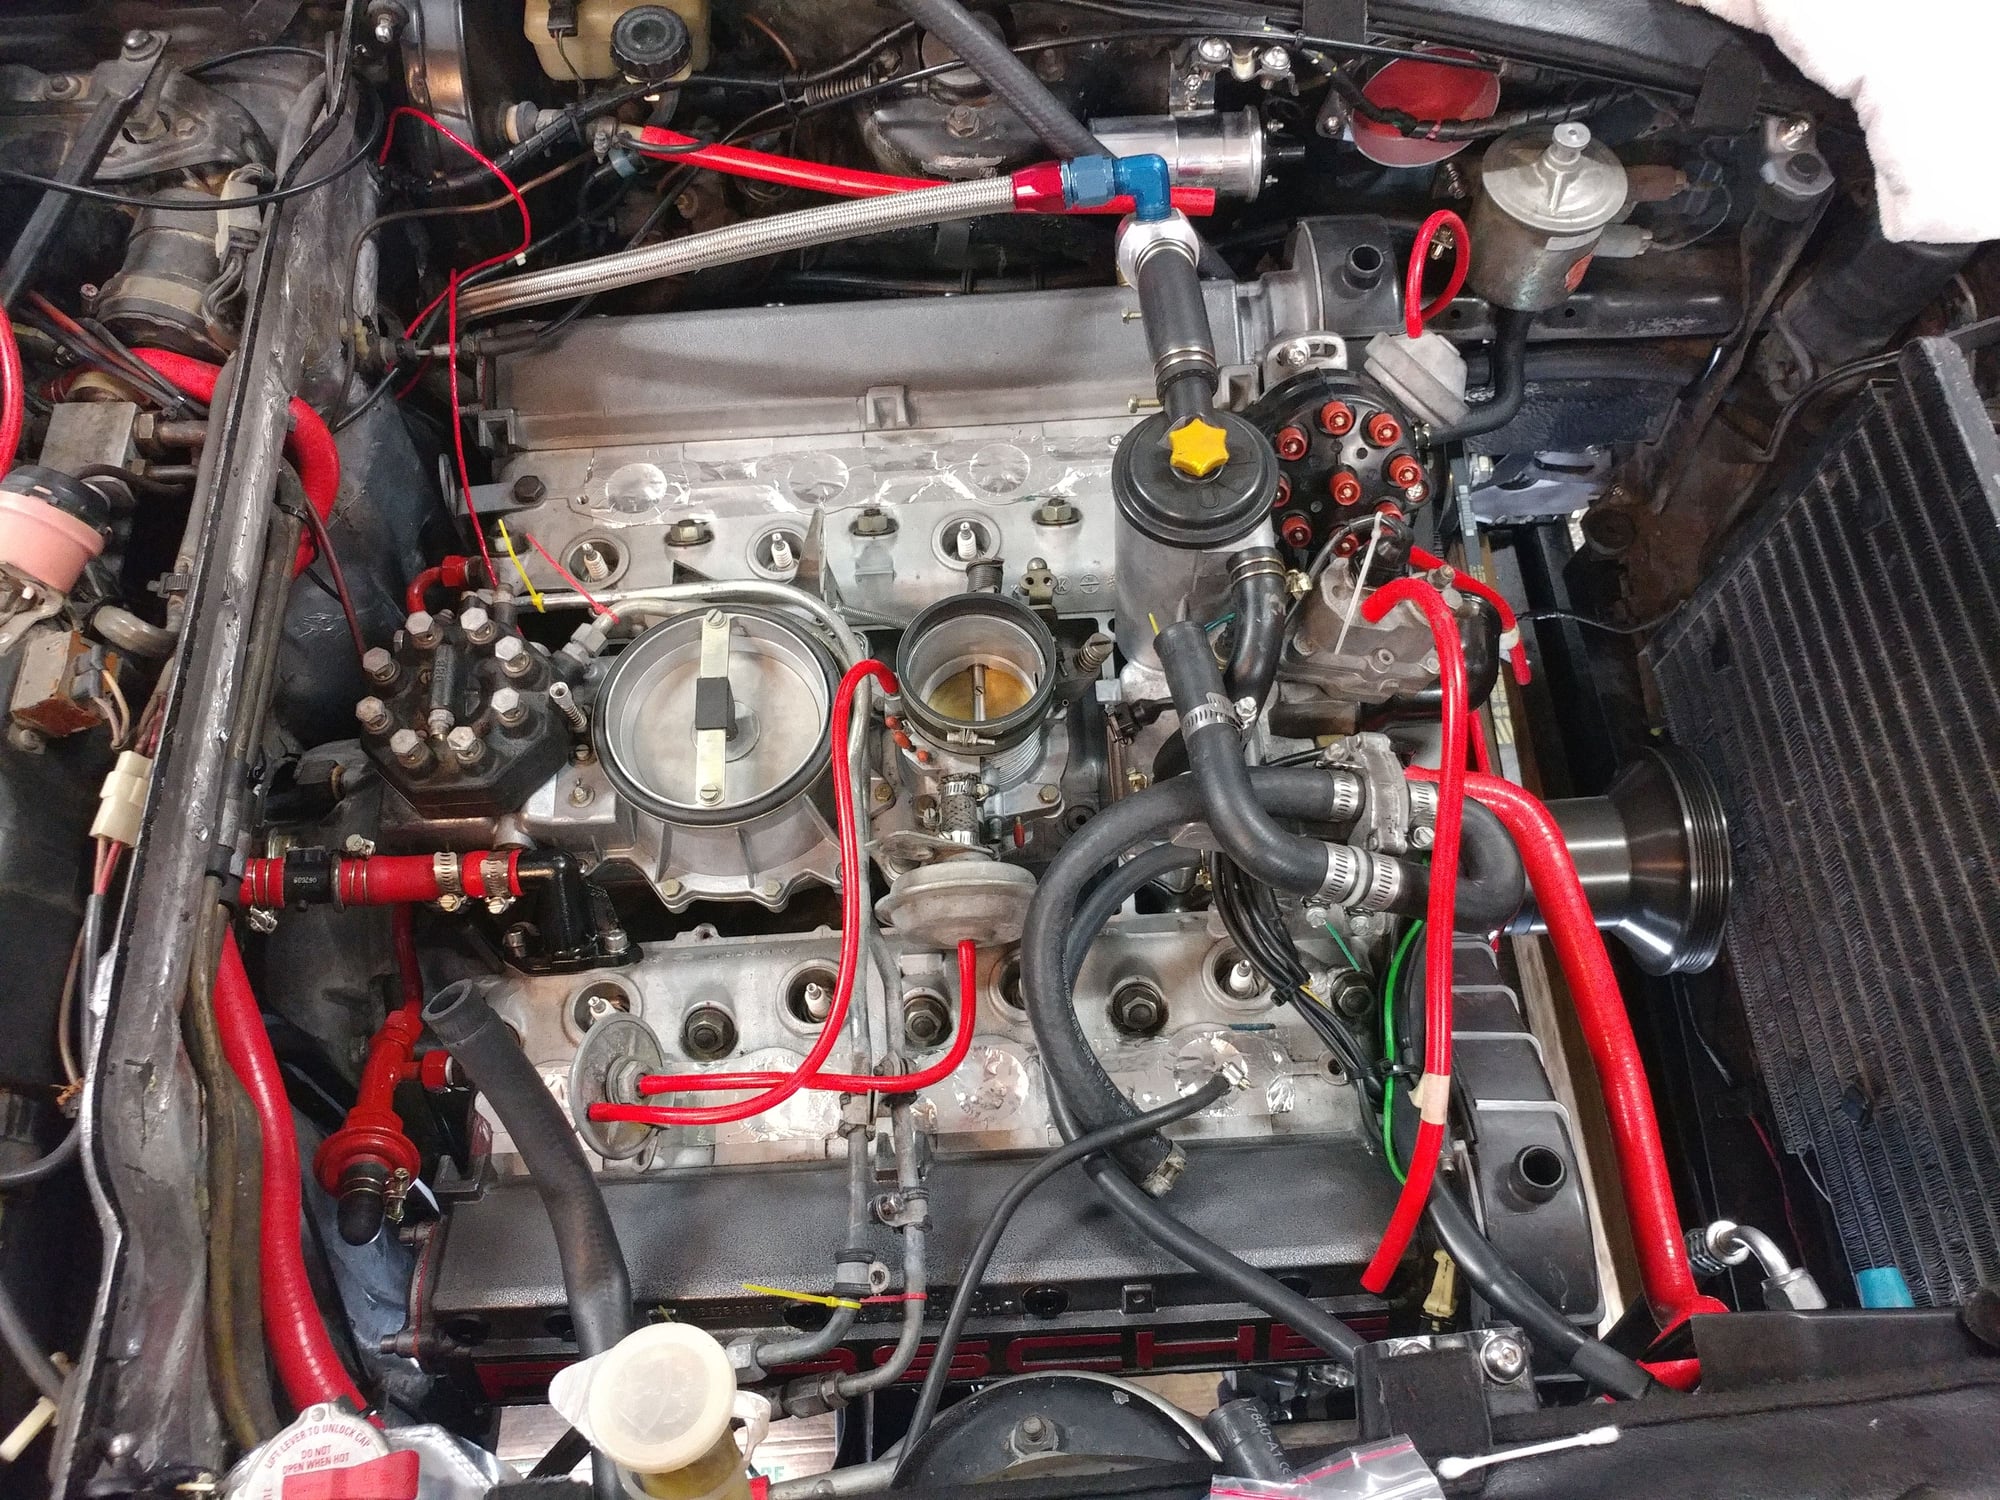
K-Jet setup is in place with the two primary fuel lines connected.
That took a little work to get it to clear the knock sensor I installed in the valley. Had to swap the position of the knock sensor and the ground, which is a little less than ideal as the knock sensor is now at the end instead of the center, and used slightly taller isolation mounts for the fueling module. I don't think that will cause an issue with the manifold.
Got 2 of the 3 new Greg Brown fuel supply lines installed. After struggling with different combinations for a few hours last night and not finding a combination that works since it seems to need a smaller fitting on the end and another 90 degree bend like the cold start line has for my application, so I used the cold start line in that spot to keep the line profile as low as possible at the front of the motor and reused my old cold start injector line until I can sort it out.
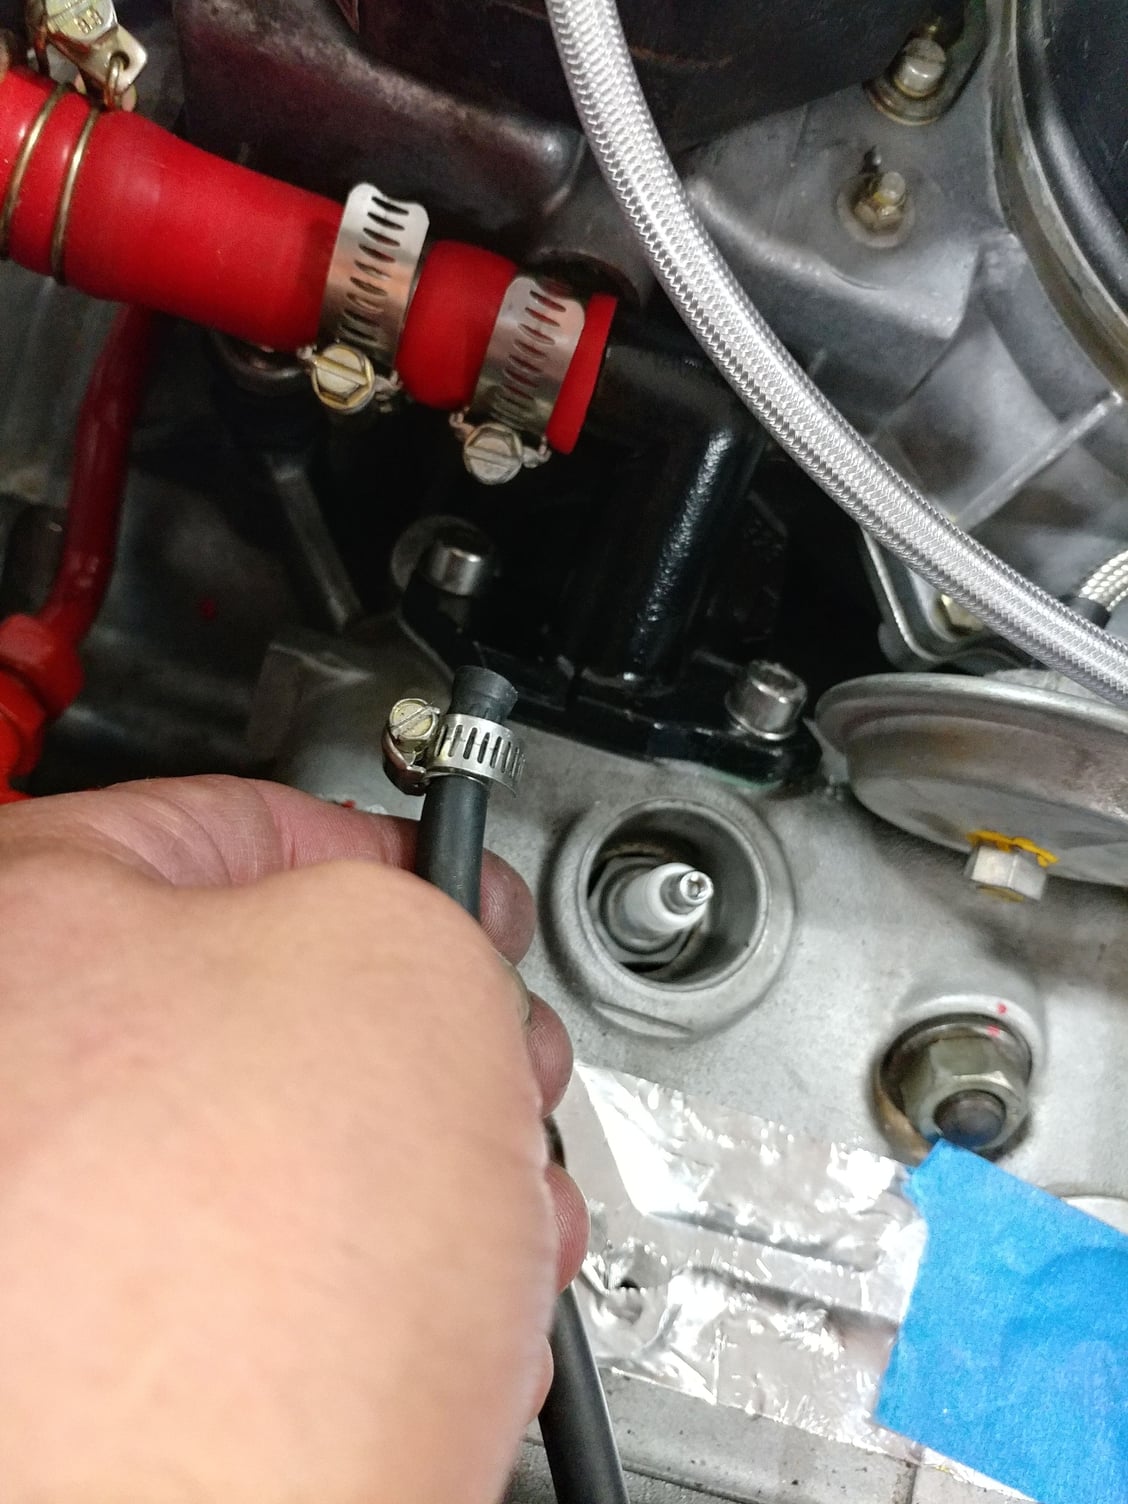
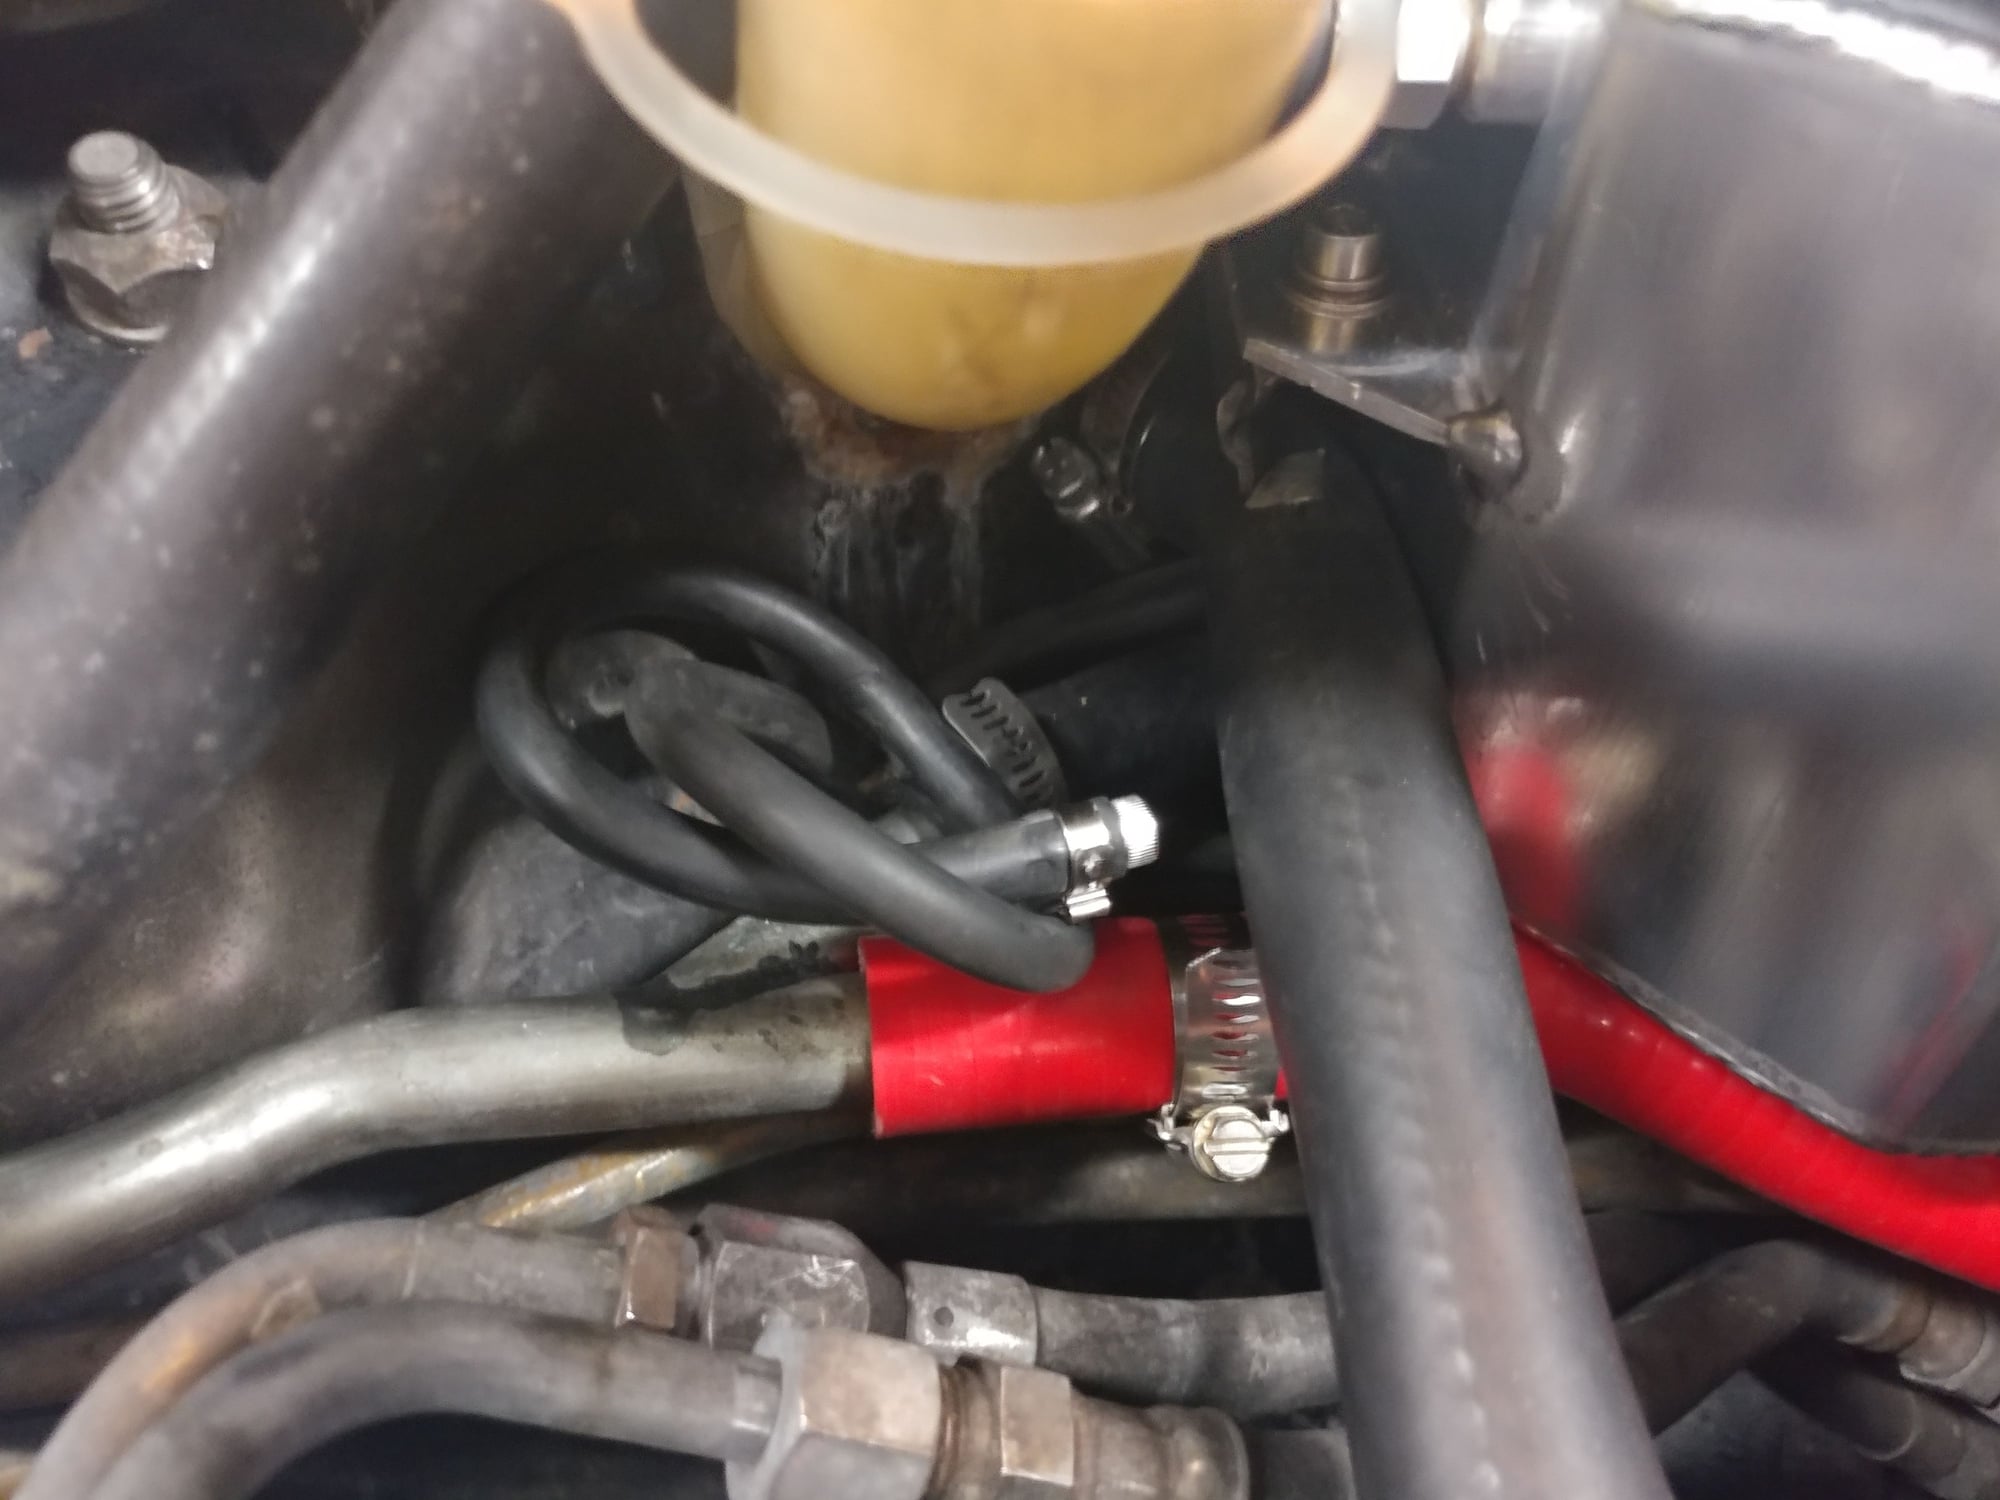
Traced and hooked up a number of the vacuum lines.
That's it for today as we're hitting the lake in the 95 degree heat.
Looks great, Pete. Don't forget to hook up the retard line to the distributor per <1982 TB connections. (The one way valve too).
Thanks for posting,
Dave
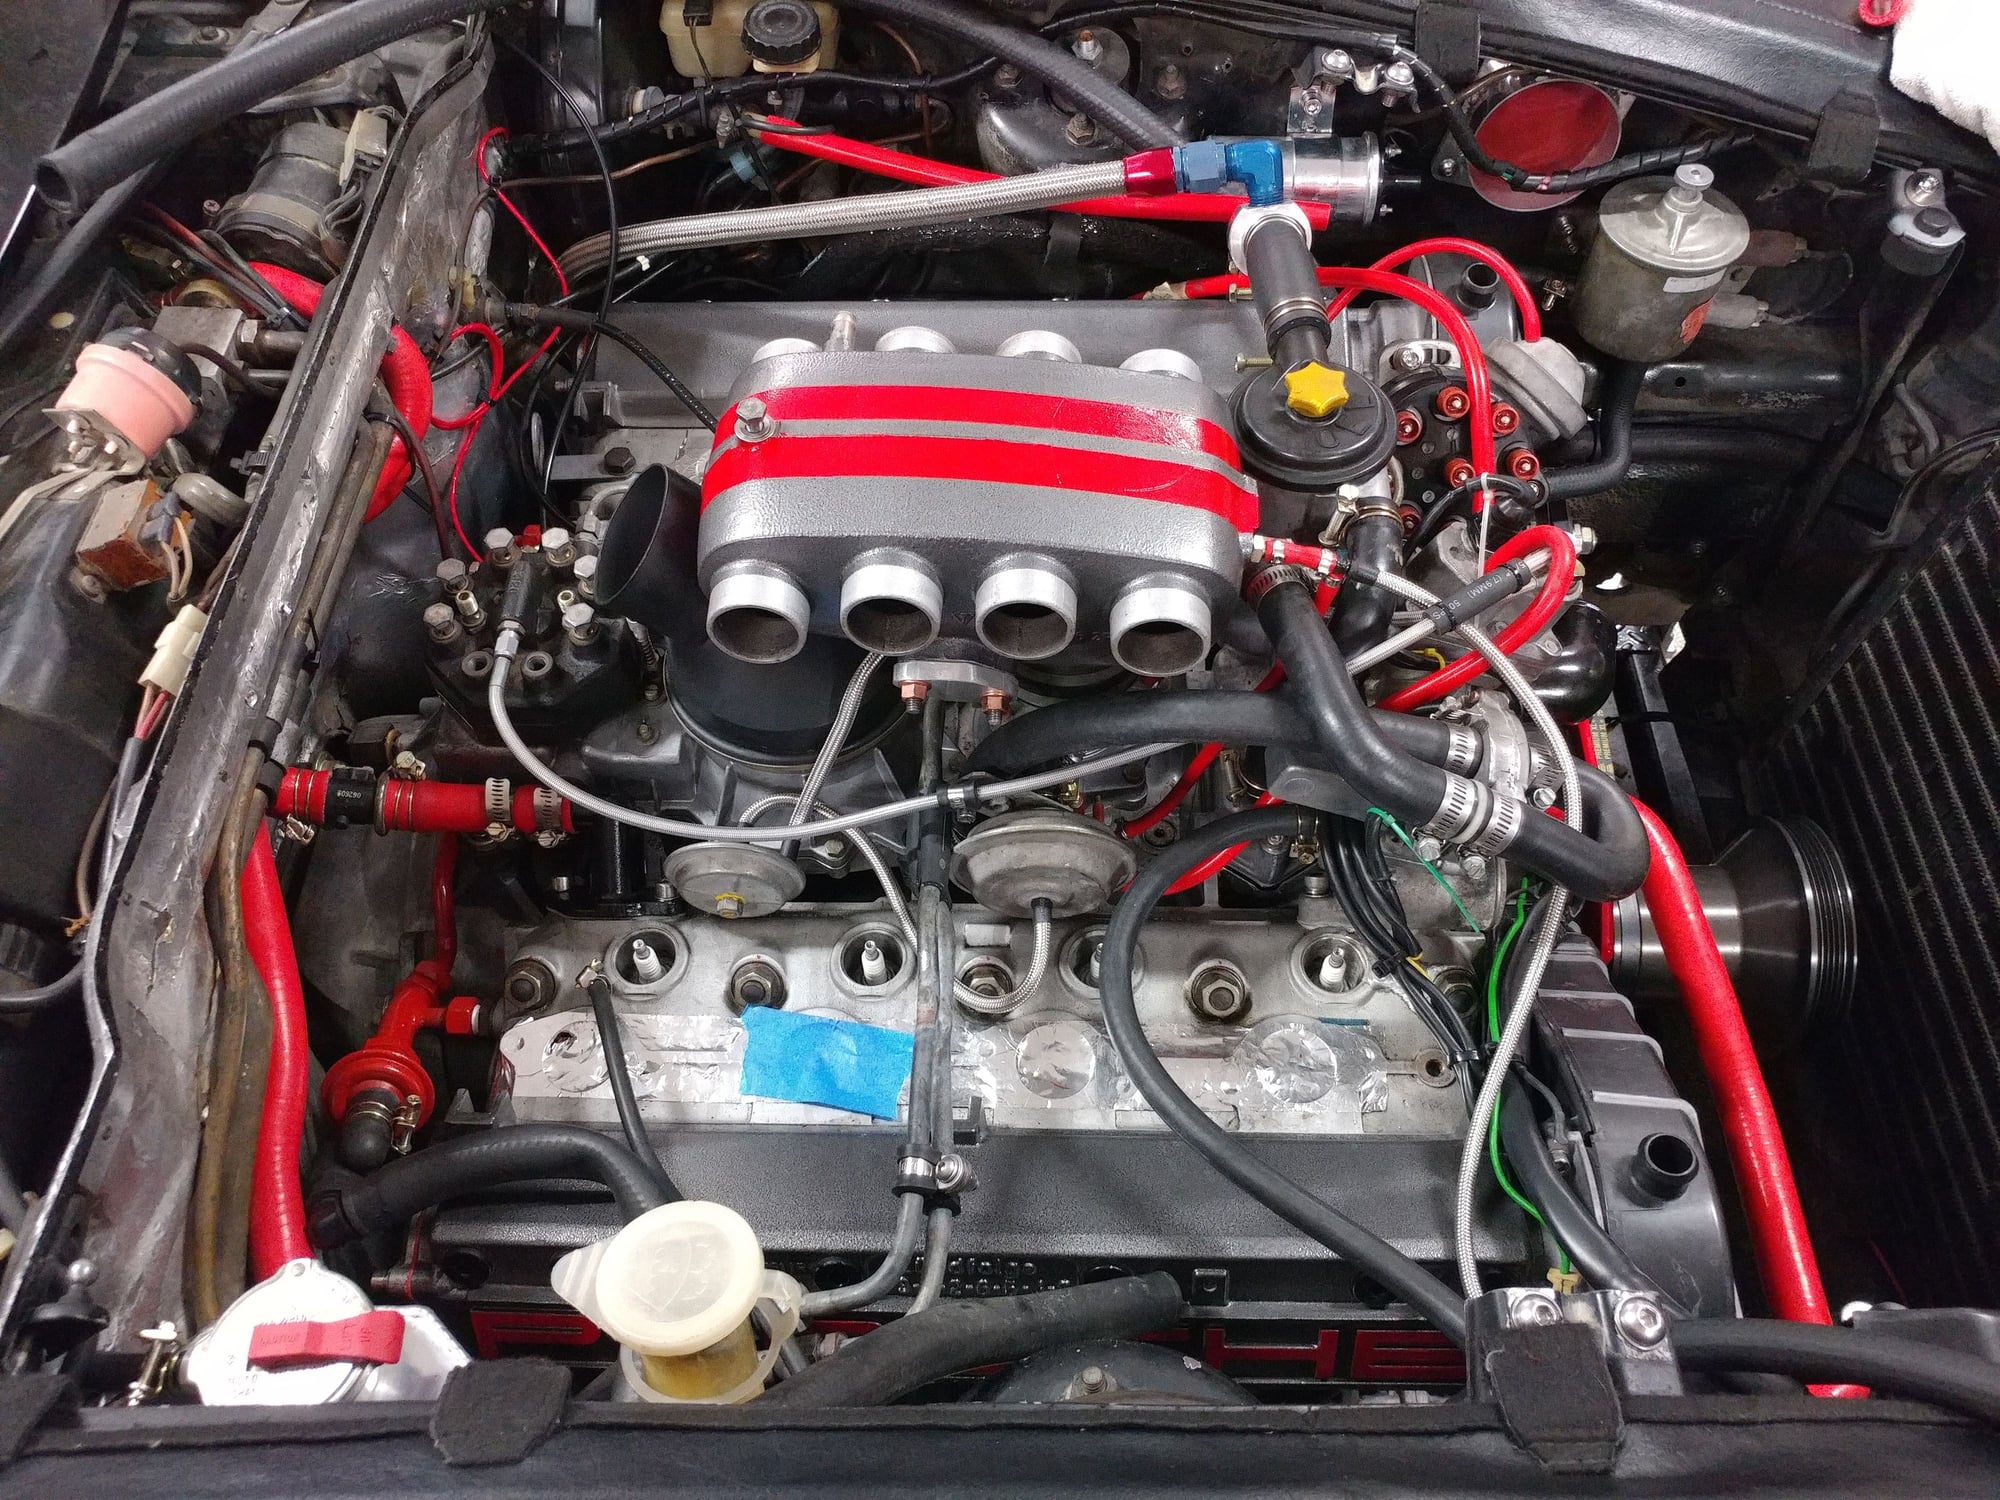
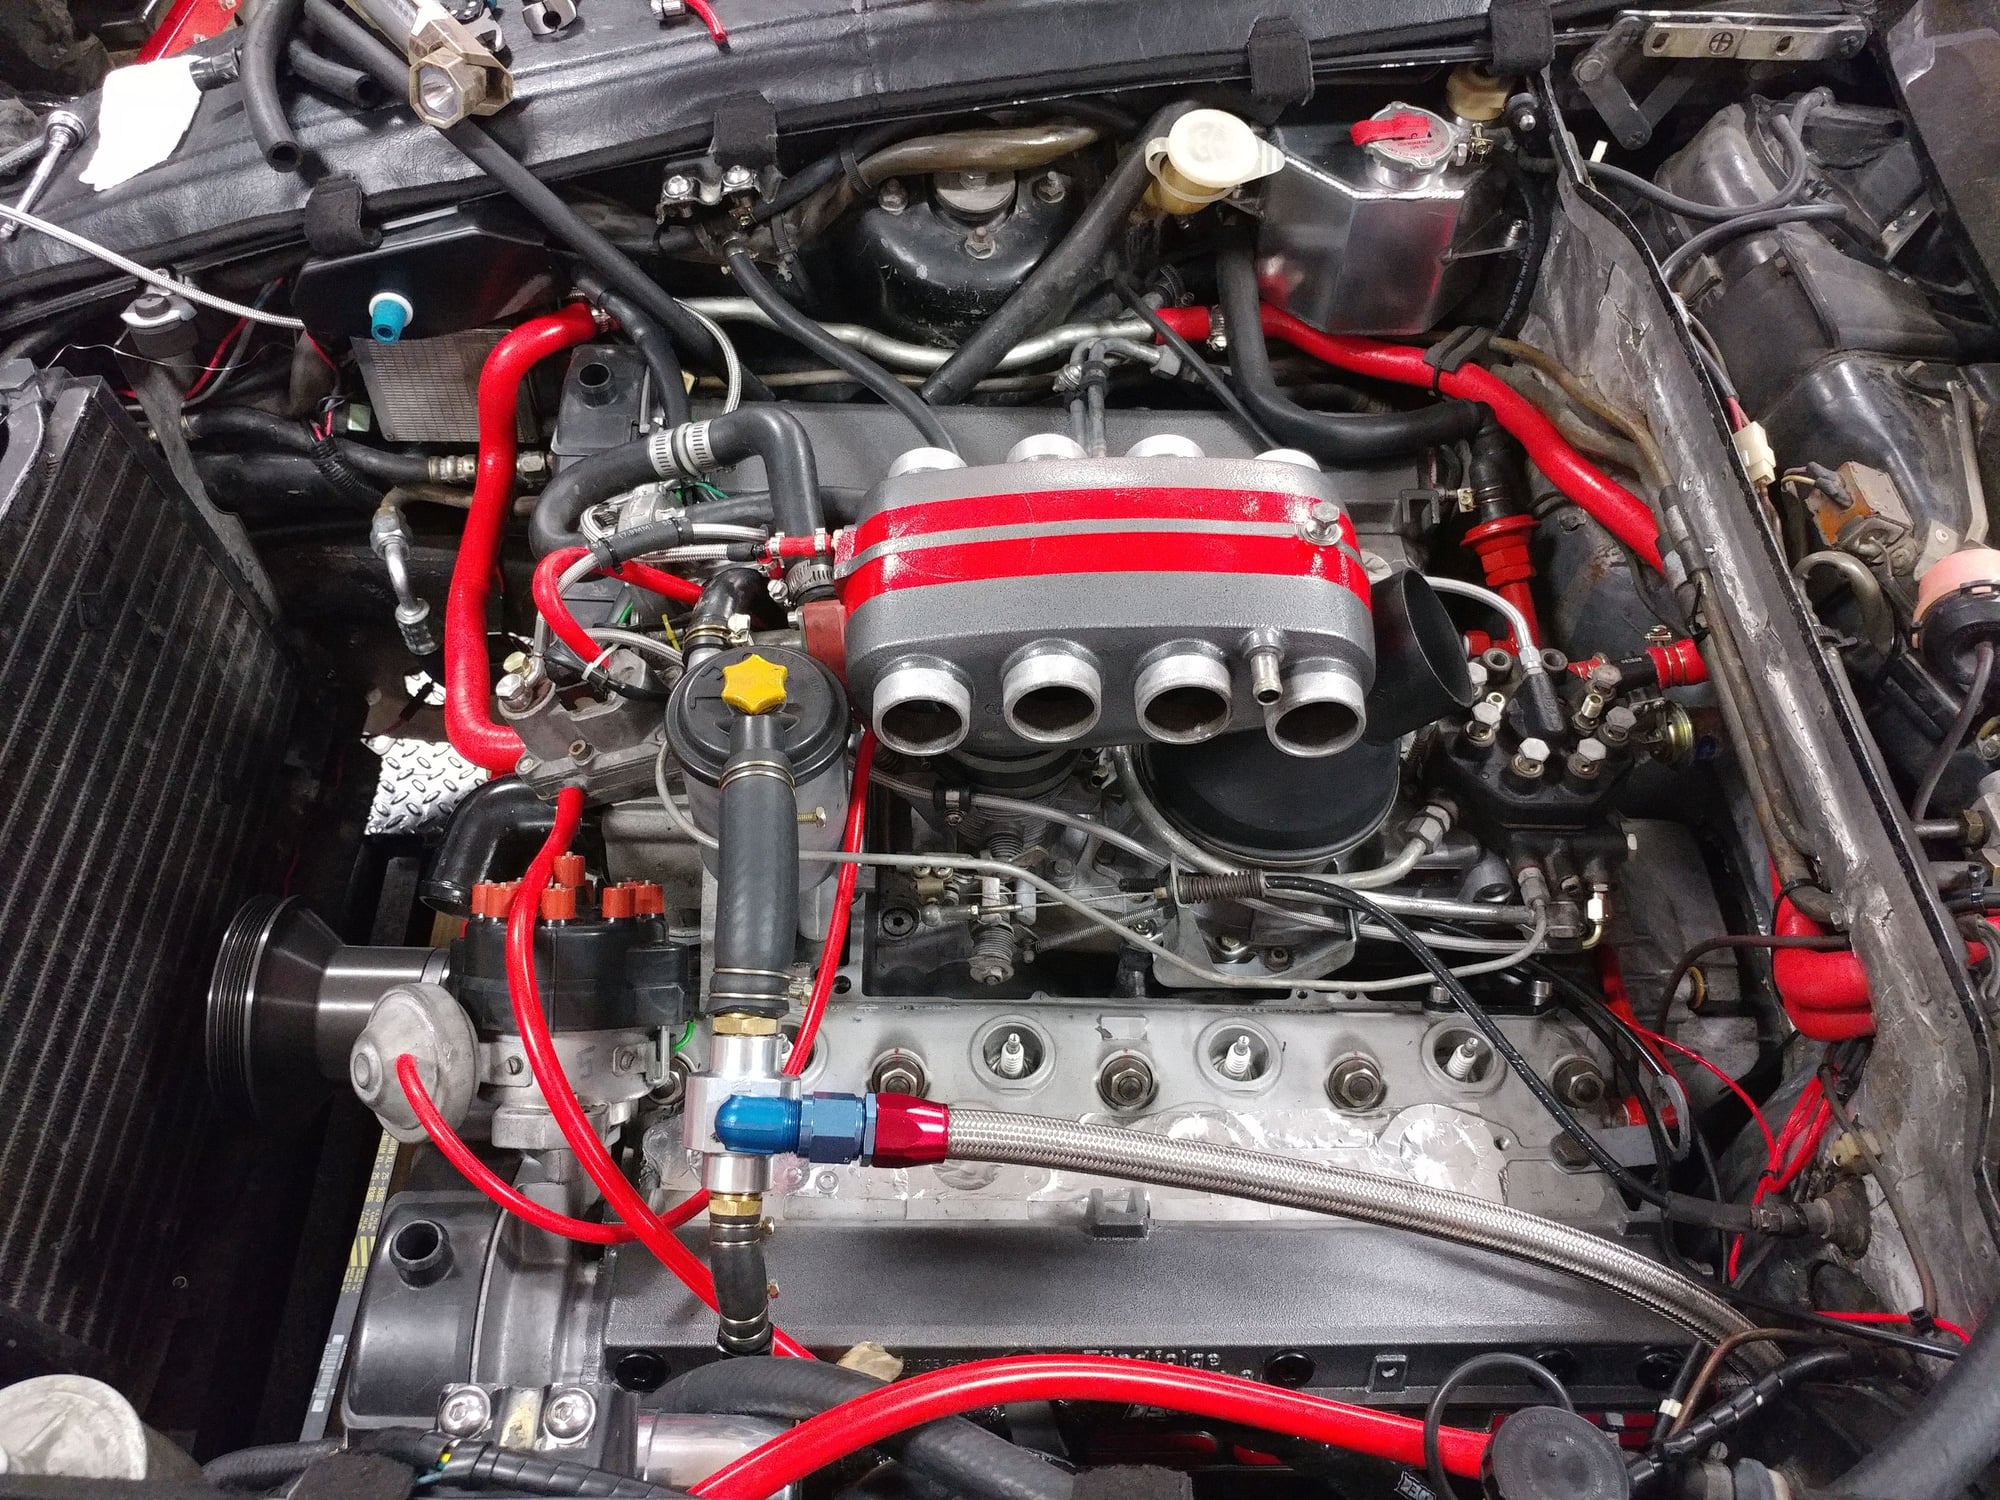
Power steering fluid is filled and not leaking (though the pump hasn't run yet), motor oil is topped up for the first start.
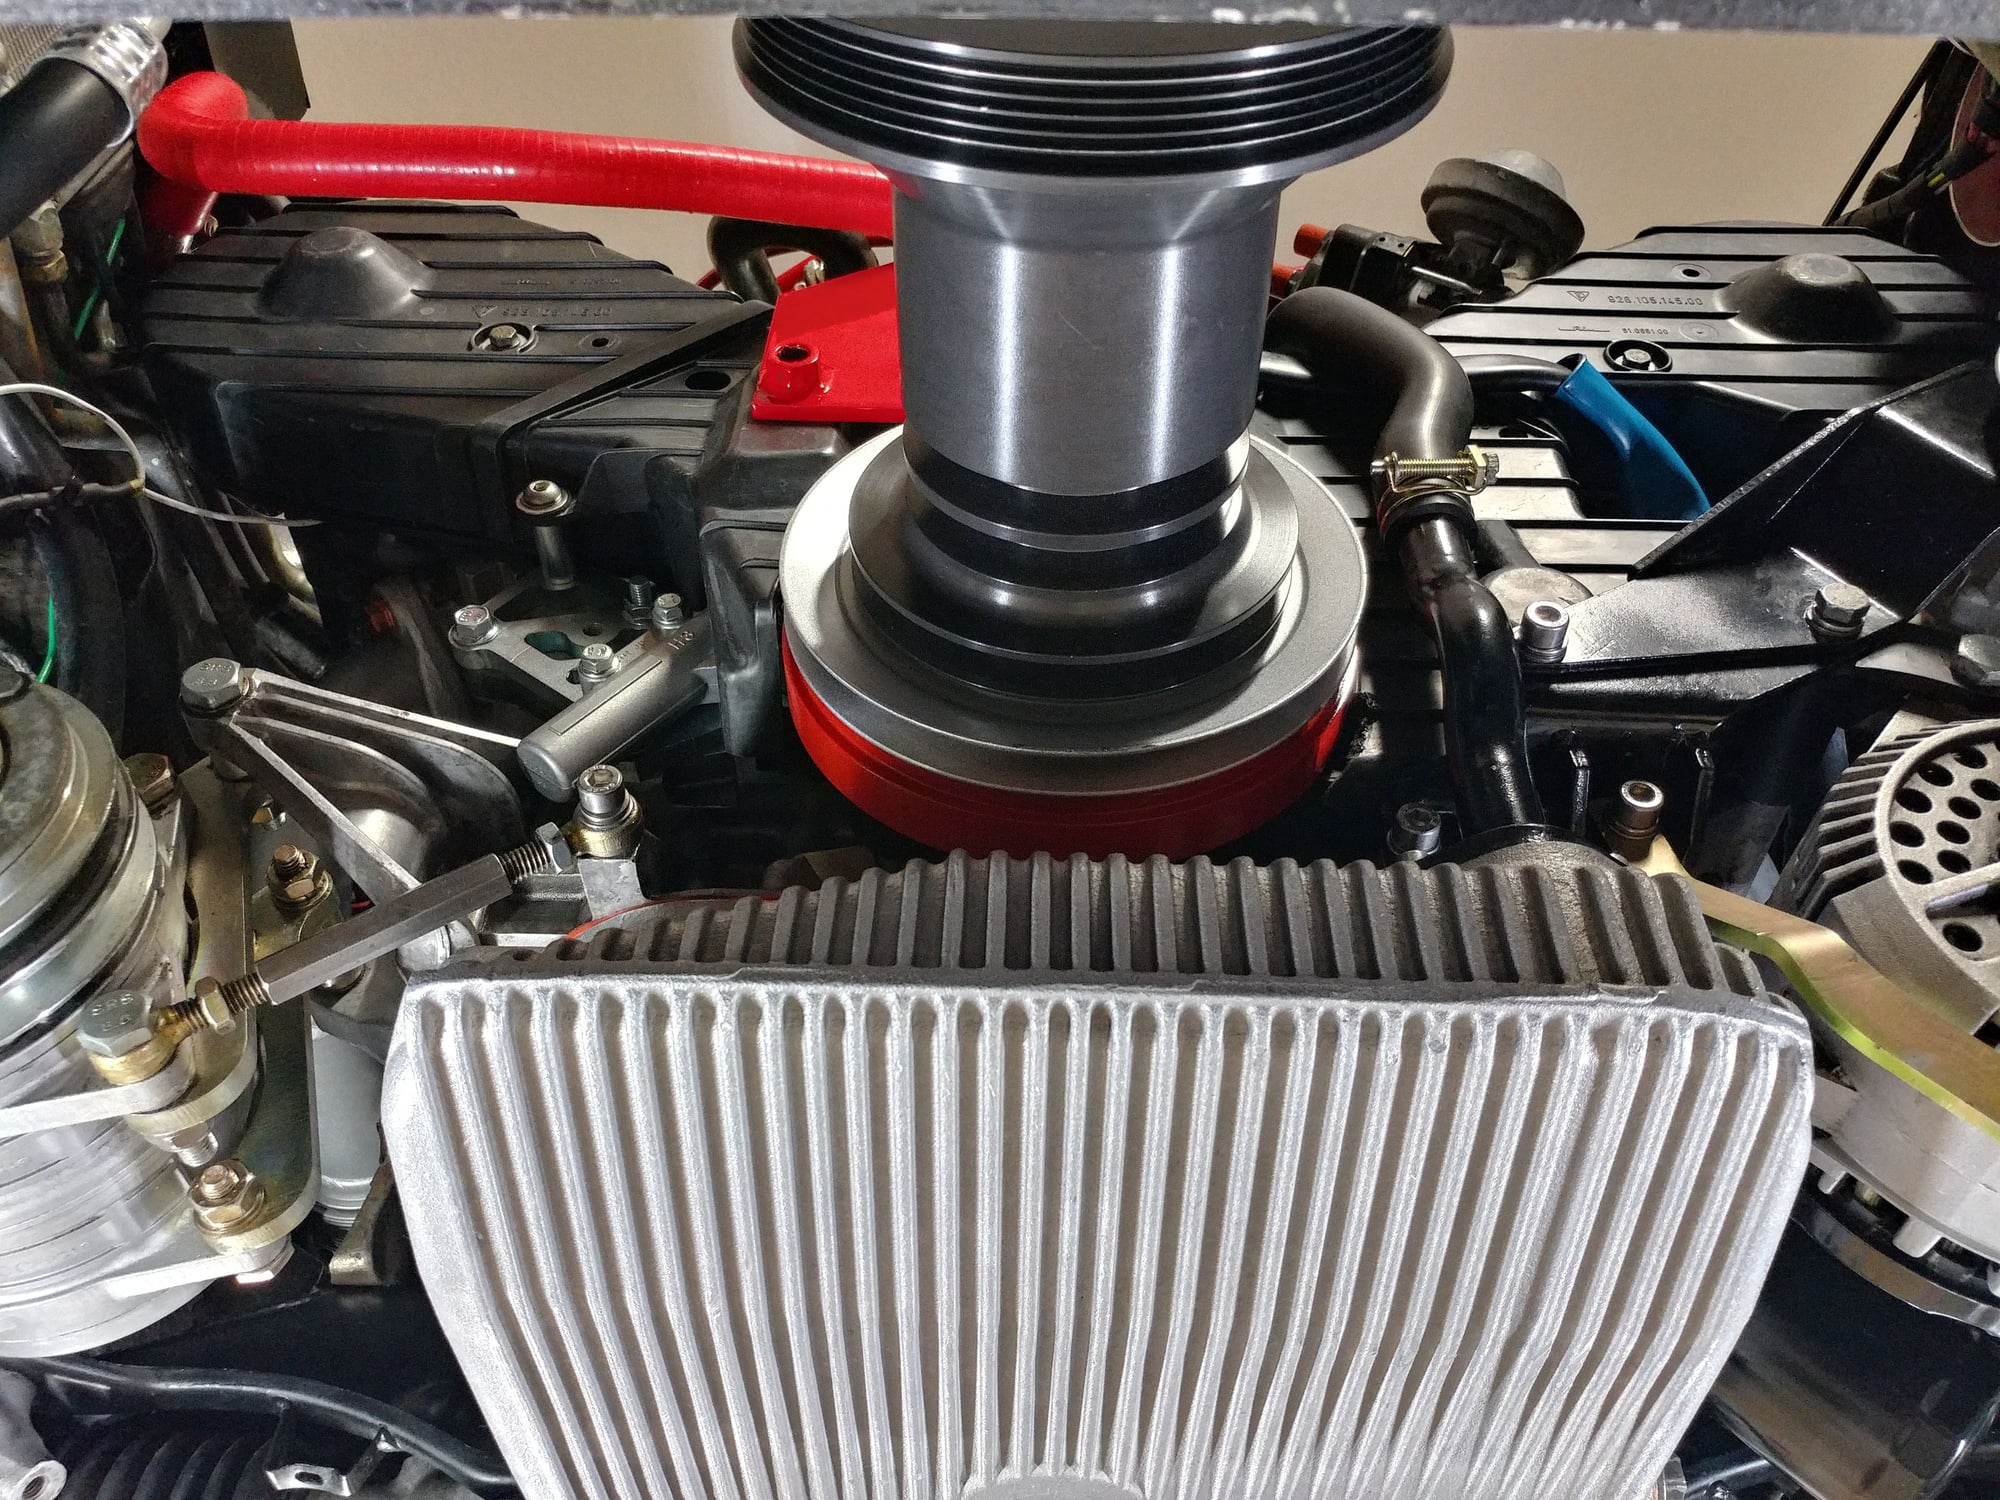
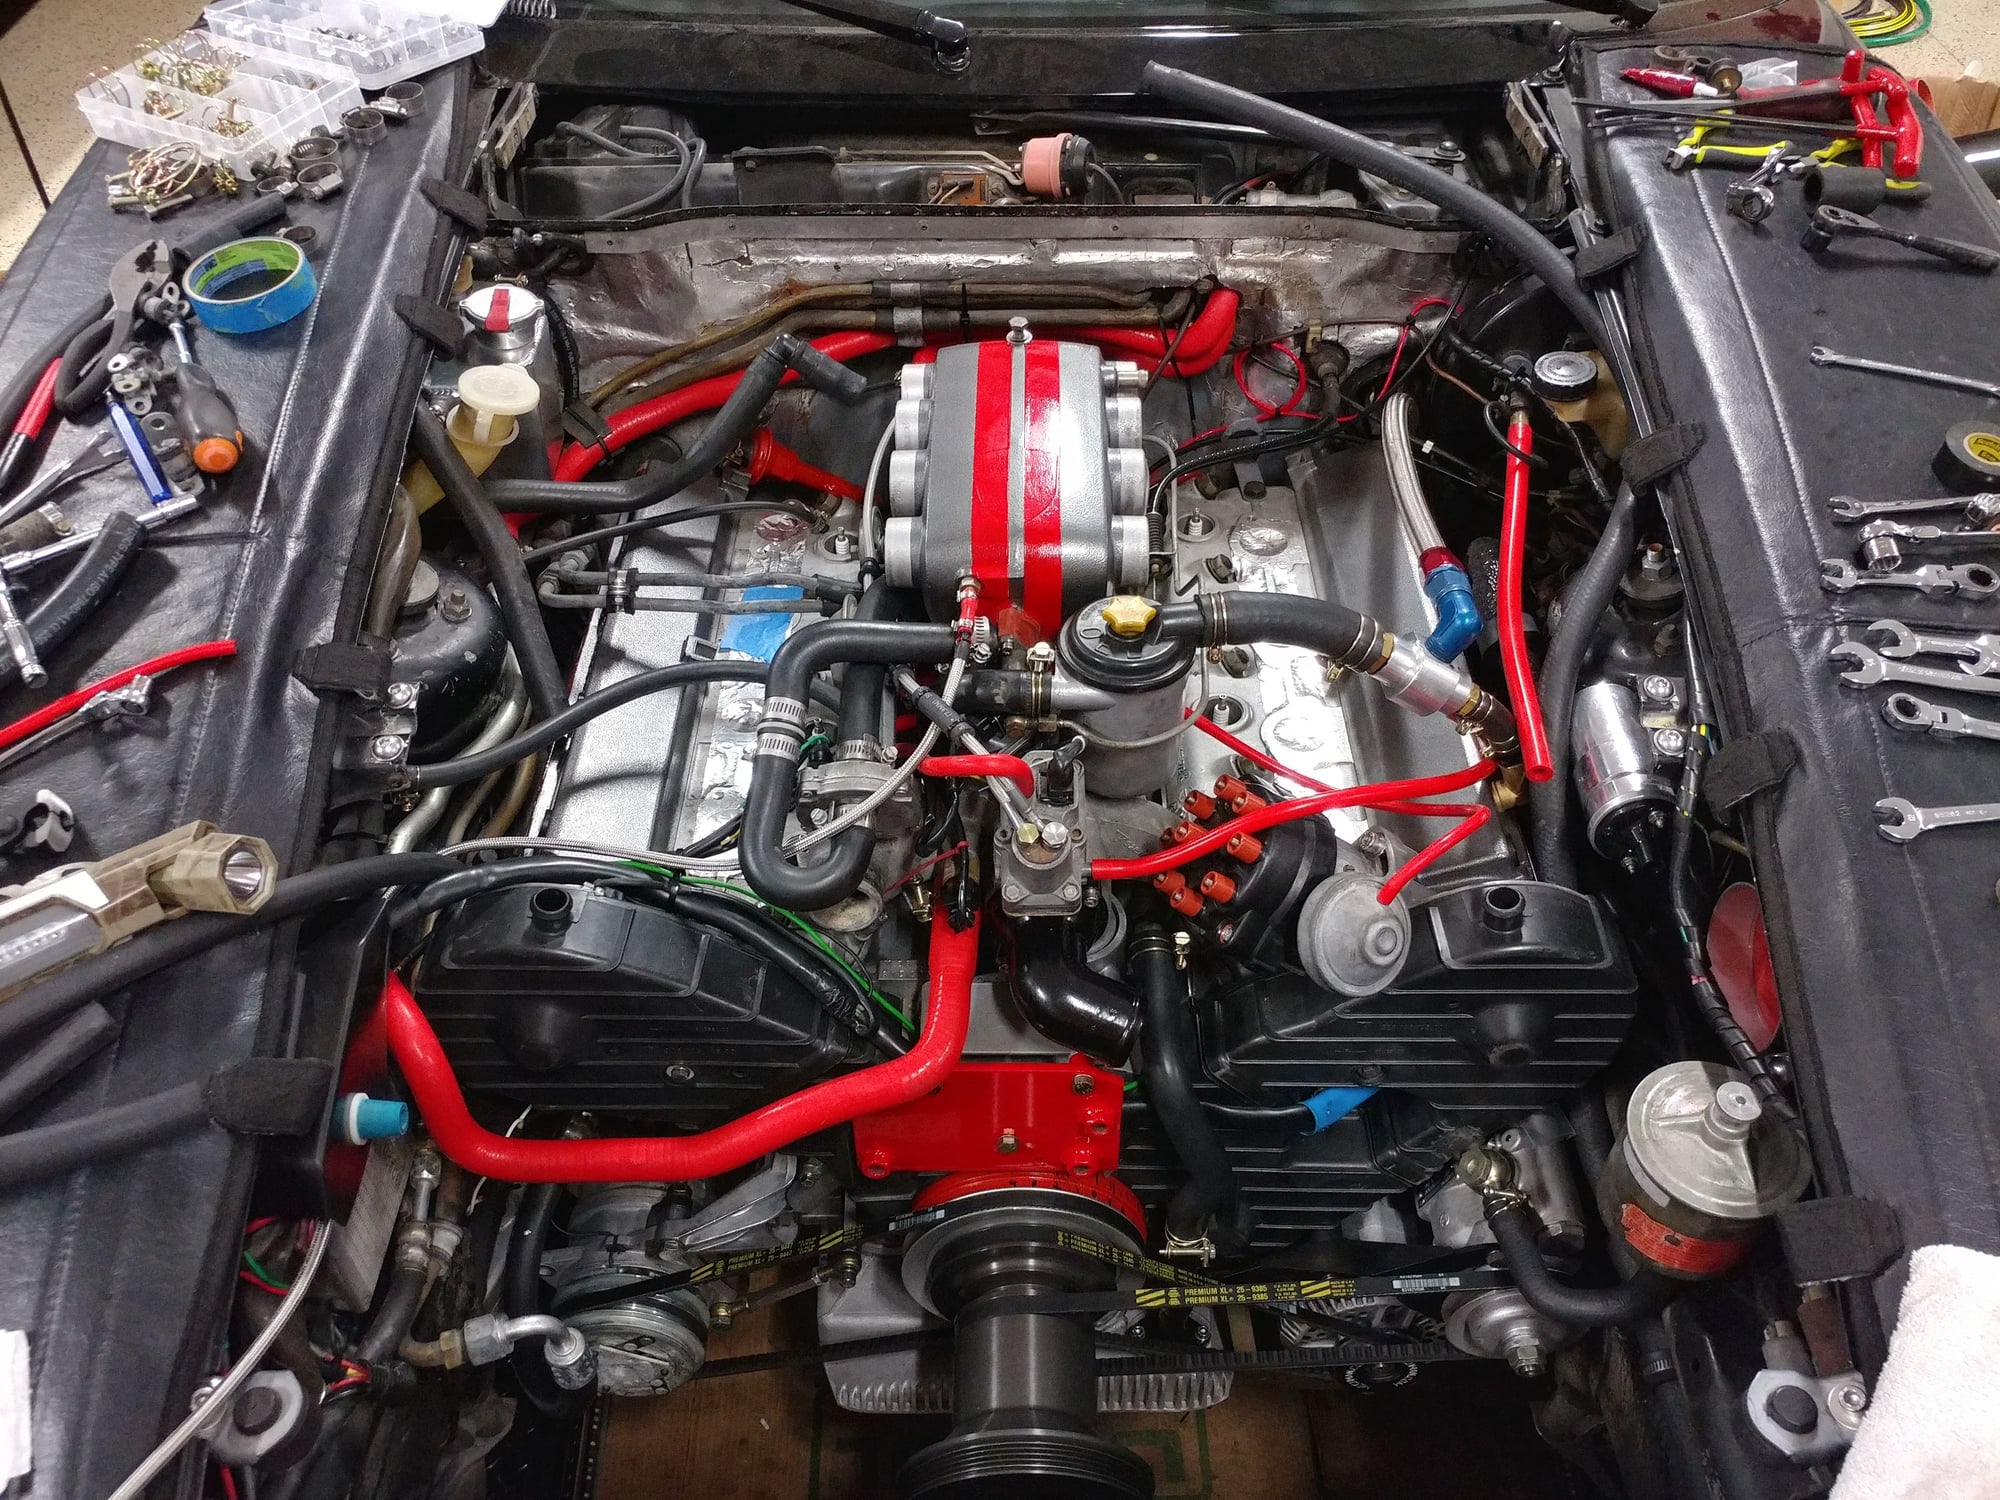
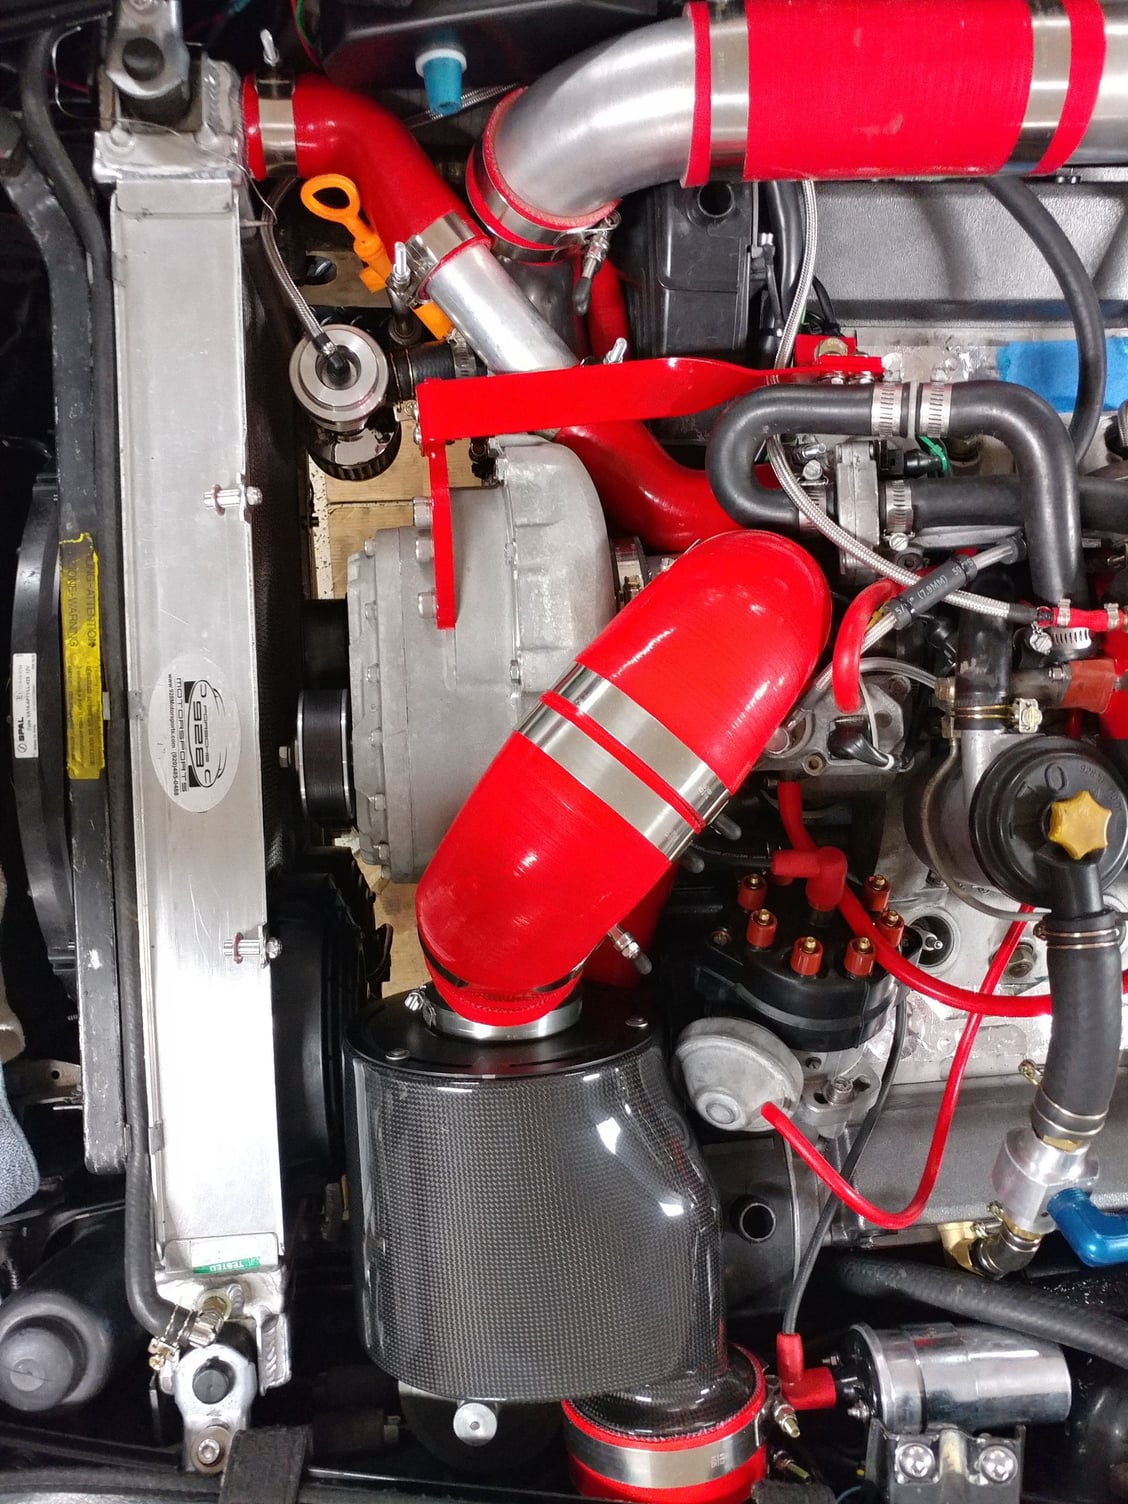
Supercharger is reinstalled, along with the belt and tensioned, as well as a couple coolant hoses
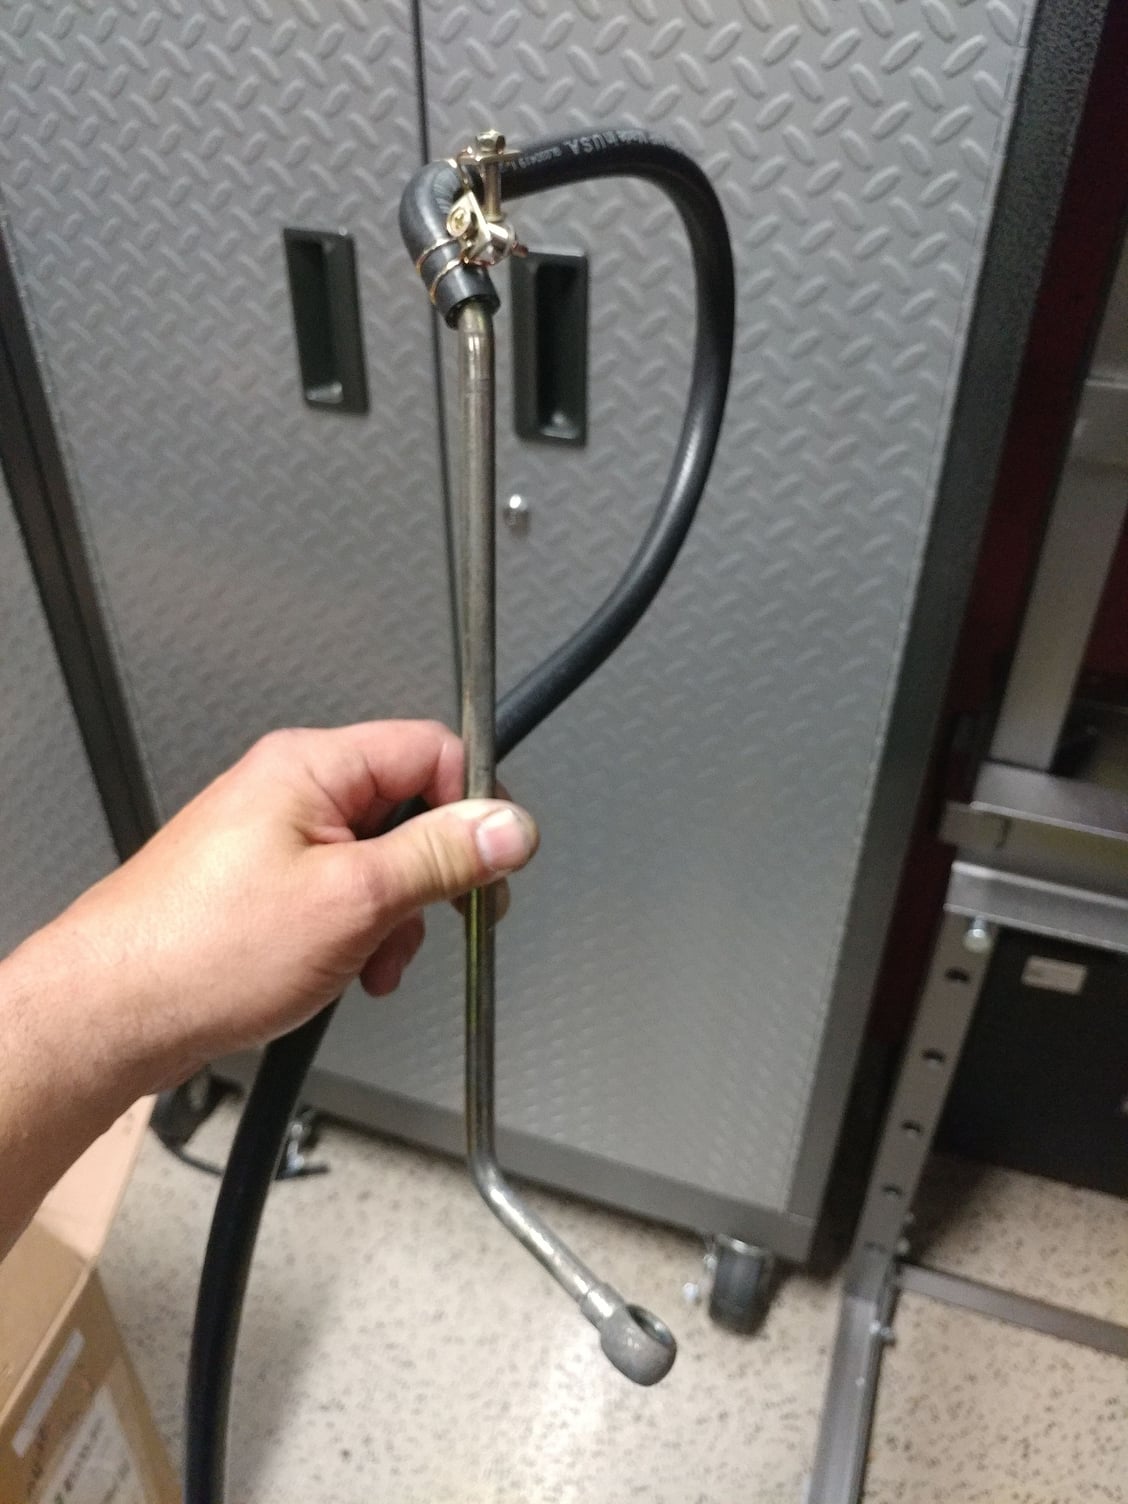
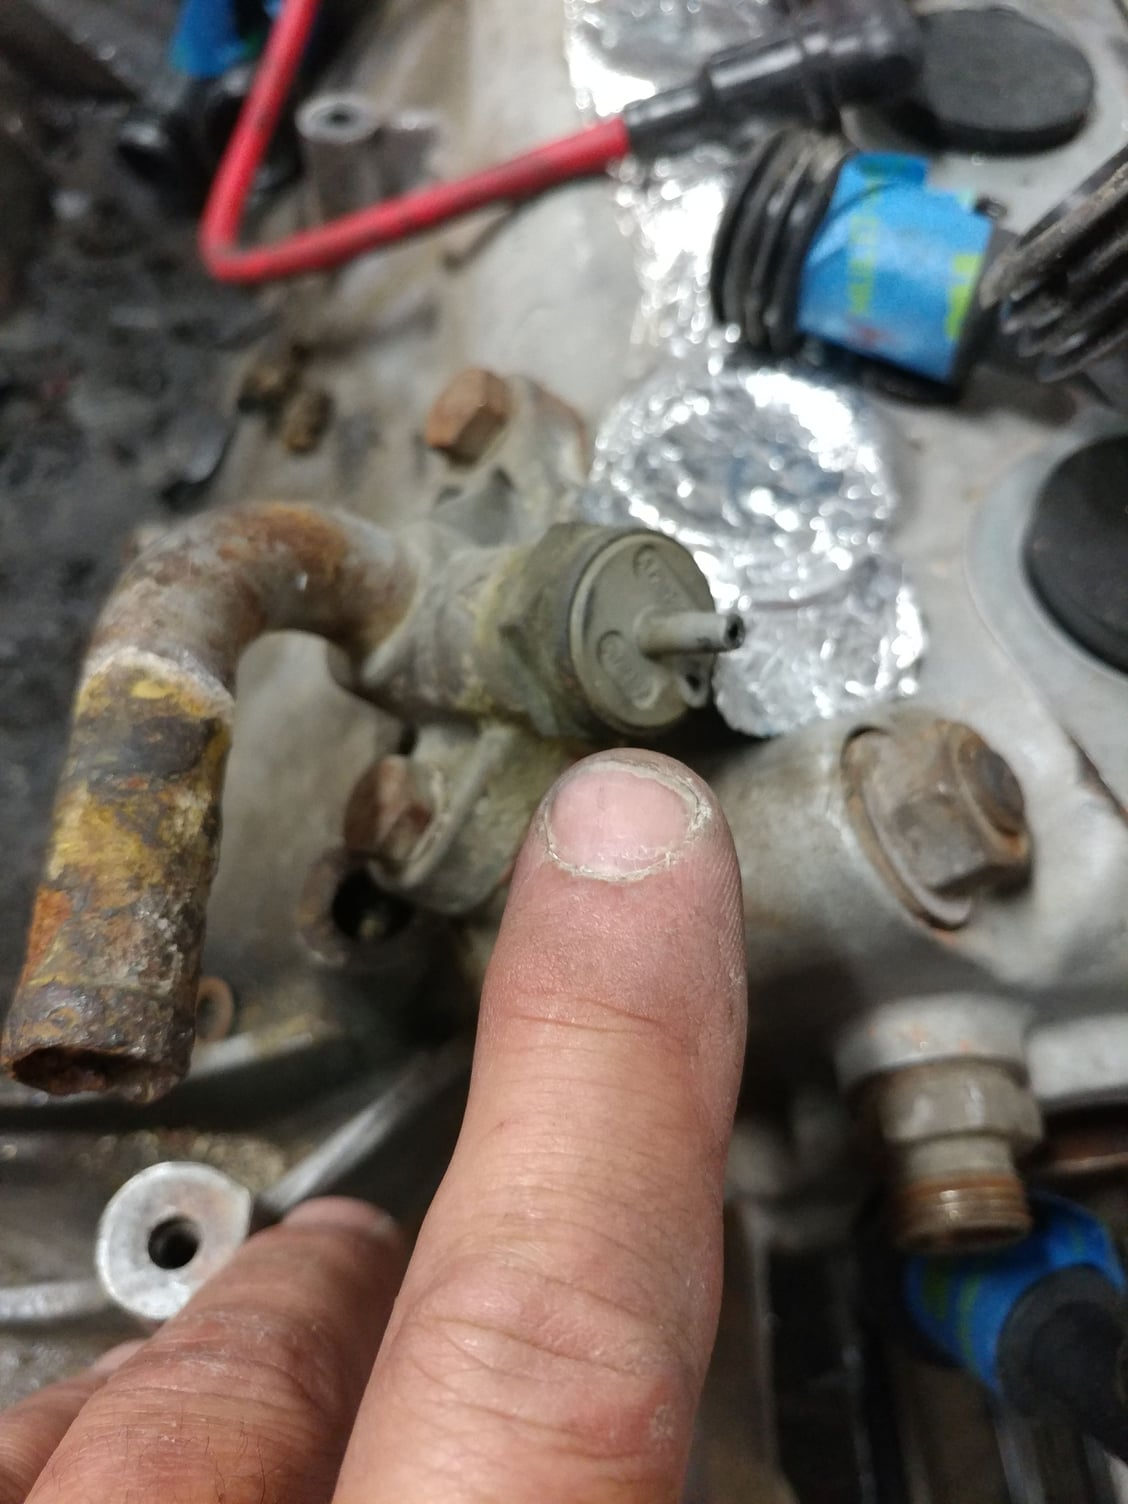
Here's a question though.. The fitting on my old motor that feeds the heater core had a vacuum line fitting on the top of it that had a hose connected to it. That hose was T'd into another small diameter hose that runs along the passenger side fender wall under the coolant reservoir.
The fitting I modified and installed on the new motor (because the old one was corroded and nasty) doesn't have this vacuum line fitting. Anyone know what this is for and can I just block off the vacuum line that used to go there or connect it somewhere else?
Here are pictures of the old fitting with the vacuum port, the new fitting and the unconnected hose in the car.
The radiator with the pull fans is reinstalled and all the coolant system hoses are connected and tightened. I'll vacuum fill the system tomorrow with the Airlift using a 50/50 mix of Dexcool and Distilled Water.
A large portion of the intake is installed too as I had to do some of this in conjunction with the cooling system due to access.
Also installed and connected the supercharger blow off valve.
I think I need to lower the K-Jet setup though as I don't like the offset between the spider legs and intake manifold when I did a quick test fit on a couple. I've ordered some various vibration absorbing mounts and spacers in different combinations so I can set it as low as possible and still clear the knock sensor in the valley.
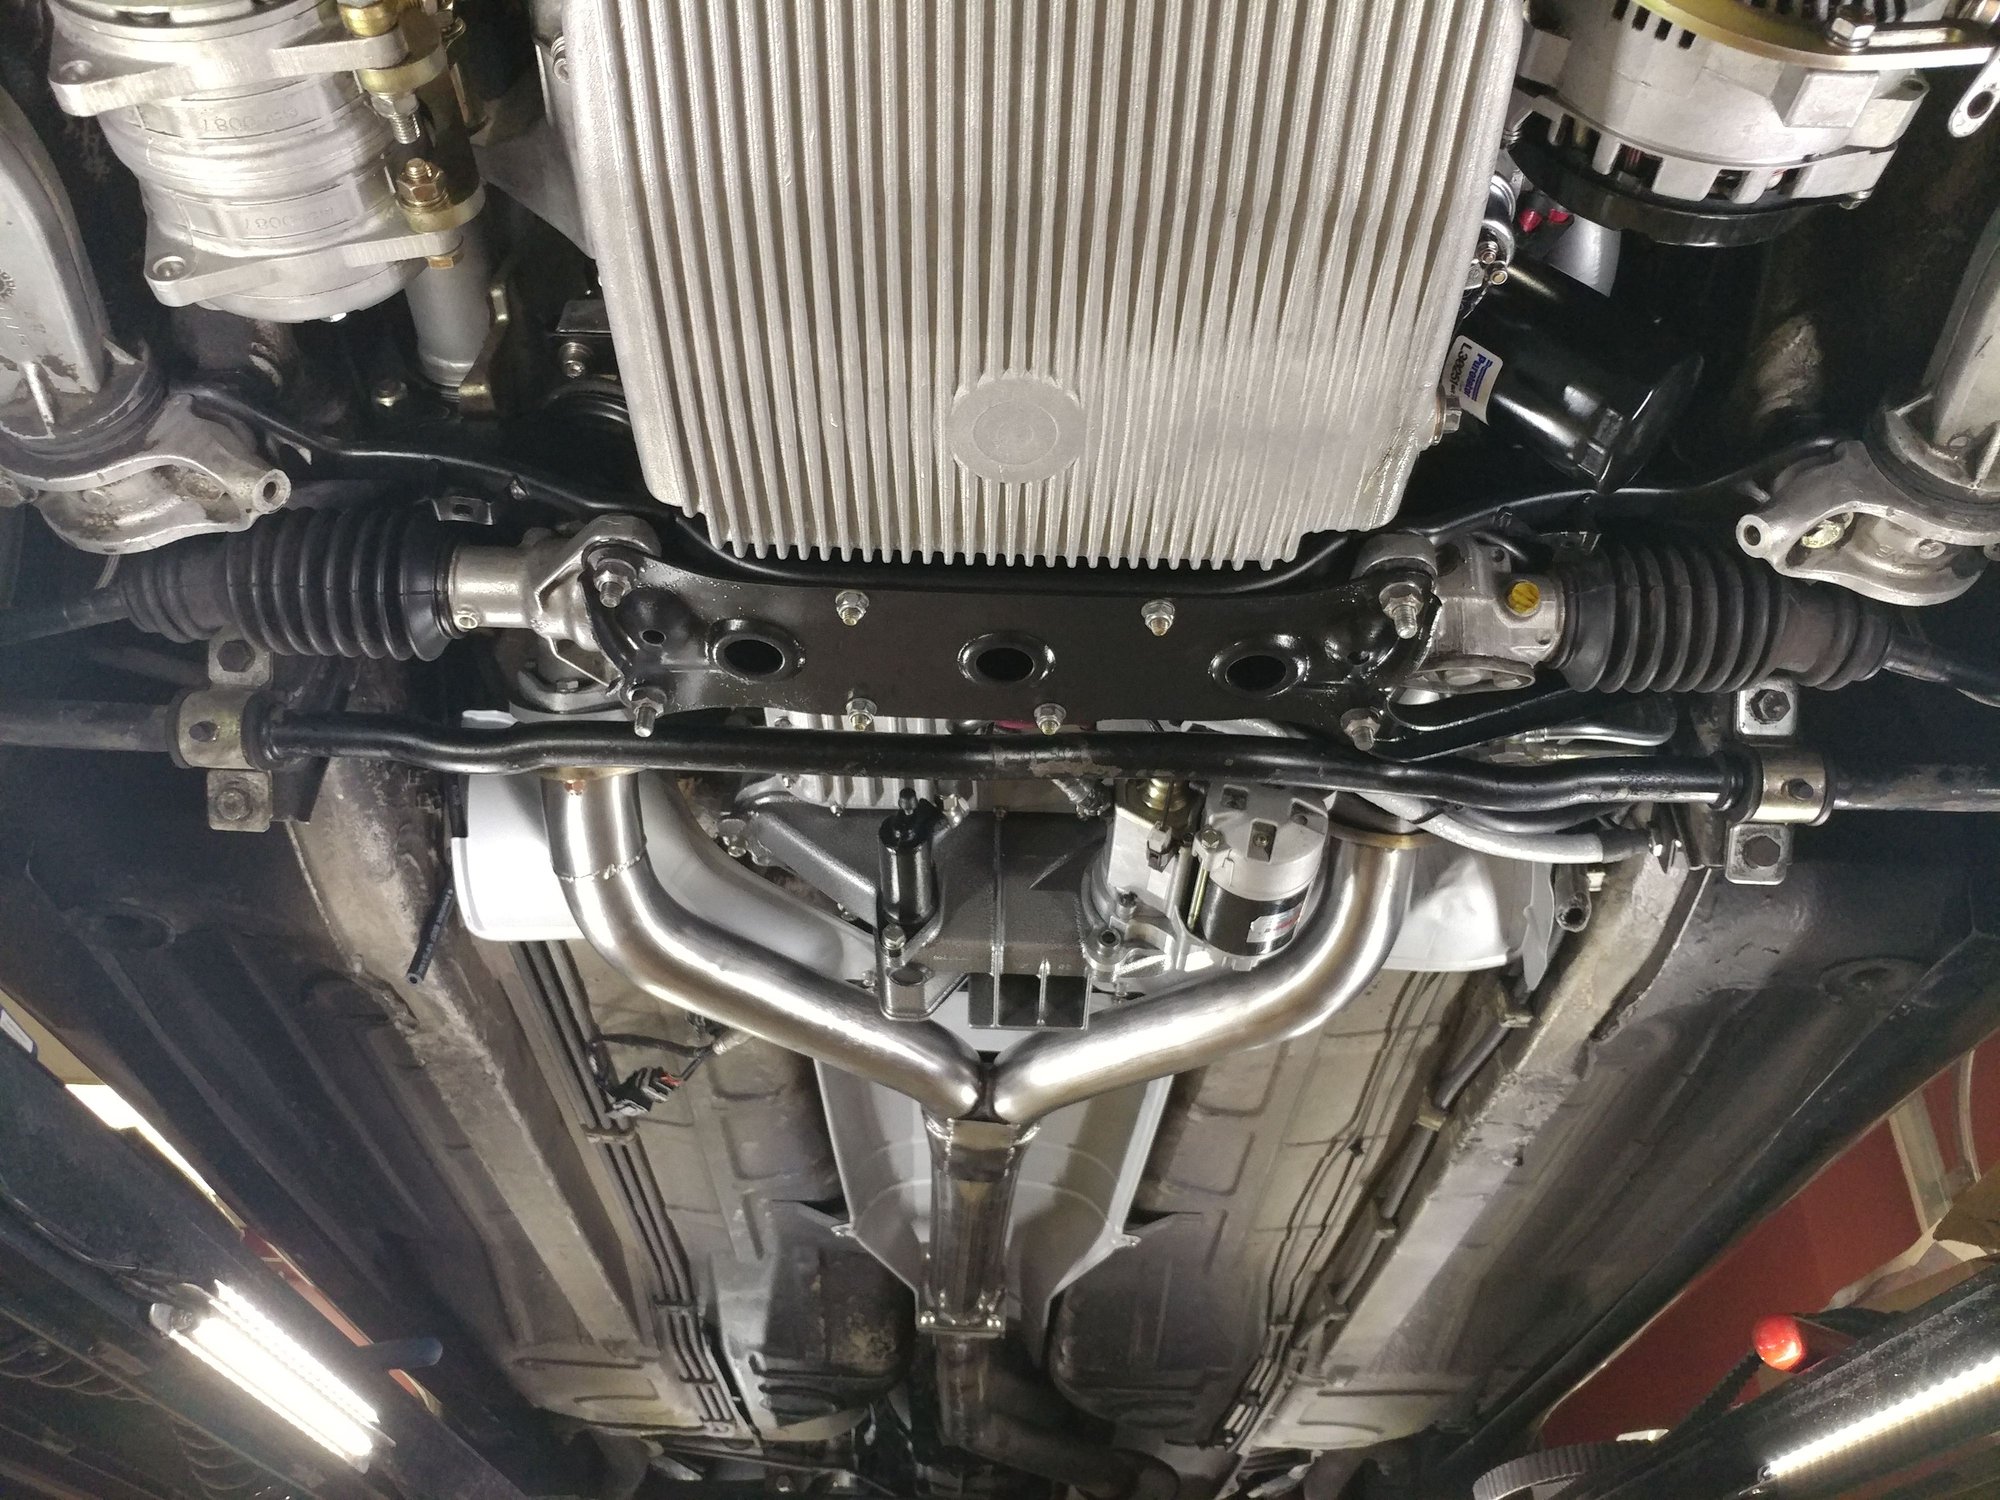
Lower cross brace was installed last night too. Upper cross brace will be one of the last things to go on so I don't have to work around it.
Reinstalled my previous extended dipstick since it's very difficult to get at the normal one with the supercharger installed.


 05-19-2019, 02:42 PM