When you click on links to various merchants on this site and make a purchase, this can result in this site earning a commission. Affiliate programs and affiliations include, but are not limited to, the eBay Partner Network.
It does seem like a pretty amazing approach. I guess there are very, very few who are set up to do this on the west coast. Seems like a lot of advantages over other media blasting or acid dip approaches. Andy showed me similar trials (not business card or egg) on a wooden pallet like where the blasting would take a little off the surface but could be turned up to blow a hole straight thru the wood. I am actually going to come into the shop to watch/help with some of this process.
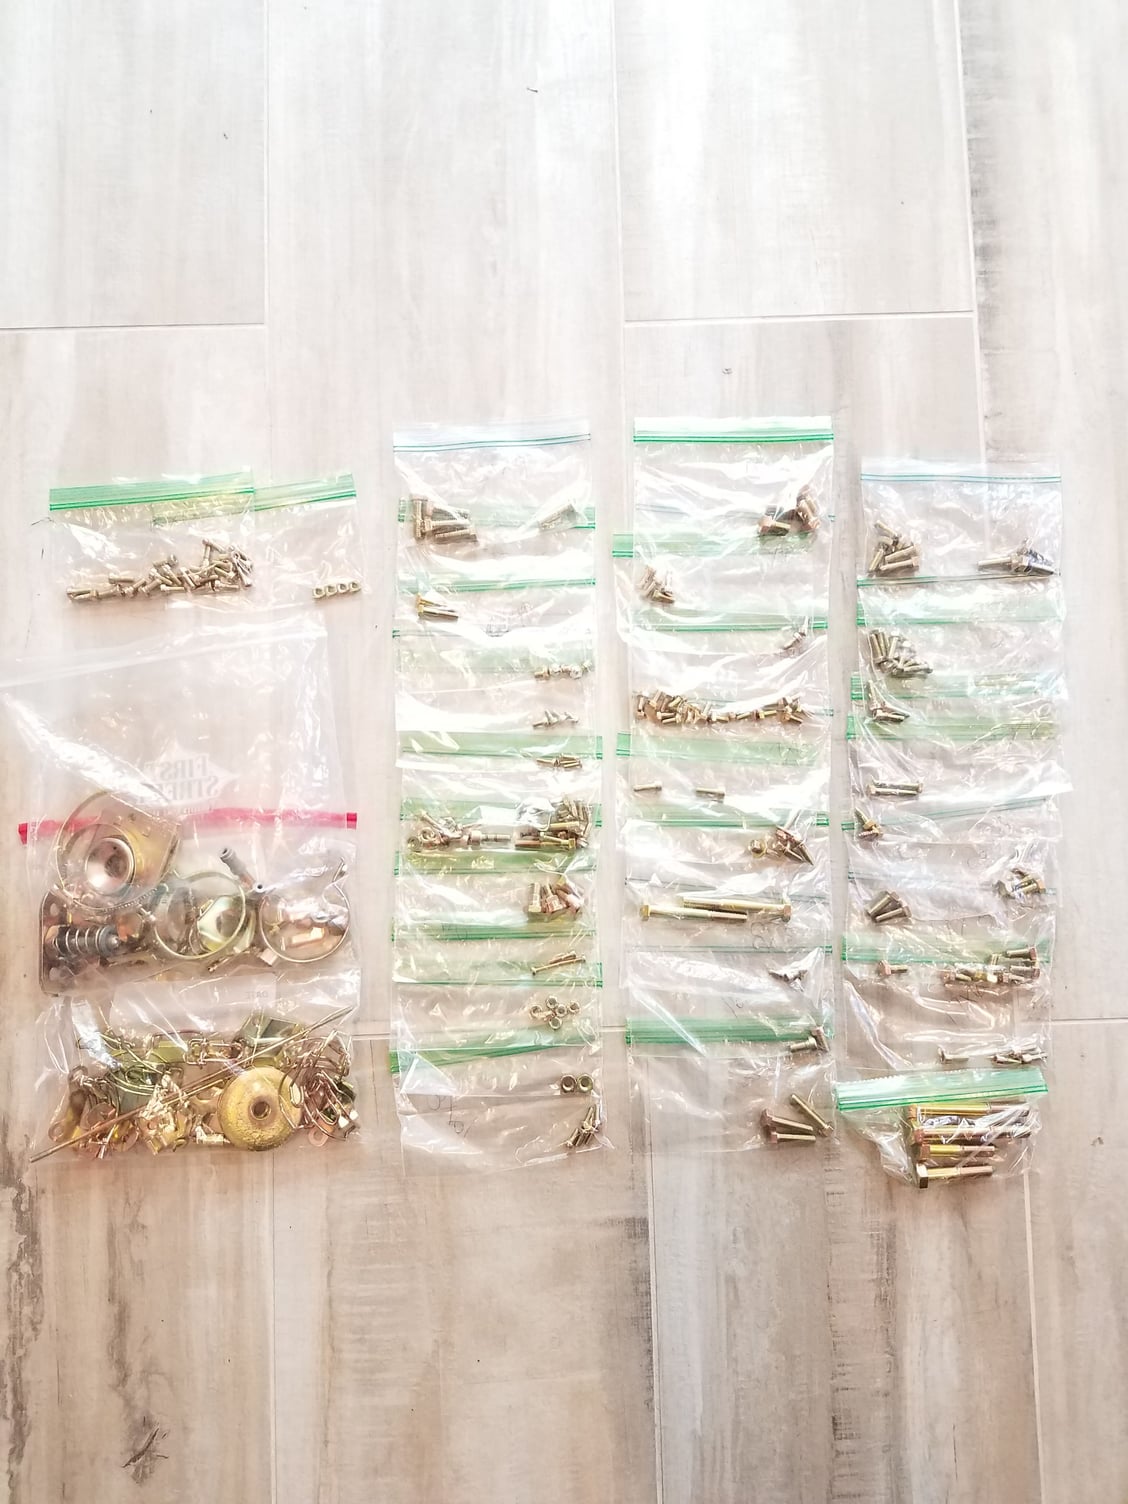
Picked up parts from plater. Looks like they lost about 25 nuts. Ugh. Have to see if they can locate them. I continue to find that it is rare for things to go smoothly with a project of this magnatude!
On the positive side, here is my growing collection of gold.
platers always lose things - did you photo the items all laid out beforehand? it might help if you show them the pic
Yes, they take photos as well. So they showed me their photo of my job hung and ready for dipping and the parts are there. When I compared my photo to theirs I see the strand of nuts that is missing. They must have packed them with someone else's job.
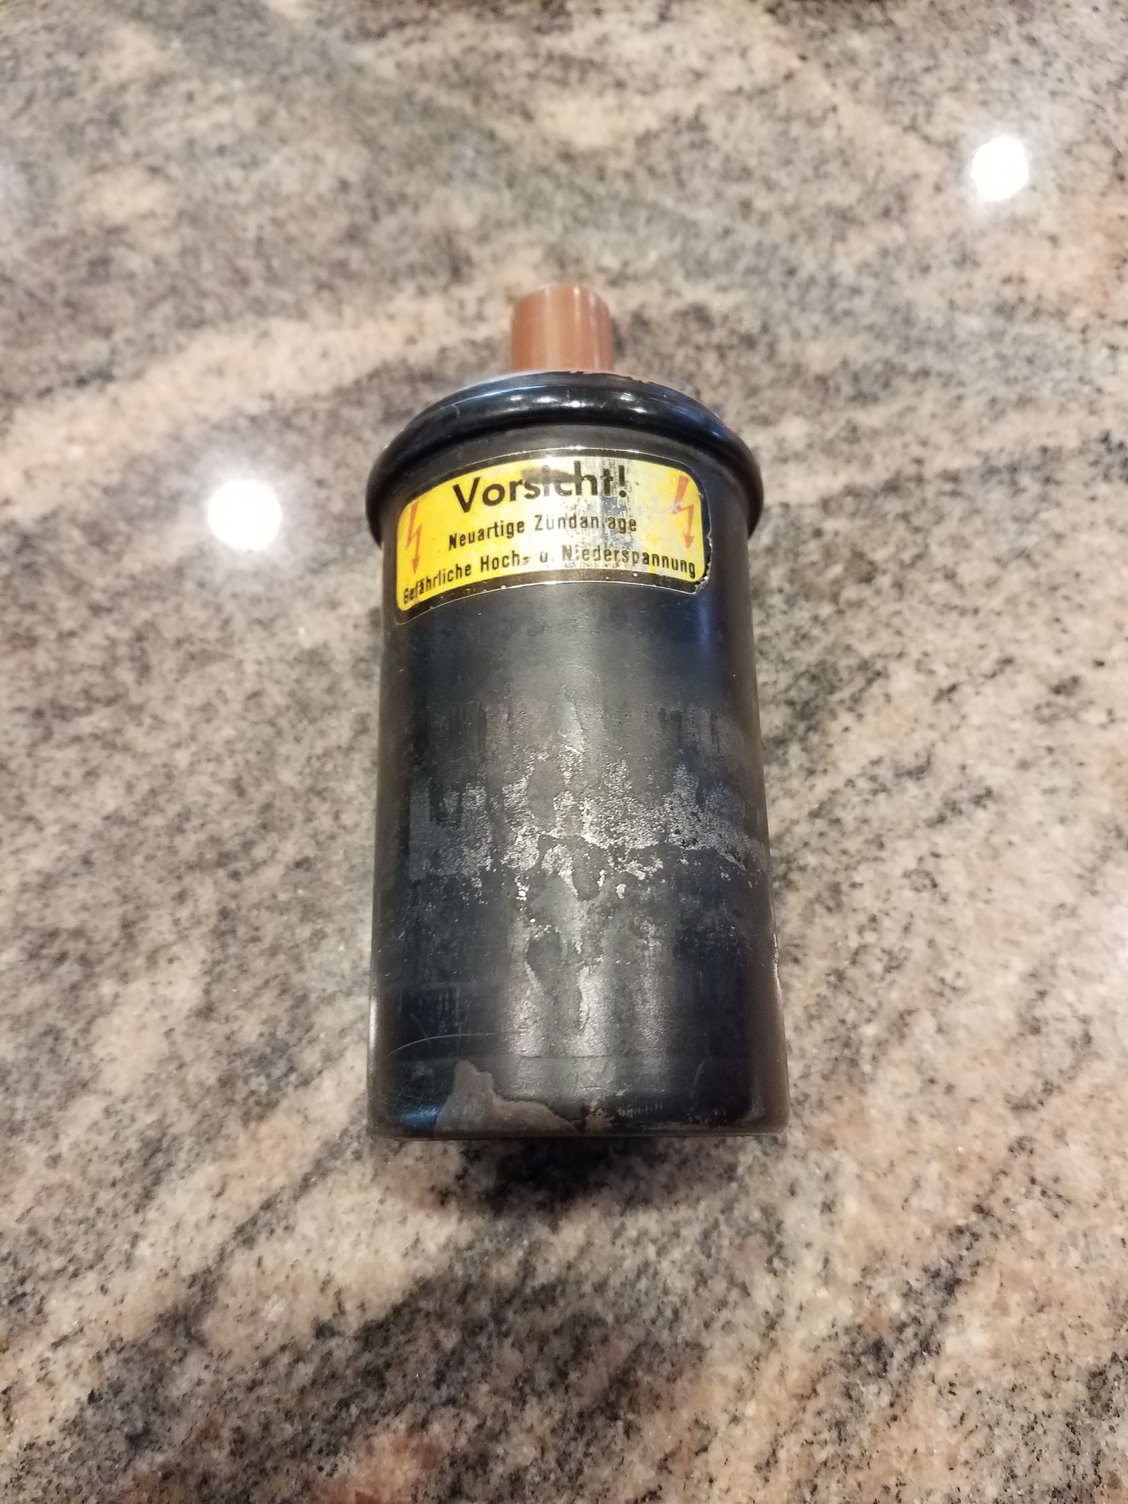
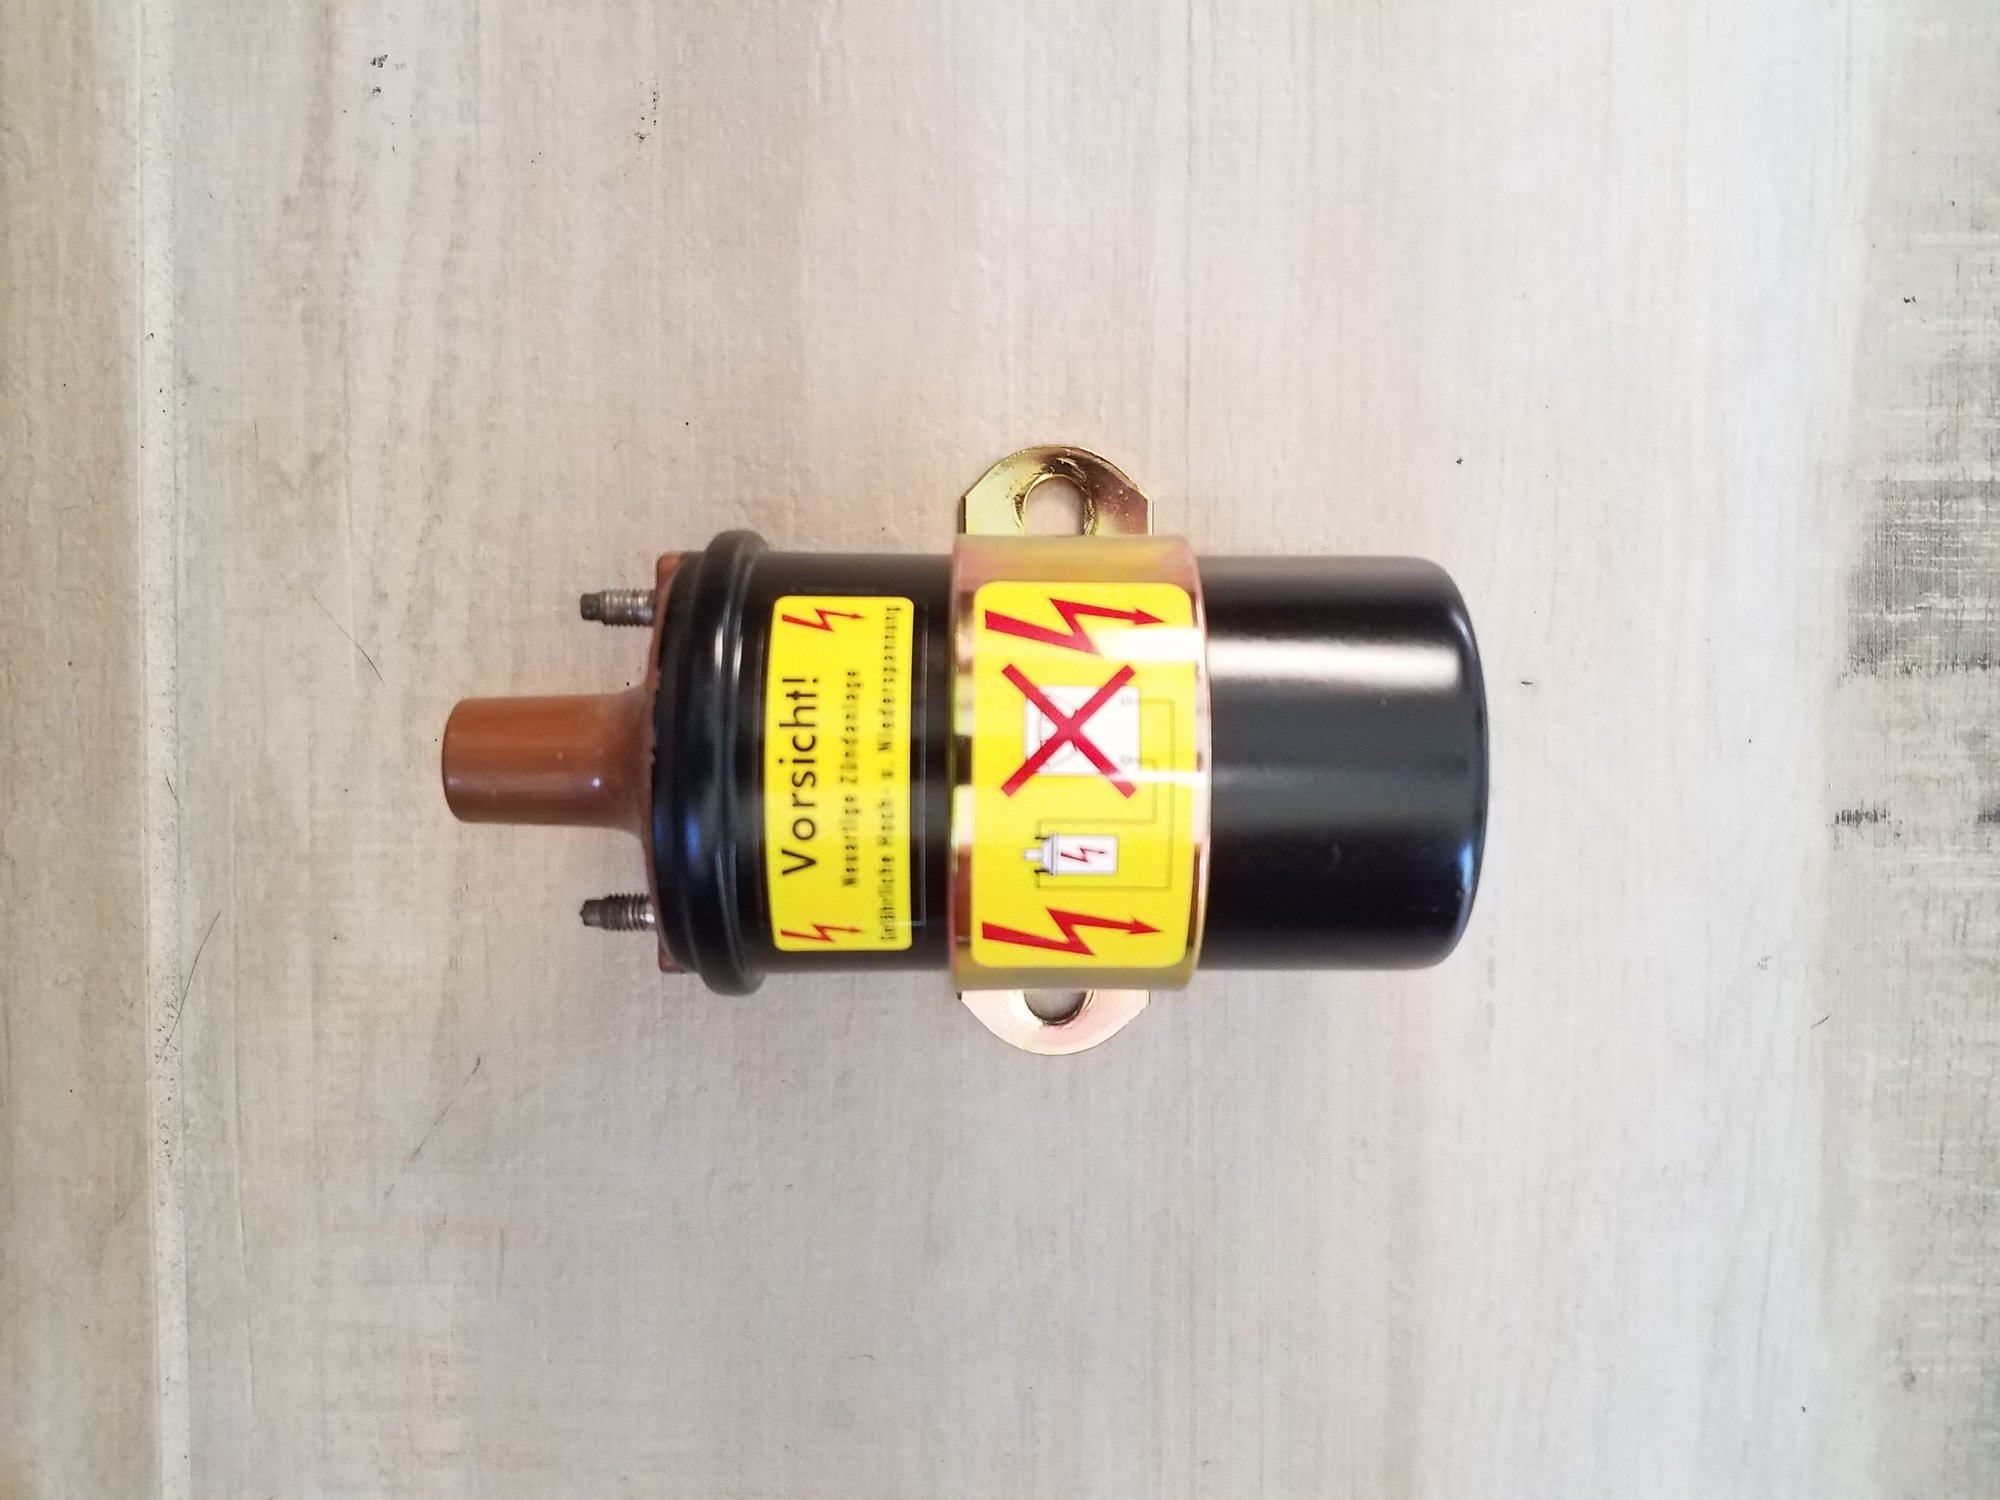
Keeping up with small restoration projects as parts come back from the plater, I figured I would restore my Bosch black coil. We all know how hard it is to find good replacements for these venerable coils. I plan to upgrade my CDI to the Classic Retrofit CDI+, thus allowing me to retain a stock look (distributor, coil, etc) but improve performance and reliability. I will be able to program ignition/advance curves, rev limit settings and it uses double spark thru the rpm range - and it is plug and play with my coil and distributor and even has a stock look to it.
Shot before restoration:
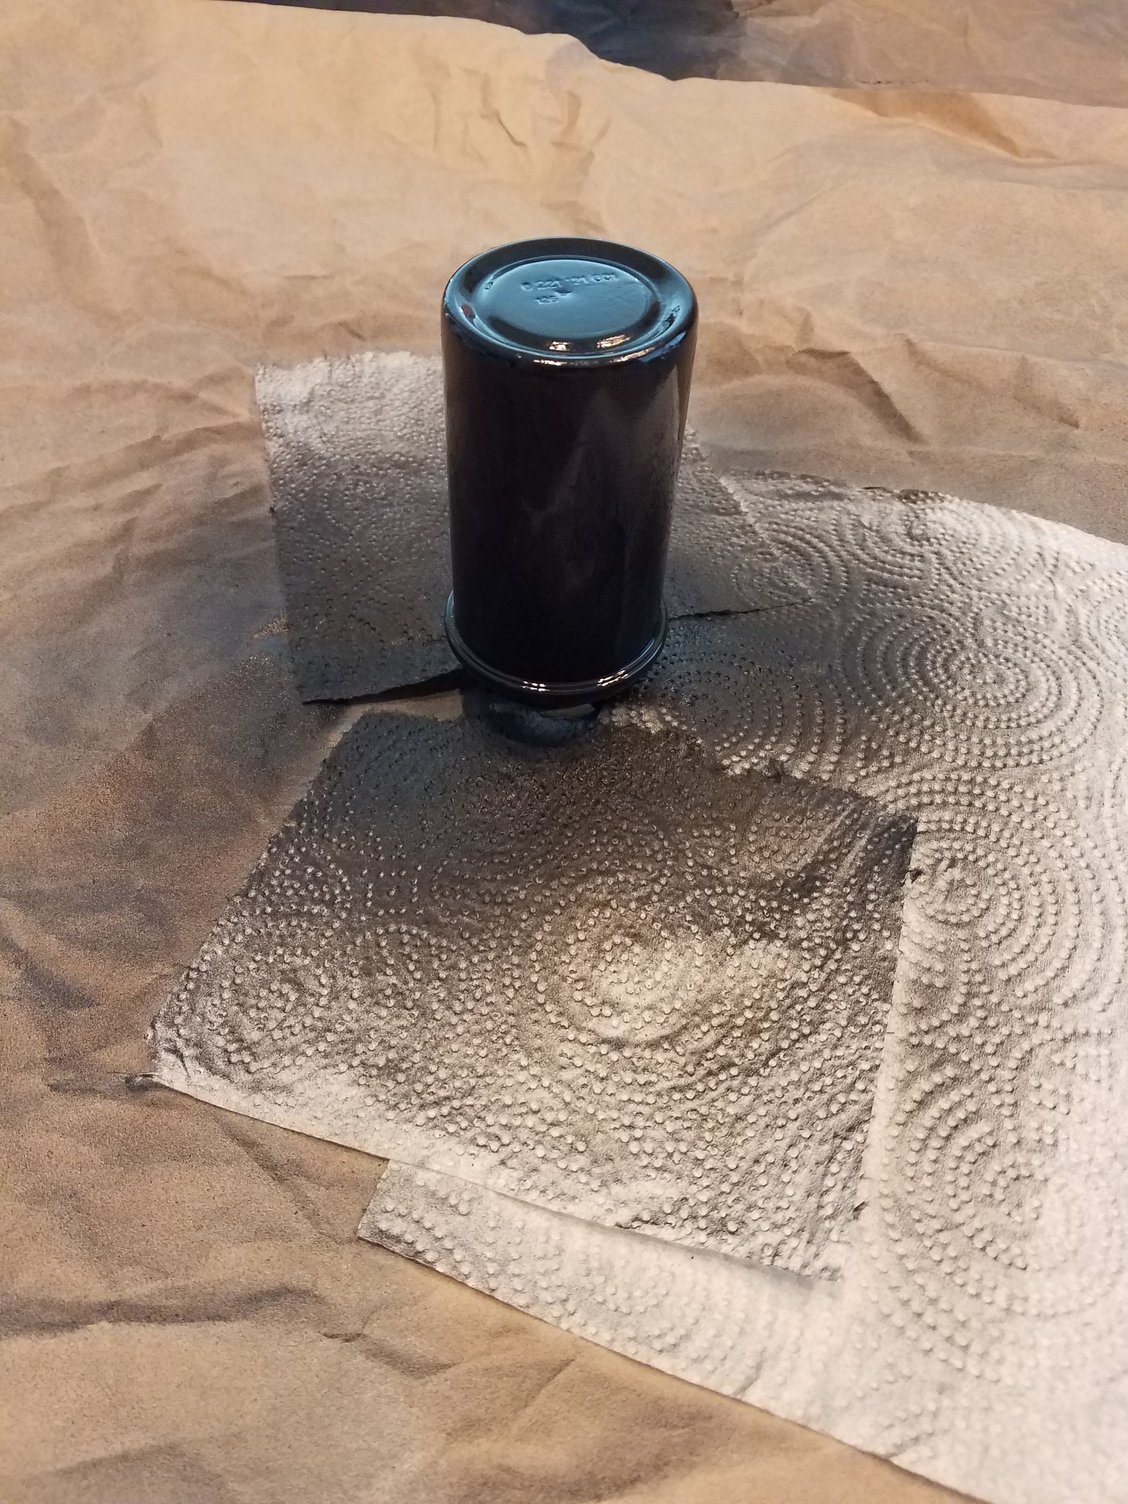
Sanded, primered and painted:
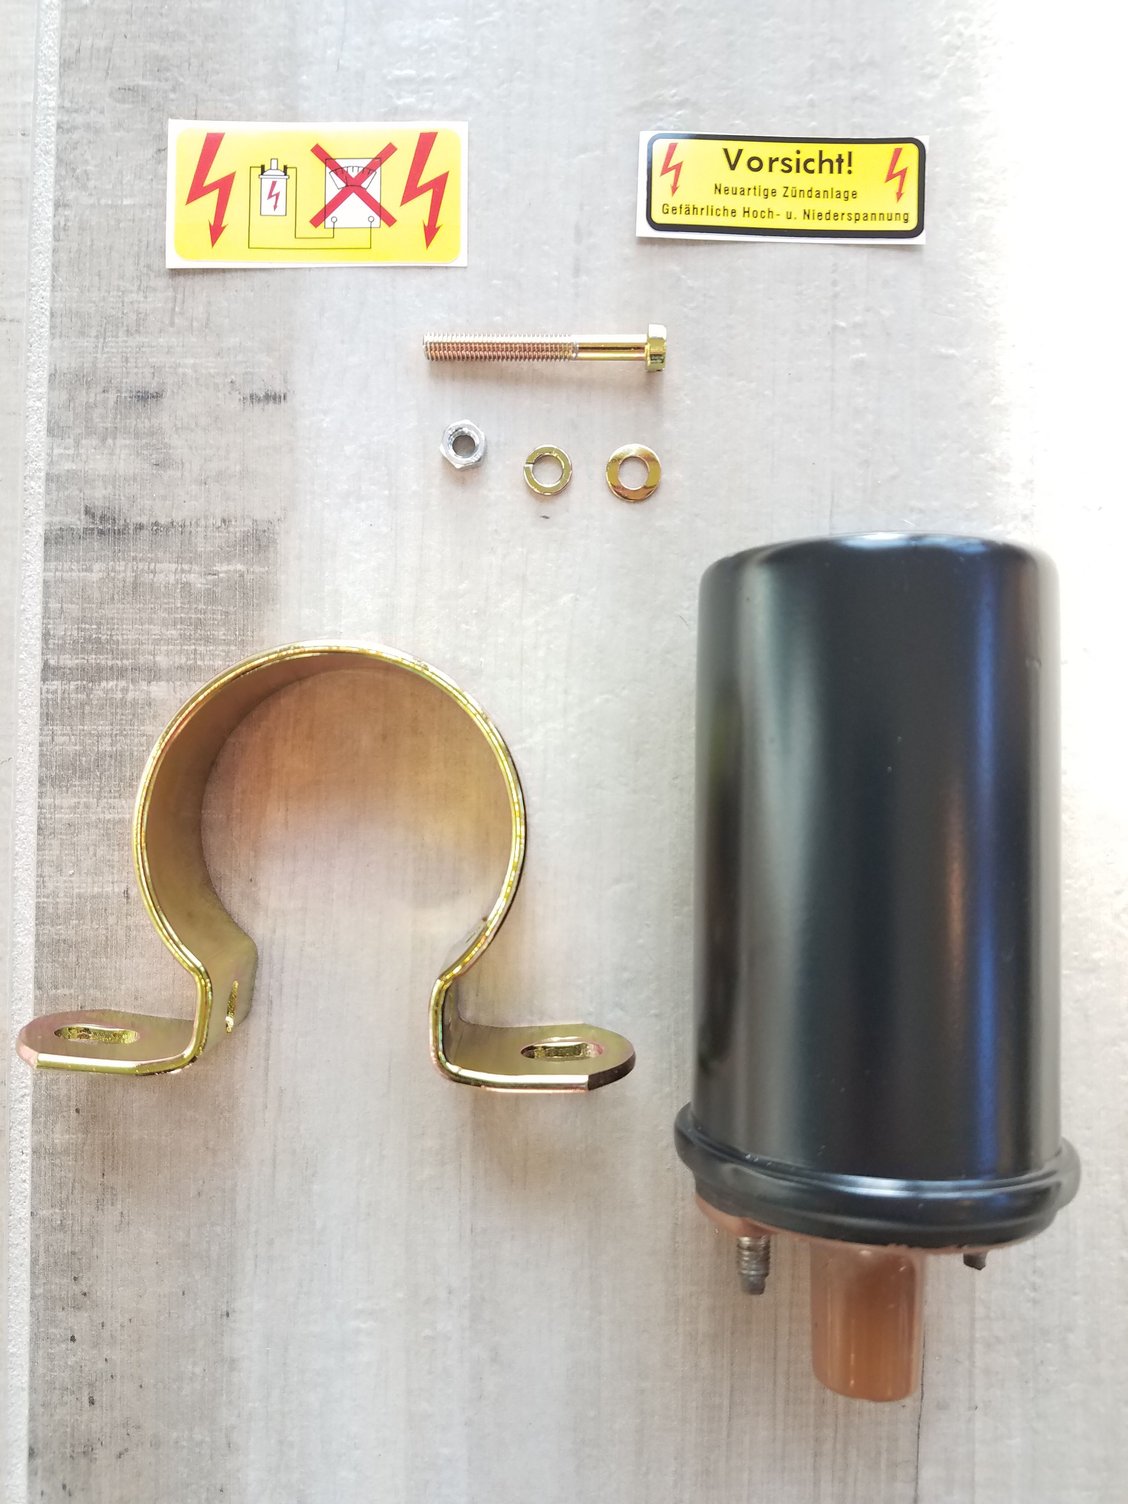
Replated bracket and hardware, and new decals ready to finish the restoration:
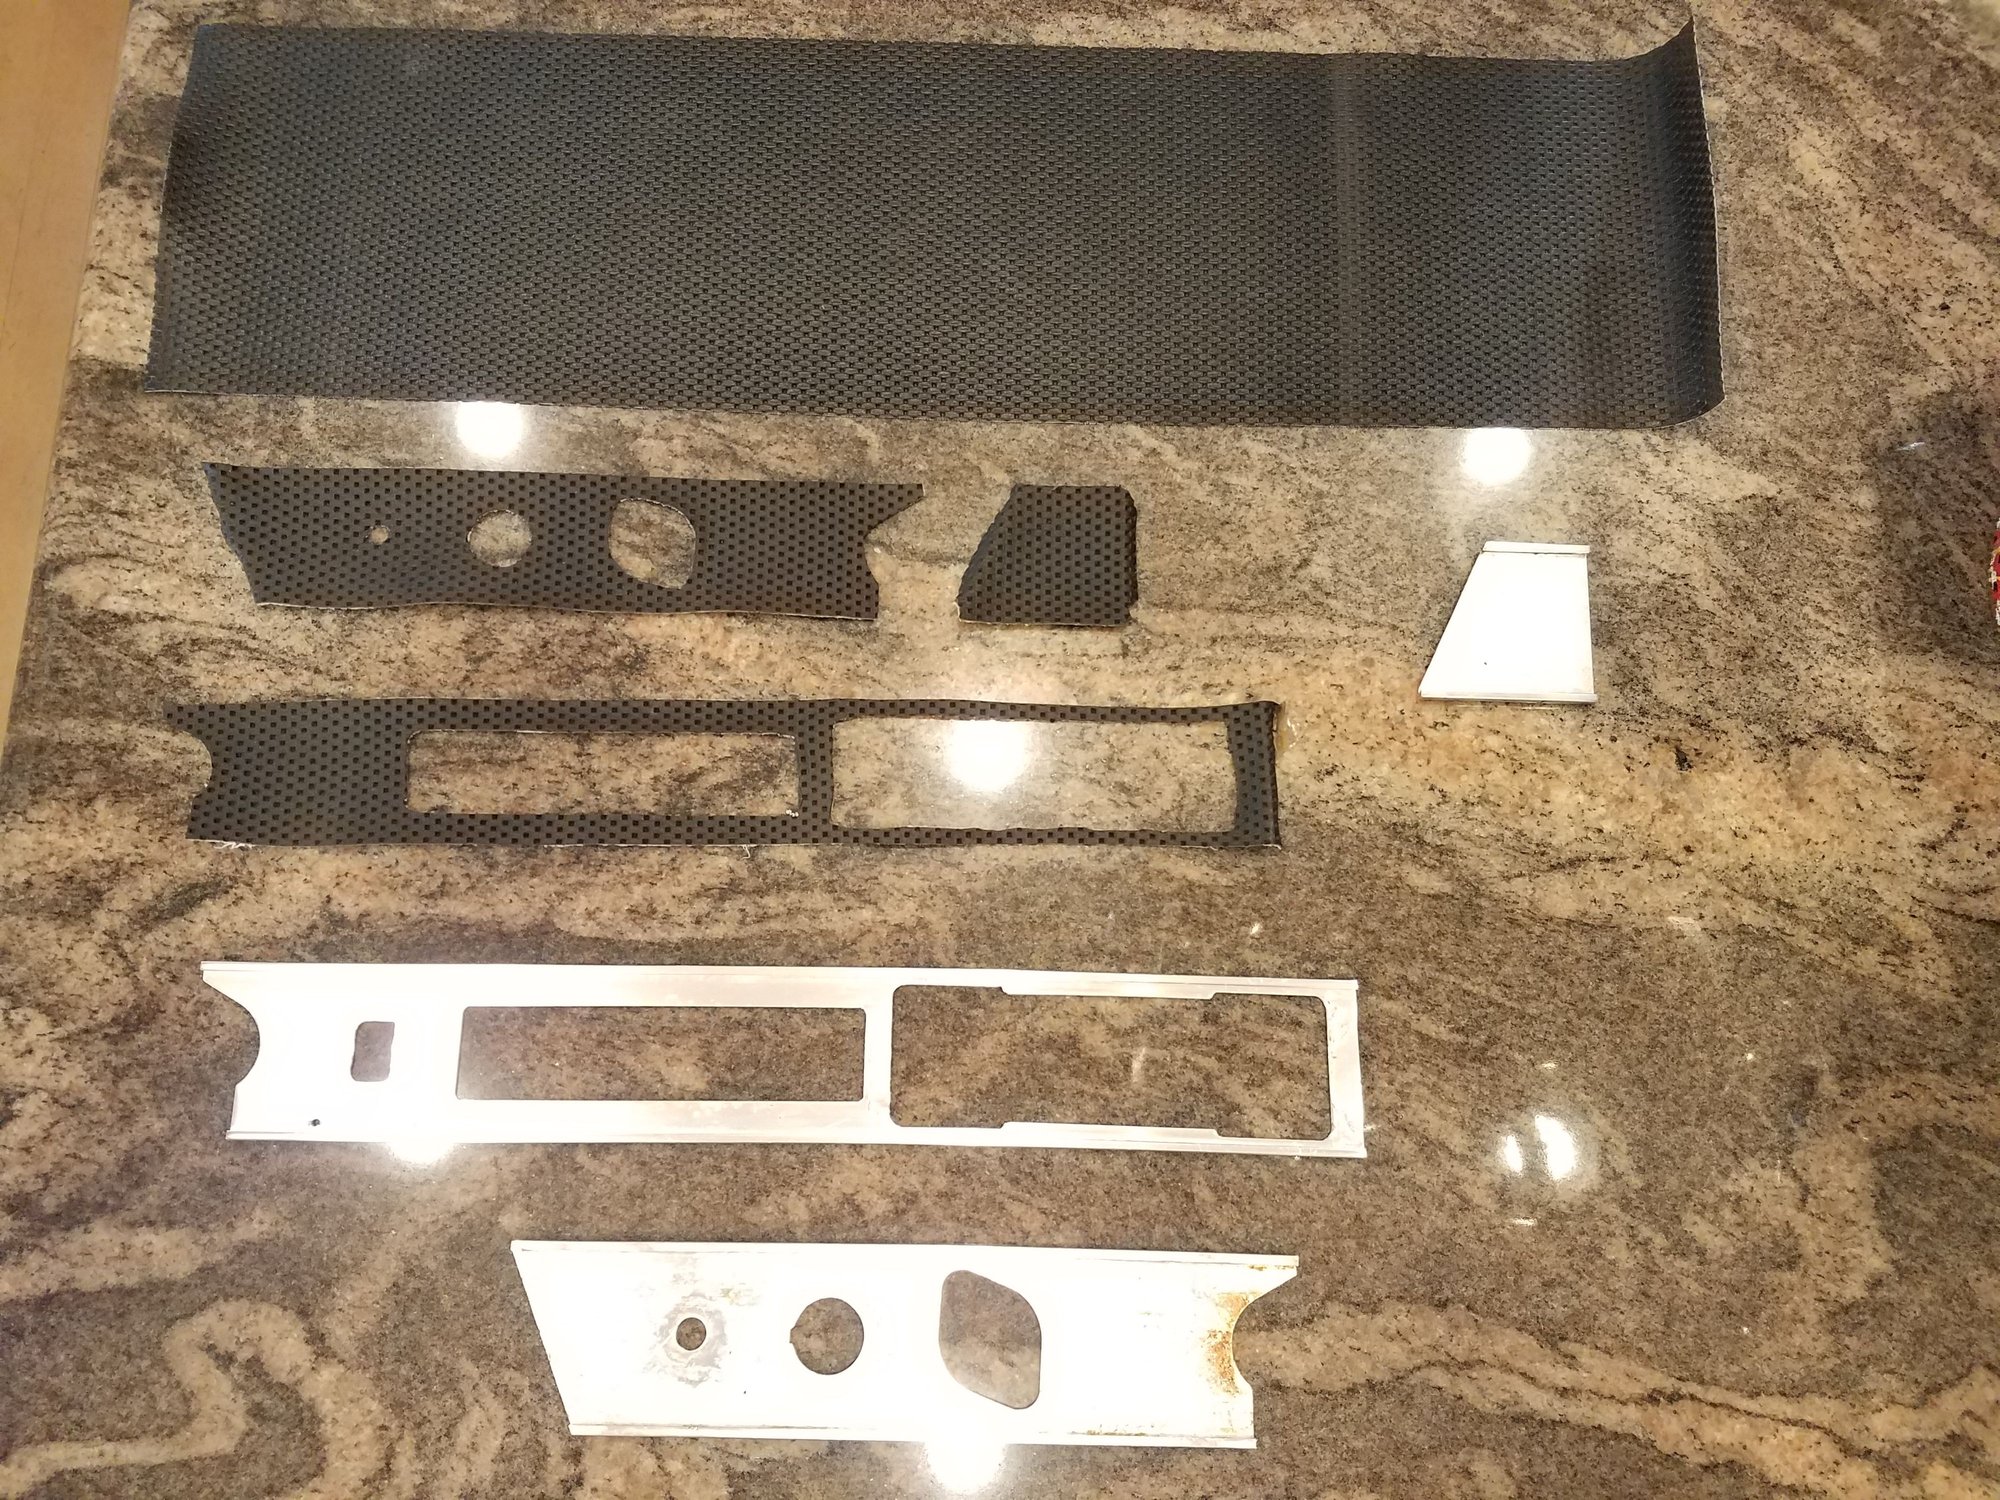
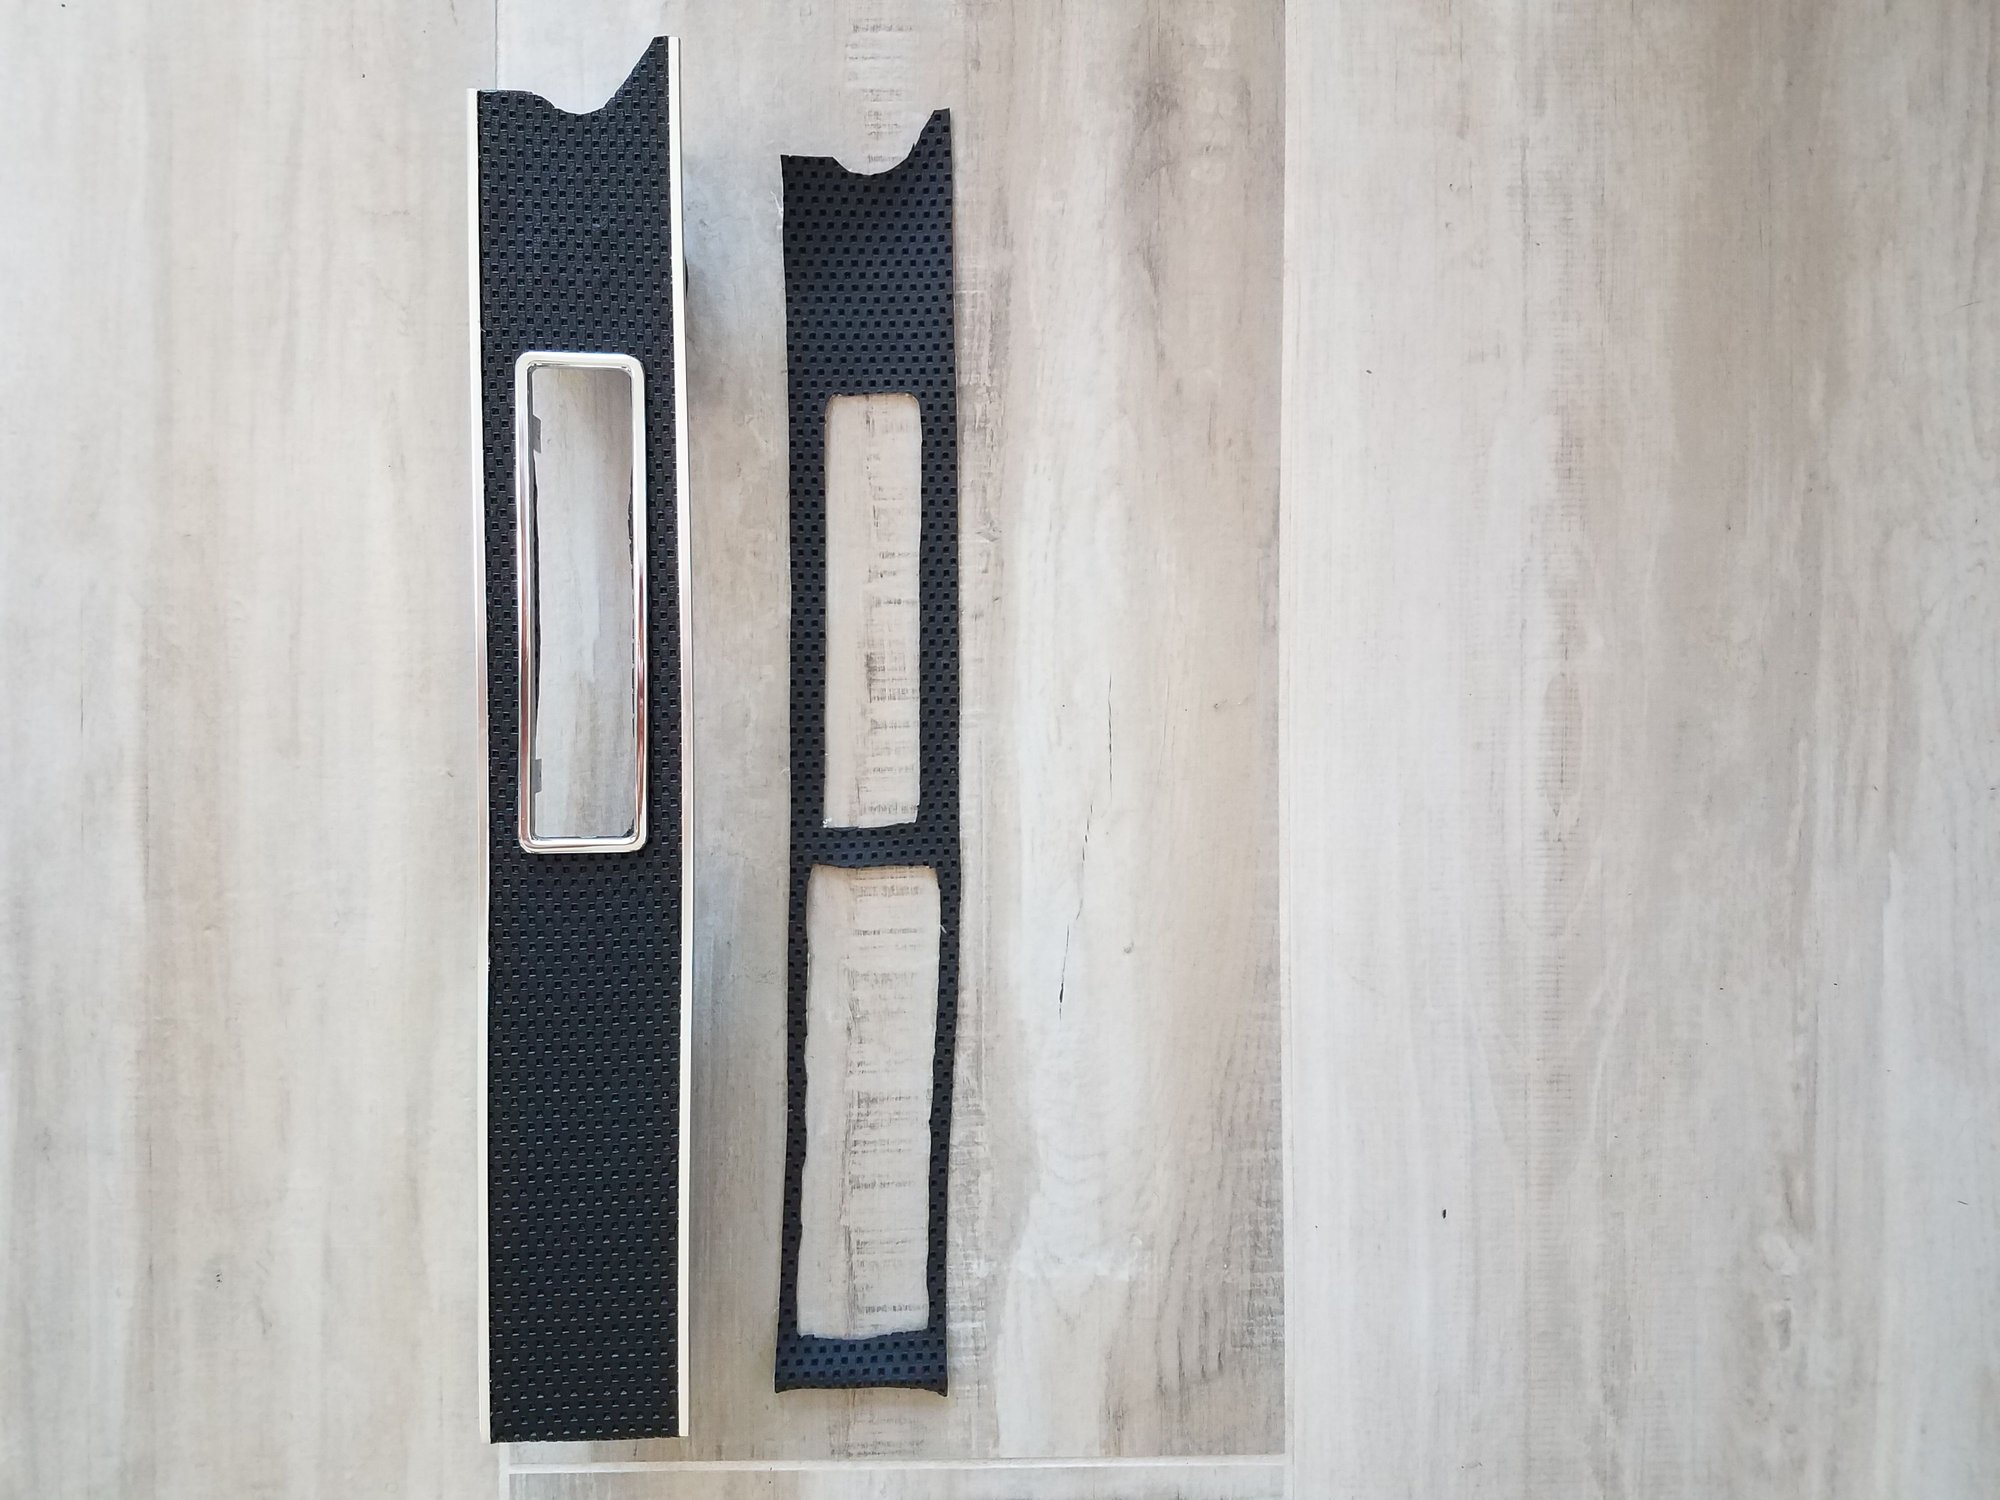
For those following along, I had been fortunate to locate a roll of NOS material for the dash inlay from a guy in Europe on Early S. I finally put that material to work. I wanted a clean radio delete look.
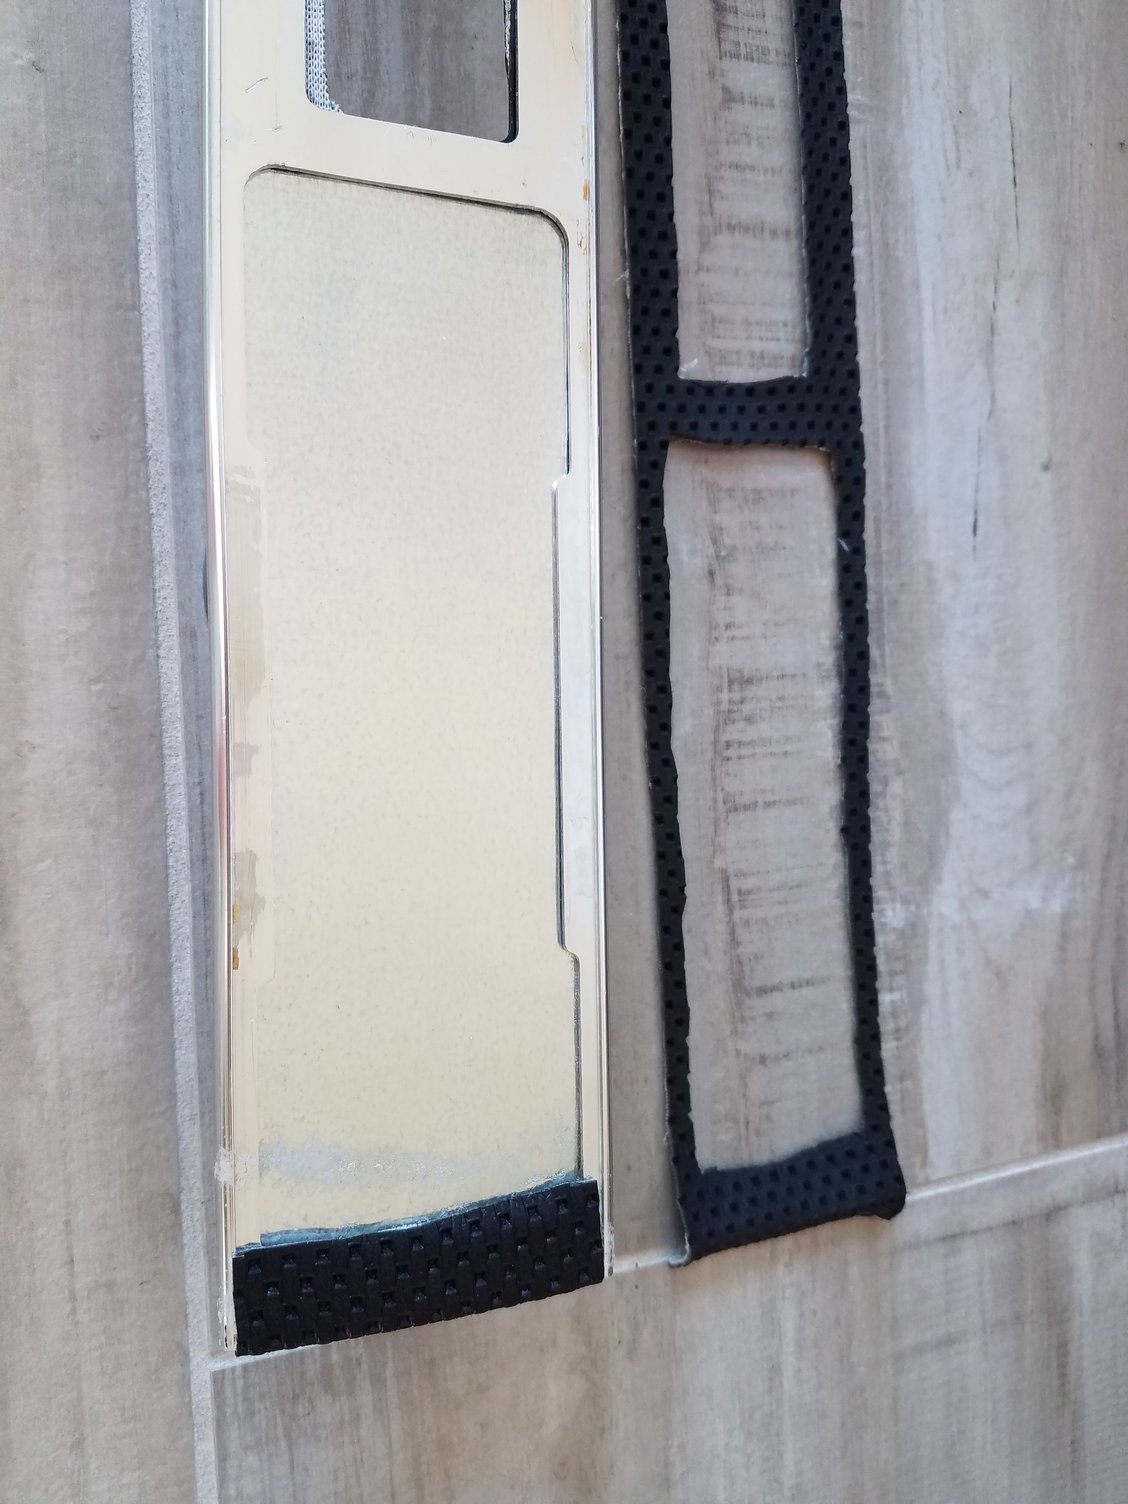
After carefully removing the original material, I used it for a template to cut out the new piece. I will be replacing the entire dash inlay as the black faded and I want a perfect match for this new piece.
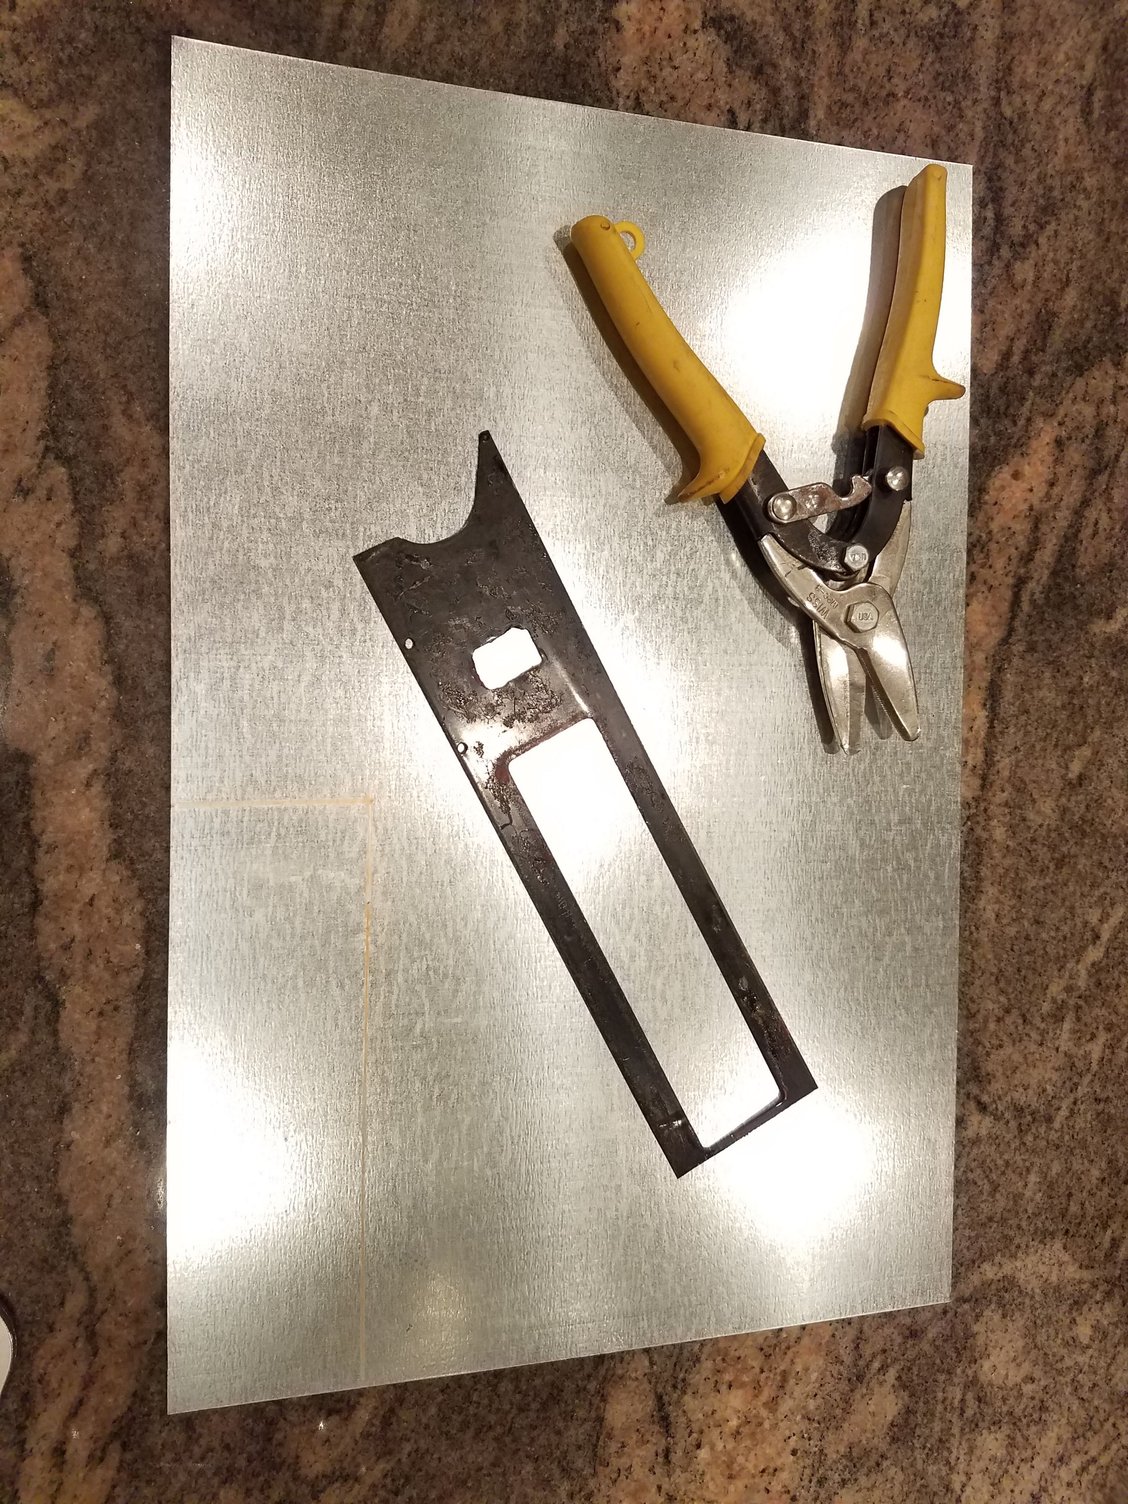
I purchased a piece of very thin (26ga) sheetmetal (same thickness as the stock piece that surrounded the fresh air controls) to cutout the radio block off. Cut that piece out using tin snips.
Used apholstery glue and boom it looks like my car was delivered without a radio.
can you the post thickness of the stock piece on the glove box door? (I need to do this too)
I used 26ga galvanized sheet metal for my radio delete patch - which is 0.55mm, however I haven't removed the trim from my glove box door yet. It is sitting on my dining room table right now and is surprisingly heavy at 2.5lbs. Do I need a glove box door?! haha
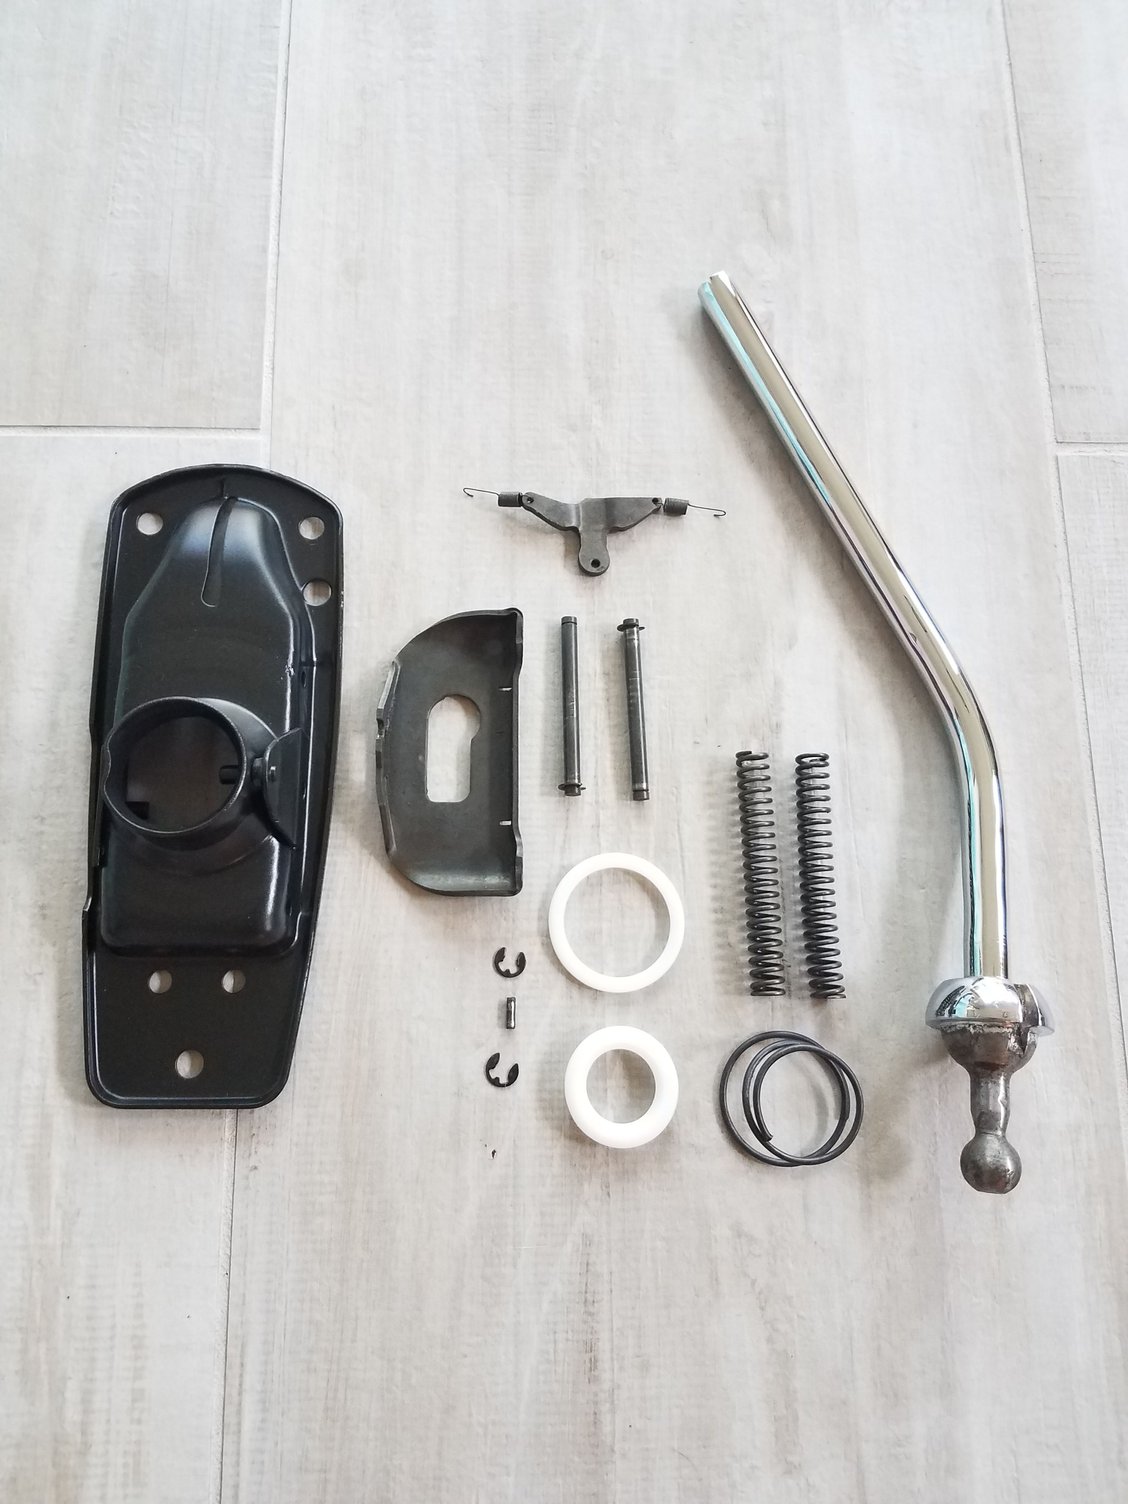
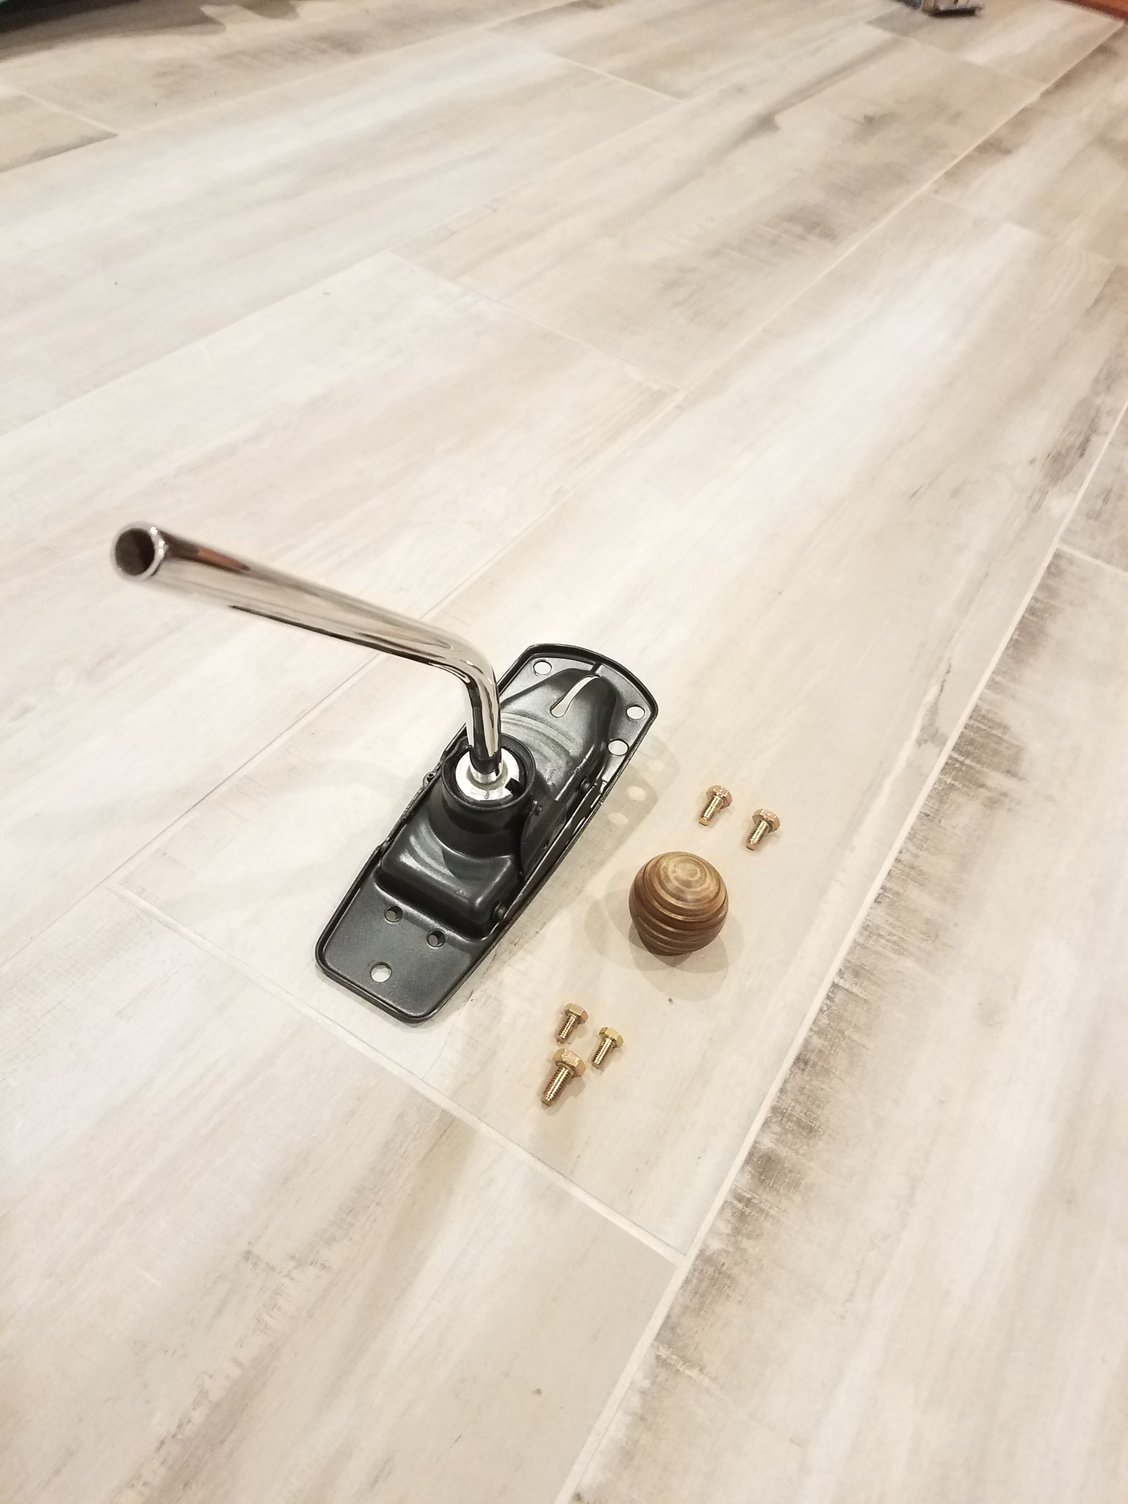
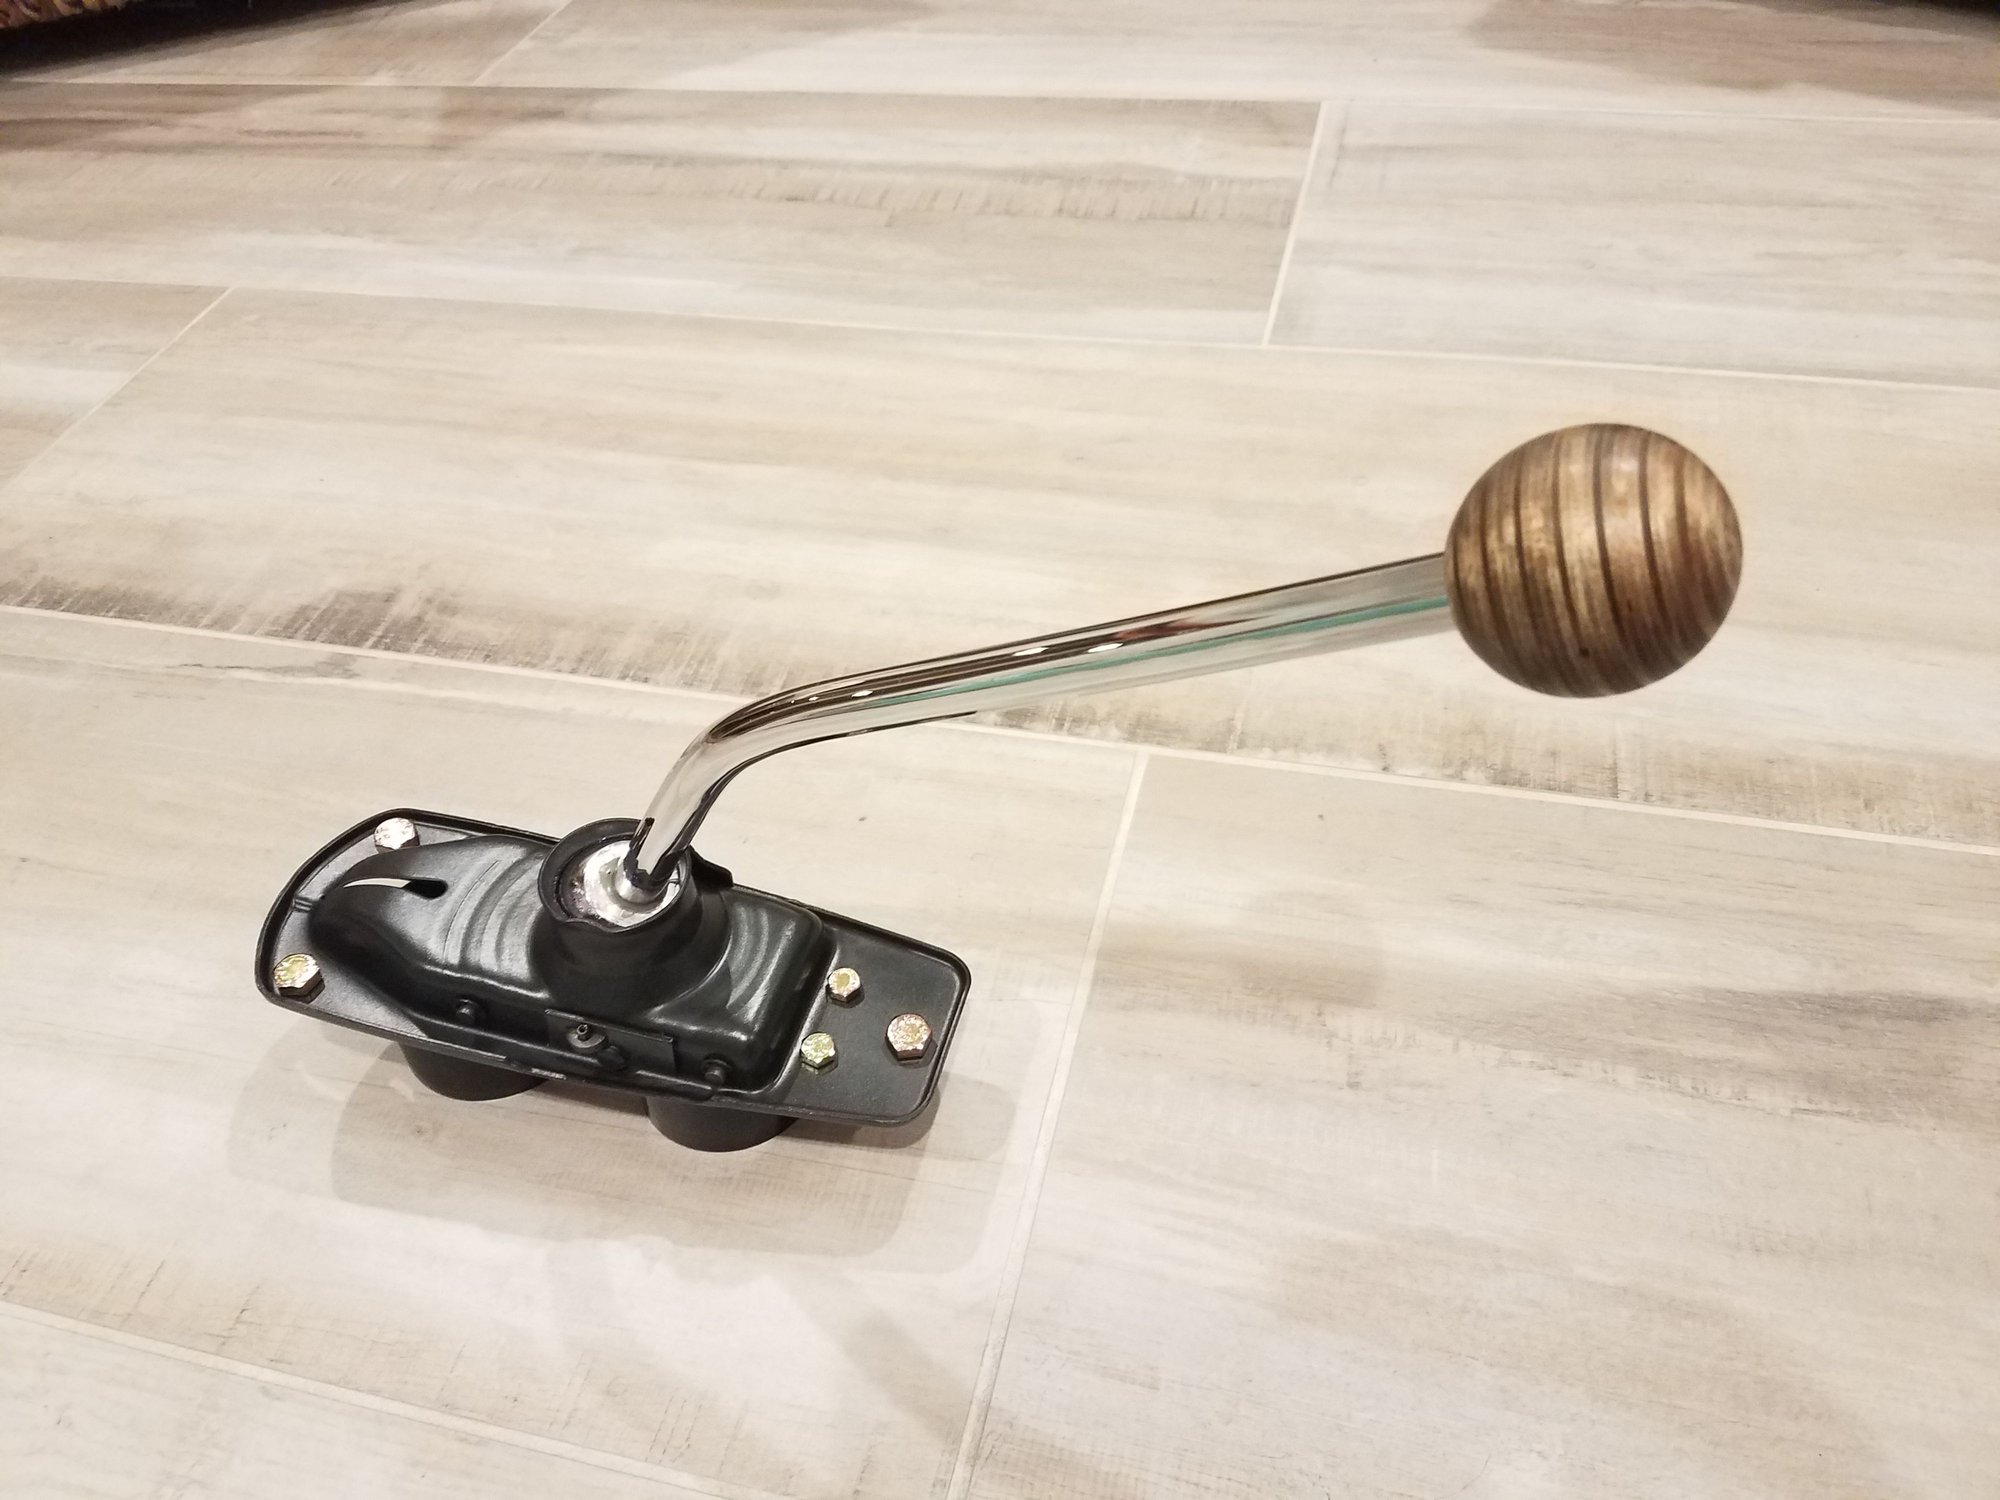
Wanted to share my shifter. Goal was to keep this 1-year only (for '72 915) shift assembly. Happy with the simple yet period correct look I was going for.
Re-chromed the shift rod. Media blasted the base and finished in 2k ceramic paint. Replaced all 3 plastic bushings and re-plated the original hardware. Yes, I have gone off the deep end with this project.
Re-assembled and lubed the unit. Compressing and reinstalling the lockout springs has been added to my list of least favorite tasks on a Porsche - huge pain.
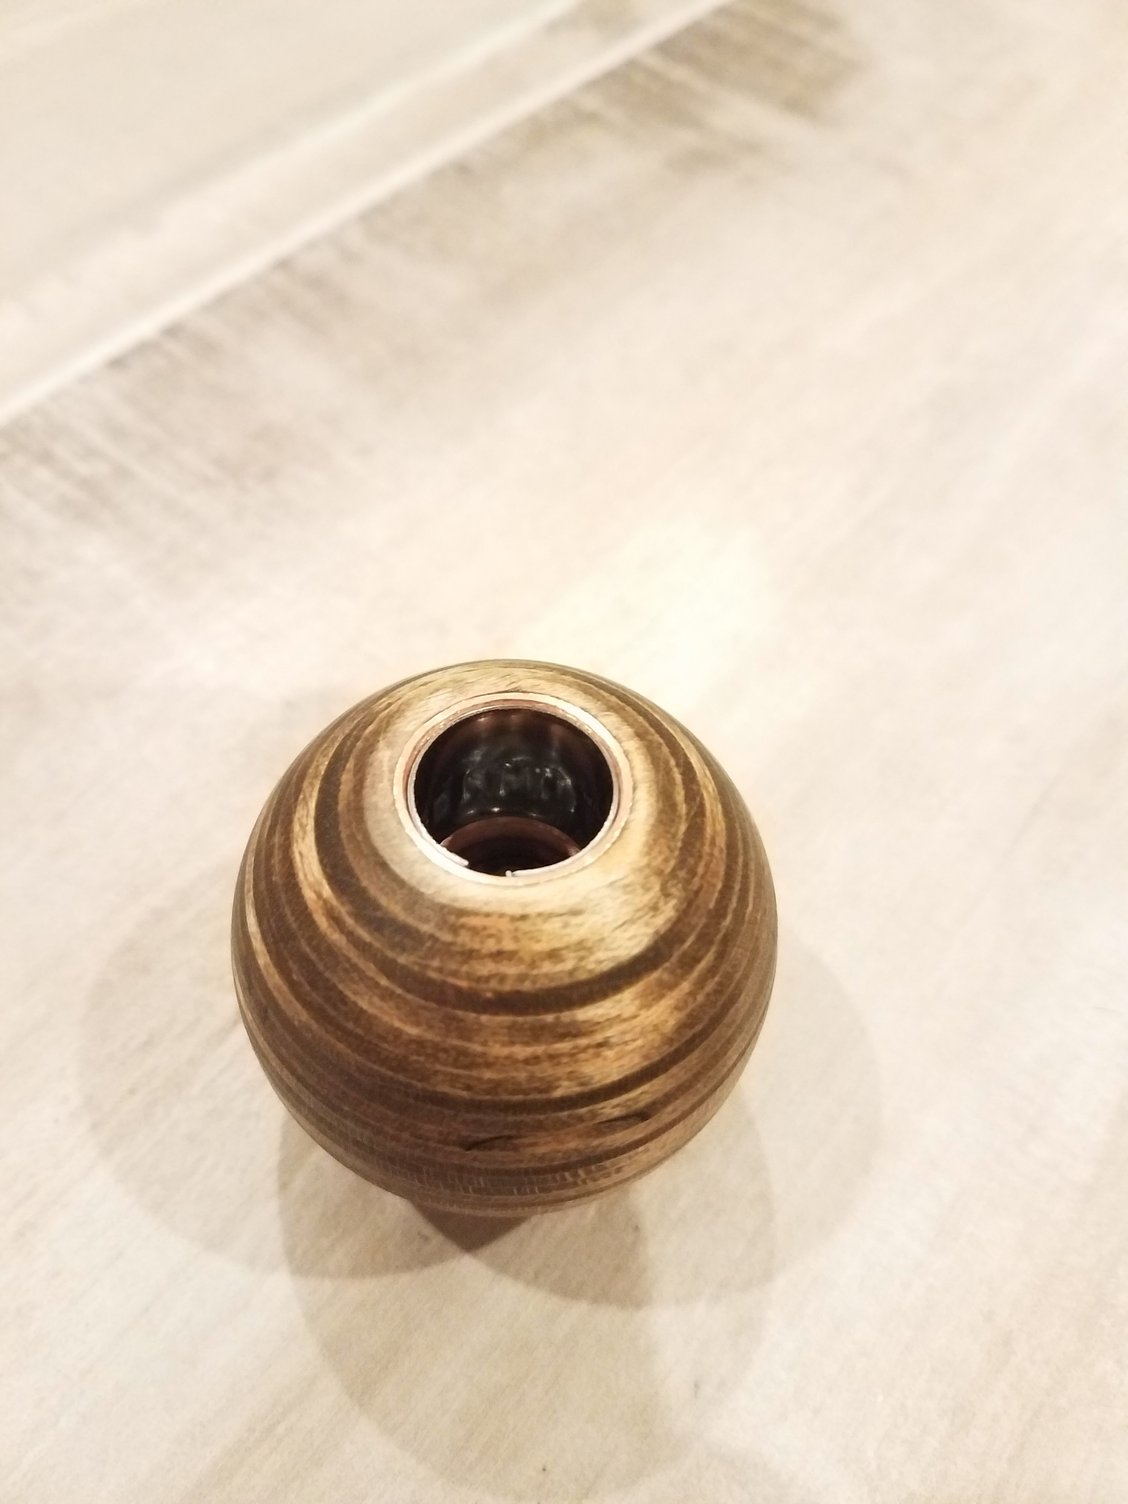
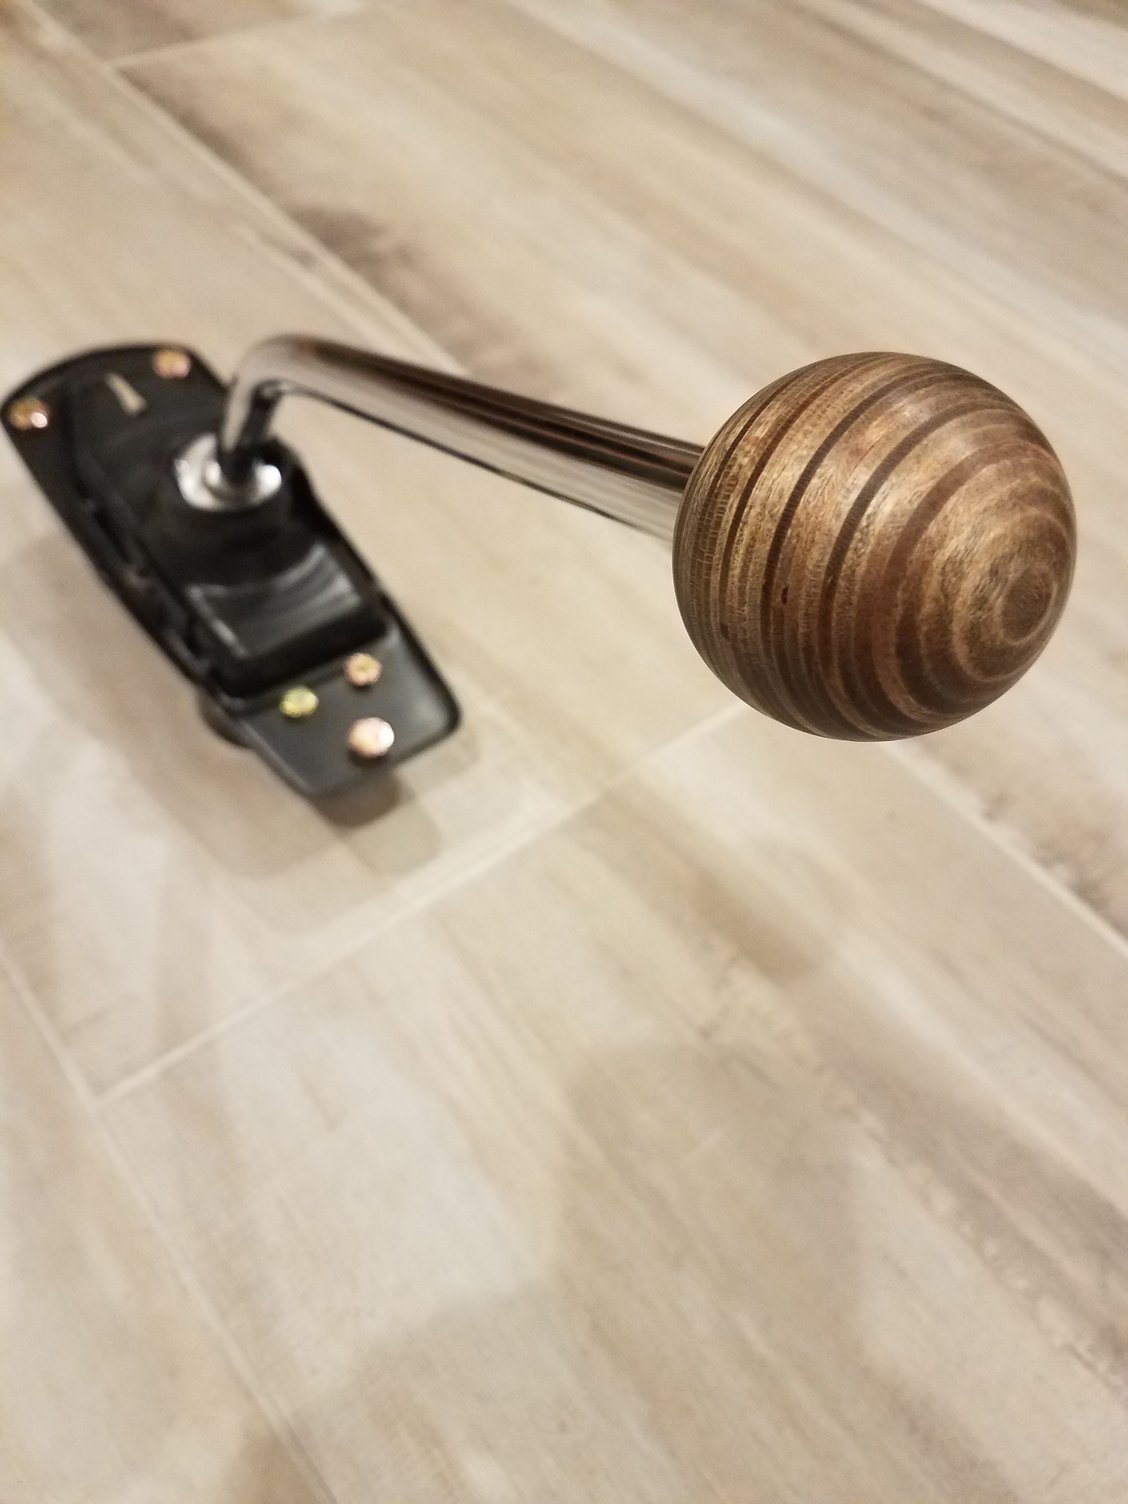
I looked at many 917/908 style shift ***** and landed on one from a guy in Poland. Took a month to arrive but very happy with it. It is his 'patina look' version which fits what I am going for. It is dull instead of shiny and looks like it has been worn by use over years.
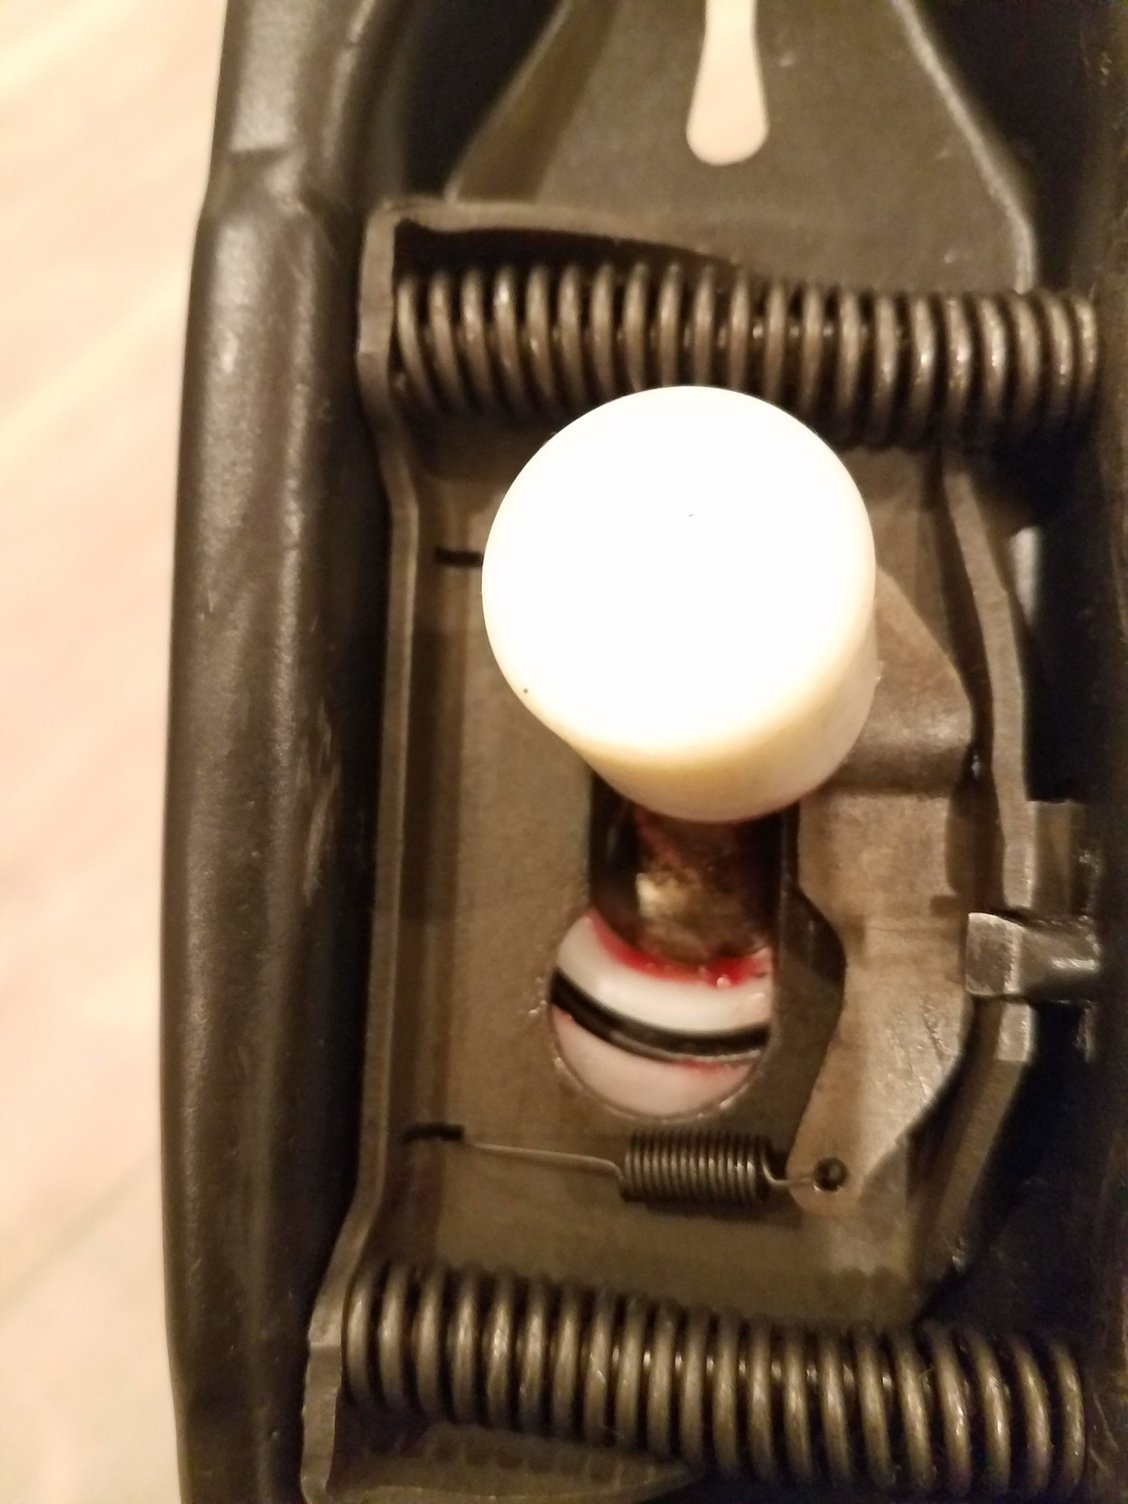
Copper metal mount and new crush sleeve.
Here is what it will look like when installed in my car. I will not put the rubber boot back on and will leave the whole assembly exposed in the car instead of covering the base with the carpet, like stock.
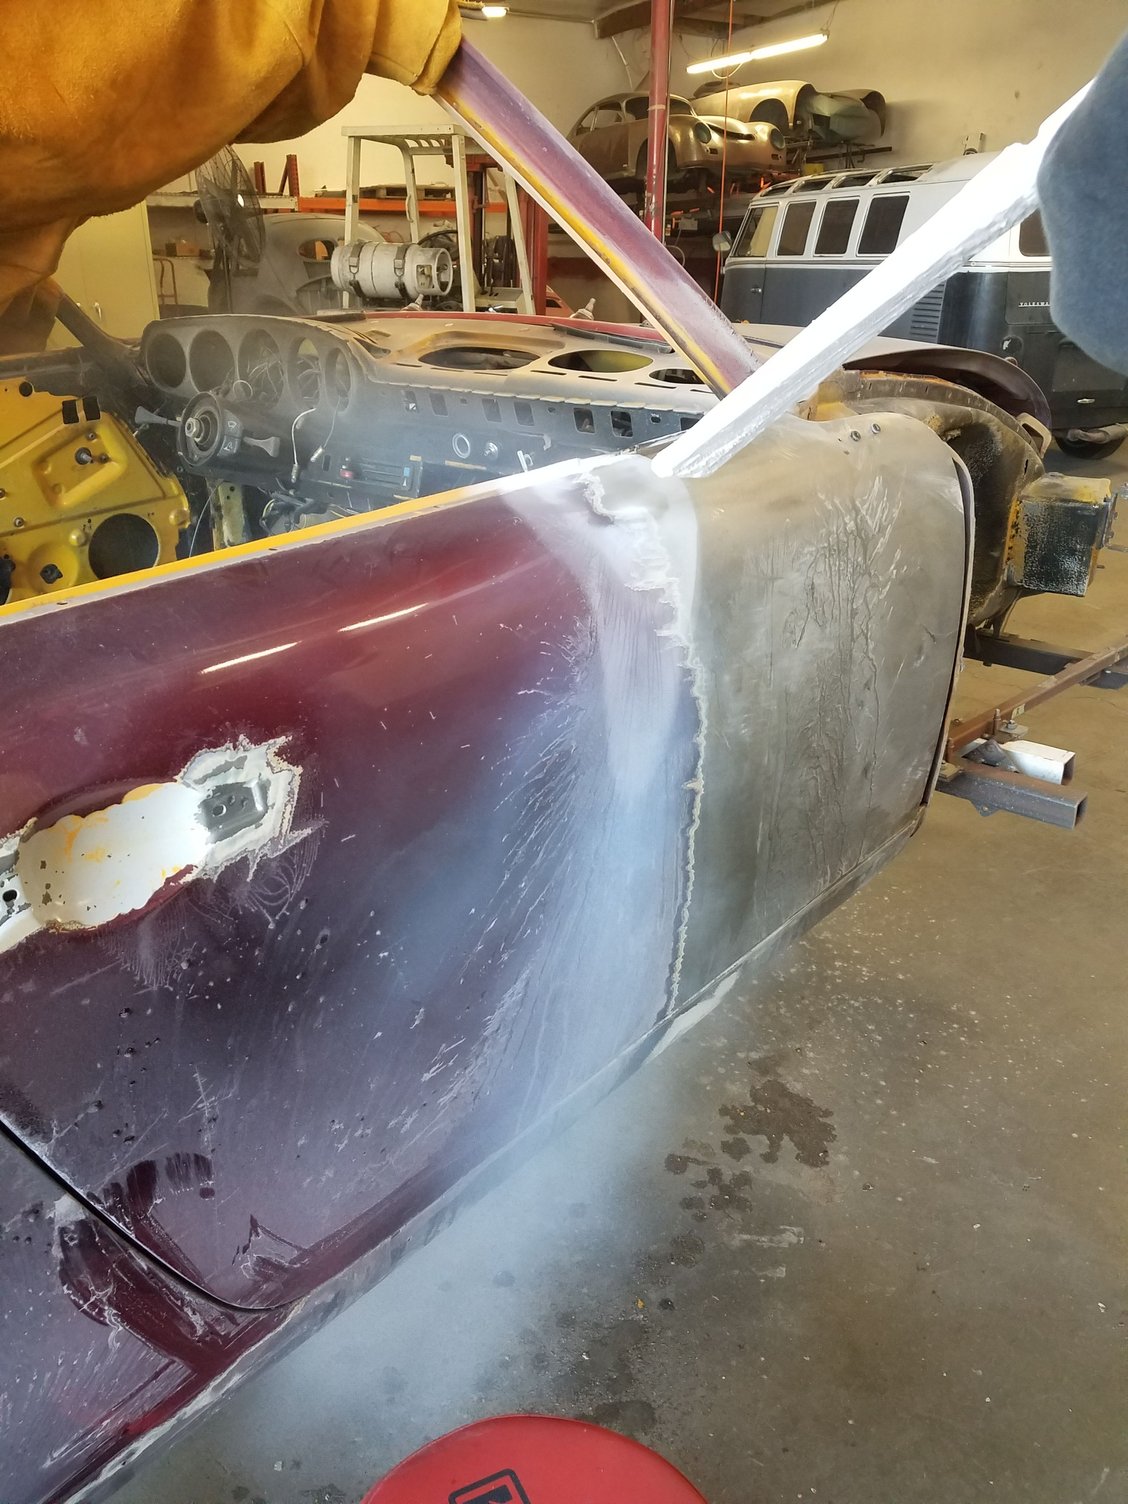
Stopped by Andy's shop and gave the dry ice blaster a try - very cool machine.
Quick shot of the door that I blasted. It strips all layers of paint and primer with no mess - leaves just clean, beautiful metal. If you look where the door handle attaches you can see it was quickly blasted and how it removes all of the paint along the inner edges of the mounting holes/slots even - this is usually tedious with chemical stripper or other methods.
looks great. shifter turned out nice too. I think mine had been redone but I had new bushings installed and the Wevo coupler. That improved the action for sure. But I like the stock shift rod/mechanismm over the wevo which i think shifts "better" but not "Better" if you know what I mean... i kinda like the floppy 901 feel.
thanks, man. I will most likely go with the Wevo coupler too - my car has an upgraded coupler on it from prior owner so may just see how everything shifts when it is back together before moving to the Wevo. I hear exactly what you mean about better vs Better. I think you can get great shift feel on a 901/915 with just ensuring all of the various bushings are replaced and the linkage is all correctly adjusted/aligned. Stock setup certainly gives you that vintage feel - which is why I like these old cars - sloppy and all haha.
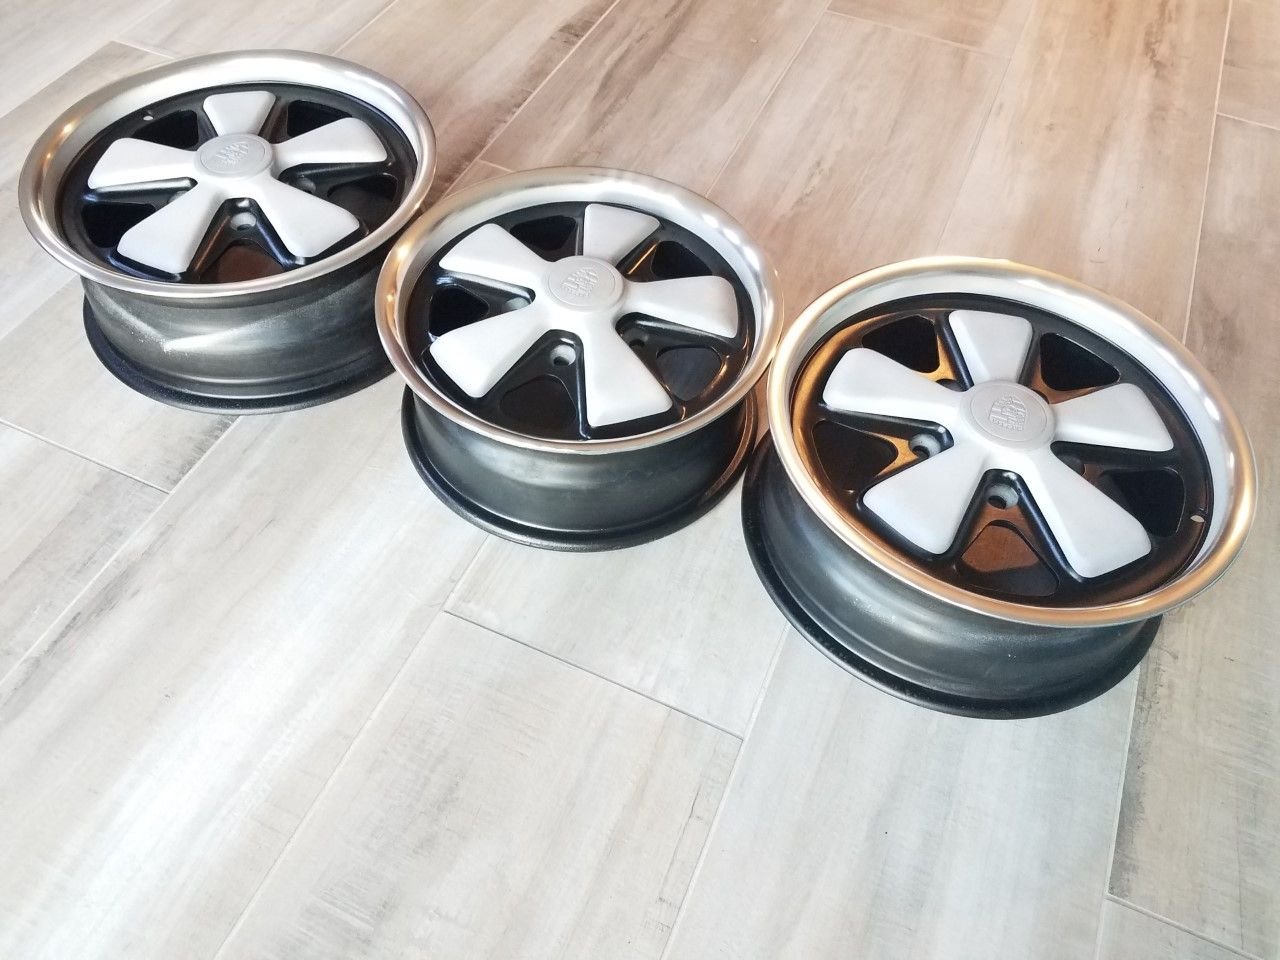
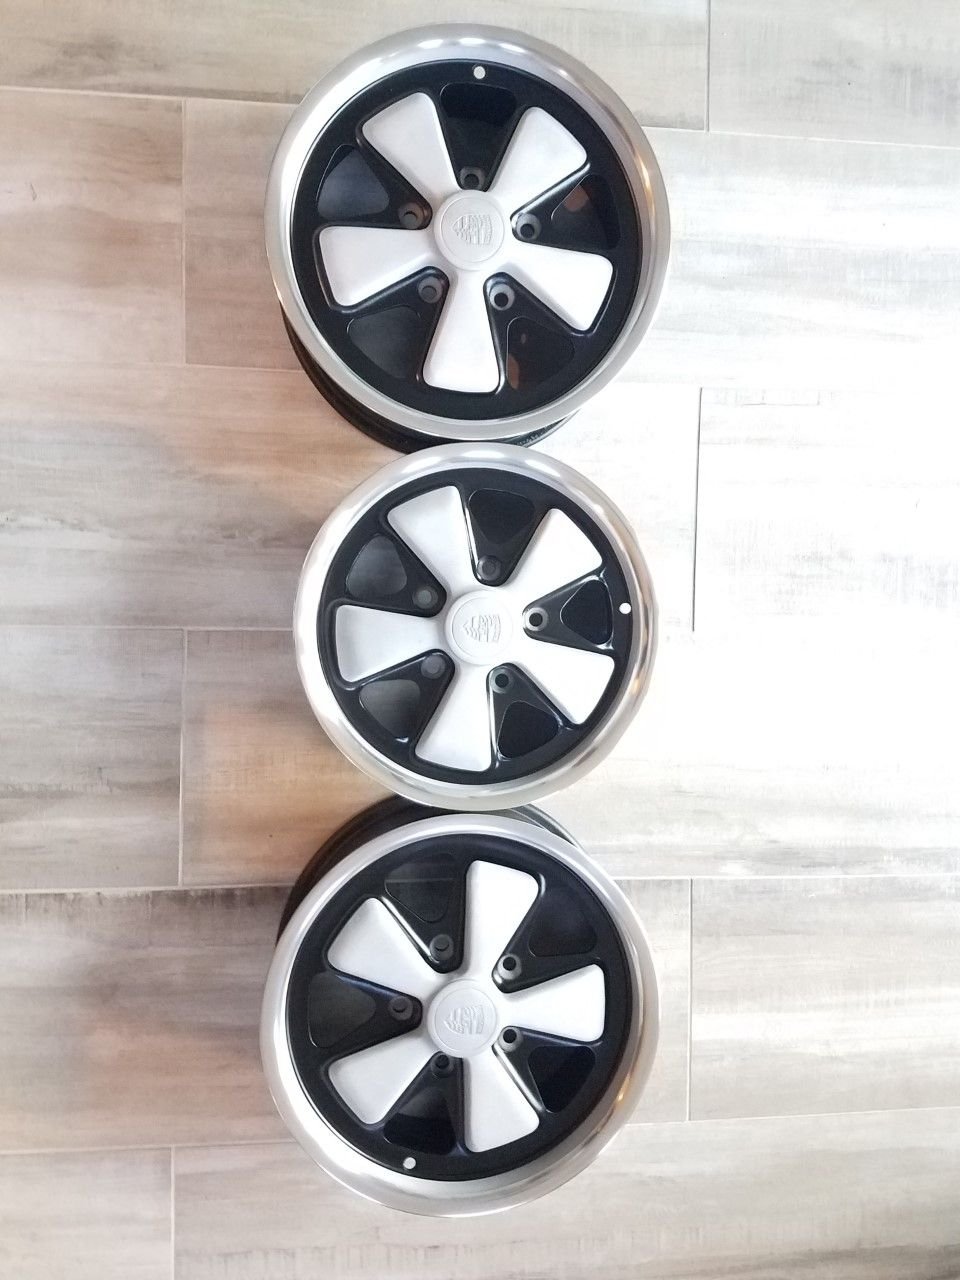
I have been meaning to update the status on my wheels. Here are a couple shots of them - I am done fiddling with these. The 14" wheel is in the middle - I thought that thing was beyond restoration but it came out nice with a bunch of elbow grease. I struggled experimenting with clear coats and got tired of stripping and starting over. The issue with the clear (and I tried more than one brand) is that it changed the look of the rough textured areas. I was going for the heavy 'frosted' look but keeping those areas a bit 'brighter'. When I look at photos of RSR finished wheels (even Magnus - whose process I followed) those frosted areas look like mine after I cleared them - they are 'duller'. I guess I am veering away a bit from the more correct RSR look since I prefer this brighter look to the frosted areas. The issue is that the wheels will have no clear protection which will make keeping them clean a PITA and may be susceptible to corrosion. We will just have to see - I spent a whole $30 per wheel on this process so who cares. I'm sure someday I will want them correctly finished by an expert anyhow. The lowest estimate I received for RSR finishing was $265 per wheel.
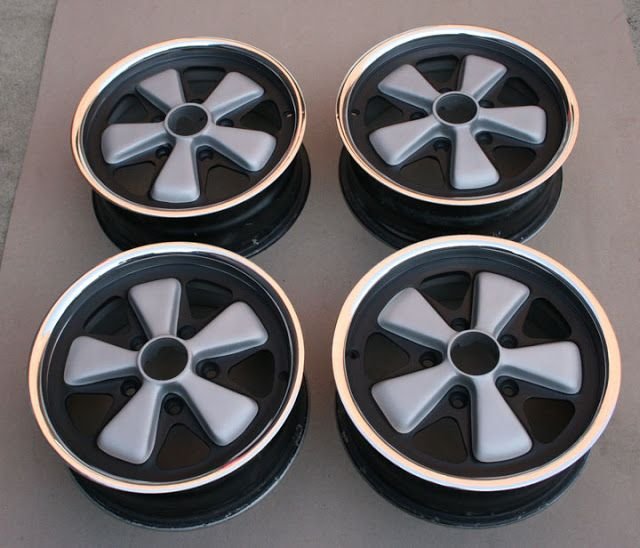
Here are Magnus' wheels - see the color difference on the petals? This is what mine looked like with clear - not sure I like this as much as the raw, brighter finish.


 11-11-2019, 07:58 PM