Notices
911 Forum 1964-1989
Sponsored by:
Sponsored by: Intercity Lines, LLC

'72 911T Hot Rod Build

Thread Tools
 
Search this Thread
 
Old 11-02-2019, 04:07 PM
  #481  
r911
Anti-Cupholder League
 
r911's Avatar
 
Join Date: Aug 2003
Posts: 3,935
Received 117 Likes on 100 Posts
Default

what is that round hole on the LH side of the vertical panel?
Old 11-02-2019, 04:29 PM
  #482  
myflat6
Drifting
Thread Starter
 
myflat6's Avatar
 
Join Date: Nov 2014
Location: Orange County, CA & Tucson, AZ
Posts: 2,165
Received 192 Likes on 123 Posts
Default

^if you are talking about the parcel shelf that round hole (at the top of the photo) is for the defroster wiring. A small rubber grommet pops in there. When installed, that end of the panel will be on the driver side.
Old 11-02-2019, 06:09 PM
  #483  
r911
Anti-Cupholder League
 
r911's Avatar
 
Join Date: Aug 2003
Posts: 3,935
Received 117 Likes on 100 Posts
Default

Thx - it is the vertical part just below the shelf per se - with the hand next to it

that is the only area on my car I've never torn apart
Old 11-02-2019, 10:25 PM
  #484  
myflat6
Drifting
Thread Starter
 
myflat6's Avatar
 
Join Date: Nov 2014
Location: Orange County, CA & Tucson, AZ
Posts: 2,165
Received 192 Likes on 123 Posts
Default

^ Oh, I see what you are talking about. That is the seat back/rear bulkhead and the hole was for the wiring for the super sweet 1980's Clifford alarm that was installed in my car before I tore it all out.
Old 11-06-2019, 11:41 PM
  #485  
myflat6
Drifting
Thread Starter
 
myflat6's Avatar
 
Join Date: Nov 2014
Location: Orange County, CA & Tucson, AZ
Posts: 2,165
Received 192 Likes on 123 Posts
Default

Fuel pump is back from Fuel Injection Corp. It basically looks new.


I had already media blasted and painted the mounting bracket. I also had the mounting hardware re-plated. I used 2k ceramic paint on the bracket.


Pump is in its cradle waiting for the day to come to be installed on the car.


Old 11-07-2019, 04:27 PM
  #486  
myflat6
Drifting
Thread Starter
 
myflat6's Avatar
 
Join Date: Nov 2014
Location: Orange County, CA & Tucson, AZ
Posts: 2,165
Received 192 Likes on 123 Posts
Default

Chrome parts back from plater. Time to put together some stuff!


Old 11-08-2019, 10:58 AM
  #487  
myflat6
Drifting
Thread Starter
 
myflat6's Avatar
 
Join Date: Nov 2014
Location: Orange County, CA & Tucson, AZ
Posts: 2,165
Received 192 Likes on 123 Posts
Default

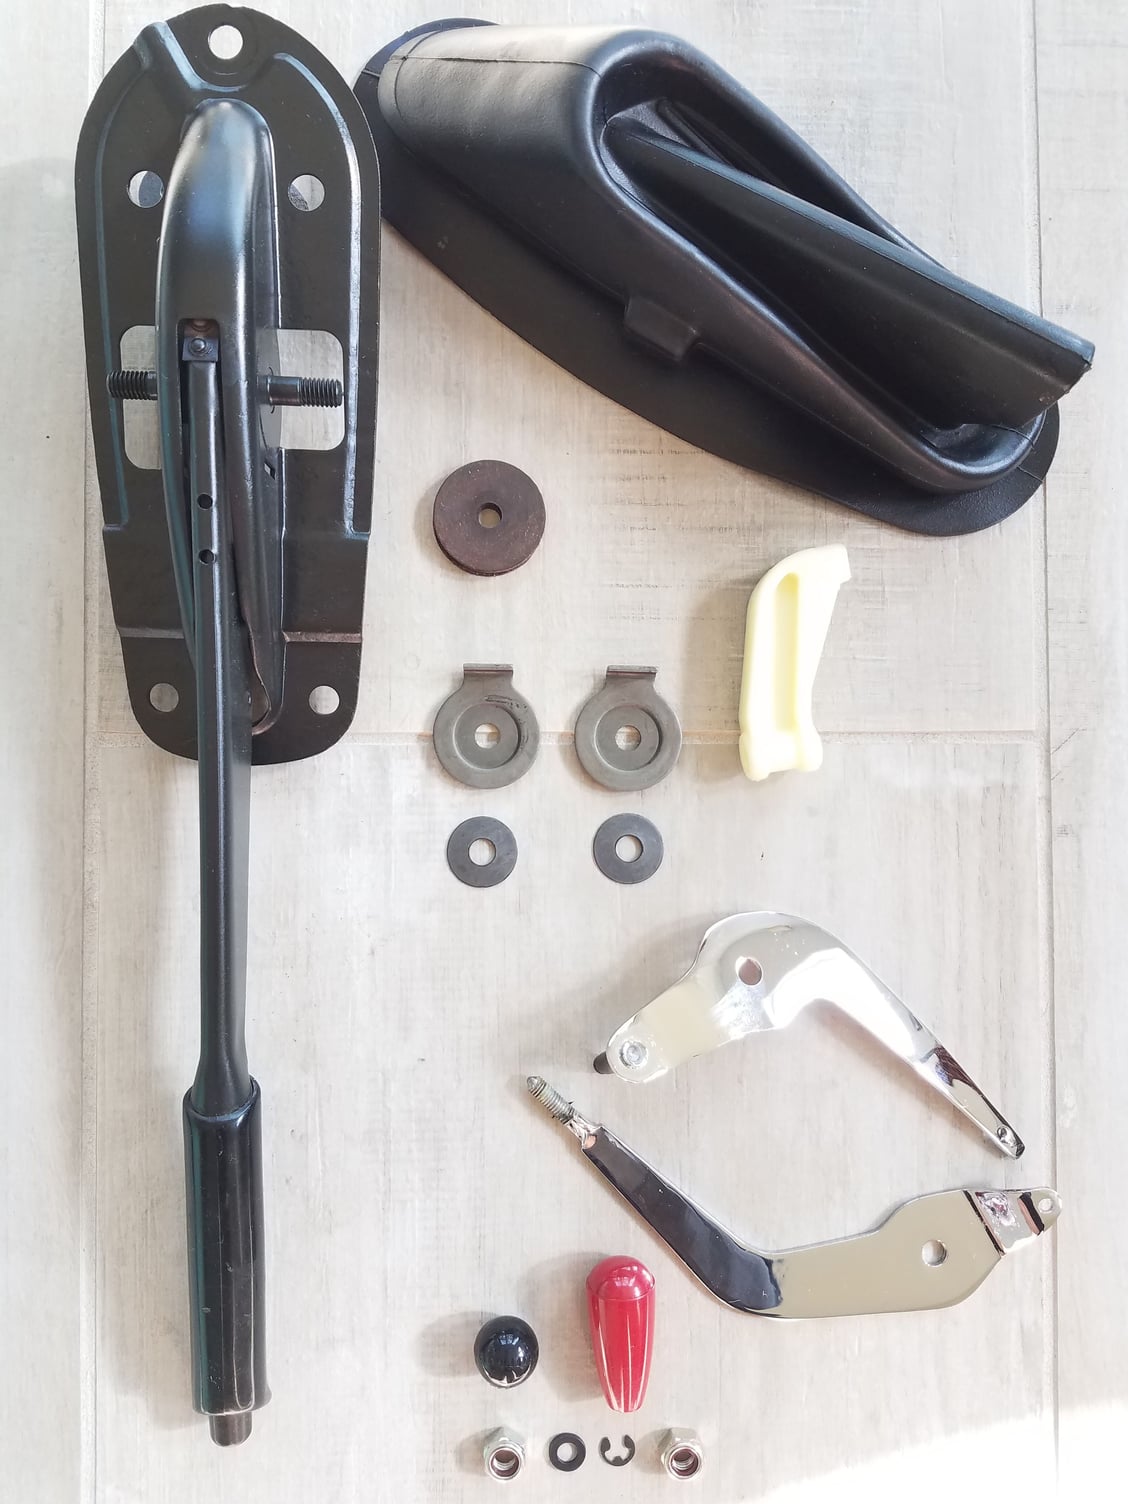
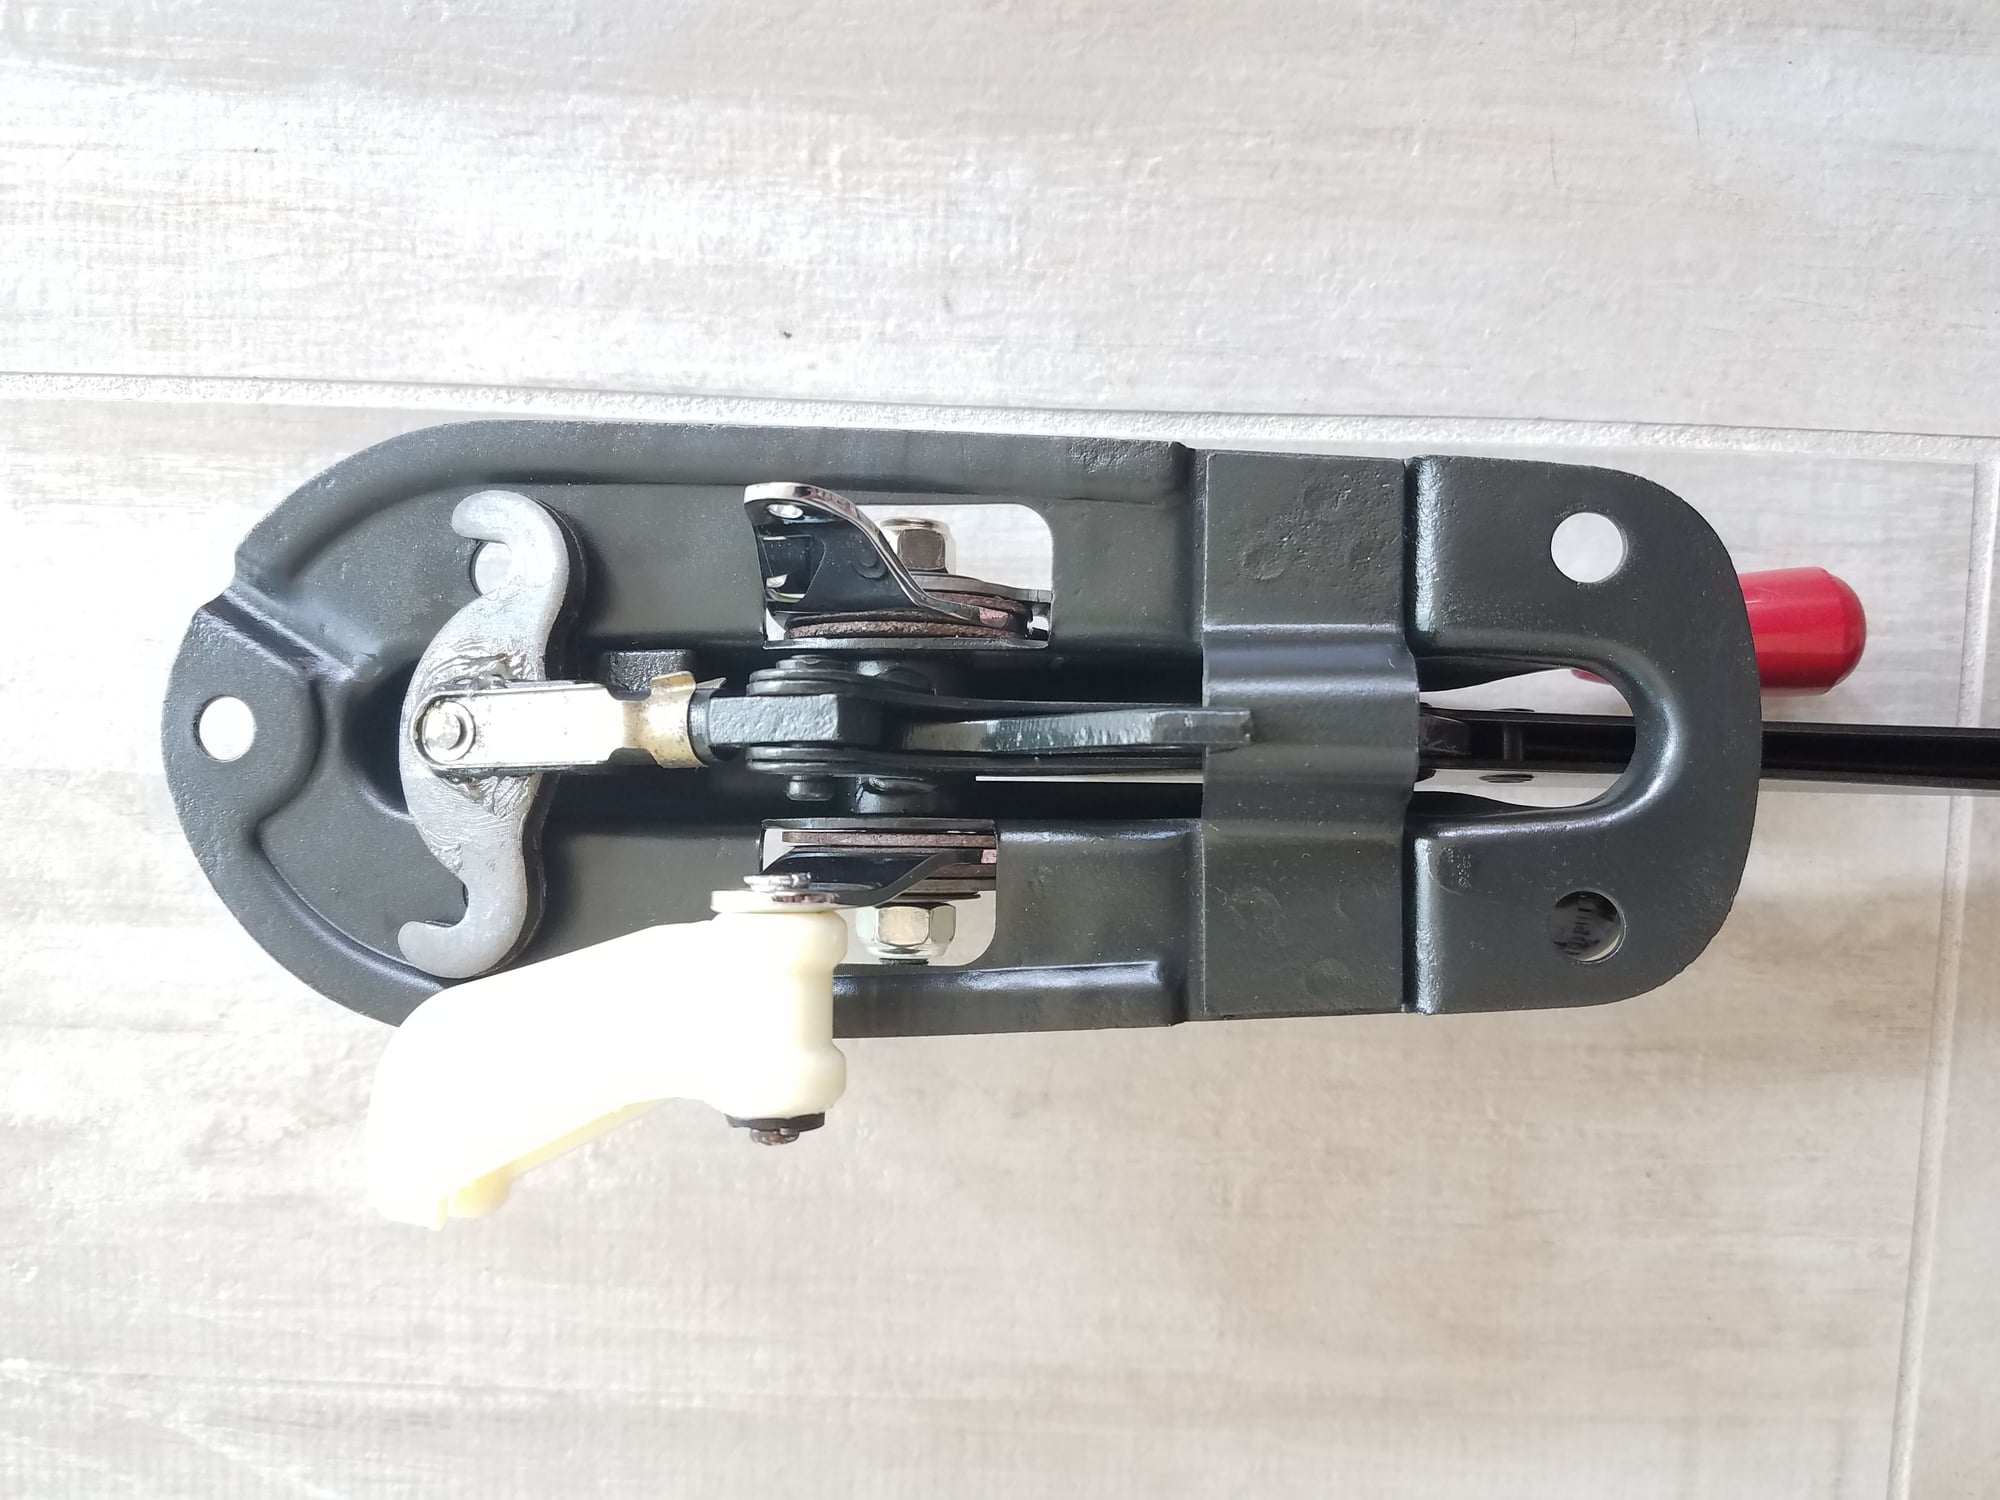
Put my e-brake assembly back together. The housing was media blasted and refinished in 2k ceramic. Levers chrome plated and hardware refinished or replaced with new.

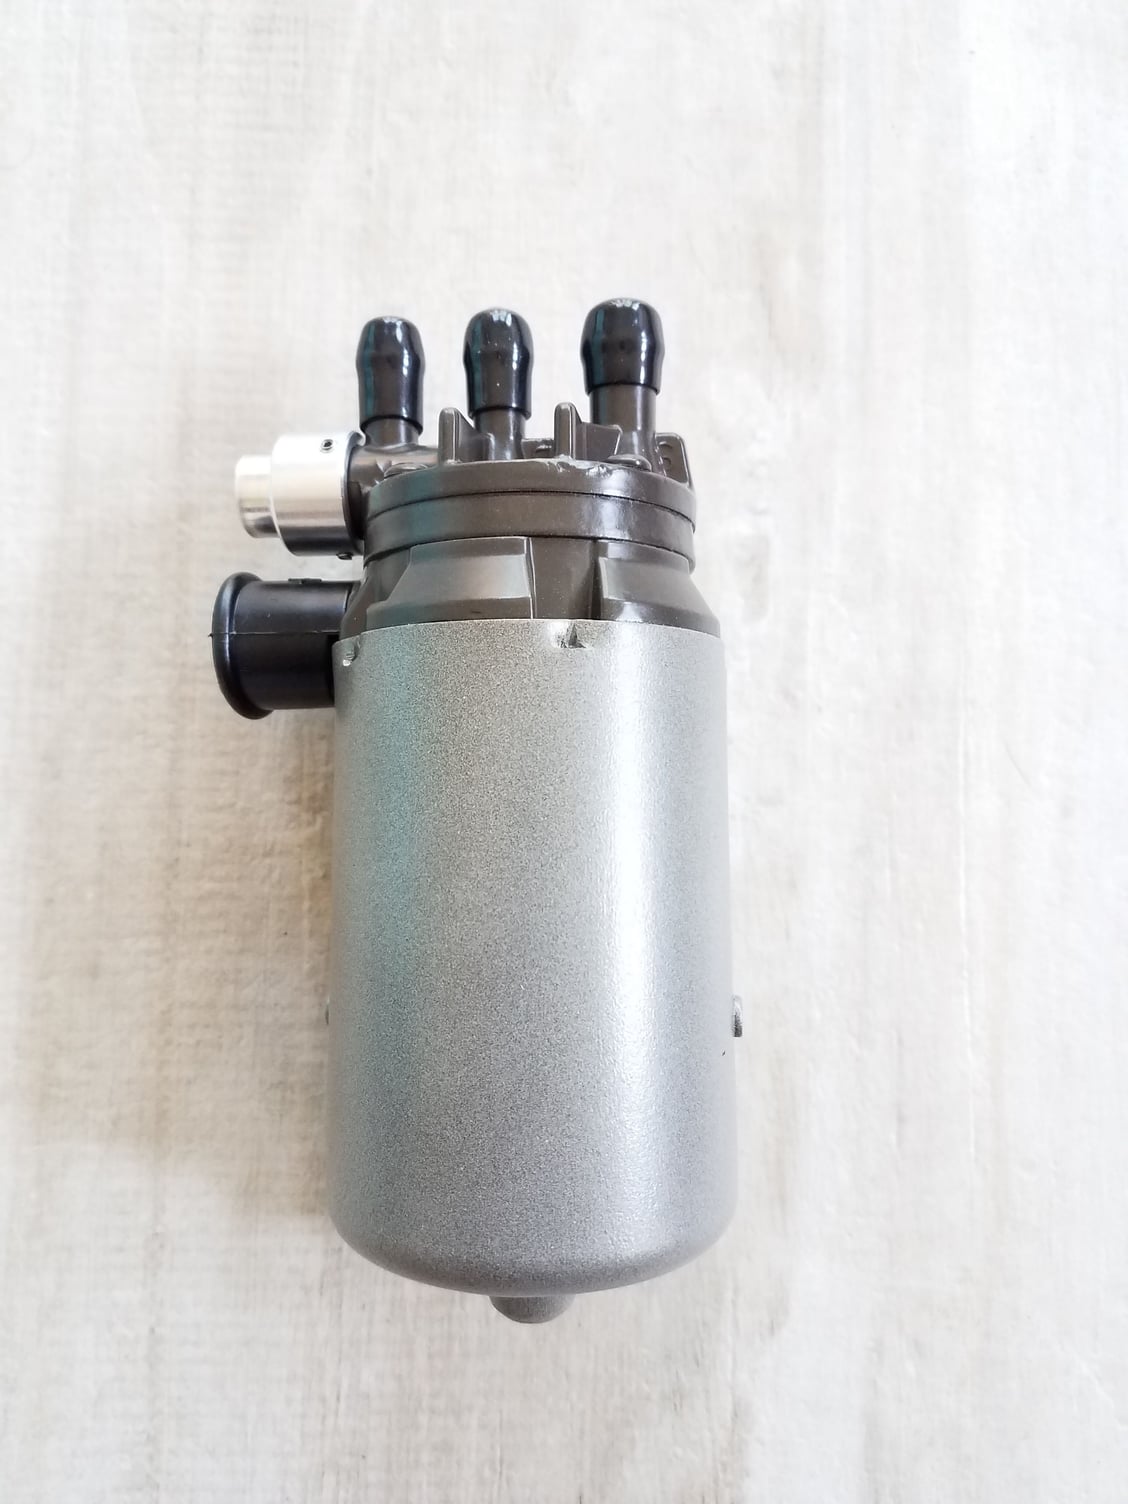
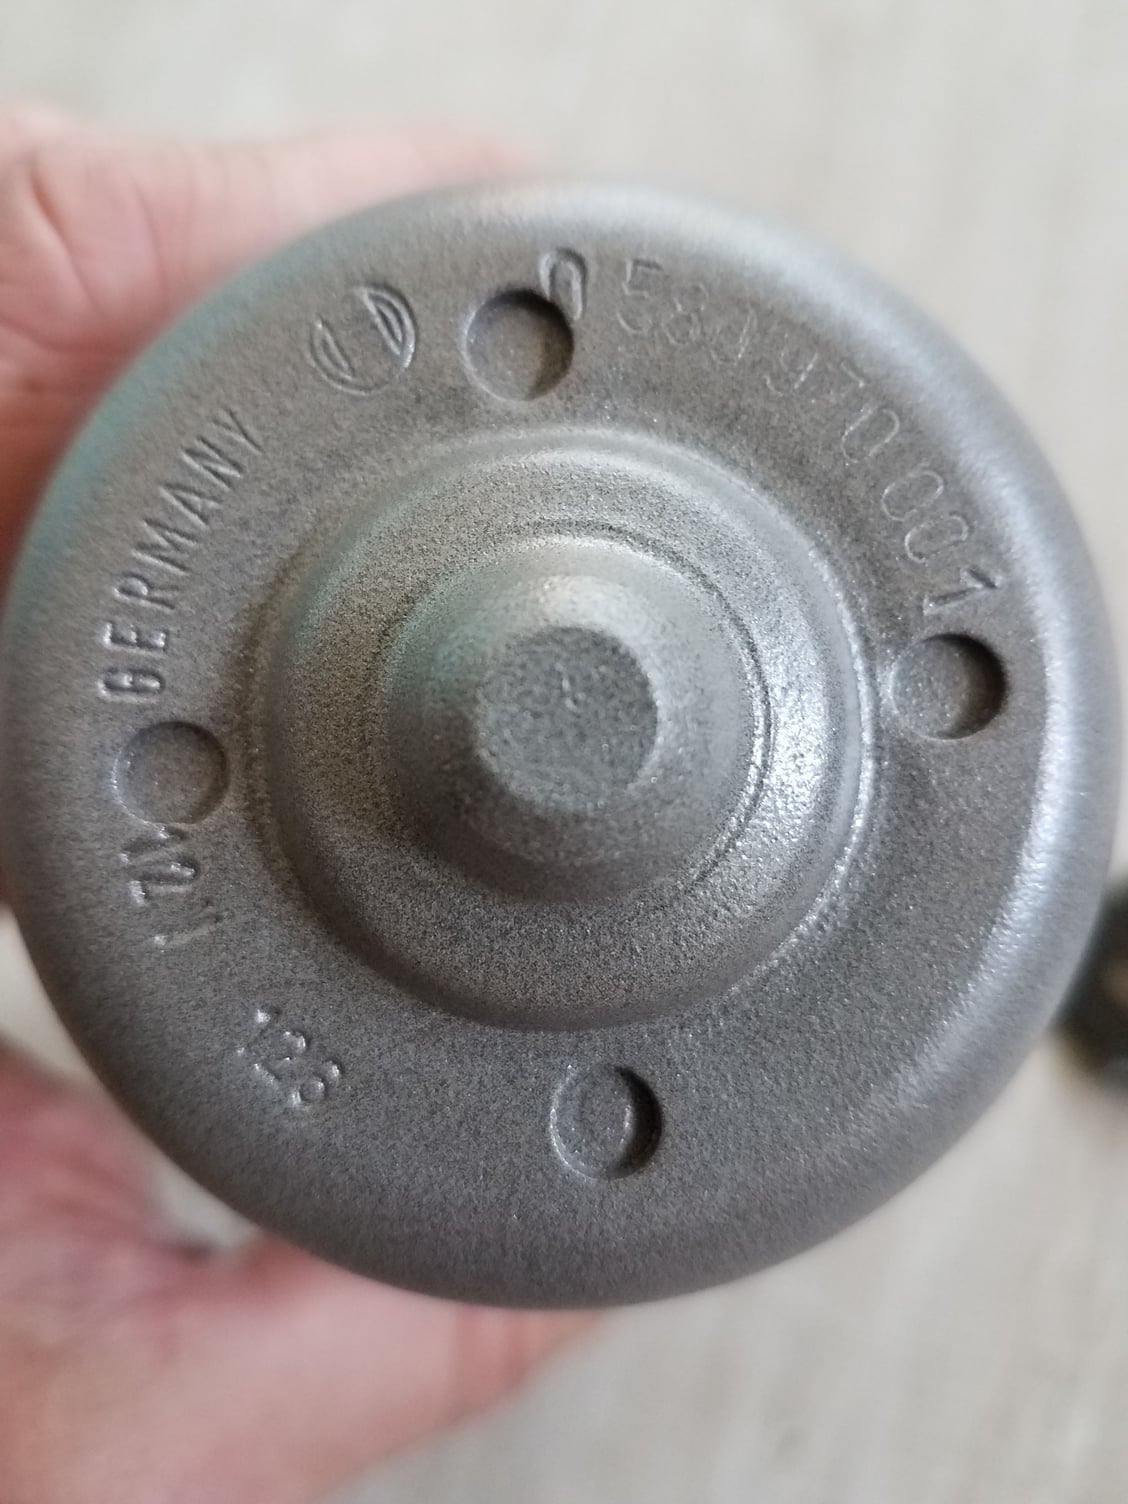
Here is the puzzle for my latest after work fun.


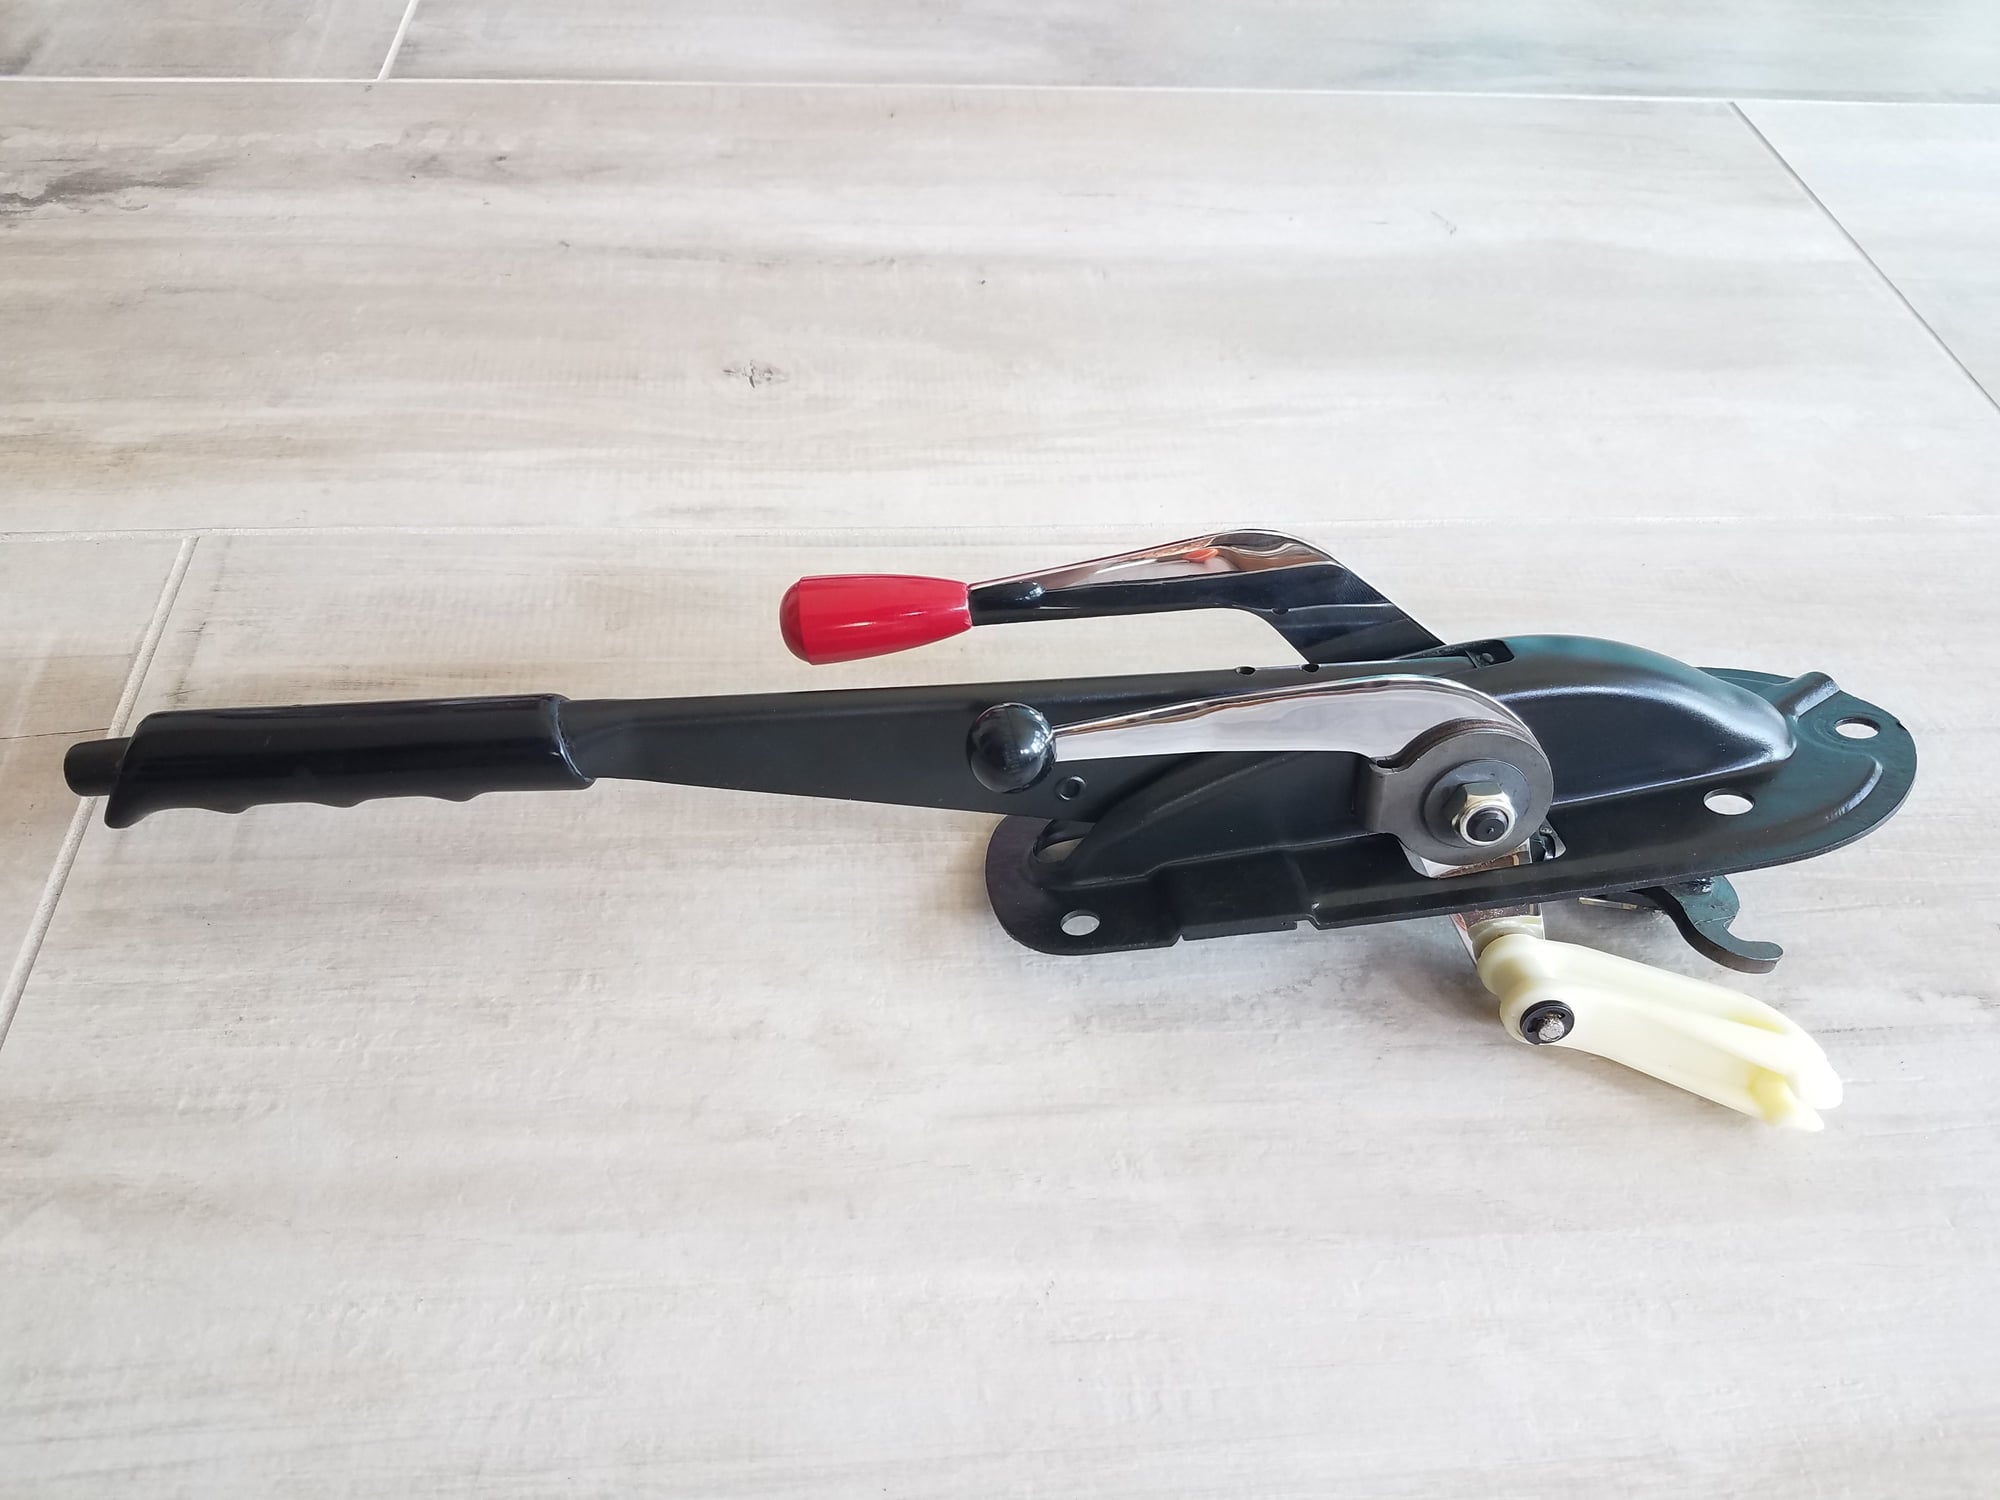
Assembled and adjusted. The white plastic bracket for the throttle lever was partially disintegrated and laying in pieces in the tunnel when I removed the assembly.


Moving parts lubricated with lithium grease.


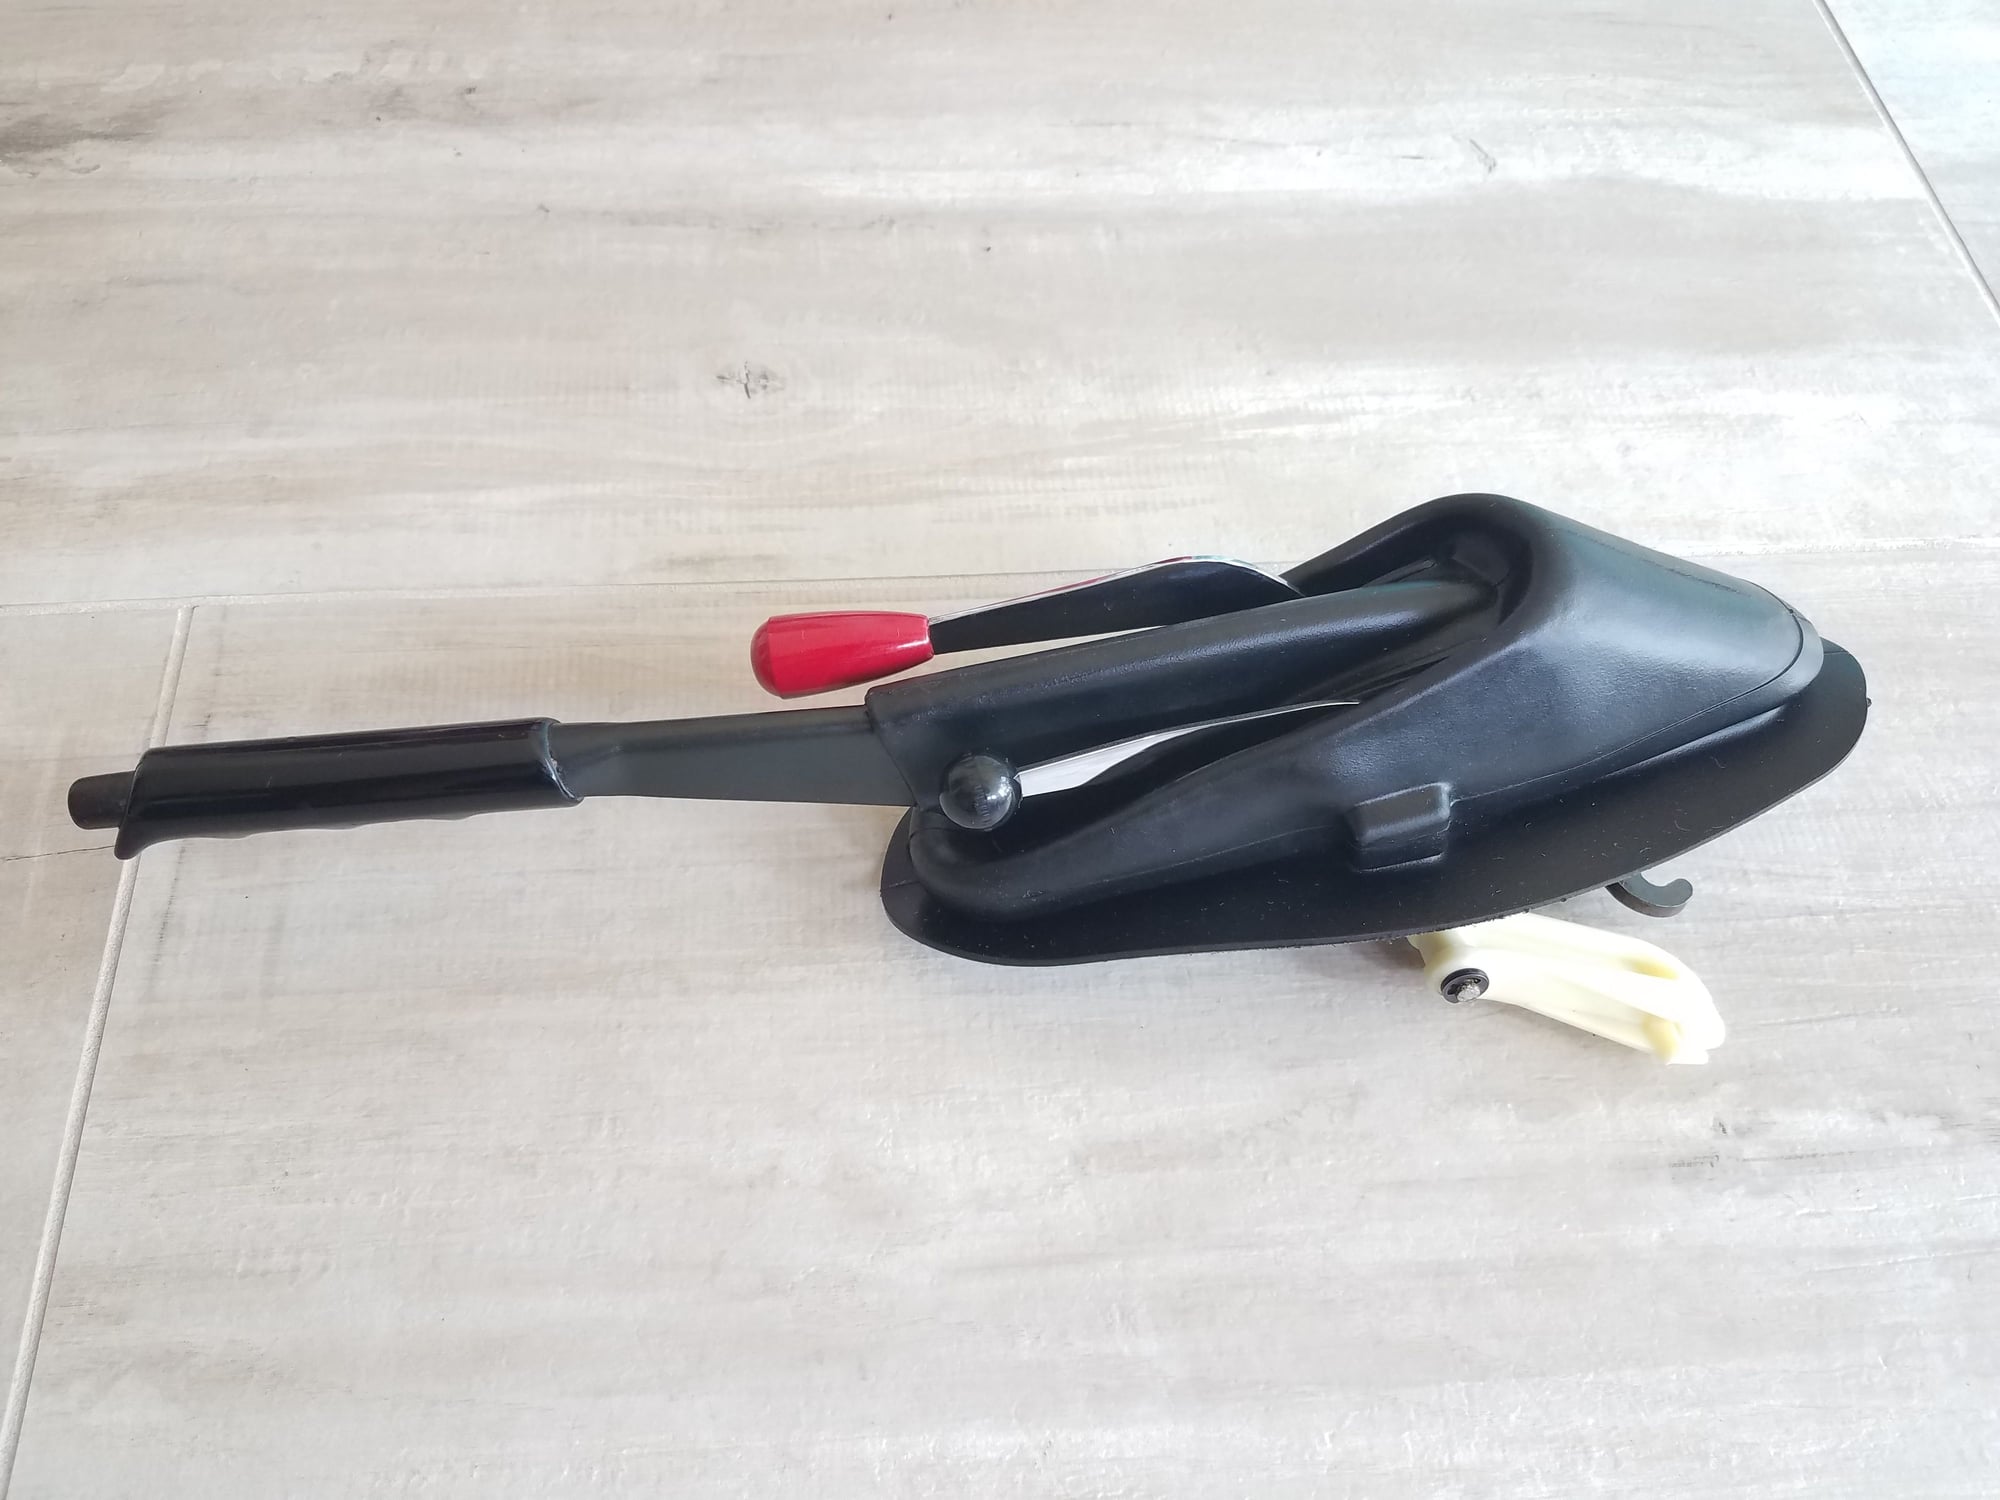
Rubber boot covers all the pretty stuff. Looks a lot better than the 47 year old rusted part I removed.


Old 11-08-2019, 02:08 PM
  #488  
r911
Anti-Cupholder League
 
r911's Avatar
 
Join Date: Aug 2003
Posts: 3,935
Received 117 Likes on 100 Posts
Default

that plastic piece is supposed to be flexible - you may want to replace it...
Old 11-08-2019, 03:22 PM
  #489  
myflat6
Drifting
Thread Starter
 
myflat6's Avatar
 
Join Date: Nov 2014
Location: Orange County, CA & Tucson, AZ
Posts: 2,165
Received 192 Likes on 123 Posts
Default

Yes that is a new part. It rotates freely on the lever shaft. It will connect to a coupler on the throttle linkage when reinstalled
Old 11-08-2019, 04:31 PM
  #490  
r911
Anti-Cupholder League
 
r911's Avatar
 
Join Date: Aug 2003
Posts: 3,935
Received 117 Likes on 100 Posts
Default

I need to replace mine too. Maybe you can post how much "fun" it is to do that...
Old 11-08-2019, 04:54 PM
  #491  
myflat6
Drifting
Thread Starter
 
myflat6's Avatar
 
Join Date: Nov 2014
Location: Orange County, CA & Tucson, AZ
Posts: 2,165
Received 192 Likes on 123 Posts
Default

Haha some of this stuff is fun and some not so much. I will update my progress on the shift assembly soon. Definitely not fun. Replacing this piece is easy as it is held on by just a small circlip.
Old 11-08-2019, 09:49 PM
  #492  
Spyerx
Rennlist Member
 
Spyerx's Avatar
 
Join Date: Mar 2012
Location: SoCal
Posts: 16,663
Received 1,827 Likes on 1,112 Posts
Default

Replacing the hand throttle plastic bit is not too bad. Easier to remove a seat to get in there.
Old 11-09-2019, 05:02 PM
  #493  
r911
Anti-Cupholder League
 
r911's Avatar
 
Join Date: Aug 2003
Posts: 3,935
Received 117 Likes on 100 Posts
Default

Good, I'll take the seat out to do new carpet anyway - I guess the real question is how hard is it to pull the handbrake assy out and replace it all lined up and adjusted correctly....

I never had a problem rebuilding or hot-rodding a motor but can't stand to think about working on a transmission...
Old 11-09-2019, 05:39 PM
  #494  
myflat6
Drifting
Thread Starter
 
myflat6's Avatar
 
Join Date: Nov 2014
Location: Orange County, CA & Tucson, AZ
Posts: 2,165
Received 192 Likes on 123 Posts
Default

You shouldn't have to completely remove the assembly to replace that part. You should have enough slack in the heater cable and the e-brake cables to pop it up and tilt it to get to the single c-clip that holds it on. Good luck!
Old 11-11-2019, 04:54 PM
  #495  
myflat6
Drifting
Thread Starter
 
myflat6's Avatar
 
Join Date: Nov 2014
Location: Orange County, CA & Tucson, AZ
Posts: 2,165
Received 192 Likes on 123 Posts
Default

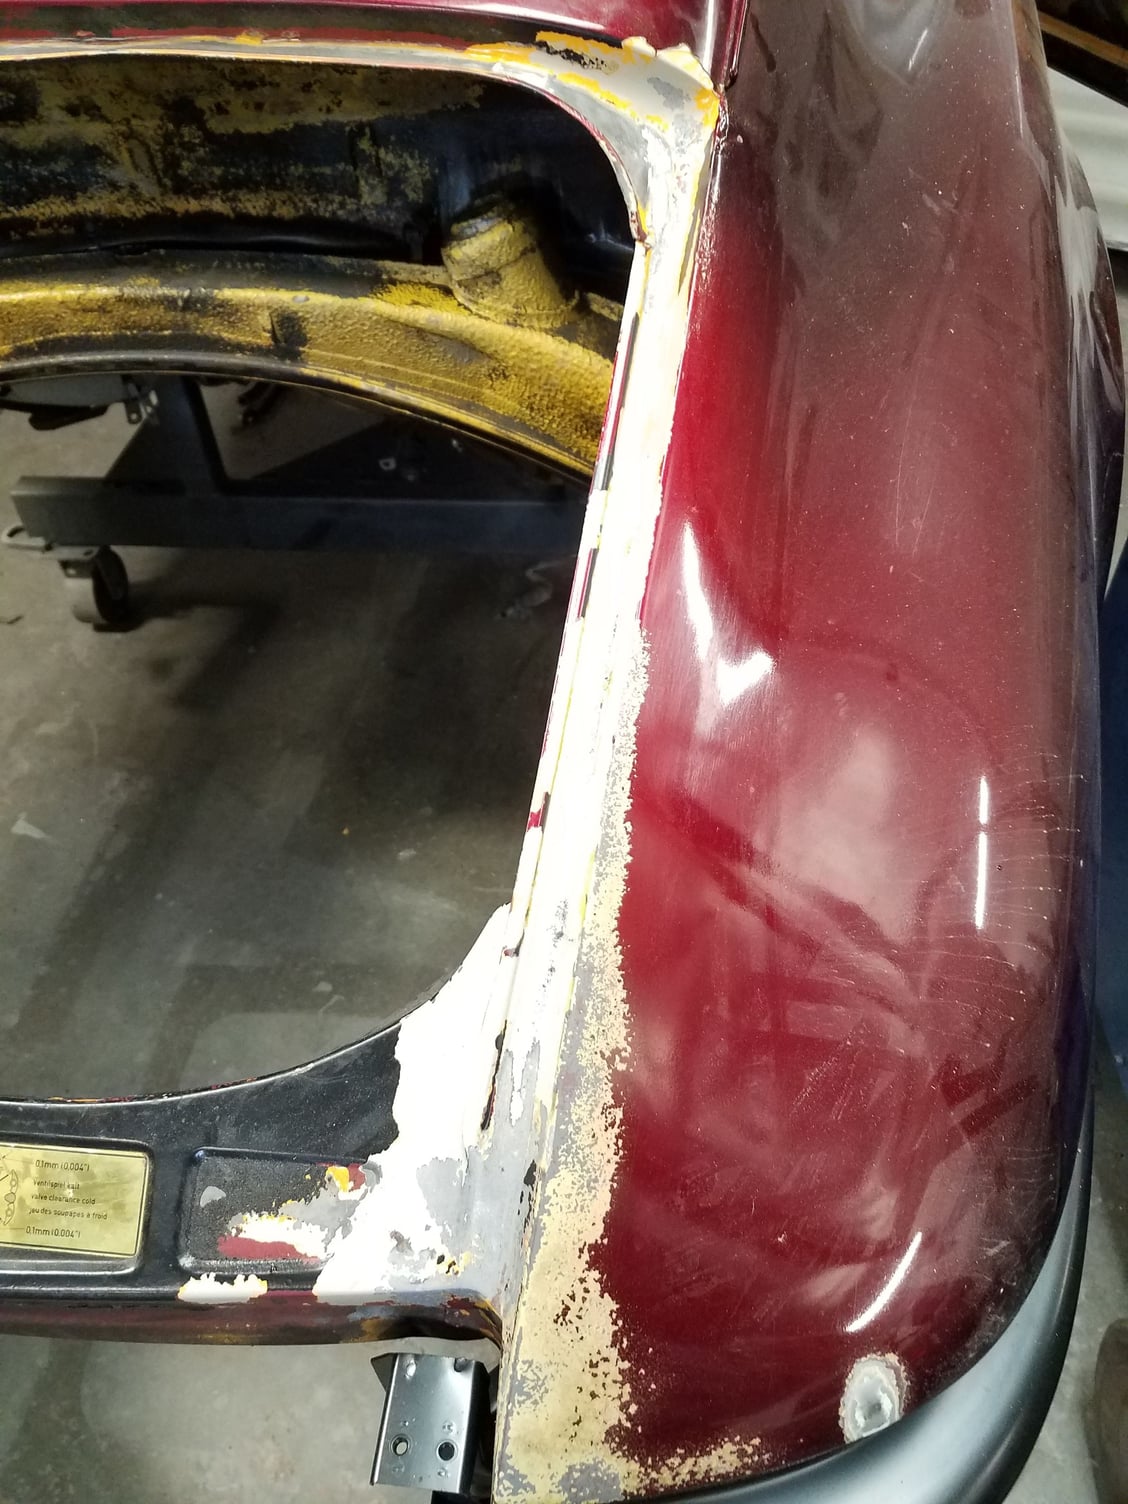
Andy was using his dry ice blaster on my car to show me what it can do. In this photo you can see how the engine compartment is showing the original yellow paint. This was just a few minutes of cleaning time. The thick layers of 47 years worth of grease and the layer of black paint were removed all while not damaging the factory undercoating or dealing with media being packed into crevices (sand, walnut shells, etc). Also,the wiring harness is still there and is not harmed by the blasting. If you recall the effort I put in to do this same work in my rear wheel wells - it was a ton of work using cleaners and wire wheels and made a huge mess. I have given the green light to clean the rest of the engine bay, front wheel wells and undercarriage of the car.

You can also see the paint along the right edge of the engine compartment. He quickly showed how the machine can remove material by layer. You can see how it was able to go several layers down to the metal (you can see some of the original lead work in the corner where the fender joins the cross-member/latch panel). I am giving the green light to remove the paint as well. This will be much easier on the panels as traditional media blasting creates heat and can put waves into panels with large flat surfaces.


Quick Reply: '72 911T Hot Rod Build


All times are GMT -3. The time now is 08:20 PM.