When you click on links to various merchants on this site and make a purchase, this can result in this site earning a commission. Affiliate programs and affiliations include, but are not limited to, the eBay Partner Network.
Thank you for the info! I am going to use 997.1 GT3 PCCB front uprights. Currently I have 997.2 RS 4.0/GT2RS street car rear uprights. The front and rear subframes are stock(I might replace the rear subframes with Cup version in the future to set the lateral arms more parallel). My target ride height is 108/135mm on 25.8/26.7" tall tires. This combo should work pretty darn good for a streetable track car.
I do have to respectfully voice my opinion that not all non-OEM parts are crap. I have non-OEM parts on my car that's been holding up well for 3+ years, as do many of my track day, time trial and club racing customers. But I am also aware that I don't have the level of build, hp/torque that you have on your car. So all variables come into play for parts selection. I am sorry to hear that you had bad experiences with aftermarket parts.
Thanks again.
Tom
Roger that Tom! Yeah, I�m pretty hard on equipment and after numerous failures and longevity issues with aftermarket stuff, I just simply stay away from it like the plaque and stick with race proven OEM Motorsport parts which I�ve found superior on all fronts. Shocks would be an exception to the rule.
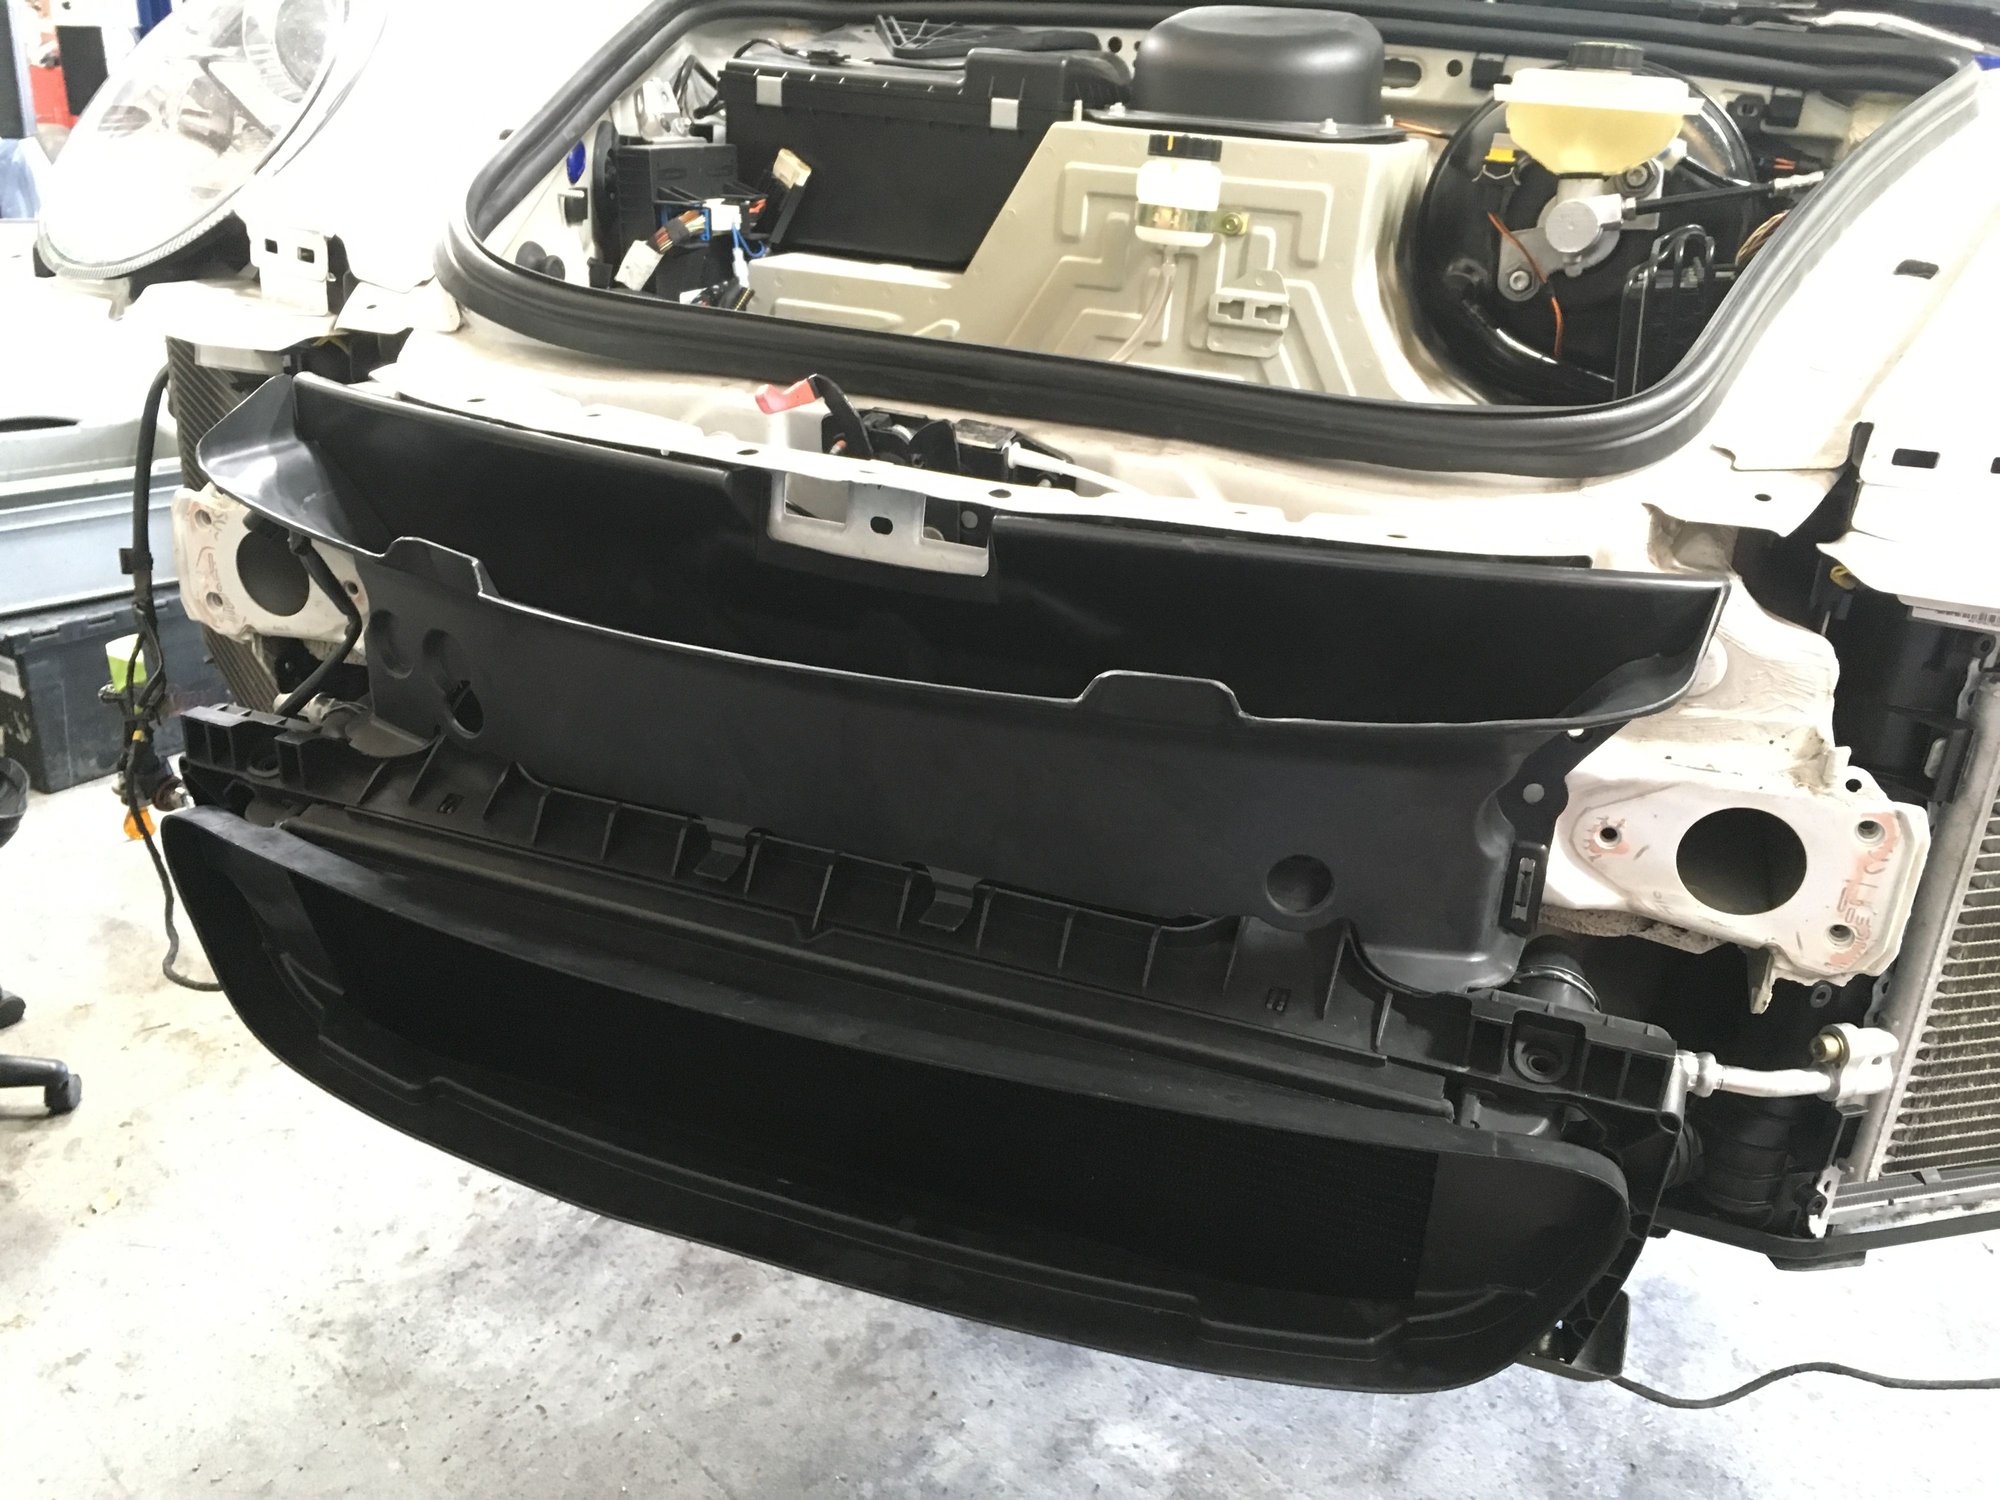
Have a pretty good list of things to do and not enough spare time, so taking baby steps starting with tidying up the front end.
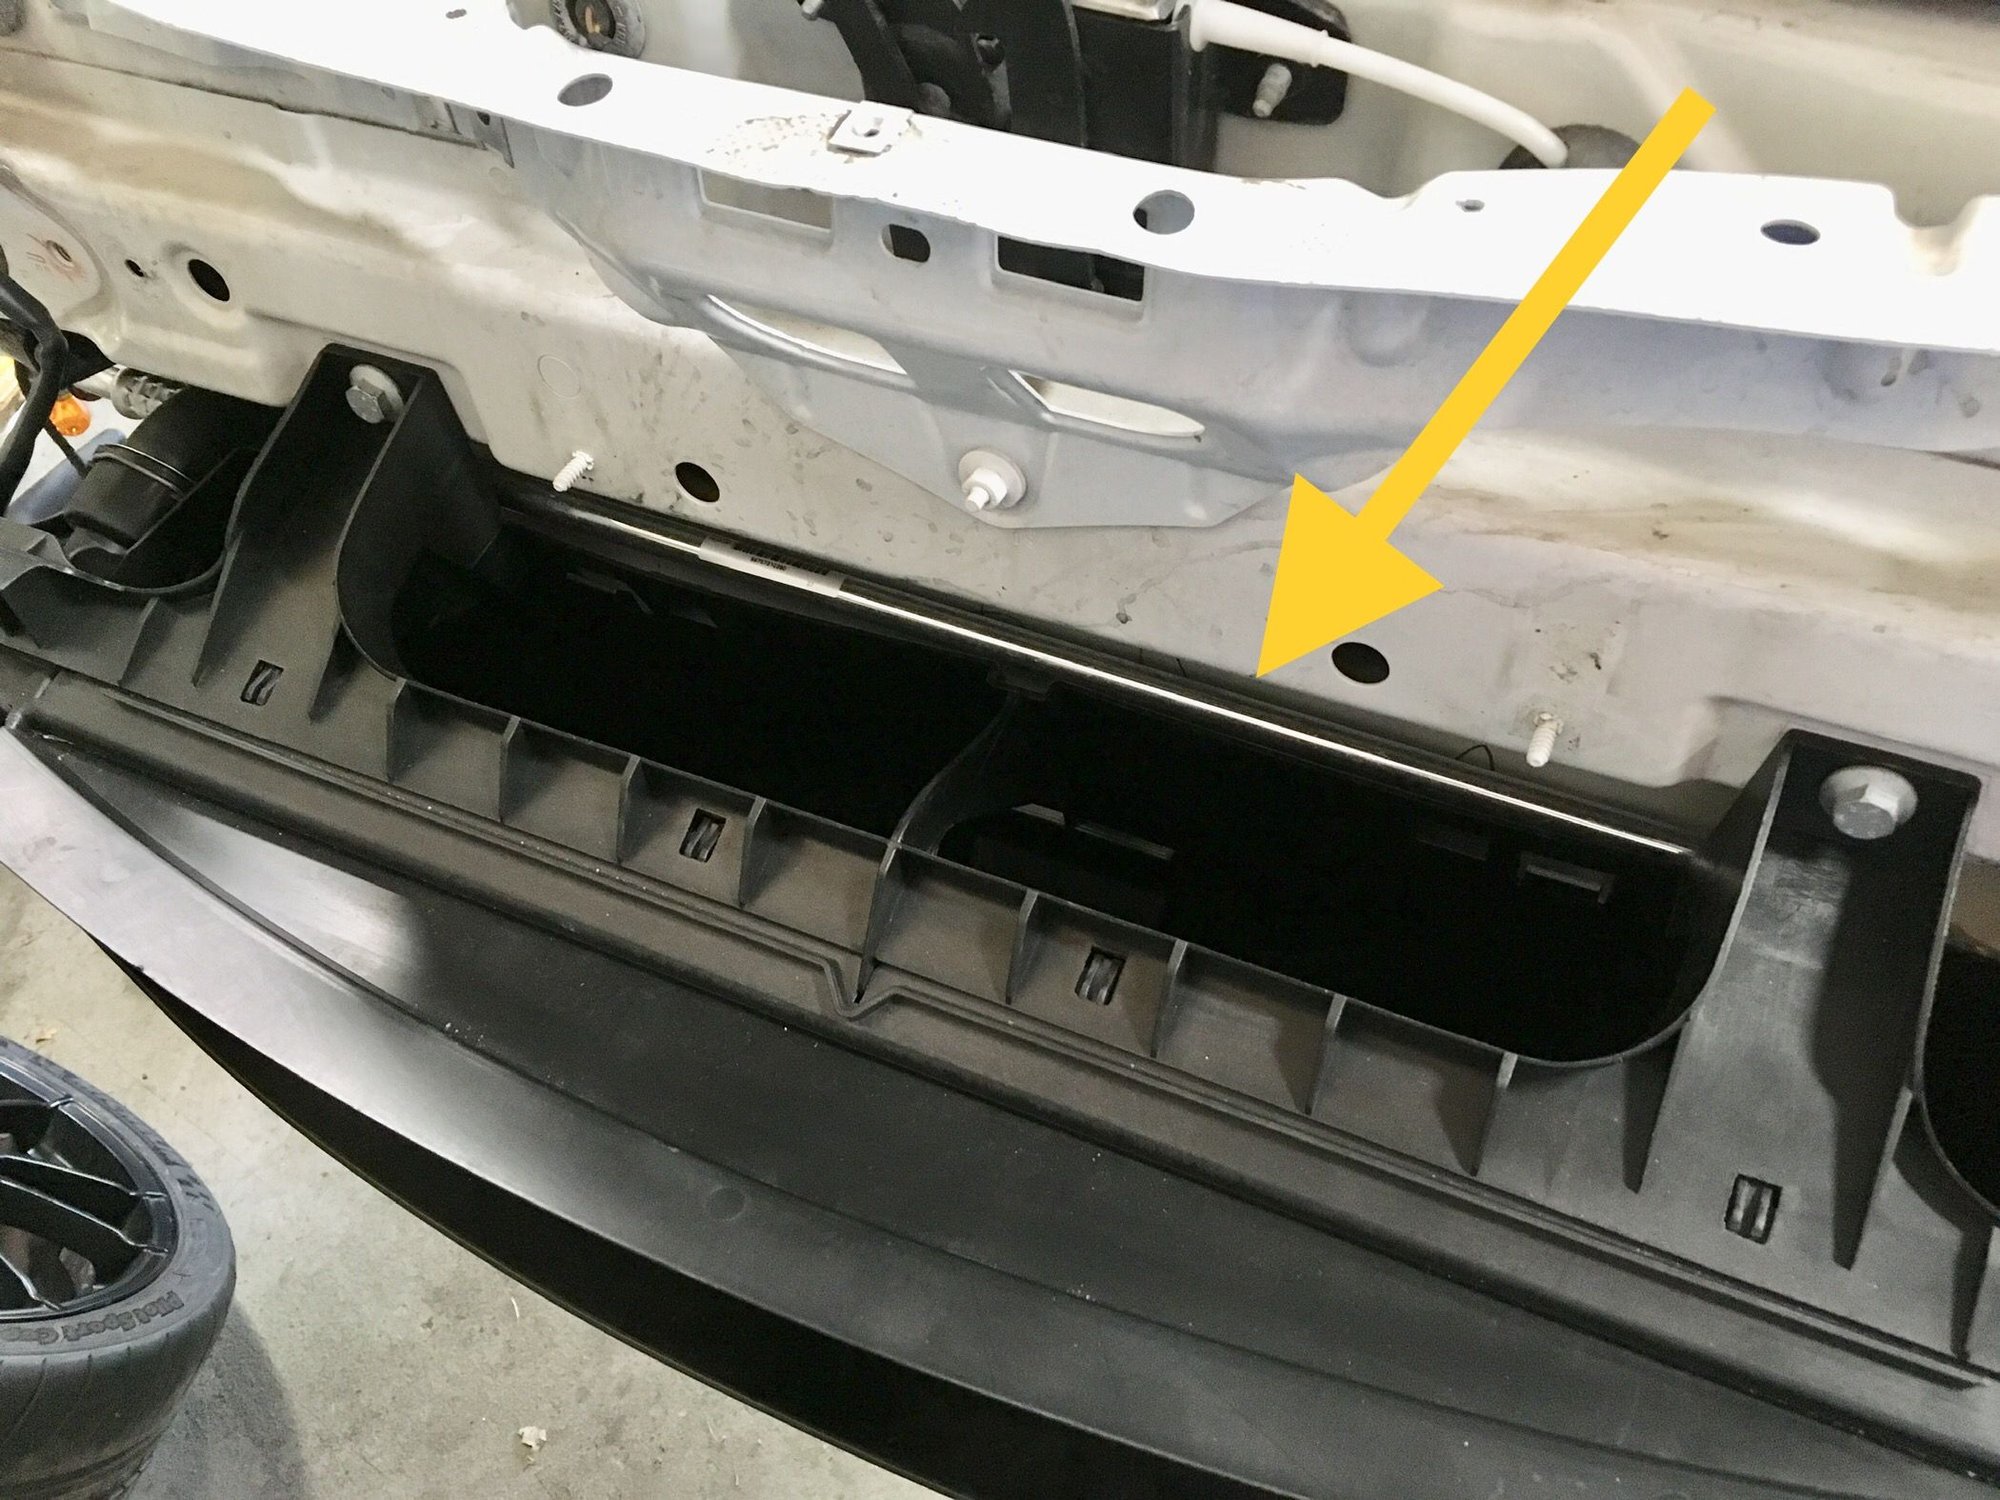
Since the .2 Cup front bumper conversion I've been driving on street with the DRL openings exposed. Have to do something about this later.
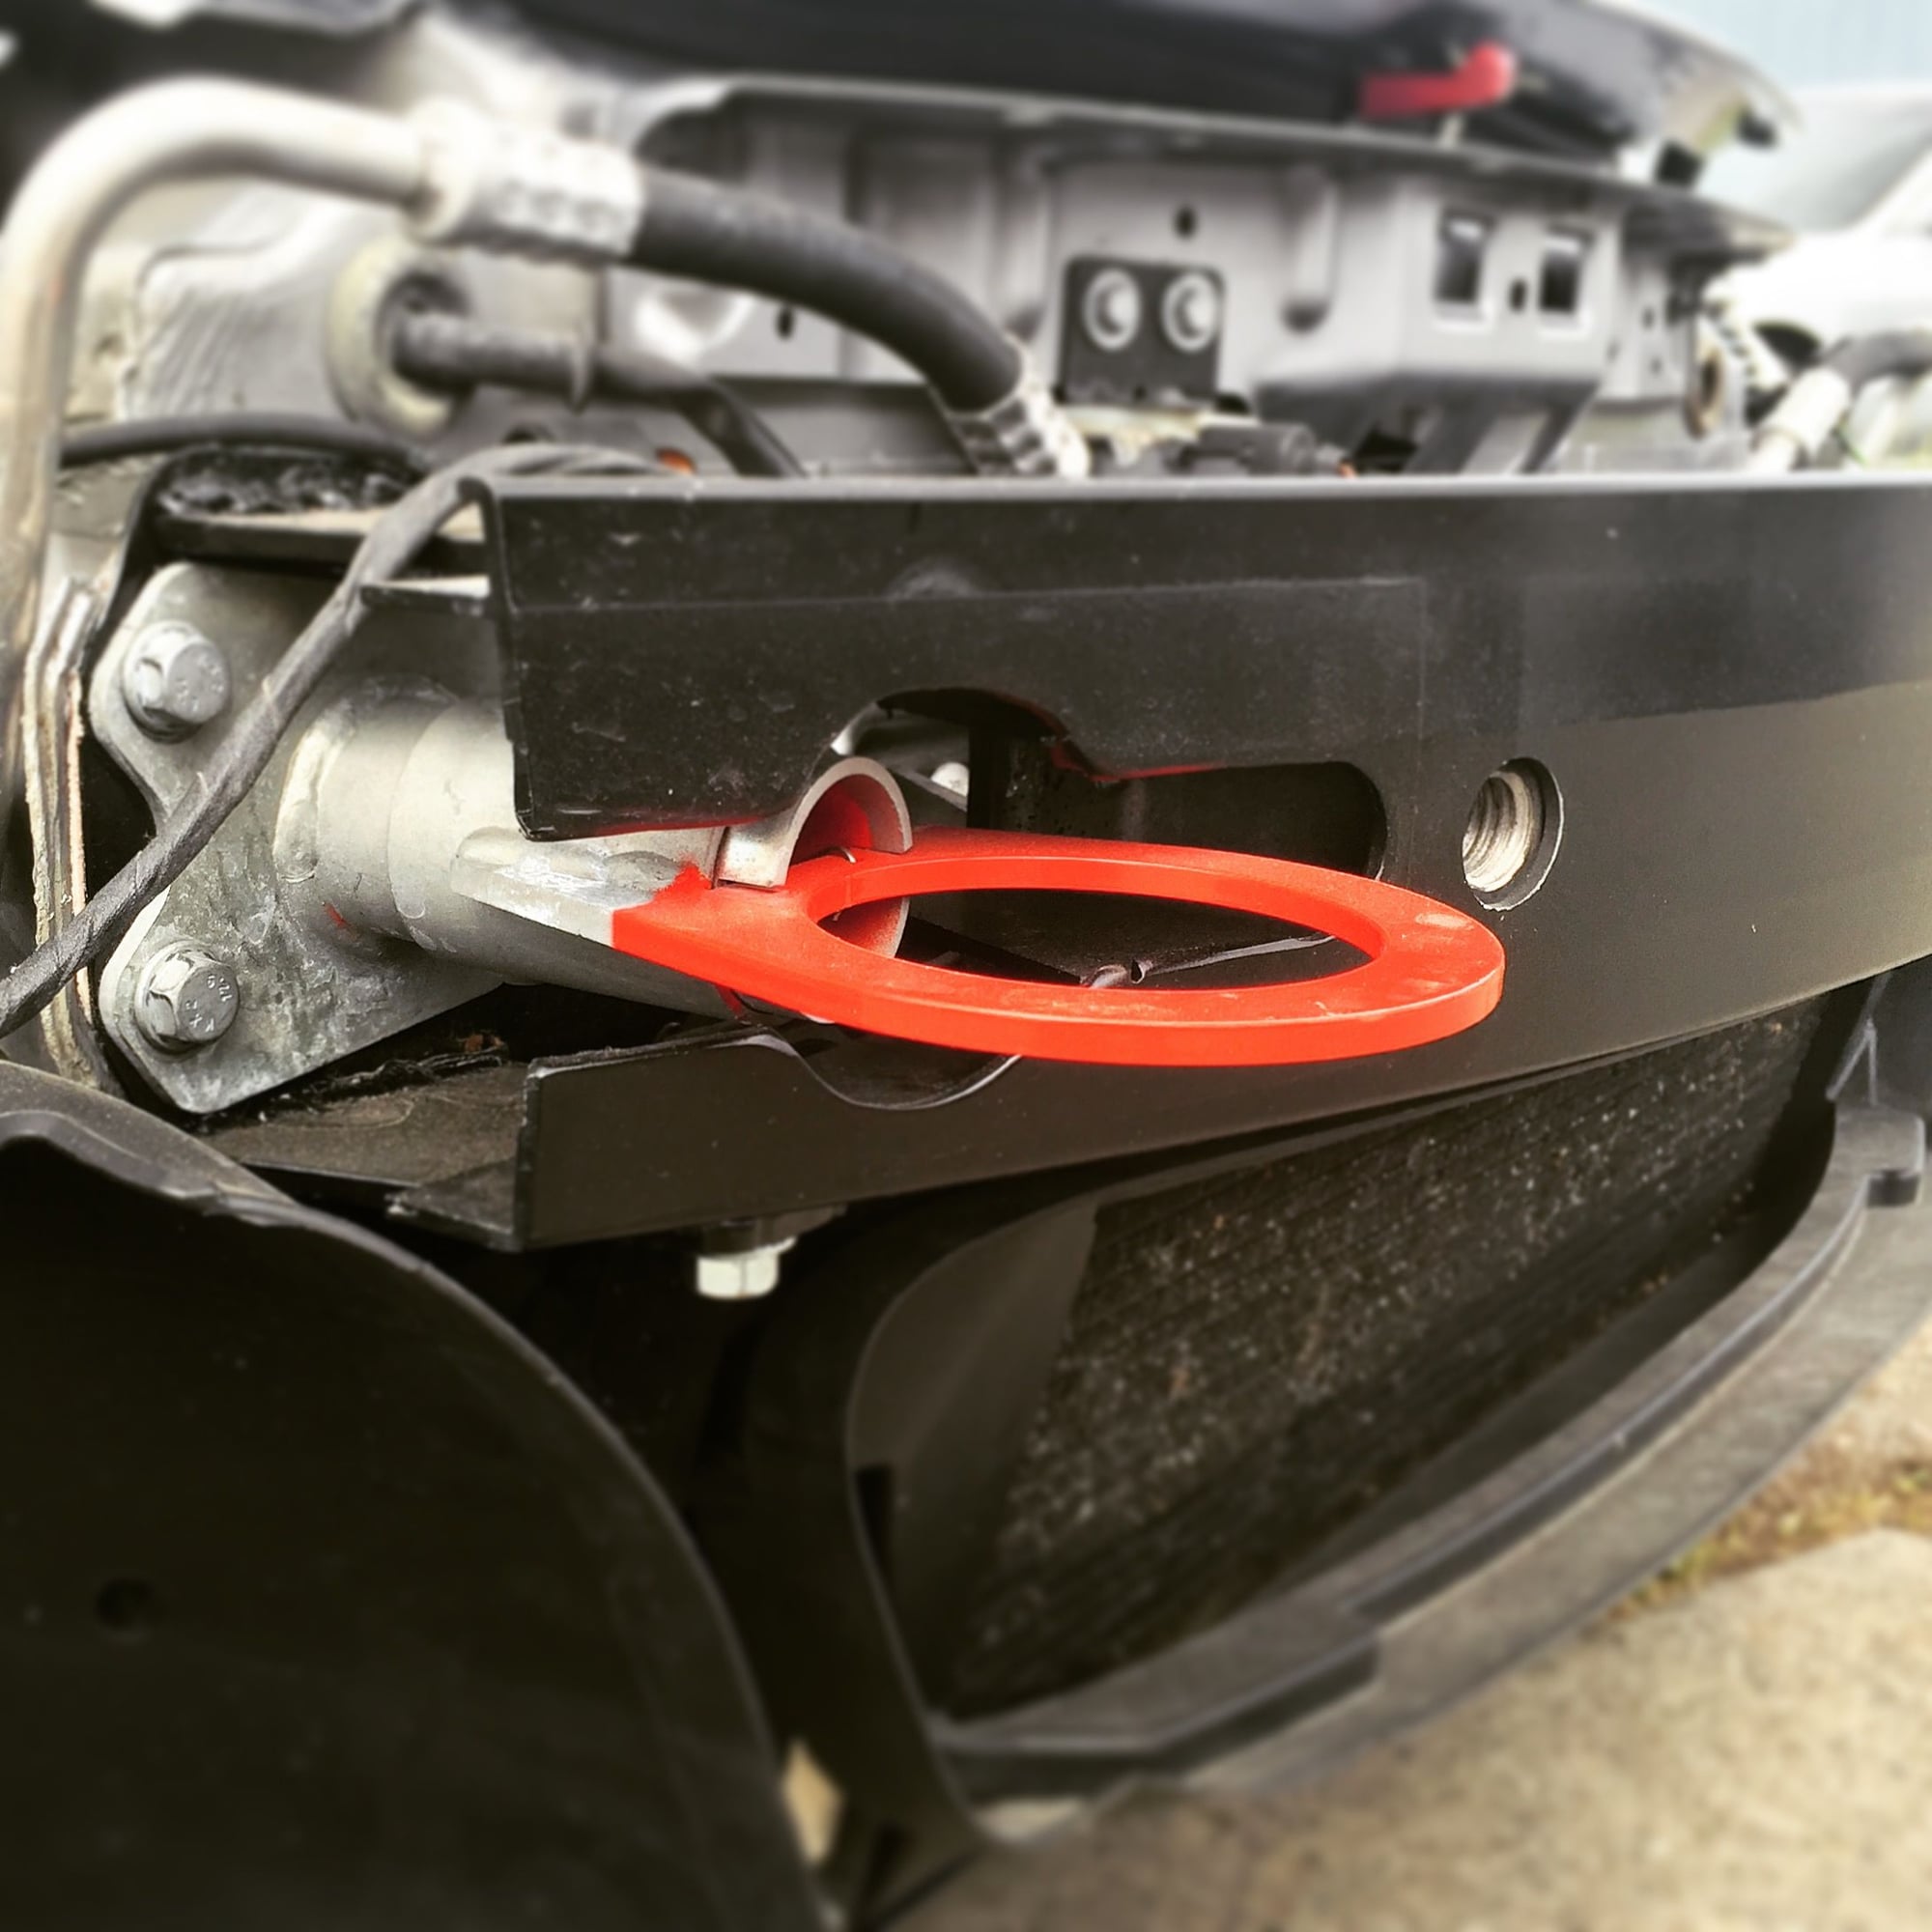
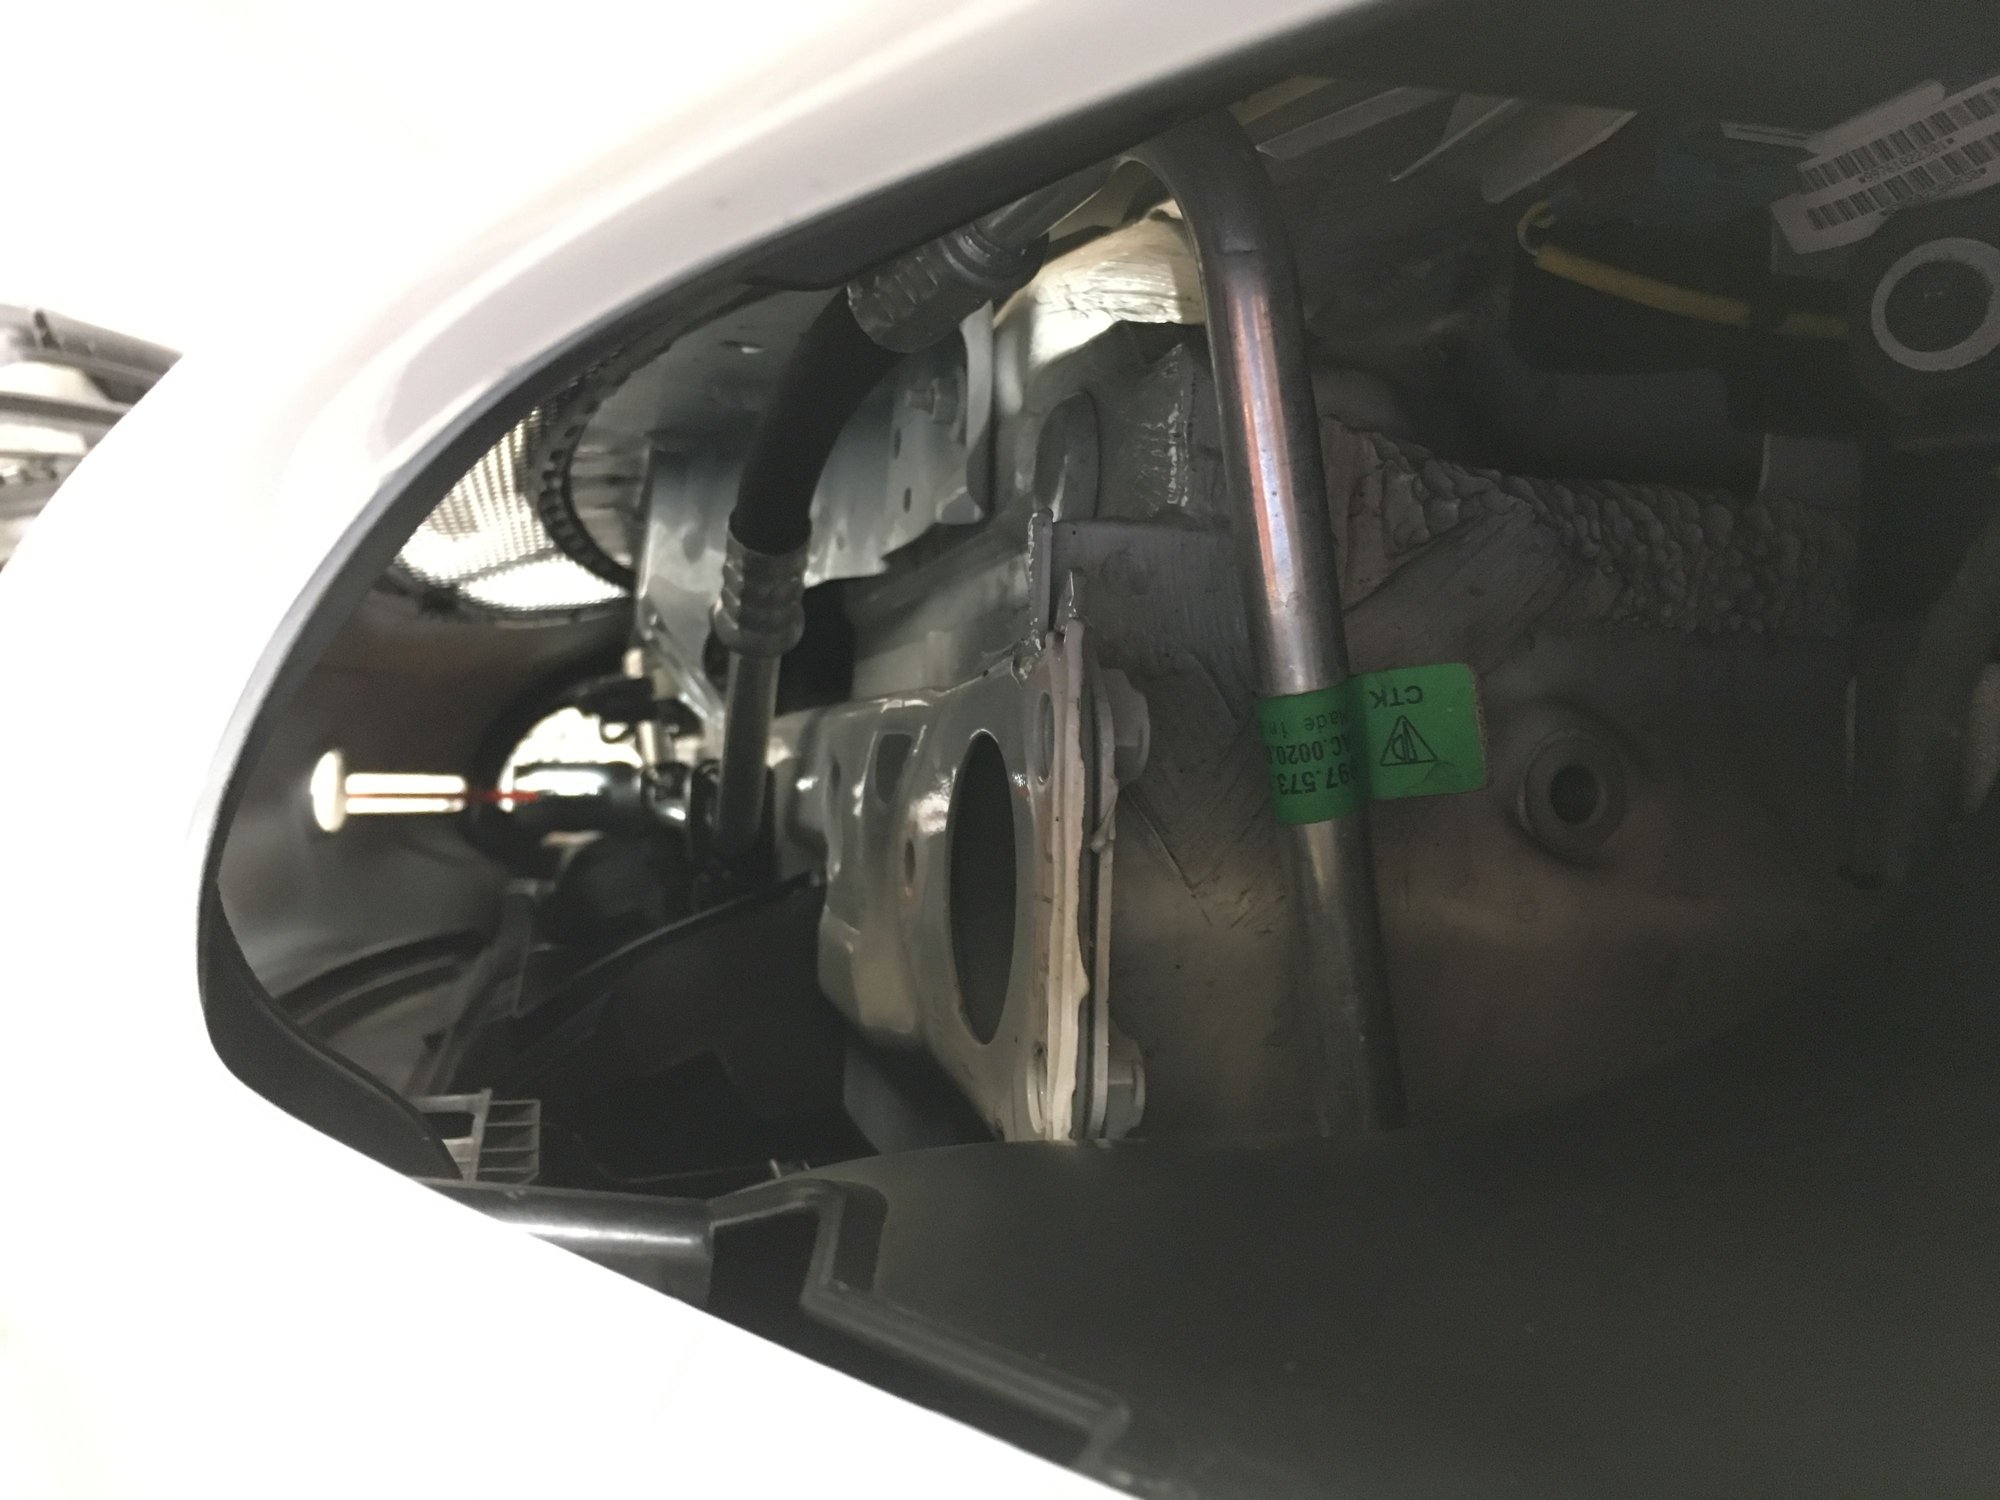
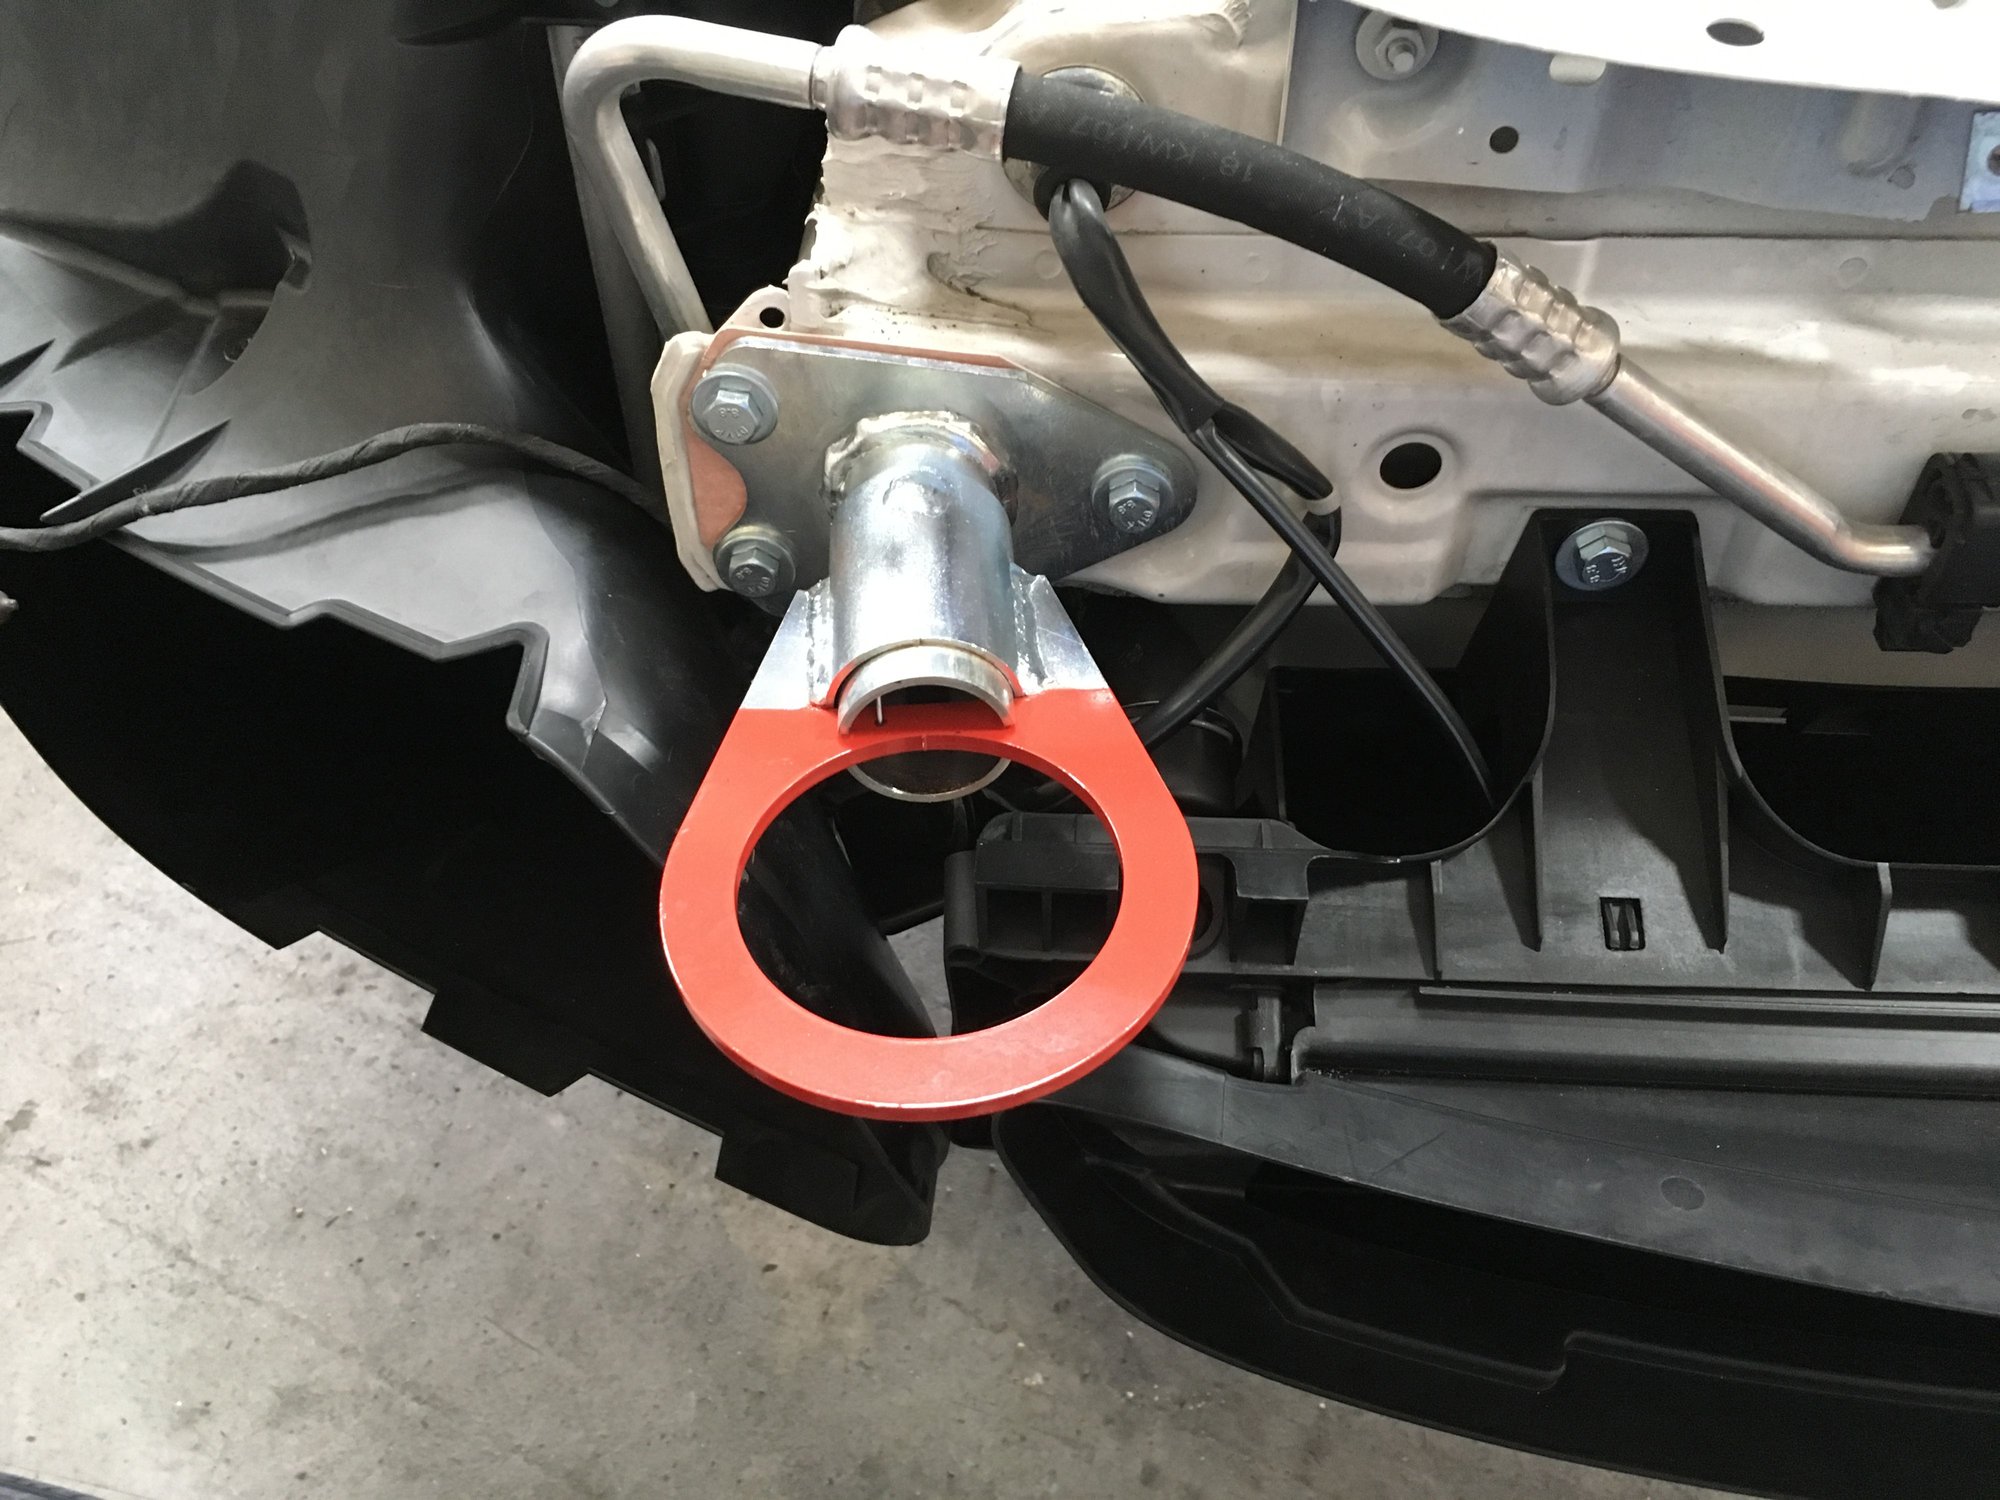
This is what the inside of the front bumper looks like through the left side DRL opening. Without the crash beam, you can see the AC line and the red GT3 Cup retractable tow loop in the far background.
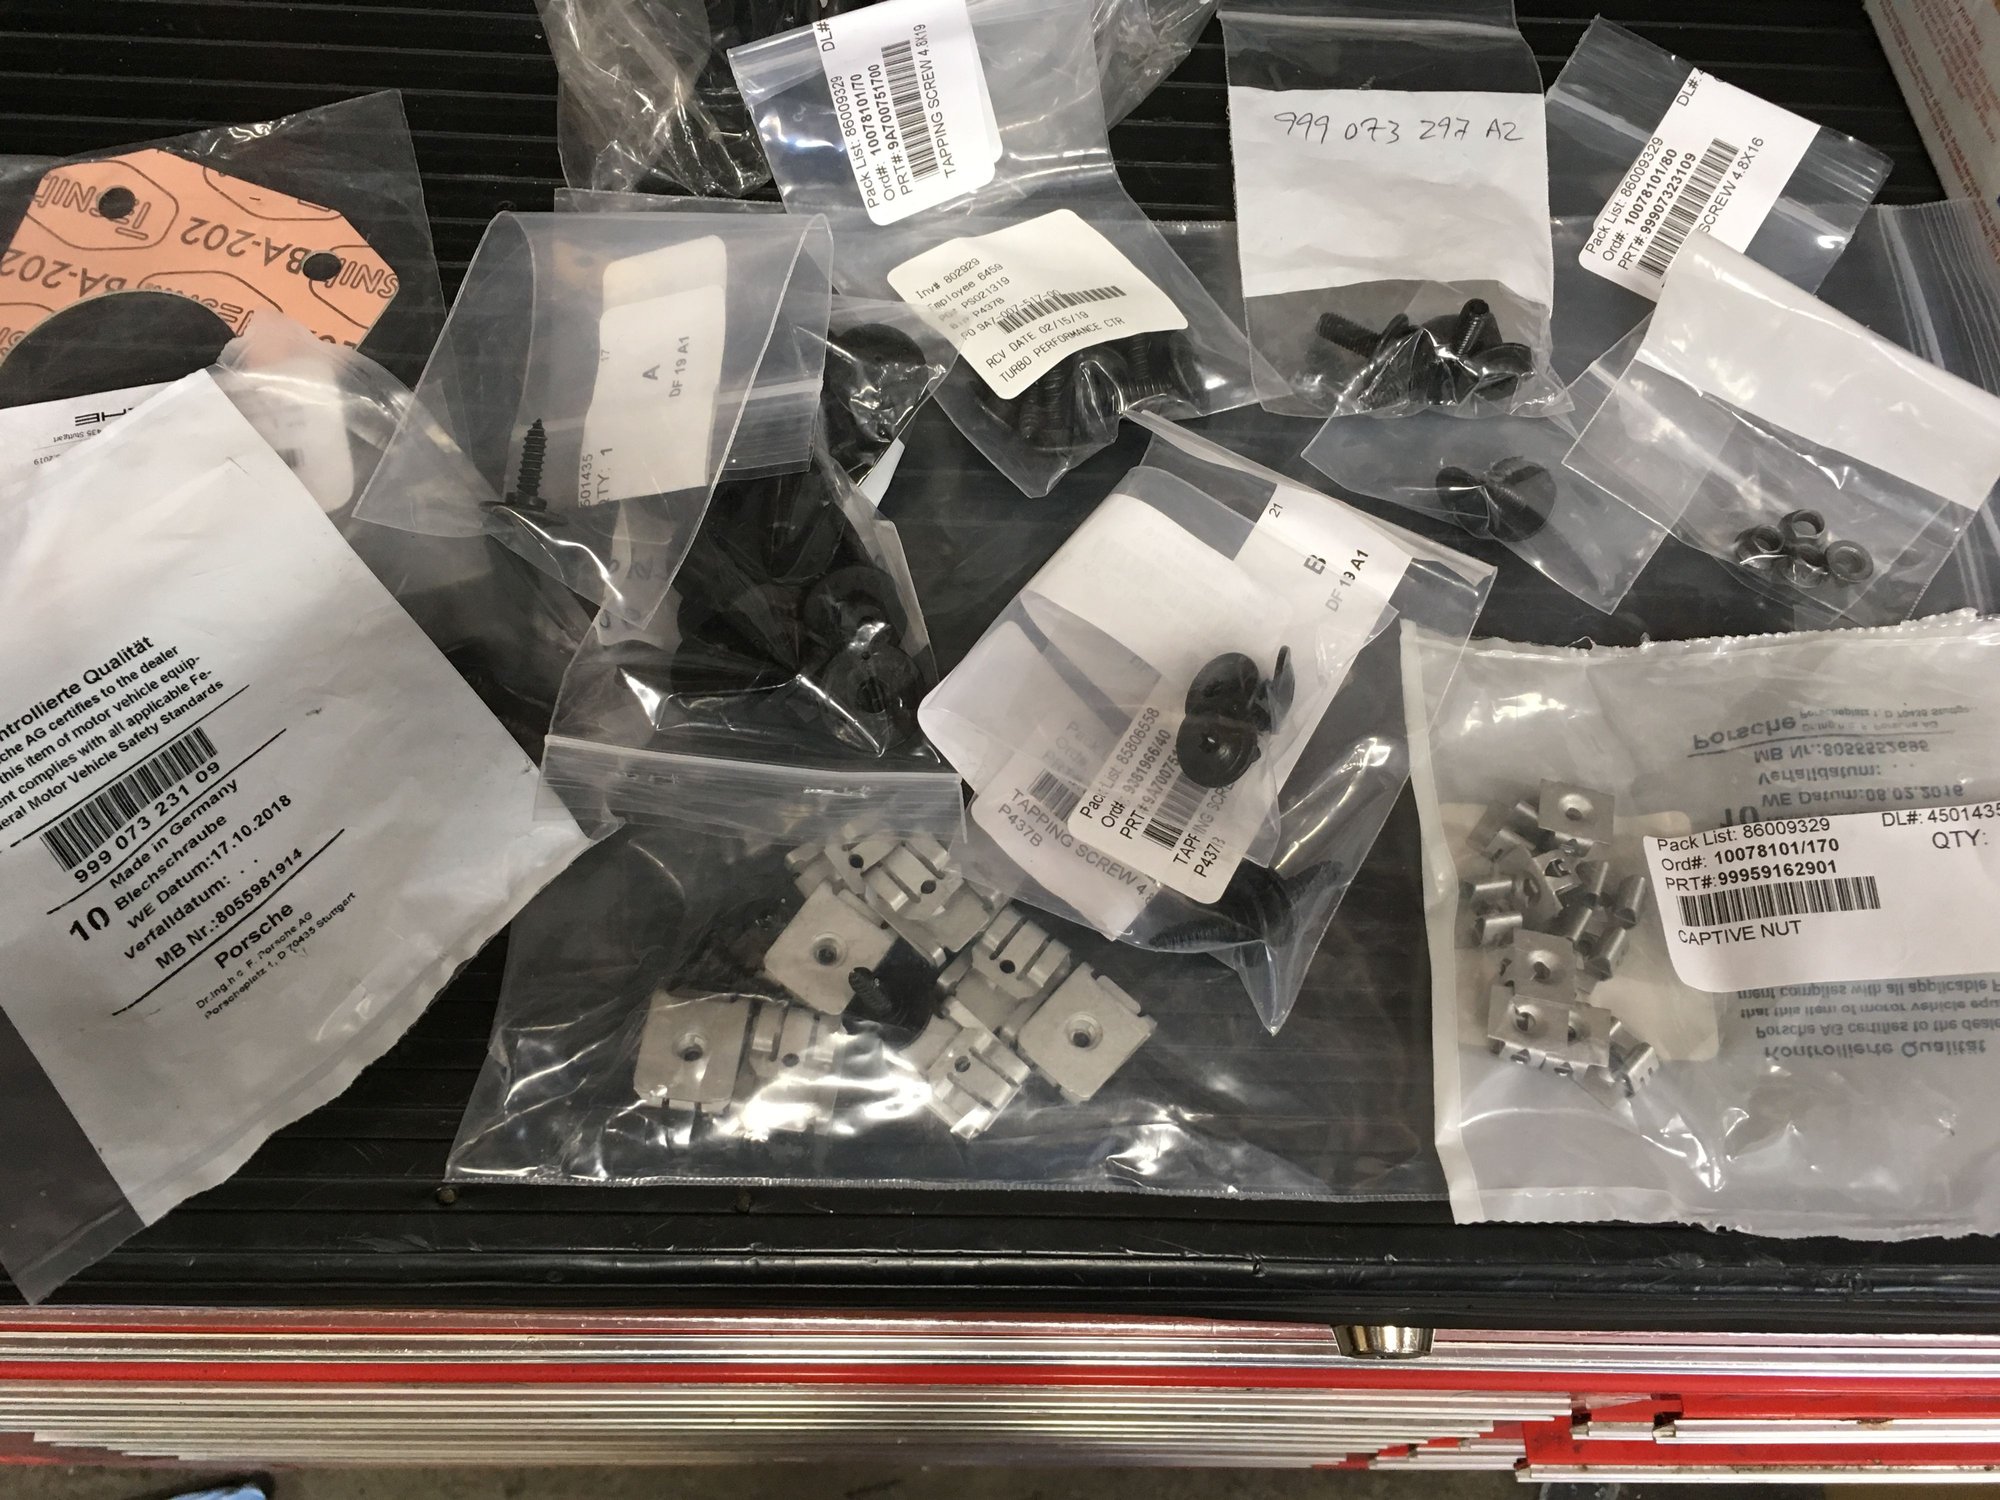
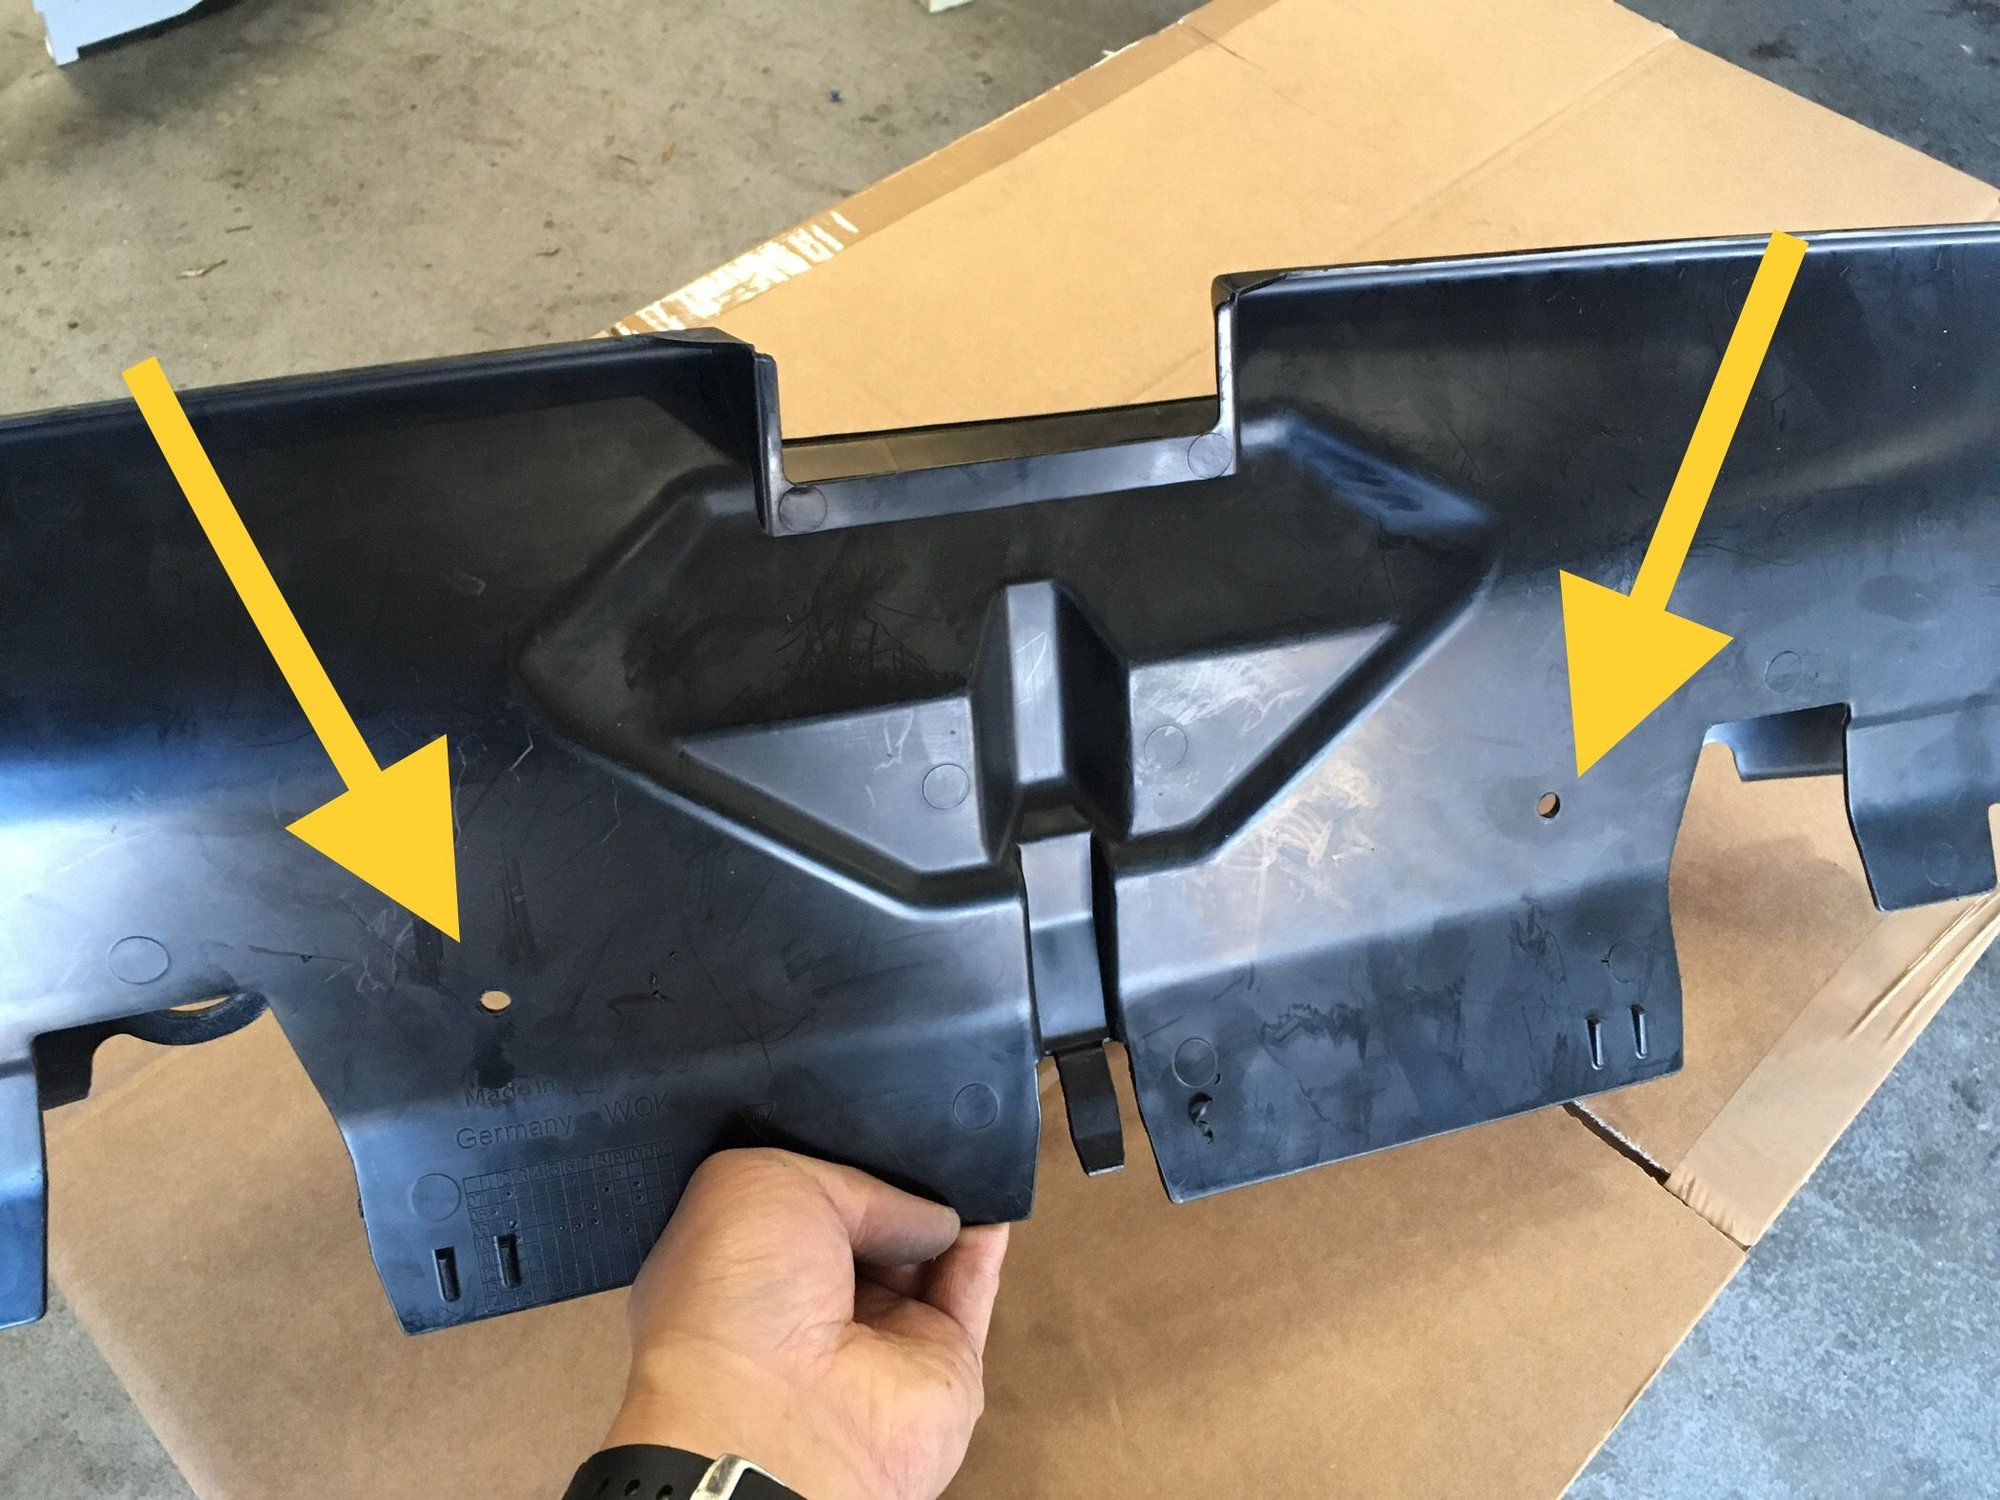
Been hoarding OEM hardware for couple of months. Now sorting out where they go...
...starting with the nut plates that go on the front bumper support strip.
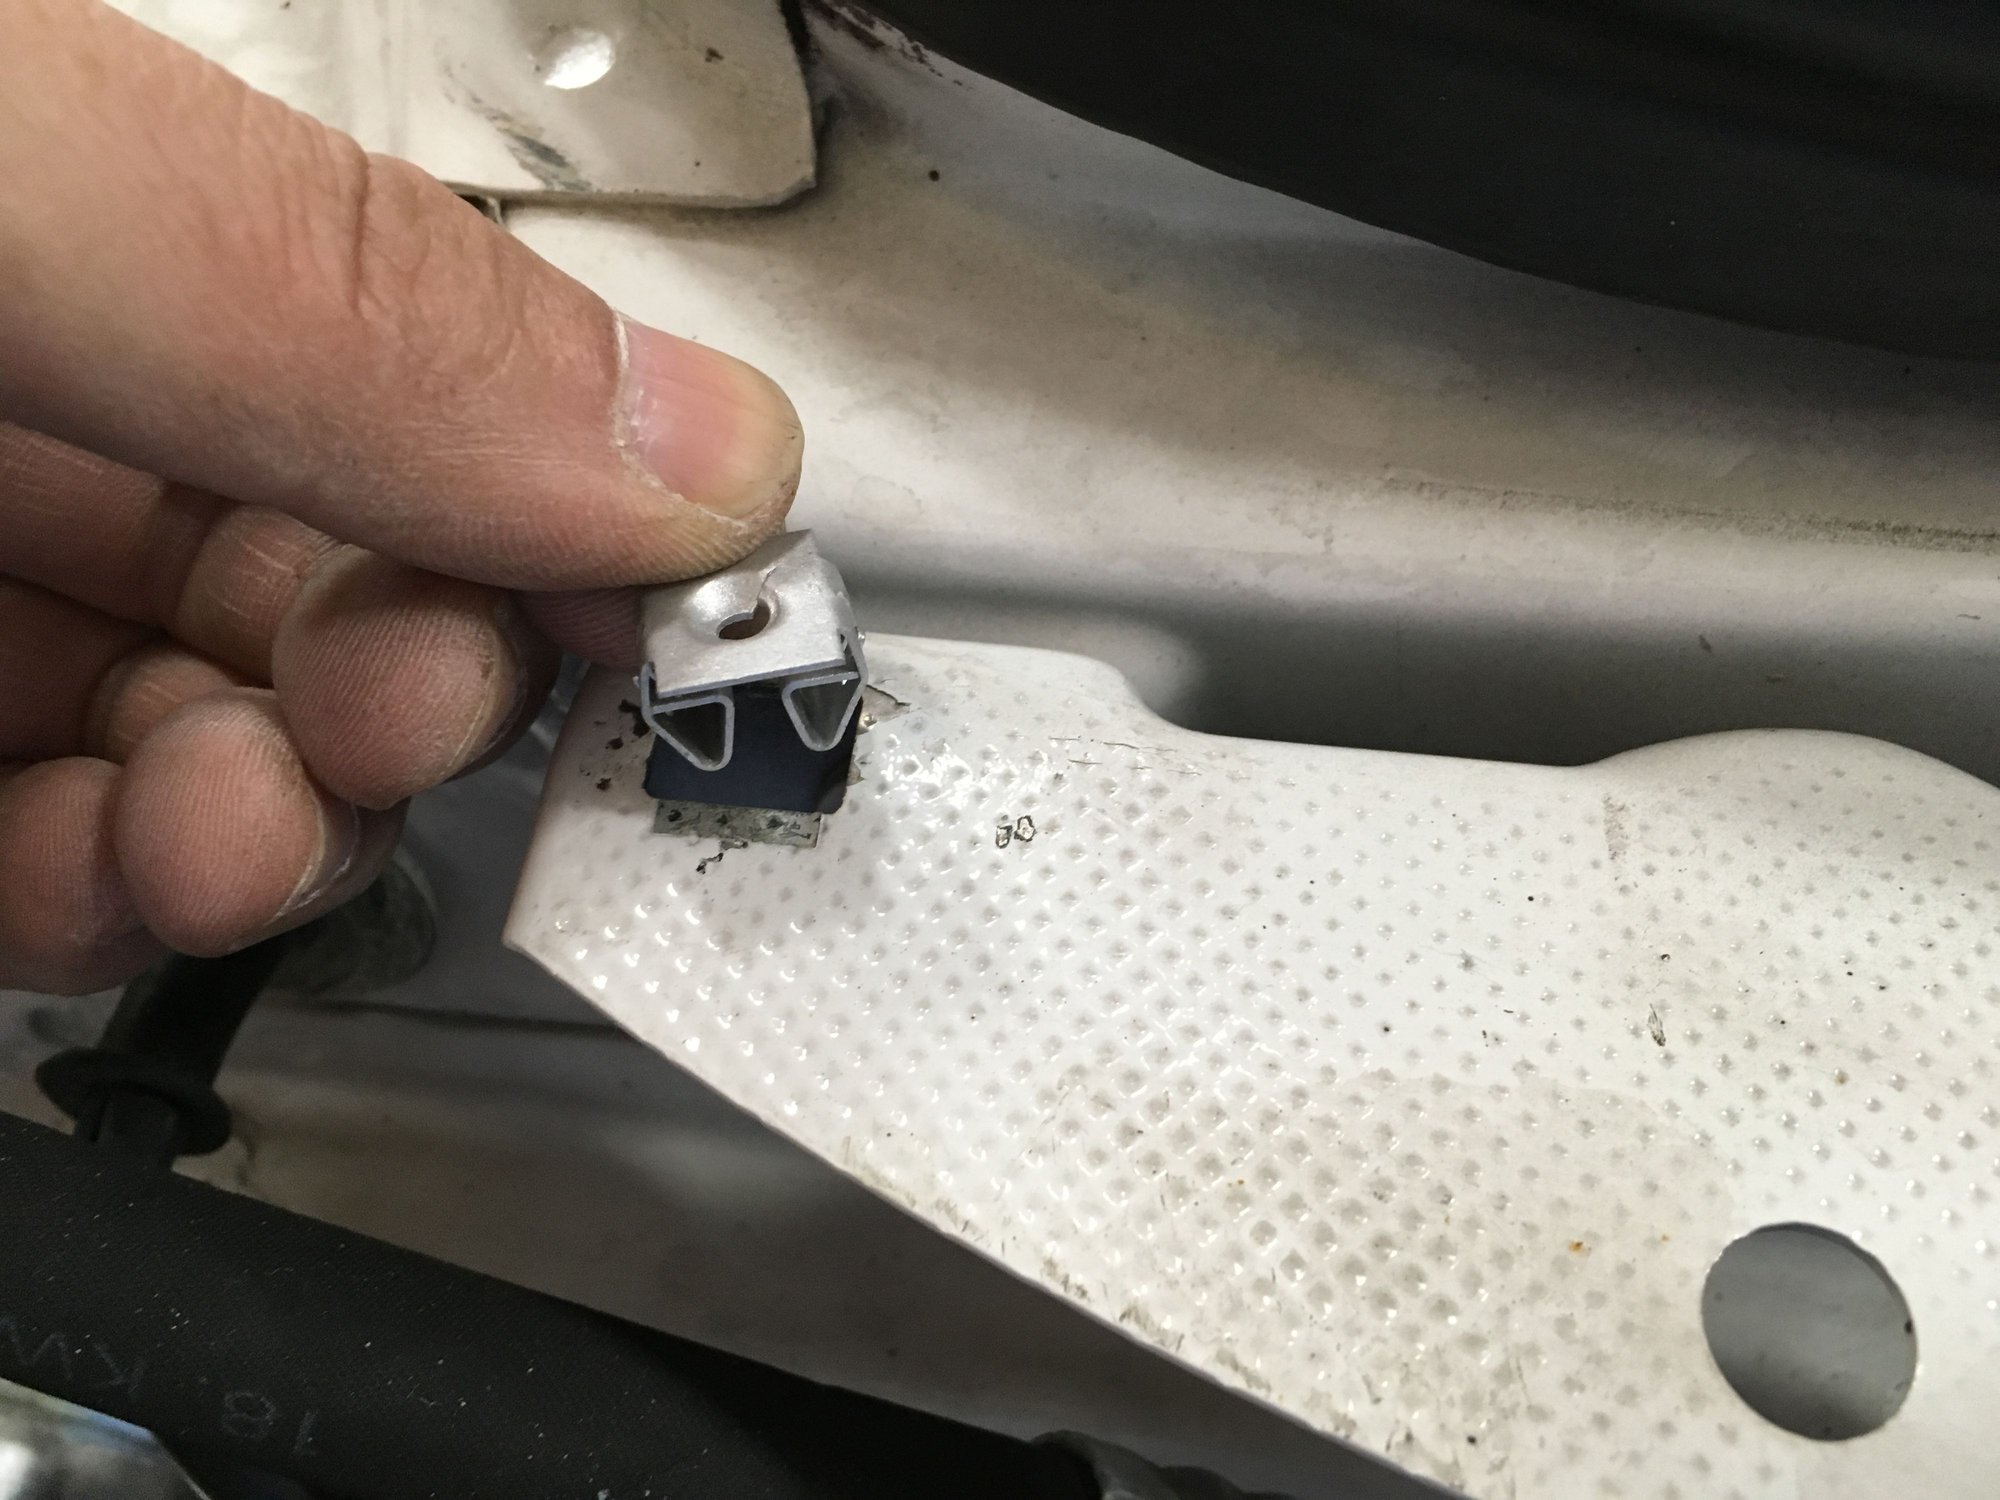
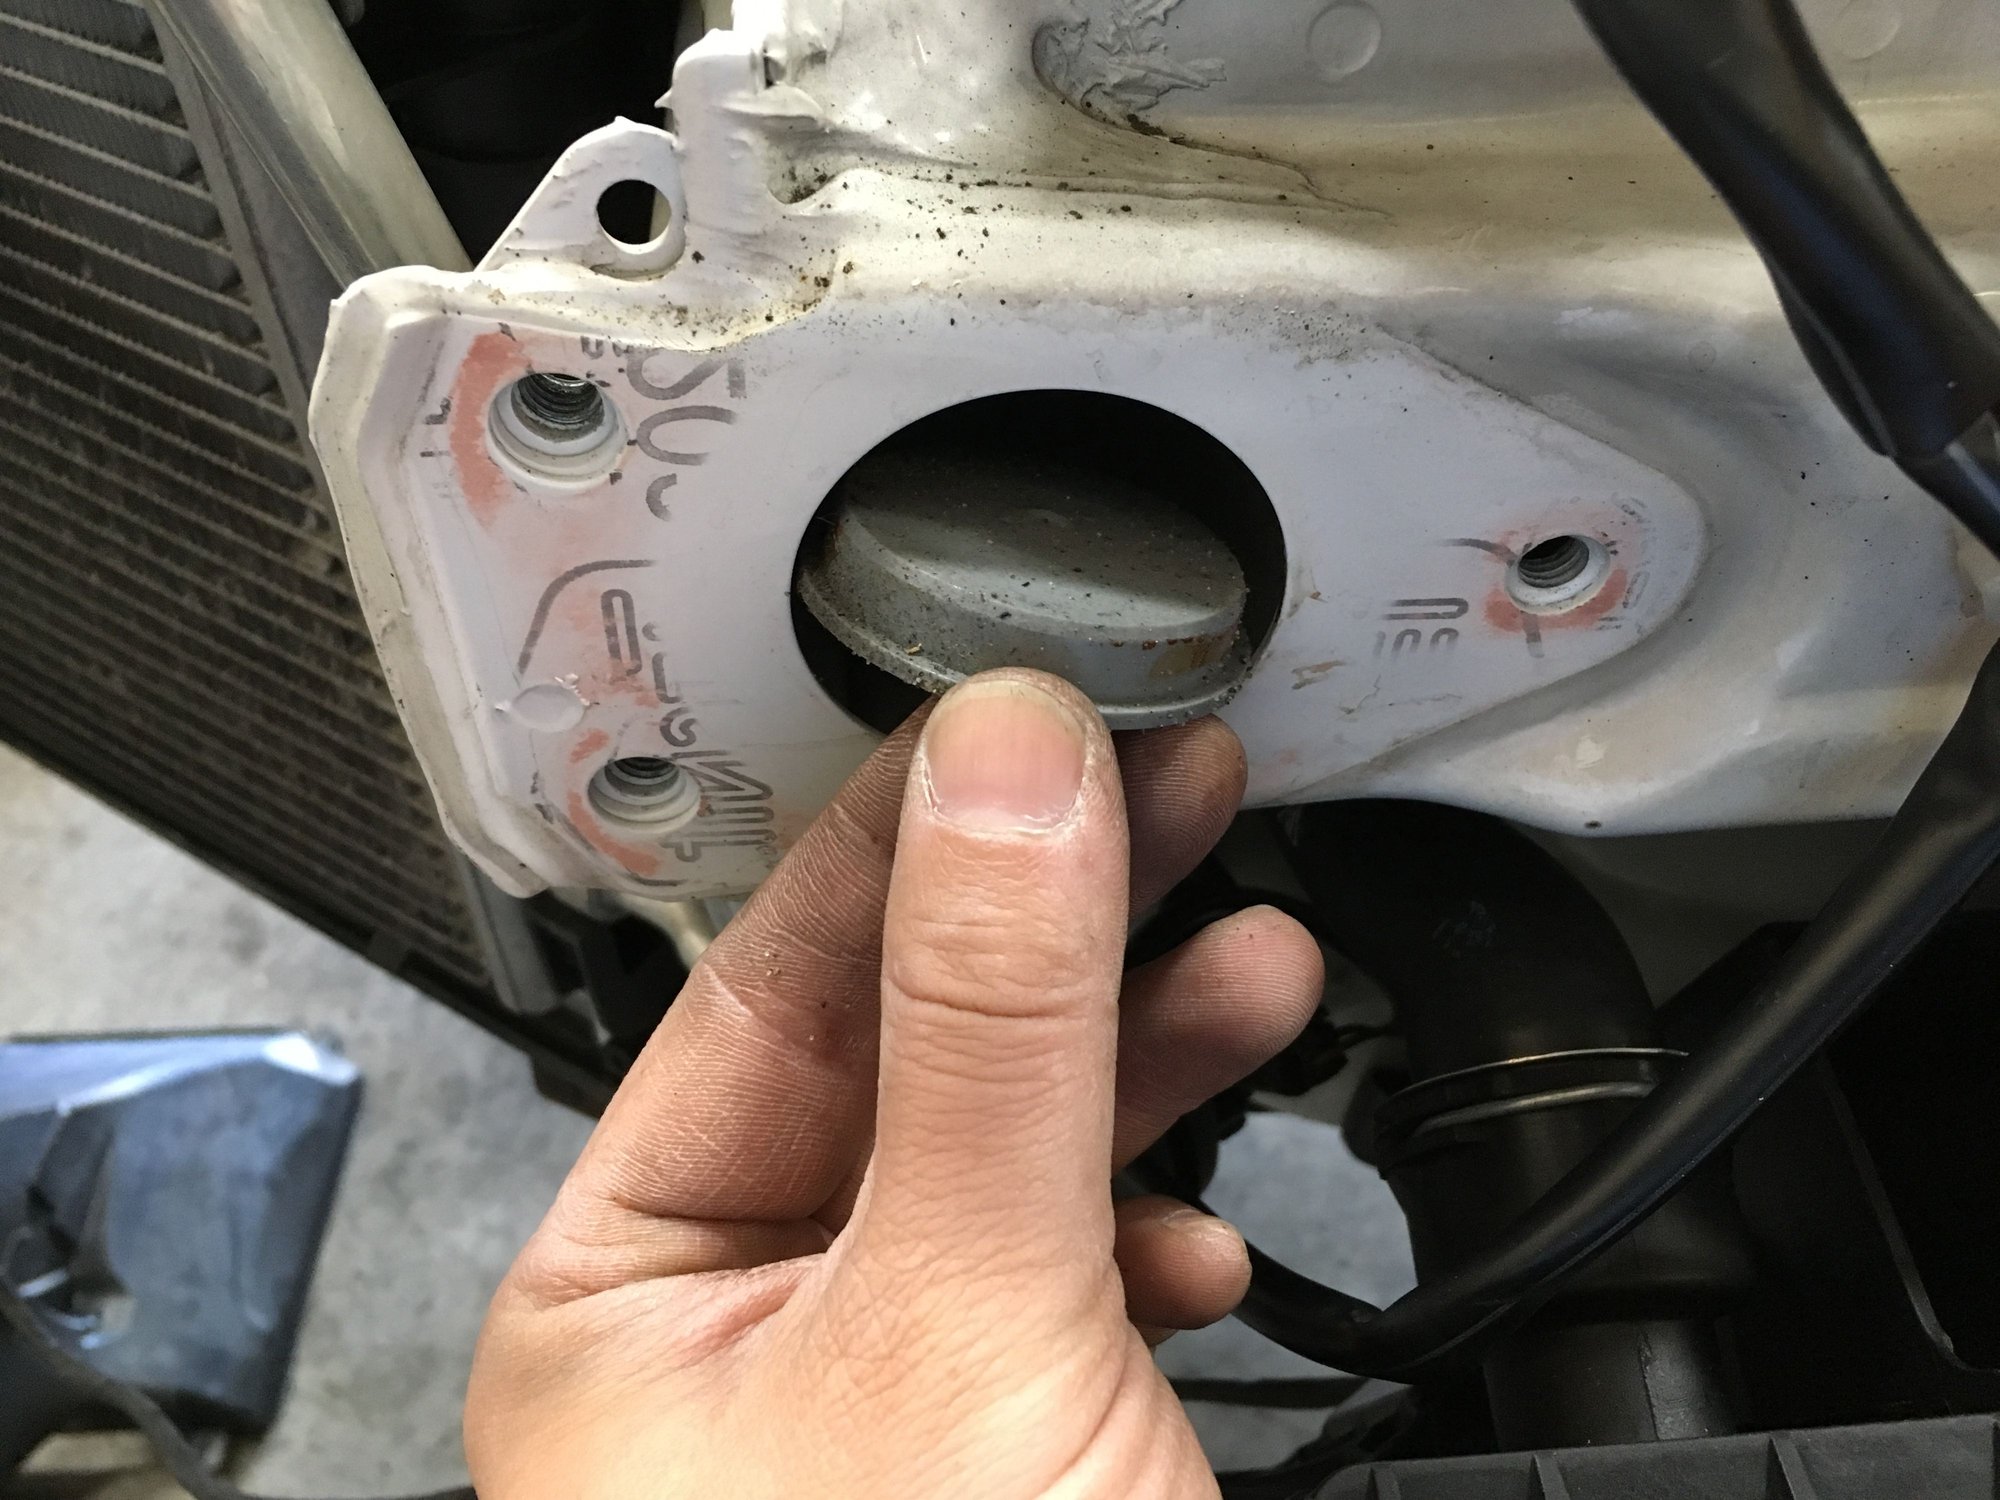
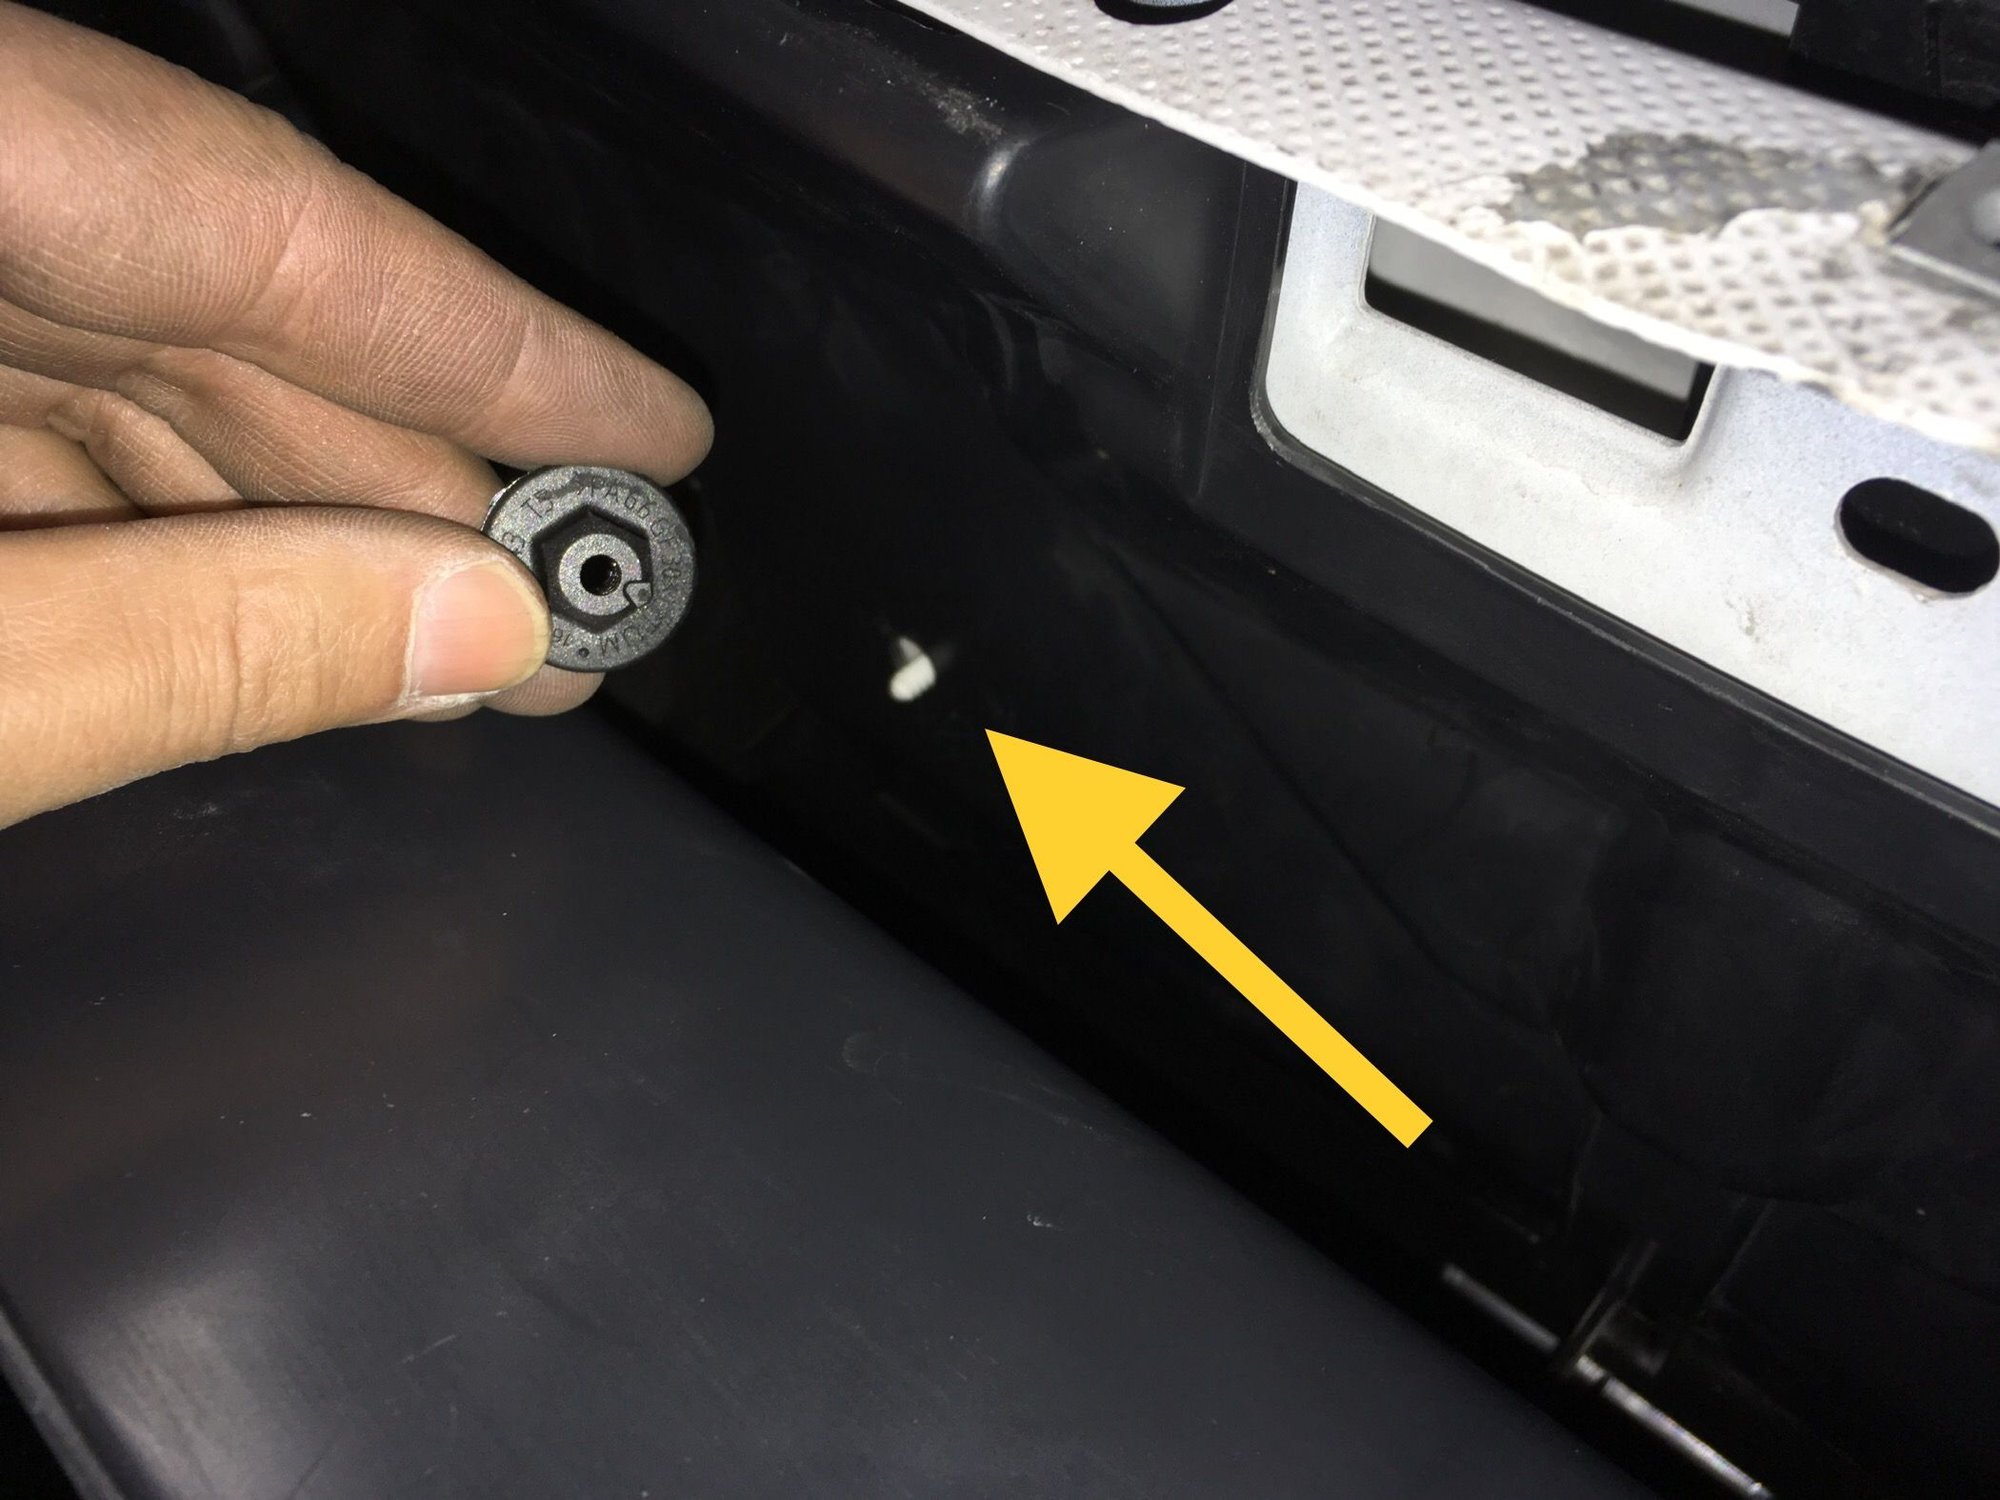
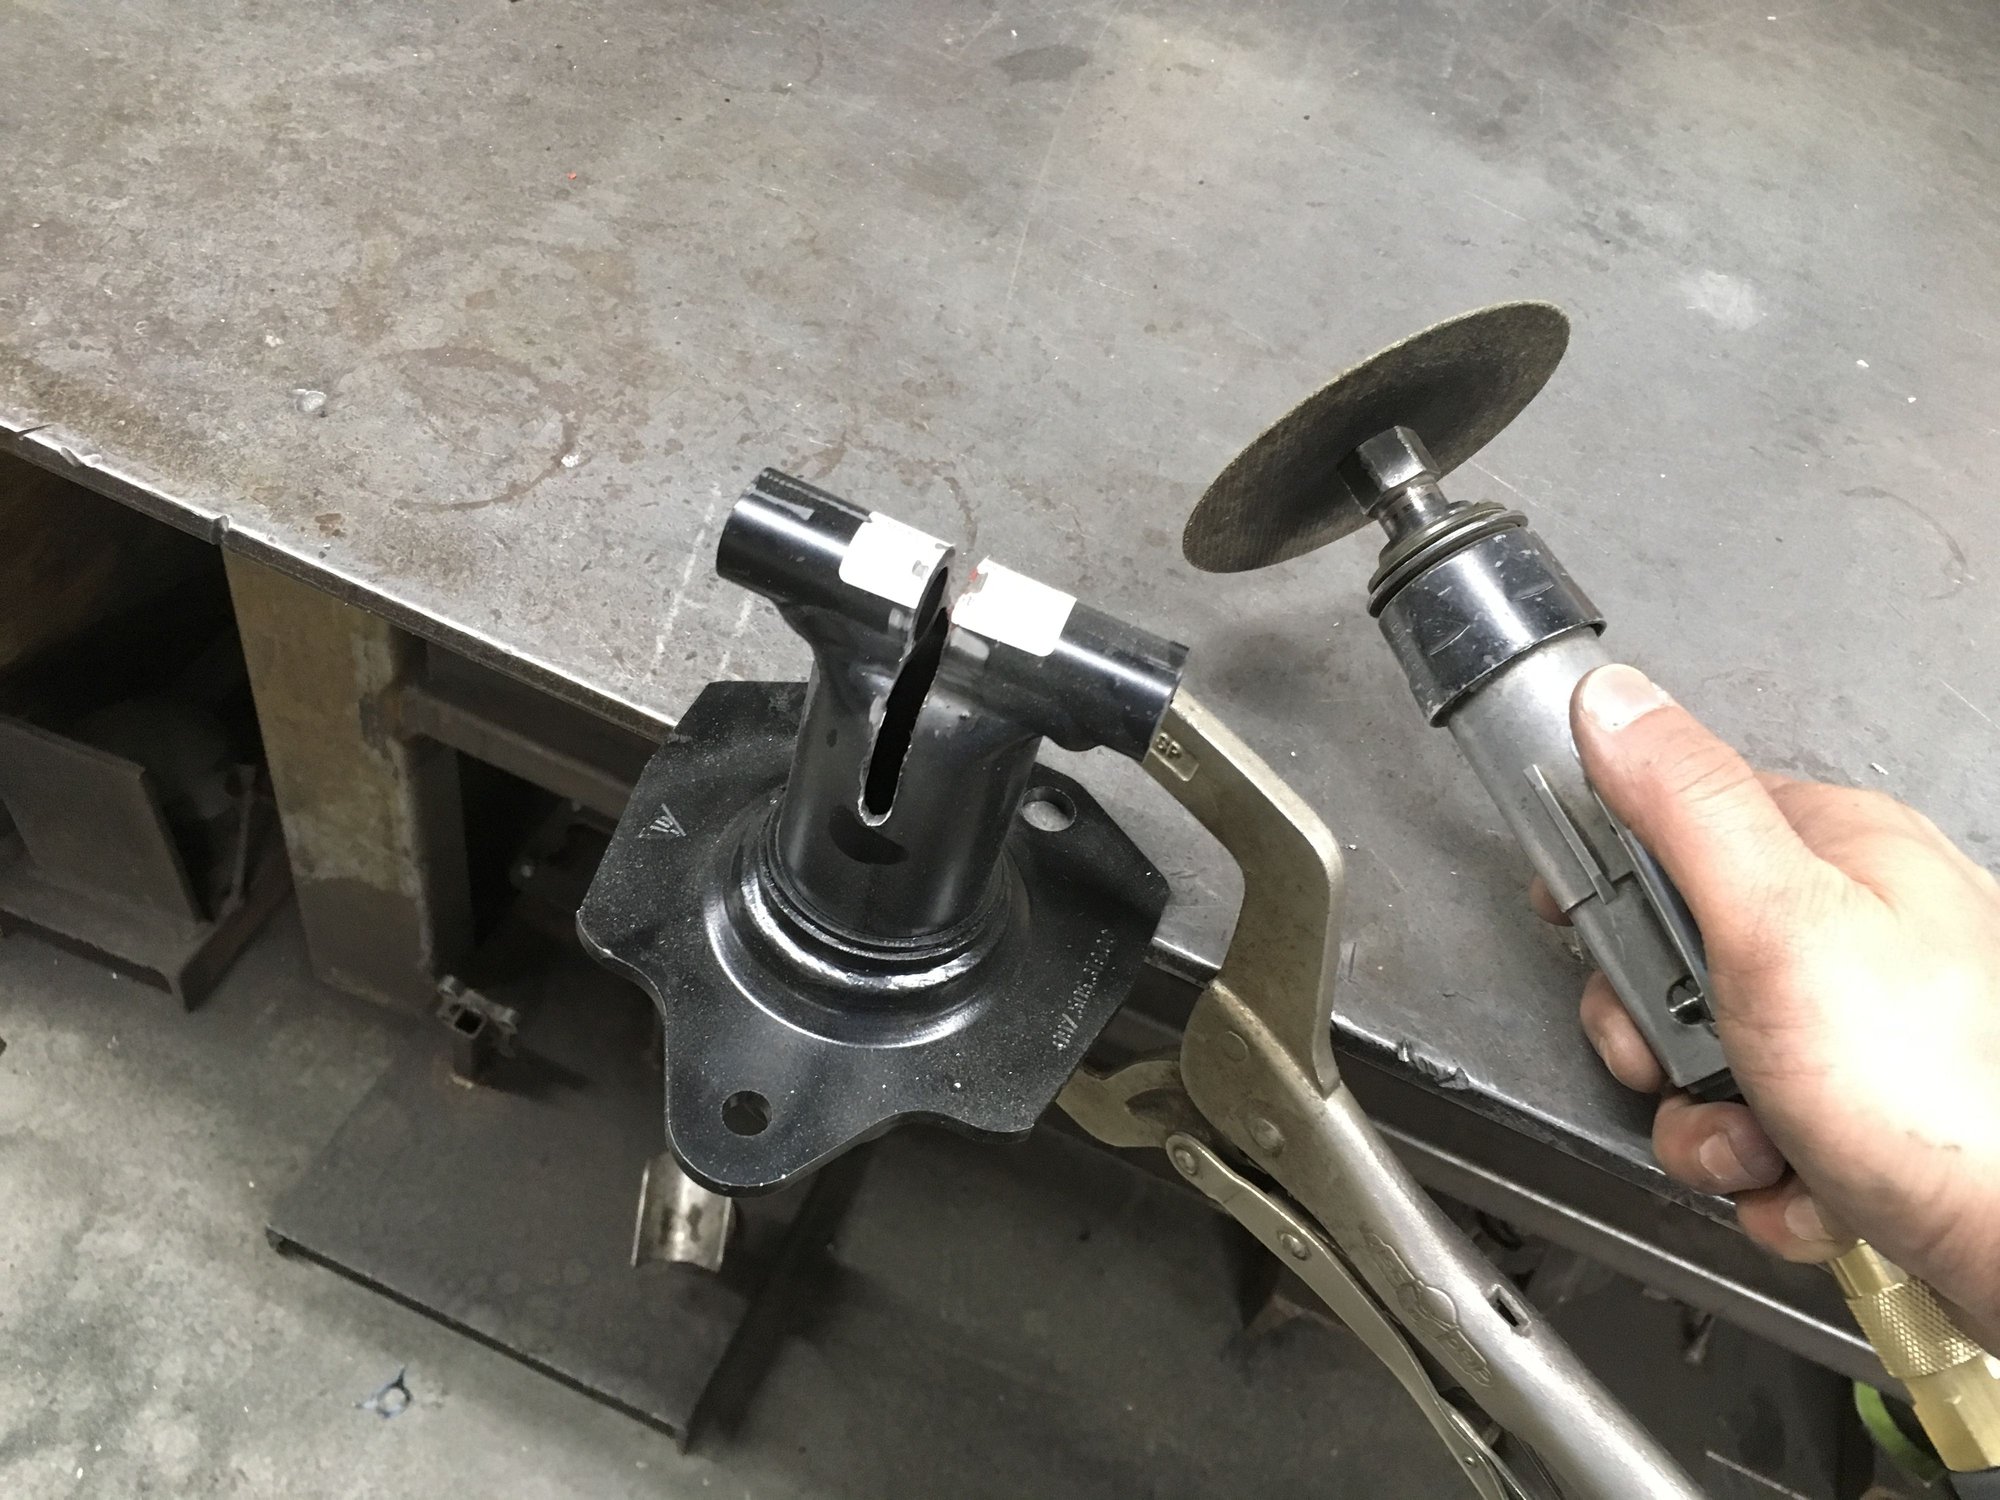
Just an observation- Found this plastic cap inside the front frame. This cap was ejected from the original crash beam support. I think by design the cap ejects when the support piece deforms from an impact letting the mechanic know that it is deformed.
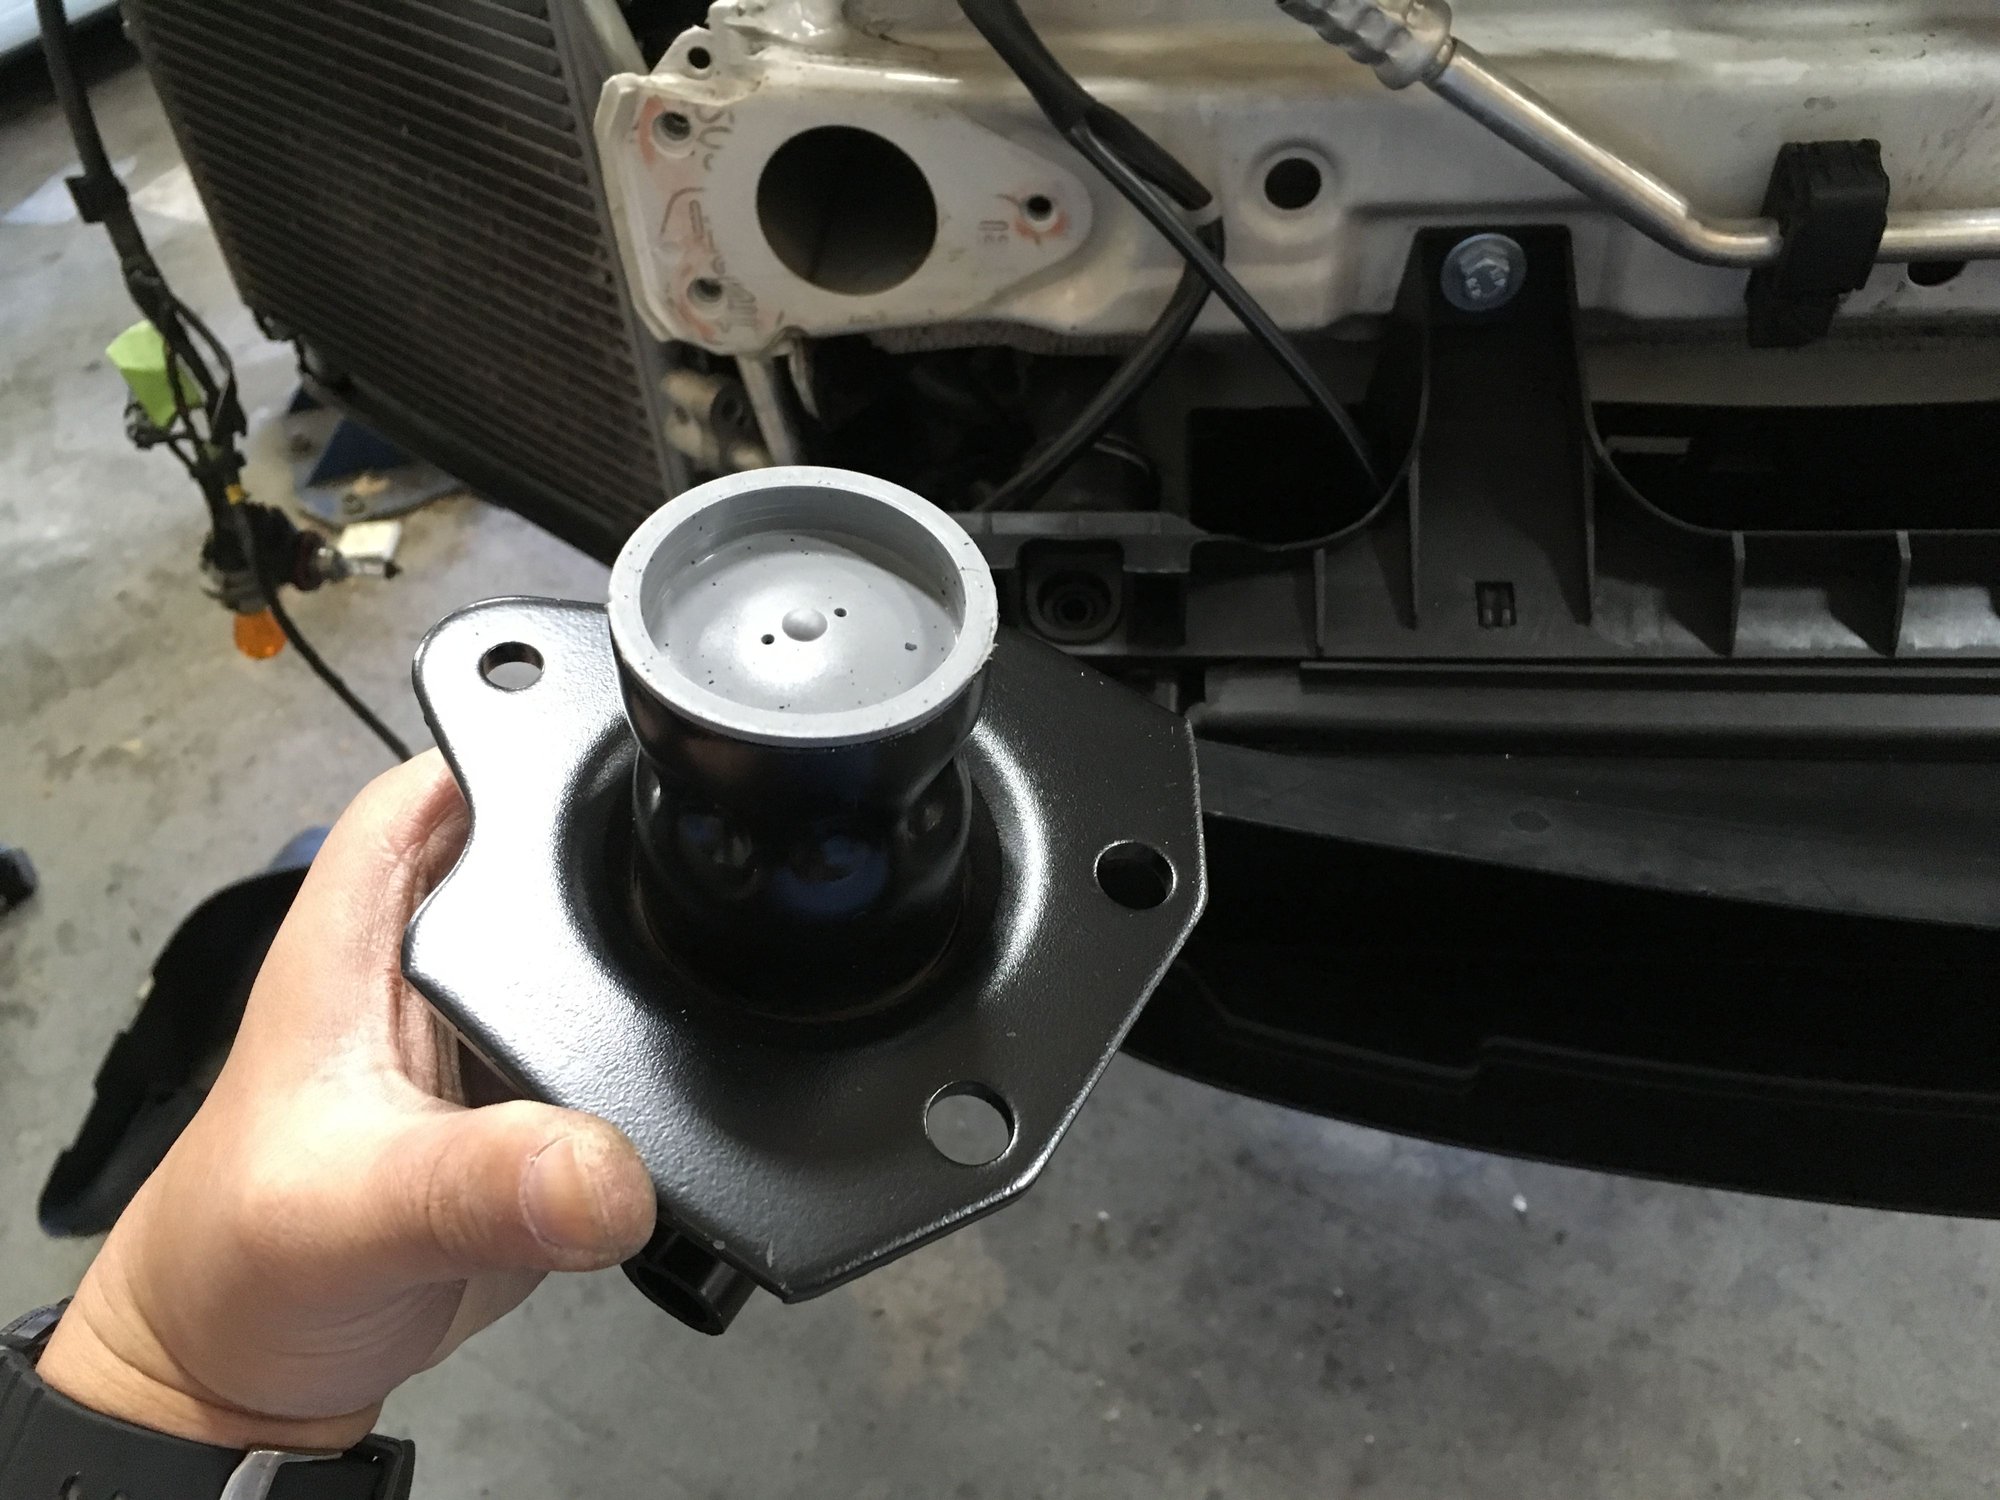
Here's a new support piece showing the plastic cap.
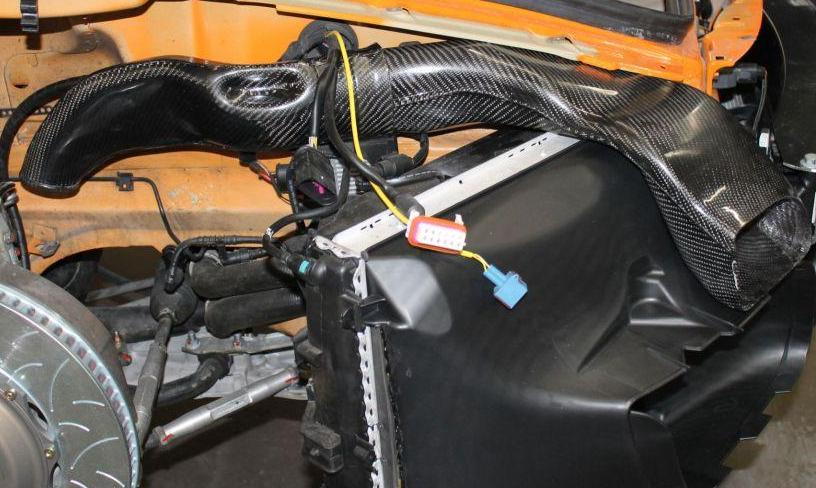
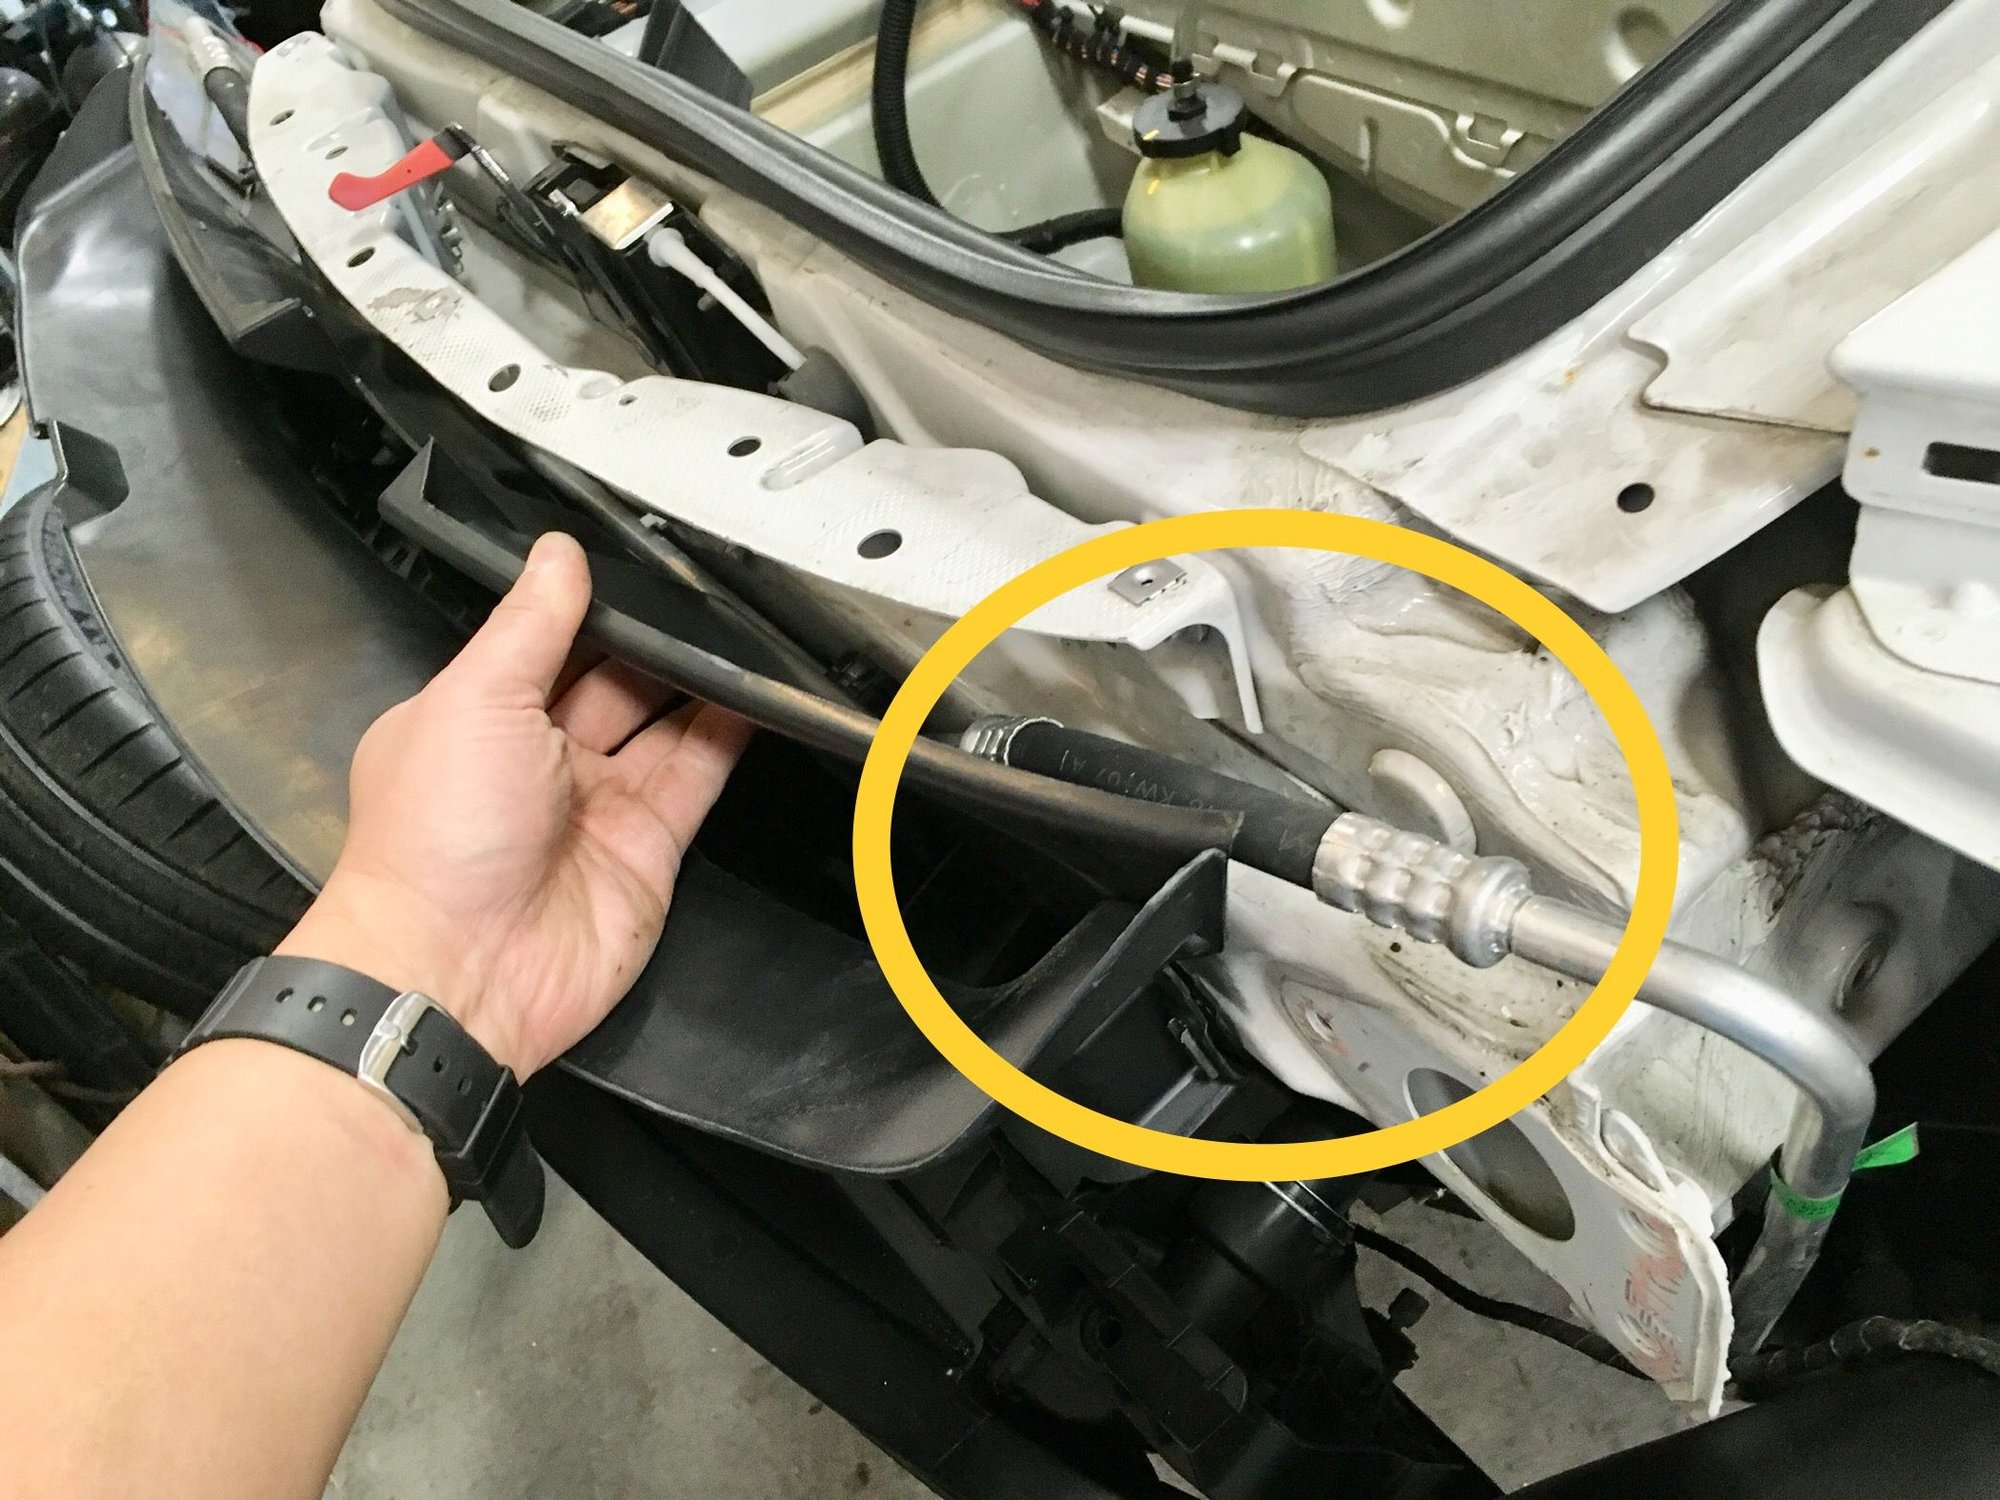
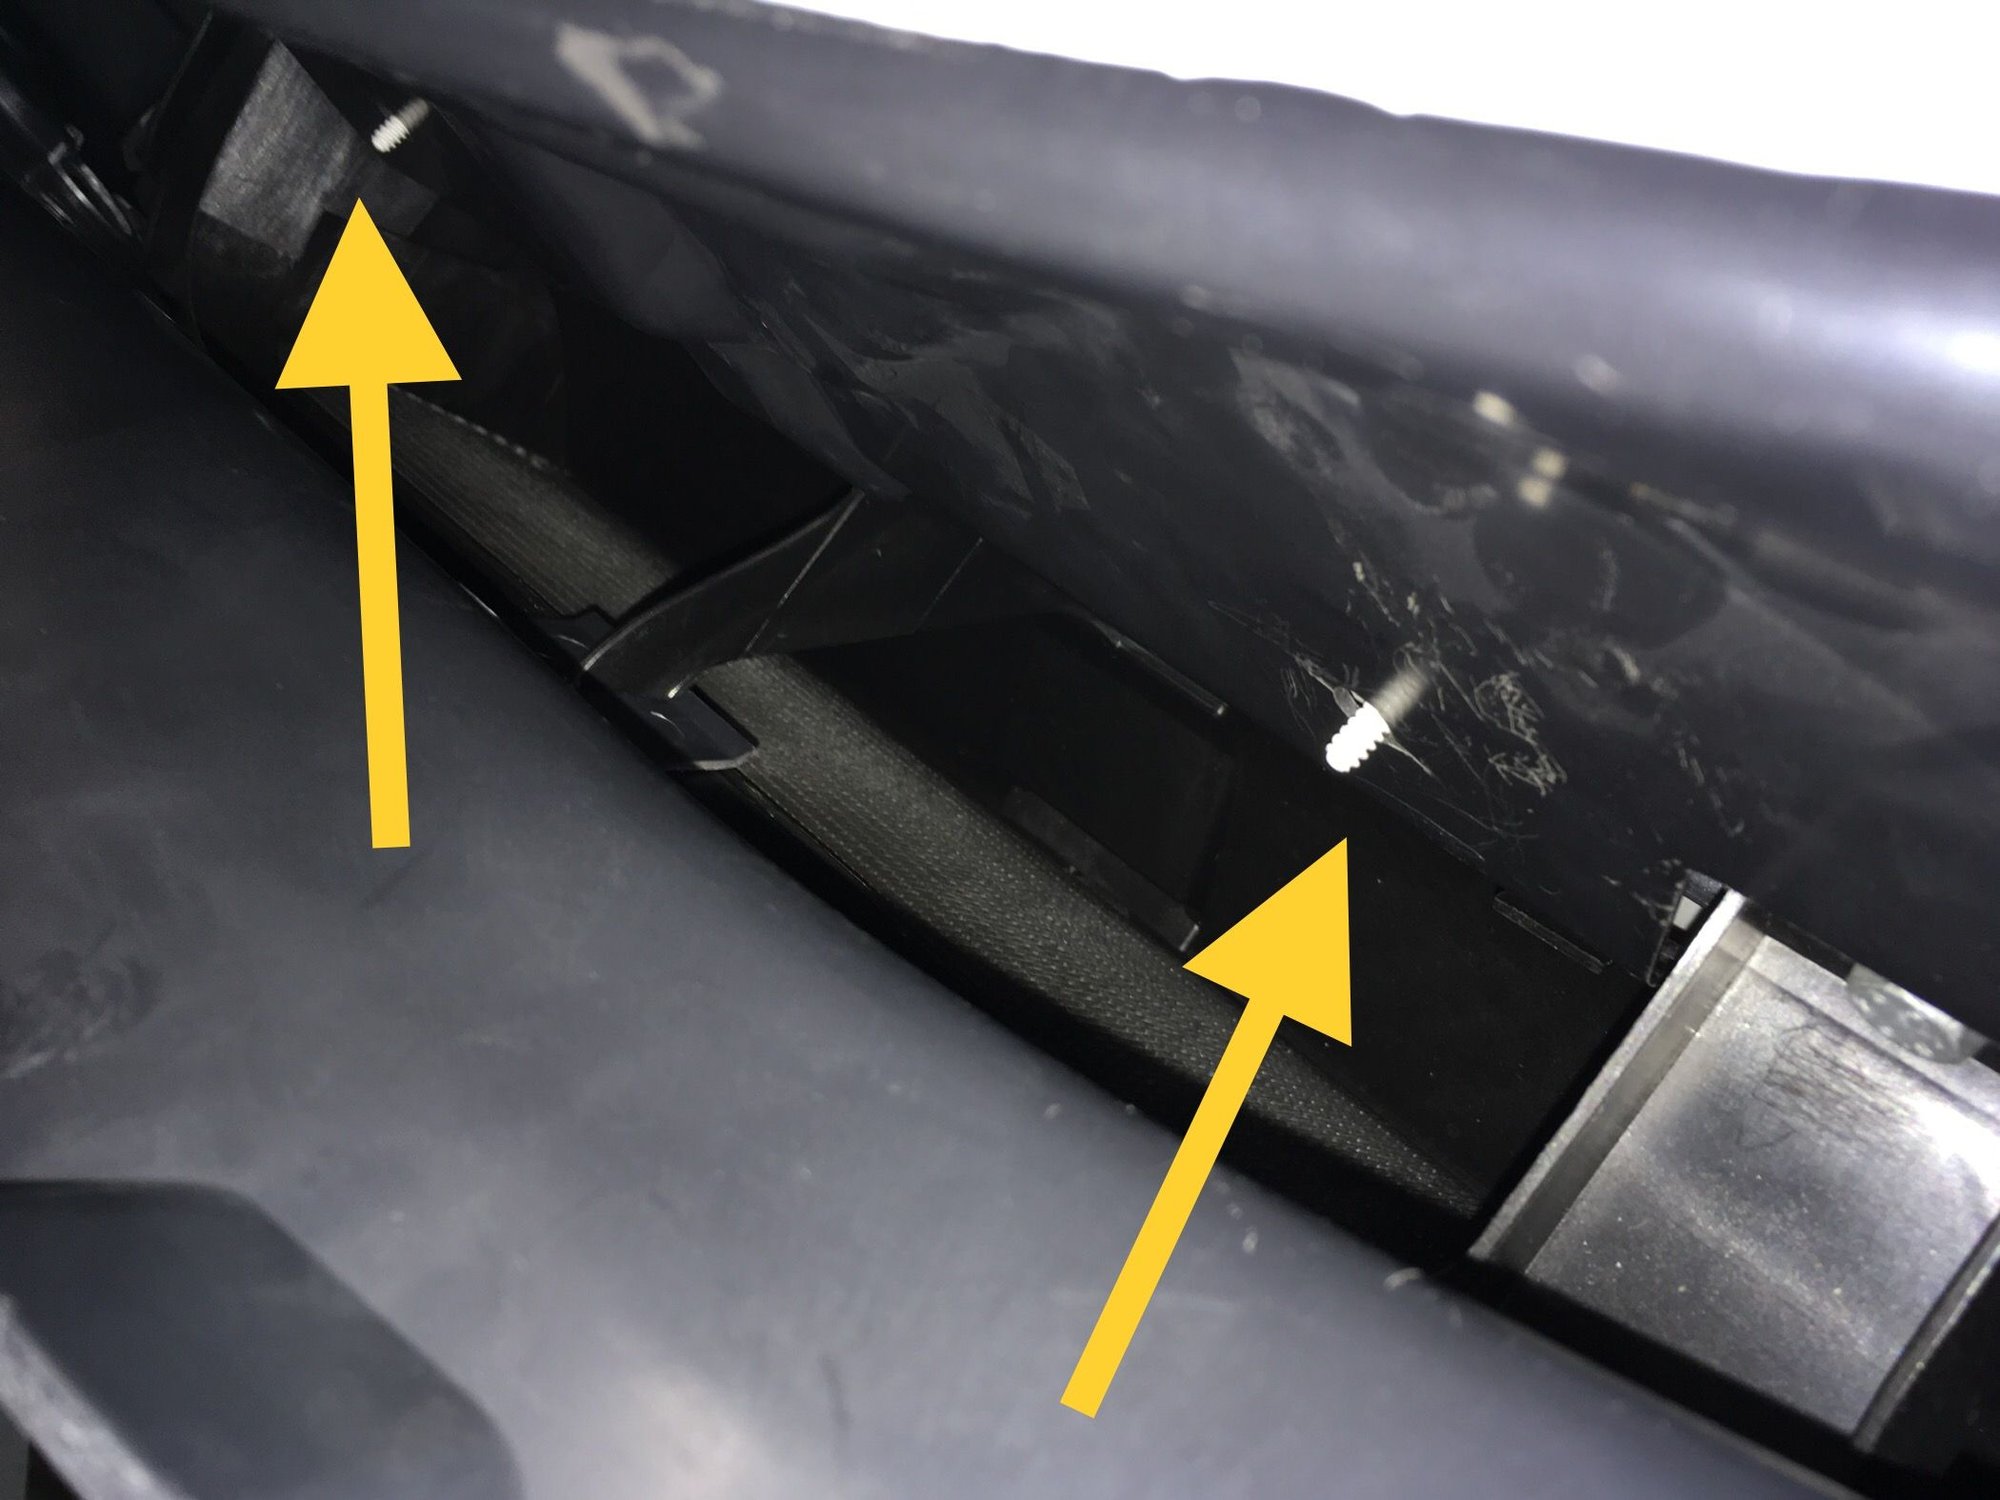
Back to business- Previously I tried to install the plastic upper duct for the center radiator. I was unsuccessful because of interference by the emergency front latch release actuator. At the time I didn't know it was for emergency release, not for normal release so I didn't remove it. Now that I know, and can live without it....off it goes.
I didn't get this far before- With the emergency release actuator removed, the next interference is the AC line. Thanks to rennlist user bmwTye for this info about the AC line before I even got this far.
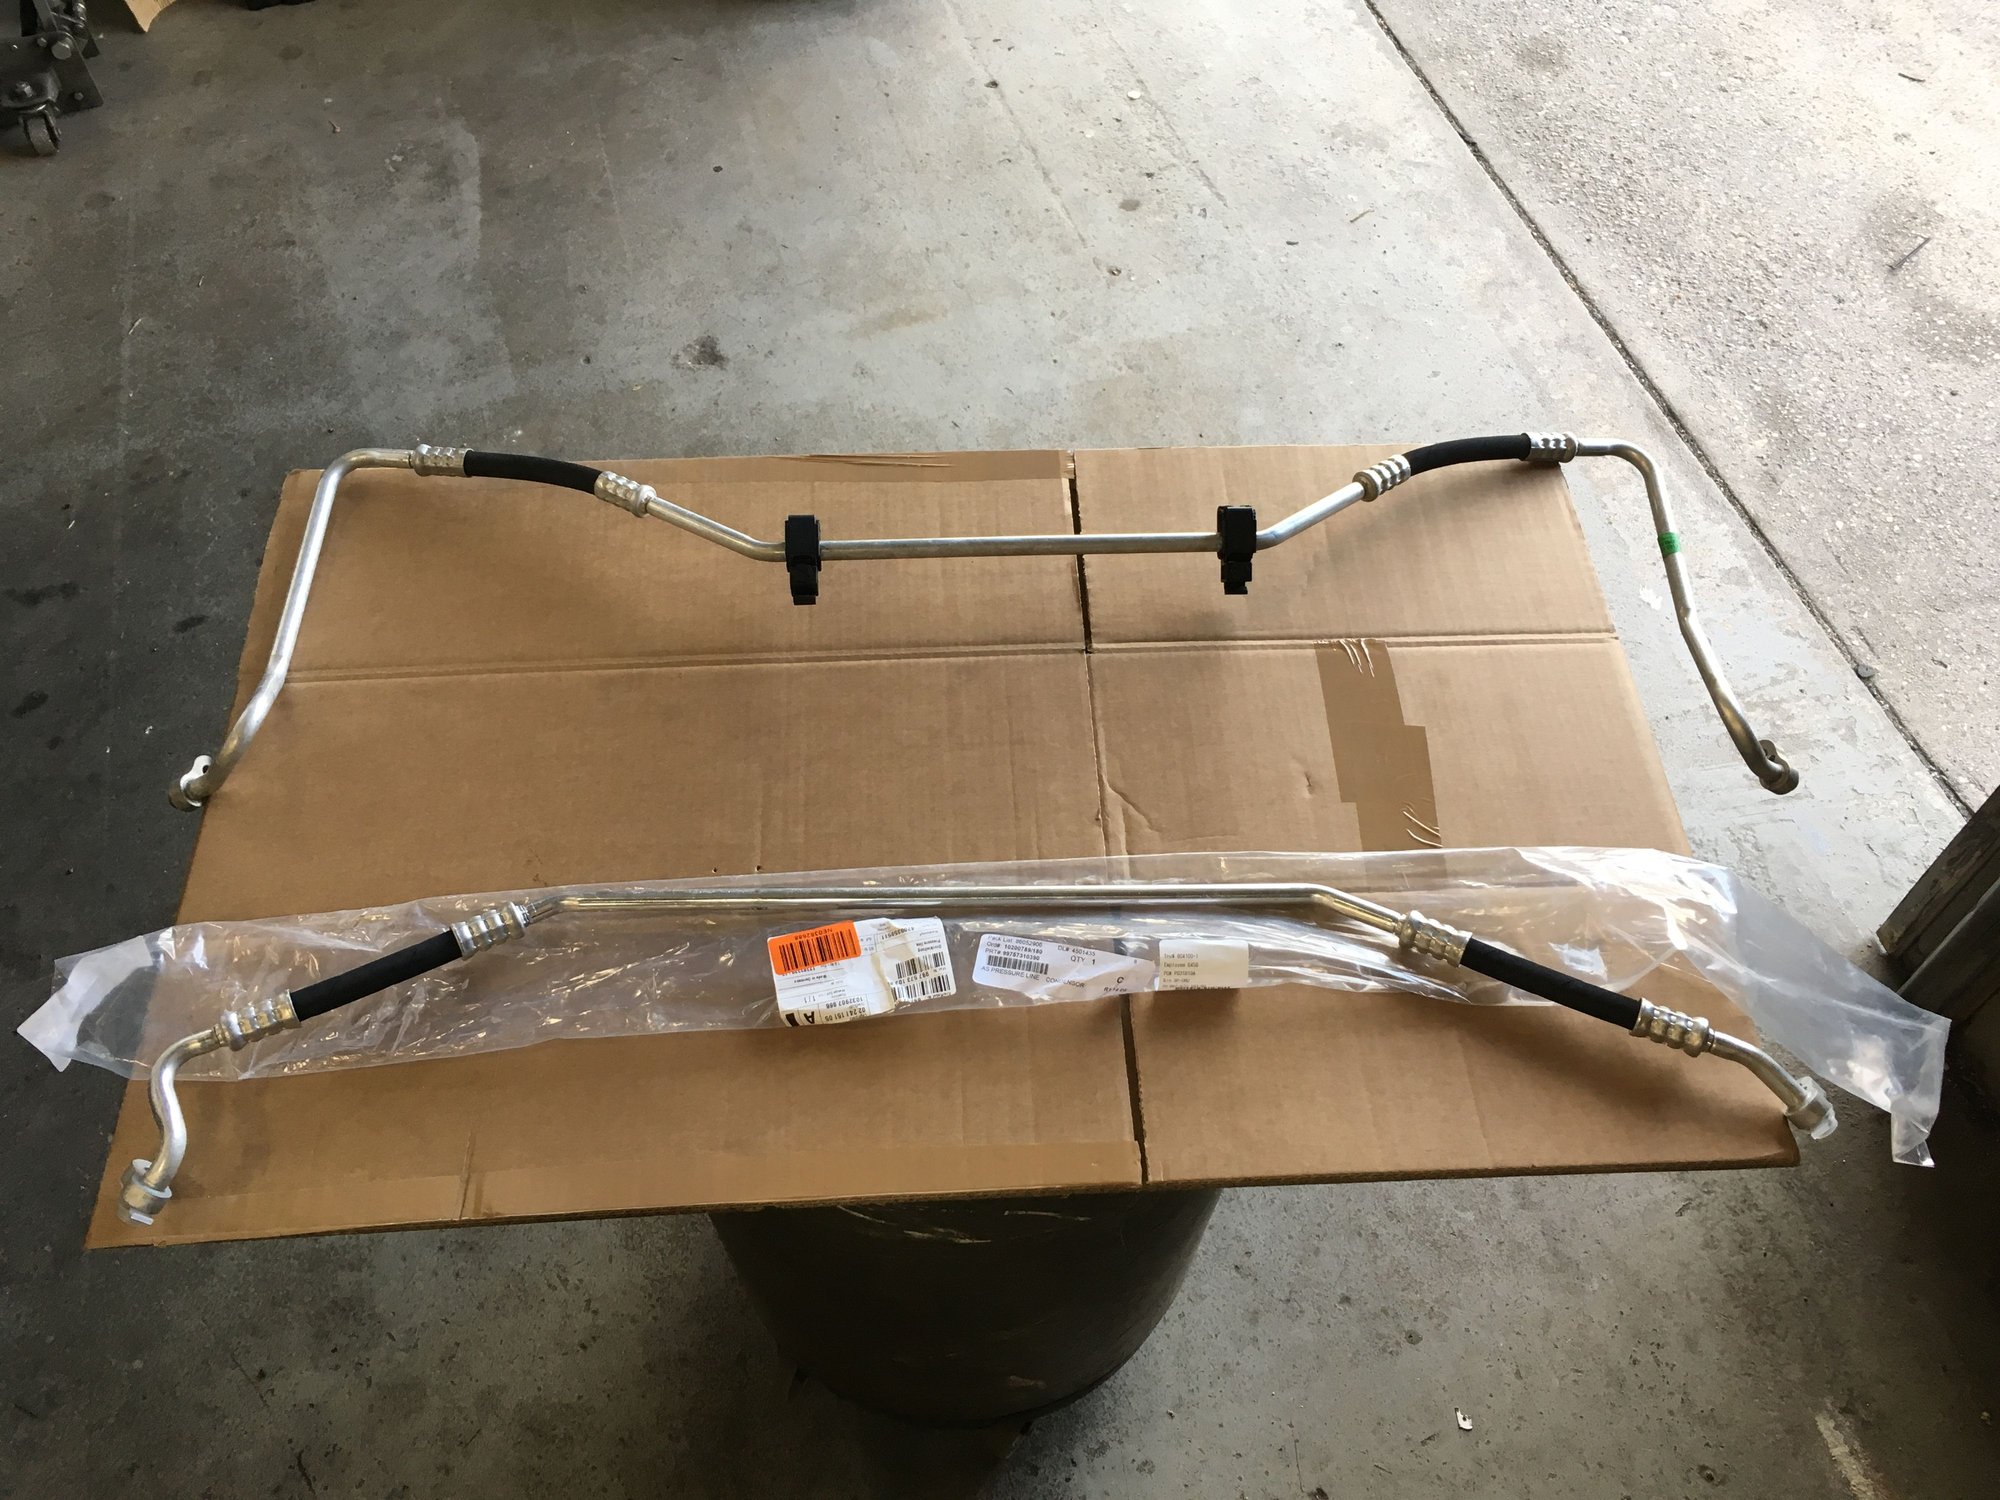
The original 997.1 GT3 AC line is same as a Carrera/Carrera S. It routes upward from the AC condenser.
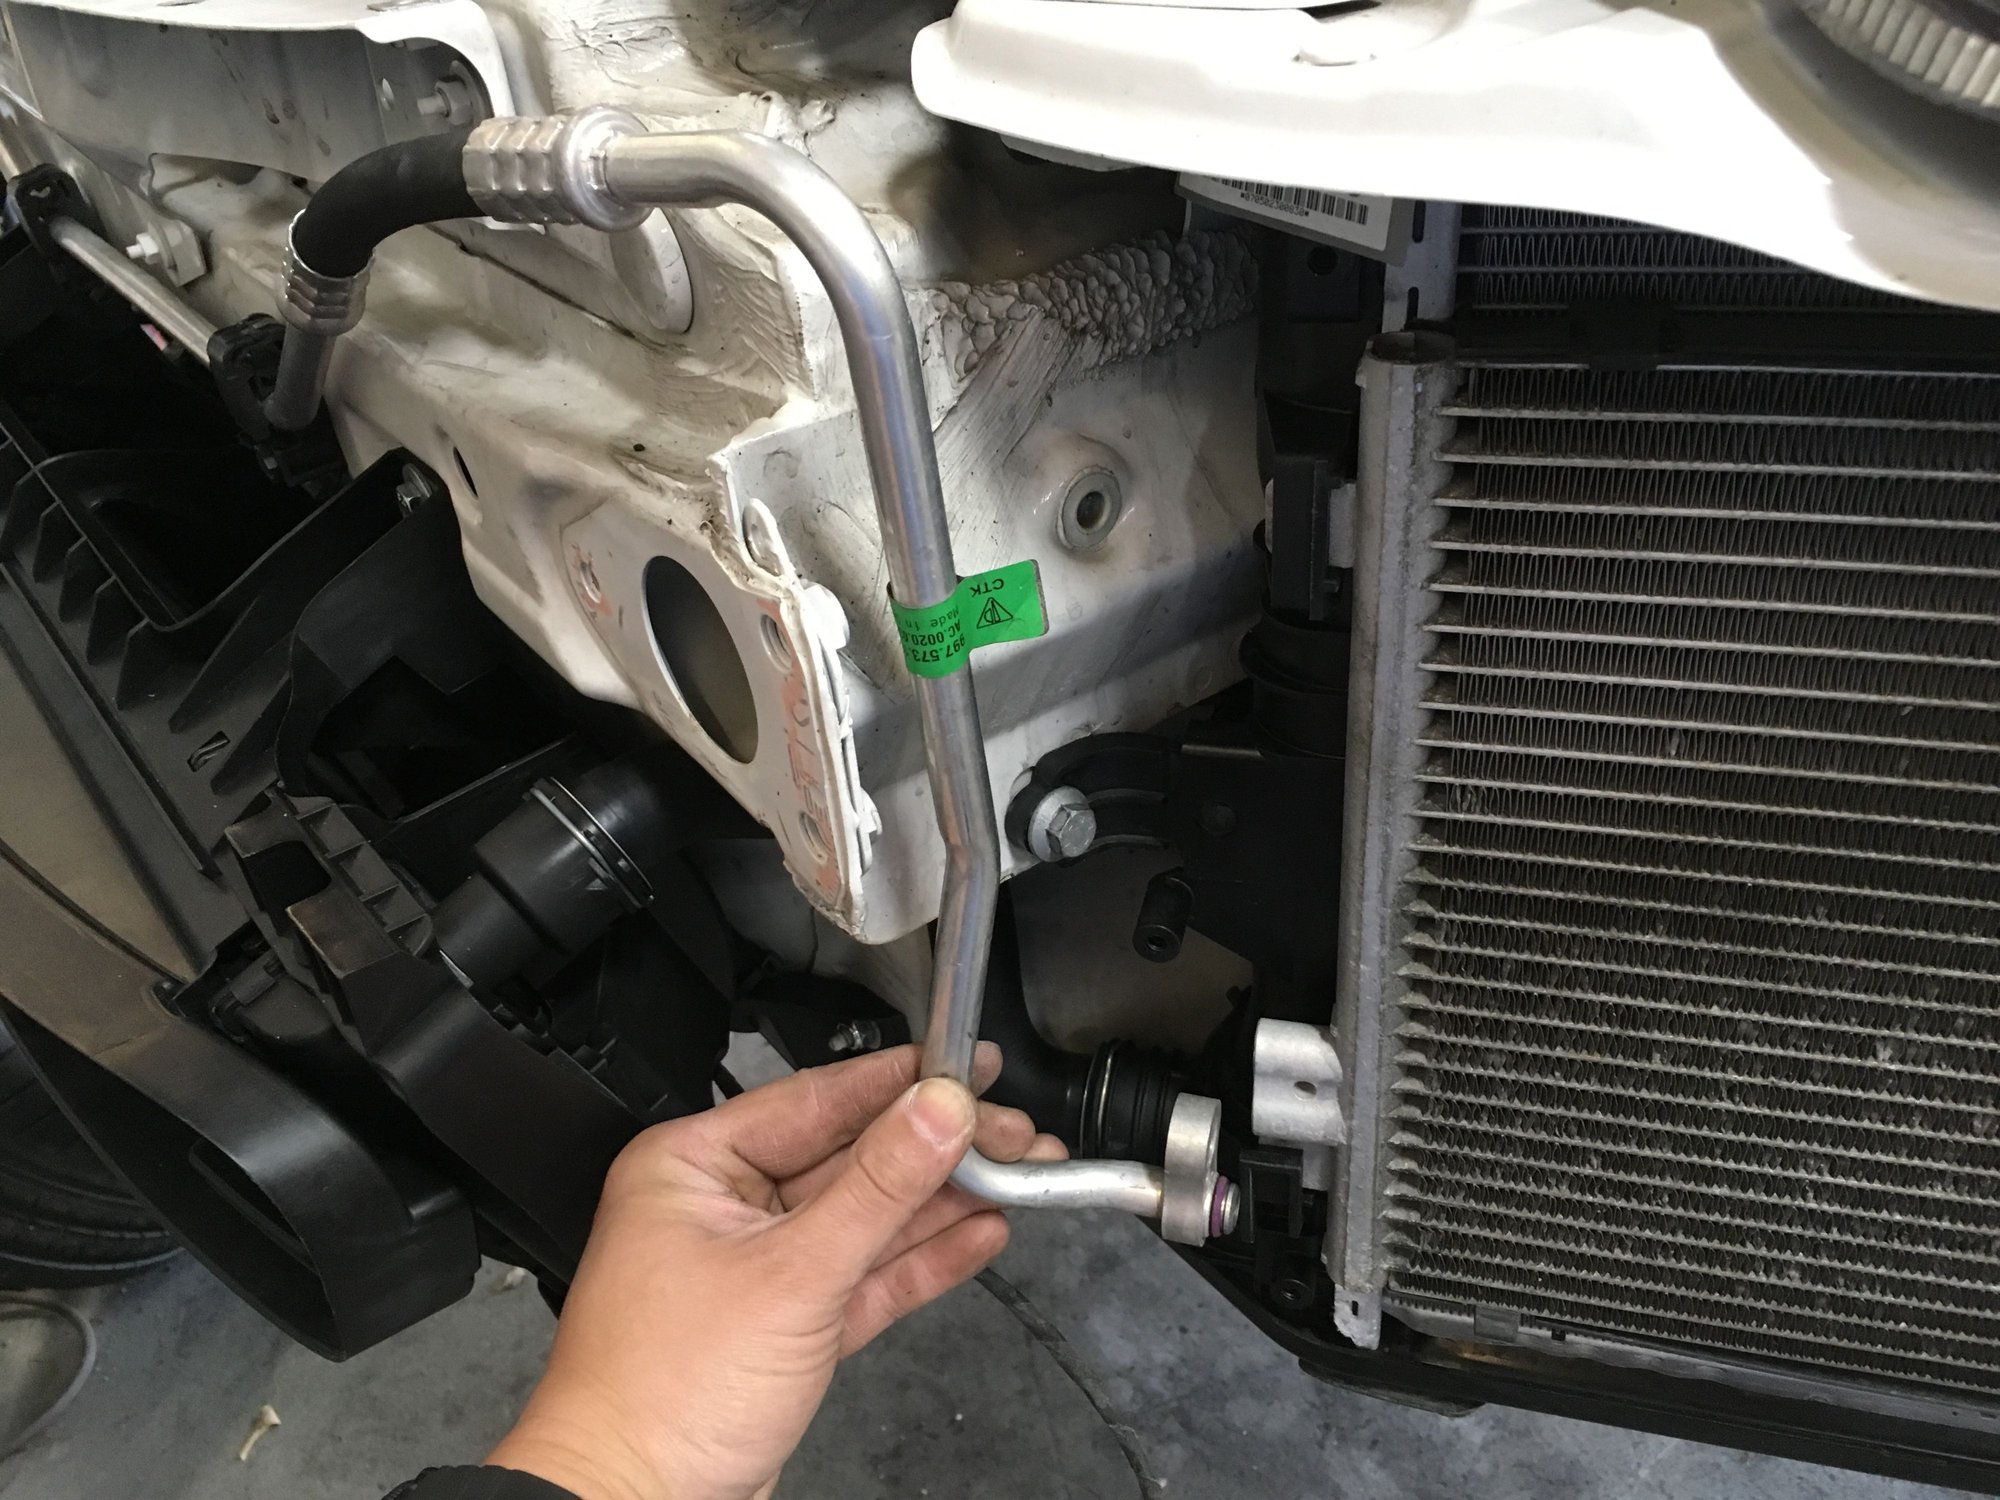
With Tye's info, I ordered the 997.2 GT3/RS AC line ahead of time. The image shows how differently the two AC lines are shaped. The new AC line is the bottom one.
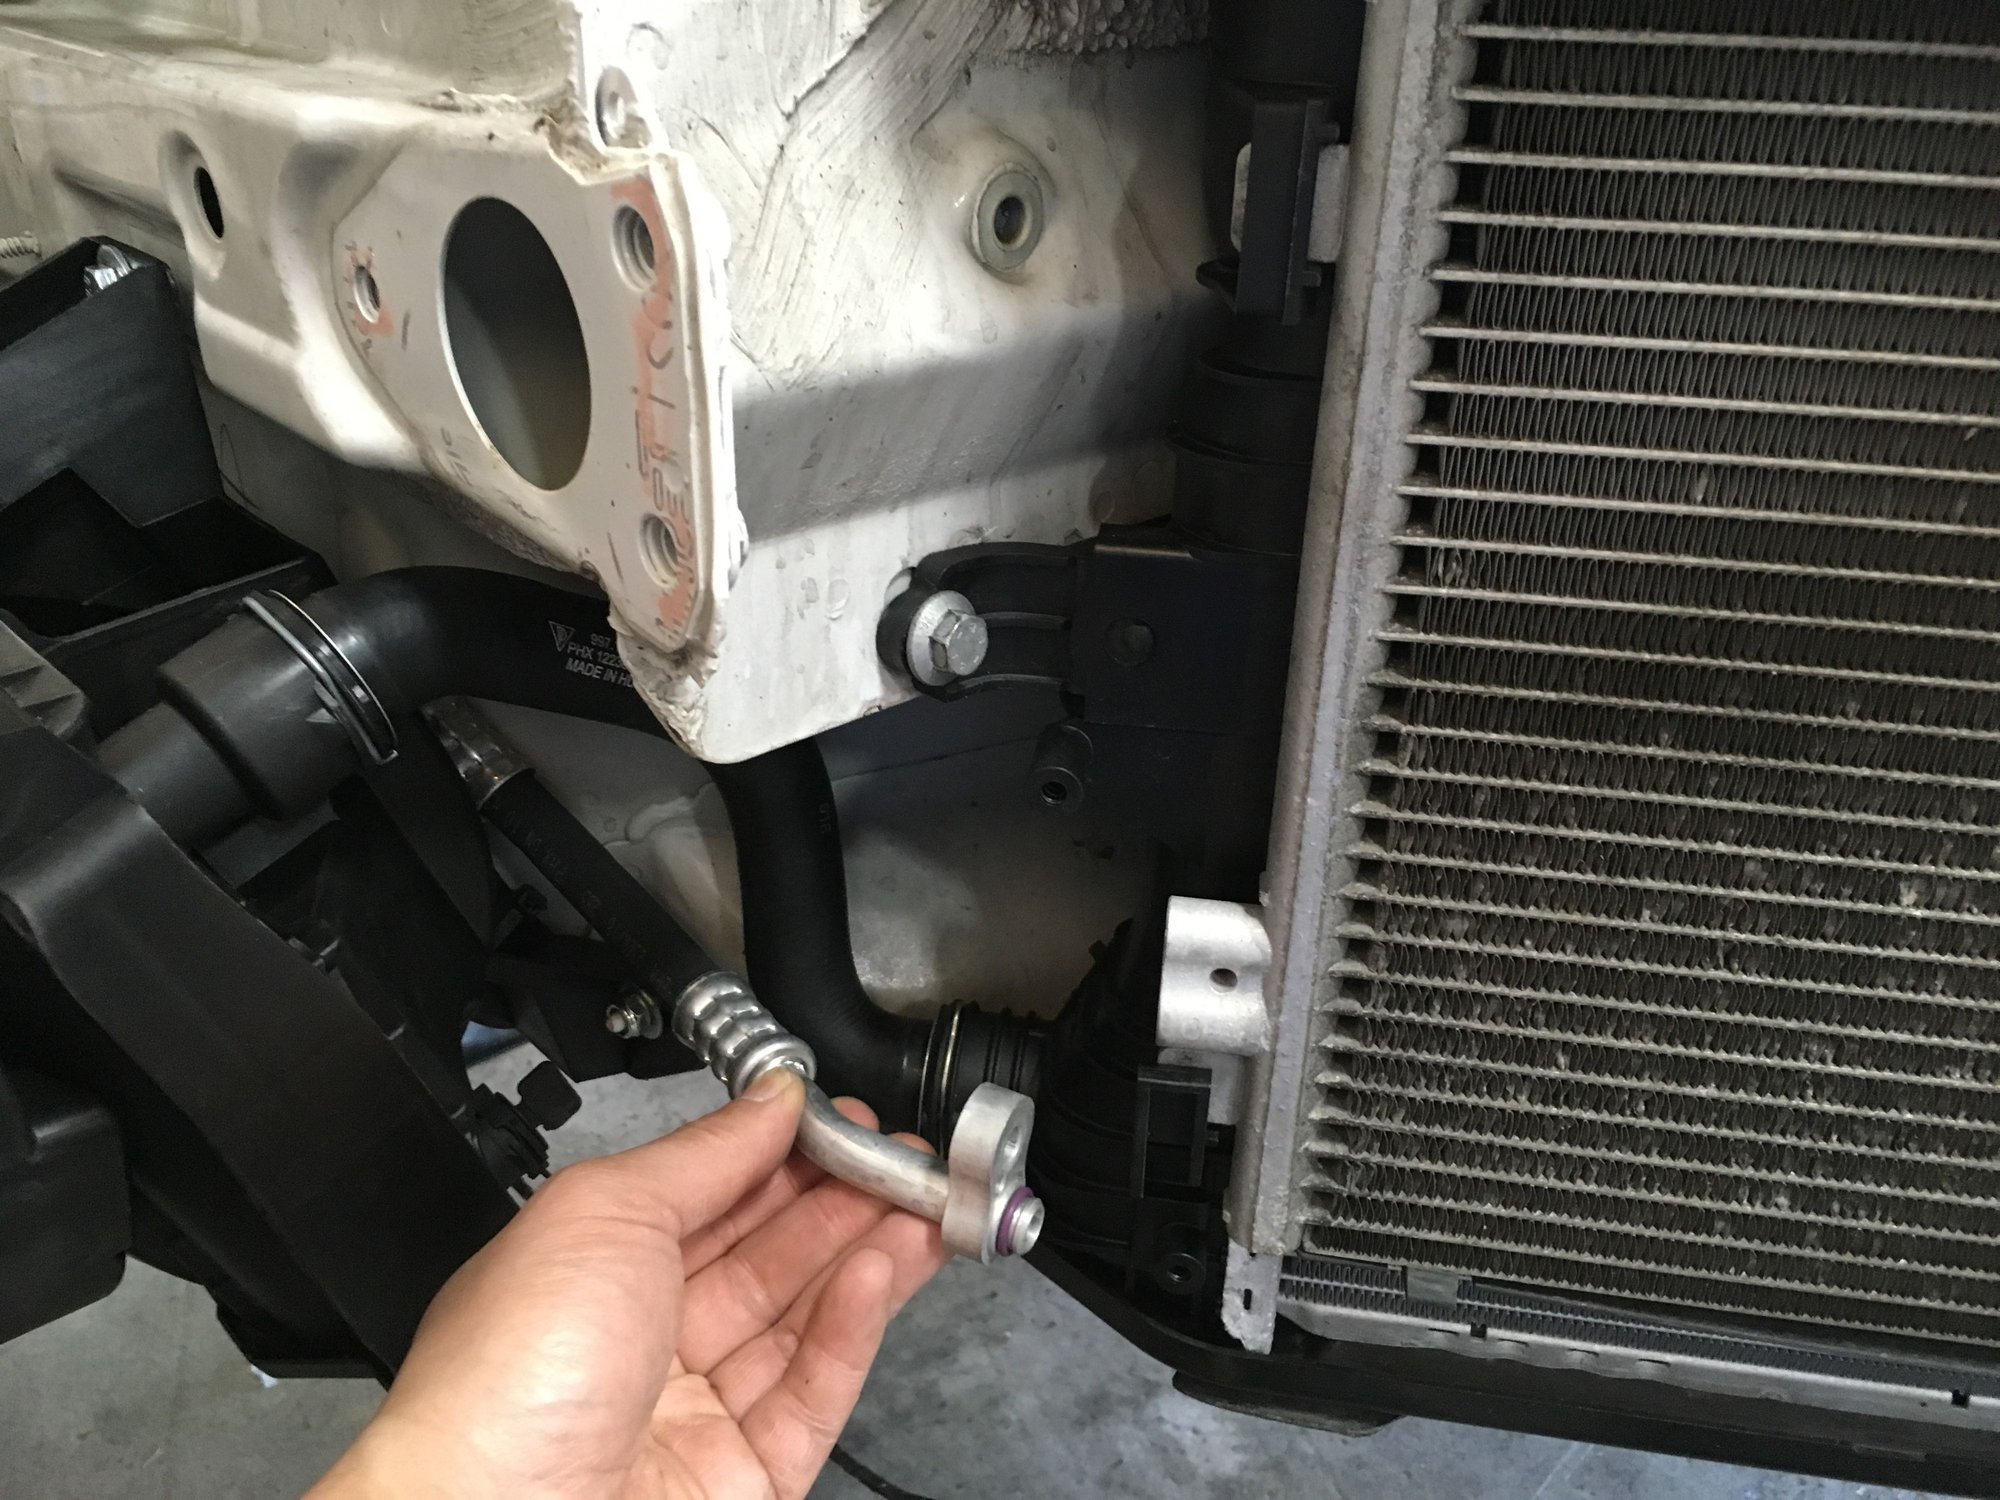
Here's the new AC line installed. Instead of routing upward, it goes behind the center radiator, and under the coolant hoses.
The new AC line tucks neatly behind the center radiator. The next interference, yes, there's more, are the two metal studs above the radiator assembly. The metal studs won't allow the duct to rest in place.
Instead of cutting off the two studs, I drilled two holes on the upper duct for the studs to protrude.
This way, the two protruding studs can be used to secure the upper duct.
The OEM plastic nuts for the under trays are perfect for this application to tighten the upper duct to the studs.
Man, that was a lot of work for a piece of plastic.
__________________
PCA National Instructor
TPC Racing stats:
2023 Porsche Sprint Challenge 992 Cup Am Champion
2023 Porsche Sprint Challenge GT4 Pro-Am Team Champion
2022 Porsche Sprint Challenge 992 Cup & 991 Cup Champion
2020 IMSA GT3 Cup Challenge 2nd Championship
2018 IMSA GT3 Cup Challenge 2nd Championship
2016 IMSA GT3 Cup Challenge Champion
2013 IMSA GT3 Cup Challenge Champion
2006 Rolex-24 @ Daytona GT Champion
2004 Grand-Am SGS Class Champion
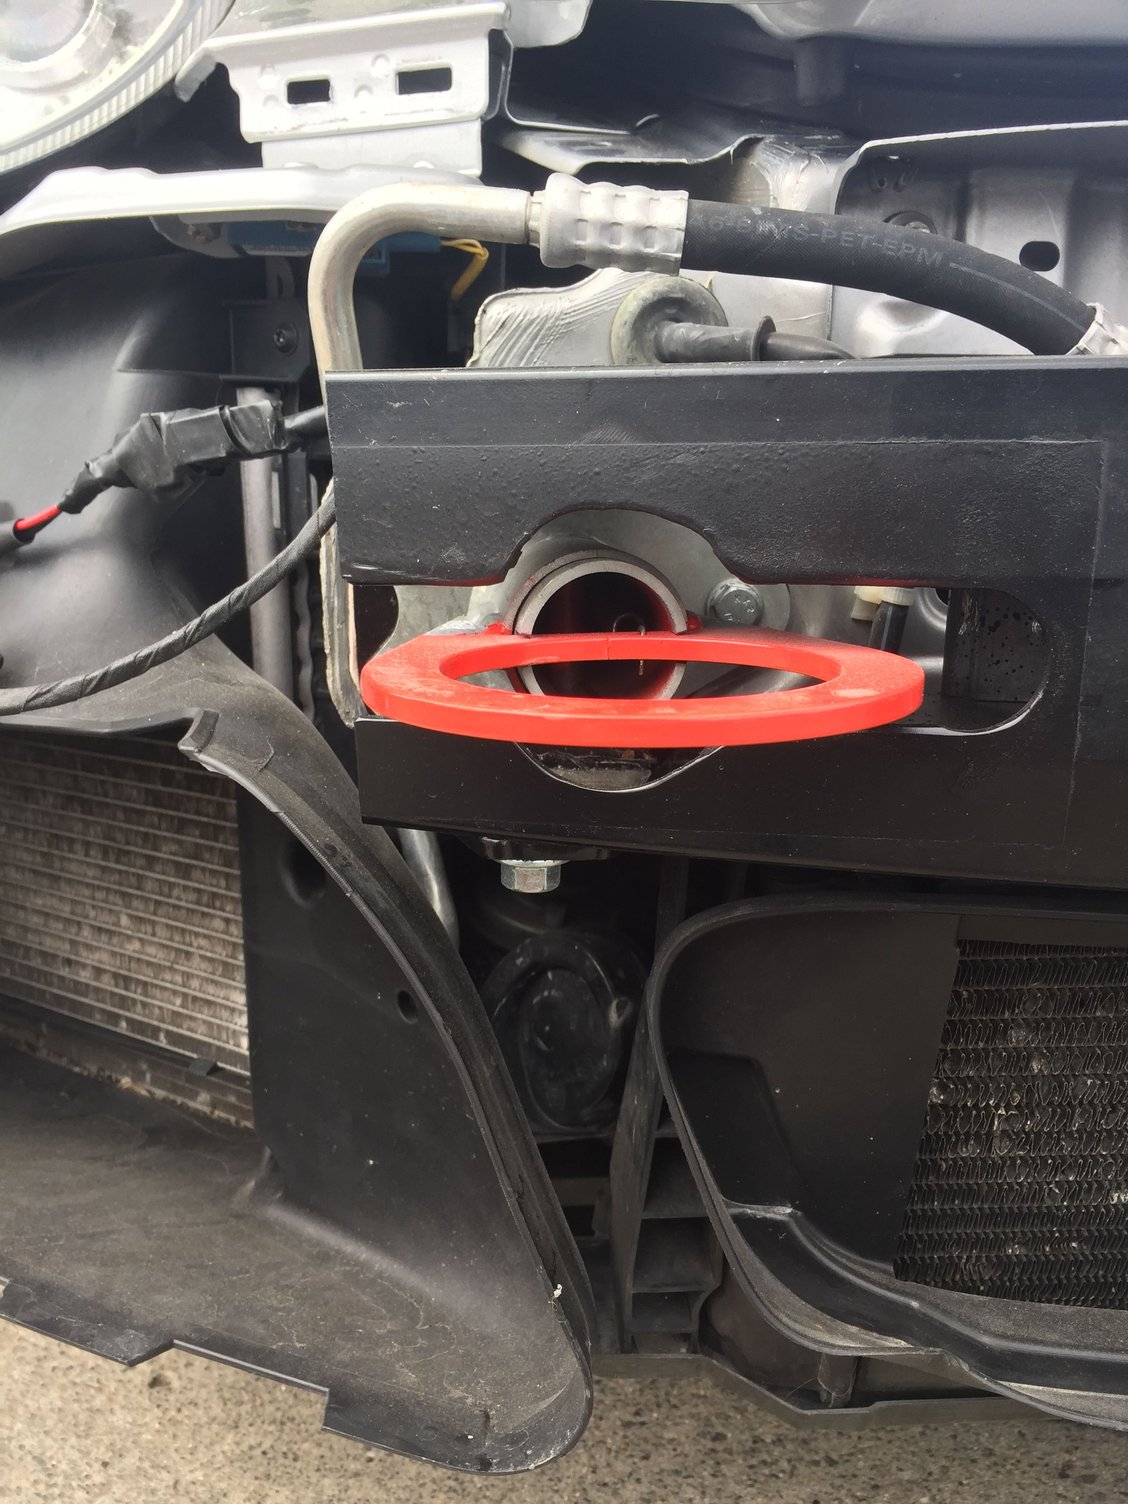
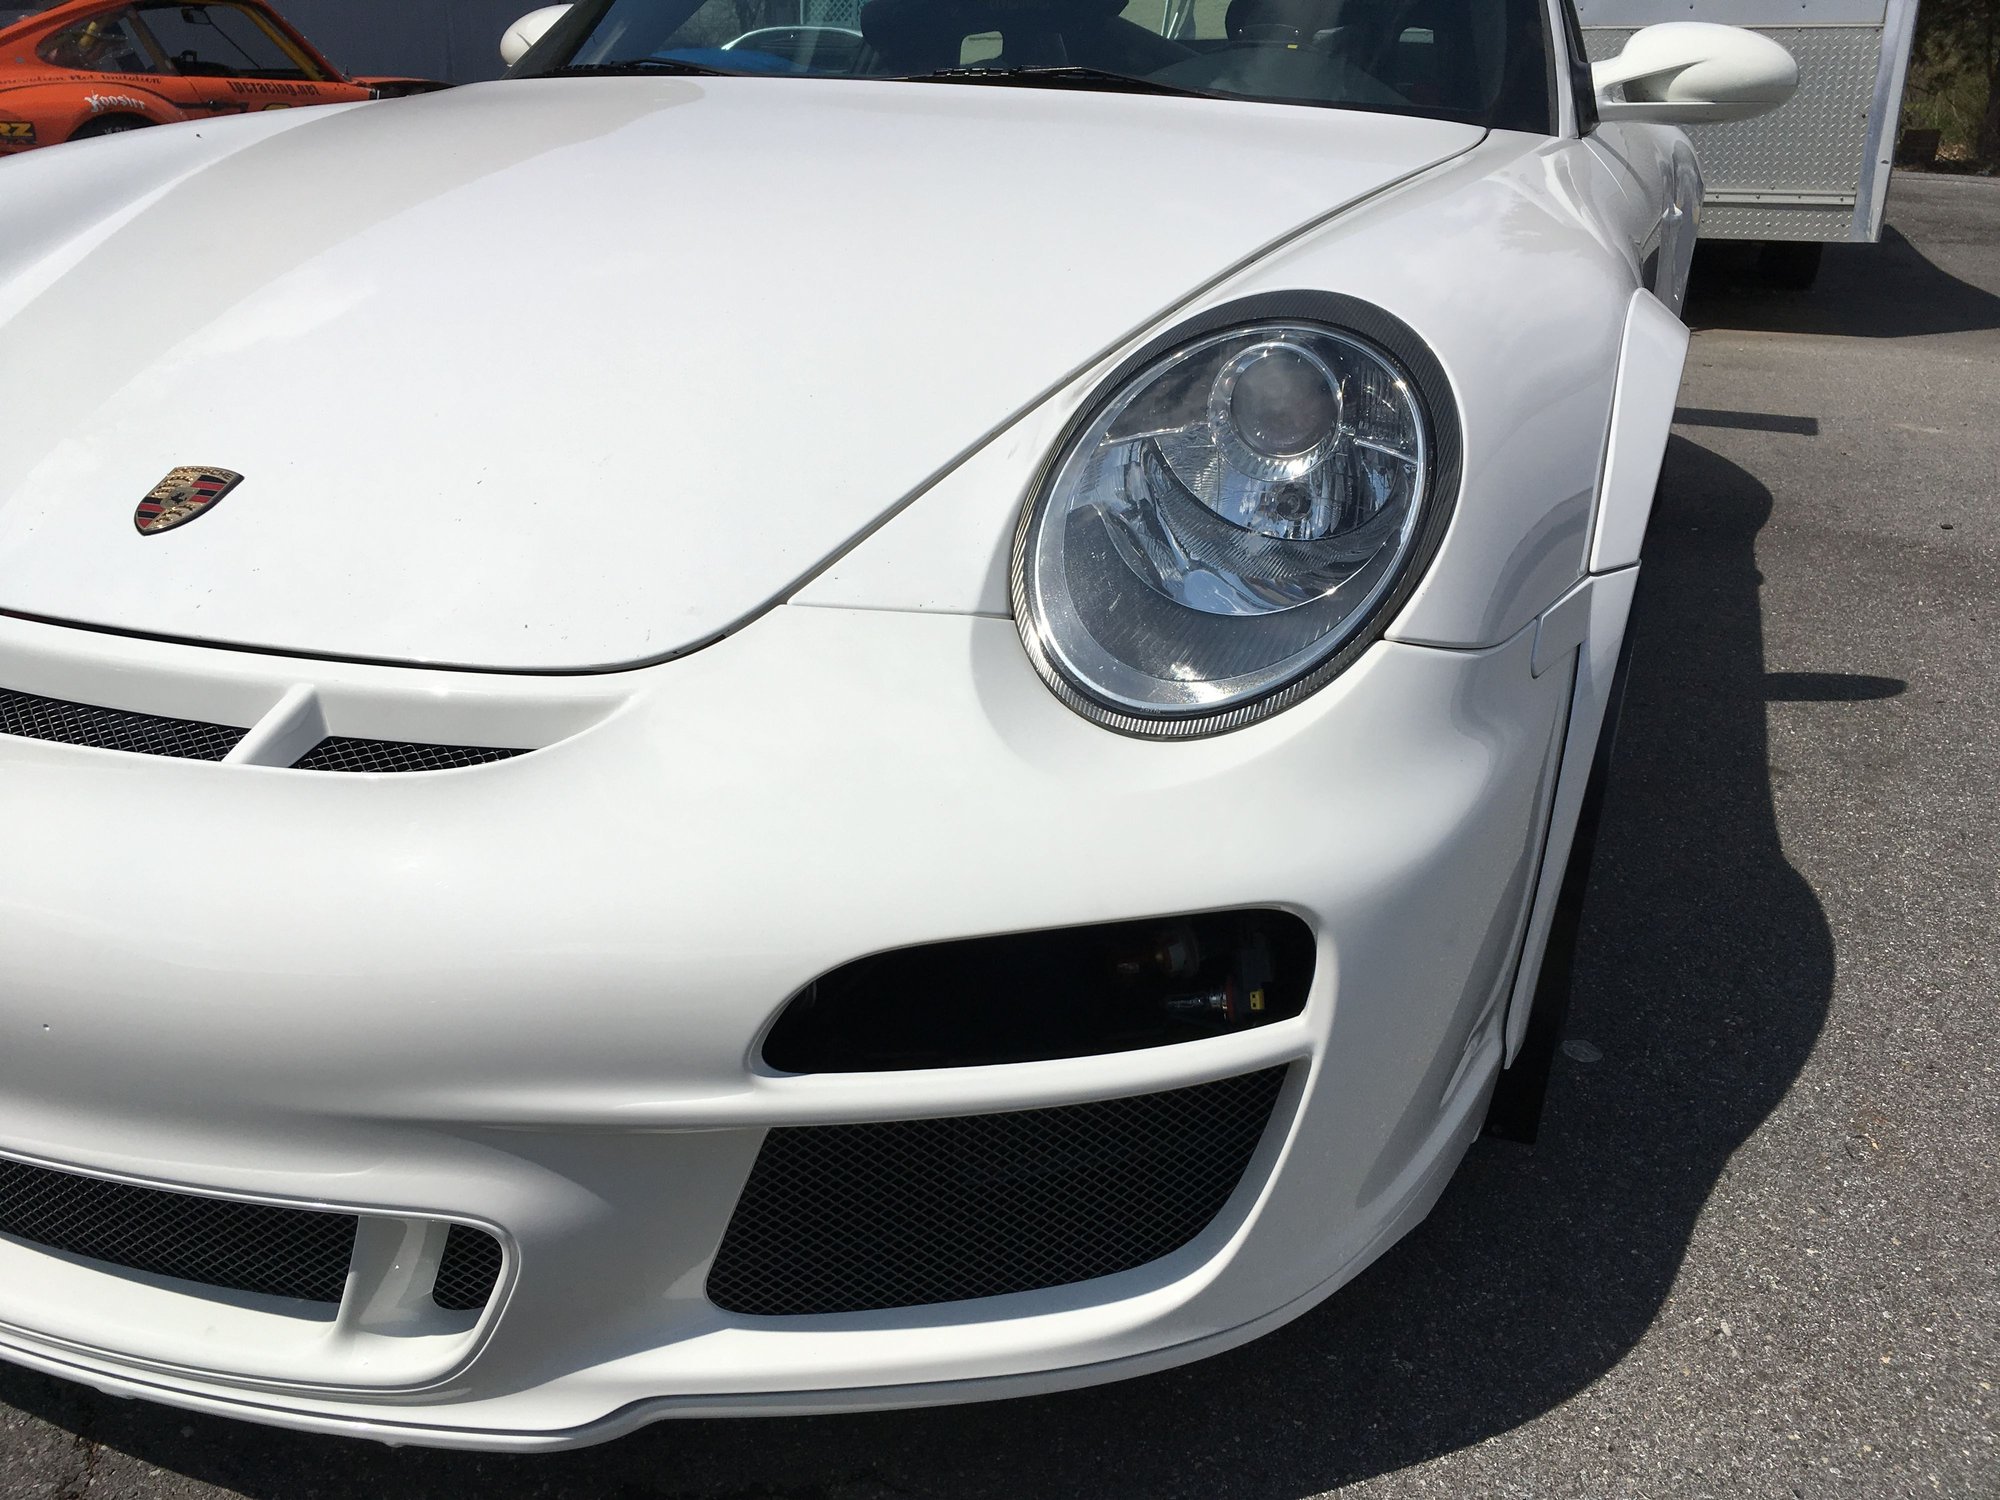
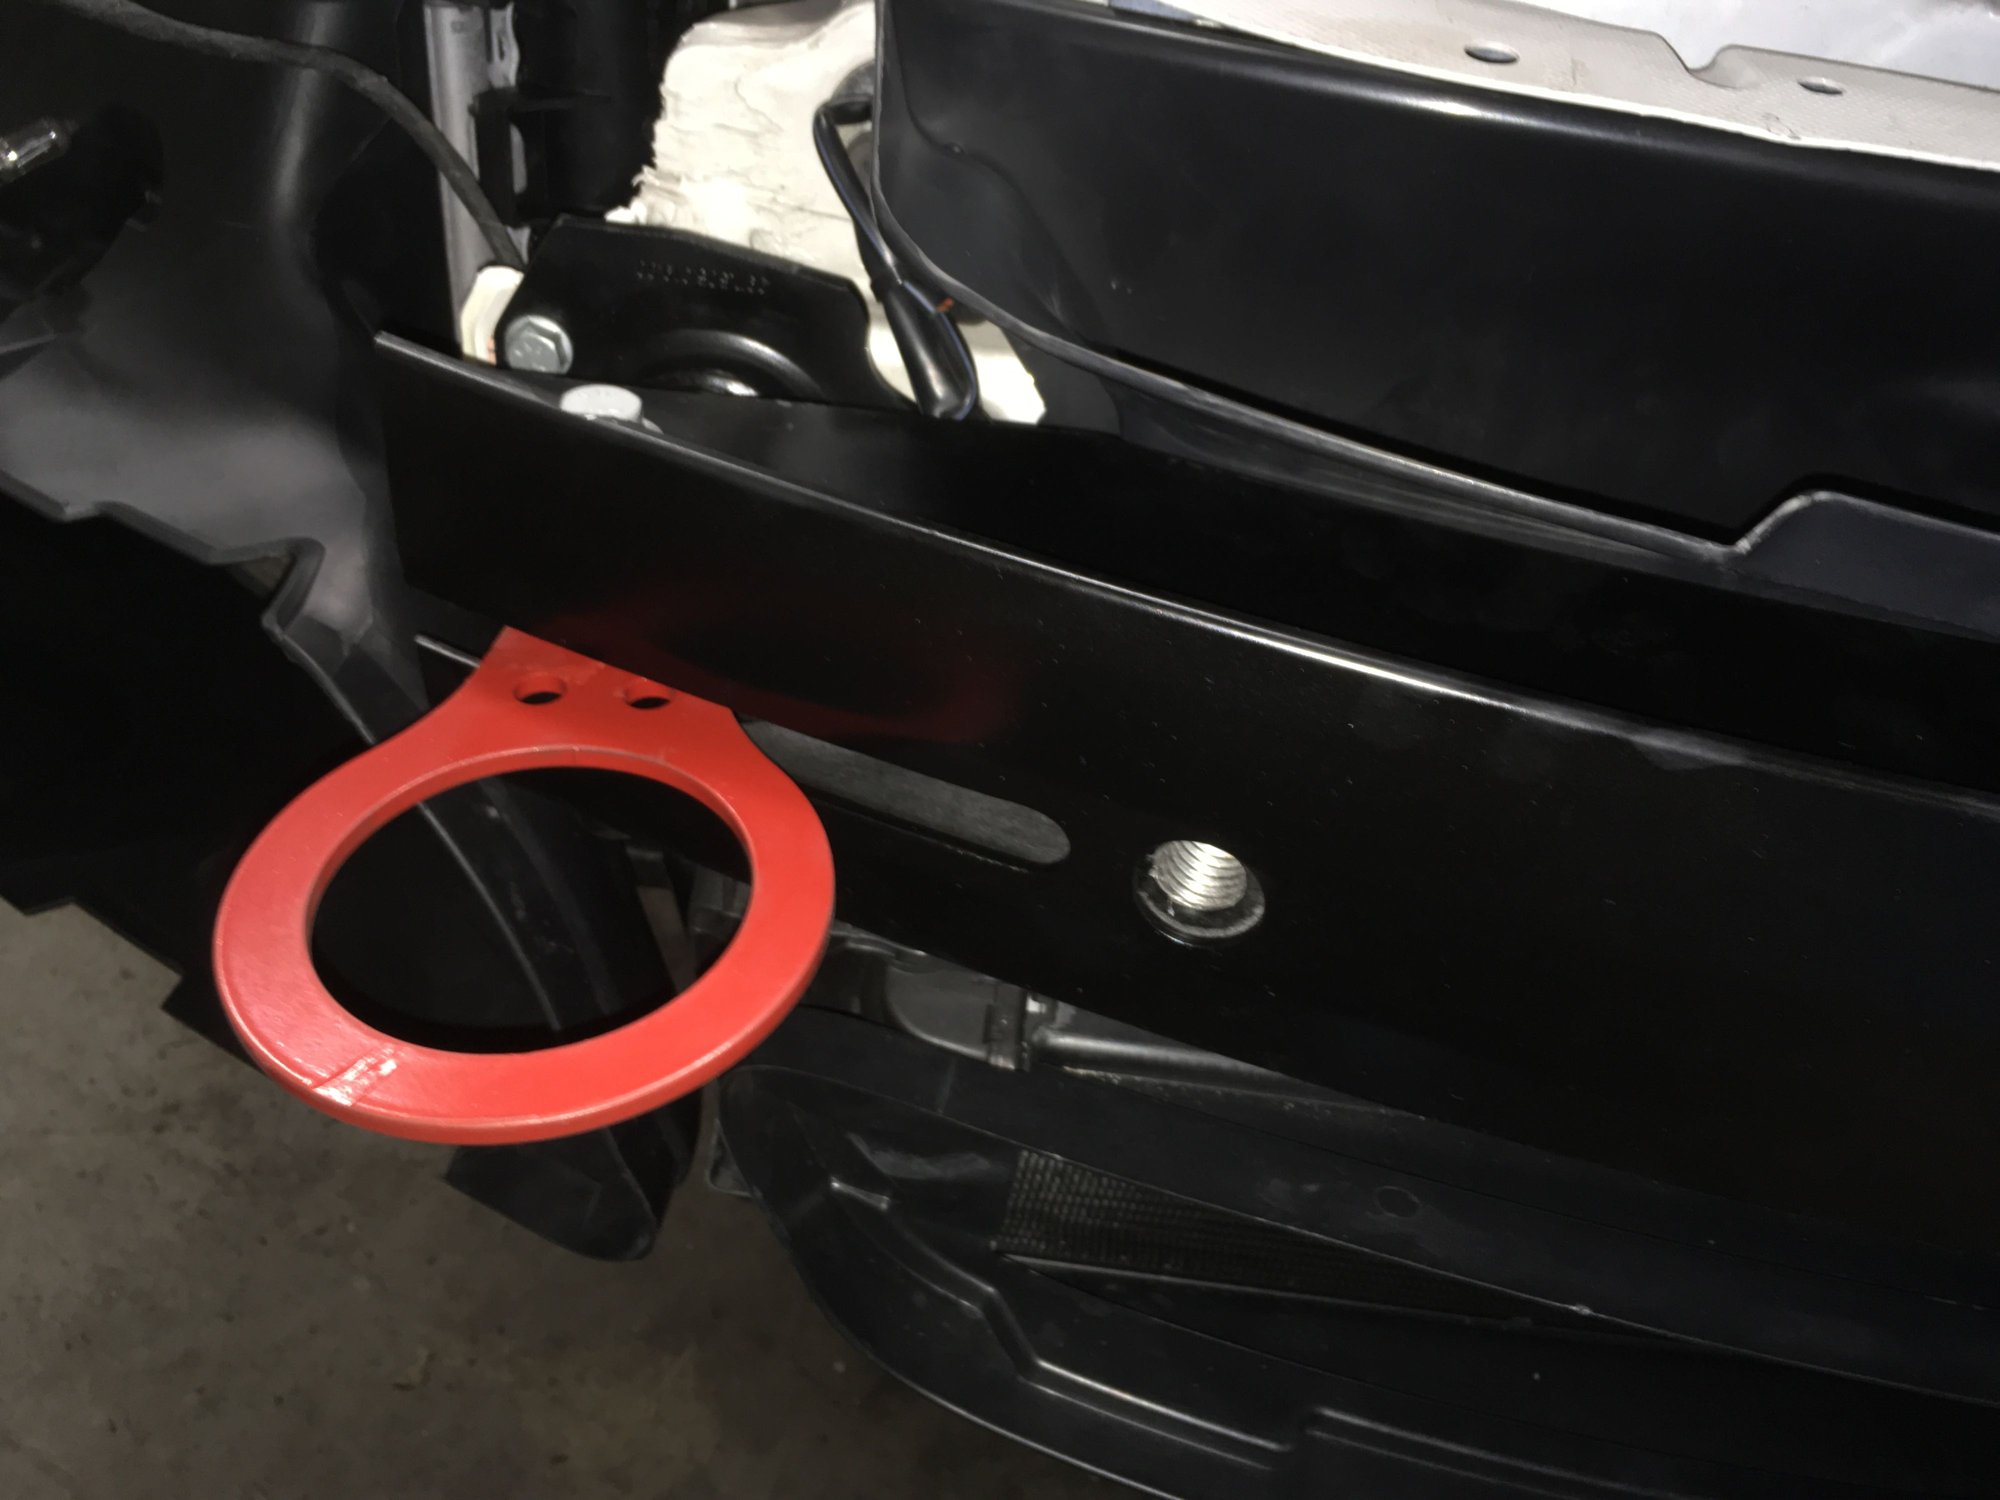
Working on the front tow loop. This is the 997 Cup retractable version. It is very well made, as you would expect, but it is not a direct bolt-on for use with OEM street car crash beam. (This pic was taken before I swapped the AC line)
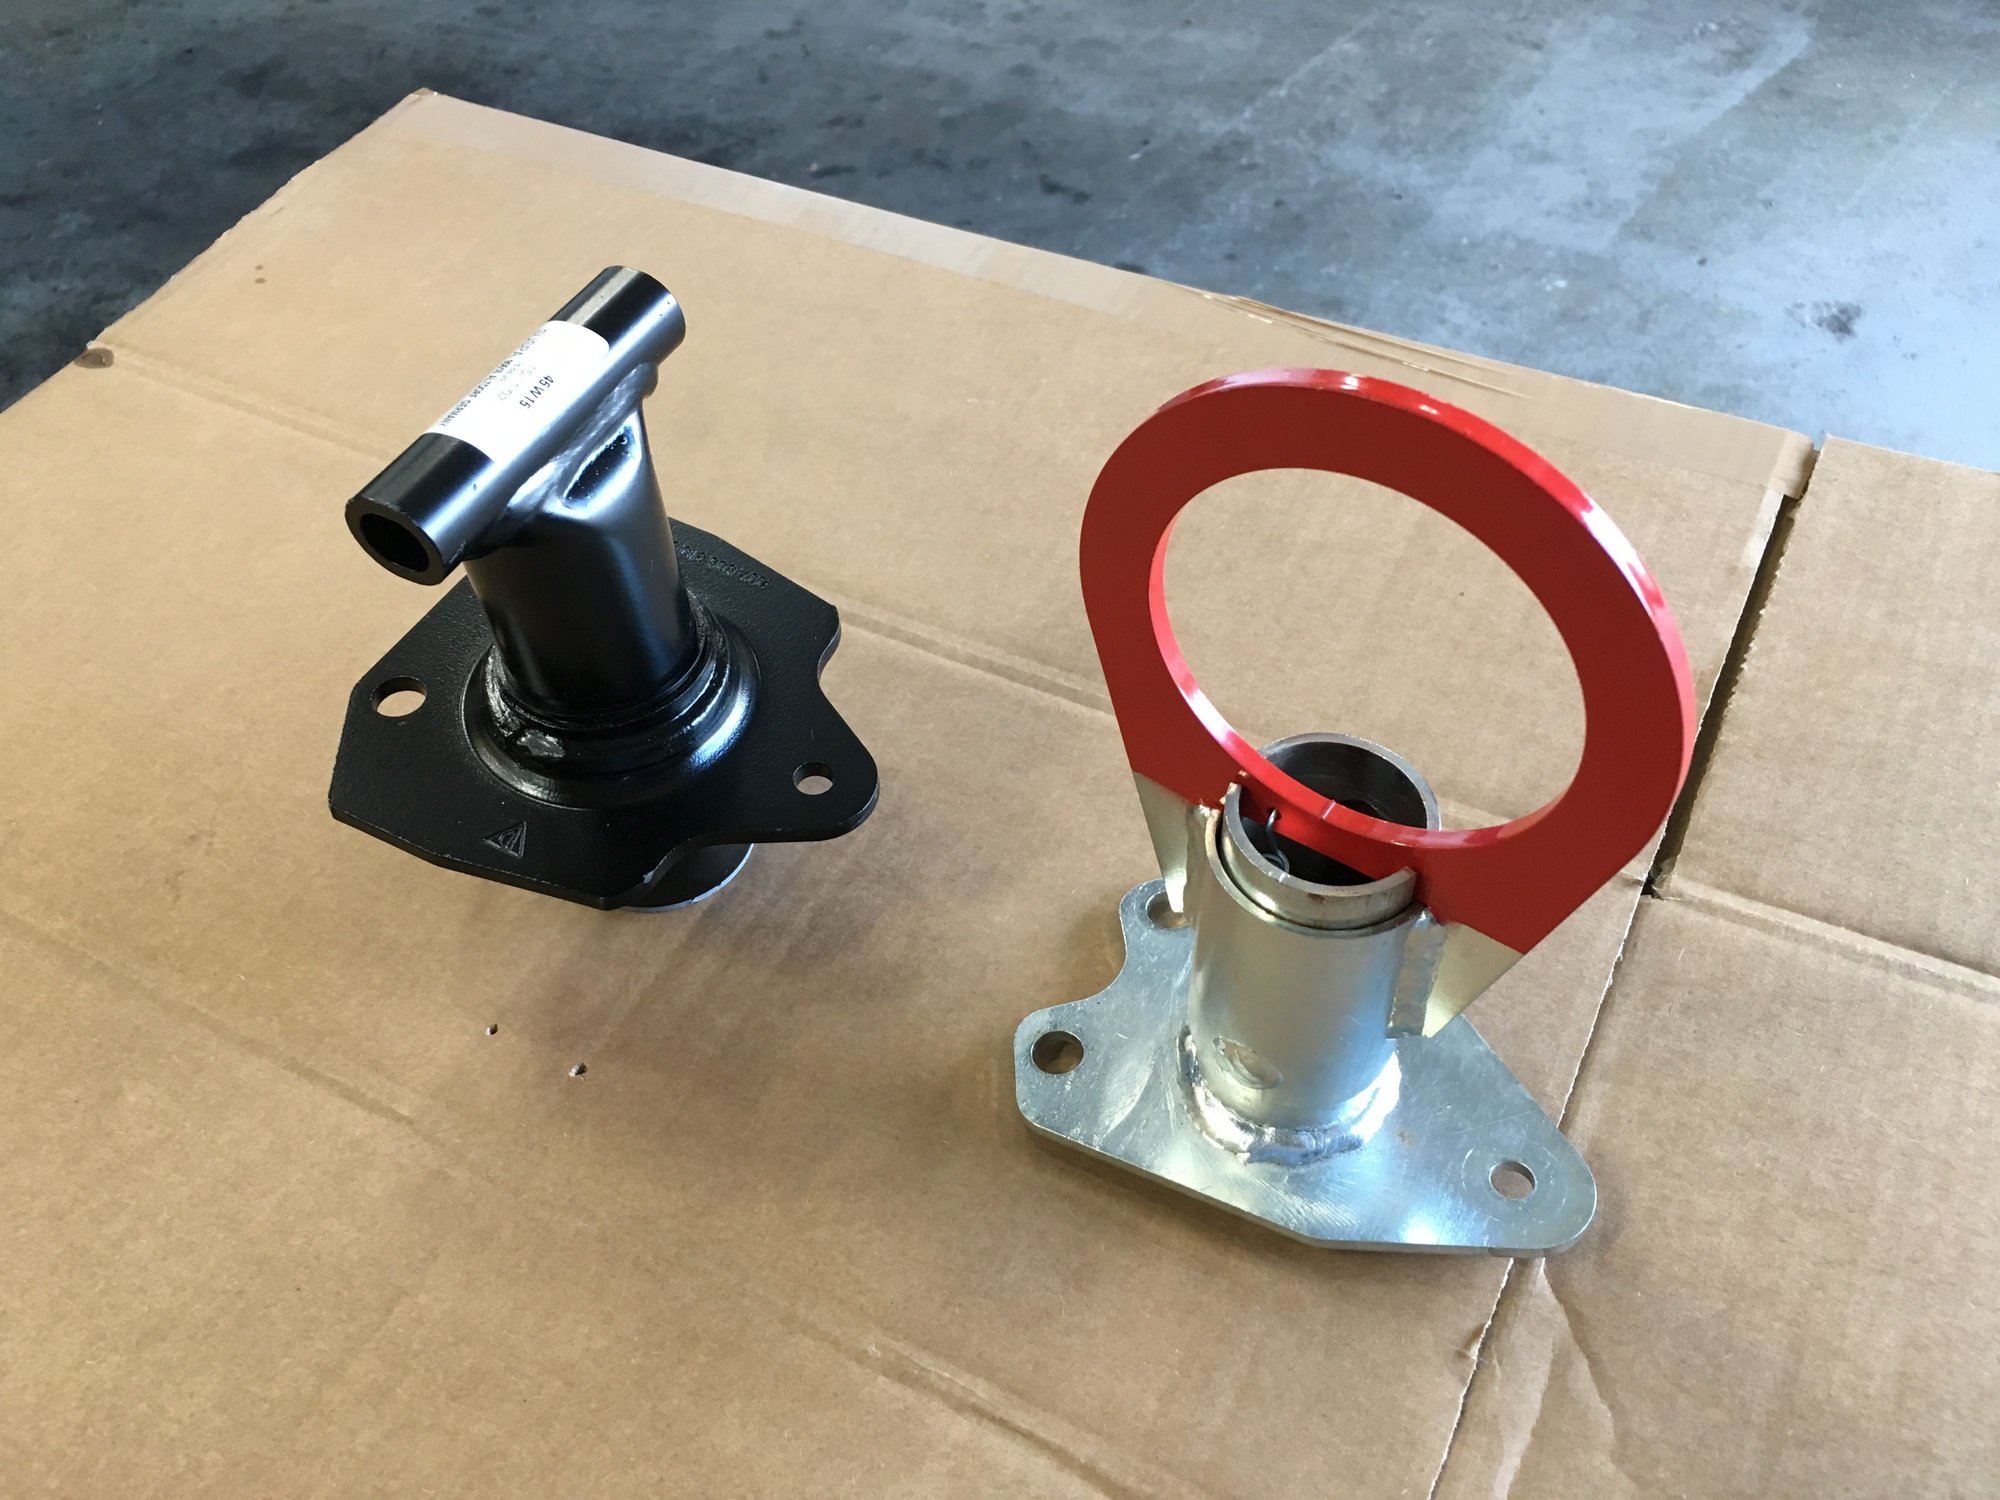
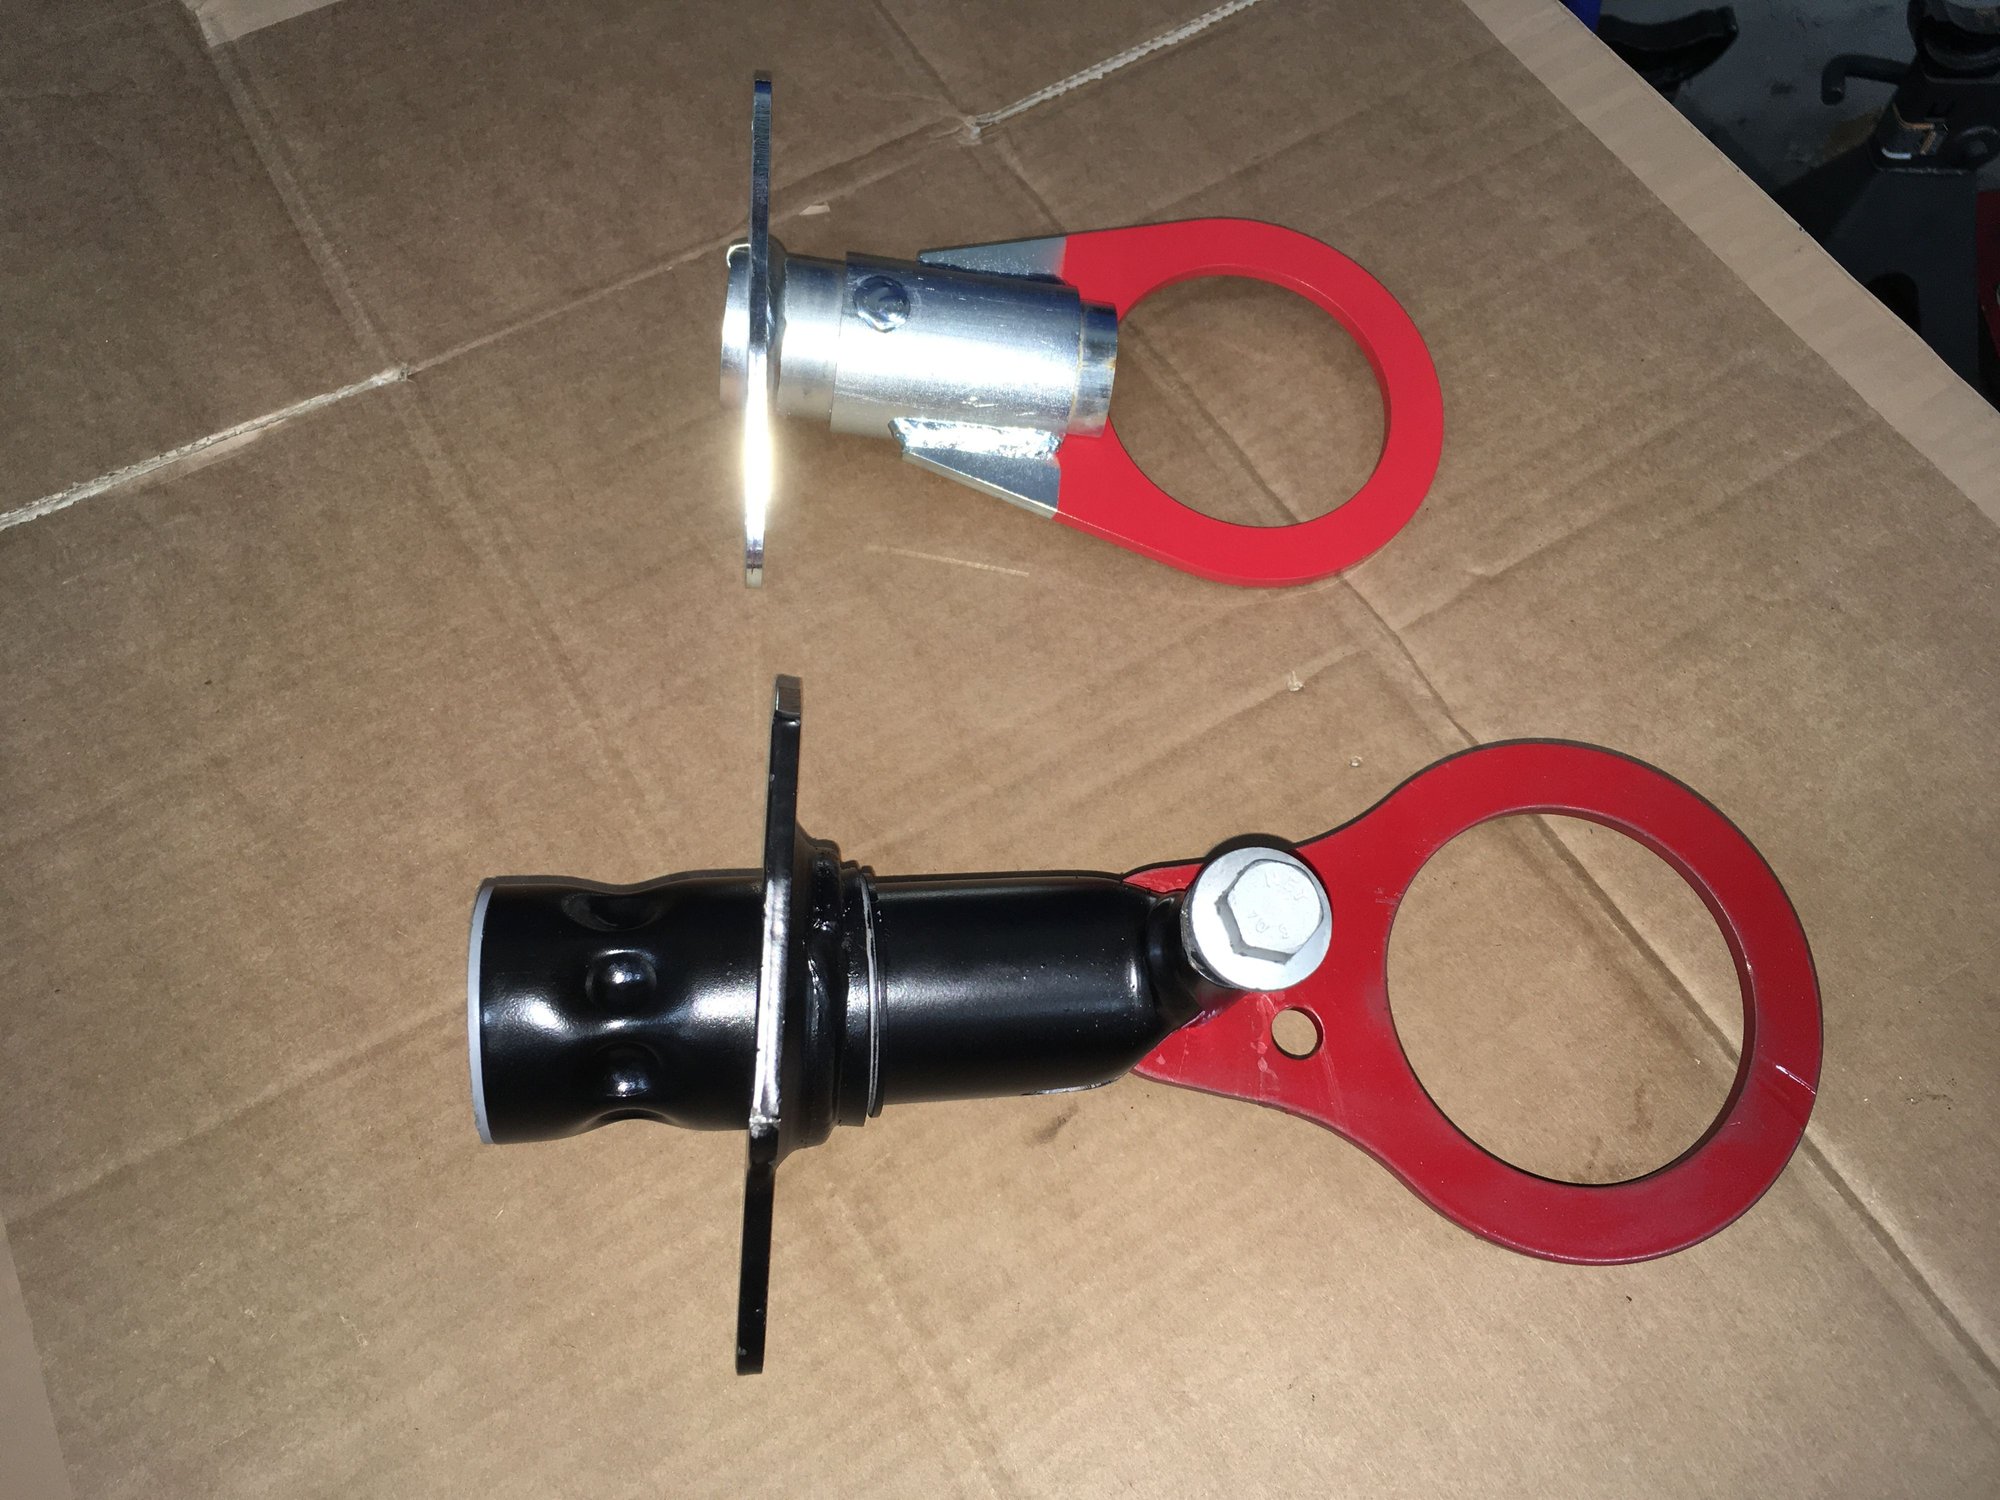
Here's the OEM crash beam support piece(left of image) side by side with the 997 Cup retractable tow loop(right of image). Obviously, both parts cannot occupy the same mounting position at the same time, so I was planning on modifying the Cup part. Which is a shame, because the Cup part is so beautiful and functional by itself.
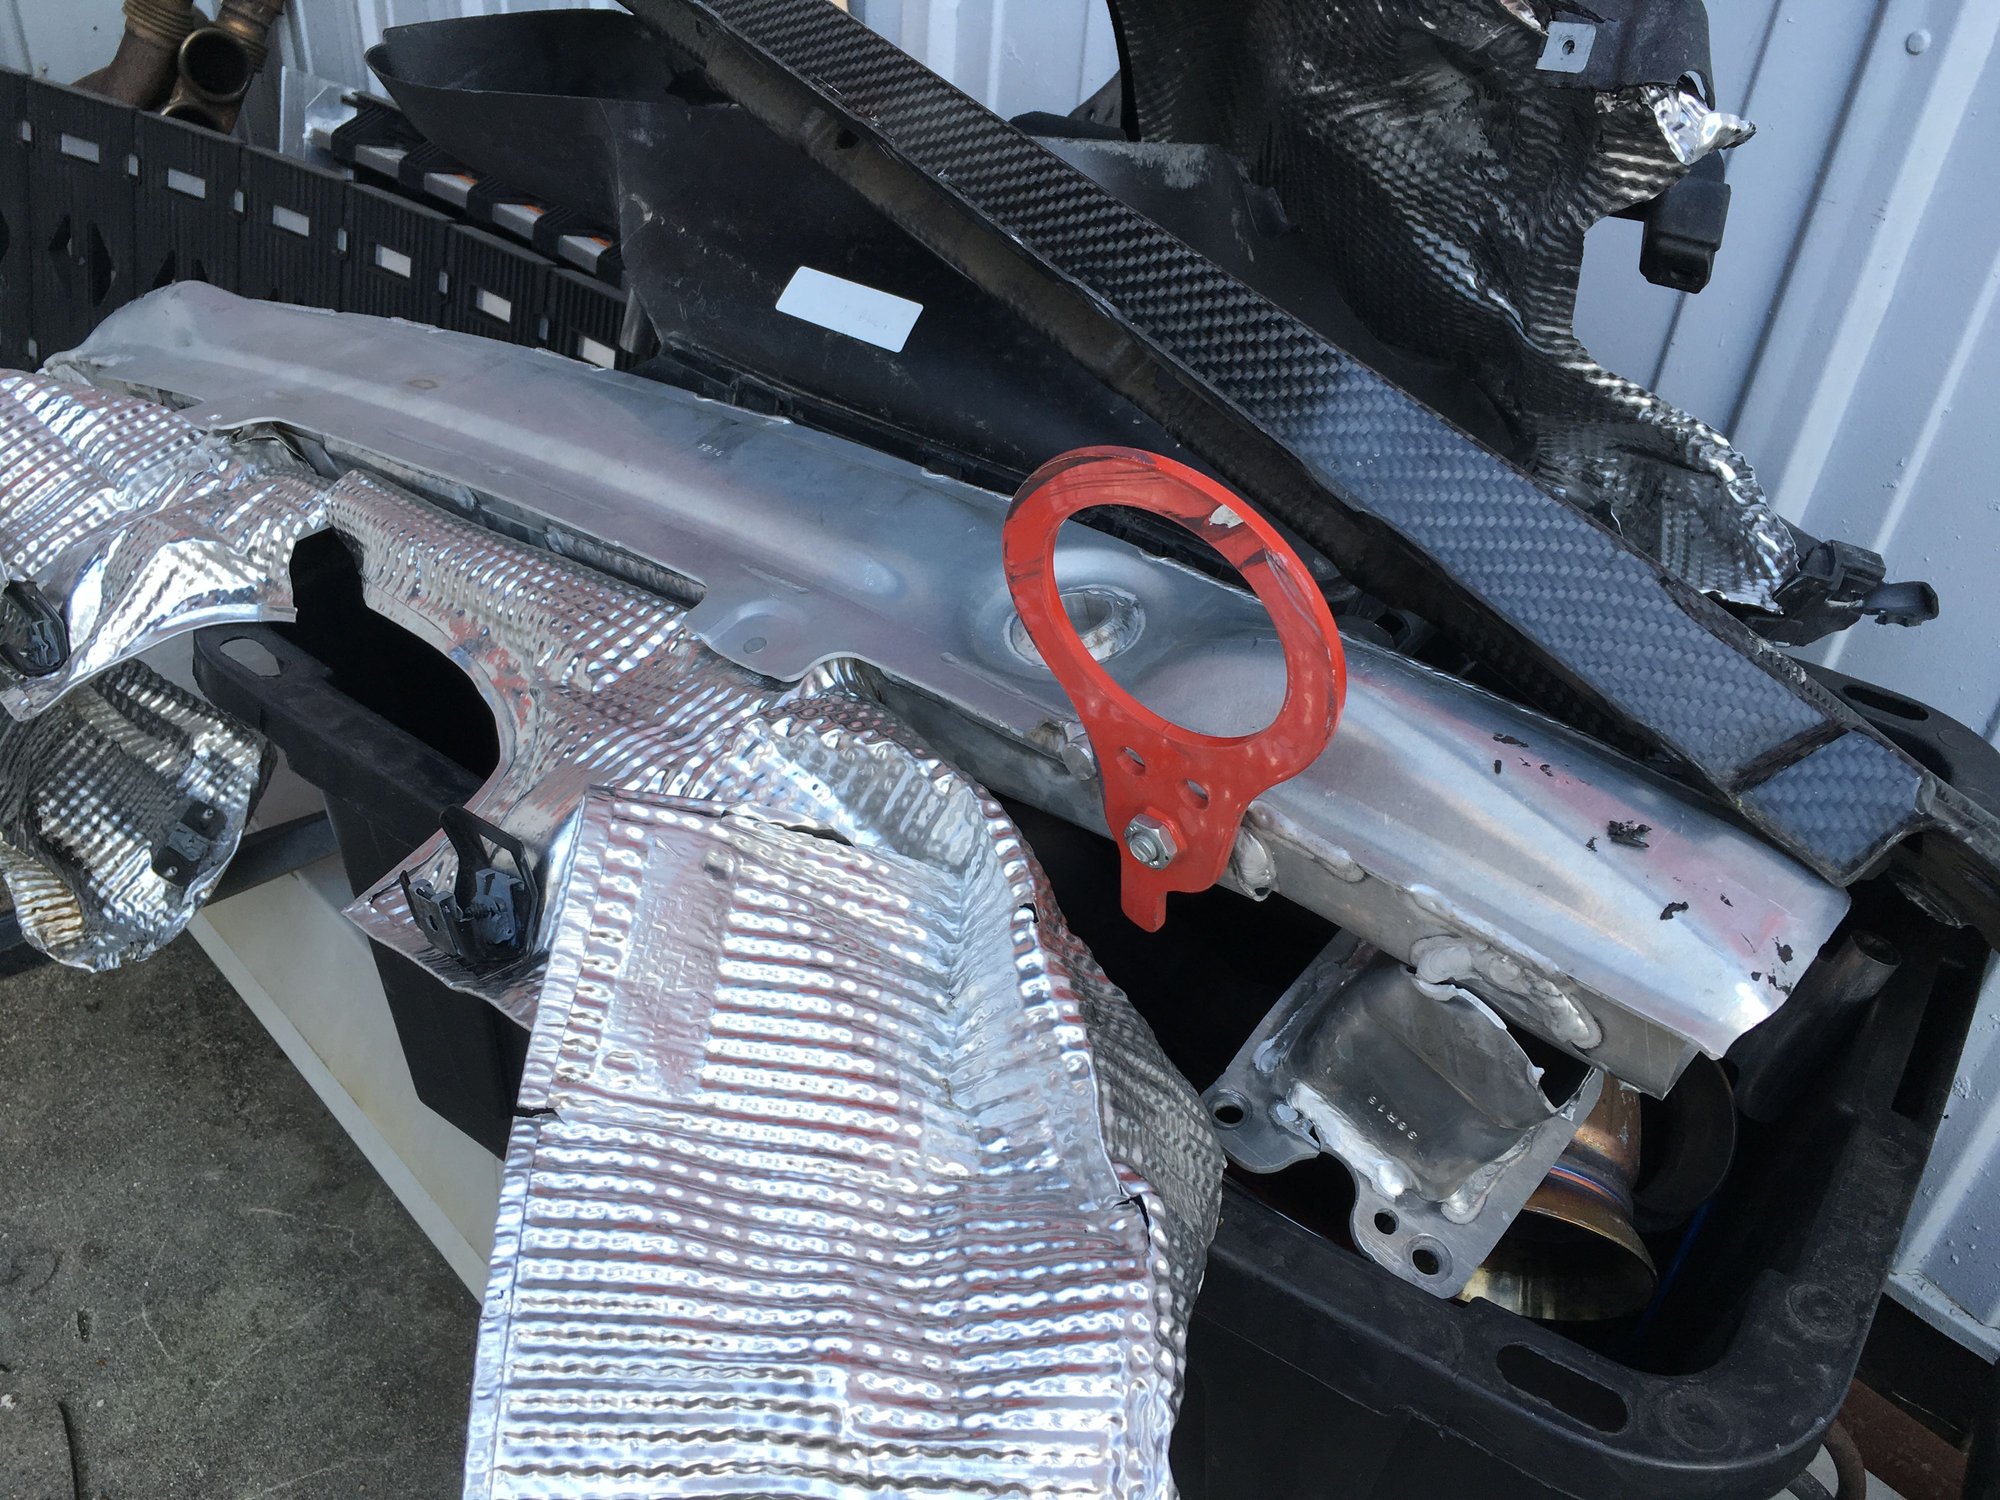
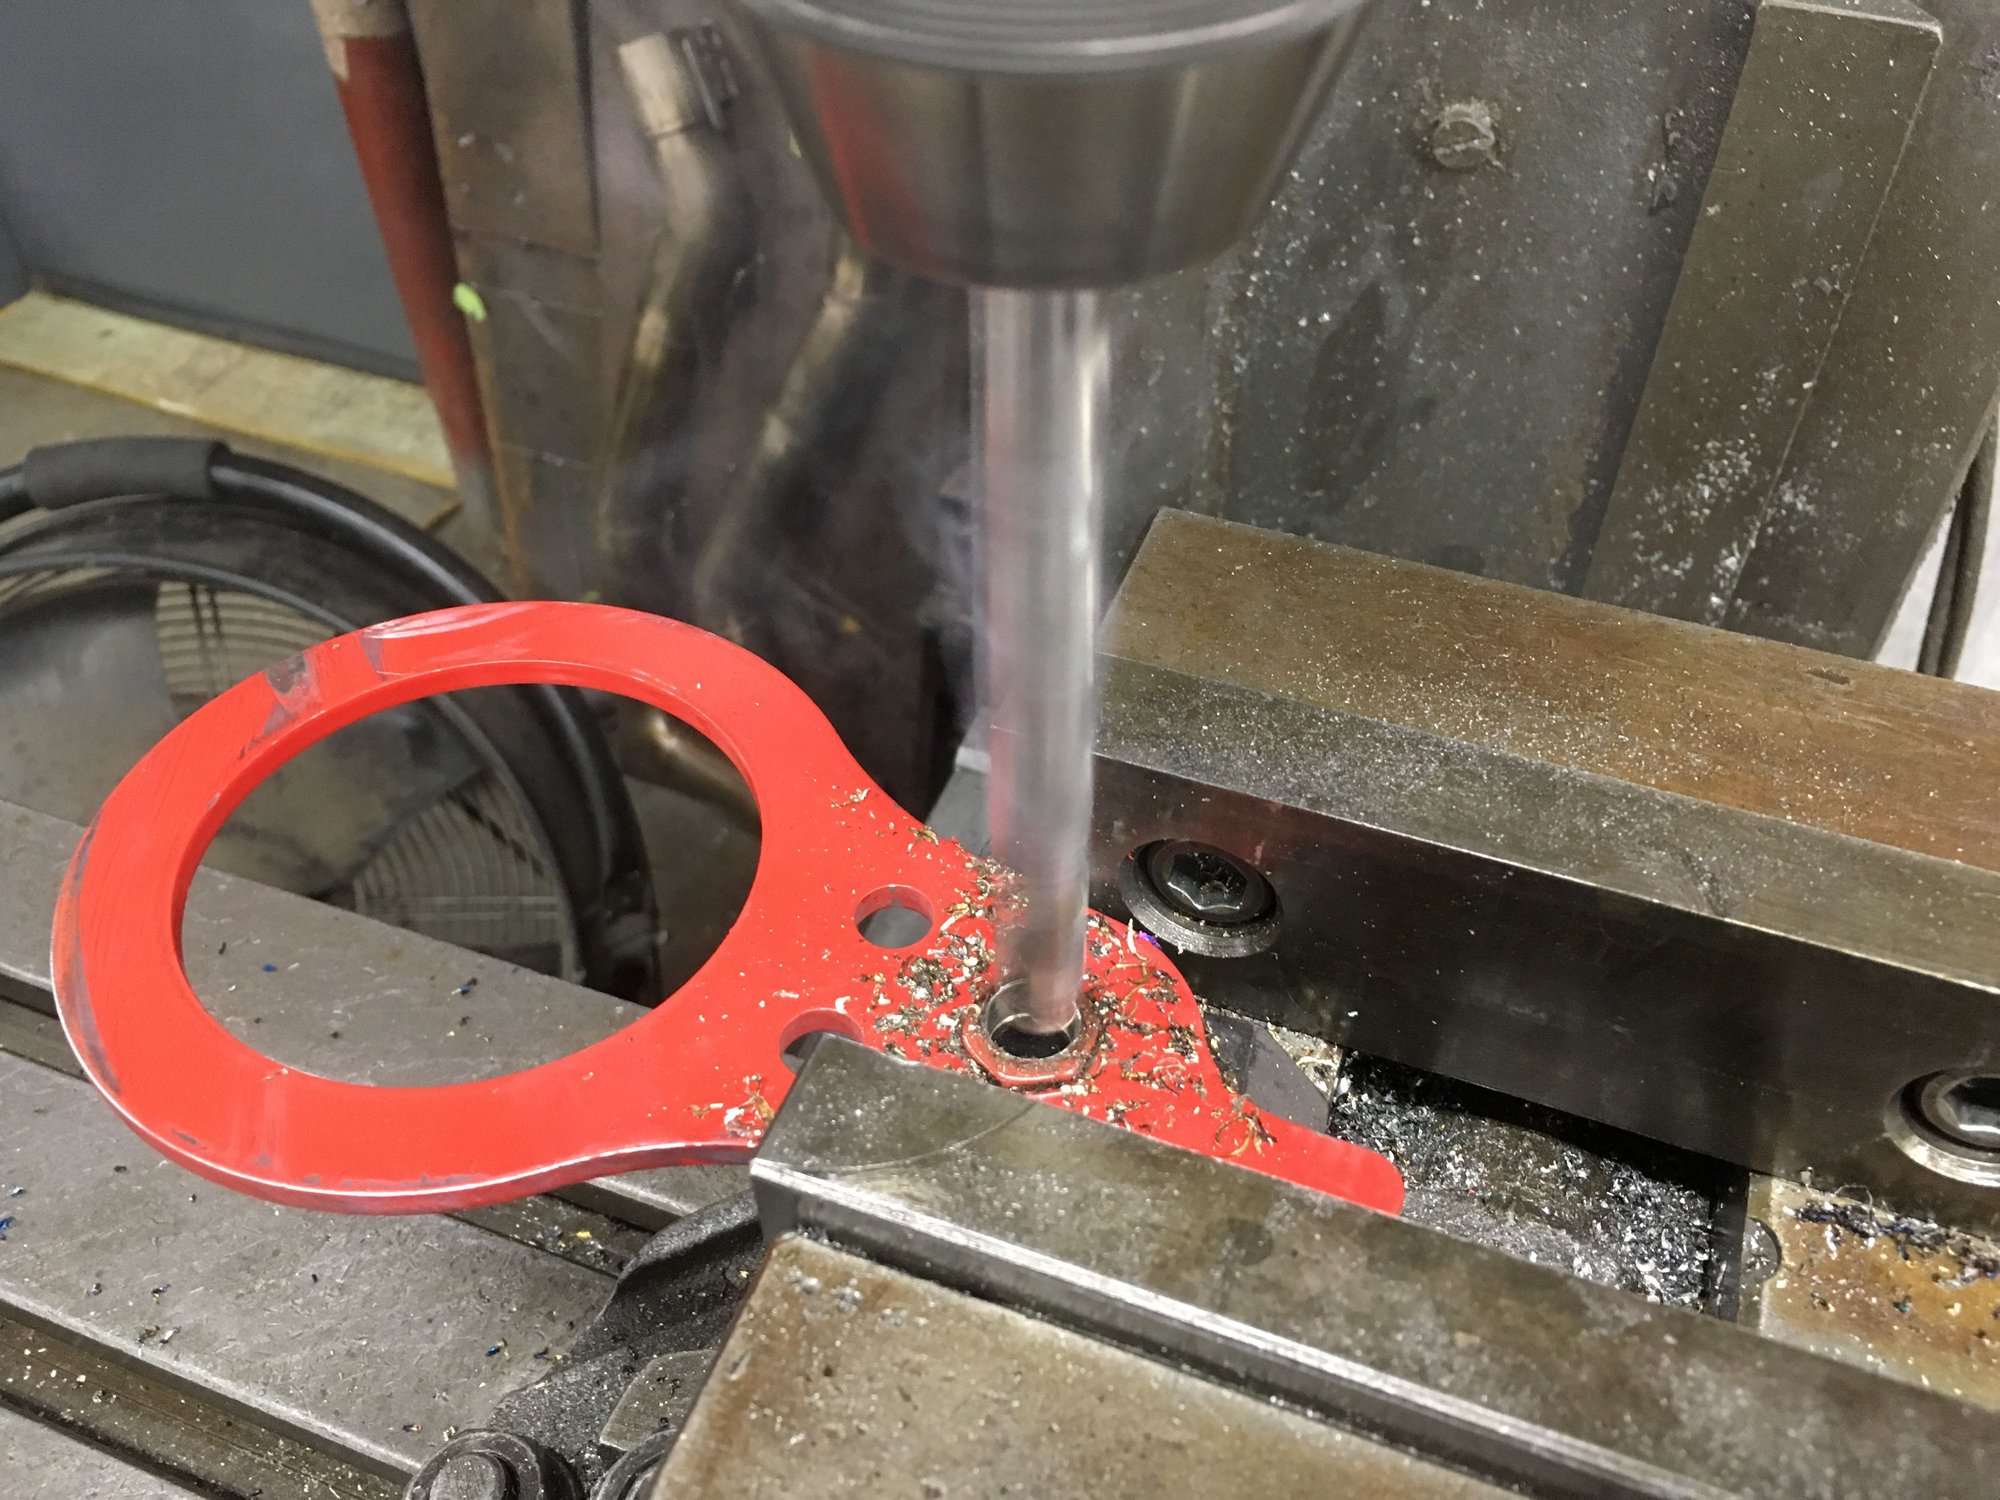
Wait! I saw this in our 991 Cup crash pile! Have an impromptu idea! I can make this work...
The 991 Cup piece has a built-in threaded nut. Drilling it out to M12. Whatever this material is, it is very hard to drill through. I went through a few drill bits even with only drilling 0.5mm at a time.
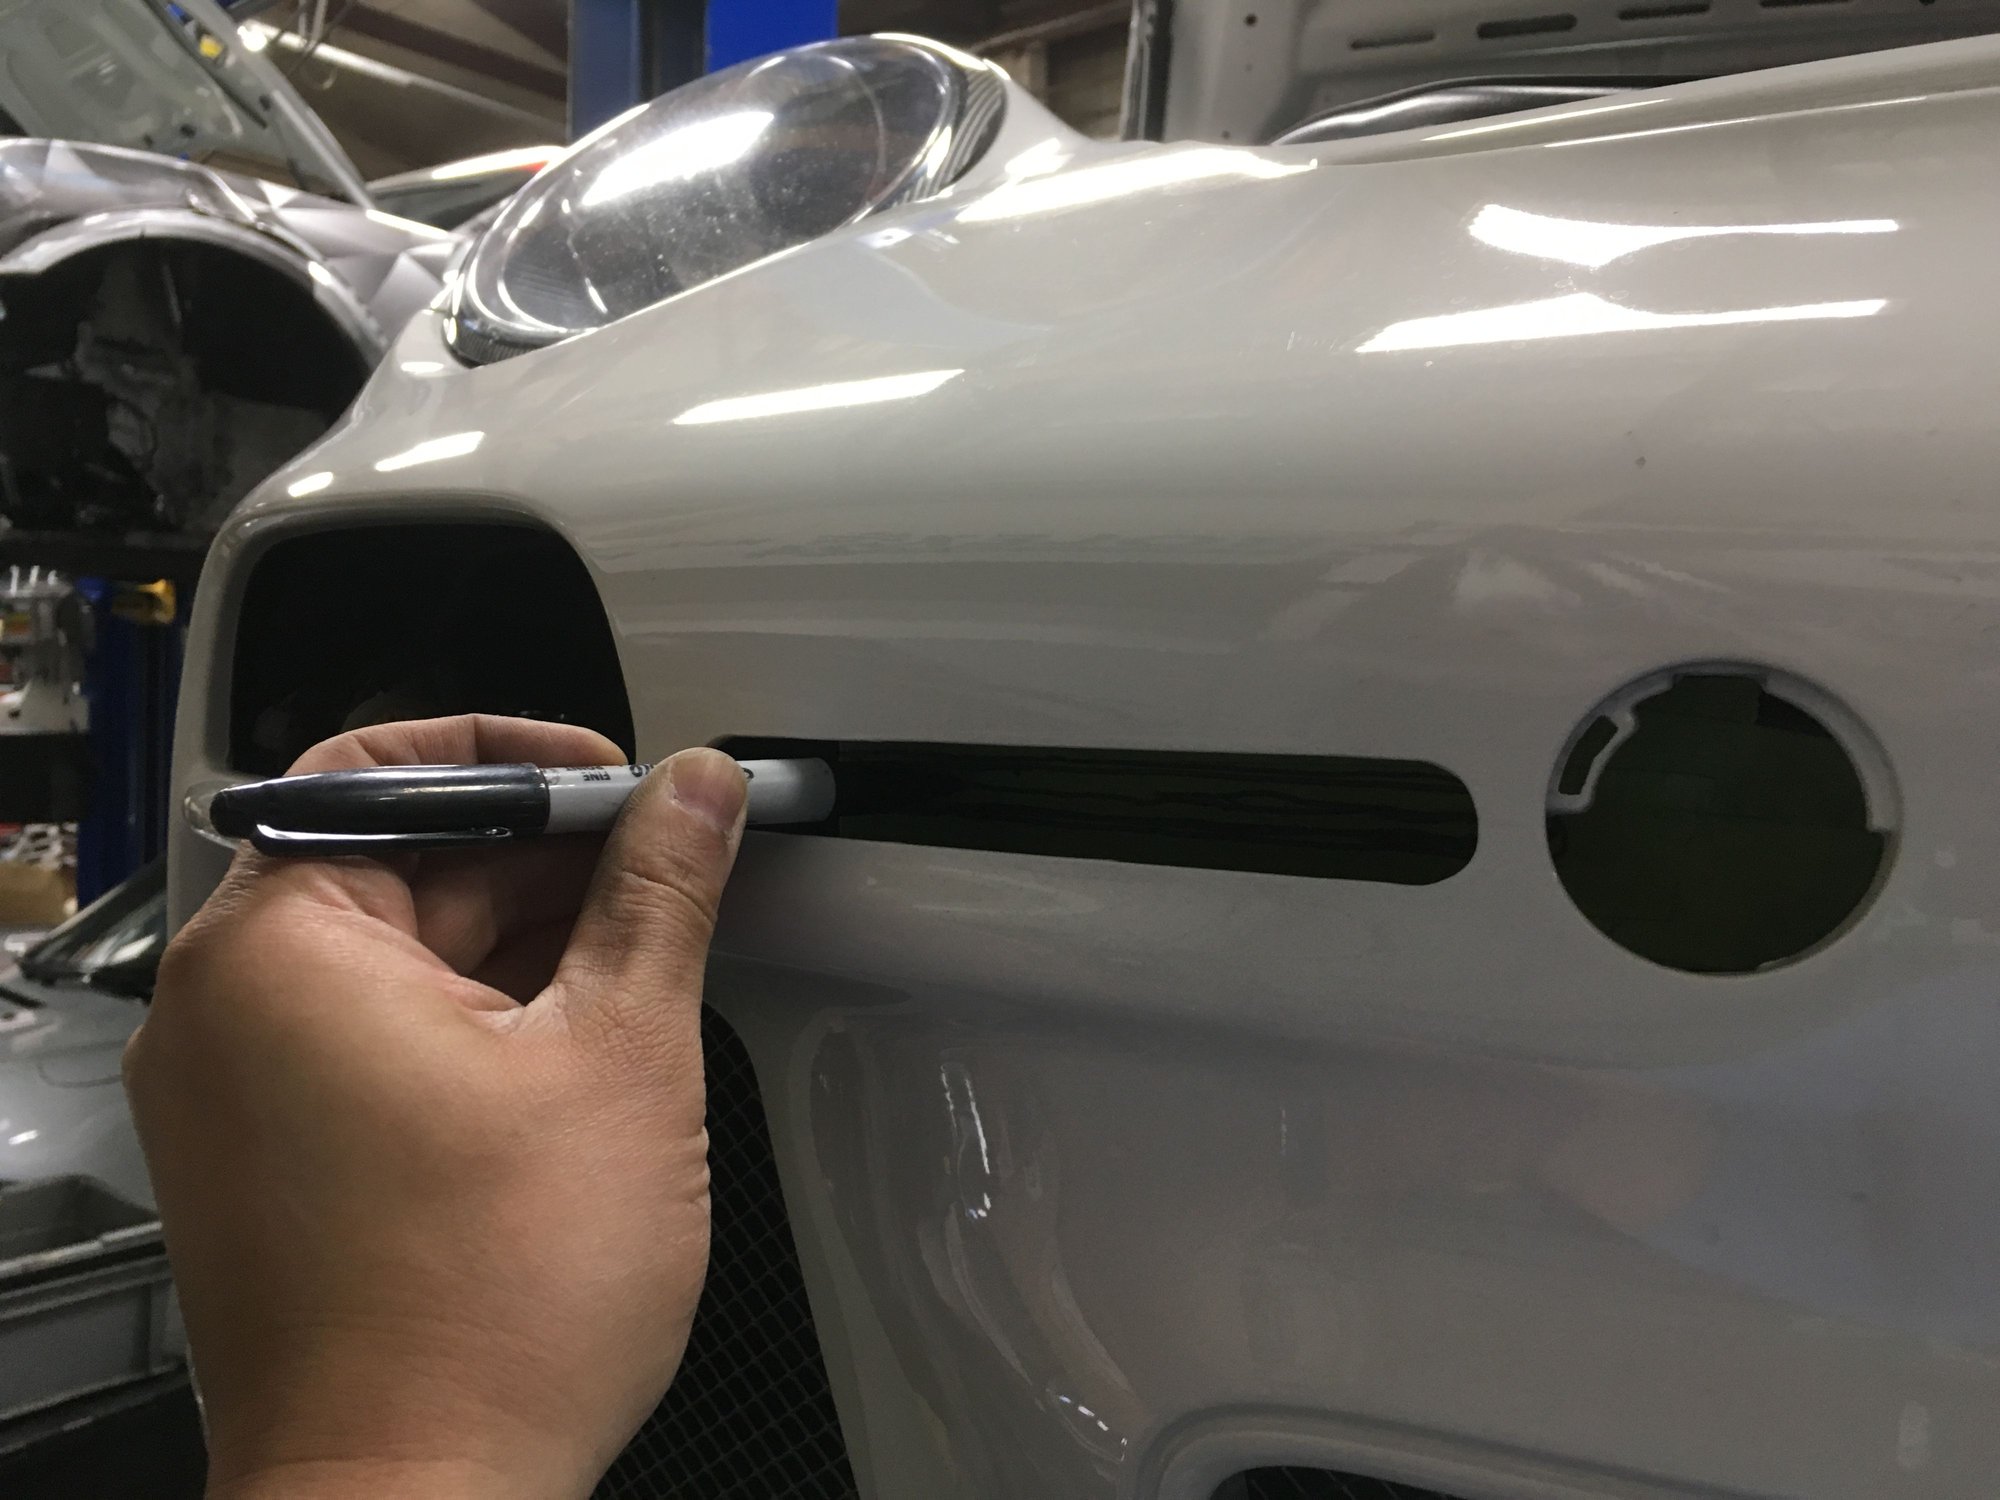
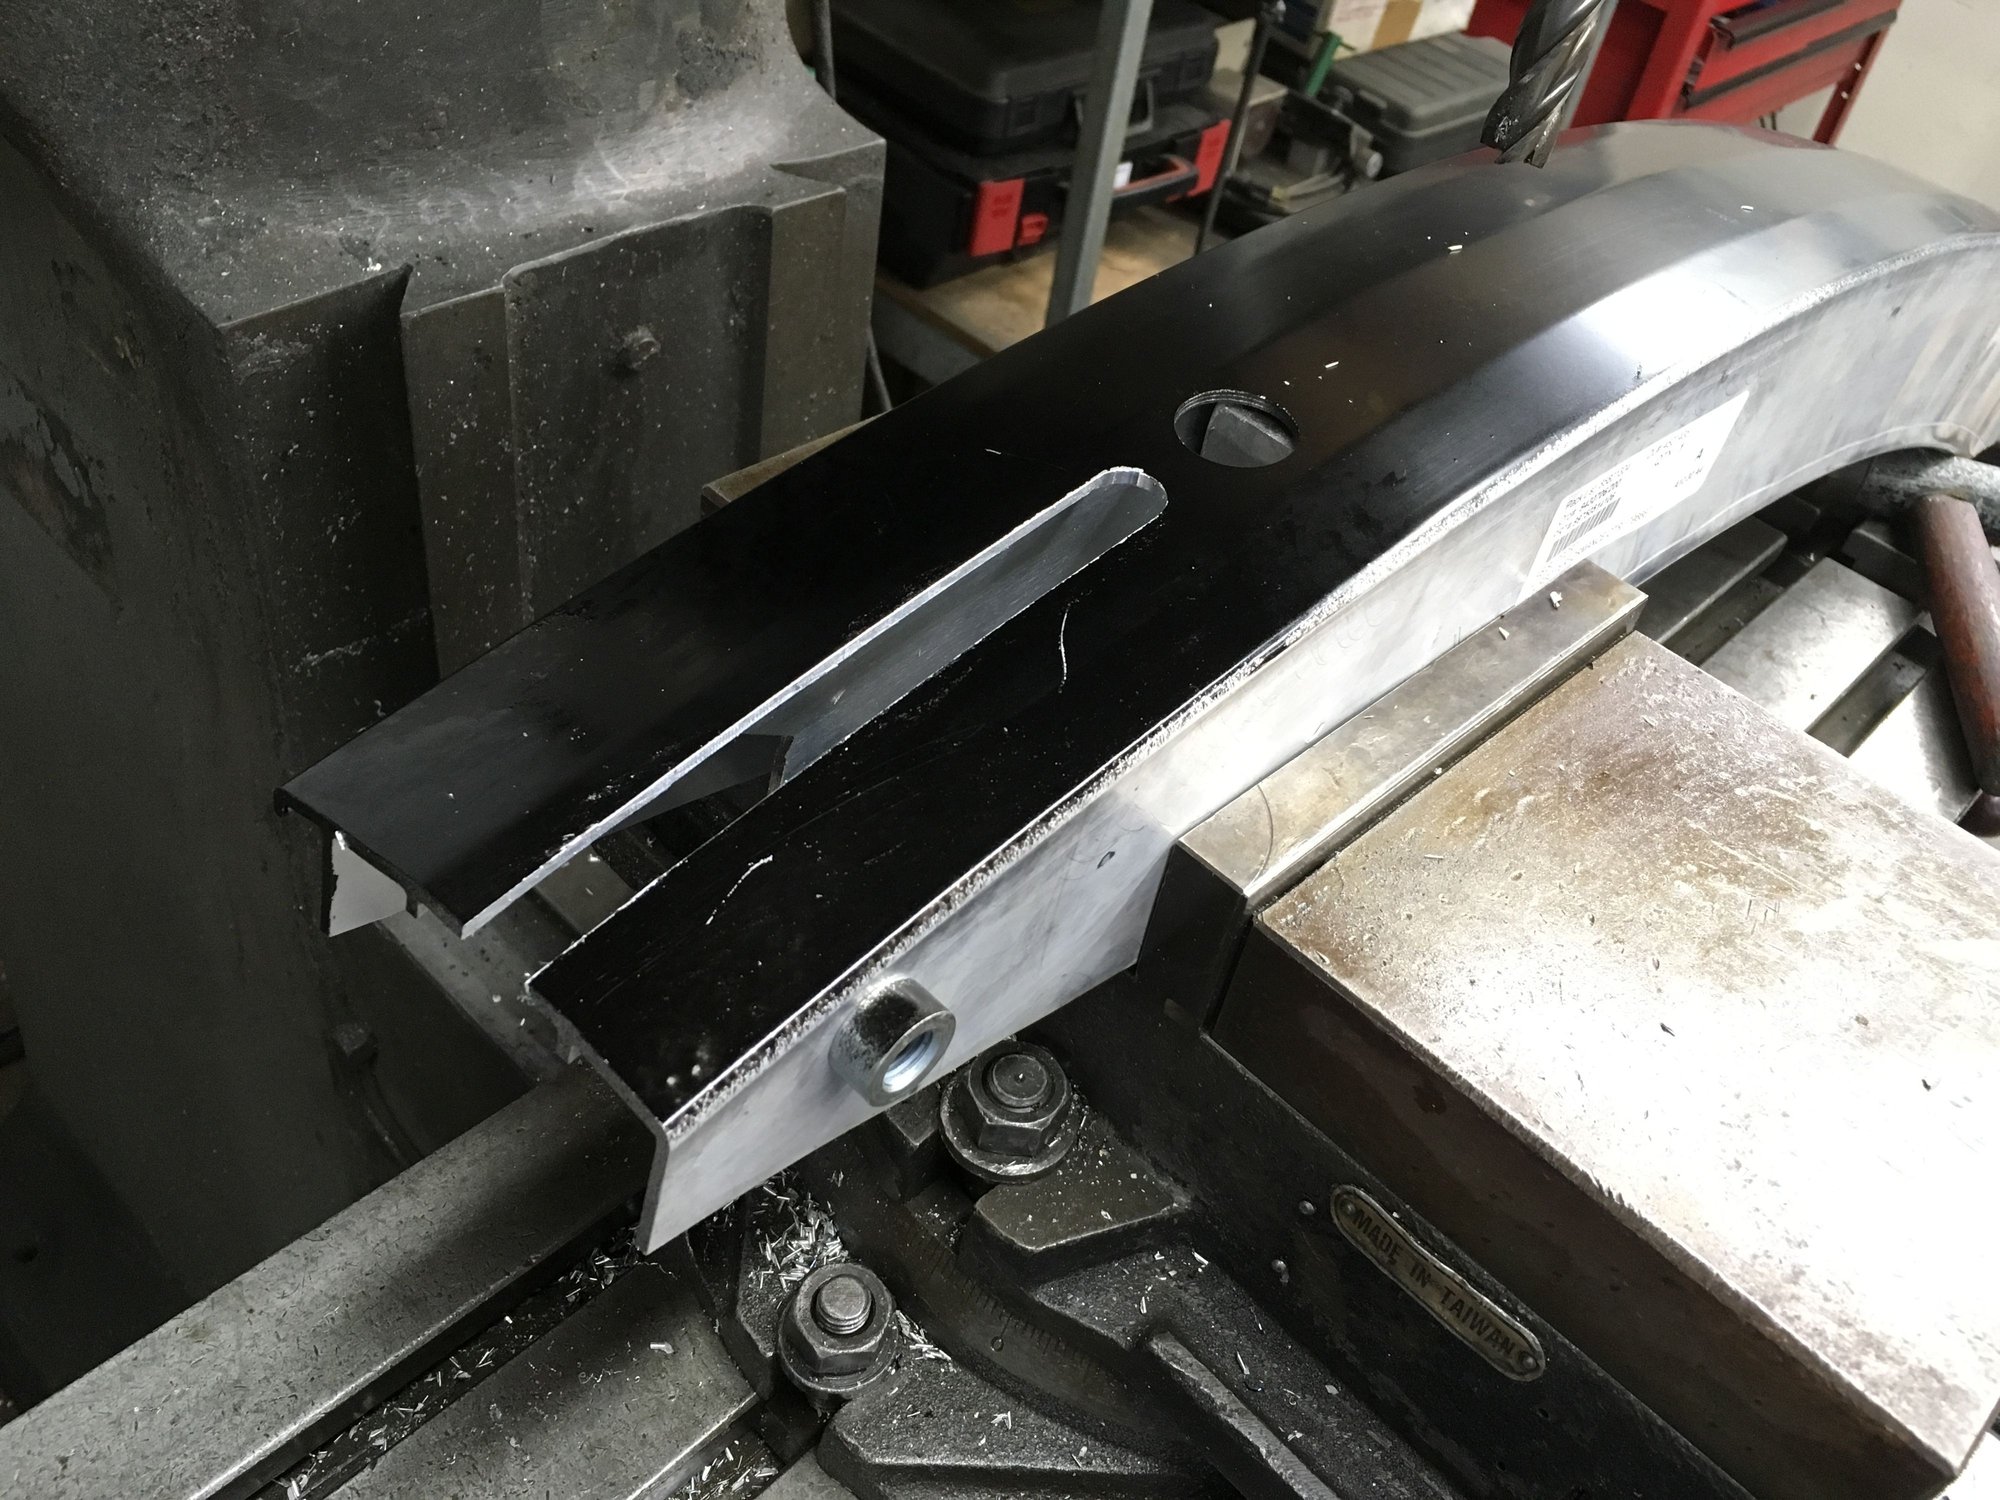
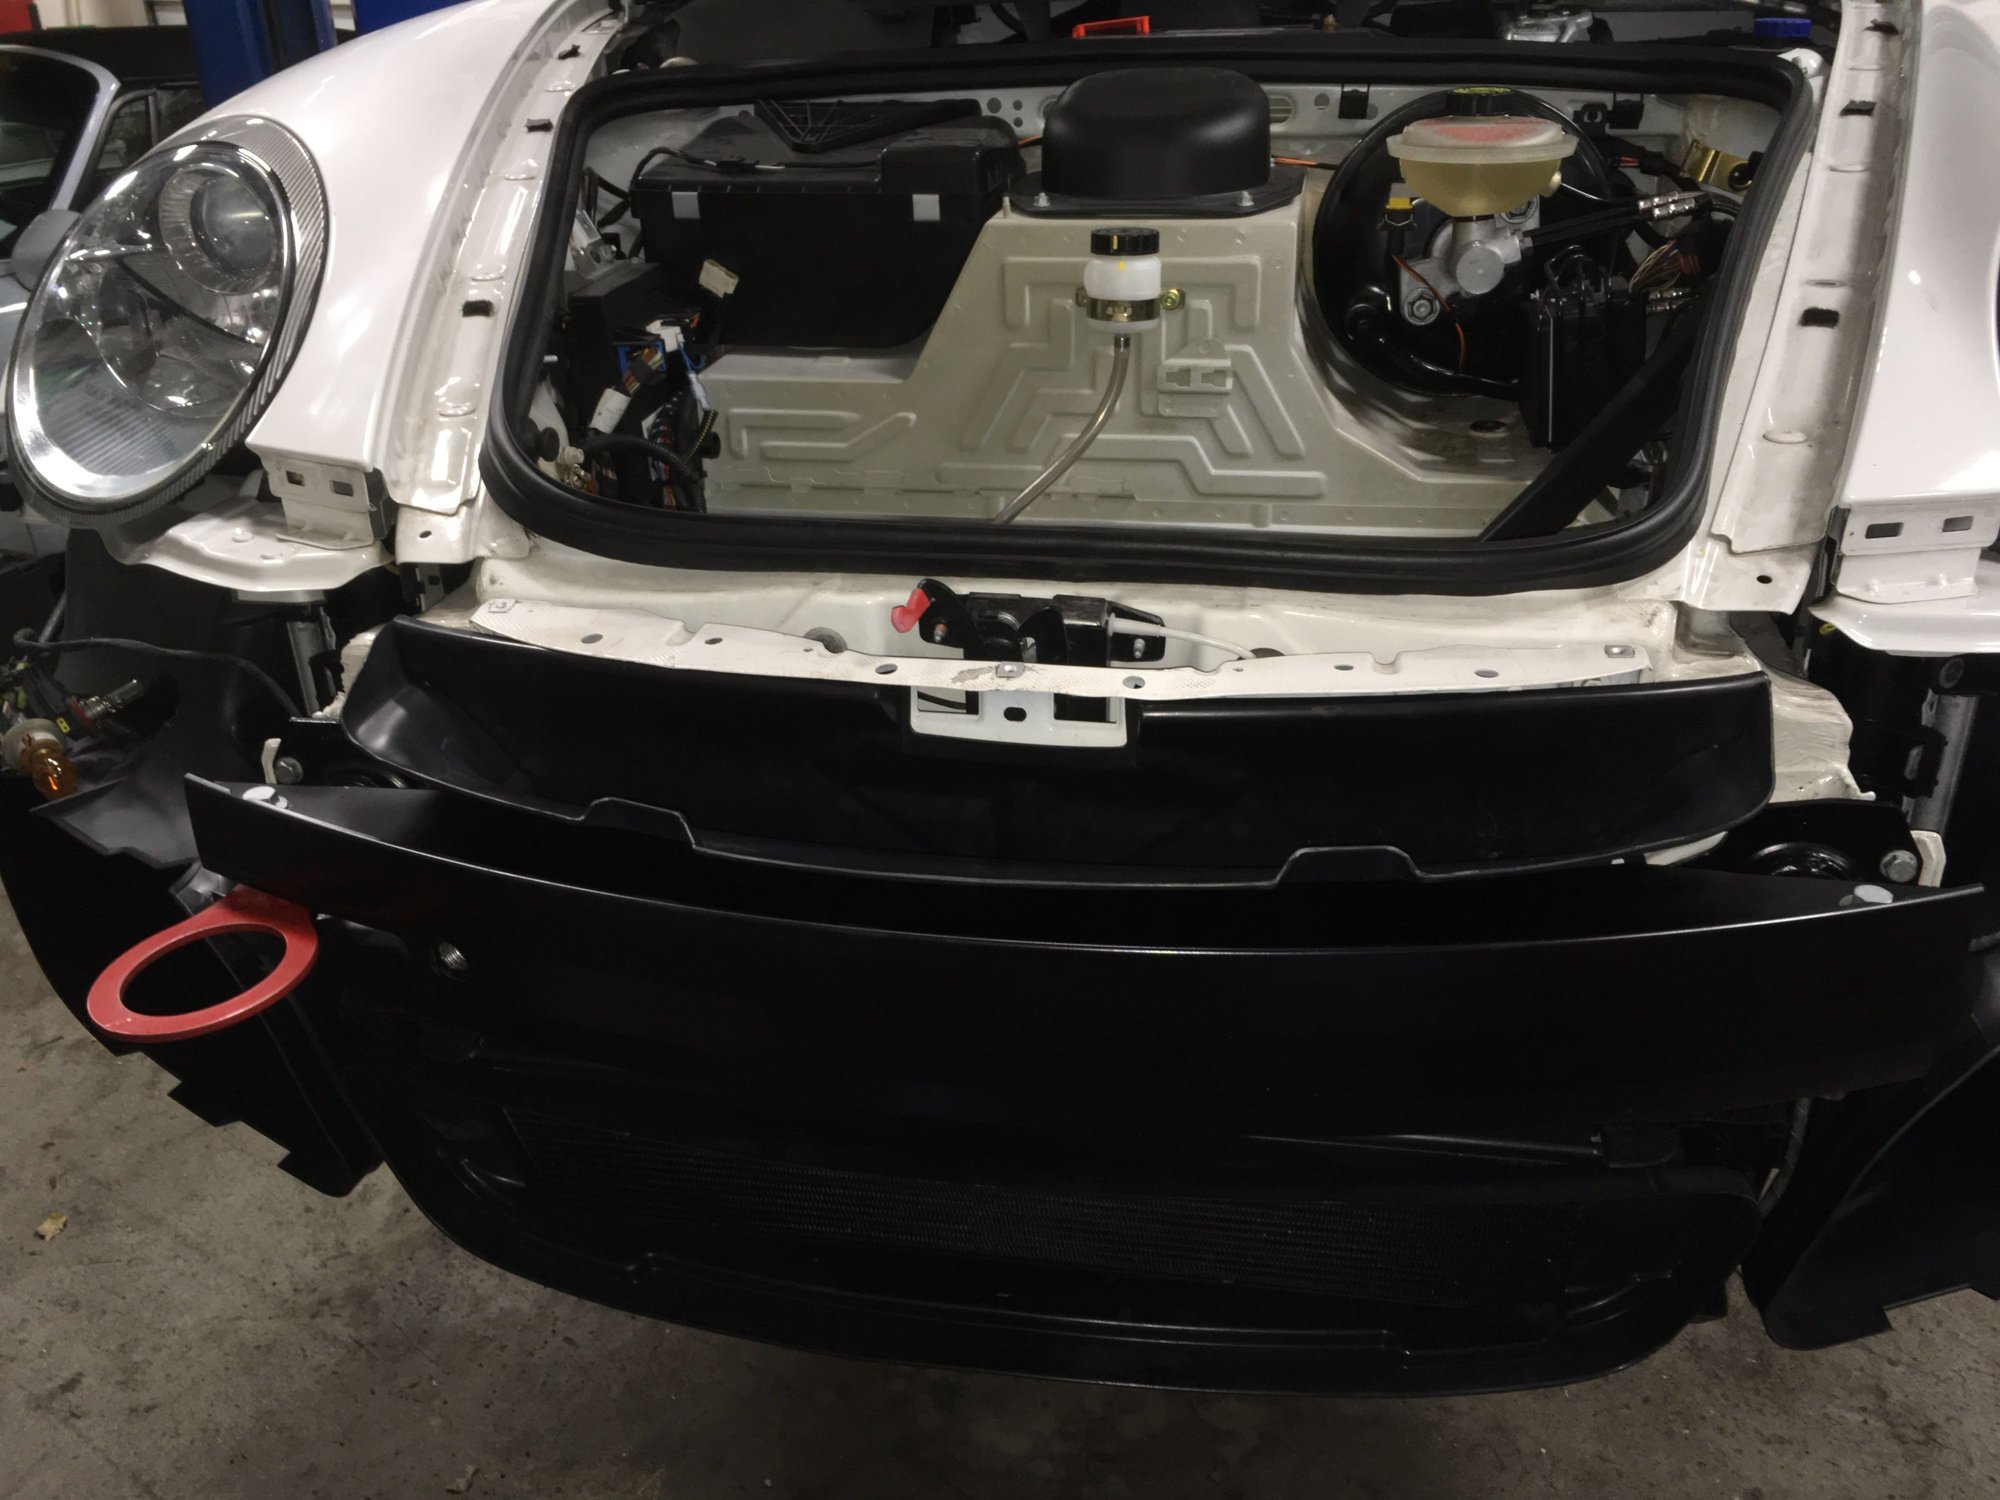
Bumper on. Marking the opening area.
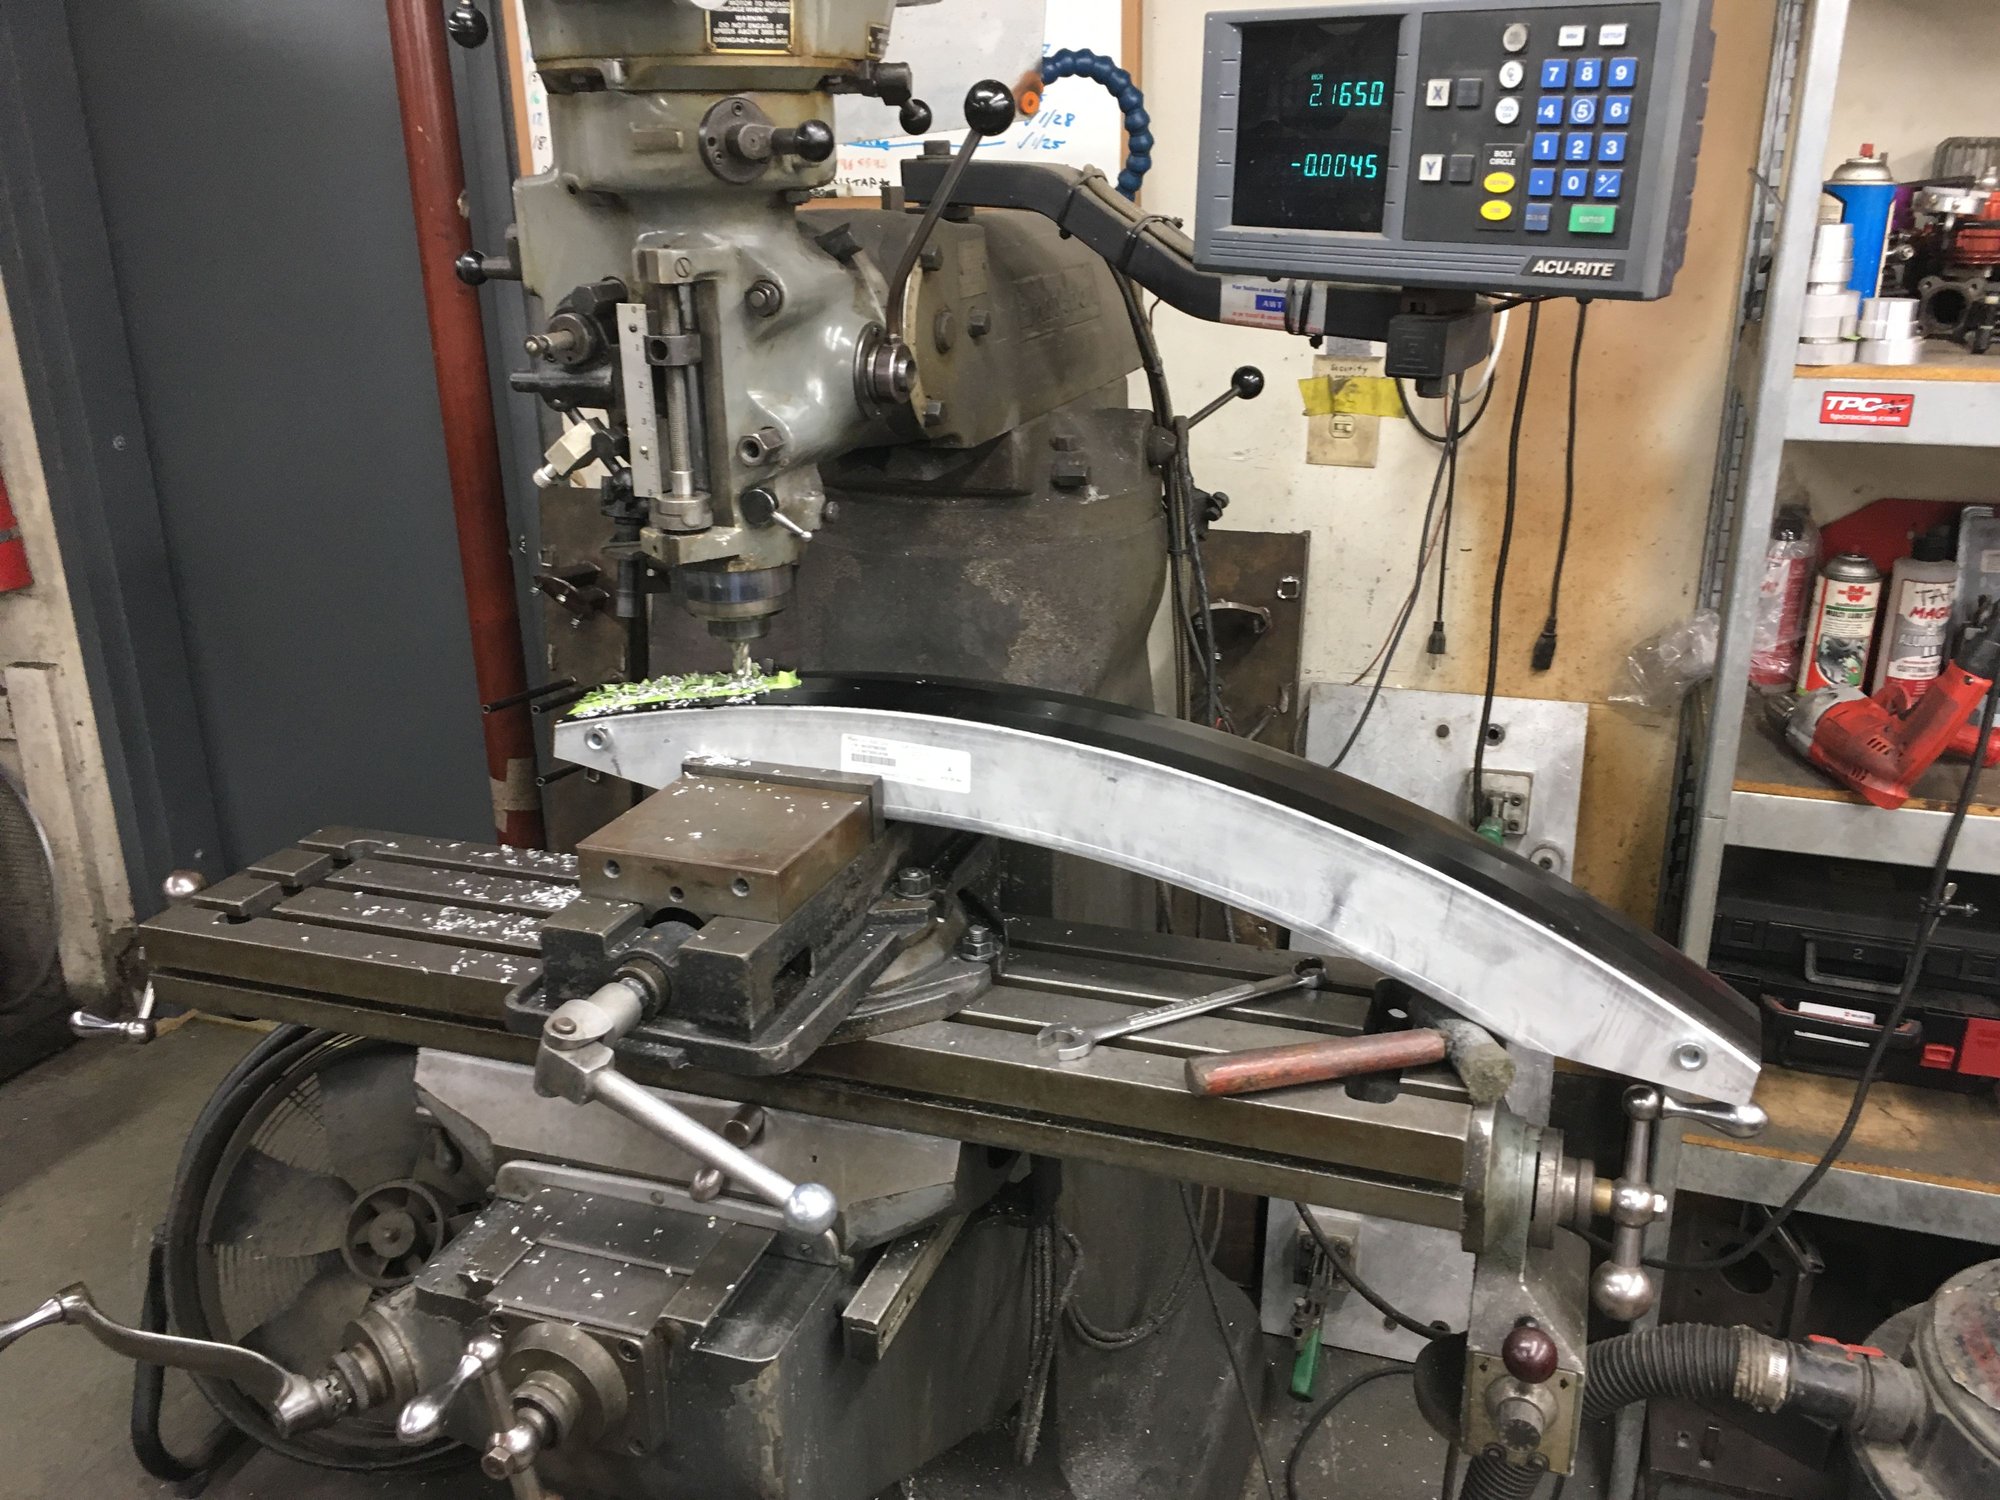
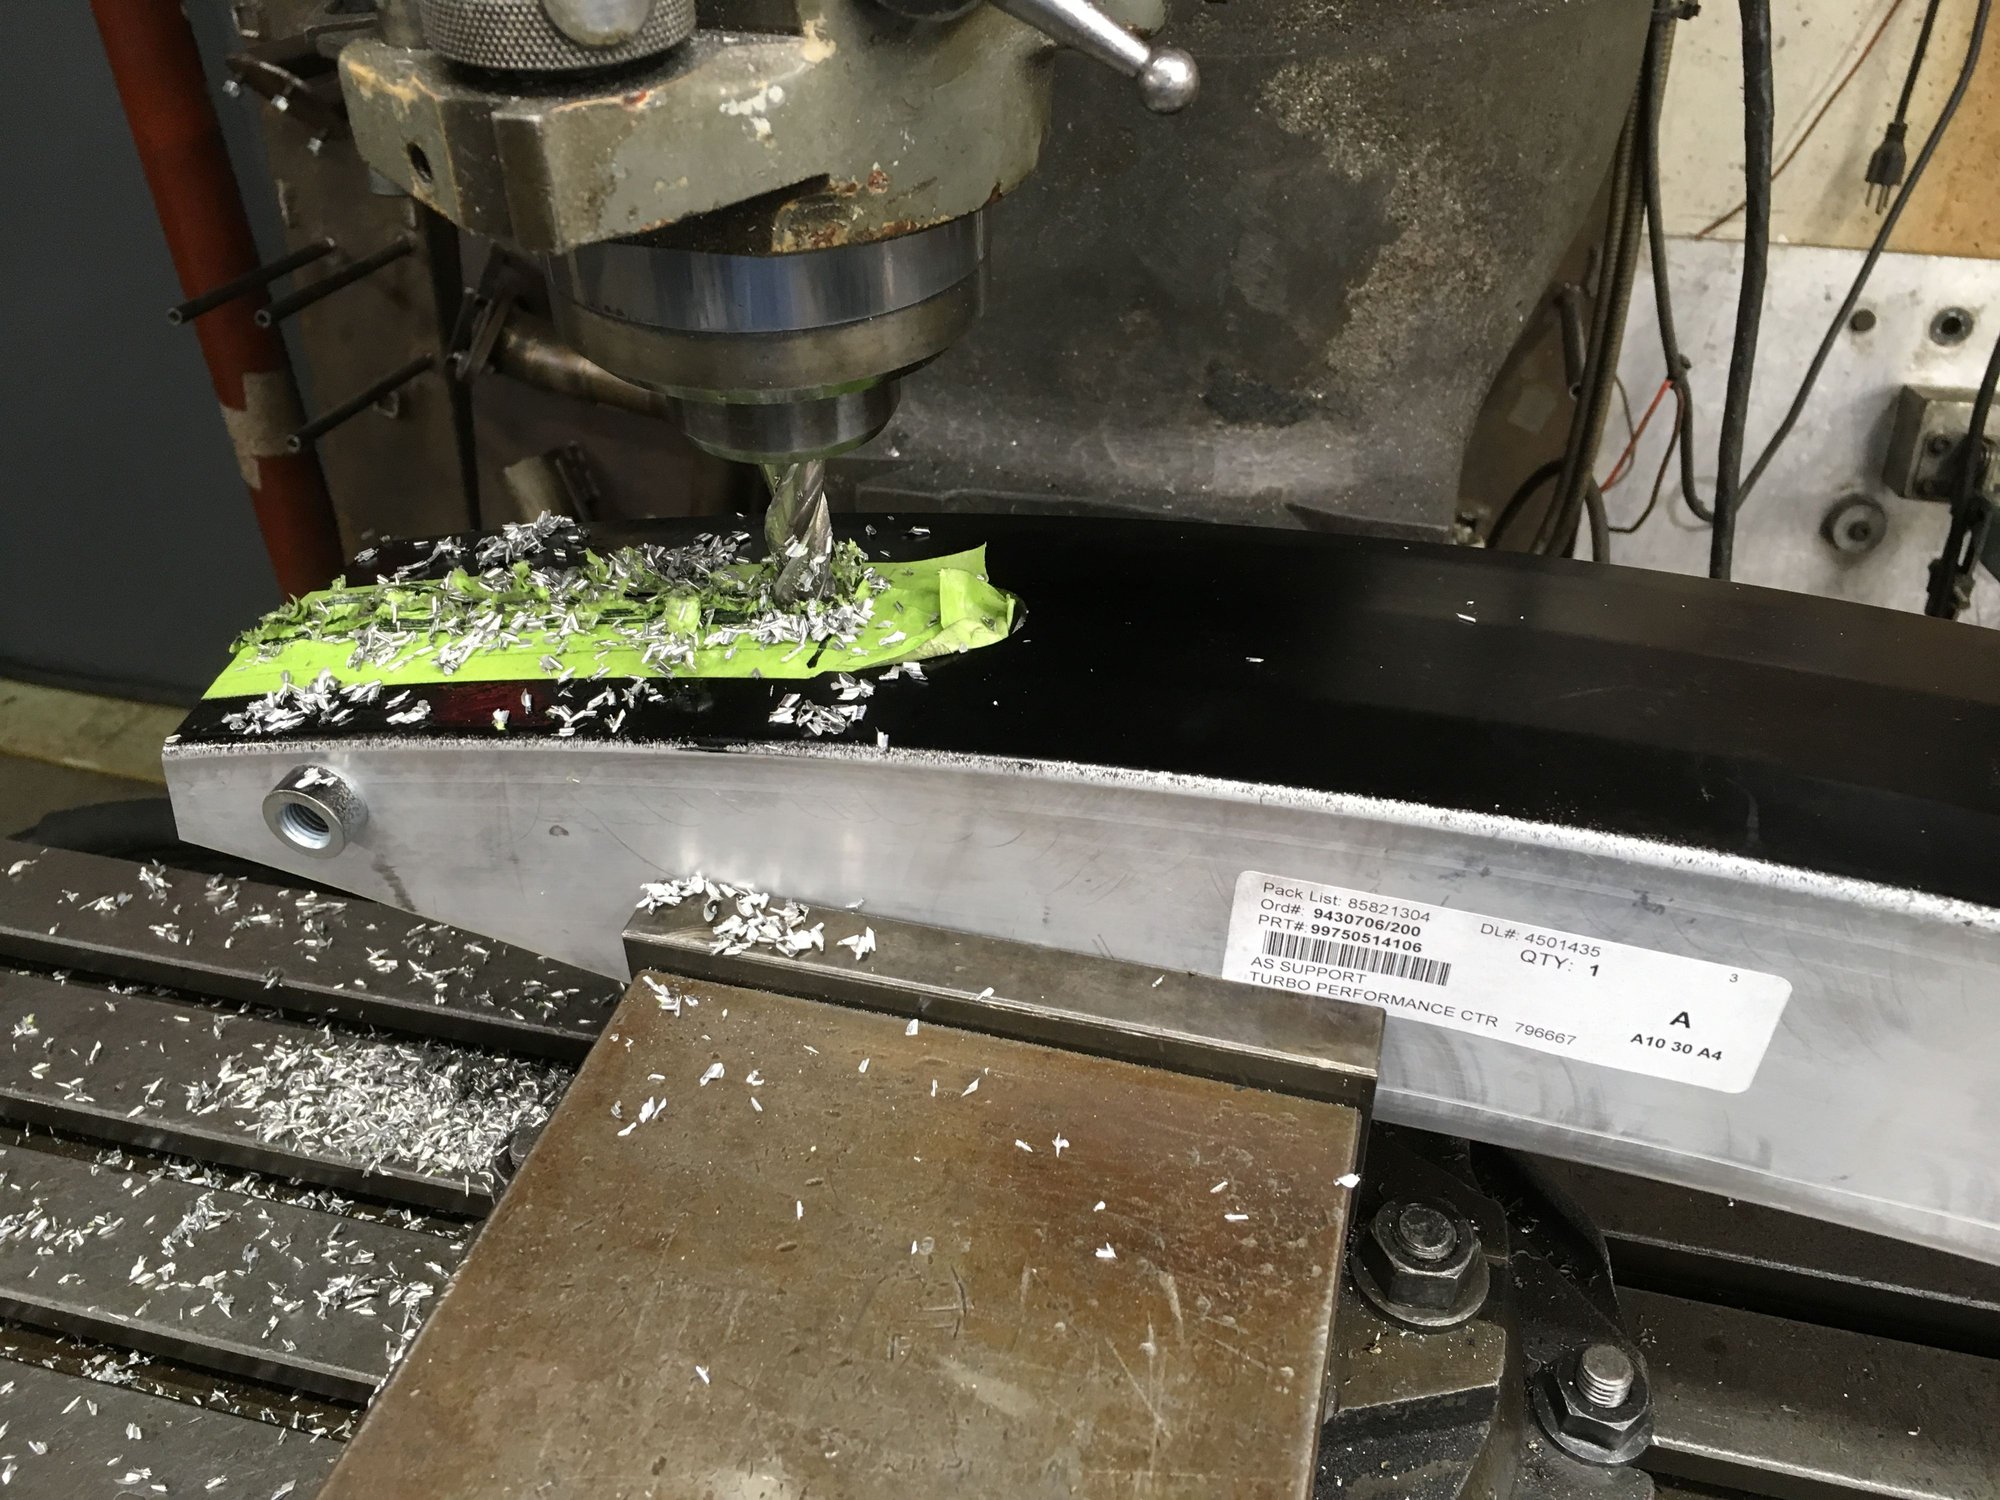
With the opening area marked on the OEM crash beam, its time to do some milling.
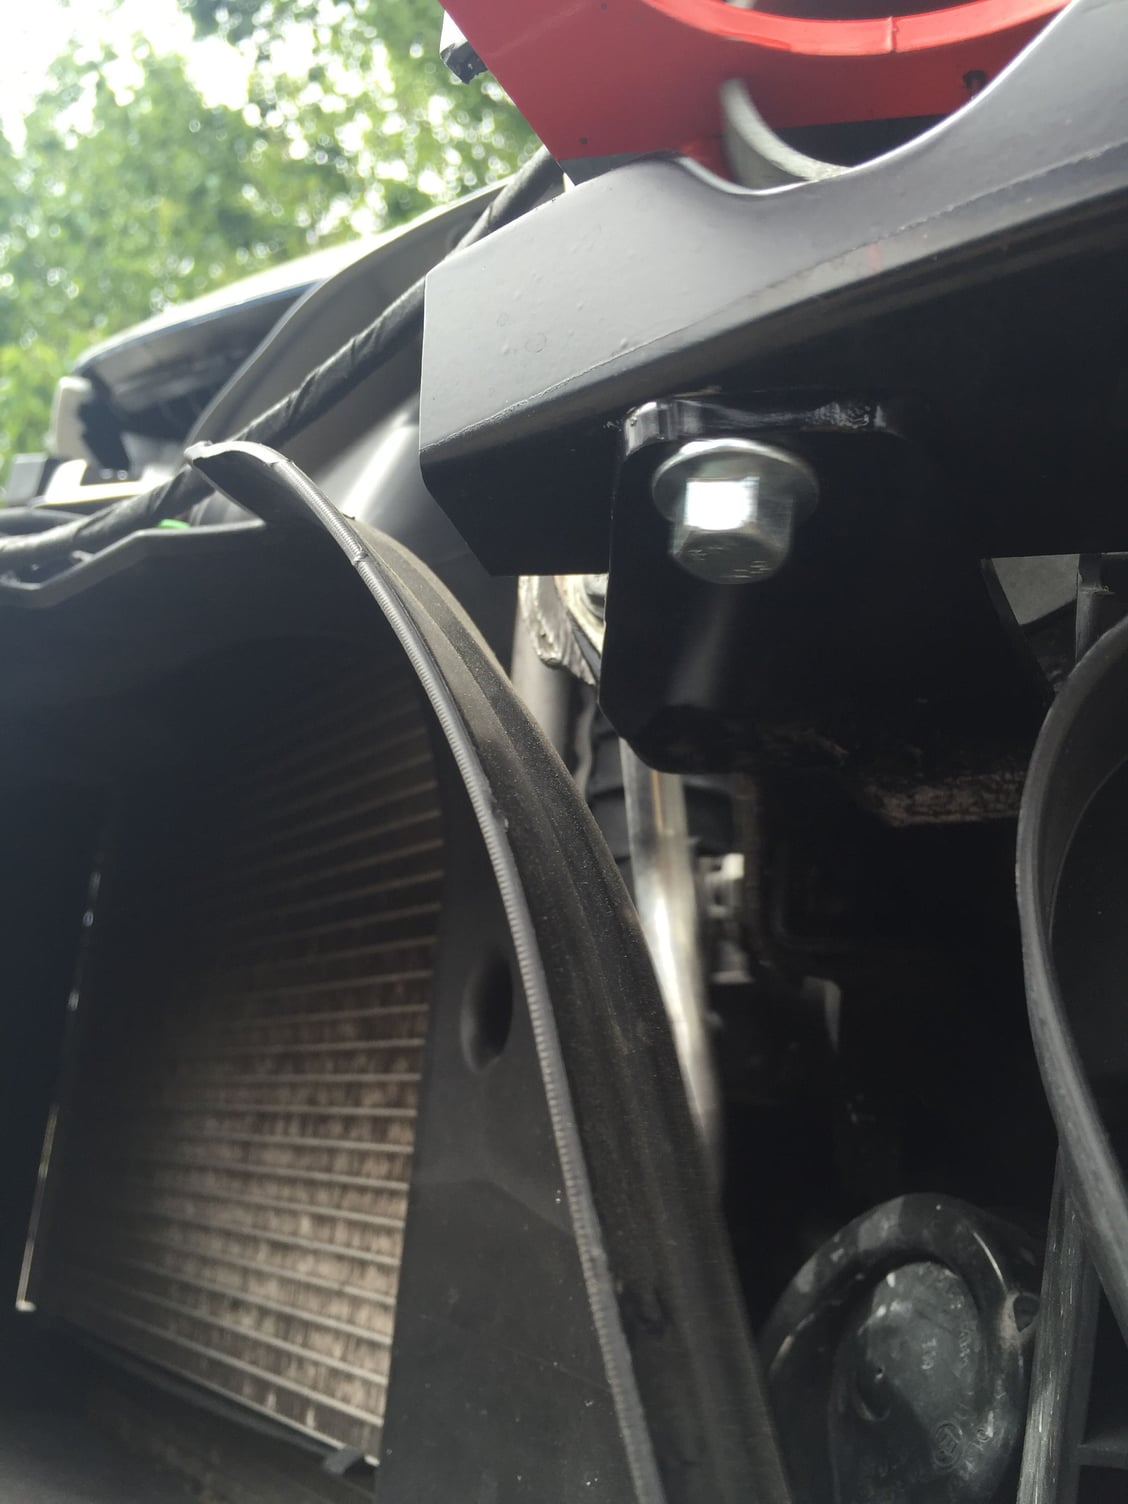
Modifying the support piece to accept the 991 Cup loop. I am well aware that after this mod the support piece won't be fully effective during an impact. I'd guess 60% effective at best...its still better than nothing.
Fits right in there.
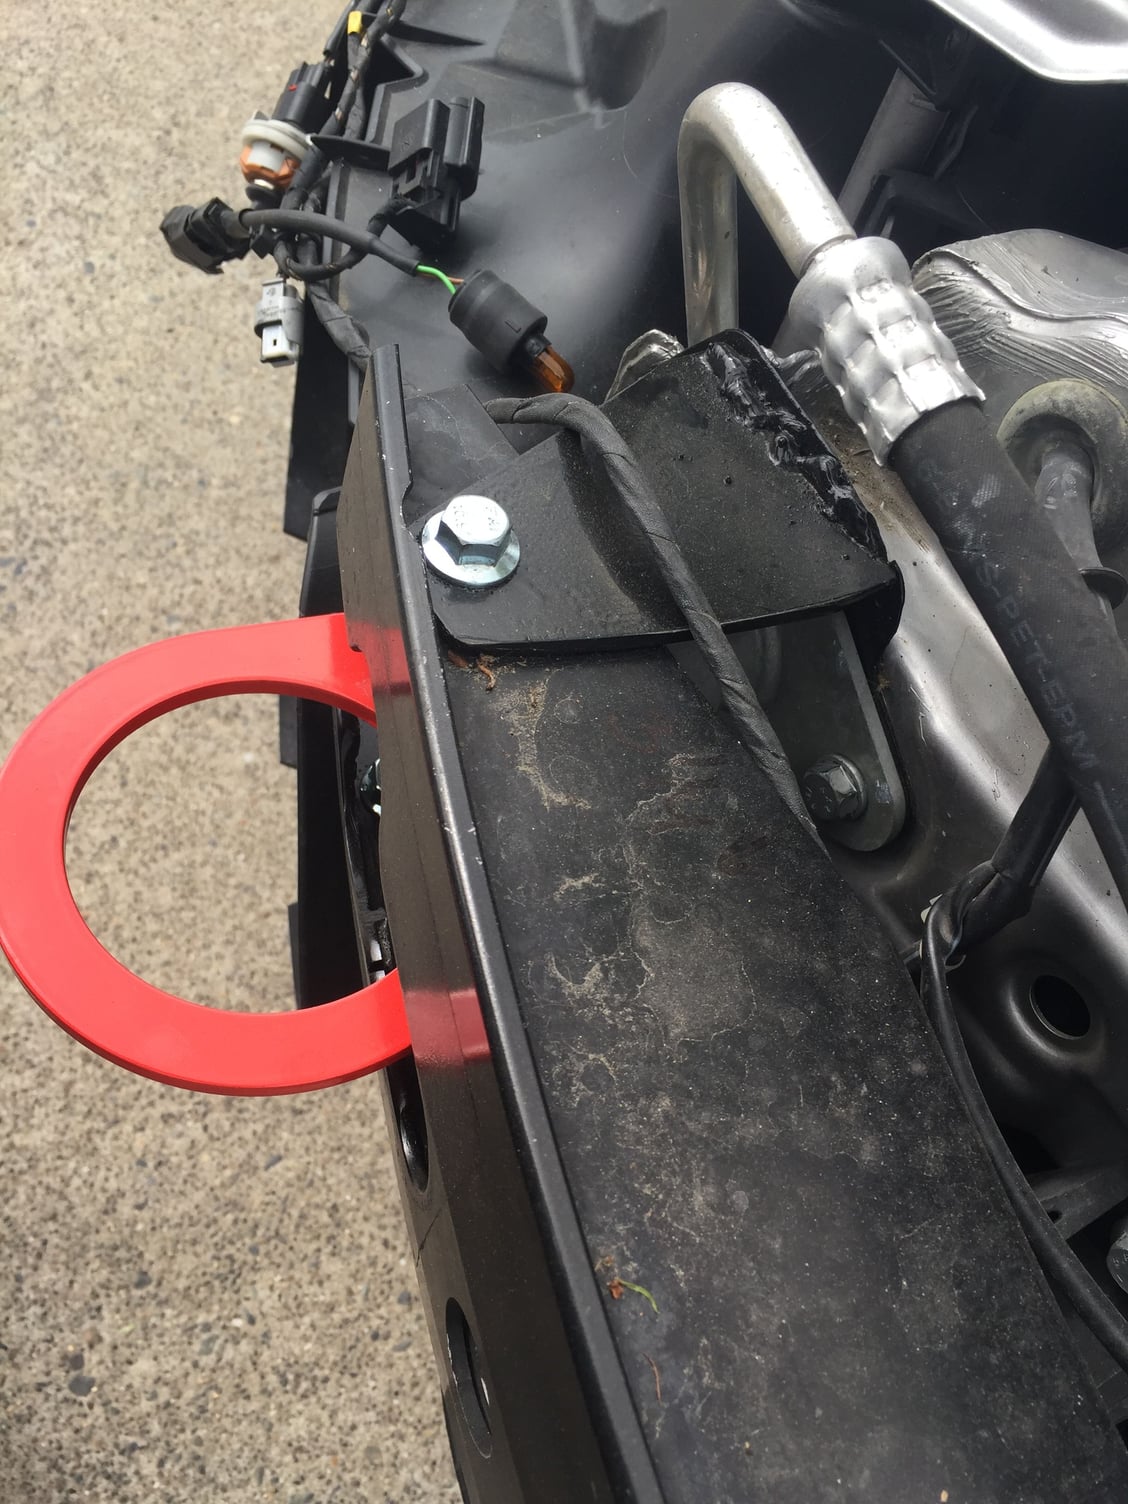
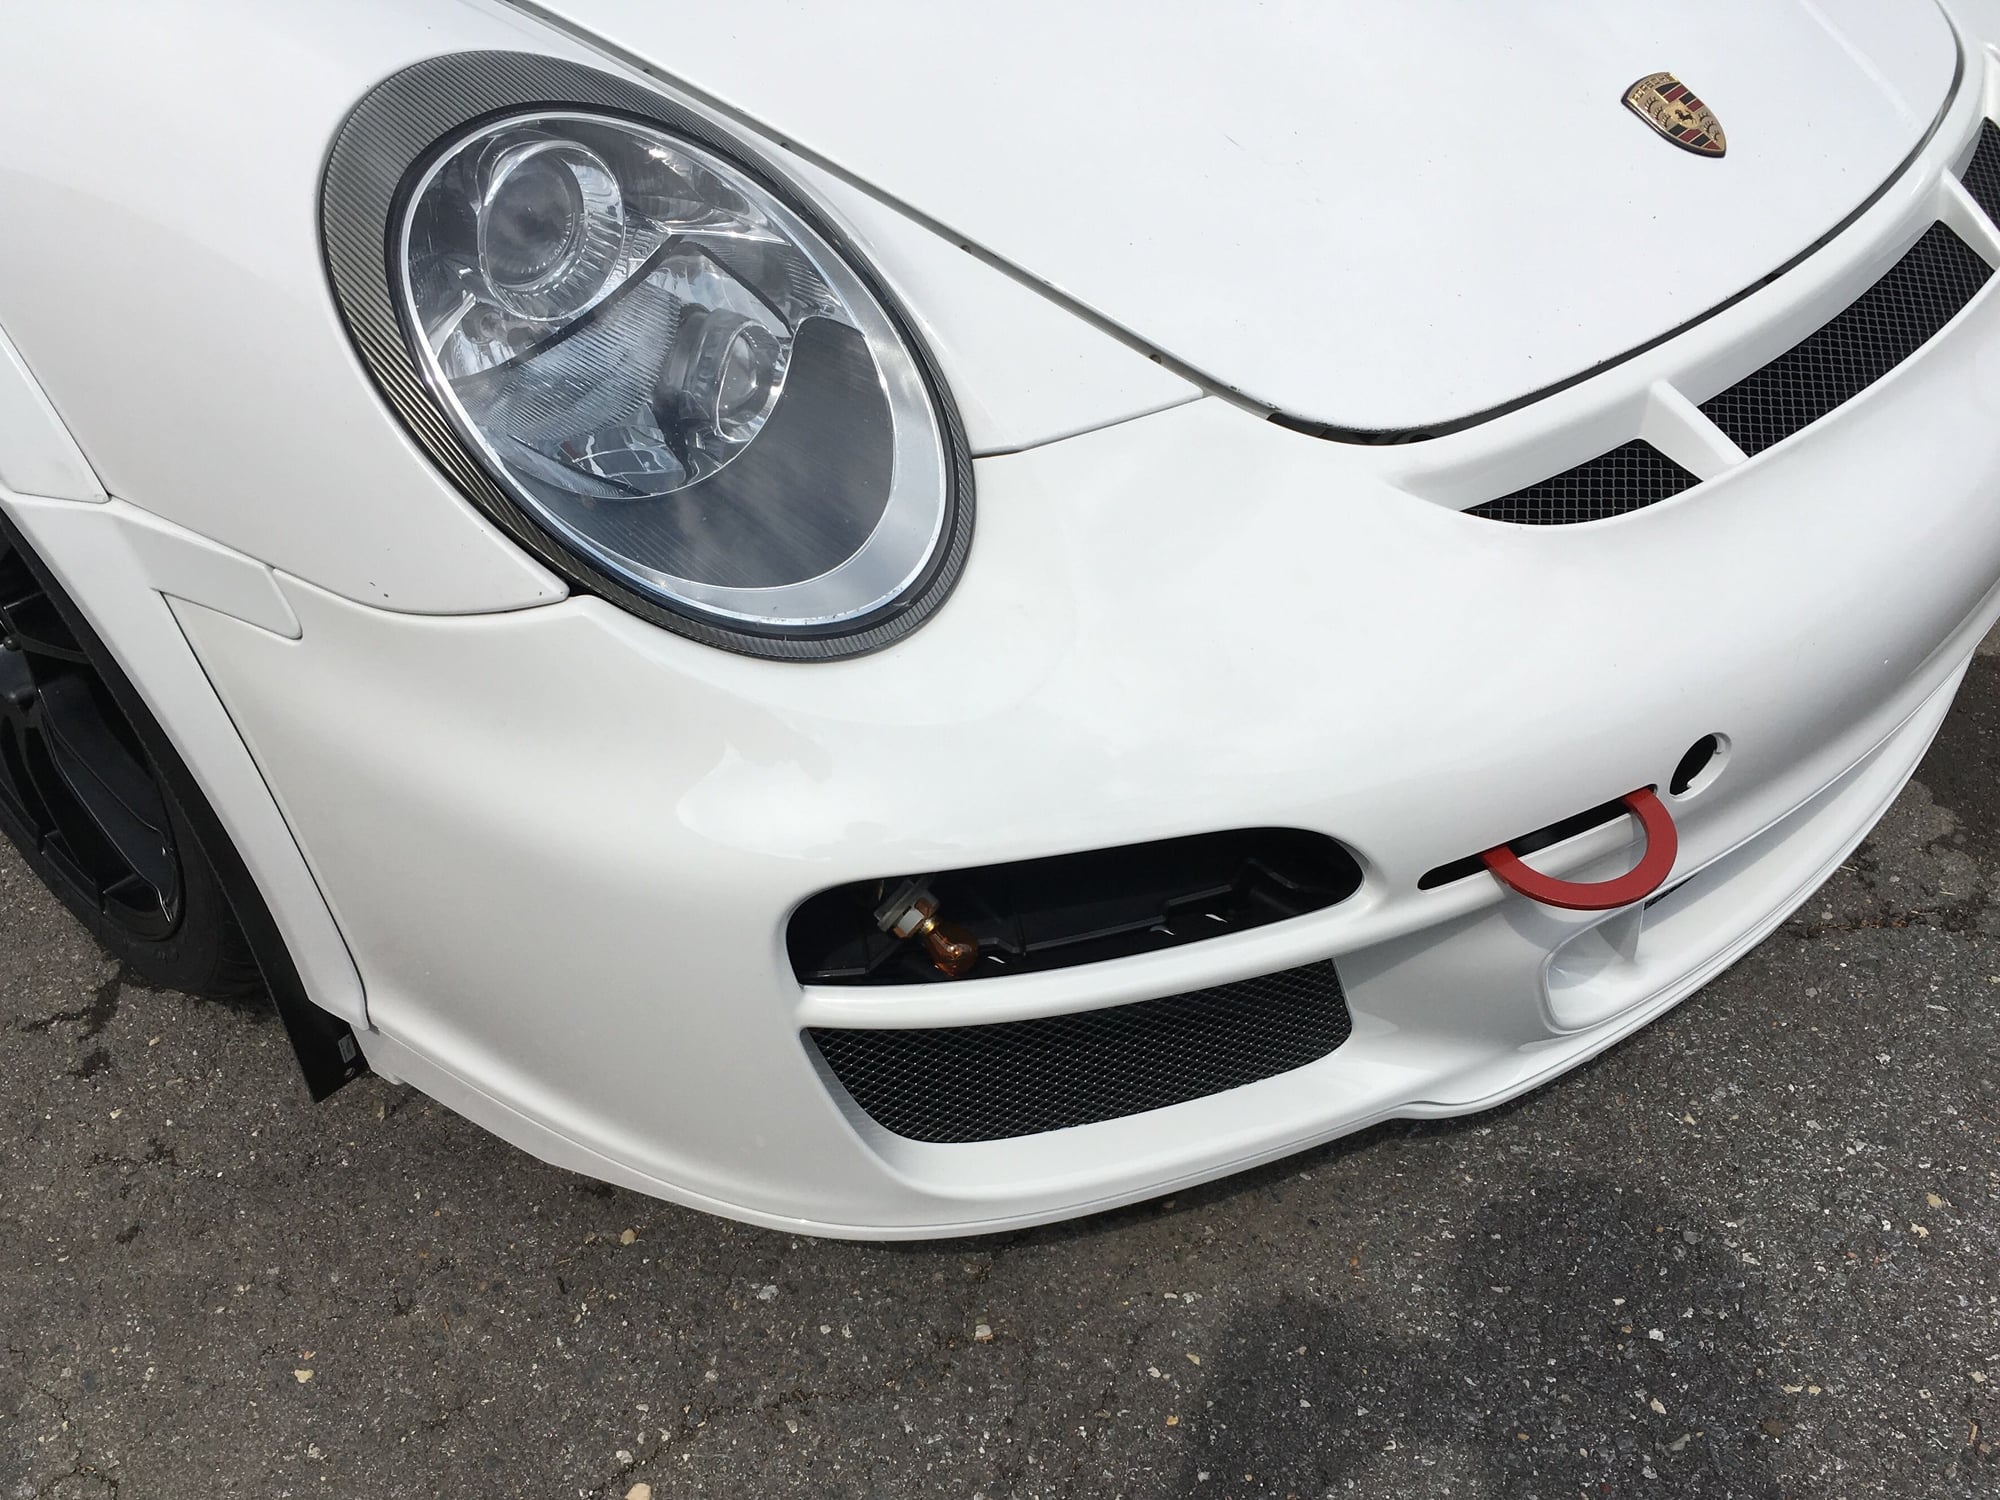
Here's my modified tow loop/semi-functional support piece side by side with 997 Cup retractable tow loop. My piece protrude the bumper about the same amount as the Cup piece fully extended.
Nice one, almost like mine...but better! You used a milling station, I an angle grinder and shortened the top part of bumper support. The tow loop itself is Rennline's universal one, it had to be modified a bit to fit.
I need to take pics of mine next time I pull the bumper off.
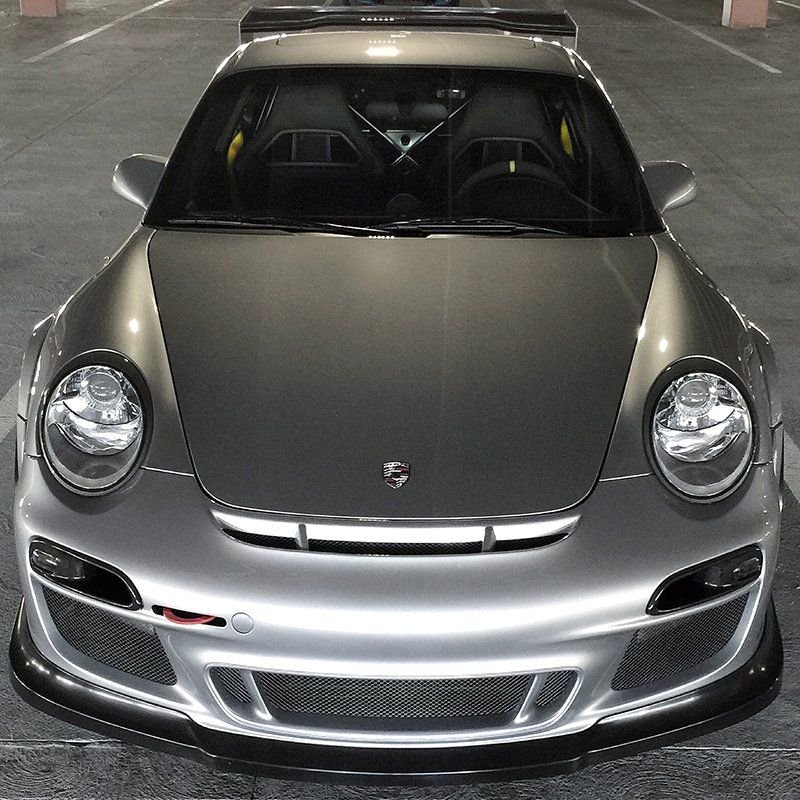
Call me crazy but I think it looks better/more aggressive without the DRL's.
Agreed! We'll discuss this in my next post.
Originally Posted by flsupraguy
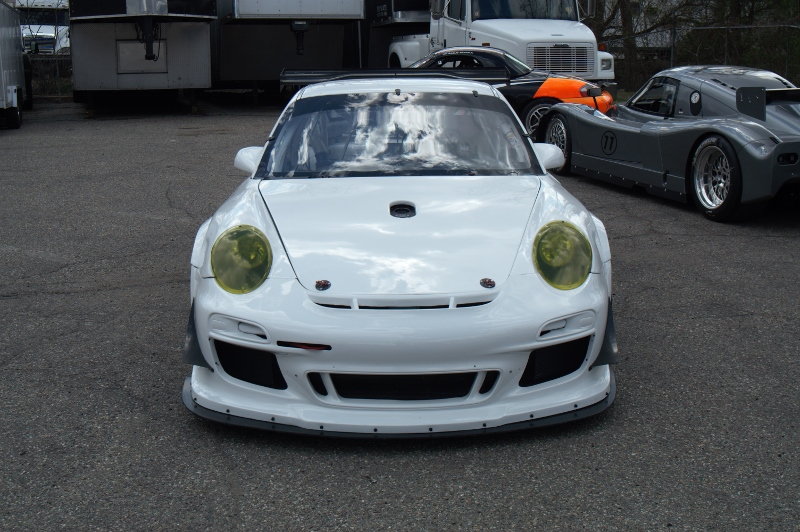
If you dont mind can you please post a full front of the car?
Here you go Sir.
Originally Posted by flsupraguy
Wow good work!
Originally Posted by rbahr
I Like!
Originally Posted by pete95zhn
Nice one, almost like mine...but better! You used a milling station, I an angle grinder and shortened the top part of bumper support. The tow loop itself is Rennline's universal one, it had to be modified a bit to fit.
I need to take pics of mine next time I pull the bumper off.
BTW, the tow loop isn't centered to the opening on the bumper because I had it rotated all the way toward the left side to its mechanical limit when I tighten the M12 retaining bolt. Rotating it either direction to its limit won't contact the edge of the bumper opening. When I get around to sorting out the DRL I'll remove the bumper and center the tow loop to the opening. And I'll repaint the loop using a shade of red that's closer to the Cup red. All I had was red engine enamel the night I did this.
What to put in the DRL openings has been troubling me for months. I wrack my brain about this during the day and at night... Let's start with what I am not not going to do- That is to buy OEM 997.2 DRL lamps(they're LED instead of halogen, so will require the following items for the conversion), OEM 997.2 front body control module, and OEM 997.2 front lighting wiring harness. Not doing that.
Here's the three options I came up with-
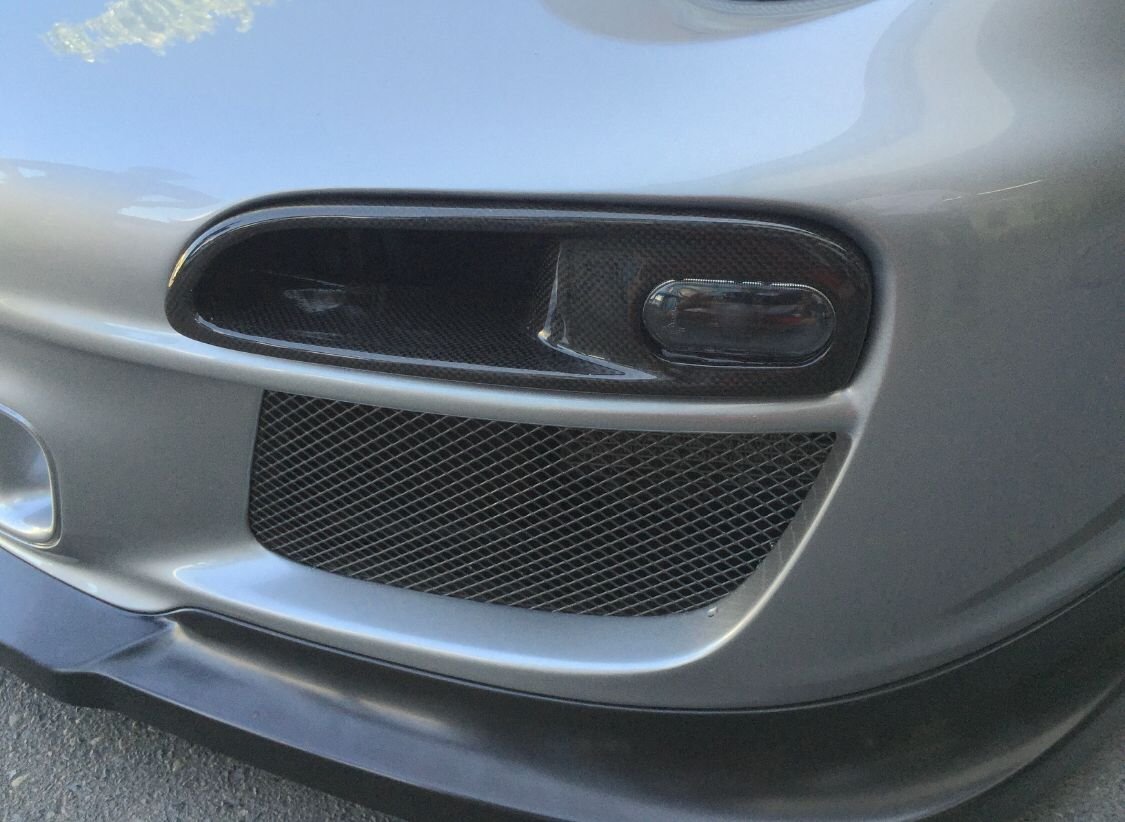
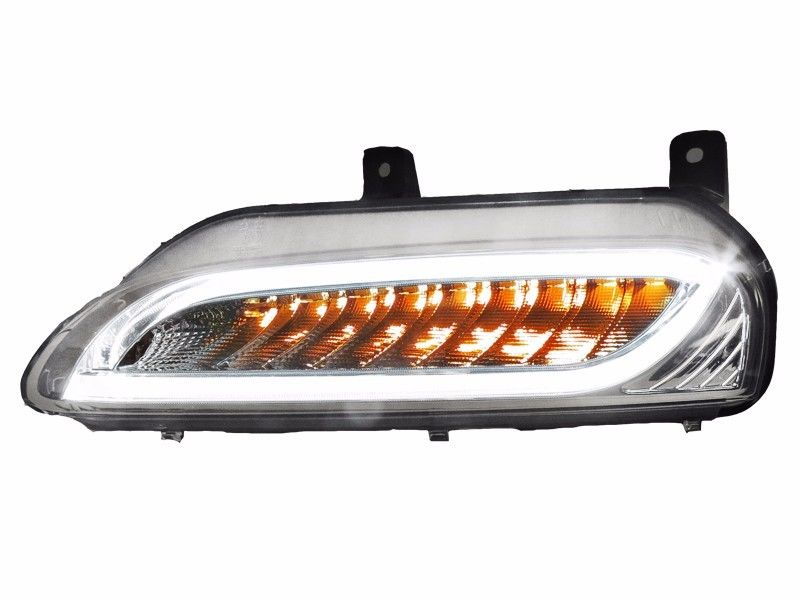
Option 1: Buy a pair of aftermarket DRL lamps from ebay for 500 bucks. The reason why I'd go with these aftermarket lamps over the OEM is because they are made with wires exposed between the back of the lamp housing and the connector(see image below). This allows me to splice-in to get the turn signal to work without having to replace the control module and the wiring harness.
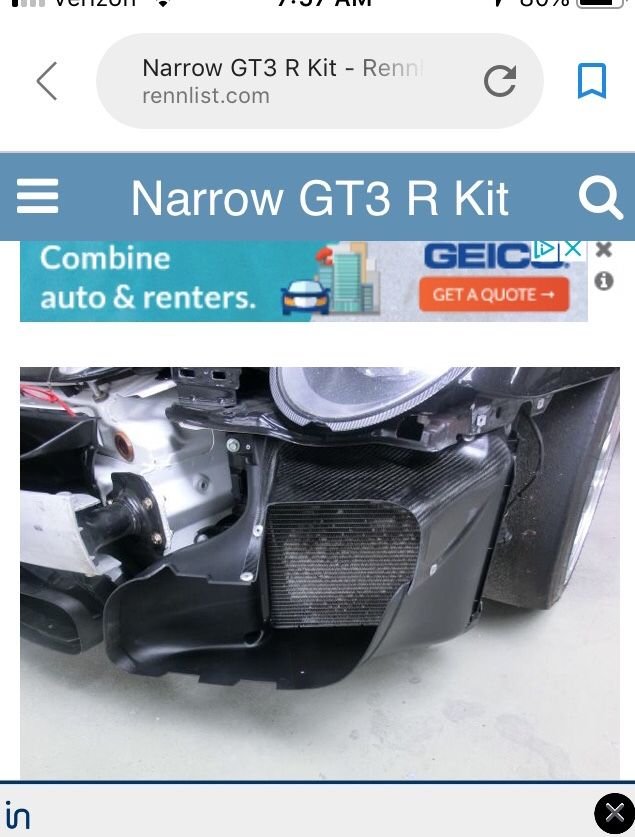
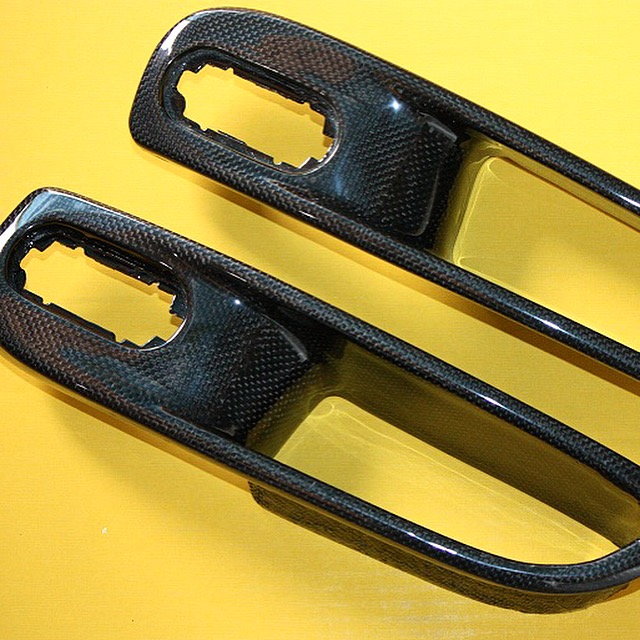
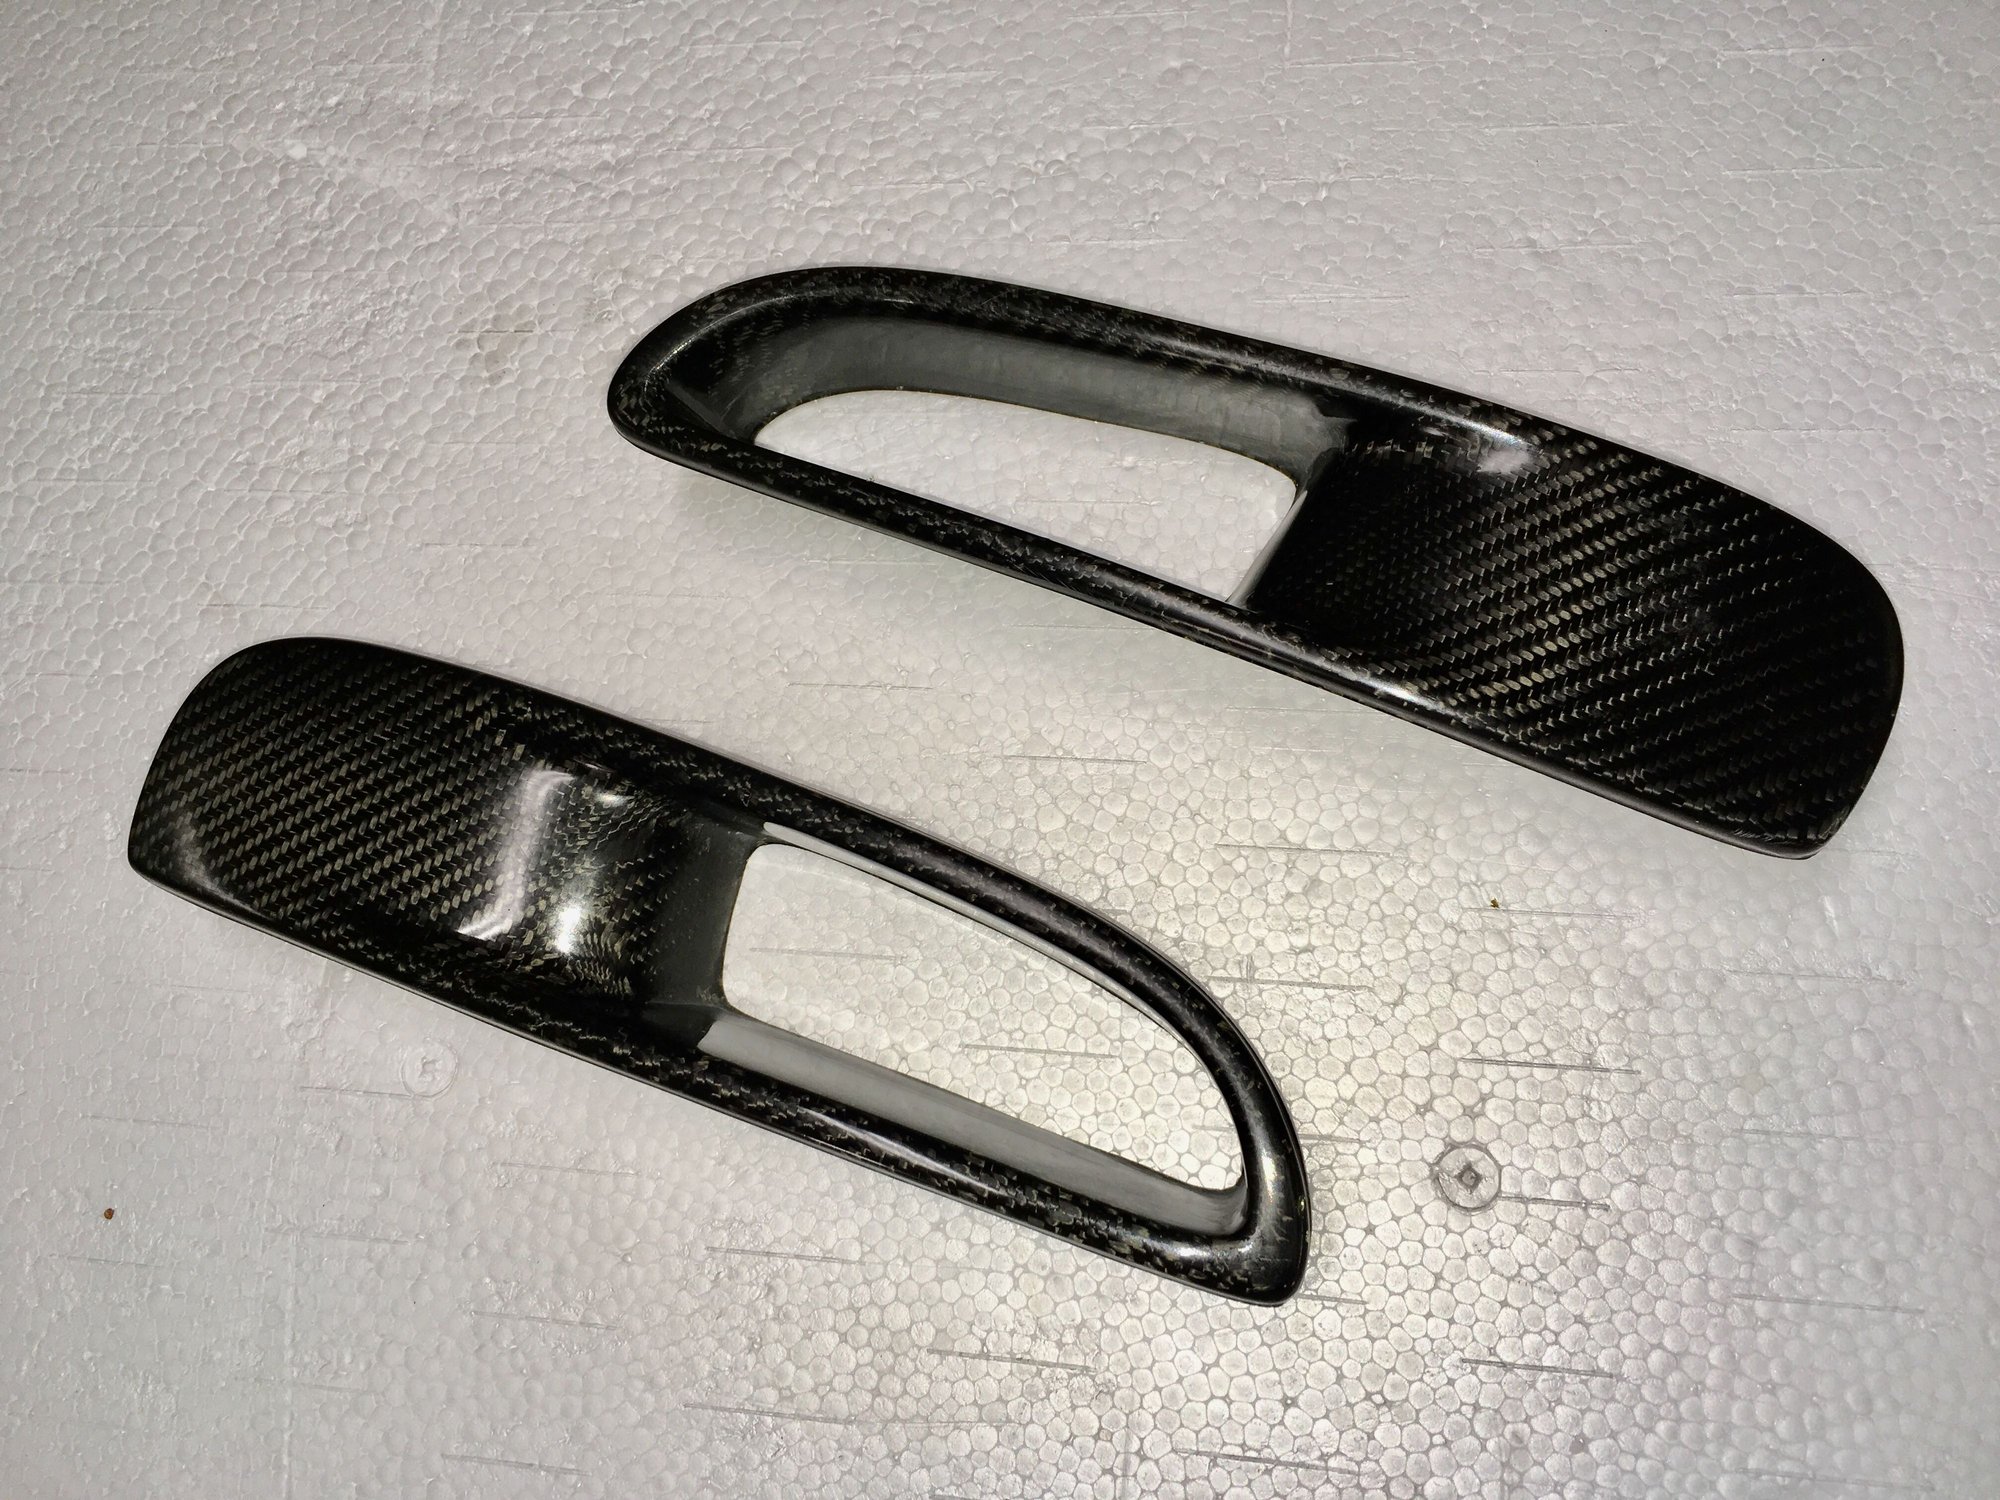
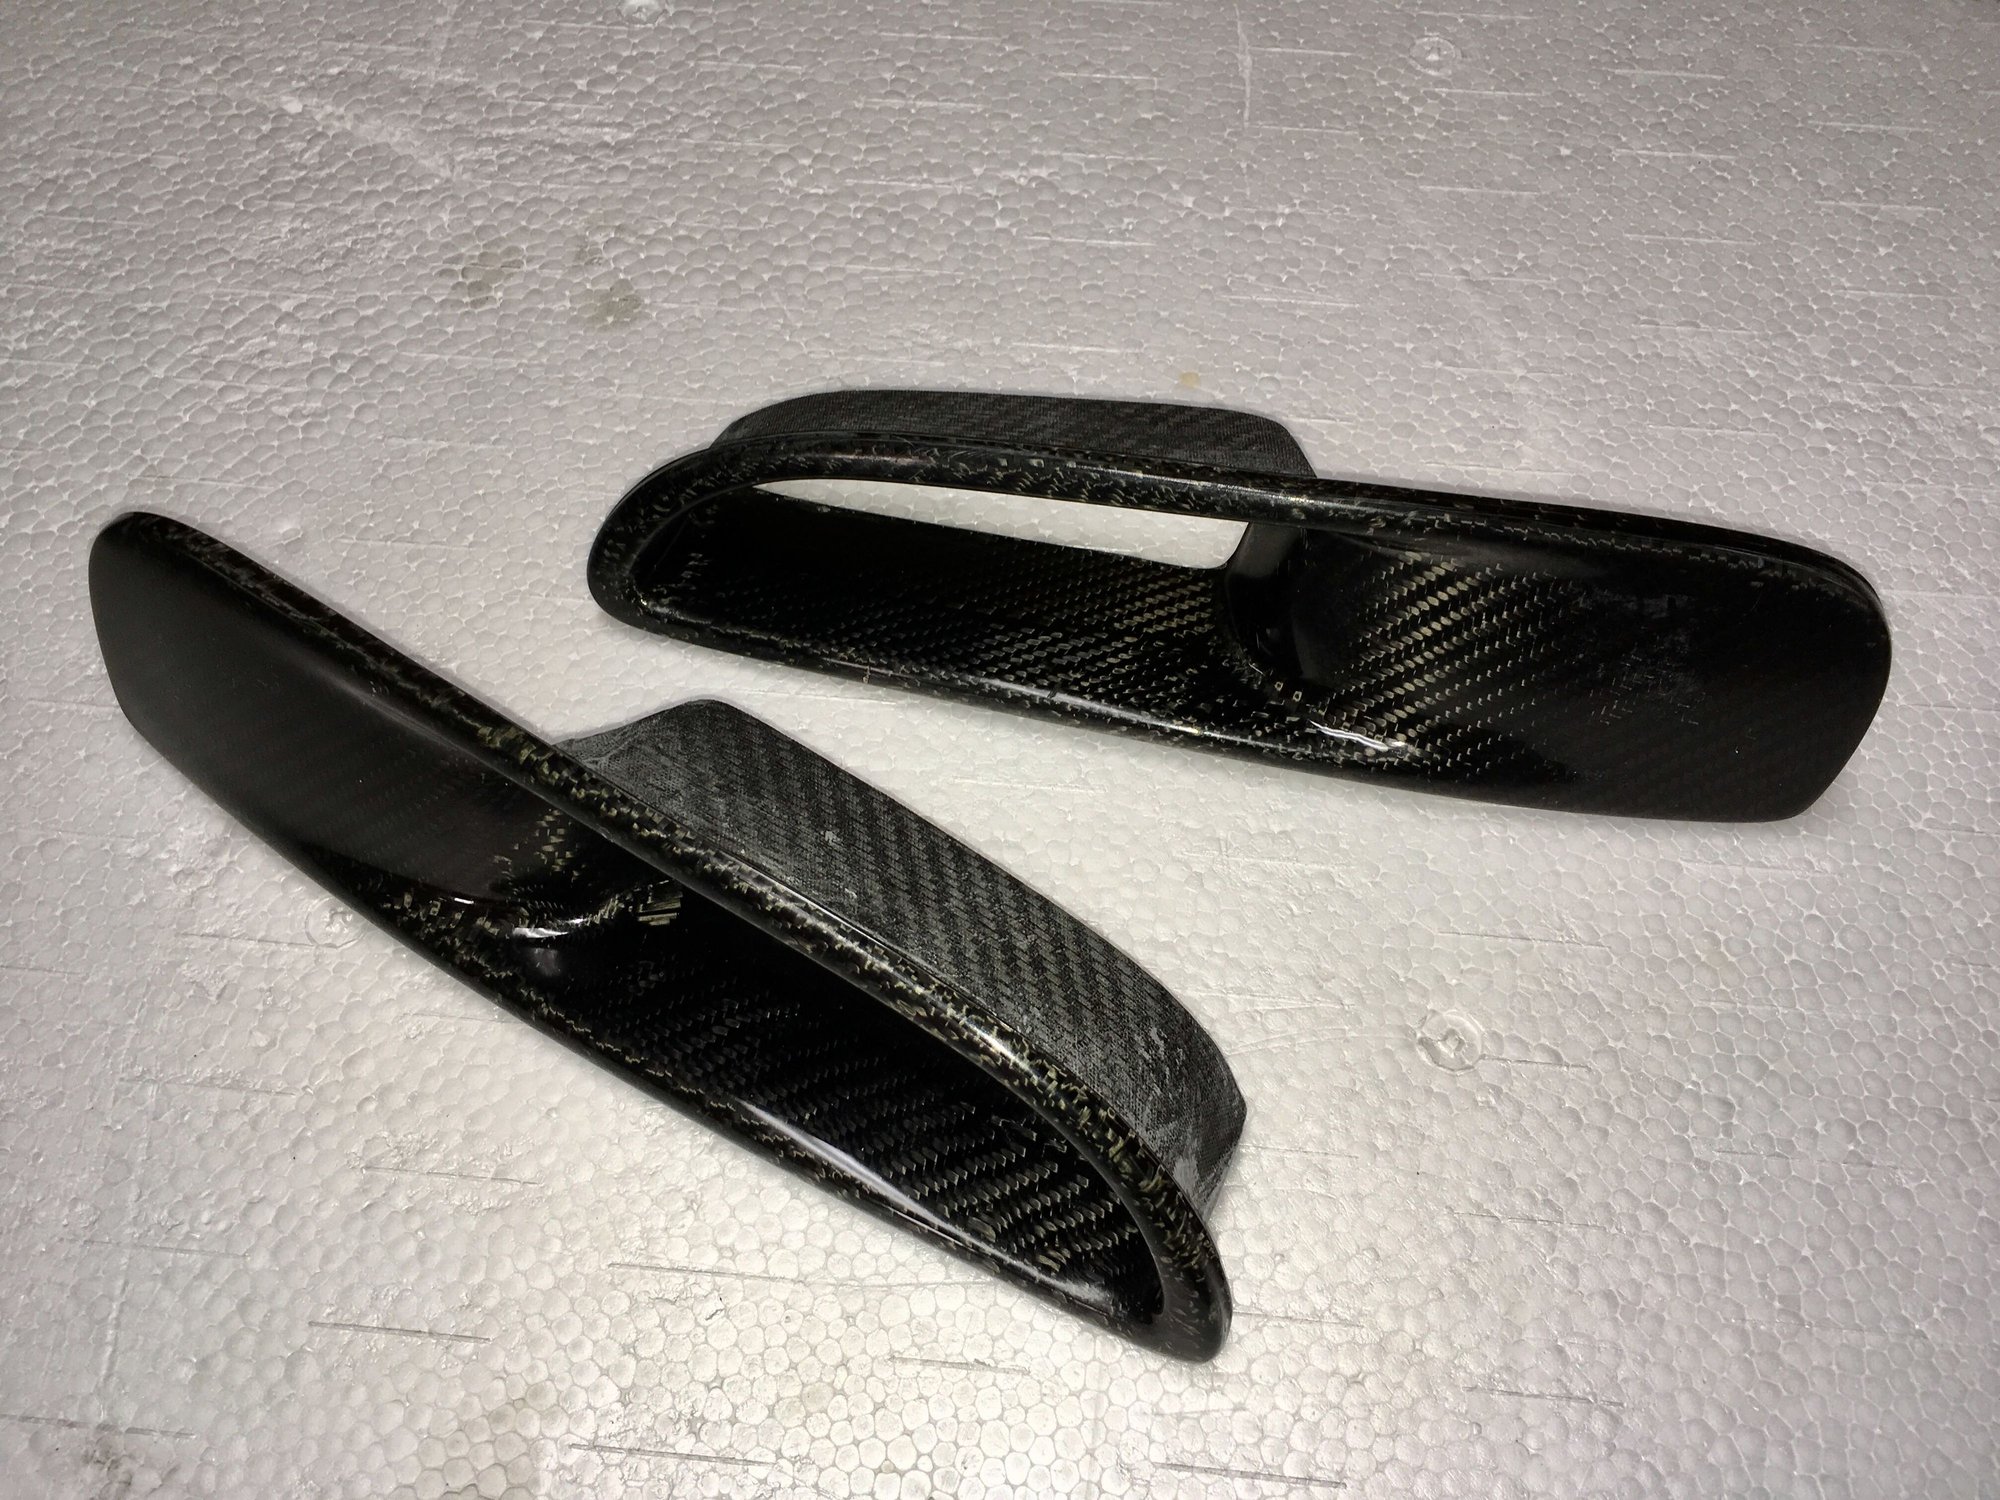
Option 2: Install the pair of Getty Design carbon fiber brake ducts that I bought last year and install the turn signal lights on them. They are very good looking. But...
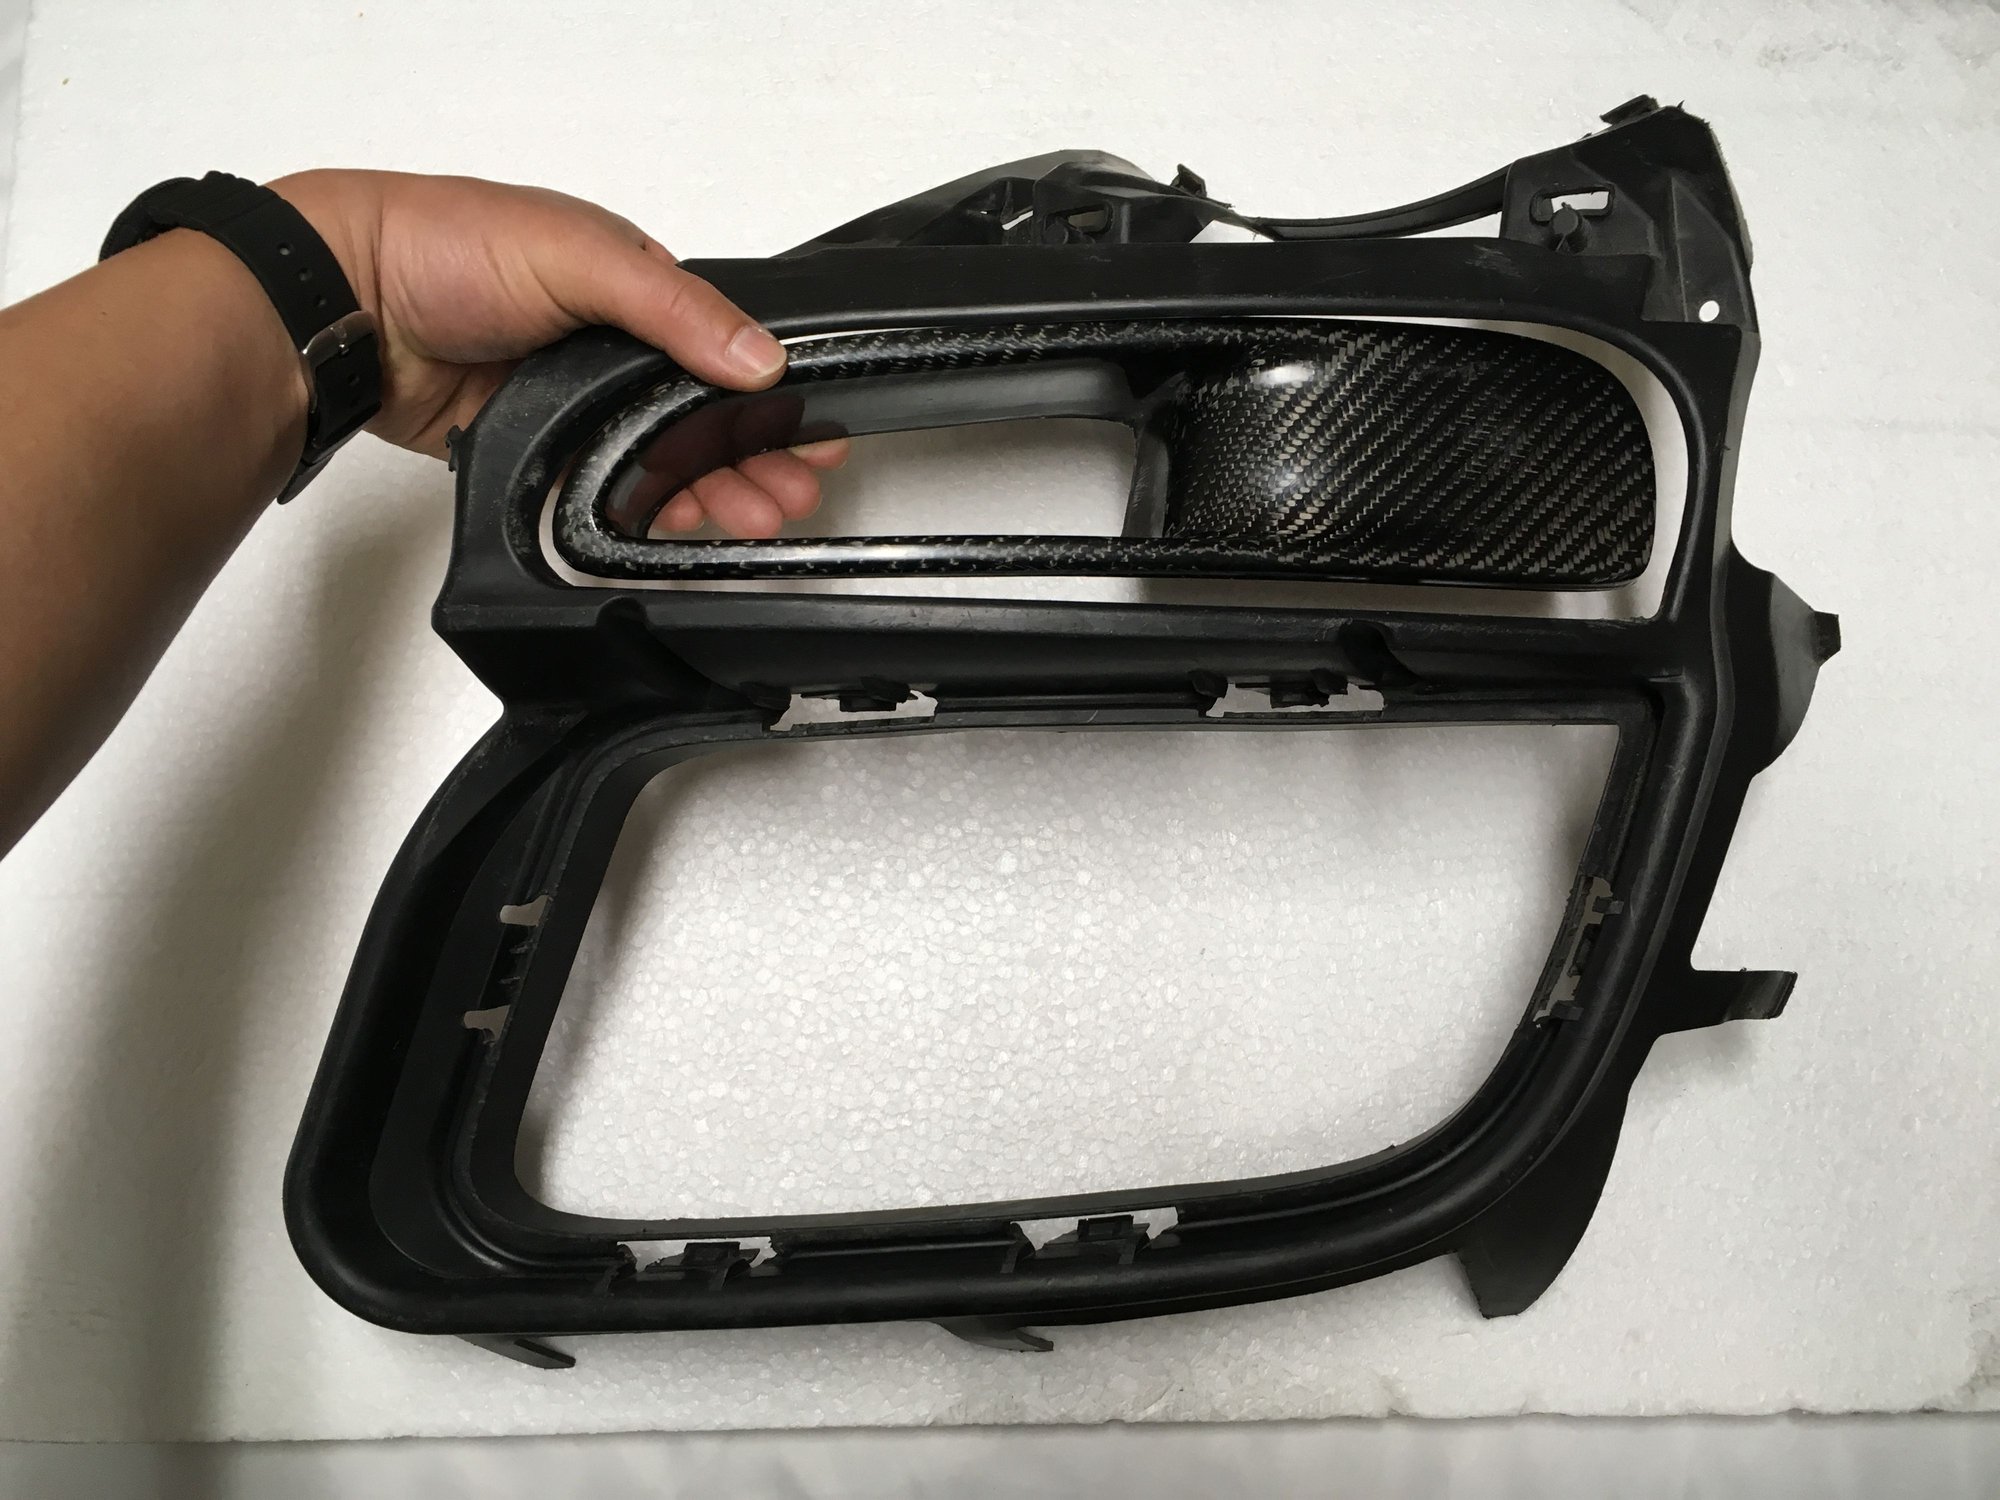
...the mounting isn't straightforward. The OEM lamps actually doesn't mount to the front bumper. They mount to this plastic frame that's hidden inside the front bumper.
Specifically, the OEM lamp housing has four built-in mounting tabs that are semi-complex shaped. The four tabs mount to these four screw holes that aren't on the the plane. So I'd have to spend 3-4 hours making aluminum brackets to mount these carbon fiber pieces to the plastic frame. And there will be epoxy involved to bond carbon fiber to aluminum.
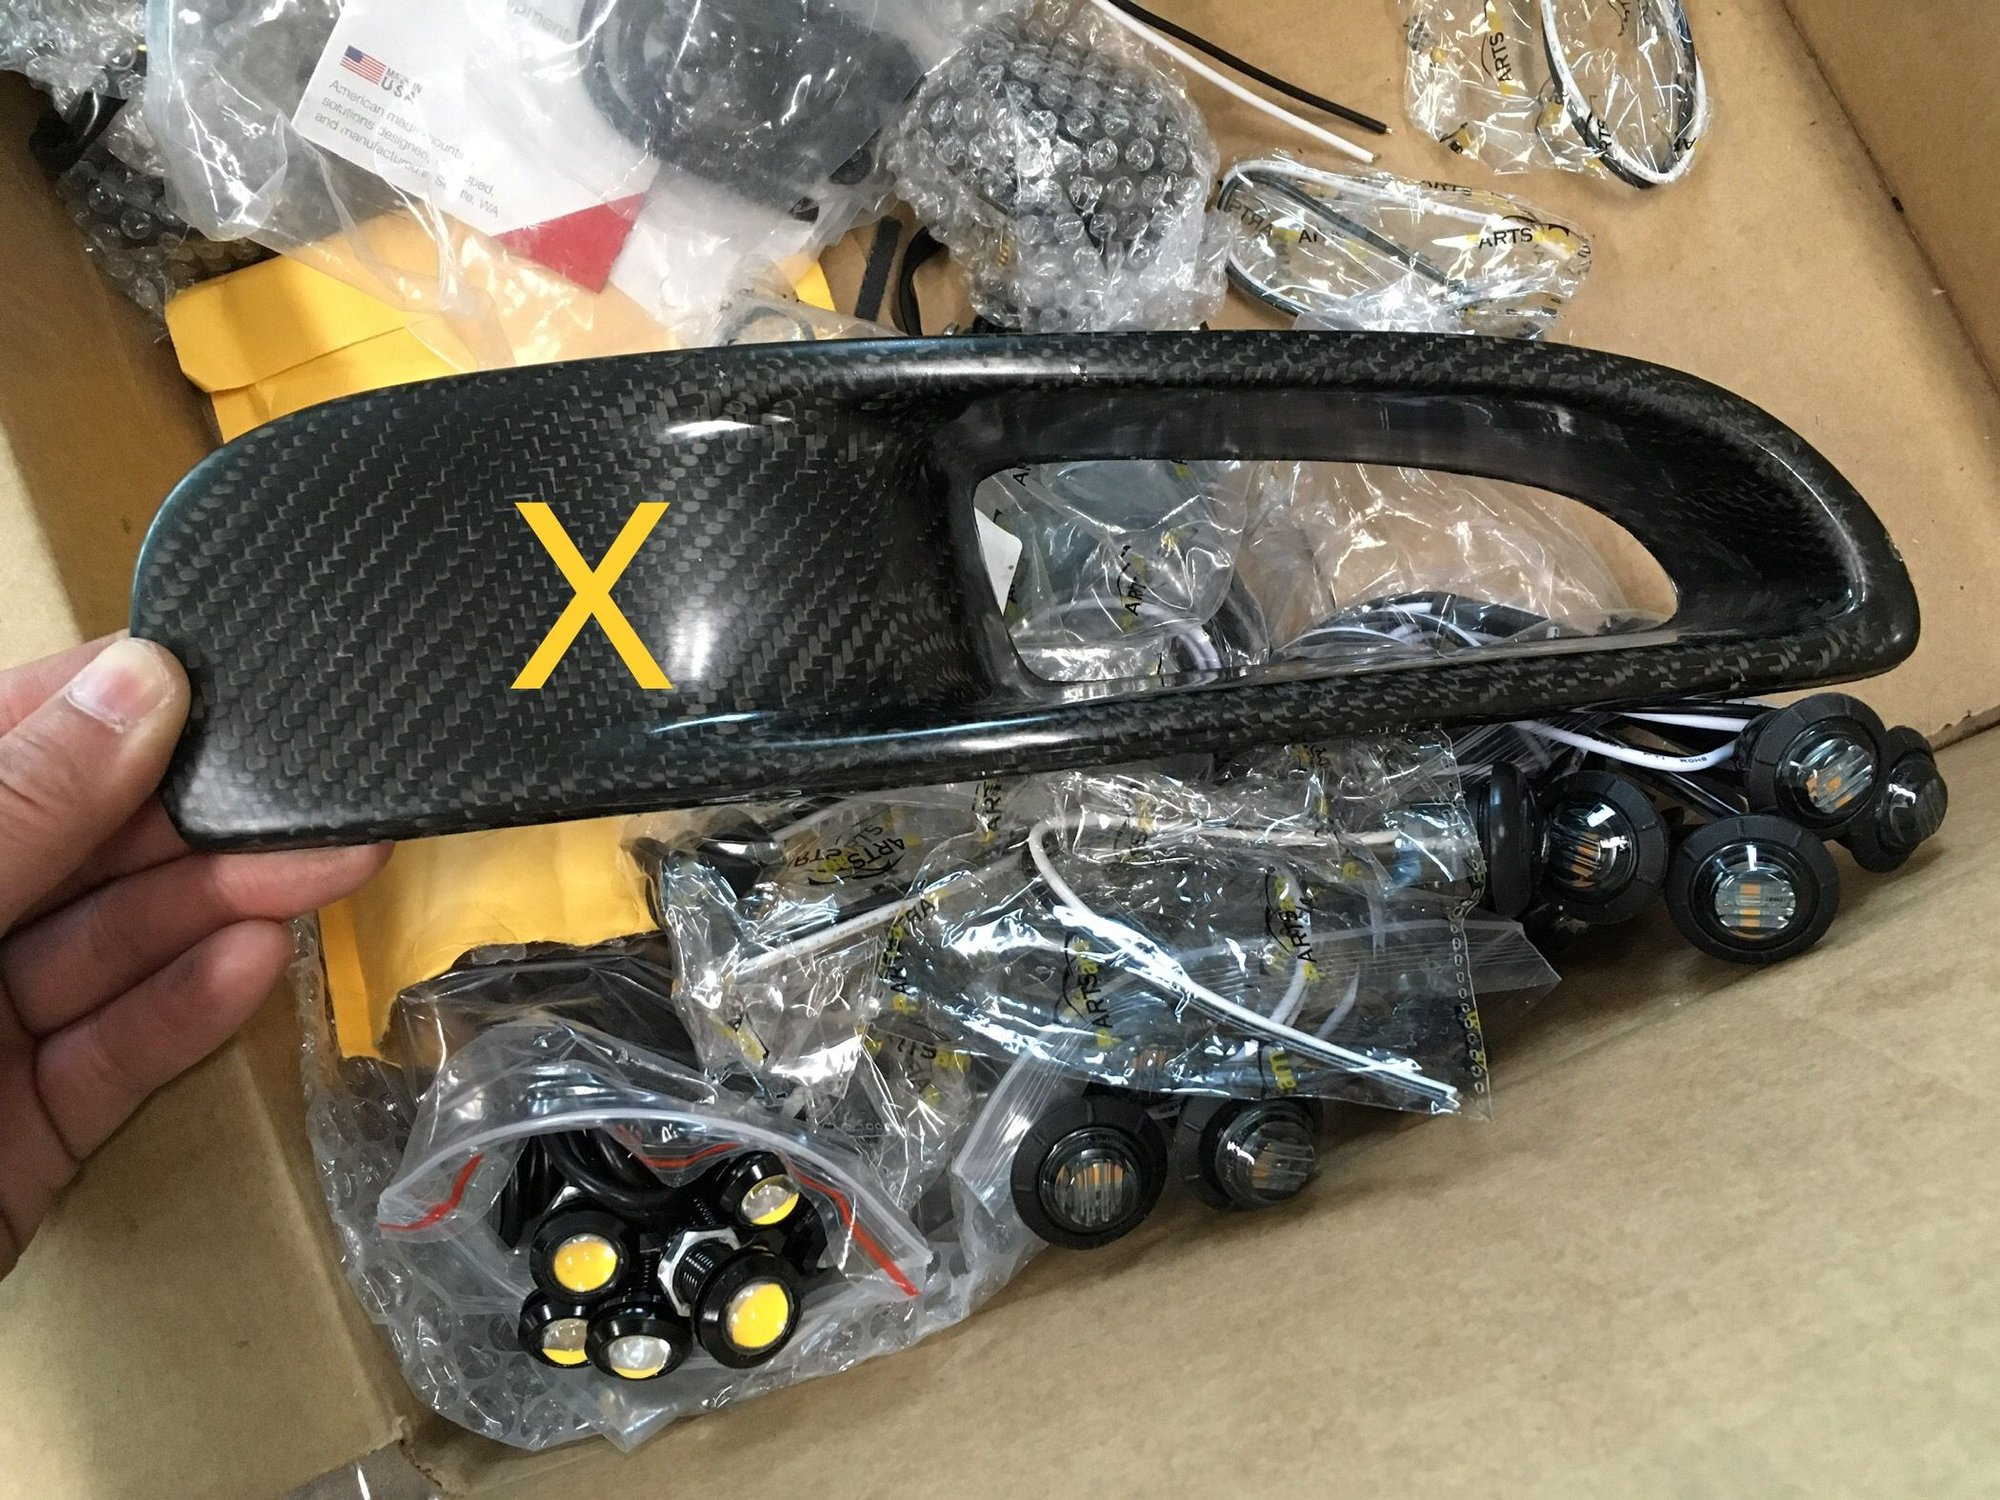
Then I'd drill a hole where the X is and install a turn signal light. I bought a bunch of different lights to choose from should I decide to go this route.
Okay, so let's say I do all that. then I still have two big openings on the carbon fiber pieces that were originally designed for this brake duct shown below. An aftermarket version of this duct cost $2K and cutting fender(the area that above the radiator and below the head light) is required to fit this duct work. Otherwise I'd leave the openings as they are and I'm really back to square one. Or I can make block plates to close those opening but that seems cheesy. Or I can modify the radiator ducts to take in the additional air flow that was originally meant for additional brake cooling.
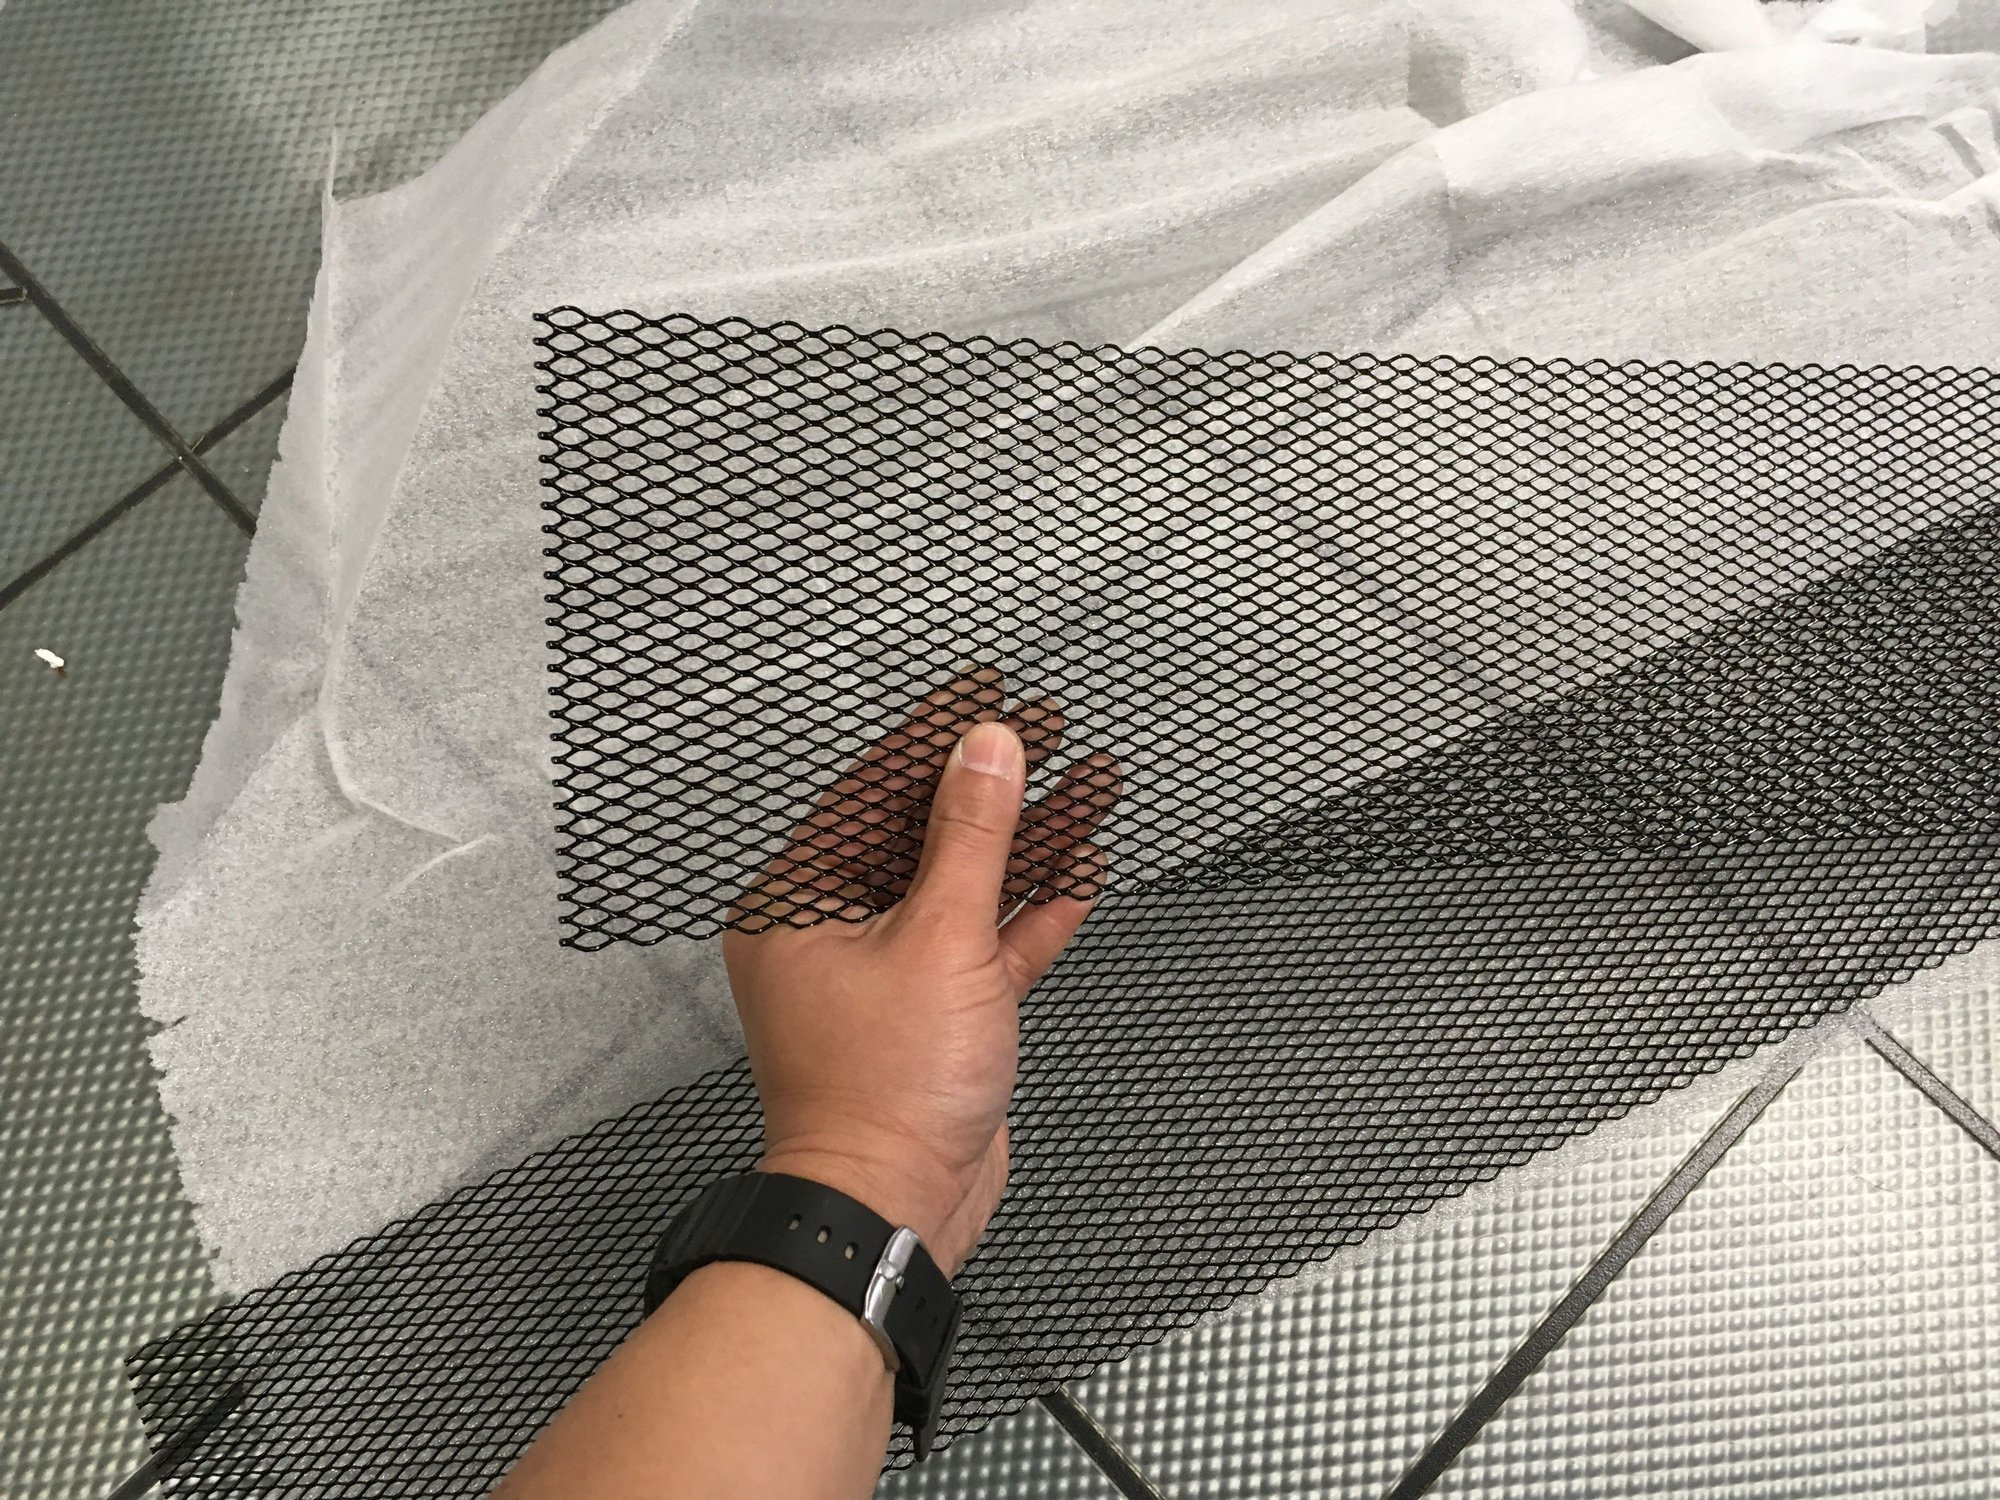
Option 3: Use universal mesh screen to cover the the DRL openings. And then...
...subsequentially have to modify(enlarge) the radiator ducts to take in the air like in the image below. I don't have a way to mold carbon fiber so I would have to use aluminum sheet to make this modification.
And then I still need to make a bracket to hold a turn signal light either behind or in front of the mesh screen.
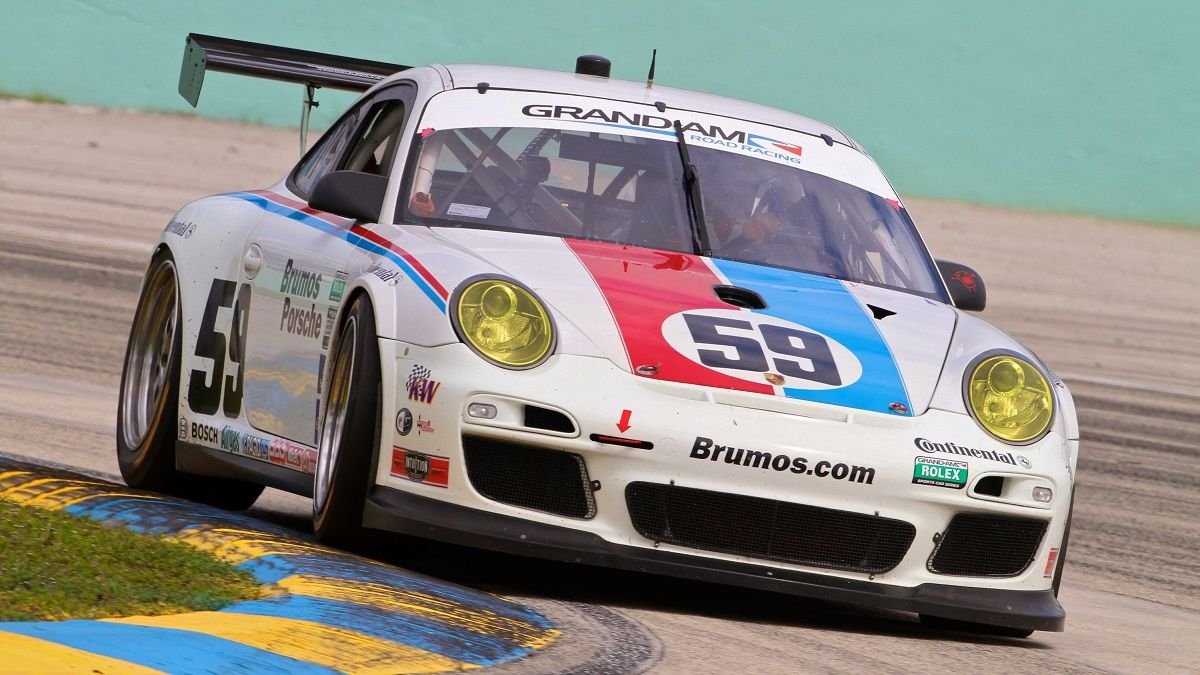
Yeah...these are the thoughts that's been on my mind for hours, days, and months. I also spent hours at night looking at images of different race cars for ideas before passing out. Images like these-
Great work here! Here is what you could do to fill the openings. Ive also included another method of doing the cup tow hook for anyone else looking to do it.
GTC Bumper Brake Ducts and Indicator Lights
Being the ducts are a race part, the carbon finish on them wasnt the best, so I enlisted the help of DbCarbon to overlay a cleaner carbon finish.
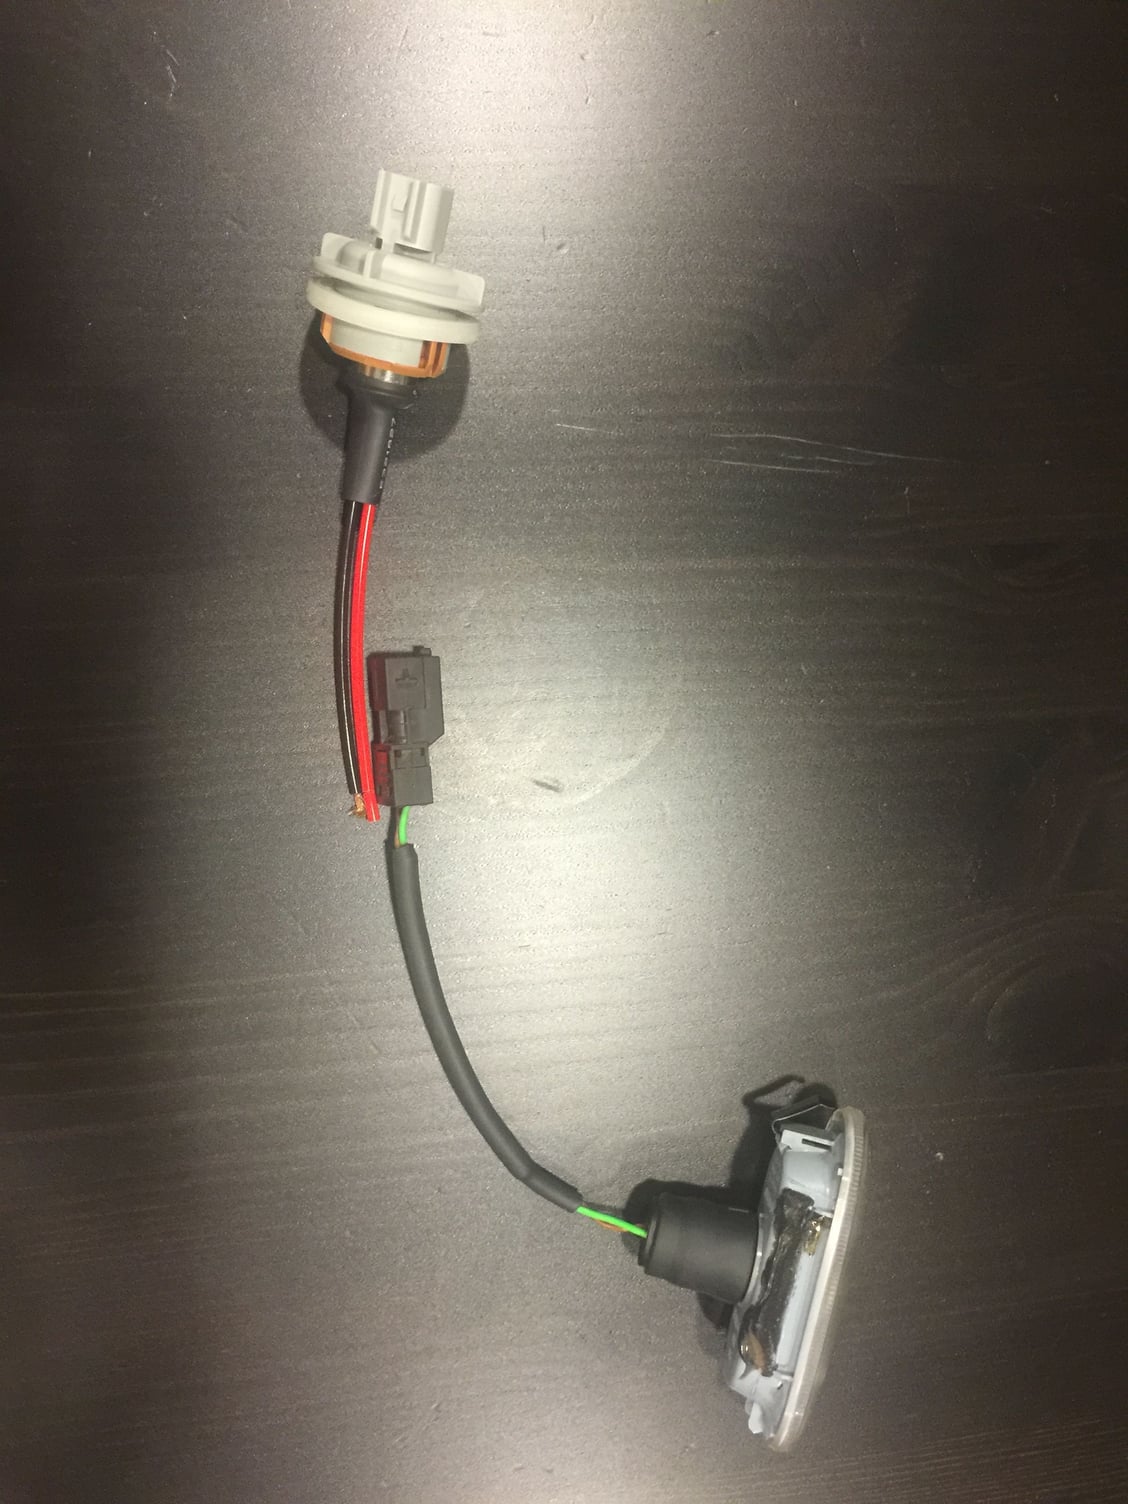
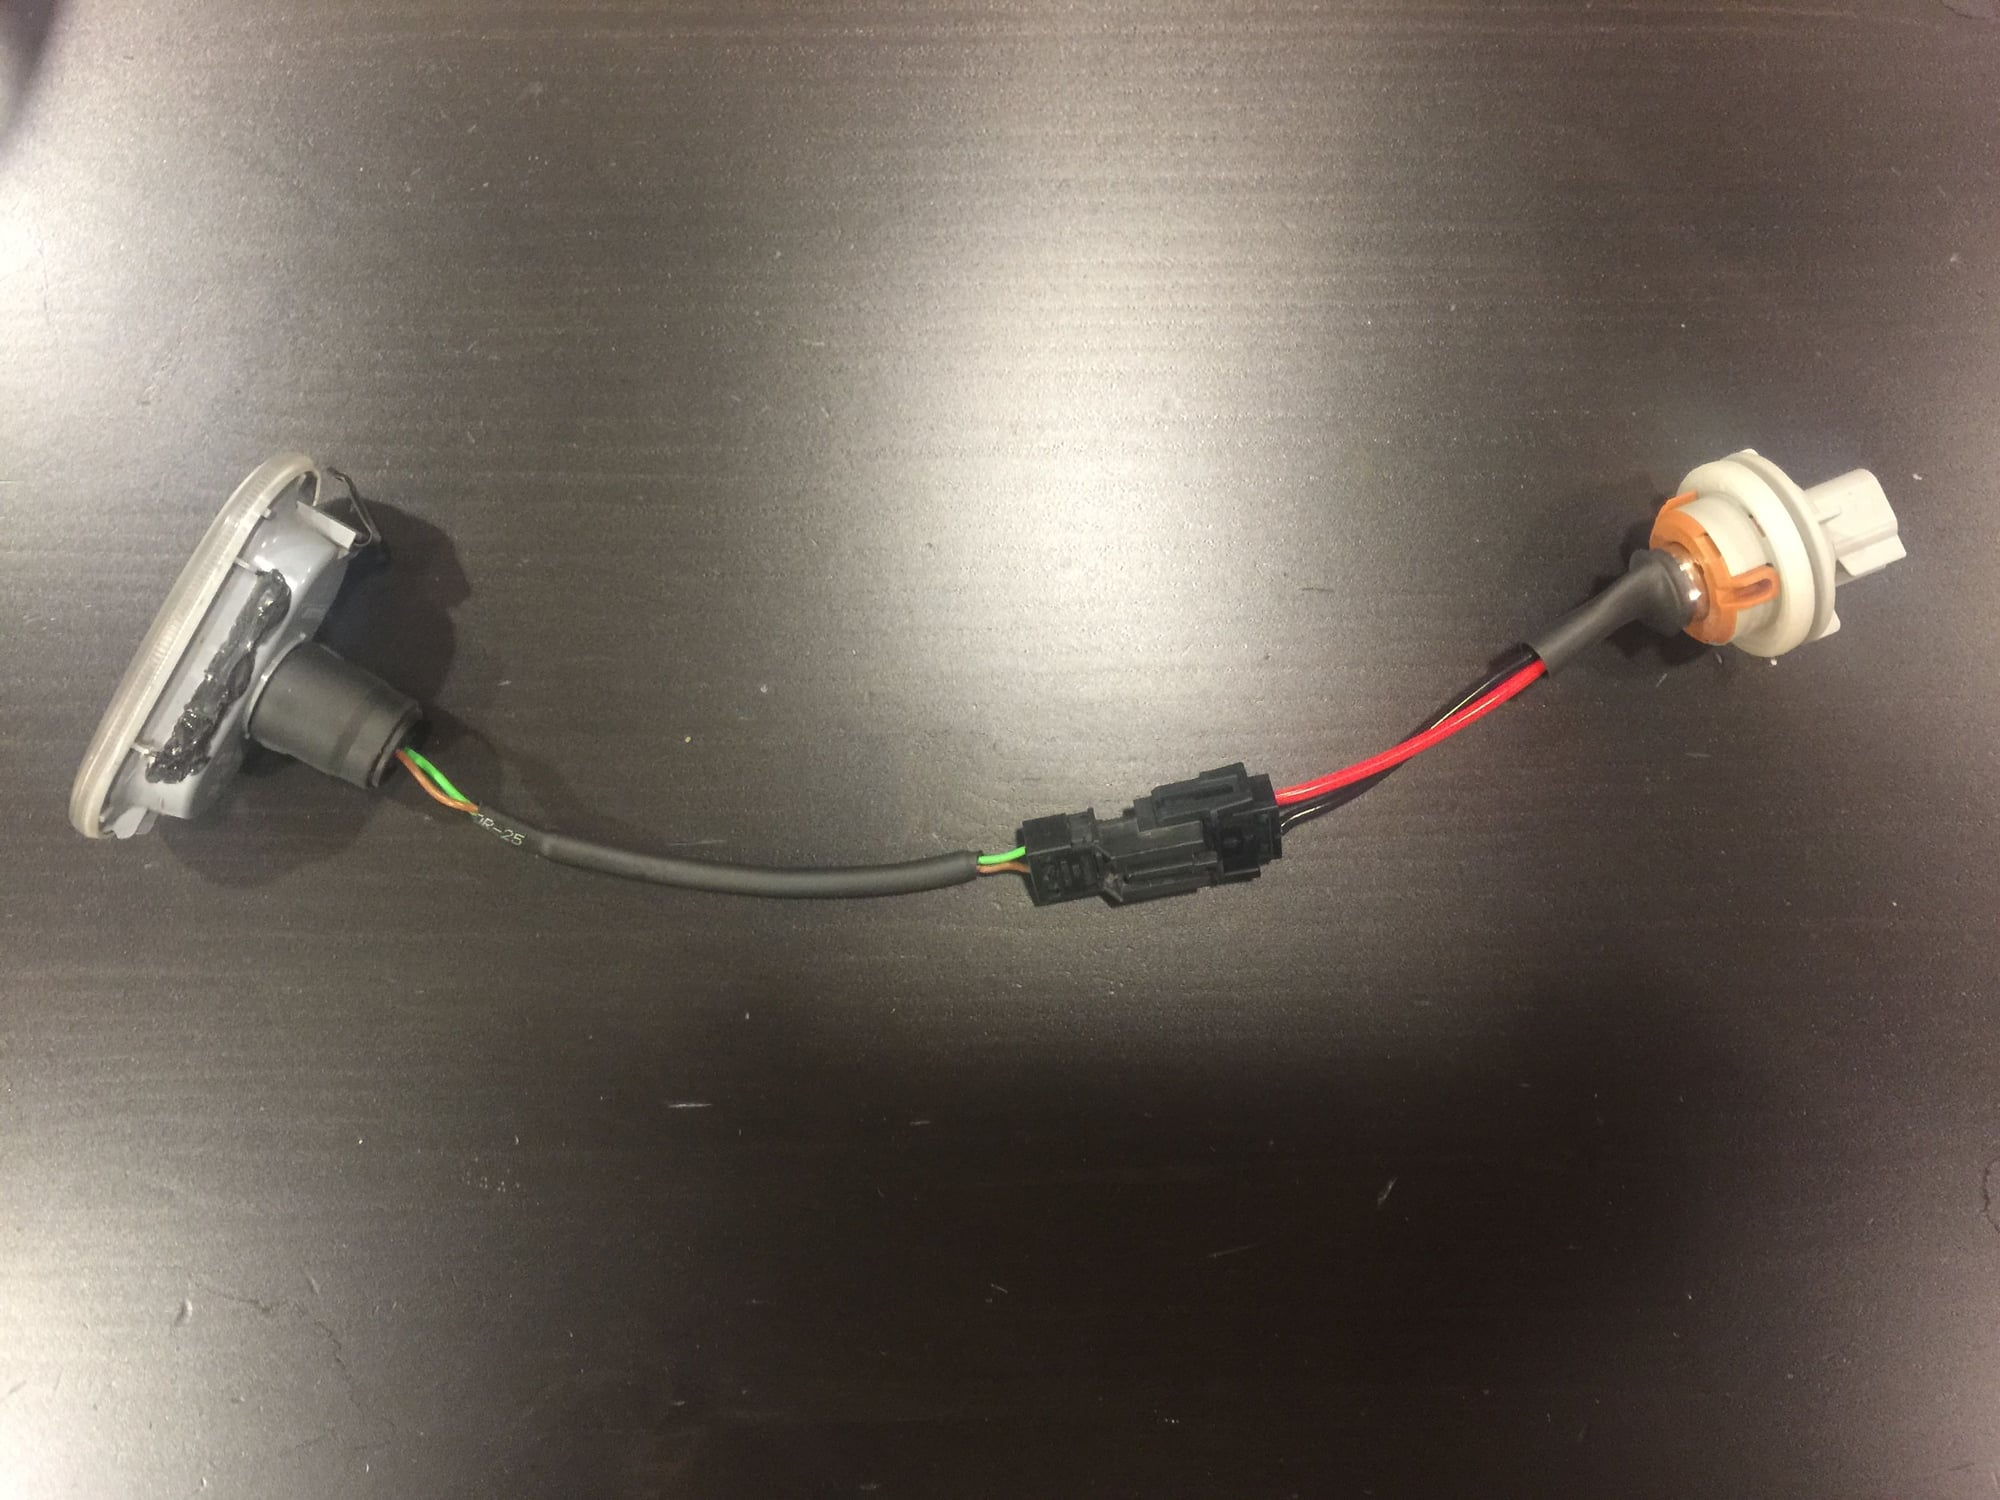
And since the GTC Bumper Brake Ducts take the place of the factory Fog/Indicator lights, I needed a way to retain the turn signals.The ducts themself have a provision for a small indicator, and I learned the factory cups using these ducts use a VW polo side marker light for the indicator. I found a smoked side marker light so that it would blend with the carbon fiber finish of the duct rather than stick out like a sore thumb. Being that I did not want to hack up the OEM indicator wiring and cut off the OEM bulb socket, I needed to come up with a solution to make this plug and play. So I found a socket insert with positive and negative (2X 1156/7506 Male Adapter Wiring Harness For Headlight Tail Lamp Signal Retrofit) and used that to make the wiring harness between the indicator and factory bulb socket. The male and female connector in between are BMW part numbers:
Female housing 611.313.78.106
Metal clip 611.313.76.191
Male housing 611.313.78.108
Metal clip 611.313.76.202 or 611.313.76.204
I chose to use these as the cup cars Ive seen used them and it makes it easier to unplug the indicator light if you need to change the bulb, and pull that through the opening in the duct.
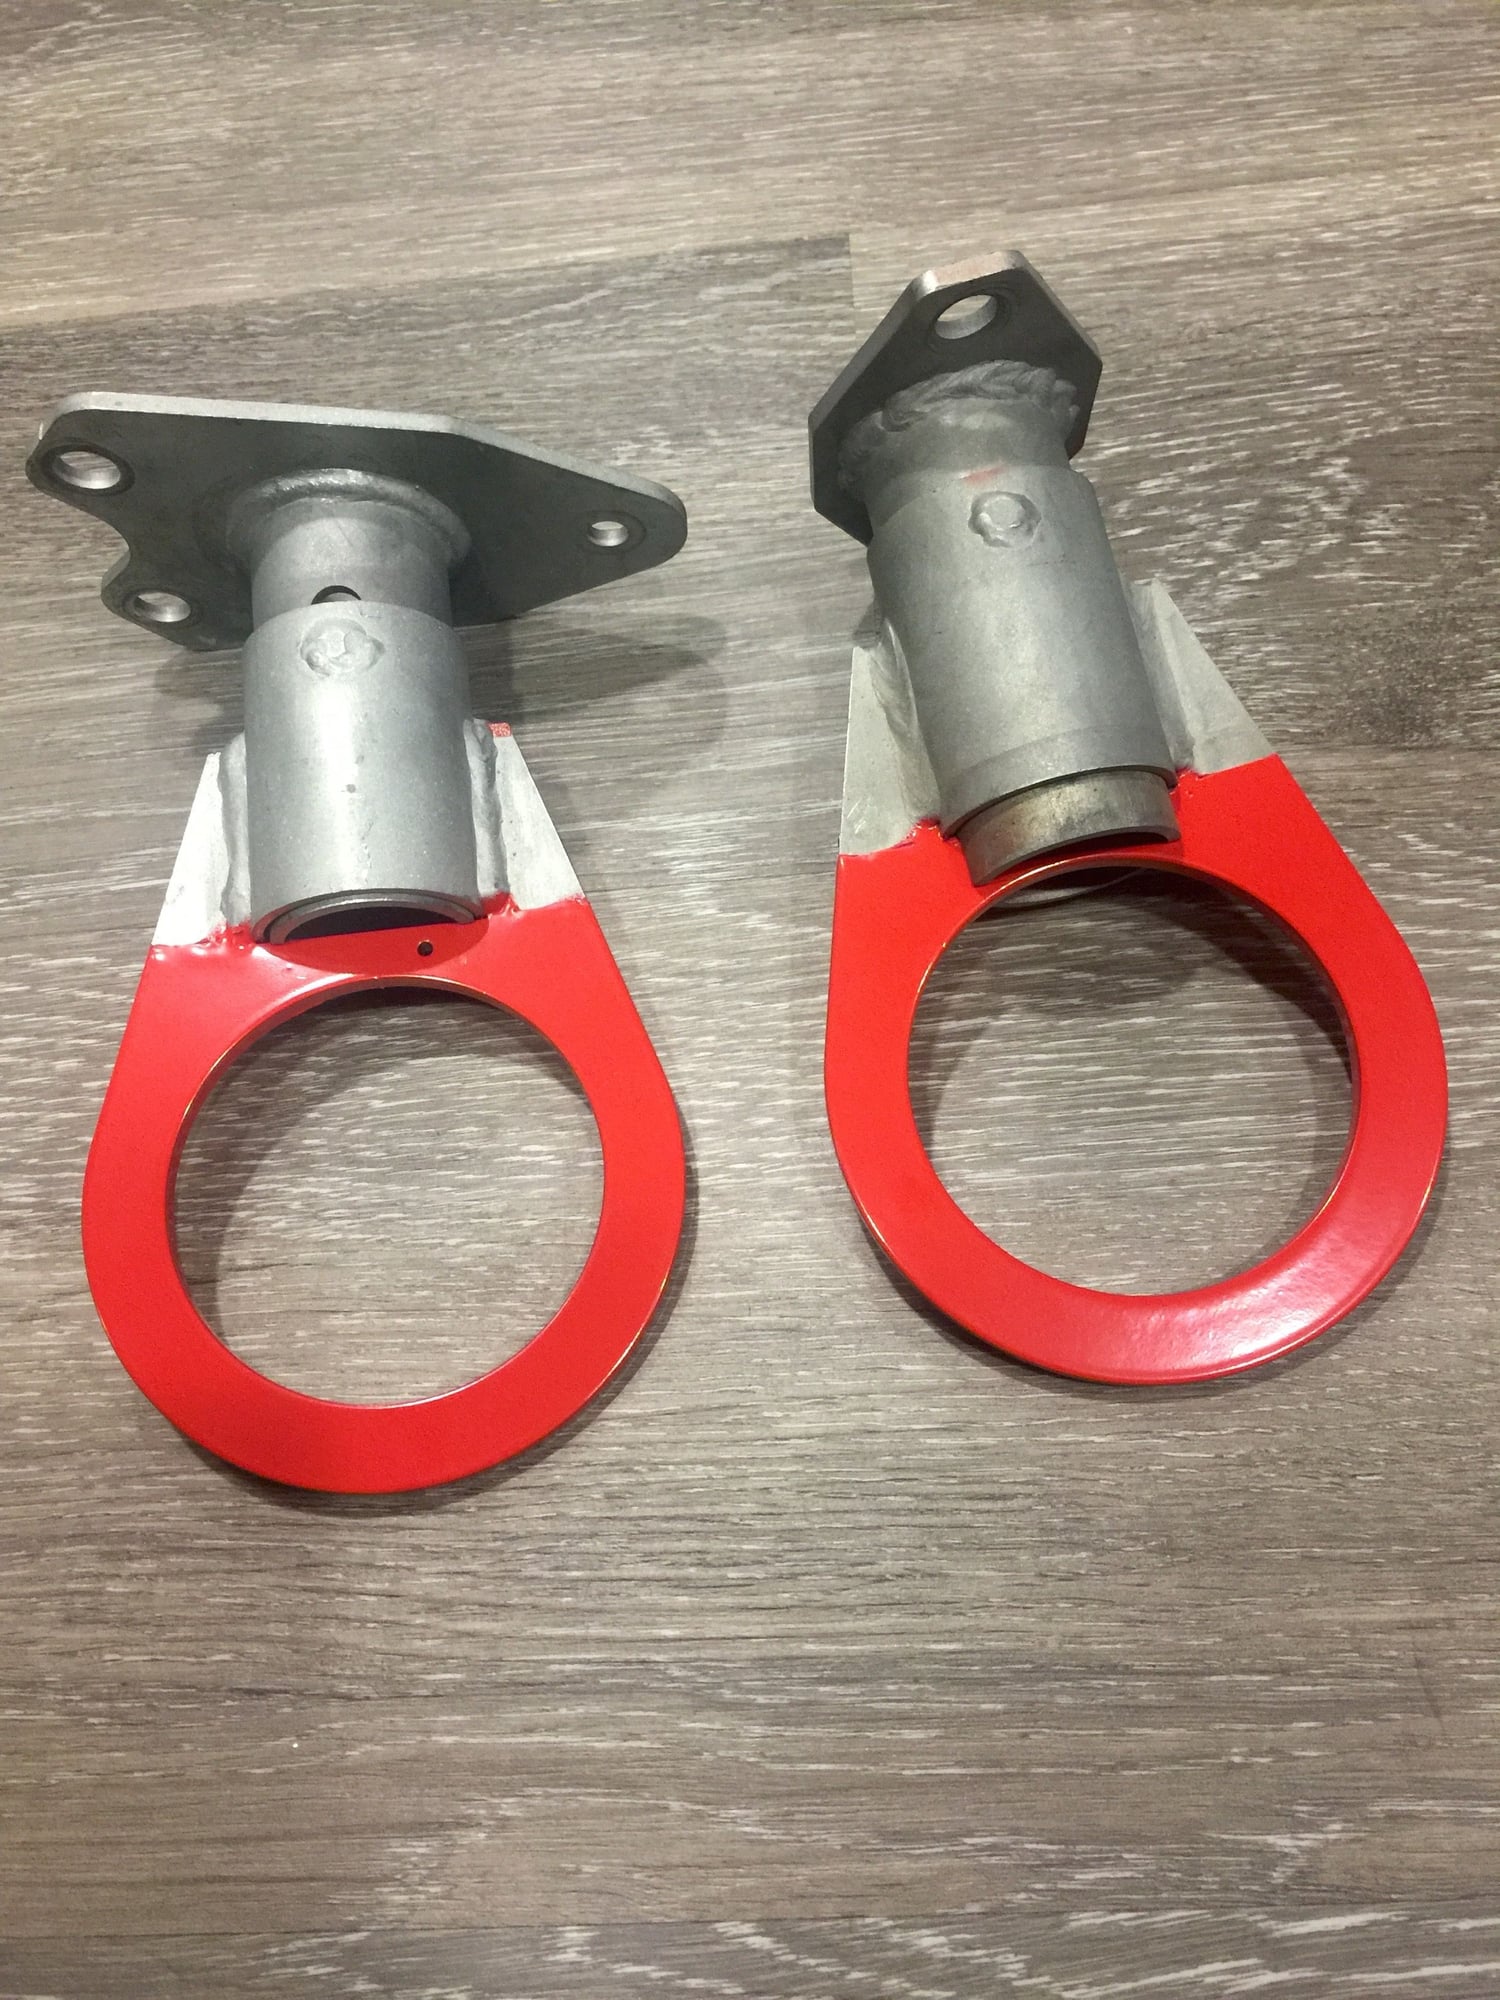
Cup Tow Hooks
Being that I wanted to remain true to form and function, I wanted to use the PMNA Cup tow hooks with my cup bumpers. Being that my car sees street time, removing the factory crash bar was not an option (cups dont have this crash bar). So I needed to come up with a way to retain the crash guard while utilizing the spring loaded cup tow hooks. The nice thing about them being spring loaded is they tuck back into the bumper and not stick out too far when not being used. And since they are bolted directly to the frame, theres no worries of actually using them if ever needed to pull the car.
The crash guard was notched to allow for the tow hook to pass through it, and a bracket was fabricated to allow the crash guard to be secured to it.
Great work here! Here is what you could do to fill the openings. Ive also included another method of doing the cup tow hook for anyone else looking to do it.
GTC Bumper Brake Ducts and Indicator Lights
Being the ducts are a race part, the carbon finish on them wasnt the best, so I enlisted the help of DbCarbon to overlay a cleaner carbon finish.
And since the GTC Bumper Brake Ducts take the place of the factory Fog/Indicator lights, I needed a way to retain the turn signals.The ducts themself have a provision for a small indicator, and I learned the factory cups using these ducts use a VW polo side marker light for the indicator. I found a smoked side marker light so that it would blend with the carbon fiber finish of the duct rather than stick out like a sore thumb. Being that I did not want to hack up the OEM indicator wiring and cut off the OEM bulb socket, I needed to come up with a solution to make this plug and play. So I found a socket insert with positive and negative (2X 1156/7506 Male Adapter Wiring Harness For Headlight Tail Lamp Signal Retrofit) and used that to make the wiring harness between the indicator and factory bulb socket. The male and female connector in between are BMW part numbers:
Female housing 611.313.78.106
Metal clip 611.313.76.191
Male housing 611.313.78.108
Metal clip 611.313.76.202 or 611.313.76.204
I chose to use these as the cup cars Ive seen used them and it makes it easier to unplug the indicator light if you need to change the bulb, and pull that through the opening in the duct.
Cup Tow Hooks
Being that I wanted to remain true to form and function, I wanted to use the PMNA Cup tow hooks with my cup bumpers. Being that my car sees street time, removing the factory crash bar was not an option (cups dont have this crash bar). So I needed to come up with a way to retain the crash guard while utilizing the spring loaded cup tow hooks. The nice thing about them being spring loaded is they tuck back into the bumper and not stick out too far when not being used. And since they are bolted directly to the frame, theres no worries of actually using them if ever needed to pull the car.
The crash guard was notched to allow for the tow hook to pass through it, and a bracket was fabricated to allow the crash guard to be secured to it.
Thank you very much for the awesome info and the pics!!!
I can't tell from the pics, did you block off the openings of the GTC brake ducts or did you channel the air flow to the brakes or radiators? Just wanted to clarify to readers of the thread- The additional air flow via GTC-type ducts to provide either "extra" brake cooling or "extra" radiator cooling is unnecessary for track sessions/races under 90 minutes. Unless its for a low speed street circuit or an engine build that puts out way more heat than original spec. This has been proven by the entire field of factory GT3 Cup cars that have raced with factory equipped OEM street car DRL lamps.


 04-07-2019 | 02:05 PM


 Or I can make block plates to close those opening but that seems cheesy. Or I can modify the radiator ducts to take in the additional air flow that was originally meant for additional brake cooling.