When you click on links to various merchants on this site and make a purchase, this can result in this site earning a commission. Affiliate programs and affiliations include, but are not limited to, the eBay Partner Network.
^I am sure that you will be very pleased with Gert’s modification and work quality.
(Yeah, Gundo hack is not a sexy name, but it somehow achieves the objective. )
When I bought my car it had factory side mufflers and a SW center bypass installed. While I love the dual personality of the valves, I did not like how they were closed for 90% of “normal” driving downshifts. I appreciate some exhaust feedback on rev-matched downshifts even at low RPM. I installed side muffler deletes and the OEM center muffler and could not be happier.
I’m sure you will love the modified side mufflers, can I ask why you didn’t just bypass them completely? Did you want to retain the valves?
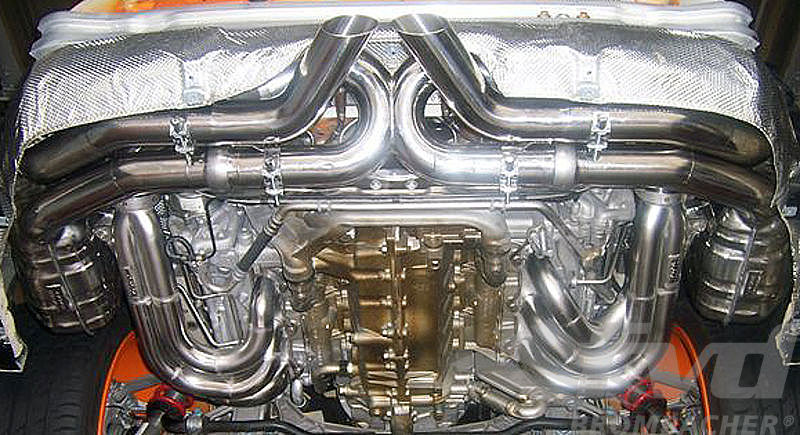
I'm running a full Brombacher system. I no longer have valves, just long tube headers into 200 cell HJS cats and then into the side muffler's. There is no room for a center muffler.
Looks so much better. Can I ask if you did it yourself or had a shop do it? If you did it, can you break it down for us. I keep hearing it's a pain. I've done it in the past for picture cars but no real care was taken and we just went at it.
Looks so much better. Can I ask if you did it yourself or had a shop do it? If you did it, can you break it down for us. I keep hearing it's a pain. I've done it in the past for picture cars but no real care was taken and we just went at it.
Originally Posted by jreifler
Nice. Next on my list as well. Let us know if you have tips.
Thanks—did it myself. Biggest tip I can give is to buy a clothing steamer, I bought a $25 steamer off of Amazon. Then you just use that on the interior of the tinted window to help melt the glue.
For the side windows I used razor blades to lift up a corner of the tint once the glue has melted and then hopefully you can start pulling off strips of tint. If you’re finding it difficult, just apply more steam and liberal use of steam is your best friend here. There will likely be some glue remaining on the window and you can steam that off as well and just scrape at it with the razor blade. Would recommend wearing at least one glove for this process both to avoid steam burns and protect against cuts. The rear side windows are tough to get started but what helped me was just slicing the tint near a corner instead of trying to start at the corner of the tint itself.
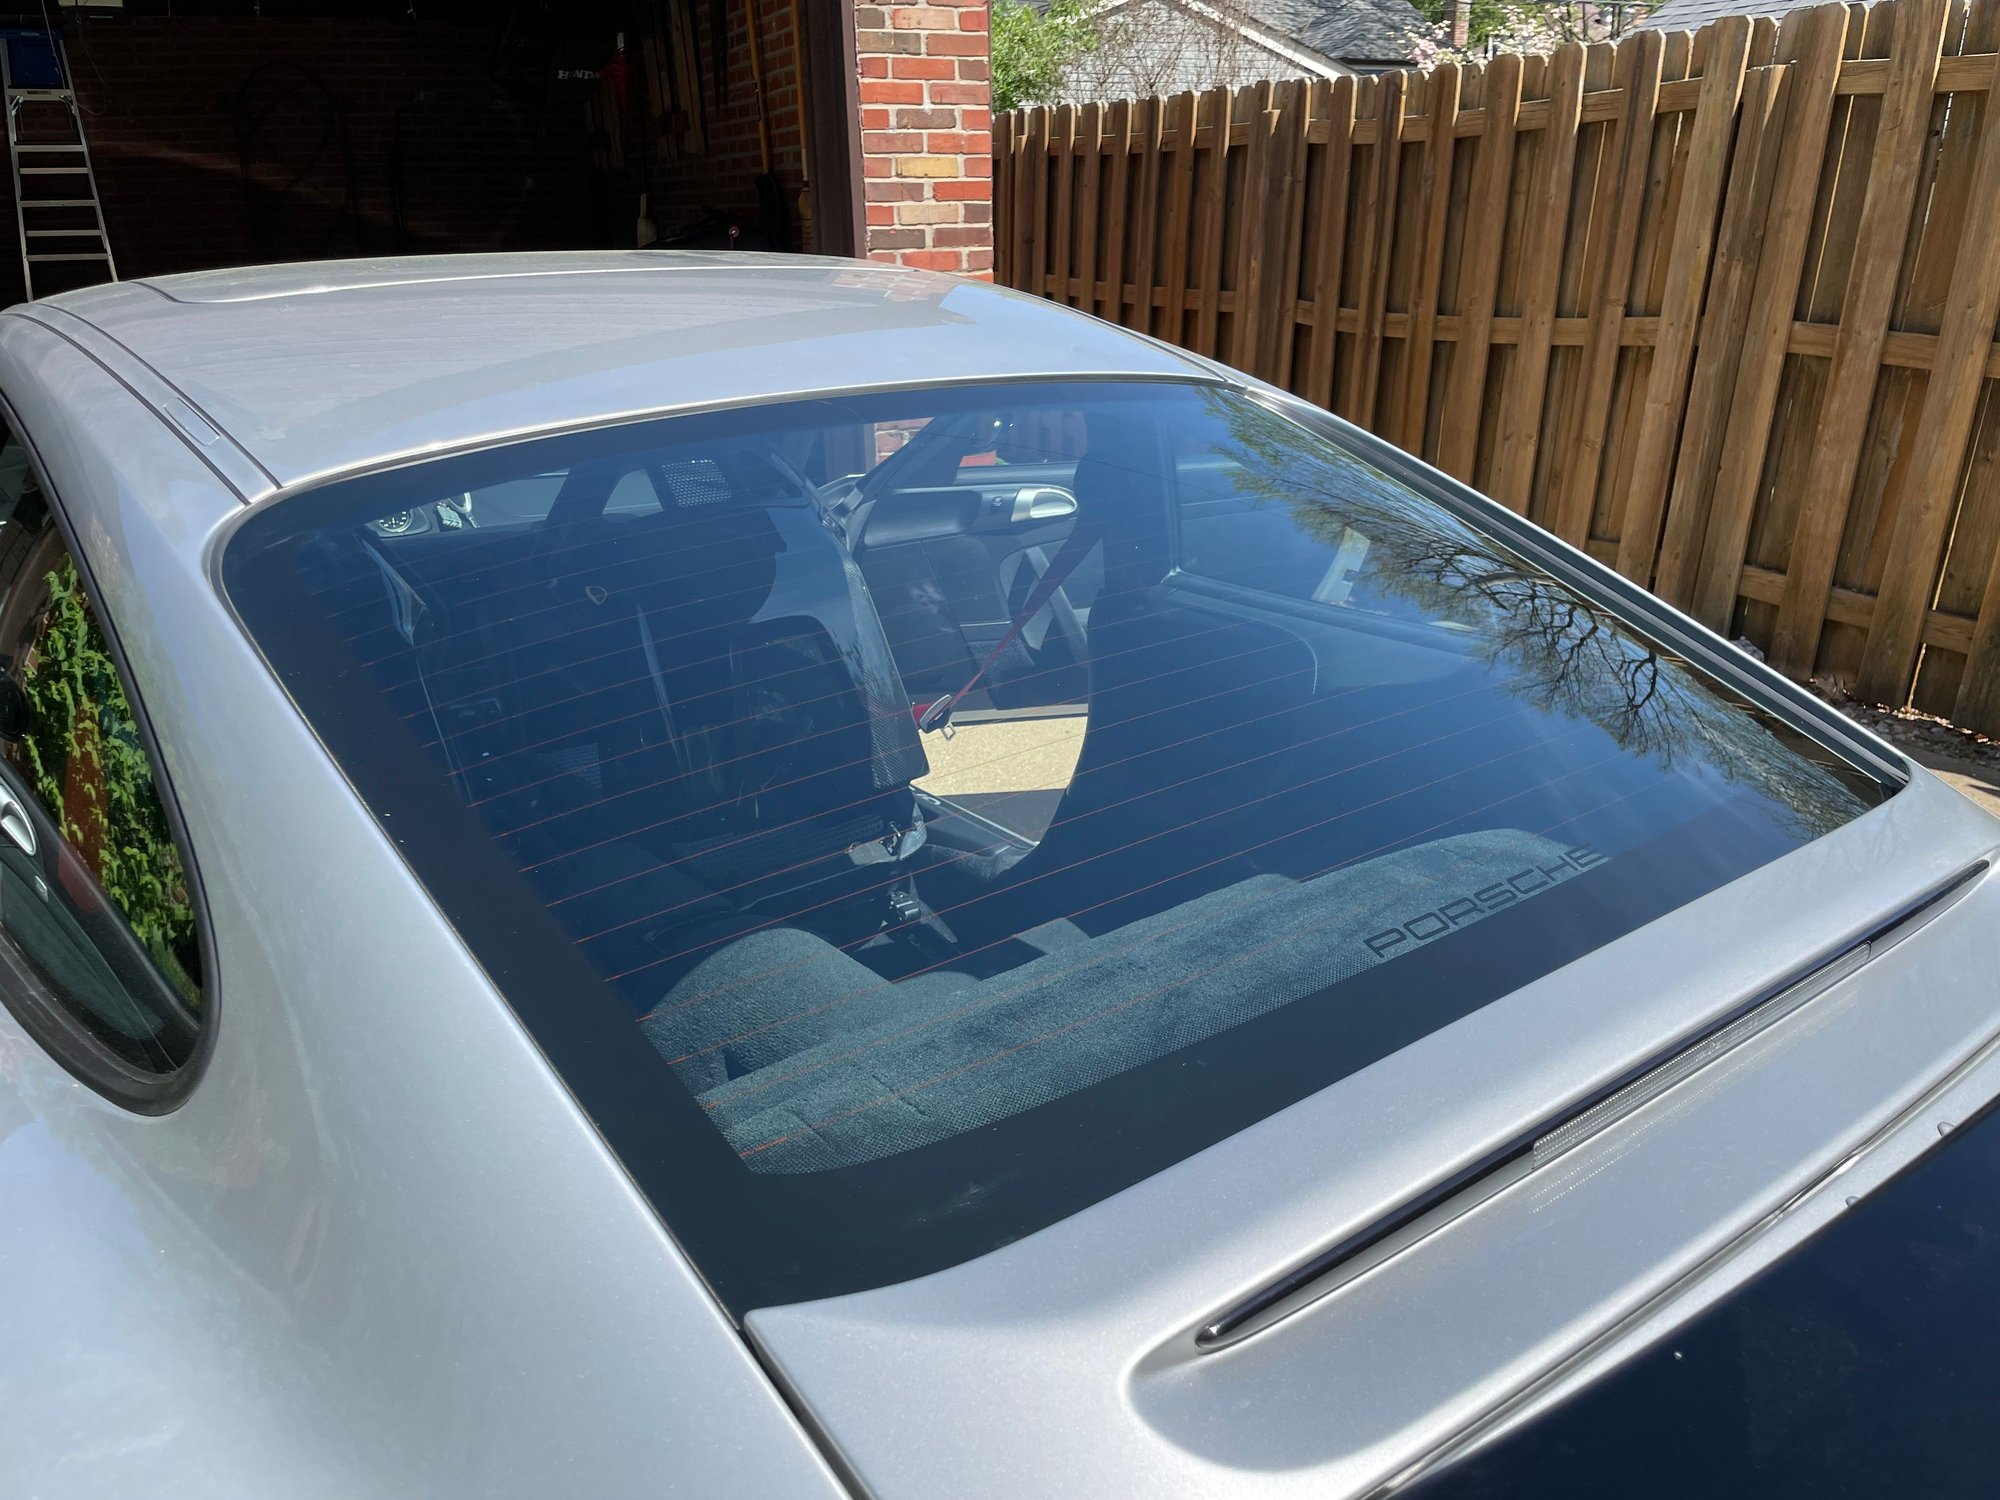
The back window is trickier because of the defrost lines and you can’t go over them with the razor or you’ll damage them. After liberal application of steam in a corner, I started just a corner with the razor blade (but not going near a defrost line). And then I did my scraping with a plastic scraper (something like
Thanks—did it myself. Biggest tip I can give is to buy a clothing steamer, I bought a $25 steamer off of Amazon. Then you just use that on the interior of the tinted window to help melt the glue.
For the side windows I used razor blades to lift up a corner of the tint once the glue has melted and then hopefully you can start pulling off strips of tint. If you’re finding it difficult, just apply more steam and liberal use of steam is your best friend here. There will likely be some glue remaining on the window and you can steam that off as well and just scrape at it with the razor blade. Would recommend wearing at least one glove for this process both to avoid steam burns and protect against cuts. The rear side windows are tough to get started but what helped me was just slicing the tint near a corner instead of trying to start at the corner of the tint itself.
The back window is trickier because of the defrost lines and you can’t go over them with the razor or you’ll damage them. After liberal application of steam in a corner, I started just a corner with the razor blade (but not going near a defrost line). And then I did my scraping with a plastic scraper (something like https://www.amazon.com/gp/aw/d/B0039...b_b_asin_title).
Sooo, ever tried with dry heat? I just did my driver’s side window with a heat gun, and literally all the glue stuck. I have the proper chemicals to remove, but was hoping for better separation. Wondering if the steam is better than dry heat, or if mine is just really baked on. Not thrilled about doing the rest myself, and yet not trustworthy enough to let a random shop dig around the full leather and carbon buckets to get to the rest.
Sooo, ever tried with dry heat? I just did my driver’s side window with a heat gun, and literally all the glue stuck. I have the proper chemicals to remove, but was hoping for better separation. Wondering if the steam is better than dry heat, or if mine is just really baked on. Not thrilled about doing the rest myself, and yet not trustworthy enough to let a random shop dig around the full leather and carbon buckets to get to the rest.
I have not--this was my first time removing tint. I will say that with steam yes there was still glue residue on the window after the tint came off, but another 5 seconds of steam with the tint off and the glue just turns to mush that comes right off with one or two effortless scrapes of the razor blade or plastic scrapper so I wasn't too concerned about getting the tint and glue off in one go.
I'd think with dry heat you'd need to be more careful with your leather, rubber, etc that surrounds the window as it's probably easier to damage than with steam but I could be wrong.
I will say that I was fully prepared for this project to be very painful and it ended up being much less so than I expected. I did actually split it up across three different days (first day front window, second rear side and third rear window) and it maybe took 30 minutes the first two days and an hour the third. Granted YMMV depending on the specific tint installed on your car and the condition it's in.
Here's the specific steamer I bought (didn't use any of the extra attachments):
For side windows, a liberal amount of windex and a new razor blade will get it off quickly. Have lots of paper towels handy. For any remaining spots that may be hard to get to, use 000 steel wool and more windex.
For the rear glass, 000 steel wool and 3M or other professional level adhesive remover. On cars with less worry, brake clean and a microfiber rag works wonders! Not sure I would try this inside of a 997 cabin though.
I actually have the professional grade adhesive remover. It does eat right through the glue and makes it easily removable with a plastic razor blade or even coarse microfiber with a little more solvent sprayed on. Problem is that literally all the adhesive remained on the first window, all the way down into the inner seals. So, it’s a massive pain in the *** to get that entirely removed. I think I’ll get the steamer before moving on with the remaining glass.
I actually have the professional grade adhesive remover. It does eat right through the glue and makes it easily removable with a plastic razor blade or even coarse microfiber with a little more solvent sprayed on. Problem is that literally all the adhesive remained on the first window, all the way down into the inner seals. So, it’s a massive pain in the *** to get that entirely removed. I think I’ll get the steamer before moving on with the remaining glass.
The issue with removing tint is the threshold at which you can remove both the film and adhesive. Too cold, won’t pull adhesive. Too hot, won’t pull adhesive. There is a “sweet spot” and steam is the easiest way to get there.


 04-20-2023, 11:09 PM