When you click on links to various merchants on this site and make a purchase, this can result in this site earning a commission. Affiliate programs and affiliations include, but are not limited to, the eBay Partner Network.
That looks like a pretty sophisticated/technical tool, if it works, will be almost as fun to use as wearing those shoes !!
Early testing shows that I need smaller tubing or thicker gauge wire.
Originally Posted by 808Bill
LOL! My eyes went right to the shoes when I opened this pic.
Originally Posted by Scott at Team Harco
I'd also change footwear before doing that. Those slippers are a major fashion faux pas.
Au contraire mes fr�res! That picture you are so quick to judge is lacking context. I co-host a small vintage BMW meet every year and these shoes will go with the decor for the Friday night event. You kind of would have to be here to see how the shoes and the BMW pennants really tie the party room together.
Yep, replacing the AOS on a .2 is harder than a .1 , and a Tip is harder than a 6MT, so you get a double whammy !! The .1 6MT being the easiest .
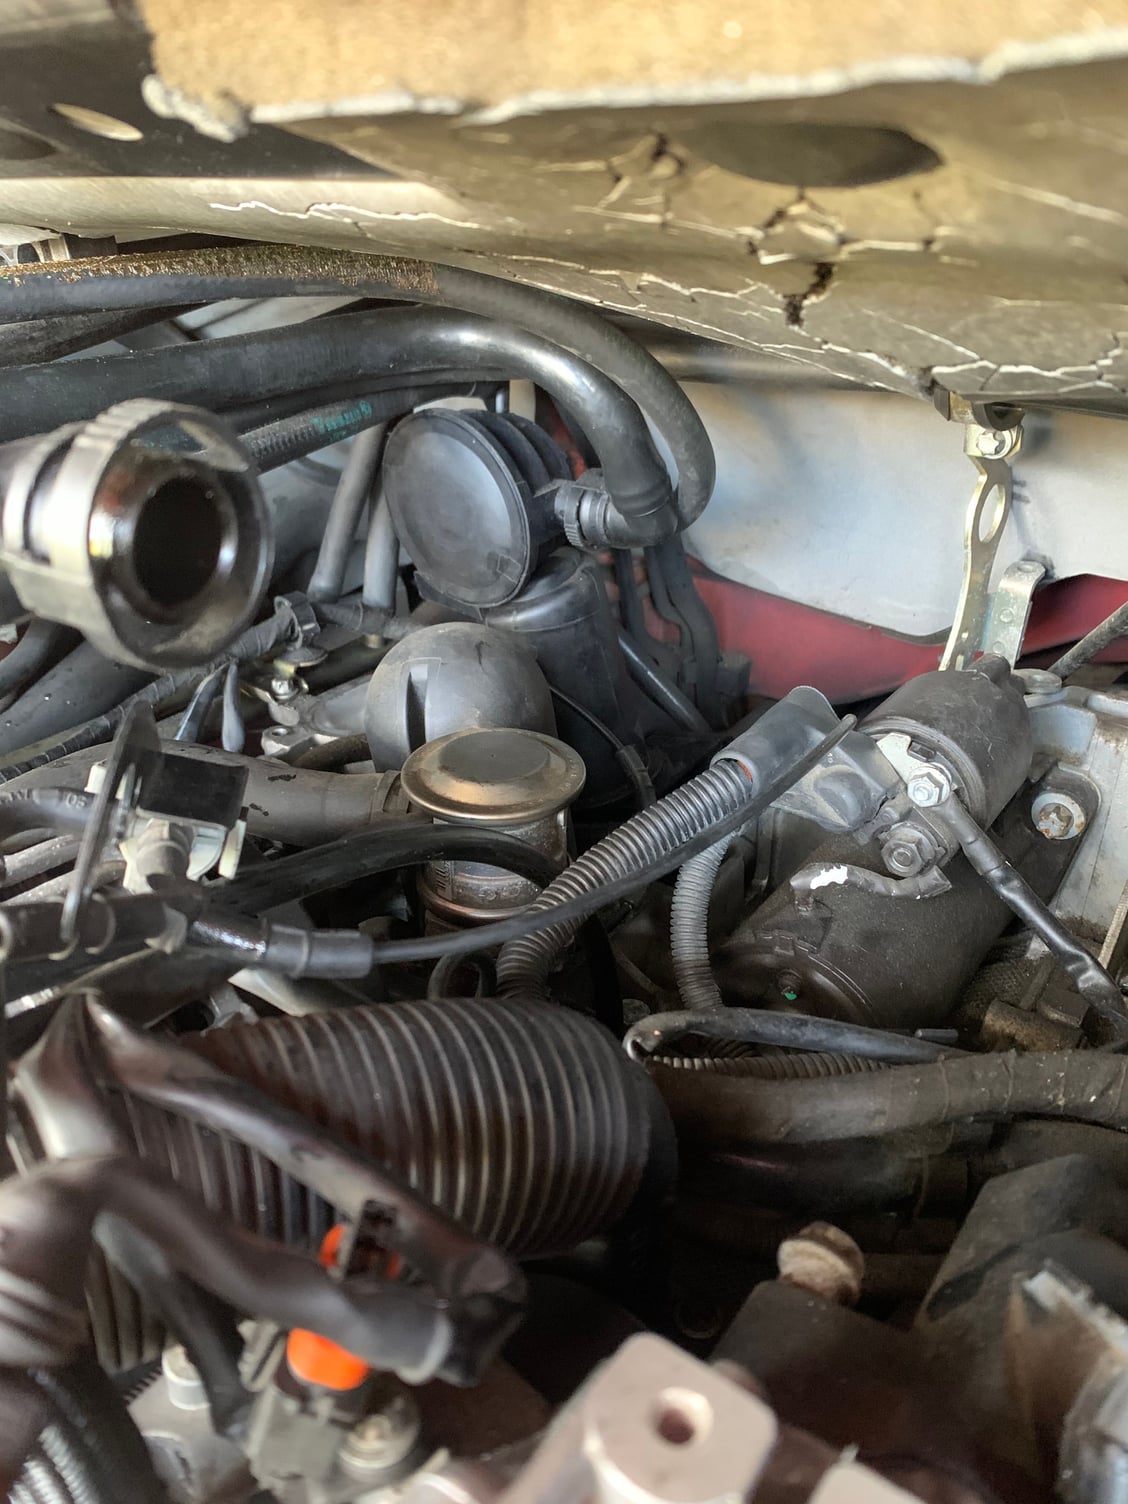
The key to an efficient and non-intrusive procedure is to disturb as little as possible, That said I started to include the URO aluminum aos heater hose connector to the UAOS kit due to it being a good "while your in there" thing to due and because someone can break that off if they still have the original oem plastic one. But I decided not to include it or have as an option to complicate things, drive up the price, and a lot of people already have this addressed.
So if you have the OEM plastic connector, then get the URO aluminum one and install "while doing the UAOS". It can be done quickly without draining the cooling system if you use two clamps above and below the connector.
great advice. The cheap factory connector will break eventually if you spend time around the TB. There�s a good reason an aluminum aftermarket part was developed.
Au contraire mes fr�res! That picture you are so quick to judge is lacking context. I co-host a small vintage BMW meet every year and these shoes will go with the decor for the Friday night event. You kind of would have to be here to see how the shoes and the BMW pennants really tie the party room together.
Here are some additional tips for removal of the old AOS and installation of the UAOS.
They are kind of random thoughts, so if it seems like I'm rambling...I am.
I assume you already know to raise the car as high as you can (your back will thank you) and to lower the engine,
I have two fully stocked tool boxes that I can choose from and here are the main tools that I used:
You'll want a very small 1/4" wratchet. I use an old Snap-on ratchet.
It is thinner than the Hazet, Craftsman, or Proto ones that I also own.
I grabbed every extension that I owned, and used almost everyone.
Once I found the perfect length to use for a specific task, I left it as-is.
I taped the sockets and extension with electrical tape so they wouldn't come off and fall into the engine compartment...and IF they did, they would be less likely to fall somewhere bad. (i.e. into the engine)
I also have some magnetic 10mm sockets.
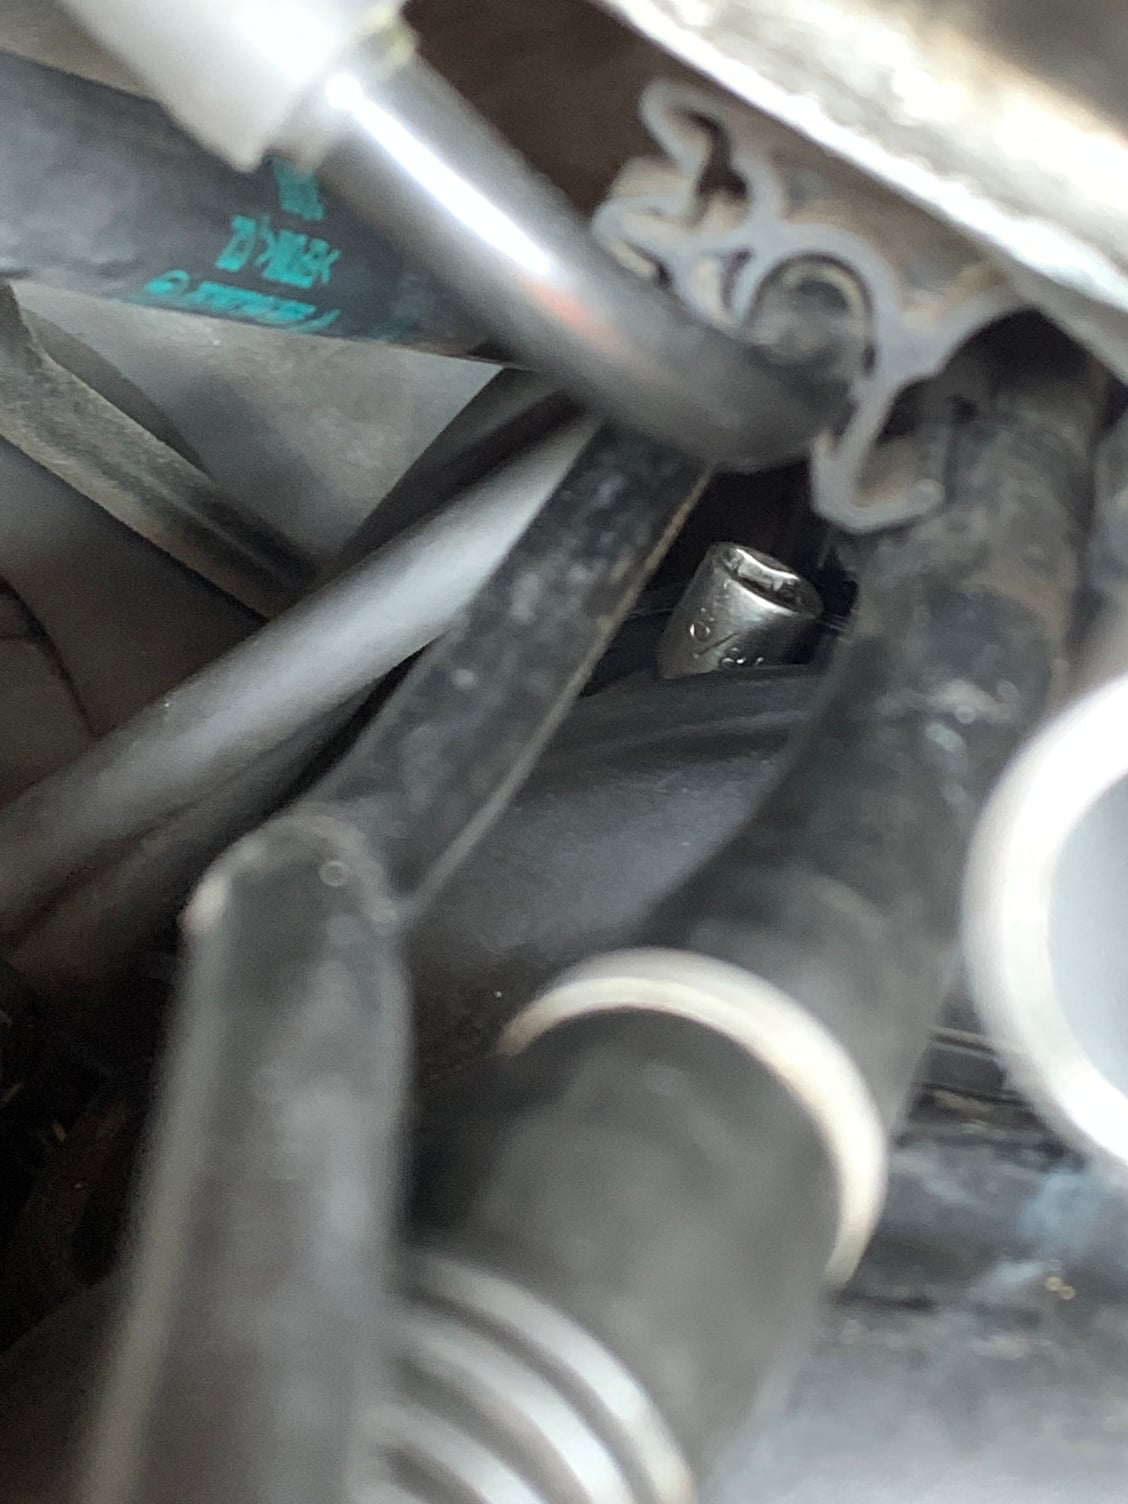
These are perfect for getting the second AOS bolt on the 996.2, or the #6 intake manifold bolt affectionately called "the bitch bolt."
Once it was on the bolt, I could let go of the extension and it would normally stay in place.
I'll have even more of these magnetic sockets next time I install an UAOS.
I bought mine sometime ago off of Amazon and hadn't used them much before.
Some cars may have torx bolts instead of 10mm hex bolts, so check you car first before buying the magnetic sockets.
Also, don't forget you'll need a tamper proof torx for the brake booster fitting/UAOS Accumulator\changeover valve bracket.
I have a set that I bought at Harbor Freight that I'd never used before...boy was I glad I had them!
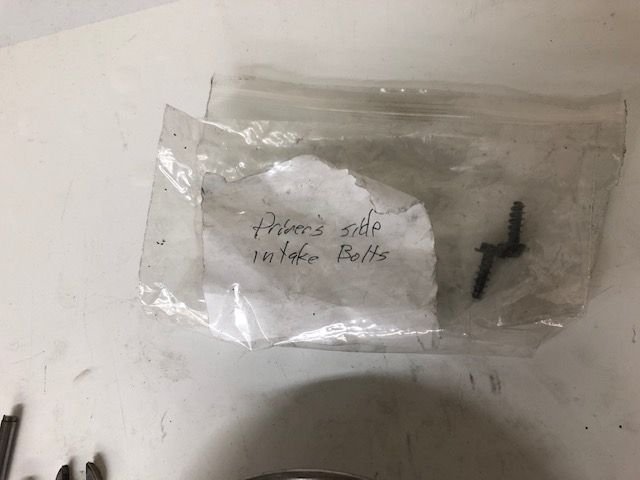
Have a magnetic tray available and when you finish removing the part, place all the bolts in a ziplock bag, grab a piece of paper, and write down what the bolts are for.
If you end up doing the AOS over several days, or in my case, over a week, you WILL forget what bolts are for.
Be prepared to replace extra items too.
My oil filler tube broke probably because I was laying on the engine trying to connect one of the oil vapor lines to the UAOS.
I put all of my removed parts (except for my skid plate) into a trashbag lined box in the front seat of my car.
This way I didn't misplace any parts.
I HATE hunting for parts.
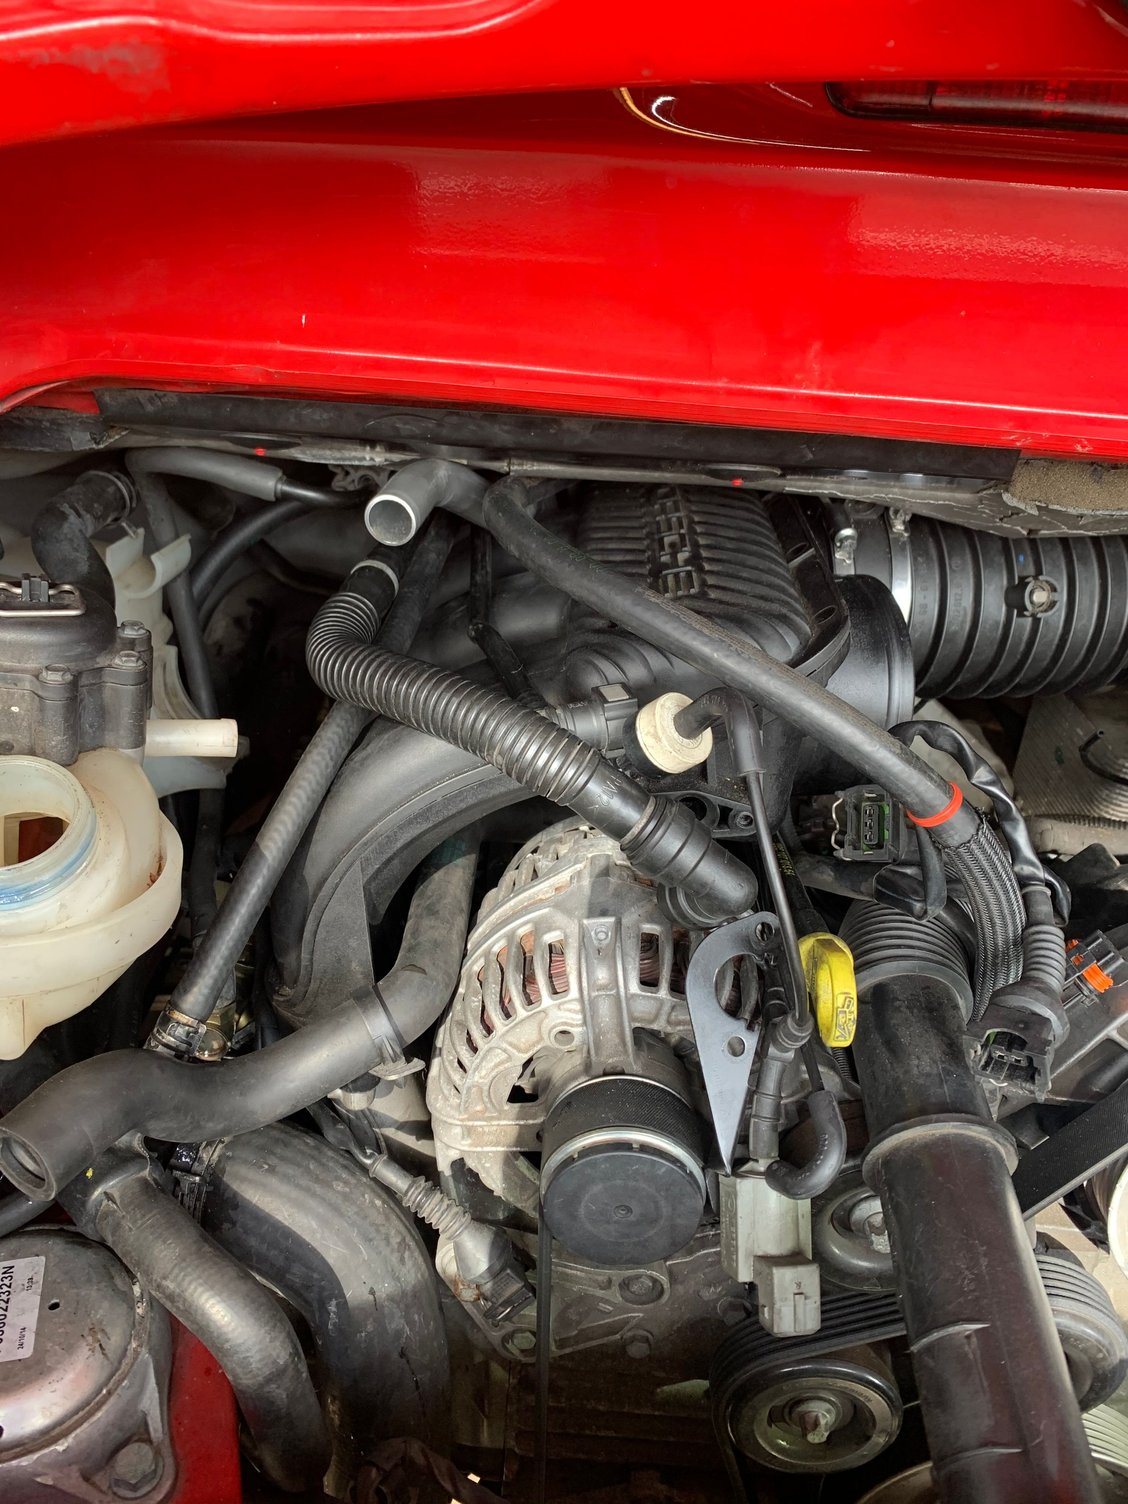
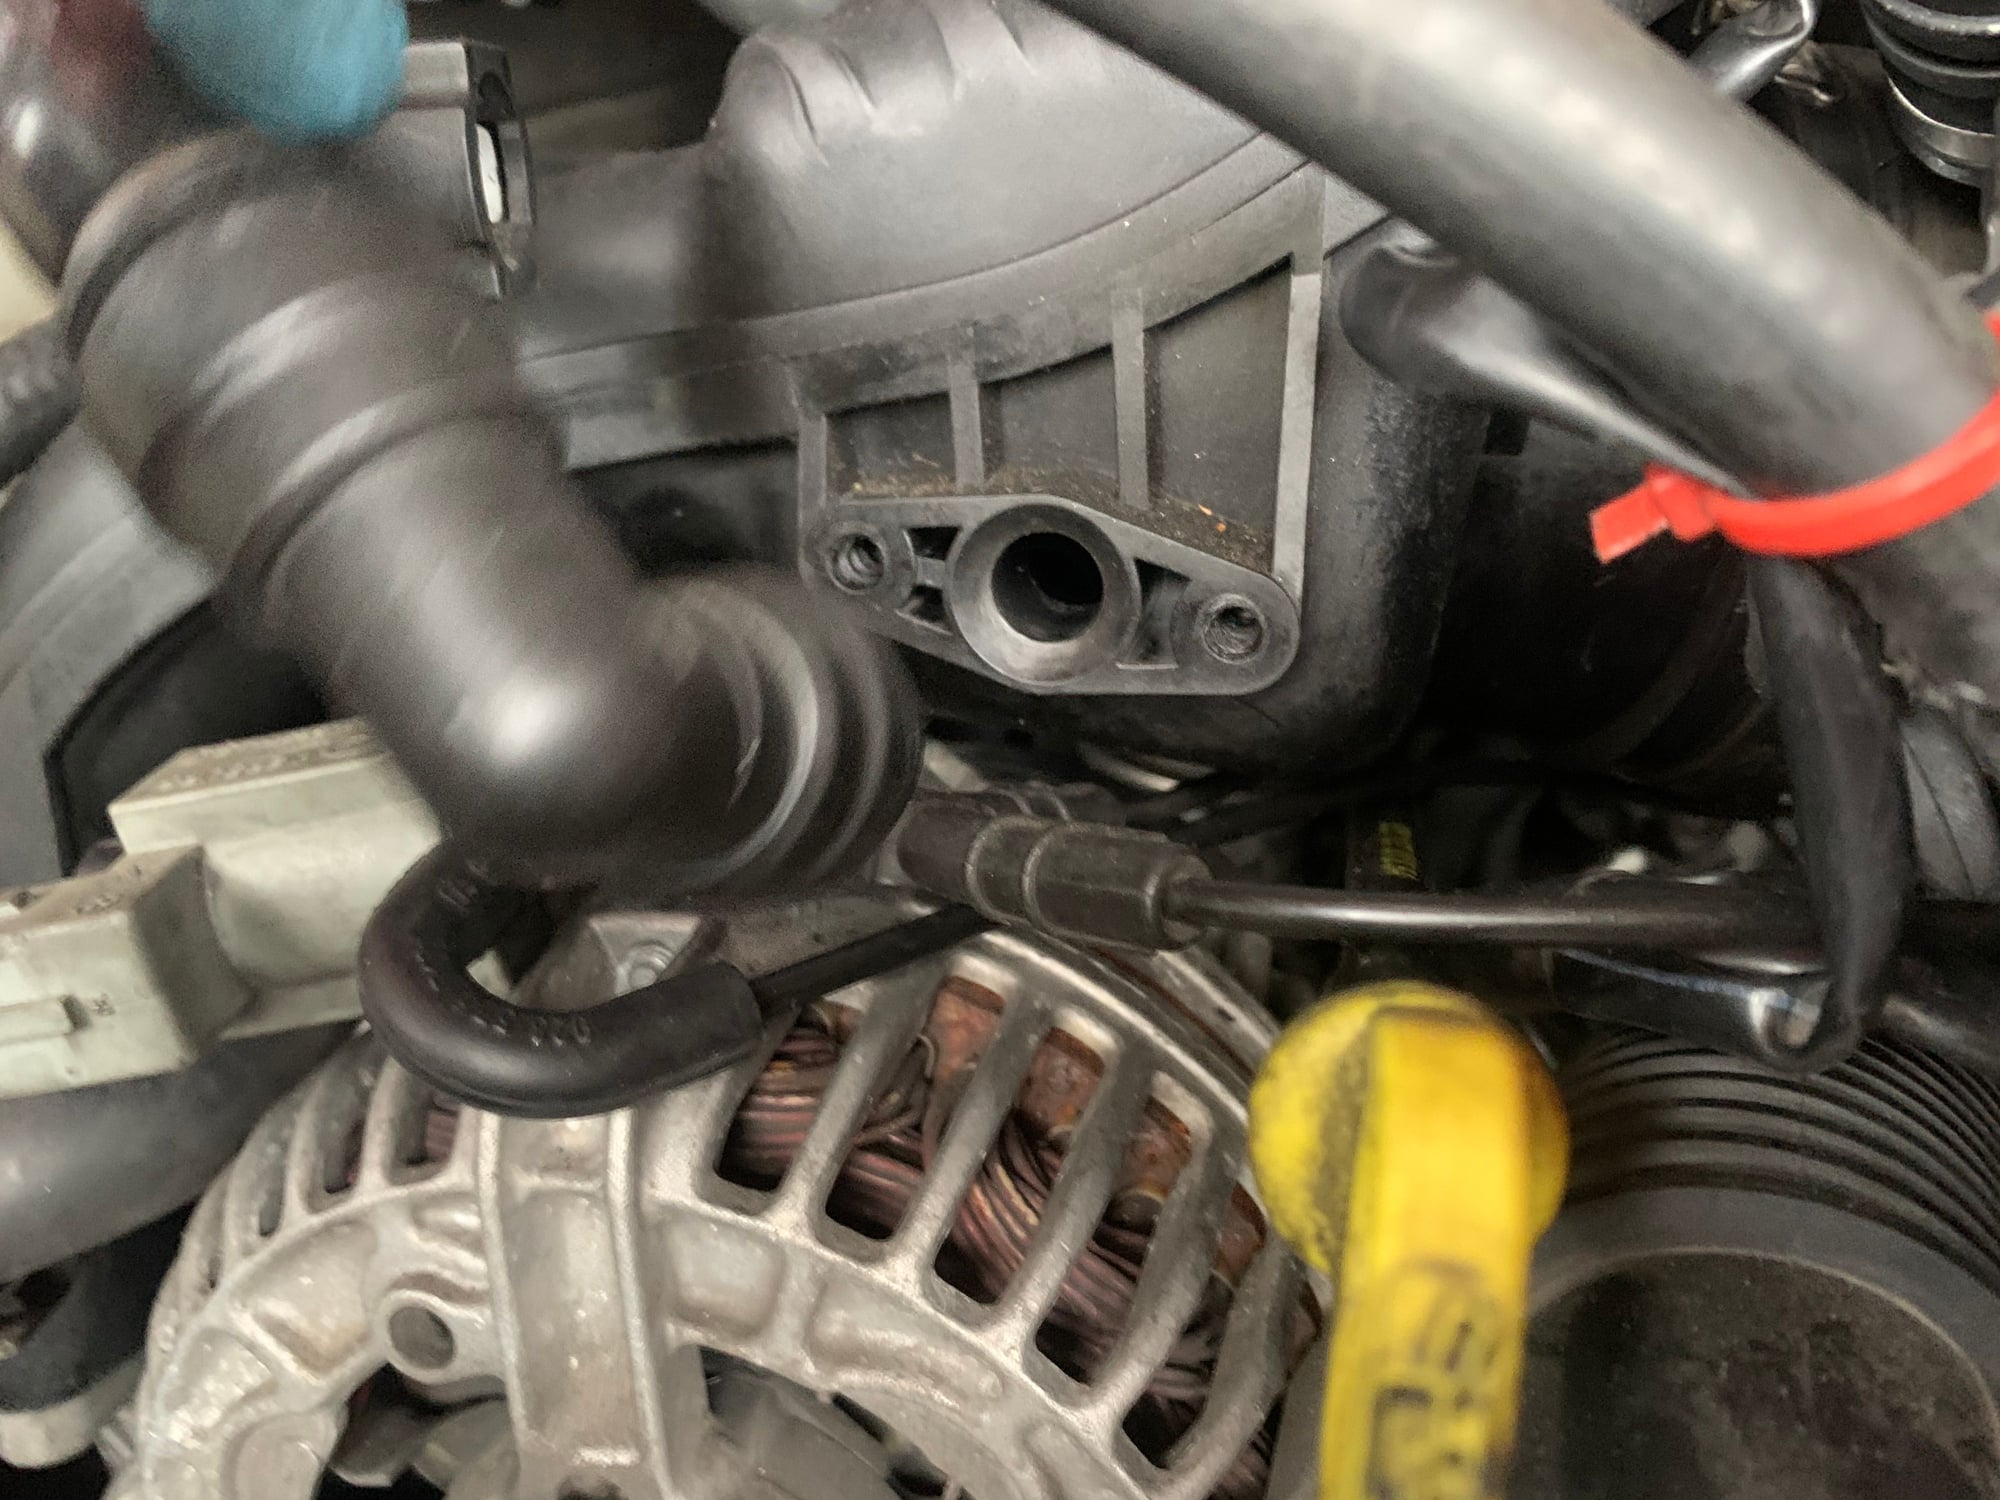
Unclip the fule injection wiring from the loom, and move it out of the way to get to the "bitch bolt."
Remove the black plastic hose holder on the 996.2 coolant tank.
I didn't do this while removing the intake and it tore up my arm reaching the intake bolts.
When I saw that it could come out, re-installing the intake manifold distributor was MUCH more enjoyable.
Cover the intake manifold holes with blue painters tape to keep anything (bolt, socket, etc) from falling into the head.
I'm 5'7". (I used to be taller, but I'm shrinking with age now)
I have a folding stool that I use when working on trucks.
I used this when I needed to lay on the engine to reach the AOS.
I also placed a box under the car.
When I did knock something off the engine compartment and it fell to the ground, it fell in the box.
I was able to grab the box and voila, there it was.
I also used carpet squares under the car when I removed the only bolt I could get to from under the car.
Take your time!
Because of COVID-19, I had lots of spare time to tackle this.
I wasn't driving anywhere, so after a full days work from home, I spent 30 minutes to an hour between work and supper.
It wasn't tough work, and sometimes after dinner, I'd go back into the garage and work a little longer.
When something got frustrating, I just quit for the day.
Here's the ziplock bag with the leftover intake bolts:
The bolts were replaced with longer ones.
I had NO leftovers.
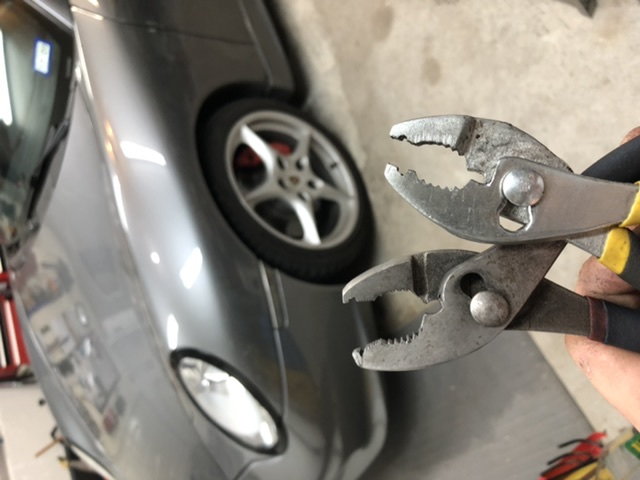
I also made my own hose clamp pliers years ago.
I like the commercially made ones, but sometimes the else work better.
buy cheap Dollar Tree pliers and cut a notch into them with a Dremel.
I also have a vertically notched pair, but these work better.
Also, Loctite on the nut will make these pliers usable.
$1 specialty tool...can’t beat that!
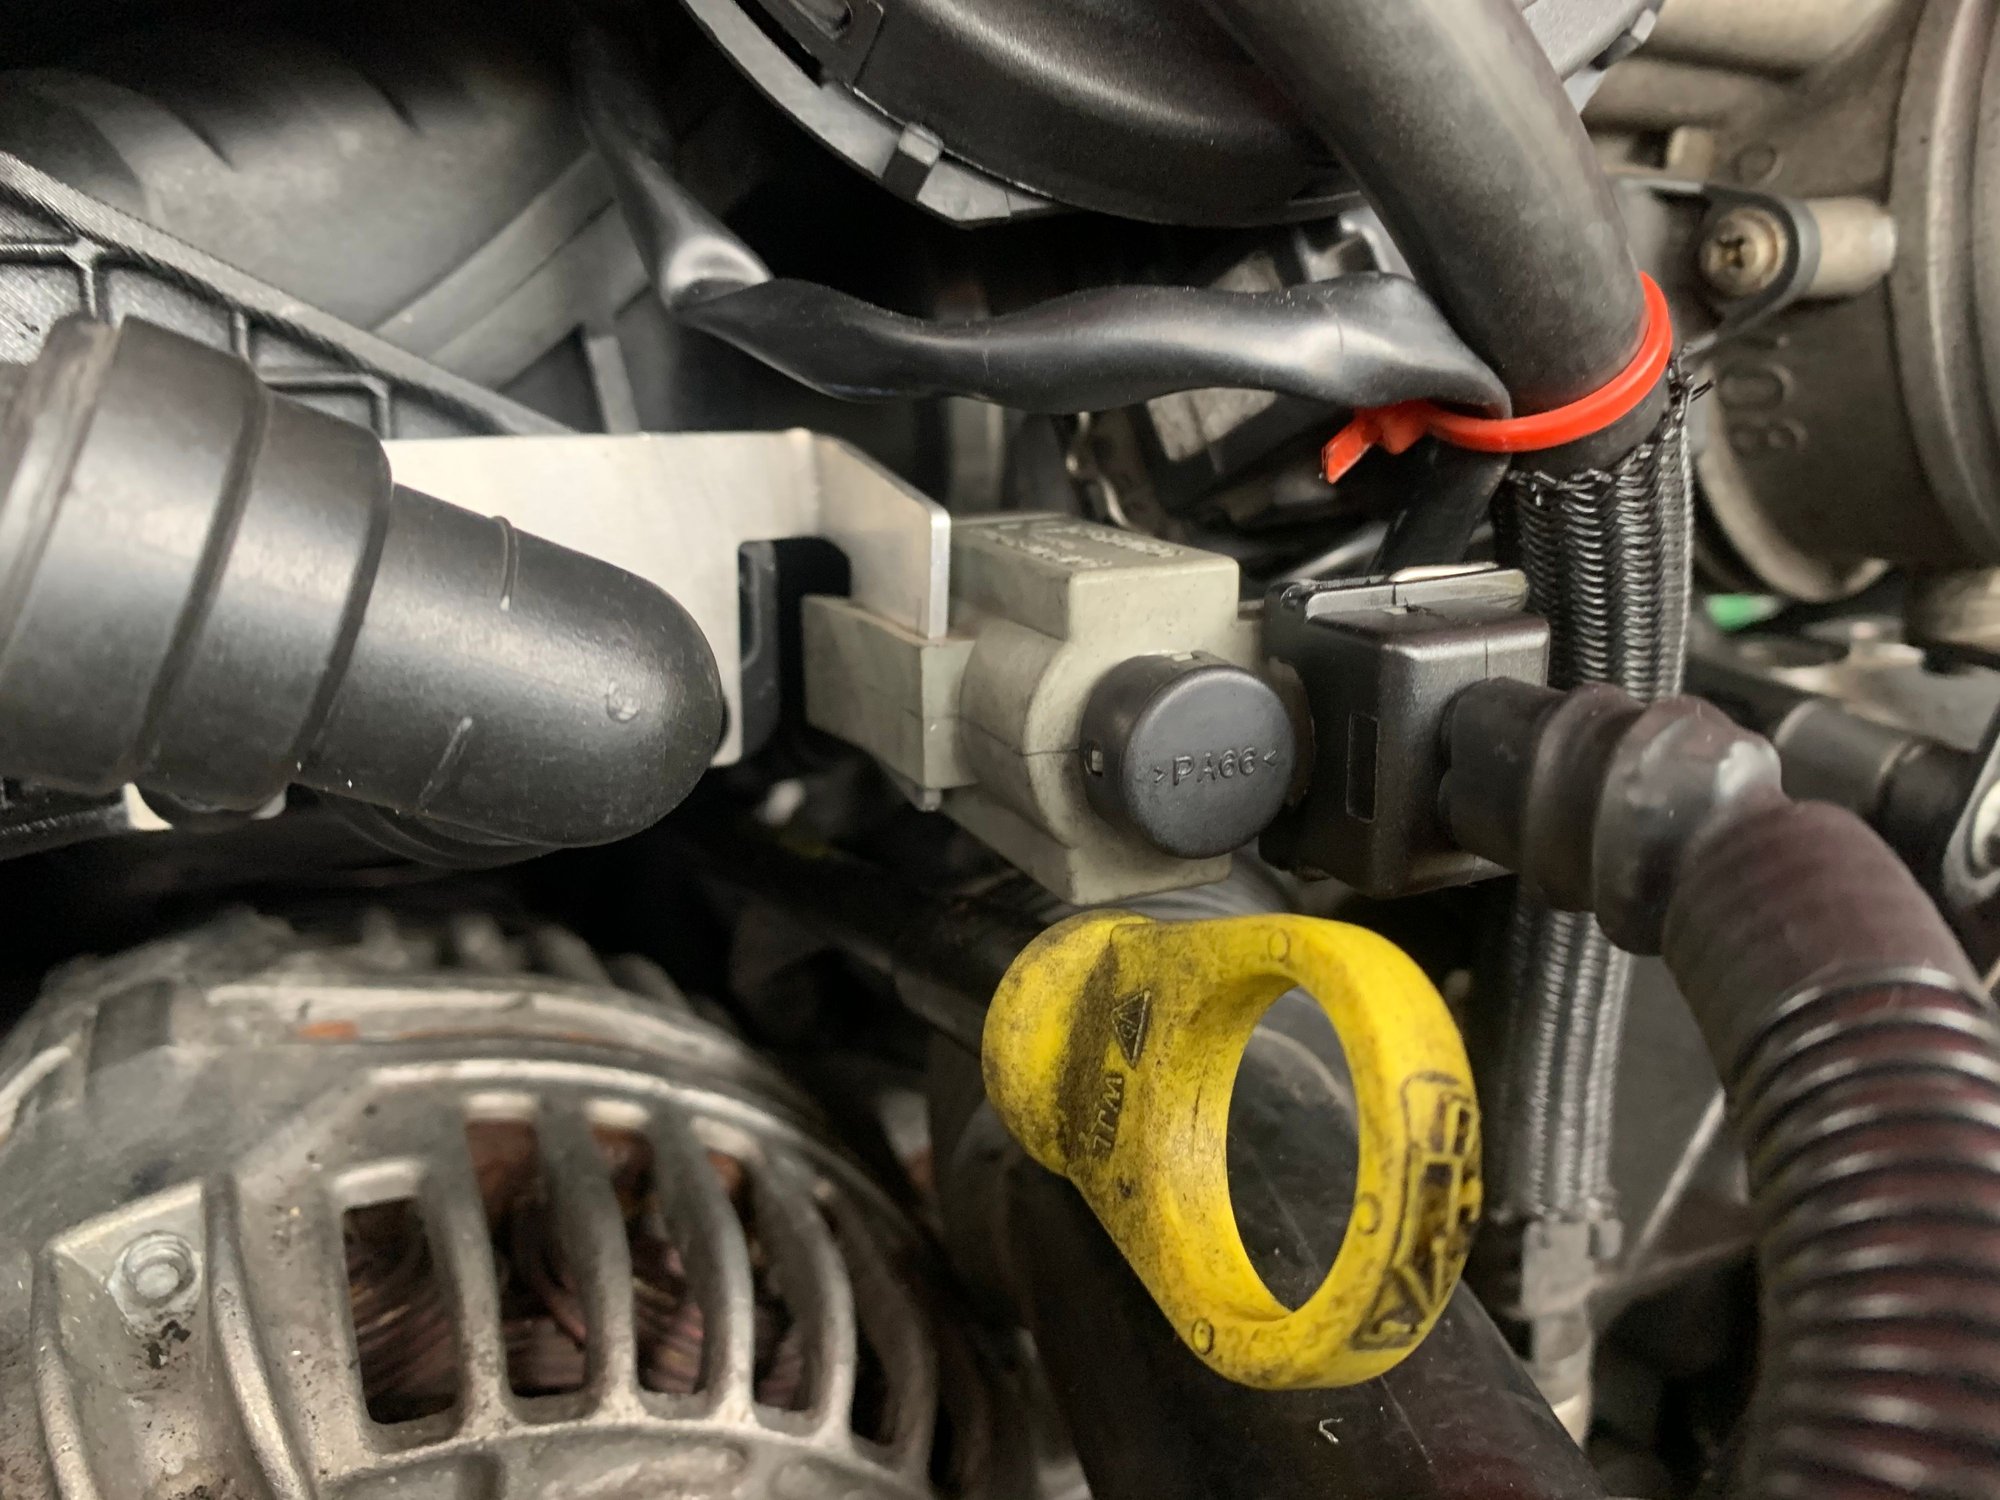
...also I tag all the connectors when I remove them. The EVAP Purge Valve and the Changeover Valve use similar connectors.
they might not reach each other, but why not just mark them all.
I use a label maker, but masking tape works fine too.
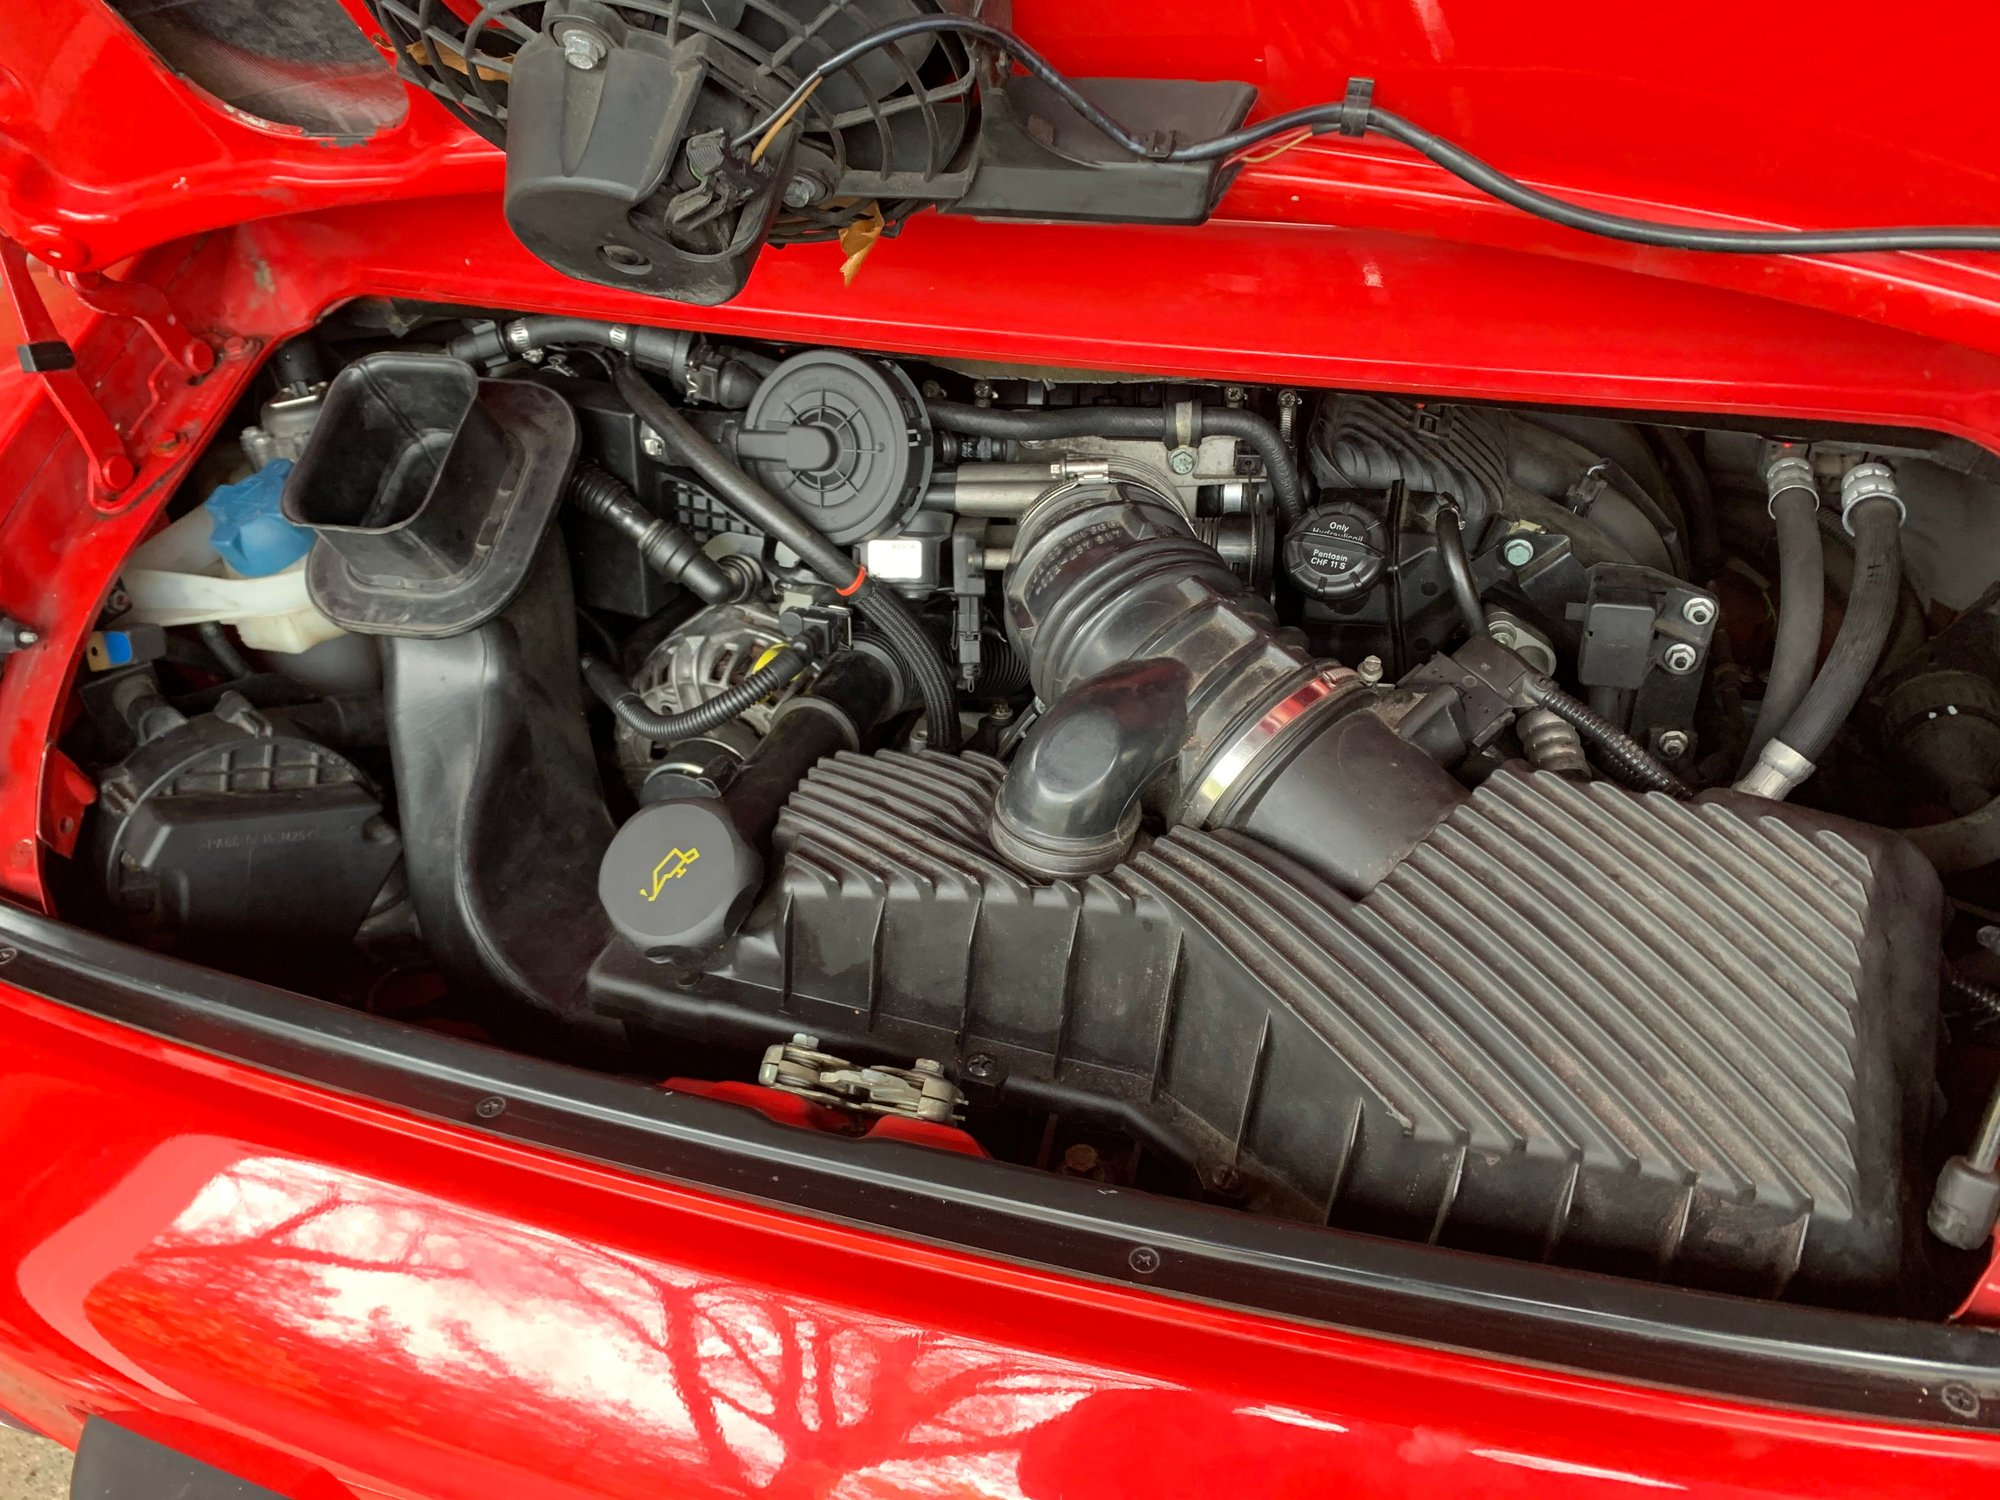
So I've decided to take the easy way out when it comes to installing the UAOS. I'm just building the entire engine around it.
I'll document each step, as I see appropriate. It will be spread over a few days and therefore a few posts. Even if you attempt to do this while the engine is in the car, you should still be able to get an idea how each component interacts and mounts with respect to its neighbors.
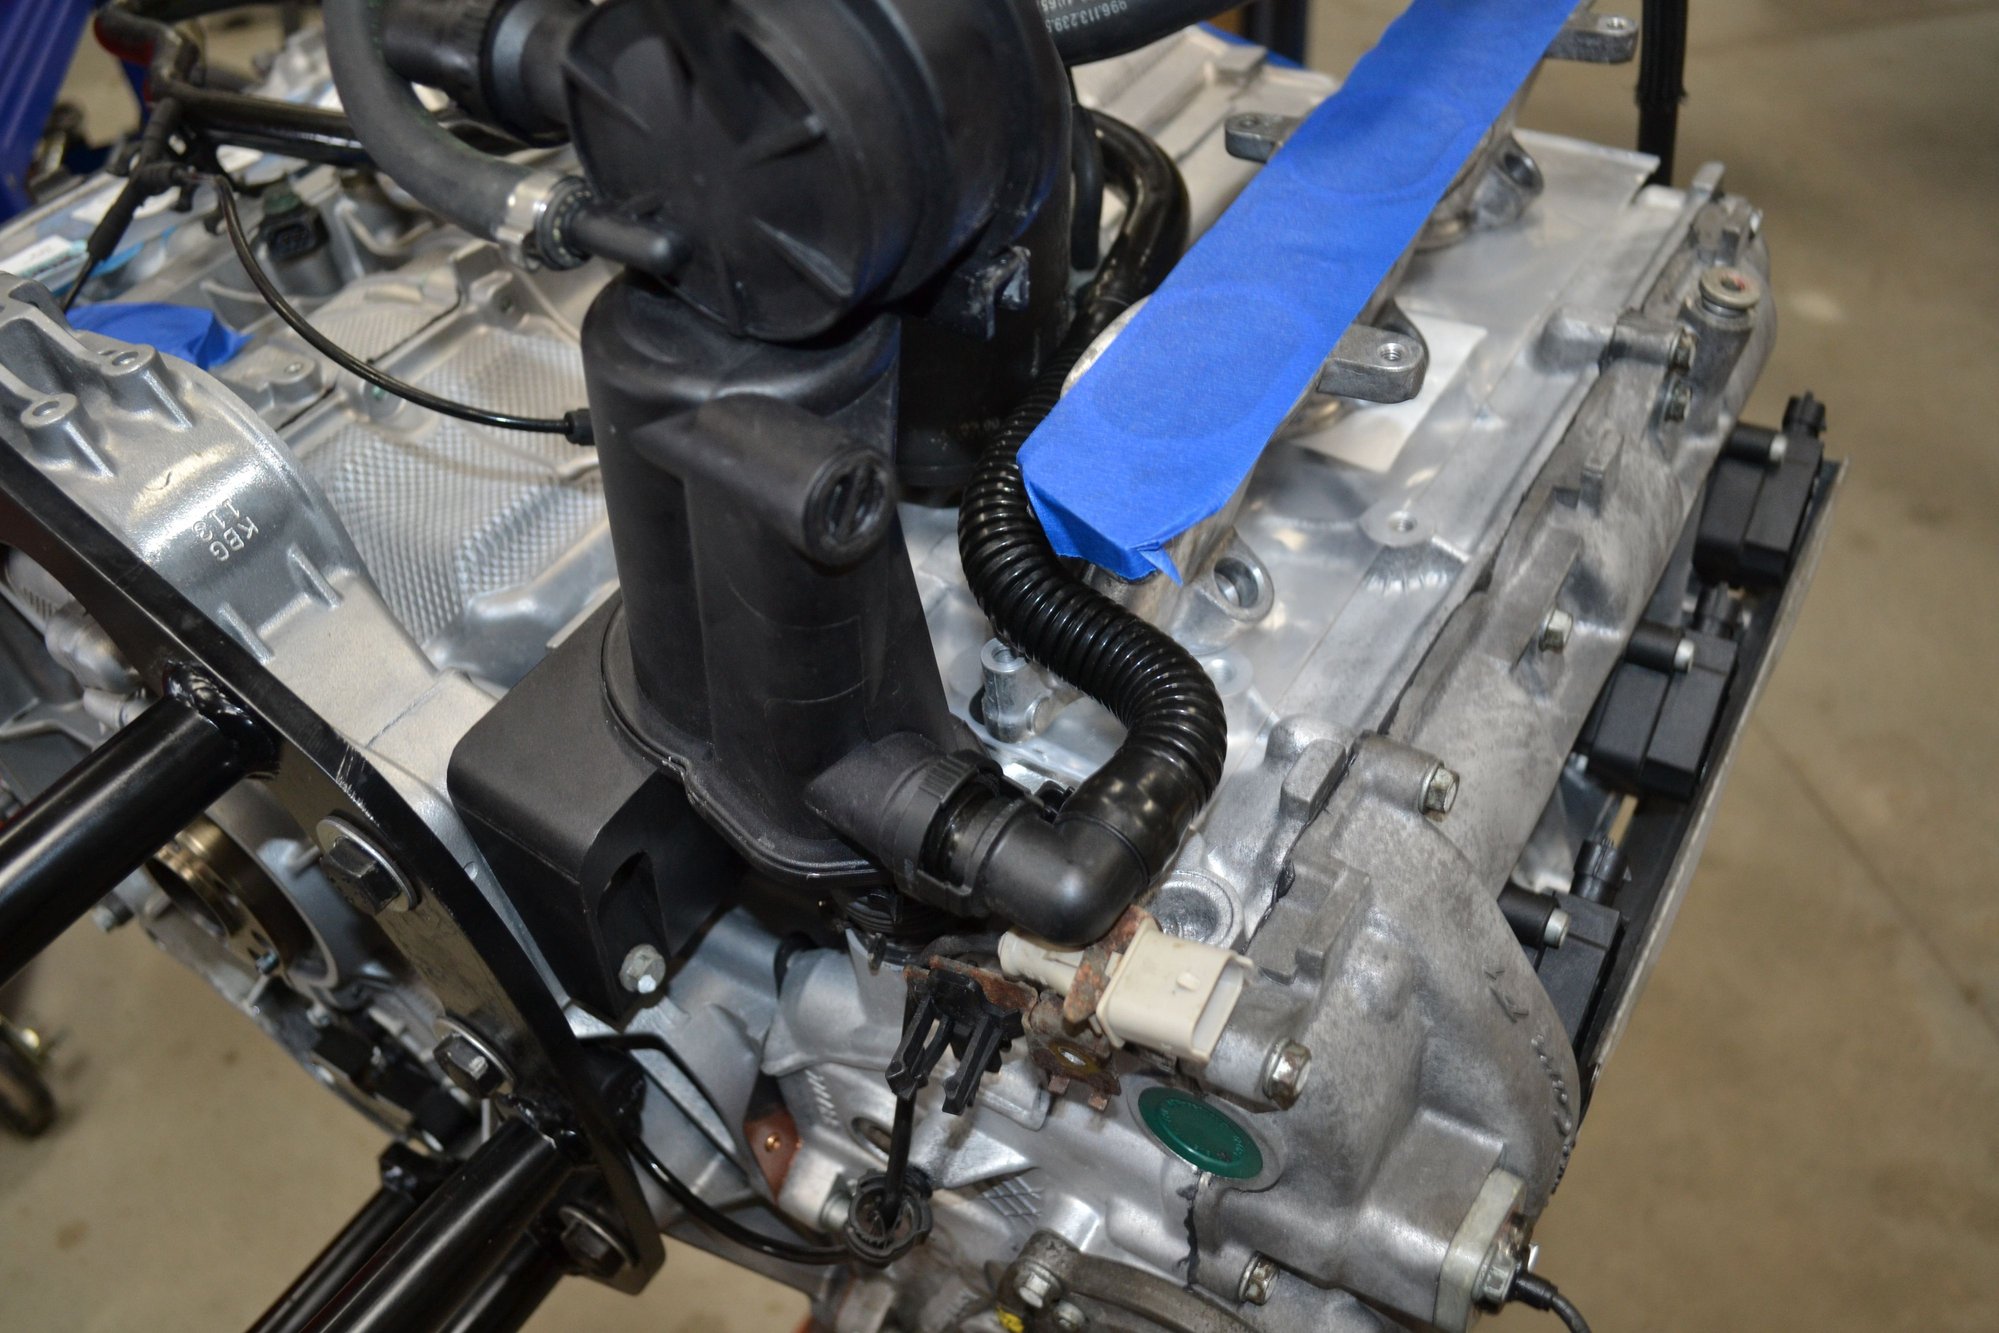
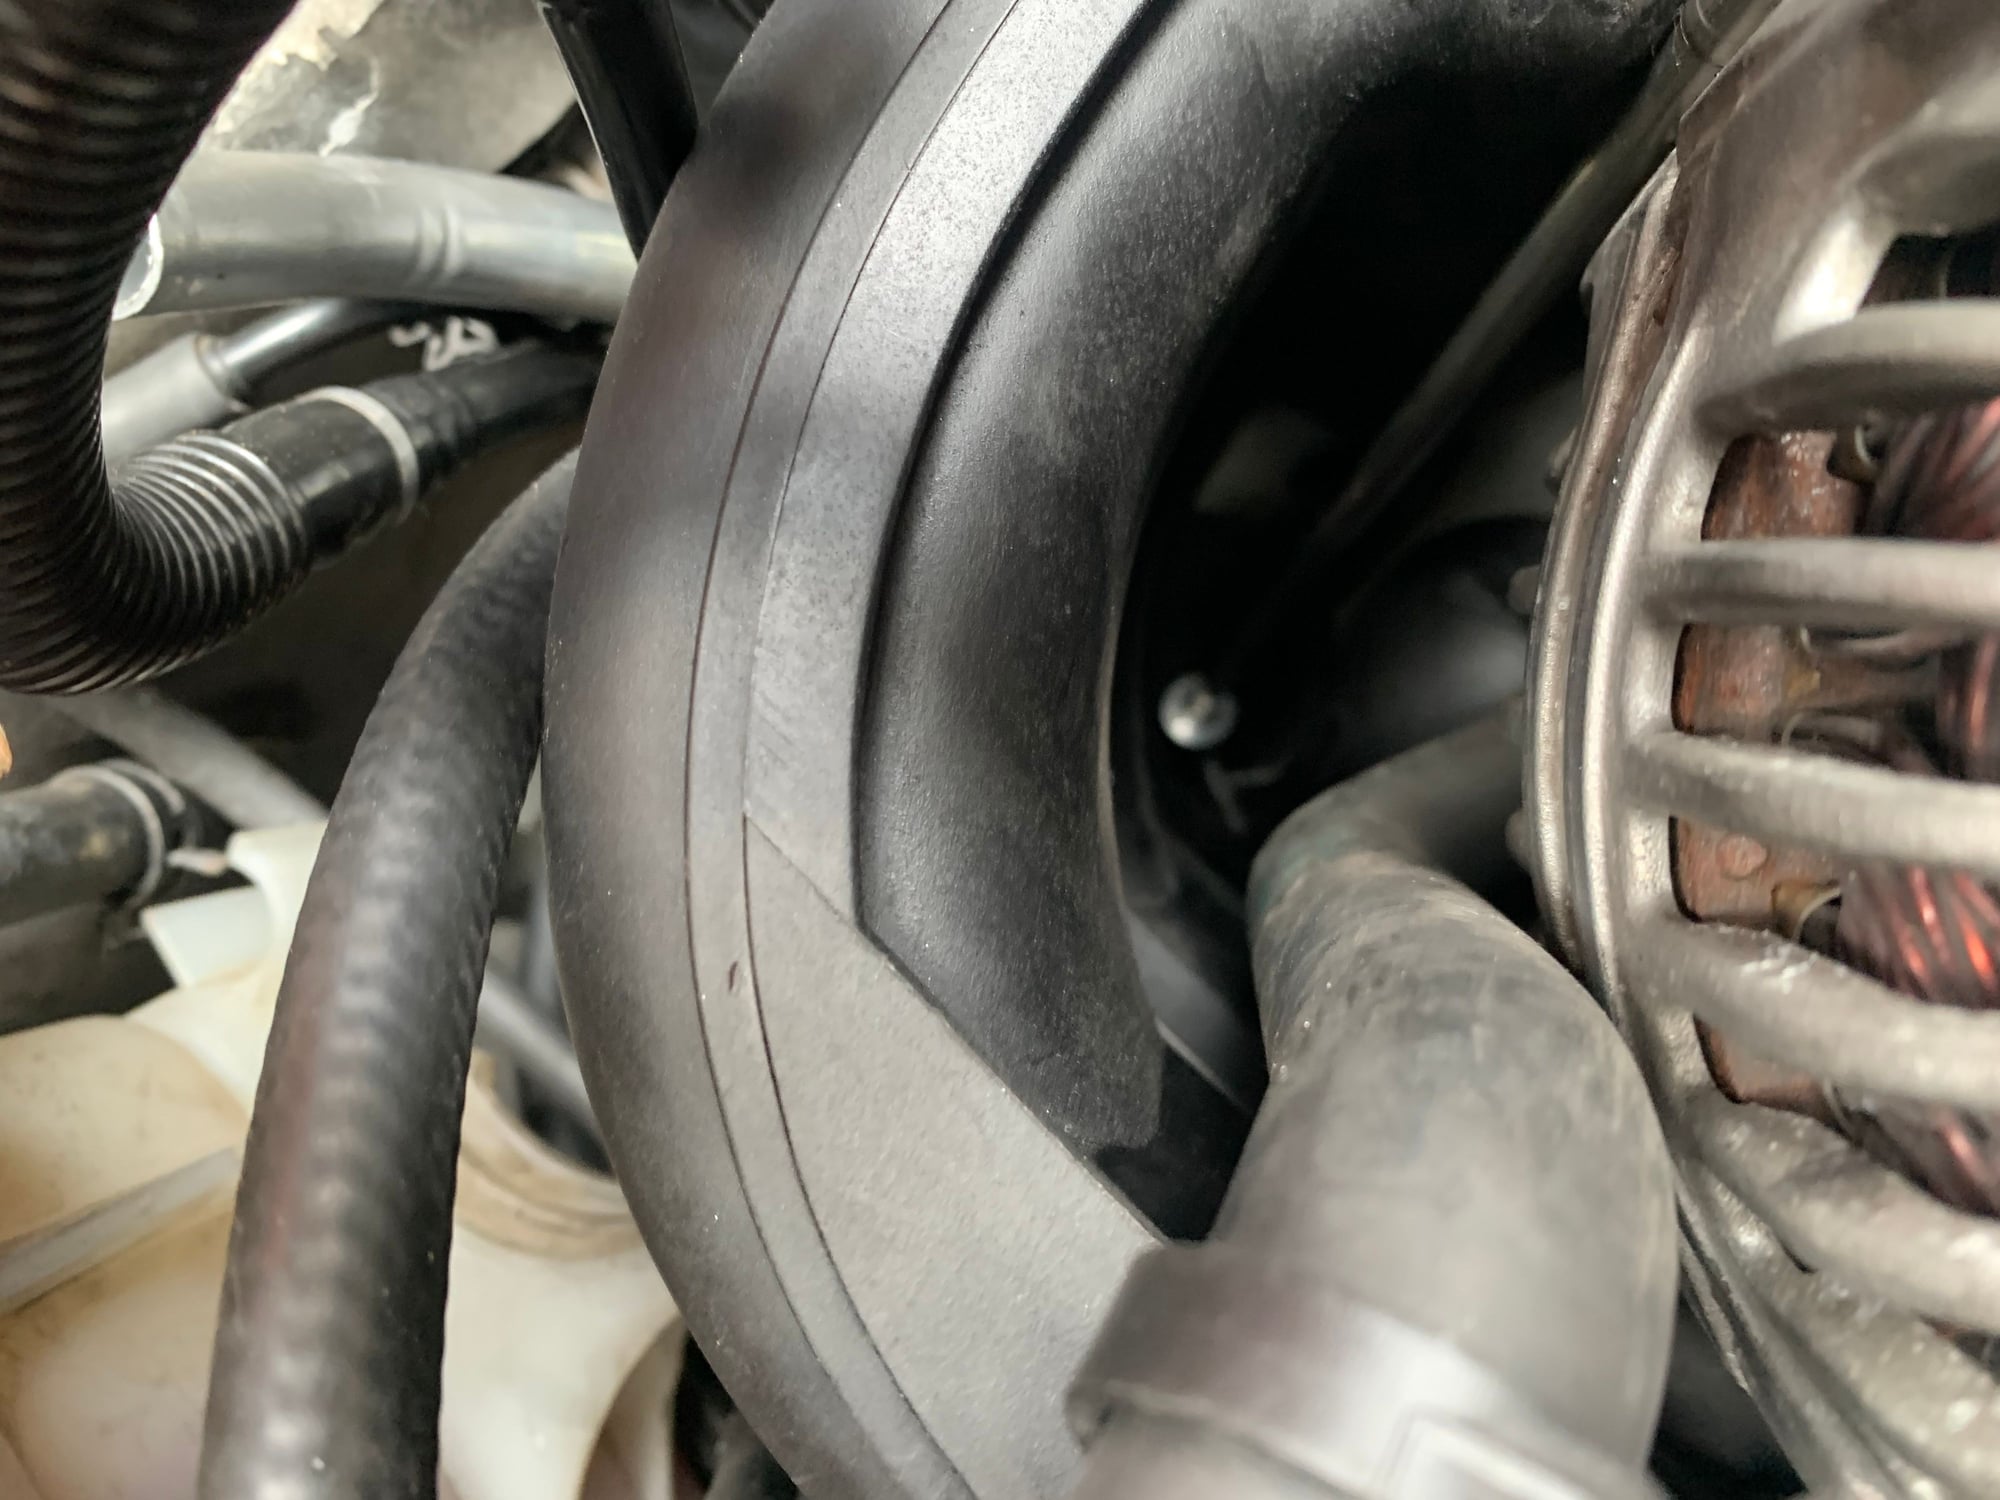
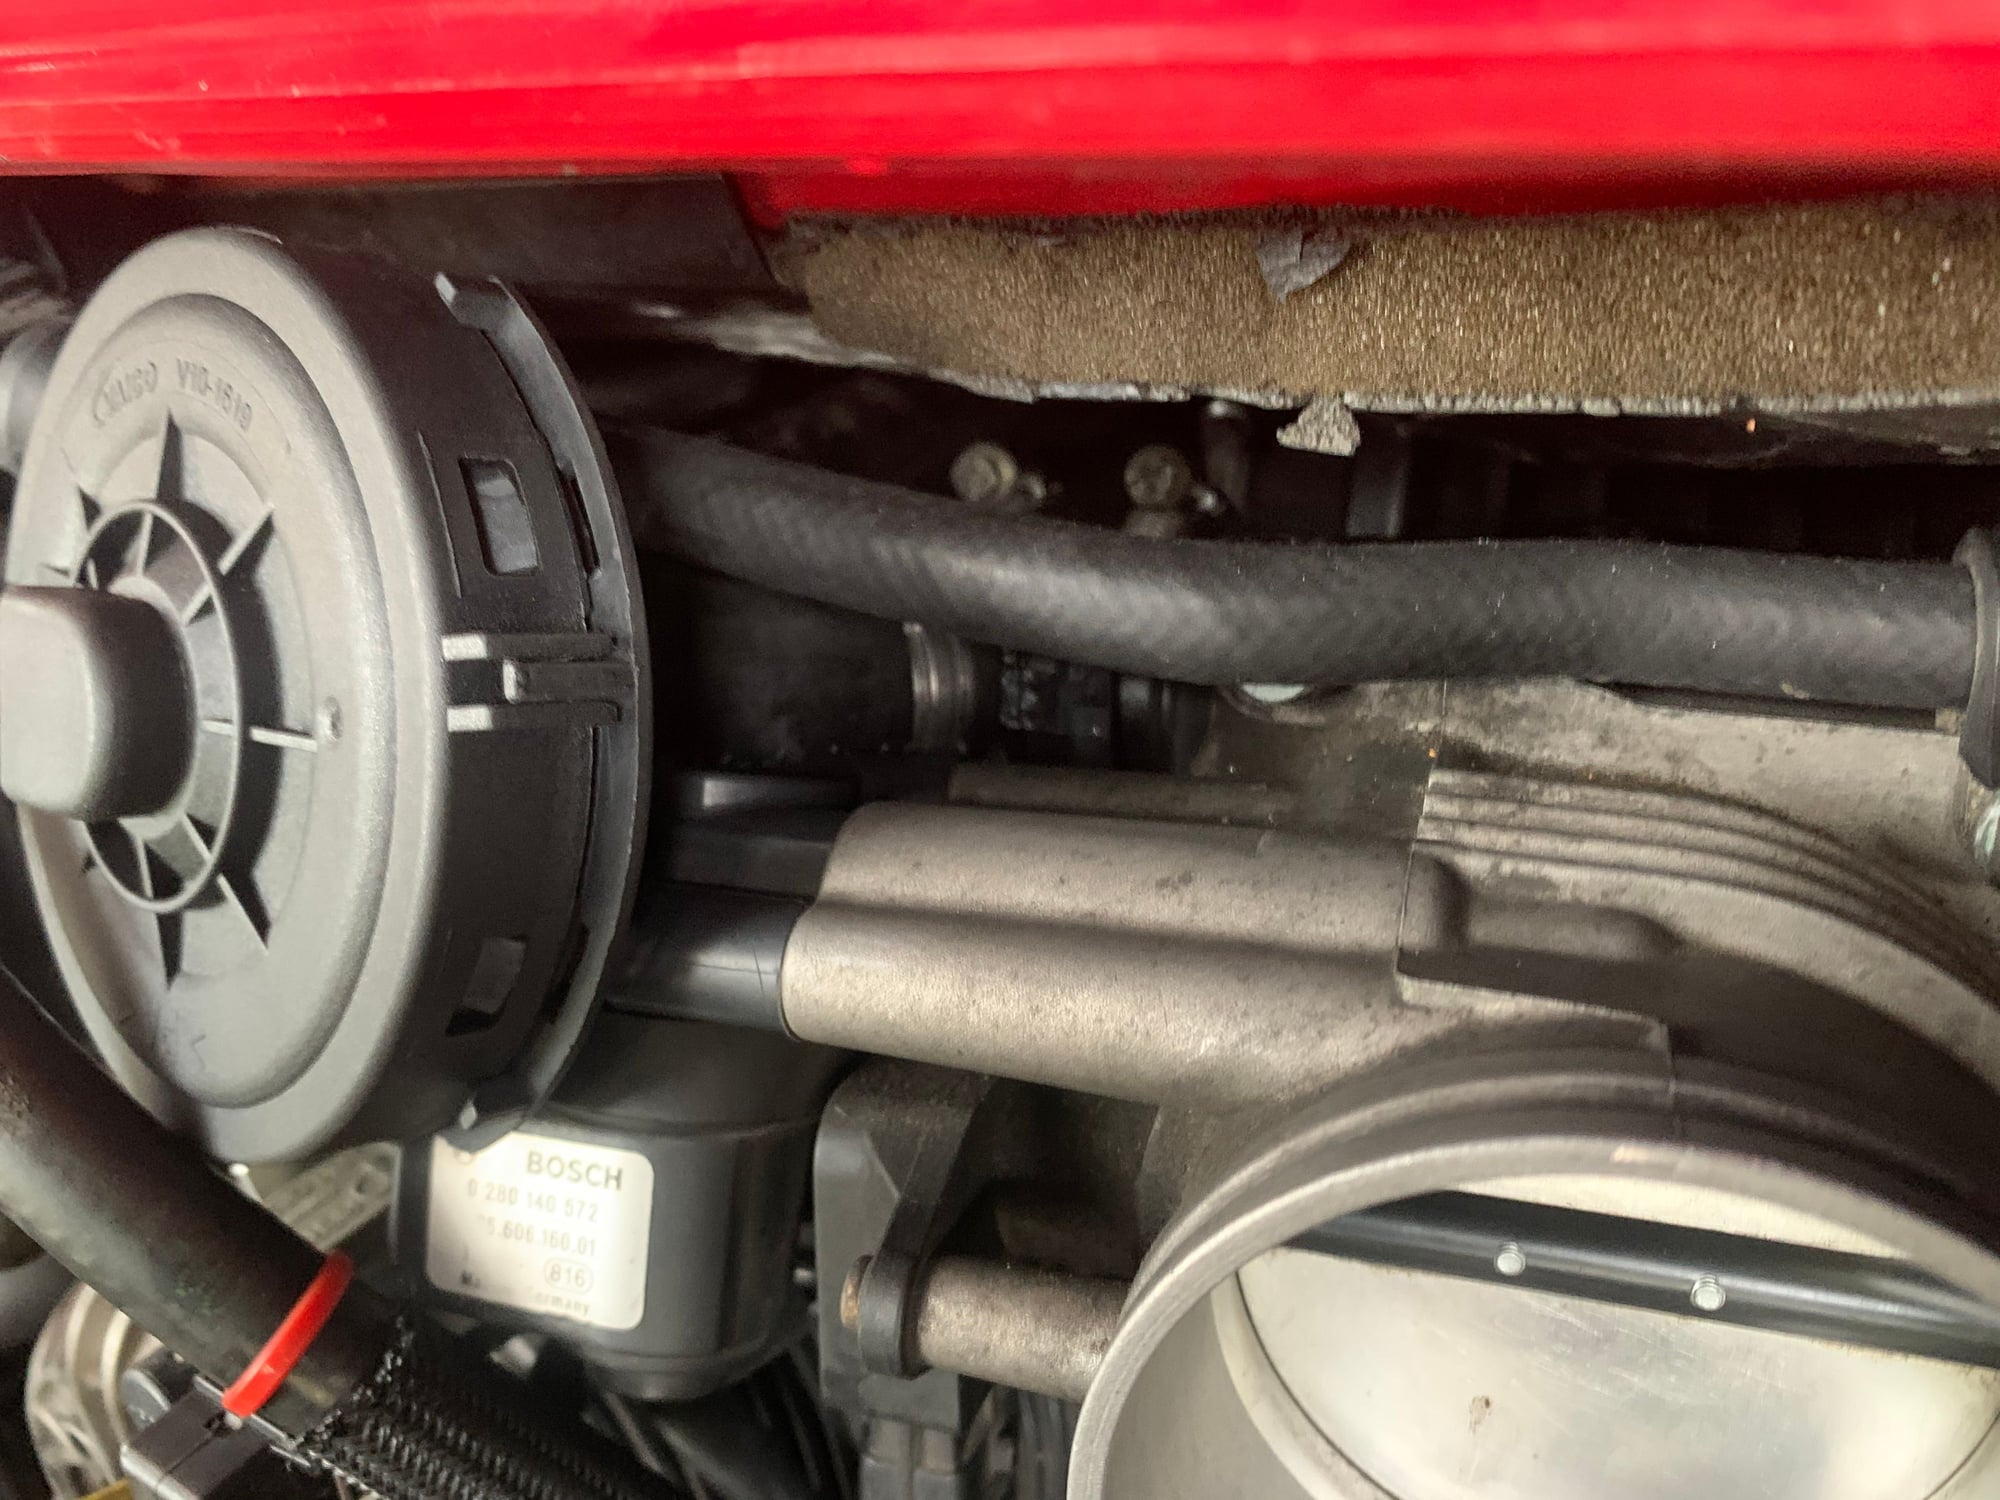
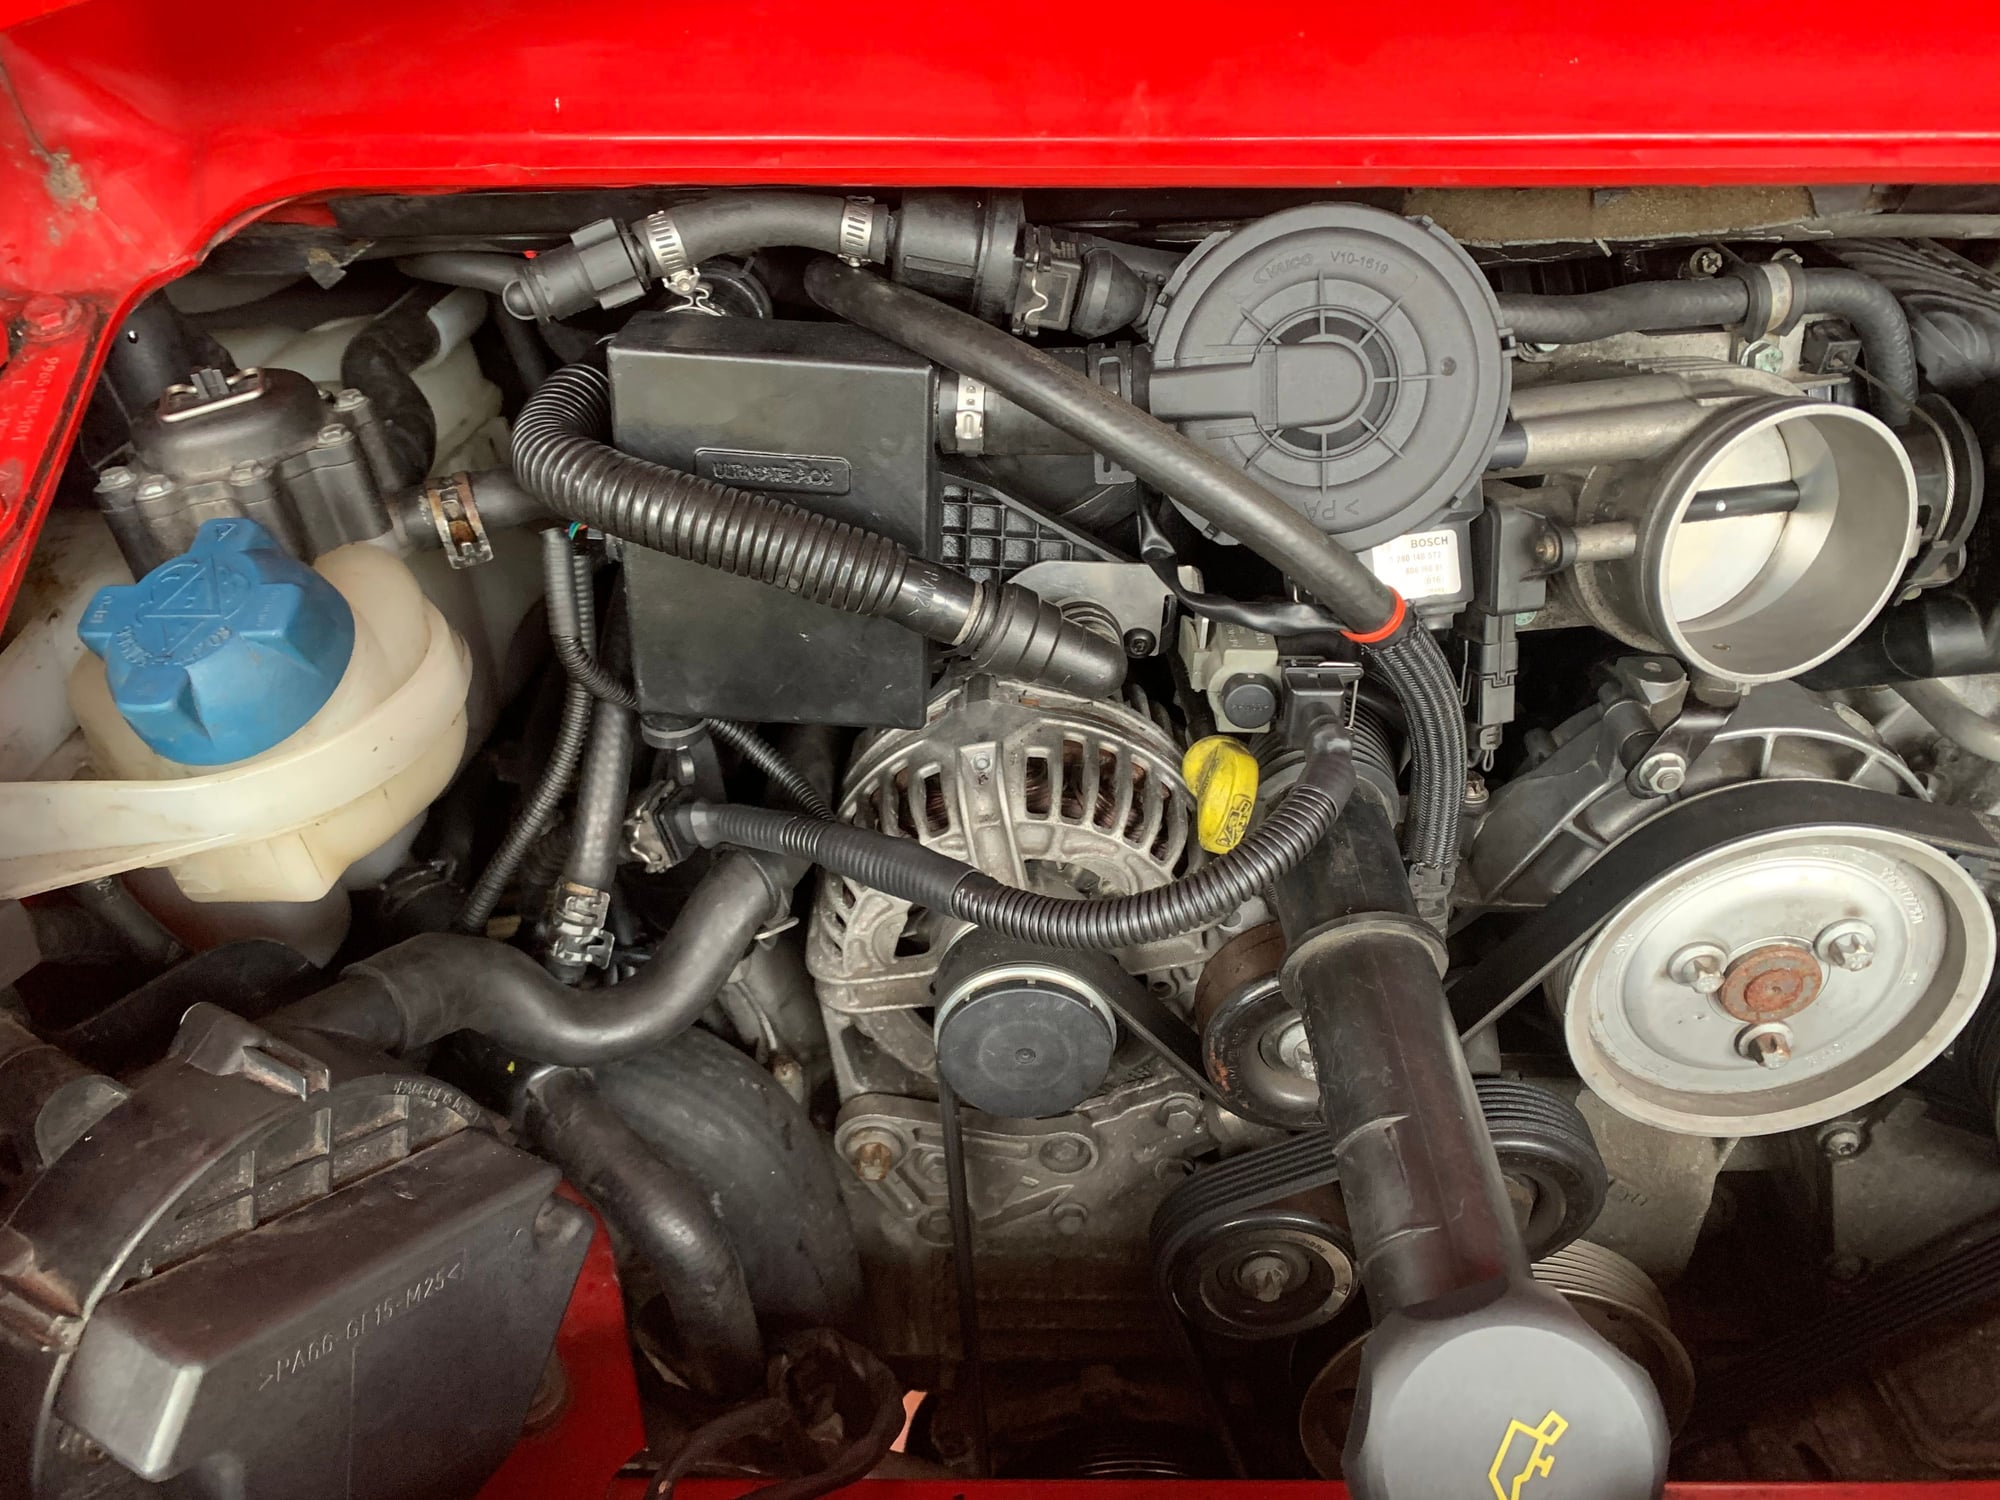
This image shows where the AOS mounts at the rear of the engine. You'll want to apply a little lubricant to the multi-ribbed seal before inserting into the block.
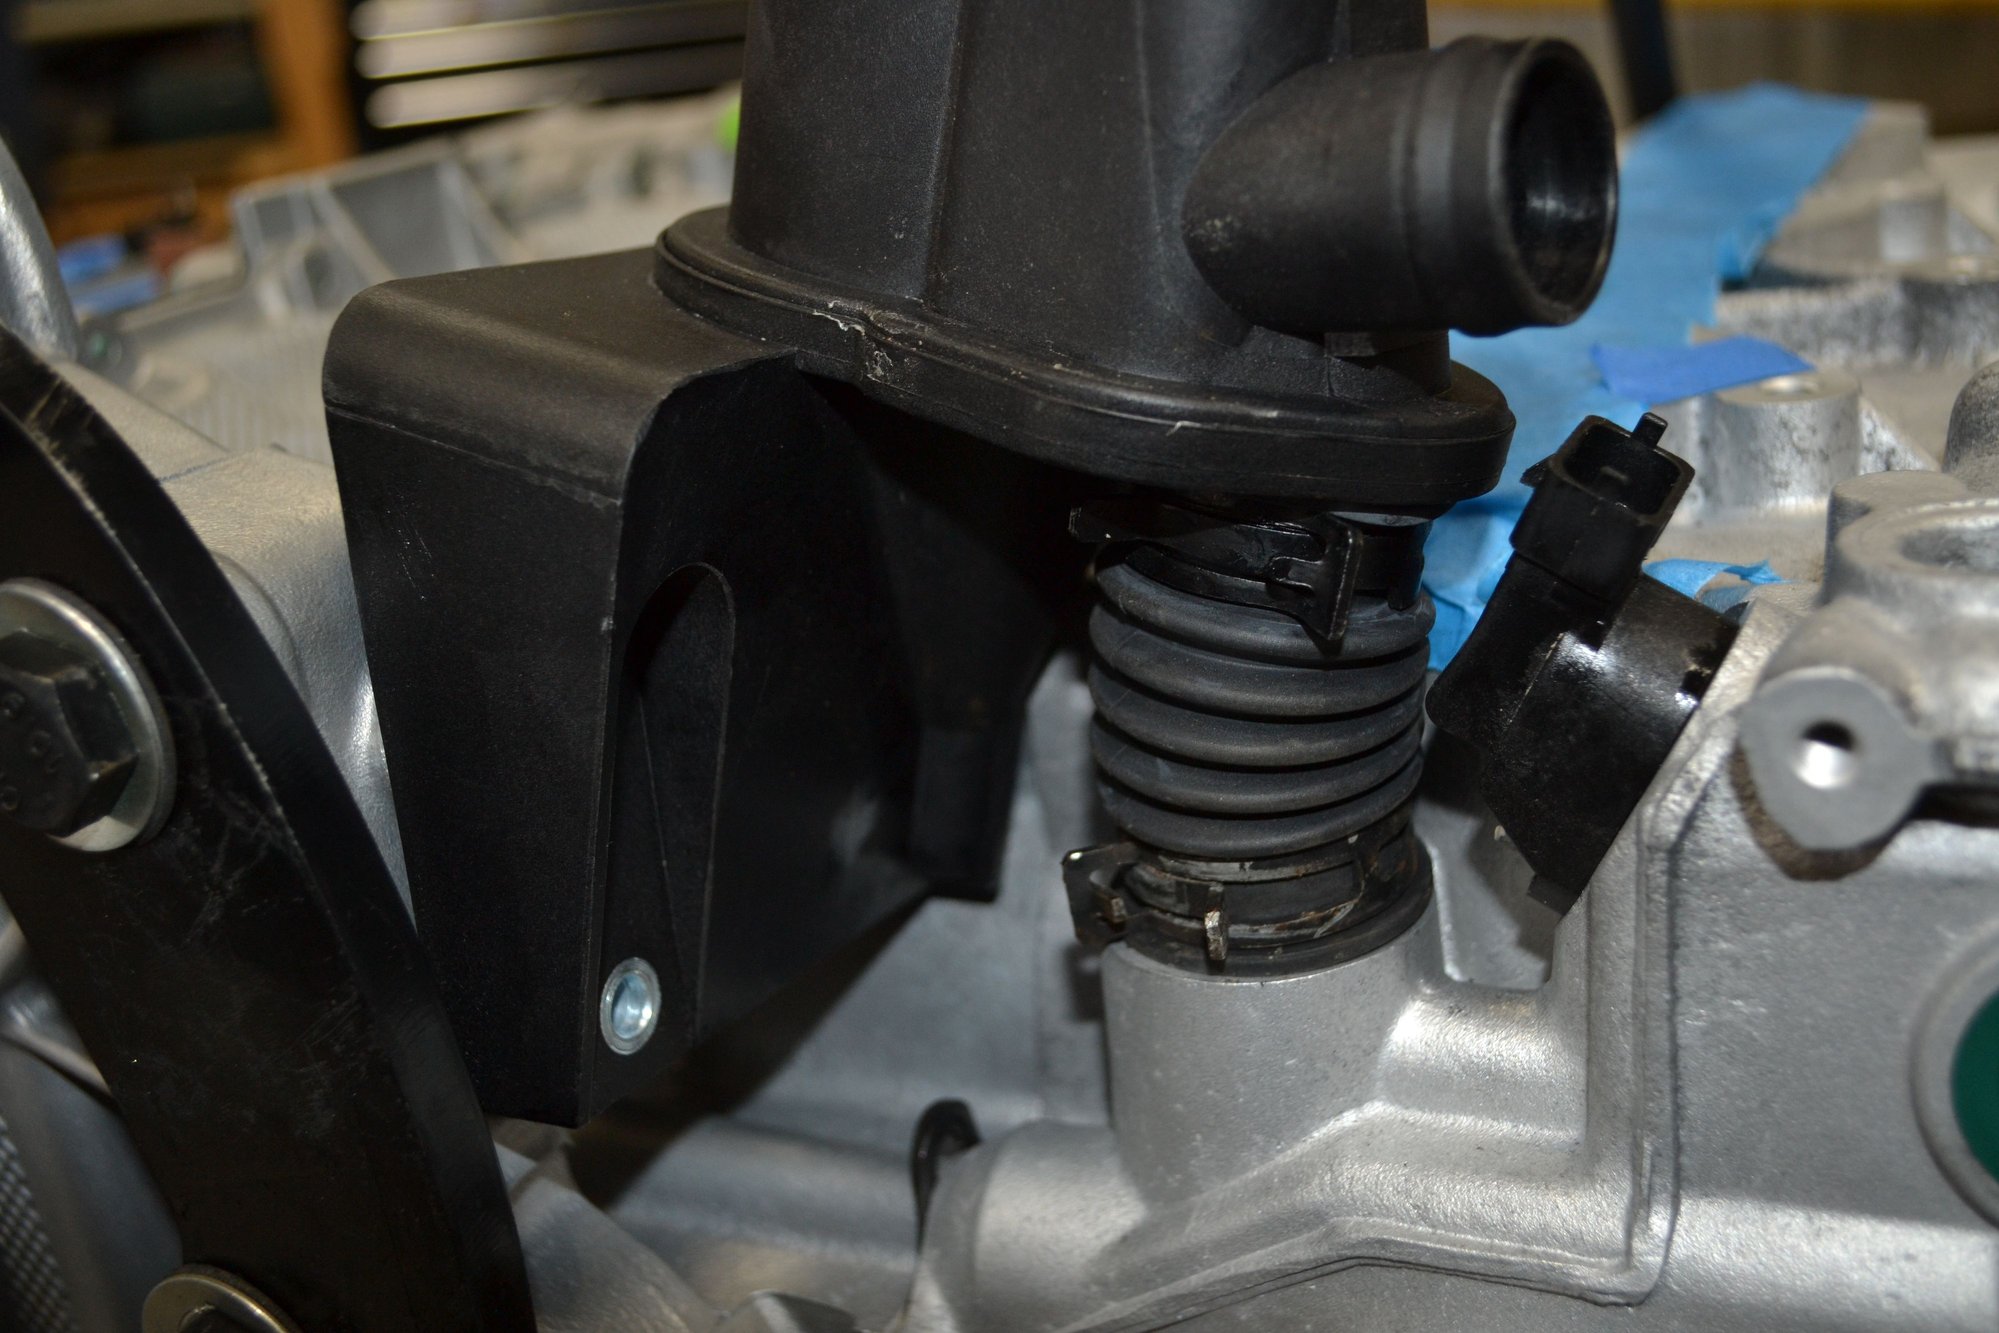
At the same time, you'll want to work the bellowed hose over the large port. Alignment of the clamps is important. There is very little room for tool access. The cam position sensor is right in the area of the upper clamp.
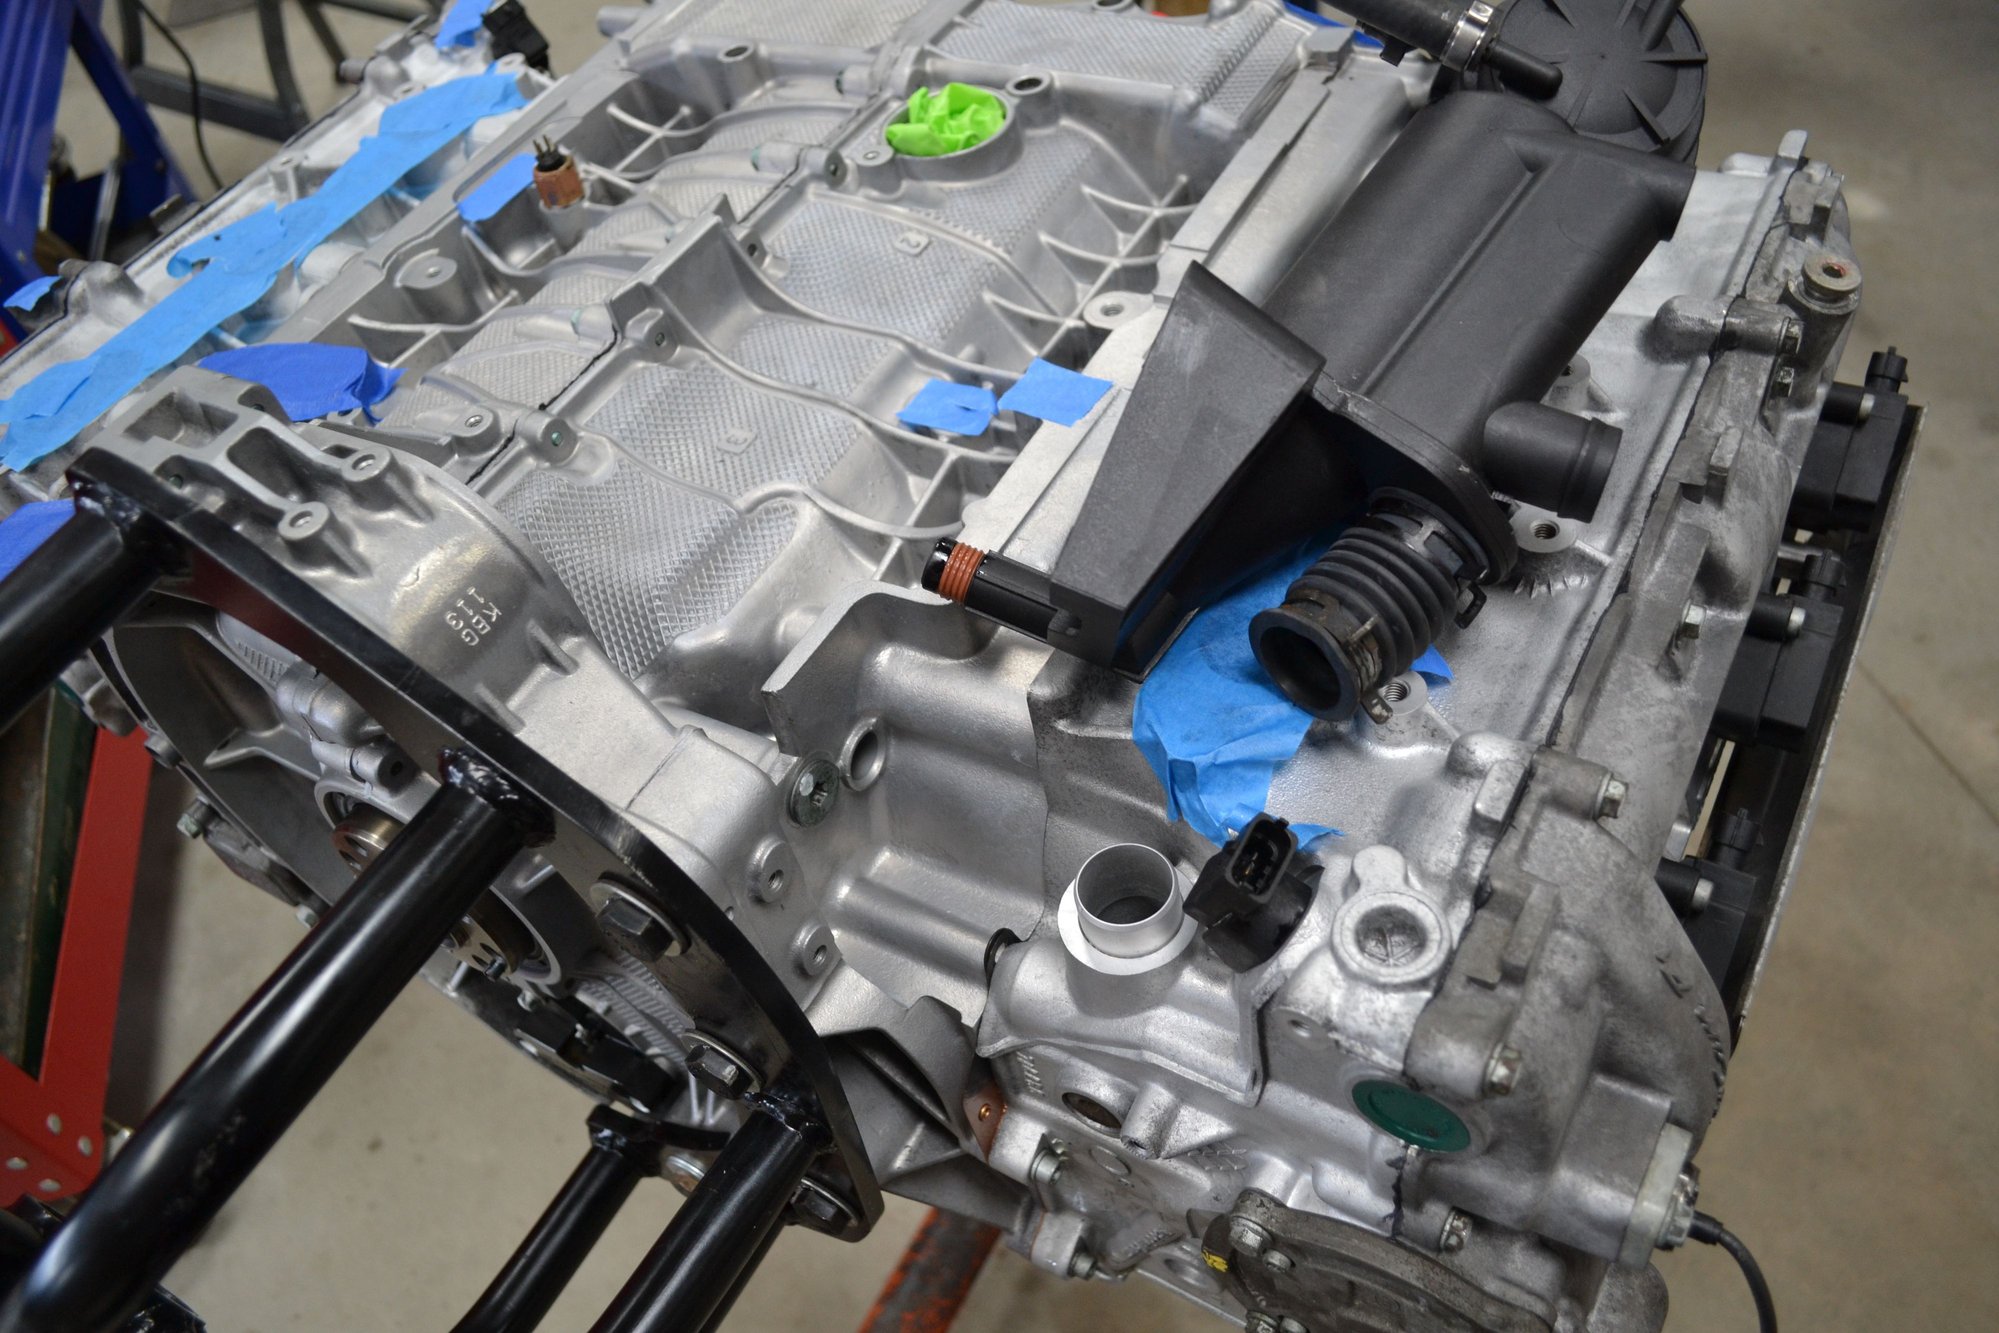
Once in place, the bolts holding the AOS to the block should be installed. M6 x 30 (7.5 ft-lbs). Note that the crank (flywheel) position sensor connector has a bracket right in that area as well. Things get really crowded, real fast. The AOS pipe that crosses over to bank #2 is just set in place to show its orientation. I will be installing a new one when it arrives next week. I'll move forward with the rest of this installation once I have that...
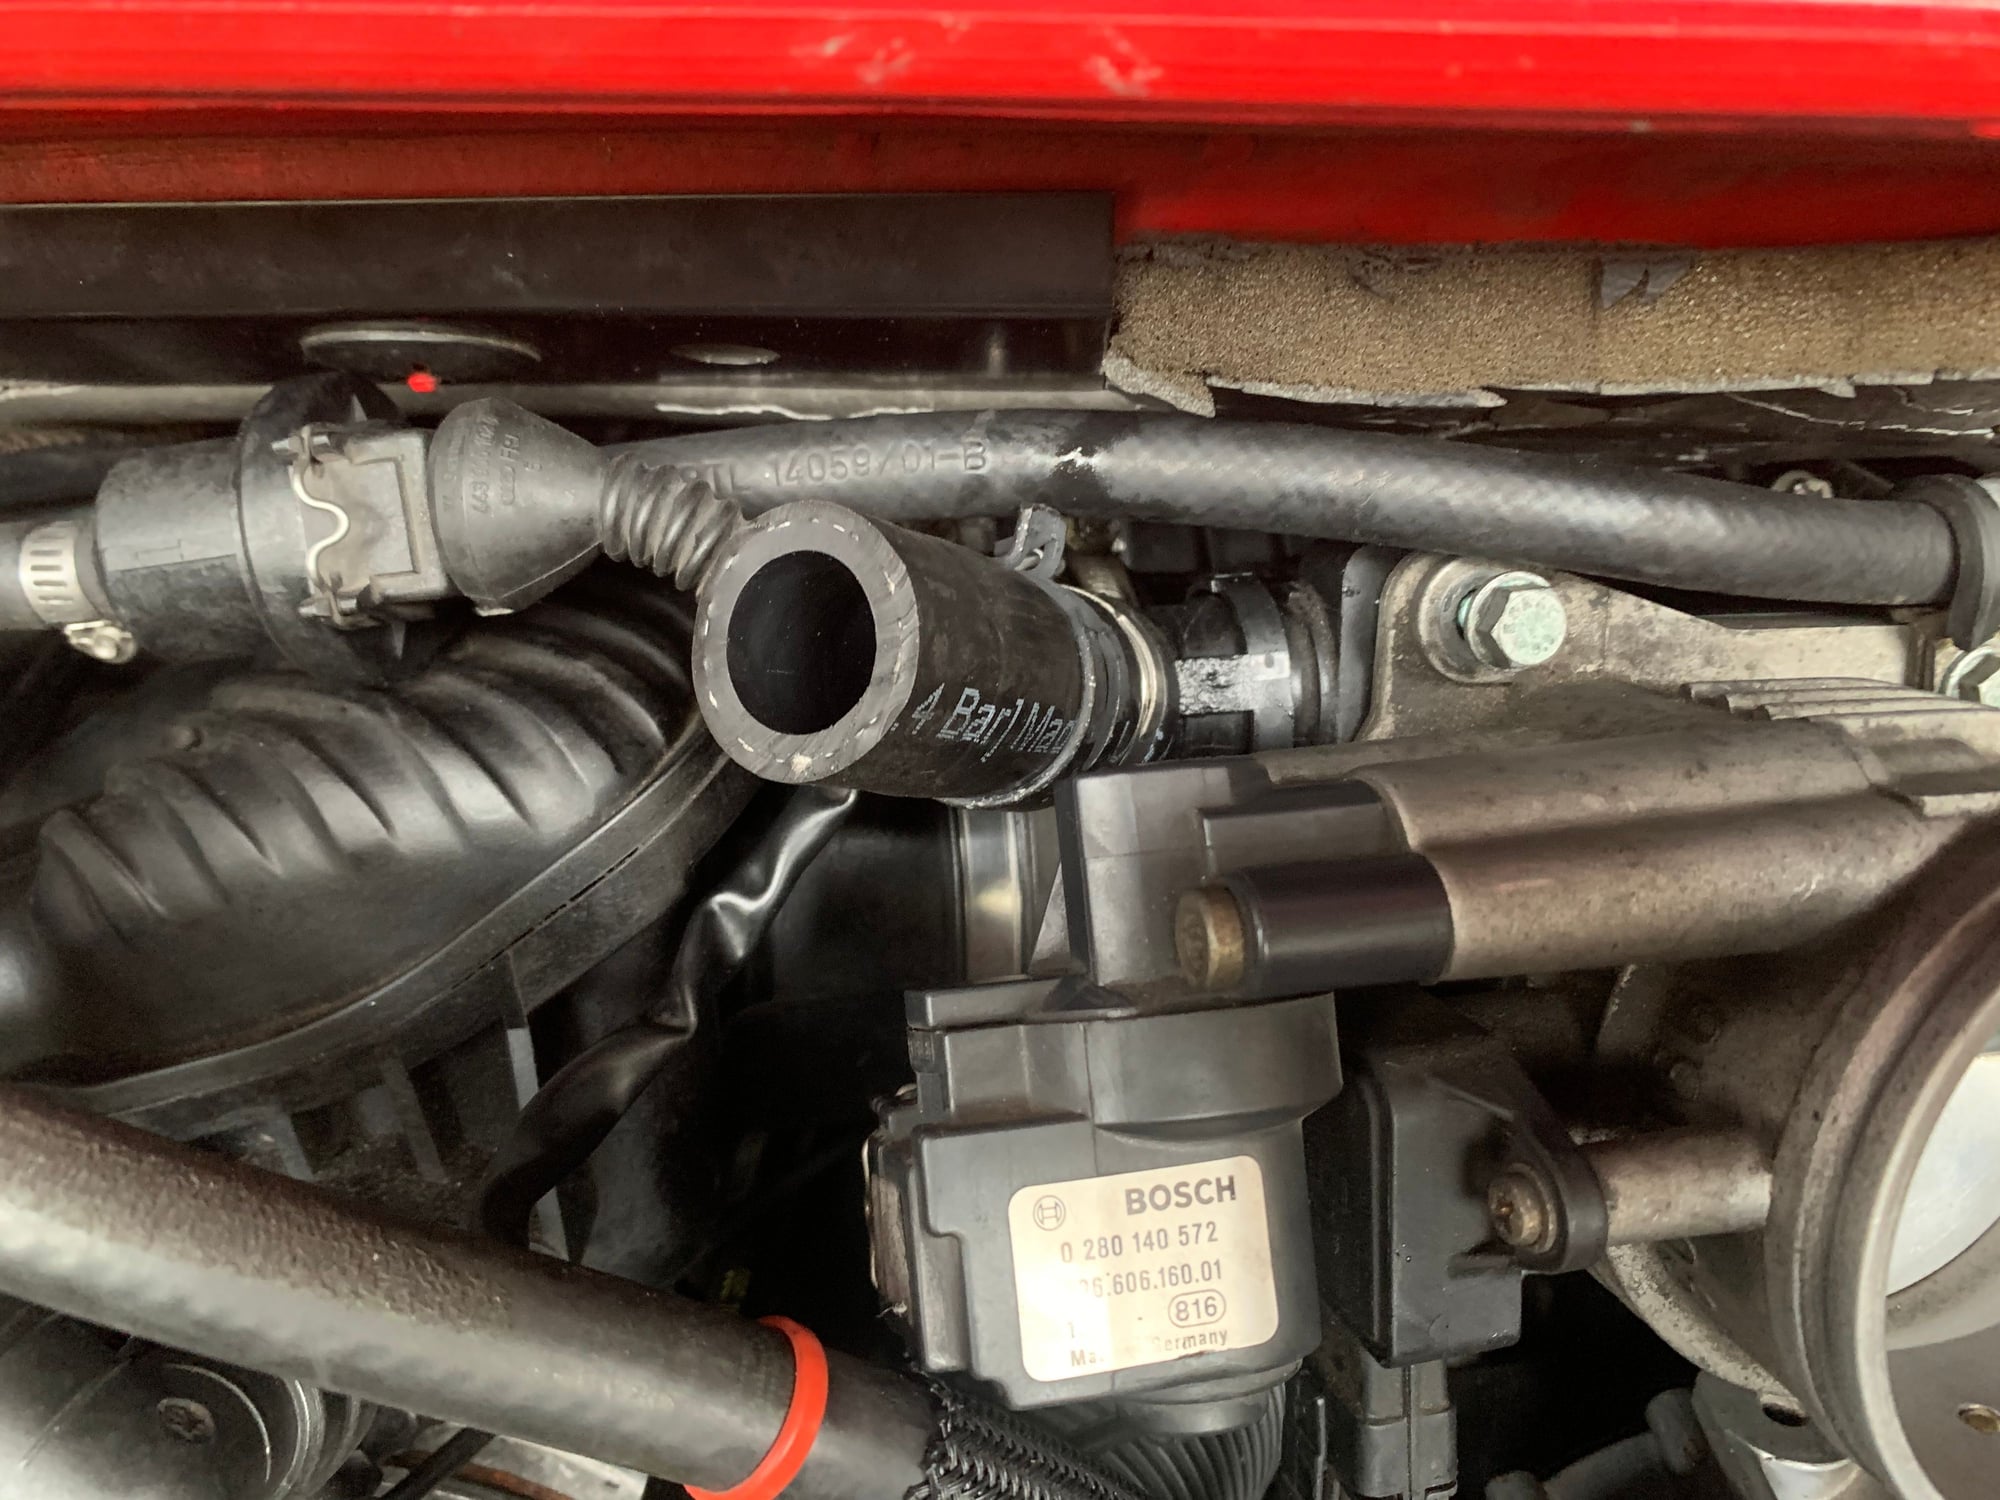
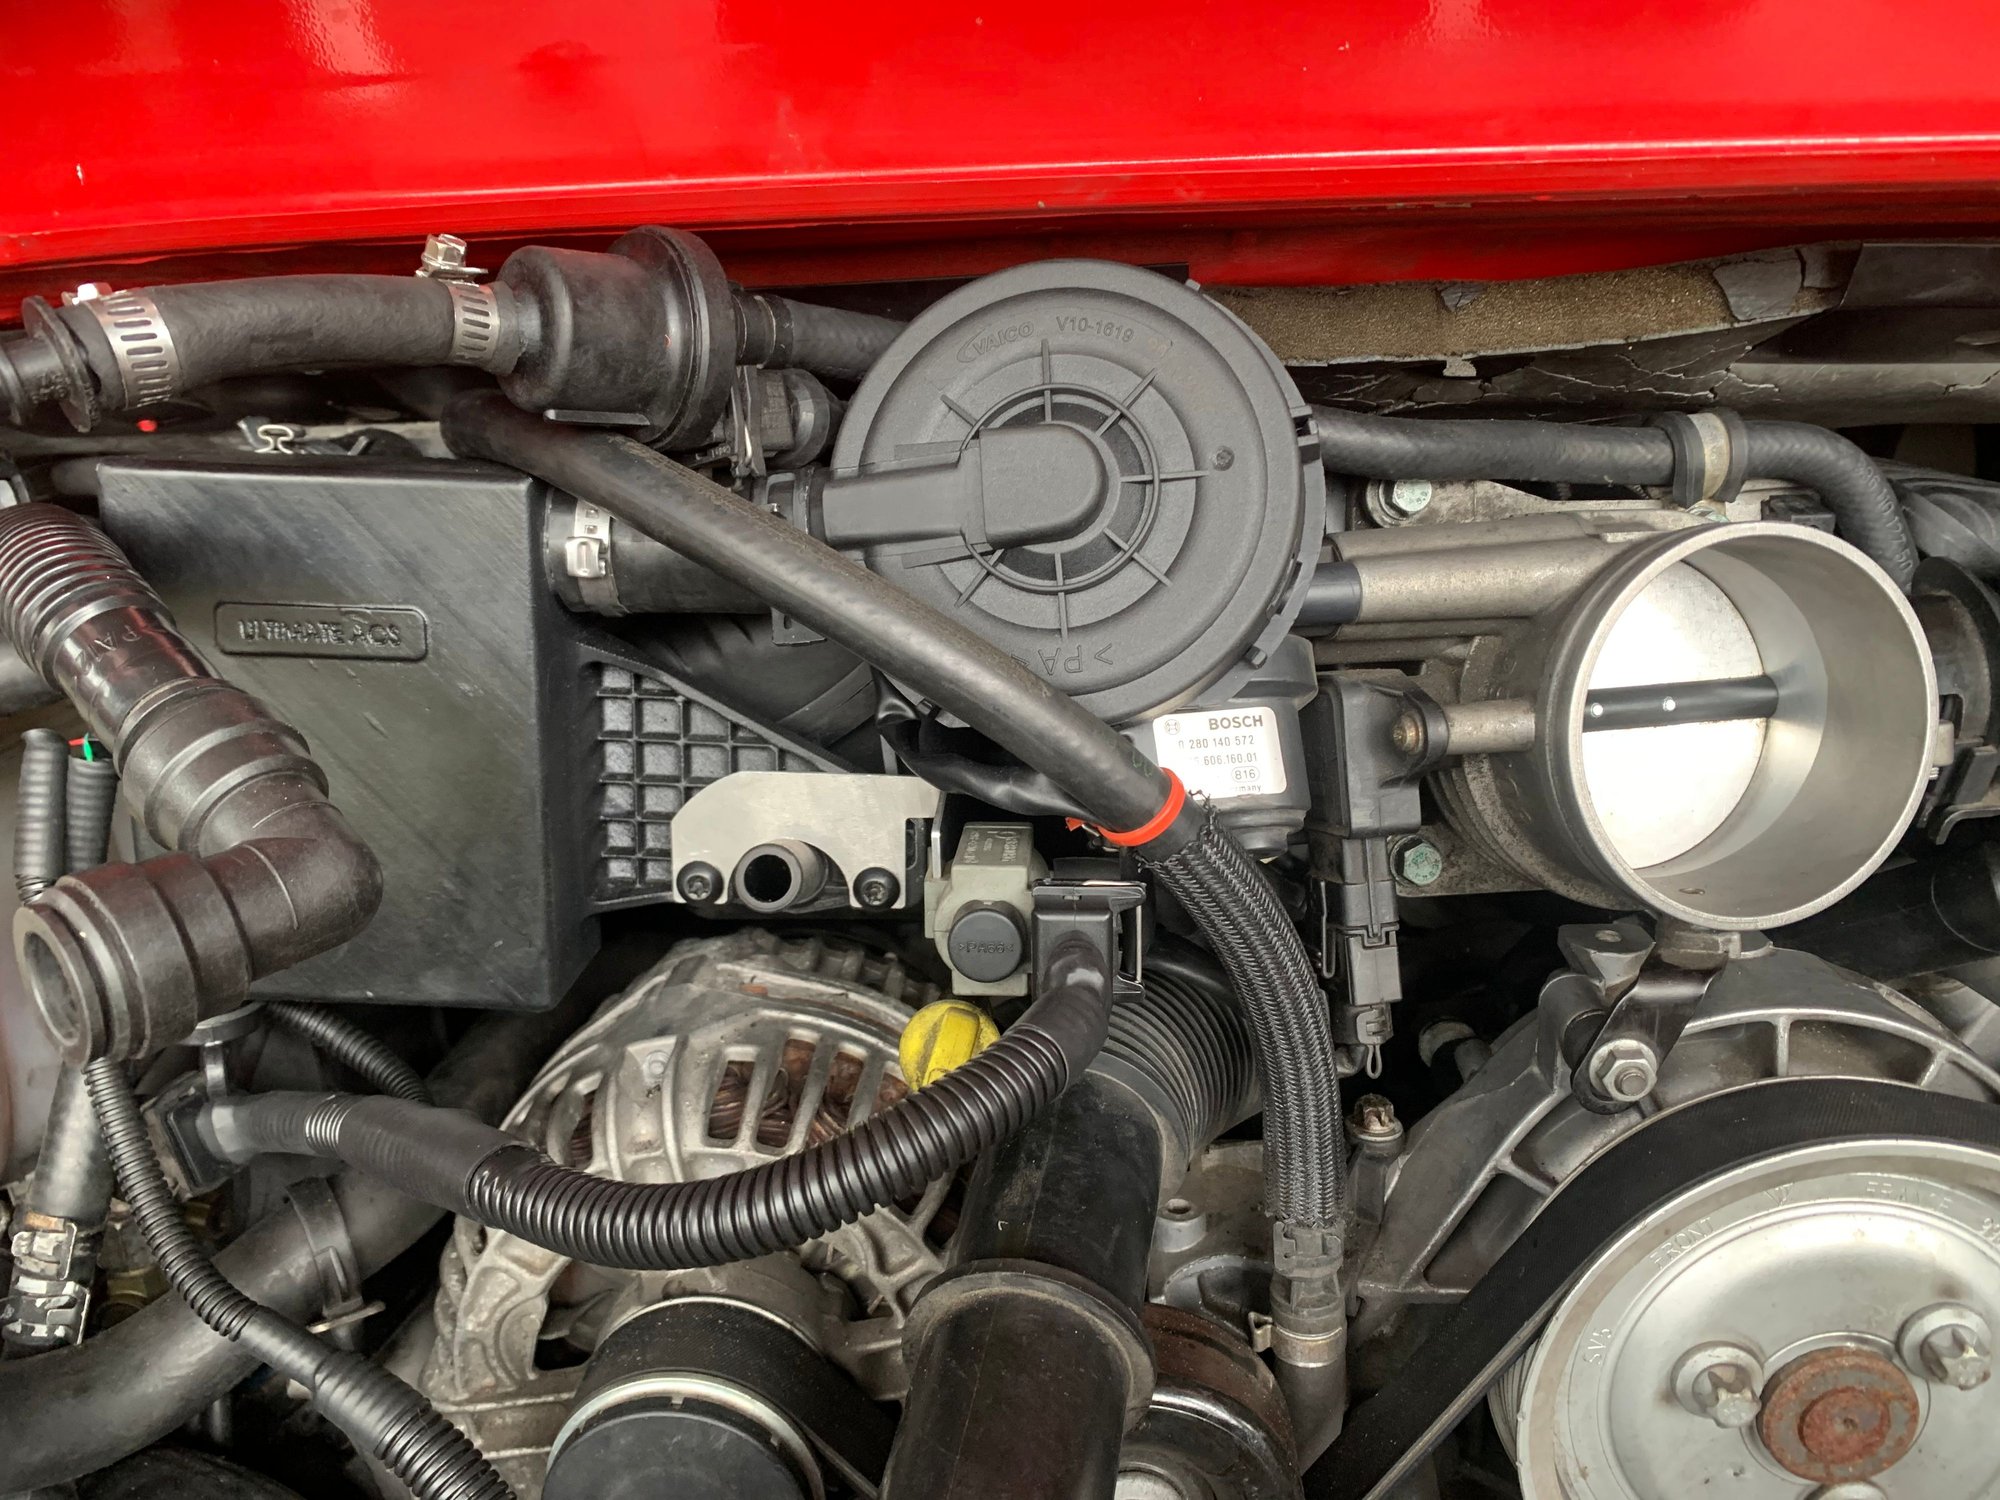
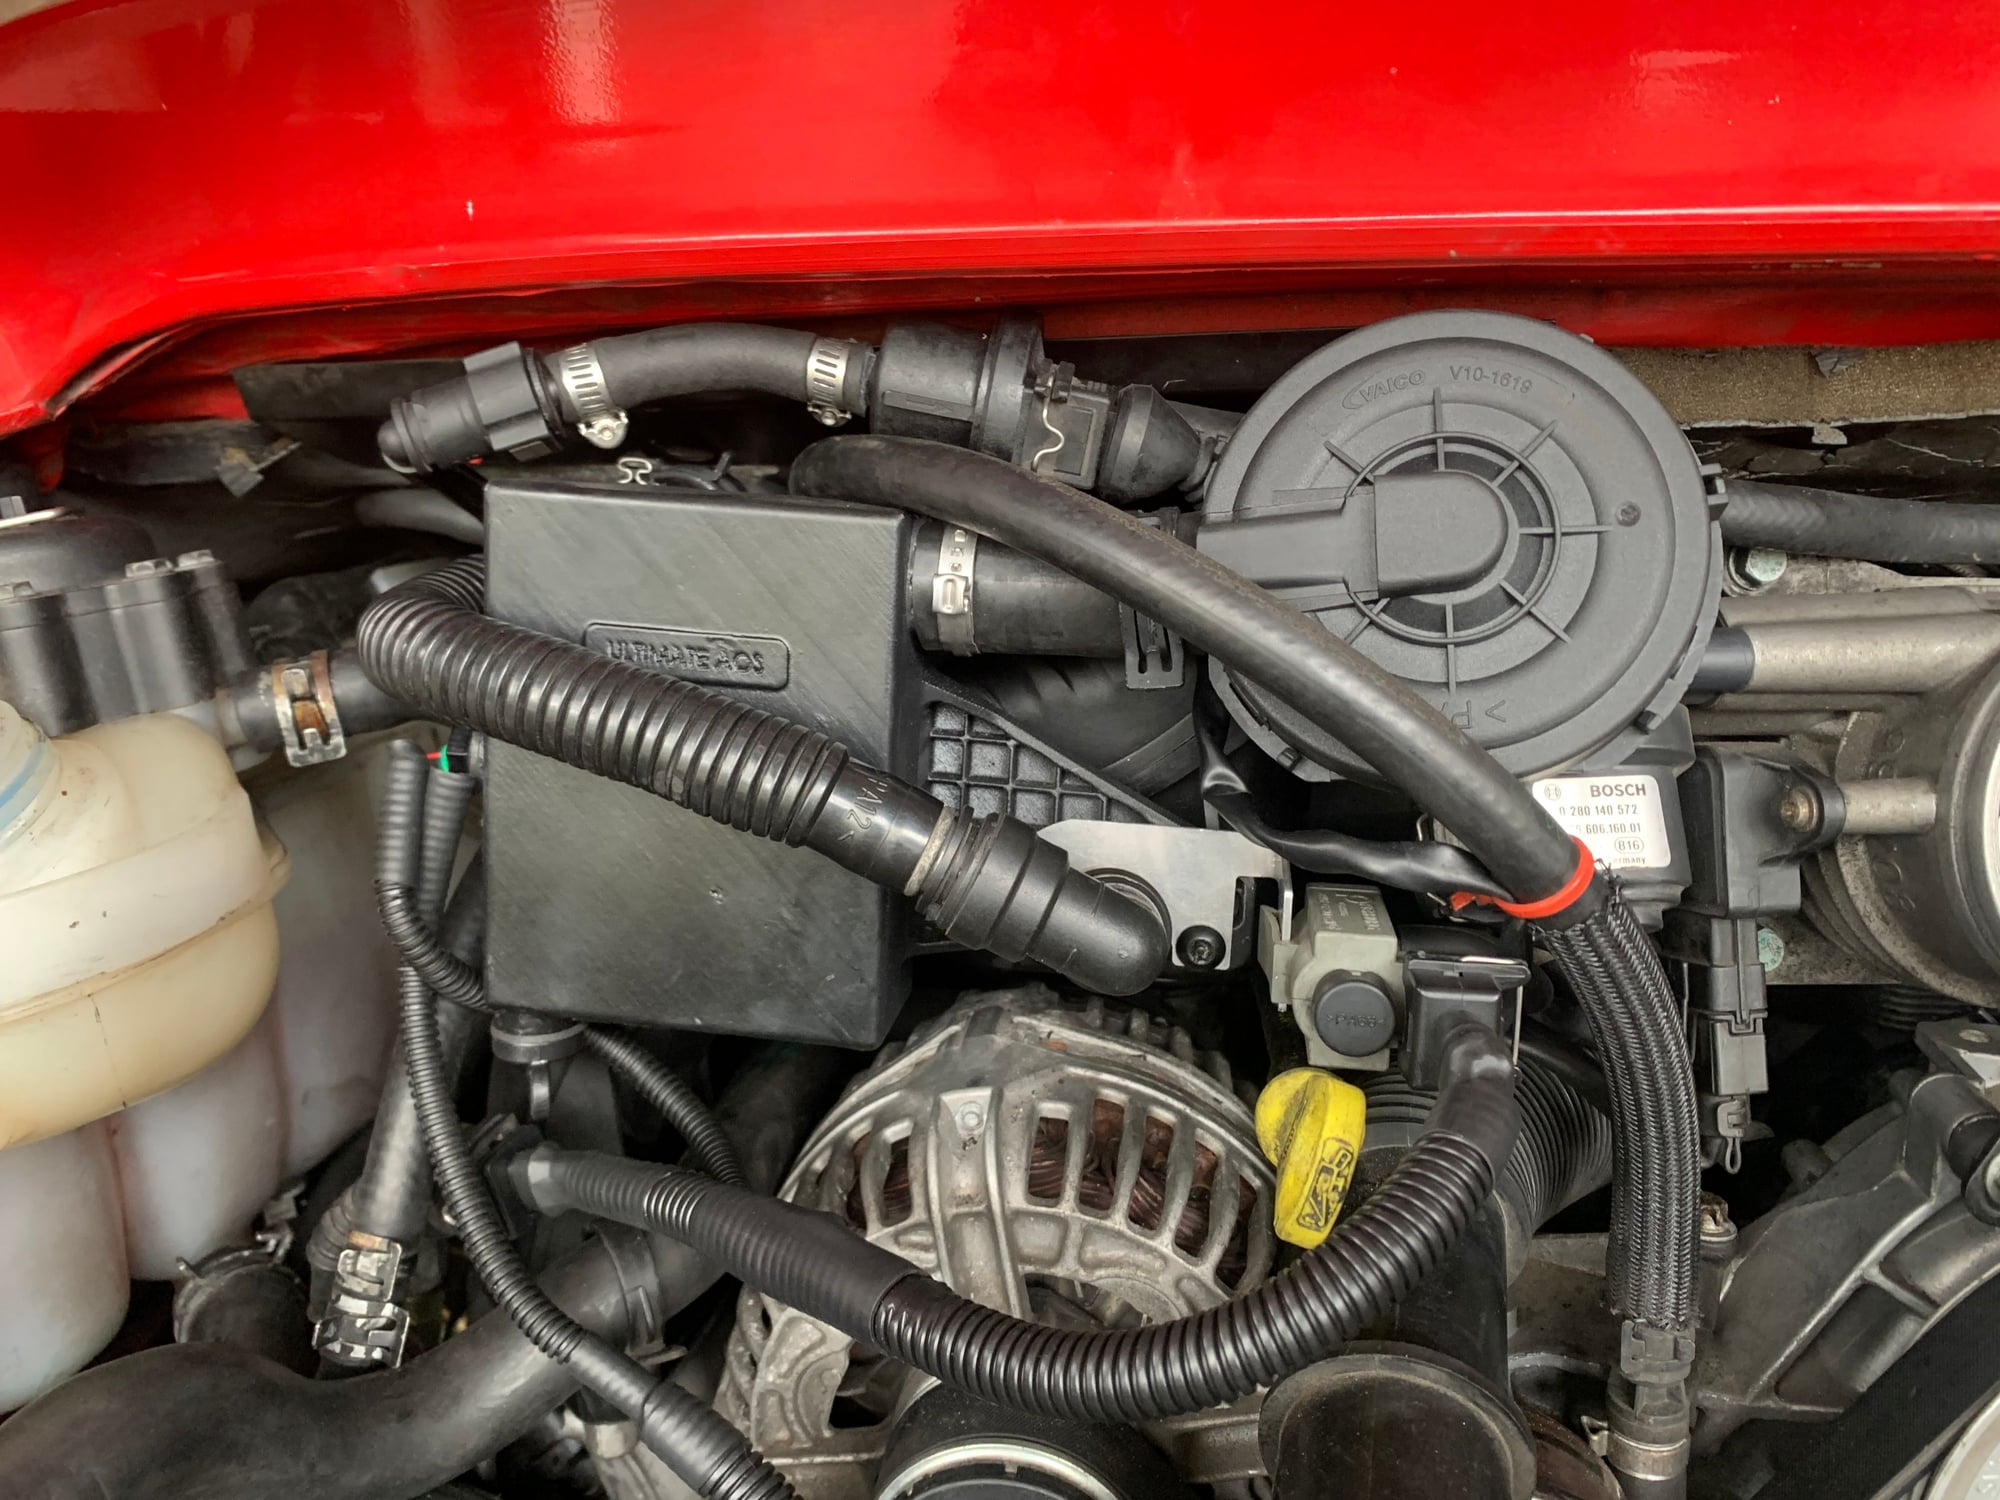
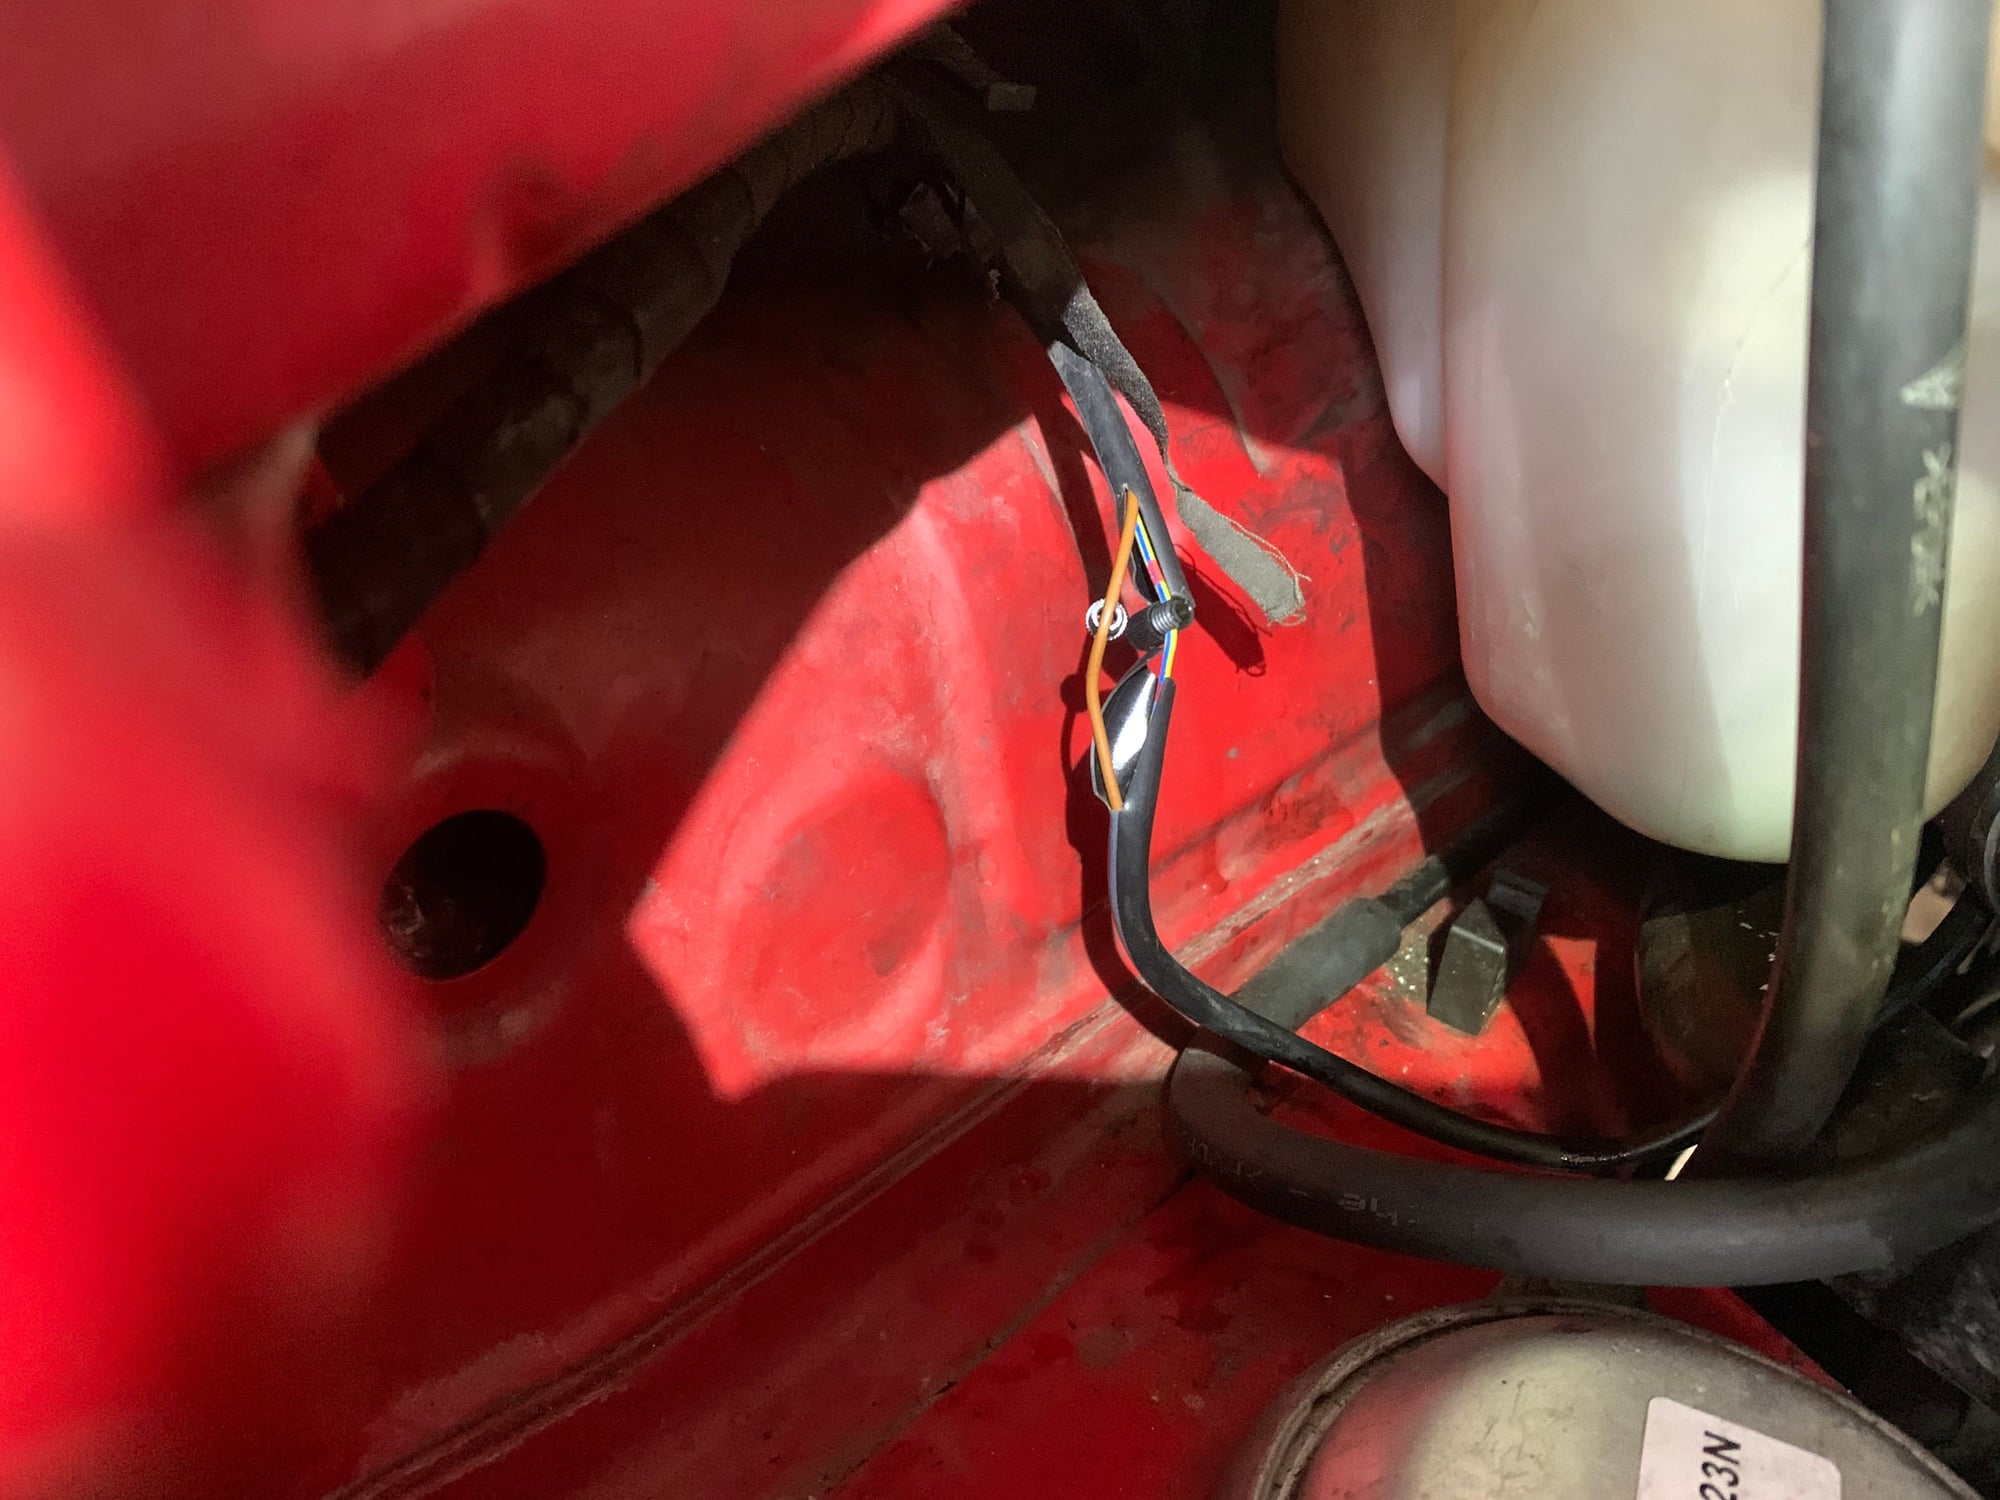
Something that could easily be overlooked; the little coolant hoses to the AOS. These are new and have new clamps. The special tool shown was purchased for crimping CV joint boot clamps. It works, just fine, on these one-time use clamps.
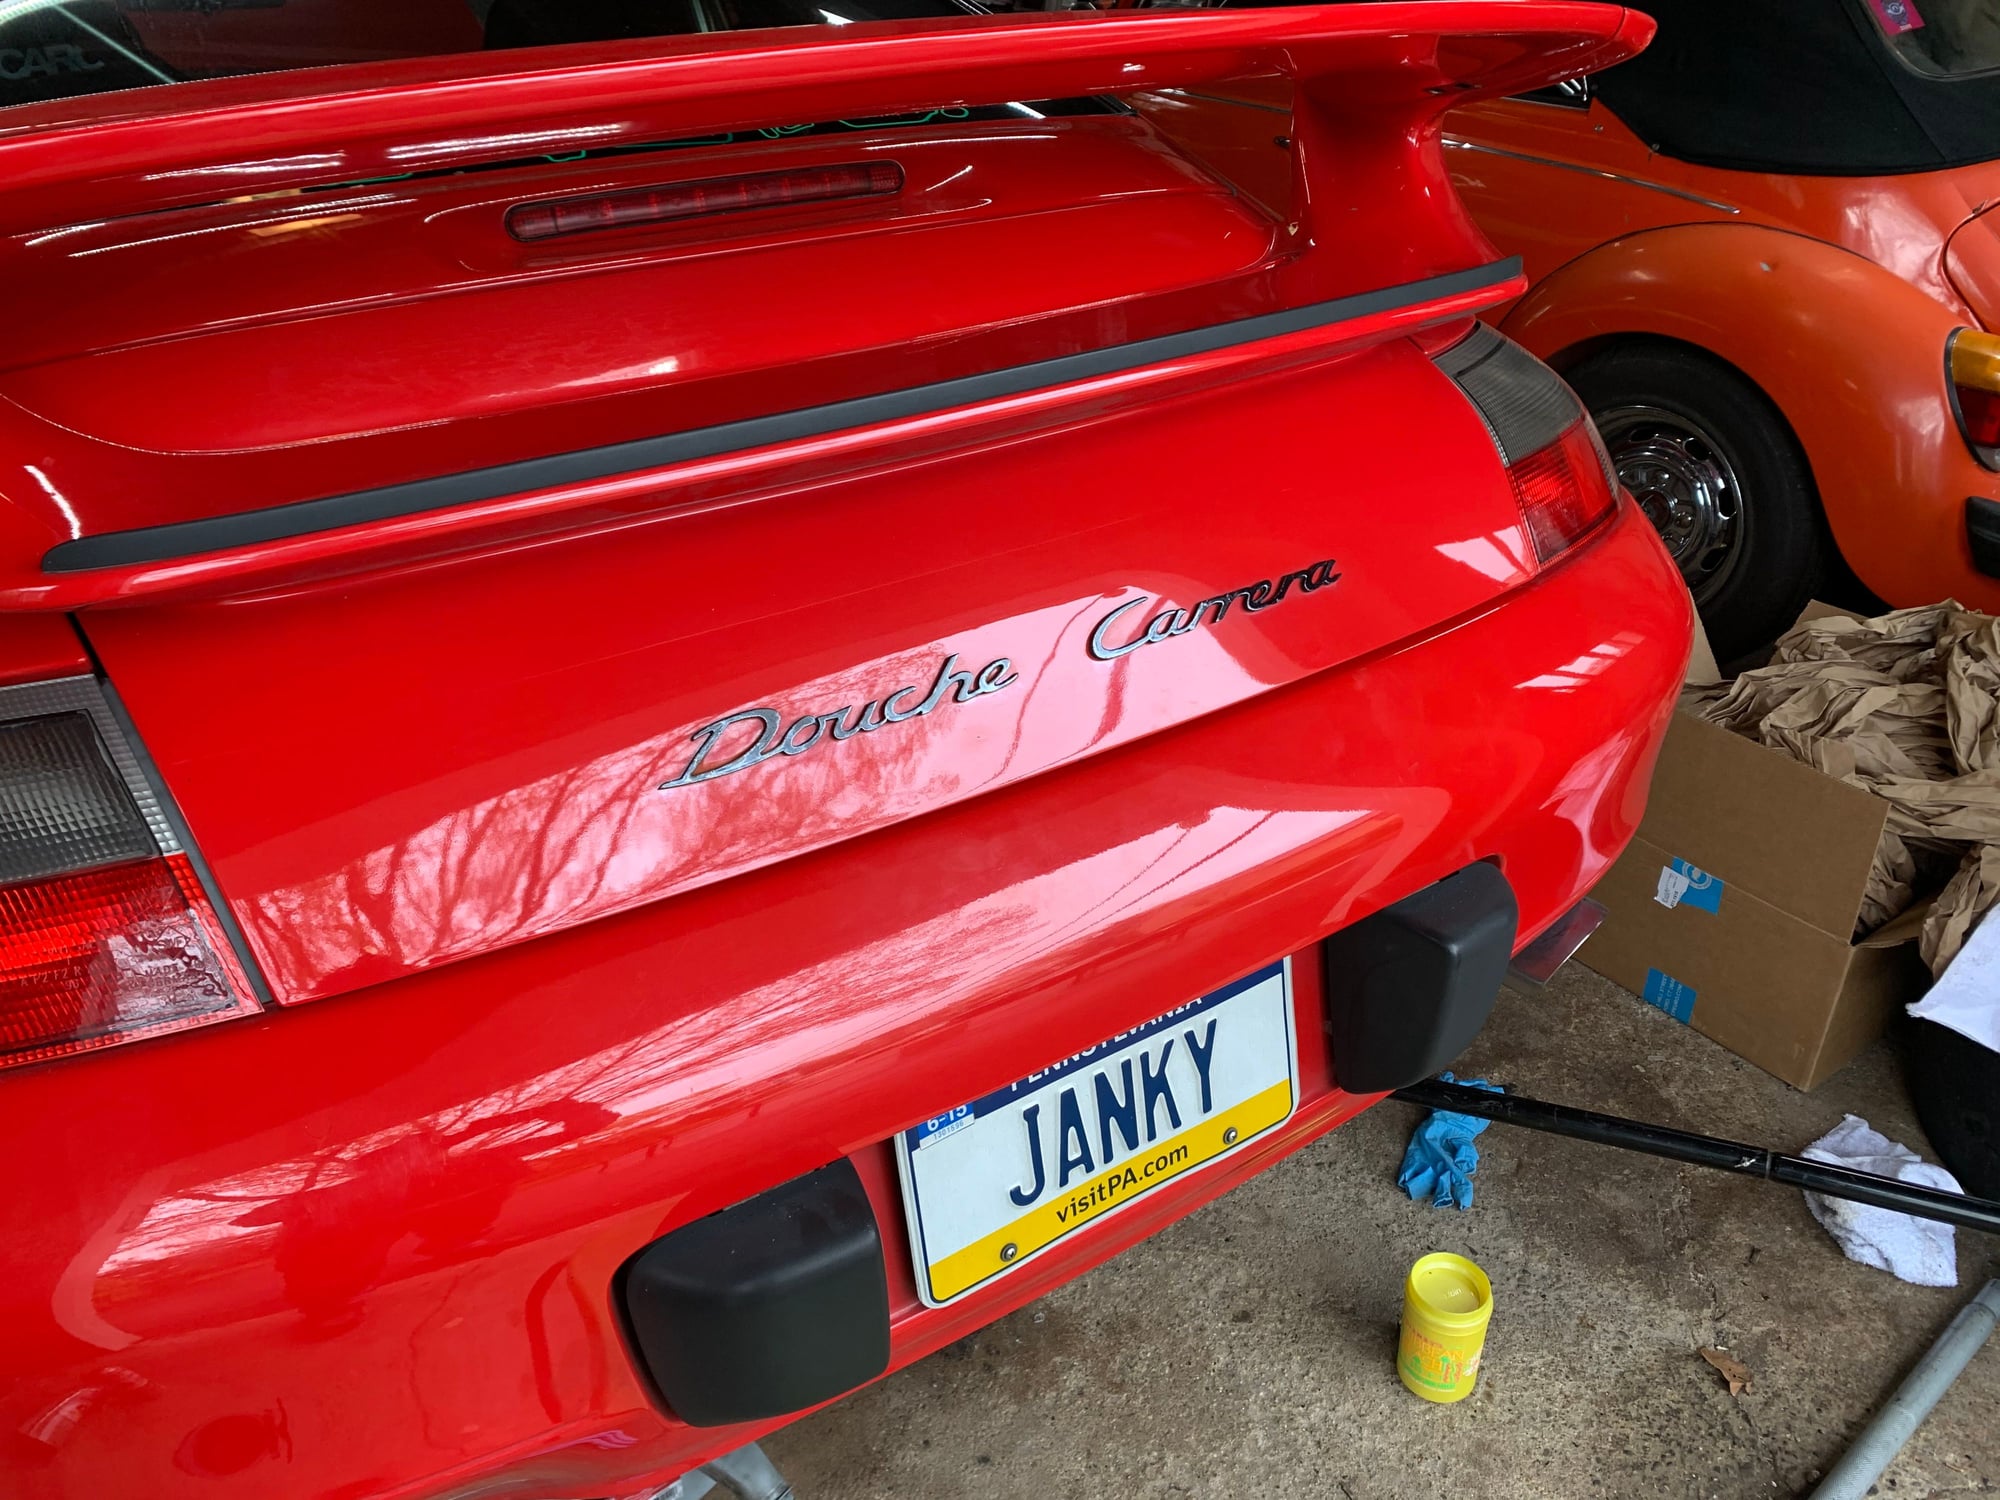
Wrapped up the install of the UAOS this weekend. The car is a 99 C2, according the Skip, the tightest of the installs due to the throttle cable on the 1999.
Not doing a full write-up. just some detailed pictures with some descriptions. I swapped out the AOS. The Pelican article is the best. In the write-up, there are a few pictures of where that stupid sixth bolt is. As a reminder, unbolt the AOS and pull it away, that will allow access. The picture below is the original AOS after the manifold has been removed.
This is the new AOS with the modified pipe from the UAOS. At this stage, do not bolt it back up to the block, you want it loose so you can get the manifold back on.
The manifold back in. Make sure to install the rear plenum at the same time as you put the manifold back on. It is impossible to install it after the manifold is installed (I've installed three AOSs, and have made this mistake twice).
Below are a couple pictures of how to get to that 6th bolt. The first one you can see a 4" extension on the bolt. The second, you can see where the hole is through the manifold. I use a telescoping magnet to get the bolt into the hole, and you can reach around the other side to push it down.
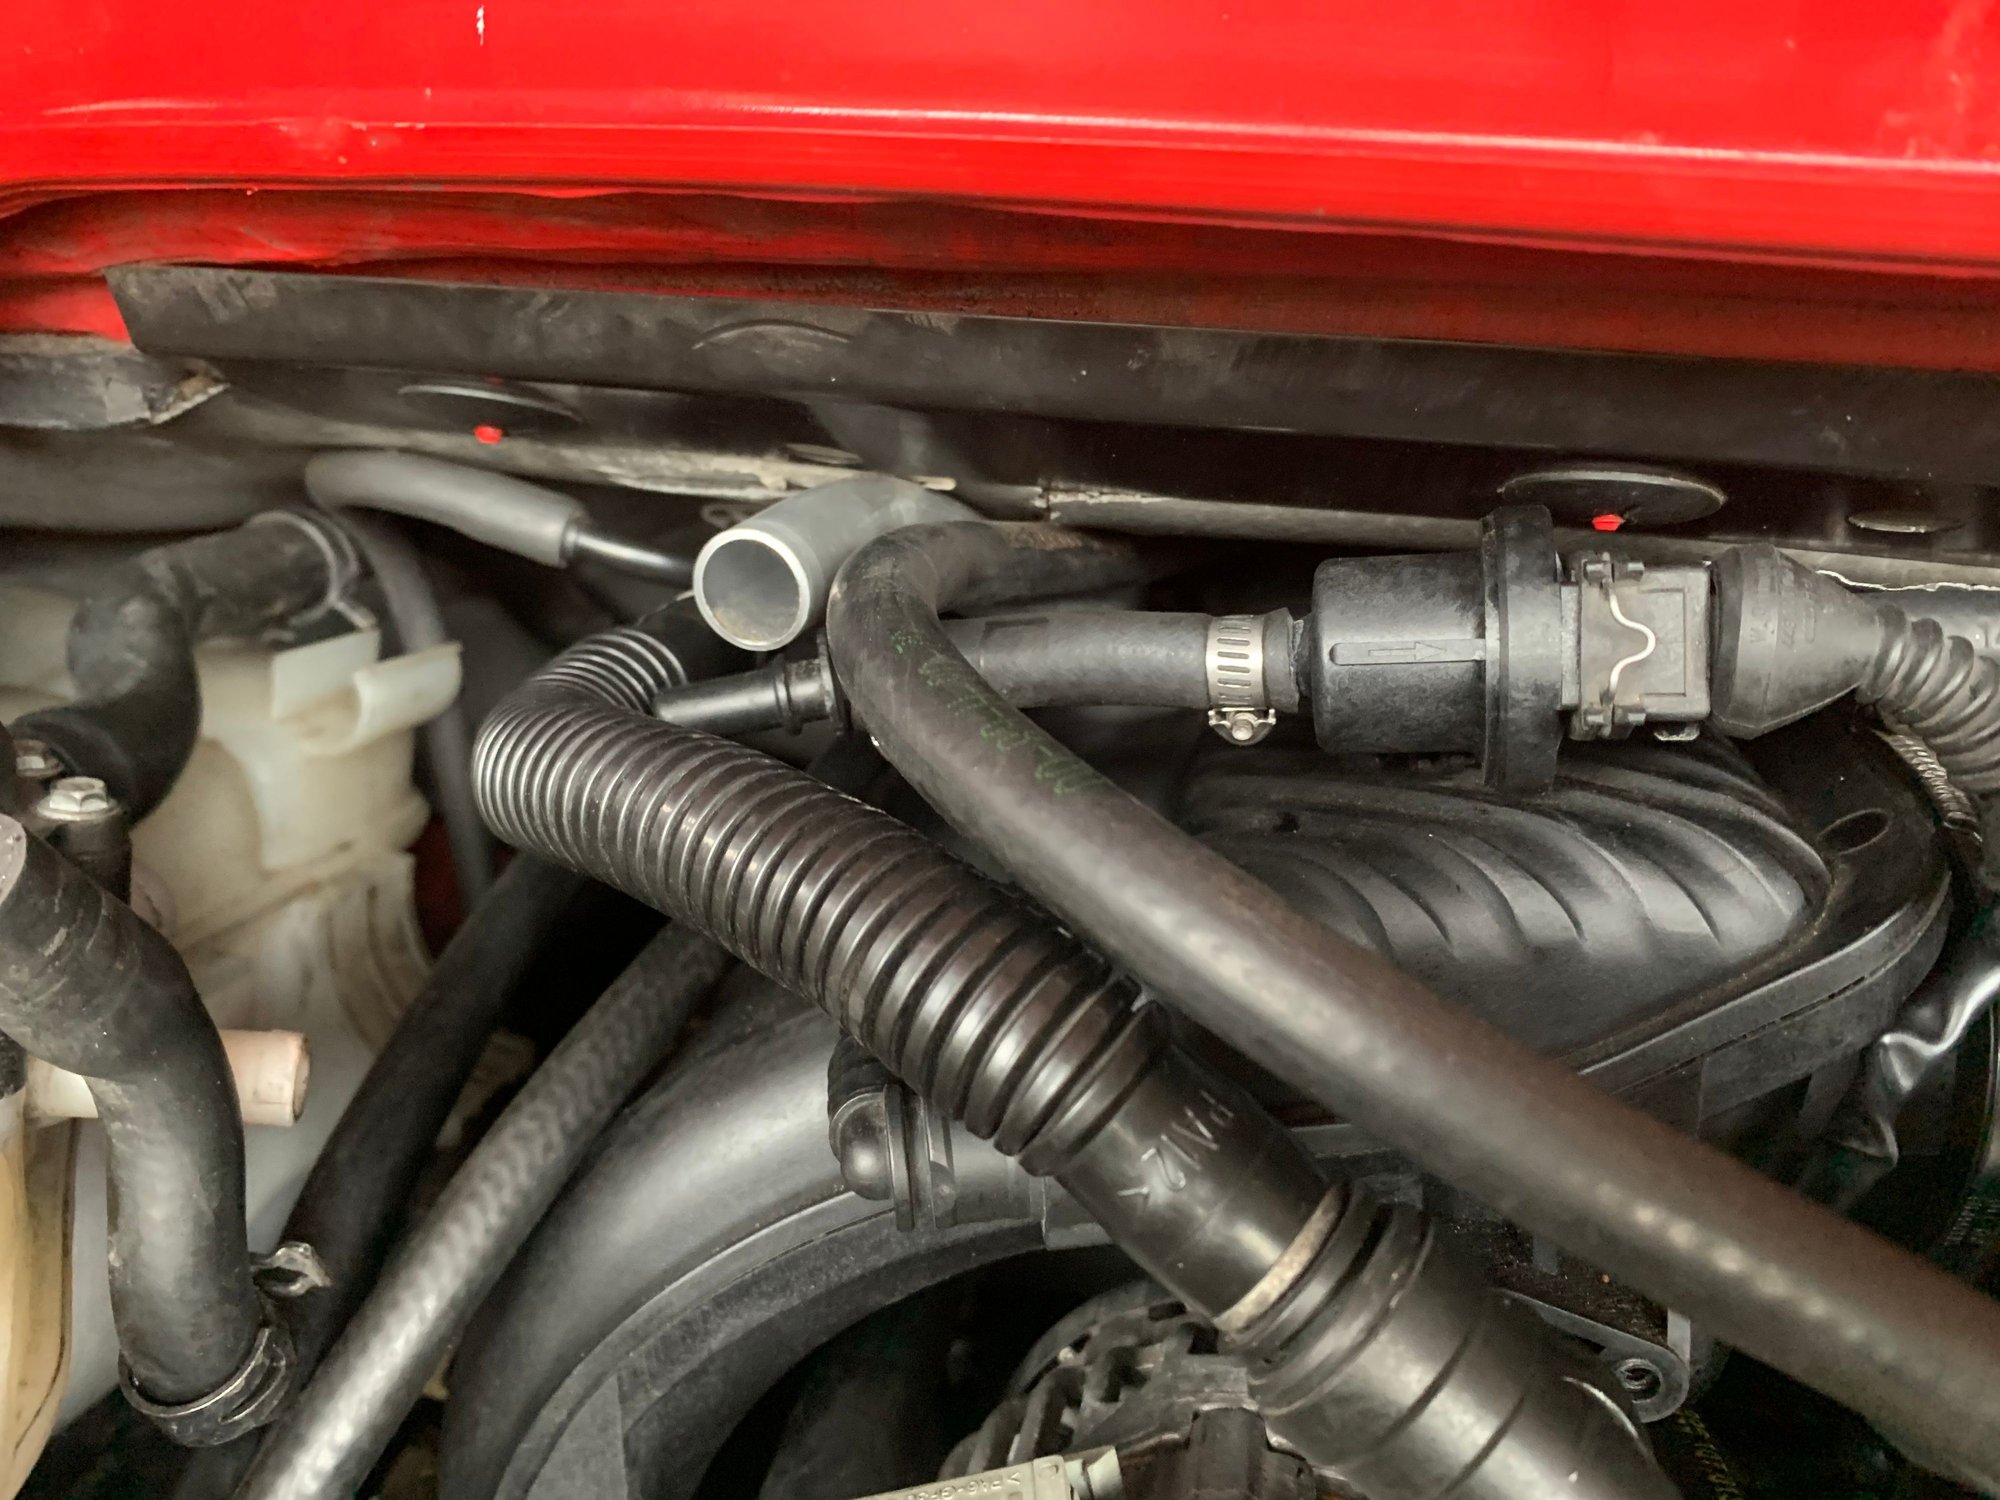
The rest are a bunch of pictures of the rest of the install. Not 100% sure I have all of the routing of the purge valve and one of the coolant lines exactly correct, but it appears to work.
All in all, this went really well and I am very impressed with the kit. Right down to the kit including the security torx bit needed. A couple of notes, especially for the 99. Attach the regulator to the throttle body first. You will need a pair of hose clamp pliers. Keep the clamp all the way at the end of the tube with it expanded, and insert the regulator, the release the clamp. I don't think it would be possible to get inserted correctly if it was already attached to the other side. The rest of it requires a little pushing adjusting and cursing to get everything in place, but I do think it would be 100X easier if it was not a 99.
The Douche Carrera is ready to ride again. Thanks Skip.
Good work on the UAOS install Kris!! Nice pics too !! The 99 C2 is definitely MUCH tighter than all the others due to the ISC and TPS sticking out in the way.
Couple of suggestion to give a more tidy look.
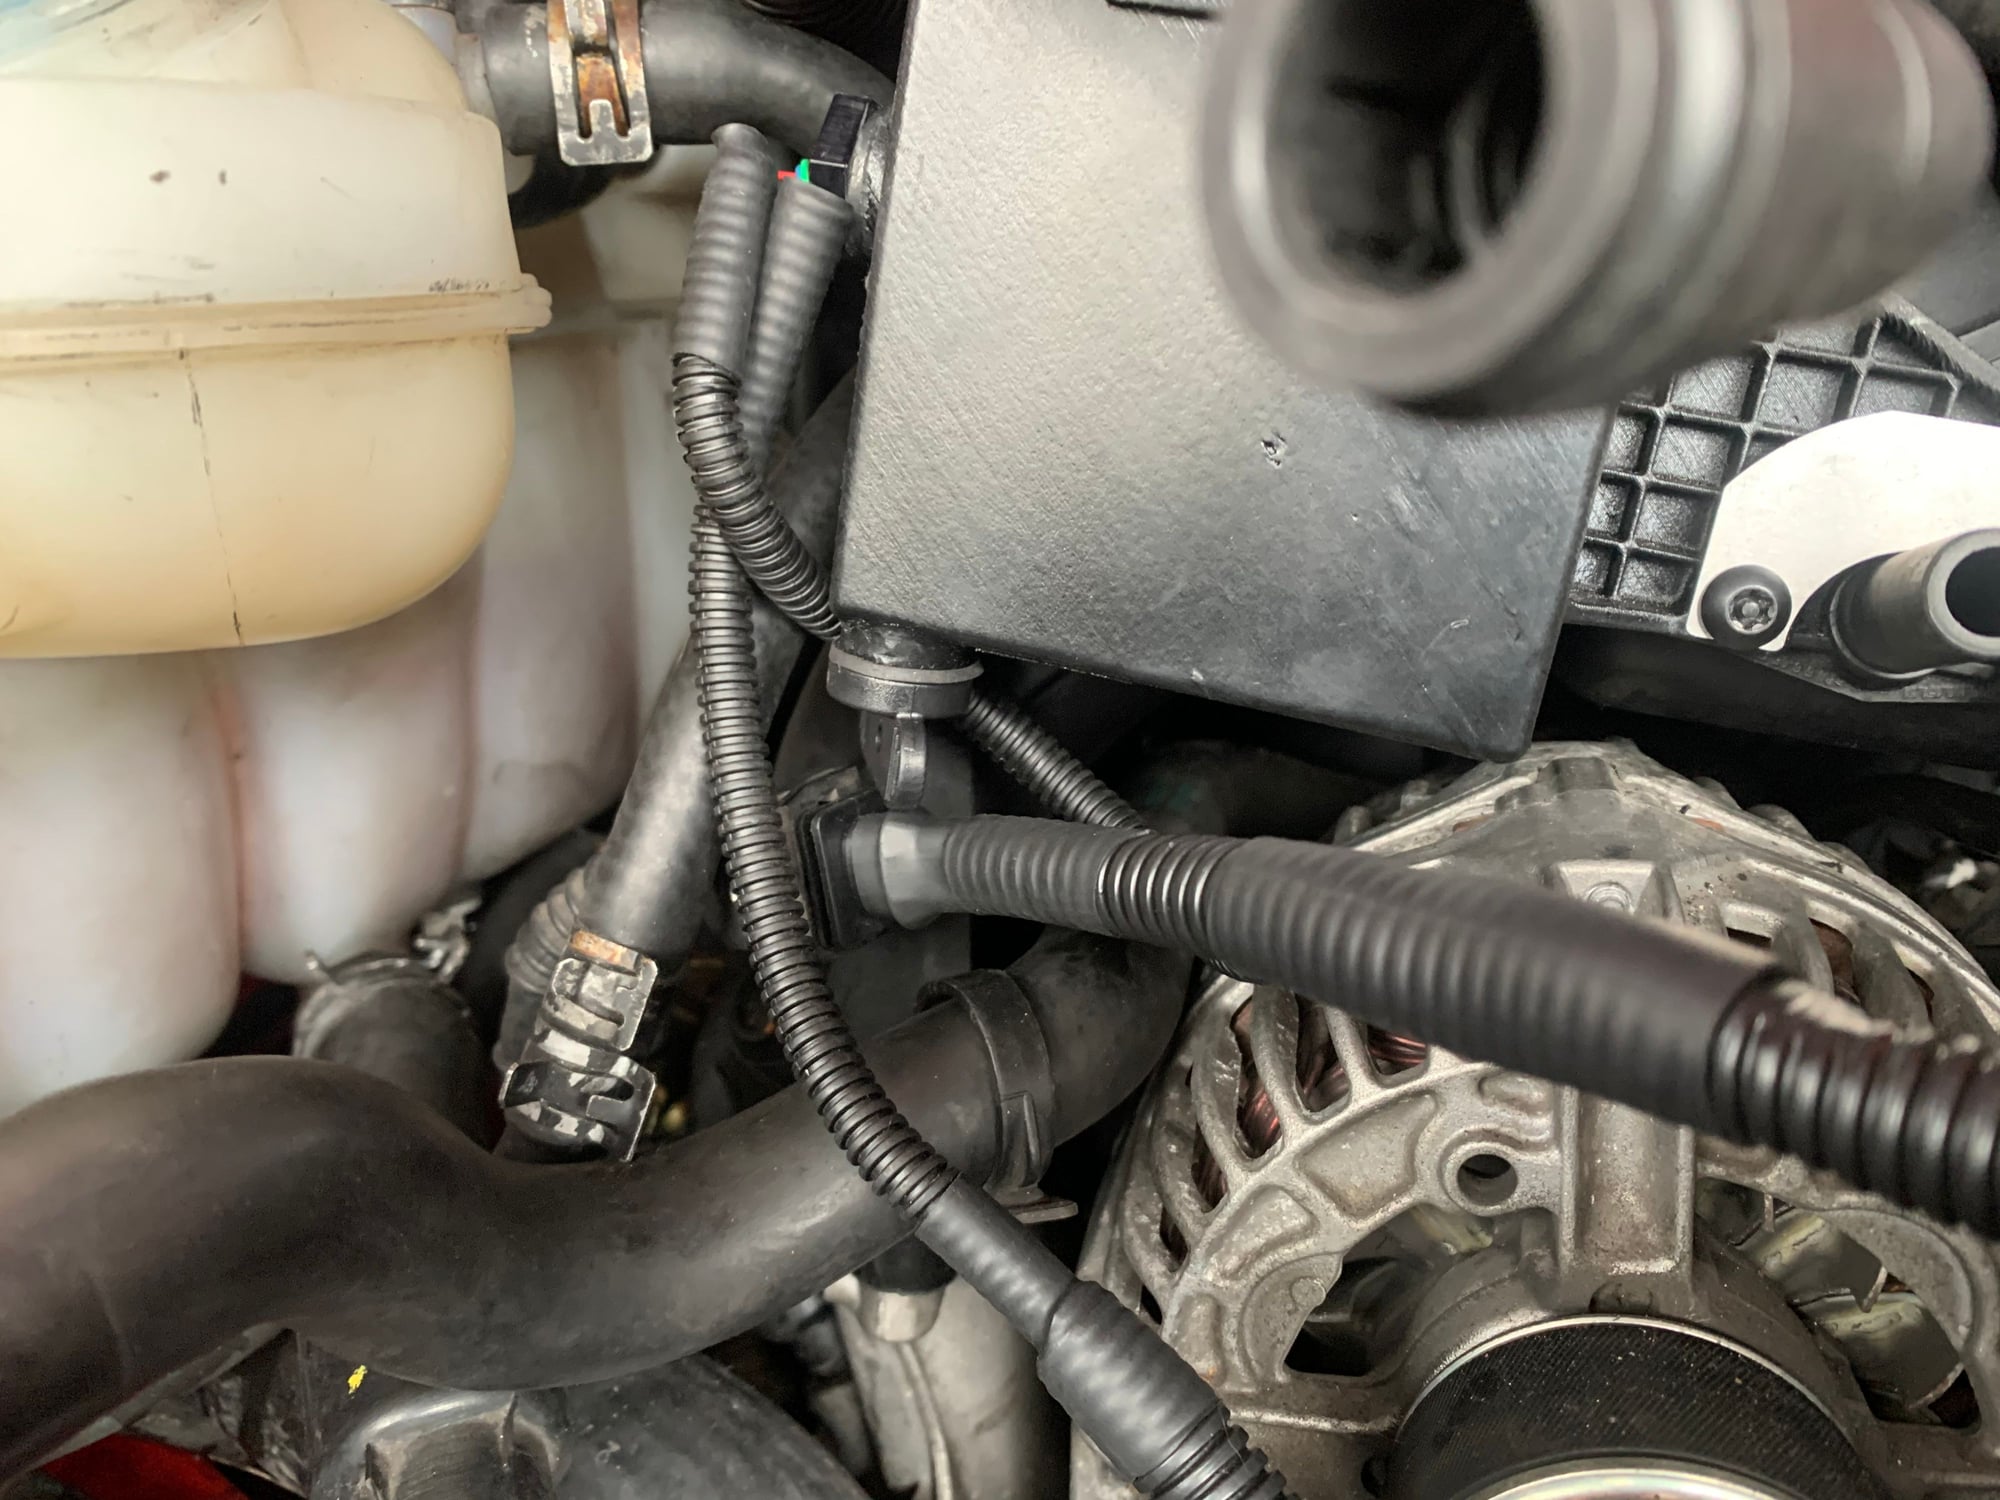
Route the change over valve extension harness right along the bottom of the Accumulator and tie strap it to the Power brake elbow.
Route the AOS heater hose over the Accumulator bracket , but under/behind the hose from Accumulator to regulator.
Adjust the regulator/hose to horizontal to the Accumulator (it will just swivel).
9 Vehicles Porsche Helped Engineer that Aren't Porsches
Slideshow: Long before engineering consulting became trendy, Porsche was quietly helping other automakers build everything from supercars to economy hatchbacks.
9 Features and Characteristics That Only Porsche People Understand
Slideshow: Some brands build cars. Porsche builds traditions, obsessions, and a few habits that stopped making sense decades ago but somehow became part of the charm.
This Builder Is Turning Heads With Its Slantnose 911 Creation
Slideshow: A small Polish tuner has reimagined the Porsche 911 Slantnose for the modern era, blending 1980s nostalgia with widebody tuning culture and serious performance upgrades.
Porsche 911 GT3 Artisan Edition Pays Homage to Japanese Culture
Slideshow: Porsche has created a Japan-only 911 GT3 Artisan Edition that blends track-ready hardware with design cues inspired by traditional Japanese craftsmanship.
Porsche Reveals Coupe Variant of the Electric Cayenne With a Fresh Look
Slideshow: Porsche's latest electric Cayenne Coupe blends dramatic styling with supercar acceleration, turning the brand's midsize SUV into a 1,139-horsepower flagship.