When you click on links to various merchants on this site and make a purchase, this can result in this site earning a commission. Affiliate programs and affiliations include, but are not limited to, the eBay Partner Network.
We're set up to vapor blast, jet wash, and ultrasonic wash. Heavily soiled blocks have to be deep cleaned before machining as the oil can contaminate the coolant in our CNCs.
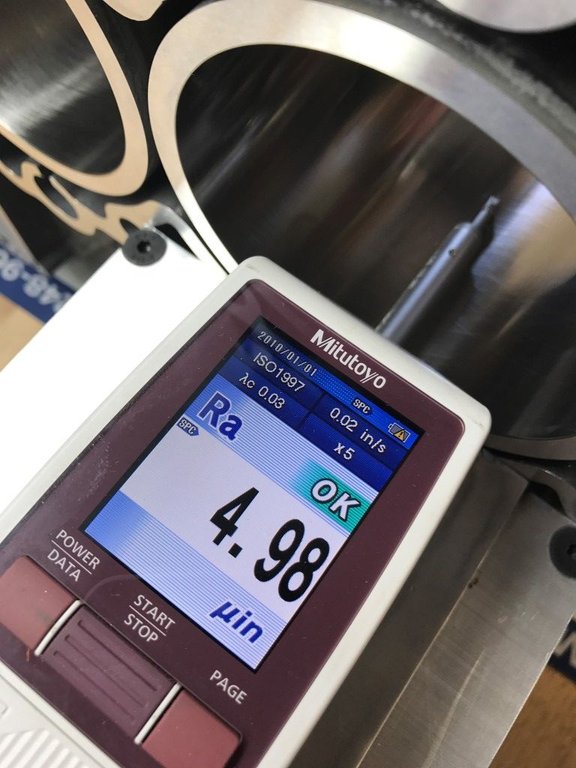
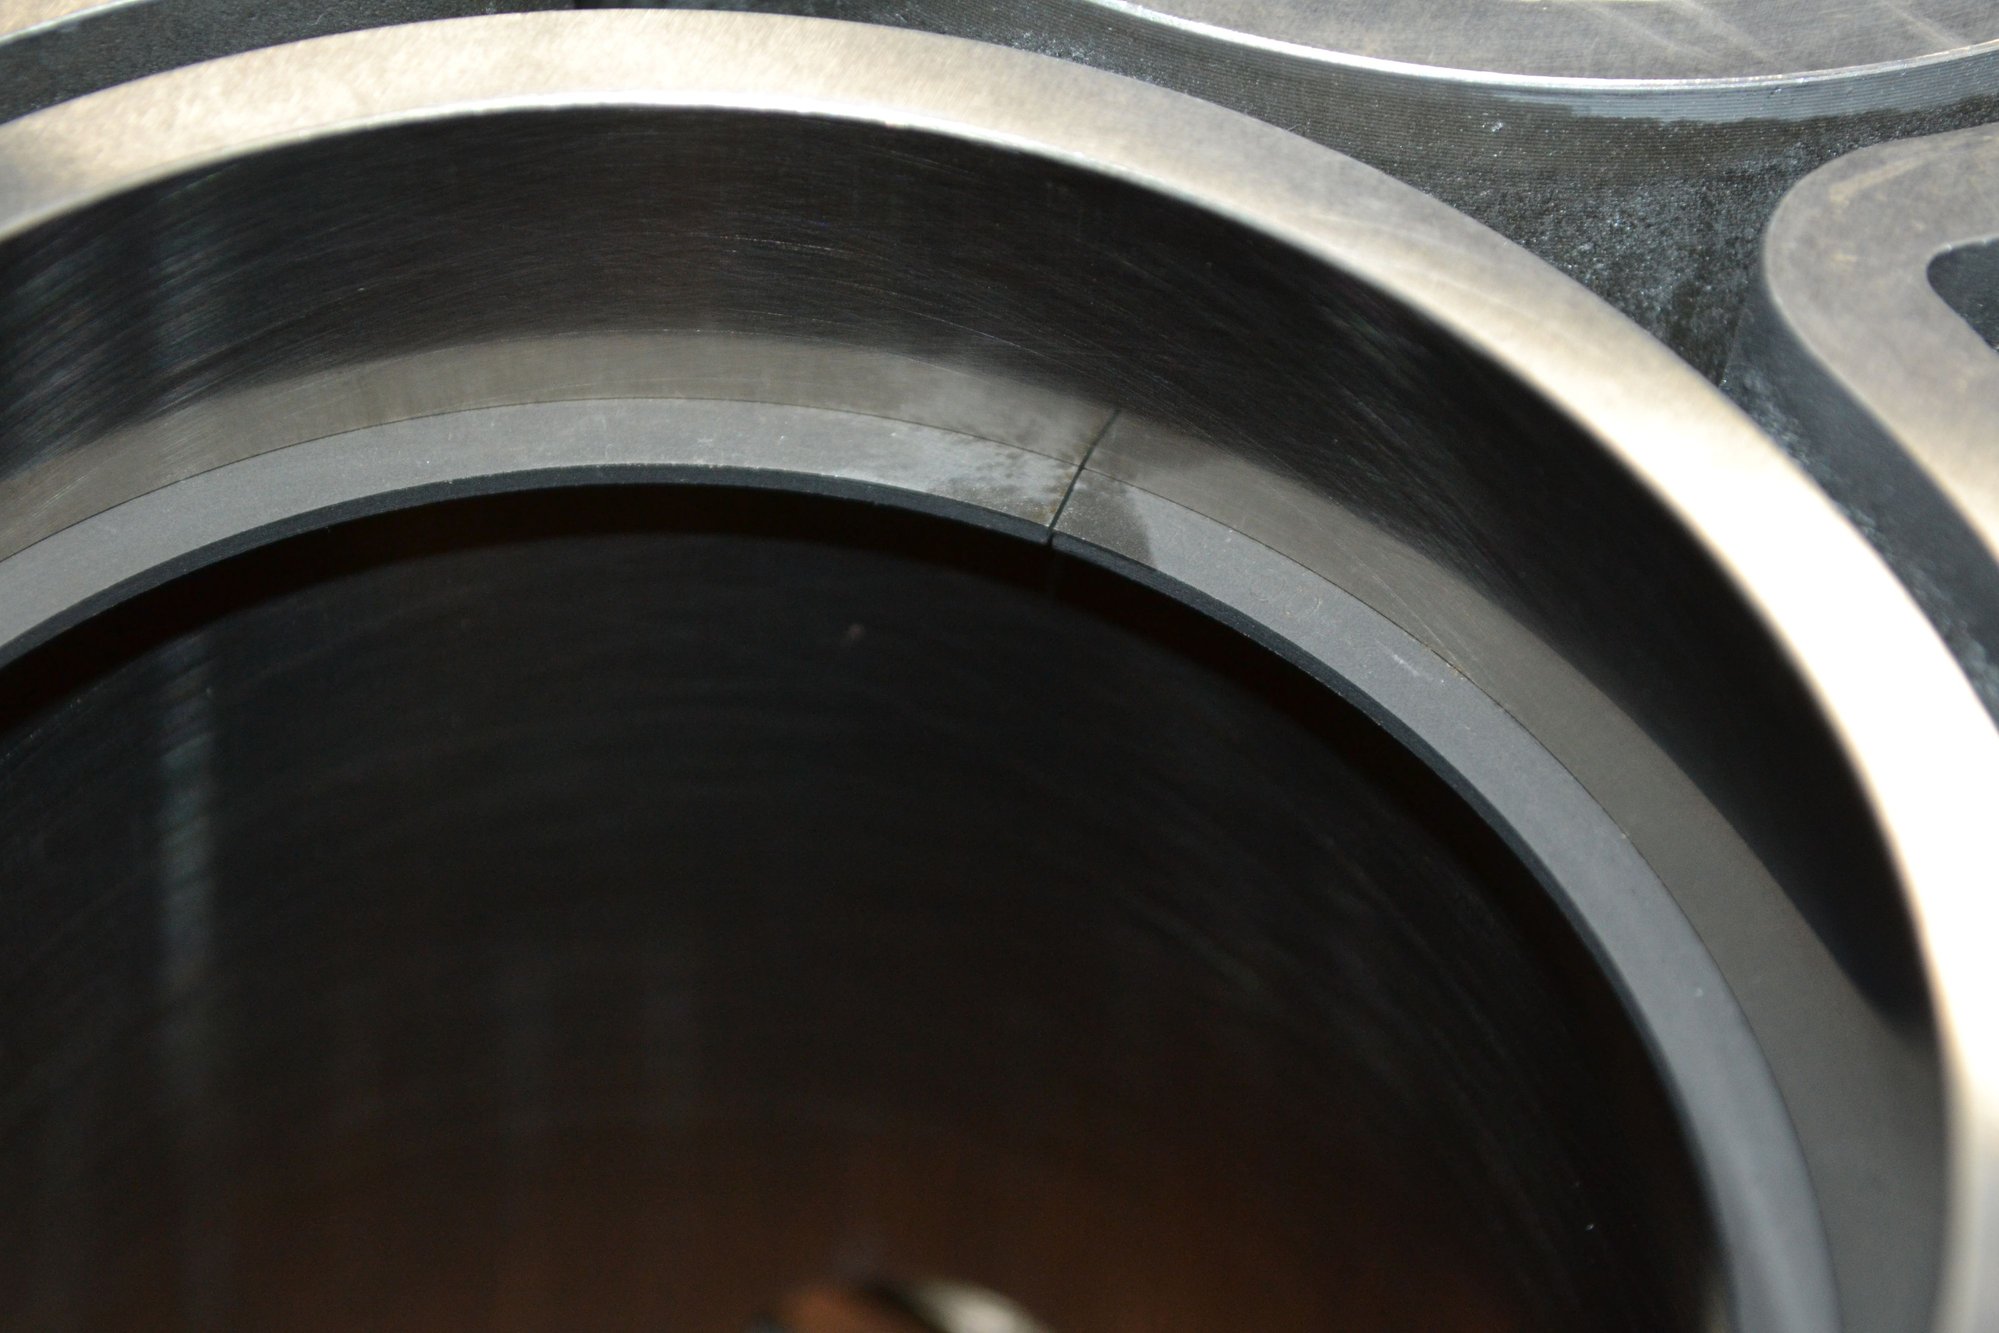
Blocks also get washed before and after machining and also after sleeves are finish honed by the platers. When blocks come back to us, we pressure test them and all bores are measured for ovality, taper, and surface finish. We have our own standards for surface finish.
It is critical that all the oil and coolant passages as well as all surfaces are thoroughly cleaned as it's possible there's contamination from the reconditioning process. Also, the bores will have honing oil/Nikasil dust mix embedded in the cylinder honing crosshatches. This is very abrasive and will cause accelerated cylinder, piston, and ring wear, resulting in poor ring seal and all your hard work having to be done all over again. This can be a costly mistake if not done correctly.
Years ago Jake and I had a mutual customer that was rebuilding an aircooled engine. Engine would only last about 1,000 miles and would begin to consume copoius amounts of engine oil. We kept on redoing the cylinders and replacing parts and eventually Jake had the customer come build the engine at his shop in GA. Jake told him to clean all the parts and to let him know when it was ready to go together. In less than an hour, he said it was all clean. Jake grabbed a cylinder and wiped it down. The answer why he kept having problems was because he wasn't cleaning the cylinder bores properly. The nikasil dust/honing oil mix was eating the rings up and resulting in bores that needed to be refinished due to scuffing. Moral of the story is "Cleanliness is next to Godliness."
We're set up to vapor blast, jet wash, and ultrasonic wash. Heavily soiled blocks have to be deep cleaned before machining as the oil can contaminate the coolant in our CNCs.
Blocks also get washed before and after machining and also after sleeves are finish honed by the platers. When blocks come back to us, we pressure test them and all bores are measured for ovality, taper, and surface finish. We have our own standards for surface finish.
It is critical that all the oil and coolant passages as well as all surfaces are thoroughly cleaned as it's possible there's contamination from the reconditioning process. Also, the bores will have honing oil/Nikasil dust mix embedded in the cylinder honing crosshatches. This is very abrasive and will cause accelerated cylinder, piston, and ring wear, resulting in poor ring seal and all your hard work having to be done all over again. This can be a costly mistake if not done correctly.
Years ago Jake and I had a mutual customer that was rebuilding an aircooled engine. Engine would only last about 1,000 miles and would begin to consume copoius amounts of engine oil. We kept on redoing the cylinders and replacing parts and eventually Jake had the customer come build the engine at his shop in GA. Jake told him to clean all the parts and to let him know when it was ready to go together. In less than an hour, he said it was all clean. Jake grabbed a cylinder and wiped it down. The answer why he kept having problems was because he wasn't cleaning the cylinder bores properly. The nikasil dust/honing oil mix was eating the rings up and resulting in bores that needed to be refinished due to scuffing. Moral of the story is "Cleanliness is next to Godliness."
Charles - thanks for adding this. Great information.
I do have a few questions: If you are willing to help resolve them, that would be awesome. Otherwise, I can place a call. I had a fun conversation with George a couple of days ago. Wouldn't mind doing that again, but your answers may help others that find themselves in the same situation as me.
1) The box that the block halves were shipped in - I want to return it. I think there is a "core" charge on it. What's the best way to close this out?
2) I recall seeing a plug for the piston pin installation tool in bank #2. I don't recall removing it, haven't found it in my box of parts and it's not in the block. Is there a chance it was removed and not returned with the block?
3) The studs at the front of the block, to hold the front console, had to be removed. I didn't know that I should have taken care of this. It would be helpful to indicate this on your website so others don't make this mistake. Had I known, I would have at least made an effort to get them out. Now that they are out, is there a preferred method for reinstalling them? My plan would be to clean the threads (both internal and external), place a little oil on the stud threads and torque them to spec by using double nuts on the opposite end. Is this an acceptable procedure?
4) Finally, not a question - just an observation - beautiful work! Amazing how clean and nice everything came out. Another thing that would be useful for others, add a note on your website suggesting that customers pre-clean the block halves prior to shipping to you. Had I known an extra charge would be incurred; I would have put more effort in to that, as well.
One more parting shot: I got another rack to keep things organized. This is currently used for new parts and those next-up in the assembly process.
Last edited by Scott at Team Harco; 03-18-2020 at 09:03 PM.
Reason: When I say bank #1, I sometimes mean bank #2
Thanks to all who are participating on this thread. You guys are so helpful and inspirational that I can't wait to read any new updates on it. What a great community and fantastic job that you are doing on your engine Scott. Keep us posted.
Charles - thanks for adding this. Great information.
I do have a few questions: If you are willing to help resolve them, that would be awesome. Otherwise, I can place a call. I had a fun conversation with George a couple of days ago. Wouldn't mind doing that again, but your answers may help others that find themselves in the same situation as me.
1) The box that the block halves were shipped in - I want to return it. I think there is a "core" charge on it. What's the best way to close this out?
2) I recall seeing a plug for the piston pin installation tool in bank #1. I don't recall removing it, haven't found it in my box of parts and it's not in the block. Is there a chance it was removed and not returned with the block?
3) The studs at the front of the block, to hold the front console, had to be removed. I didn't know that I should have taken care of this. It would be helpful to indicate this on your website so others don't make this mistake. Had I known, I would have at least made an effort to get them out. Now that they are out, is there a preferred method for reinstalling them? My plan would be to clean the threads (both internal and external), place a little oil on the stud threads and torque them to spec by using double nuts on the opposite end. Is this an acceptable procedure?
4) Finally, not a question - just an observation - beautiful work! Amazing how clean and nice everything came out. Another thing that would be useful for others, add a note on your website suggesting that customers pre-clean the block halves prior to shipping to you. Had I known an extra charge would be incurred; I would have put more effort in to that, as well.
One more parting shot: I got another rack to keep things organized. This is currently used for new parts and those next-up in the assembly process.
The wrist pin access plug has to be removed during the process. It is normally in a small zip lock bag, but it's possible it got misplaced if it wasn't removed prior to shipping to us. We can get you a replacement sent out - not an issue.
There is a small core charge on the box somewhere under $100 (I don't know the exact cost on these, but it's expensive), but shipping is close to the cost of the box due to dimensional weight, so most choose not to send it back. Normally shops hold onto them for the next block to send in.
Double nutting the studs is the best way to re-install them unless there is some fancy snap on tool to do this (which I'm sure there is).
Thanks for the suggestion. We do provide instructions with the pre-paid block block box shipping (where we send the customer the empty box with block preforms) that provides guidelines for what needs to be removed and about cleaning the block. These guidelines are on the website too. There is lots of information on there - I'll work to make it easier to find.
Thanks for staying tuned-in Charles. I'll do another check for the plug. I'm fairly certain it's not in the box. I did find the studs in with the pistons.
You're absolutely right - there is a lot of information at your website. I could have easily missed the two details I mention.
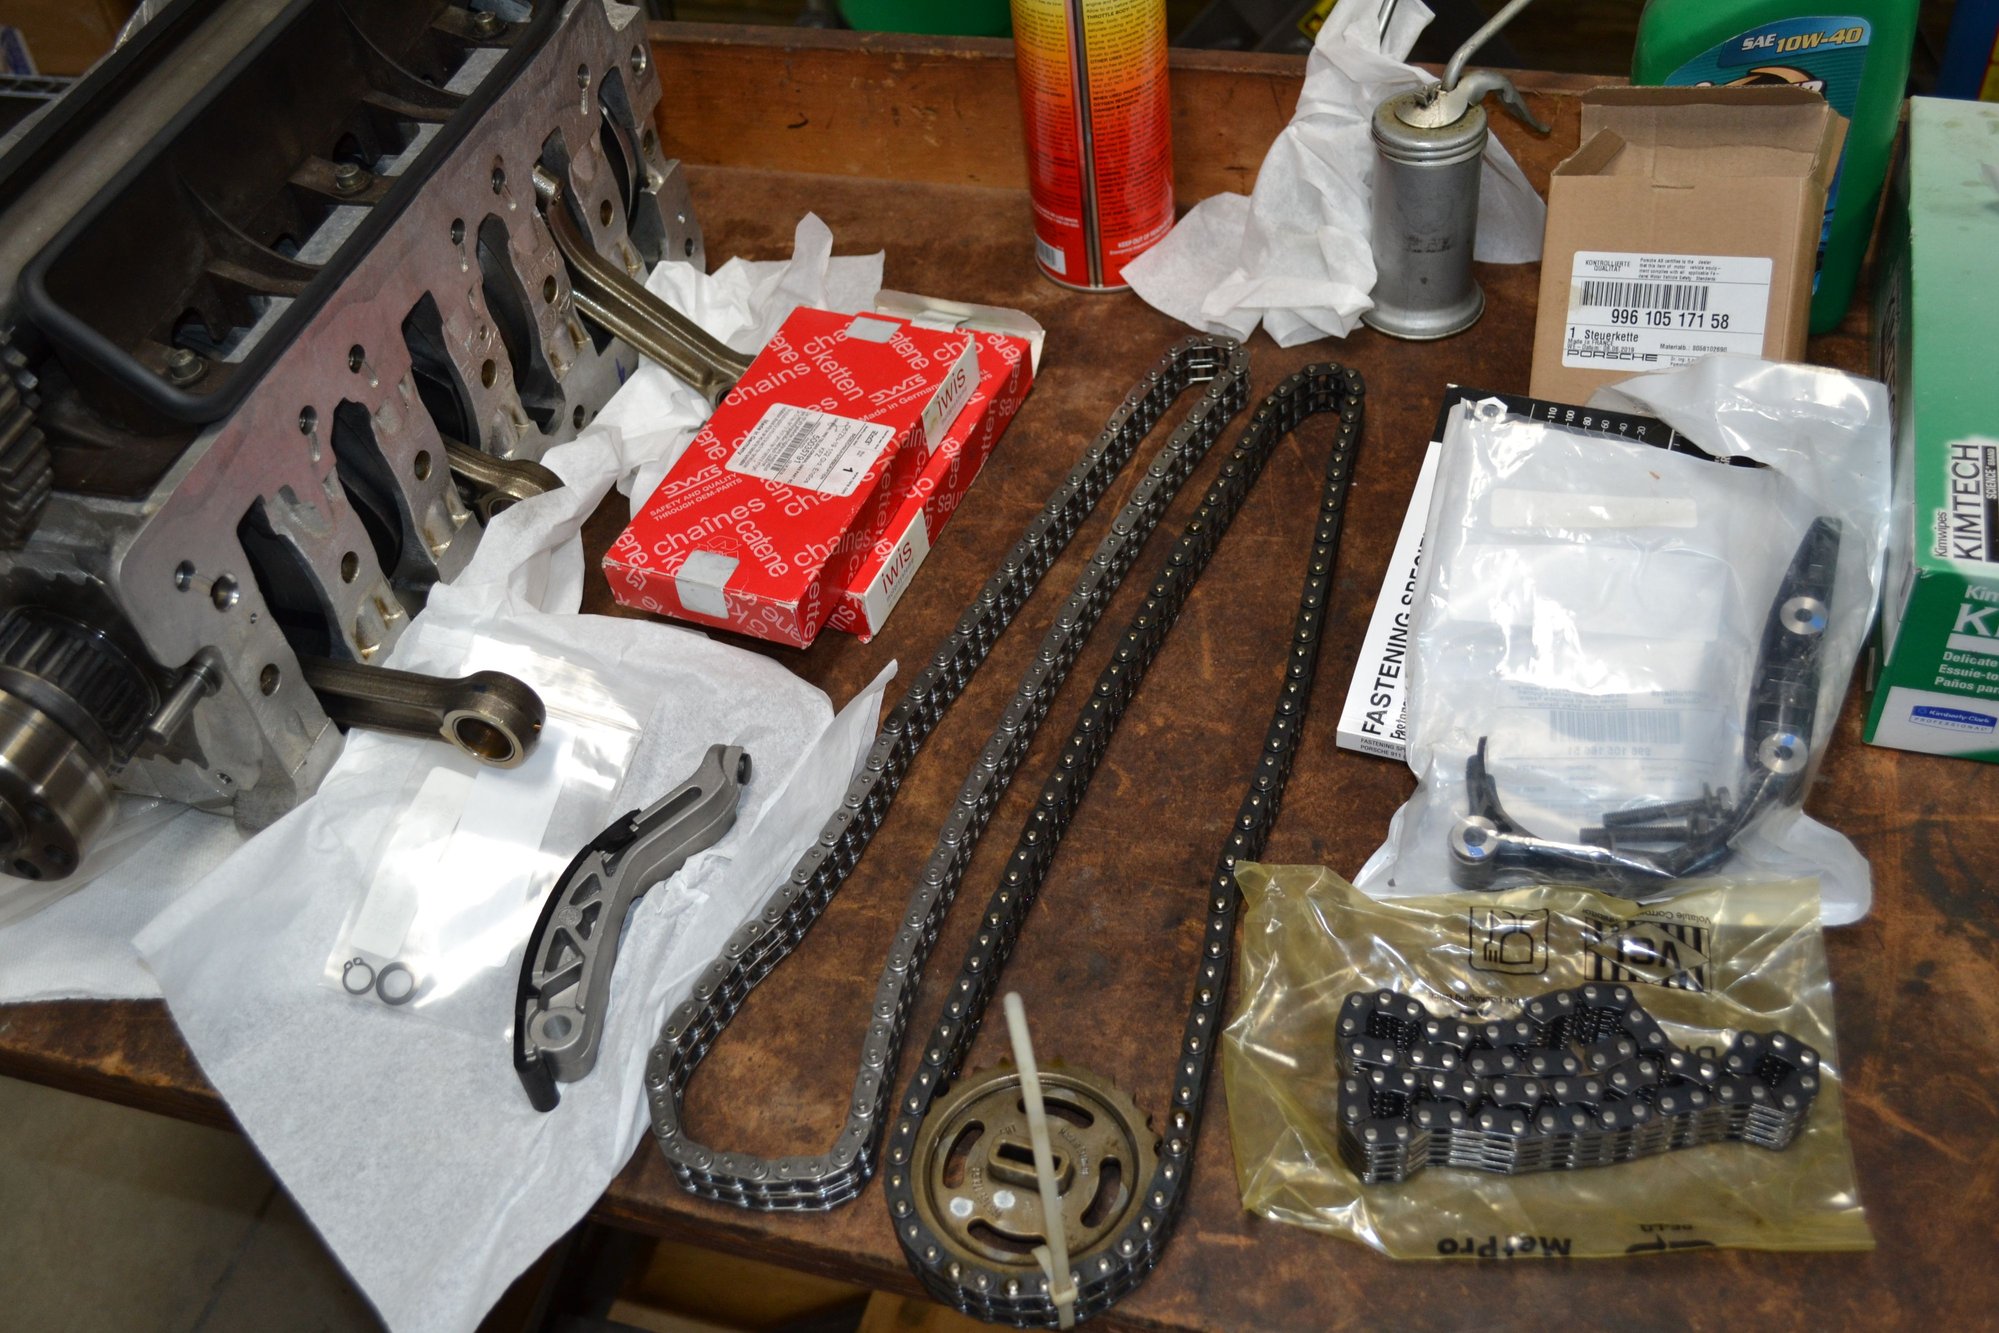
Got a package of parts today. Mostly coolant related. One thing, that has delayed the completion of stage 2, was delivered. The IMS internal gear chain.
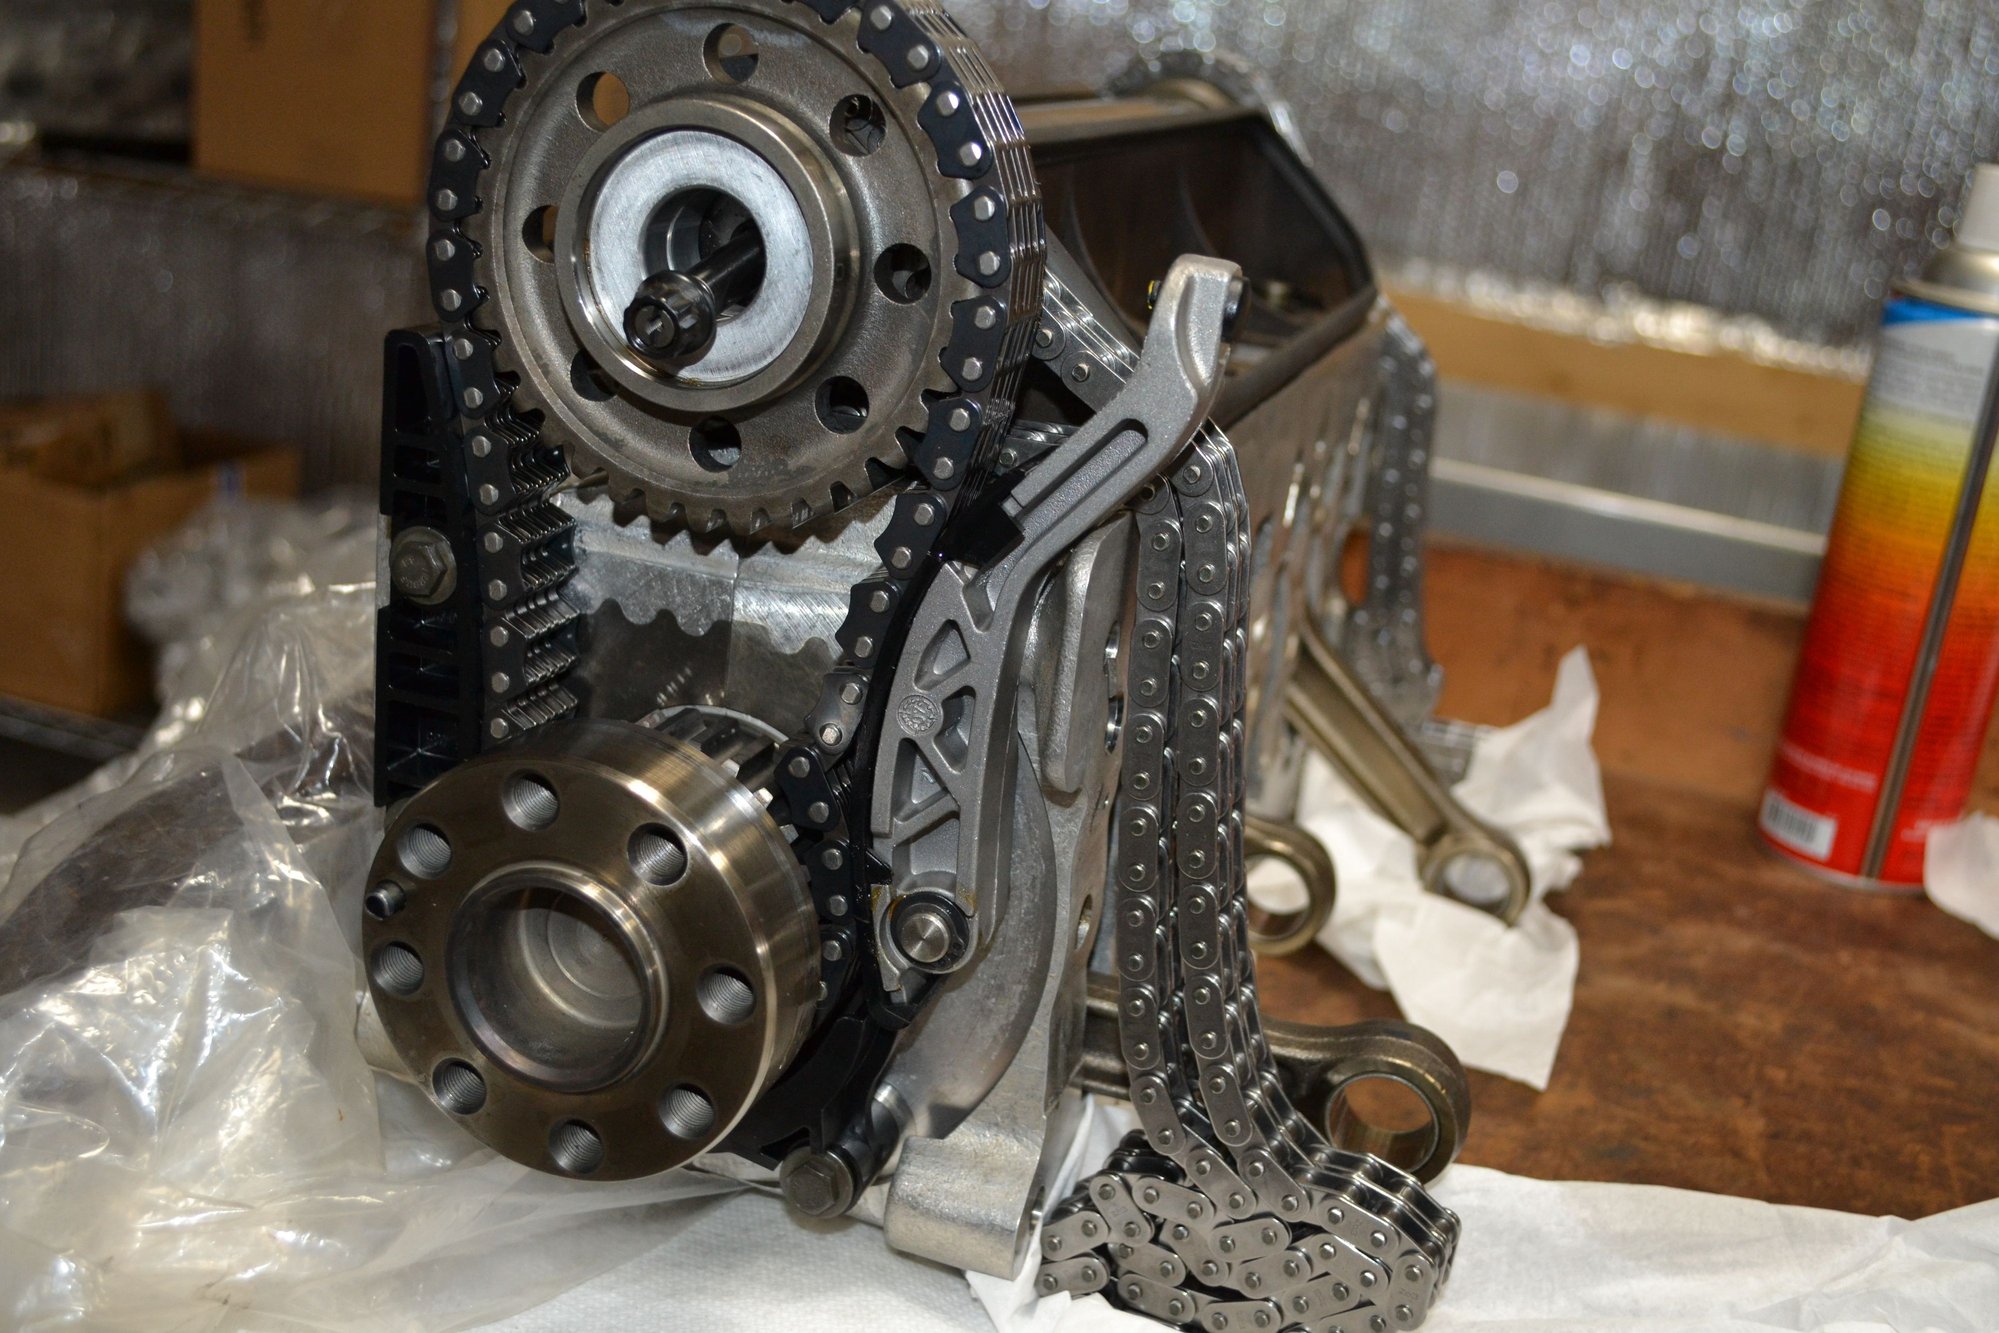
Preparing for the next stage: Bank #1 pistons and rods.
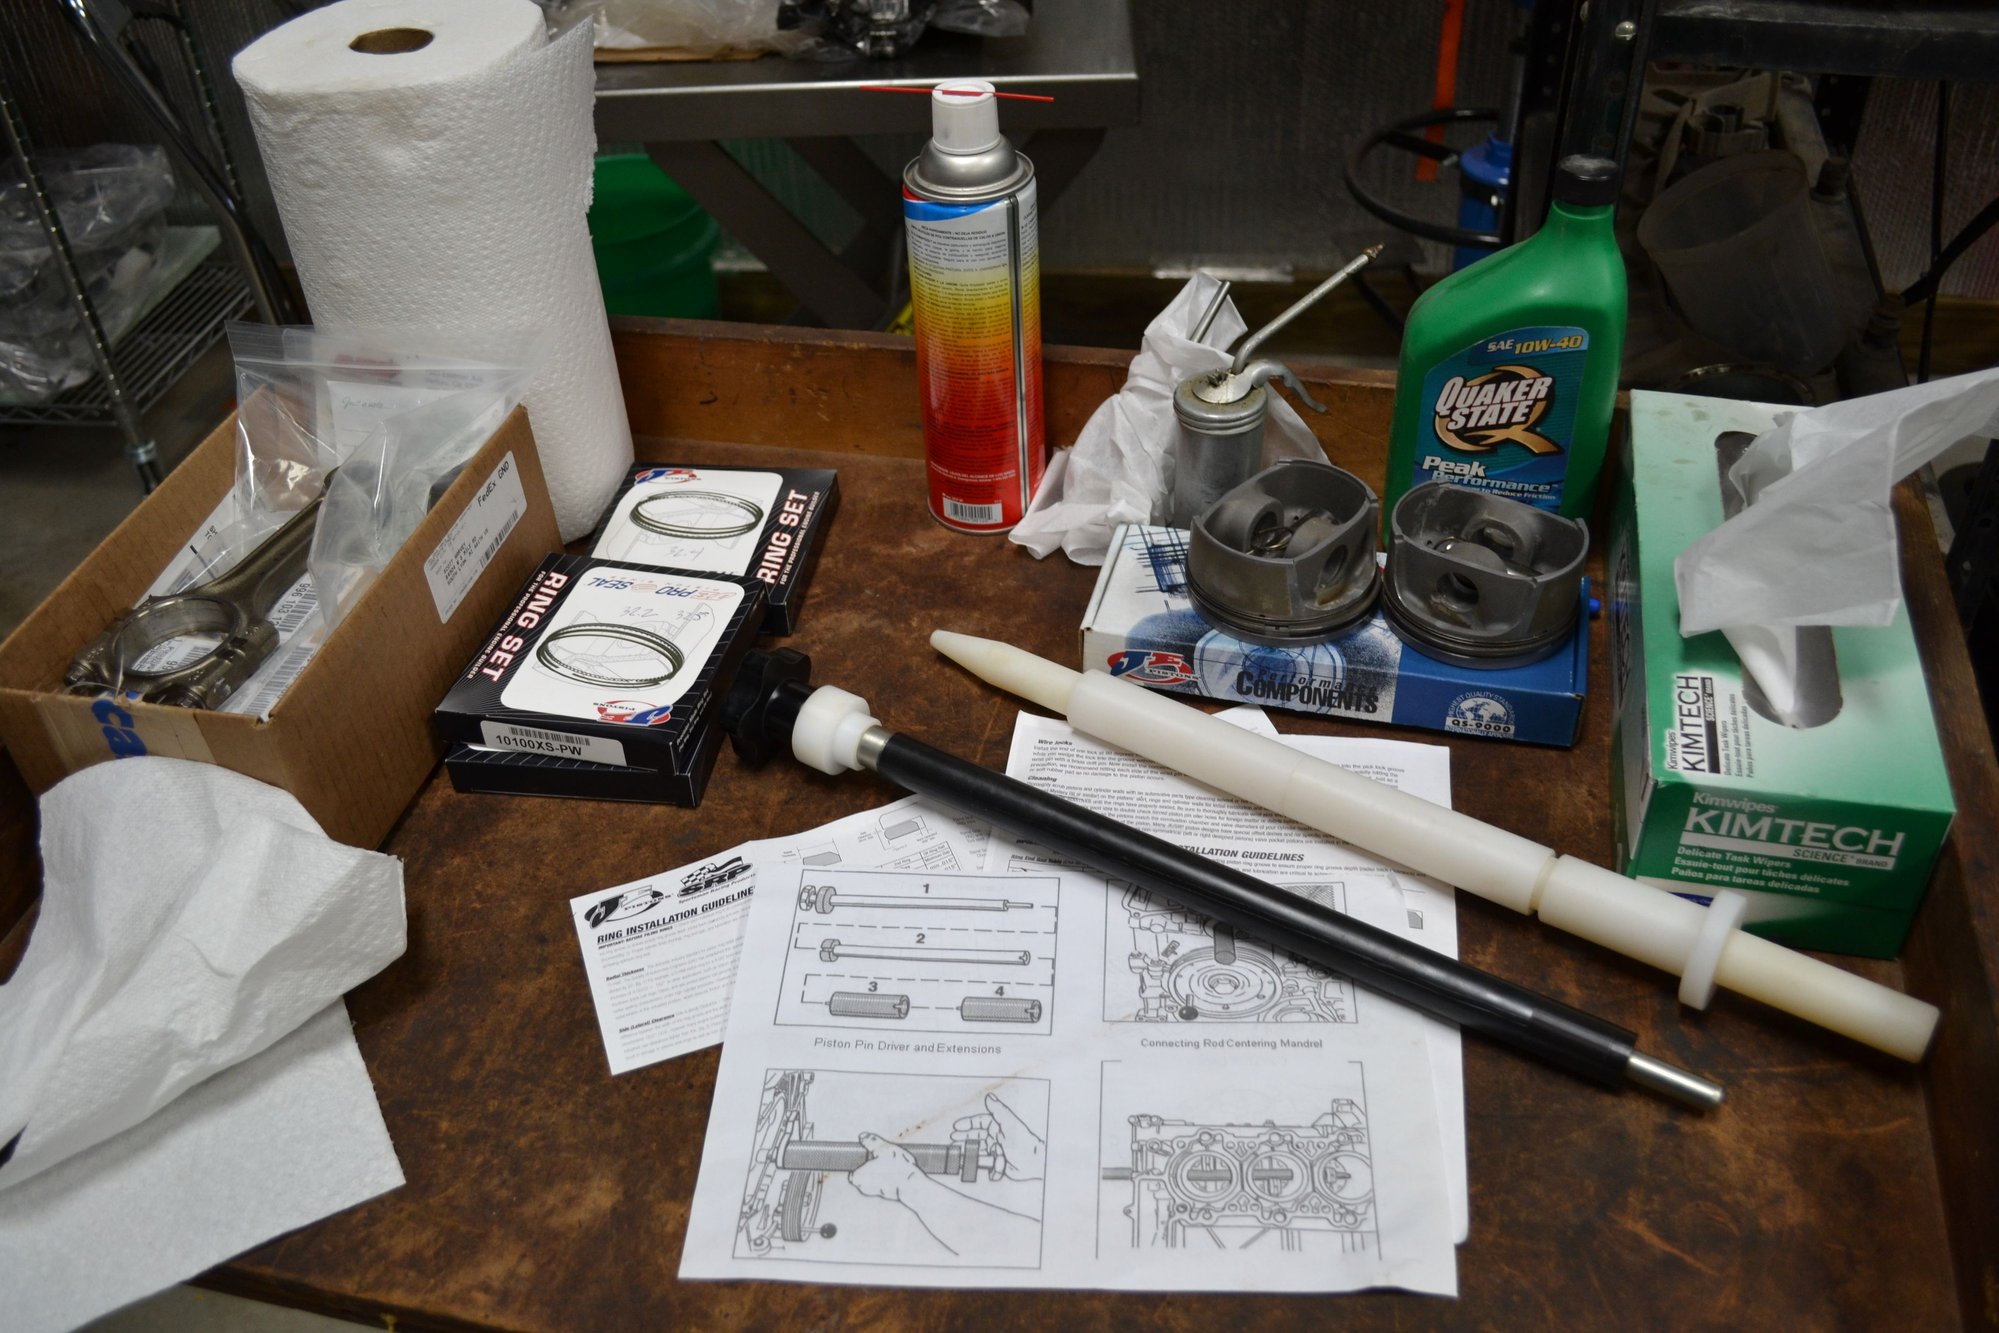
Installing the pistons, the pins and clips outside the block will be no problem. Doing it for real - inside the cylinders (bank #2) will be the challenge. I'll be practicing with this for a while. Since the bank #2 block is open, it's the perfect time to learn from mistakes.
Messed with a ring set just to get familiar with each piece.
This makes me very happy. If I don't have to mess with end gap, it will be great. Still need to check all rings in their respective bores. But this is encouraging.
The ultimate thread. Scott I know your spending some good money with competent people.
You must love the body style and I do too.
I hope you many trouble free safe miles.
Just Awesome
Porsche should consult with LN on how to properly build an engine.
My budget is tight and I just barely squeezed into a 996.
I can understand spending the money. Great Car.
Since Scott mentioned not being able to find some of the information posted on our website, I've uploaded a bunch of bulletins and guides that I've written over the last few years pertaining to the M96 all to one place. These are available for download through the LN website, but I thought I would make it easy and share them from dropbox so they are all in one place.
What I have noticed over the years is that many people spend big money on an engine, but when it comes time to put it in, they skip out on replacing sensors, injectors, intake seals, etc. and don't take the required steps to ensure a successful installation like smoke testing engines to ensure there are no vacuum leaks. To give an example, another big mistake made is how you prime these engines for pressure. You can't just pull the spark plugs and crank it over, even though we explicitly state not to in our instructions. You will wipe out all the bearings if you do. What I might think is common knowledge may not be known by the person rebuilding and installing an engine. Although it's a long read, the RND Instructions are quite thorough and have received many revisions every time we have encountered a problem caused by an installer.
It's fun & easy to replace sensors while the engine is out ! Not so much when in the car.
 03-17-2020, 08:07 PM