When you click on links to various merchants on this site and make a purchase, this can result in this site earning a commission. Affiliate programs and affiliations include, but are not limited to, the eBay Partner Network.
It says clearly and directly that "they are not keyed". From this statement you can extrapolate that the cam sprocket is a press/interference fit (like the main sprocket)... This has also been mentioned in several if not myriad threads over the years. I'd think a rudimentary search would turn up relevant results. Good luck PS - get your IMS Sprocket pinned! It's a small price to pay while you're in there...
It says clearly and directly that "they are not keyed". From this statement you can extrapolate that the cam sprocket is a press/interference fit (like the main sprocket)... This has also been mentioned in several if not myriad threads over the years. I'd think a rudimentary search would turn up relevant results. Good luck PS - get your IMS Sprocket pinned! It's a small price to pay while you're in there...
The main sprocket is not keyed. Why would I assume the cam sprockets would not be keyed, or otherwise indexed. Is it not possible for there to be a feature on the main sprocket to engage and locate the rear cam sprocket?
If you have a thread to share where this is clearly described, I would appreciate the information. Regarding the search function at this site - have you used it? Did it provide satisfactory results?
Hey there Team Harco, let me clear up the mystery. None of the gears are keyed, they are assembled on a fixture orienting the teeth on the IMS tube with a slip fit/light press fit, then a thicker sleeve is pressed into the inside of the tube thereby "swedging" ( expanding) the tube to lock the gears.
Hey there Team Harco, let me clear up the mystery. None of the gears are keyed, they are assembled on a fixture orienting the teeth on the IMS tube with a slip fit/light press fit, then a thicker sleeve is pressed into the inside of the tube thereby "swedging" ( expanding) the tube to lock the gears.
Excellent! The explanation I have been looking for.
Please excuse my ignorance. I like fact based and documented evidence to clear up ambiguities. These ambiguities may only exist in my mind. Those that have been there, and know these things, have been extremely helpful. I have great appreciation for all of you. You really have no idea.
Alright enough of that - let's see some parts.
Out with the old...
.
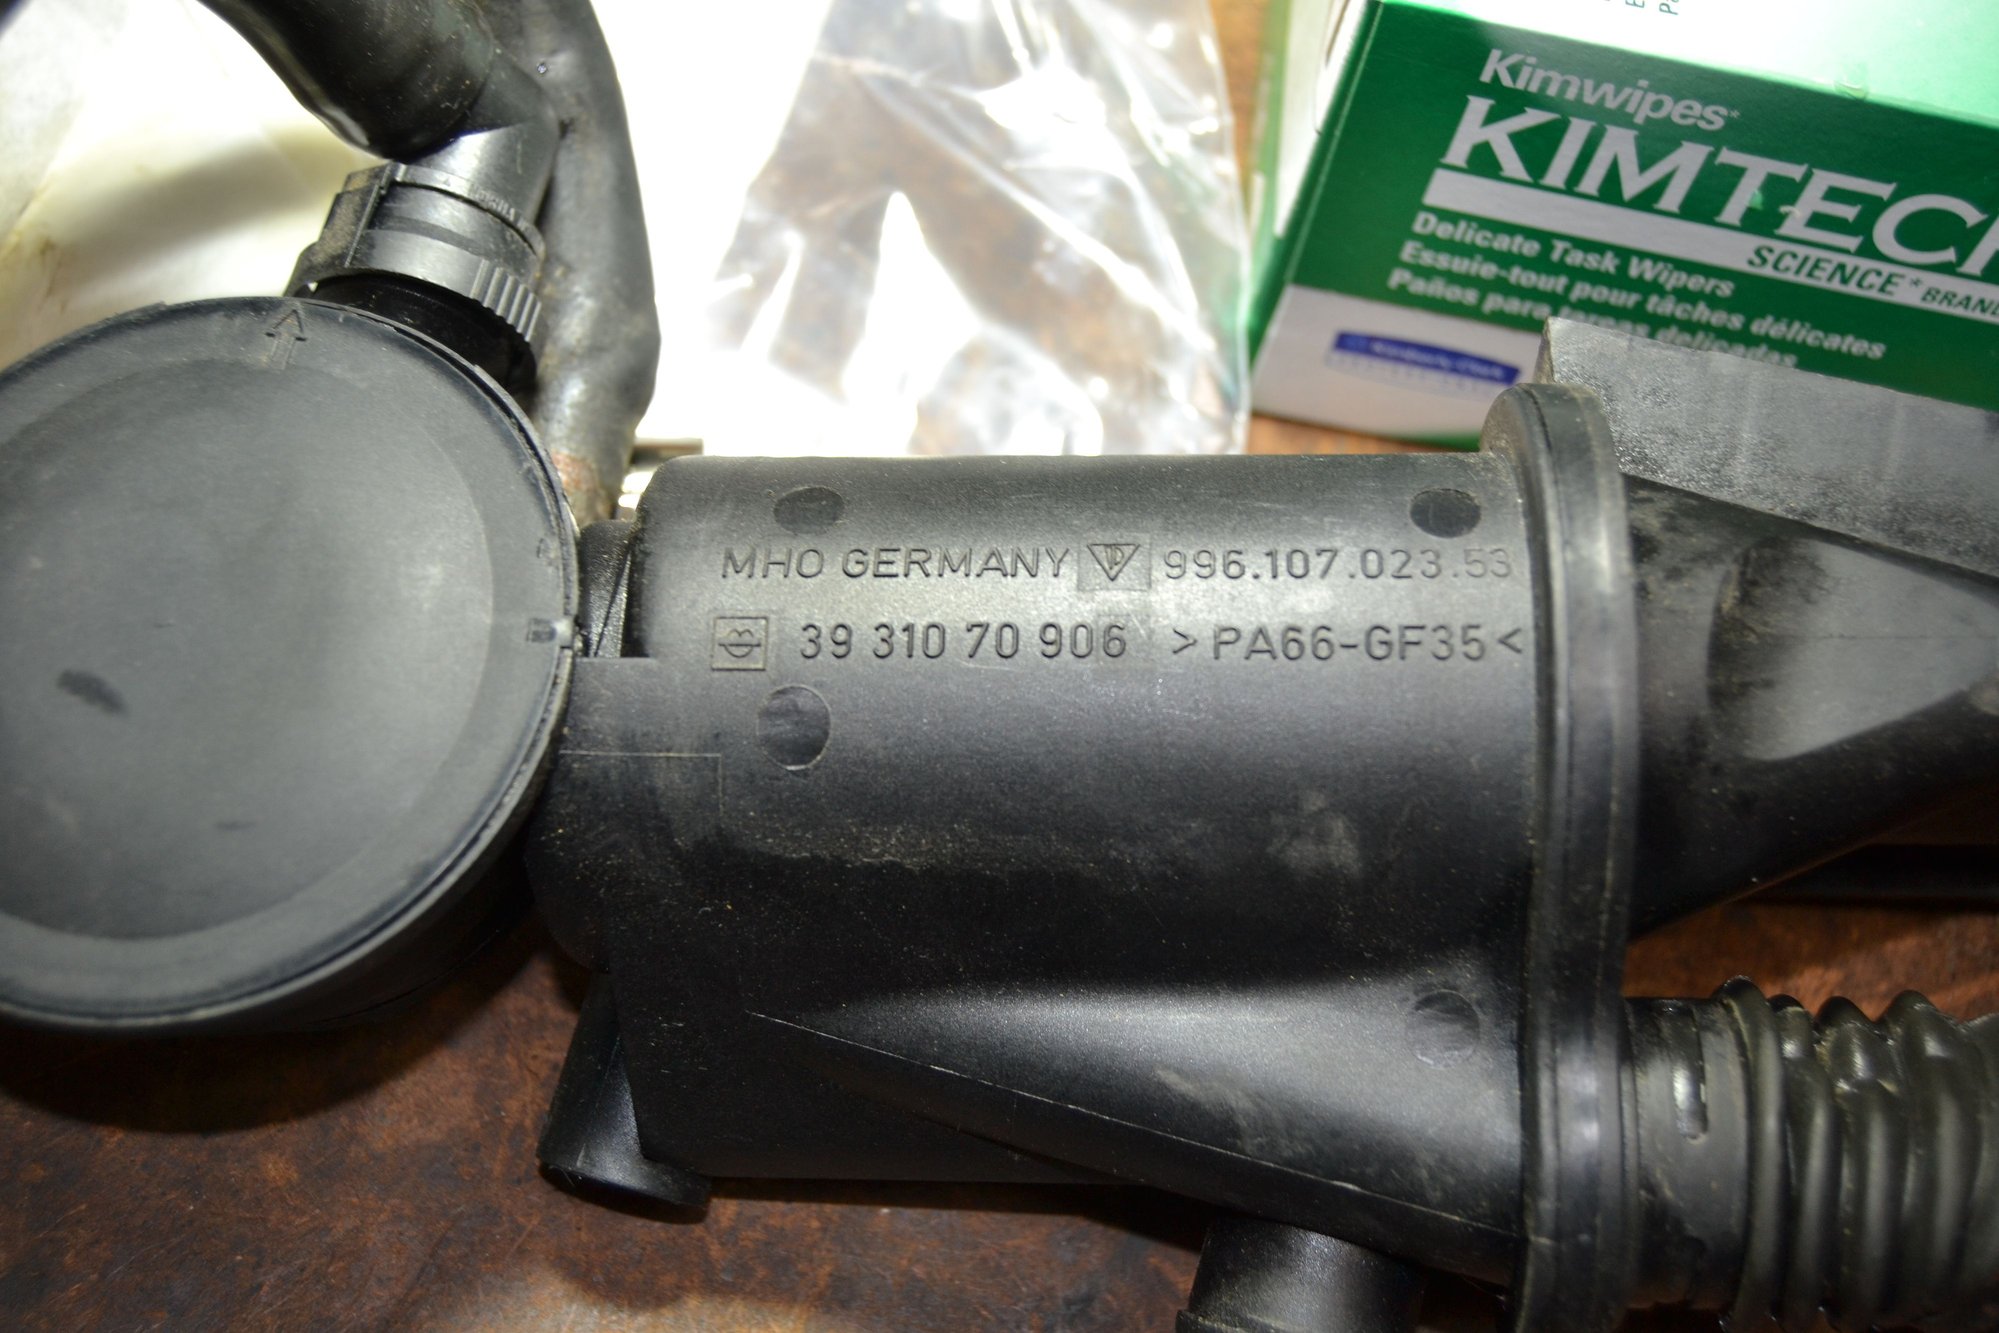
Wait !!! Look at that !!! An old "53" part number AOS. Notice where the Atmosphere port is on that(notch), different from where they have been putting them for years/decades. I'm wondering how many more of these "Old ***" AOS's are still out there and haven't failed yet..
Scott , inspect that closely, or cut it open to see exactly where the port enters, my instructions for sealing the Atmosphere port in the channell will not apply to those old "53" parts.
Last edited by Porschetech3; 03-02-2020 at 10:59 PM.
Wait !!! Look at that !!! An old "53" part number AOS. Notice where the Atmosphere port is on that(notch), different from where they have been putting them for years/decades. I'm wondering how many more of these "Old ***" AOS's are still out there and haven't failed yet..
Scott , inspect that closely, or cut it open to see exactly where the port enters, my instructions for sealing the Atmosphere port in the channell will not apply to those old "53" parts.
Hey Doc - I'll very likely cut it open. I'll document that, if it will be of any value to your project. Or, I could send it to you as well. The new part has a "55" suffix. I am still looking at it to see where the atmospheric port is located (it must be very small). Once I find it, I'll probably use silver silicone sealer to seal the port. A good contrasting color should aid in visually identifying where to seal it, in case others want to know.
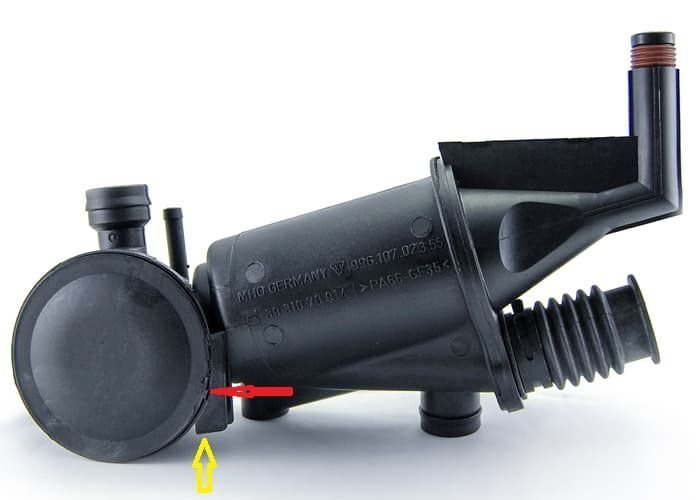
The mystery is where it's located on the new part. I have this to go on:
First step is to seal off the atmosphere port on the AOS, seal inside of this channel (yellow) and seal around the seam at Red area.
Matching that description and the arrows on my part may require some powerful glasses. My first look didn't provide me with confidence that I had found the right places to seal it. Once I figure it out, I'll post photos and details.
Hey Doc - I'll very likely cut it open. I'll document that, if it will be of any value to your project. Or, I could send it to you as well. The new part has a "55" suffix. I am still looking at it to see where the atmospheric port is located (it must be very small). Once I find it, I'll probably use silver silicone sealer to seal the port. A good contrasting color should aid in visually identifying where to seal it, in case others want to know.
Yes, I love failure analysis, you will be able to see the tear in the rubber diaphragm, and also locate the Atmosphere port to help others who still have a good "53" AOS and want to install the UAOS after sealing the port.
Originally Posted by 808Bill
Is that not it at 6 o-clock?
Yes, the notch at 6 o-clock should indicate the port is right behind there in that crevice.
Originally Posted by Scott at Team Harco
On the old part? The one that failed?
The mystery is where it's located on the new part. I have this to go on:
First step is to seal off the atmosphere port on the AOS, seal inside of this channel (yellow) and seal around the seam at Red area.
Matching that description and the arrows on my part may require some powerful glasses. My first look didn't provide me with confidence that I had found the right places to seal it. Once I figure it out, I'll post photos and details.
Correct, seal the channell and the notch/seam at 7 o-clock...
Hey Doc - I'll very likely cut it open. I'll document that, if it will be of any value to your project. Or, I could send it to you as well. The new part has a "55" suffix. I am still looking at it to see where the atmospheric port is located (it must be very small). Once I find it, I'll probably use silver silicone sealer to seal the port. A good contrasting color should aid in visually identifying where to seal it, in case others want to know.
Scott, you have the new AOS in hand out of the car and can't find the port? I don't feel quite as bad now for having difficulty finding it installed in the car with borescope
I'll probably use silver silicone sealer to seal the port. A good contrasting color should aid in visually identifying where to seal it, in case others want to know.
The fact that your camera was manufactured in this century will be a yuge help too. Maybe the inventor of the UAOS will take note.
Scott, you have the new AOS in hand out of the car and can't find the port? I don't feel quite as bad now for having difficulty finding it installed in the car with borescope
You're not kidding. I spent a little more time messing with it today. Not a whole lot, but some. I plugged most of the ports and then blew in the last open one to see if I could hear air escaping out a port. Inconclusive. I'll keep messing with it. I might have to bring out a magnifying glass and maybe even apply a low pressure air supply. This will get solved.
Originally Posted by SoCal911t
The fact that your camera was manufactured in this century will be a yuge help too. Maybe the inventor of the UAOS will take note.
Crazy, isn't it? The inventor and I have traded a few notes. We're working on some ideas to document this in detail. Instructions with lots of visual aids are coming.
I was preoccupied with something else for much of my free-time today. Got a couple of boxes delivered from Hamheads.
New guides and springs. Lots of clean-up and resurfacing.
The fact that your camera was manufactured in this century will be a yuge help too. Maybe the inventor of the UAOS will take note.
For real !!! The automatic brightness/flash/focus on my smart phone camera screws up more than it helps.Outside in natural light it does good, but indoors when in the evening trying to take pictures of parts or under the cars hood ect , it SUX big time. I've never had a decent camera, wouldn't know how to use it, or what one looks like.Some people make it look easy though.
Is there such a thing as a simple point and shoot camera that takes good pictures and doesn't cost a left nut?
Is there such a thing as a simple point and shoot camera that takes good pictures and doesn't cost a left nut?
I'm sure there is. I had a reasonably good point and shoot a few years ago. I would think the technology has only gotten better. It was an Olympus. It was pretty good until the brain failed. In the camera...
Then I got my current digital SLR (Nikon). I started with a Pentax SLR film camera many years ago. It was fully manual. You had to set shutter speed, aperture and focus. The cost of film and processing led to improved skills. Now with digital photography, film is real cheap. Skills aren't as critical either.
I'll try to investigate some ideas. I haven't kept up with what's out there, in years.
 03-02-2020, 11:39 AM
 PS - get your IMS Sprocket pinned! It's a small price to pay while you're in there...