When you click on links to various merchants on this site and make a purchase, this can result in this site earning a commission. Affiliate programs and affiliations include, but are not limited to, the eBay Partner Network.
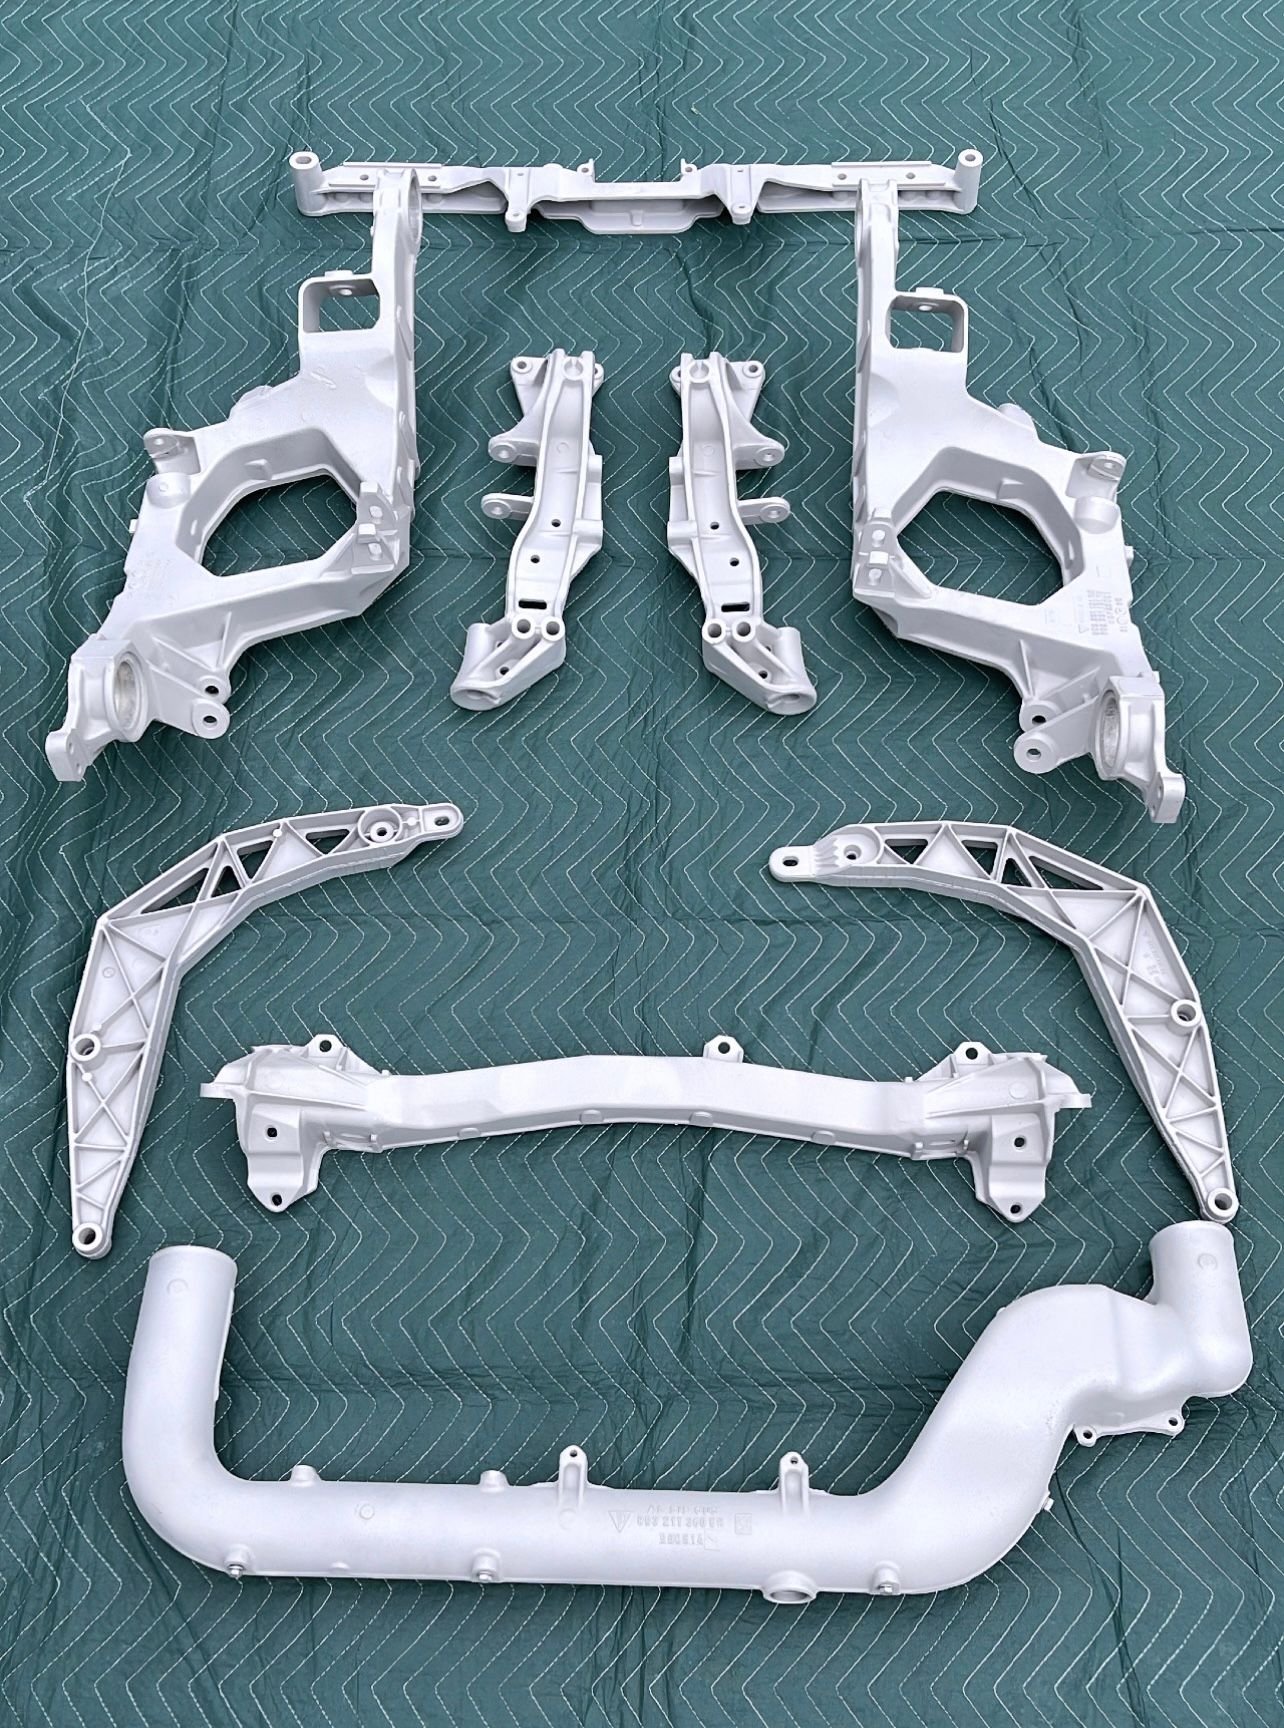
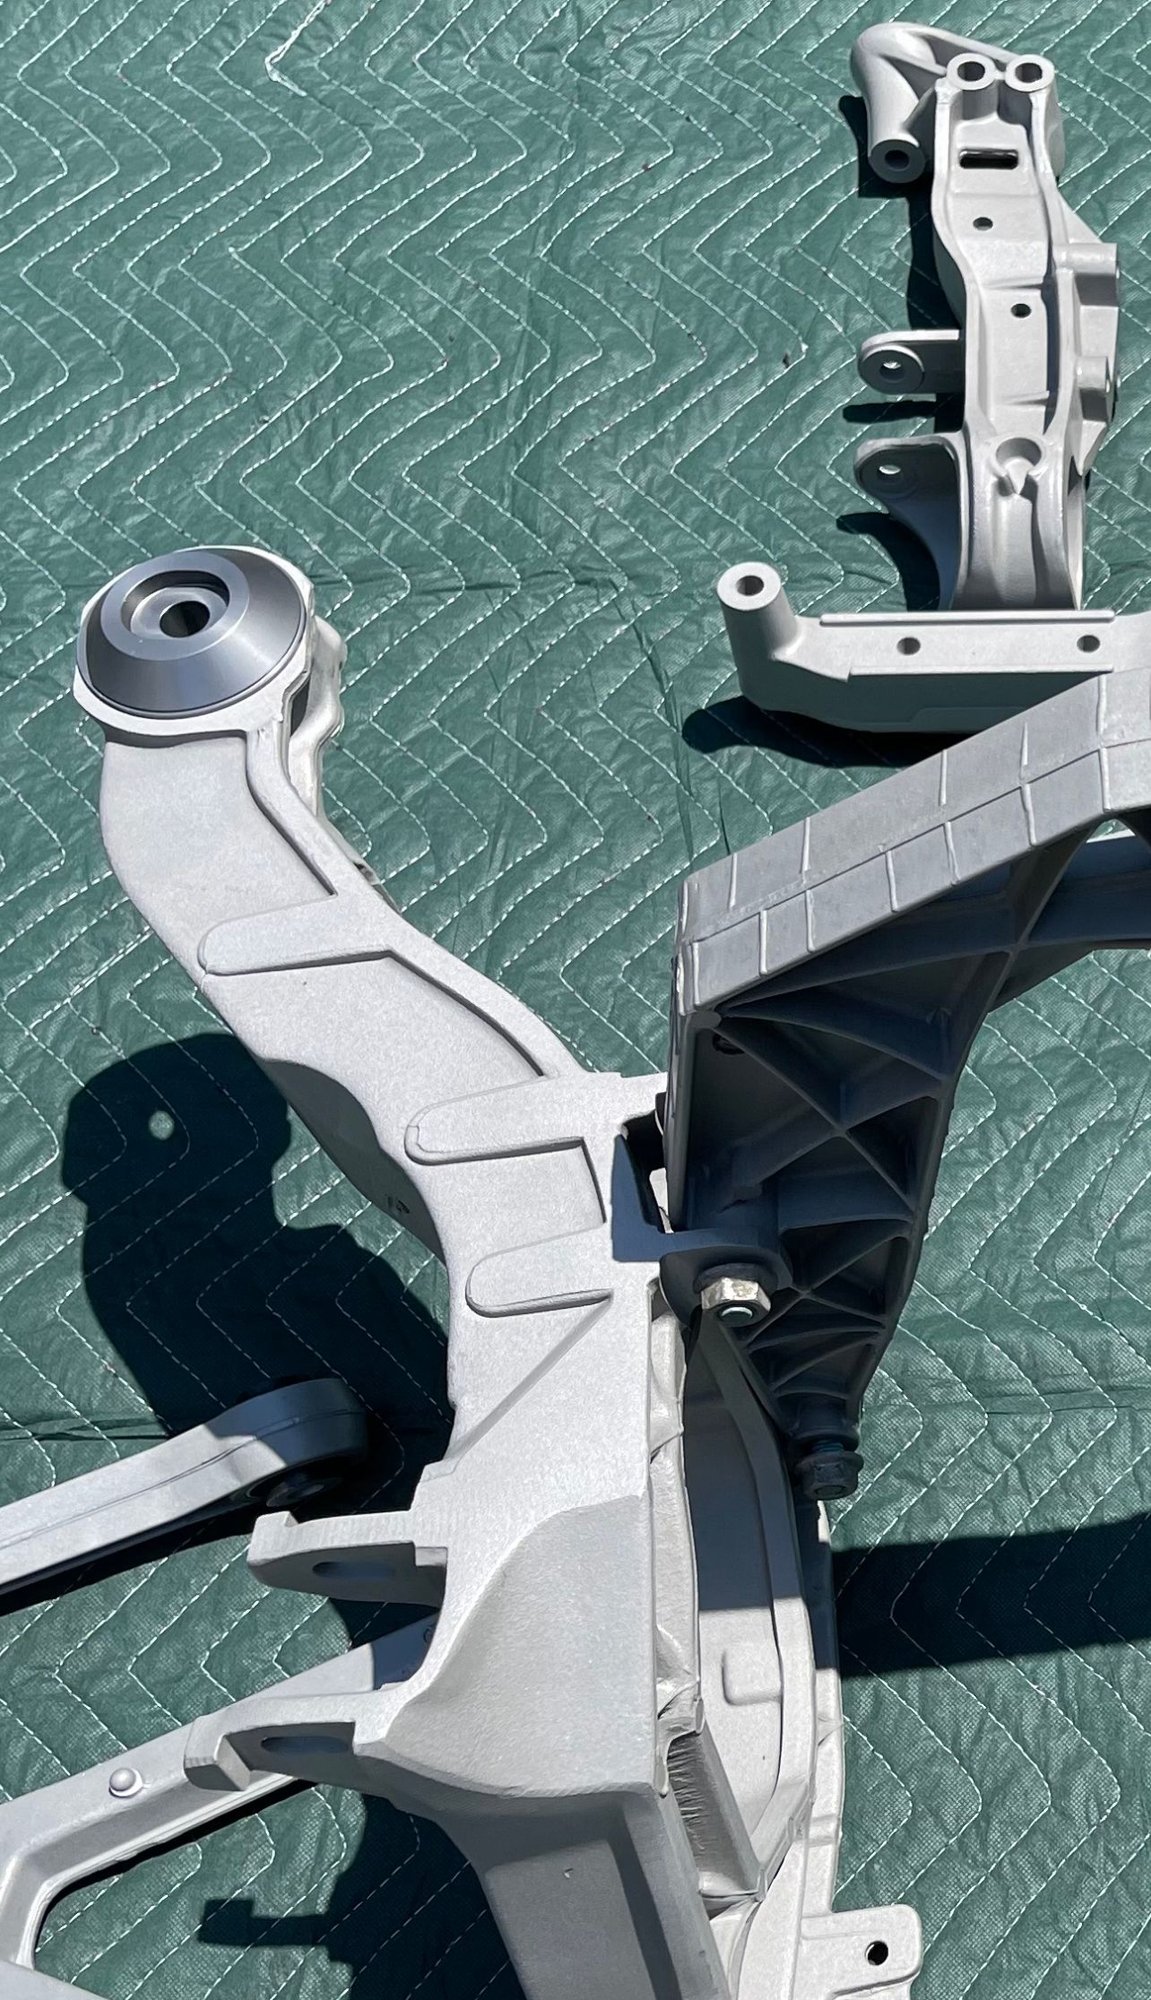
- All suspension control arms, wheel carriers (including new RS fronts) and front/rear subframe parts all blasted clean and then sprayed with SprayMax 2K semi-matte clear
- All bushings replaced with RS style "sport" hardness bushings
- All new wheel bearings front and rear
- Solid rear subframe mounts
Before 2K clear...
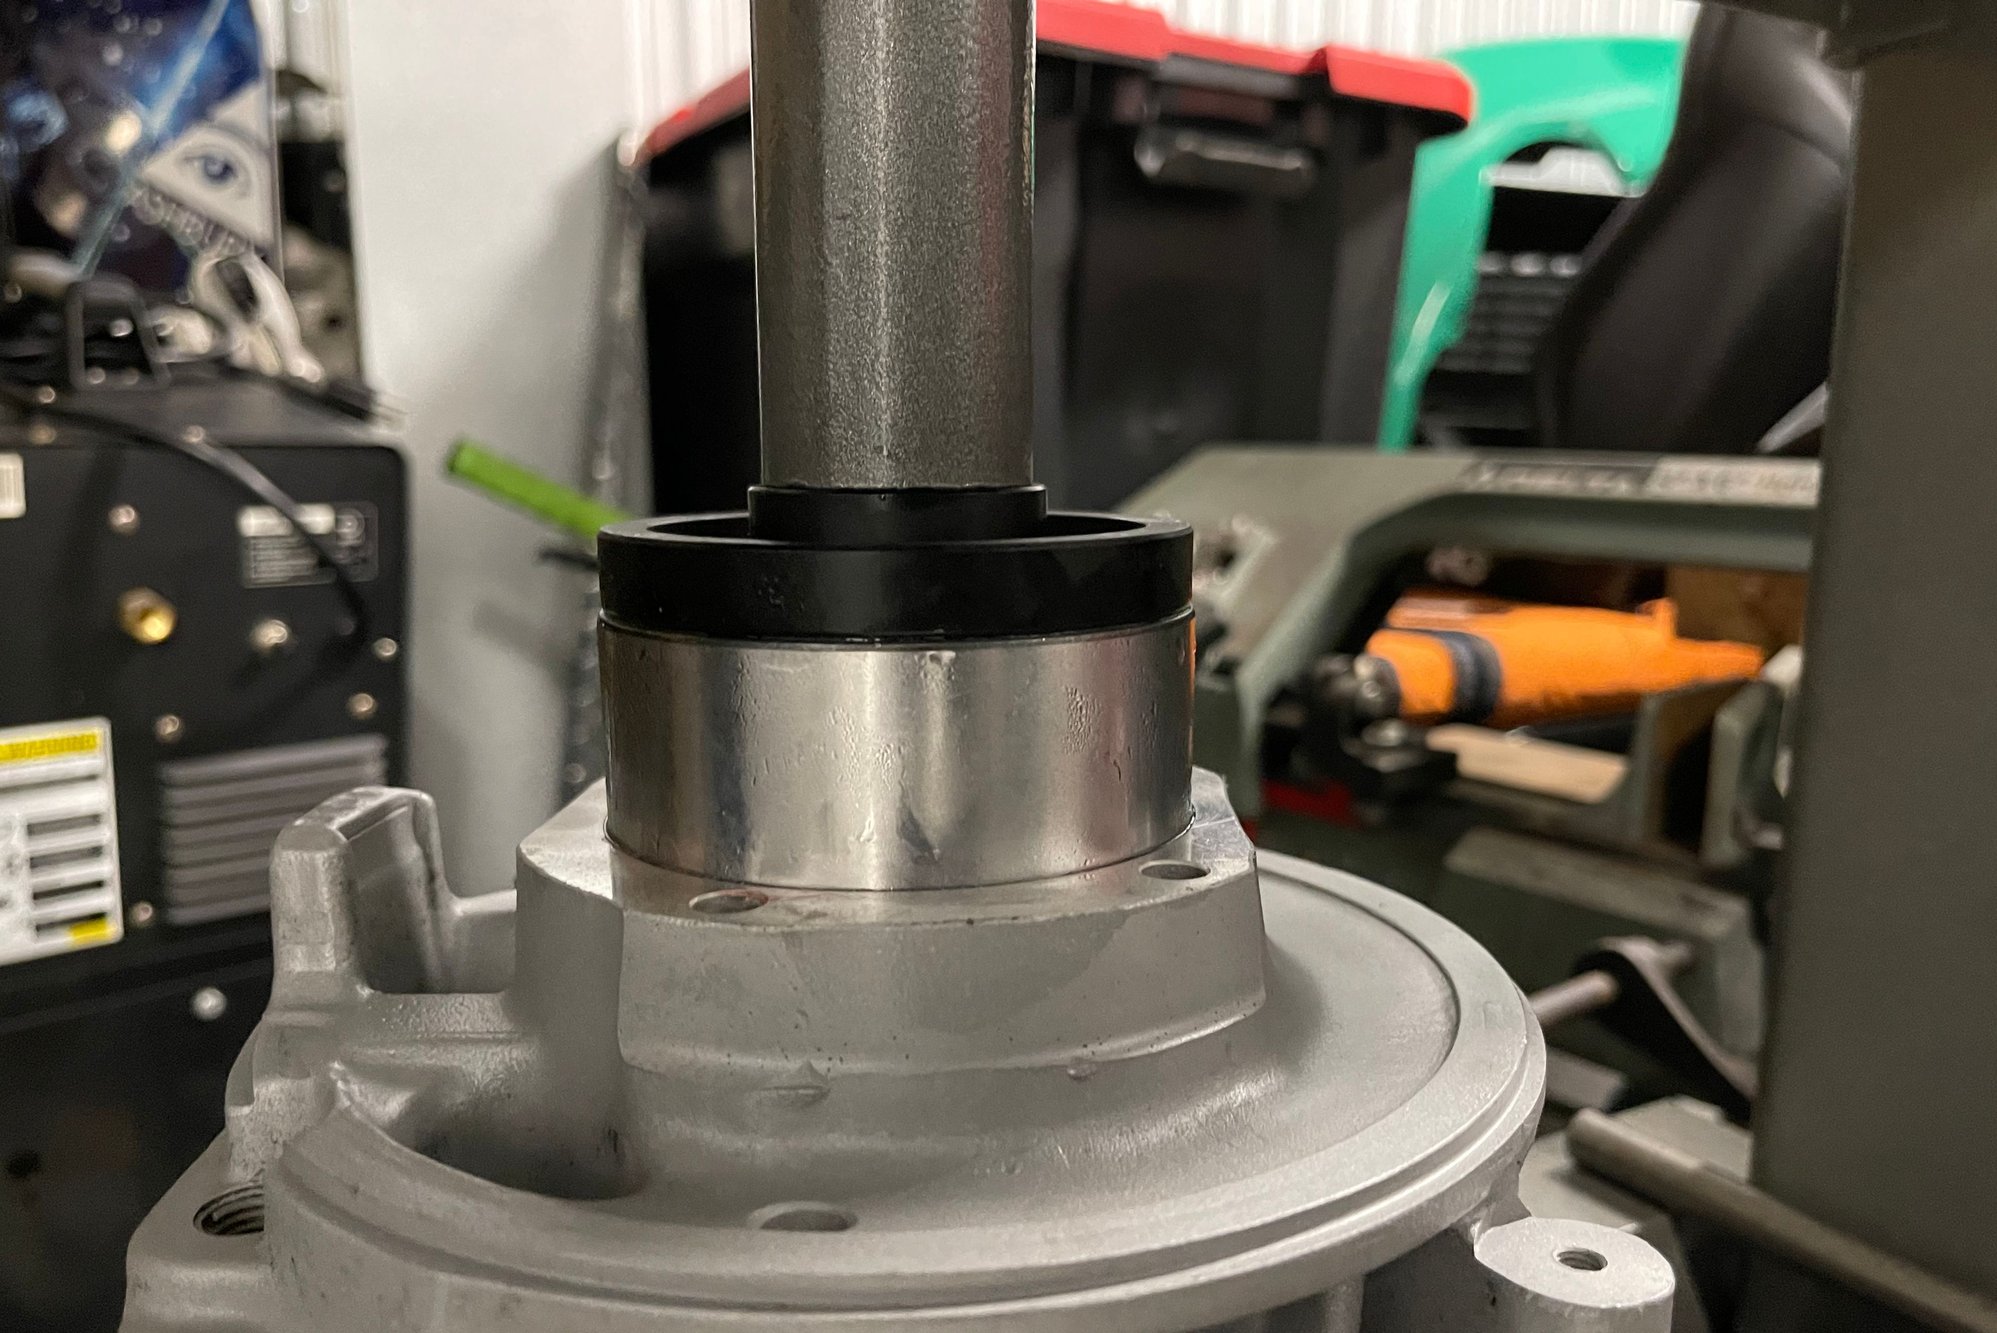
A trip to my storage unit (shop press is there) to press in some frozen bearings...
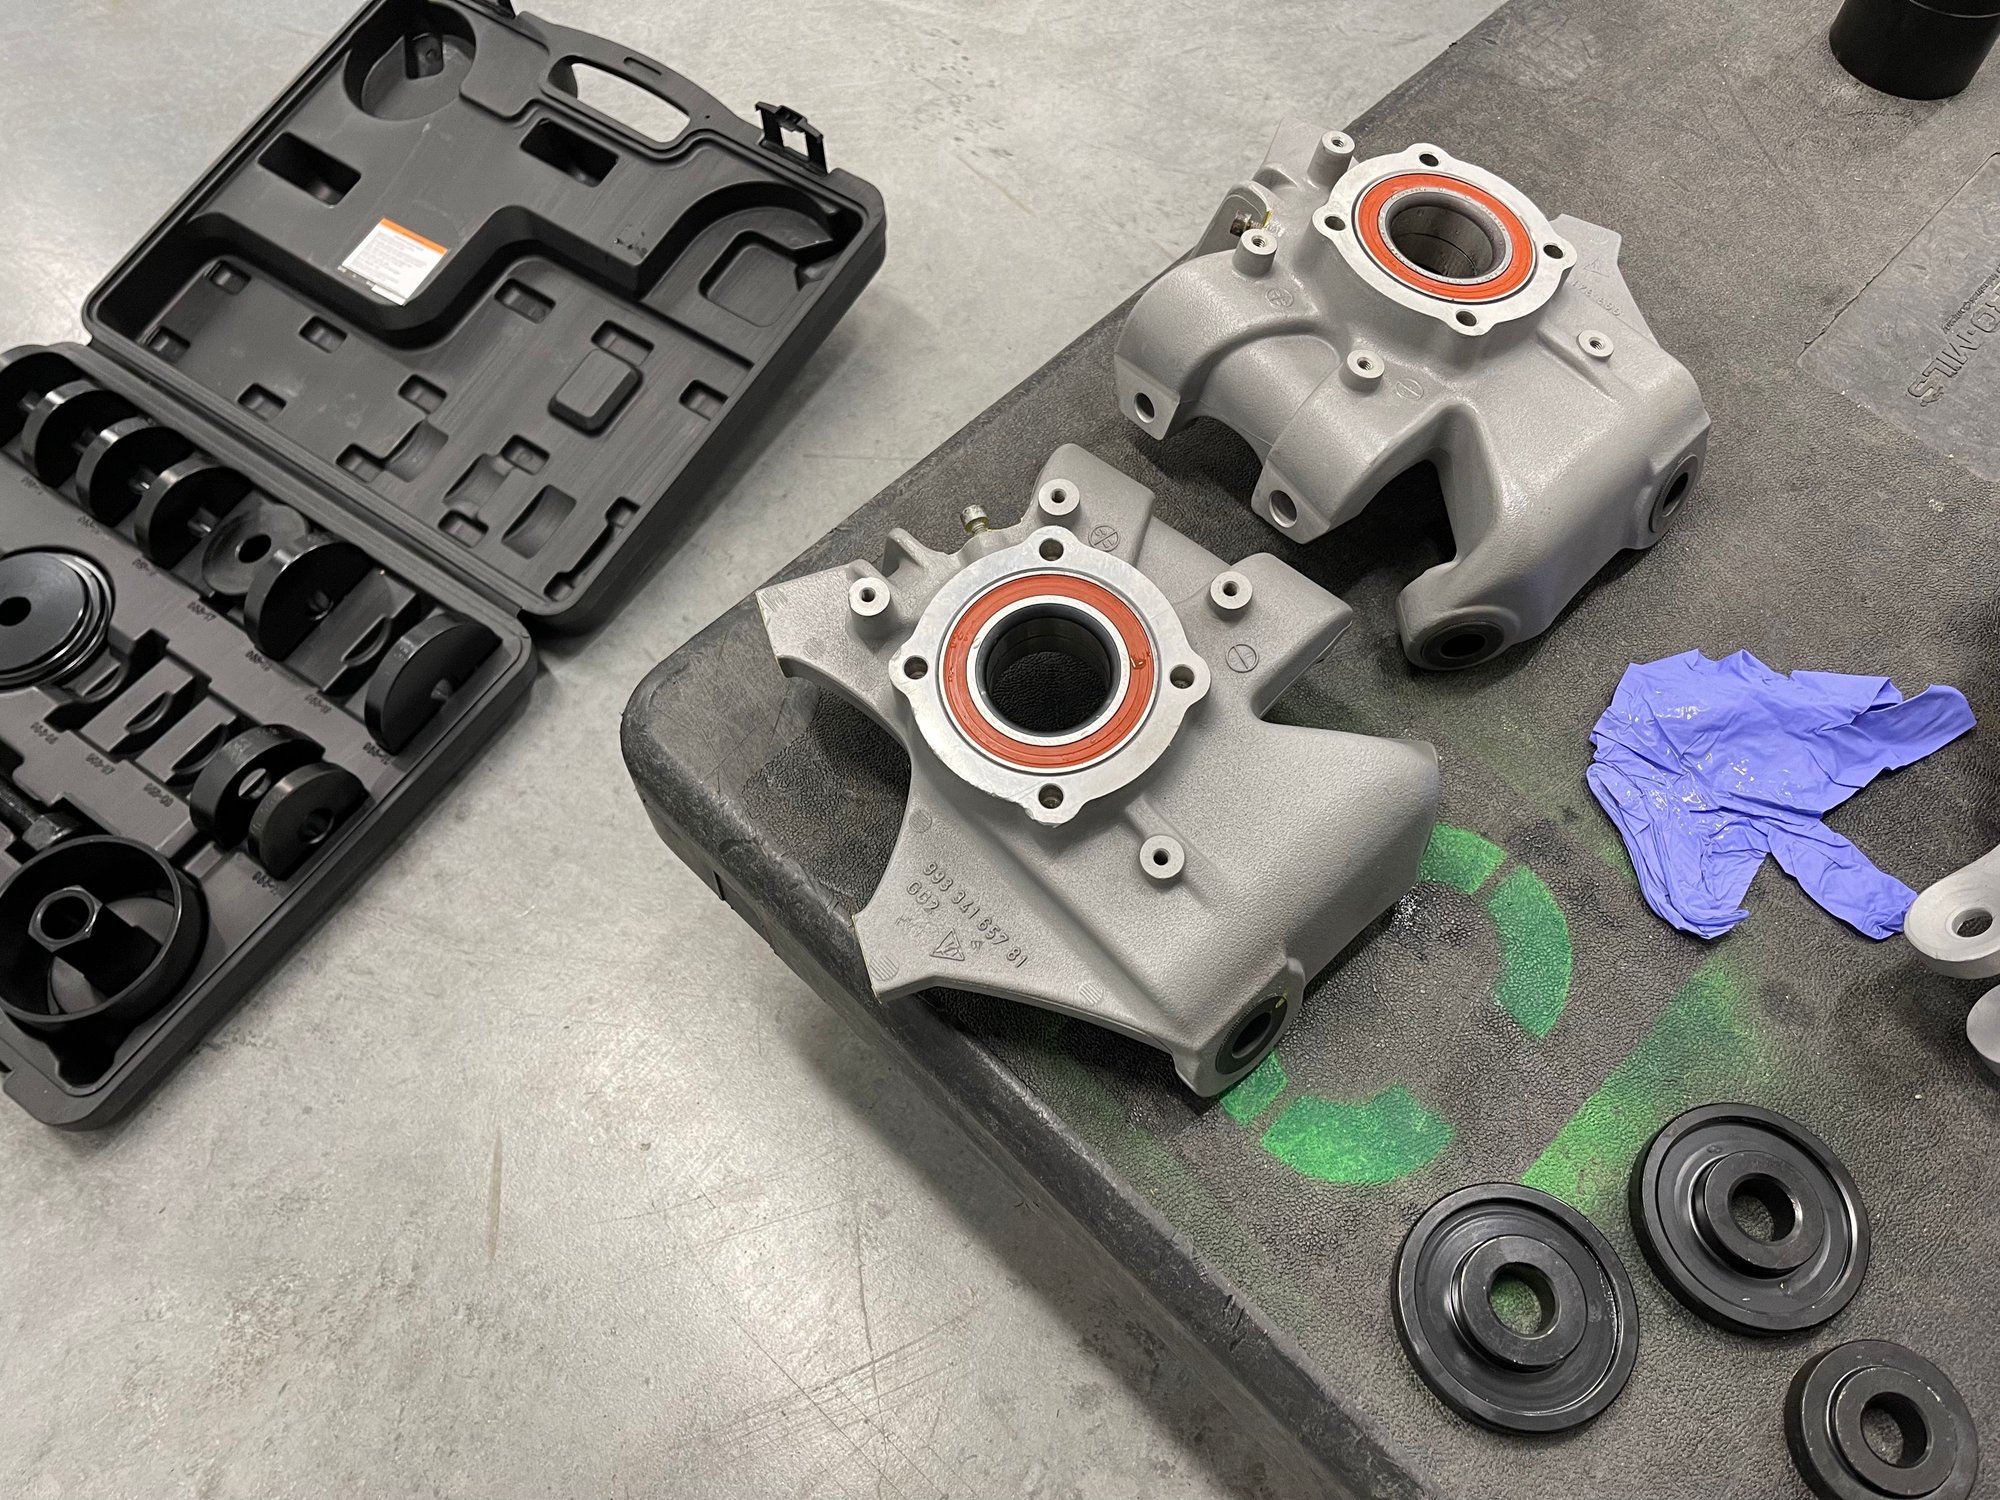
A good shot of the 2K clear on the front RS uprights. Goes down super thin. Laid down 2-3 light coats. Just enough to prevent some corrosion and aid in cleaning.
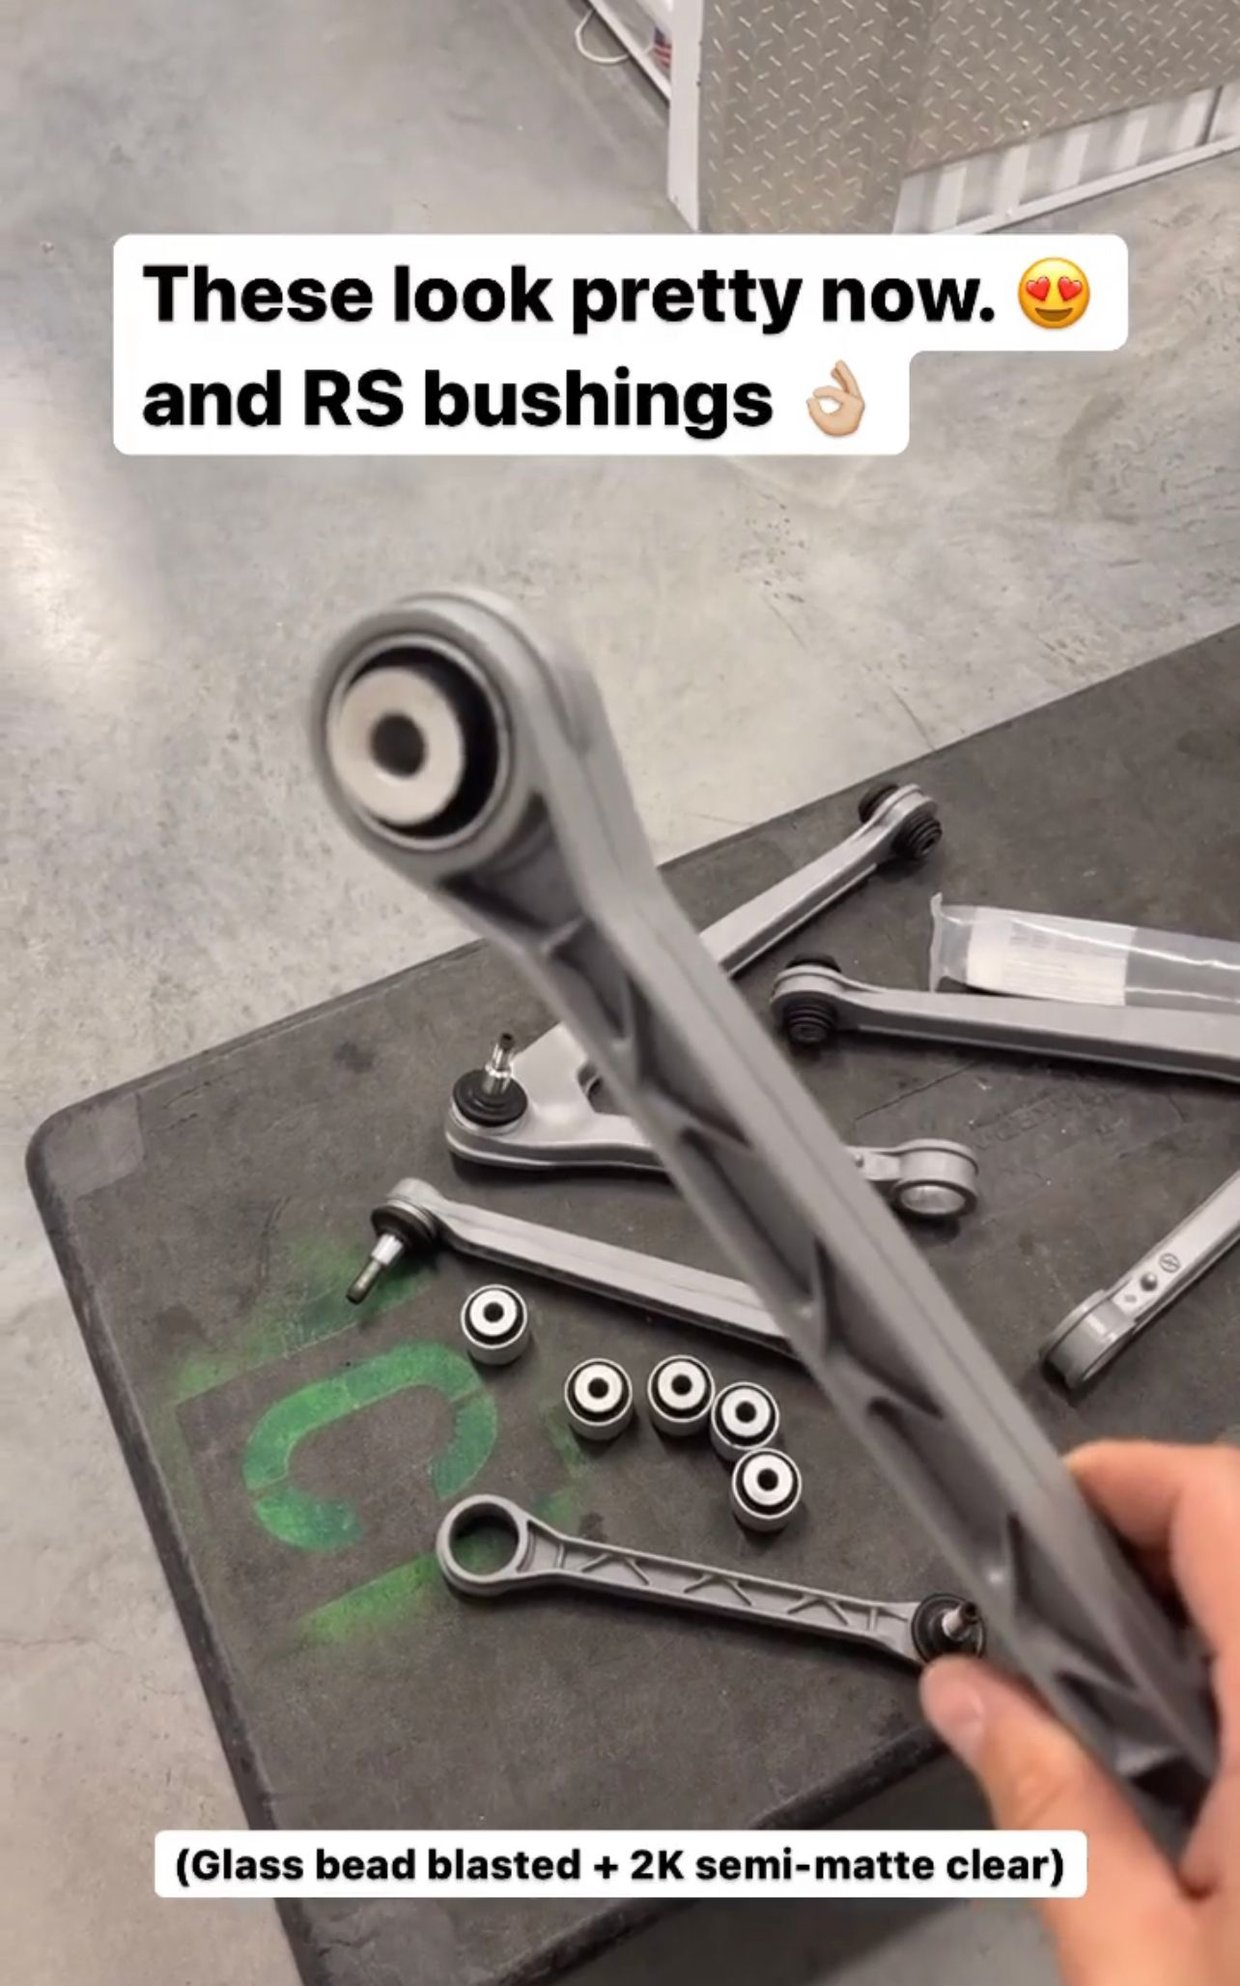
RS bushings pressed in. Apologies for the blurry photo, it's a screenshot from a video.
A little mock-up of the rear-subframe before it went back in... (lots of sunlight that day washed out the photo a bit)
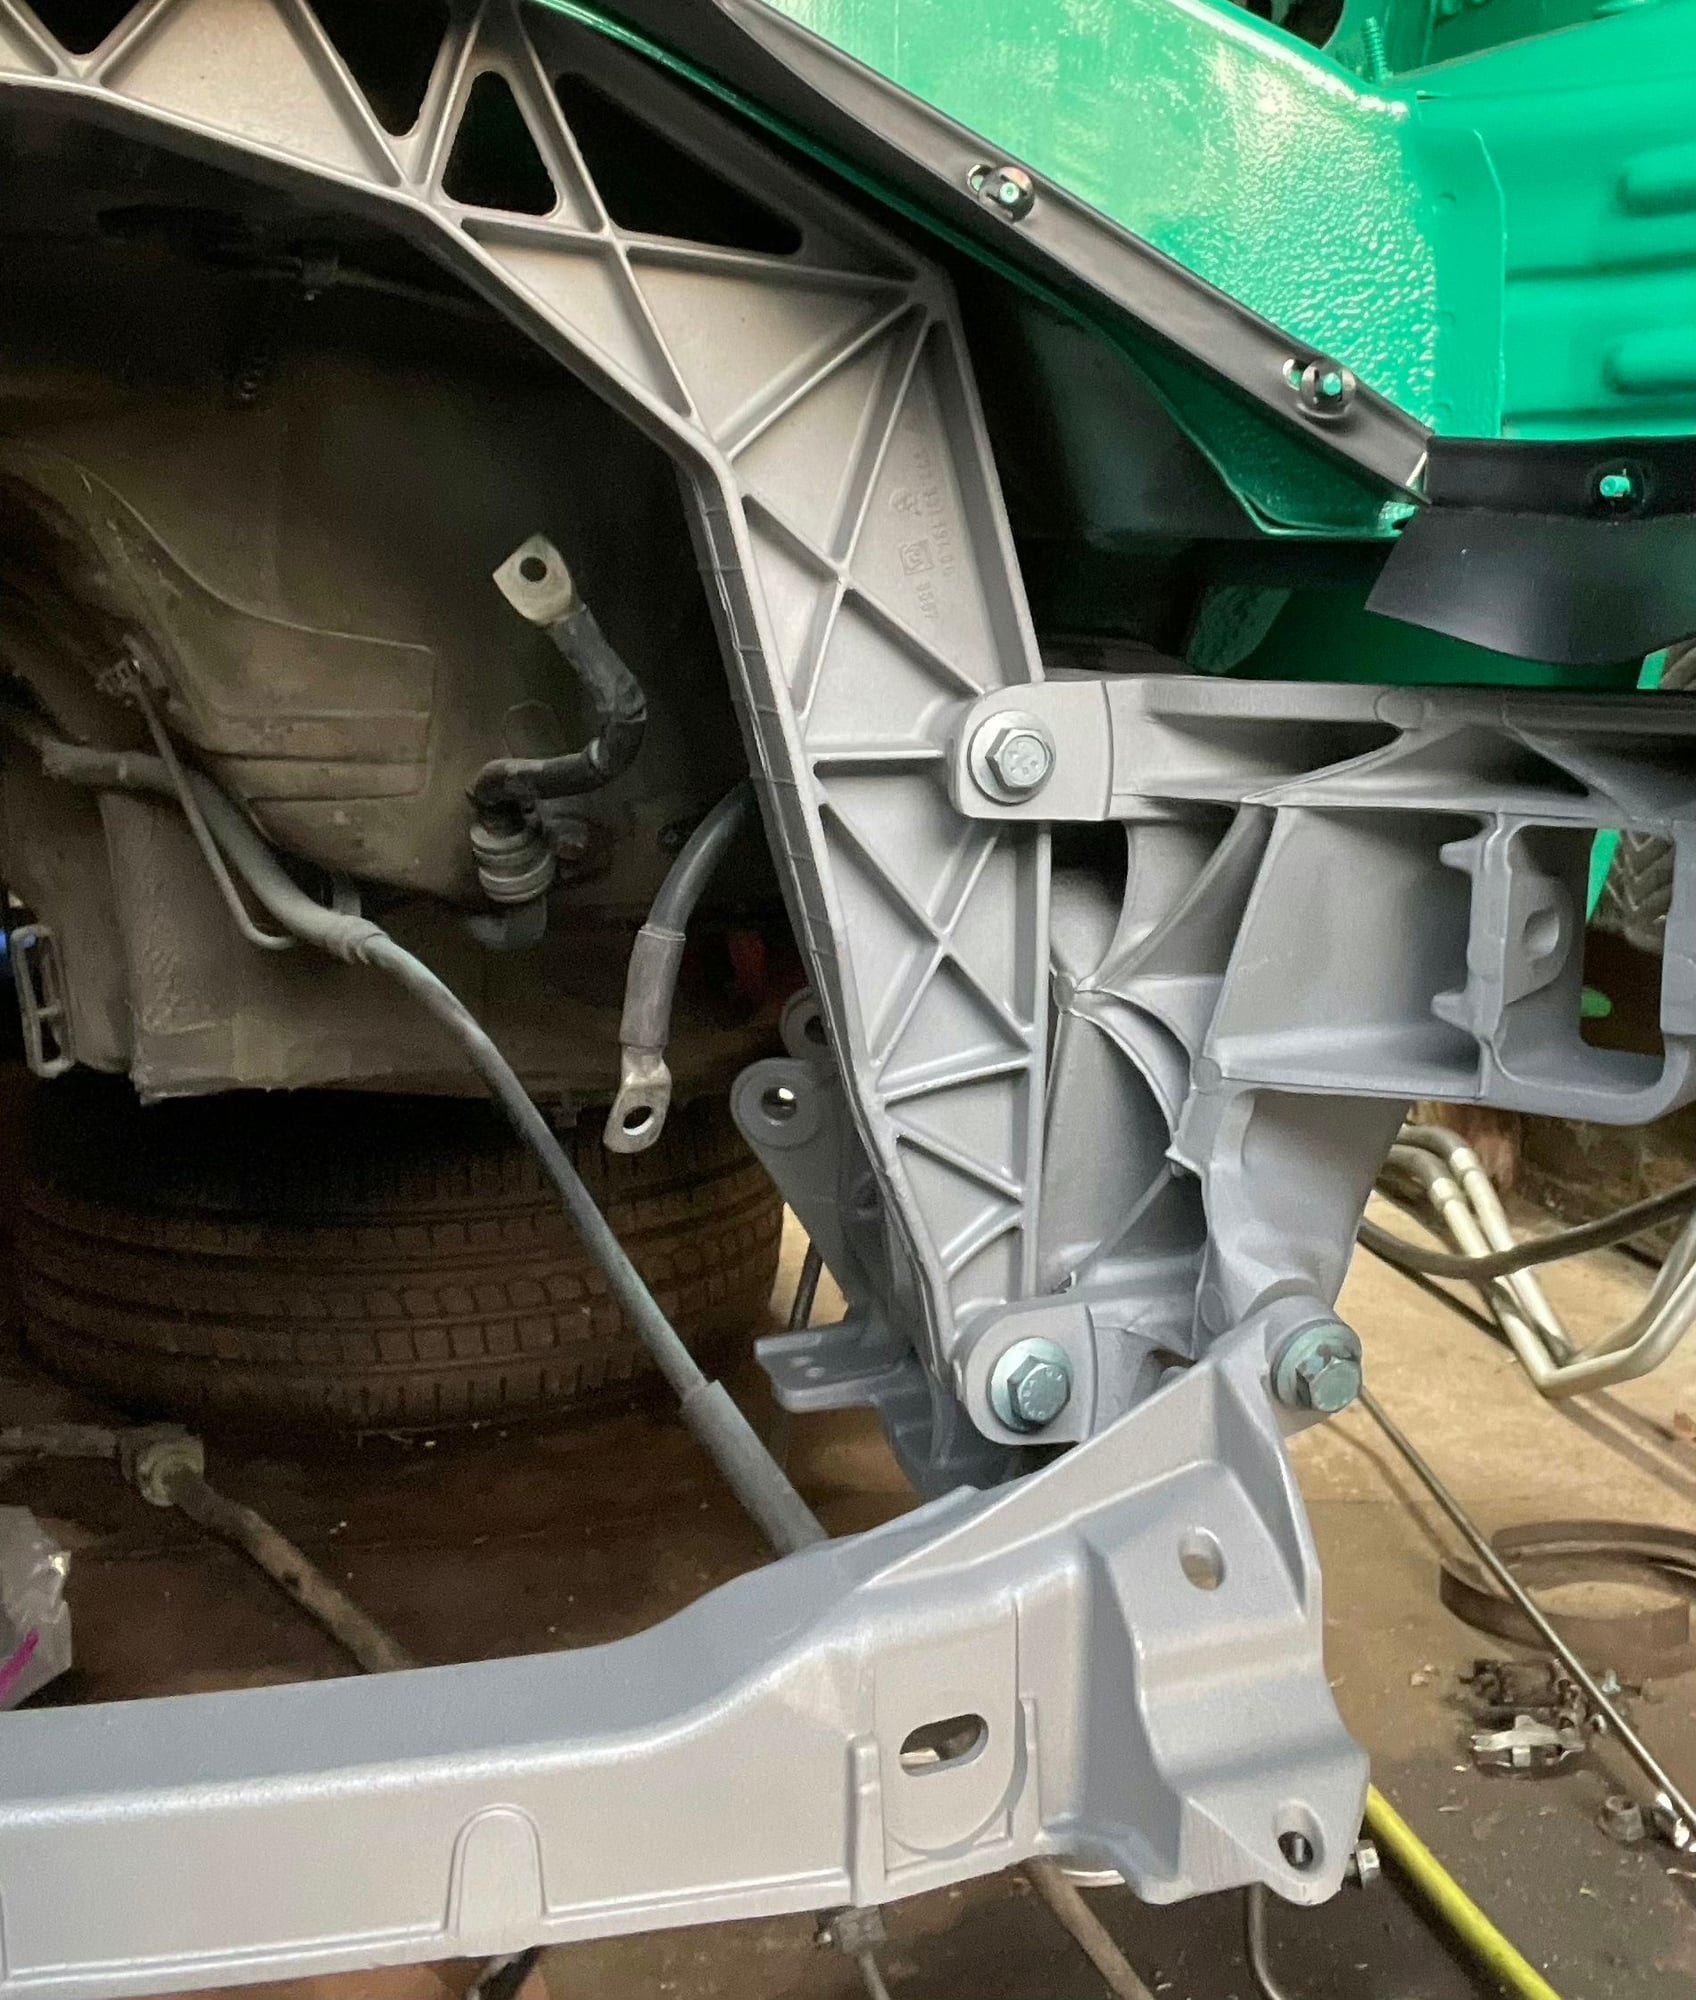
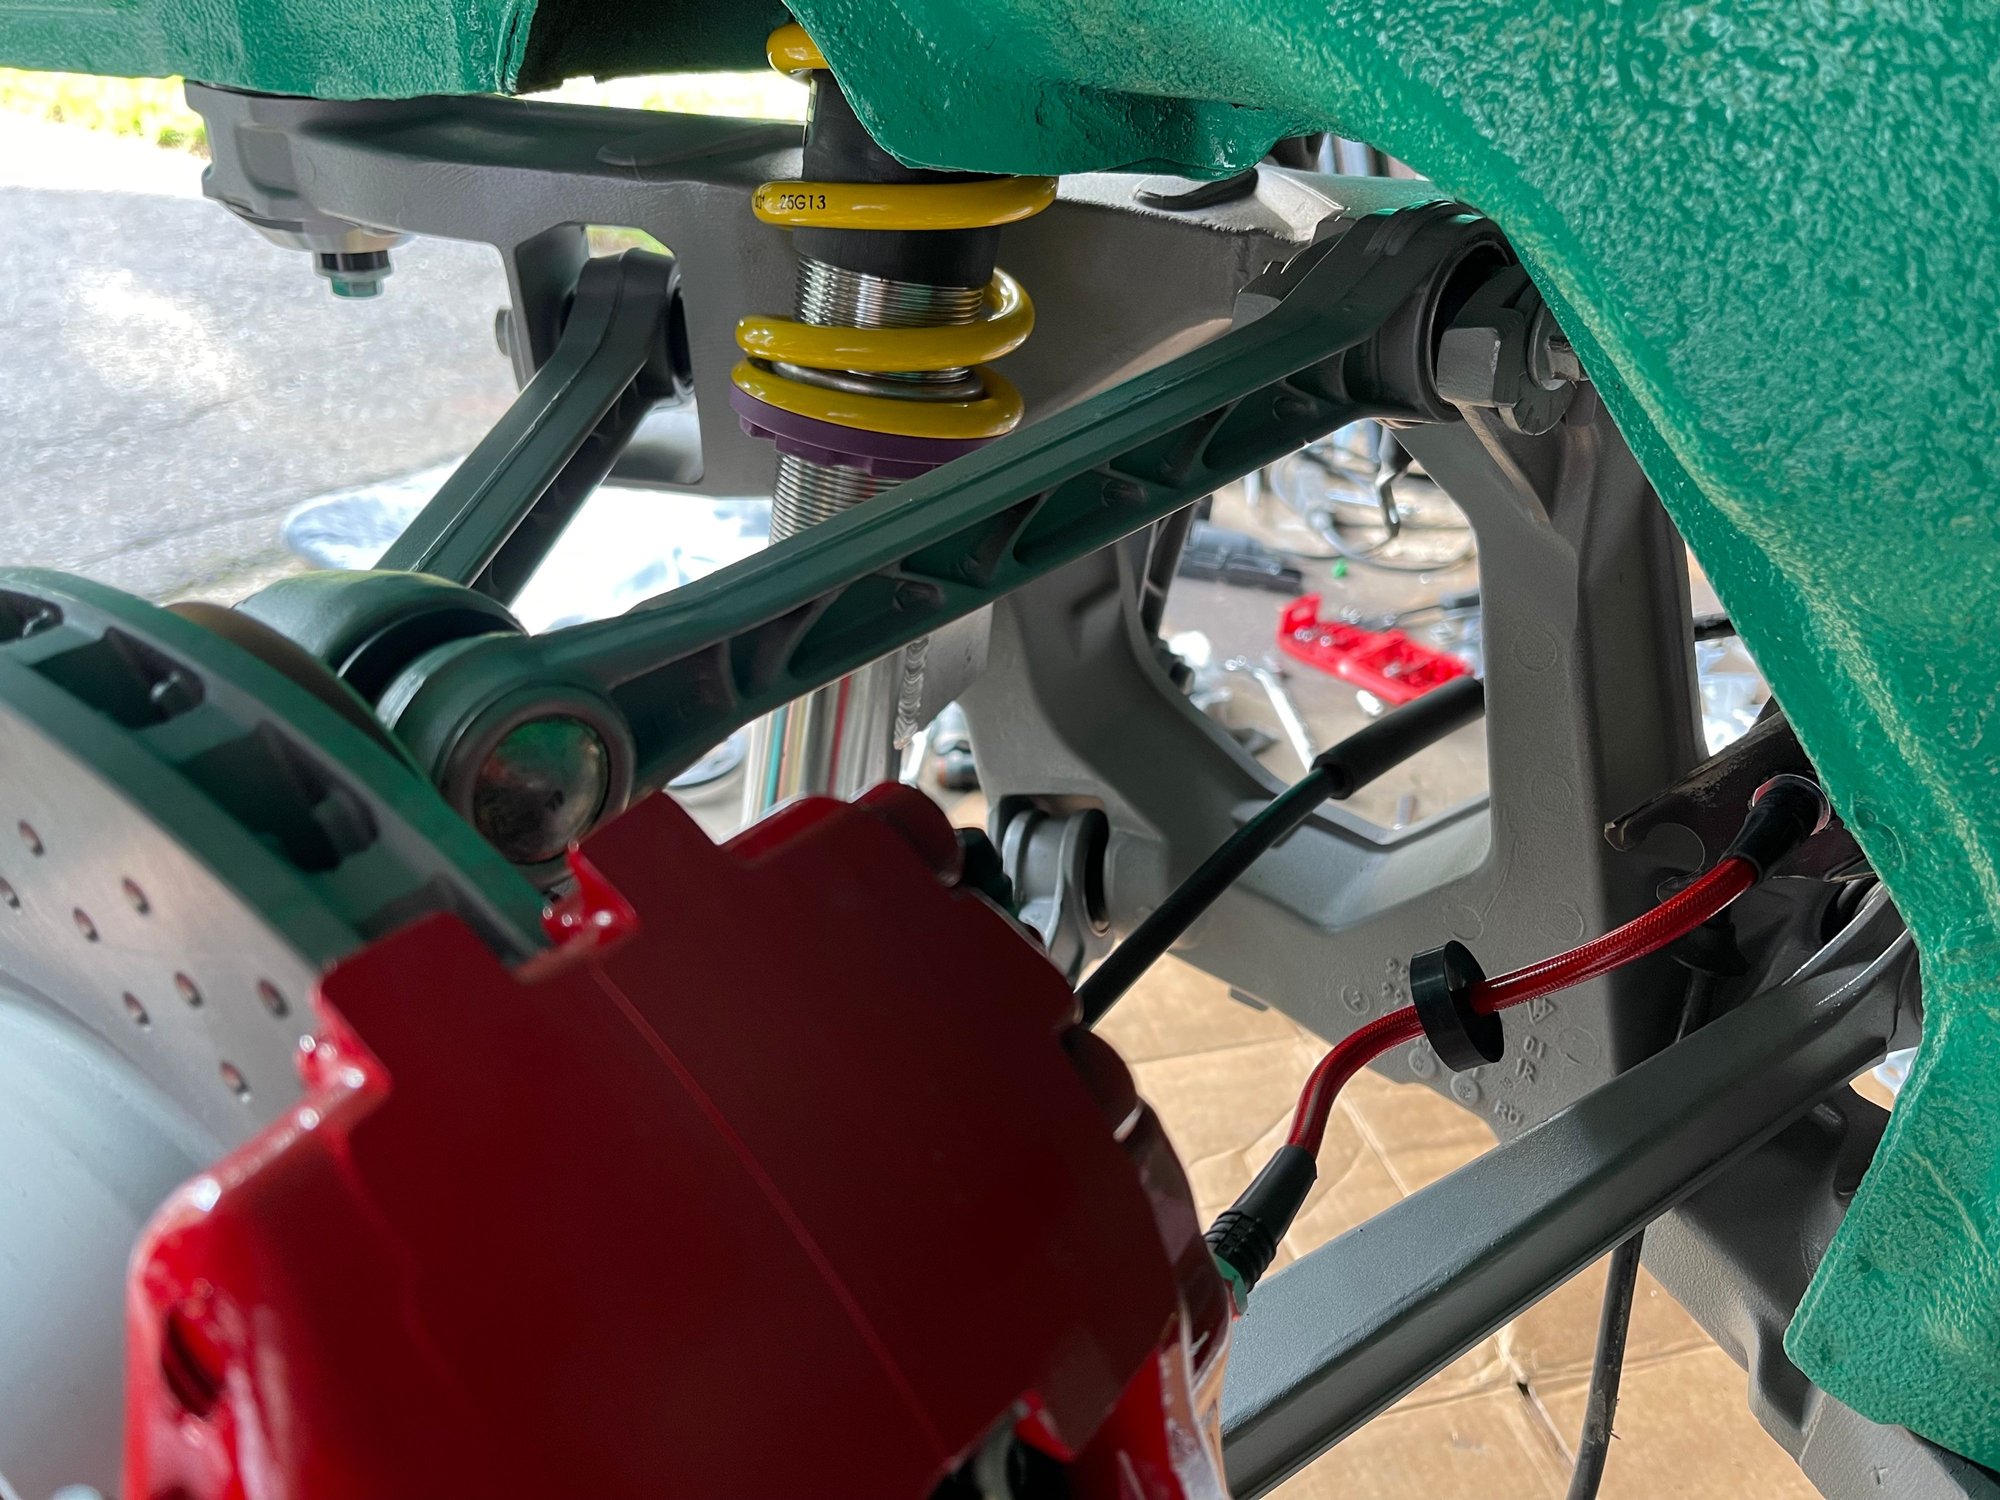
- Rear subframe back in and torqued to spec
- Rear wheel carriers back in
- Rear control arms back in and torqued to 80% value in horizontal position, per service manual (they will be loosened and torqued to full spec once full weight/ride height dialed in)
- New drum brake shoes installed along with all drum brake parts cleaned up
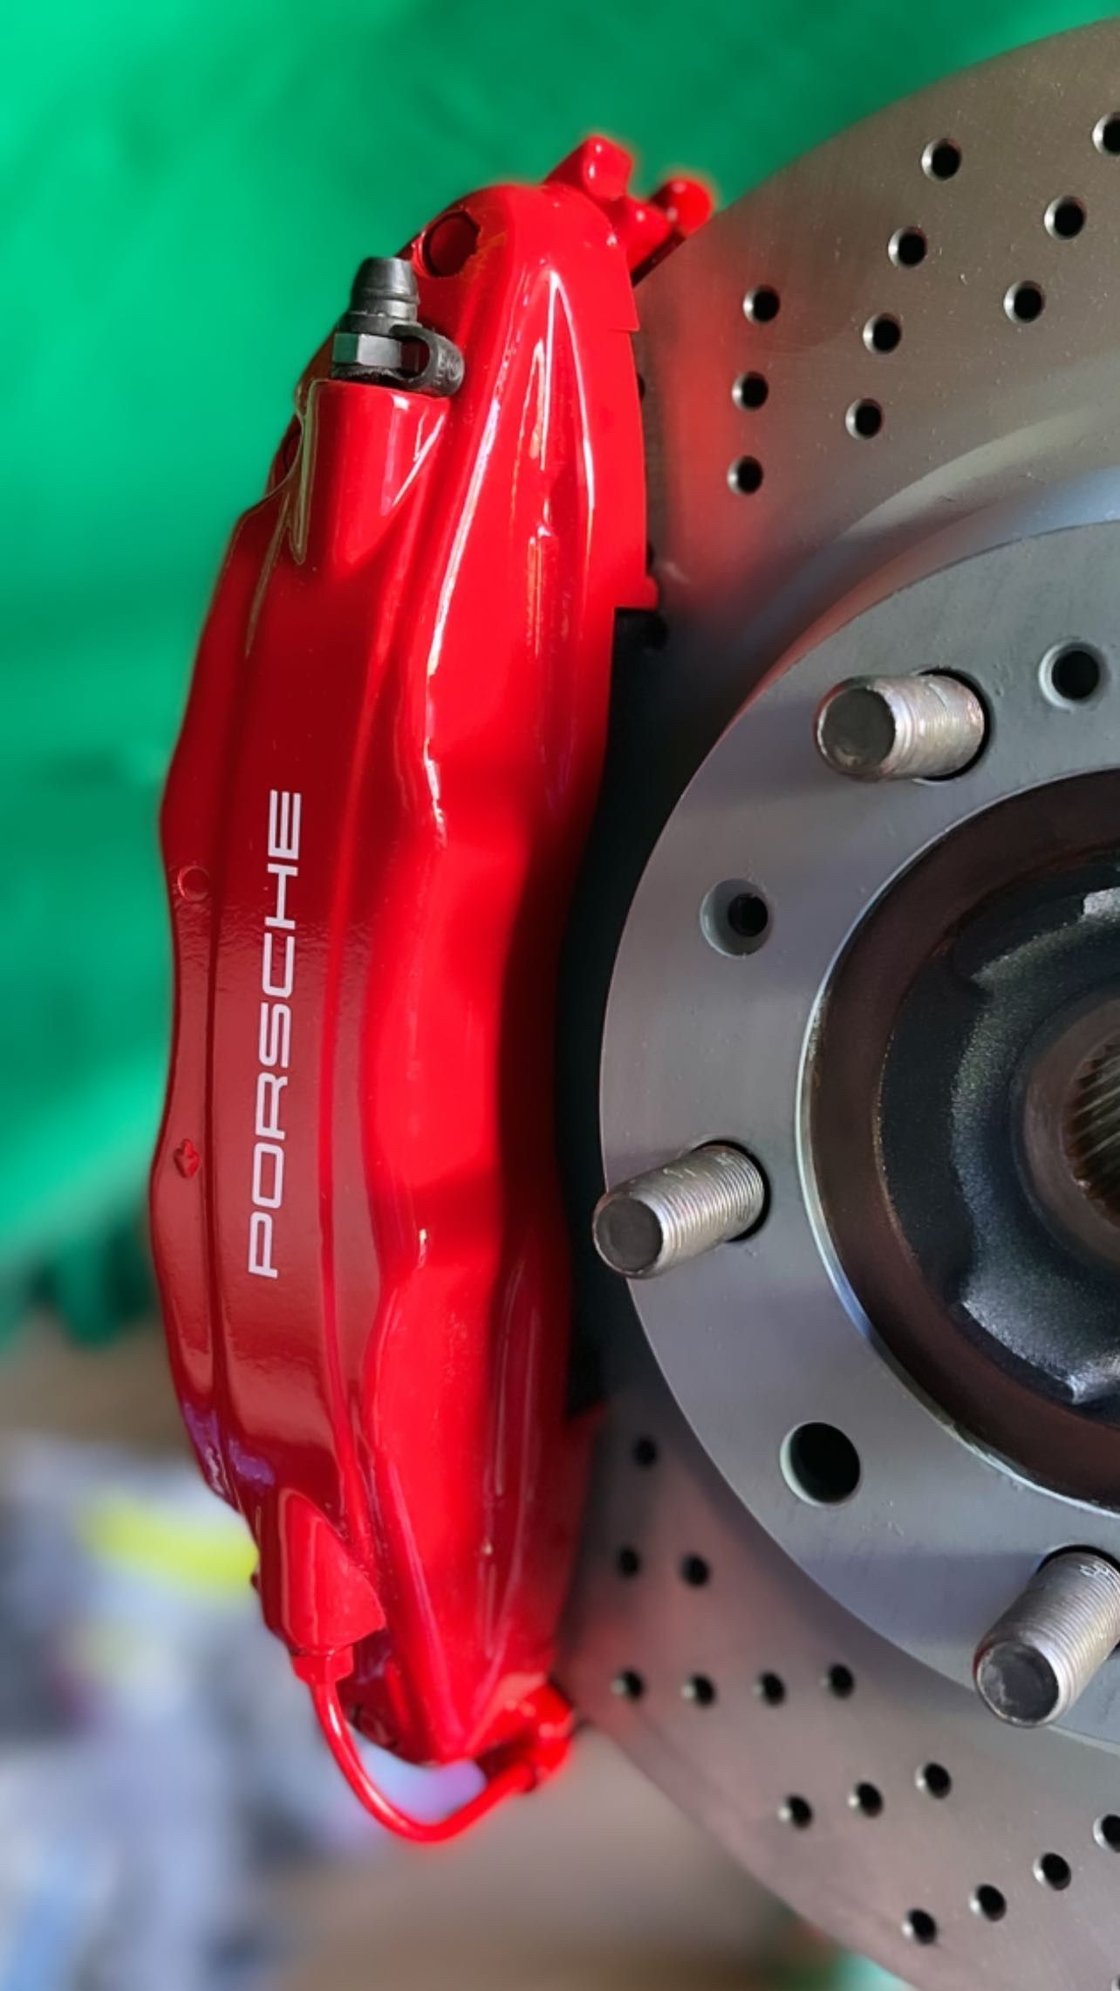
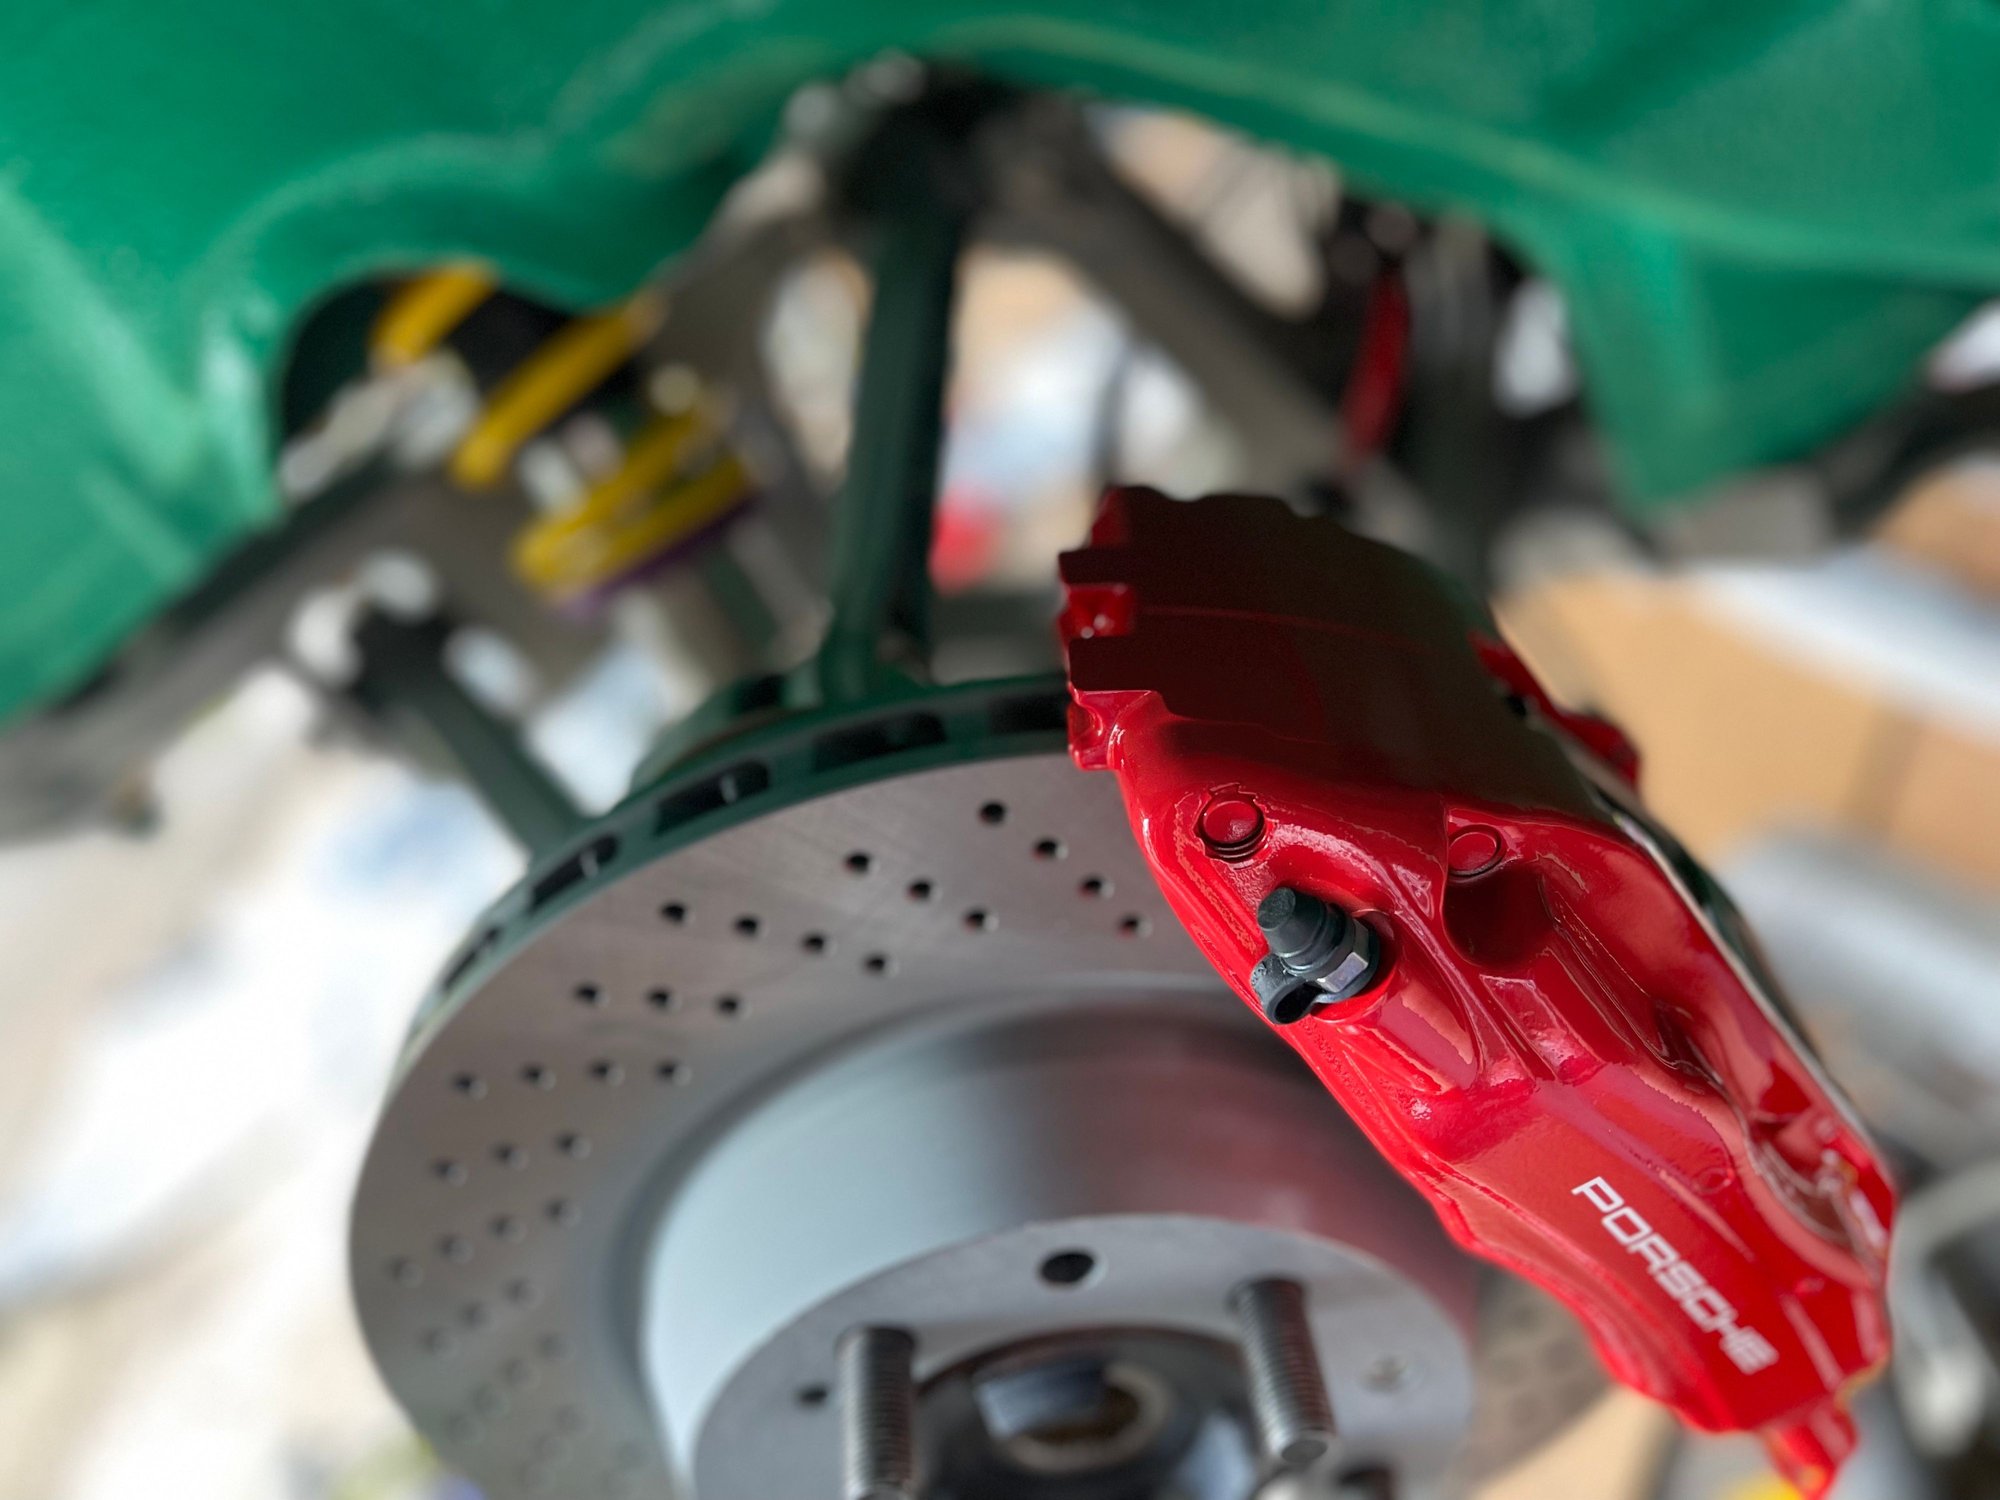
- New 993RS calipers and rotors
Just one quick pic to share. Was so excited to finally see these 993RS big reds against the Jade Green paint... (yes I know the screws that hold the rotor down are missing in the pic. They're installed now.)
Last edited by boomboomthump; 06-05-2022 at 11:20 PM.
Love the progress pics! Just a general question... how do you keep track of which bolt is where and which wire is mounted there and plugged up to what?
It always amazes me how folks can take a car apart and put it back together. I had a hard enough time keeping track of plugs and vacuum lines when I was taking off the intake manifold to get to the SAI pump.
Lots and lots of labeled zip lock bags of differing sizes which I label with a sharpie. Some pictures along the way too.
The biggest challenge I have though is when I bulk order a bunch of new parts from Porsche. By the time they arrive I've found myself scratching my head saying "what did I order these 4 nuts for?" which then turns into me searching through the PET to find the 37 places that nut is used.
I'm floored by the effort, details and money that goes into this. I'm also more about driving than showing the car but if I was doing this, i'm not sure if I'm gonna drive the car lol. It's so clean and perfect!
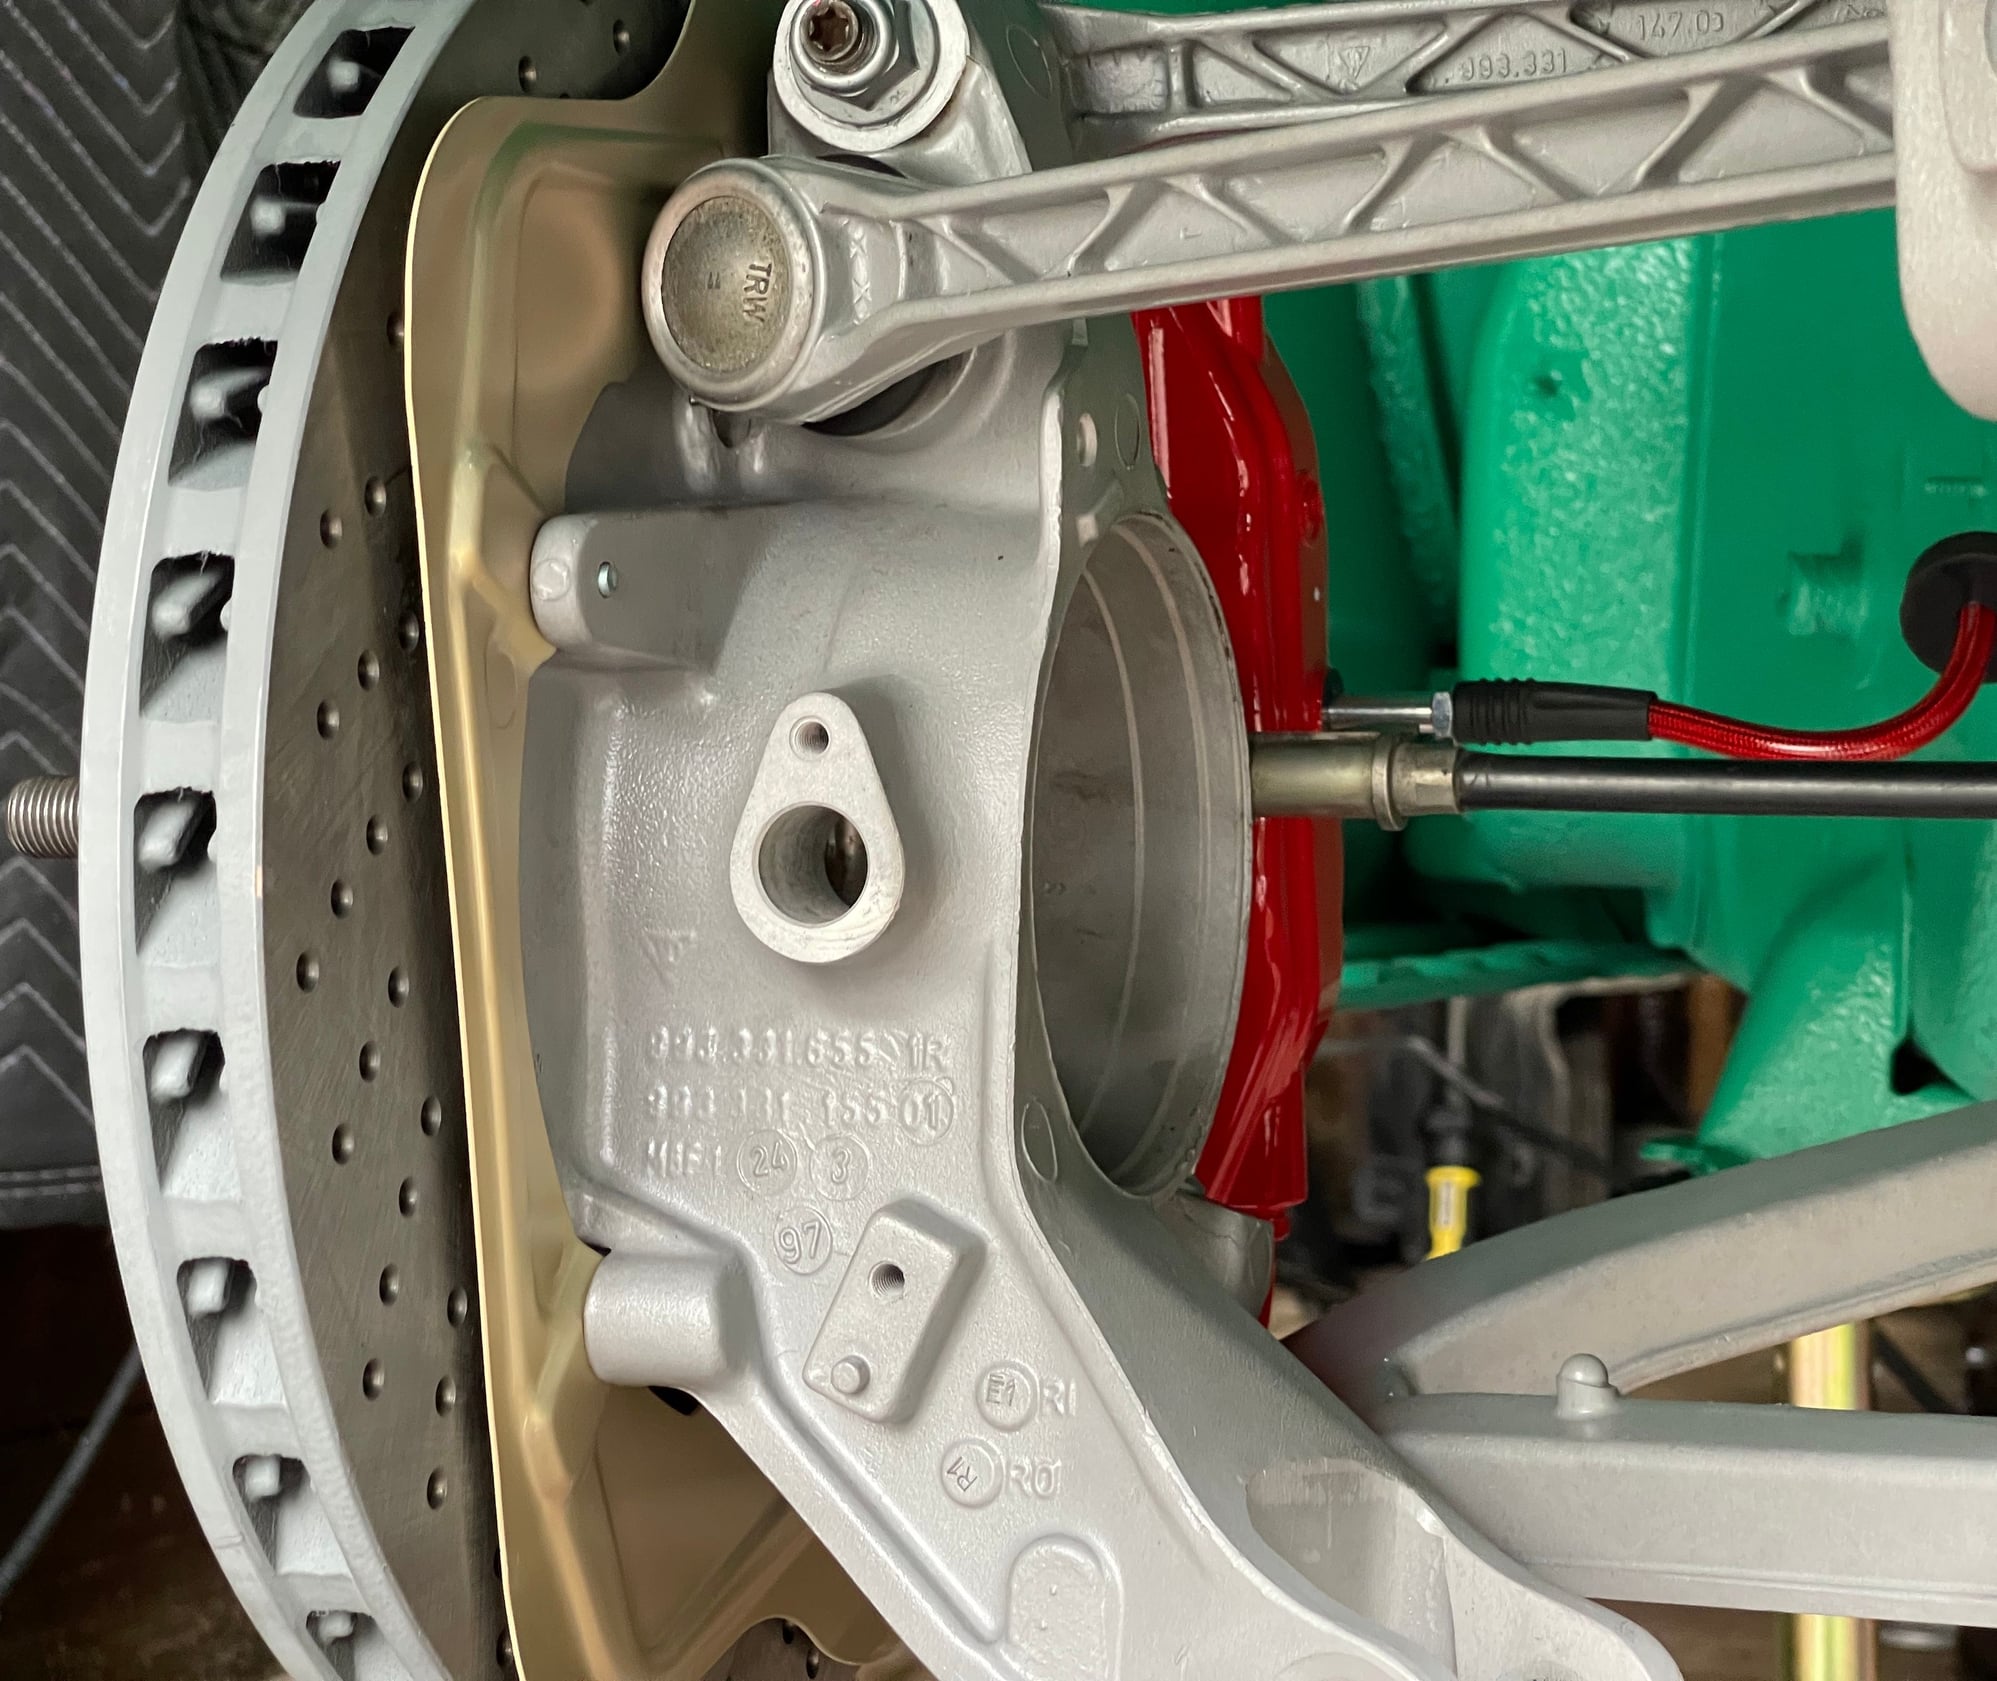
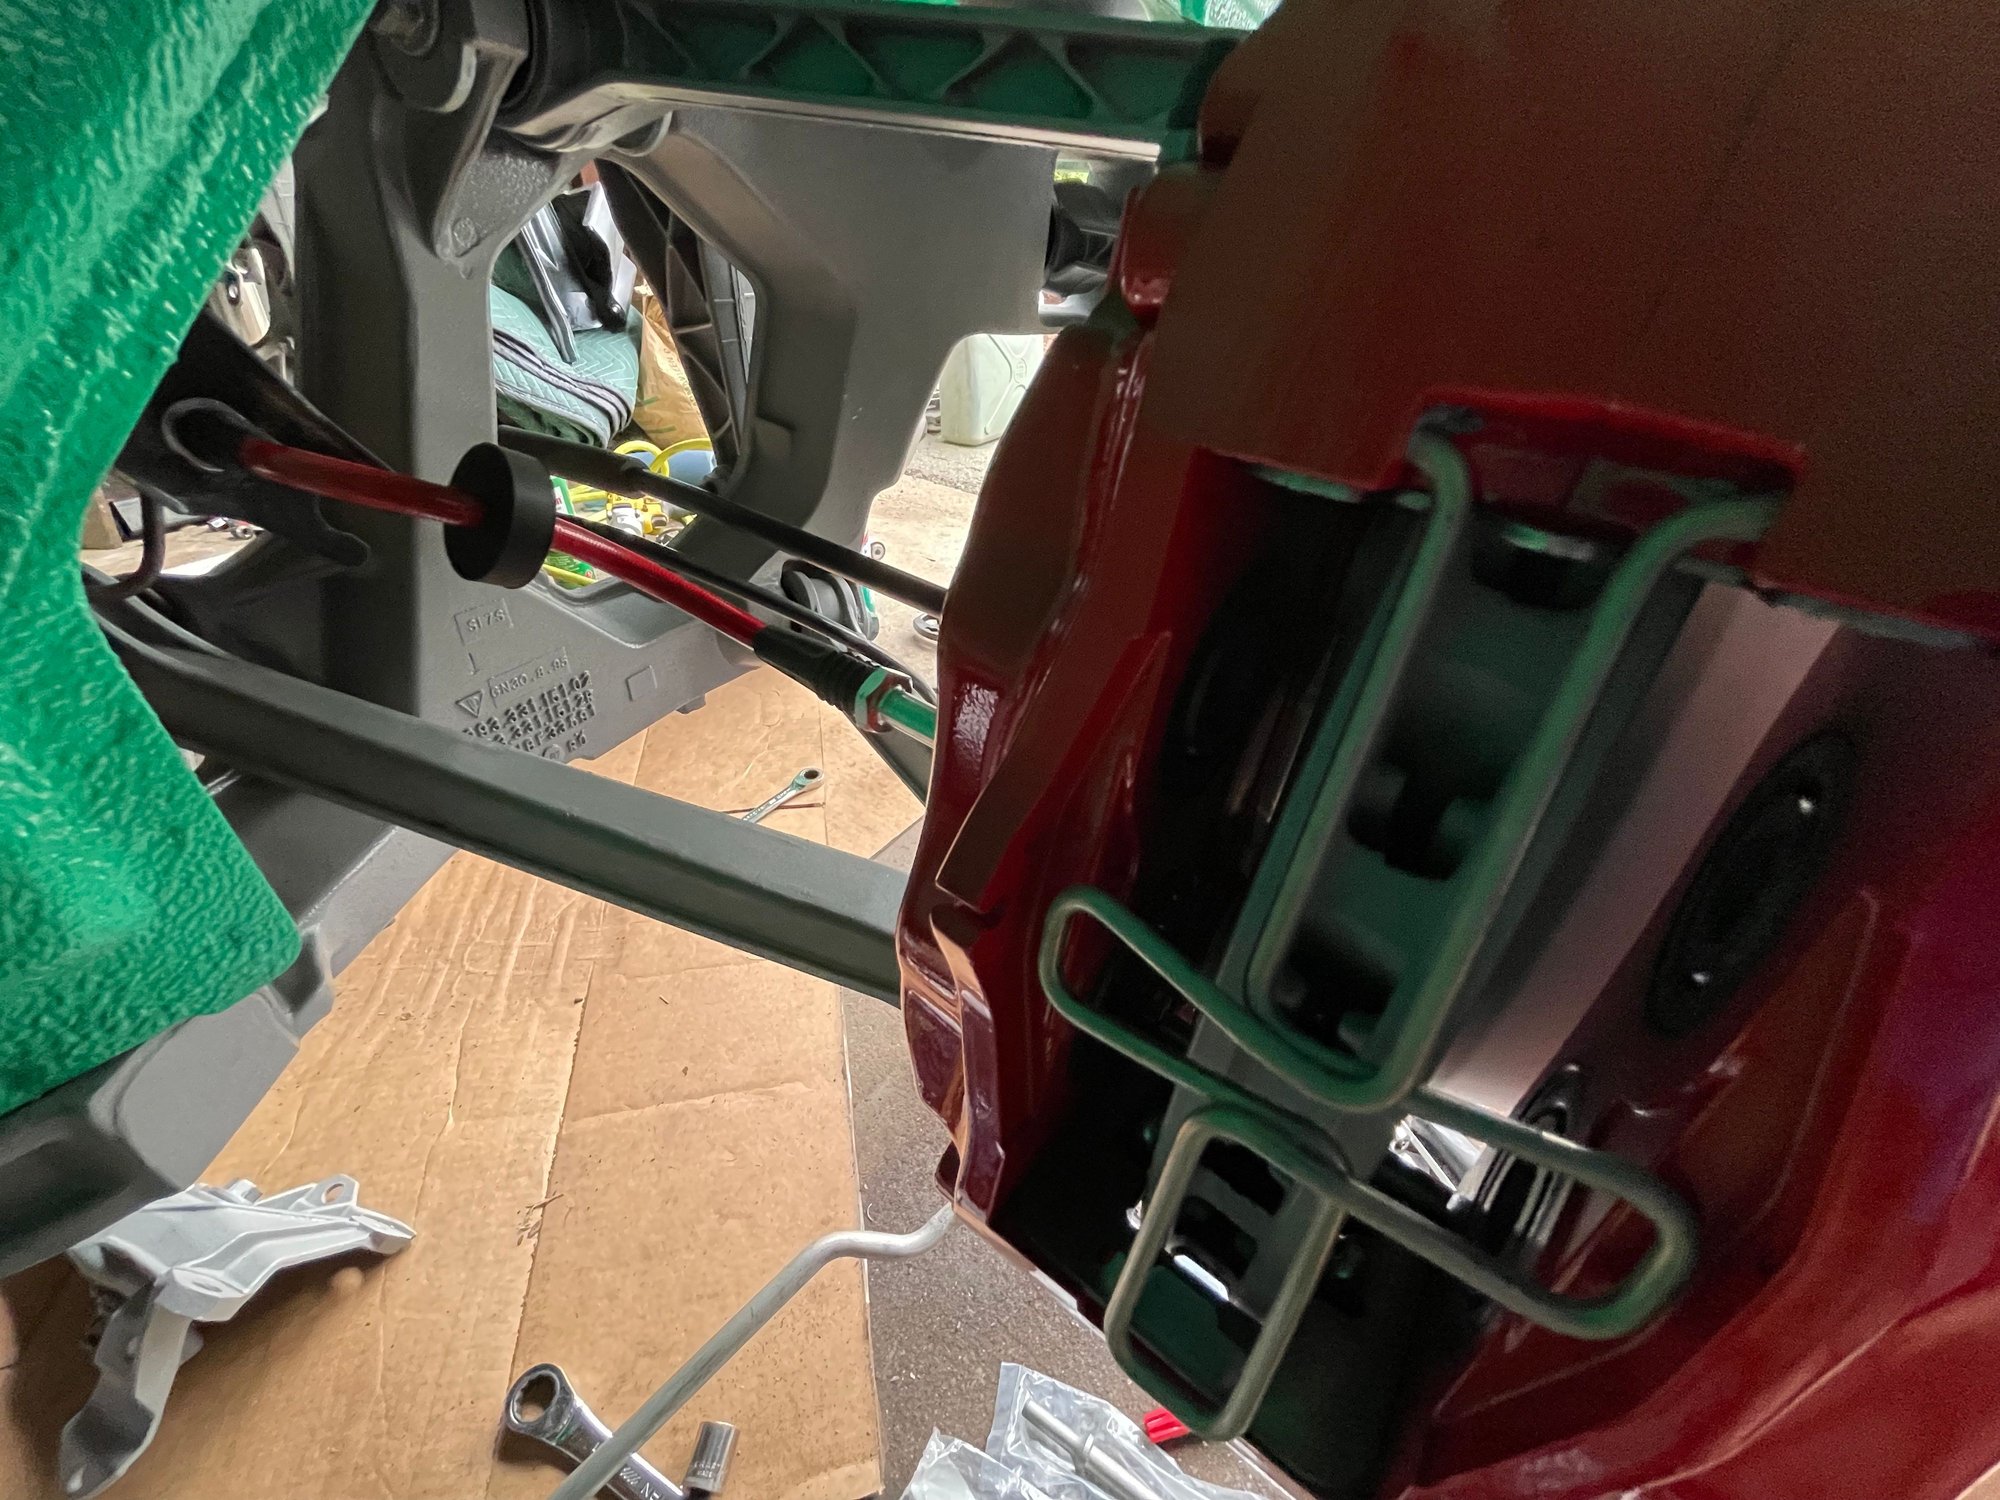
- new dust shields (old ones were pretty trashed; decided against ditching them altogether)
- new stainless brake lines from @FisterD (decided to add a small touch of bling and match them to the calipers)
- got everything all torqued up
Next up: rear axles going back in and then time to get the front suspension/brakes in.
Hats off for the work you are pulling through, Brian. Really, this is awesome to watch it unfold.
However I am wondering, whats your intention with the build? Because your at a perfectionist level of this build, and do you think you will ever use the car once you are done with the refurbishment? The level of finish will be next to none.
Your project is looking freaking awesome and I wish you all the best with the projects future.
Im contemplatig a colorchange myself, and you are quite the inspiration, but theres so many unceratin buts. Budget budget budget my better half kerps telling me, but i dont know if I agree 🤣
Great work. Having done a similar job with the suspension parts, with no where near the detail, I can appreciate the time it takes.
Originally Posted by boomboomthump
Lots and lots of labeled zip lock bags of differing sizes which I label with a sharpie. Some pictures along the way too.
The biggest challenge I have though is when I bulk order a bunch of new parts from Porsche. By the time they arrive I've found myself scratching my head saying "what did I order these 4 nuts for?" which then turns into me searching through the PET to find the 37 places that nut is used.
The changing part numbers added to my frustration. Lost count the number of times I searched every bag looking for a part only to remember to look on my spreadsheet to see the part number had changed.
What an inspiration man. I haven't been back here on the 993 Forum in years but been following your build on Insta. This thread is next level in detail!! Such a joy to go through from post 1 to the end today.. This is basically my dream project for my black 120K worthless wide body Hopefully one day.
Great work. Having done a similar job with the suspension parts, with no where near the detail, I can appreciate the time it takes.
The changing part numbers added to my frustration. Lost count the number of times I searched every bag looking for a part only to remember to look on my spreadsheet to see the part number had changed.
Good point! I failed to mention that... yes, compounding the problem is when you search for the part number in an attempt to figure out what that nut/bolt was for and it's not even in the PET because it was superseded with another part number. Figuring that out in reverse is sometimes quite a challenge!

 05-28-2022, 11:10 AM