Some Maintenance work
 03-05-2008, 01:14 AM
#46
RL Community Team
Rennlist Member
Rennlist Member
Raj, I changed the RMS on my blue car with the bellhousing on. It was easy enough to get it out with the drill-and-screw trick, while getting it in was tricky, but very doable! If the only reason you're pulling the TT back is to do the RMS, you really don't need to, IMHO.
I had to fashion a little tool to use the flywheel bolts to press in the RMS. I can PM you pics/details if you need. Others have fashioned tools that use other fixed points to press it in. Doable!
If you still want to pull the TT then cheers and good luck!
I had to fashion a little tool to use the flywheel bolts to press in the RMS. I can PM you pics/details if you need. Others have fashioned tools that use other fixed points to press it in. Doable!
If you still want to pull the TT then cheers
and good luck!
 03-05-2008, 11:00 AM
#47
Rennlist Member
Thread Starter
Arash, I also have to do the oil pan gasket and oil filter housing gasket, along with water pump thermostat. I think it might be easier with the engine out at this point. Not much left to do to remove it.
Raj
Raj
03-05-2008, 11:14 AM
#48
Rennlist Member
Raj,
I hope you are taking pictures in preparation for your upcoming book on "How to dismantle and rebuild your Porsche 968". I look forward to the continued saga. ;-)
I hope you are taking pictures in preparation for your upcoming book on "How to dismantle and rebuild your Porsche 968". I look forward to the continued saga. ;-)
03-05-2008, 11:45 AM
#49
Rennlist Member
Thread Starter
I will keep updating everytime I make progress

Rak
03-09-2008, 10:13 PM
#50
Rennlist Member
Thread Starter
Update: 03/09/2008
Removed the engine out of the engine bay
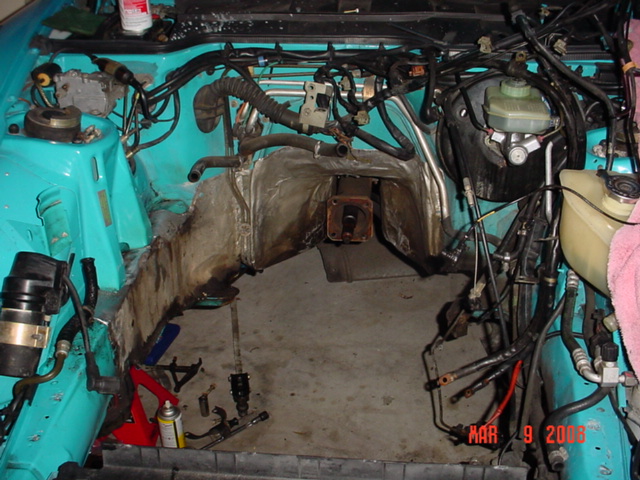
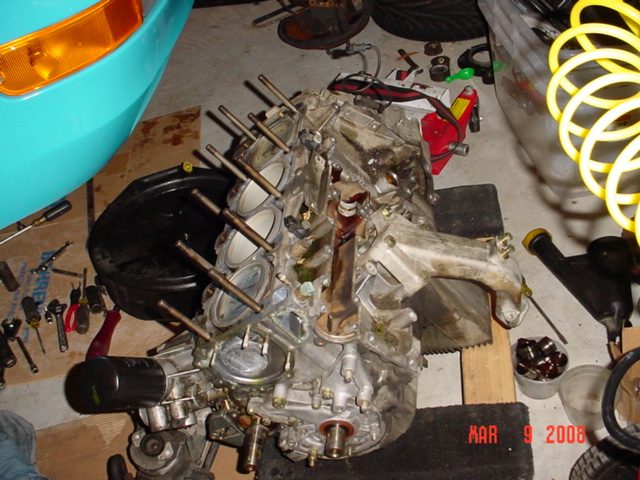
Picture of engine outside. It should be much easier to work on it now. Should have the engine on engine stand by wed. A big thank you to Steve for lending a hand. I removed the engine from the bottom.
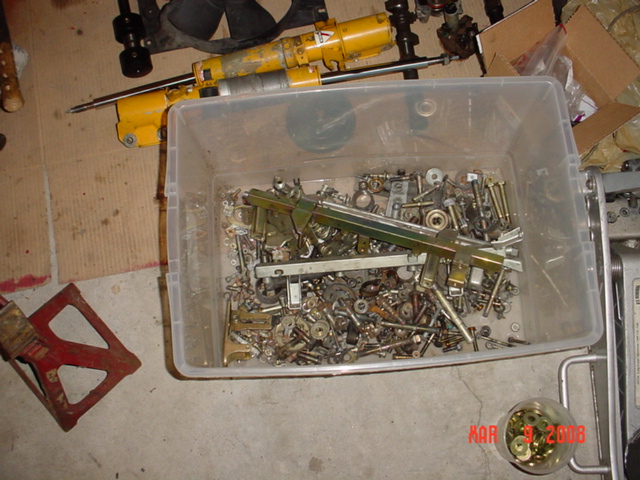
Trying to gather all the nut/bolts/heatshields so they can be sent for plating
Regards.
Raj
Removed the engine out of the engine bay
Picture of engine outside. It should be much easier to work on it now. Should have the engine on engine stand by wed. A big thank you to Steve for lending a hand. I removed the engine from the bottom.
Trying to gather all the nut/bolts/heatshields so they can be sent for plating
Regards.
Raj
03-09-2008, 10:42 PM
#51
Addict
Rennlist Member
Rennlist Member
Good Heaven's, Raj! You're starting to get serious! I'd never be able to remember which bolt went where....
BTW, is the stock 968 oil pan gasket cork? If not, is there a stronger aftermarket piece?
Good luck!
Harvey
BTW, is the stock 968 oil pan gasket cork? If not, is there a stronger aftermarket piece?
Good luck!
Harvey
03-10-2008, 12:01 AM
#53
Rennlist Member
Thread Starter
The toughest part of the job is keeping track of so many nuts/bolts etc. Taking is apart is easy, lets see how installation goes
 .
.Raj
03-10-2008, 03:23 AM
#54
Rennlist Member
Jumpin' Jehosephat, Raj. You're into this knee deep already!
It's also critical to follow the tightening sequence specified in the Factory Manuals, and not over tighten or apply too much sealant. In fact, sealant is only used on the corners. The rest of the gasket "seals itself."
For the bolts, just use a lot of marked ziplock bags to keep track of everything. Taking photos of everything is also very helpful. That's where the wife comes in!
For the bolts, just use a lot of marked ziplock bags to keep track of everything. Taking photos of everything is also very helpful. That's where the wife comes in!
03-10-2008, 04:31 AM
#55
RL Community Team
Rennlist Member
Rennlist Member
Nice work. I love looking into an engine bay with a nice color all around. Working in black engine bays is depressing, but that's about the only thing bad with black.
I envy the result of all this work - I'm sure the entire engine bay will be cleaned and detailed, the motor will be spic and the ancillaries will be span! Not to mention the thing will be as good as new. I was under my car today, and everything is so.... juicy.
I envy the result of all this work - I'm sure the entire engine bay will be cleaned and detailed, the motor will be spic and the ancillaries will be span! Not to mention the thing will be as good as new. I was under my car today, and everything is so.... juicy.
03-10-2008, 11:16 AM
#56
Rennlist Member
Thread Starter
Jumpin' Jehosephat, Raj. You're into this knee deep already!
It's also critical to follow the tightening sequence specified in the Factory Manuals, and not over tighten or apply too much sealant. In fact, sealant is only used on the corners. The rest of the gasket "seals itself."
For the bolts, just use a lot of marked ziplock bags to keep track of everything. Taking photos of everything is also very helpful. That's where the wife comes in!
Raj
03-10-2008, 11:36 AM
#58
Instructor
Join Date: Feb 2007
Location: Kentucky
Posts: 201
Likes: 0
Received 0 Likes
on
0 Posts
OK, I am at a stand still again. I am trying to do a front end reseal and can not get the 2 hex-head bolts that hold the belt guide below the crank pully out. The things are stuck and now stripped. There is not enough room to get a socket on them and was wondering if anybody has any tips. This should have been an easy job, but everything that can go wrong has.
Ryan
87 944S
92 968 cab
Ryan
87 944S
92 968 cab
03-10-2008, 12:35 PM
#59
Rennlist Member
Thread Starter
OK, I am at a stand still again. I am trying to do a front end reseal and can not get the 2 hex-head bolts that hold the belt guide below the crank pully out. The things are stuck and now stripped. There is not enough room to get a socket on them and was wondering if anybody has any tips. This should have been an easy job, but everything that can go wrong has.
Ryan
87 944S
92 968 cab
Ryan
87 944S
92 968 cab
The way you are doing it, it will take you forever and you will never be able to get the new bs belt on.
Raj
03-10-2008, 12:57 PM
#60
Instructor
Join Date: Feb 2007
Location: Kentucky
Posts: 201
Likes: 0
Received 0 Likes
on
0 Posts
Raj, the pullys are off. I need to remove the belt guide in order to get the plastic shield off. The plastic shield is so close I can't get anything on the outside of the hex-heads and their is not a lot of room in front with the fan and rad still in the car.
Ryan
Ryan