When you click on links to various merchants on this site and make a purchase, this can result in this site earning a commission. Affiliate programs and affiliations include, but are not limited to, the eBay Partner Network.
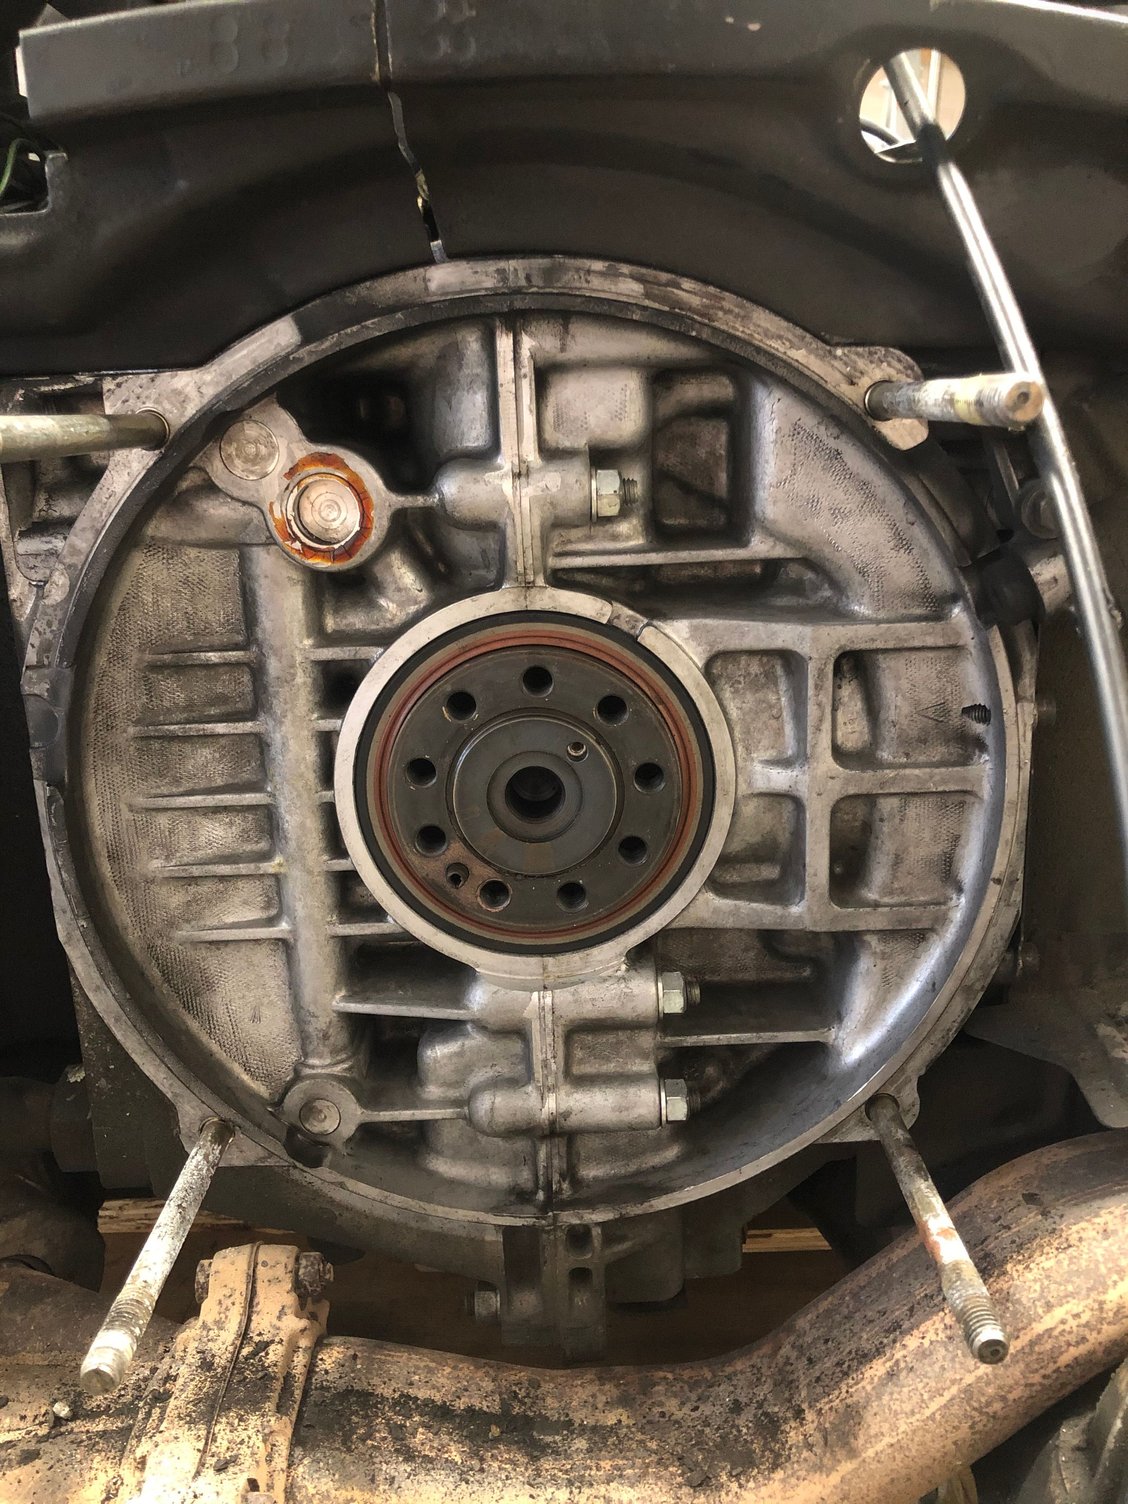
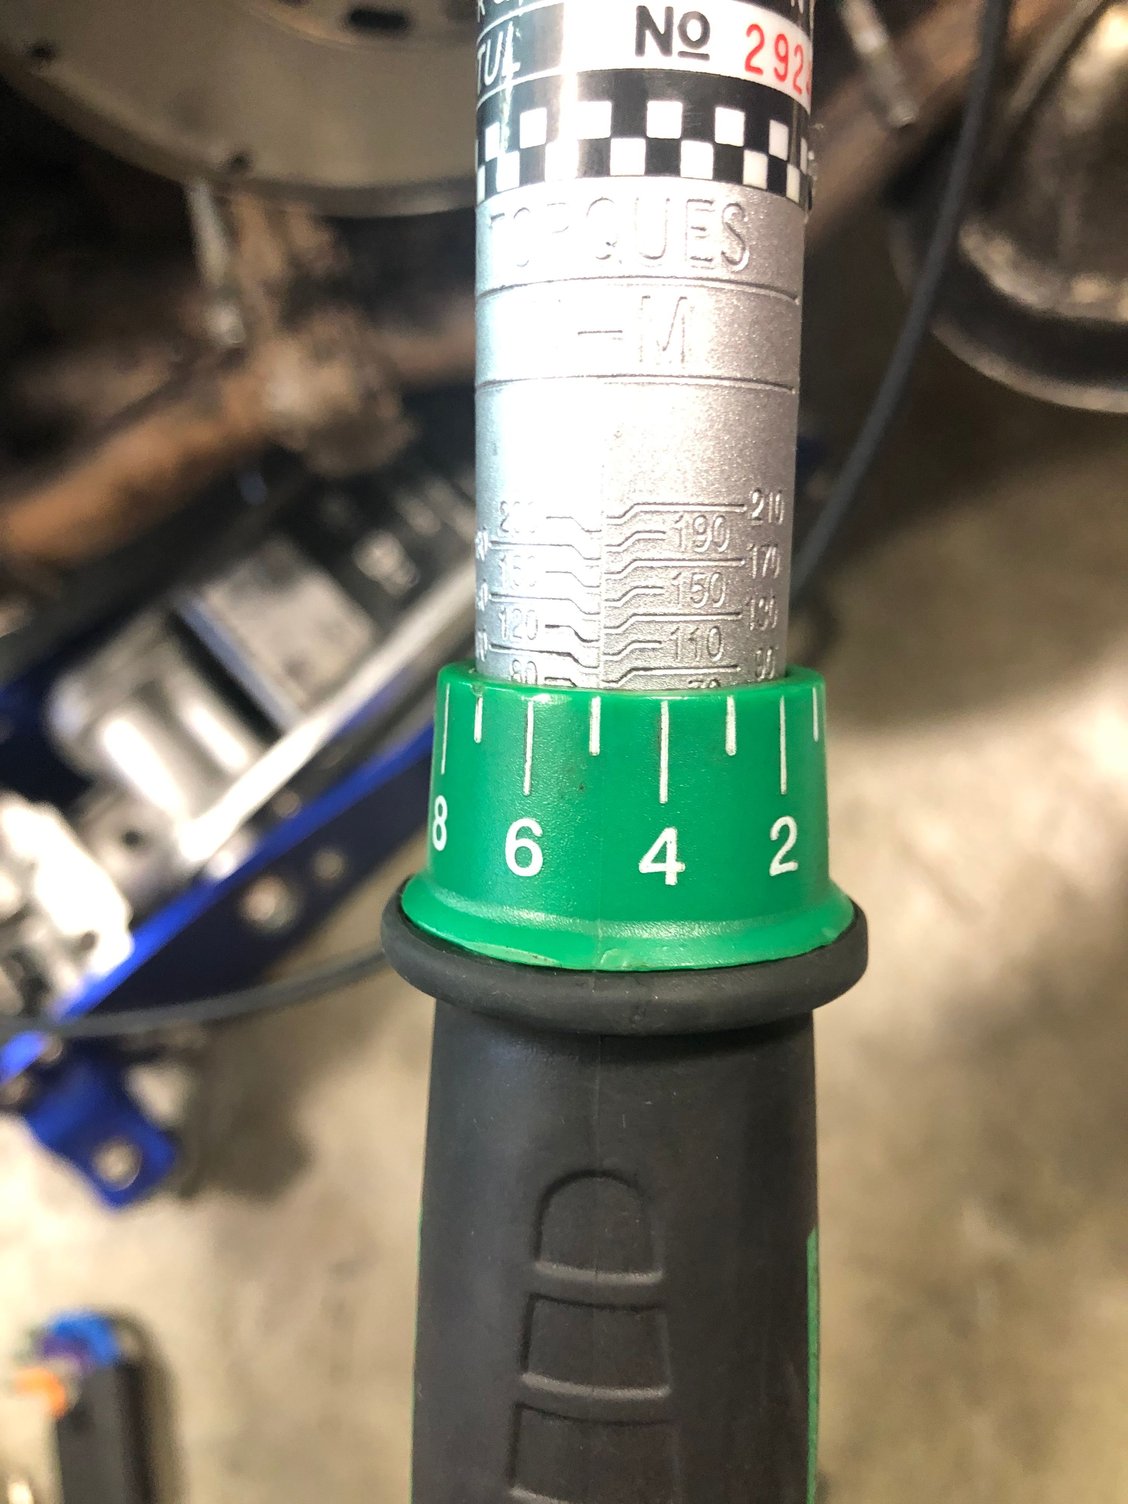
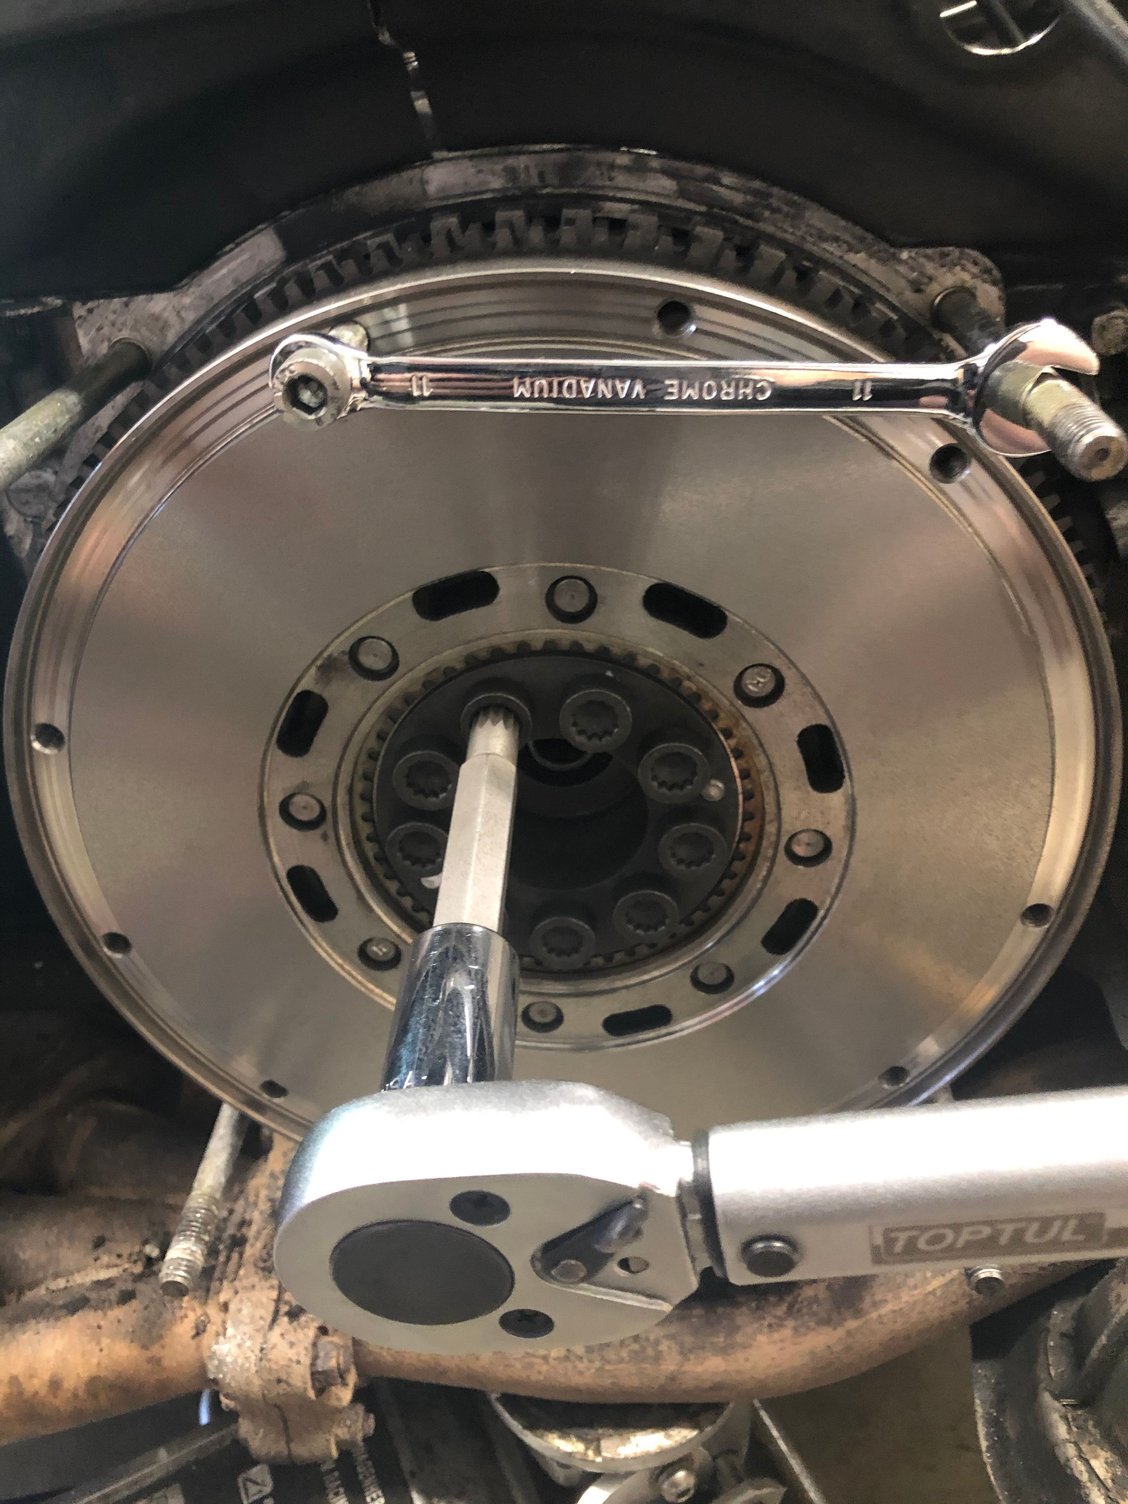
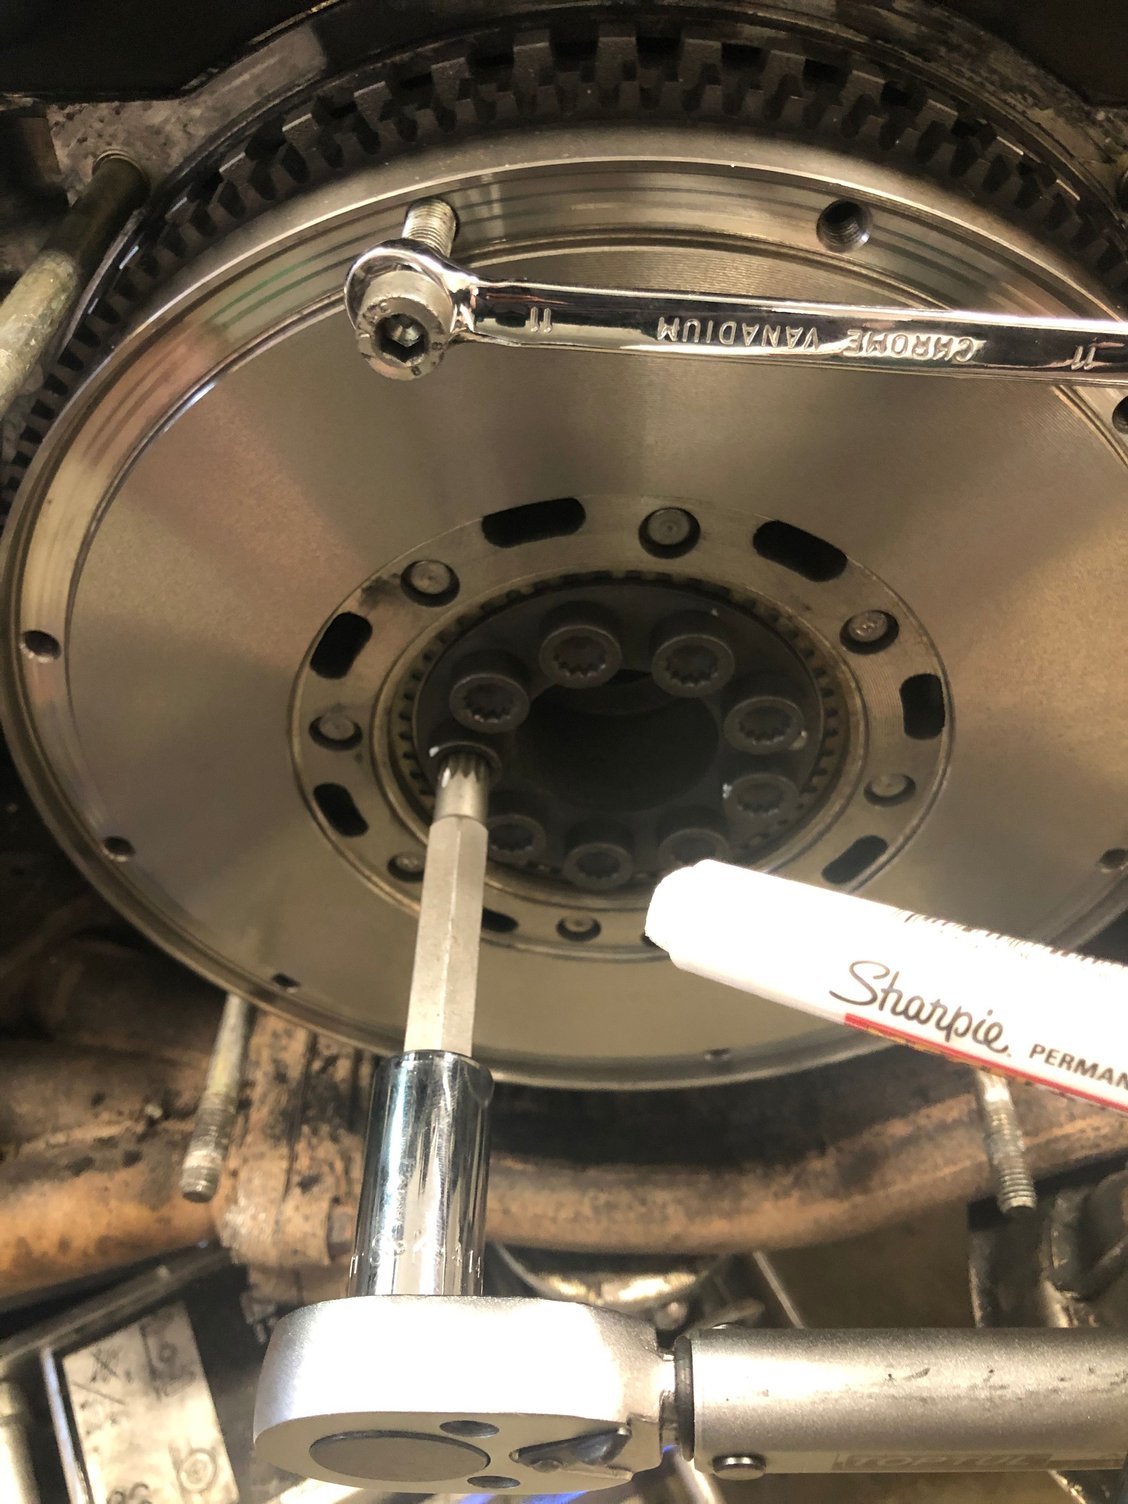
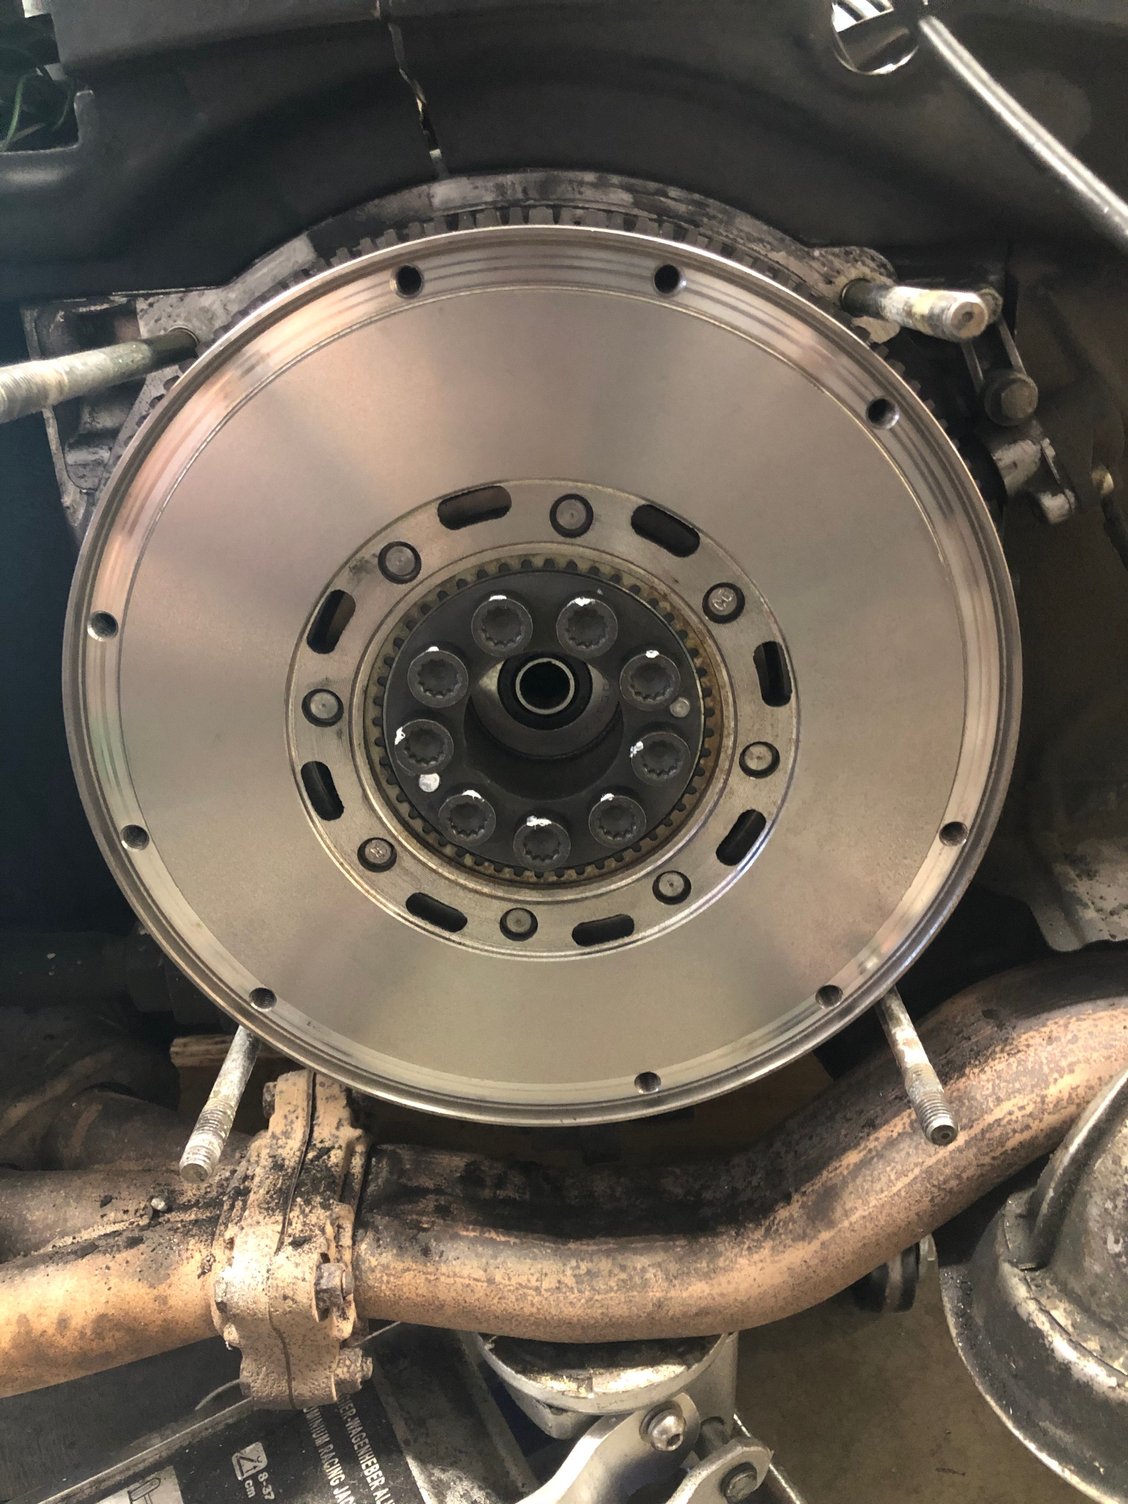
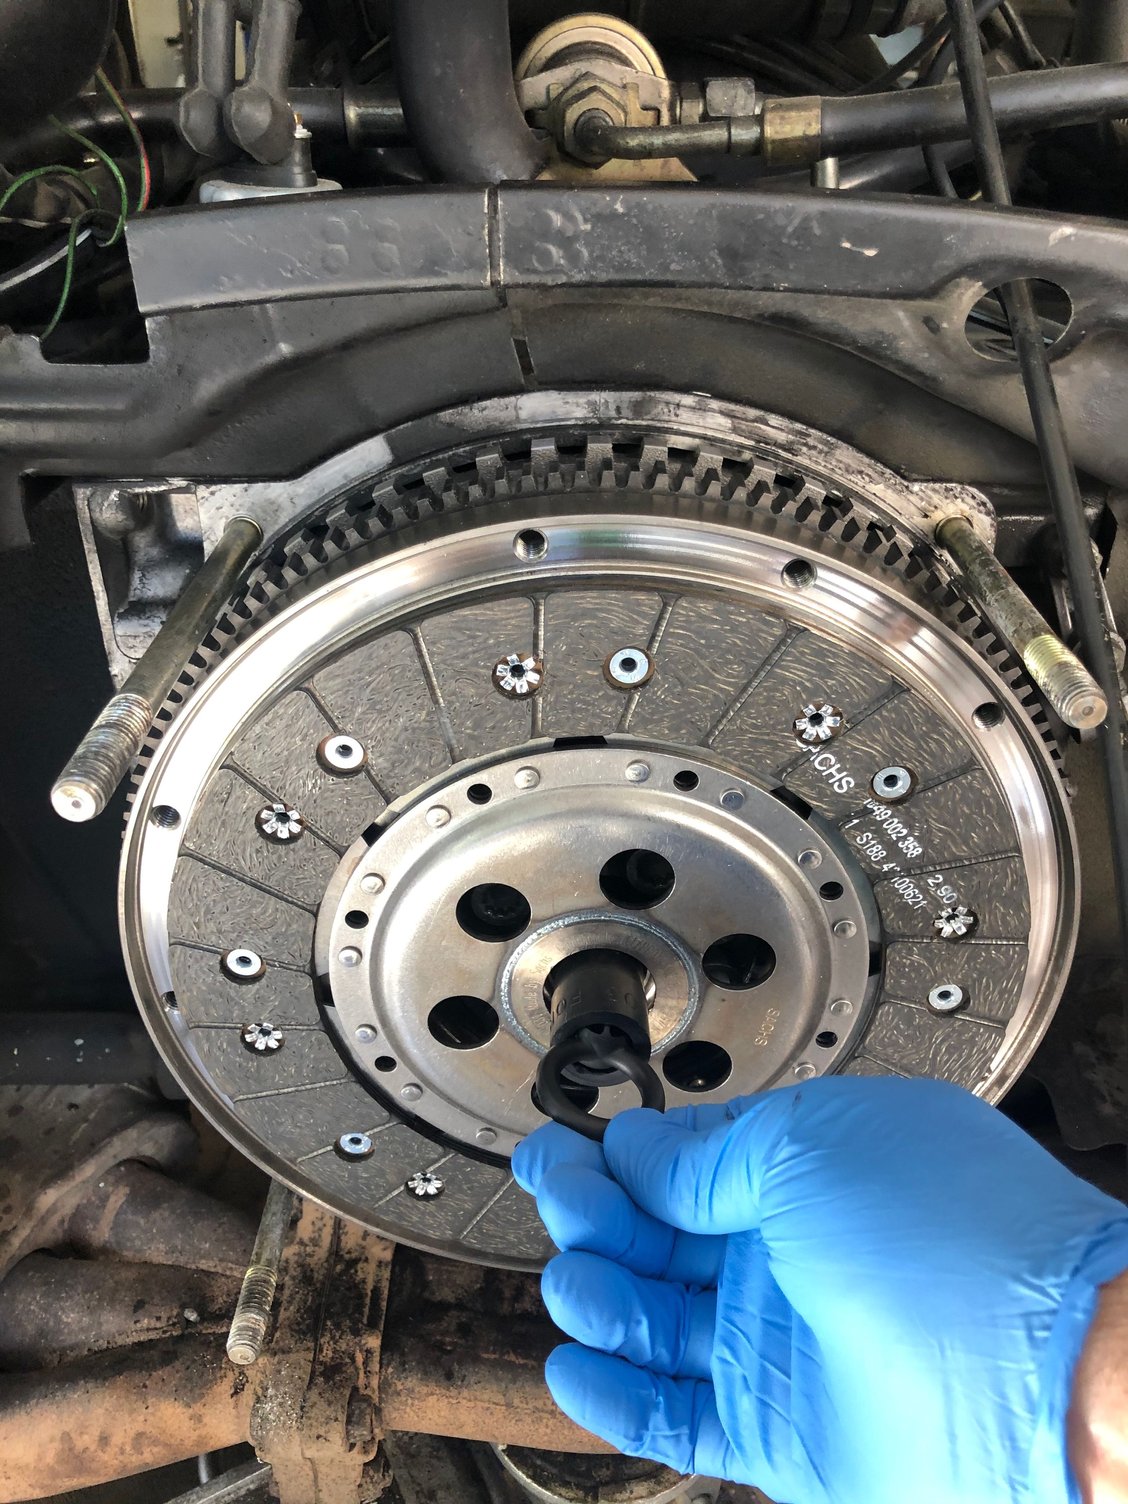
Check RMS. Mine was fine. Mark the front of the DMF where the locating pin is on the back. Count the number of holes to the top hole. Insert the clutch tool into the pilot bearing hole and a bolt into the top hole and carefully position the DMF so it is square and lined up. Insert the other 8 bolts finger tight. Slowly tighten the bolts in a star pattern. The torque for the DMF is 85Nm. This is less than the 90Nm for the LWF (Thanks to Jason Andreas for that info). When the first bolt clicks at 85Nm, mark it with a white marker and tighten others in a star pattern, marking each one. Complete one final round to make sure all are still torqued to 85Nm. I also checked the depth of the pilot bearing to make sure it�s square. It is.
Last edited by John McM; Mar 12, 2021 at 08:11 PM.
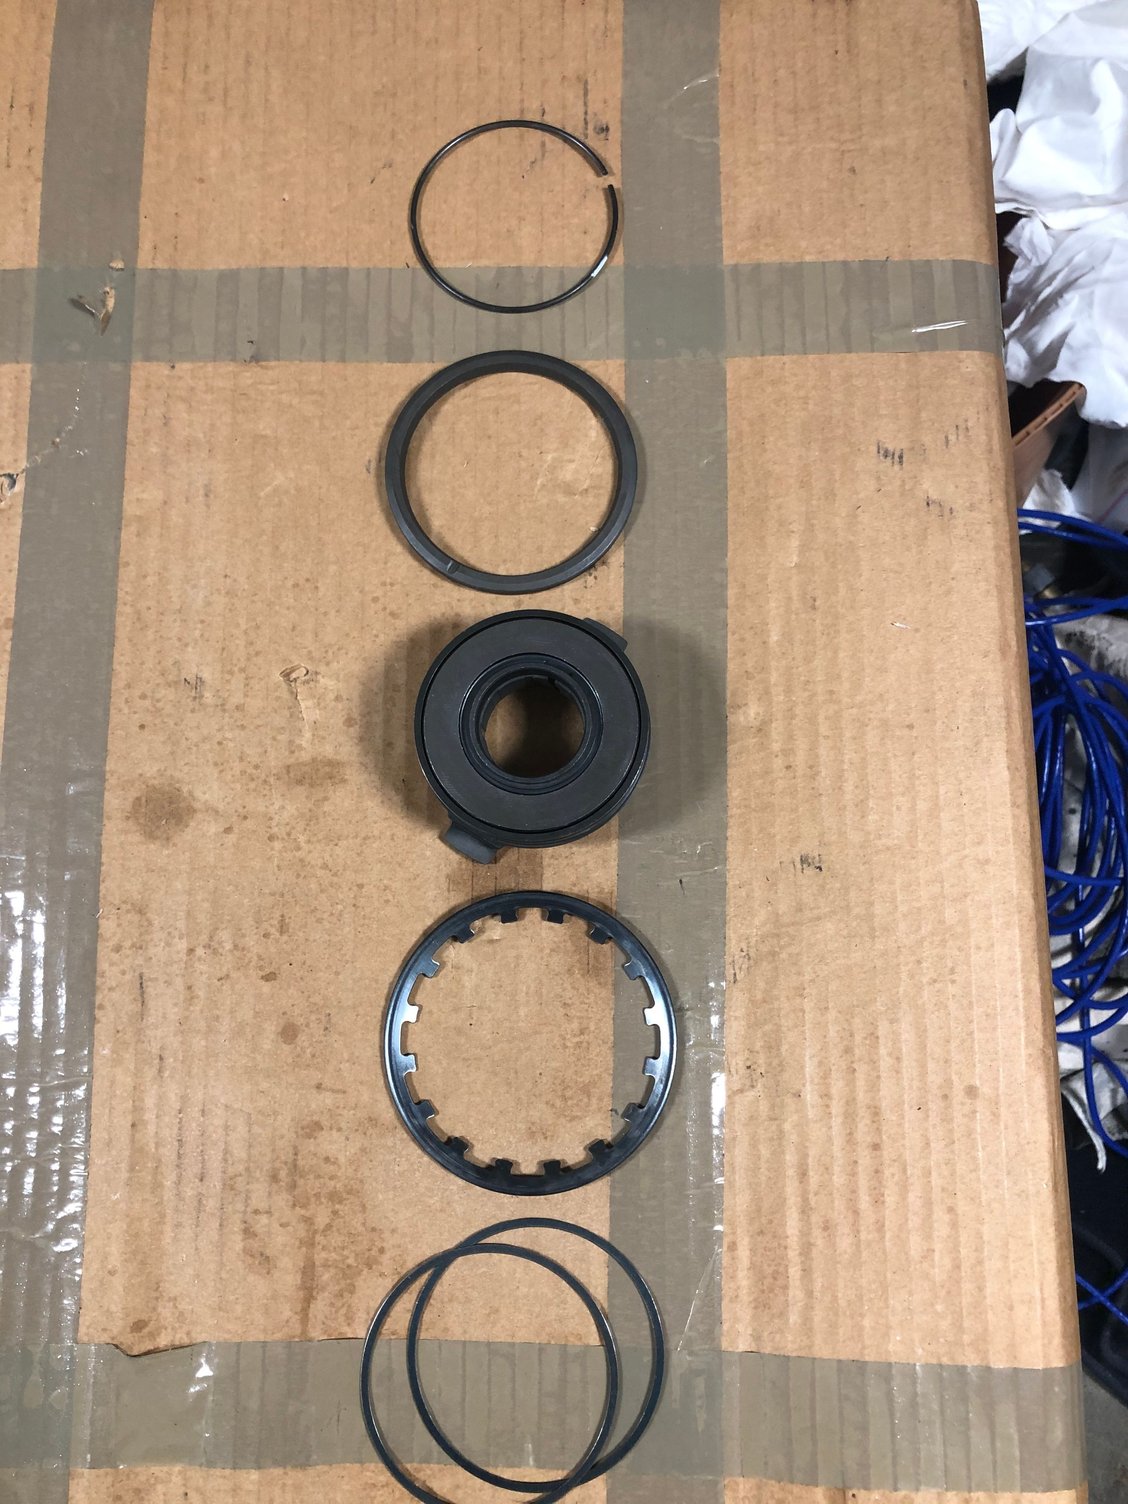
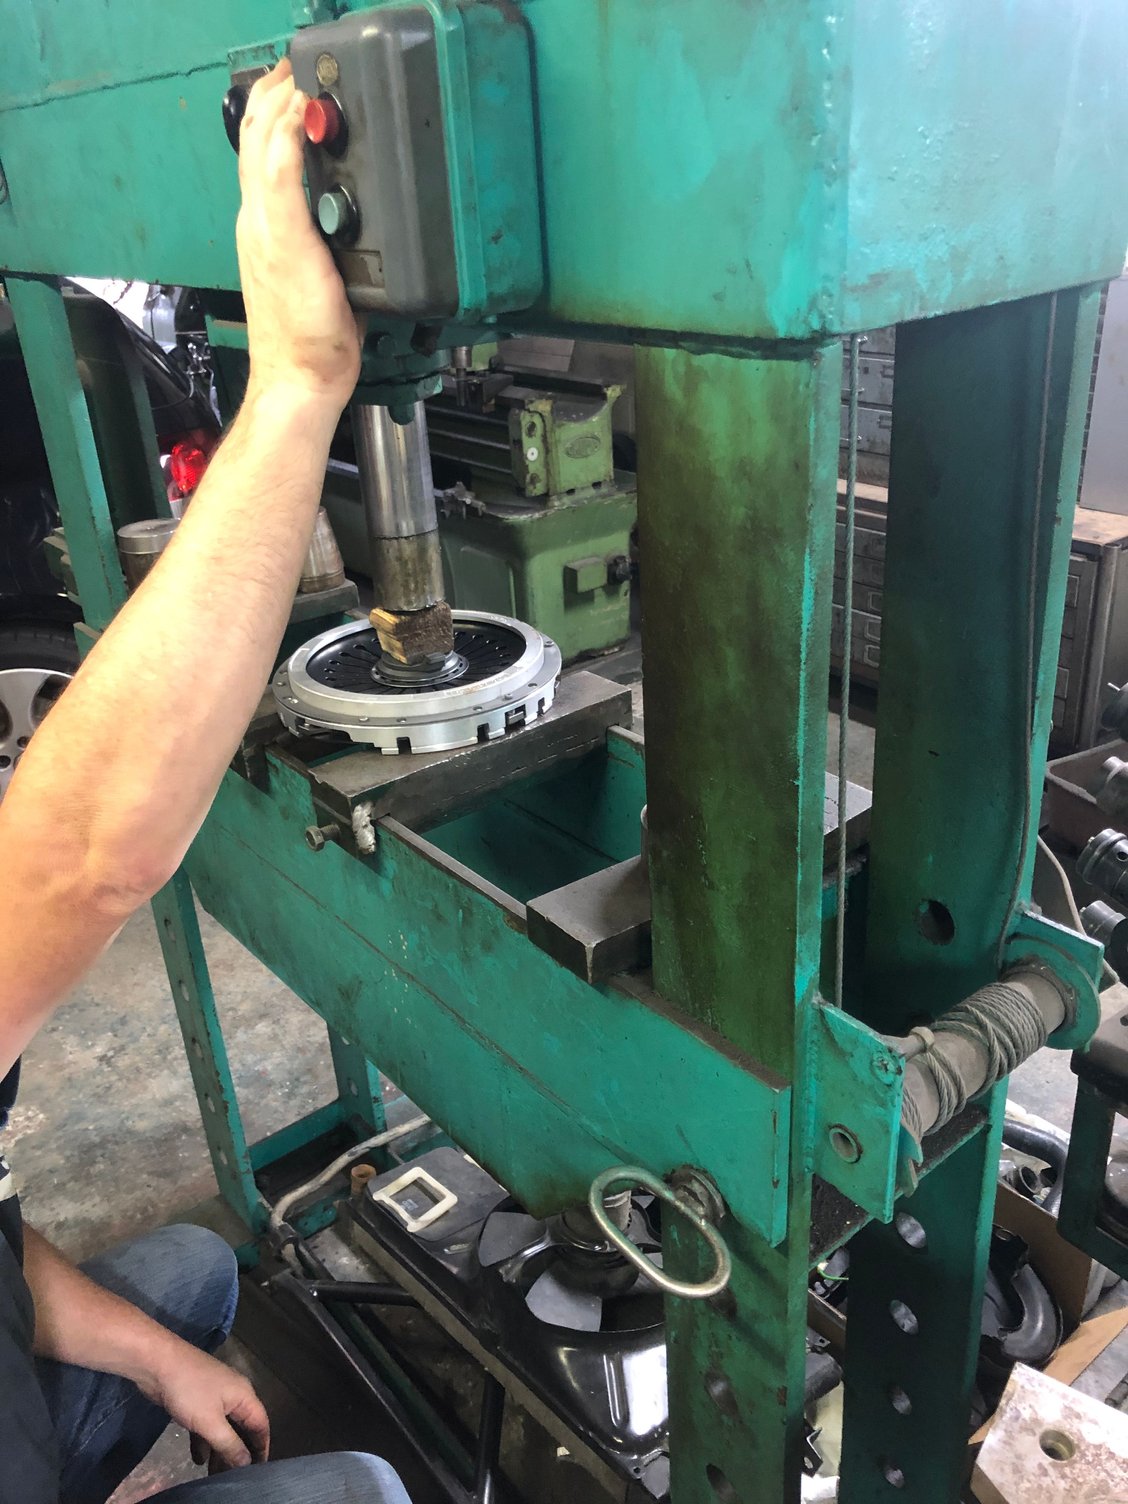
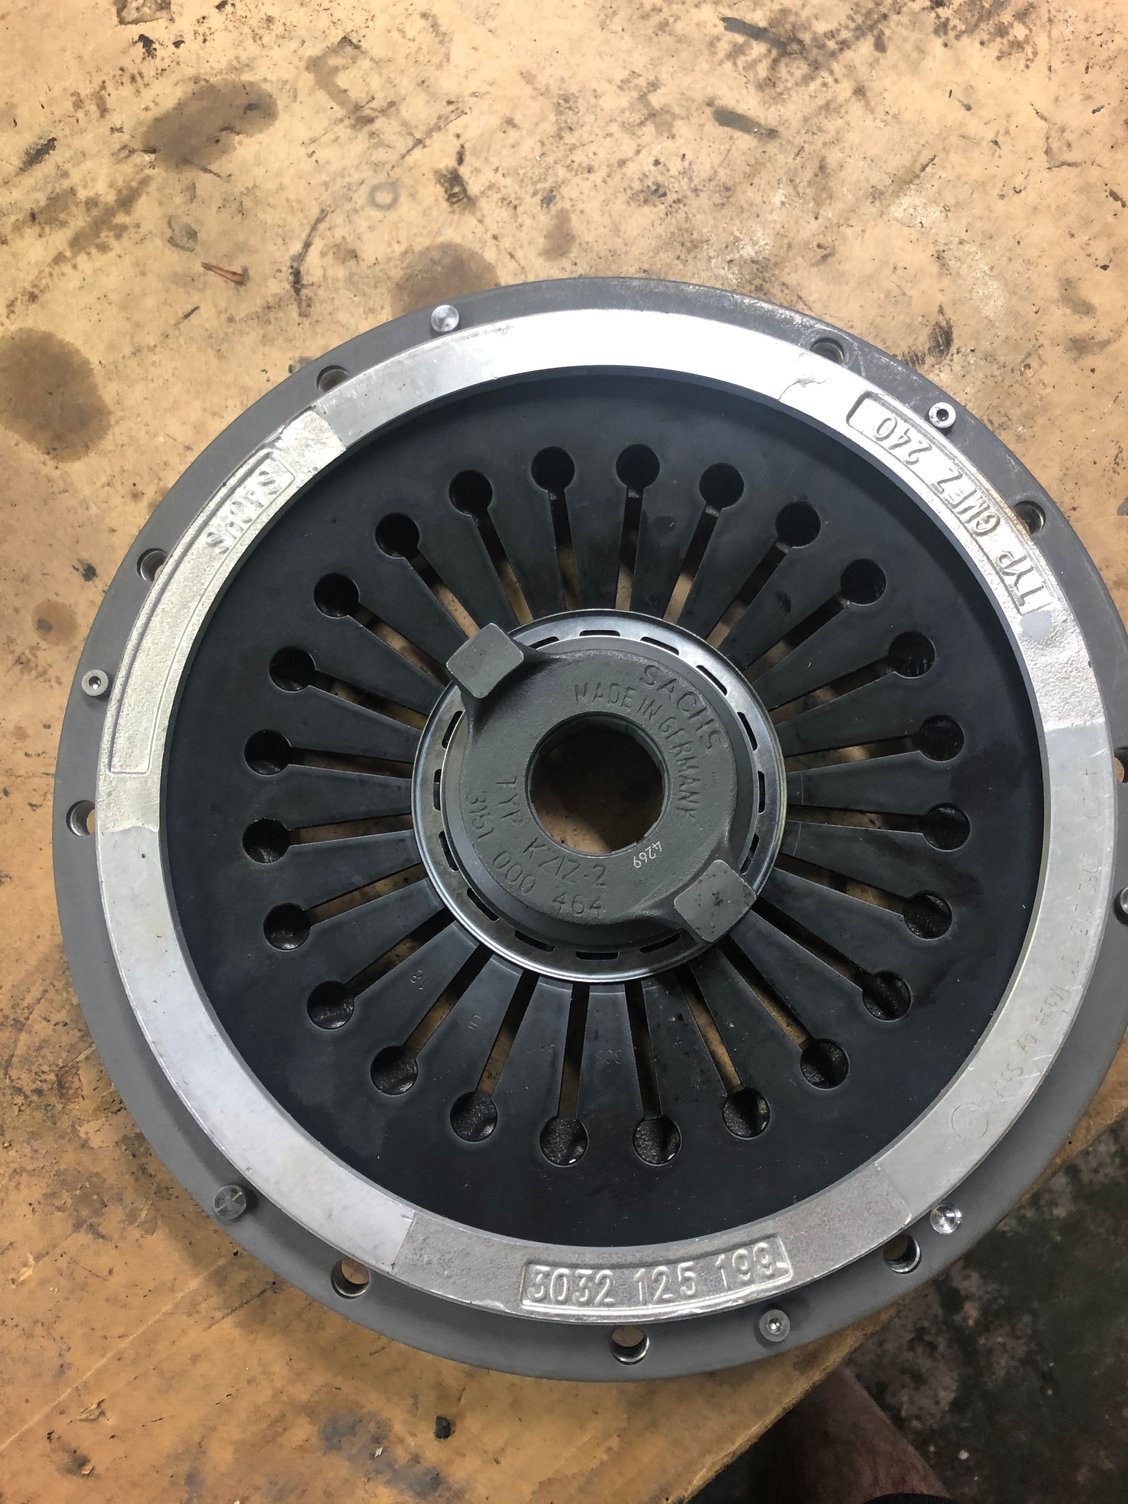
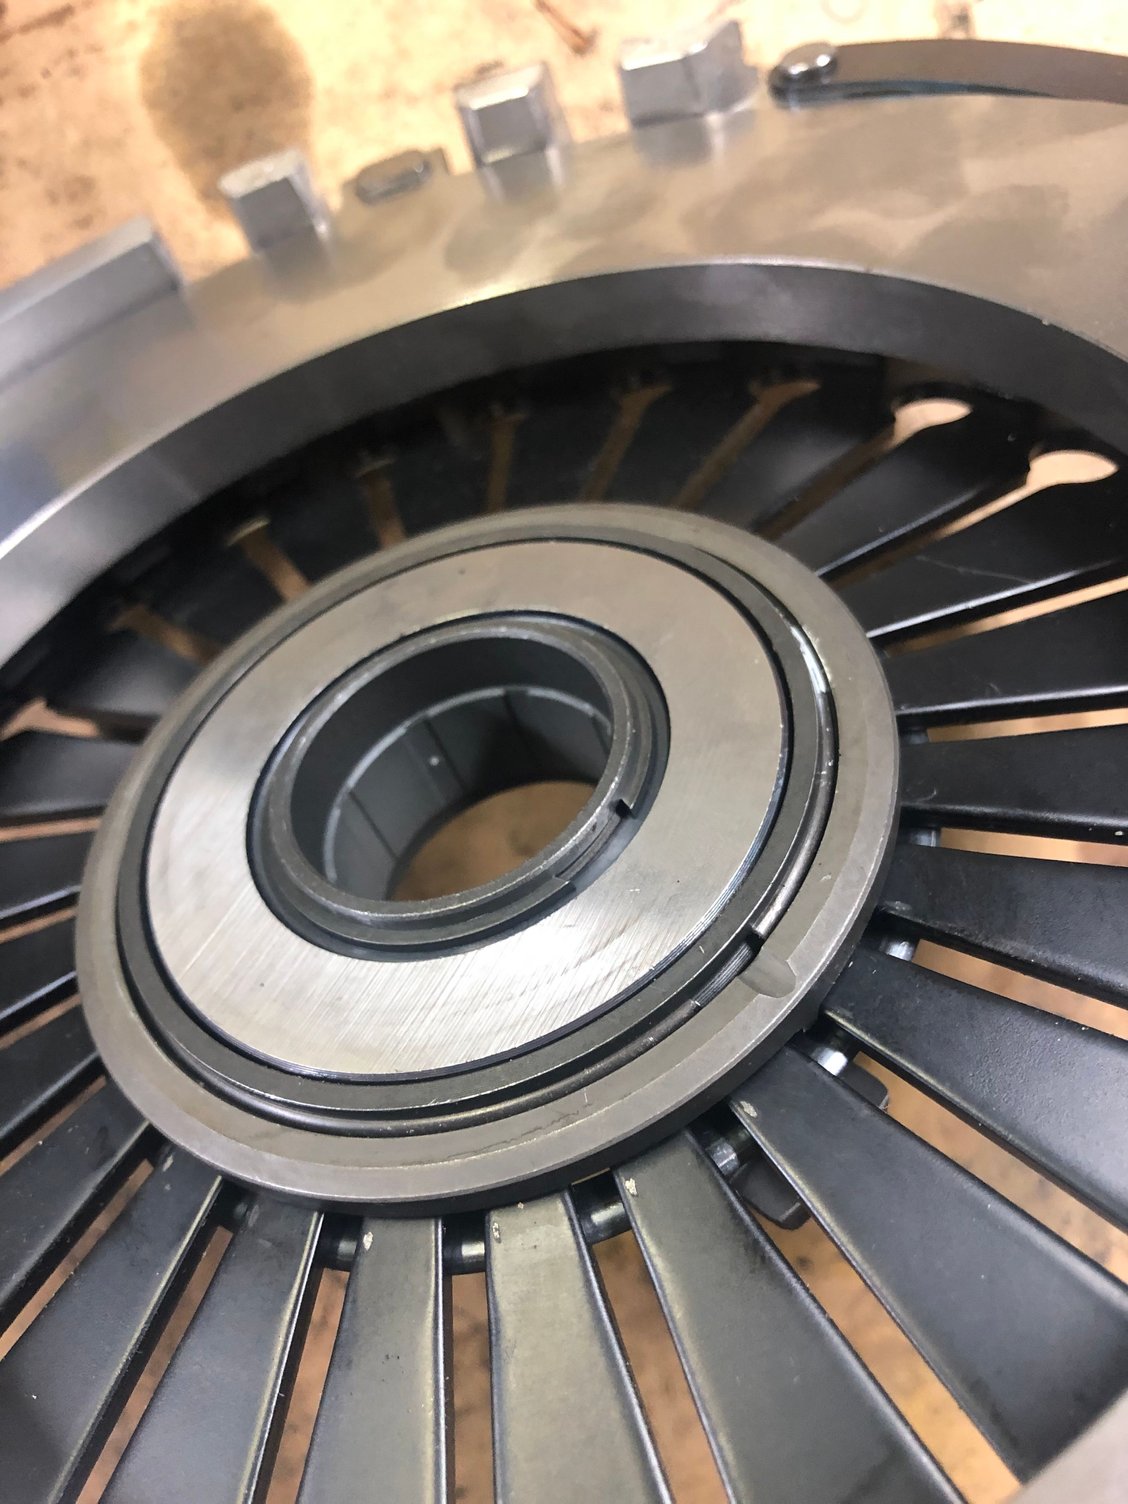
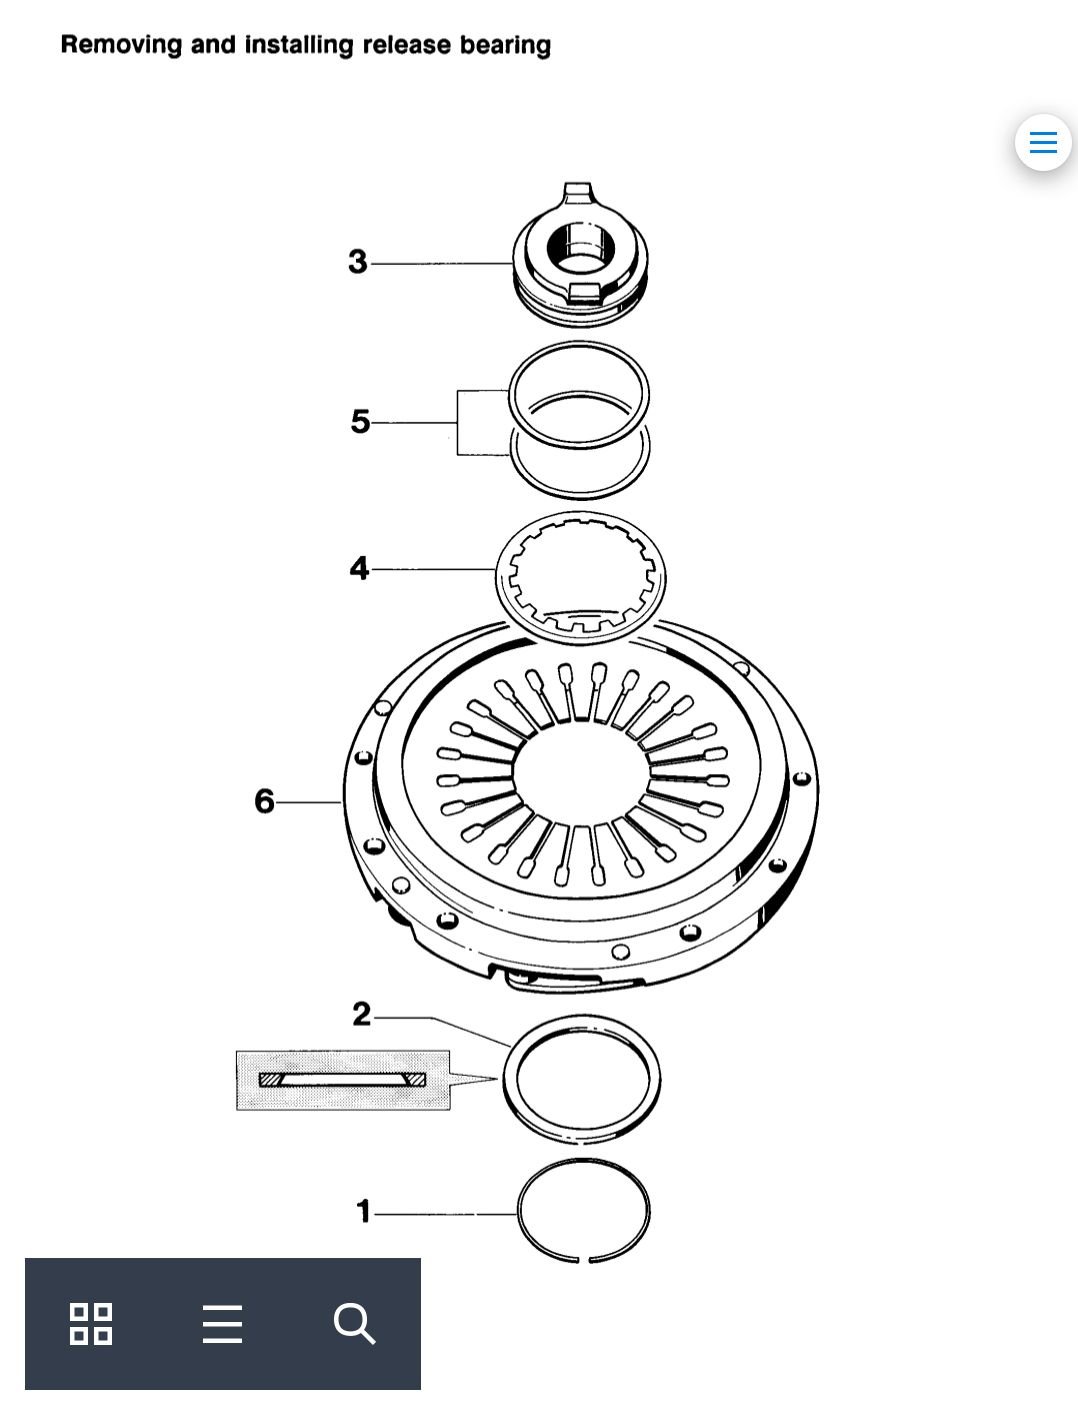
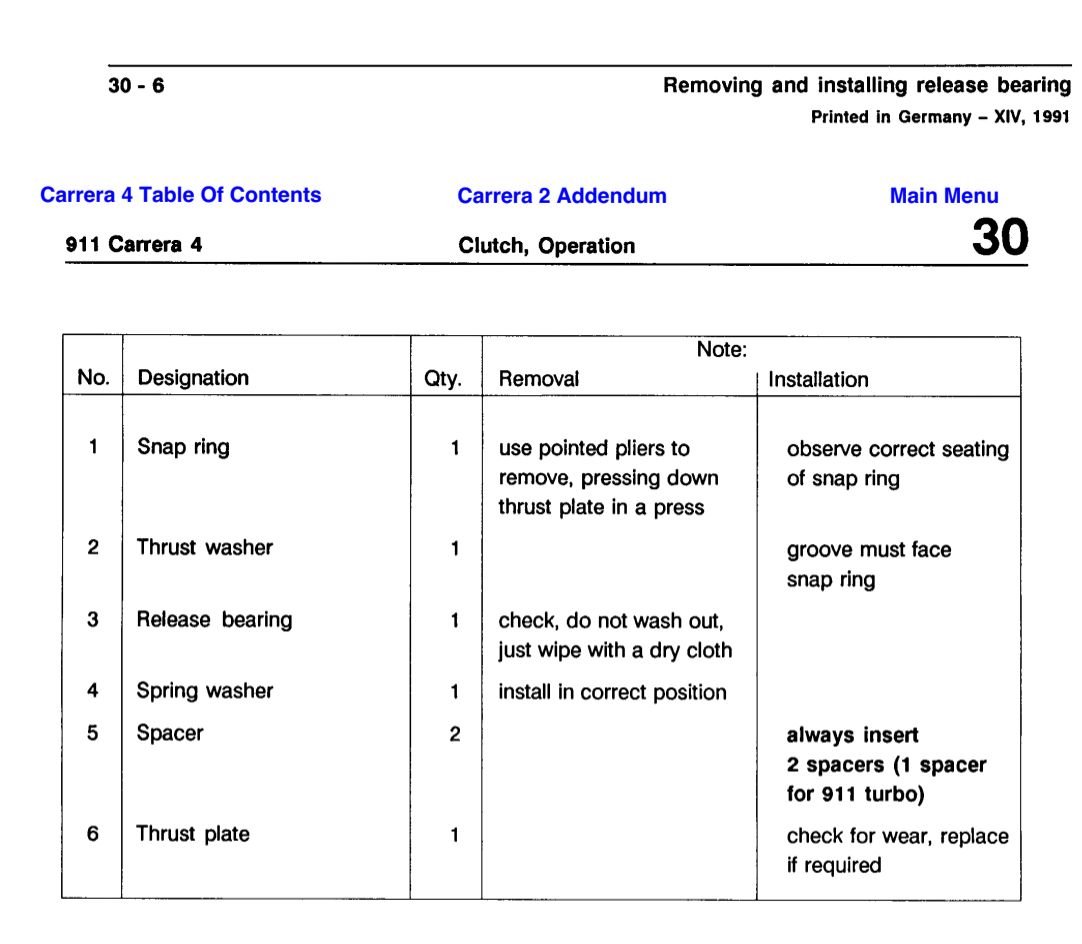
Installing the release bearing. I thought about having my wife stand on the pressure plate to compress it, but I figured it was too hard so I visited Racoguy, who has the right equipment. The only point to note is that my RS bearing has one spacer but the manual says you use two for all but the turbo.
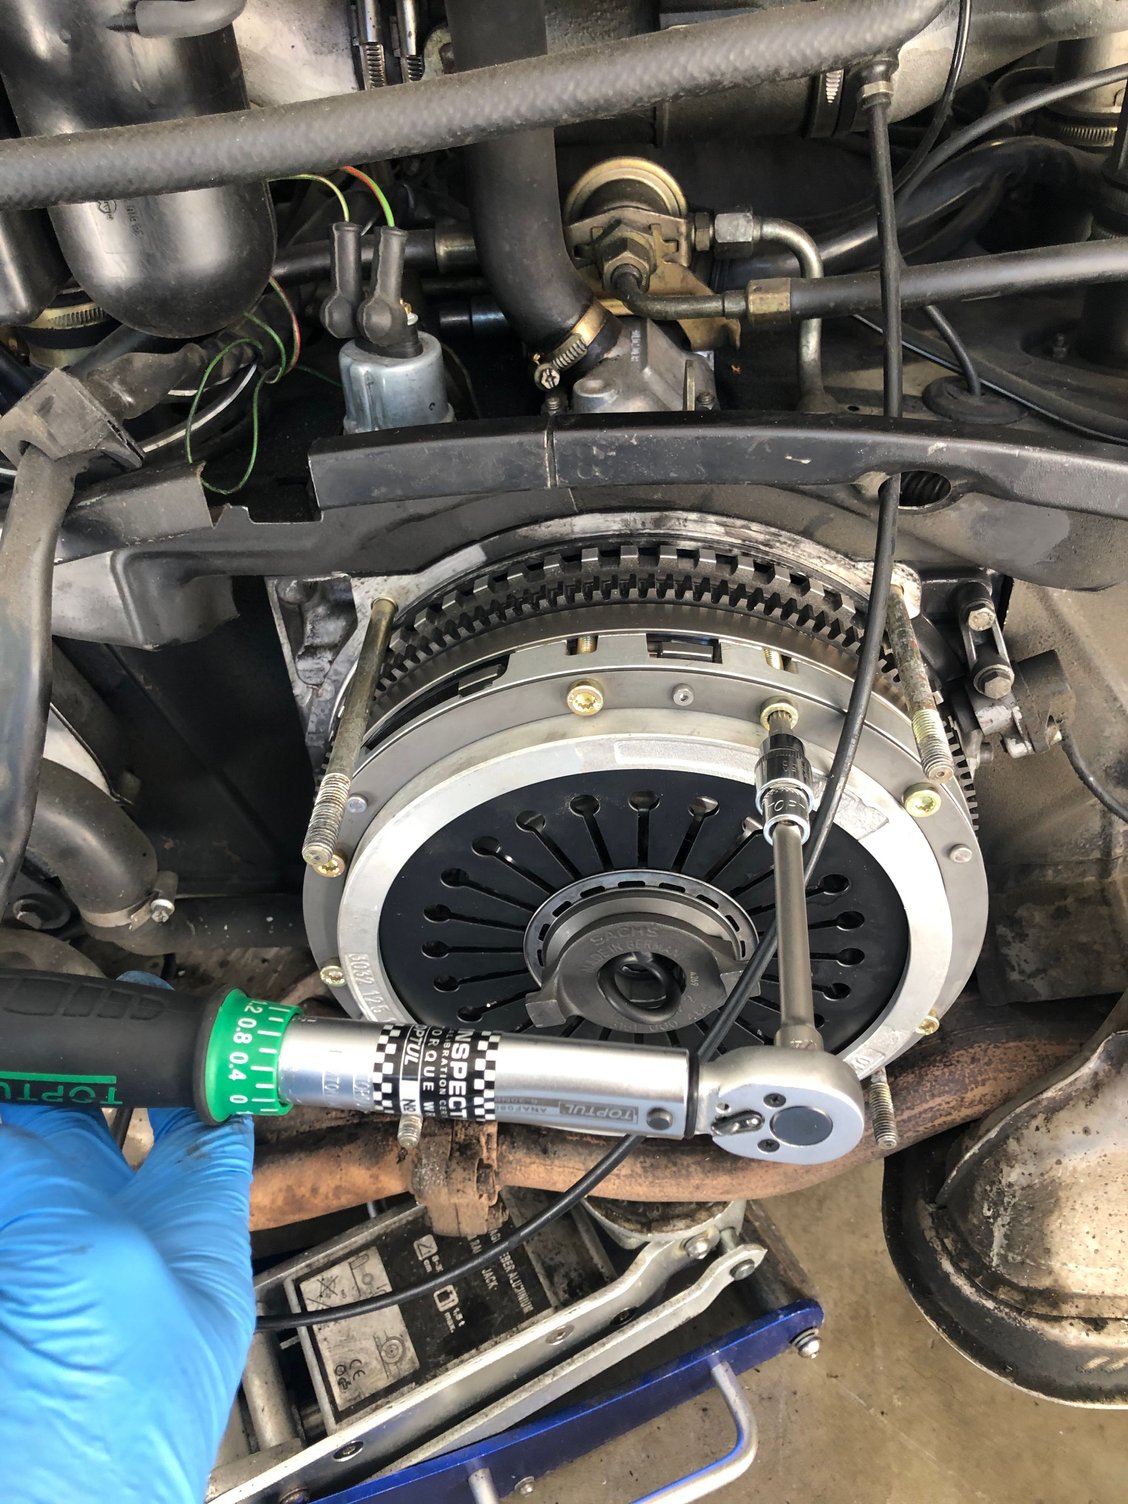
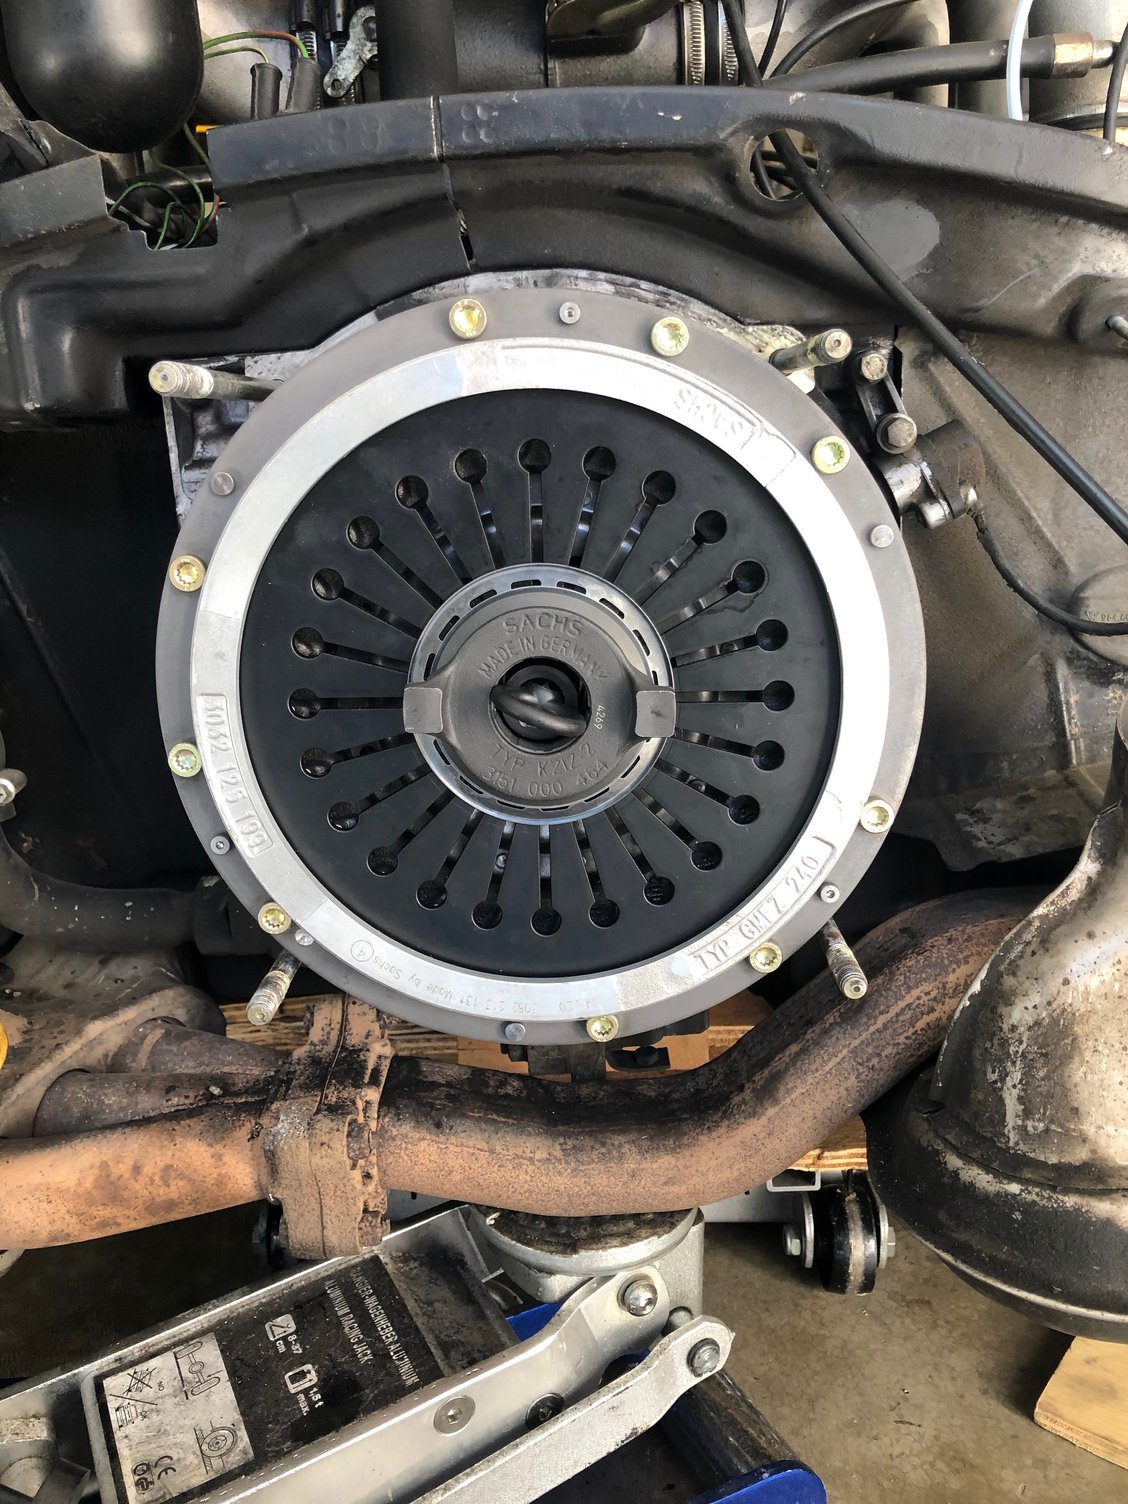
Clean faces of pressure plate and flywheel with brake cleaner. Insert clutch tool in disk and push fully home against the flywheel. Fit the pressure plate over the disk, lining up the 9 holes. Insert bolts and tighten in a star pattern until you reach 23 Nm.
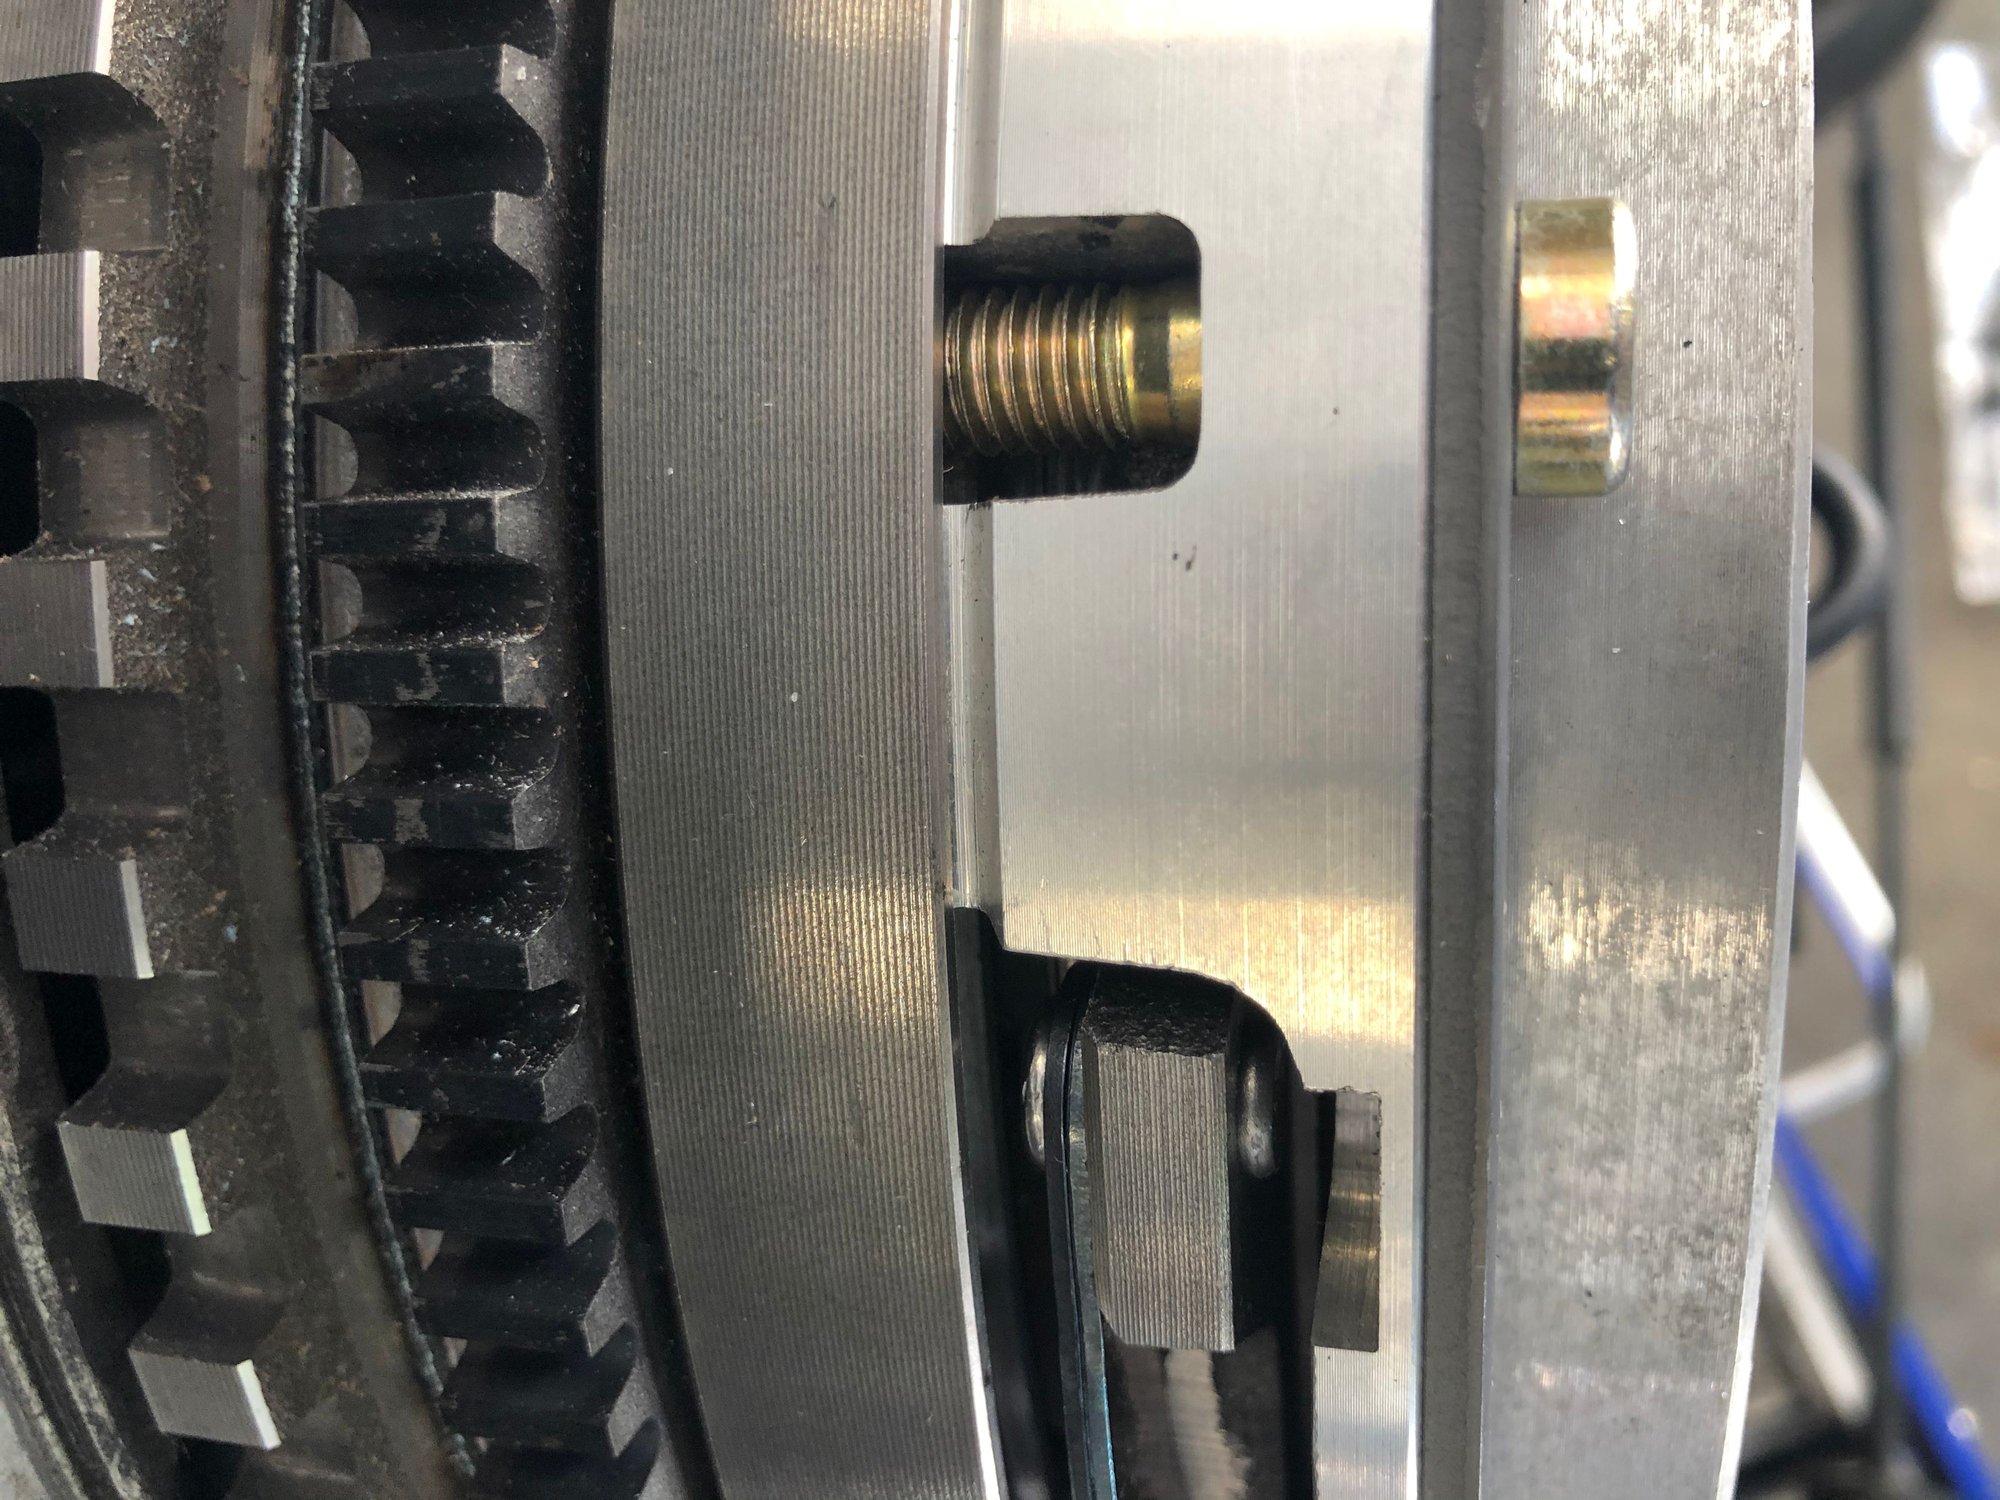
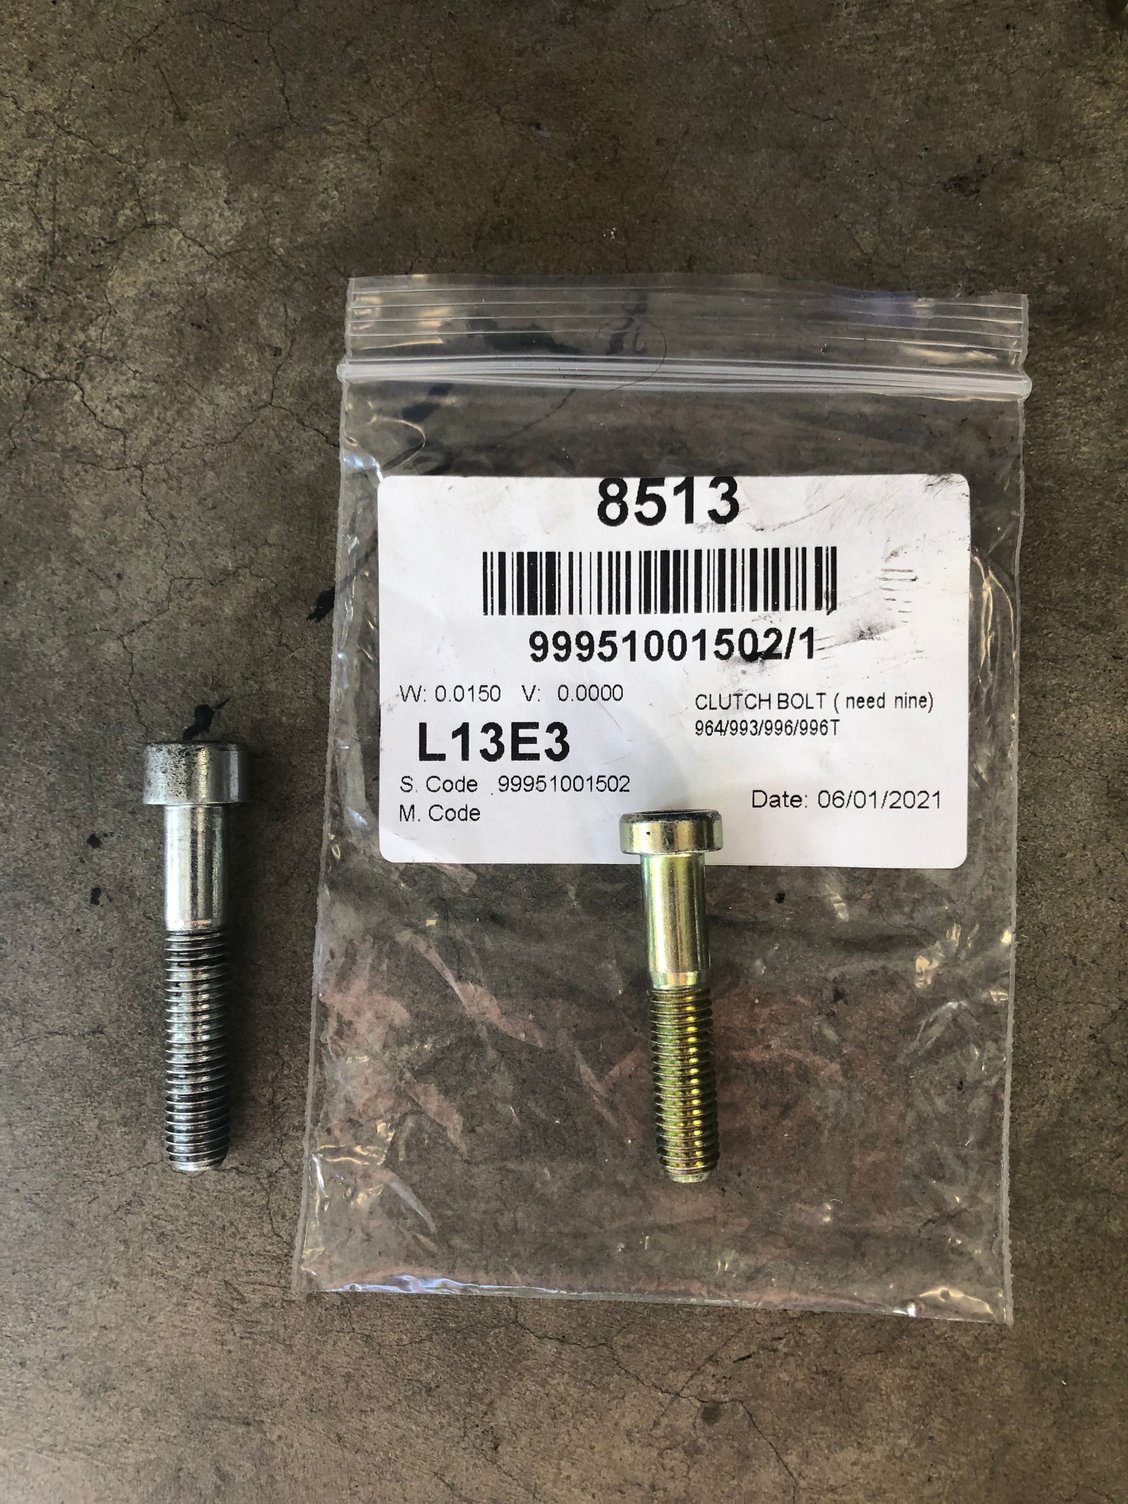
Footnote. With my old pressure plate I used M8 44mm bolts. The ones specified with this one are M8 40mm. I used the old ones to draw the pressure plate in, then swapped them for the new ones as my measurements showed that the longer bolt possibly bottomed out.
Last edited by John McM; Mar 13, 2021 at 09:09 PM.
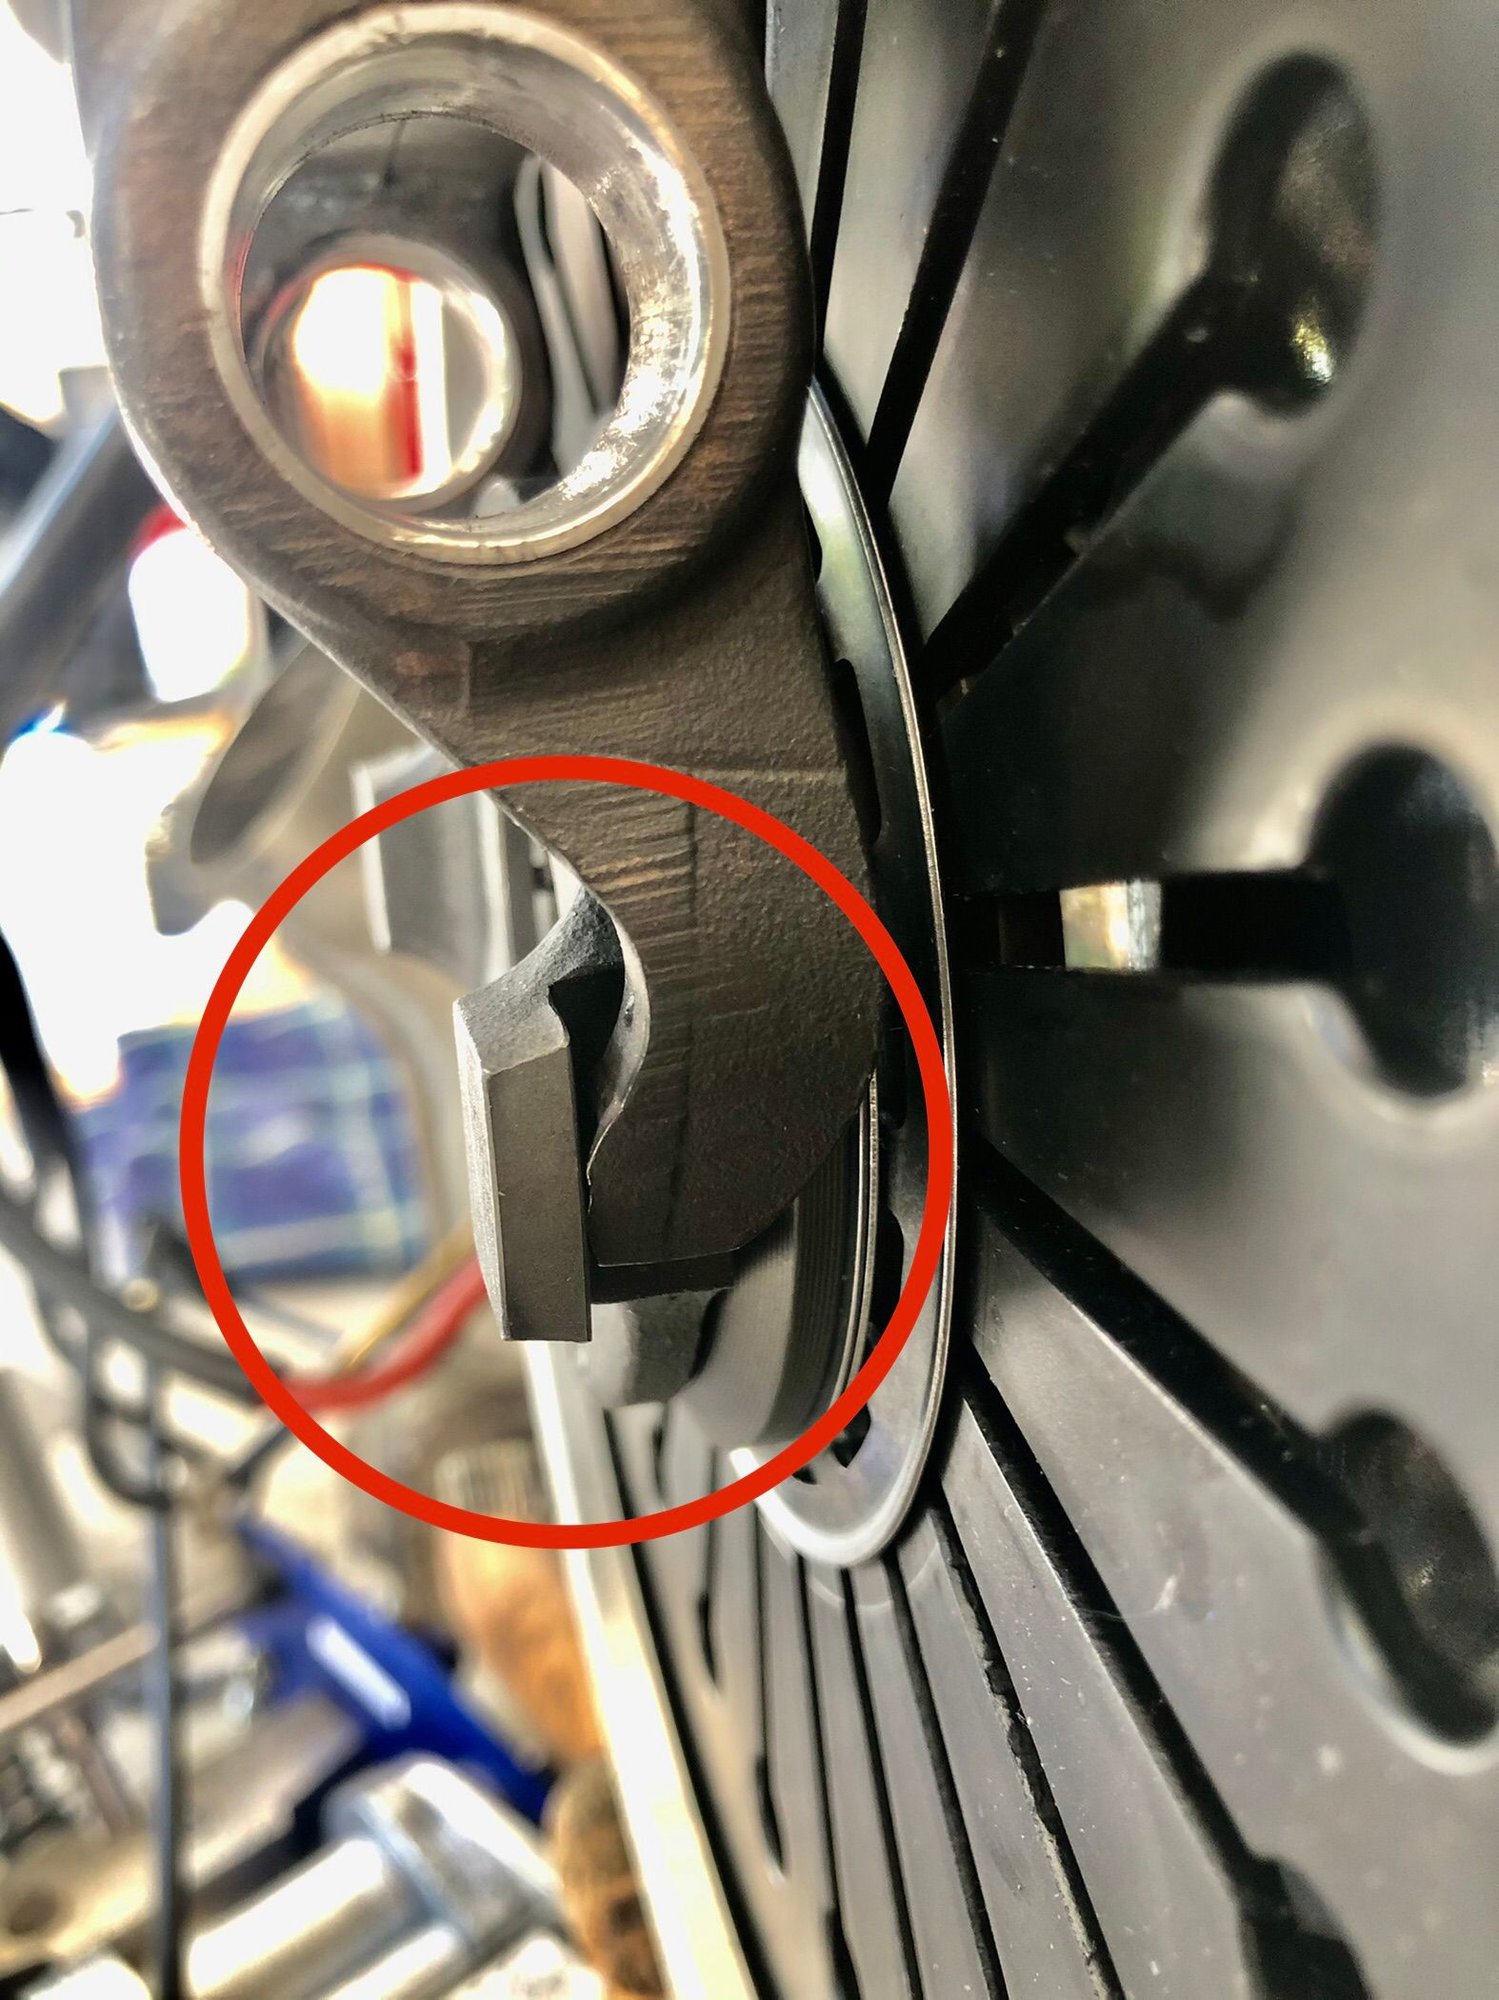
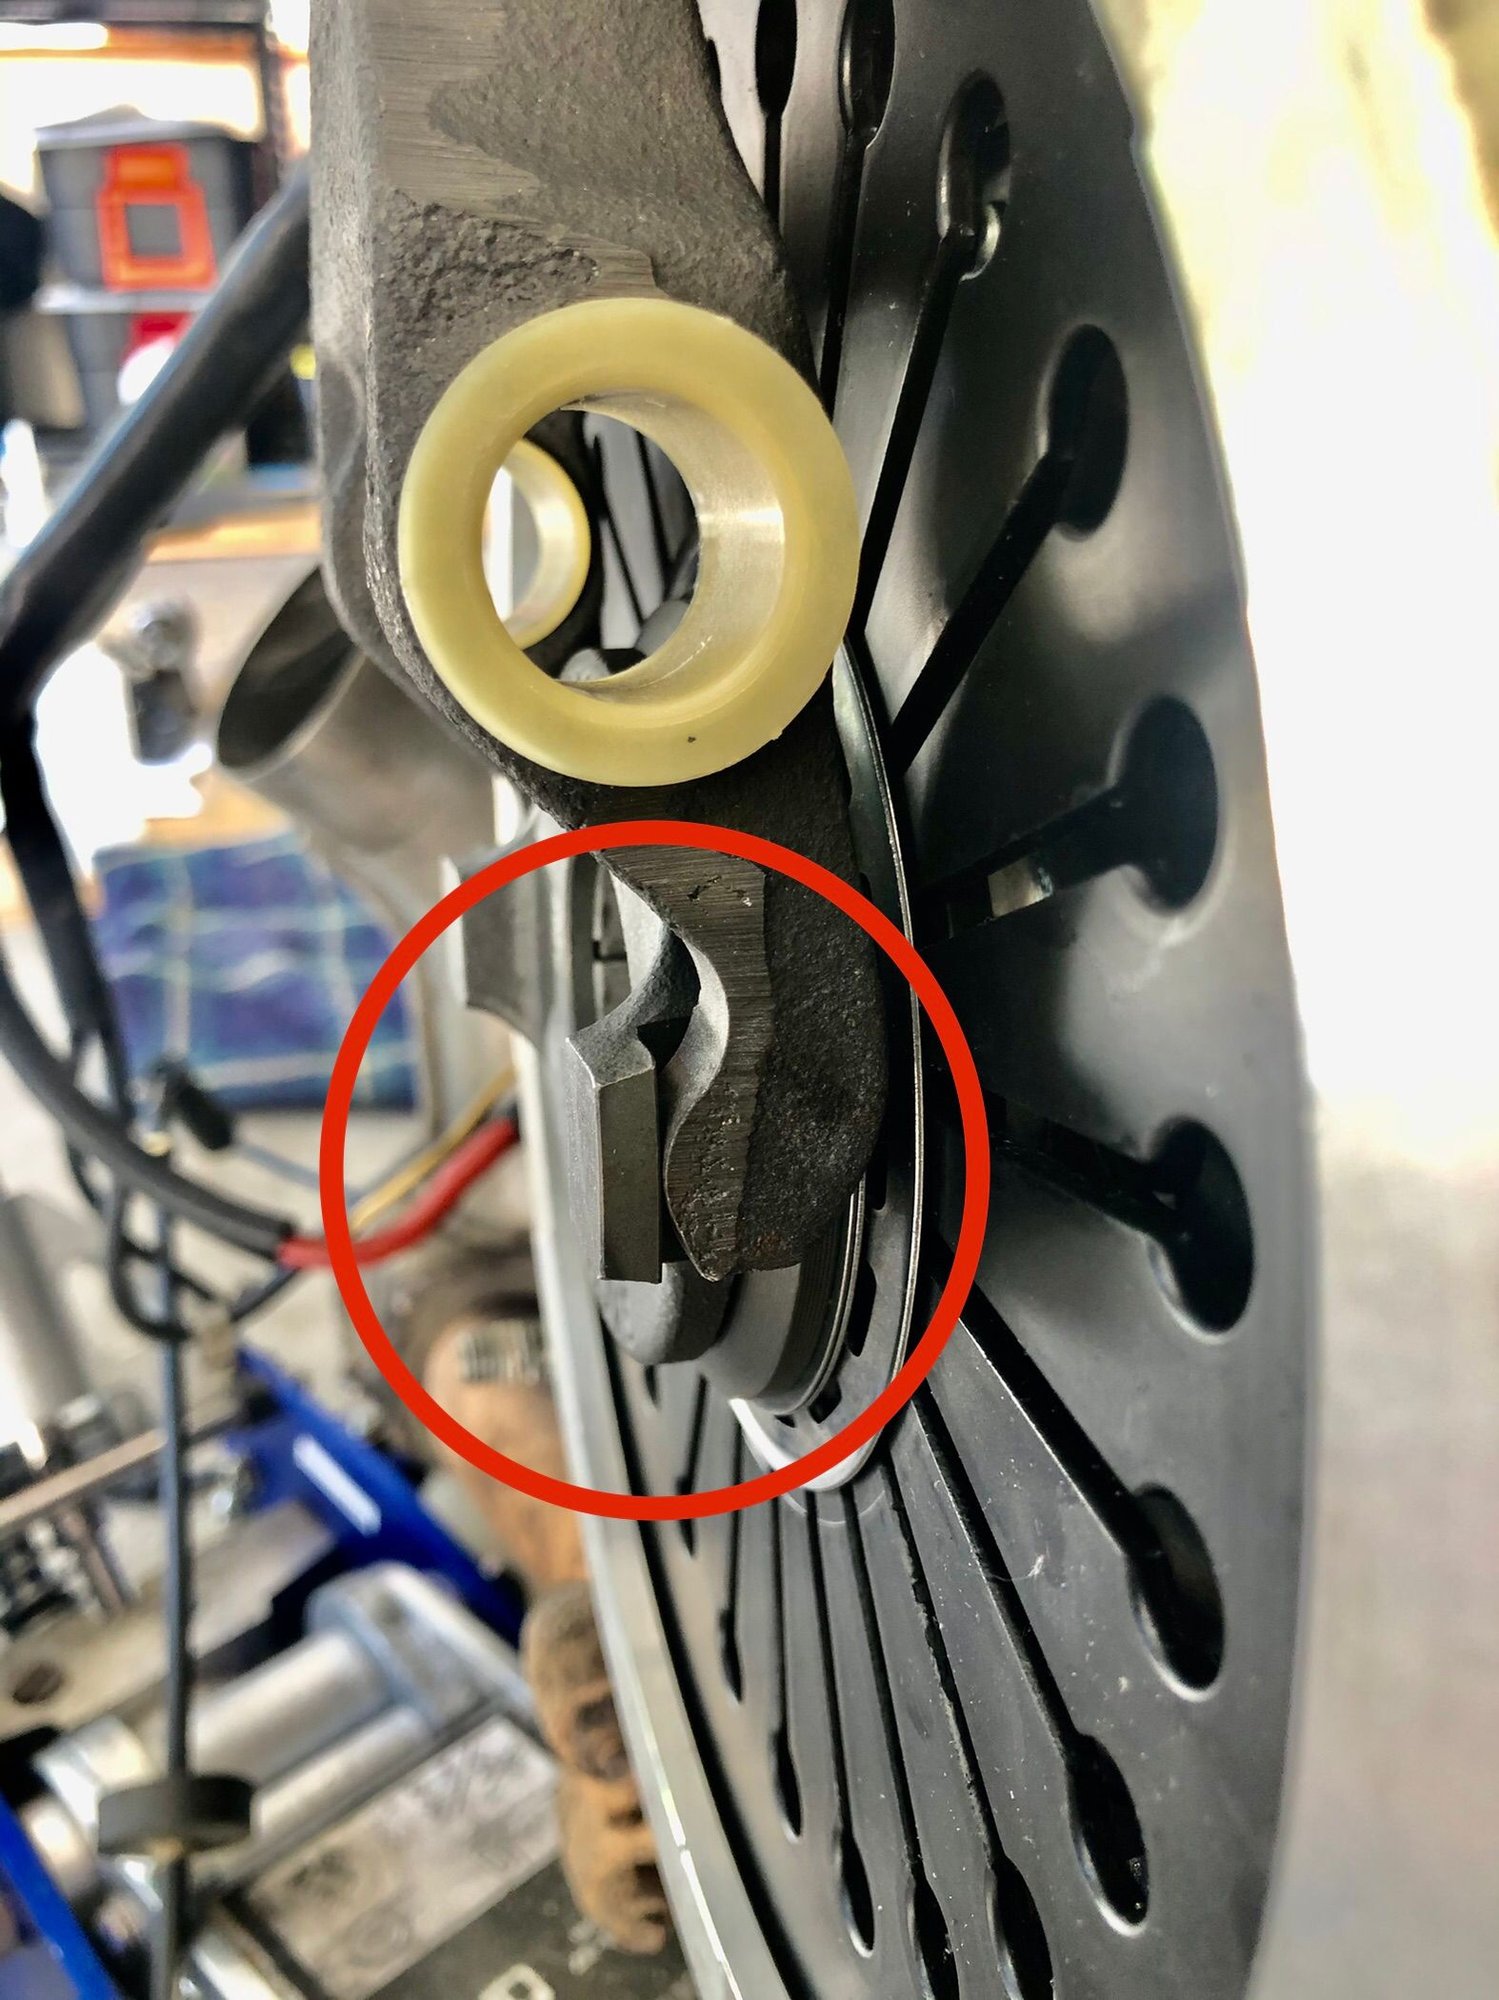
Side view of original clutch fork compared to the 997 version. The later version has a rounded profile which should make the action more progressive. Original 1990 Clutch fork 997 version of clutch fork. Note the likely more progressive action as the fork rolls over the release bearing ear.
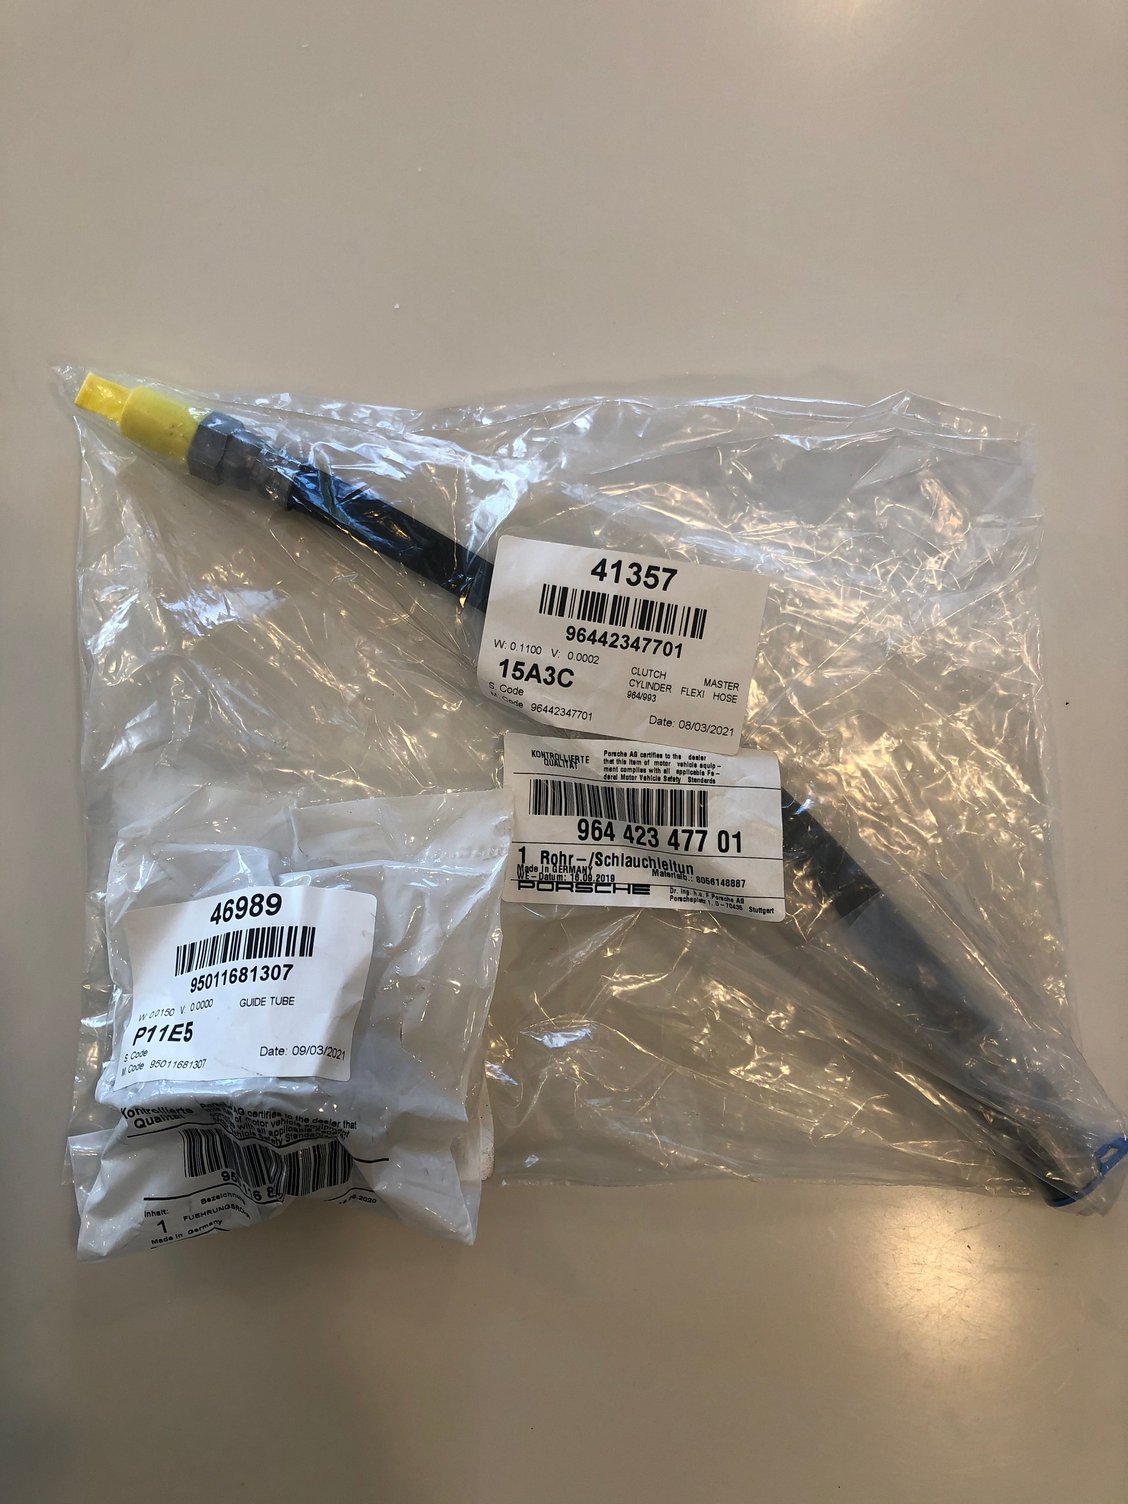
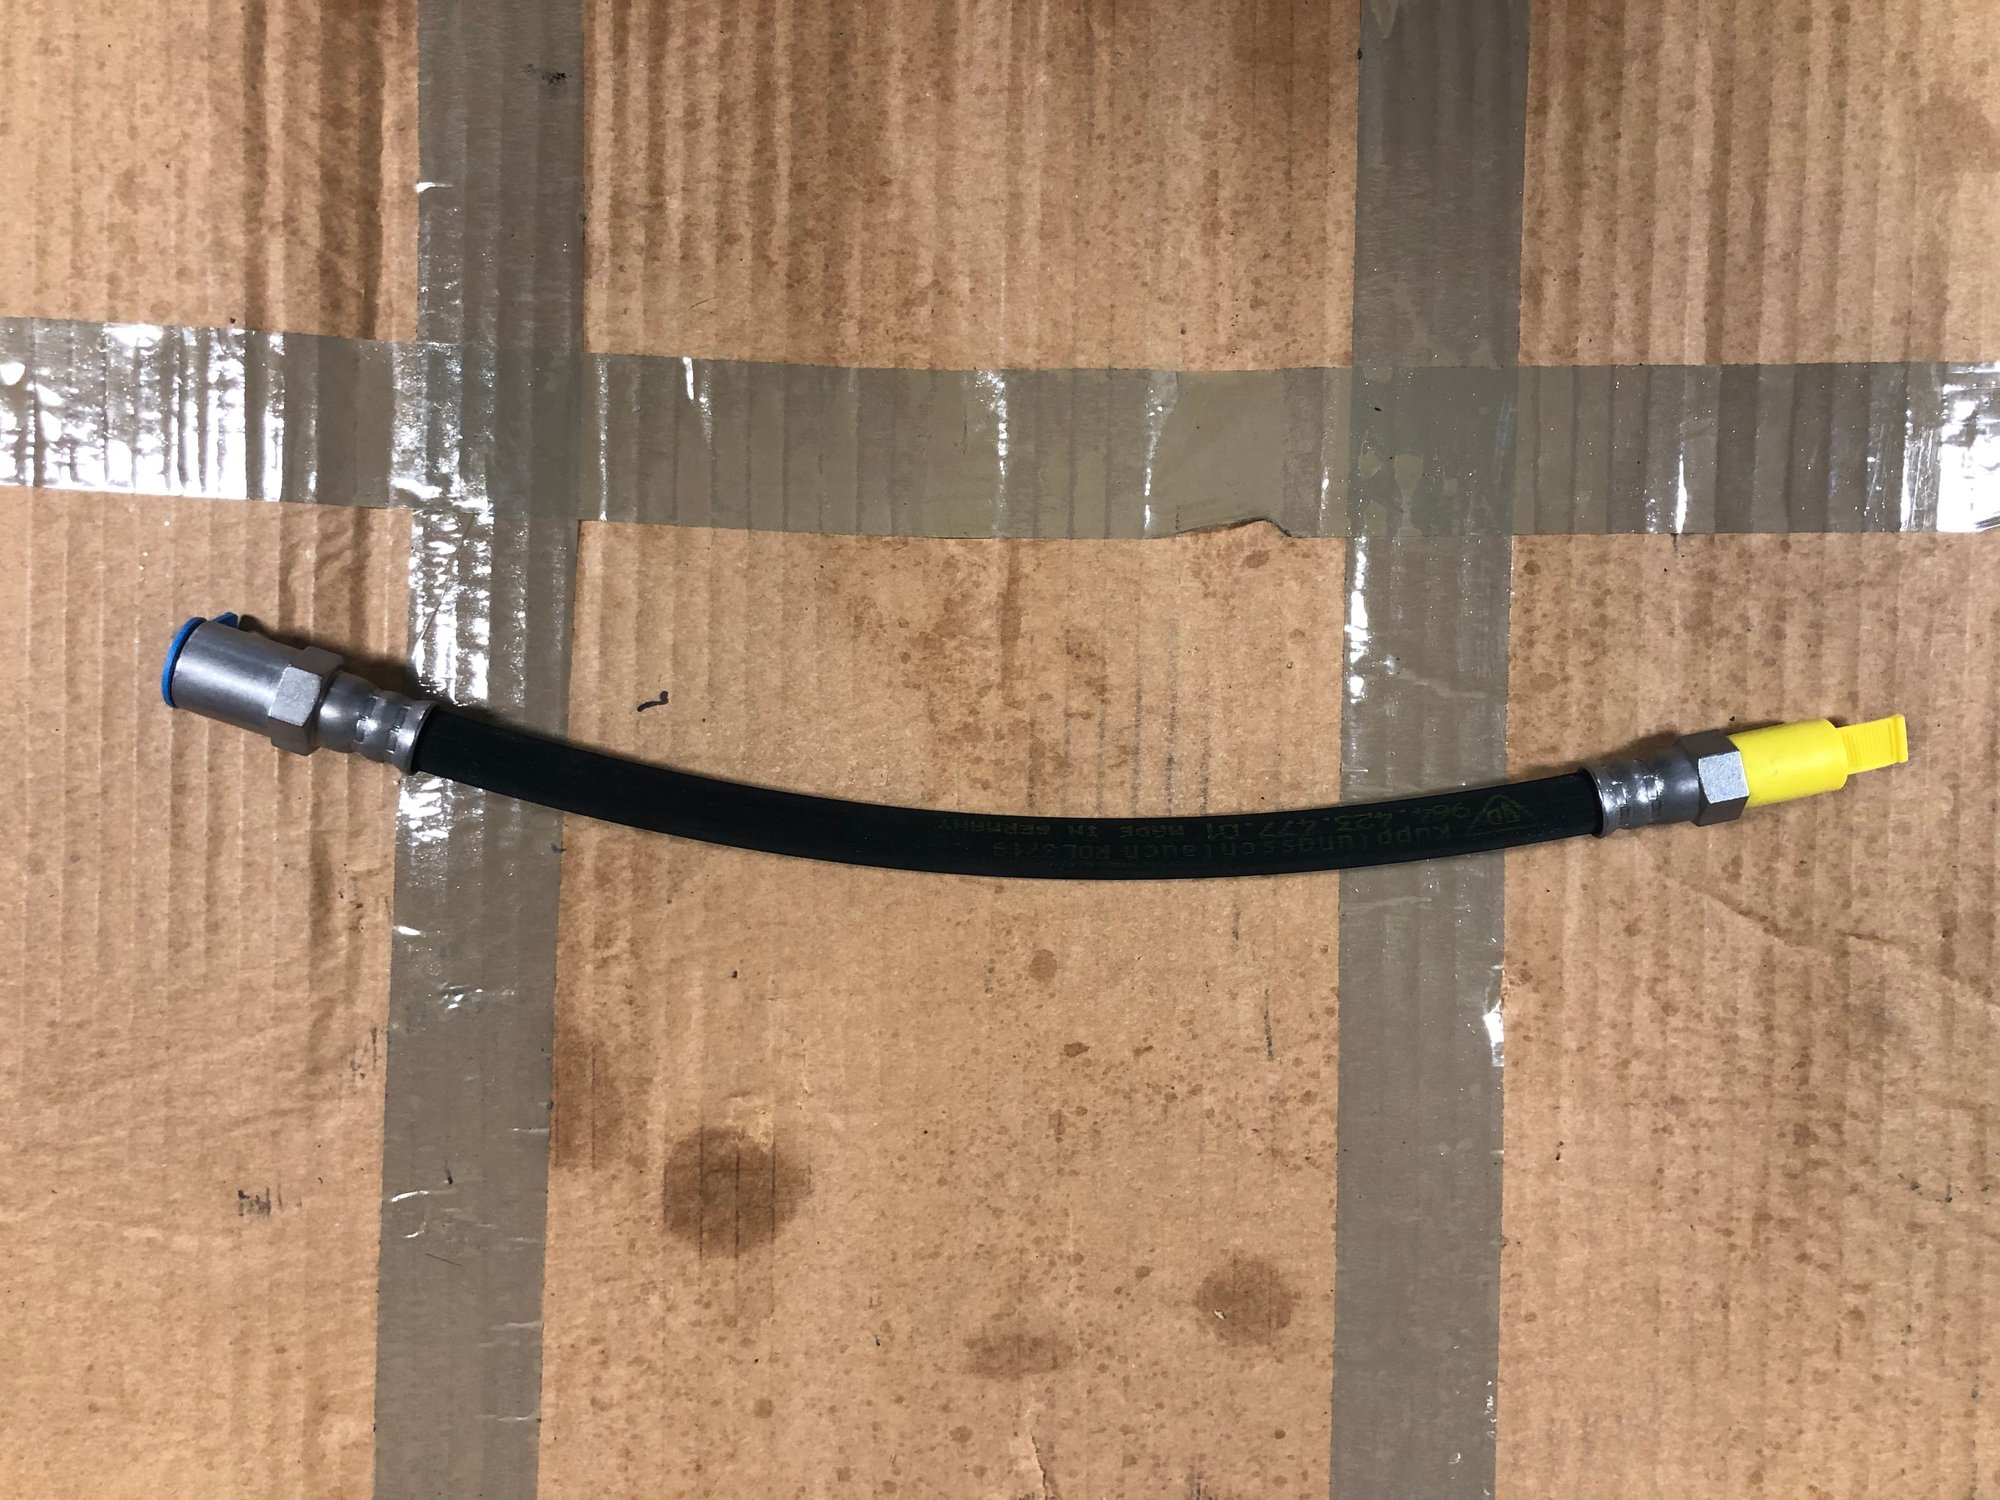
The final parts arrived today. Both are Porsche branded parts. Both were expensive. Particularly the Flexi line when there is an aftermarket option at 1/4 the price but I never want to do this again and some cheaper hoses can apparently bulge, affecting the system pressure to the clutch. Normal Guide Tube RS Guide Tube
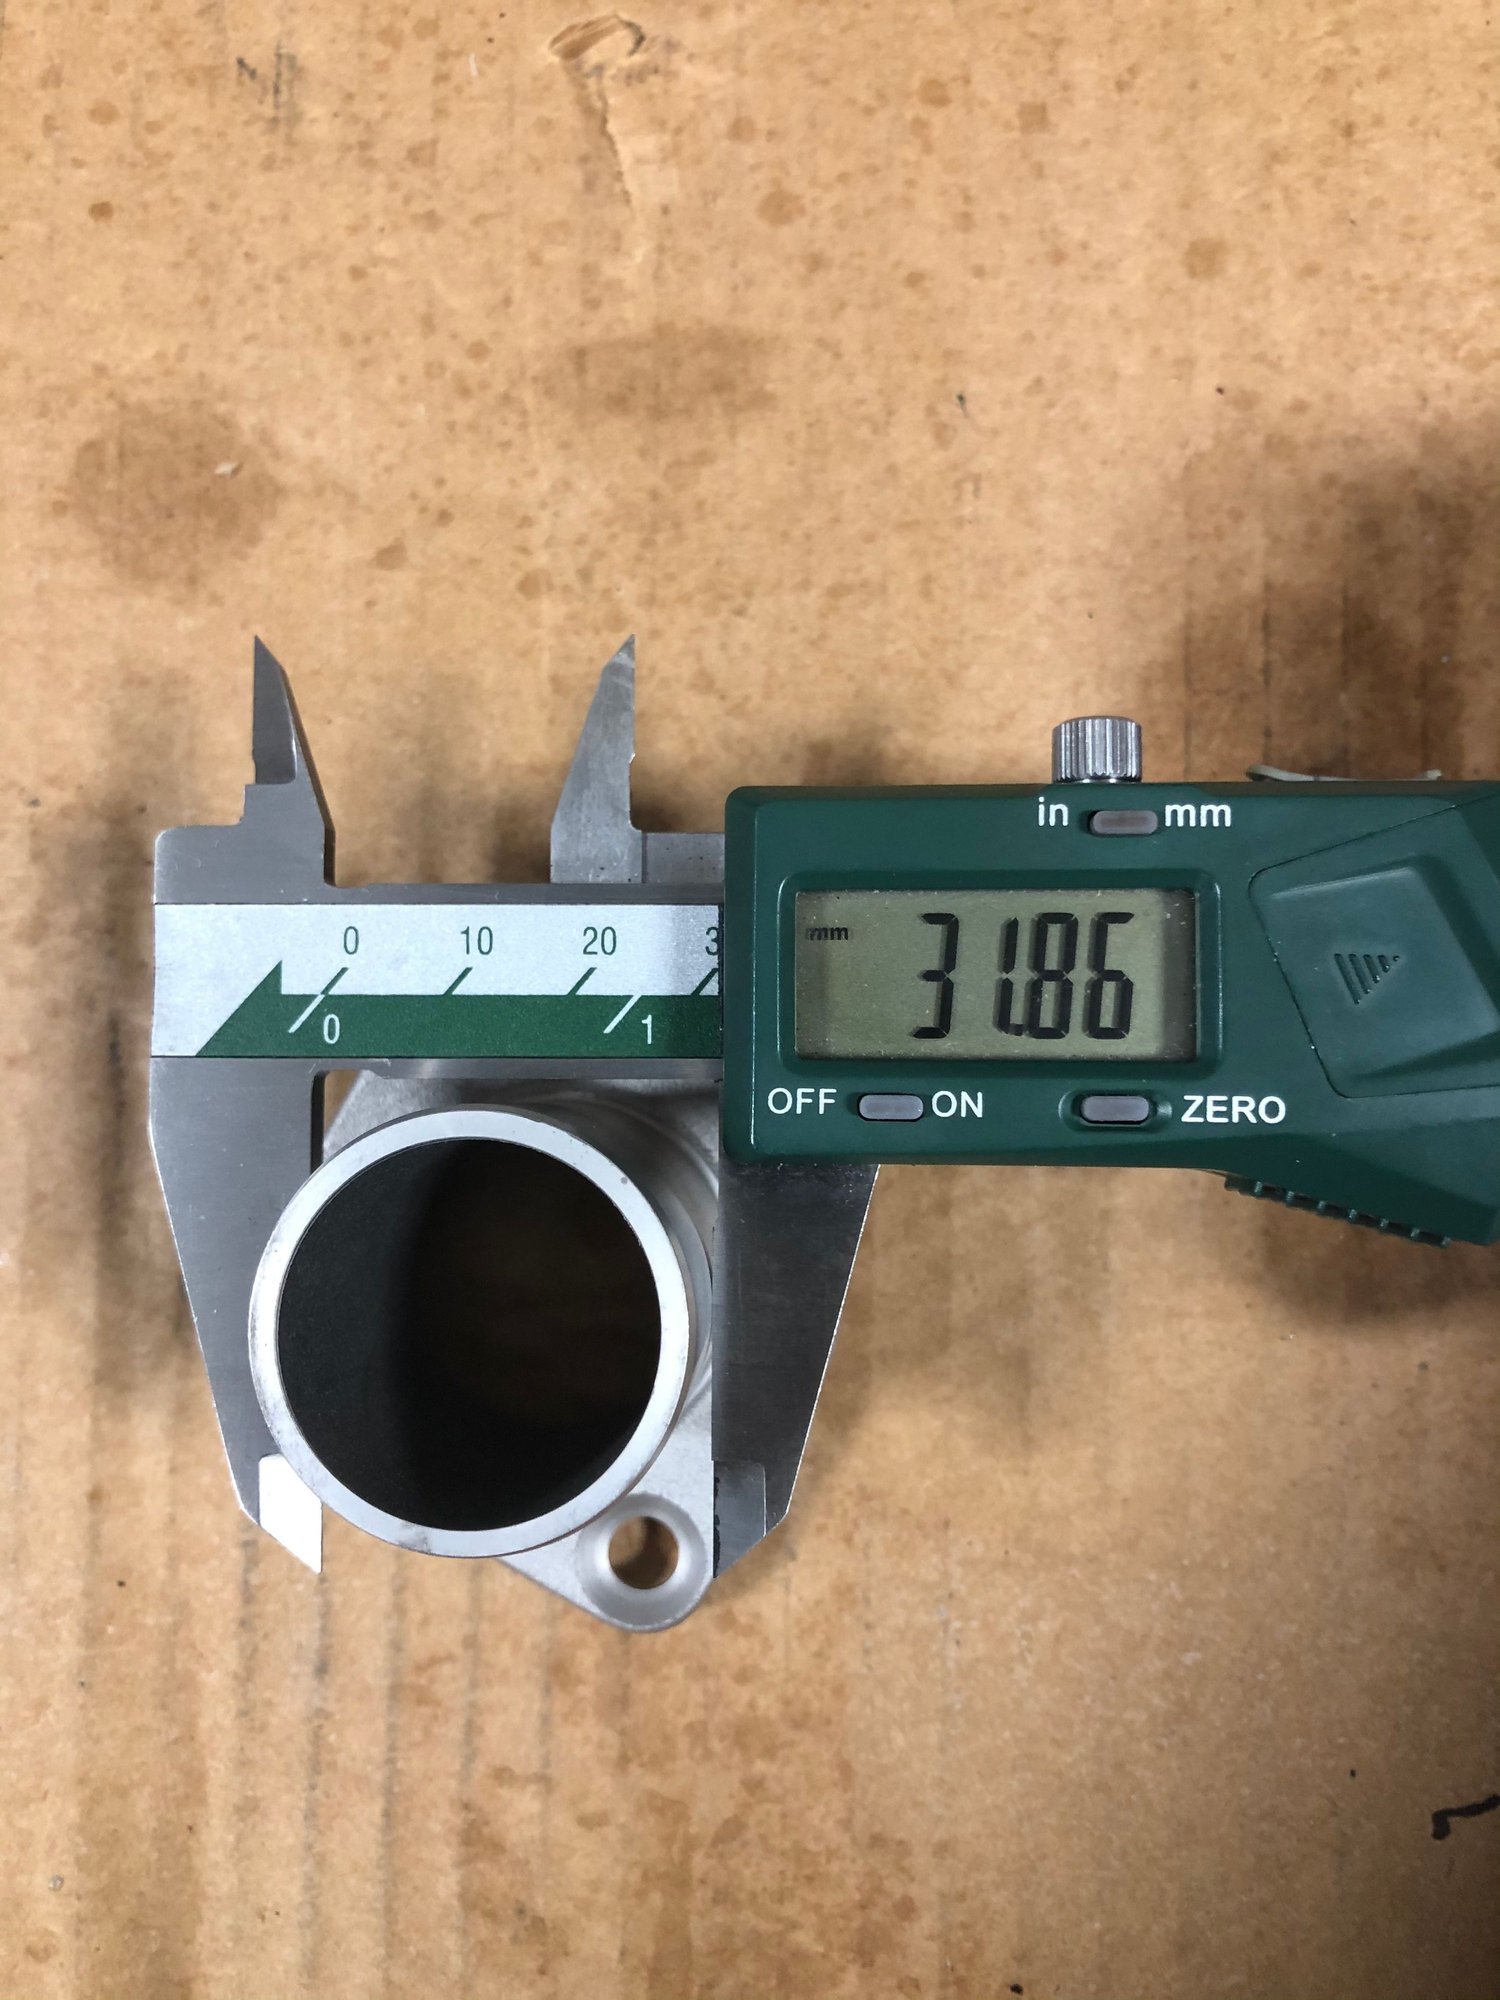
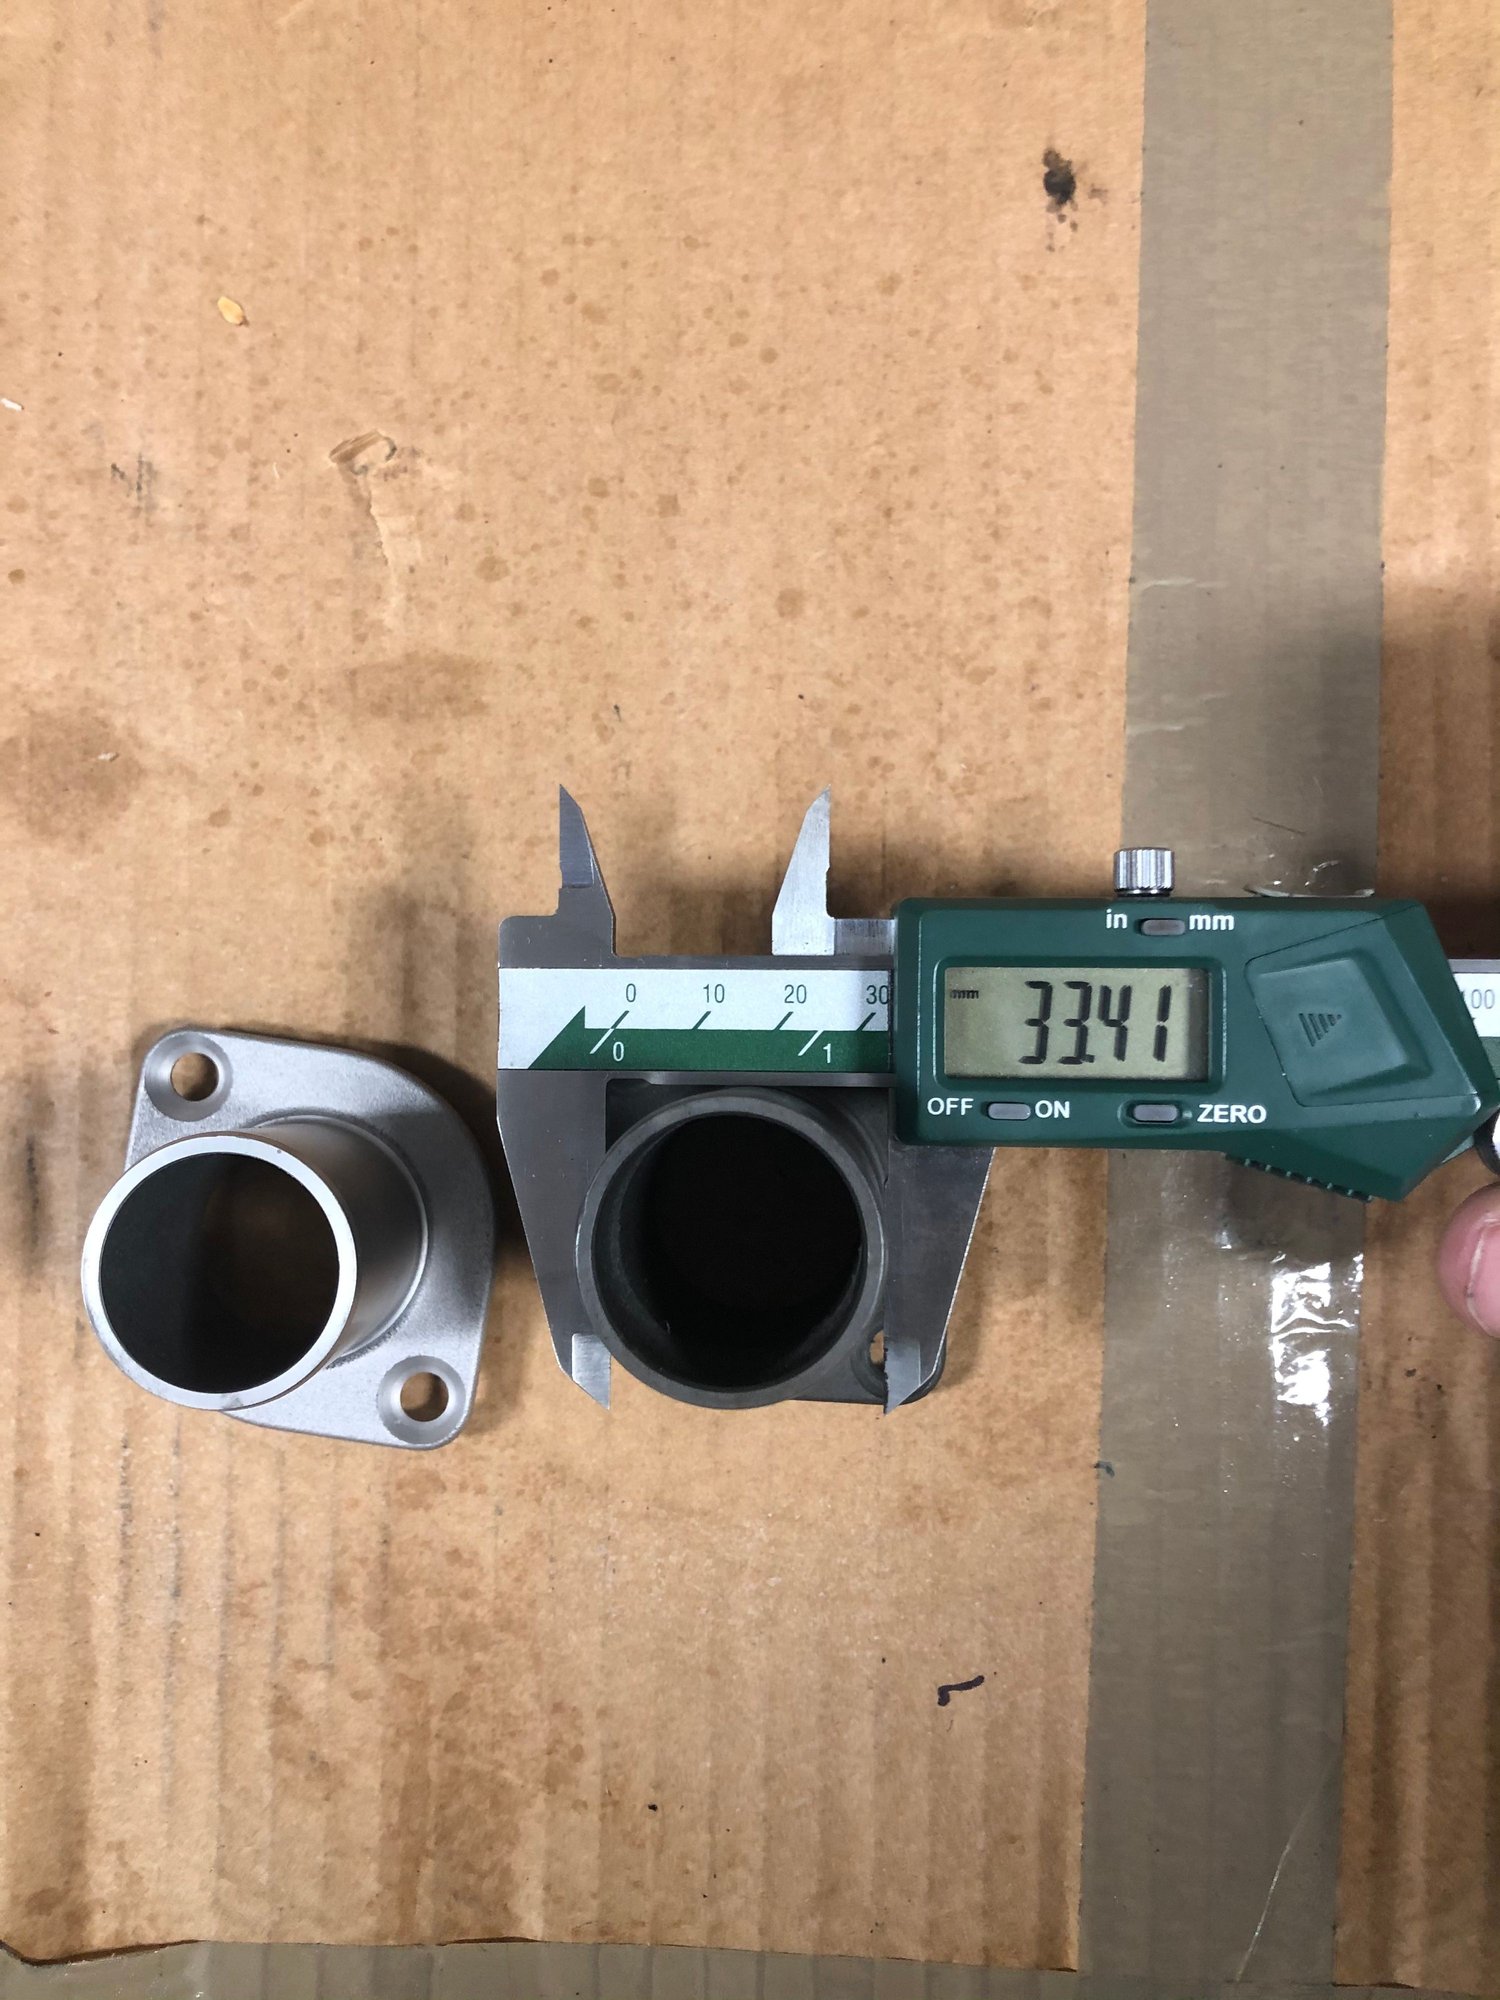
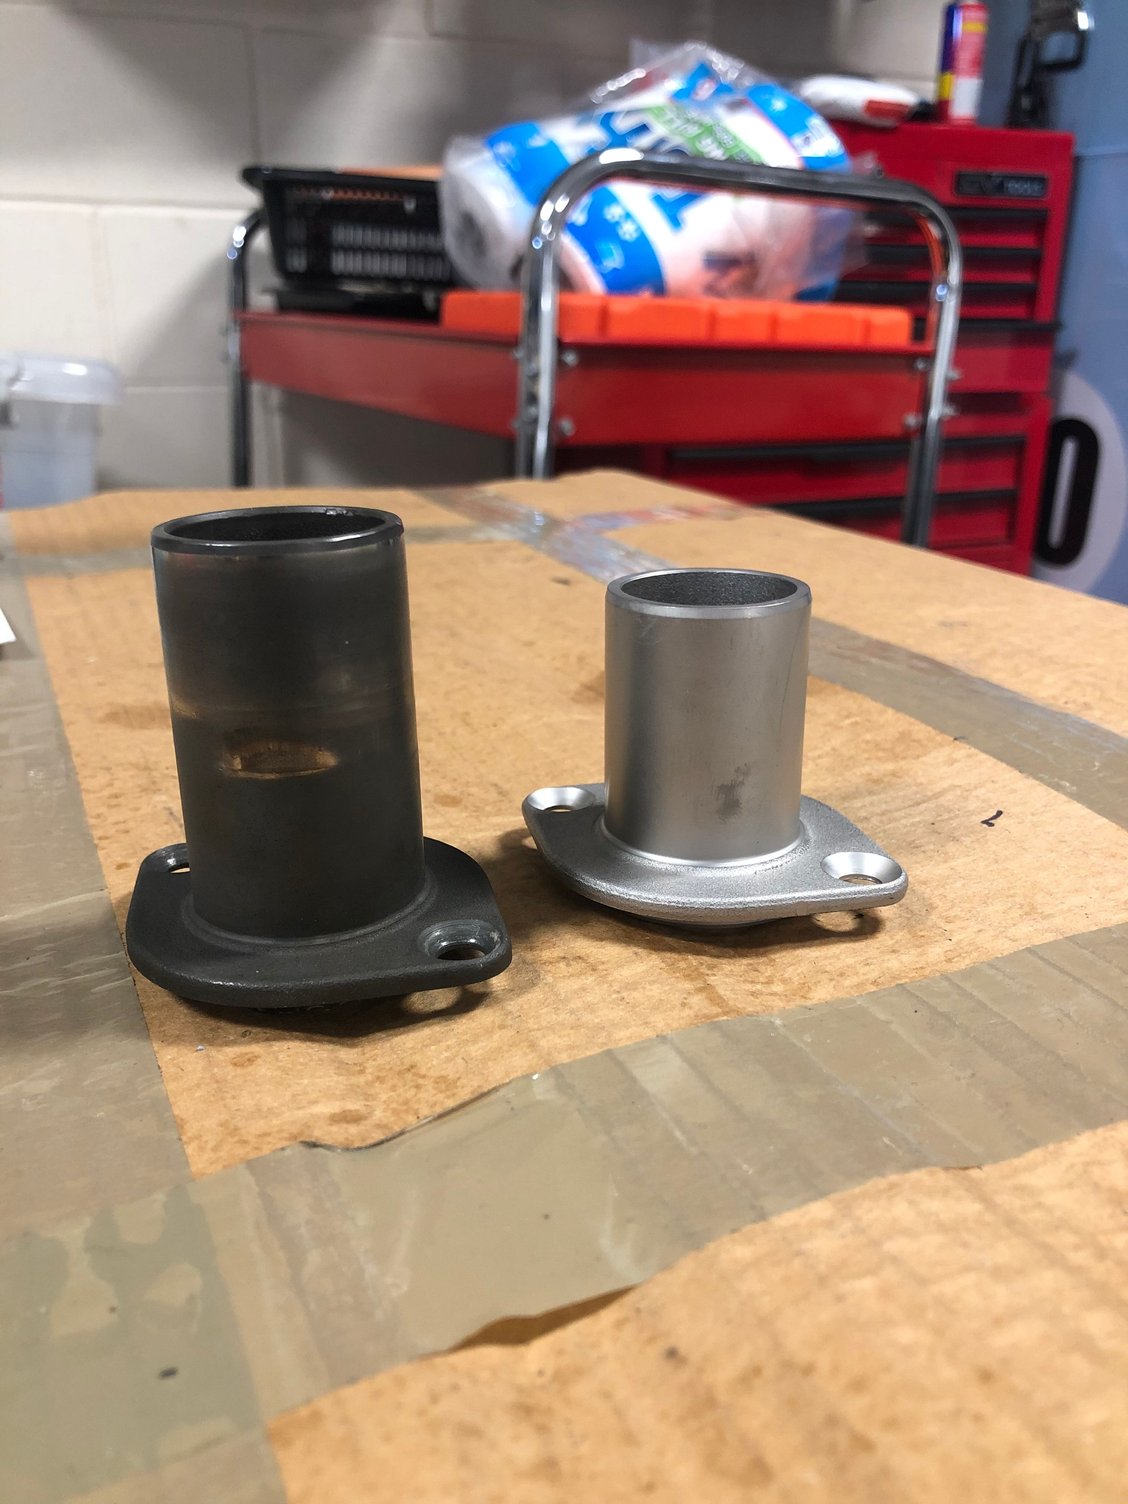
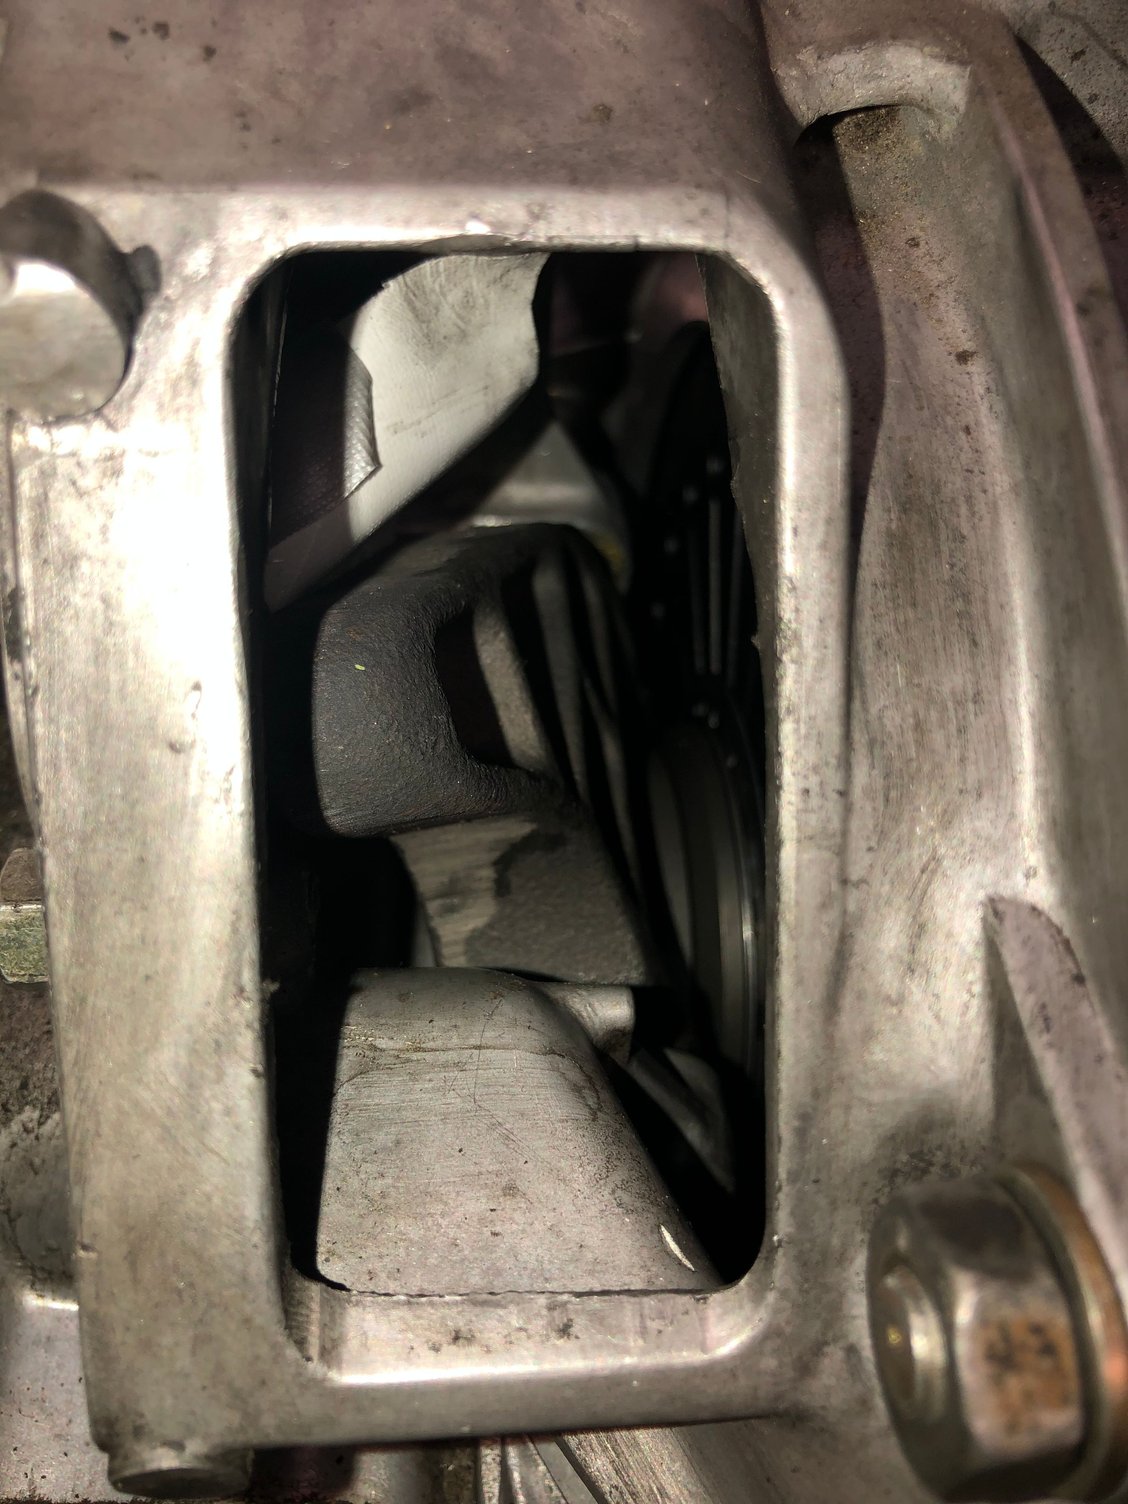
The normal and RS guide tube dimensions are very different. The normal one is shorter and smaller than the RS version.
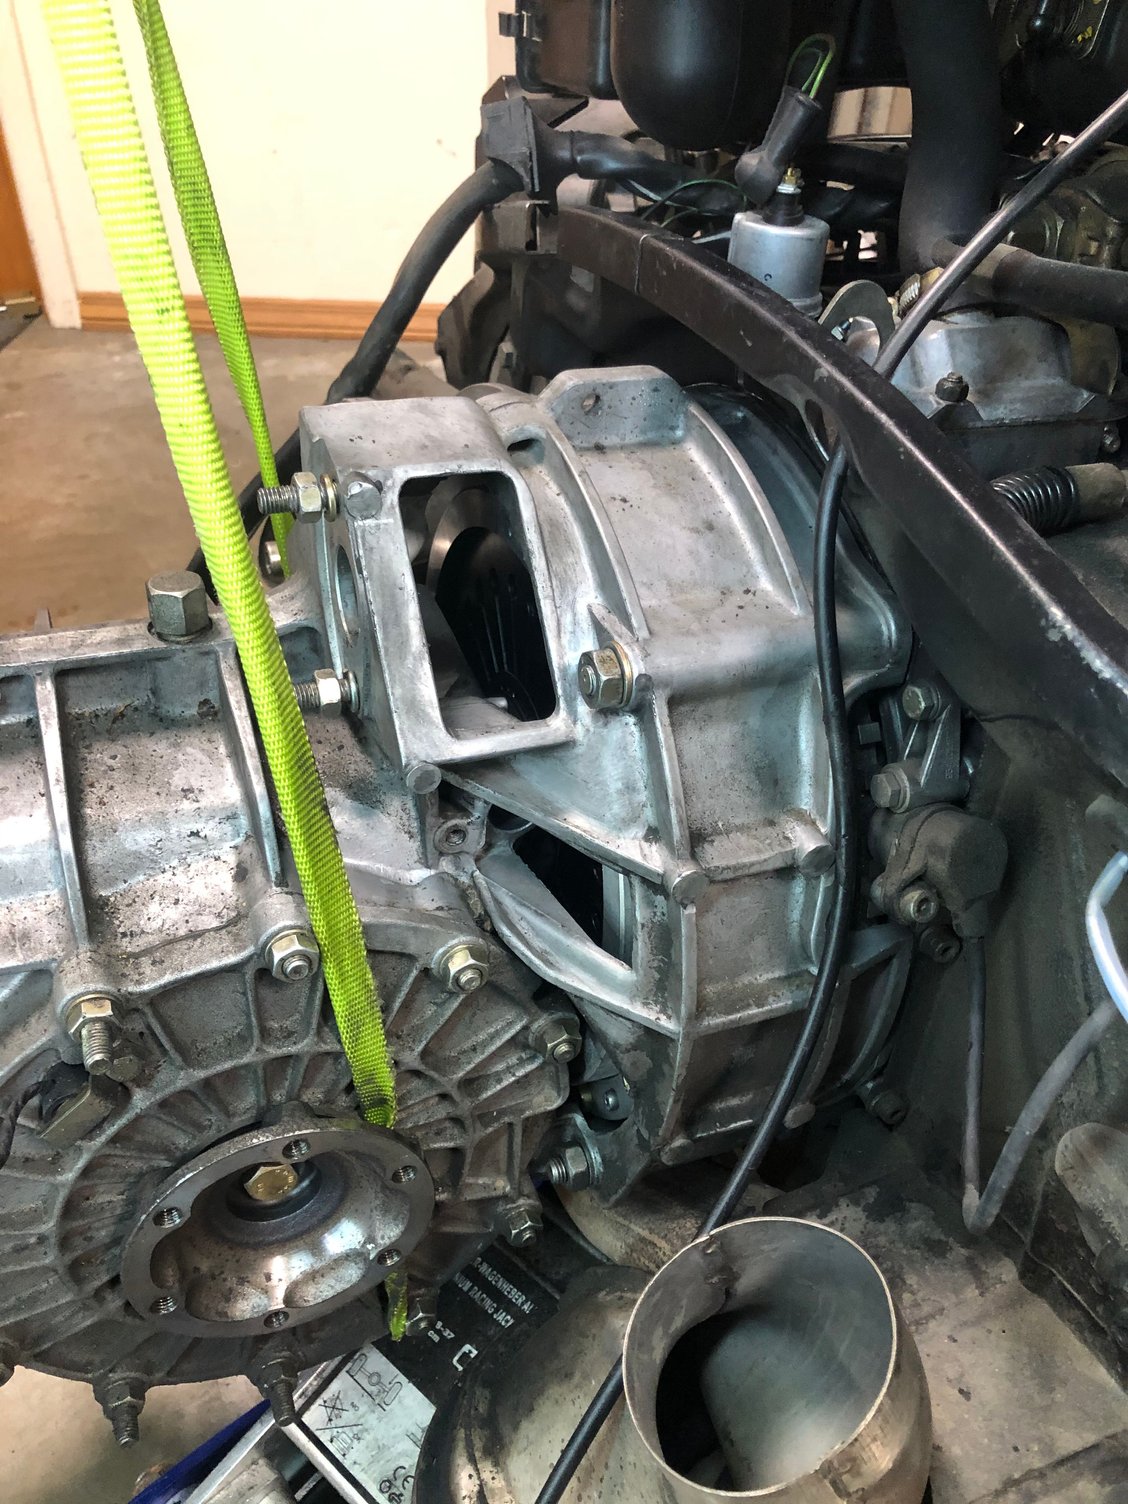
Thin smear of Number 3 aviation gasket sealer on the flange (just for fun) fit the guide tube and tighten the screws
(no idea how much but more than hand tight).
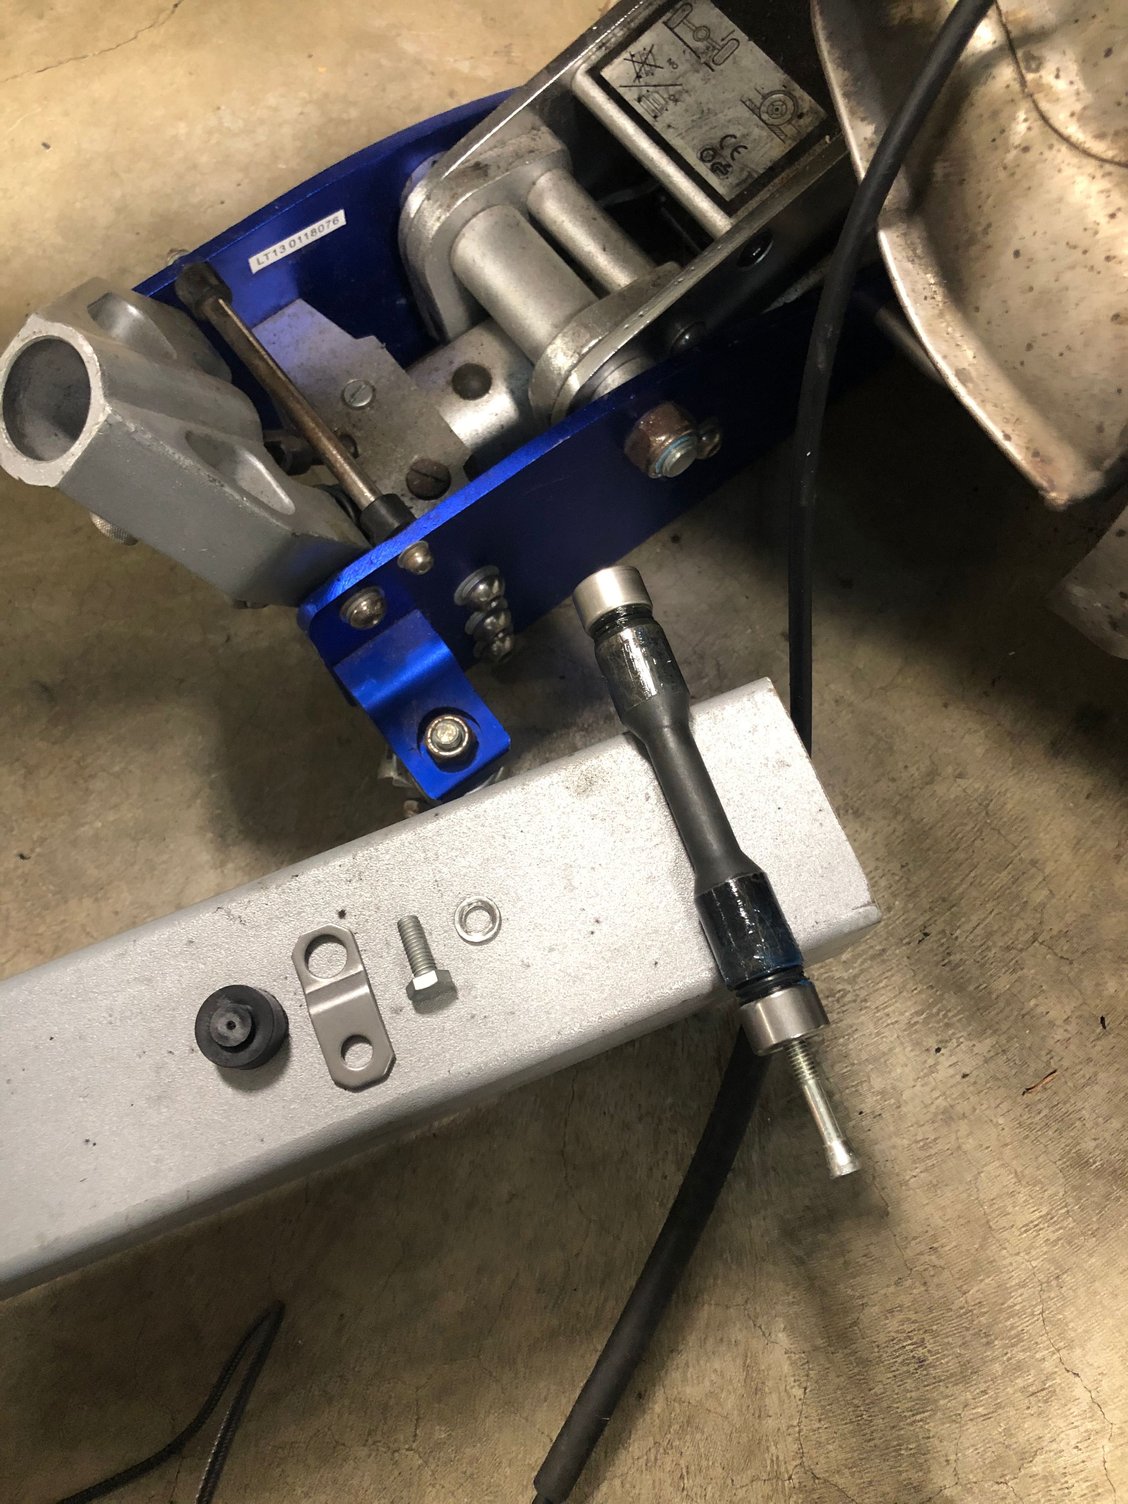
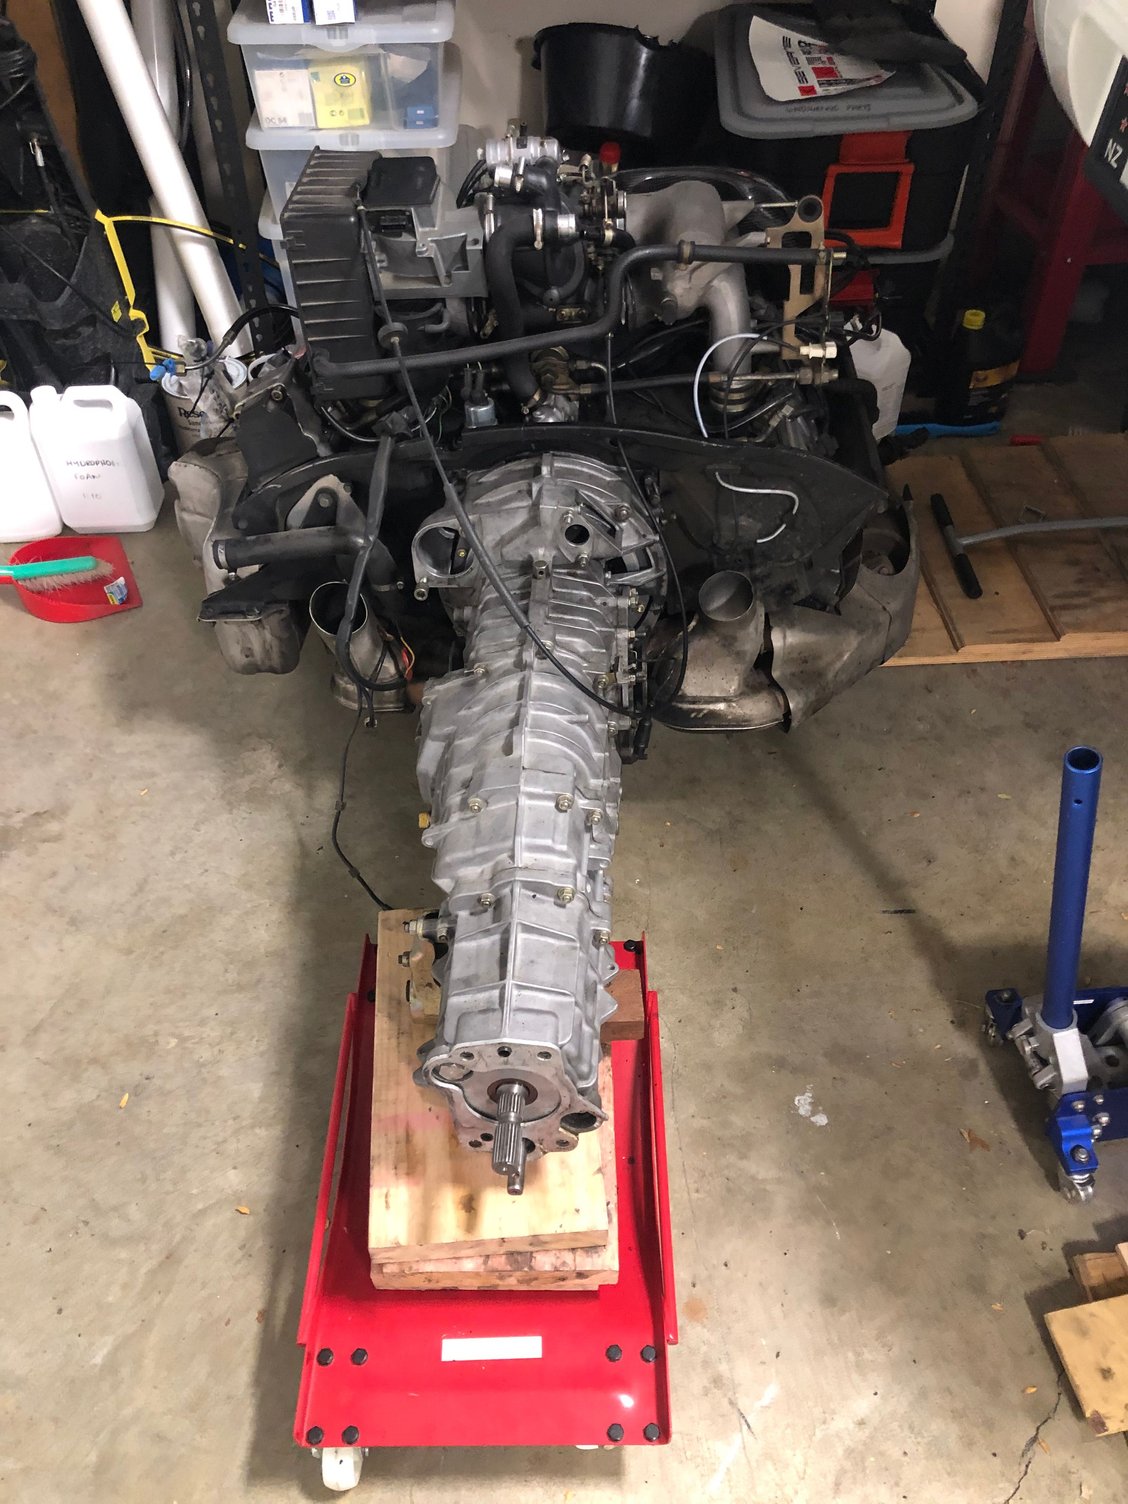
If you are on your own and have a bad back, like me, use an engine crane
with a leveling bar to present the box to the engine, level and square. Push the two together while gently rotating the gearbox output spline (C4 only). Maintain pressure and the two should mate together. Put washers and nuts over the studs.
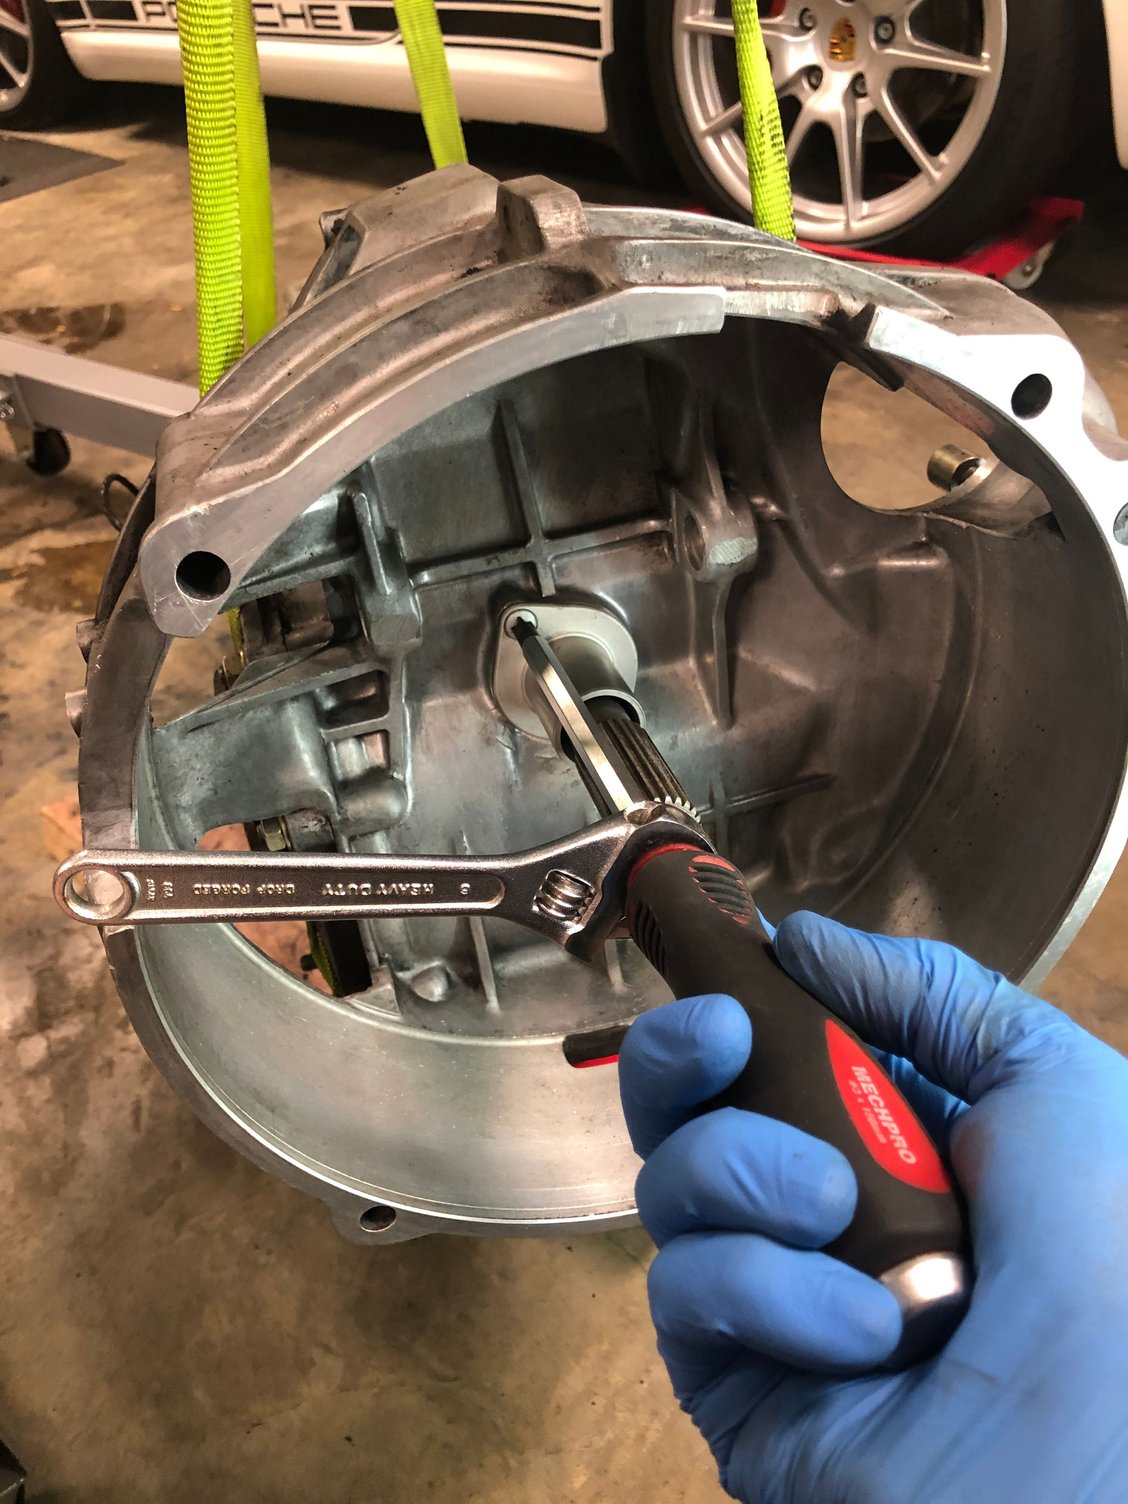
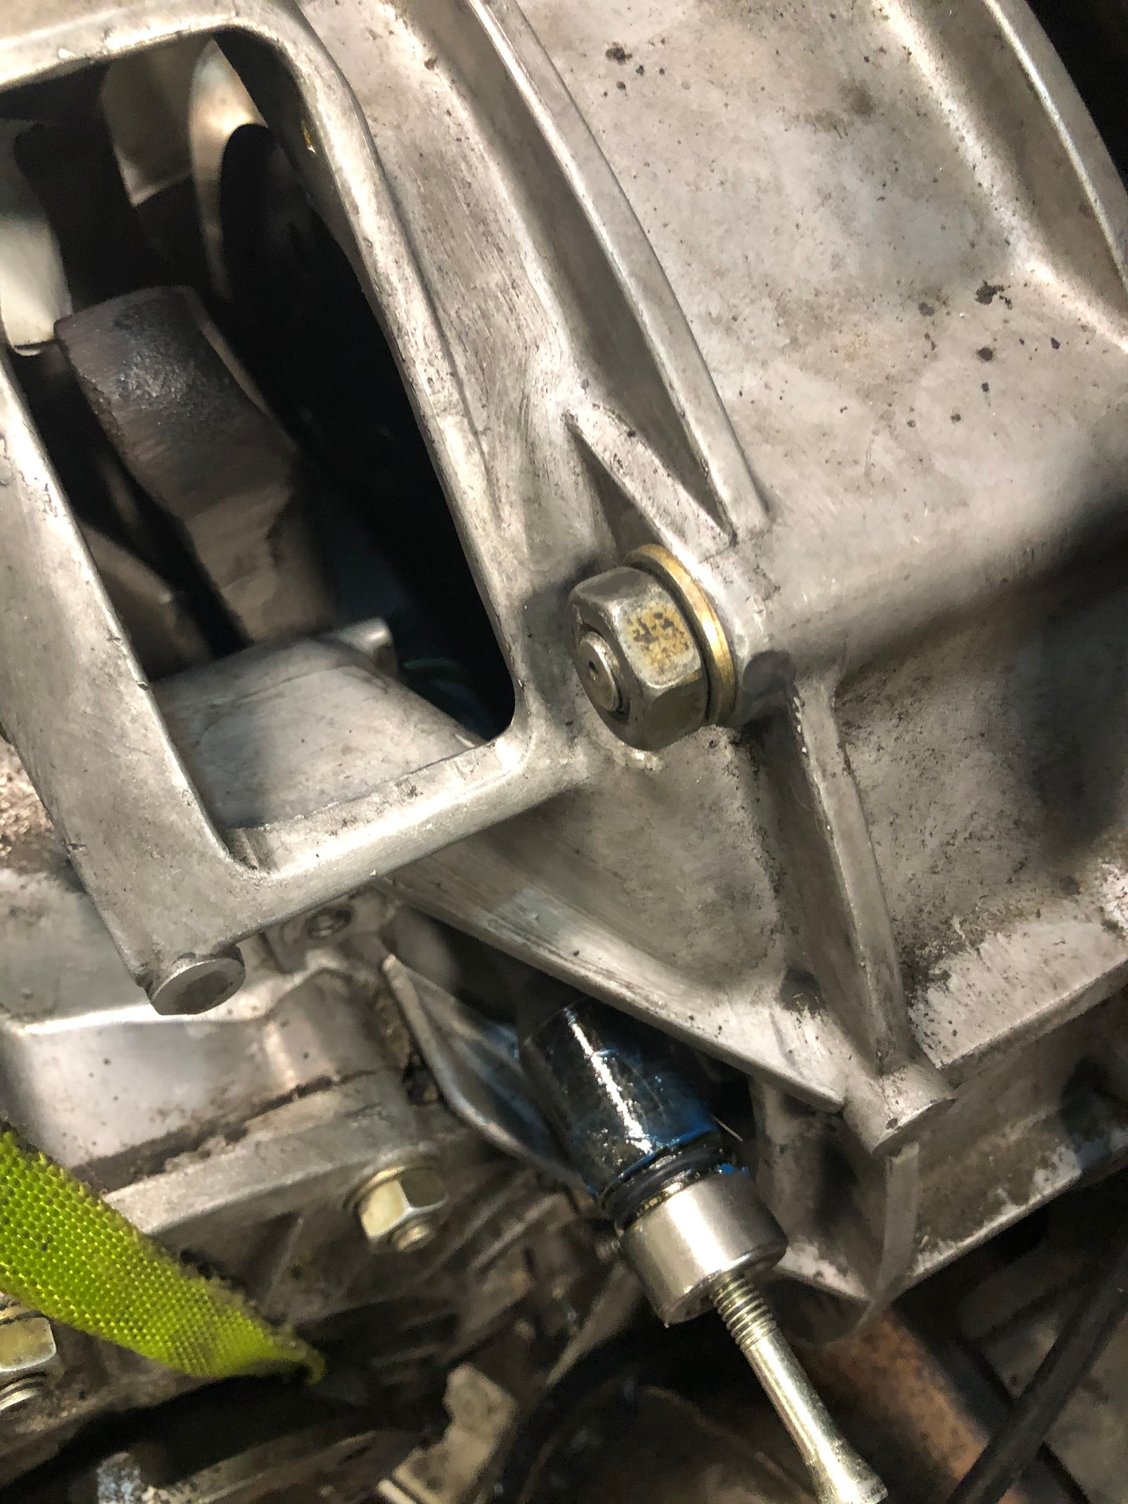
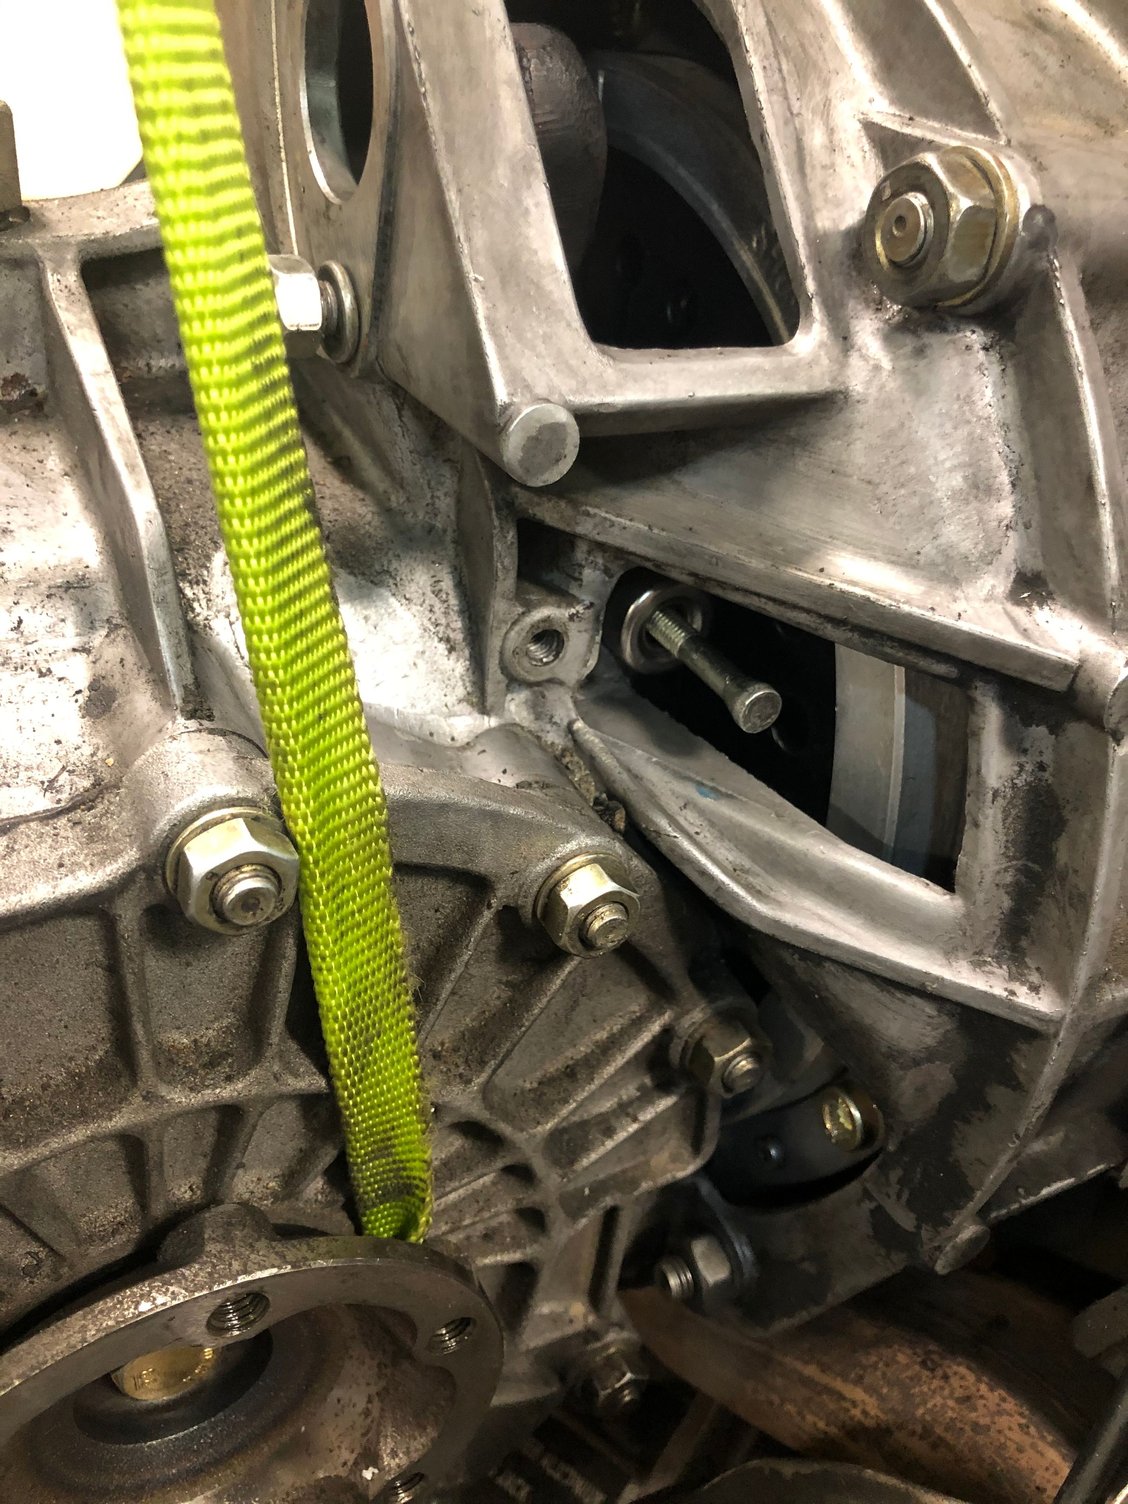
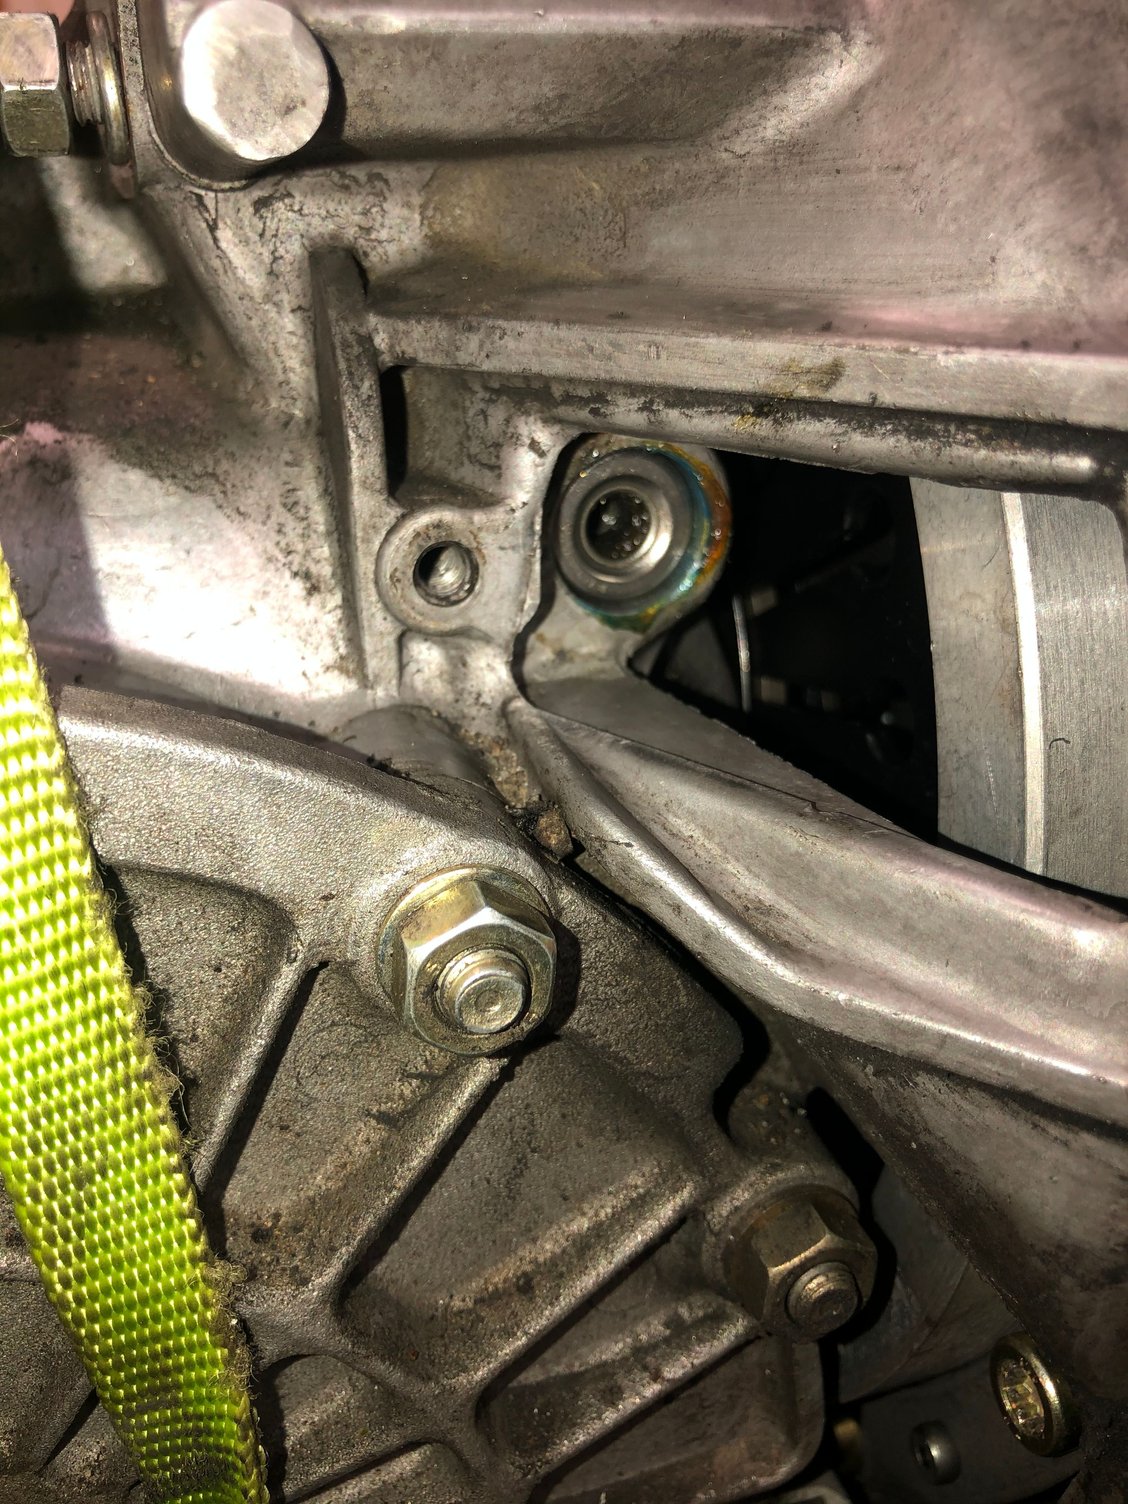
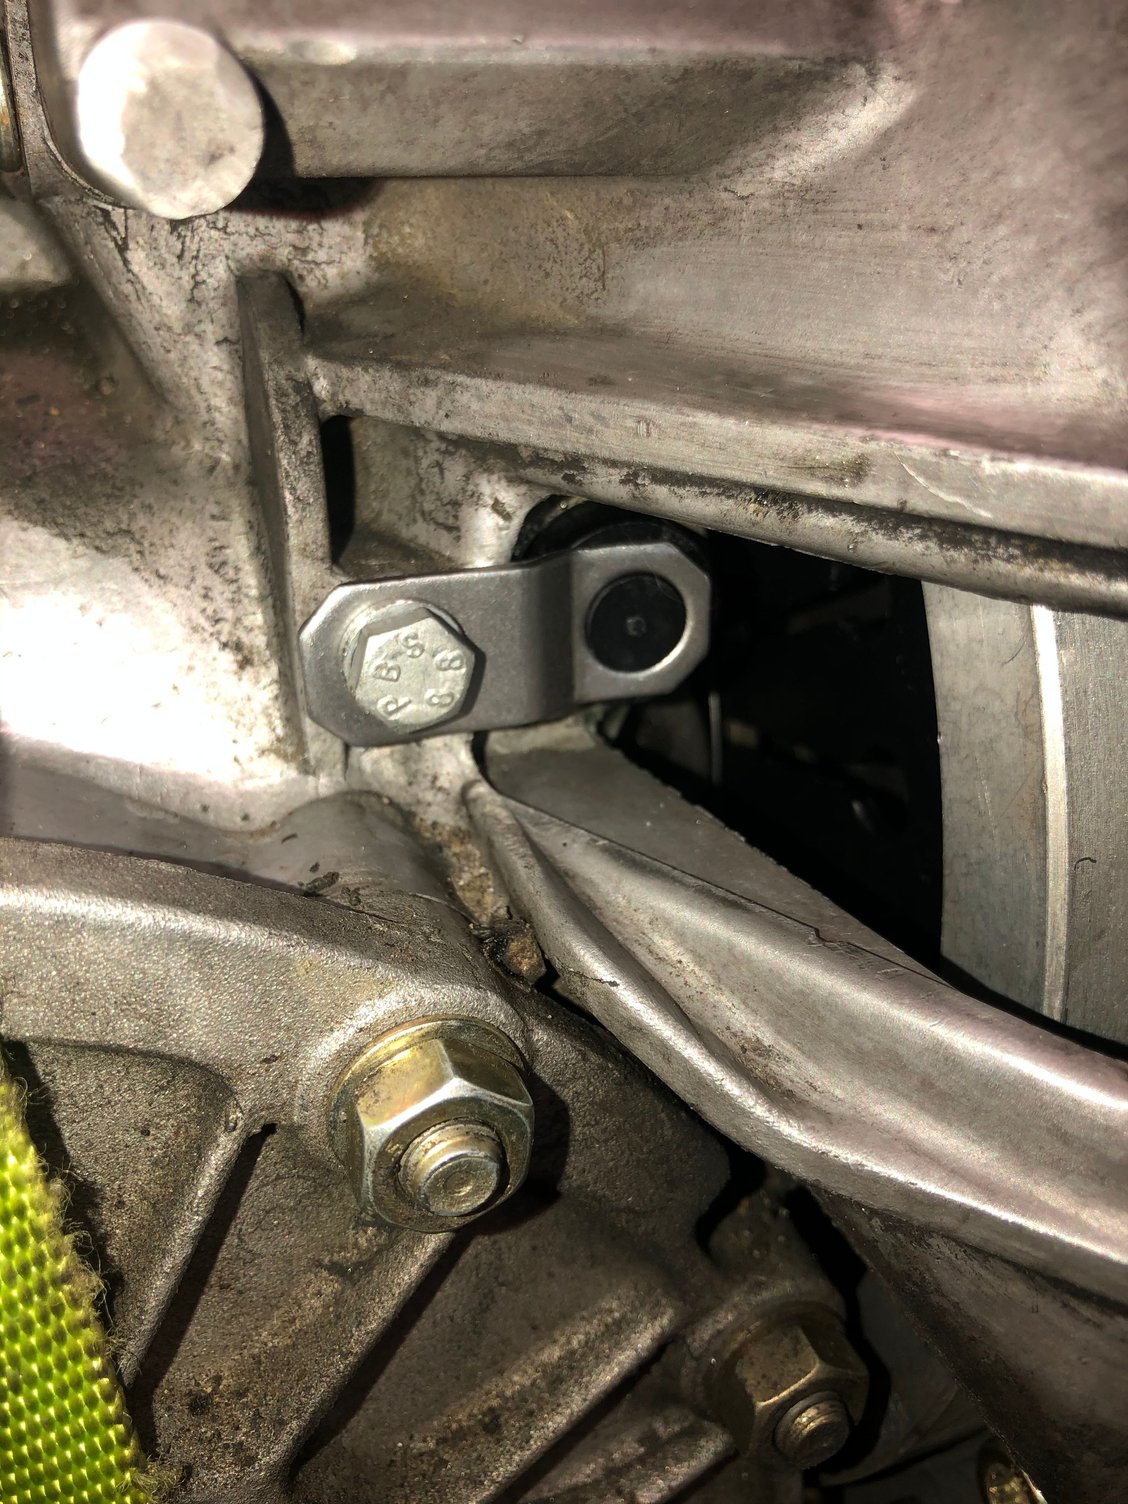
Assemble the clutch fork shaft. Use Sachs grease in bearings and lithium high pressure grease in the areas that will rotate in the plastic bushes (Can�t source Olista MP0 in New Zealand)
. Place a bolt in the end of the shaft. Use the access holes to gently thread the shaft inside the fork holders until it is fully inserted. Do not try to back out as you may lose the end bearing in the box and have to redo it all again. The secret is lining up the fork while pushing. Remove the bolt and fit the end cap and bolt. Remove the tape from the fork. Torque the flange nuts and support the box while removing the crane support. Admire the rejoined engine and box.