When you click on links to various merchants on this site and make a purchase, this can result in this site earning a commission. Affiliate programs and affiliations include, but are not limited to, the eBay Partner Network.
Apologies if you�ve stated this earlier in the thread, but are you using the stock chip or something different?
When I installed my Fabspeed cup pipe and cat bypass, I also replaced the stock chip with a Steve Wong chip meant for the exhaust modifications.
I don�t know if the stock chip coupled with the cat bypass would cause that dramatic of a change but that could be a place to investigate.
I hadn't mentioned it previously, however there is an invoice for a "chip" with no further details from ~20yrs ago. I'm not sure which chip it is, but in any case it wouldn't be setup for the cup pipe + cat bypass as that was all subsequent to the chip. Maybe the answer is a new chip, but as you say it seems pretty dramatic to not be able to stay running with just these modifications.
I have the same cult werks ducts about to be painted and I purchased rain gutter mesh at home depot. You should be able to place in the square area you cut out. Again i haven't tried yet so not sure how much further the duct goes past the square hole.
I hadn't mentioned it previously, however there is an invoice for a "chip" with no further details from ~20yrs ago. I'm not sure which chip it is, but in any case it wouldn't be setup for the cup pipe + cat bypass as that was all subsequent to the chip. Maybe the answer is a new chip, but as you say it seems pretty dramatic to not be able to stay running with just these modifications.
Tom
I know it is generally recommended to pair a chip with those modifications. I never tried starting mine before swapping the chip, so I can�t say as to whether or not that is definitely the problem as I can�t compare performance after exhaust modifications with the stock chip. The chip is supposed to compensate for changes as a result of the cat & primary muffler bypasses.
Steve Wong has three different versions for the 964 depending on how much of the exhaust system has been modified. I have the one for cat bypass + primary muffler bypass.
Incredible work done here! Really enjoyed the whole thread.
I like that front lip, do you have mor info about it?
The splitter is an RSR 2 piece splitter - if you search on FVD for RSR splitter you'll see it. Install is dead easy and I like it, subtle and doesn't reduce front end clearance at all.
The round buzzer is also the warning buzzer for the electro hydraulic brake system. If the brakes don't pressurize within a specified time it will beep repeatedly on a turbo or C4.
Am I seeing this correctly? Is your bumper still original paint? The vin sticker on the 89 & 94' s still remains and doesn't appear to have any paint lines.
I am curious since I rarely come across a car with the intensive washer option. Although does your car have a rear wiper? The switch you show in that location is usually for the rear wiper and not the intensive washer AFAIK.
Wow, I feel a bit silly now.....I had mentioned that my car didn't have the intensive washer option, but appeared to have the switch. Now that you've pointed it out though, I think the intensive washer switch would have been on the other side of the dash by the clock....my car does indeed have a rear wiper. I had assumed this switch was for the non existent intensive washer because when I pressed it nothing happened, but I guess my rear wiper doesn't work. I'll add it to the list of things to look into and find an alternative solution for my gdo...
To answer your other question, yes original paint. As far as I know the whole car is original paint, although I haven't personally verified the other panels.
While I wait for some small parts to arrive, I had a plan to jump into intake madness. I read through Goughary's thread and figured mine could probably go for a refresh. I also thought that since I'd be pulling off the blower motor and airbox to change the shocks I'd be part way there anyways. As part of this exercise I picked up a bunch of AN6 hose and started accumulating the necessary fittings to replace all the fuel lines.....while I was in there.
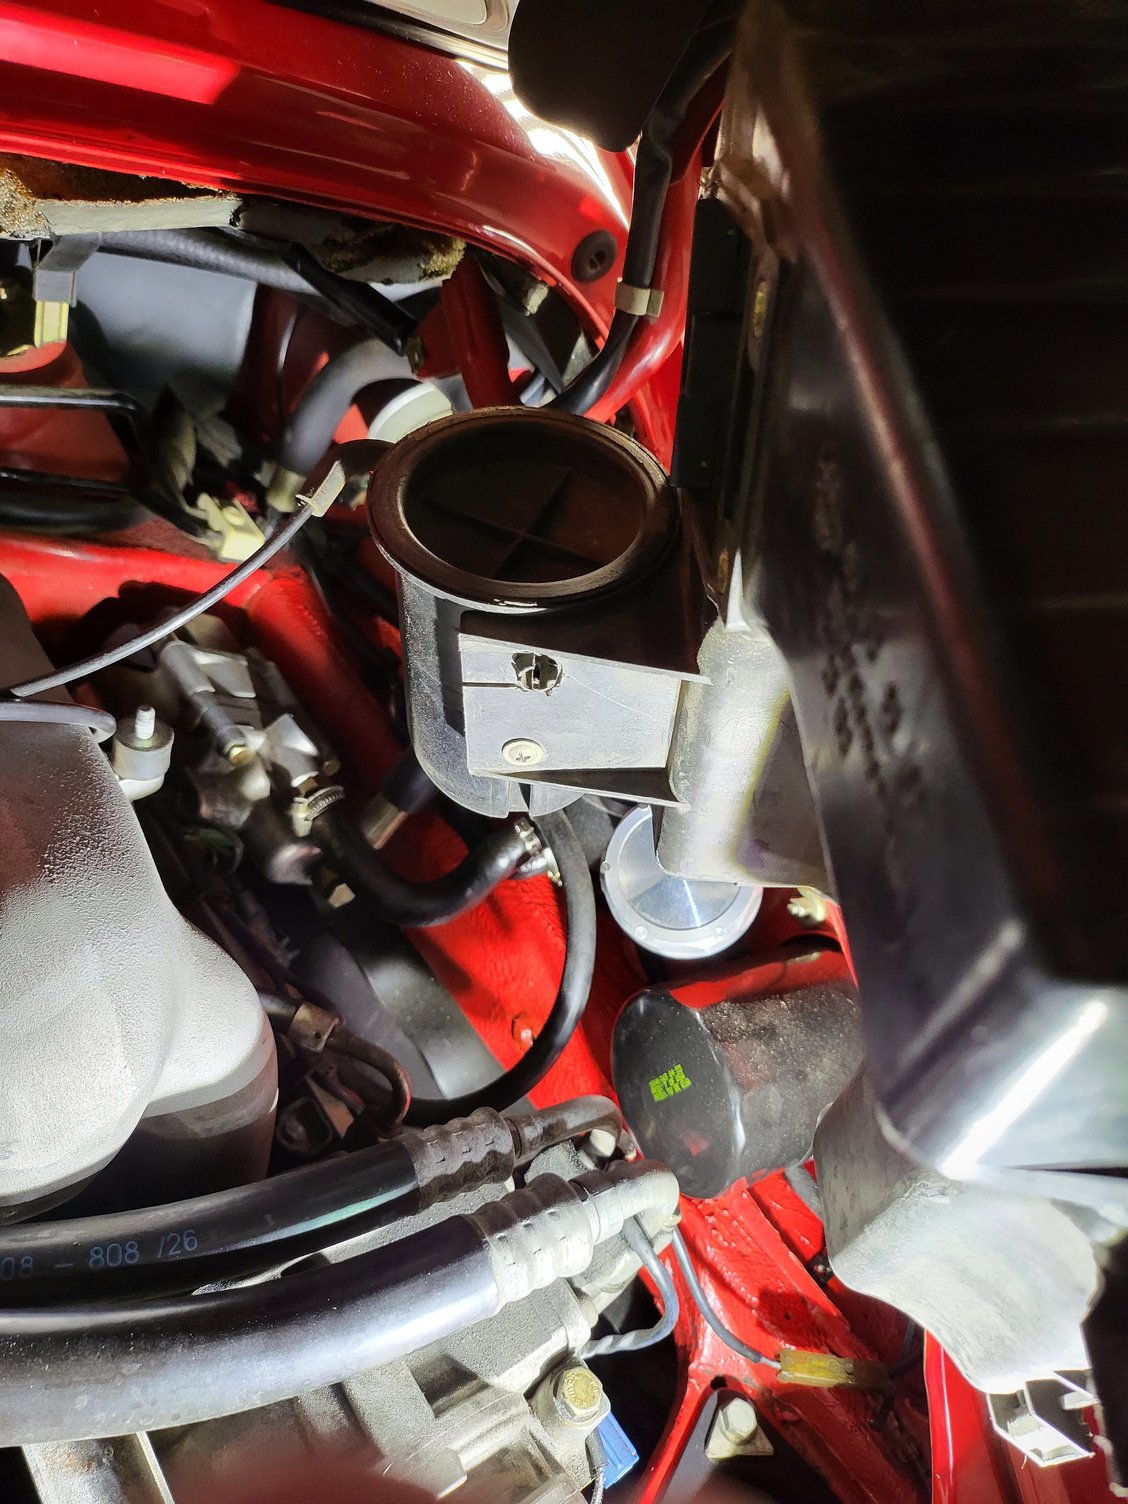
Pulled the blower motor out and then started on the airbox side, which I'd never removed.
Please ignore hideous engine pad, which I will address someday. Anyways, I opted to separate the airbox and AFM - I know you can take it out as one but I wanted to look at them individually. Airbox came out pretty easily, and when I unhooked the vacuum line hose from the reservoir I got a pretty pronounced hiss of the vacuum being released despite the car not having been run for over a week. I took this as a pretty good sign that I don't have a notable vacuum leak anywhere.....any reason to suspect differently?
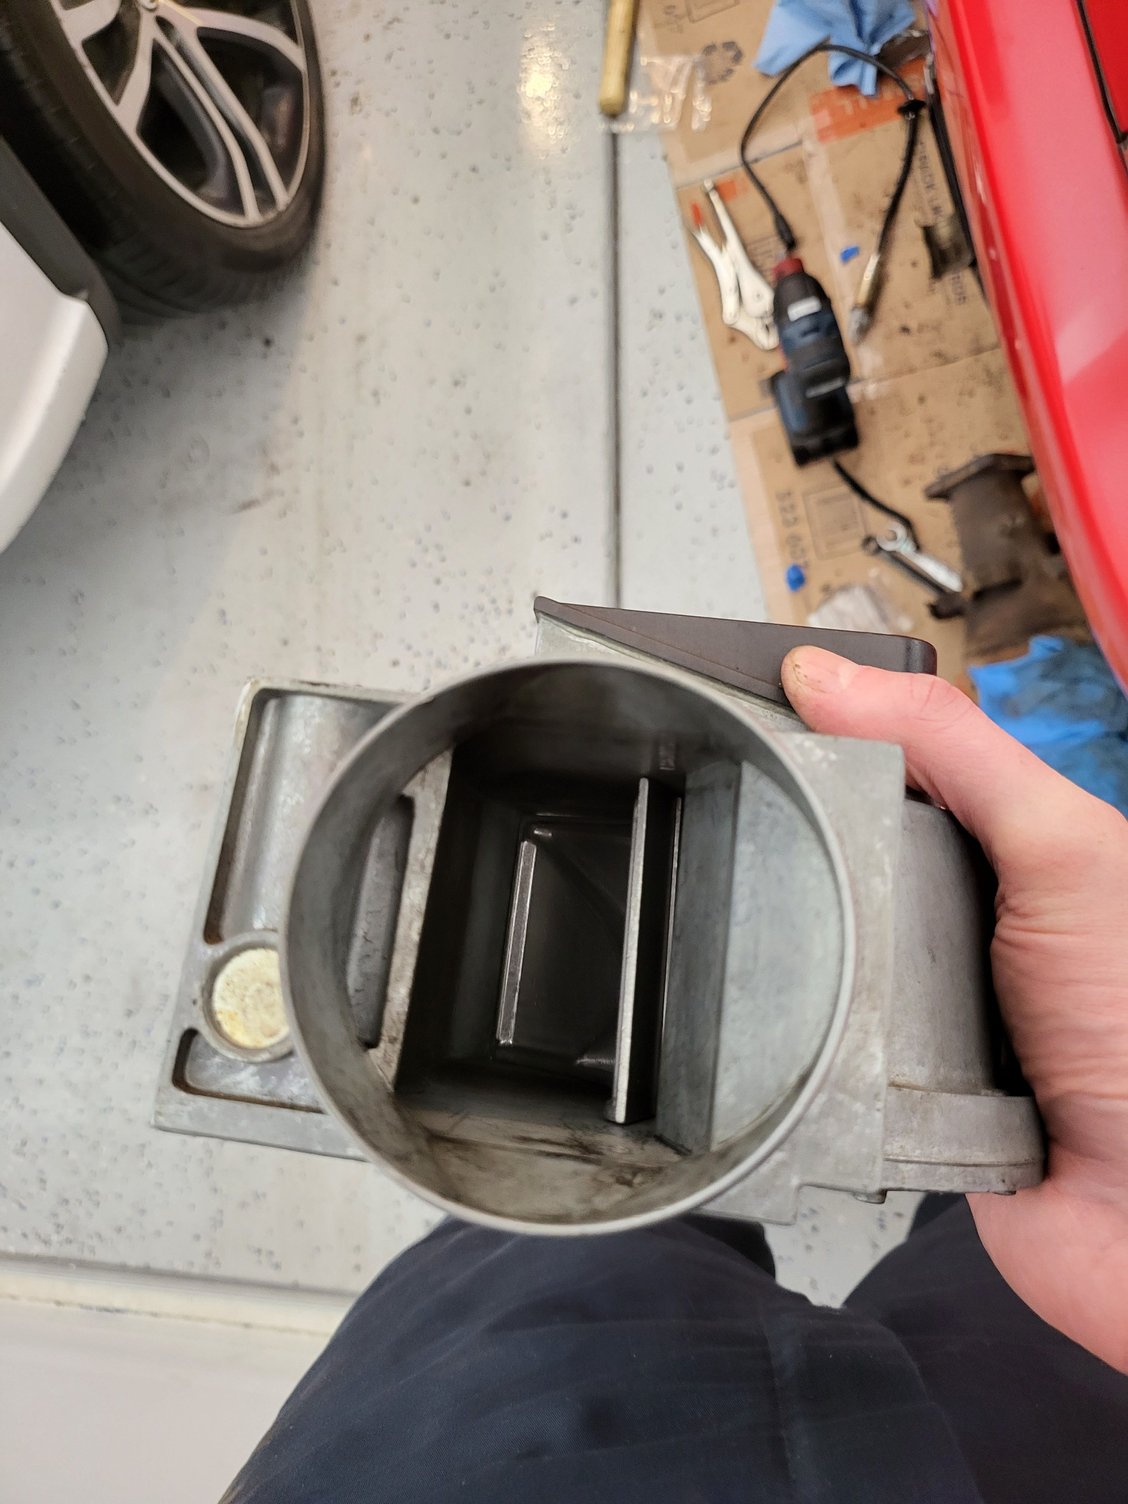
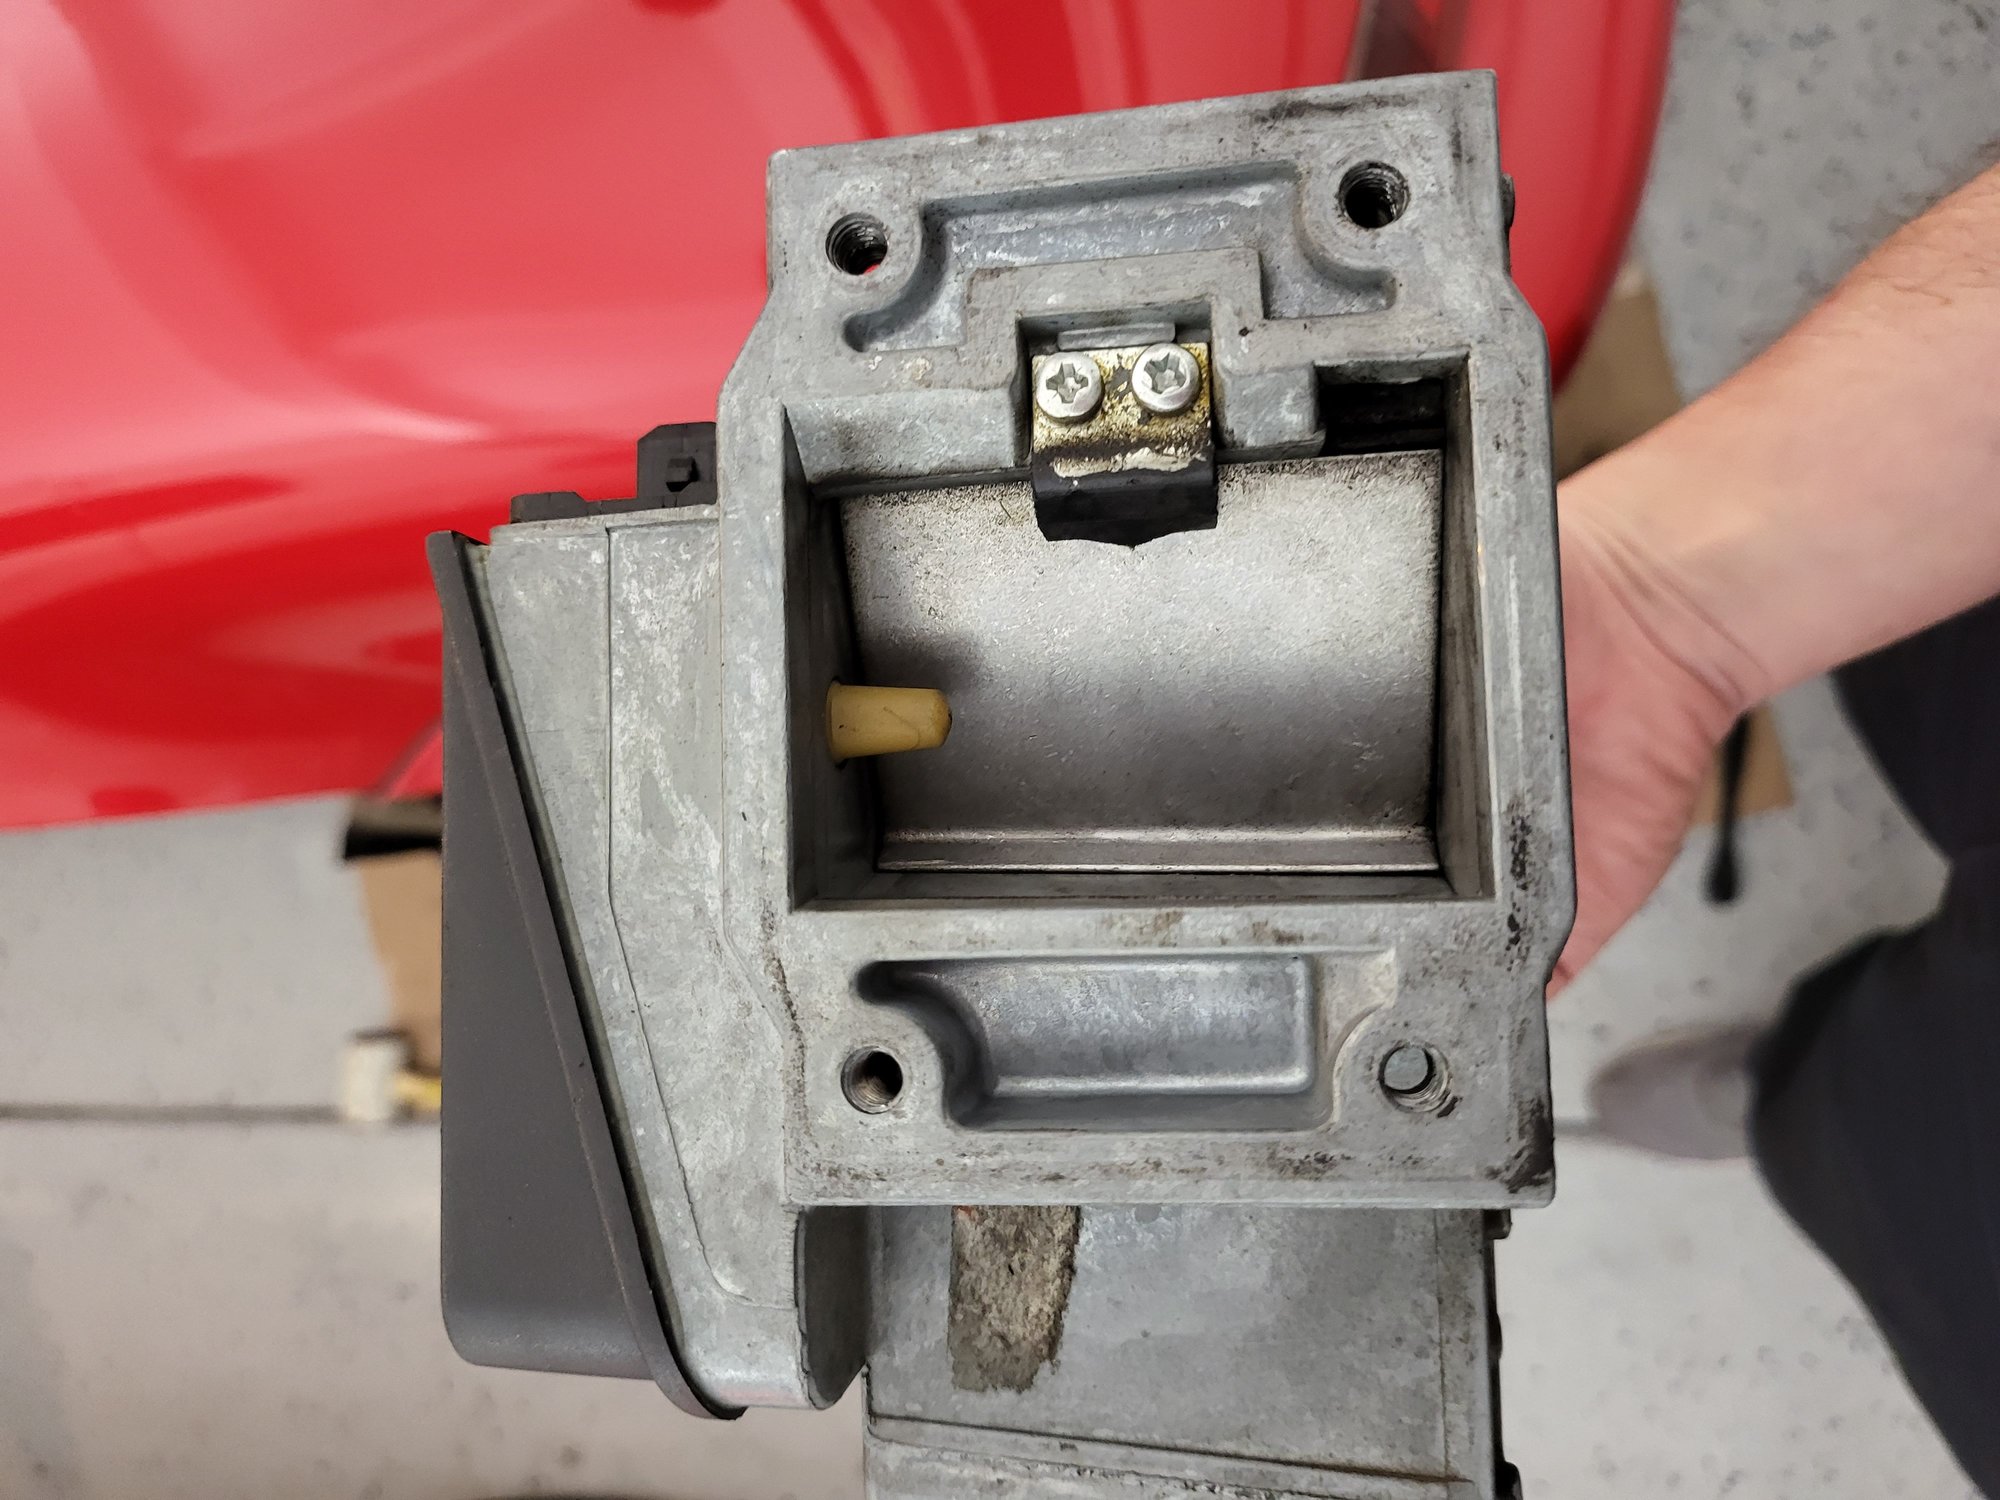
Anyhow, next I loosened the jubilee clamp for the AFM and pulled it out expecting to find a messy situation....
No mess, and door operates smoothly, I don't think there's any action required here....starting to second guess my plans.
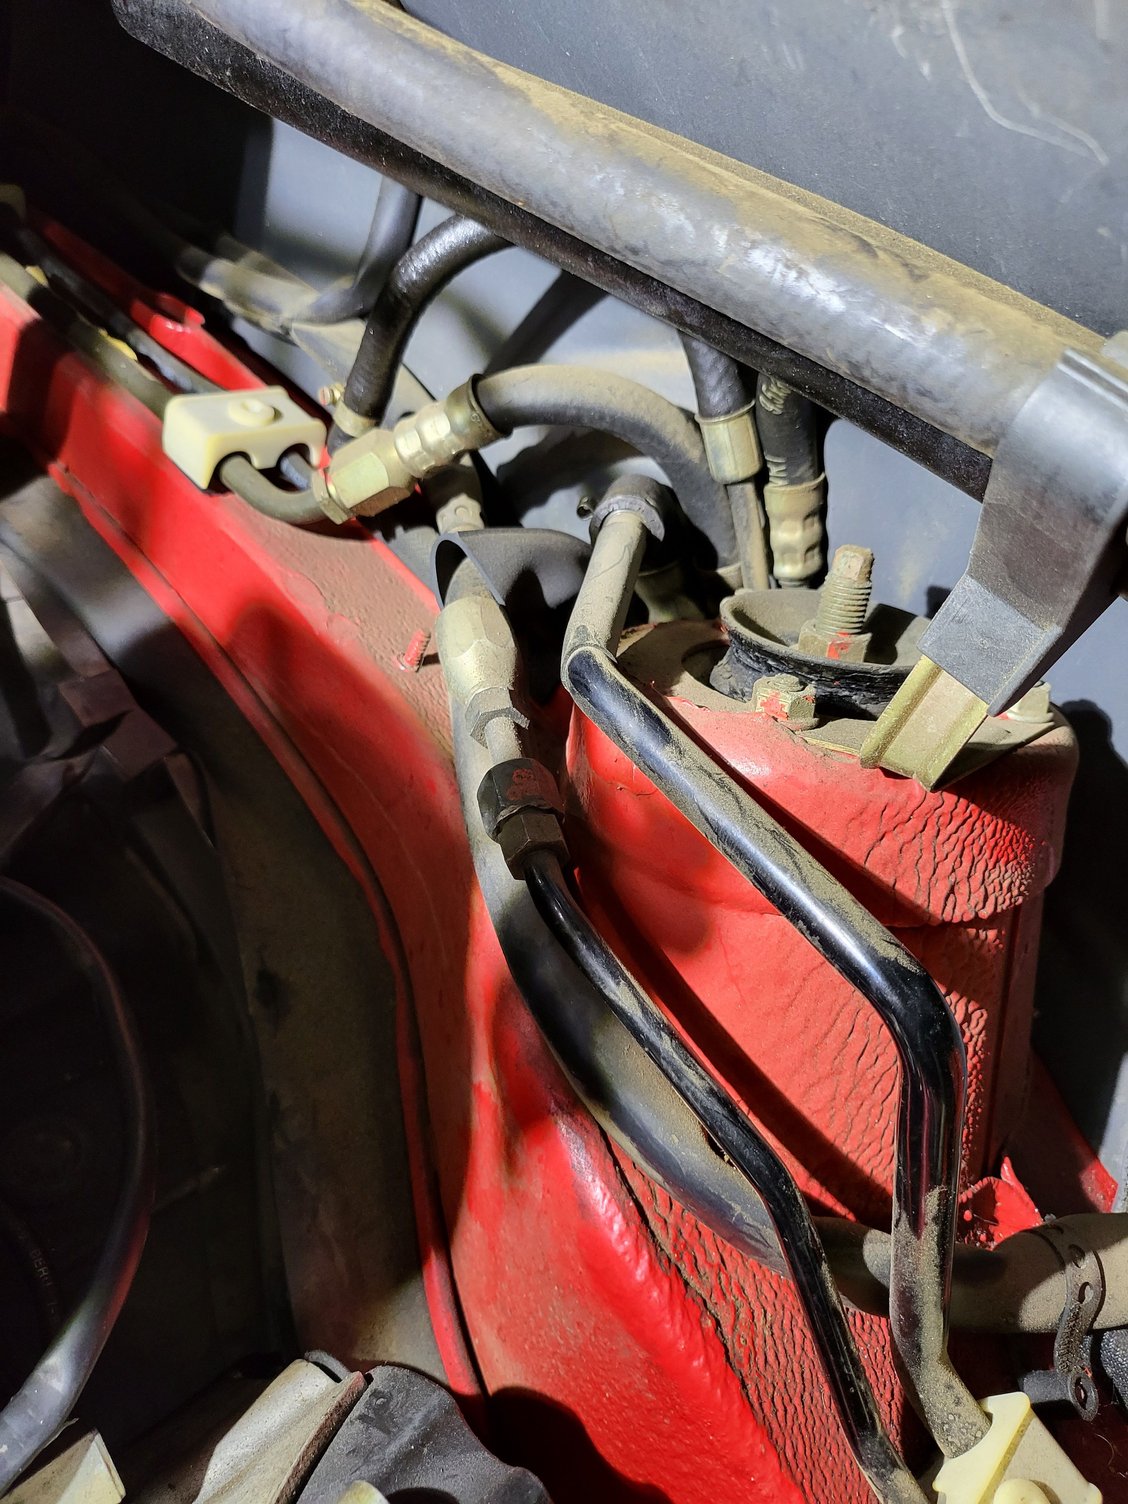
Took a look at all the lines in the back of the engine bay.
There's a nice layer of dust on some of the lines, but everything looks to be in quite good shape. I think I've decided to leave it alone for the time being - I was expecting a much worse situation. This is a long post to say I basically didn't do anything.
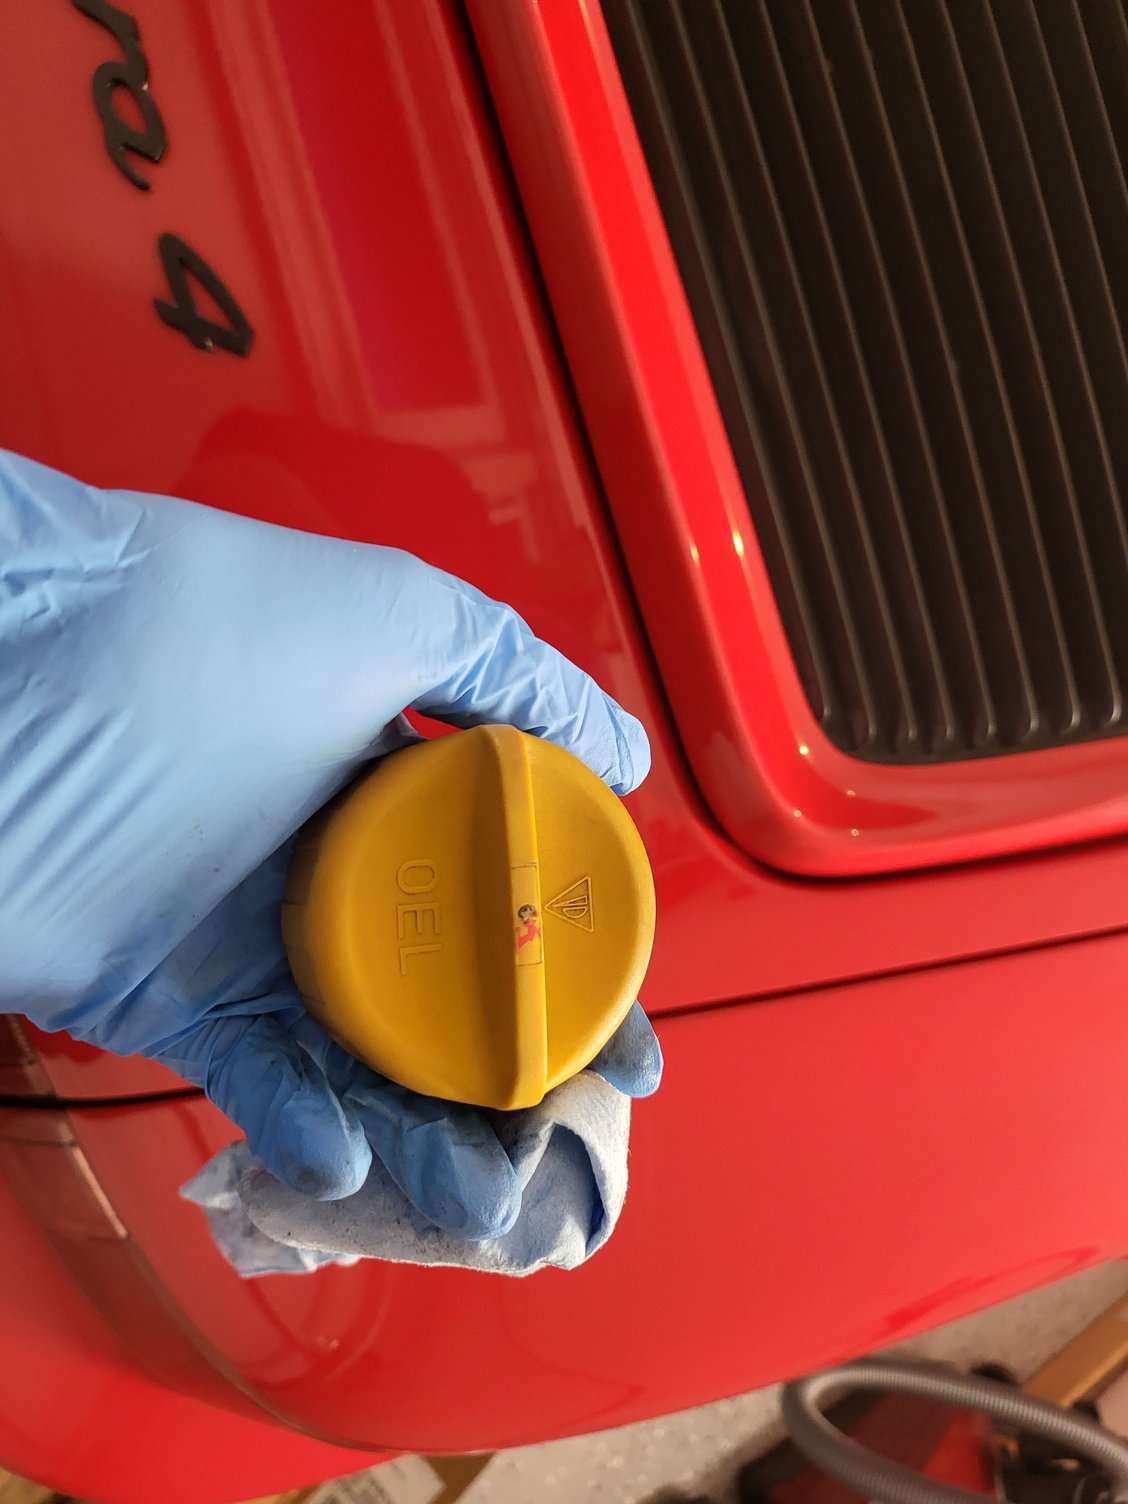
Well actually, I did do one thing; no matter how much I scrub the yellow oil cap, it just looks grungy. The below photo is actually very flattering, it looks worse in person.
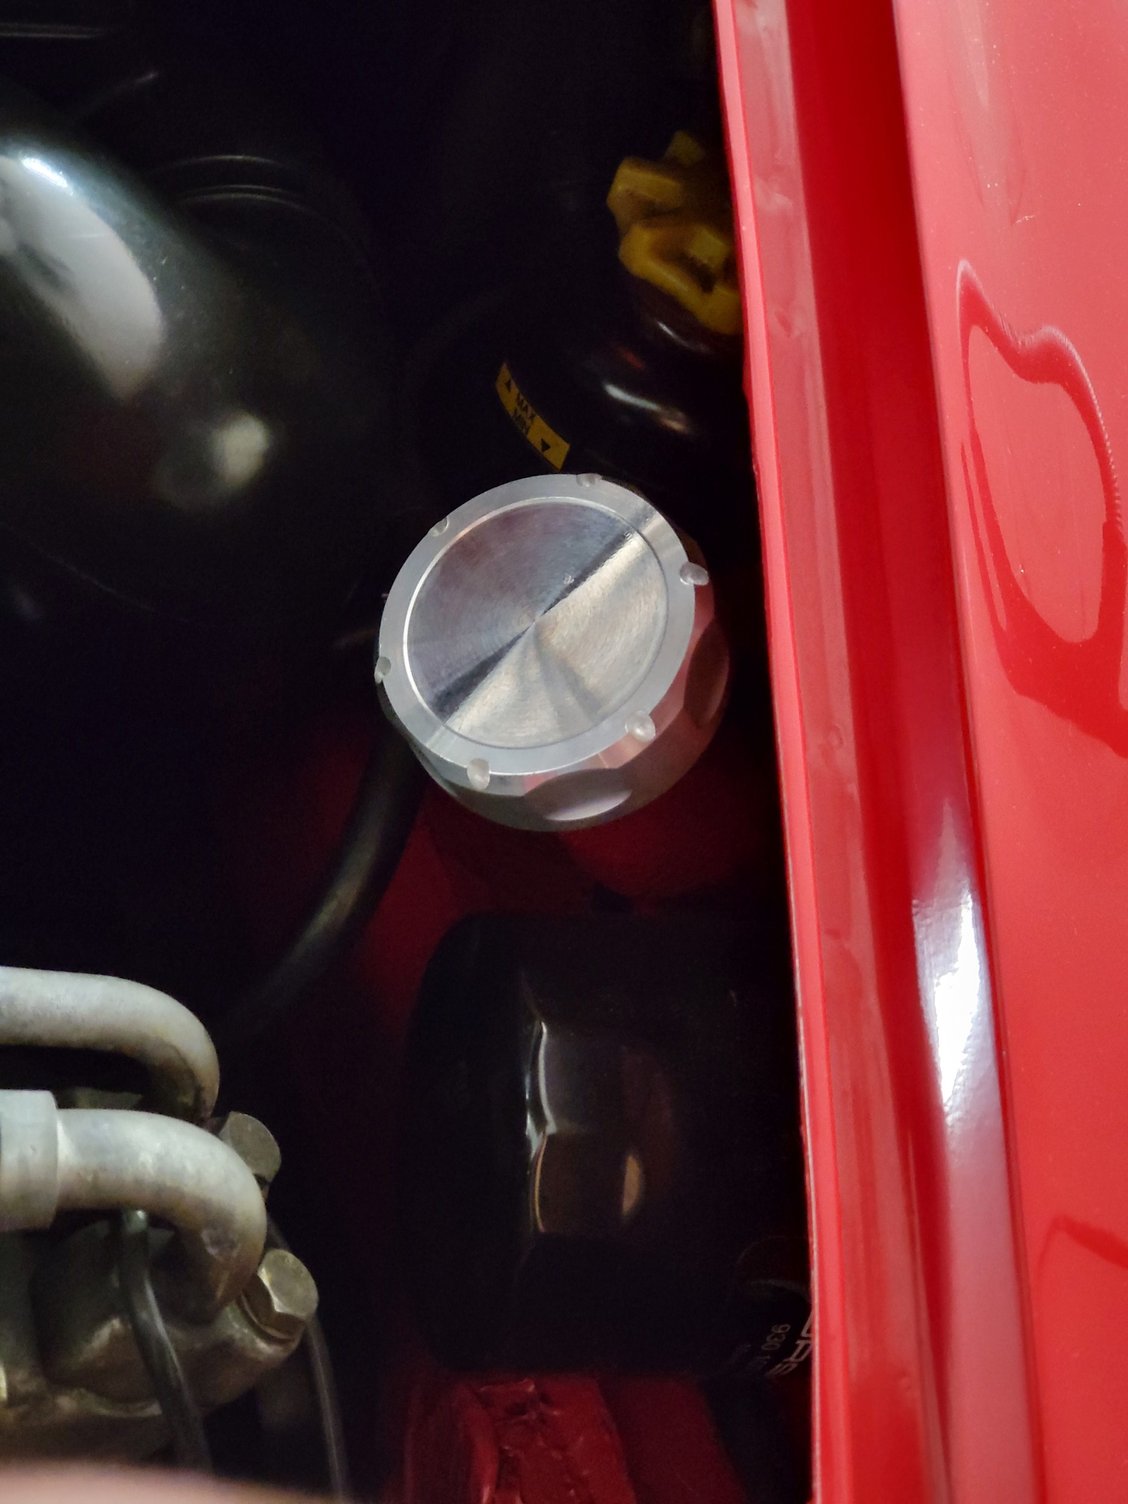
I picked up a billet aluminum replacement and think it looks much better.
I picked up a billet aluminum replacement and think it looks much better.
Hope you don't mind me asking but where did you find the aluminum cap. I'm looking to replace mine as well and didn't realize they have nicer looking options
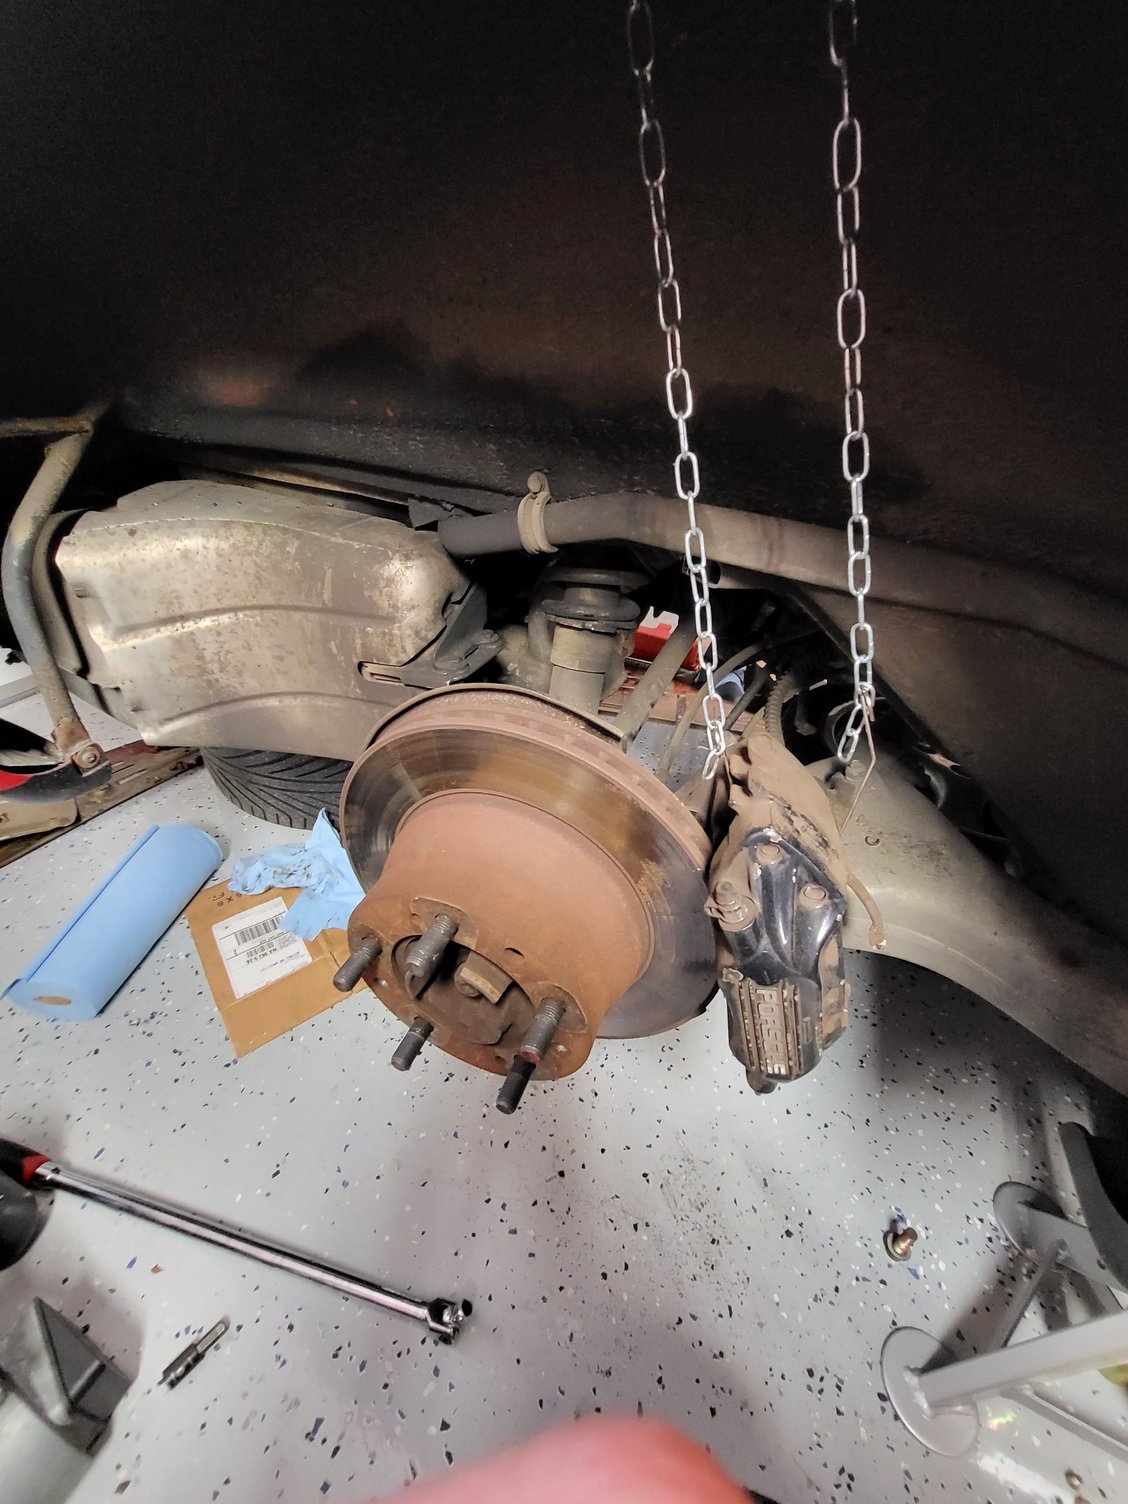
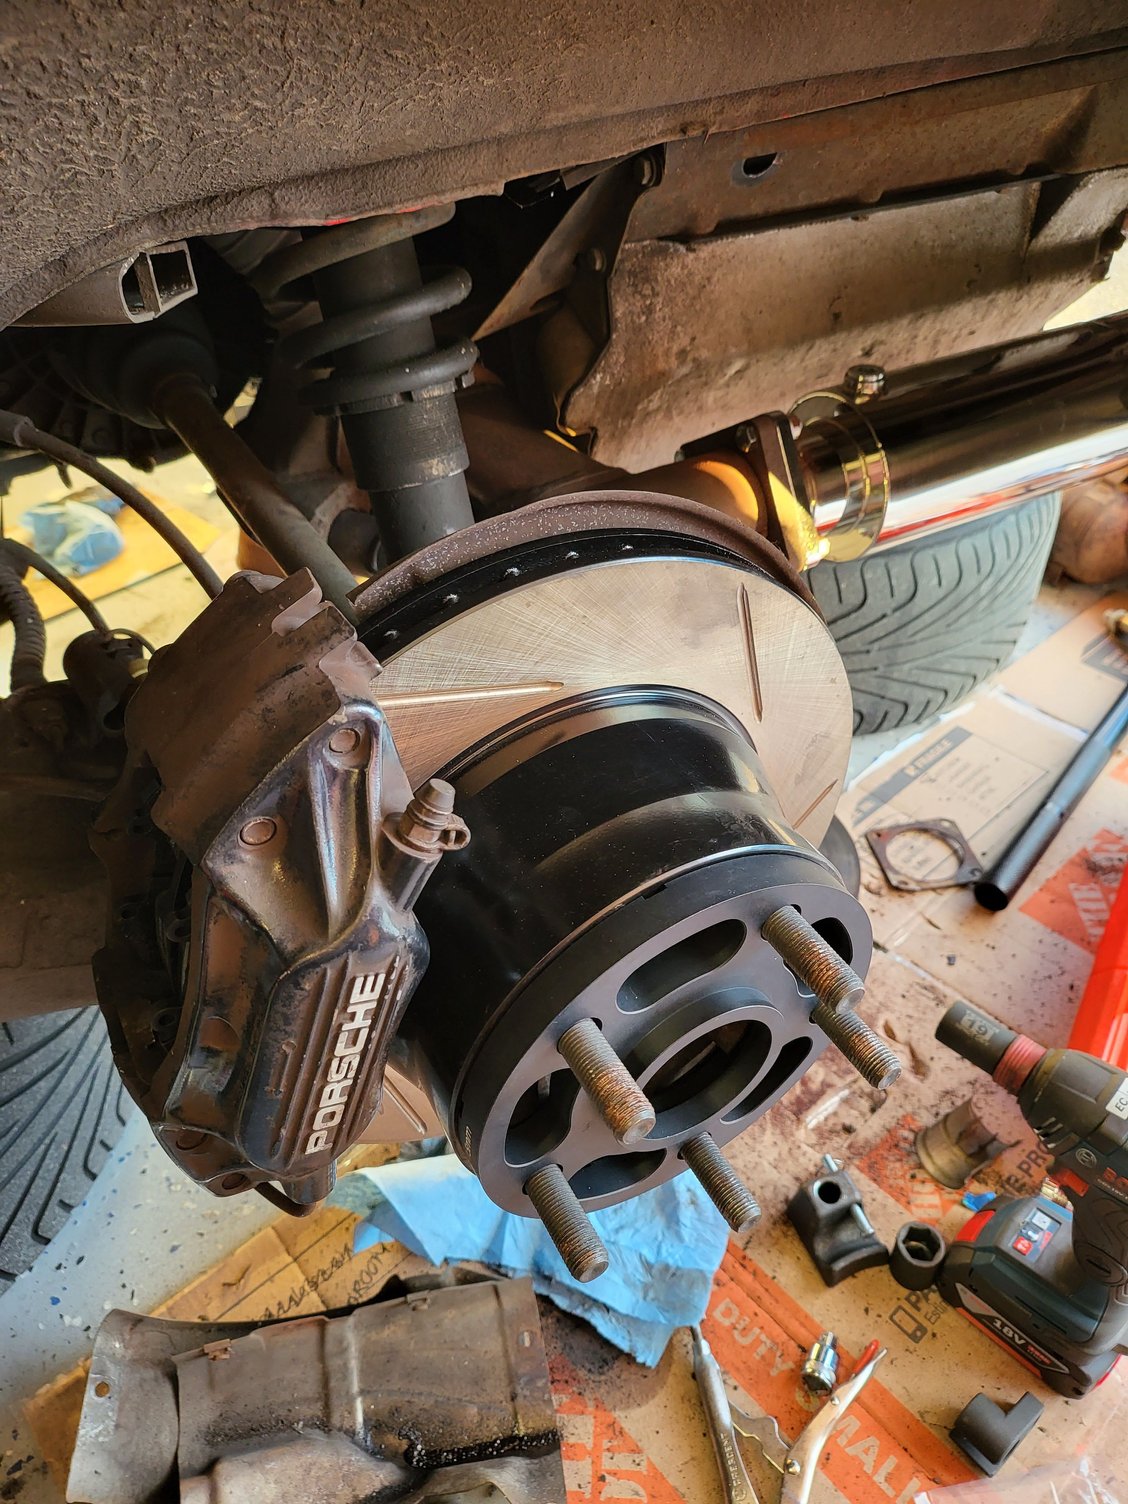
Not much progress happening recently as most of my time has been consumed with ski trips, however I did get a spare hour this afternoon to get out into the garage. I want to change out my wheel studs in favor of longer ones to accommodate spacers. It had taken me a little while to figure out a good system for pressing out the front wheel studs with the hubs in-situ, but thanks to some advise in another thread its now pretty fast. Today I tackled the rear...
I had read that longer wheel studs in the rear can be a challenge since the e-brake is in the way, preventing 66mm (what I'm using) studs from being fitted. I figured I'd see for my self, but after pressing out the first original stud I confirmed this to be the case. I found the easy solution to be the following:
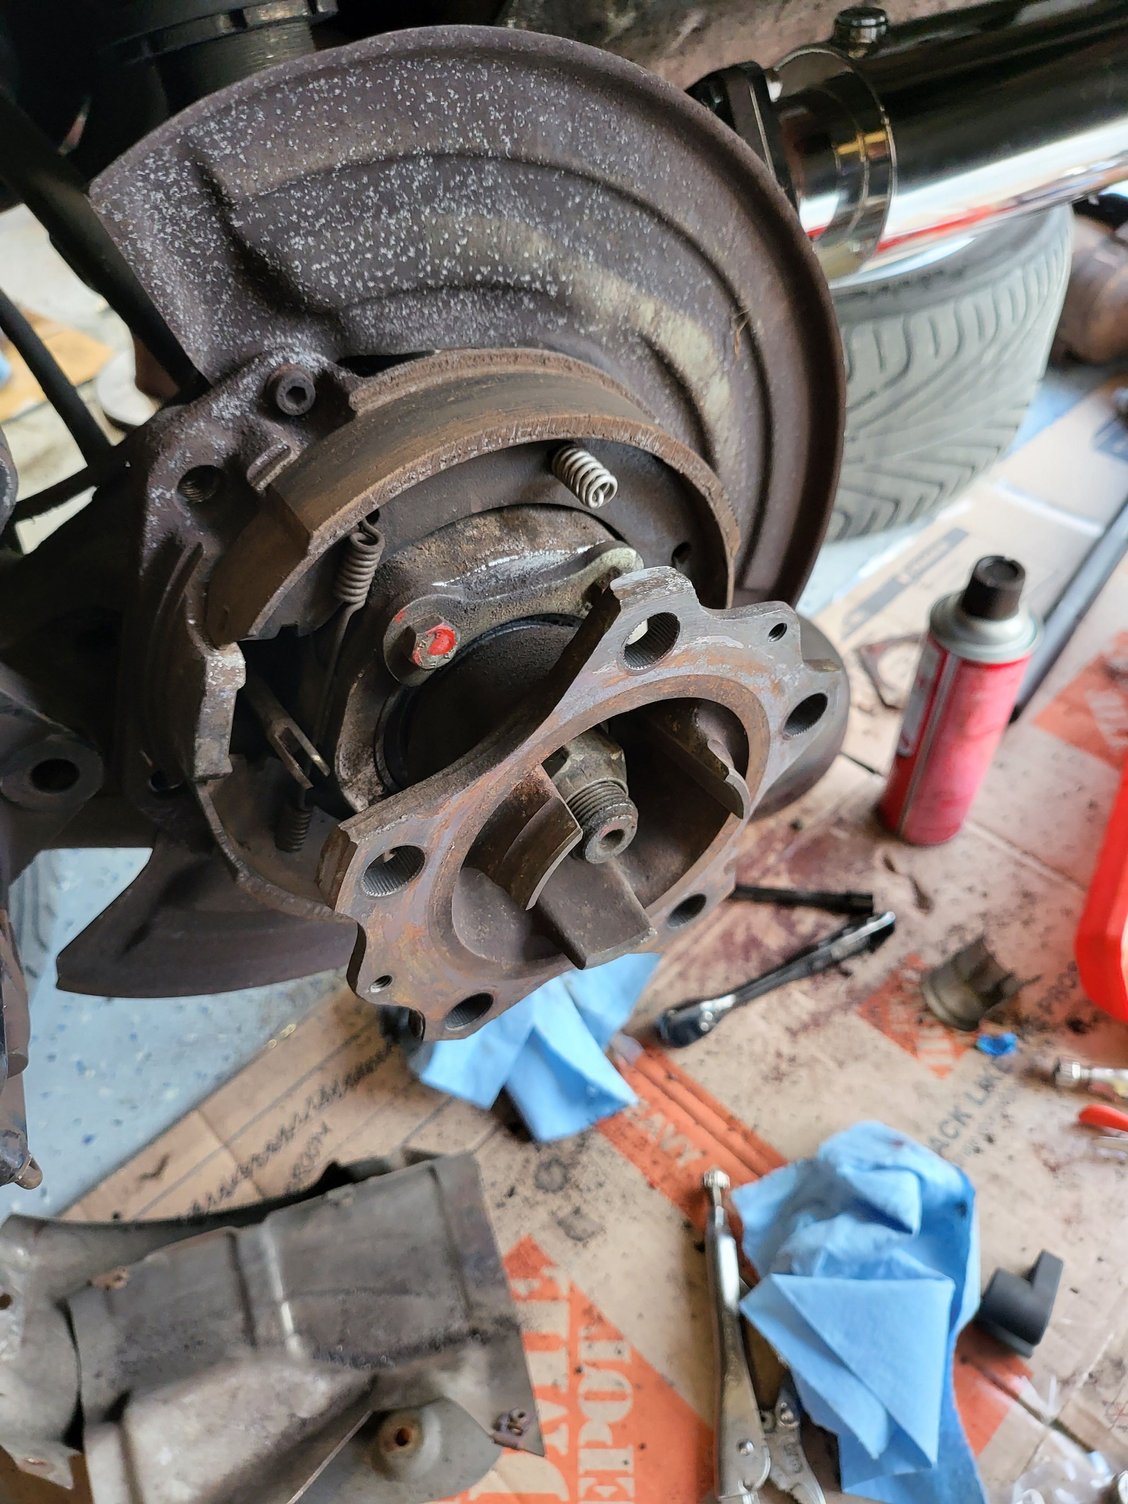
First, hang the caliper out of the way, and pull the disk off (obviously). By the way, I have no oil drips at all from this car, but how does this oil line look? Its not as obvious when I'm looking at it in the garage, but in this picture there is quite obvious oil discoloration on the "patina" in the wheel well......Something to address or leave until something more dramatic happens? Anyways...
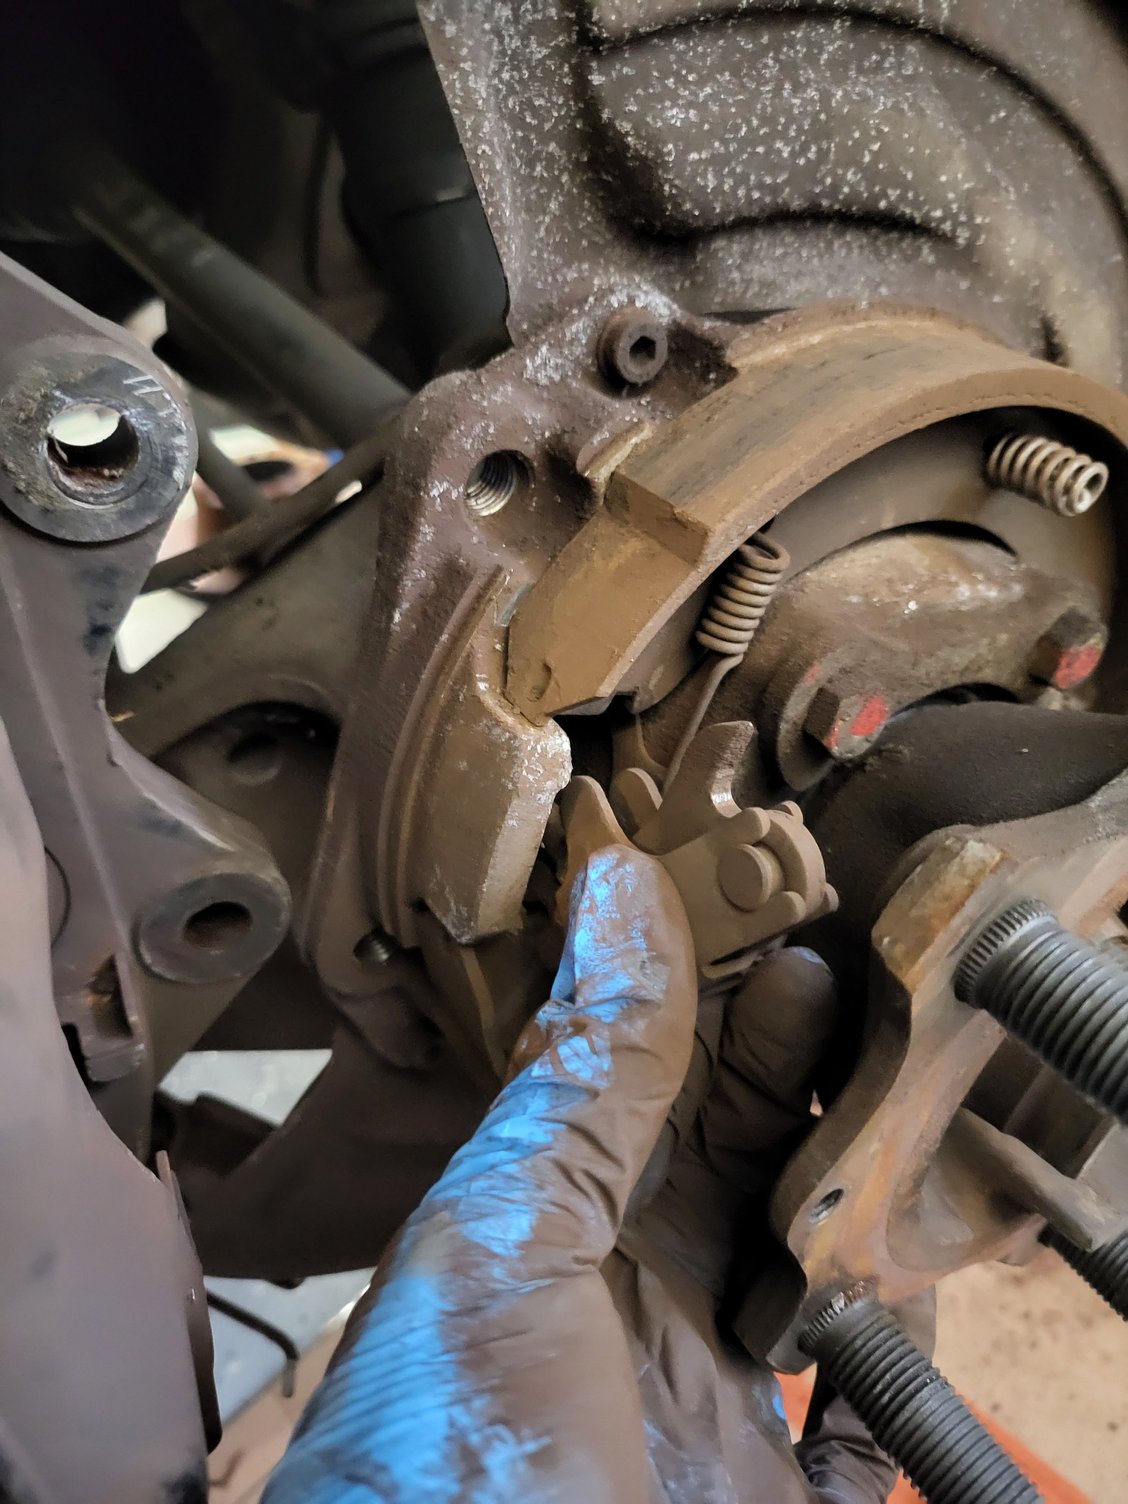
Use a large screwdriver to pry the brake shoes apart far enough to allow you to pull out the e-brake lever mechanism. Once one side is released it will be easy to see how it comes apart (or it will fall apart and you can chase the little rod all over the floor).
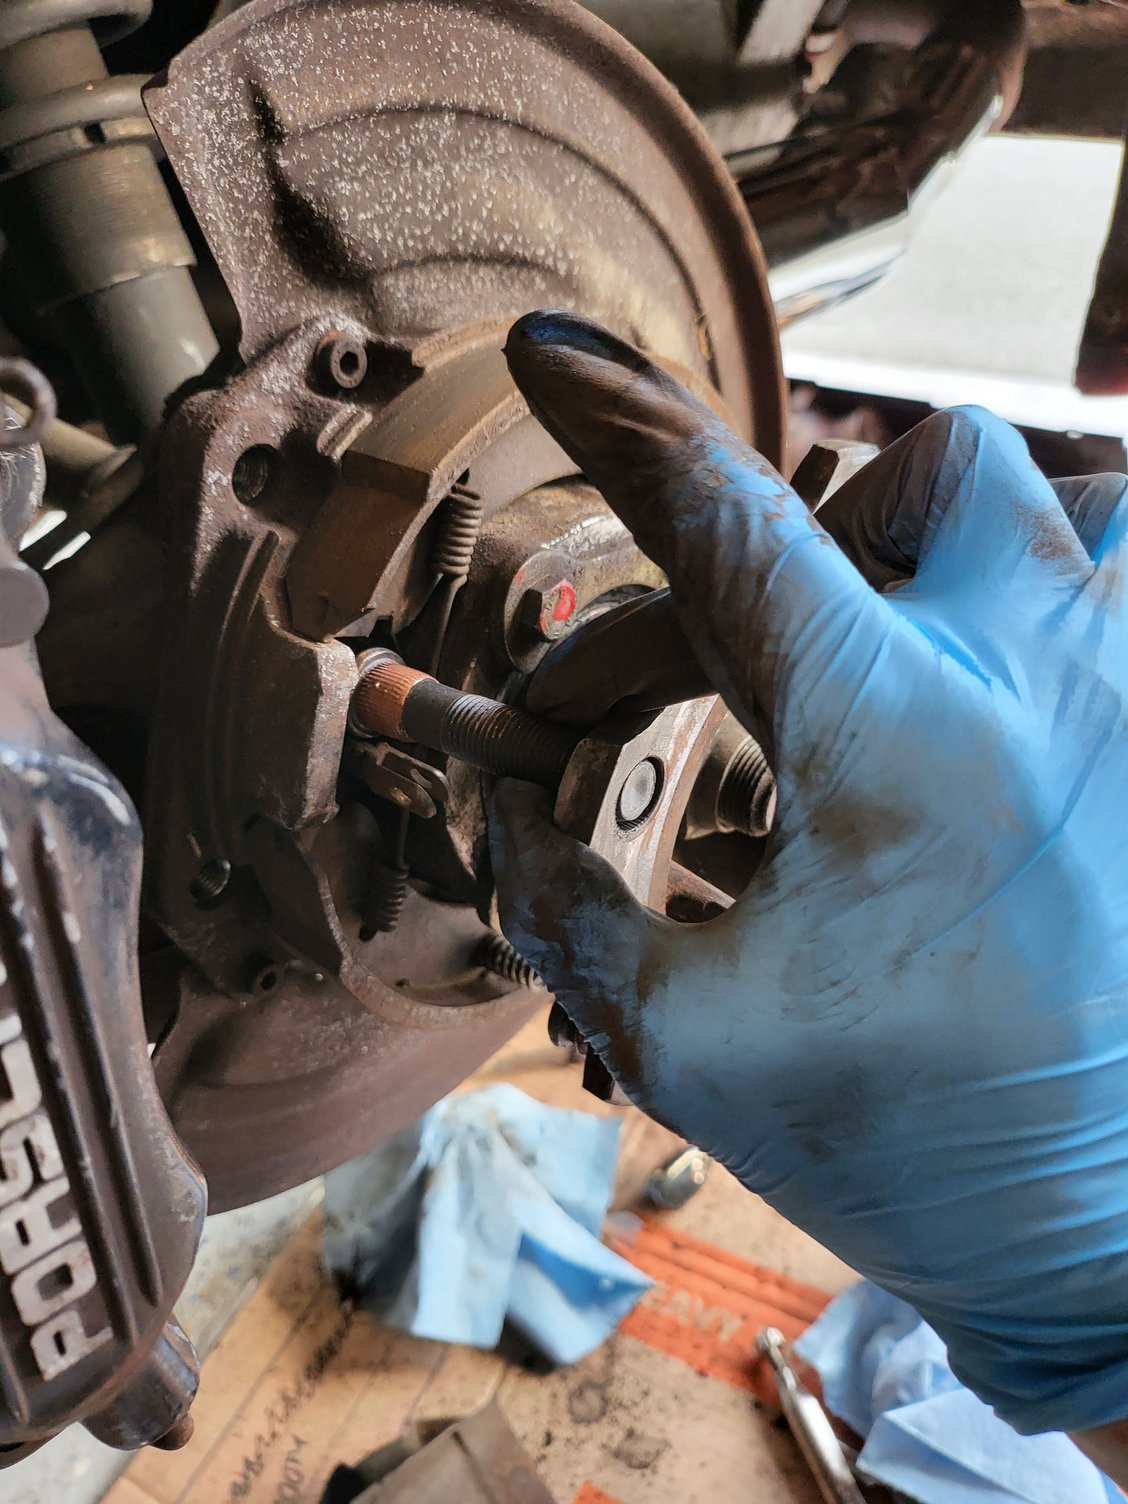
Removing this piece provides enough clearance in this one area to maneuver a stud in place.
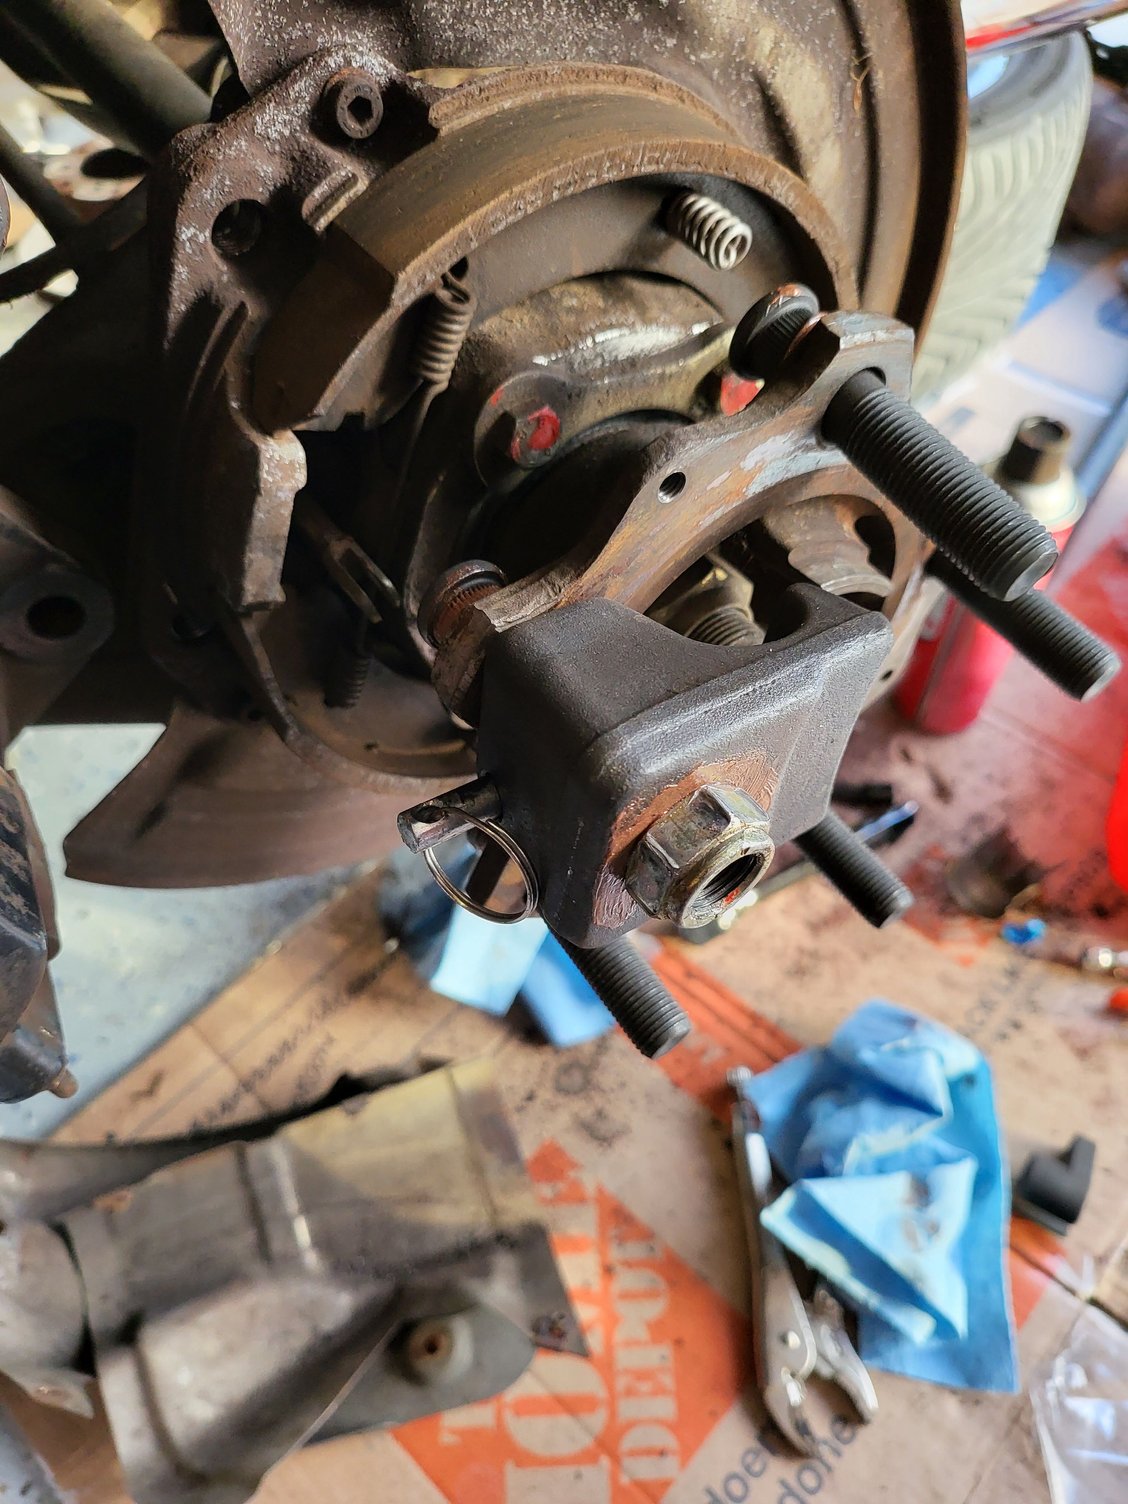
Rotate the hub so that you can get all the studs in and then find a suitable spacer and nut to pull them through. I use this end of a spring compressor.
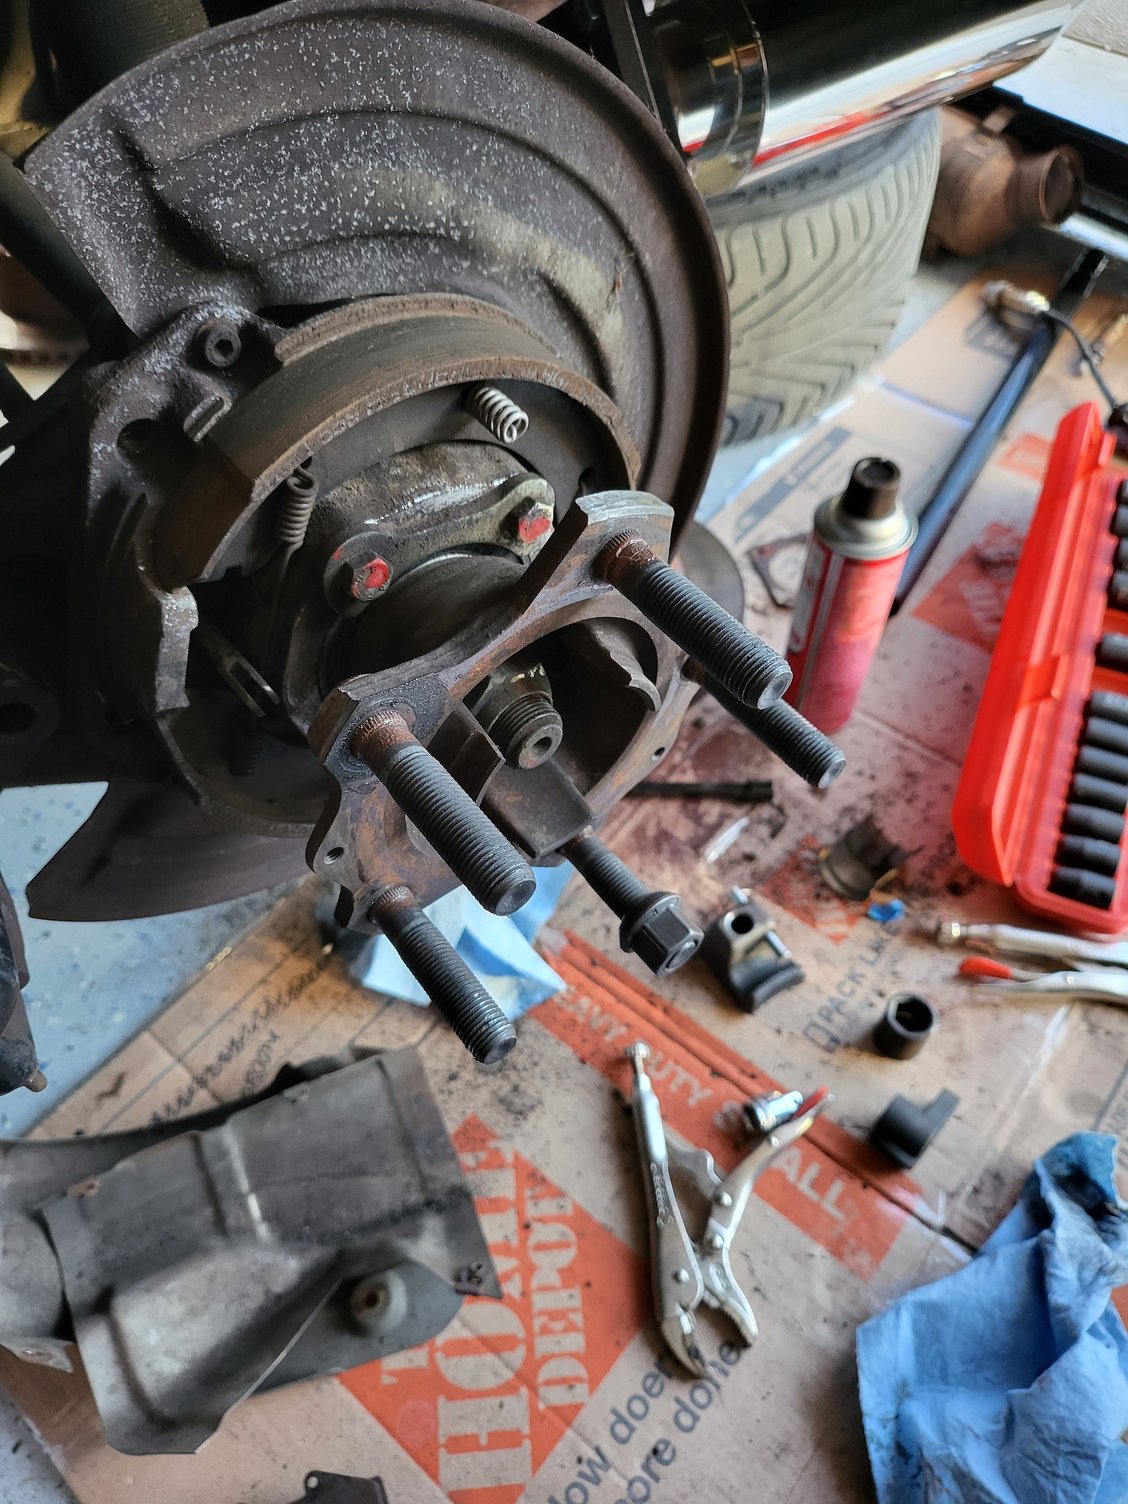
Spend 5 minutes with a rattle gun to pull the studs through tight.
Fit new brake rotors, pads and spacers, and its back together. Calipers are in need of a repaint but its going to have to wait for now....I need to cut down on the number of simultaneous projects.

 01-19-2022, 01:19 PM