

zerMATT951's re-assembly thread

 08-17-2011, 01:10 PM
#47
Your parts look great. Good work.
Jason
Jason
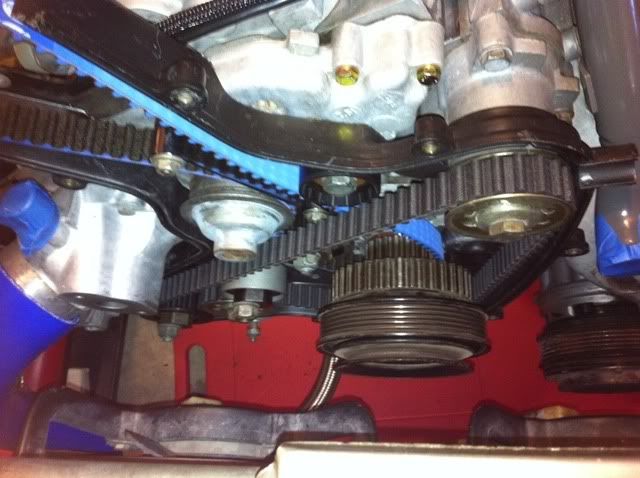
Did a little more work last weekend, but not much. Installed the new LR fuel line fittings in the fender well, cleaned up the belt covers, and installed some timing/balance gears & rollers until I picked up the smooth steel roller and felt it's a little too loose for my taste, so I'm buying a new one. Funny thing is that ALL of the rollers were supposed to be replaced less than 5k miles ago when I sent it to the shop for a refresh... I guess that got overlooked just like the front cam seal.
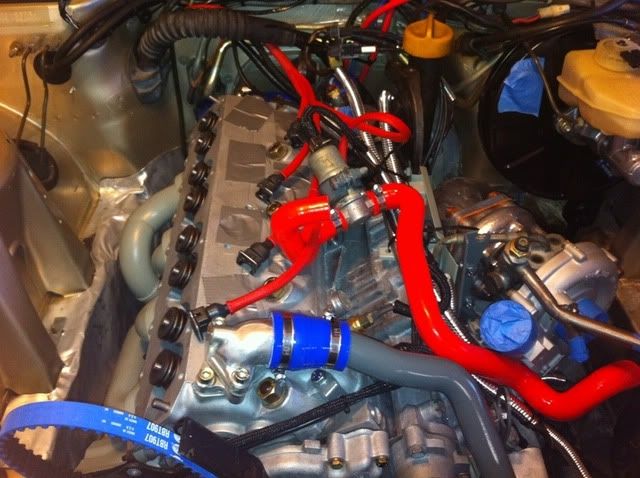
I also picked up my powder coated parts... they look nice! I'm going to sand off the raised letters on the cam tower this weekend:

I also picked up my powder coated parts... they look nice! I'm going to sand off the raised letters on the cam tower this weekend:
08-17-2011, 02:33 PM
#48
Rennlist Member
Your PC'd stuff does look great! I hope your experience sanding the letters smooth goes better than mine has. On mine, the original casting was nothing resembling level and I had to take off a lot of material to get it close... It still doesn't look the way I want it to, but it's a lot better. Next time I have it off, I'll probably take it to a machine shop and have them shave the letters (like they would a head) and then have it PC'd. I hope your casting is better.
Anyway, looks great!
Anyway, looks great!
08-17-2011, 09:34 PM
#49
Addict
Lifetime Rennlist
Member
Lifetime Rennlist
Member
Thread Starter
I've also thought about removing the coating with a small die grinder or dremel with a soft abrasive wheel. I wonder which process will be more tedious?
I asked the powder coating guys about doing the machine work first, they said it would be cleaner to have it done after... so I got it PC'd, them took it to a machine shop friend and he tells me that the machining process might chip the PC. Geez!!
I asked the powder coating guys about doing the machine work first, they said it would be cleaner to have it done after... so I got it PC'd, them took it to a machine shop friend and he tells me that the machining process might chip the PC. Geez!!
08-17-2011, 09:40 PM
#50
Rennlist Member
I started with 60 grit sand paper on a block and worked it finer and finer. Then used Mothers to polish. Took an hour or two but was really happy with the results.
08-18-2011, 12:12 AM
#51
Rennlist Member
On my Alfa, I used a bastard file, and then 80 grit, and then worked finer and finer until about 600. I wasn't going for a polished look, more of a brushed sort of look... 600 was where I stopped cause I thought it looked good. On the 951, so far, I've used the file.. need to pick up some more sandpaper.
08-18-2011, 10:02 AM
#52
Addict
Lifetime Rennlist
Member
Lifetime Rennlist
Member
Thread Starter
Once I remove the paint/powder, I plan to mask off most of the surrounding paint then shoot some clear over the area where I removed the paint to seal it. I'm thinking it will make for easier maintenance & appearance in the long-run. Has anyone done that before?
08-18-2011, 11:08 AM
#53
Three Wheelin'
Join Date: Feb 2007
Location: Indianapolis,IN
Posts: 1,408
Likes: 0
Received 0 Likes
on
0 Posts
If it was mine, I'd just be prepared to polish the letters quickly once a year or so. Masking the edges for clear wouldn't be all that pretty, and the clear wouldn't want to stay on bare aluminum all that well. JMO
08-22-2011, 12:15 PM
#55
Addict
Lifetime Rennlist
Member
Lifetime Rennlist
Member
Thread Starter
Only got a couple of garage hours in this weekend, so I buttoned a few things up with the PC'd brackets. I had to chase threads in all of the threaded holes because of the PC overspray... and they were covered up!
08-22-2011, 01:58 PM
#56
Rennlist Member
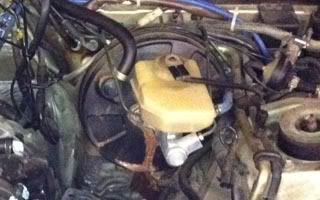
Lookin' good, Matt. Just out of curiosity, can you remove/replace the brake booster heat shield with the turbo in place? I was just wondering that when I had my engine out, and I notice yours is removed but your turbo is there...
08-22-2011, 03:46 PM
#57
Addict
Lifetime Rennlist
Member
Lifetime Rennlist
Member
Thread Starter
Once I removed it, I could see how rusty the brake booster unit was, so I decided to paint it. I left everything in place, masked it all off, and sprayed it with eggshell black paint... the thing looks new again and it only took like 30 minutes!
 After:
 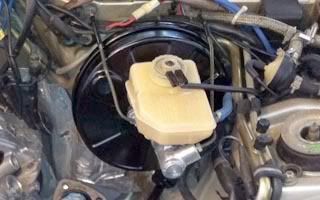 08-22-2011, 04:53 PM
#59
Rennlist Member
Very Nice. Aren't rattle cans awesome! Between a few rattle cans, some scotch-brite and a little elbow-grease, all sorts of 25 year old stuff can look brand-new!
08-27-2011, 02:09 PM
#60
Addict
Lifetime Rennlist
Member
Lifetime Rennlist
Member
Thread Starter
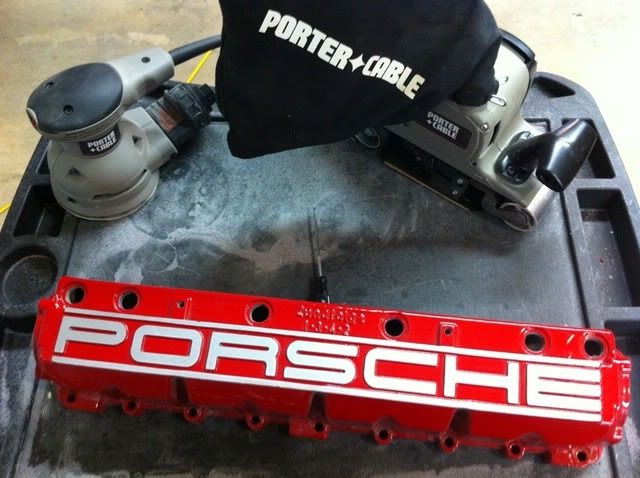
This took about 30 minutes with the help of a couple of old Porter Cable friends. Started with 50, 80, then 120 on the belt sander, then knocked it down a bit with 220 on the random orbit. I think it came out great, and I've only got one accidental tiny scuff on the far left where nobody but me will ever know it's even there.
Last edited by zerMATT951; 08-29-2011 at 12:03 AM.