
Track car pics


 06-08-2004, 11:08 PM
#197
Race Director
Originally posted by Ski
Either Jim, he and I both, will have the car at one of the fall DE's at TWS.
Either Jim, he and I both, will have the car at one of the fall DE's at TWS.
06-09-2004, 12:18 AM
#198
Thefu
Rennlist Member
Rennlist Member

Join Date: Sep 2003
Location: 28*09'58.16" N, 82*35'17.07" W
Posts: 19,934
Received 658 Likes
on
330 Posts
Originally posted by Ski
It's the race splitter from GT Racing,,I think.
It's the race splitter from GT Racing,,I think.
06-09-2004, 11:13 AM
#199
Addict
Rennlist Member
Rennlist Member
Thread Starter
You are correct. It's the race splitter from AIR, $175 regular but rennlisters get a break. I just tried their website and its down.
 06-09-2004, 07:18 PM
#202
Addict
Rennlist Member
Rennlist Member
Thread Starter
Thanks Sam and David. I can't stress enough though how much credit goes to Jim(jwl) - very impressive on the interior and suspension - pretty darn good wrench too!
I've had a couple of emails so let me address some technical stuff:
We did change rings in the car just because it was down that far. We changed the orientation of the rings too, we offset each ring by about 18� from their original position.
The rod bearings were good, probably would have gone for another 50k or so but not for a track car. We changed all rod bearings, rear main and installed a lightened factory flywheel - by 4.5#
We installed an A/C delete bracket. This was a Porsche part number from Europe. The stock bolts(if you get one of these) will NOT keep it in place. You can GET BY with the top two being put in position of the bottom two but the top ones, you will have to get new ones or new ones for the bottom and then cut the top ones. We cut two and got two new ones. You then use the old tensioner from the A/C to put on the bottom of the alternator, install your new shorter belt, tension and tighten - done.
We DID NOT change the main bearings or the balance shaft bearings. We used a WFHG with an O-ringed head. The factory head studs were at the stock height and we reused them - reason was - if it messes up we will jerk the engine out, take it to Mr Duffin in San Antonio(did OZ951's engine) and we will make a 2.7 or 2.8.
One thing we did encounter that scared the living $hi! out of me was that we popped a thread on one of the head bolts tightening it down. It was on the second torque and it went off like a rifle! I thought I broke a stud, man I tell you my heart sank. Pulled it off and it was a thread but the nut was not of the same thickness as the others. Now all the head nuts were in a bag as they were pulled off. Where was it done? Don't know who did it but by the looks of the head gasket, it had not been off but who really knows. Anyway, thanks to some great people in Corpus AND on a Sunday, we got a new nut, and finished the procedure in sequence.
We did leave the belt covers off. WE just felt that they were not needed on the track car. Getting rid of the covers, the front water pipe and moving the alternator down really opened up the front of the engine area.
Mistakes - check all the tranny hardware ahead of time if your installing a tranny that is shipped without the cooler because you have an extra cooler but NOT the little C clips for the side and back. Do not install the tranny with the oil cooler attached because you still have to install the axle on the passenger side")
Get new grommets for the fuel lines ahead of time.
Get good header wrap for the crossover and not some free $hi! that someone gave you. It will almost catch on fire after a few test miles
We had three people working on this this past weekend. We had our share of "wheres that 13mm ratchet wrench - where the 3/8 drive impact - have we got air - did you - yeah I did, then where is it....but all in all it was GREAT fun and was pretty much incident free except for above.
I've had a couple of emails so let me address some technical stuff:
We did change rings in the car just because it was down that far. We changed the orientation of the rings too, we offset each ring by about 18� from their original position.
The rod bearings were good, probably would have gone for another 50k or so but not for a track car. We changed all rod bearings, rear main and installed a lightened factory flywheel - by 4.5#
We installed an A/C delete bracket. This was a Porsche part number from Europe. The stock bolts(if you get one of these) will NOT keep it in place. You can GET BY with the top two being put in position of the bottom two but the top ones, you will have to get new ones or new ones for the bottom and then cut the top ones. We cut two and got two new ones. You then use the old tensioner from the A/C to put on the bottom of the alternator, install your new shorter belt, tension and tighten - done.
We DID NOT change the main bearings or the balance shaft bearings. We used a WFHG with an O-ringed head. The factory head studs were at the stock height and we reused them - reason was - if it messes up we will jerk the engine out, take it to Mr Duffin in San Antonio(did OZ951's engine) and we will make a 2.7 or 2.8.
One thing we did encounter that scared the living $hi! out of me was that we popped a thread on one of the head bolts tightening it down. It was on the second torque and it went off like a rifle! I thought I broke a stud, man I tell you my heart sank. Pulled it off and it was a thread but the nut was not of the same thickness as the others. Now all the head nuts were in a bag as they were pulled off. Where was it done? Don't know who did it but by the looks of the head gasket, it had not been off but who really knows. Anyway, thanks to some great people in Corpus AND on a Sunday, we got a new nut, and finished the procedure in sequence.
We did leave the belt covers off. WE just felt that they were not needed on the track car. Getting rid of the covers, the front water pipe and moving the alternator down really opened up the front of the engine area.
Mistakes - check all the tranny hardware ahead of time if your installing a tranny that is shipped without the cooler because you have an extra cooler but NOT the little C clips for the side and back. Do not install the tranny with the oil cooler attached because you still have to install the axle on the passenger side
Get new grommets for the fuel lines ahead of time.
Get good header wrap for the crossover and not some free $hi! that someone gave you. It will almost catch on fire after a few test miles
We had three people working on this this past weekend. We had our share of "wheres that 13mm ratchet wrench - where the 3/8 drive impact - have we got air - did you - yeah I did, then where is it....but all in all it was GREAT fun and was pretty much incident free except for above.
06-09-2004, 09:19 PM
#204
Addict
Rennlist Member
Rennlist Member
Thread Starter
It is strictly a DE car. Go have fun, be safe and drive the hell out of it. NO class restrictions, no rules, no getting Teched...just weekend fun.
06-18-2004, 04:08 PM
#205
Addict
Rennlist Member
Rennlist Member
Thread Starter
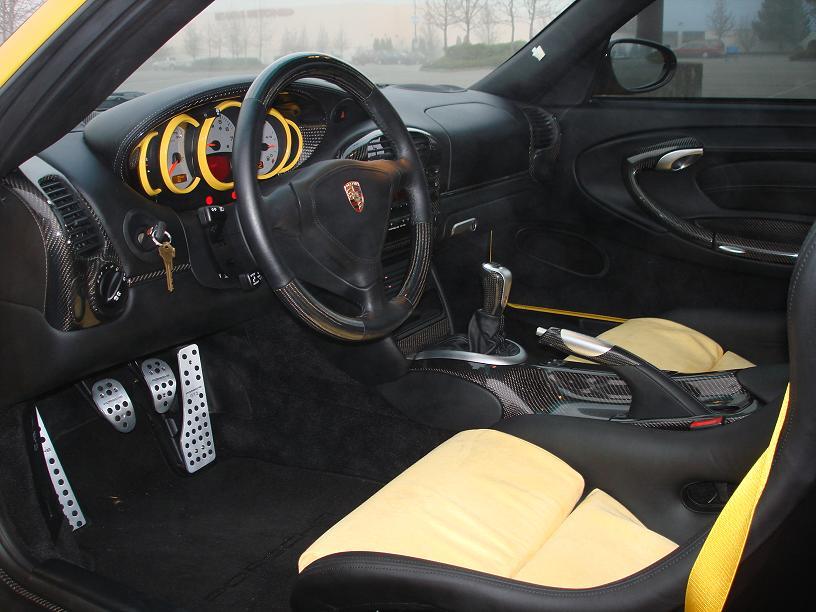
Bit of an update: The car is very nimble and quick on the drives, even with the small amount of boost. The combination of the short shift kit on the tranny, coupled to the Kokeln shifter, shift throws feel almost instant. The RSR clutch package takes a bit of getting used to. Jim got the LR Stage III MAF installed last night, I downloaded my fuel map to the Mafterburner piggyback so we hope it fires right back up. The !@#&*$# front seal or o-ring is leaking. So we've gotten all new stuff: seal, oil pump drive gear sleeve, o-ring and washer. I am so glad we didn't put the belt covers back on. We finally found a drive gear for the tranny so we would have a speedo and we've started on the gauges: VDO boost/vac, extra oil and water temp. We also have a SPA dual electronic boost and temp gauge. We're going to tap the intercooler and see how the charge air temps are. The area over the glove compartment and the area above the console are going to get either black plastic covering or thin aluminum, which will house the WBO2, couple of toggle switches. We're going to put a support pc under the dash in aluminum, that will house the SPA gauge, its calibration switch, manual boost controller and fire pull handle.

should end something similar to this

should end something similar to this
06-18-2004, 05:15 PM
#206
Race Director
Very very nice. You may want to consider some dimmer rings for your gauges to angle them towards you.
I'm working on finalizing my interior as well right now. Got the dash mounting brackets welded on and mostly bent to the right height. Got to tack a couple of washers to a couple of them because I can't get the high enough (shouldn't have trusted old marks). This weekend I'm gonig to finalize all the dash brackets. Trying to work out some net brackets that won't catch on my suit or get in the way of the opening. So close.
Keep up the updates. Very nice.
I may have a few photos of mine soon, but the bulk will be after everythings painted. I do have some work to do on my cracked dash. I've had an idea for some time to repair it and cover it with black flocking to cut glare. Should have photos of that soon if it works out.
06-18-2004, 10:08 PM
#207
Addict
Rennlist Member
Rennlist Member
Thread Starter
Whoo hooo! Mafterburner is in, car started right up! Had to increase fuel pressure to smooth it out, hook up the WBO2 tomorrow afternoon or Sunday morning before the US Grand Prix. Car throttles up very crisp, no stumble and then comes back down to idle smooth, idle is 900+.
George, post some pictures of your progress. Ordered some dimmer rings, thanks for the suggestion.
Just for the technical record, we grabbed power for the MAF off the diagnostic port, 12.6v with car running and we grabbed power for the MAfterburner piggyback off the DME harness at wire 18. The actual piggyback computer, we're putting it on the glove box door so that when you open it (yes it still has the arms) the hook up for the laptop (change settings or datalog) is right there.
06-19-2004, 12:38 AM
#208
Race Director
Originally posted by Ski
George, post some pictures of your progress. Ordered some dimmer rings, thanks for the suggestion.
George, post some pictures of your progress. Ordered some dimmer rings, thanks for the suggestion.
I'm really close on the window net. I keep coming back to wanting to mount a heim joint at the main hoop for the lower rear net mounting with a nylon strap for the lower front net mounting. That will allow the net to swing out of the way of the cockpit opening, but keep it at hand.
My neighbor should finish the final welds on the critical welds this weekend (it was a killer last weekend weather-wise) and once that's done I just have to clean the interior thoroughly, pull or bag the wiring harness and I'm ready to paint.
I can't wait.
I may just throw a known working engine in it (I don't have a clue about the condition of the one in it right now) just to get it on the track sooner.
06-21-2004, 11:07 PM
#209
Race Director
OK, the cage is complete with the exception of mounting the net. But I figured out exactly how I want to do that today. Got to get some minor parts and they are not available at the local hardward store. I'll probably get that done tomorrow evening (morning interview and afternoons are too bloody hot and humid now) or Weds. morning.
I'm out of town this weekend, but I think the following weekend I'll have the local guys over and we'll pull the harness and I'll start prepping the interior for paint.
Here's a few pix with the dash installed. The bolts are just for mock-up. The final bolts will be black button heads. I'll be working on repairing and flocking the dash in the coming week. It's about to get really exciting.


I removed the electric hatch release, but I needed some other way of opening the hatch (I got the car with no keys) so I installed this manual set-up. I have to take it out to paint, but when it's reinstalled, the handle portion will go through a yet to be drilled hole in the bracket on the right side of the cage.

For more photos, I've thrown up a small page here:
http://home.earthlink.net/~geo31/Geo's_944_Cage.html
More as it happens. Got to make the instrument panels and HVAC mounting pod.
I'm out of town this weekend, but I think the following weekend I'll have the local guys over and we'll pull the harness and I'll start prepping the interior for paint.
Here's a few pix with the dash installed. The bolts are just for mock-up. The final bolts will be black button heads. I'll be working on repairing and flocking the dash in the coming week. It's about to get really exciting.
I removed the electric hatch release, but I needed some other way of opening the hatch (I got the car with no keys) so I installed this manual set-up. I have to take it out to paint, but when it's reinstalled, the handle portion will go through a yet to be drilled hole in the bracket on the right side of the cage.
For more photos, I've thrown up a small page here:
http://home.earthlink.net/~geo31/Geo's_944_Cage.html
More as it happens. Got to make the instrument panels and HVAC mounting pod.
06-22-2004, 11:51 AM
#210
Thefu
Rennlist Member
Rennlist Member
Join Date: Sep 2003
Location: 28*09'58.16" N, 82*35'17.07" W
Posts: 19,934
Received 658 Likes
on
330 Posts
Geo, that is too funny. I came up with just about the exact same way to open the hatch. I used a bracket that came off the car, and made a strap from nylon webbing as the pull handle, other that that, just the same as yours.