When you click on links to various merchants on this site and make a purchase, this can result in this site earning a commission. Affiliate programs and affiliations include, but are not limited to, the eBay Partner Network.
Jheriott ...wow you did a LOT of work! I love that color...my 3rd favourite color!. Was it your 1st time doing TB? if so whose tutorial did you use. love the Constantine Super Clamp
Did some spring cleaning under the car. Scraped and cleaned a bunch of grime off the oil pan and surrounding parts. Broke the oil level sensor wire in the process (or maybe it was already broke and I just found it). I called Roger at 928srus and got a new connector and rubber boot. Although it is a bit strange that with the broken wire it doesn't trigger any warning lights to come on. I guess the sensor only "senses" the oil level not if the wire is broken. I guess it's a good thing I know how to use a dipstick and not rely on the sensor. A couple of healthy squirts of degreasing foam and some time on my back with the scraper and wire brush so it's not sparkling clean by any means but at least you can see the metal again in most places. Also cleaned up the transaxle a bit in preparation for a 75w90 gear oil change.
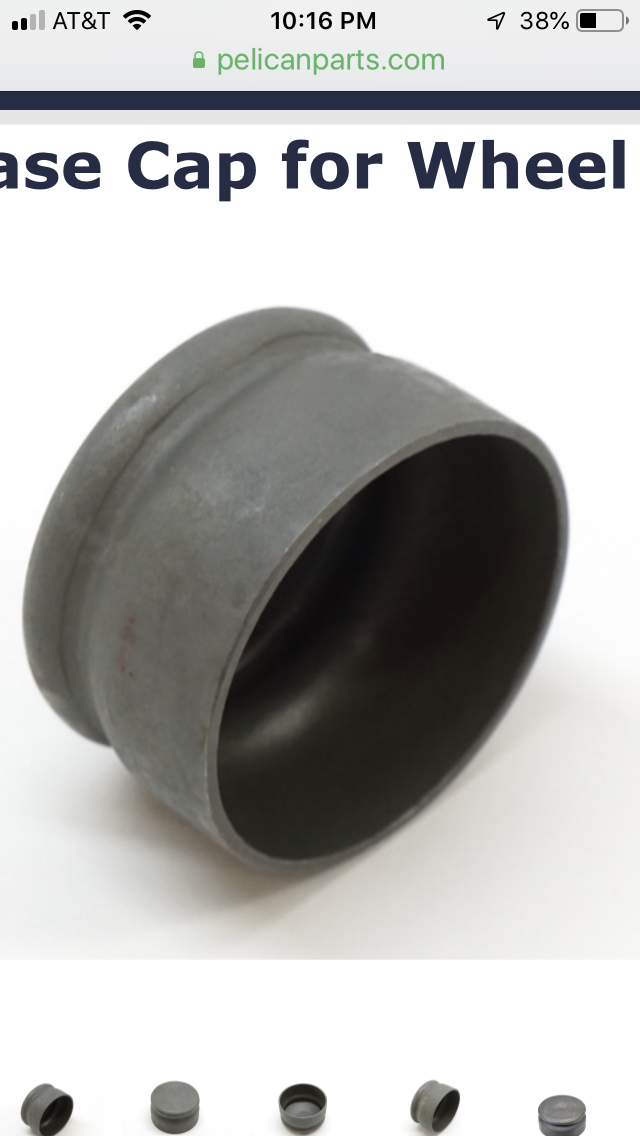
You can take that bearing cap off and dremel cut the green line -reinstall and put your wheel center cap on
Thanks for the tip! Does that really make a difference? I would have thought the flared "hip" of the grease cap would still end up sitting in the same spot. I thought I'd have to hammer in the dome a bit if anything!
Jheriott ...wow you did a LOT of work! I love that color...my 3rd favourite color!. Was it your 1st time doing TB? if so whose tutorial did you use. love the Constantine Super Clamp
Again Awesome and great pic
Thanks very much!
Yes, this is the first time I have done the TB since the PO. Although I wasn't too worried as I bought this car from Alex "Gandi" Gandeski, who was winning shows with this car in the past but now has a mint silver ,78 OB. He is not on Rennlist, but I believe he attends Sharks in the Mountains every year. Because of his attention to detail, I had 5 years of very easy ownership. The only major thing I had so far was the steering rack.
But Fuel lines were something I absolutely wanted done for piece of mind. Also, I had developed a small leak from the transmission that I decided to bite the bullet on... I figured, since the car was out of commission, I may as well check some things off the list.
But basically I did buy the car again this year, lol!
Thanks for the tip! Does that really make a difference? I would have thought the flared "hip" of the grease cap would still end up sitting in the same spot. I thought I'd have to hammer in the dome a bit if anything!
Jase.
. It works. I did it myself with success. That was just a picture I found on the internet. It might not even be flared. I found out how to do it on this 928 forum. I didn�t have to deform the tops of mine at all
Thanks for the tip! Does that really make a difference? I would have thought the flared "hip" of the grease cap would still end up sitting in the same spot. I thought I'd have to hammer in the dome a bit if anything!
Jase.
It certainly does - I did exactly this on Saturday in order to fit some panamera wheels. The dust caps have a different profile to the ones pictured.
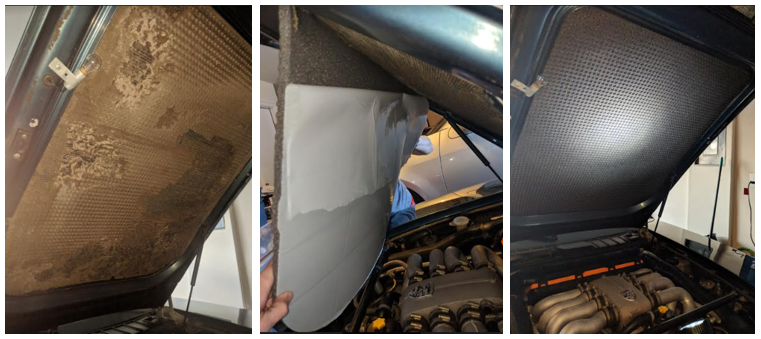
New hood liner and cowl cover. The cowl cover was a 2-minute fix. The hood liner took about an hour to scrape/vacuum off the old crusty bits and about 15 minutes to put the new one in. I used a shop vac and basically scraped/sucked it off at the same time. Saved me from having a huge mess. Putting the new pad on was a 2 person job. I left the plastic on the back and tucked it into place. Then I peeled the top (part closest to the latch) down about 8 inches, peeled back the plastic and cut the plastic off leaving the rest covered. I used a sturdy plastic cup like a rolling pin to squish it into place. The glue on the back is super sticky. Small fingers around the edges are helpful and my wife helped tuck in all the edges.
I finally got around to replacing the power steering lines in my S4.
I didn't realize how much crap is in the way though. Had to take out the fans, which of course were blocked by the AC return line.
Then I removed the rad, which of course had the line for the trans cooler seize on so I had to bend the hard line section and fight it to get the rad out.
I removed the line from the cooler fitting by heating it with a mapp gas torch, which got it to finally let go. the hose is fine, I hope...
Getting the cooler line that runs in front of the rad in was easy compared to that. Then of course the return line and pressure lines from the rack fought me every step of the way, even after removing the alternator.
Now I just have to torque everything, put it all back together and pray it doesn't leak. Because it was leaking heavily before...
Been a week of seals. Friday I replaced my rear hatch seal, the old one was literally falling apart, total garbage. New one is in, rear is more happy.
Today I replaced the passenger door seal. Which required taking off the main molex plug, the alarm wiring (put a new disconnect in there), and the door stay (simple). Once again the old seal was a *wreck* and I am glad I didn't cut the new seal, this is one I want to be perfect.
Next on the list is to get more door clips, then replace the clips in the top liner, rear liner, and take apart the driver's door to figure out the defroster wiring short. Always something to do in 928 land...

 03-31-2019, 09:22 AM