When you click on links to various merchants on this site and make a purchase, this can result in this site earning a commission. Affiliate programs and affiliations include, but are not limited to, the eBay Partner Network.
Turned on all the lights, windows work,... and started it for the first time since reinstalling the repaired and cleaned CE panel. Everything works...nice.
On my 88 S4, I wrapped up the power steering pump rebuild, alternator voltage regulator replacement, air flap removal, and air pump removal projects. The big motor fired right up after 3-months on jack stands. Everything seems to be functioning normally. The pump was not clean and dry after 10min of turning lock to lock. I'll do a secondary inspection this week.
The injectors were a bit louder than I remember. Fuel Injector noise
Also, I finally was able to make some adjustments to my voltage gauge. It was reading about 2volts too low when compared at the battery. I had the pod out to repair the speedo and swap the pod for a non cracked unit. There is a good write up on how to adjust the gauge on the list, but I thought I would post a little video as well.
Adjusting voltage gauge
And lastly, I was able to eliminate all remnants of the aftermarket alarm and return the wiring back to stock appearance. In all I found 9 wires spliced or cut. The aftermarket alarm was always flakey and was just one more source of trouble that needed to be eliminated. Very satisfying!
Projects left on the docket:
- reinstall bumper after repaint
- POD swap, ODO repair, Rear foglight switch, LED updates to gauges and *****.
- Double DIN backdate to single DIN with original Balupunkt Reno
removed both rear seats and center console, removed about 60% of the interior carpet. looking at grey vinyl for interior pieces and door cards, charcoal carpet.Drained about 3 gallons of bad gas from the tank.
Enjoyed the colorful vocabulary when I told her that she put the windshield washer pump on the wrong side of the mounting bracket. $12 more in tiny rubber parts.
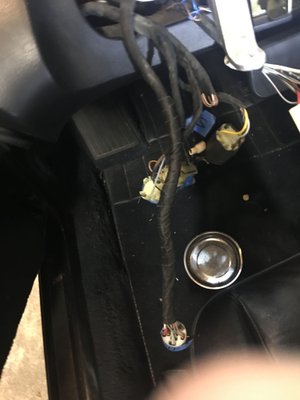
removed all rear fuel lines, filter and external pump. Removed fitting for in-tank fuel pump and the cavity was empty. Happily, it was also pretty clean, with no crud or debris.
I'm going to reproduce the lines and hoses with the help of my friends at napa.
Picked up a heavy duty steam cleaner I plan to use on the engine and other areas.
I'm rebuilding the bumper for this 79; it appears to have had two decent bumps. Inner bumper and absorbing struts in the rear are missing.
After some internal biaxial cloth patches are in place where the fractures are located, then I'll build a jig that will hold the bumper in place with support for sanding, glassing and refinishing.
James
Though the end result looks great, steam cleaning an engine is not the best idea. Steam molecules are smaller and faster moving than water molecules, so electrical connectors that are water-resistant aren't necessarily steam-resistant. The steam can penetrate the boots or get into circuits of the component and create corrosion short-circuits, etc and could cause you all sorts of electrical gremlins. Engine cleaning should really only be done using an aluminum safe degreaser and a rag, not a pressure washer or steam cleaner.
I've started on the first of many winter projects: repairing the damage from hitting a tree lying on the road. I could get a refurbished cover for $800 plus $$$ shipping, but I'm going to have my local body guys fix up a few irregularities, and then paint it. Curses upon the last guy who installed the cover: I don't think loctite was needed.
Placed an order with Rob Budd for a rear cargo piece of carpet that's long enough to cover end to end when the rear seats are down!
I carry five detailing bags, buckets and a vacuum and don't want to scratch the rear center console.
Andy--
My car has no window tint, so there are a couple smaller black bath towels that ride on top of the rear seat-backs as sun blockers. The rear center console has a similar towel fitted to it for the same reason. Offers protection from casual damage from stuff riding in the boot as a fringe benefit. I'd be tempted to have a cover made from carpet, but only if I replace all the original carpet around it on the tunnel. New color will be different from the almost thirty year old stuff in there now. The car is always covered or full sunshades when parked outside for any significant duration, but it's still lighter back there than under the front seats, for instance.
assembled and installed the rear end in our 86 restoration, Ever nut, washer and bolt has been cleaned and plated not to mention all aluminium pieces glass blasted and original painted pieces stripped back redone. Hopefully soon when we get some time we will get her on the hoist re install the engine and trans.
Regards
Sean


 12-12-2016, 12:20 AM