When you click on links to various merchants on this site and make a purchase, this can result in this site earning a commission. Affiliate programs and affiliations include, but are not limited to, the eBay Partner Network.
Changed out the front ball cup and rear shifter linkage.
That front ball cup is a PITA right of passage!
Lucked out on the rear shifter linkage set screw. Torched it to melt the Locktite and she backed right out. Rear linkage bushings were totally shot. No slop now.
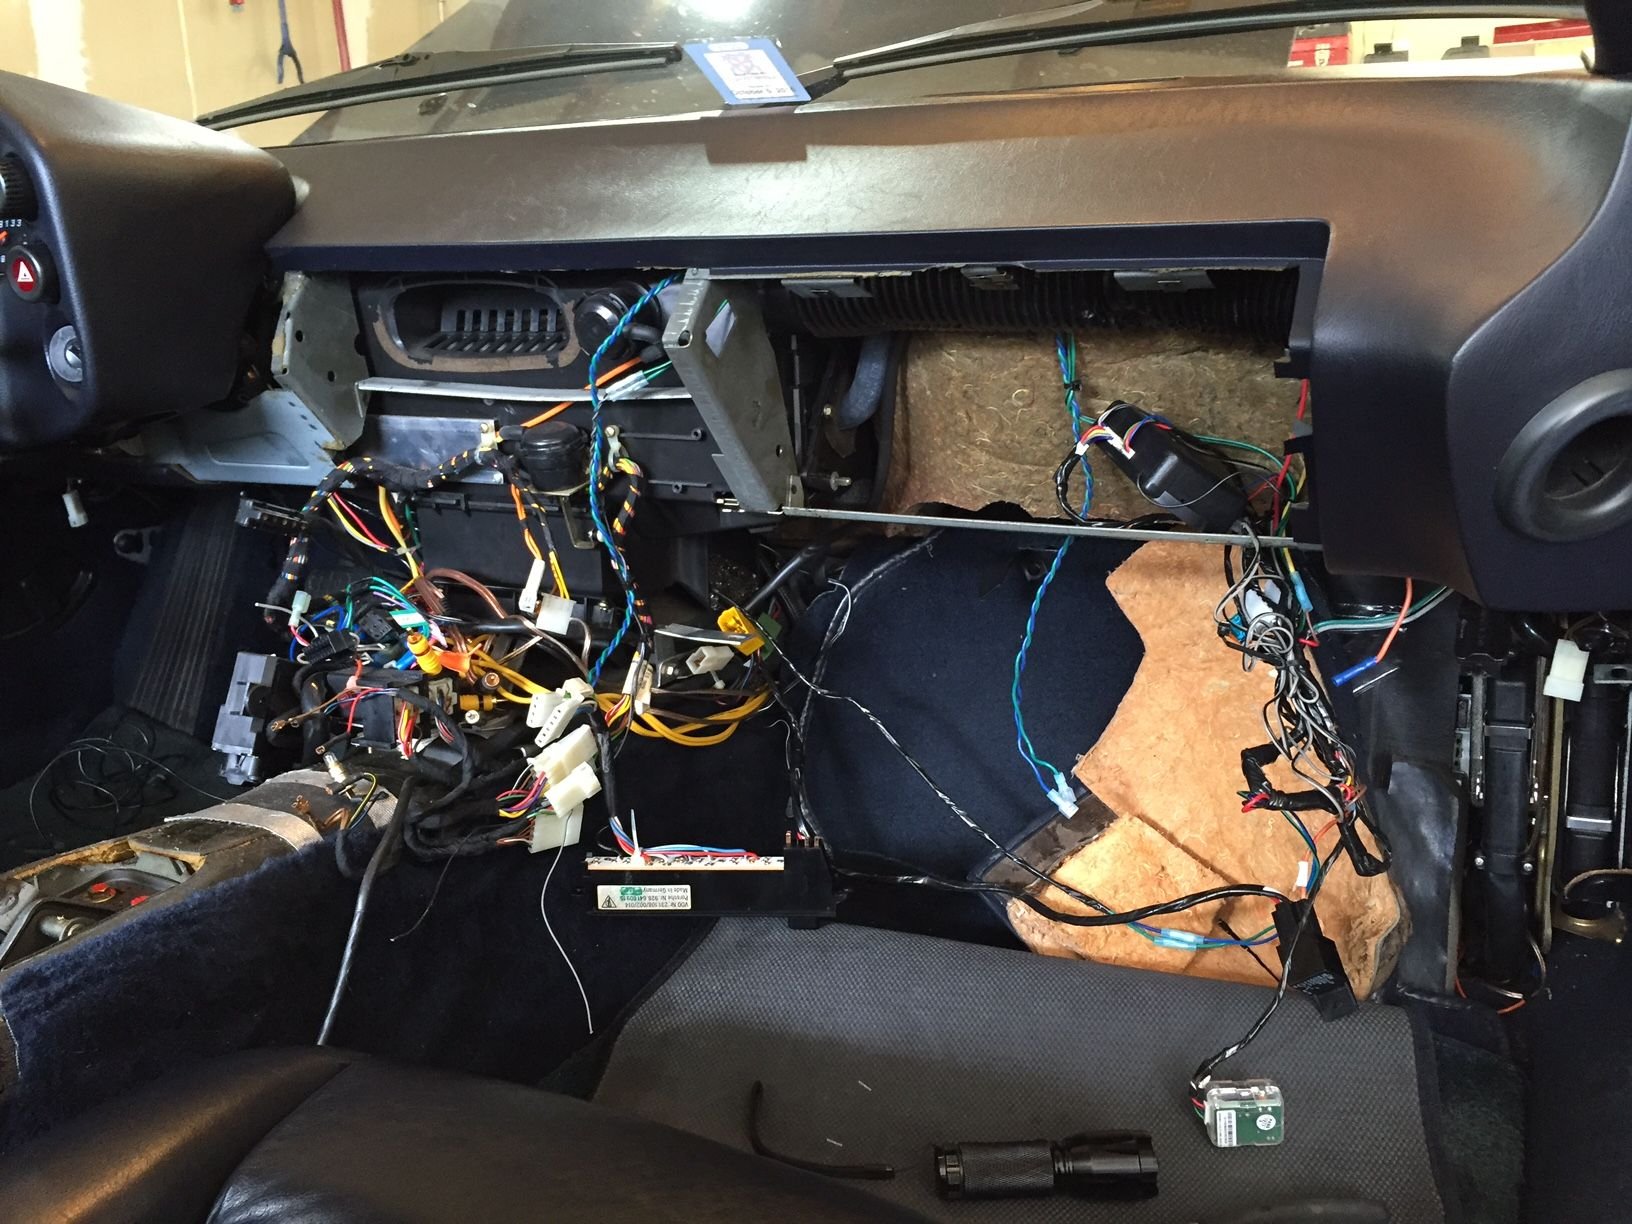
HVAC Center/comb flap and footwell flap pod repair...and more.
After a month of small steps, today I pressed on until the console and the glove box were out. It's been slow going mainly because it's been like a caving expedition and I've been trying to decipher all the evidence (wires) that others have been here before me. It's starting to make sense...and I only care to understand well enough identify what I can rip out. Unfortunately I broke one of the small interior temp sensor wires at the solder joint.
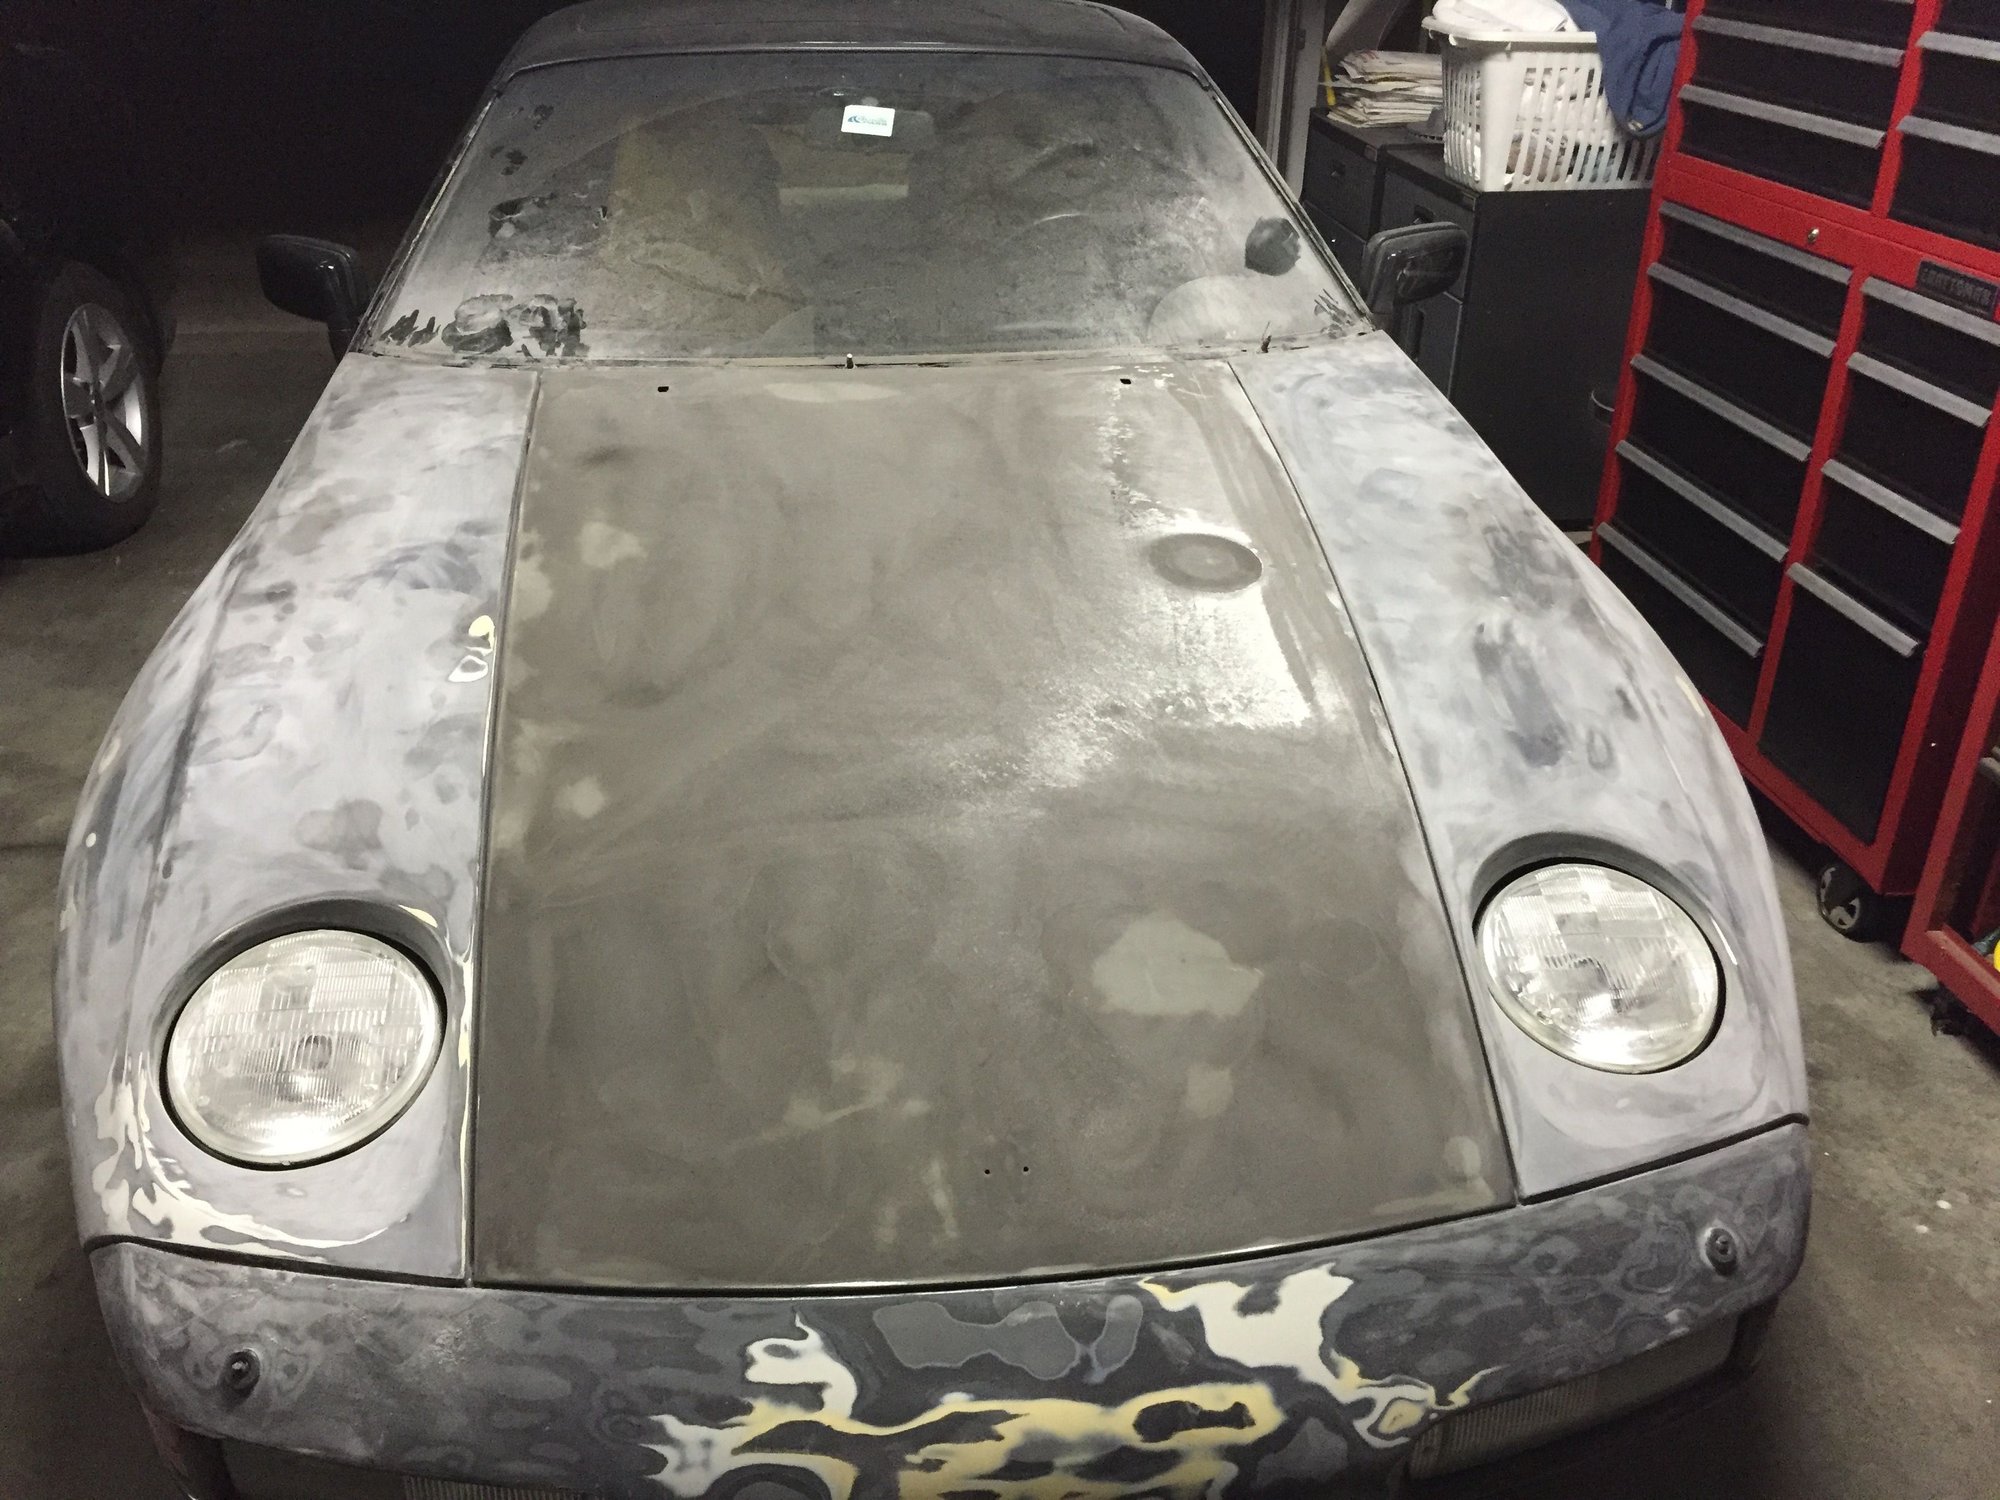
Continued with sanding of front end( 180 then 320 grit). Hood and front fenders ready for painting. Left rear quarter panel sustained some damage since the rear end paint job last November so I need to re-sand for a respray. Front bumper comes off next for final prep then off she goes to body shop.
I was a total newbie when I had the rear of car painted. I did all the disassembly, masking, sanding and other prep work not ever having done it before. Painter did a great job coaching me on prep and result was near perfect.
So far doing the front of the car is going way faster and far less stressful. Rear bumper removal was a humper due to rusted side attachment brackets especially on passenger side near gas filler tube. Front bumper removal looks way easier. Probably shouldn't have said that...
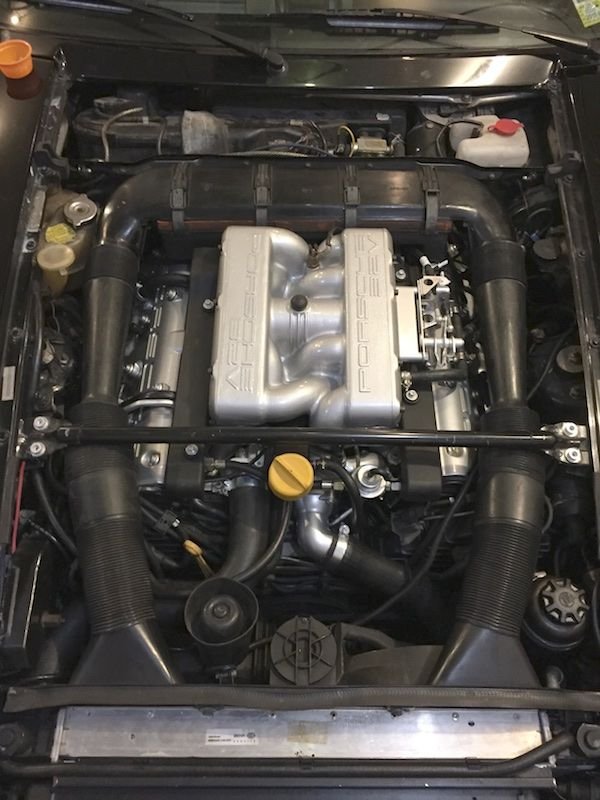
For those who have not been following my intake refresh adventure (I don't blame you), I got everything put back together again a few days ago. The car started up, ran well for a while, then ... it didn't. After a few easy fixes, I went out again today and the car was great!
For those who have not been following my intake refresh adventure (I don't blame you), I got everything put back together again a few days ago. The car started up, ran well for a while, then ... it didn't. After a few easy fixes, I went out again today and the car was great!
Looks great!
What were the easy fixes you needed to perform? **Edit - just caught up on the adventure thread. Nicely done.**
(and I was following your refresh adventure thread. Thanks for posting in it!)
Front bumper removal looks way easier. Probably shouldn't have said that...
You are correct, you shouldn't have said that............
I'm just finishing what you have just begun, and removing the front bumber was by far the crappiest part. All care taken, but snapped off pretty much every thread holding it on, had to drill out and re-tap with new threads....
Just before paint......
Primer on......
Paint on photos to come once I've finished compound and polish.
I started to rebuild TT, but had wrong sized Bushings..Moved onto the heater hoses, took out wiper system then decided to pull Xpansion valve...PO put stripped bolts back in,,now I have to drill the screws out. So, removed the fuel cooler and all of the hard tubes in front of it..there is a vacuum tube hole just in front of the xpansion valve that I can use a long drill bit through to remove them..Not a good night..
The days before..
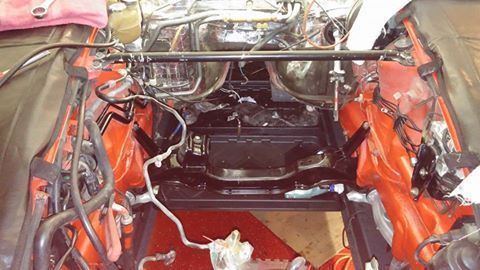
Steering rack installed
Motor Mounts installed on engine
Fuel lines on engine all connected
New hoses for A/C and oil cooler manufactured
Removed prepped and painted all lines in engine bay
cleaned and painted engine bay
Repair heat shield
Installed new wiring harness to engine
removed All A/C parts forward of firewall
..
Got the windshield washer reservoir out. As with many others, the metal ring was rusted to a crust. Crushed it out, removed the motor & sensor for some love, and currently have the reservoir going through the dishwasher.
Tomorrow - Doing Stan's Simple Green + small rocks trick, with assembly to come once my next order from Roger hits the front door.
I put the engine on a stand and removed the fuel system in preparation for a reseal/wp/tb/hoses, etc project.
Noticed some a** plowed into 1/4 panel w/ a motorhome. Next up, track down the owner/tenant. Hell to pay.


 03-06-2016, 10:27 AM