
Water Pump Impeller Repair Pieces
 08-25-2009, 11:45 AM
#61
Rennlist Member
Join Date: Jan 2006
Location: central cal
Posts: 975
Likes: 0
Received 0 Likes
on
0 Posts
The cutter won't be removing much material, and it will easy to vacuum out- the bigger problem is getting all the shavings the impeller created- many flushings later, there will still be some in there. But, being metal, it will sink to the bottom and collect in places where the flow stagnates..I'd remove the thermostat, put the housing back on and plug a garden hose in there for some reverse-flow action and let it run till you don't see glitter in the water anymore...
After that, Don't Worry, Be Happy....
After that, Don't Worry, Be Happy....
 08-25-2009, 03:41 PM
#62
Former Sponsor
Thread Starter

The cutter won't be removing much material, and it will easy to vacuum out- the bigger problem is getting all the shavings the impeller created- many flushings later, there will still be some in there. But, being metal, it will sink to the bottom and collect in places where the flow stagnates..I'd remove the thermostat, put the housing back on and plug a garden hose in there for some reverse-flow action and let it run till you don't see glitter in the water anymore...
After that, Don't Worry, Be Happy....
After that, Don't Worry, Be Happy....
I'll make a piece that plugs into the water pump area and allows backflushing.
08-25-2009, 03:52 PM
#63
Former Sponsor
Thread Starter
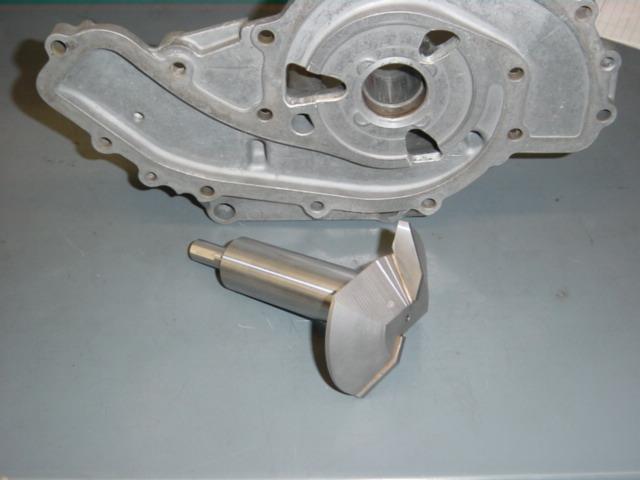
Here's pictures of the cutting tool. I'm going to machine a "test block" today and see how everything actually works, before I do the "real" engine.
I'll take some pictures and post them. Rennlist can be the "keeper" of the instructions!
I'll take some pictures and post them. Rennlist can be the "keeper" of the instructions!
08-25-2009, 04:24 PM
#65
Not the sharpest tool in the shed
Rennlist Member
Rennlist Member
Hell Greg, that cutter looks like it'd make a fine impeller. Why not just bolt it up, spin it a few times, flush the block and be done with it?


 08-25-2009, 05:04 PM
#67
Former Sponsor
Thread Starter
08-25-2009, 06:22 PM
#68
Rennlist Member
Awesome to see this approaching the finish line! Great work, Greg and Steve! 
Since I don't see a reference to it in this thread, here is a link to the thread that started this. I had suggested a guide plate at post 274, and Greg had already thought of it but was struggling with the "how". I made a suggestion a bit later that seems to have sparked some creative juices, and Steve obviously has done a fabulous job of turning the armchair theorizing into a workable concept and running with it.
Sure it needs to be proven and tweaks may be needed but Greg and Steve have really broken some new ground here IMHO.
Way to go, guys!
08-25-2009, 09:44 PM
#69
Rennlist Member
Amazing work guys....folks on this board continue to impress the hell out of me!! Nice work Greg / Steve!
08-25-2009, 11:43 PM
#70
Rennlist Member
Join Date: Jan 2006
Location: central cal
Posts: 975
Likes: 0
Received 0 Likes
on
0 Posts
Kudos to you too, Dave- hope you never need the damn thing!
We need to keep poking Ed for some pics of his pump- I KNOW that was a lot of work, and I'd like to see it...wouldn't y'all?
STeve
We need to keep poking Ed for some pics of his pump- I KNOW that was a lot of work, and I'd like to see it...wouldn't y'all?
STeve
08-26-2009, 02:19 PM
#71
Former Sponsor
Thread Starter
Dave:
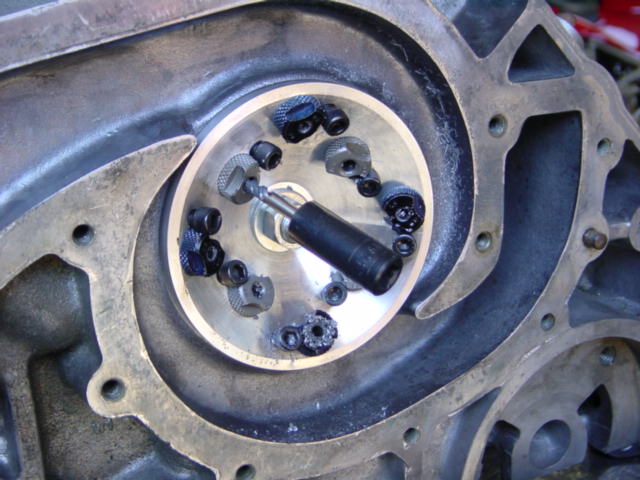
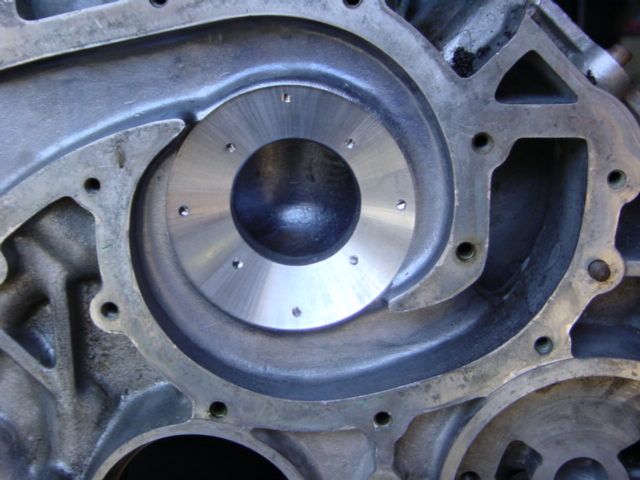
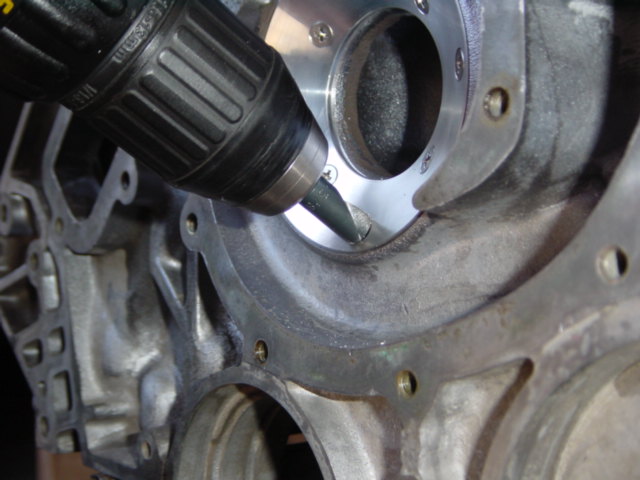
Here's pictures of your idea to make a fixture and have it bolt onto the block, in action. Great idea! Thanks for the idea/help.
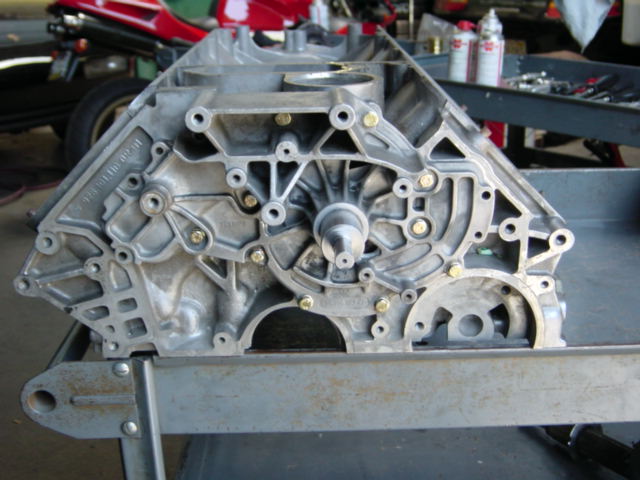
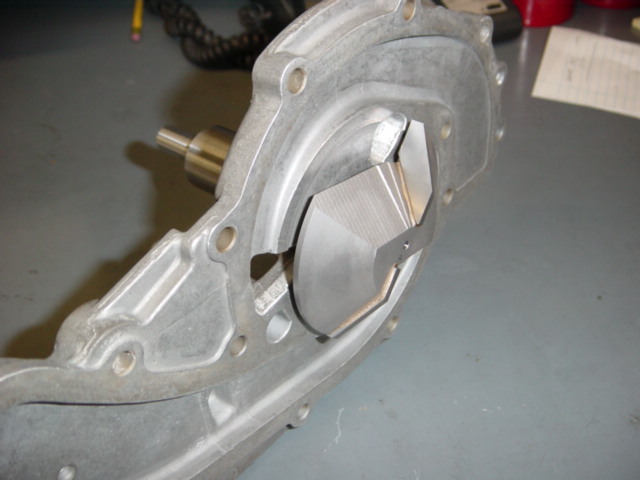
Cutting tool/fixture attached to block. Determine "extent of damage" beforehand and calculate thickness of "insert needed.
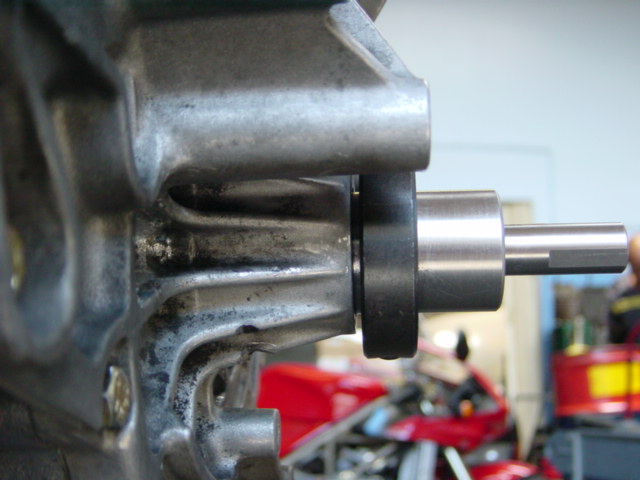
Set "stop" to desired insert thickness.
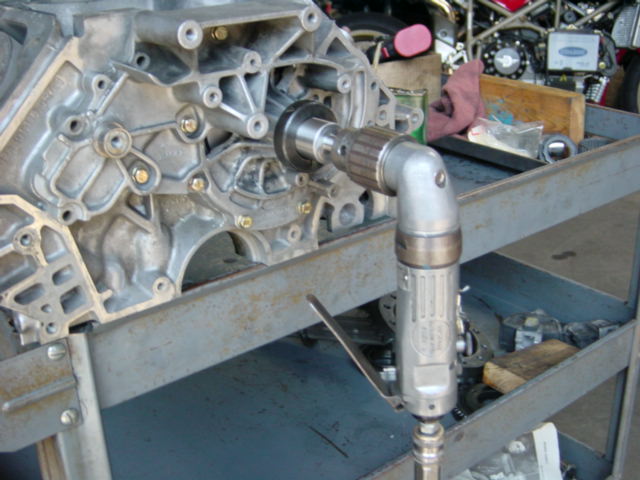
Attach drill
Begin cutting. Use lubricant. Vacuum up chips to keep tool from binding.

Cut done. Check depth. If surface still has damage, repeat above, adding "next" thickness insert into calculation.

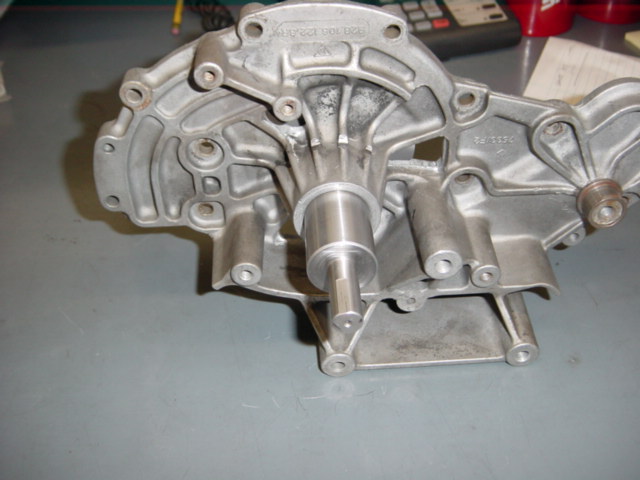
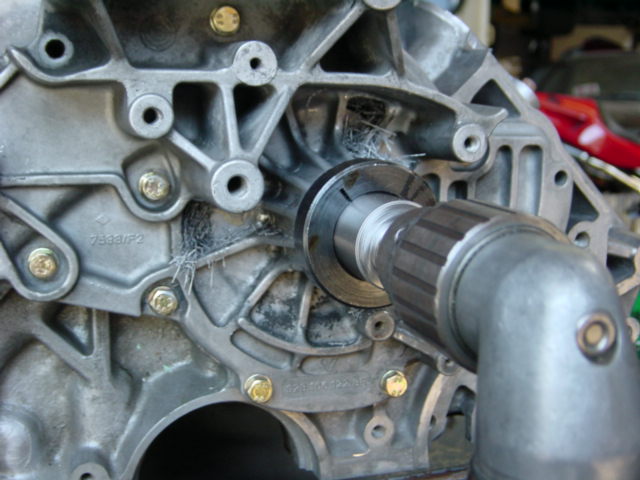
Mount drilling/tapping fixture. Insert "dark" bushings into inner holes and drill.
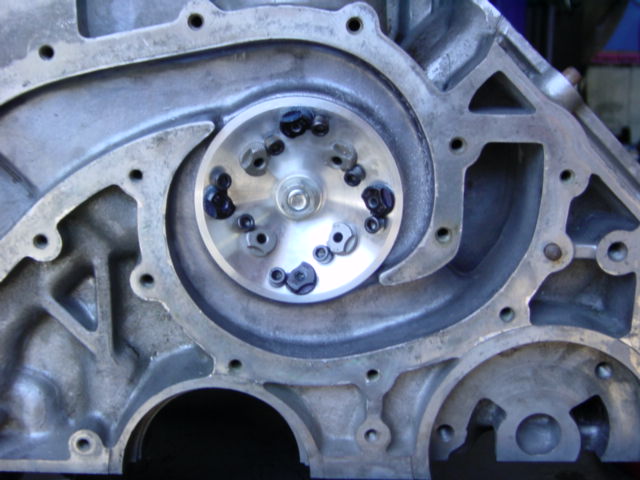
Move "dark bushings to outer holes. Install "light" bushings, in order to tap inner holes. Drill outer holes.
Tap inner holes.
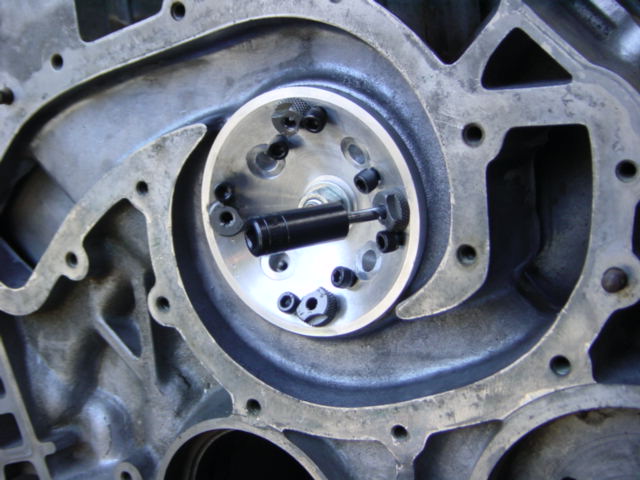
Remove "dark" bushings. Insert "light bushings into outer holes and tap.
Remove fixture.
Holes drilled and tapped.
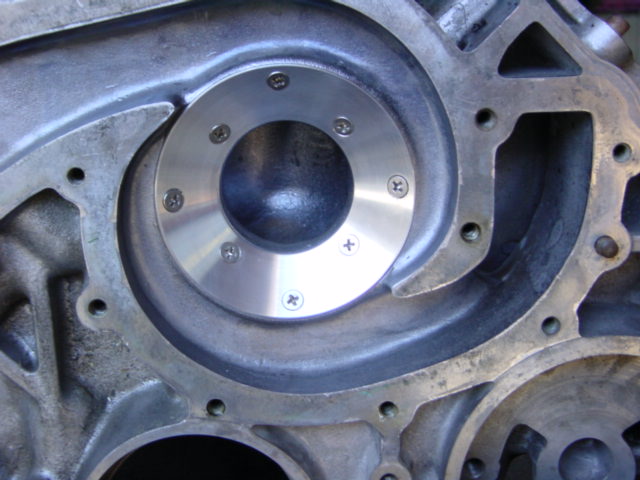
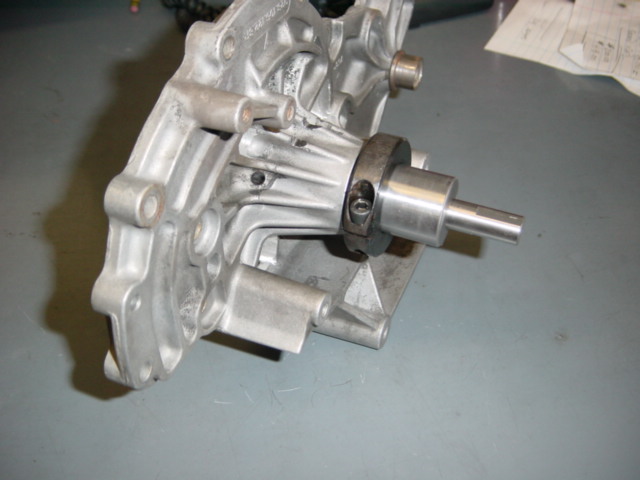
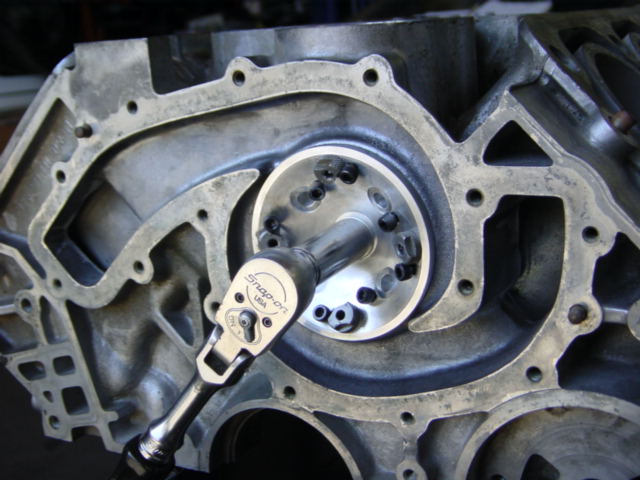
Install insert. Tighten screws as evenly as possible. If any screws stick up, swap with "different" screw. There is variance between screws!
If any screws remain high, gently countersind hole to make screw flush.
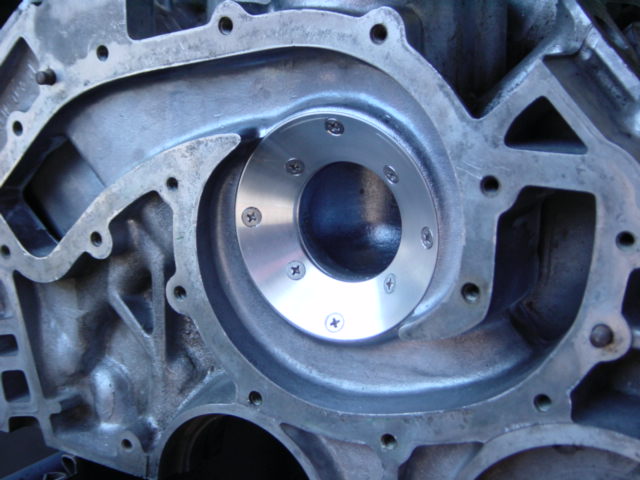
Check all screw depths
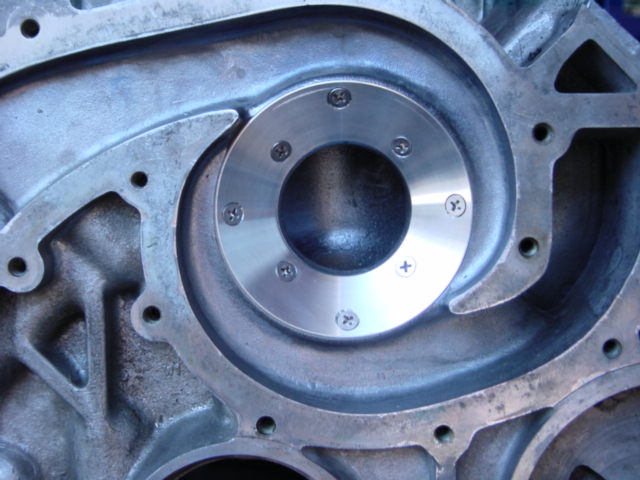
Done. Ready to remove, clean, and epoxy into place. Only one screw "communicates" with "outside of block". Eventually, this will be used for a "sensor" to monitor impeller distance, for those who are interested. This will allow people to use the more "durable steel impeller", without fear of future damage, for high performance use.
Here's pictures of your idea to make a fixture and have it bolt onto the block, in action. Great idea! Thanks for the idea/help.
Cutting tool/fixture attached to block. Determine "extent of damage" beforehand and calculate thickness of "insert needed.
Set "stop" to desired insert thickness.
Attach drill
Begin cutting. Use lubricant. Vacuum up chips to keep tool from binding.
Cut done. Check depth. If surface still has damage, repeat above, adding "next" thickness insert into calculation.
Mount drilling/tapping fixture. Insert "dark" bushings into inner holes and drill.
Move "dark bushings to outer holes. Install "light" bushings, in order to tap inner holes. Drill outer holes.
Tap inner holes.
Remove "dark" bushings. Insert "light bushings into outer holes and tap.
Remove fixture.
Holes drilled and tapped.
Install insert. Tighten screws as evenly as possible. If any screws stick up, swap with "different" screw. There is variance between screws!
If any screws remain high, gently countersind hole to make screw flush.
Check all screw depths
Done. Ready to remove, clean, and epoxy into place. Only one screw "communicates" with "outside of block". Eventually, this will be used for a "sensor" to monitor impeller distance, for those who are interested. This will allow people to use the more "durable steel impeller", without fear of future damage, for high performance use.
08-26-2009, 02:41 PM
#72
Former Sponsor
Thread Starter
BTW..
We're considering putting inserts into all our high performance engines, to allow us to "blueprint" the water pump impeller distances, for optimum efficency. This distance varies considerably, from block to block, pump to pump, impeller to impeller.
Wait until you see our new billet water pump!
greg brown
08-26-2009, 02:59 PM
#73
Basic Sponsor
Rennlist
Site Sponsor
Rennlist
Site Sponsor
Greg,
So we have two billet water pumps???
I am very interested.
Roger
So we have two billet water pumps???
I am very interested.
Roger
__________________

Does it have the "Do It Yourself" manual transmission, or the superior "Fully Equipped by Porsche" Automatic Transmission? George Layton March 2014
928 Owners are ".....a secret sect of quietly assured Porsche pragmatists who in near anonymity appreciate the prodigious, easy going prowess of the 928."
Does it have the "Do It Yourself" manual transmission, or the superior "Fully Equipped by Porsche" Automatic Transmission?
George Layton March 2014928 Owners are ".....a secret sect of quietly assured Porsche pragmatists who in near anonymity appreciate the prodigious, easy going prowess of the 928."
08-26-2009, 03:13 PM
#75

Billet anything is always fun.