When you click on links to various merchants on this site and make a purchase, this can result in this site earning a commission. Affiliate programs and affiliations include, but are not limited to, the eBay Partner Network.
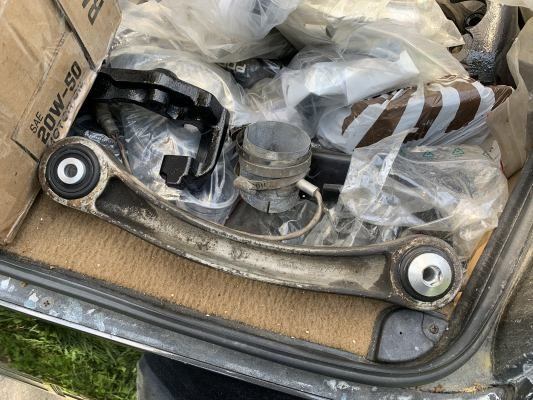
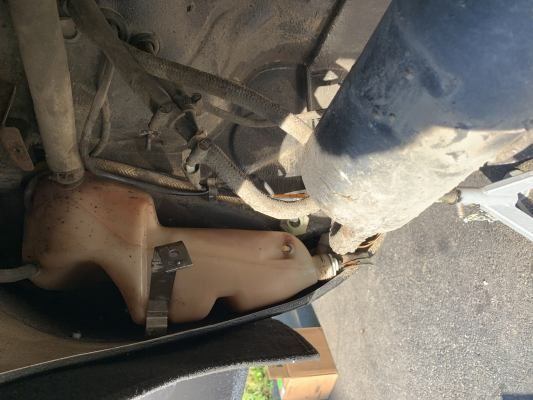
Greg in the hose picture the long fat hose is the transfer hose, this vents fuel from the body of the tank to the inlet,
If your replacing this hose the later version is really thin wall almost like a vent hose VS the early style that has a thick wall and should last forever.
The long thin hose is the one from the expansion tank to the tank vent port on the top of the tank inlet inlet.
The short hose with the split ferrule is the return line from the hard line to the sender,
the short curved line is strainer to pump.
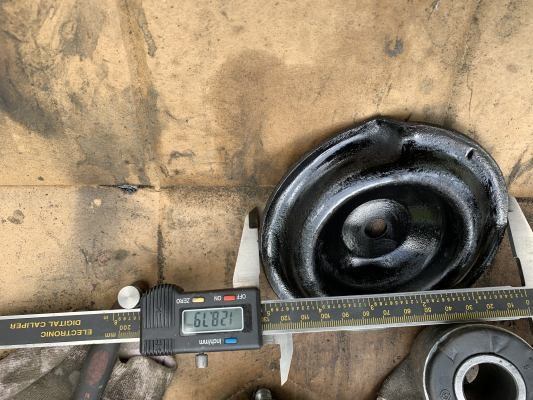
the small aluminum pieces are the remains of the strainer bung.
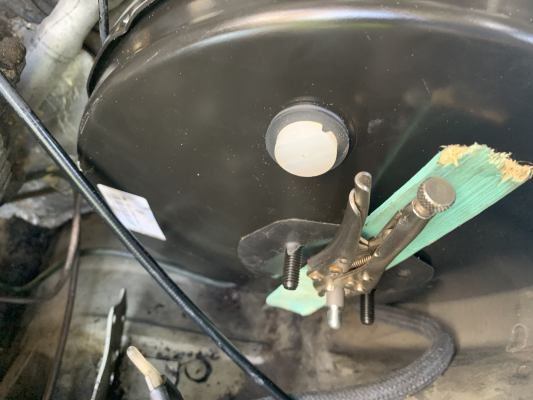
Put a NORMA clamp around the collar to hold the insert. cut off the little risers so the clamp sits flush,
try using a 17MM 6 point on a gun to remove the strainer, work it back and forth.
I used loctite PTFE non setting pipe sealant on the strainer threads
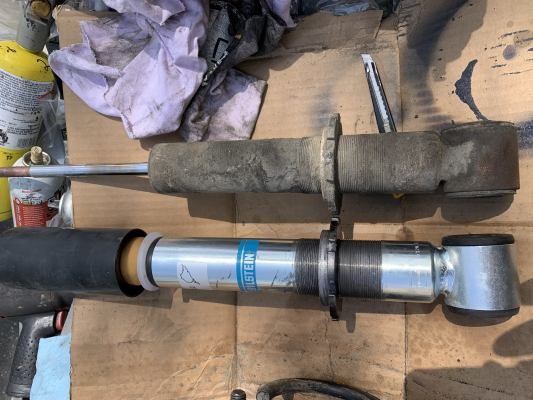
I got started on the rear shocks today, these appear to be original competition package Bilstiens,
the ones that are sealed with a silver cap, similar to what I have on my 1988 S4 Yellow machine.
While doing this I also added some VHT epoxy paint to the rusty LCA tubes and the halfshafts.
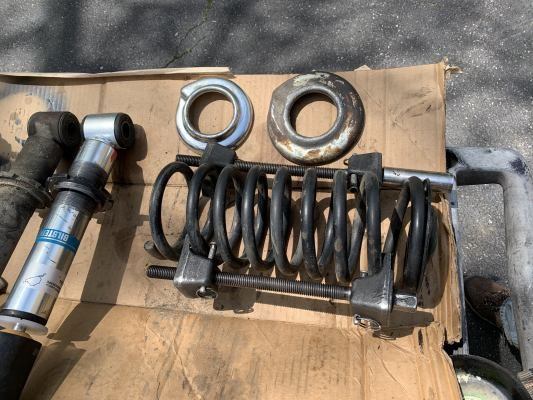
The strange thing is that these rear springs are unlike any that I have seen on a 928,
maybe because the Bilstien package uses different springs, this is the first machine that I have seen with original Bilstiens.
it only took a minimal amount to compress the spring enough to free the shock piston .
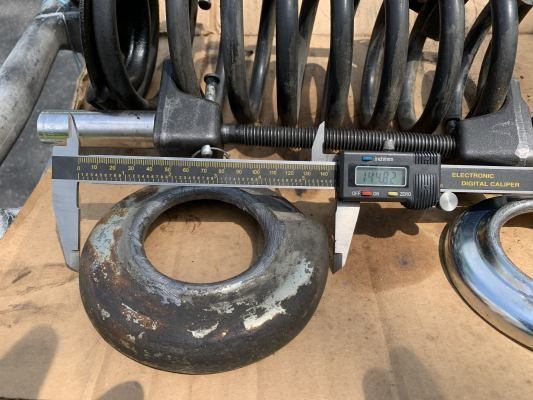
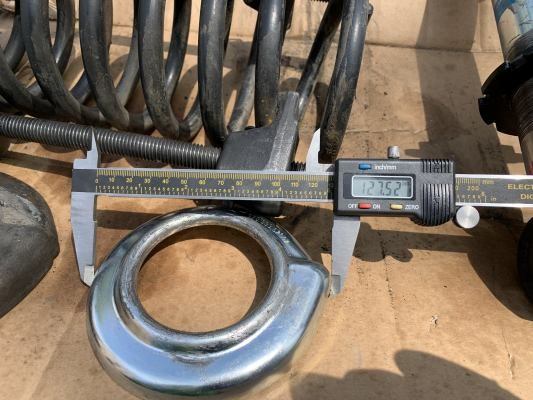
Anyway the new lower perches that come with the shocks are clearly too small in diameter to fit these springs,
the adjuster collars are the same size.
and the adjuster collars are very hi up on the shock tube body,
the springs did not appear to have had coils cut from them.
I took pictures to document these differences.
I got the parts for the E brakes and the new dog bone bushings so thats all put together,
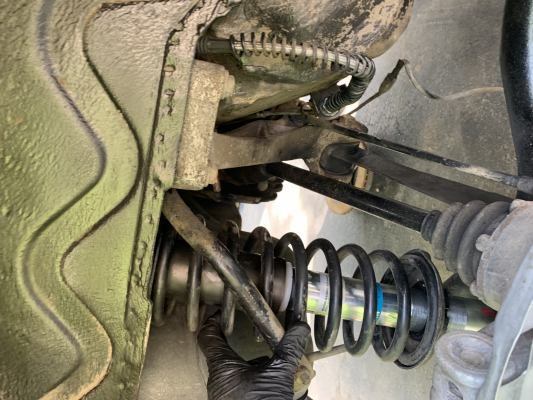
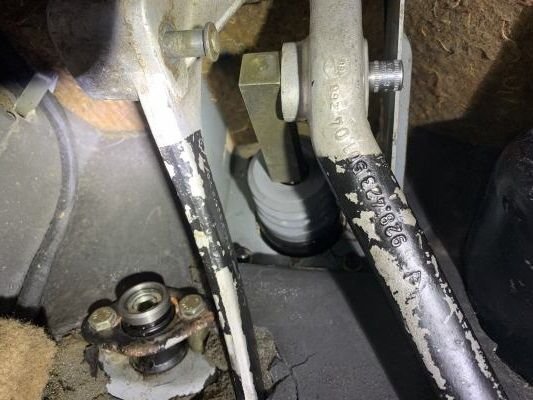
To do the dog bones,
I remove the lower sway bar bar link bolt, the 3 hat nuts on the strut,
and then the dog bone bolts,
the strut drops down about 2 inches and can be pushed back, (shown in picture)
then inner connection of the link can be removed.
I used my 99.00 dollar HF press and a 36 MM and 24 mm sockets to press out the bushings.
Use a floor jack to lift the assembly back into position
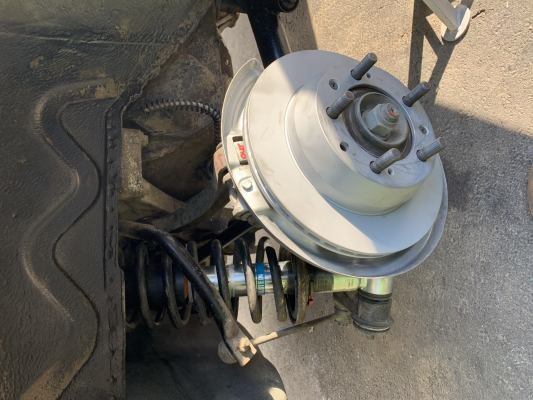
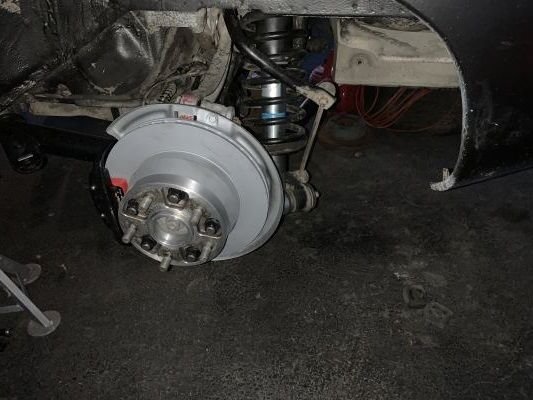
New E brake shoes and spring kits are used as well as new Zimmerman E coated rotors.
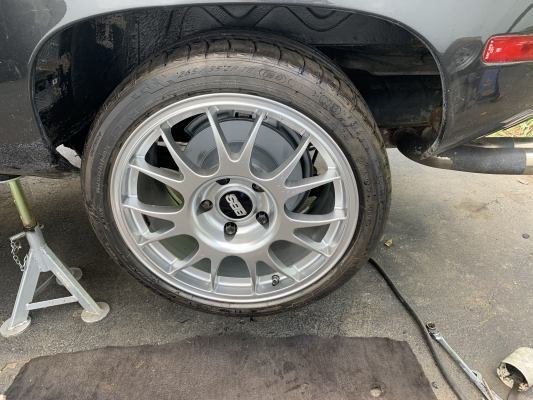
Test fitting the new BBS wheel set I picked up with a 25MM spacer for the rear.
wheel spec 18 X 10 ET65
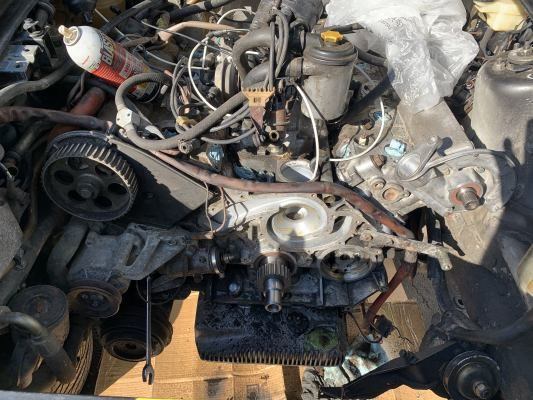
been grinding away at this beast, every turn is more fun.
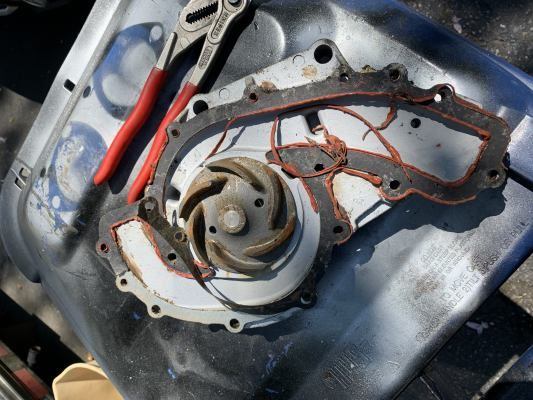
I was removing the water pump it looked new but it was spray painted silver .
Im putting in a new Laso with plastic impeller.
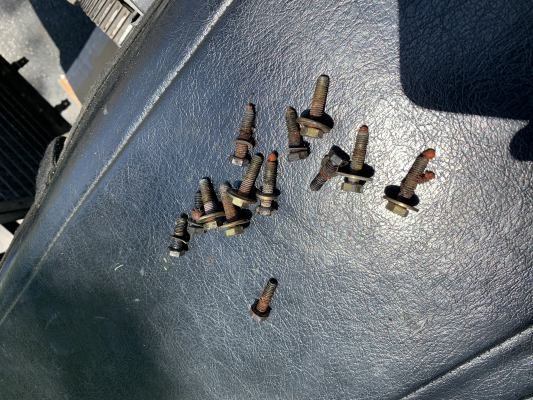
Anyway the bolts were very rusty thats why I now use the Loctite PTFE non setting pipe sealant on the bolts,
and give a smear of silicone to the gasket
NOTE how it came free from the block with minimal clean up required.
This engine is also getting a GB oil block off plate under the oil fill tube.
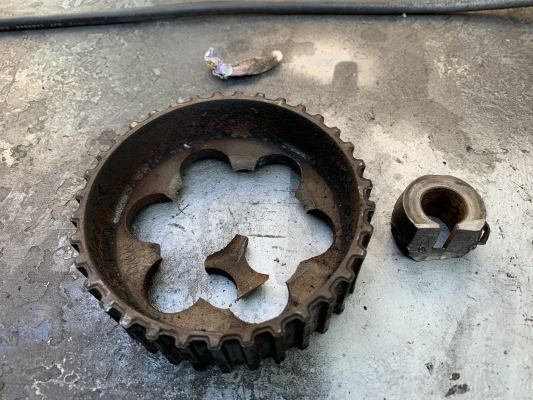
I had fun with the rusty oil pump gear it finally snapped while using a 3 legged puller,
a first for me.
I ground down where the key was then used a chisel to open the collar to get it free from the shaft.
She is a tough ole gal but I speak her language,
we will soon be getting things back on track,
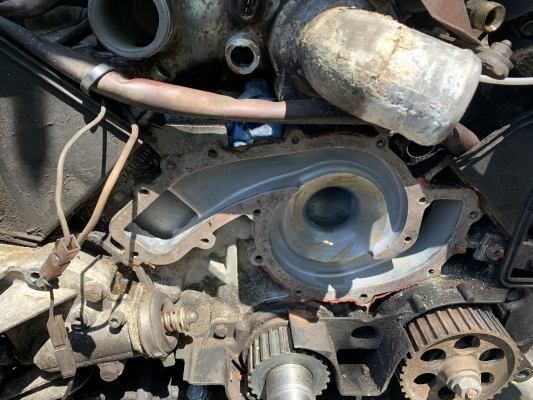
also refreshed the cam tower front and rear gaskets and O rings and radial seals.
I got into the washer tank it looked full but it was empty as the fluid had leaked out of the headlight pump,
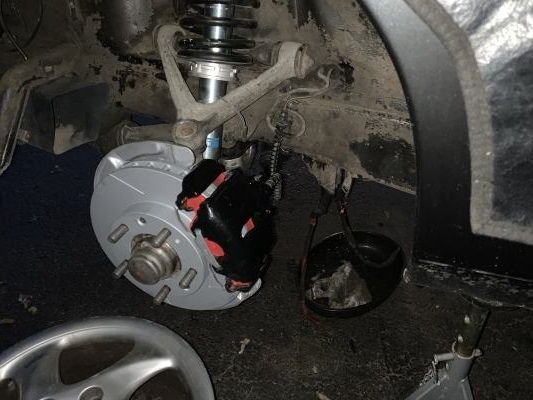
Progress picture of RR with new strut and Zimmerman E coated rotor,
and new E brake shoes and new dog bone bushing and SS brake hoses installed
well I have been waiting for a few other parts to show up to get on board,
finally the clutch and the brakes have been restored to service,
New EBC Red Stuff pads, Zimmerman Z coat rotors, new caliper rebuild kits, new flex SS lines,
an ATE Booster, and ATE MC, new Clutch master and slave and a G. Brown flex line.
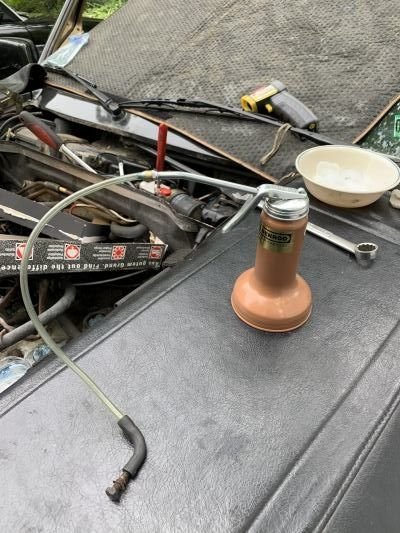
I got hand pump from Amazon and filled it with Super blue fluid.
I used my motive tank to pressurize the tank and opened each caliper bleeder to remove any remaining fluid from the lines.
then i removed the tank.
I put the fluid filled hand pump tank on the LF RF LR RR calipers and pumped till I saw the fluid rising in the tank about 35 pumps for the LF 40 for RF,
45 for LR and 30 for RR.
I topped off the tank then put on the motive unit and pressurized to 10psi
I opened the B nuts at the MC and looked for air, none found .
Then pumped the brakes a few times and bled all the calipers for final air removal;
I opened the slave bleeder till I saw fluid , then removed the slave from its mount,
then pressed the pushrod all the way in I could head air going back into the tank,
I held it like this for about 30 seconds and let the pushrod come out on its own.
Then I repeated the pressing the pushrod in again and holding for about 30 seconds.
this time only a slight hint of air then repeated again.
This time the slave felt solid, then held for 30 seconds then installed it, greasing the pushrod tip.
I opened the bleeder and verified no air from the bleeder, I went and pressed the pedal and the clutch feels great.
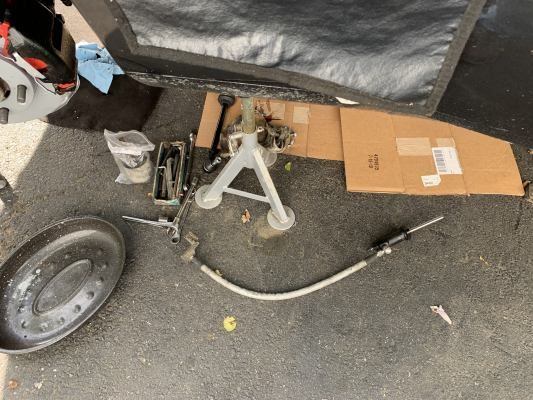
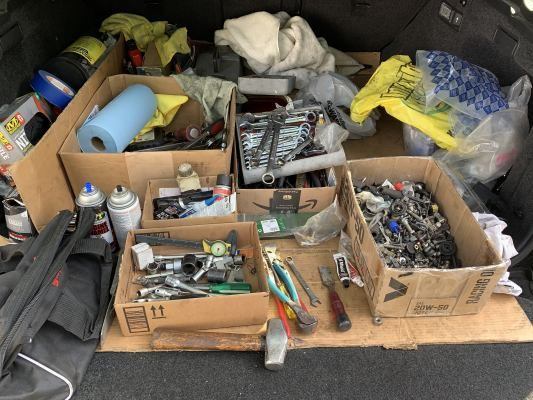
I moved the tools from the tool tray cart to my Range Rover to give me more working space on the cart.
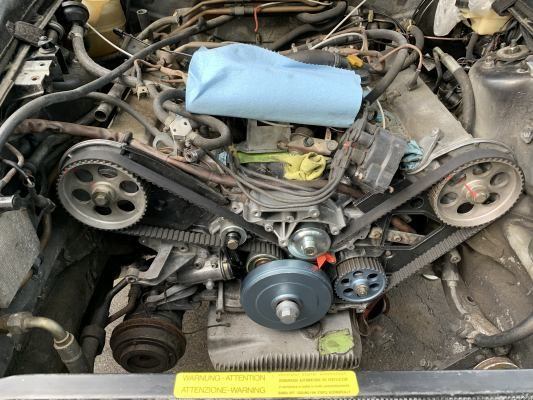
I also got the timing belt run back together, I got a used oil pump gear, new Laso pump new front cam tower seals,
rebuilt the tensioner, and used Hondabond on the new gasket and STP to fill it,
I loosened the Tensioner bolts once the belt was on so the unit could find its place with belt tension .
then retightend them.
Rack has been installed with new tierods and boots and new P/S pressure lines, alternator has been inspected.
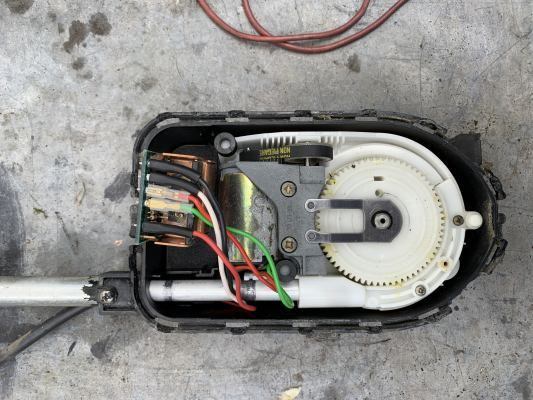
I also I split the Hirshmann antenna to replace the mast,
I need a toothed drive cable,
the lift motor runs so this should come back to life.
Swapped out the clutch and brake hydraulics,
The slave was frozen,
The clutch master was frozen,
NOTE new GB slave flex hose will replace the rotted out flex line/hard line assembly.
The brake master might have been good,
but the booster was filled with 3 oz of rusty brake fluid,
probably from the previous master cylinder swap out.
I used a trick on the booster clevis,
after loosening the locknut I removed the clevis pin.
then turned the clevis to verify it spun easily.
I got a 1/4 inch drive deep 8 mm socket and put it through the pedal, then put the clevis onto the protruding socket.
I used a long breaker bar to press the brake pedal,
then fit the plastic shield and paint stick and small vice grips to hold the booster in the pressed position.
I got inside the car and pushed the clevis off the socket,
NOTE the clevis pin will hit the side anchoring of the pedal box thus preventing removal thats why to use a socket.
The clevis easily pushes off the socket, then unscrew the clevis, then remove the 4 anchor nuts and washers.
Work the booster free from its home.
+1 on GB clutch hose....its in my car and made such a difference in the quality of the bleed I can feel each disc engage separately...butter smooth and obsessive/compulsive accurate. Such a difference I recommended to the shop that did it to include it as part of a clutch job, period.
I got hand pump from Amazon and filled it with Super blue fluid.
I used my motive tank to pressurize the tank and opened each caliper bleeder to remove any remaining fluid from the lines.
then i removed the tank.
I put the fluid filled hand pump tank on the LF RF LR RR calipers and pumped till I saw the fluid rising in the tank about 35 pumps for the LF 40 for RF,
45 for LR and 30 for RR.
I topped off the tank then put on the motive unit and pressurized to 10psi
I opened the B nuts at the MC and looked for air, none found .
Then pumped the brakes a few times and bled all the calipers for final air removal;
Hi Stan!
Will you please clarify this more for me? I am having trouble exactly visualizing what you did here. Also, do you have a link to the hand pump on Amazon?
I am always documenting brake bleeding methods because sooner or later, I will be finishing the brake system on the Red Witch. I will be filling and bleeding from dry, and look for any and all advice I can find.
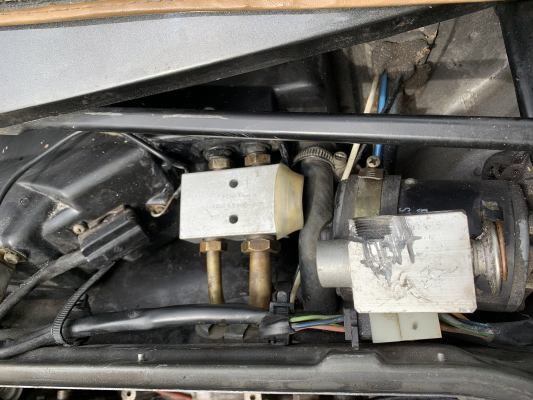
Well I got busy on the AC system, the compressor was pretty cruddy and the lines were rusted and original ,
so I went ahead and got new lines and a new Denso AC compressor, along with an new EX valve and drier.
Now this gal is pretty sweet but she sure is tough in some of the corners.
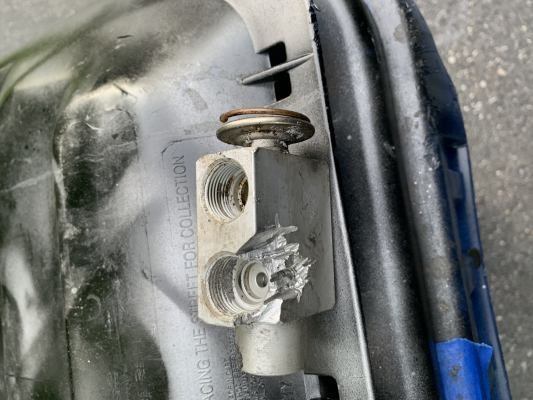
I had a 2 hr battle with the EX valve I finally used a dremel to break away parts of the body so the B nut would come free.
The new one was also a battle to install, if they would have used some antiseize on installation the unit would have come free.
The AC system held suction over night so it looks like we are good to add fresh refrigerant,
after filling with refrigerant I found small dot of oil from one connection on the drier,
after tightening,
the lower rail to the mounting fitting started bubbling indicating a crack in the weld ,
so now I have to remove the condenser and get it welded, dagnabbit !
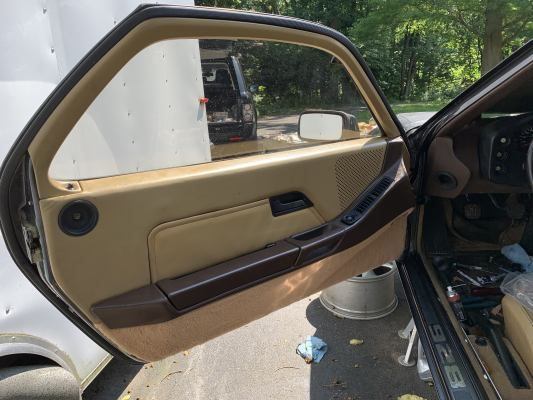
Carpet was delivered a week ago now getting busy with the installation and cleaning and rejuvenating the leather Im using Skidmores leather restoration creme,
also rebuilding the window motors and replacing the window stops.
Left door is done and the window works great right door is in process
\


 05-06-2021, 10:41 PM