When you click on links to various merchants on this site and make a purchase, this can result in this site earning a commission. Affiliate programs and affiliations include, but are not limited to, the eBay Partner Network.
Ed the D 90 on the RF was swapped out at the loading point as the tire wouldnt hold air,
lucky Jim had a few extra wheel tire assemblies sitting around we filled it up with air and Tim L swapped the wheel out so we could load it on the trailer.
The D 90 are 7.5 front and 9 inch in the back they have RDK sensors in them the chrome is peeling off and i think they will be scuttled.
I like the look of them but its really hard to get a good matching set of tires . more to follow.
Well after about 4 hours of poking and prodding I got the tank sender out,
the tank is filled with rust from the top of the sender falling down,
The fuel strainer OTOH looks brand new.
The fuel rails were still filled with fuel,
I found on the CE panel the fuel pump fuse was swapped at some point from a 25A to a 8A,
this then resulted in the end of the fuse melting away at the fuse holder effectively killing the power to the circuit.
I put a good battery in it to see whats going on,
The HL wont come up, they do come on though, L window is just clicking, sounds like it needs a new brush block.
The starter was frozen it time and wouldnt crank, I dropped the header pipes and removed the belly pan with the starter
I took the starter apart and cleaned out the gunk from the slots in the armature ,
D100 to the brushes, lubed the starter drive and cleaned out the muck in the solenoid.
Put it back together and put the 14 pin onto the hot post, and waalaa she cranks over.
I had pulled the fuse for the pump since the sender was out and have not checked to see if the pump even runs.
A few squirts of ether,
put the key into the run position,
and hit the hot post with pin 14 and , she cranks and sputtered to life for a brief instant, Yeay !
A few more start attempts prove it to be firing on all 8.
So parts to get it back to driving are being ordered,
More action to follow after the rain goes away.
I'm encouraged , and a lot of stored up parts are gonna come out of their hiding places to fix this car.
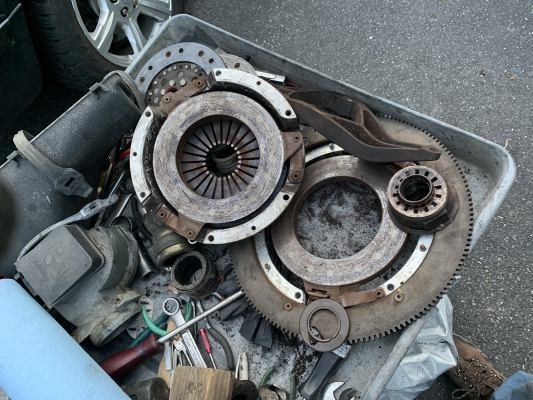
It looks like it needs a clutch pack as well.
I also need a rear hatch lock cylinder, no key is good as I can rekey it,
this car has an alarm but its not necessary for that either.
anyone have one?
It’s really interesting, as someone who doesn’t own but has always loved the 928, watch the wizards on this forum rehab these neglected cars back to life!
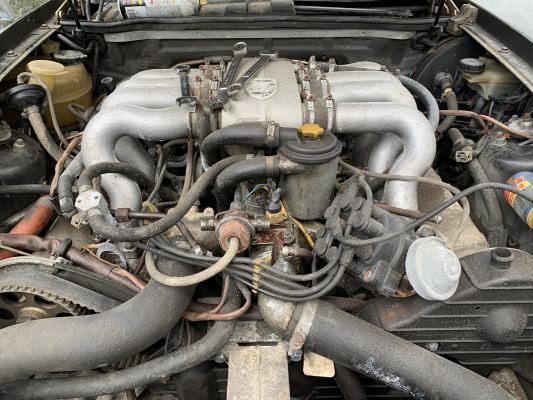
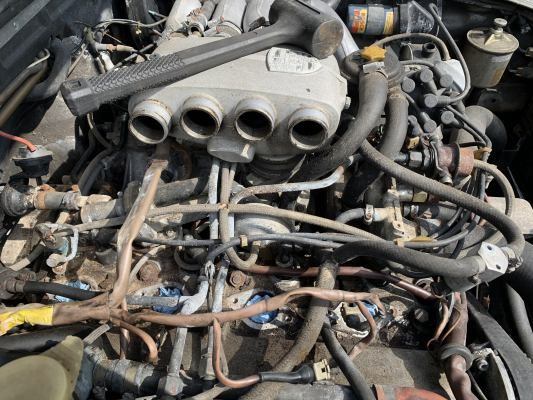
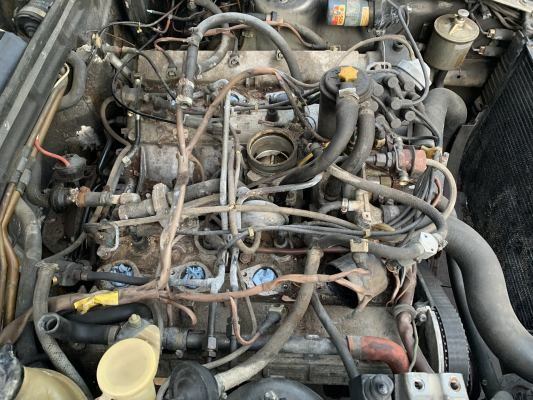
Finally got some dry weather with warm temps so we are are off,
first step take off the intake parts, for cleanup ,
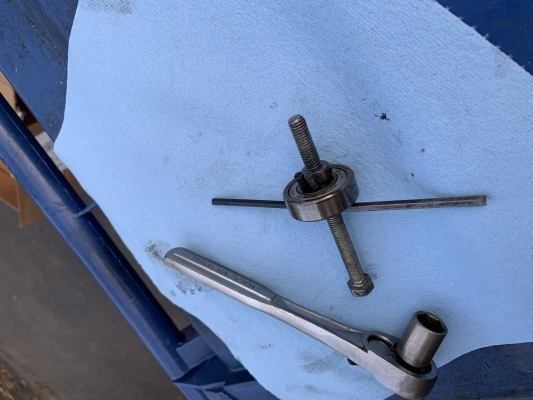
then remove the clutch, it was pretty rusted together,
the pilot is seized so I used the Detroit shuffle to remove it, a few progress pictures
Stan, Nice save and it did wash up very well. We're working on a "not quite barn find" but stored in an old garage and in similar condition. Surprises around every corner... that's the fun part
Got the DS window motor working it had some water damage,
new brush block and cleaning the gear case now its good as new,
the new pilot bearing is in and the R M seal as well.
Cleaned the intake gasket surfaces.
got the clutch together and installed it.
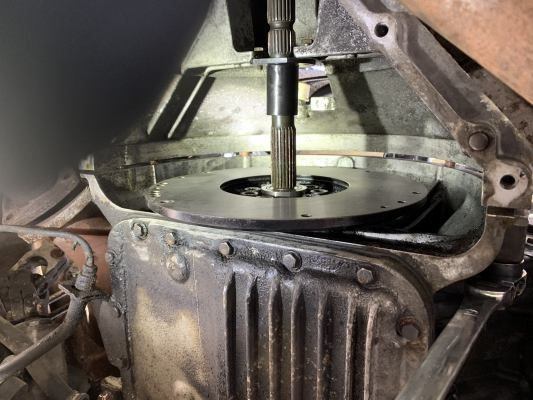
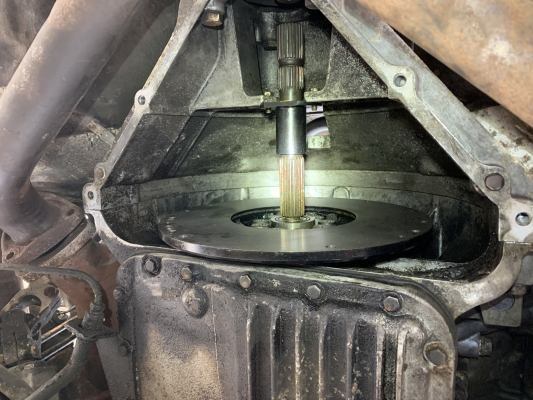
NOTE the two pictures of the mockup of the stub shaft, to set and mark the shaft for proper insertion depth into the pilot bearing.
The first picture is prior to rejoining the rear bell housing, after dropping out the clutch pack,
this must be rejoined for an accurate measurement.
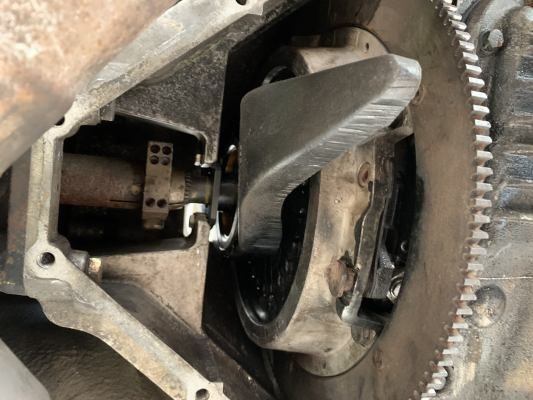
Chris the reason the bell is pushed back is to make the removal and installation as easy as possible
I am not driving the pins so no hammering on the flywheel .
I loosen the 4 bell bolts till about 3 turns from out, remove the 2 trans mount bolts.
NOTE remove the pinch bolts first.
Pry the trans/TT back and clutch will drop out without any pins touching, the bell will slide back on the bolts.
NOTE snug the lower bolts to draw the bell together, AND sometimes the upper bolts must also be snugged to draw the assembly evenly don’t force anything.
NOTE once the stub shaft is mocked up and you marked the line on the aft side of the guide tube,
when final assembly is done you don’t have to guess if you have the stub centered in the pilot bearing.
NOTE after mock up loosen the bell bolts and slide assembly back to make installation of clutch pack a painless effort.
NOTE before removal of clutch fit the 3 spacers this also makes installation easier. and aids in TOB removal
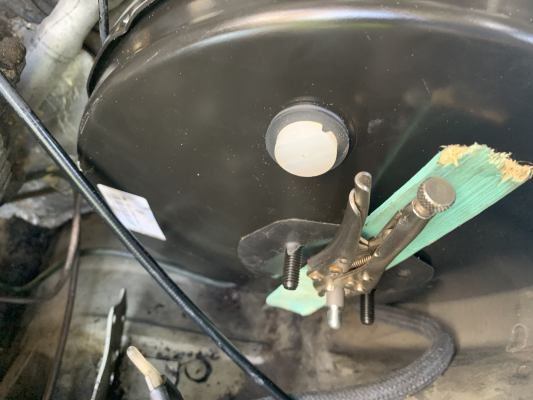
Swapped out the clutch and brake hydraulics,
The slave was frozen,
The clutch master was frozen,
NOTE new GB slave flex hose will replace the rotted out flex line/hard line assembly.
The brake master might have been good,
but the booster was filled with 3 oz of rusty brake fluid,
probably from the previous master cylinder swap out.
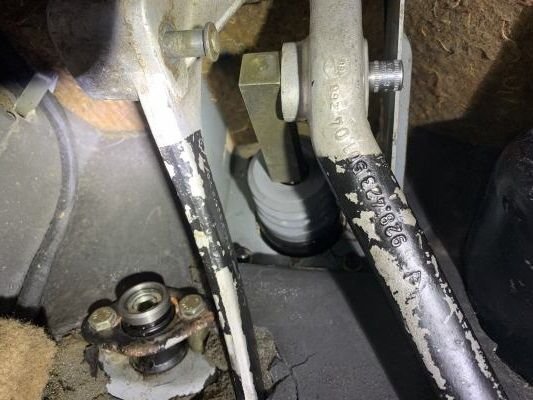
I used a trick on the booster clevis,
after loosening the locknut I removed the clevis pin.
then turned the clevis to verify it spun easily.
I got a 1/4 inch drive deep 8 mm socket and put it through the pedal, then put the clevis onto the protruding socket.
I used a long breaker bar to press the brake pedal,
then fit the plastic shield and paint stick and small vice grips to hold the booster in the pressed position.
I got inside the car and pushed the clevis off the socket,
NOTE the clevis pin will hit the side anchoring of the pedal box thus preventing removal thats why to use a socket.
The clevis easily pushes off the socket, then unscrew the clevis, then remove the 4 anchor nuts and washers.
Work the booster free from its home.
dropped the fuel tank swapped in a new 944 sender had to fight with the old strainer,
it came out in pieces,
First I used a gun on the old part it just rounded off, it was an original part
so i had to cut the center out then use a dremel to cut down to the threaded collar.
I did put a NORMA hose clamp on the collar first after cutting off the burrs on the collar.
this took about 2 hours to get done. Anyway the tank is cleaned out the new sender is in the new strainer is in,
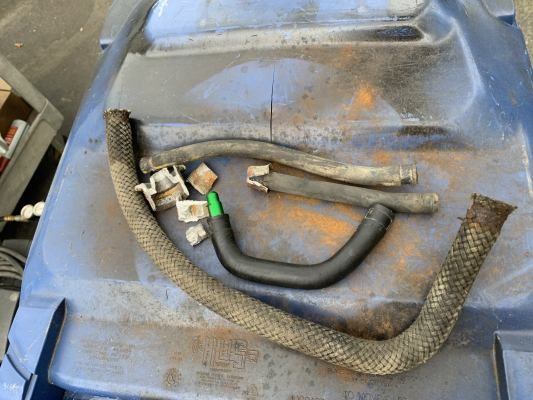
and the new rubber older style transfer hose is in.
NOTE the new style cloth covered transfer hose is pretty weak as far as a fuel hose goes,
so I get the early style this is fully a rubber hose that pretty thick and very flexible,
it is more expensive but it is piece of mind, Roger sells them.
I also swapped in a new return hose to the sender these are usually pretty rock hard.
I plugged the 944 secondary port and put the new sender in .
I put PTFE non setting sealant on the new strainer threads.
also added some primer and paint to the corroded tank saddle then a good covering of fluid film on the affected area
Also installed the MC tank I used another tank as the one from this car had a small crack on the top of the tank.
Nice work. I am about to drop my tank again with strainer leak issues and now a spun insert. What exact product did you use on the thread? And did you replace the breather hose. Or is that the transfer hose you speak of.


 04-15-2021, 11:01 AM