When you click on links to various merchants on this site and make a purchase, this can result in this site earning a commission. Affiliate programs and affiliations include, but are not limited to, the eBay Partner Network.
I bought one of those, but it was a different model that was specified for the early cars and it doesn't thread in properly, like the thread pitch is incorrect. Maybe I need to try the one you've shown. Will that one fit my early to mid oil pans?
I really can't hazard a guess - I'm a 87+ specialist.
I really can't hazard a guess - I'm a 87+ specialist.
I have a set of those metric thread gauges. I'll see which one fits into the pan I just removed and cleaned since the specs on that valve you posted are an M20-1.5 to see if that's what I need. If so, I'll pick one up. I also think they make 90 degree versions which would point the draining stream down into the collection pan - the risk there being it orienting correctly at the proper torque value so the straight eject one with a hose on it is probably the safer bet.
If you don't have the timing belt on yet, you can prime the whole oiling system and bring it up to pressure with an electric drill. Bits that fit a drill and snap into a 3/8" socket drive are common. Put the right socket on the nut and spin it up.
If you don't have the timing belt on yet, you can prime the whole oiling system and bring it up to pressure with an electric drill. Bits that fit a drill and snap into a 3/8" socket drive are common. Put the right socket on the nut and spin it up.
Timing belt isn't on yet as I don't pick up the powdercoated cam towers until tomorrow. Also haven't filled the engine with oil yet as I thought I might need to flip it upside down again, but will definitely do that once I have it filled up.
Picked up the parts from powdercoat on Friday and started serious reassembly today.
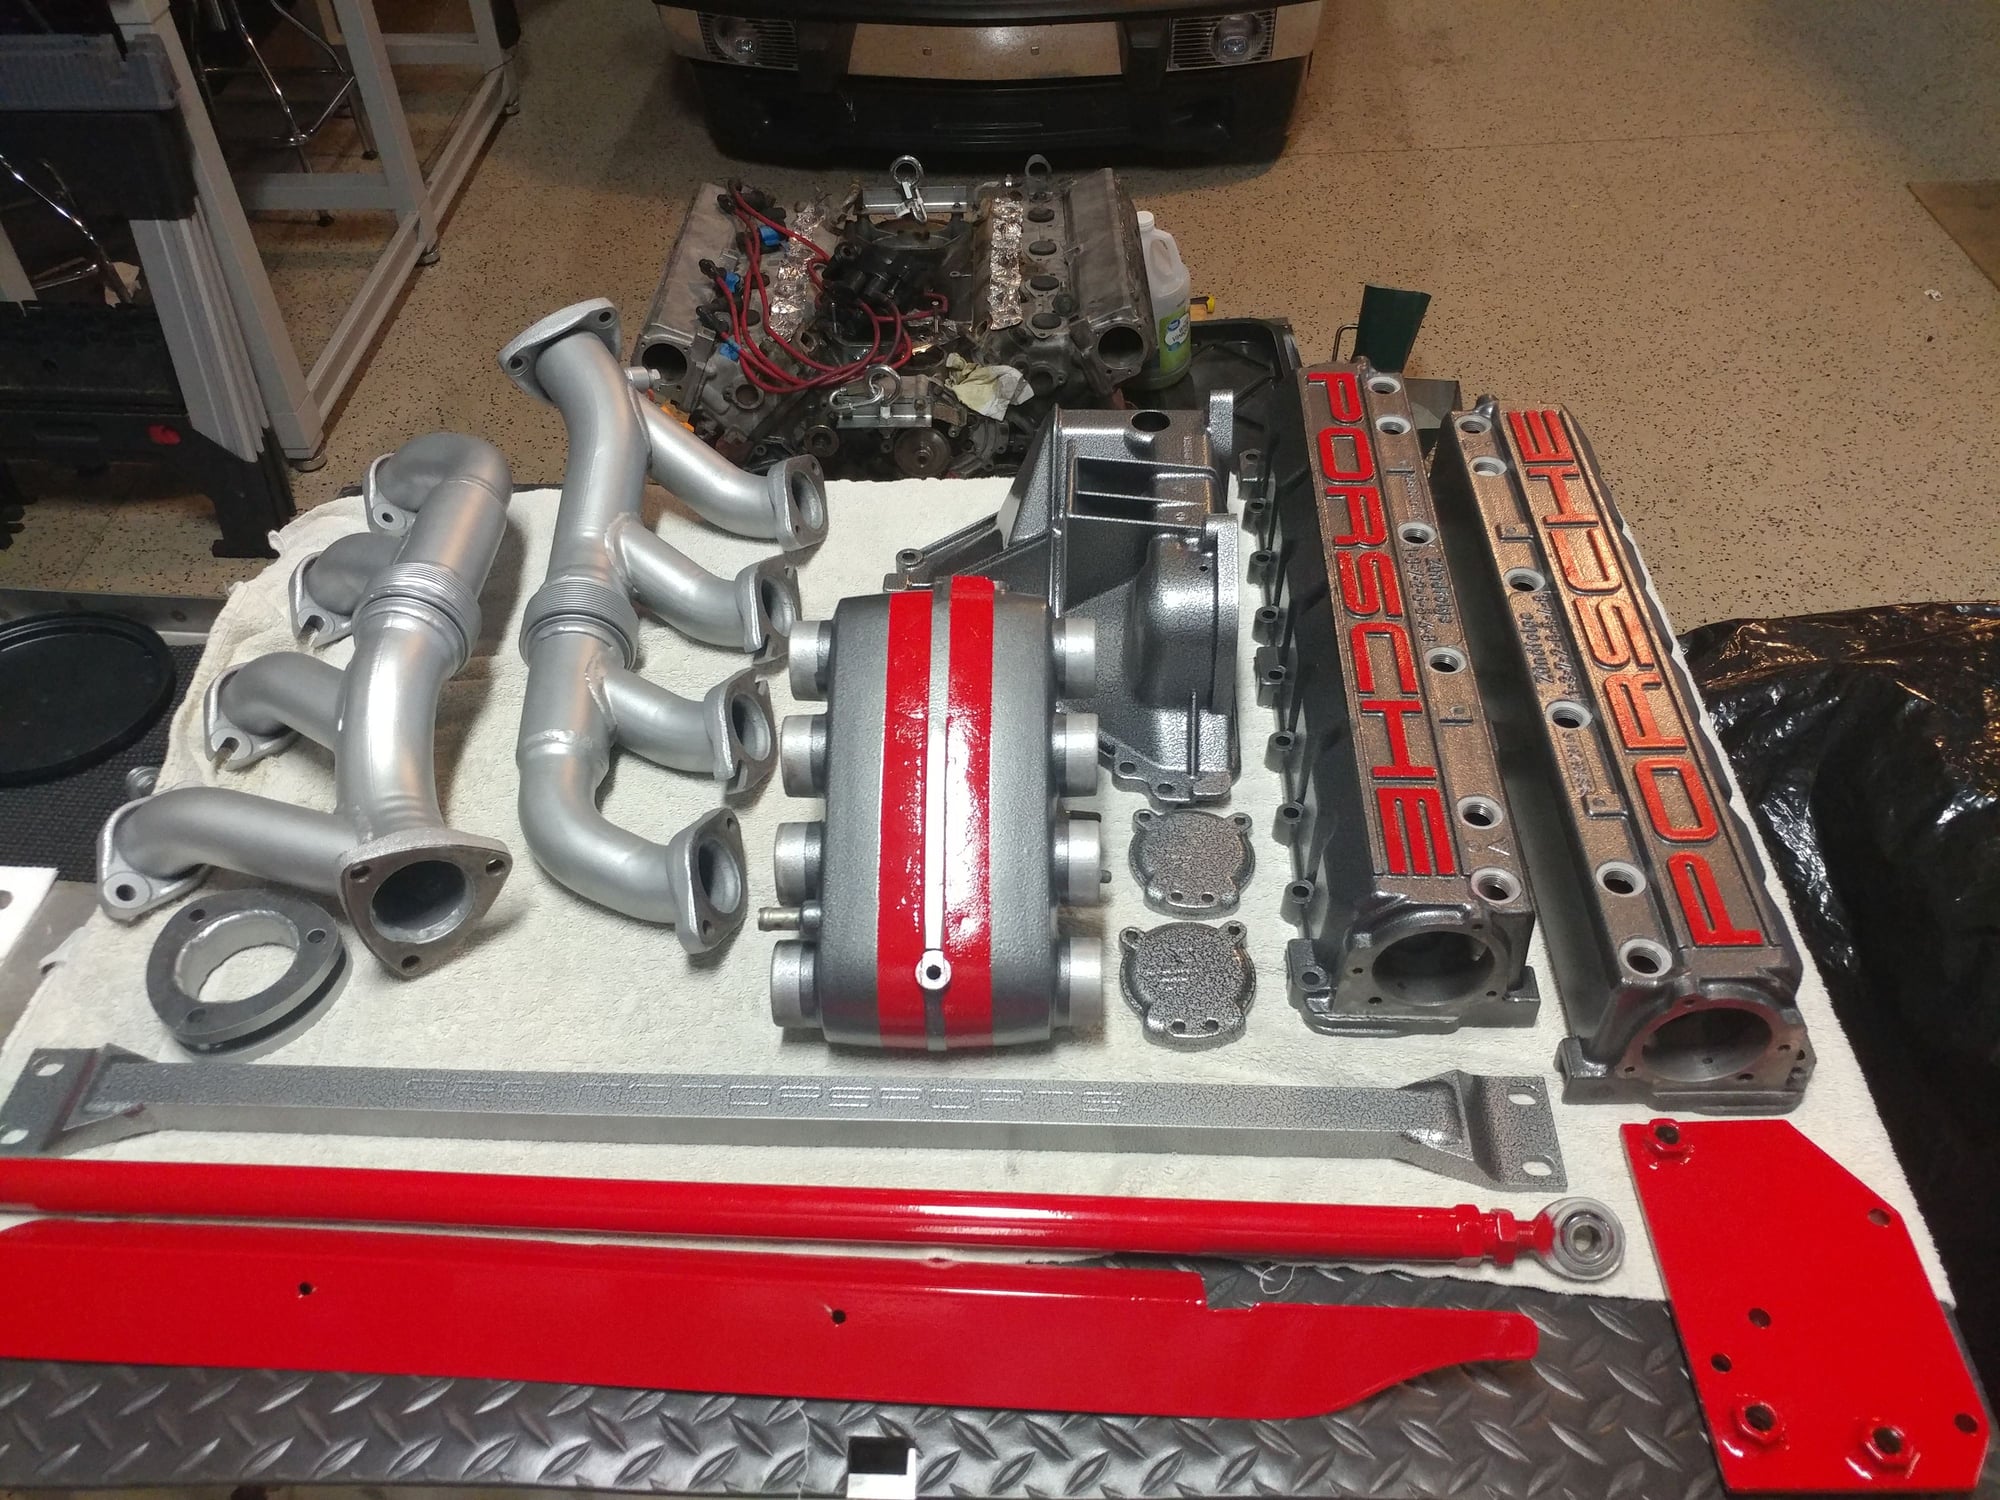
Parts from the powdercoater
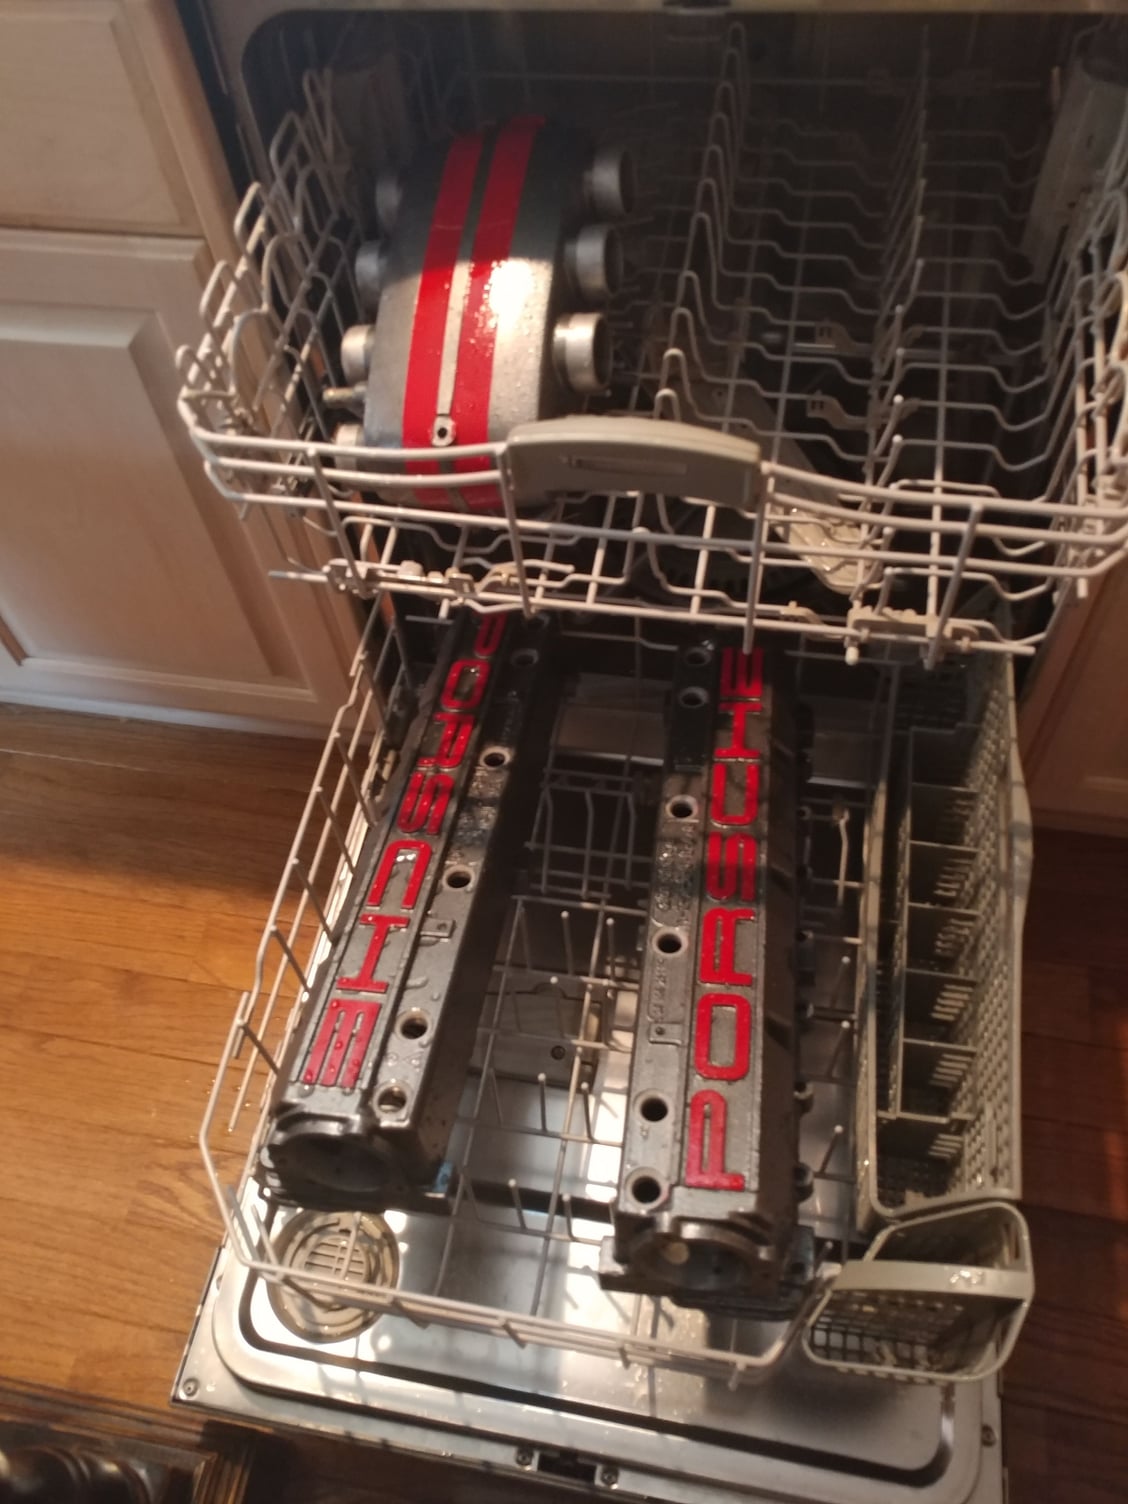
Since they sandblasted them before coating, I wanted to make sure any sand was thoroughly flushed out. They looked too clean to run back through my garage parts washer since it has dirty cleaning fluid in it now from this project, so I used the other parts washer
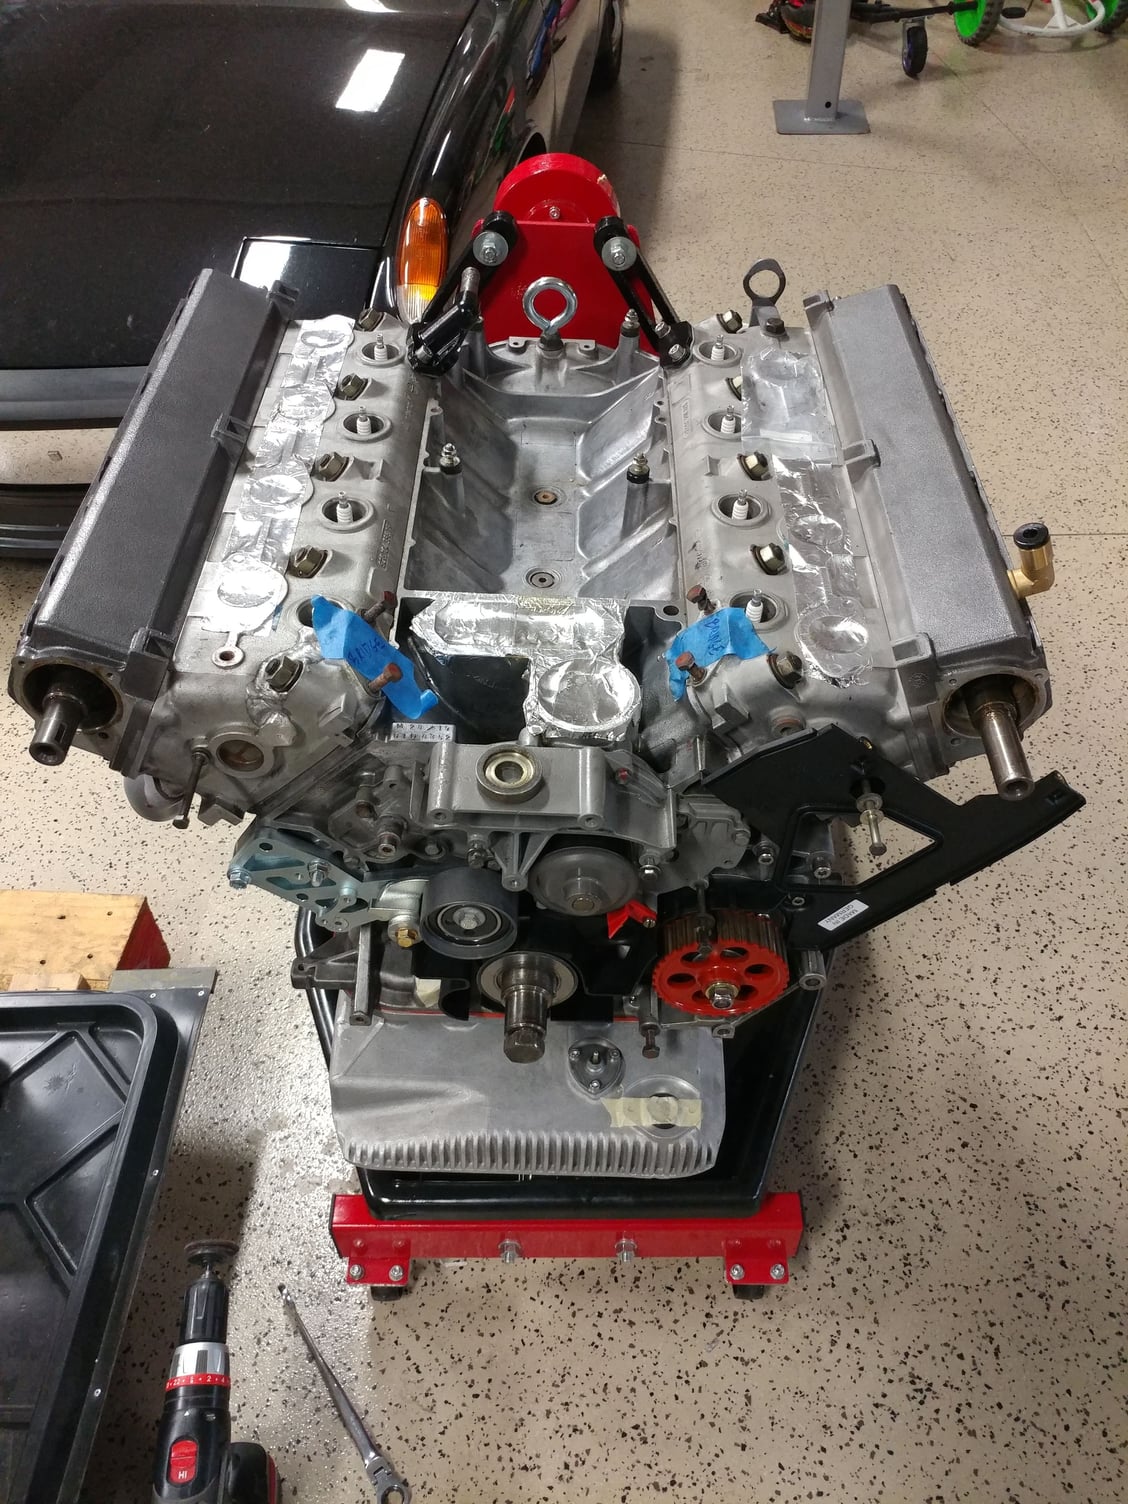
CM tower all greased up with lifters installed ready to go back on
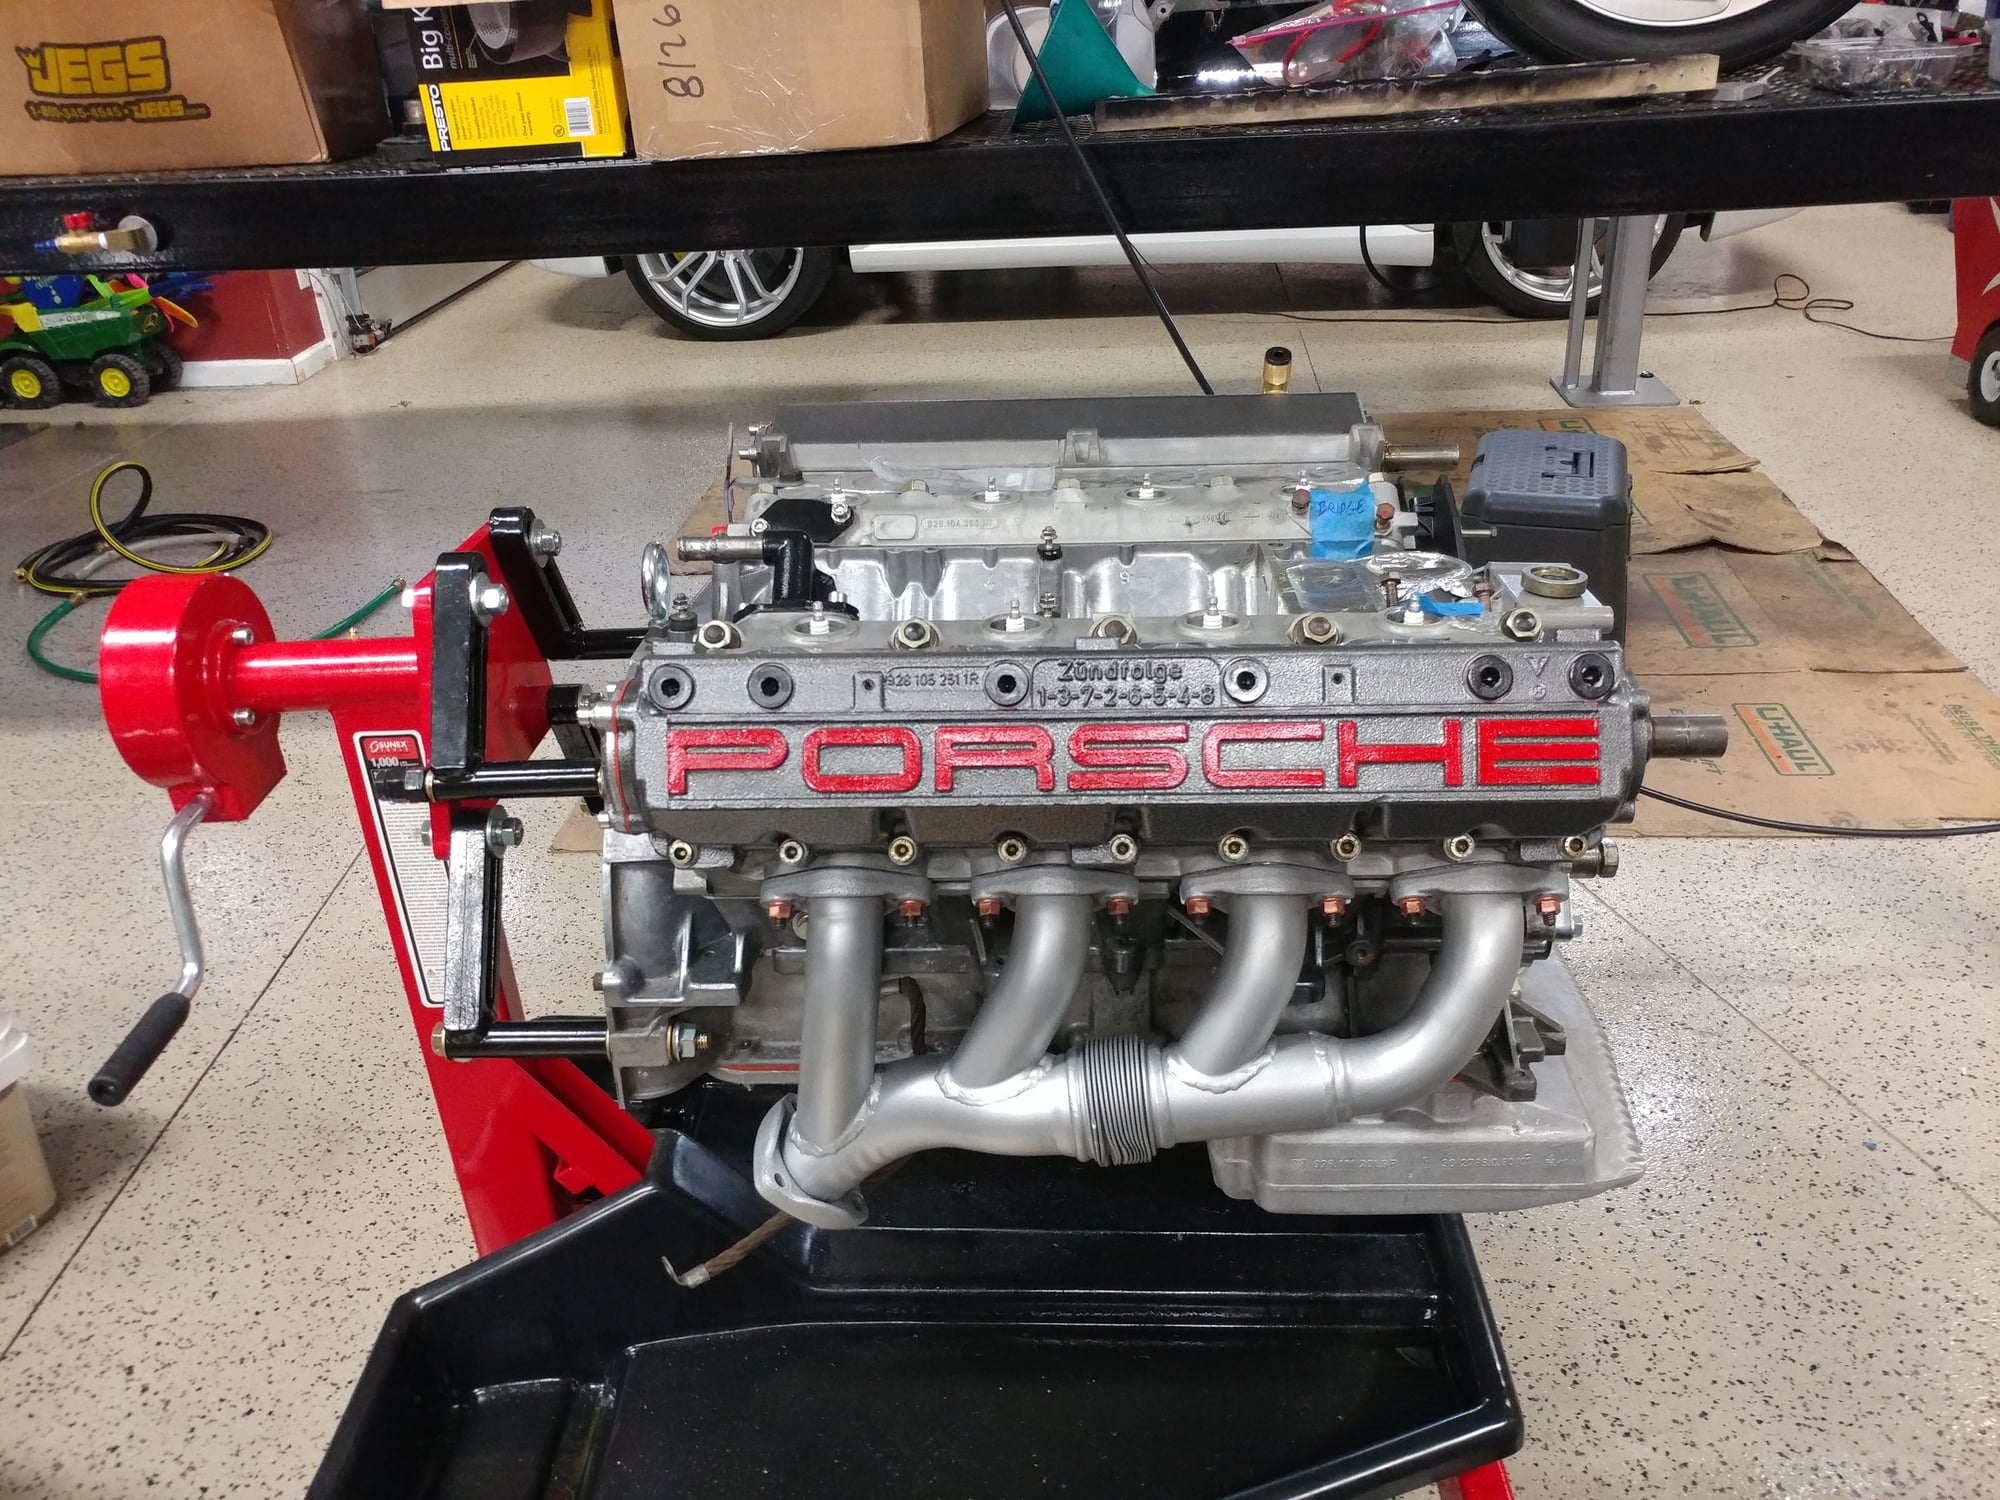
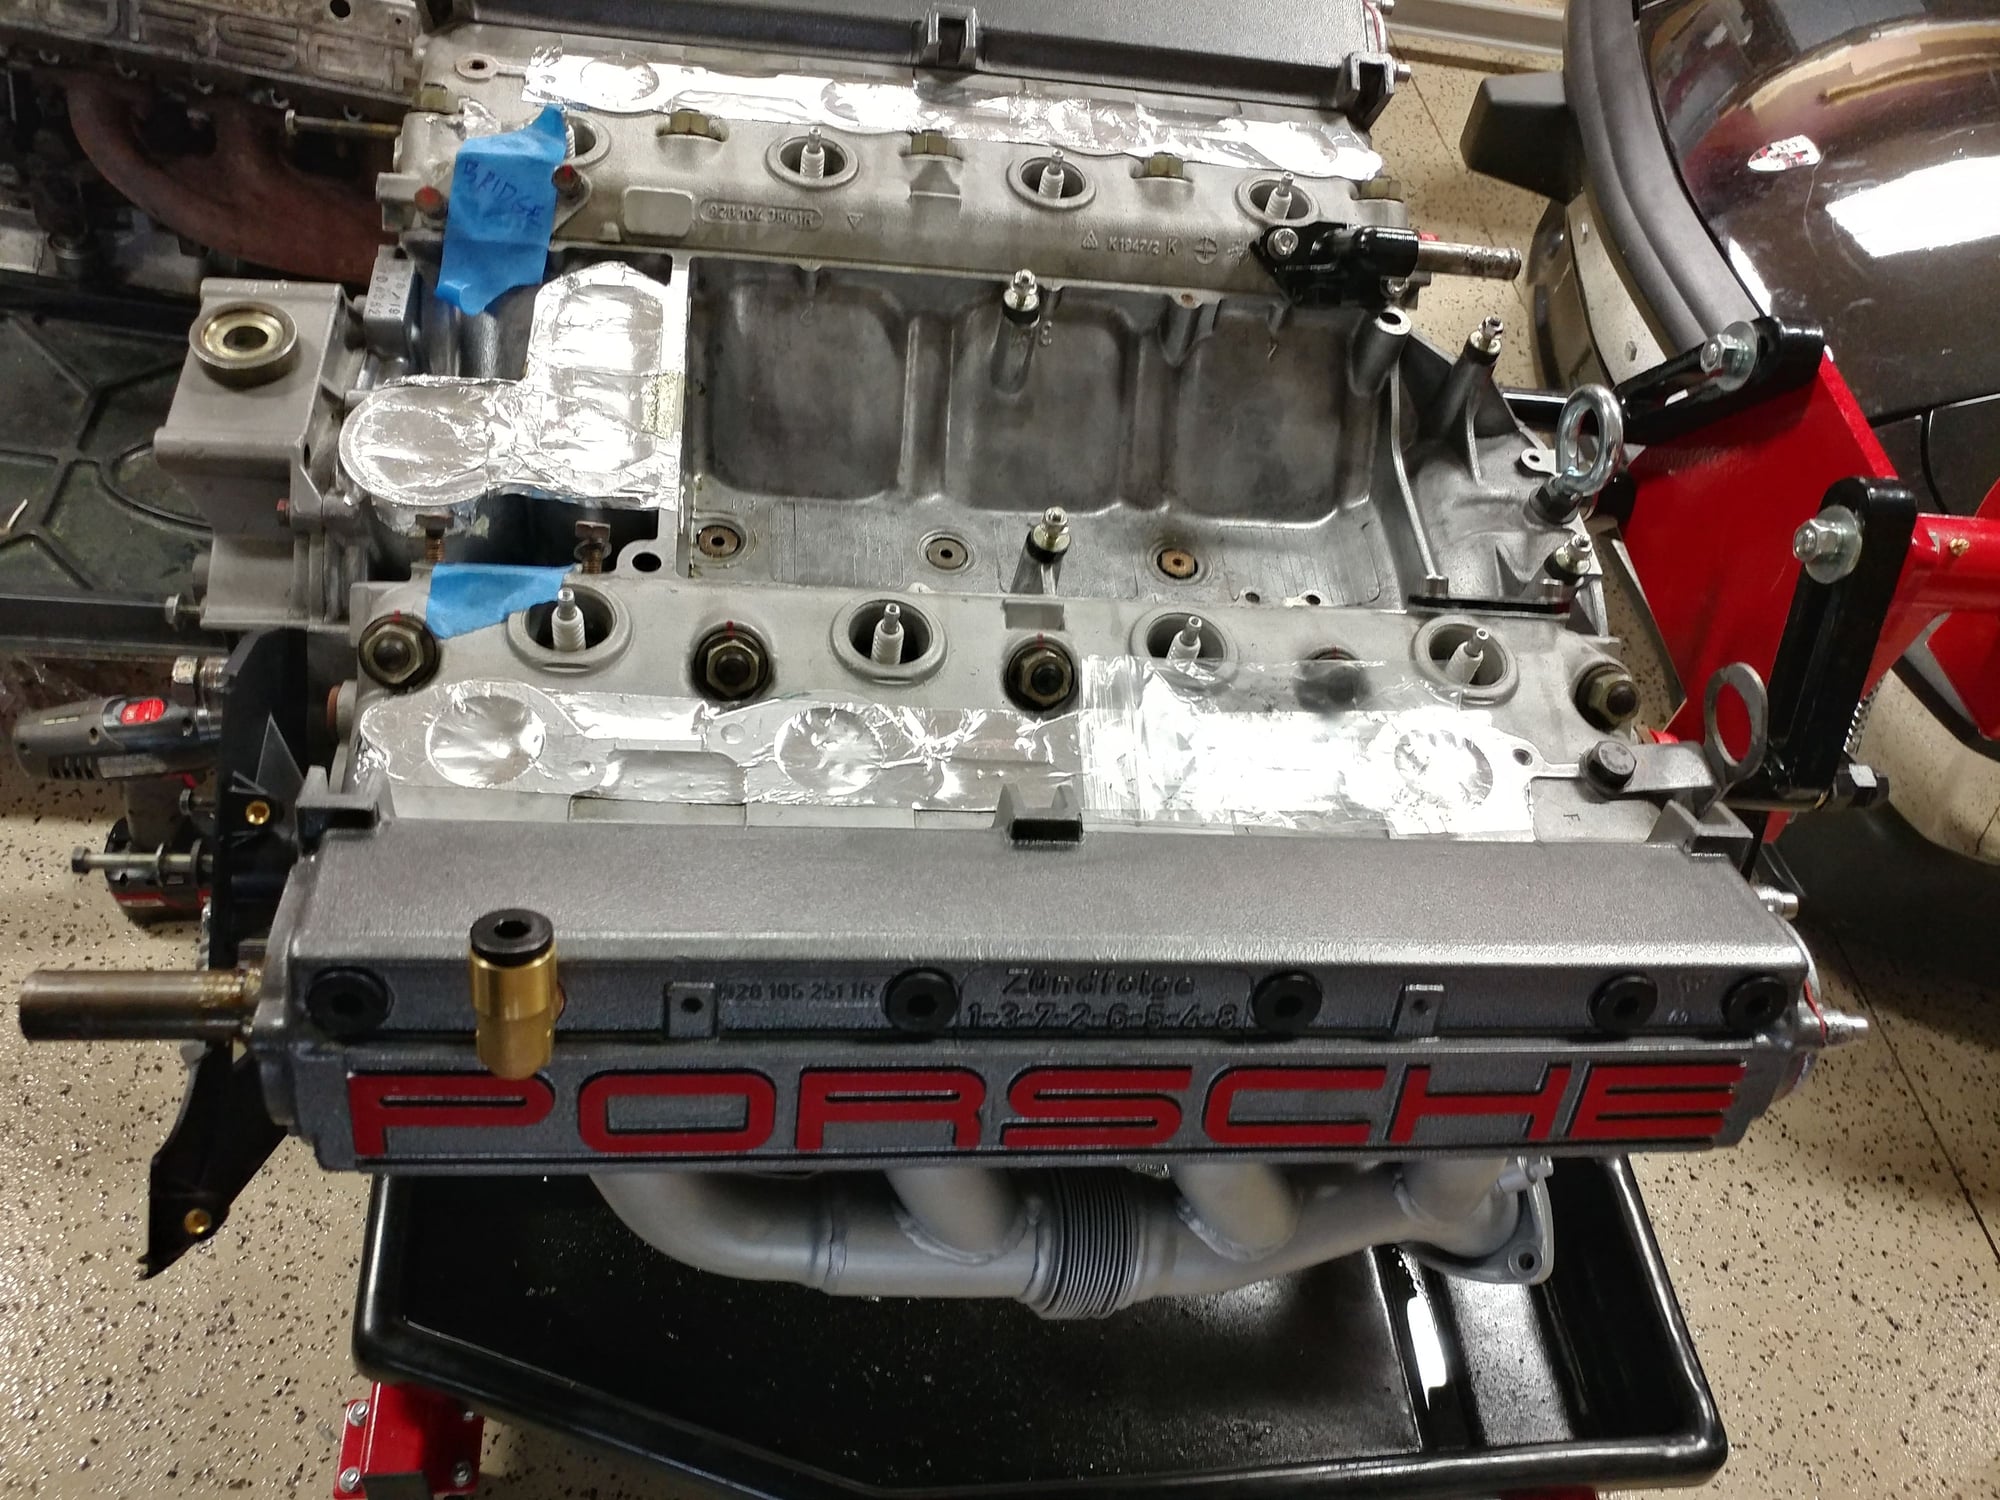
Passenger side done with Cerakote coated SS round tube headers I picked up from Jim Doer
Driver's side completed with port for crankcase vent
Both sides on along with preliminary setup of the Porken Tensioner
I have the other cam tower caps (pulley side) in the freezer to make them contract a little, as they seem to be a pretty tight fit, even before I get to the o-ring sealing gaskets.
Worked on a few things today, but couldn't do too much with it being mother's day and all.
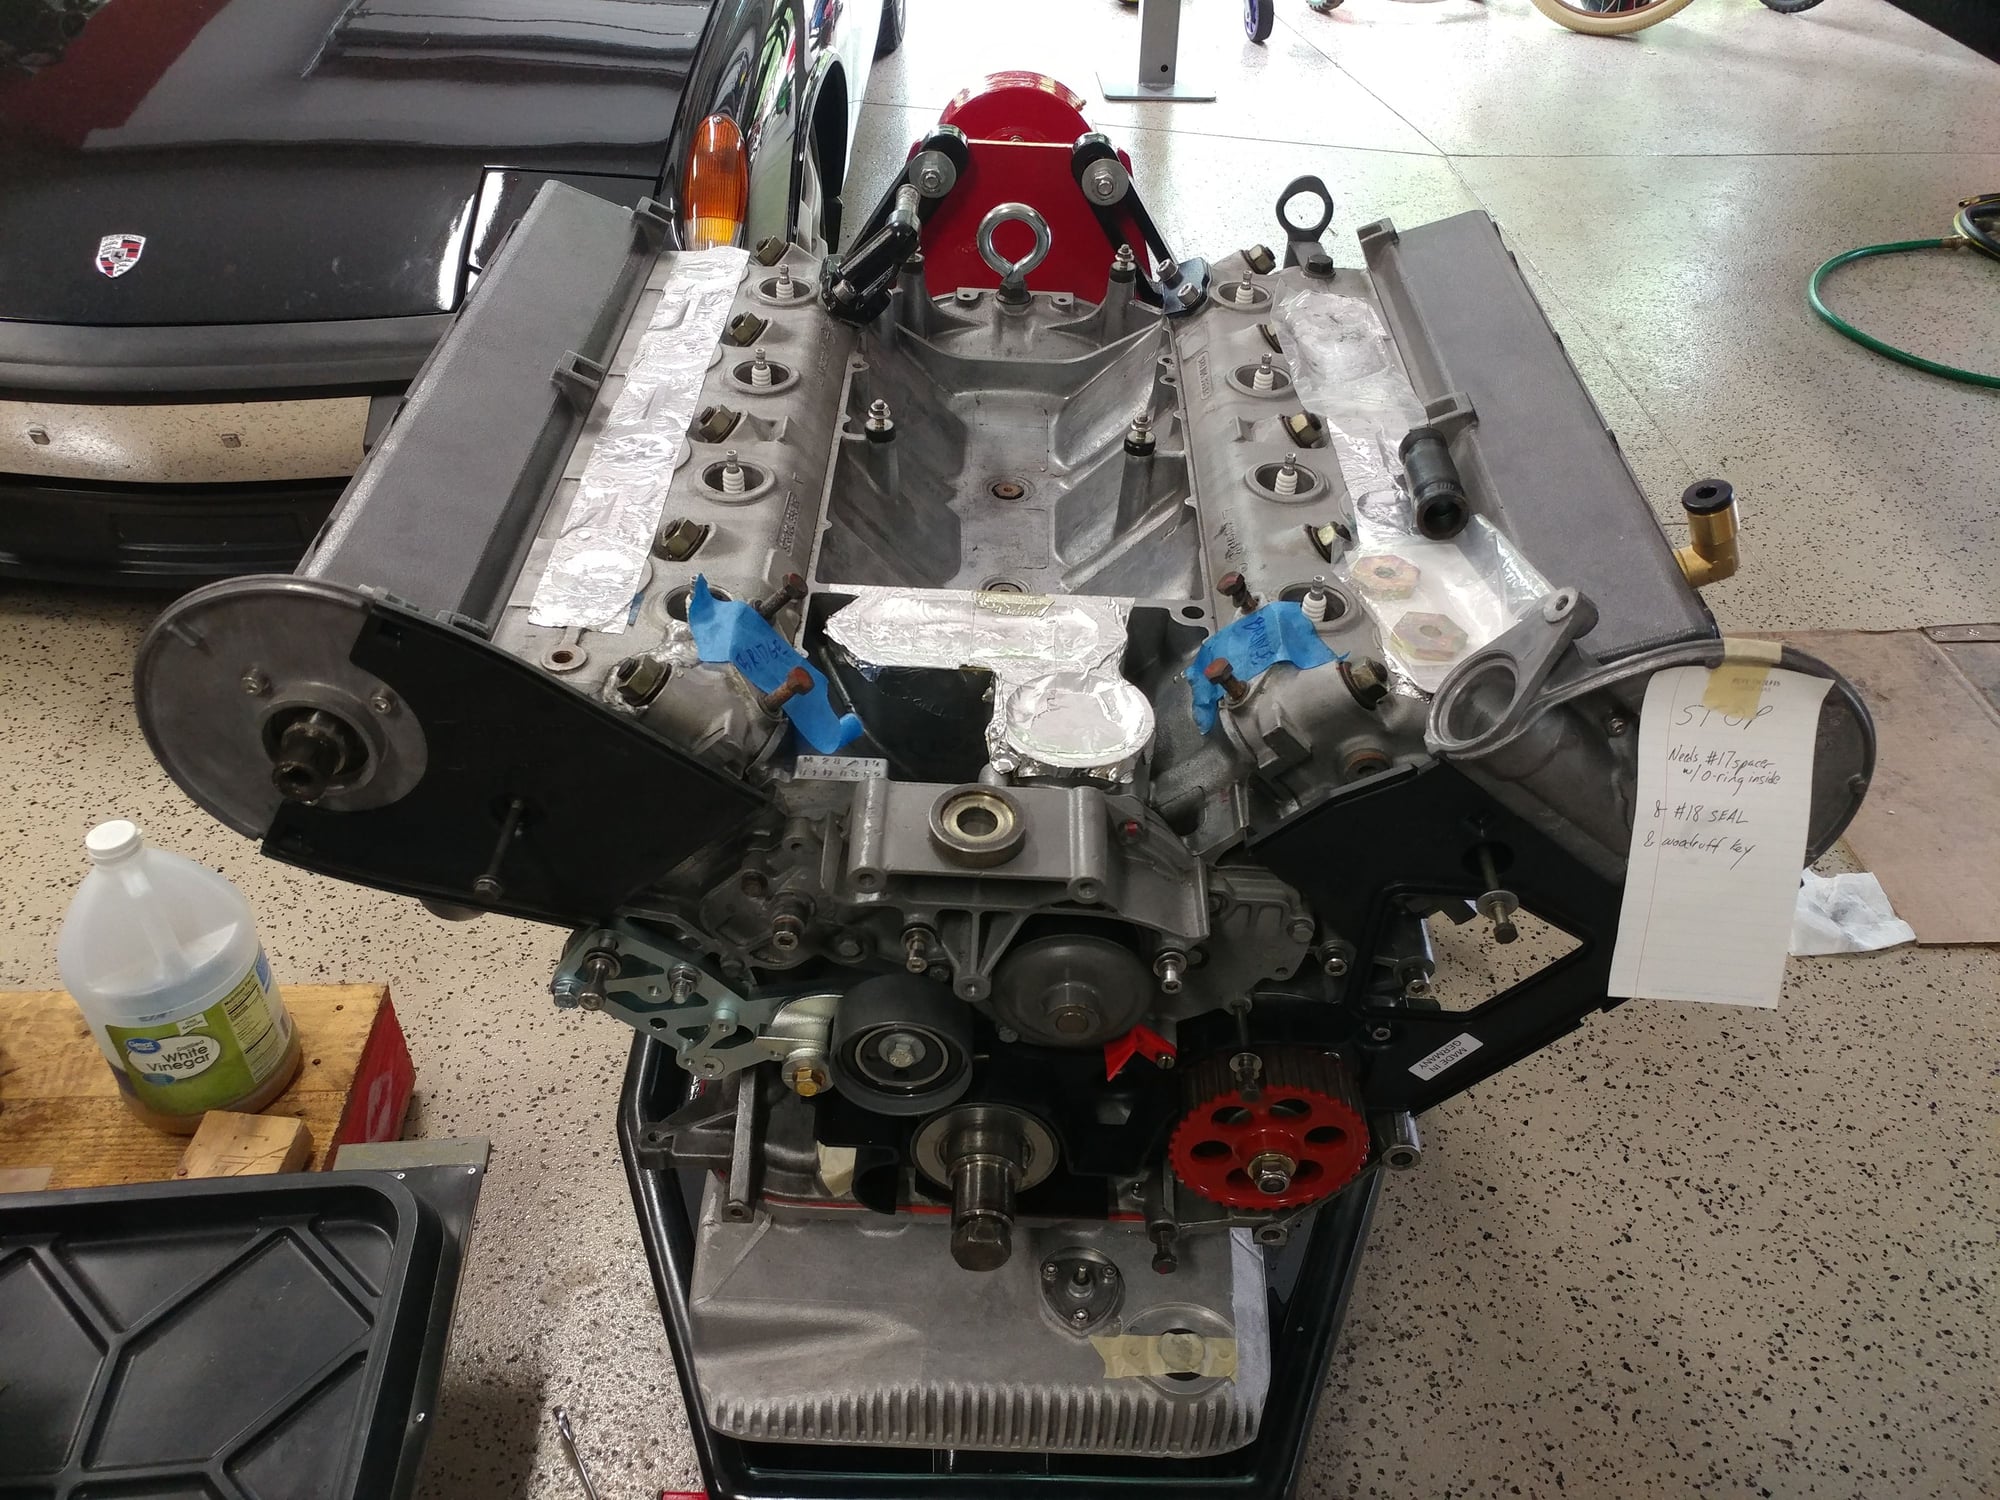
Freezer trick worked and the ends are now installed, but I realized I'm missing a few small parts like the end seals and I need a new bushing on the driver's side.
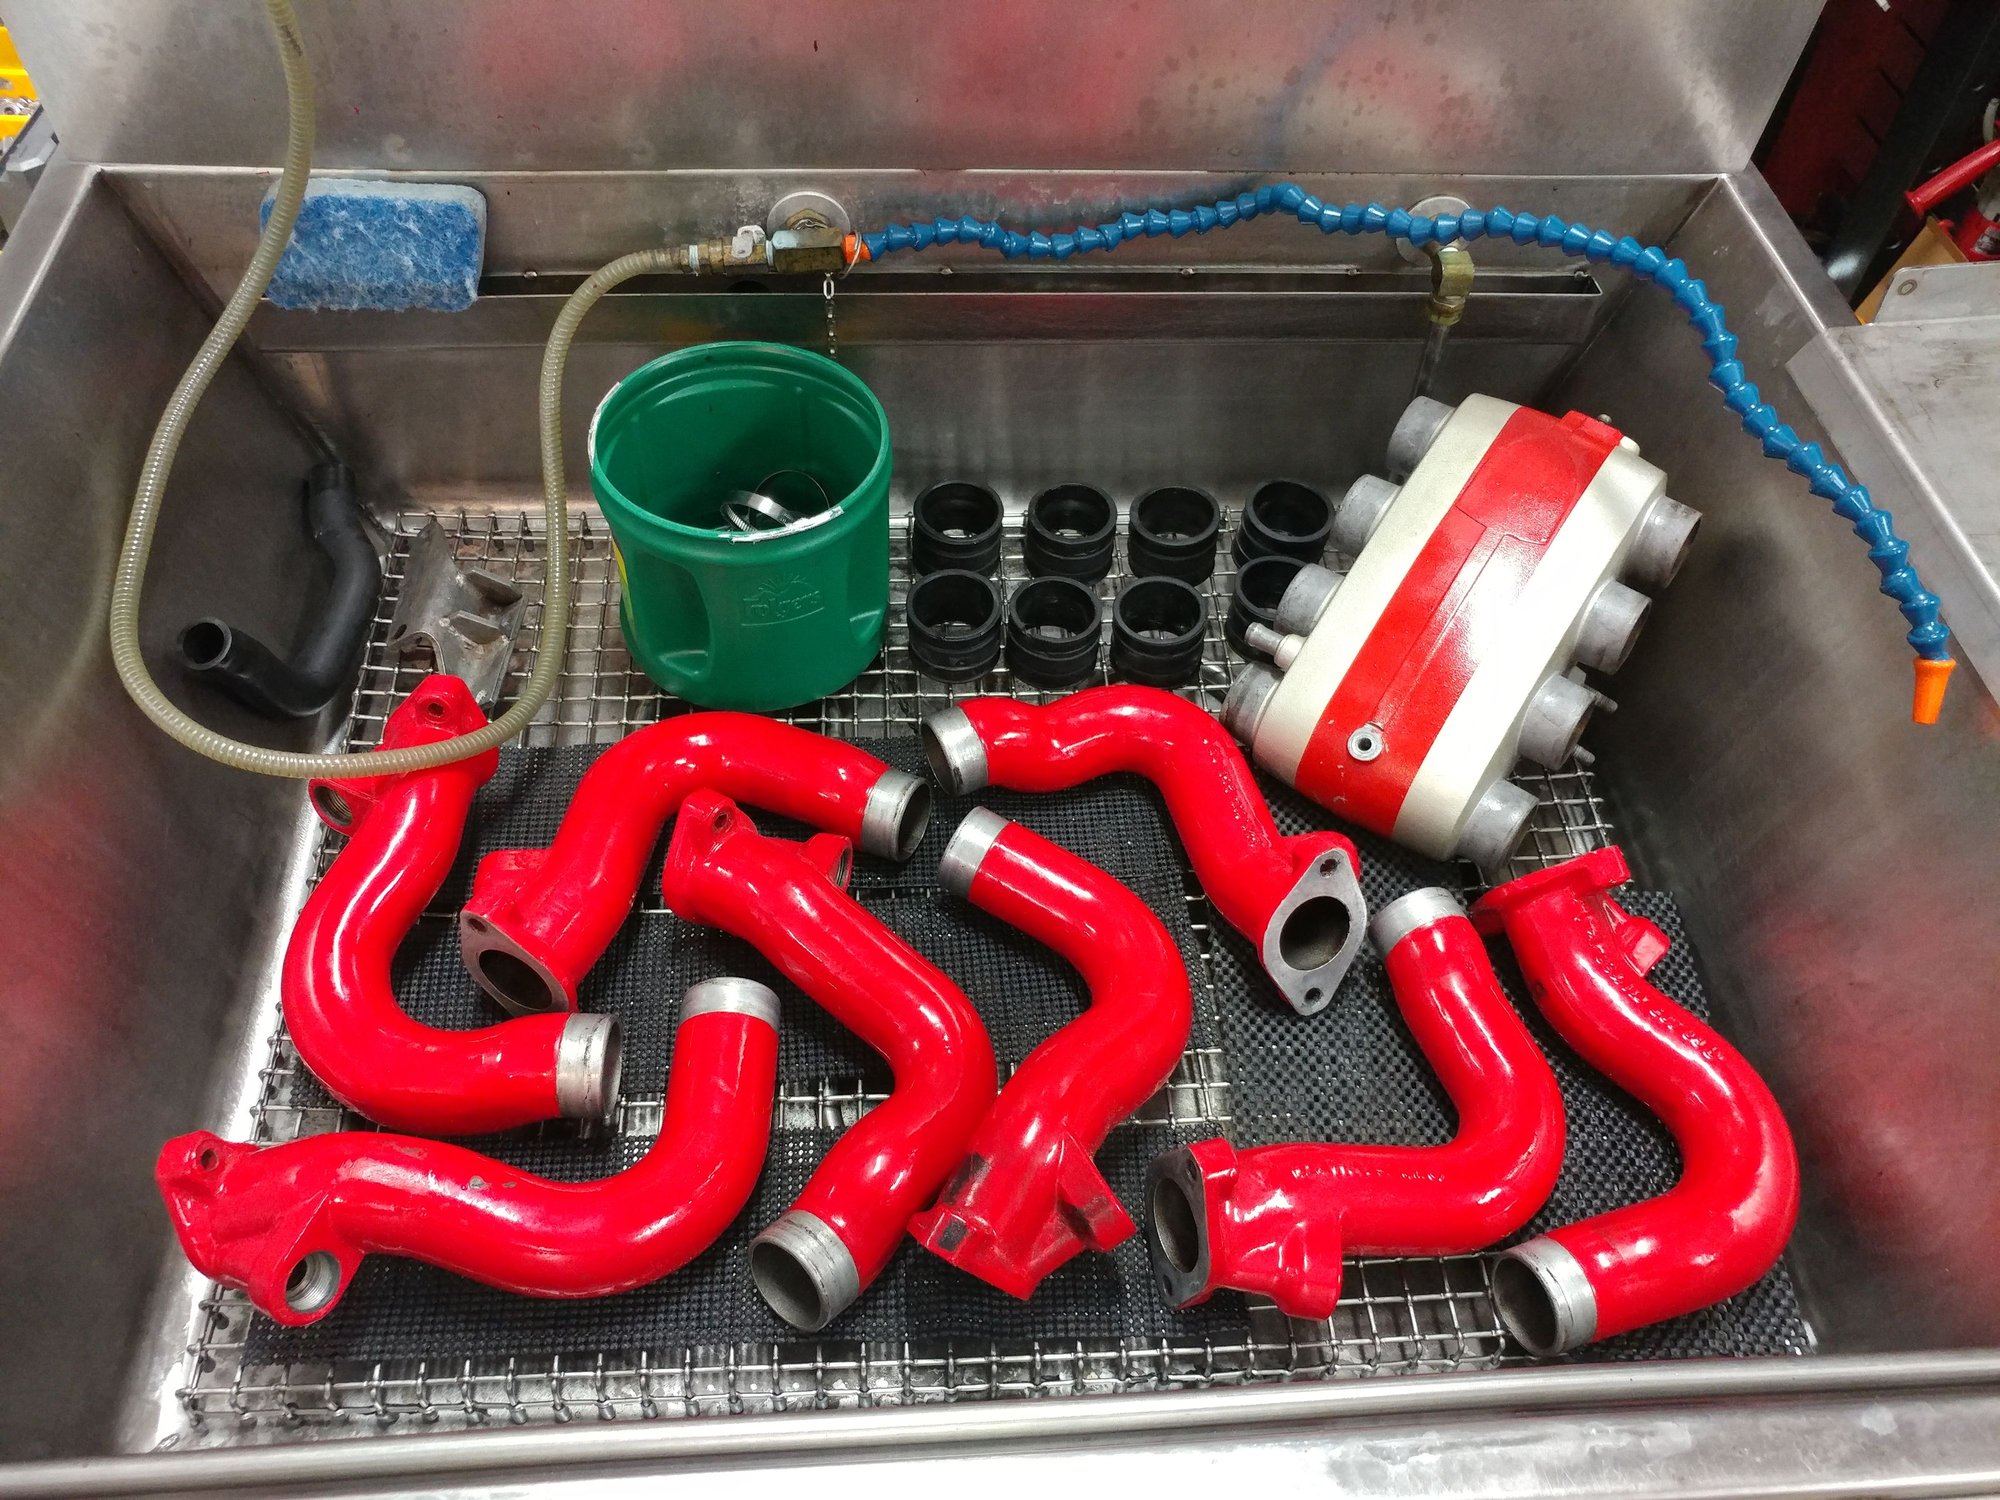
Took apart the spider intake to clean it up. This body will be sold with matching painted legs that I have, but these legs will get reused with the new spider body.
Also spent some time going more cleanup and polishing on my stainless Y-pipe. I'm trying to get all the burned on oil from the prior engine off so it's slow going.
As part of this engine project and because of the supercharger, I'm adding a knock detector even though the early cars didn't use them. This, along with the AFR gauge, and the updated distributor from a 4.7L car that has both advance and retard capability, I should be able to fine tune the advance timing for maximum benefit, but still protect the motor from knock occurring. The knock sensor is a kit from LINK systems, called their Knocklink and is self calibrating. It essentially learns what the motor sounds like under normal situations and then should it detect a knock outside of that normal, will flash a warning light in the cockpit (http://dealers.linkecu.com/G4KNL).
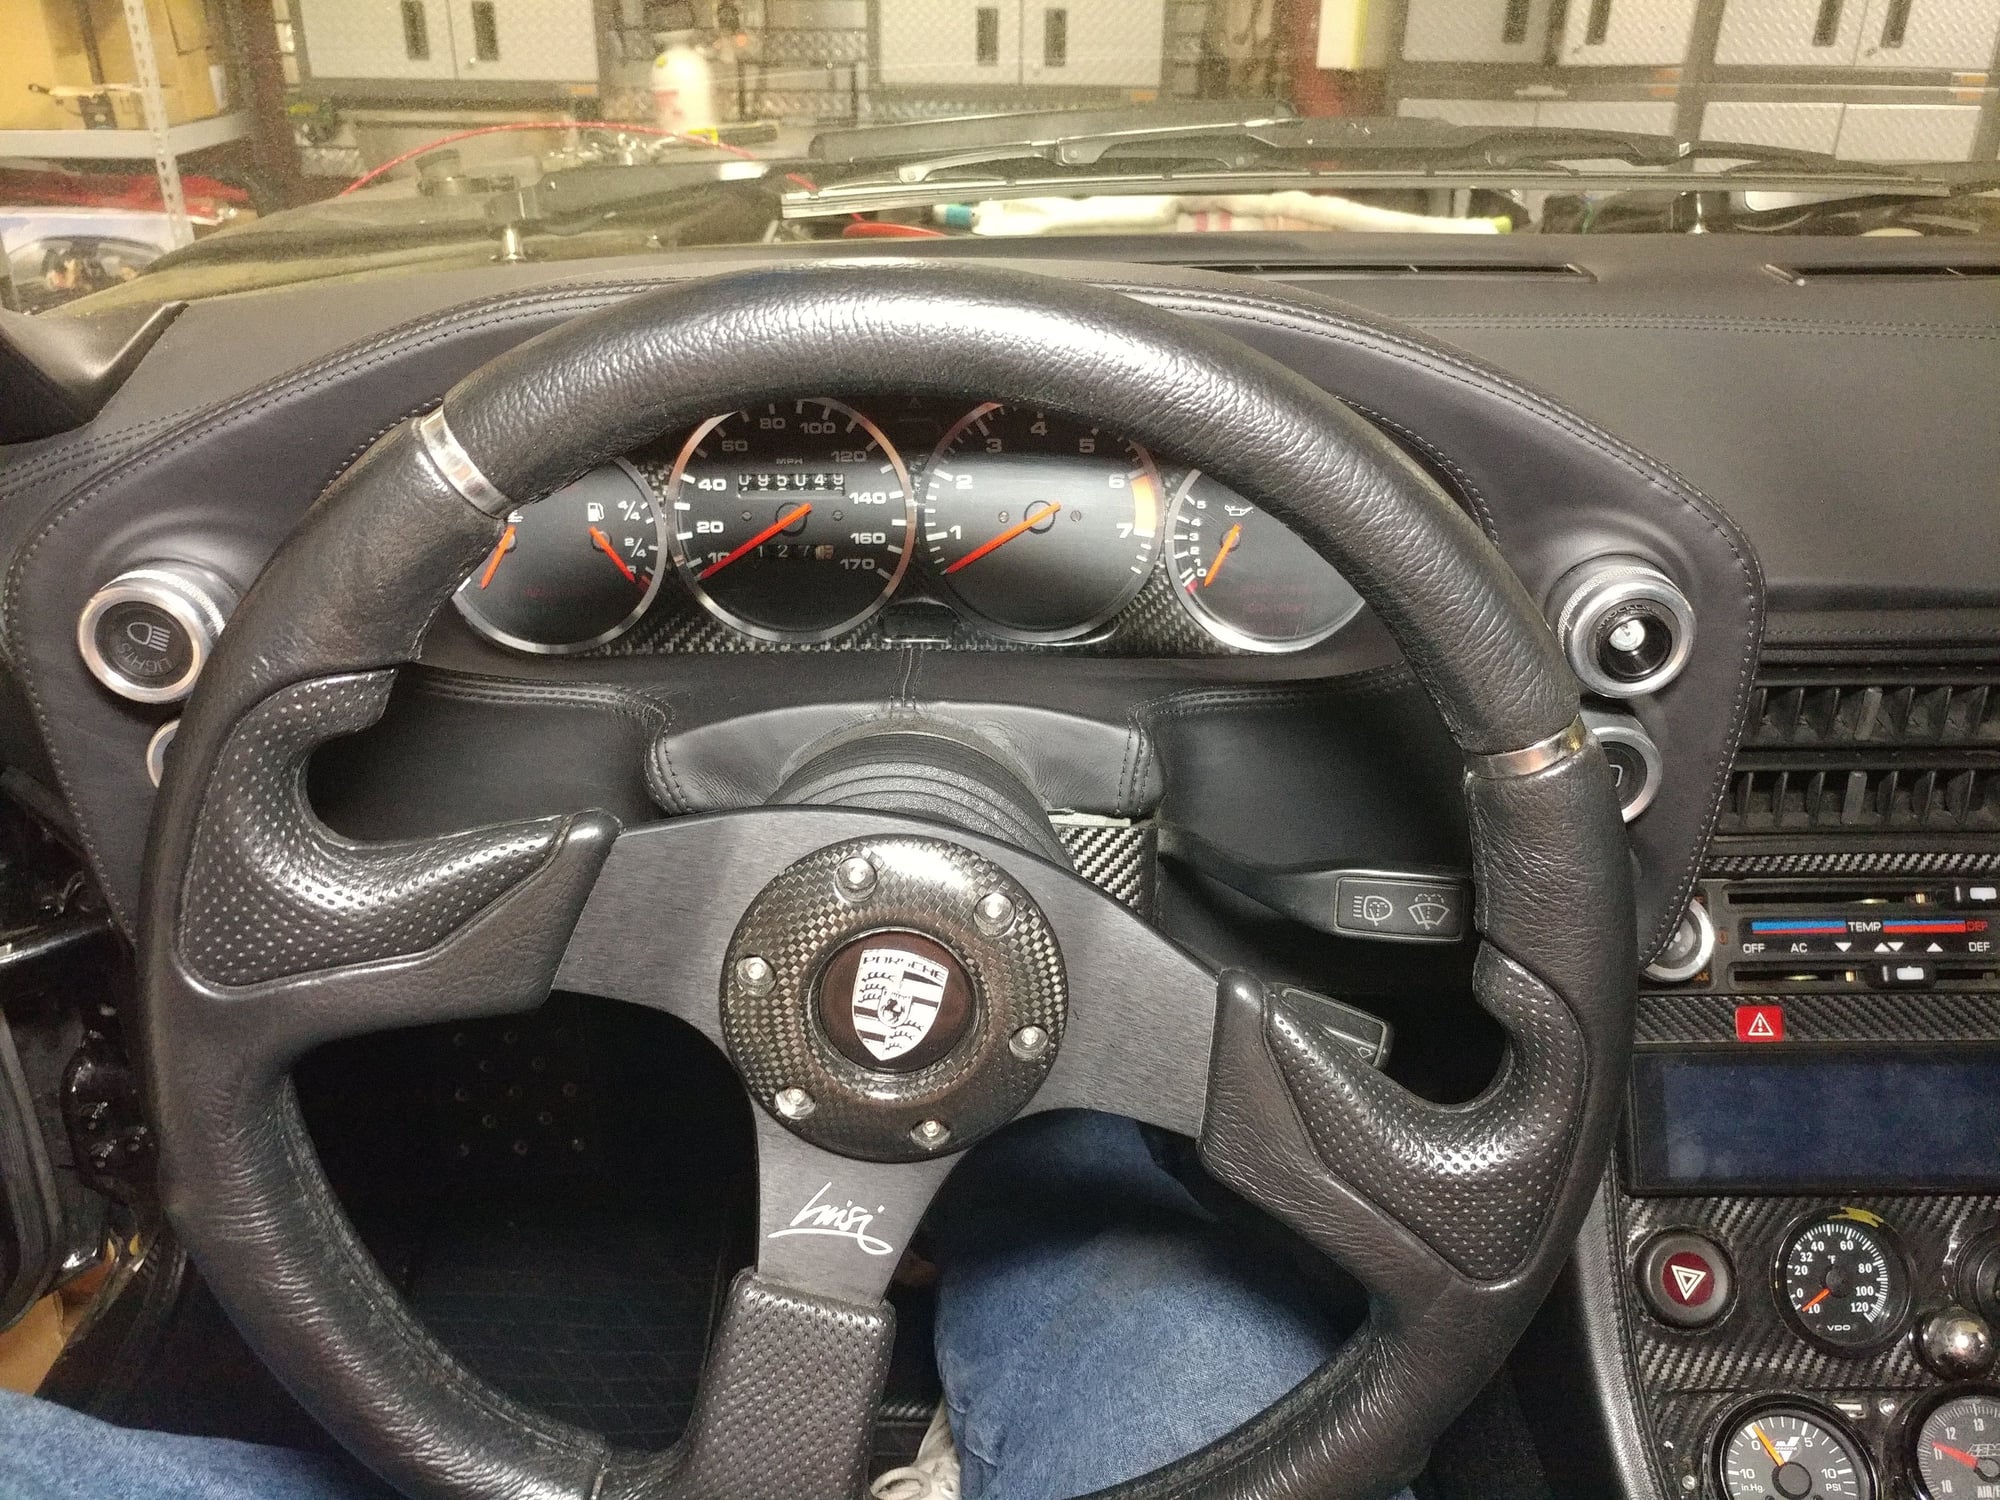
While I was waiting on some cam end shaft seals to arrive, I decided to tackle this one last night. I had already made a hole through the firewall for previous wiring projects, so passing the 2 strand shielded cable through from the cockpit to the engine compartment was pretty easy. The next challenge was trying to decide where to mount the warning light which also has the system controller built into it, so larger than just a warning light would need to be. I thought about up on the windshield visor area, but didn't think I wanted a flashing red light up there at night, considered the center console area, but couldn't come up with a plan that would look nice and in the day time, thought I might not see the warning light if down that far, and then I had a great idea....
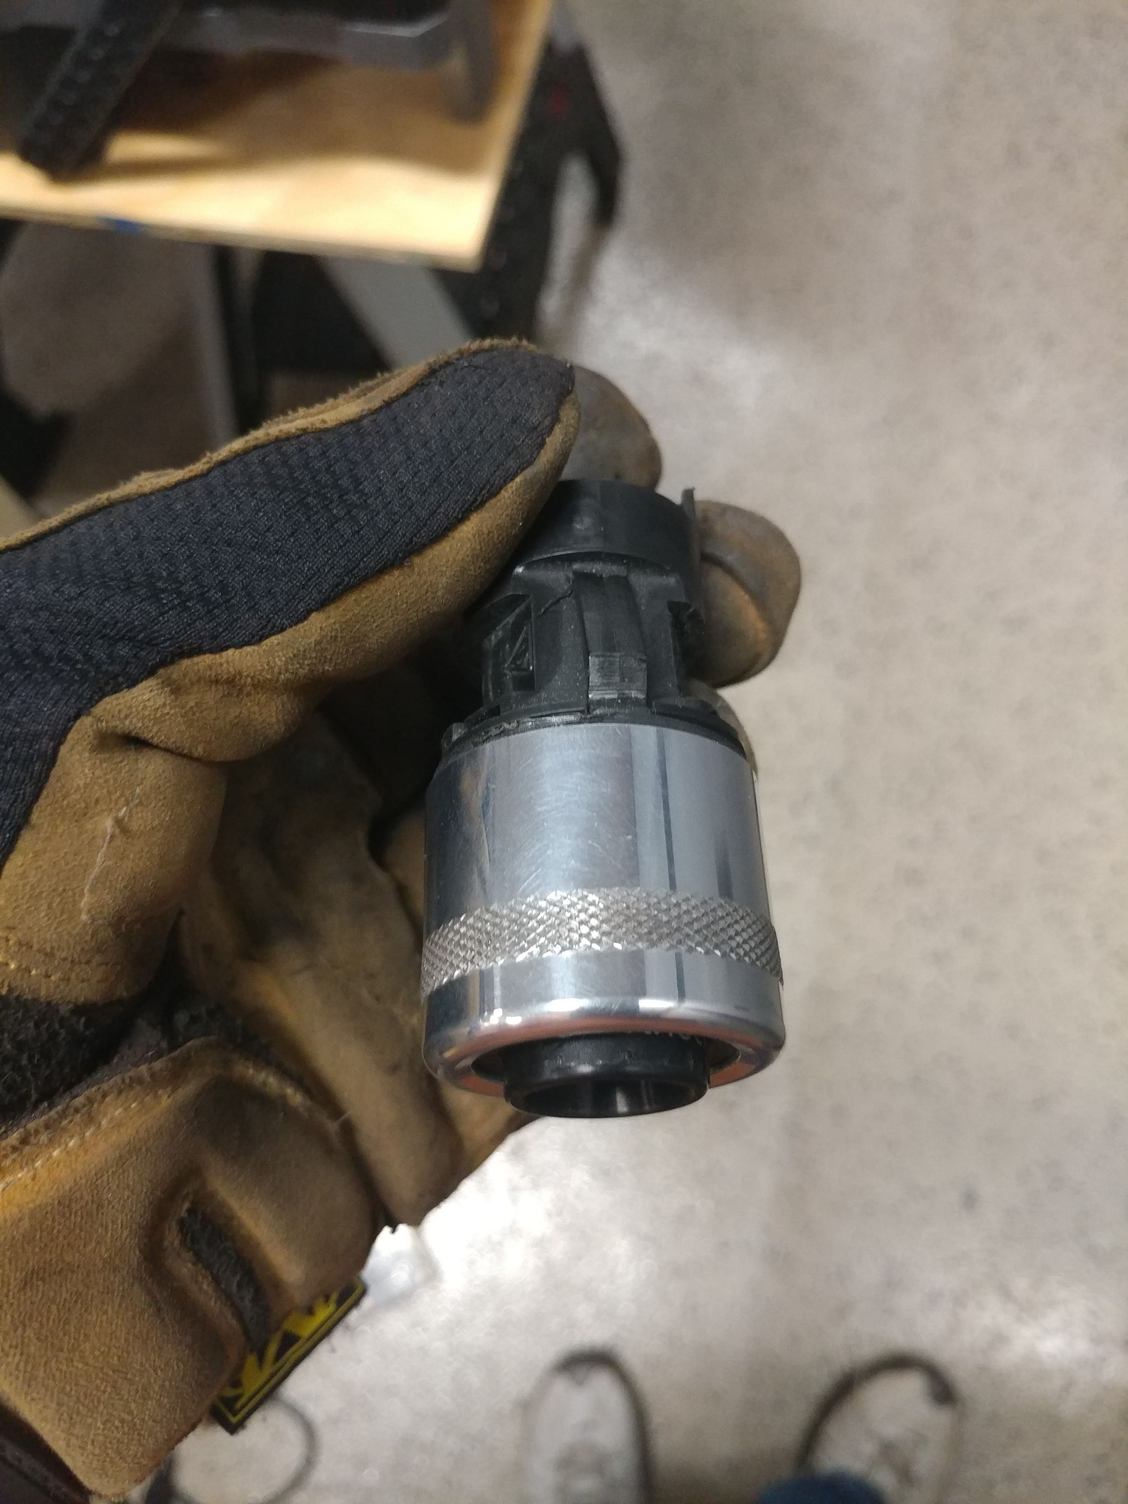
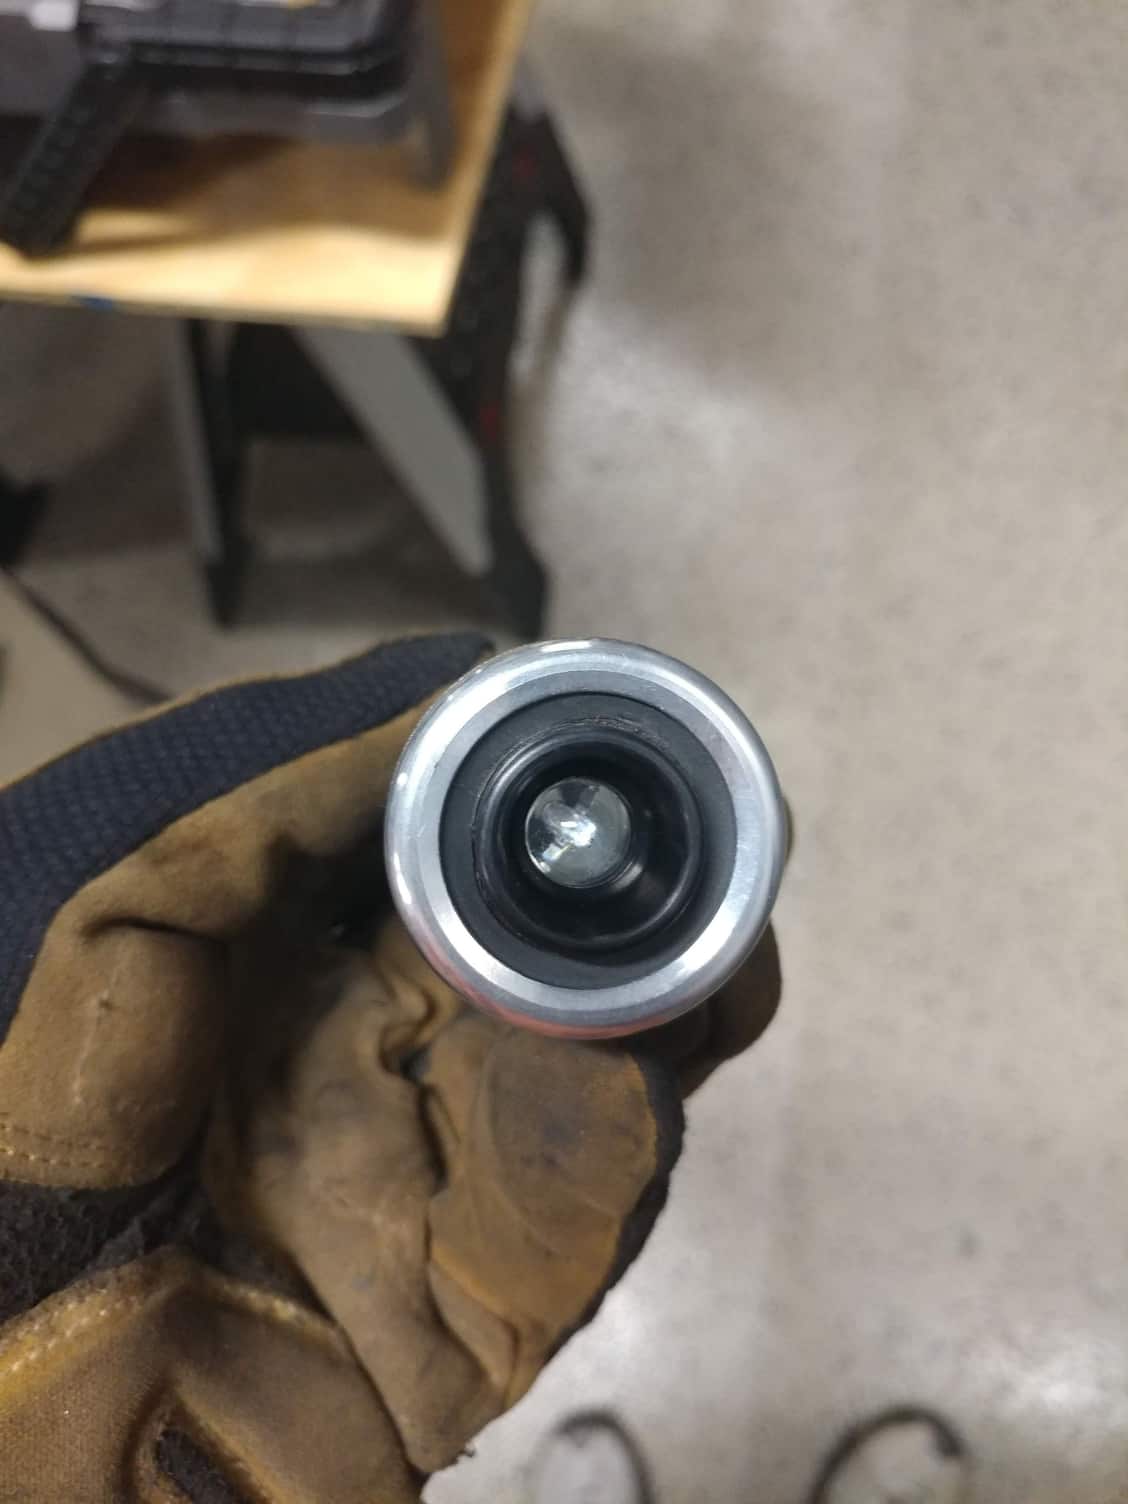
Because my car is a convertible, I do not have a rear wiper, even though I still have a rear wiper switch that isn't used for anything. It would provide for a 12v switched circuit to power the knocklink when the key was on, an easily accessible ground wire, and be in a good position to catch it blinking without having to specifically direct my attention to it, so I pulled out the switch from the top right position of the pod and started looking at it to see if there was a way to install the warning light there.
With some customizing (cannibalizing) of the old switch, it looks like it will work perfectly.
Kit packaging and info including the Bosch brand knock sensor.
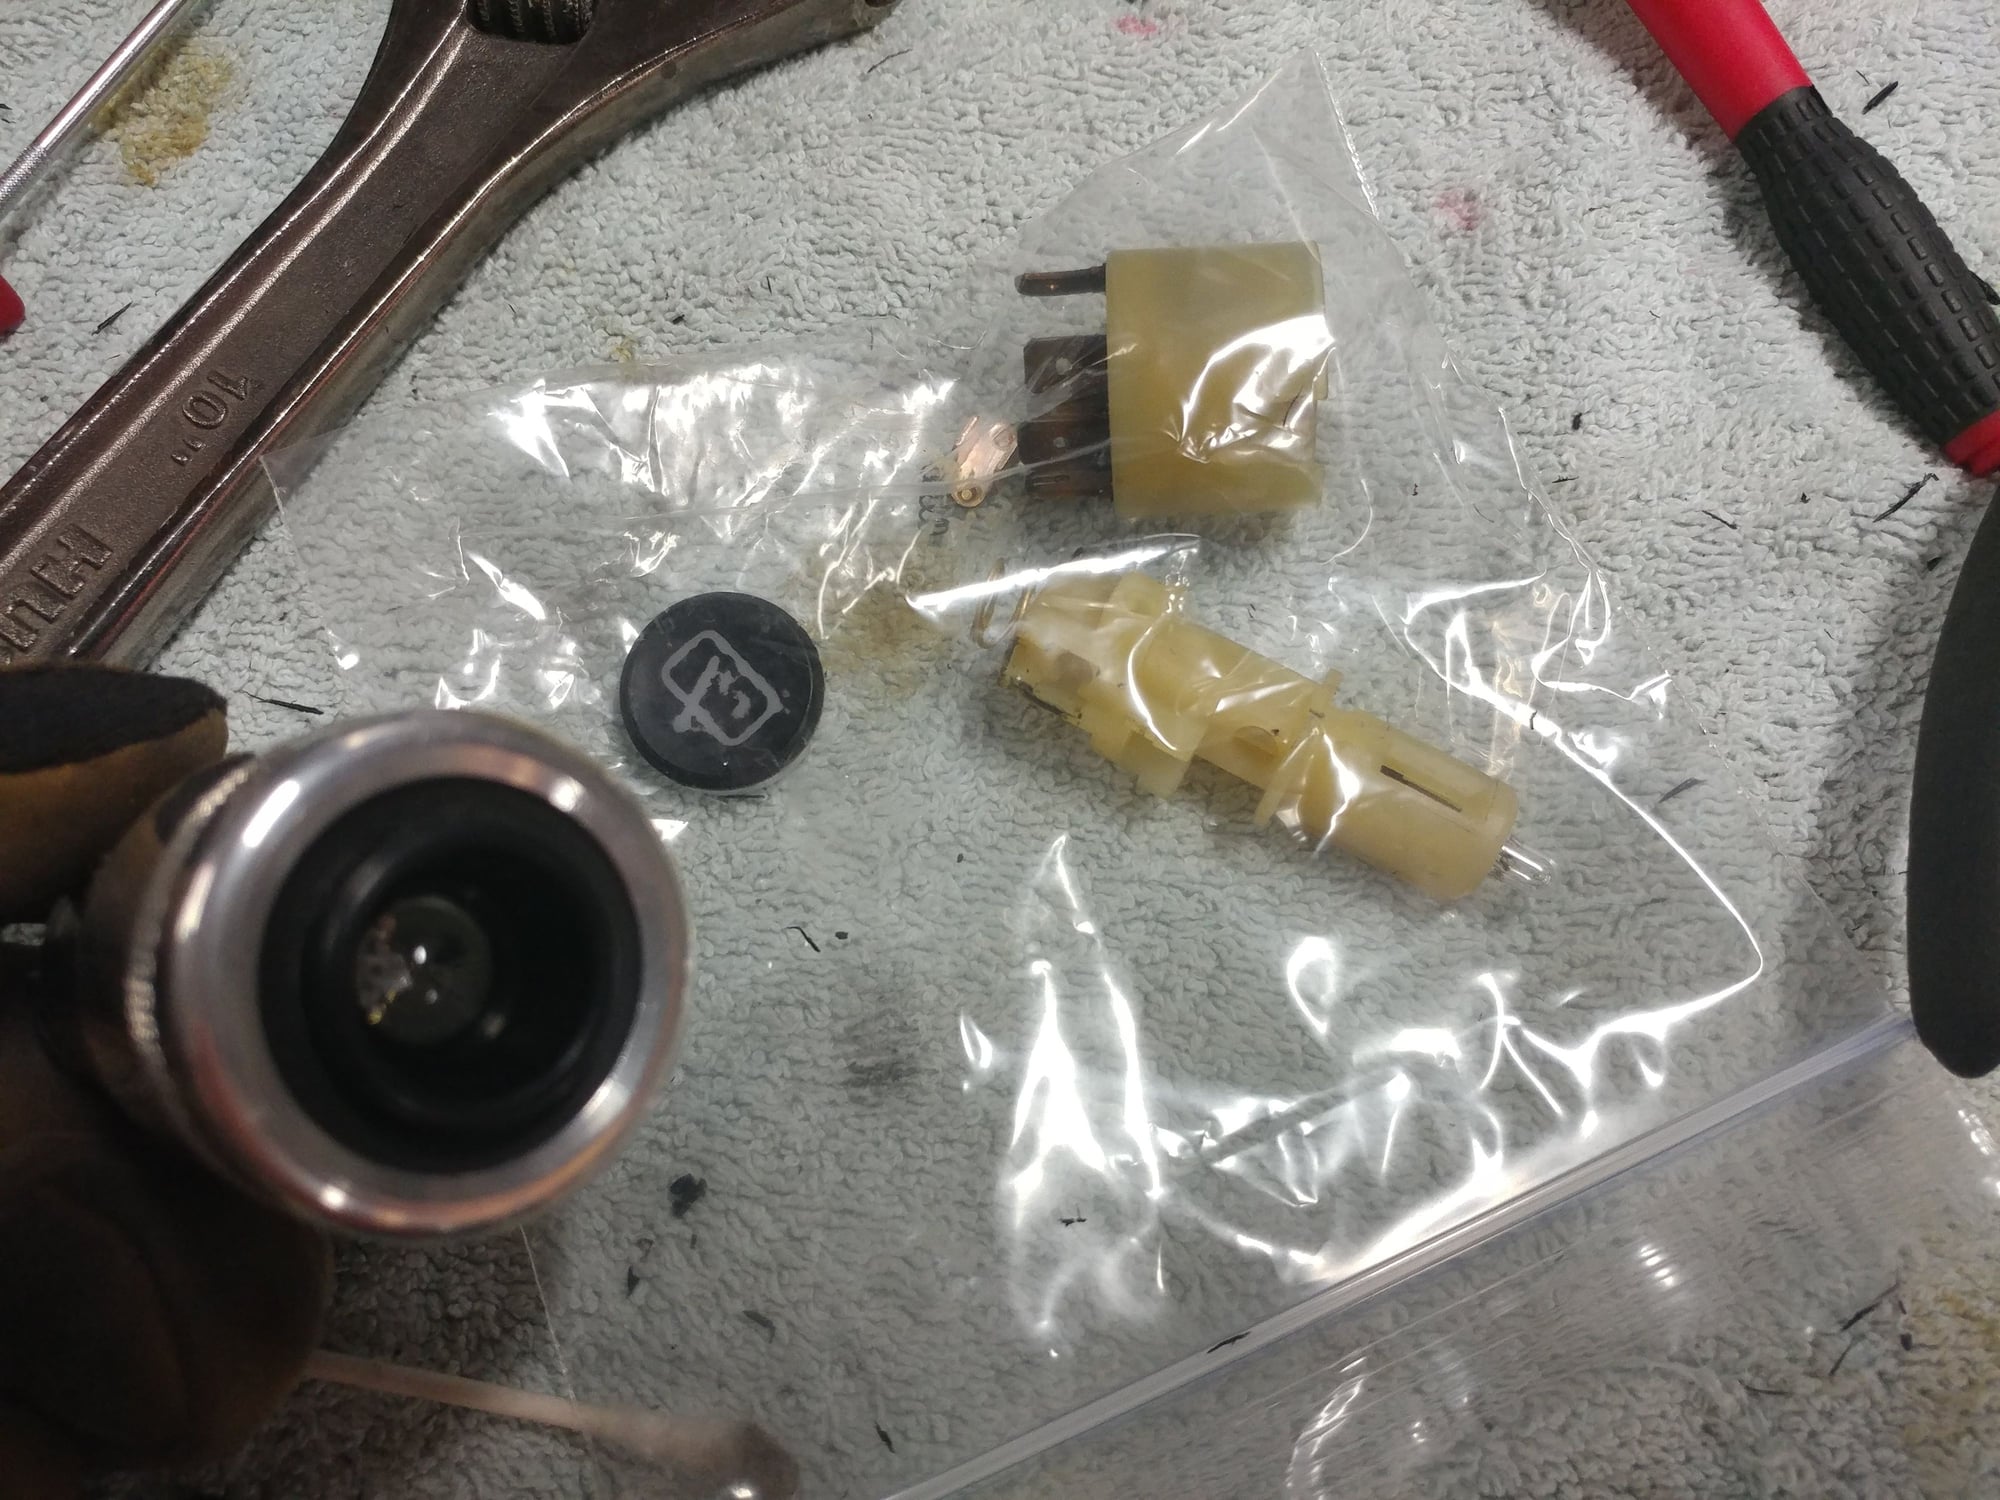
Pieces of the old rear wiper switch and the sensor mounted in it
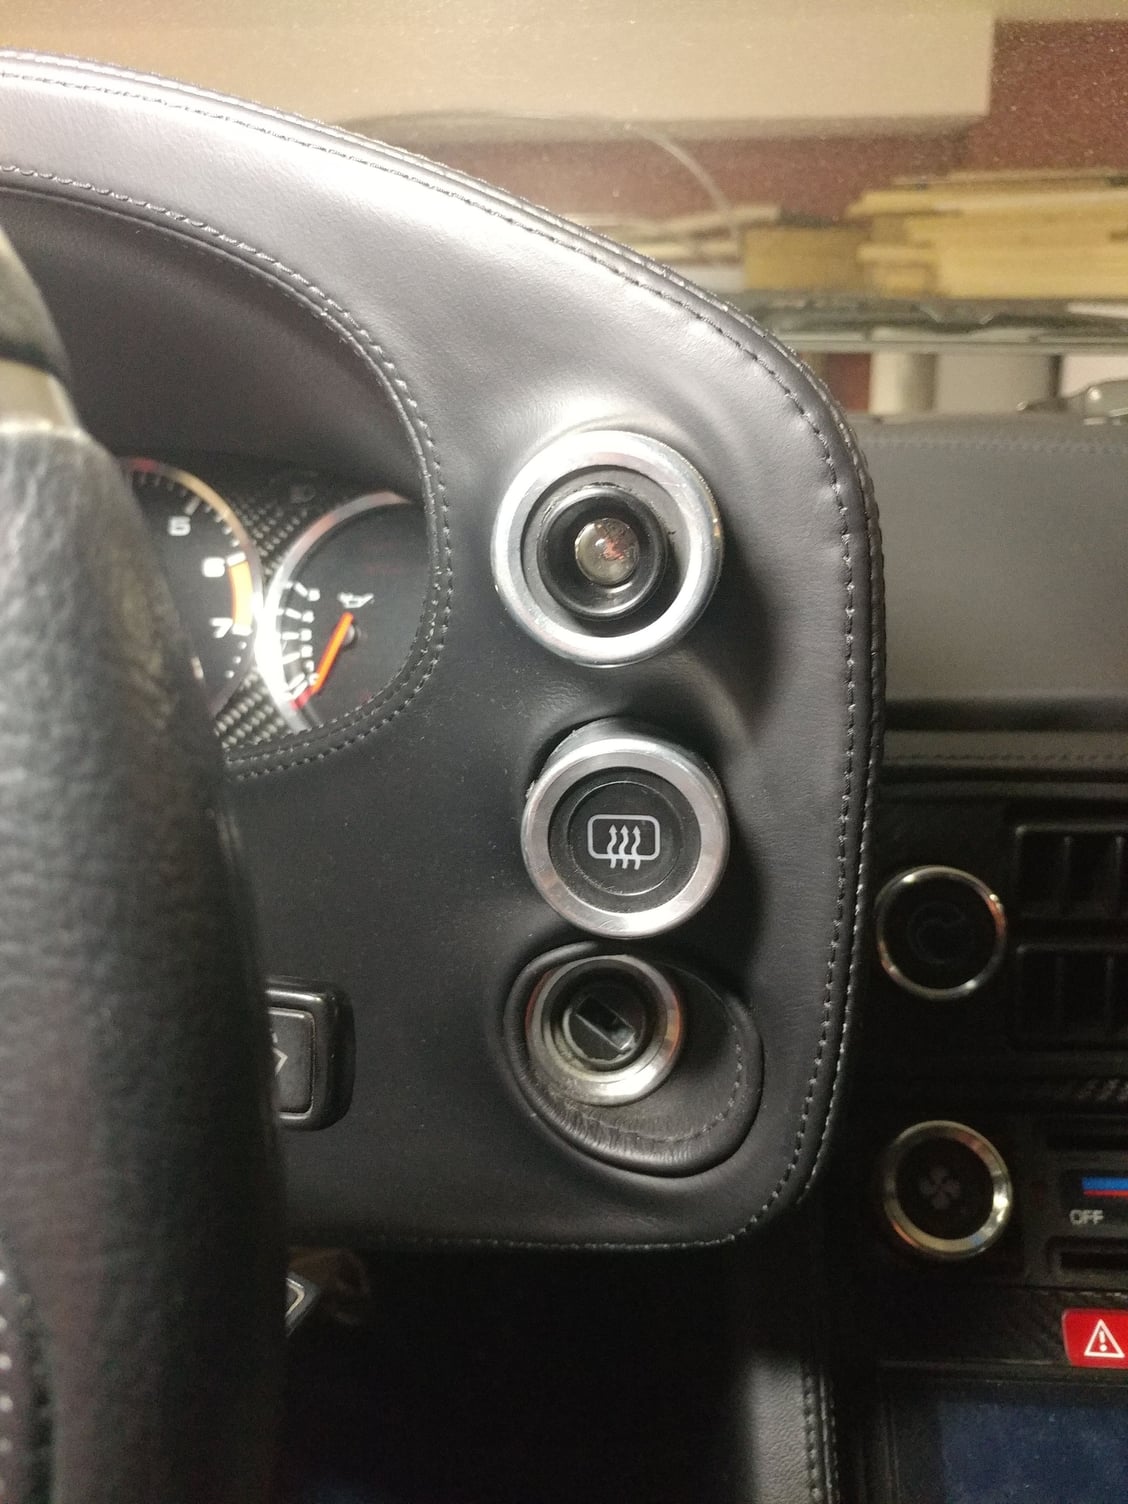
The sensor is a tight fit in both the rubber switch part, which is held tight by the Jager pod trim rings I use and I also used the back part of the switch that locks it into the dash pod hole \
Front view
Close-up installed in pod
Wider angle view
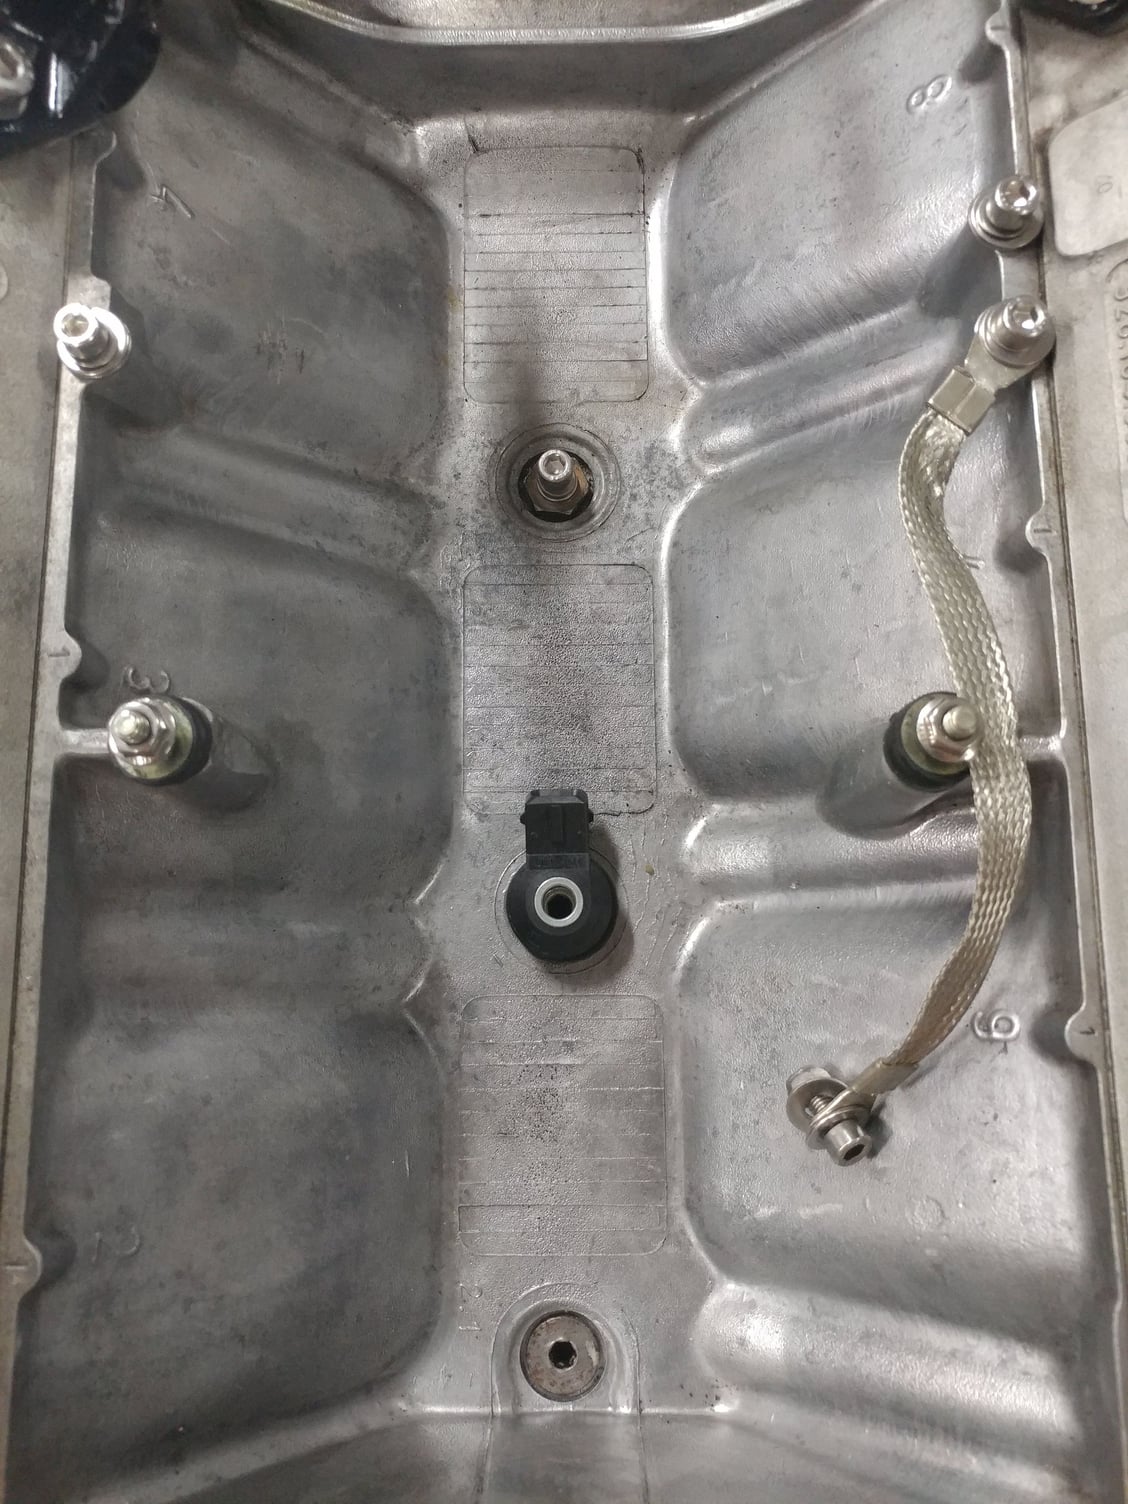
The knock sensor will mount in the center position of the block with an 8mm bolt that will thread into an adapter I've purchase. The adapter is an M14x1.5 plug with a threaded 8mm center hole. I'll install both with sealing washers to prevent any oil leaks. I've already successfully broken loose the center valley plug. The M6 bolt you see threaded into the flywheel side valley plug will be used for the ground location of the knock sensor (instruction say to ground it to the block as close as possible to the knock sensor.
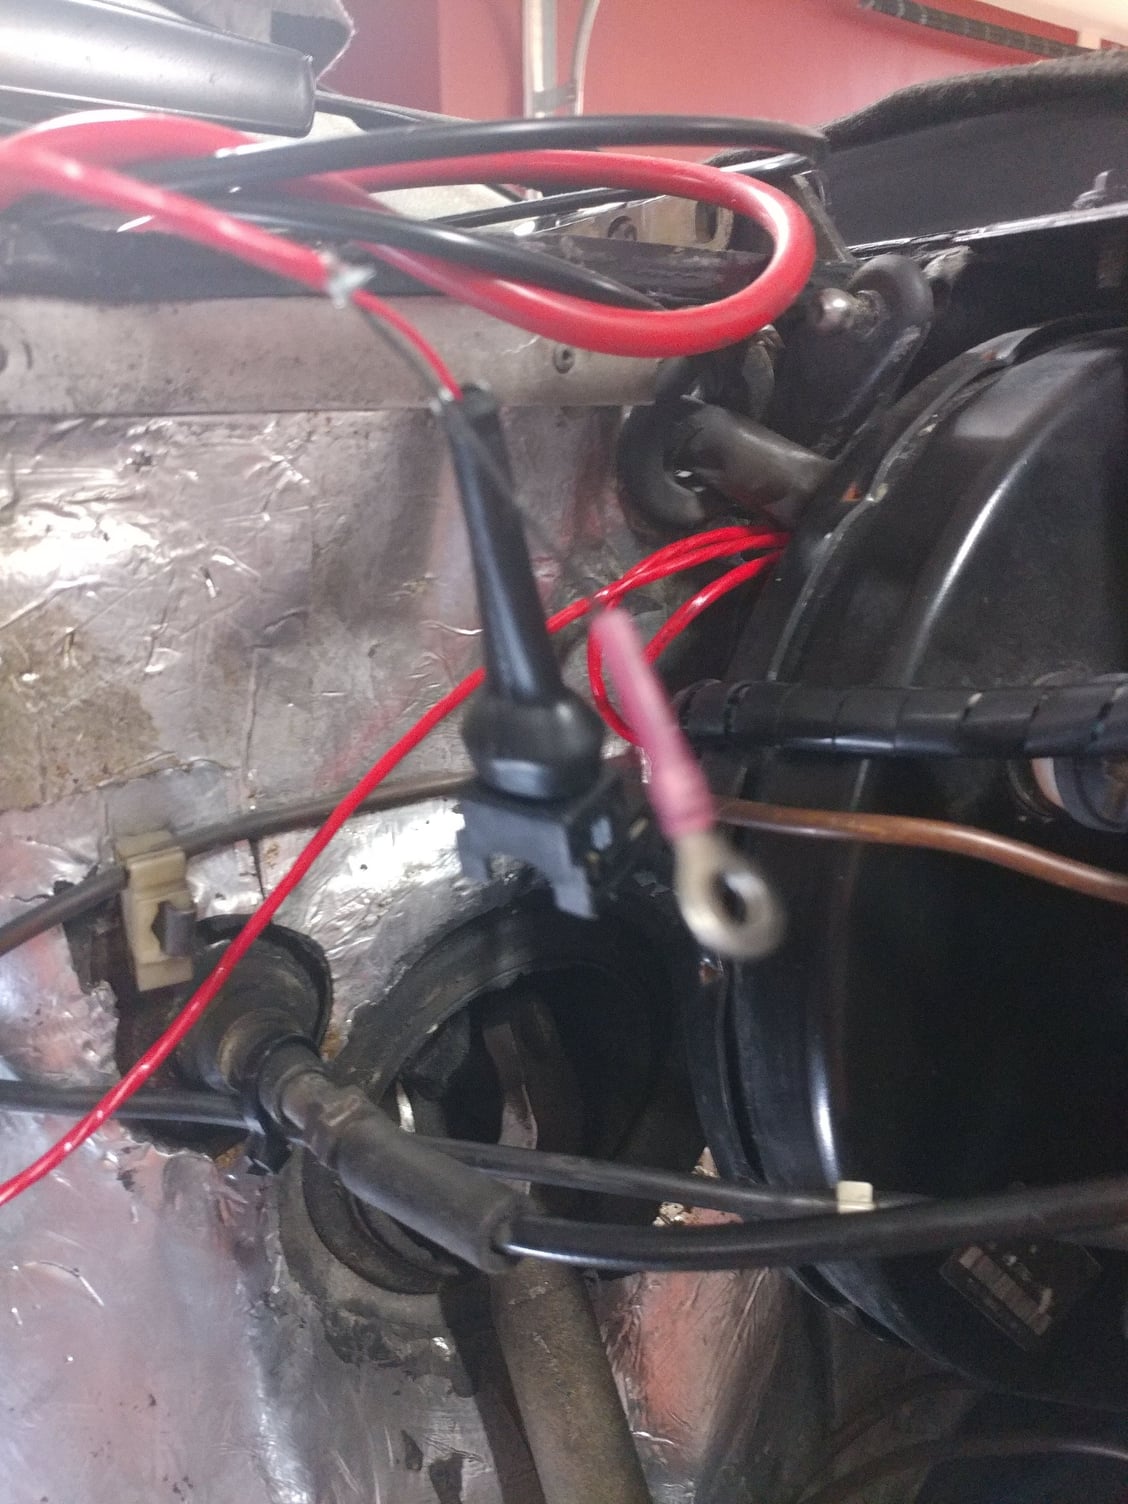
Here's the harness that comes through the firewall. Ring terminal is for the ground and the other plug with the sensor wire will attach to the knock sensor once the motor is mounted back into the car. I'll clean up the red wire looping once everything is connected an I determine the optimal routing.
The only thing I couldn't test when coming up with this plan was whether the green wire that goes to the rear wiper switch is a 12v switched circuit or a constant 12v circuit since my battery is currently disconnected while working on the engine R & R. I was assuming it was switched since the wipers only work when the key is switched on, but because of wiper parking functions, wasn't 100% certain. Can anyone confirm tha's a switched wire?
That is a pretty neat device but based off their description of how it works, don't you think the constantly blinking lights will get really annoying, especially being mounted there? It will pretty much always be blinking in the bottom of your vision. The information it provides is useful but 99.99% of the time, you're only interested if it flashes red.. unless there's some way to configure that on the device so it only lights up if it detects an issue?
That is a pretty neat device but based off their description of how it works, don't you think the constantly blinking lights will get really annoying, especially being mounted there? It will pretty much always be blinking in the bottom of your vision. The information it provides is useful but 99.99% of the time, you're only interested if it flashes red.. unless there's some way to configure that on the device so it only lights up if it detects an issue?
Here's a YouTube video that better shows what you'll see vs the description they provide.
It changes color and blinks during initial startup, then displays a solid green light unless detonation is detected, in which case, it flashes red. So should be just a dim, solid green light all the time, unless knock is detected. If it's too bright, I'll cover the lens with a piece of tint film until I get the intensity right.
It changes color and blinks during initial startup, then displays a solid green light unless detonation is detected, in which case, it flashes red. So should be just a dim, solid green light all the time, unless knock is detected. If it's too bright, I'll cover the lens with a piece of tint film until I get the intensity right.
That's not so bad. And here I was thinking of some complicated solution involving modifying your instrument cluster and an Arduino


 05-07-2019, 11:06 PM