When you click on links to various merchants on this site and make a purchase, this can result in this site earning a commission. Affiliate programs and affiliations include, but are not limited to, the eBay Partner Network.
In a 928 it usually is, but in my case, I have the 928MS 3-piece front cross-member where I can remove the center section without disturbing the side pieces, the suspension, or the motor mounts, so I guess that would be an option. I cleaned up the crushed vanes and once they turn the same worn aluminum color as the rest of the pan will probably be OK. I have to pull the pan to upgrade the gasket anyway so I'll be able to see if there are any cracks in that one corner I'm concerned about. Worst case scenario is I could pull the pan from my 4.5L but it has always leaked around the drain plug so I was hoping not to have to reuse it and that motor is sitting on a skid on the oil pan so not convenient to extract it.
If your 4.5 has the original design pick-up with the cloverleaf in the bottom of the pan and the windage screen neat the top, you will want to use those pieces.
If your 4.5 has the original design pick-up with the cloverleaf in the bottom of the pan and the windage screen neat the top, you will want to use those pieces.
Greg,
Thanks again for your input.
I wasn't planning on pulling the pan from the 4.5L motor as it's currently sitting on it and I don't have a good way to do that (no second engine stand), but if the 4.5L has a better pick-up design than the 4.7L I might need to rethink that. By the end of next week the pan I ordered will have arrived, at which time I'll pull the current pan from the 4.7L to see what it looks like inside and figure out what to do from there.
Also, the pan I have coming looks like this inside, which seems to have a windage screen and maybe the other things you mentioned. Is this the setup you'd recommend I use or is this different from what should be in my 4.5L motor?
Did a few things with the little time i had over the weekend. The painted plate under the steering rack is now reinstalled, I cleaned the K-Jet intake to get it ready for reinstallation atop the 4.7L motor once it's back in the car, cleaned and made a painting jig so I can paint the cam tower caps without getting paint on the sealing surface or threads, and changed the sealing method on the ring of the air meter for the intake. The plastic ring has never sealed very well with the piece that's part of the supercharger setup, probably because it is crushed in one area and doesn't align perfectly with the other mating piece. Tonight I figured out when cleaning it that not only does the black plastic ring come out, but the metal base ring just lifts off also. I separated the plastic ring and will throw that in my parts box but not reuse it, then used some foam weatherstripping in the mating grove around the metal ring and this should allow it to seal up extremely well once reassembled so I don't suffer any boost loss at this joint like I have in the past.
Cleaning the K-Jet setup - capped off any openings to prevent the introduction of any cleaning solution. Afterwards, propped the air meter and throttle plate just in case there was any solution entry so it could dry out. In the 2nd picture, note the new seal around the air meter housing - this is what the 928MS piece mates with for the forded air entry.
Here's what the old plastic, deformed piece looked like.
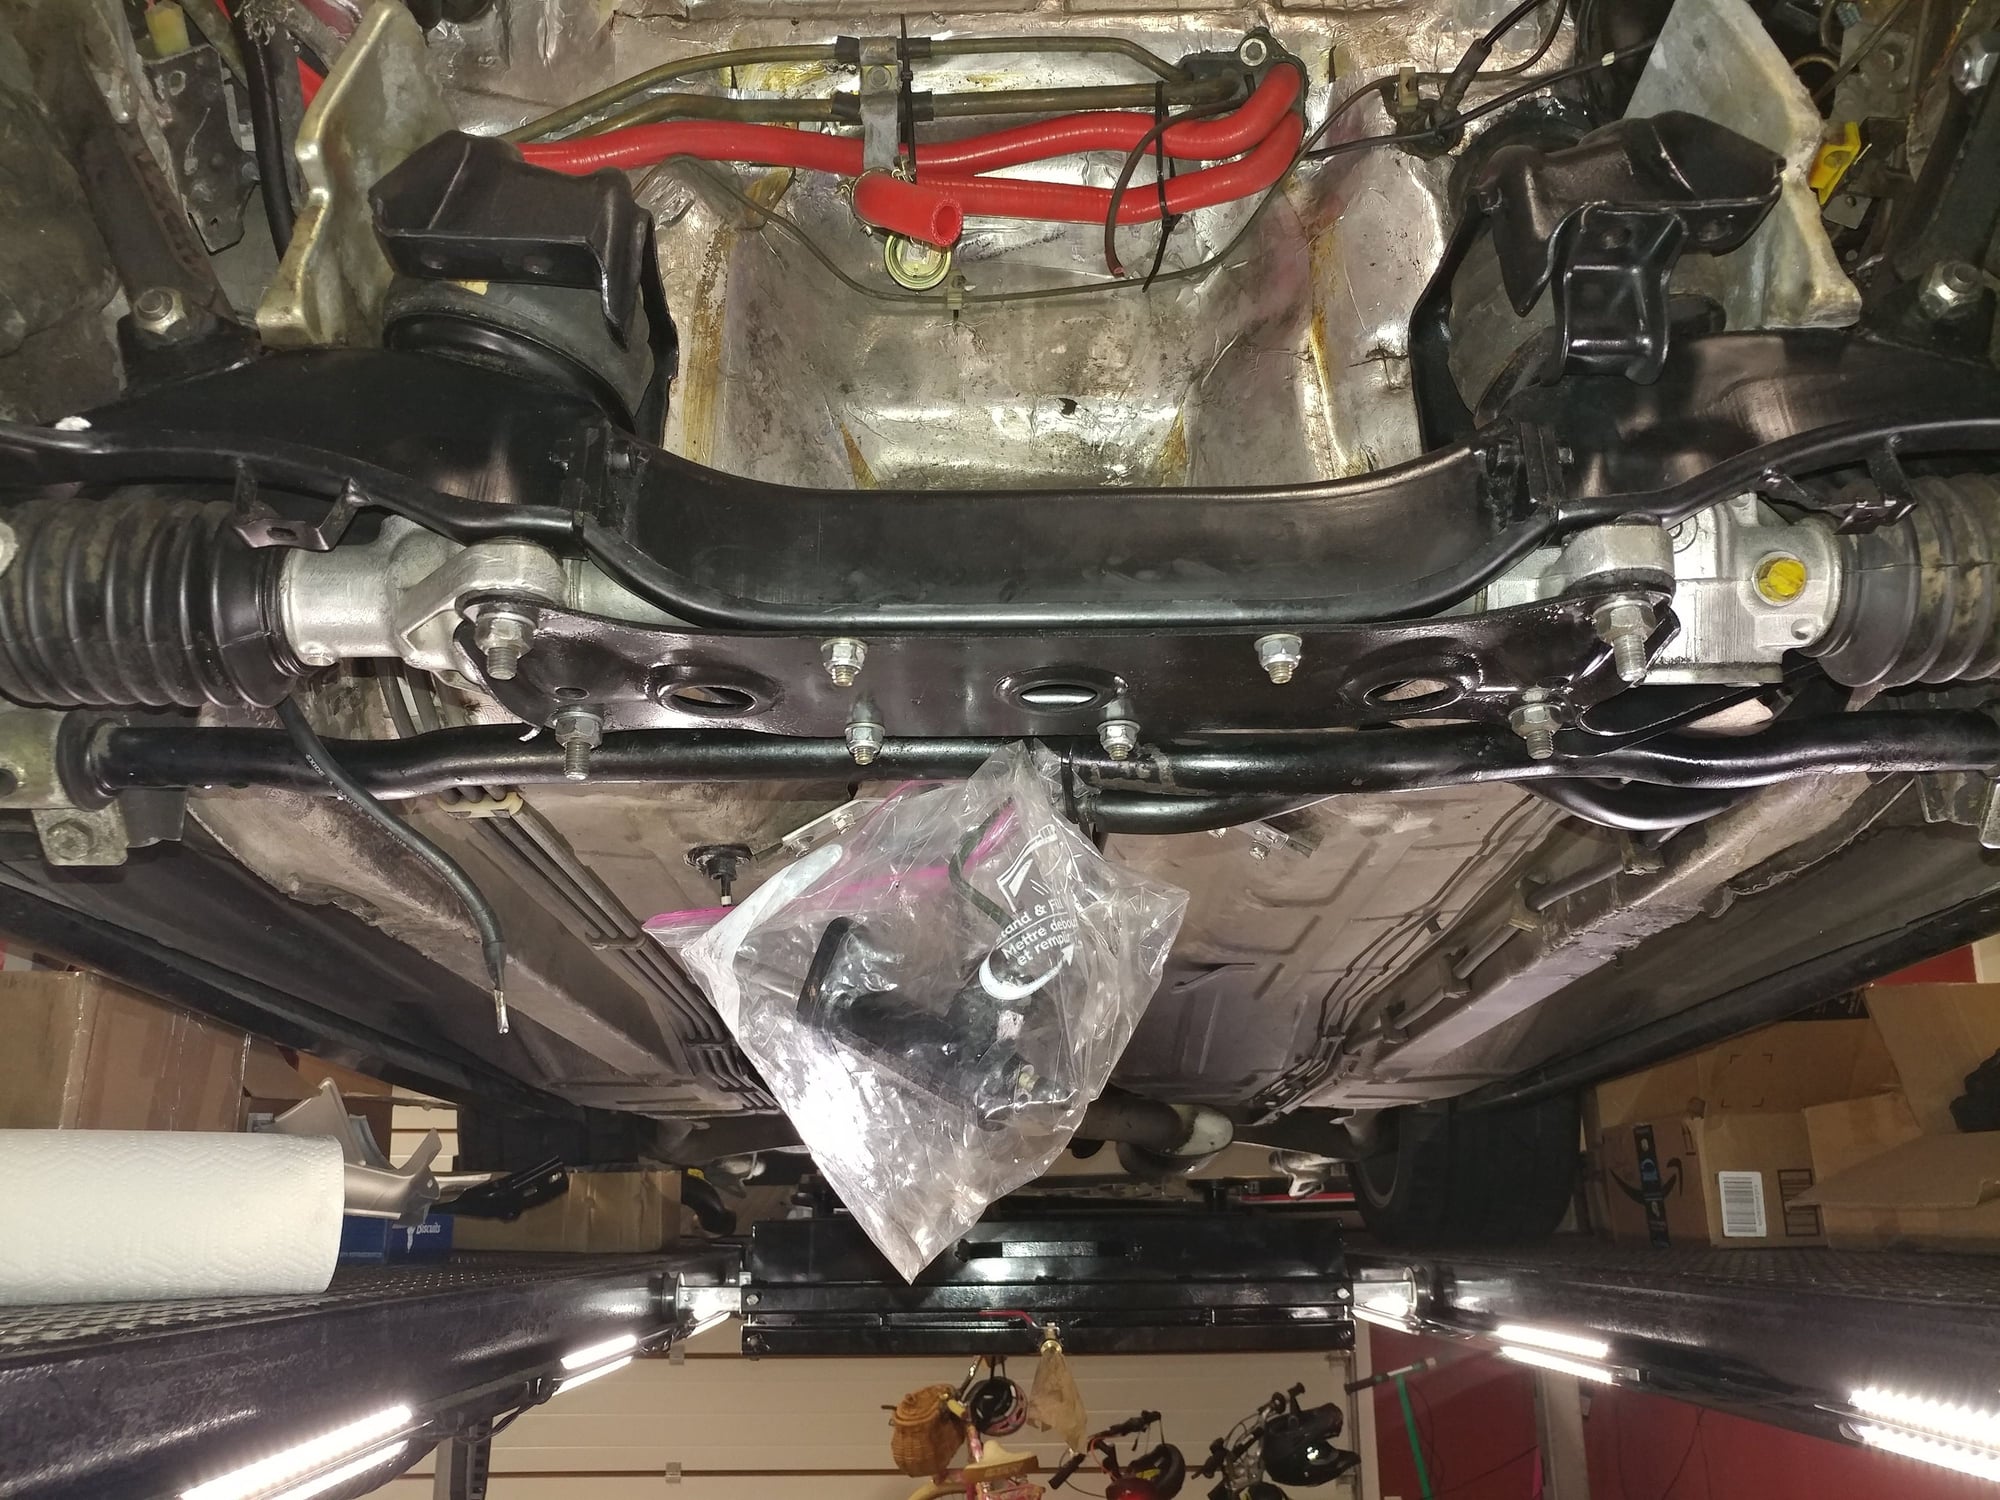
Installed the plate under the PS rack
Here's the little cam tower cap painting tool that exposes the tops and sides, but protects the mating surfaces and threads. I'll lay a strip of wax paper on it then push the plugs through to prevent the paint from sticking to the wood and getting messed up when I remove the plugs.
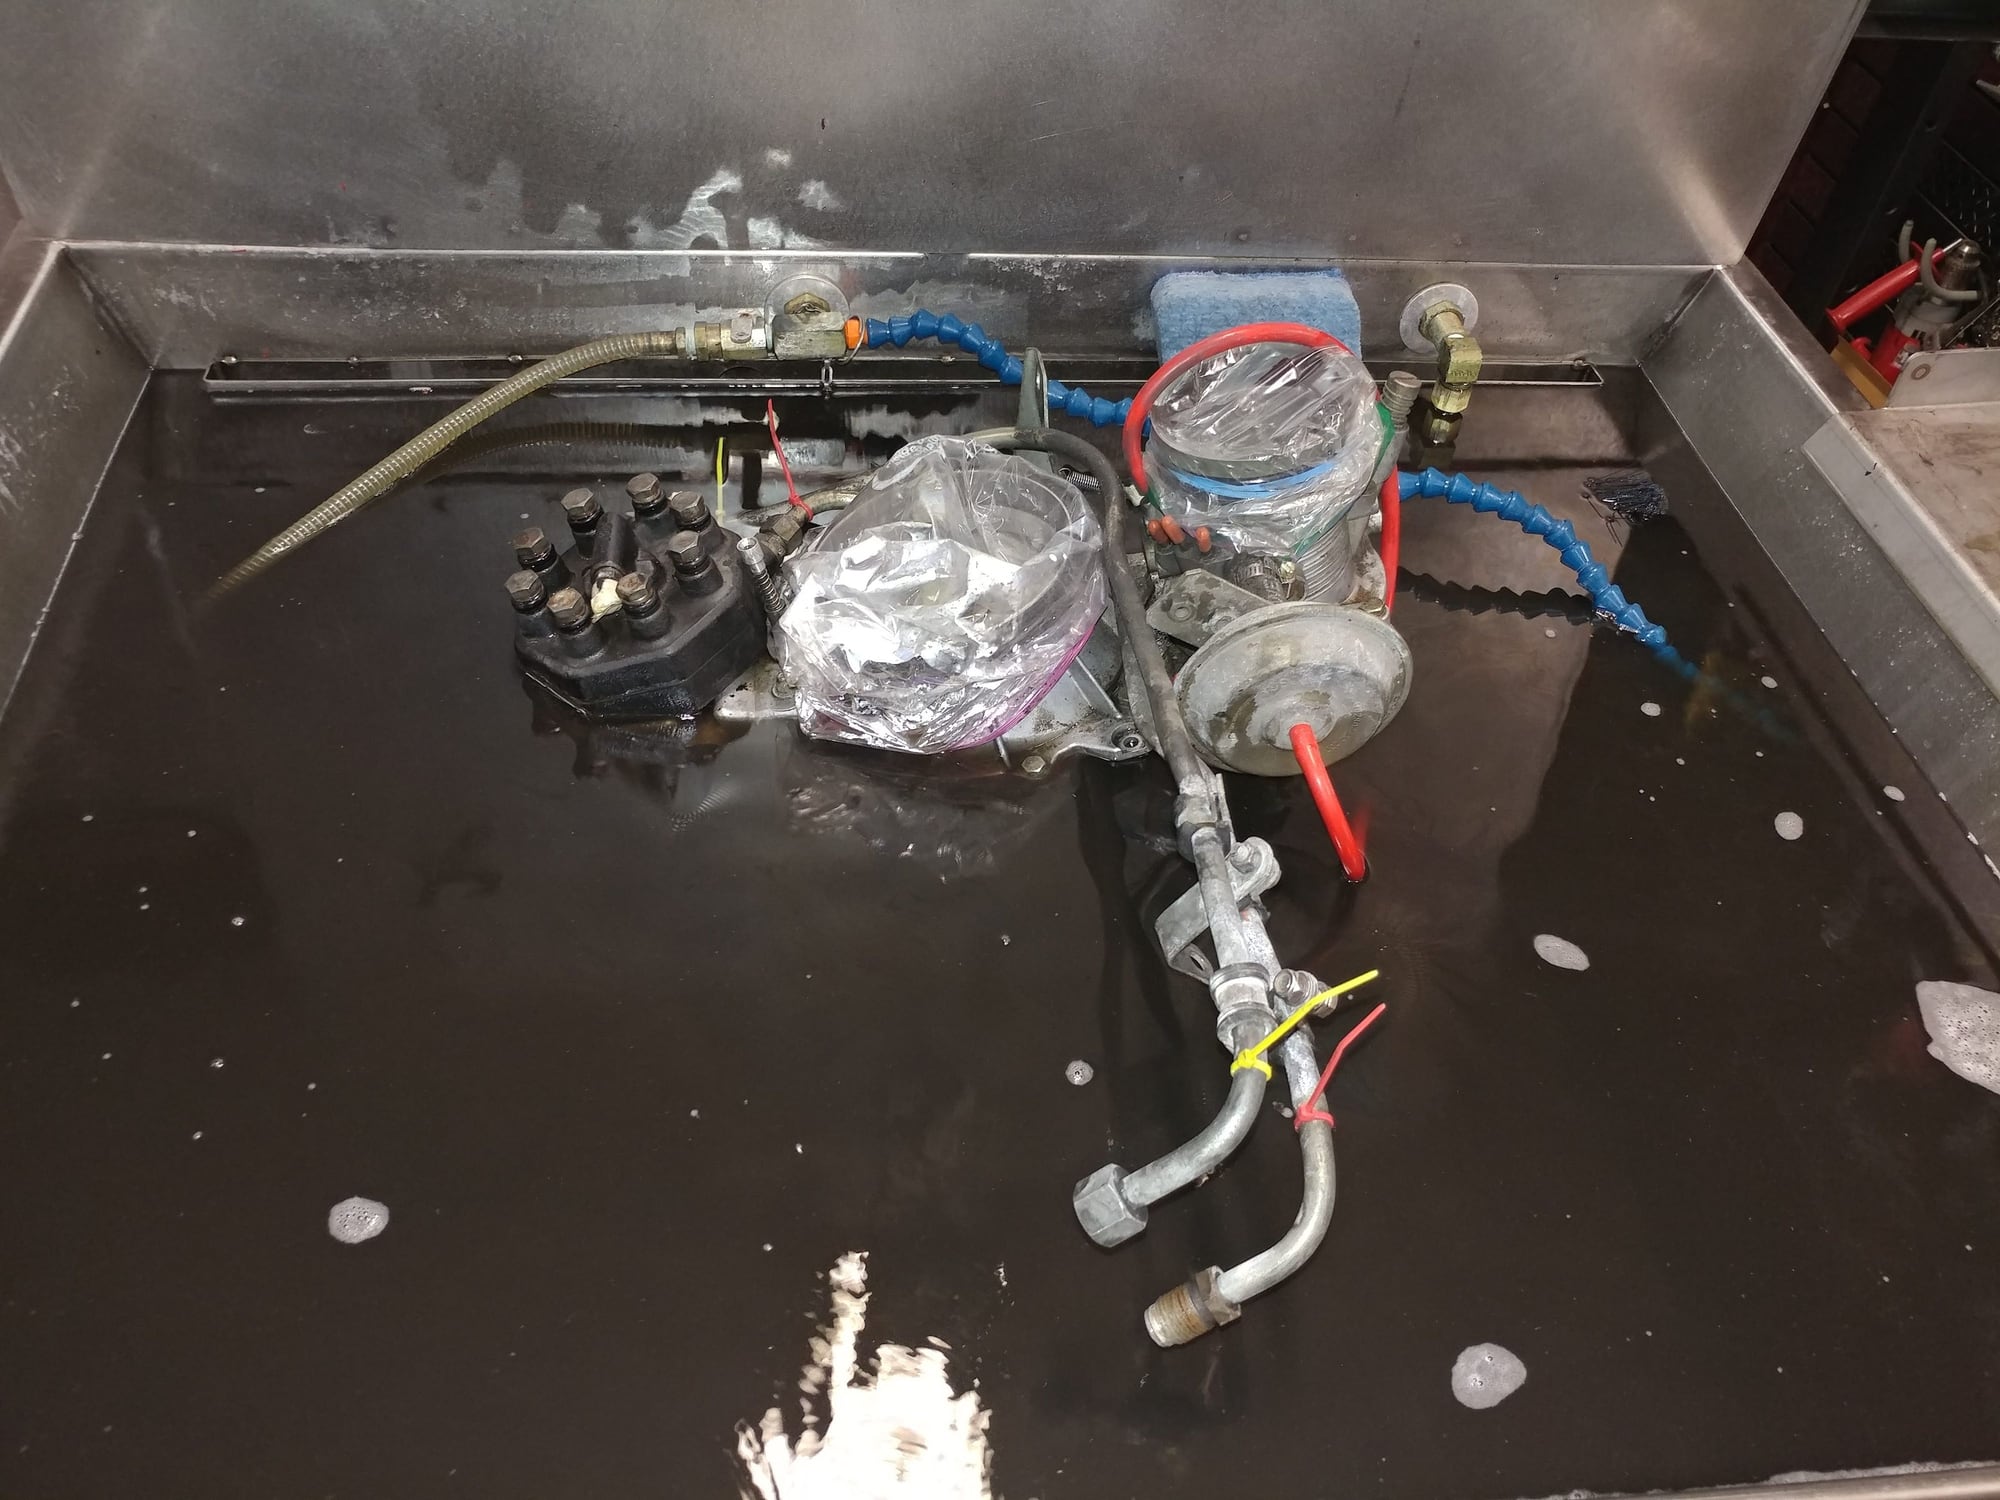
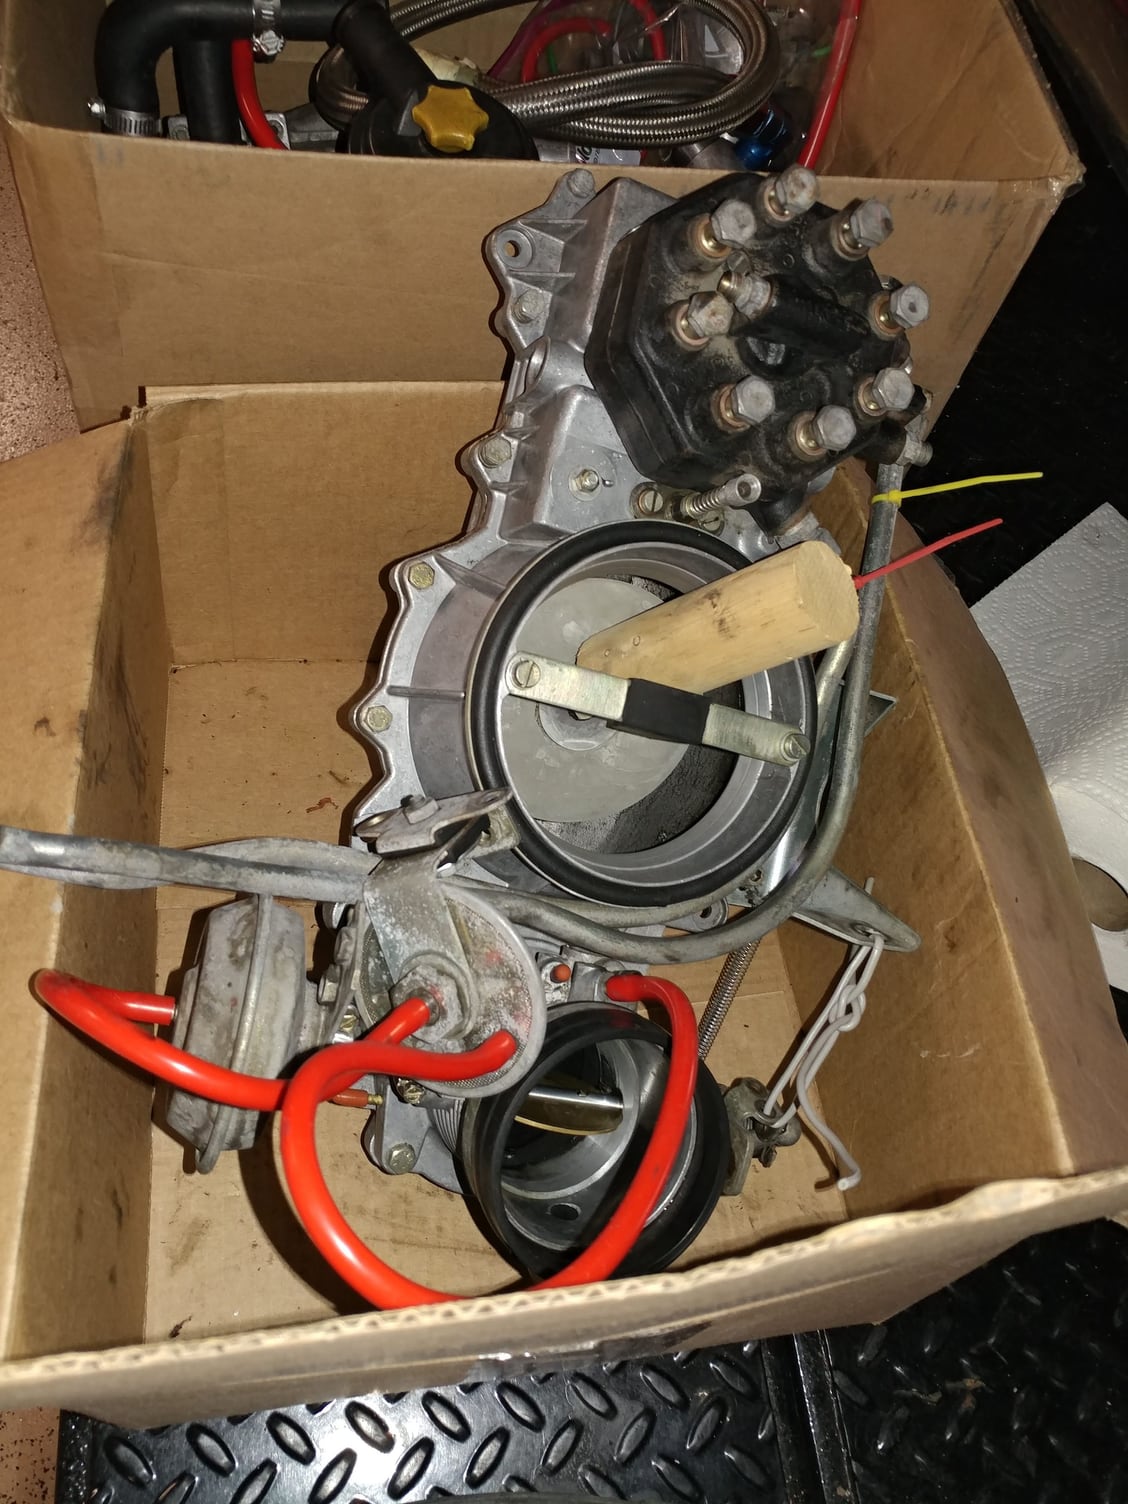
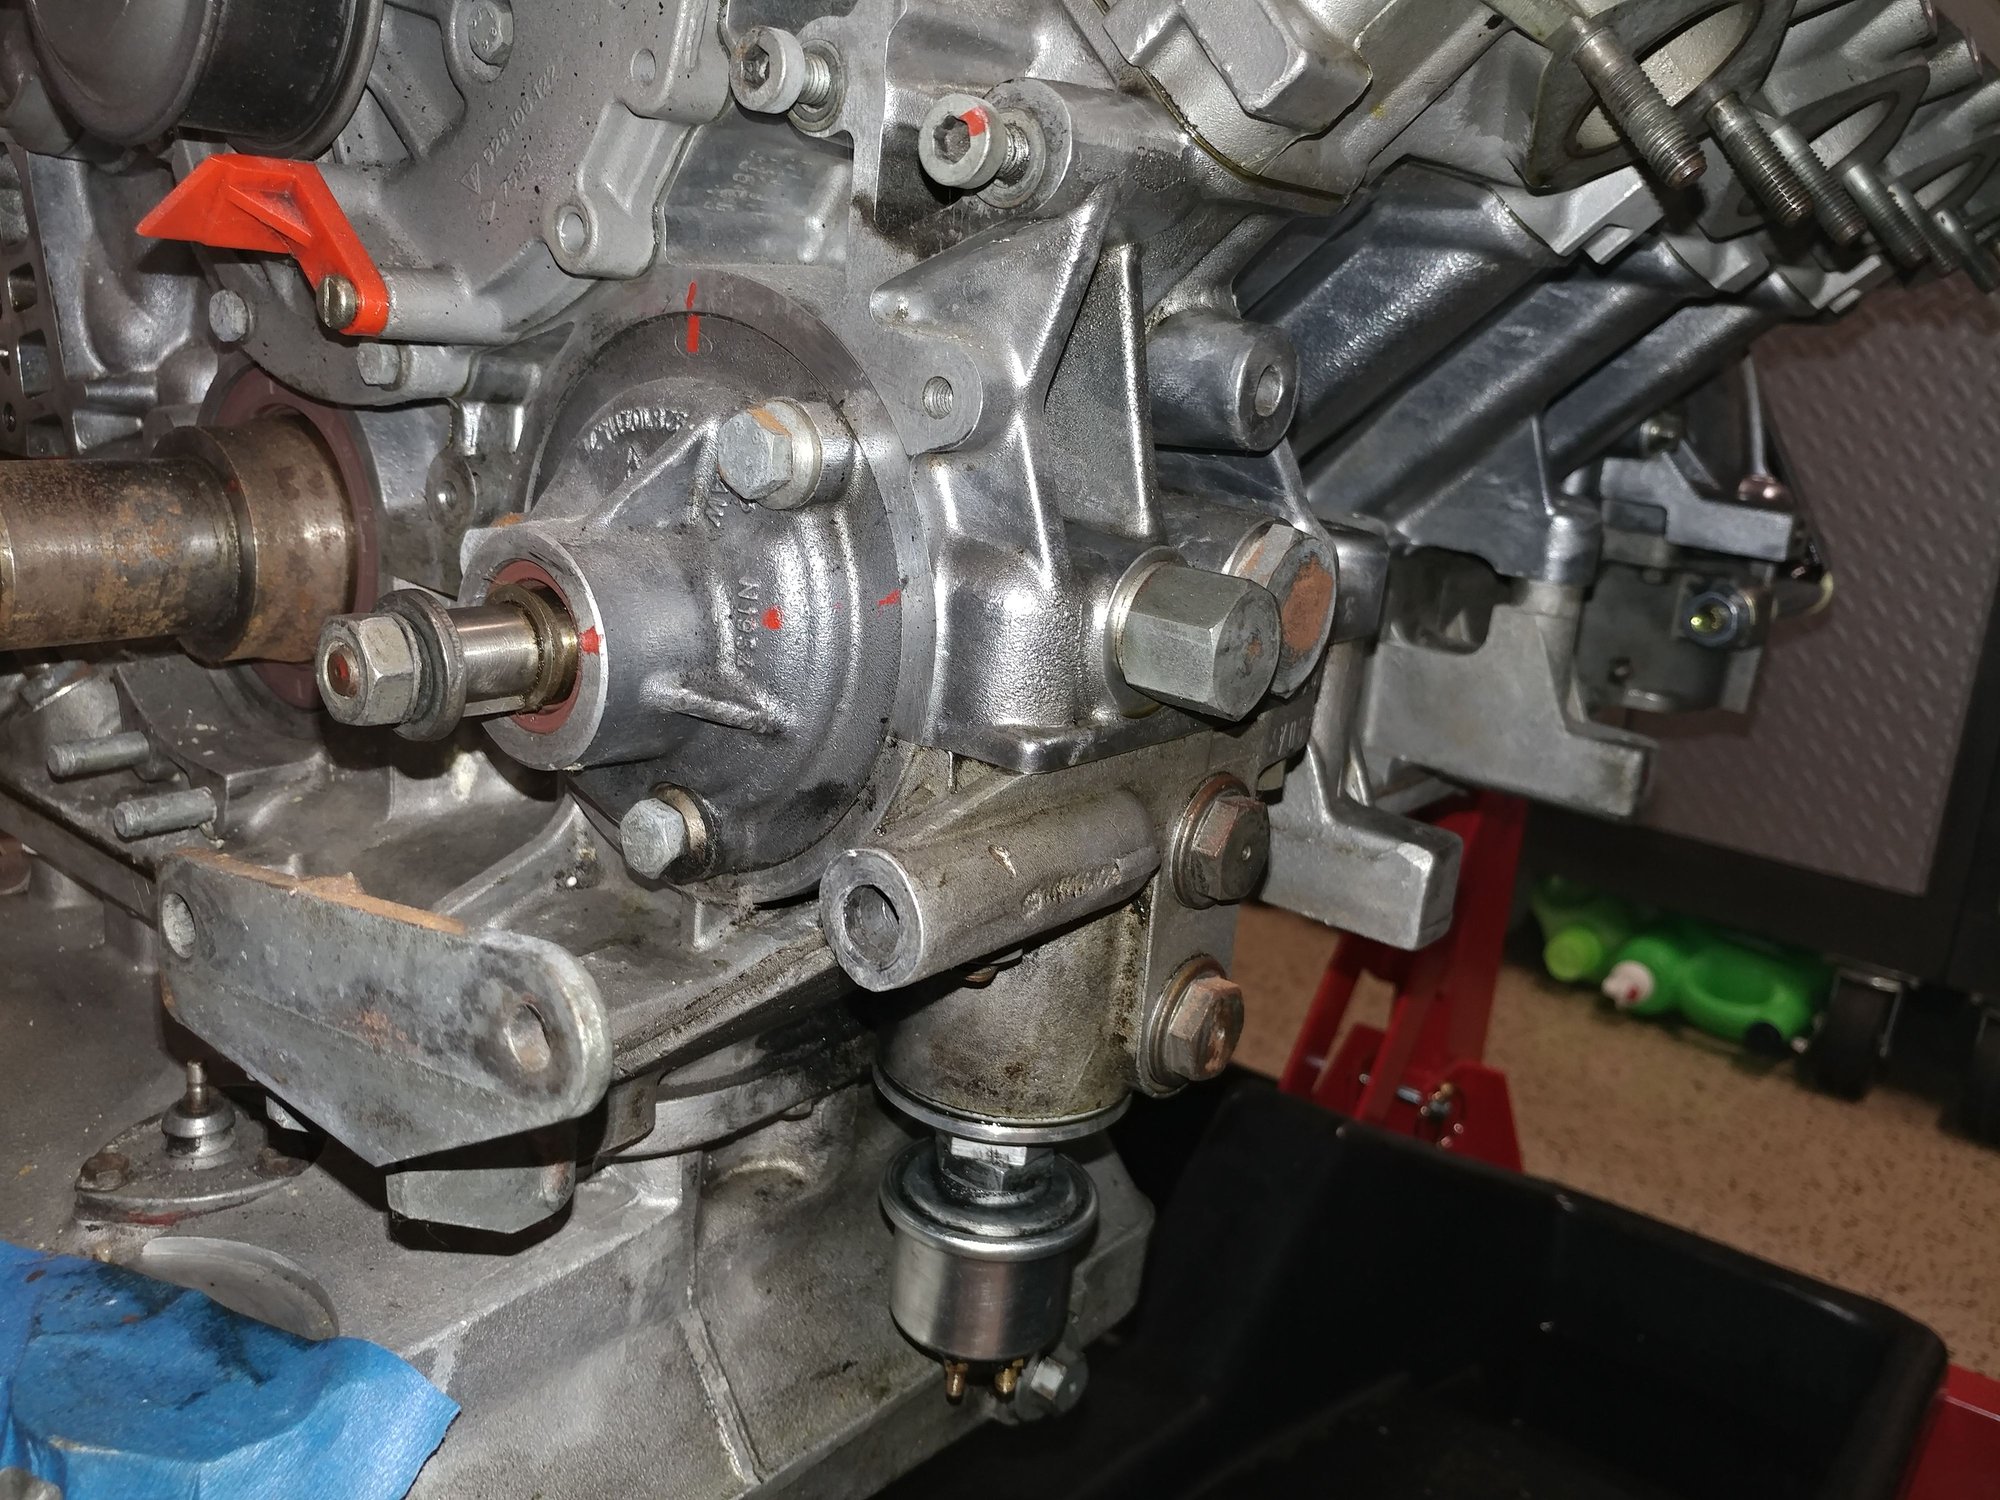
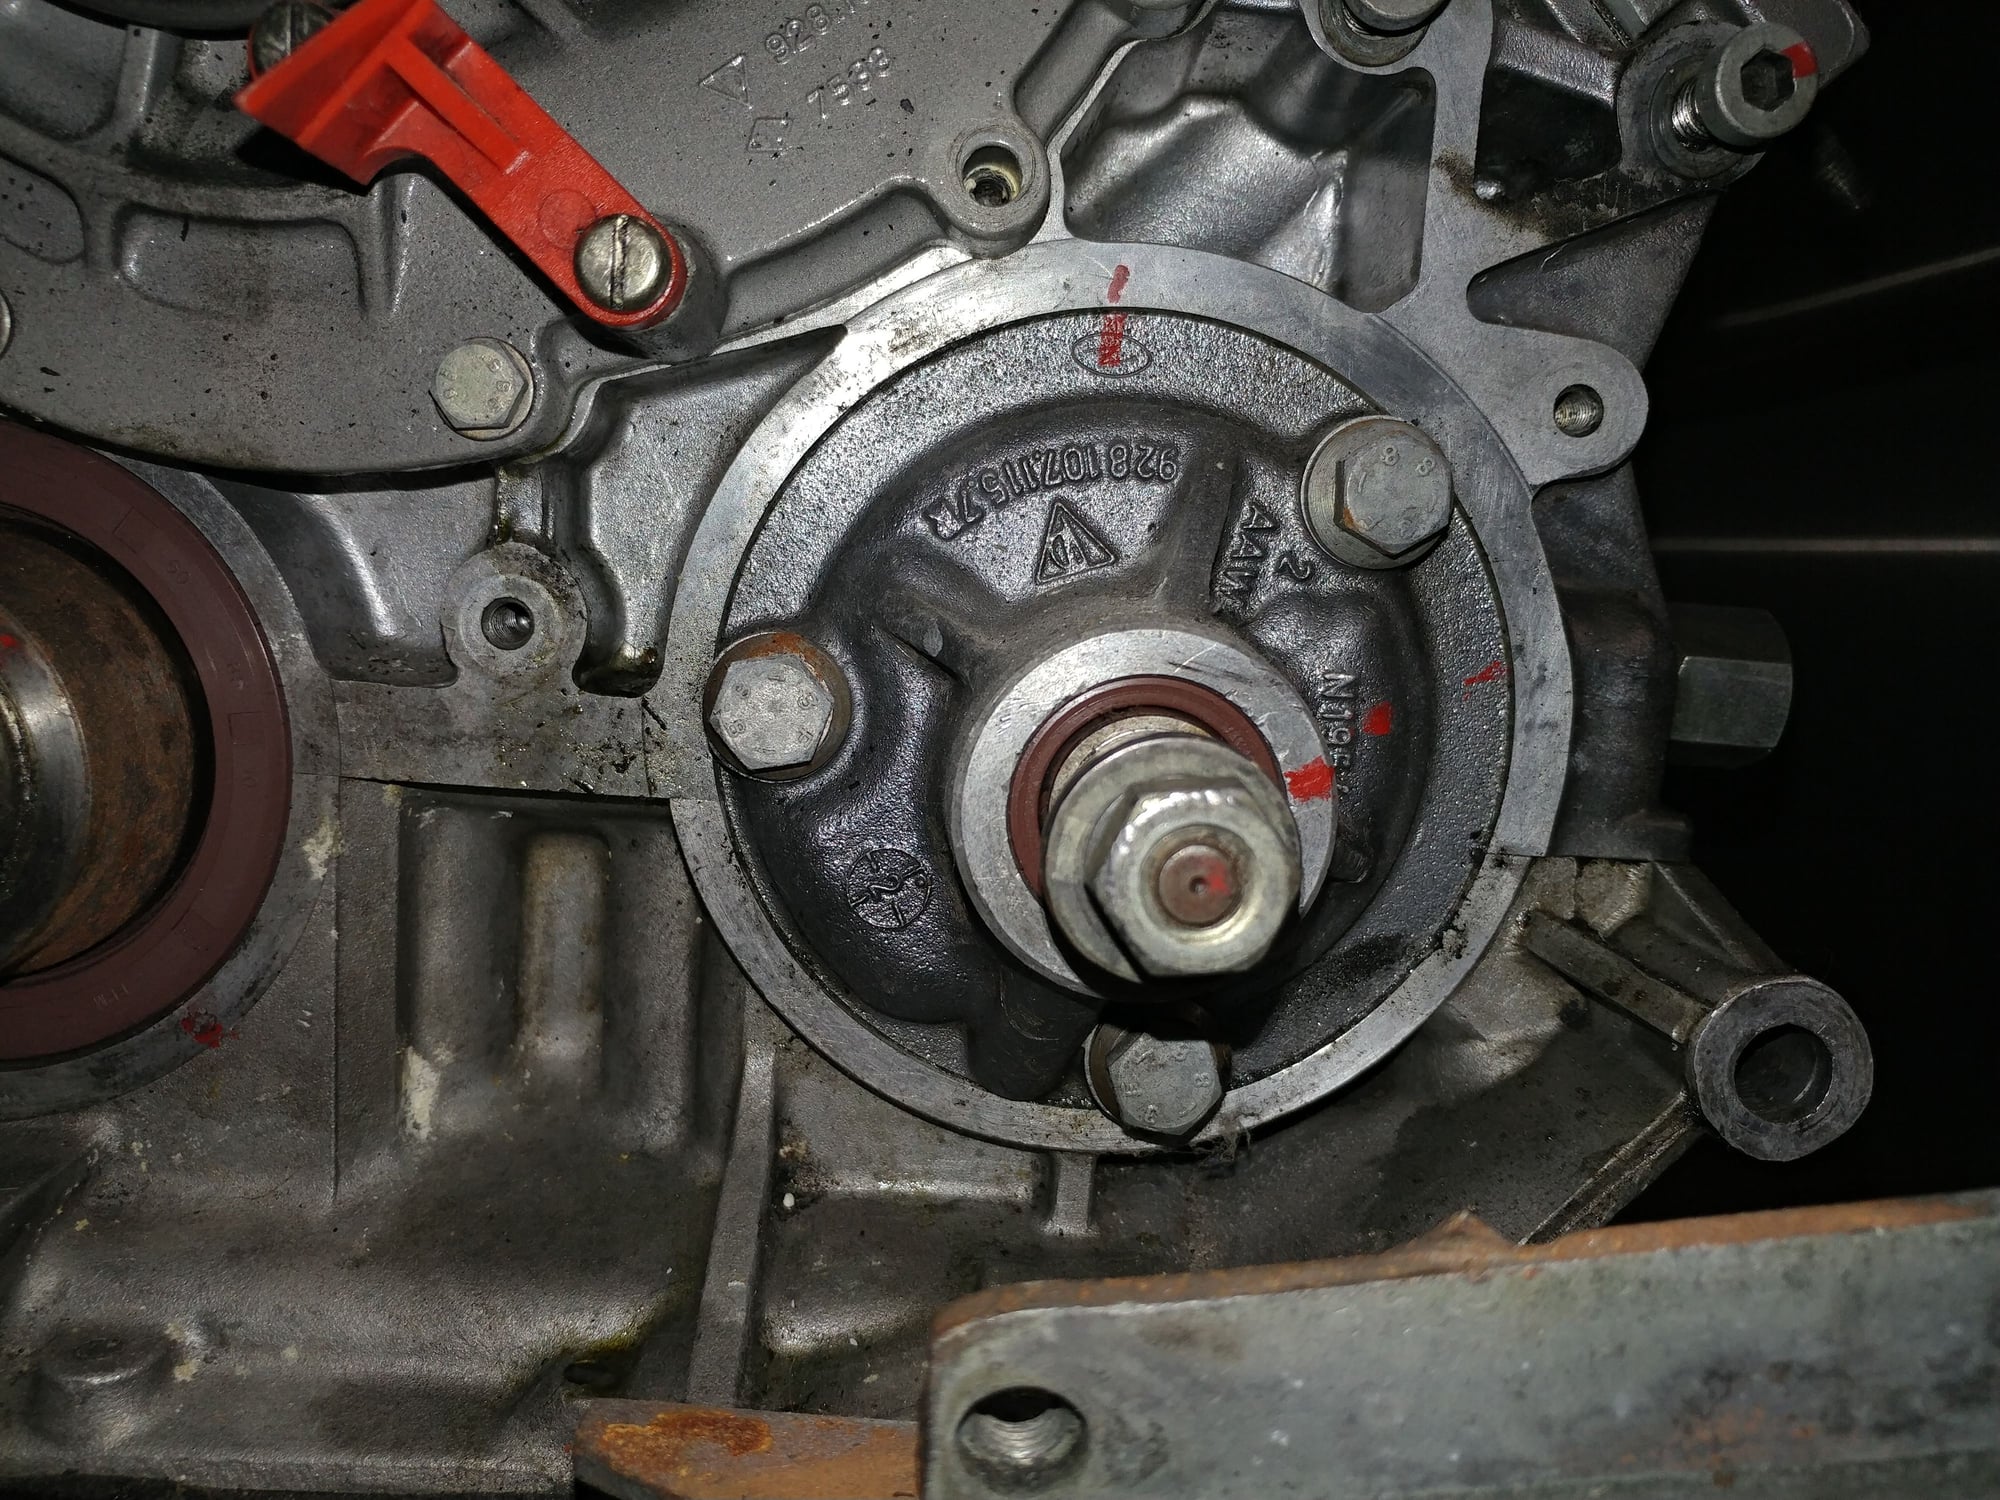
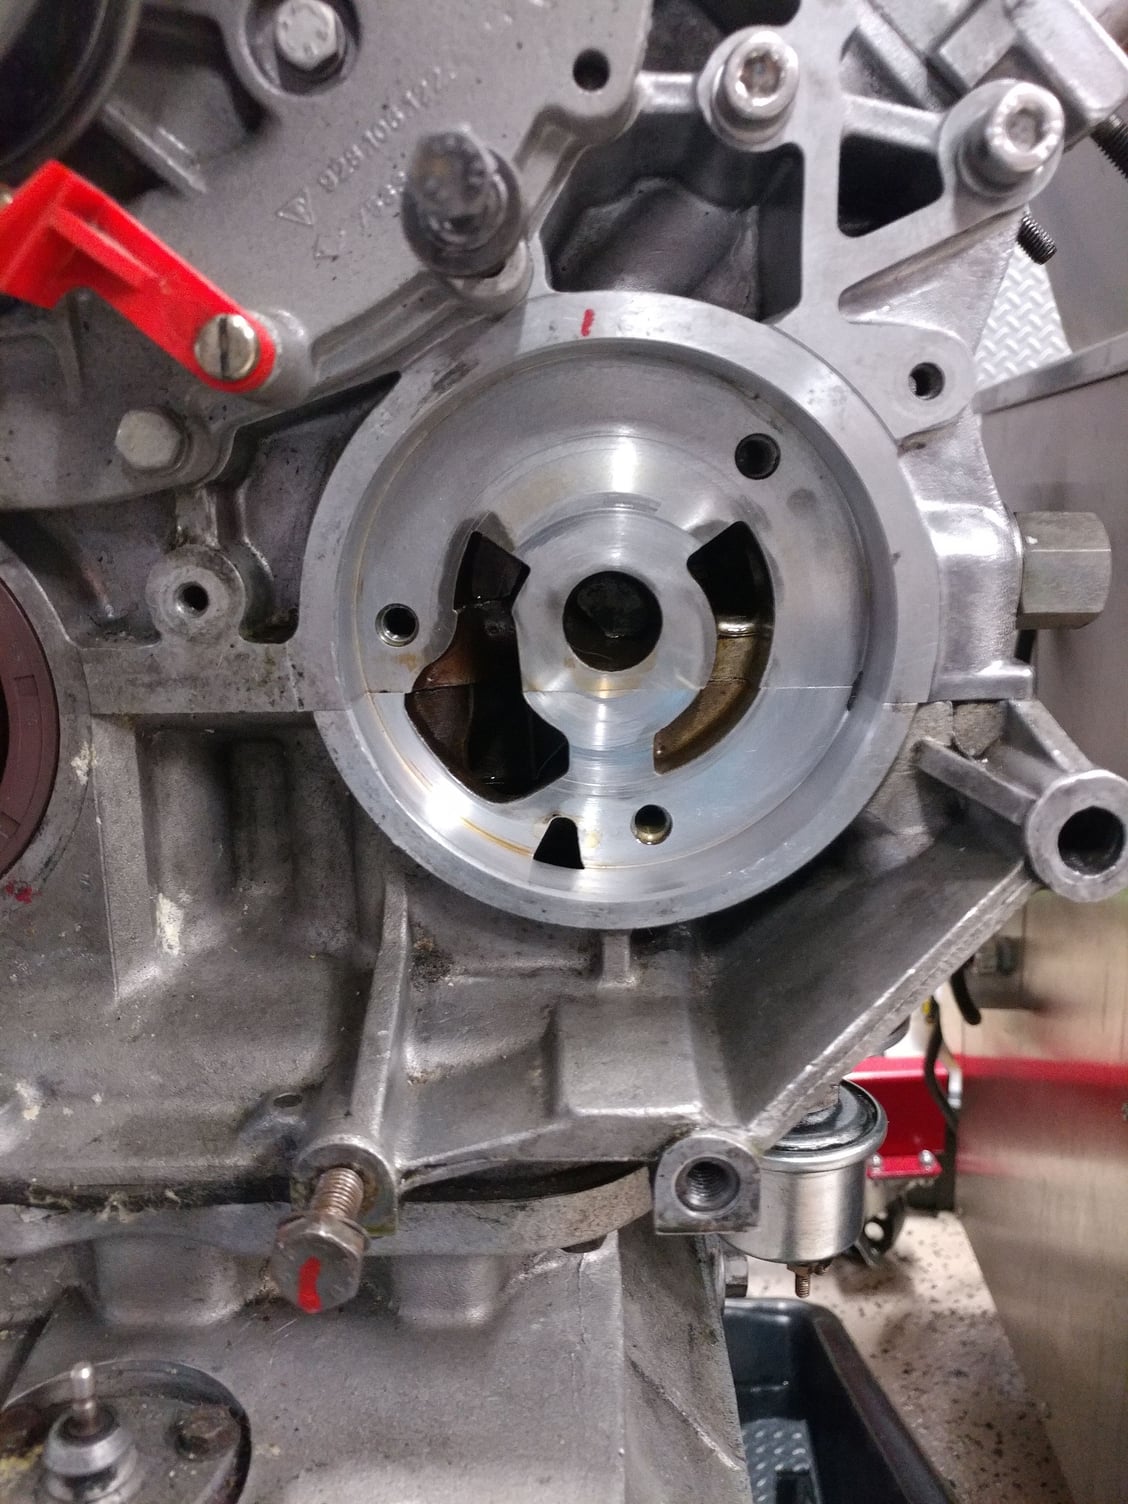
So tonight I was going to pull and reseal the oil pump, but this engine looks so clean and well put together, and the pump shaft turns smoothly that I'm thinking this might be a waste of time and just create the possibility for leaks that wouldn't otherwise occur.
Based on these photos, what would you guys do - pull it or leave it as is?
I did get a chance today to paint the cam tower caps. I was going to use red but the red likely wouldn't exactly match the red powdercoating being used for the cam tower writing, and they're already a grey color (though not all the same color), so I went with black, which will also give it a little old-school flavor of the black rubber press in caps from the original motor.
That's what you want. Whoever is sending you the pan, ask them to send the oil pick-up also.
Veritable treasure, right there.
Fantastic thread!
Regarding this pan and pickup, Is it a standard 4.5 pan? If so, should I pick one of these up (+oil pickup tube) for a future engine project on a 5.0 (if compatible) and while they are still available?
I have never seen a factory pan like this:
Can't wait to see this car in person at SITM or PCNA Rendwous in Atlanta. Great perseverance and attention to detail Pete!
So tonight I was going to pull and reseal the oil pump, but this engine looks so clean and well put together, and the pump shaft turns smoothly that I'm thinking this might be a waste of time and just create the possibility for leaks that wouldn't otherwise occur.
Based on these photos, what would you guys do - pull it or leave it as is?
Unless you know it's been done before...
Pull it, replace the o-ring and bolt o-rings. Easy decision.
Pull it, replace the o-ring and bolt o-rings. Easy decision.
It was done when the engine was rebuilt, which was only 1,500 miles ago, but also about 16 months. I should probably just pull it and do the seals as I already have them on-hand and would be really mad if I put it all back together and then had an oil pump leak.
What about the main shaft seal in addition to the o-ring an bolt seals?
If you have the seals on hand you might as well for fun and peace of mind. Its very easy. After I did mine a few weeks ago I read on here that oiling the outer surface of the seal prior to insertion is highly frowned upon as some folks have had a history of the seals walking out over time if this is done. There is no question that the seals are still good after 16 months, but it would be good to know they are in just the way you want and to have a look at the shafts. My '88 was all original and after 372 months they were not so good.
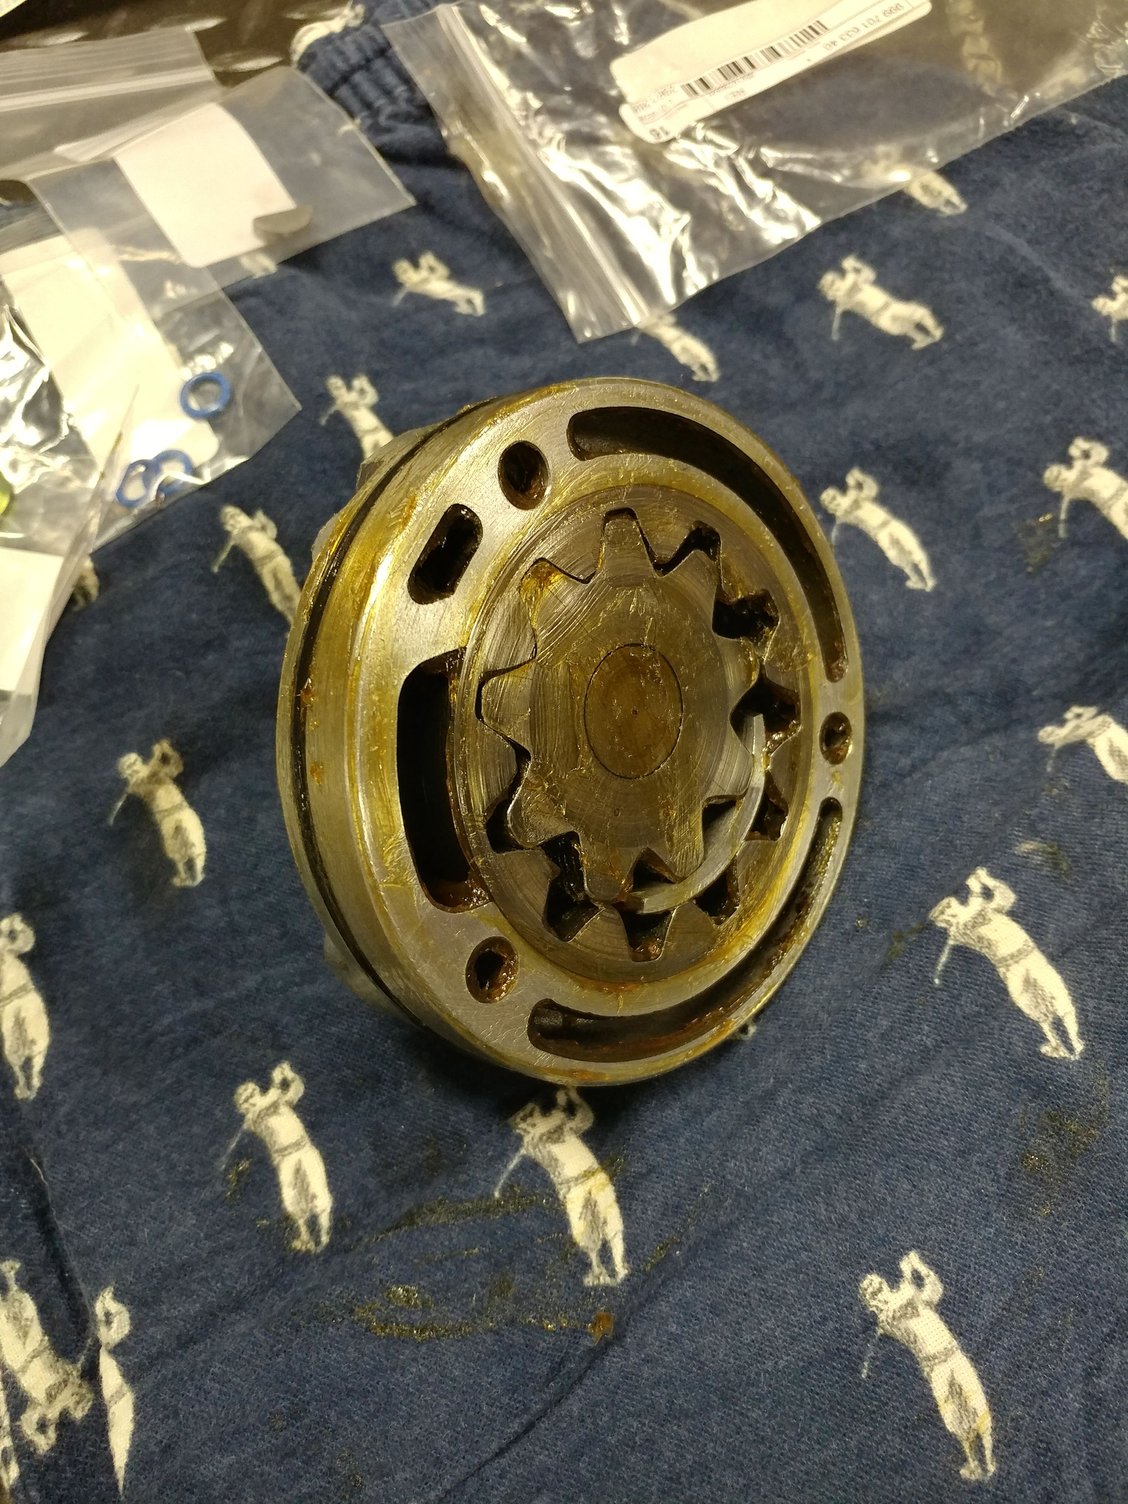
I took care of the oil pump last night. Glad I decided to do it as I discovers my pump gear is the steel version and from what I read on Rennlist (Stan), and in the WSM, the 1mm shim that was installed on my shaft should only be used with the aluminum pump gear. Please confirm that's correct.
I put everything back together with Driven Assembly Grease and will first run this motor with their BR break in oil, for 50-100 miles or so, since it has some new parts and I'm using the cams from the 4.5L motor and want everything to settle in nicely. The Driven Assembly Grease is designed to dissolve in thee Driven BR oil and not clog passageways or remain thick.
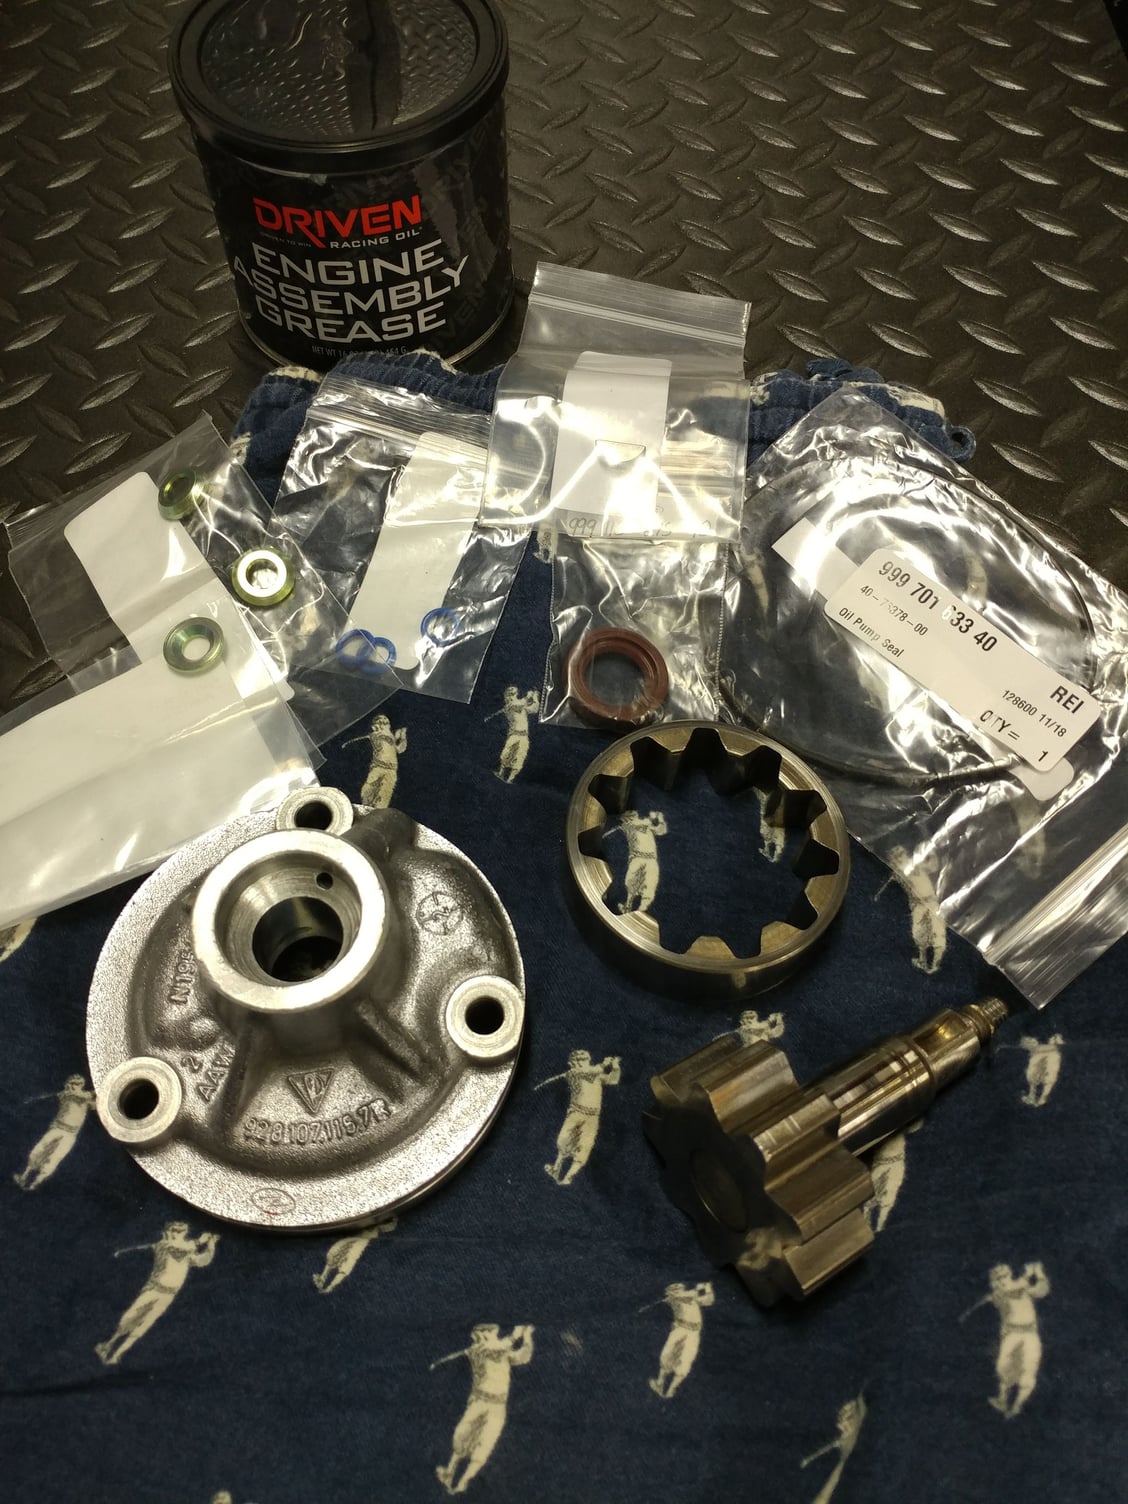
Removed, disassembled, and cleaned. New parts collection for reinstallation.
Pump housing on engine cleaned up - looks good inside
Pump gear is steel (ferrous) but you can also see the 1mm shim that shouldn't be used with the steel gear
Oil pump reassembled with new o-ring and generously coated with Driven Assembly Grease. Note dots visibe on both gear faces that need to face the block side of the engine. This means the outer gear is installed in the correct orientation.
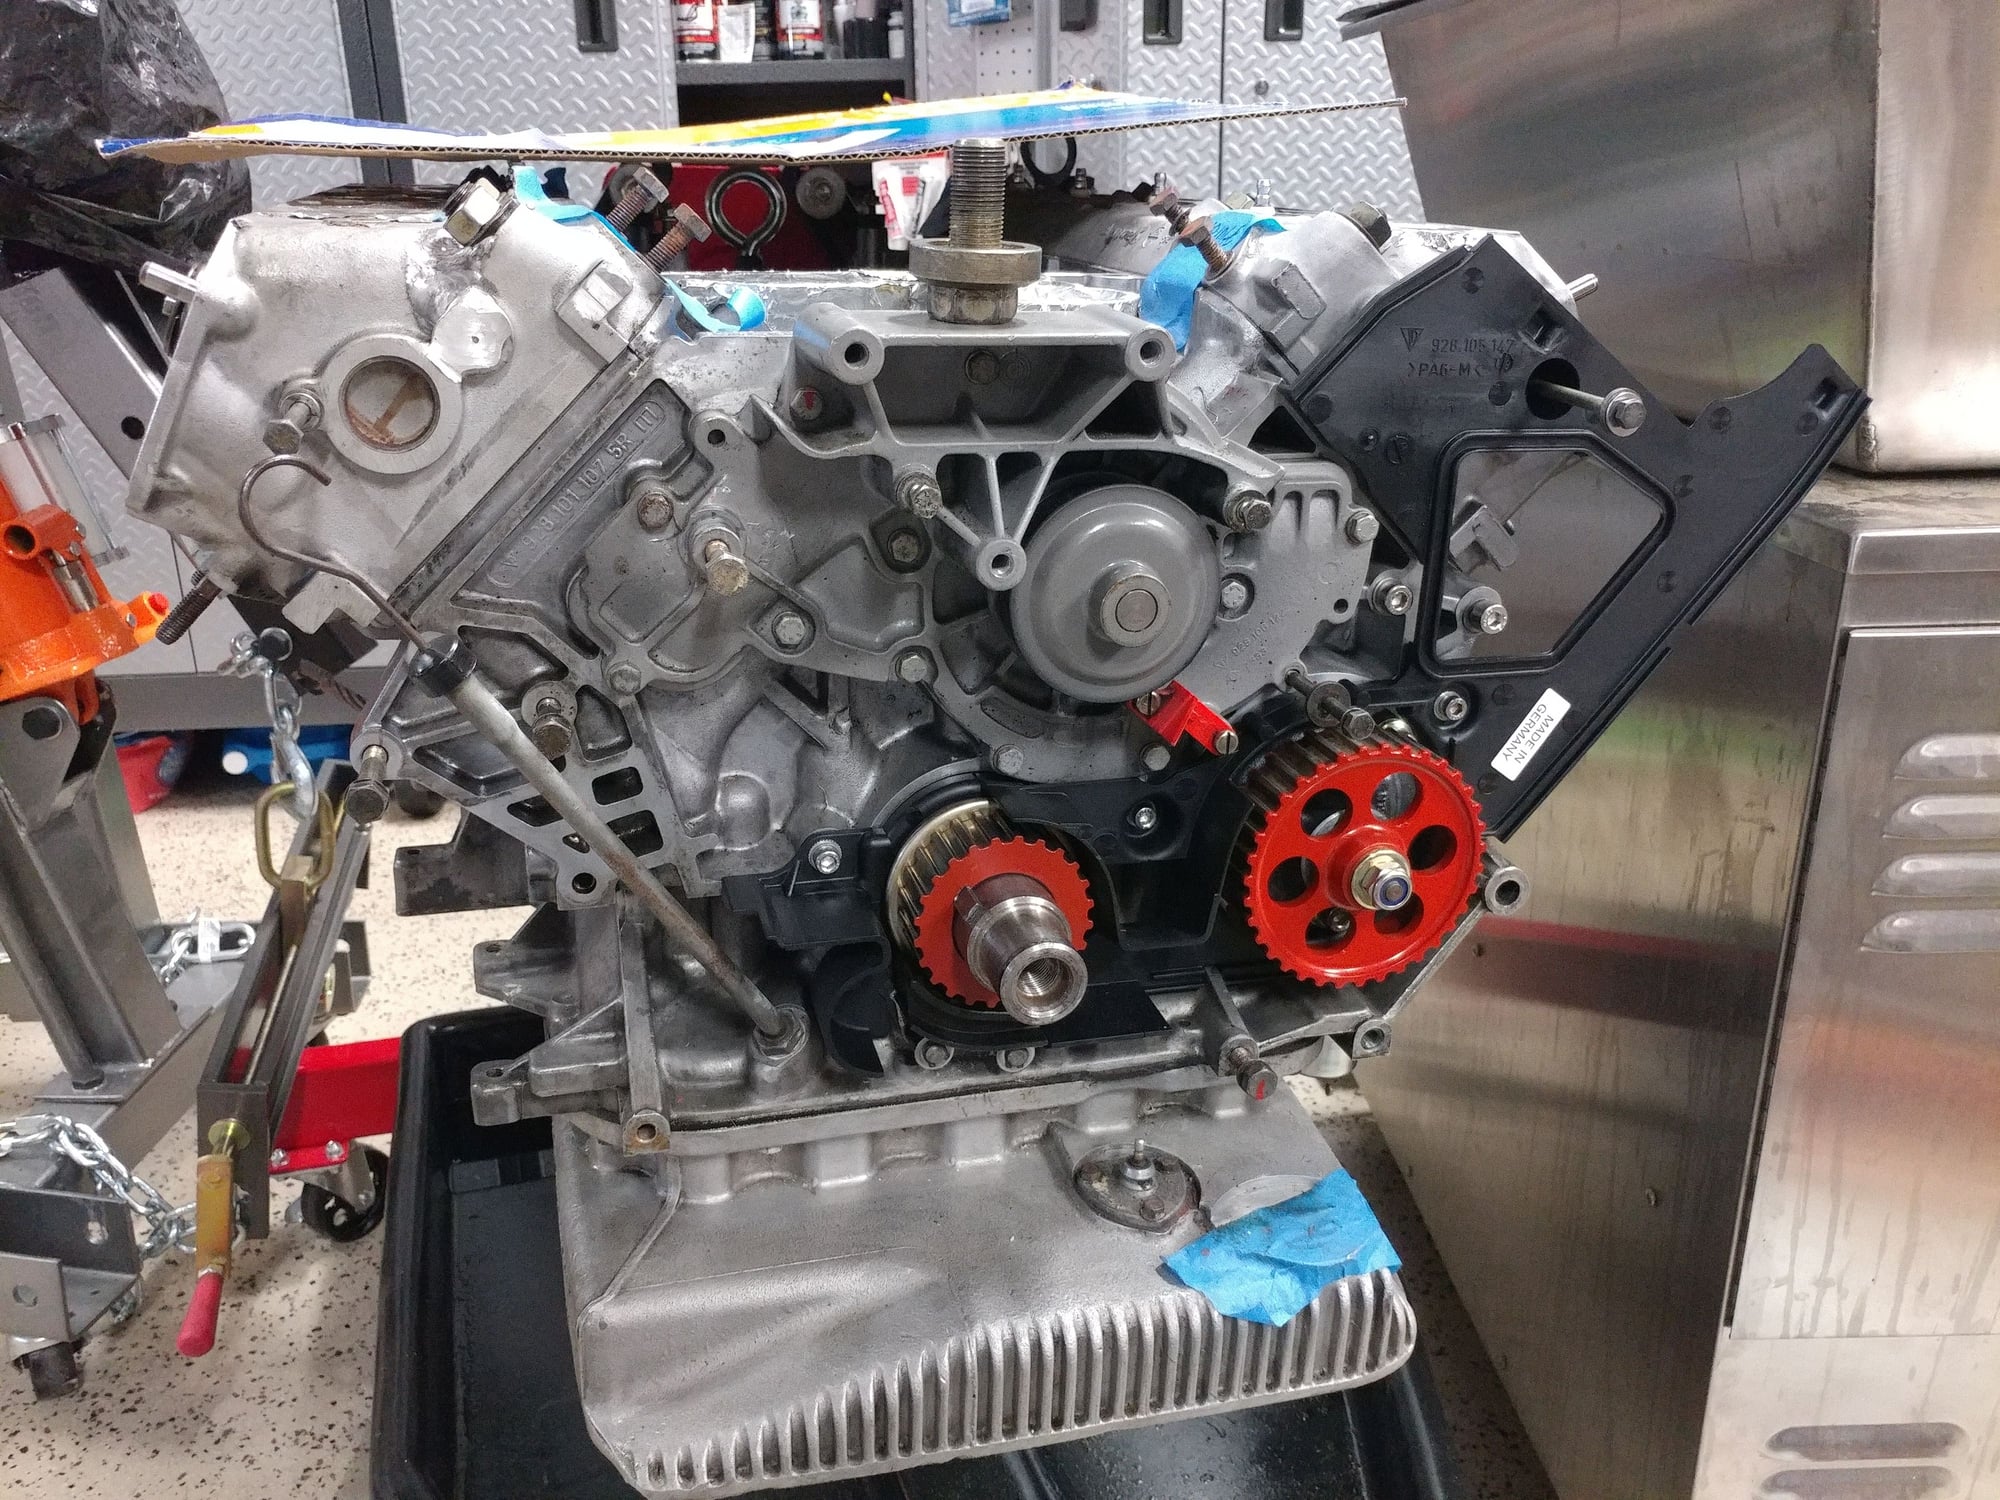
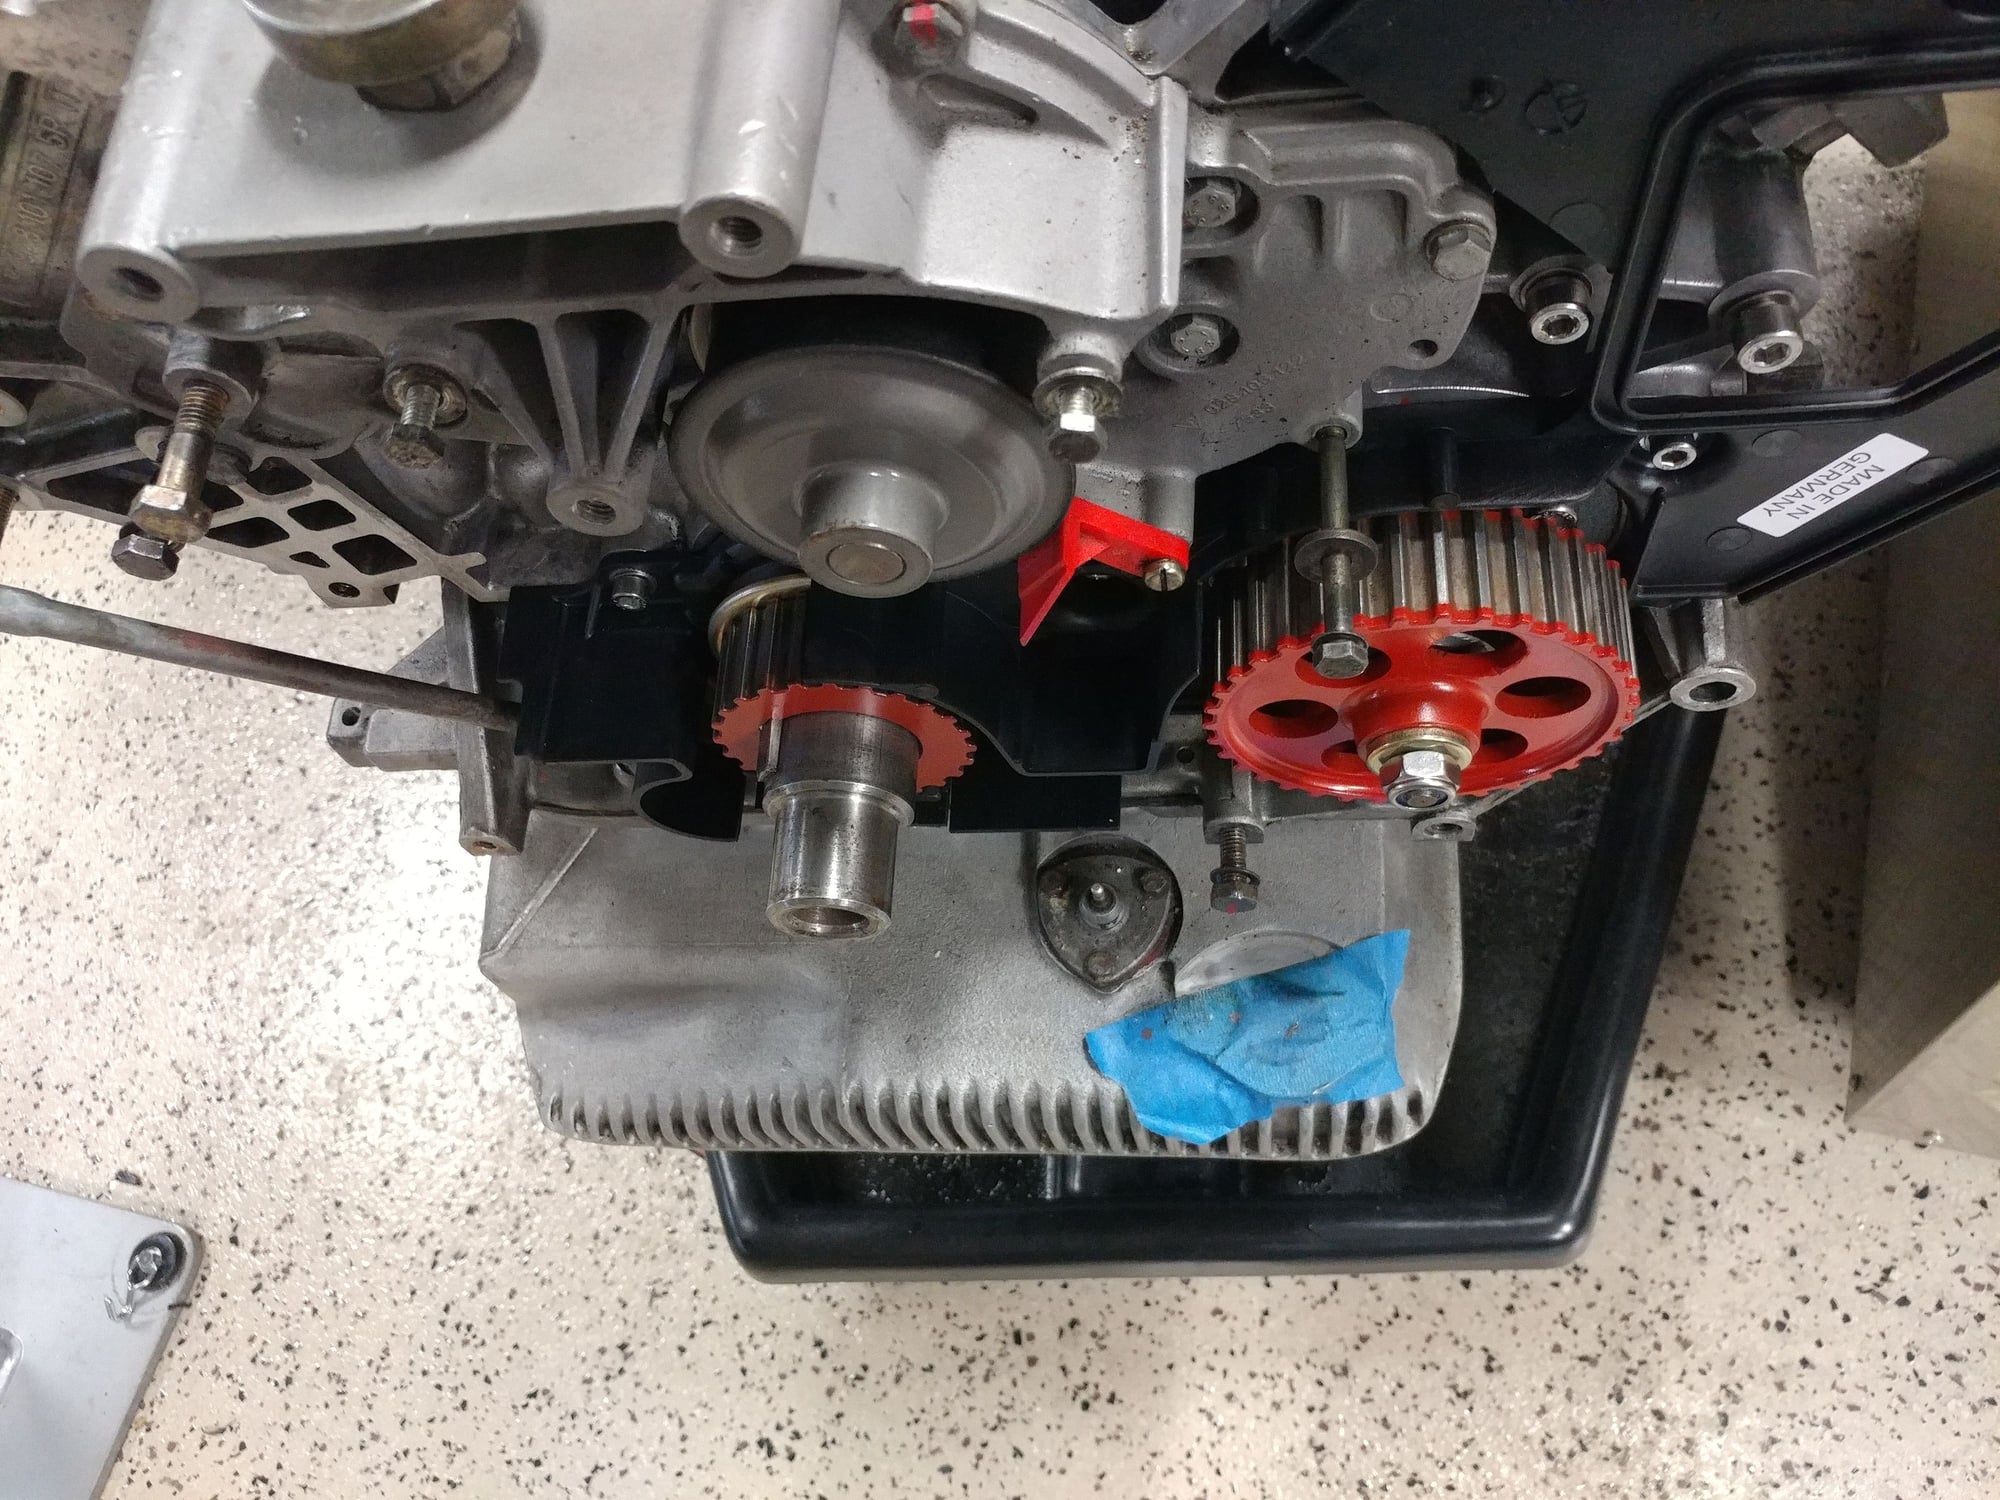
Oil pump installed with new woodruff key, 1mm washer omitted, inner plastic cover installed and both the oil pump pulley and crankshaft pulley are reinstalled.
I painted the steel pulleys that are going onto this motor with VHT hi-temp ceramic engine enamel, but not the running surfaces of the pulleys to avoid any issues the paint might cause with the belt.
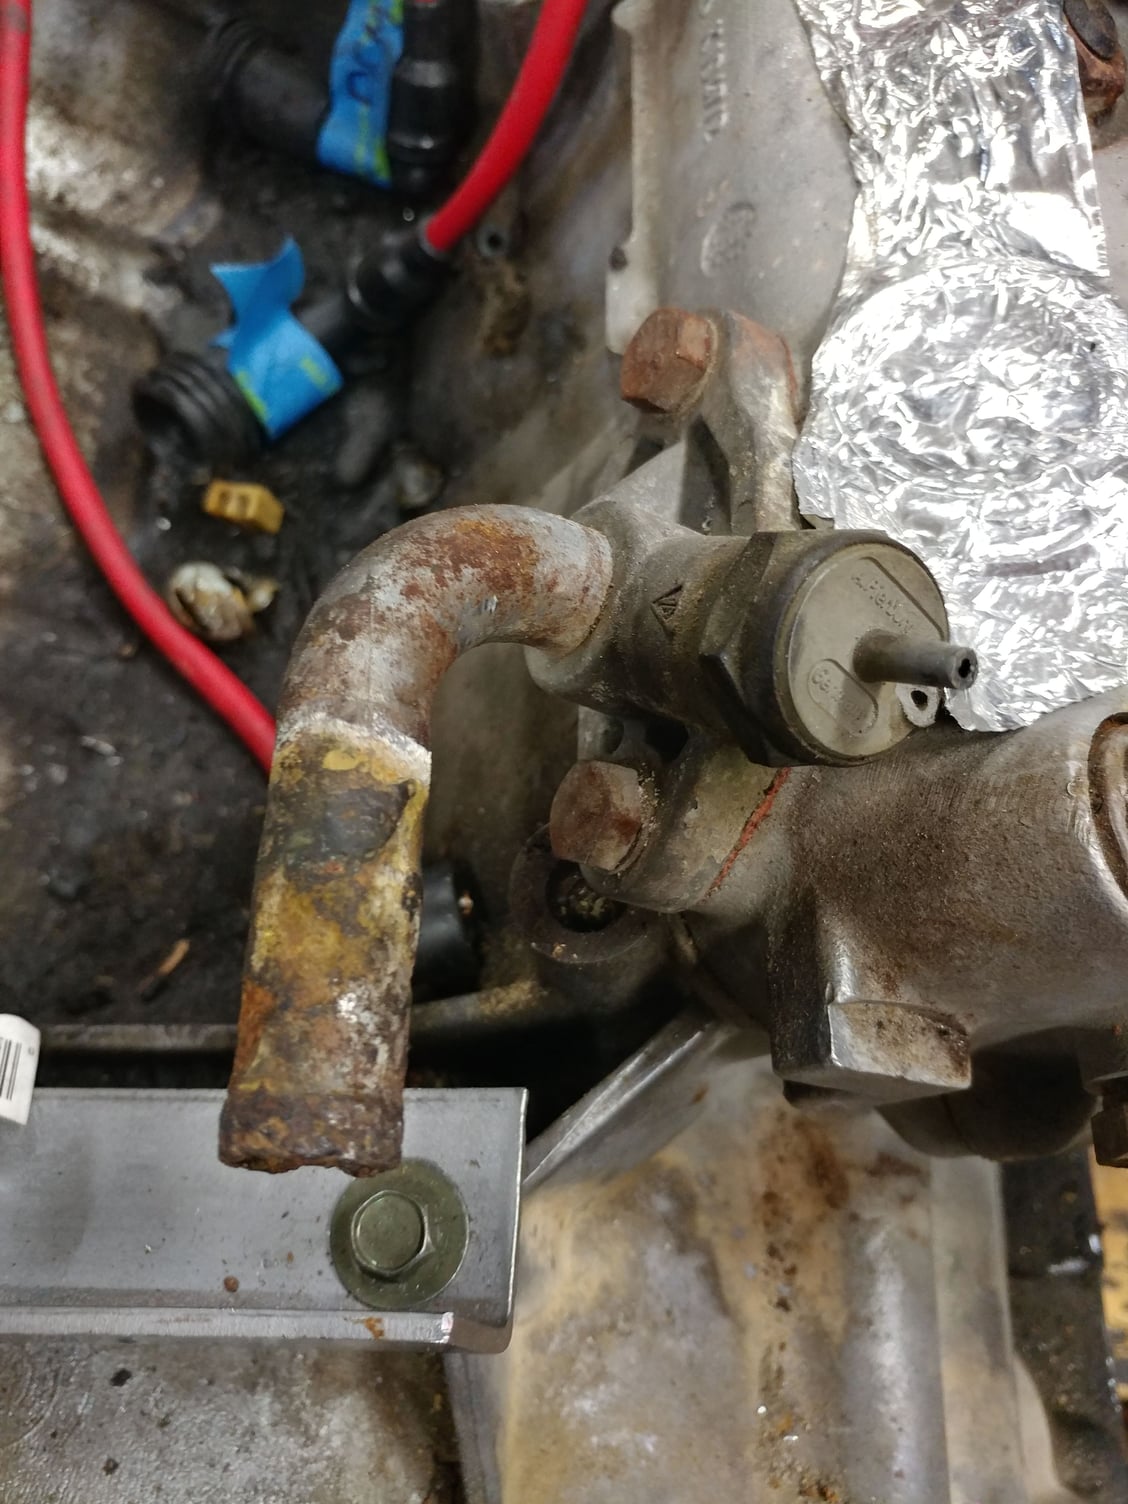
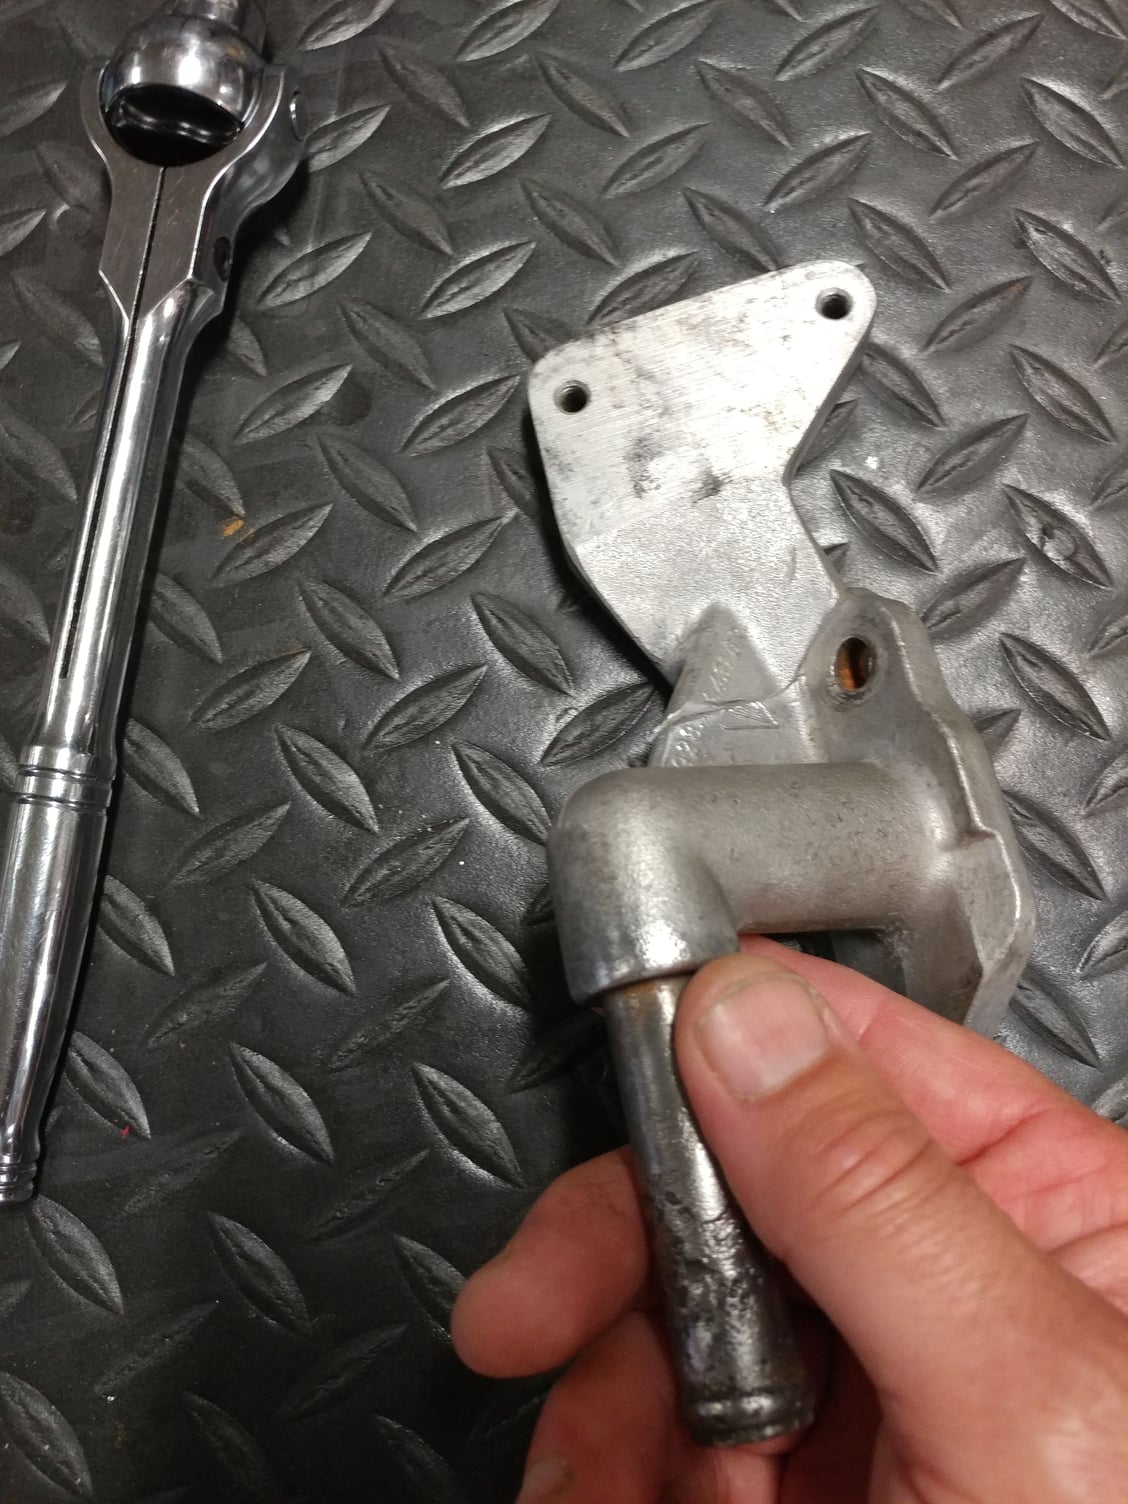
I also did a little work to the water inlet pipe on the flywheel side of the motor. Mine was badly corroded.
My 4.5L fitting was pretty badly corroded
The one on the 4.7L motor was much better but has this extra wing that must be used to mount something related to the L-Jet system. With me reusing my K-Jet setup, that portion is in the way of the assembly, so I trimmed it off.
The steel versus aluminum pulley is the one you painted red - not the one you have a magnetic probe attached to. It's that actual pulley that is important. If your pulley is aluminum, replace it with the steel version and leave the shim off.


 04-27-2019, 06:00 PM