When you click on links to various merchants on this site and make a purchase, this can result in this site earning a commission. Affiliate programs and affiliations include, but are not limited to, the eBay Partner Network.
The plan is to chop all the hair into a very fine powder -slightly smaller than an individual metallic flake. Small enough to pass thru the Glasurit specified 1.3 nozzle.
The pubes need to be mixed into some M4 binder separately. Then reduced with E-93 at 20% by volume. Then mixed into the base.
The 125 micron strainers are a lot more limiting than the 1.3mm fluid needle tip.
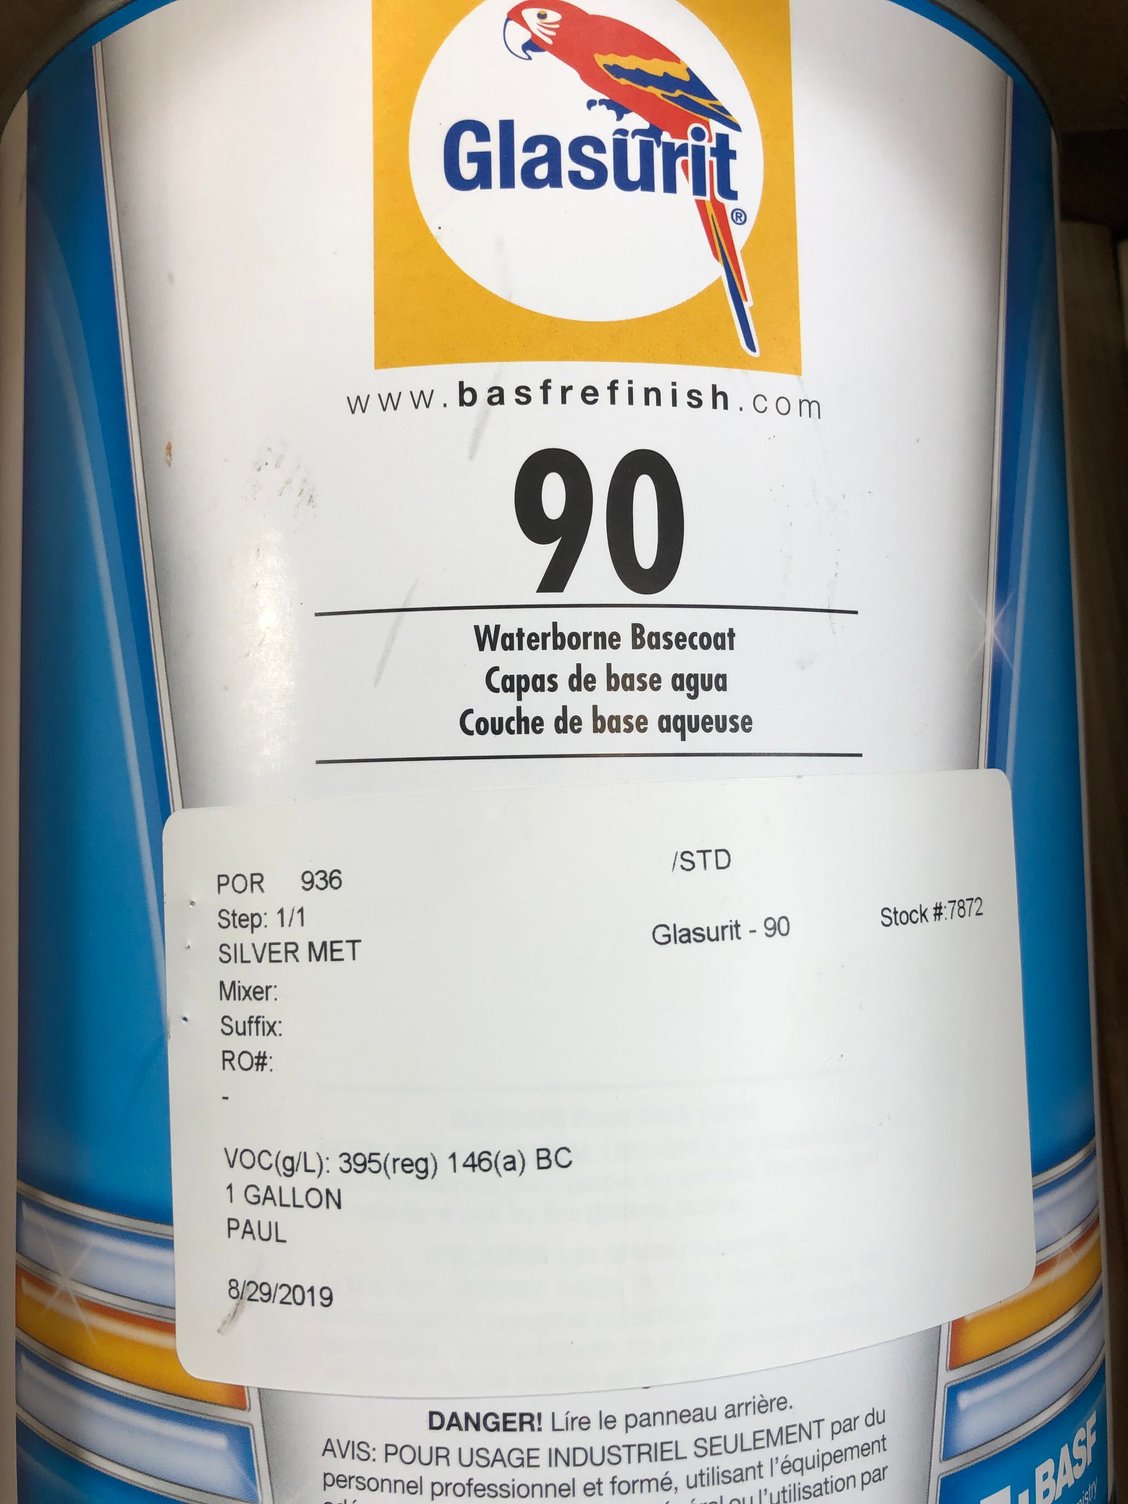
It is official. 01117 will be getting base coat and clear this Saturday. The car gets transported to undisclosed location no. 2 on Thursday night. Friday is booth cleaning, car positioning, masking, masking and masking. Saturday a.m. is final inspection, wipe down, test coupons and eventually base coat application.
We have been hard on it all week to get the guide coat down from 320 grit, to 400 and finally to 600 grit. Here are a few progress photos. This is the 3M powder version of guide coat on the roof panel we are in between 400 grit and 600 grit.
thought you west coast dudes went dark when the base/clear was within reach...no
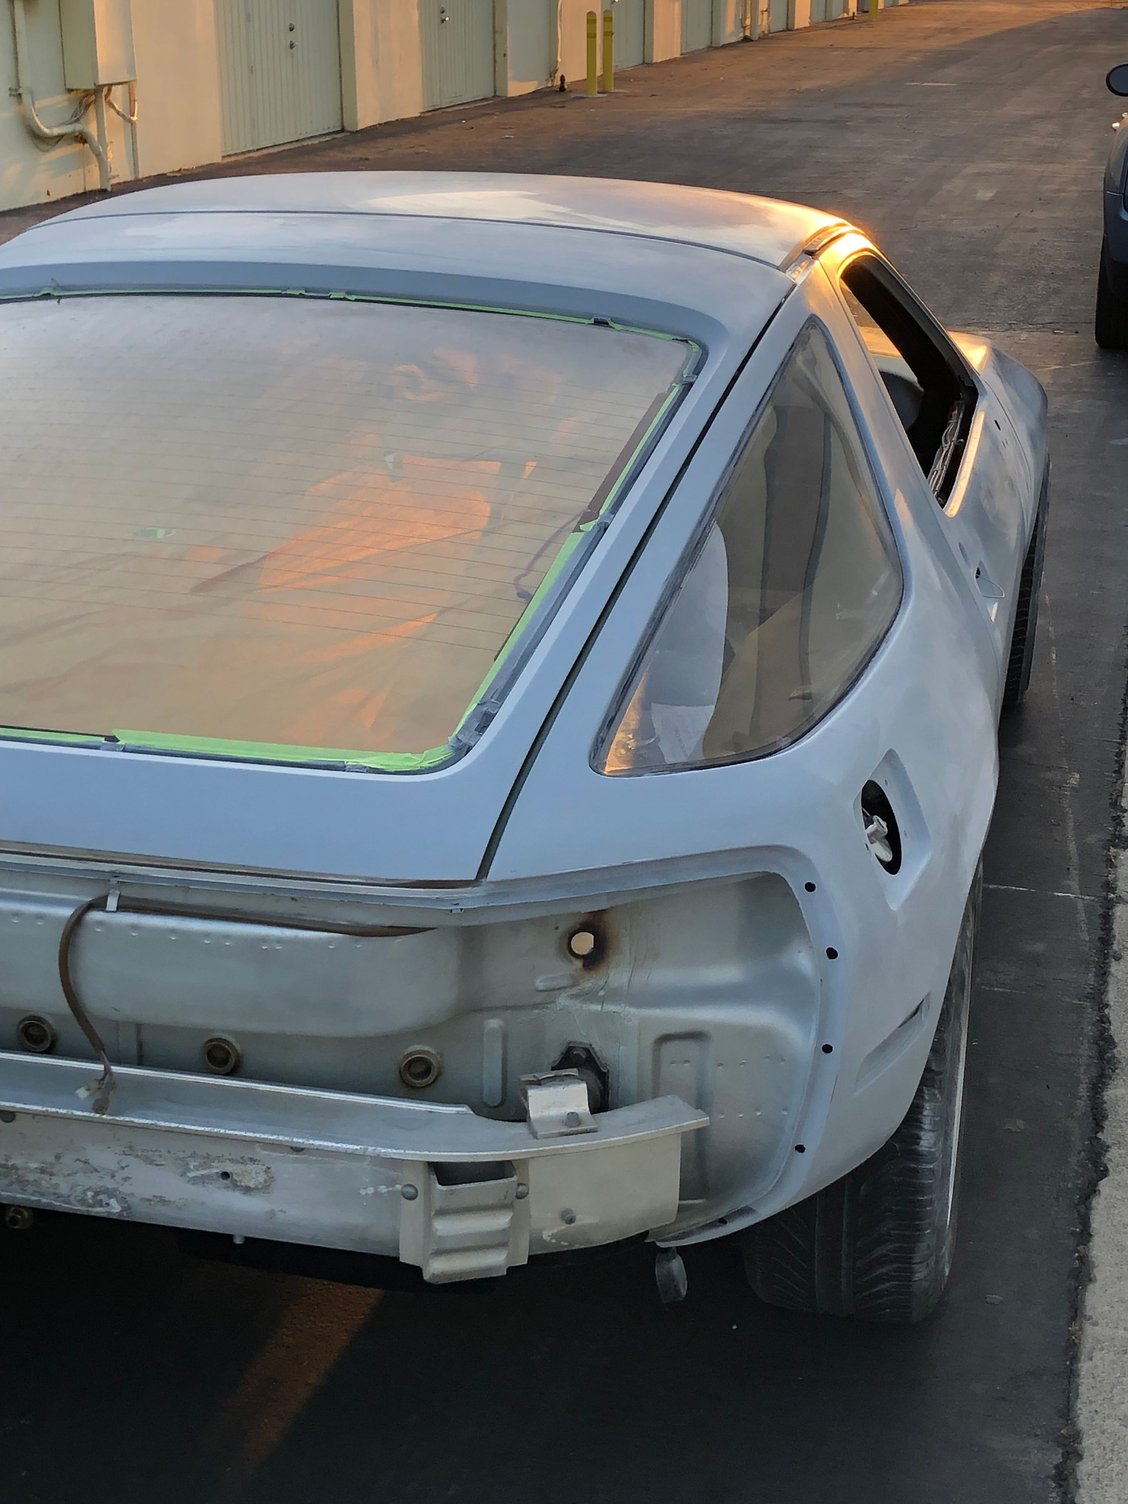
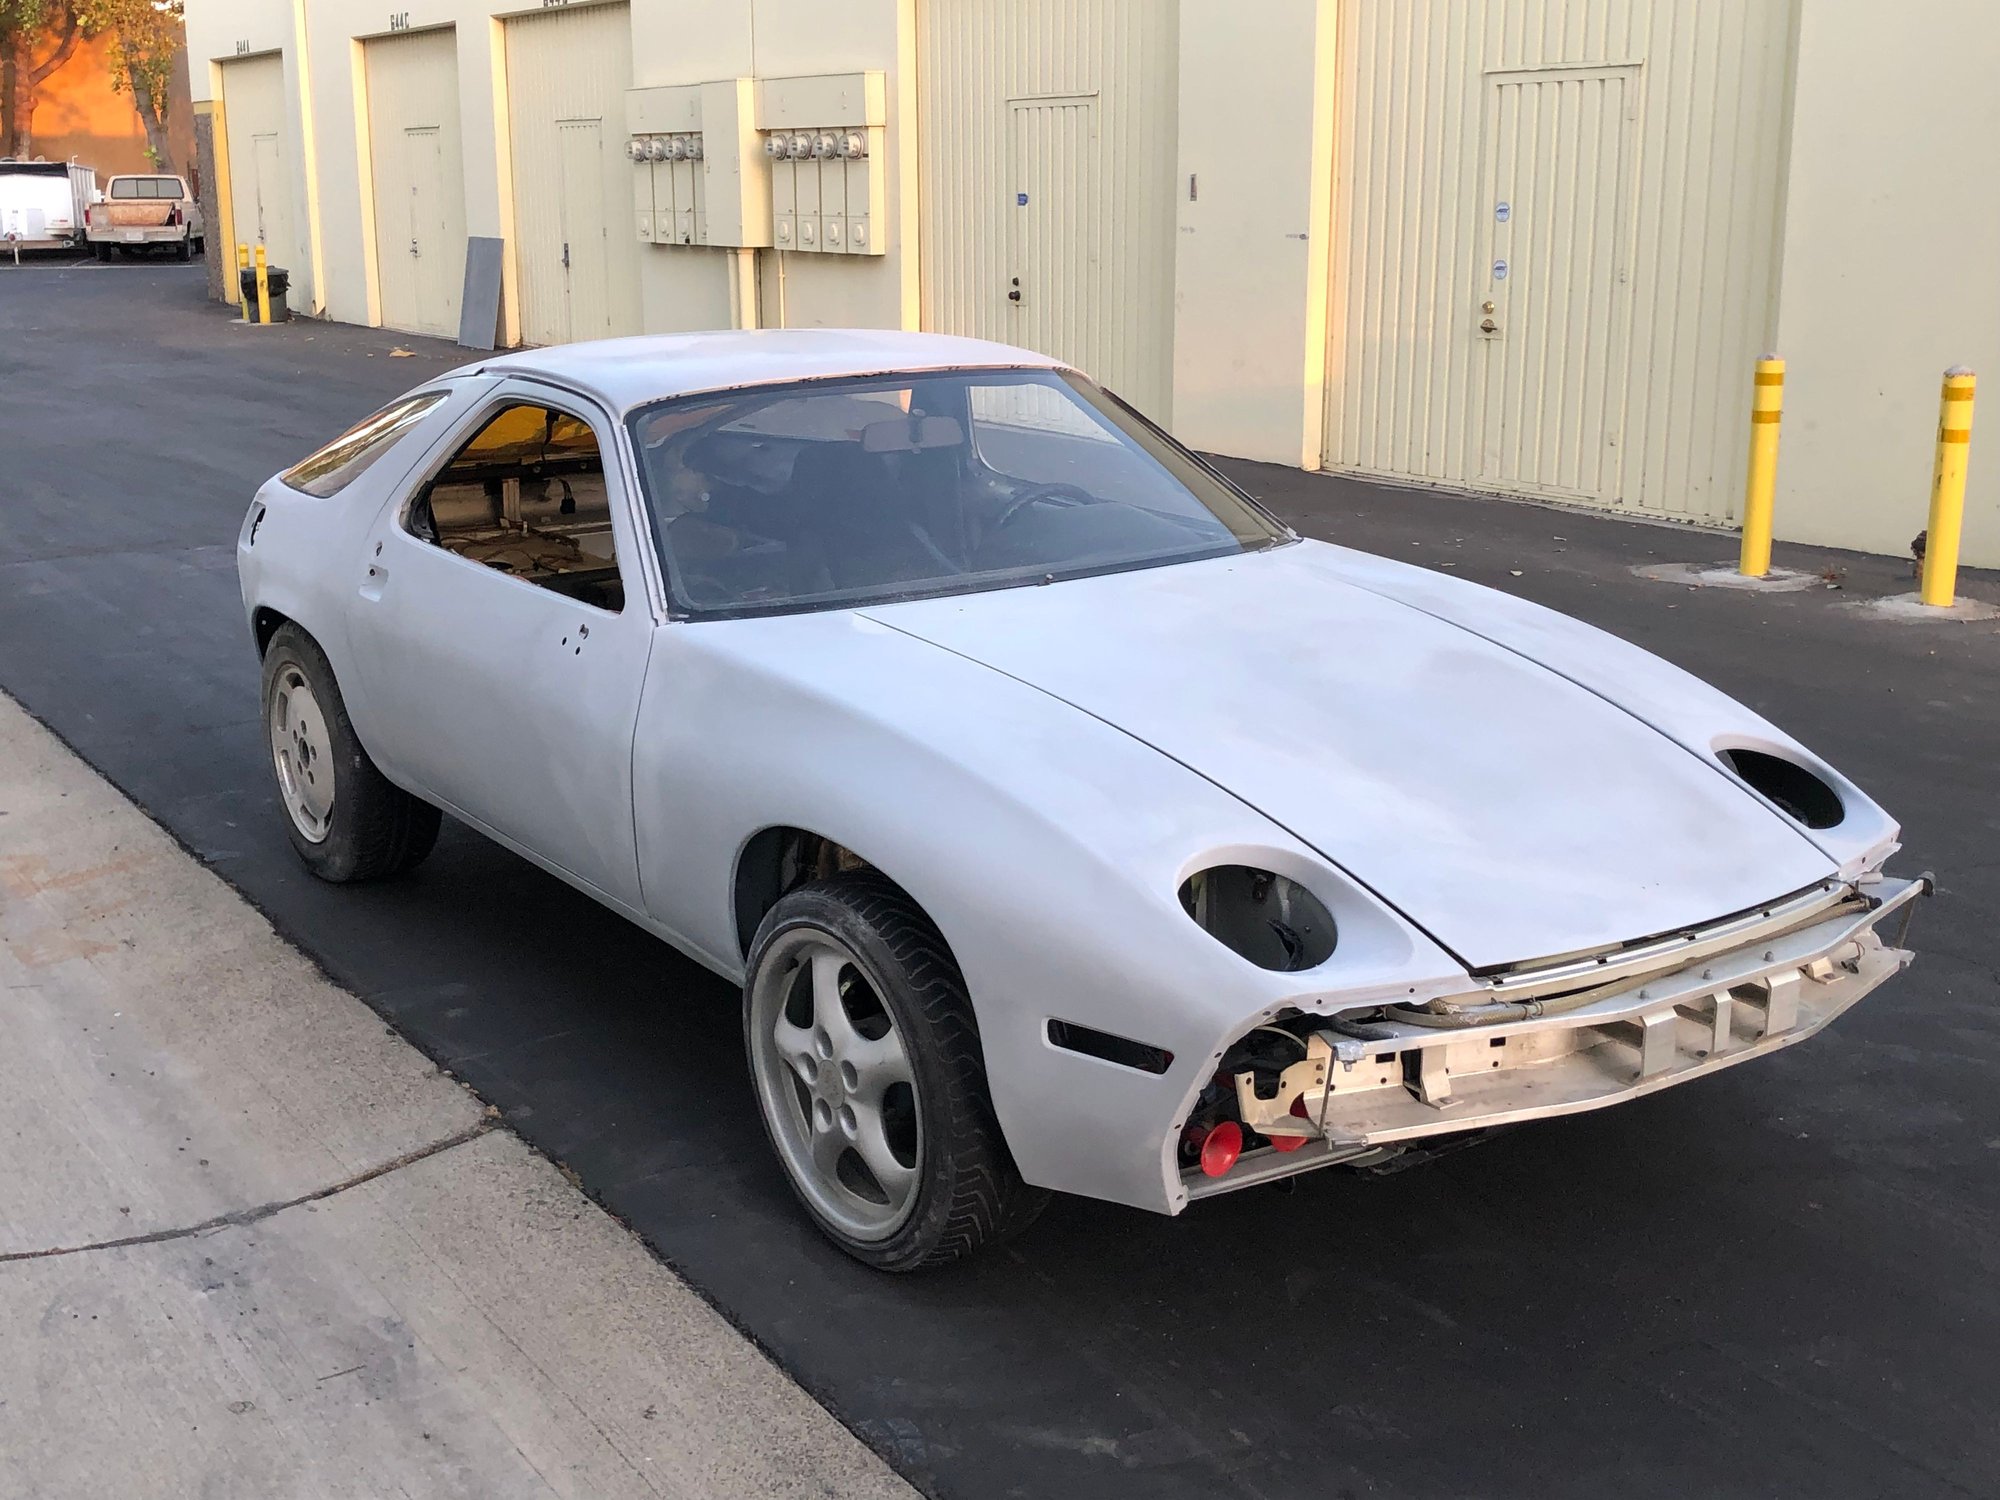
This the car on Wed night. Almost all of the old paper is off. Thursday is a full soap down and washing to get all the dust off the car. It will dry on Thursday night and be ready for masking on Friday.
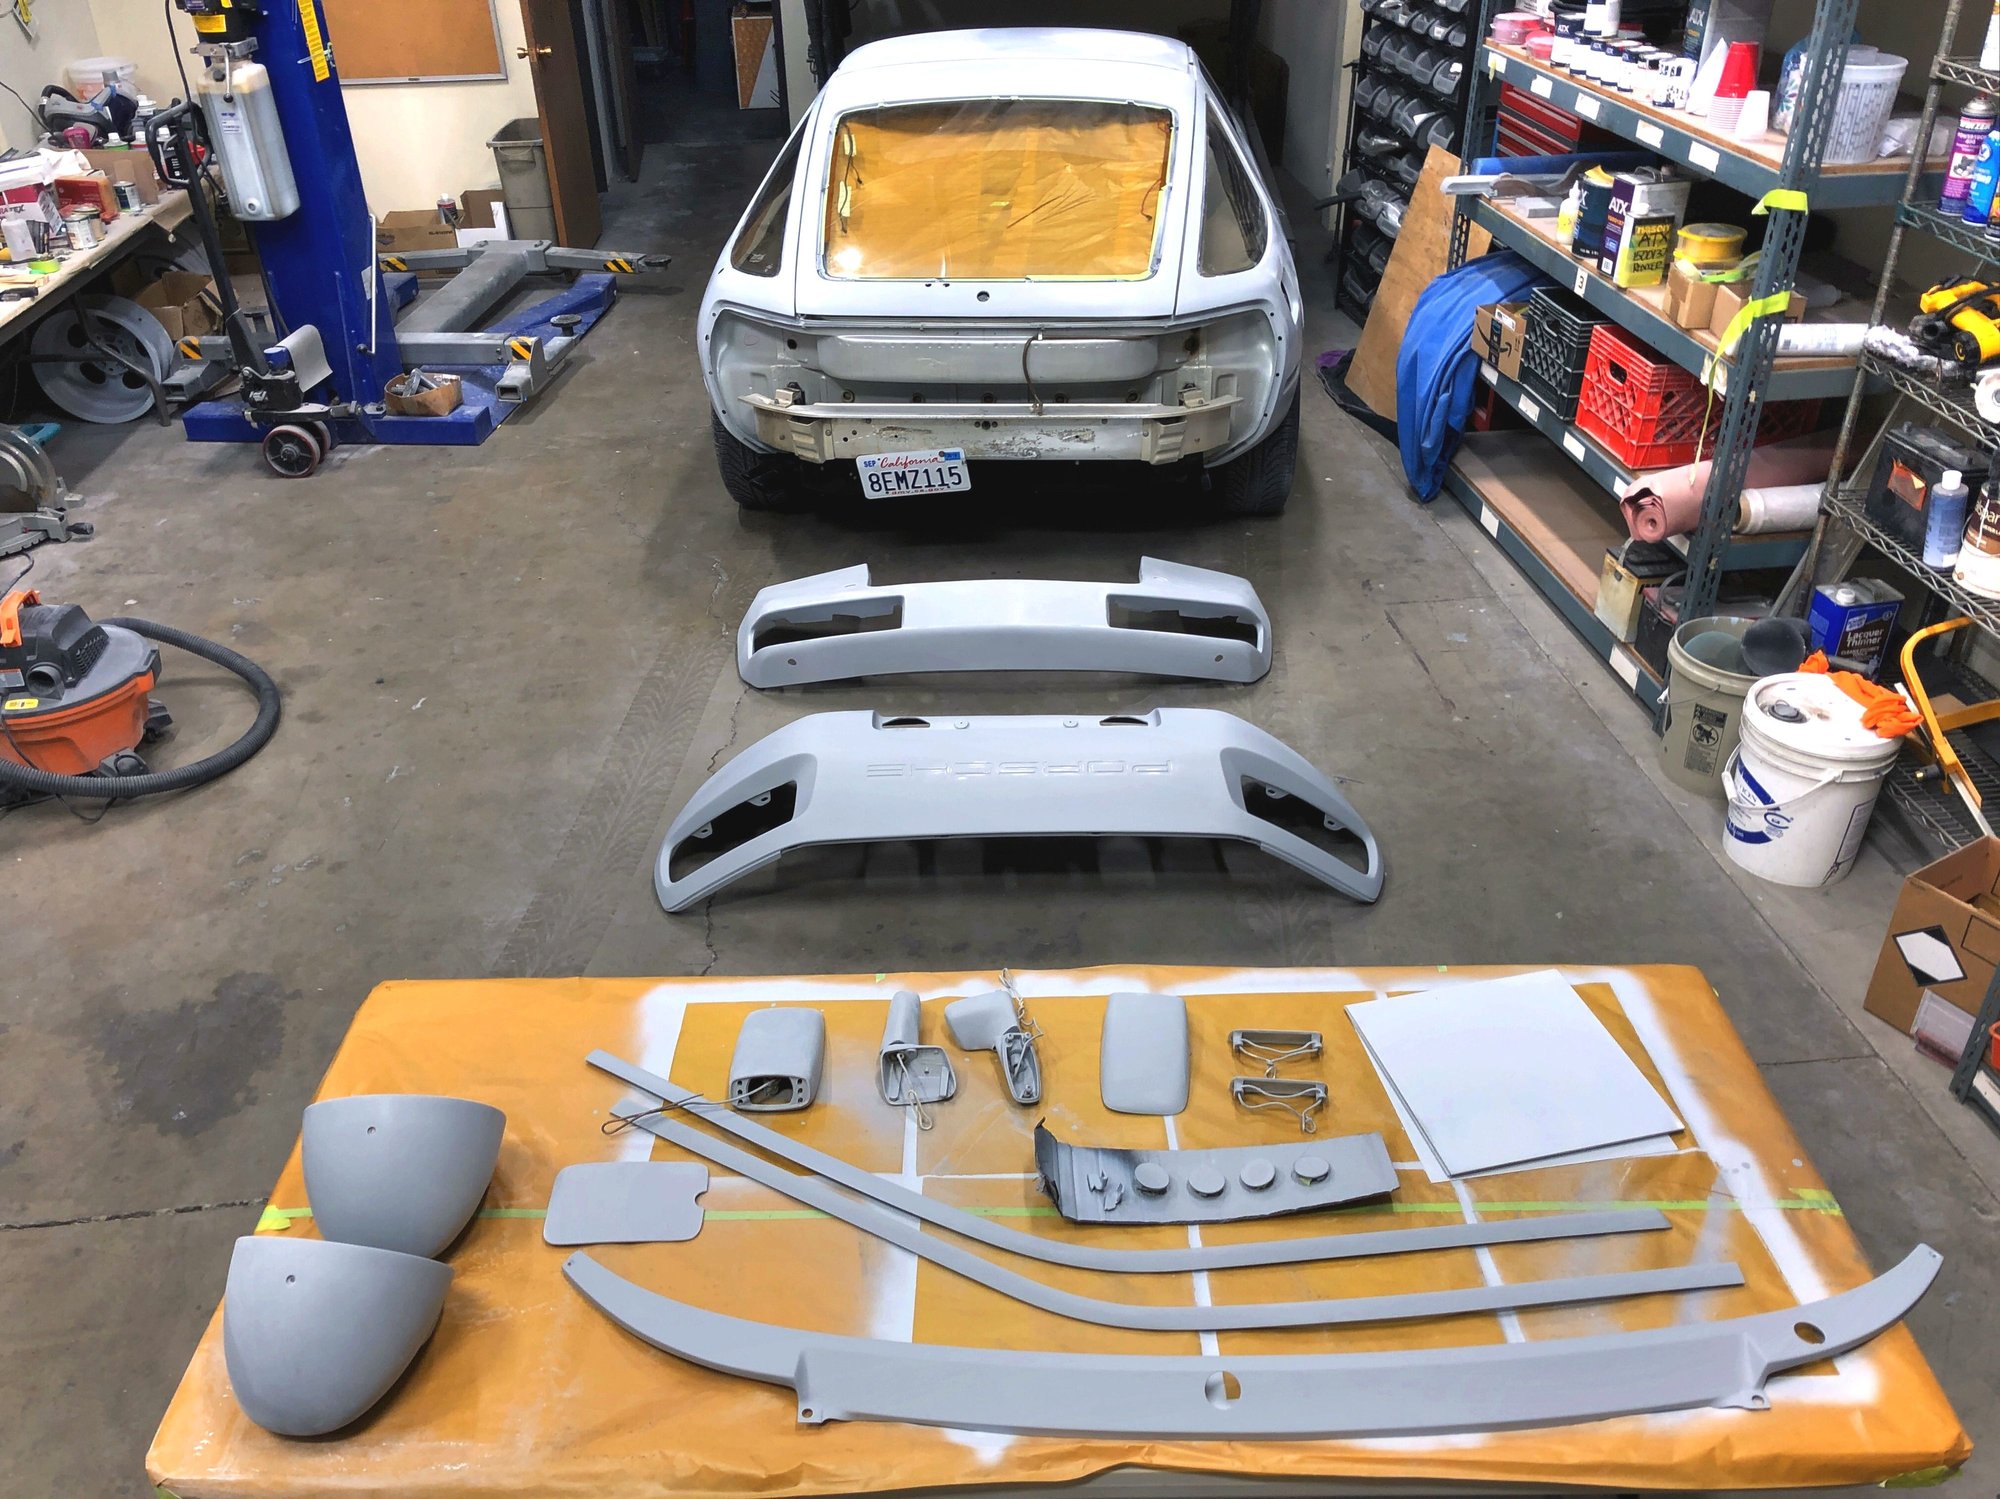
Here are the body colored 928 pieces in primer, sanding to 600 grit. If I never see another unpainted front bumper cover again it won't be too soon.
The mystery square panels (top right on table) are paint sample coupons. Starting with mild steel. they were all sanded, then etching primed, then a thick coat of High build. Sanded to 400 grit. These are test coupons for Saturday morning. for both base coat and clear coating
The pubes need to be mixed into some M4 binder separately. Then reduced with E-93 at 20% by volume. Then mixed into the base.
The 125 micron strainers are a lot more limiting than the 1.3mm fluid needle tip.
Kiln_Red,
Thanks for these pre-mixing tips. We have a lot of chopping once the hair arrives. We will be targeting a 123 micro length on each hair so most pass through the strainer.
Rob Edwards wanted to go all 'commando' and put the chopped hair straight into the cup without straining!
I'll pick up some E-93 in the morning. I might check back with you on the reducer amount on Saturday if our humidity goes above 43 percent. I am starting to get worried that if Ferry was using hair dye, we might get a little bleed out.
You guys are going to do excellent! I can already see the Glasurit clear shining from BG, KY..
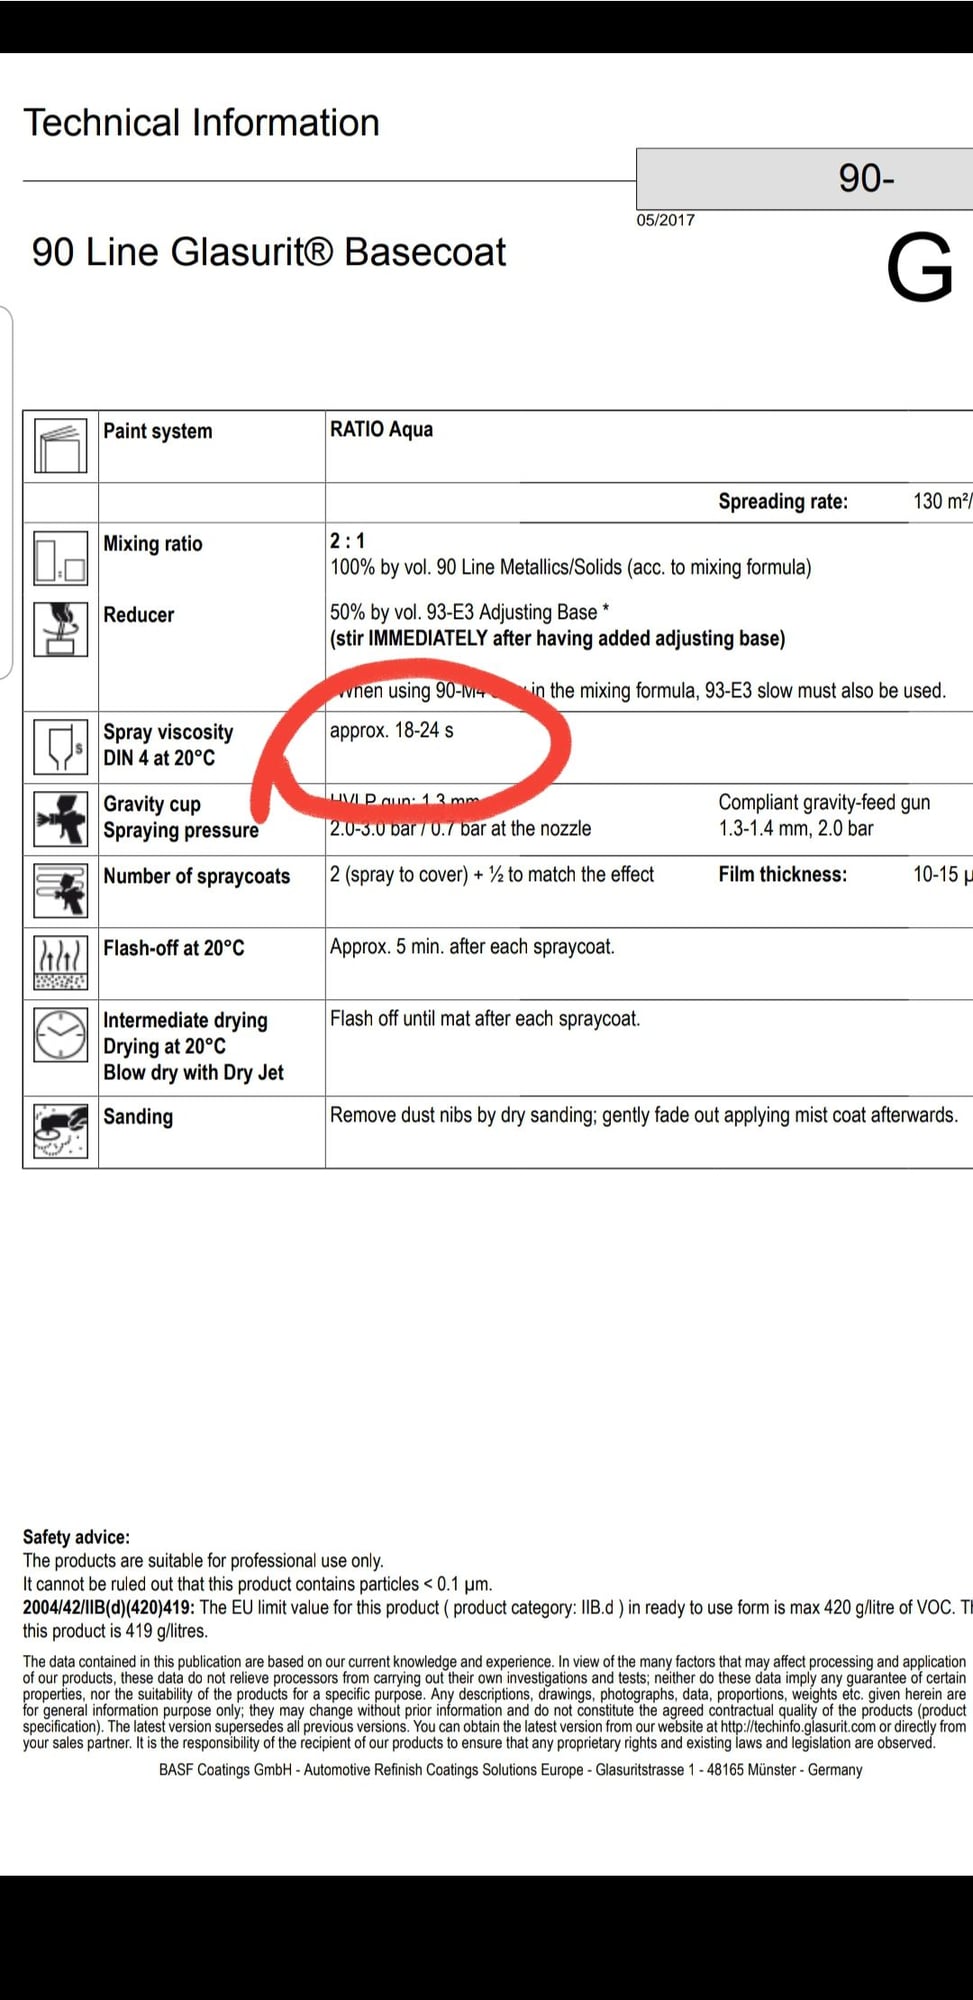
Happy to be of service however I can assist. The viscosity test outlined in the TDS sheets is a great guide for gauging proper reduction. Yes, climate is a HUGE variable in the characteristics of 90-line. The amount of reduction needed will widely vary from one set of climate conditions versus another. I would be looking for a 22-24 second viscosity for your color.
I'll PM you my cell phone number. Shoot a text, call, pics, whatever.. I'll do all I can from this side of the Mississippi River.
Note the 1/2 coat recommendation for final pass. This is the drop quote I was referencing in an earlier post.
And I was totally joking about the mixing strategy for the hair. You can literally just throw the hair powder in the mix cup (after reducer), then agitate the concoction once more before pouring it through your strainers. If you get it fine enough to pass the strainer, then there should be no concerns over the hair manifesting as debris in the paint. If you don't get it fine enough.. Well, same result. Only now, you will have to question the dark web investment altogether as no hair will have made it into the final job.
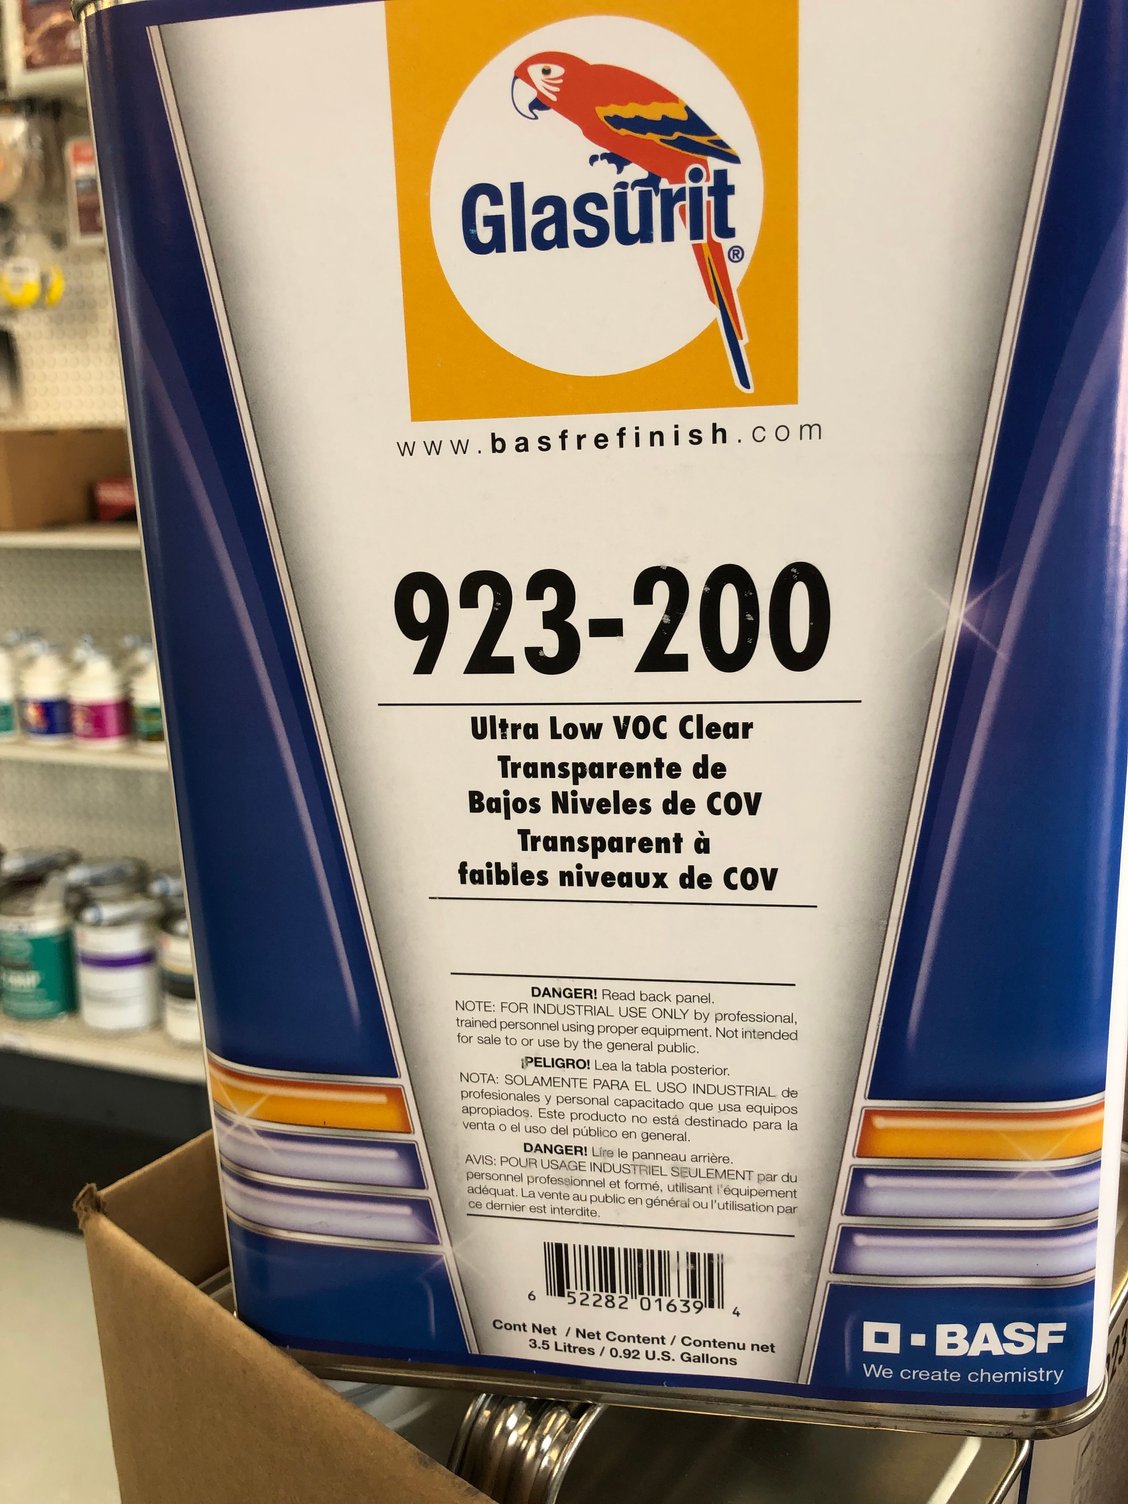
Well crud.. That is literally one of two 923 series clear coats ever made that I haven't shot. I'll do my best!
You definitely have enough paint. That is for sure. Not sure if you have ever handled Glasurit CCs before, but the transfer efficiency is literally 2x as good as 90% of competitor products.
Cross flow paint booths are very hard to use in general. Adding in the extra dry time for 90-line and the fact that this a complete respray makes this a required act of wizardry.
Most of the cabinet will be 'charged' during the paint job - there will be little 'dead air' and plenty of air moving outside of the spray zone. Ideally, you want the only moving air to be within 1' of the vertical (side) panels. That will not be the case here. Acceptable results with minimal denibbing may come more painlessly by following a few tips:
1. DO NOT TRUST THE CABINET PRESSURE GAUGE! Do any of you smoke? Start the booth up. Crack the man door open. Leave just a little gap and puff smoke in the direction of the opening, or just hold the stogie up to the opening and observe the smoke. Is the smoke getting sucked in to the cabinet or is it climbing along the door edge? You want the latter. If the smoke is being blown away from the door, this is also problematic and the man door is probably hard to close because the cabinet pressure is TOO HIGH. You want the cabinet pressure to be just barely positive and NEVER negative (vacuum).
2. You're using waterborne basecoat, so don't soak the floor in H2O as is commonly done in cross flow booths. The added moisture will push the flash time further out. The longer each coat stays 'open', the easier it will be for the basecoat to catch debris. Instead, cover the floor in plastic sheeting and put the car on jack stands. Go up as far as you can while still remaining comfortable for reaching the center of the roof with the spray gun. Continue masking the car with paper as you have been.
3. Let every successive coat dry 'naturally' so as to let the air flow of the booth handle 100% of the drying load. I suppose you have become familiar with much of the recommended supplement drying equipment for waterborne basecoats. Don't utilize any of it. R&R between each coat instead. It may seem counterintuitive as this leaves the base wetter for longer BUT you'll do more harm than good by adding air to that cabinet as there is too much live air in the cabinet already.
EDIT: Don't know how I overlooked the filters in the doors! This is not like the cross flow construction I was thinking about. Does this cross flow booth have an air makeup unit (AMU) or any system of supplying more fresh air than it exhausts? Is there an adjustment for cabin pressure?
Kiln_Red,
I do not believe there is any make up or supplemental air sources. Further I don't think there is any adjustment for the internal pressure.
Question. I regards to the flash off timing for each of the base coats. Instead of having the cross flow air being turned on, I was thinking of turning the air off. And just let the base coat kick slower with still air. that way we dont get any extra dirt in the paint.


 09-11-2019, 08:09 PM