When you click on links to various merchants on this site and make a purchase, this can result in this site earning a commission. Affiliate programs and affiliations include, but are not limited to, the eBay Partner Network.
Kiln_Red - precisely. There is no firm deadline on this entire painting project. Once the two coats of high build are applied it will go into storage at the current location. With these recent temps in calif. -this facility makes a nice curing oven. We will then take a break and head up for the Monterey car week. Returning in late August to think about final block sanding.
Here is the swage line on the right rear quarter right after rough blocking. Hopefully reflecting the accurate shape as noted in the above PROJECT images.
FBC has been a much larger project than anticipated. Positive bumps in the top center areas are going to require some back side draconian measures. Latest purchase from ebay just arrived. A 30 inch block sander -used it to rough in the top of the RF fender. Its purpose will be later after the two coats of high build are applied Fresh fiber gaskets and thanks to Rob Edwards donating the replated correct "K" bolts Engine compartment gutters are nearly there.
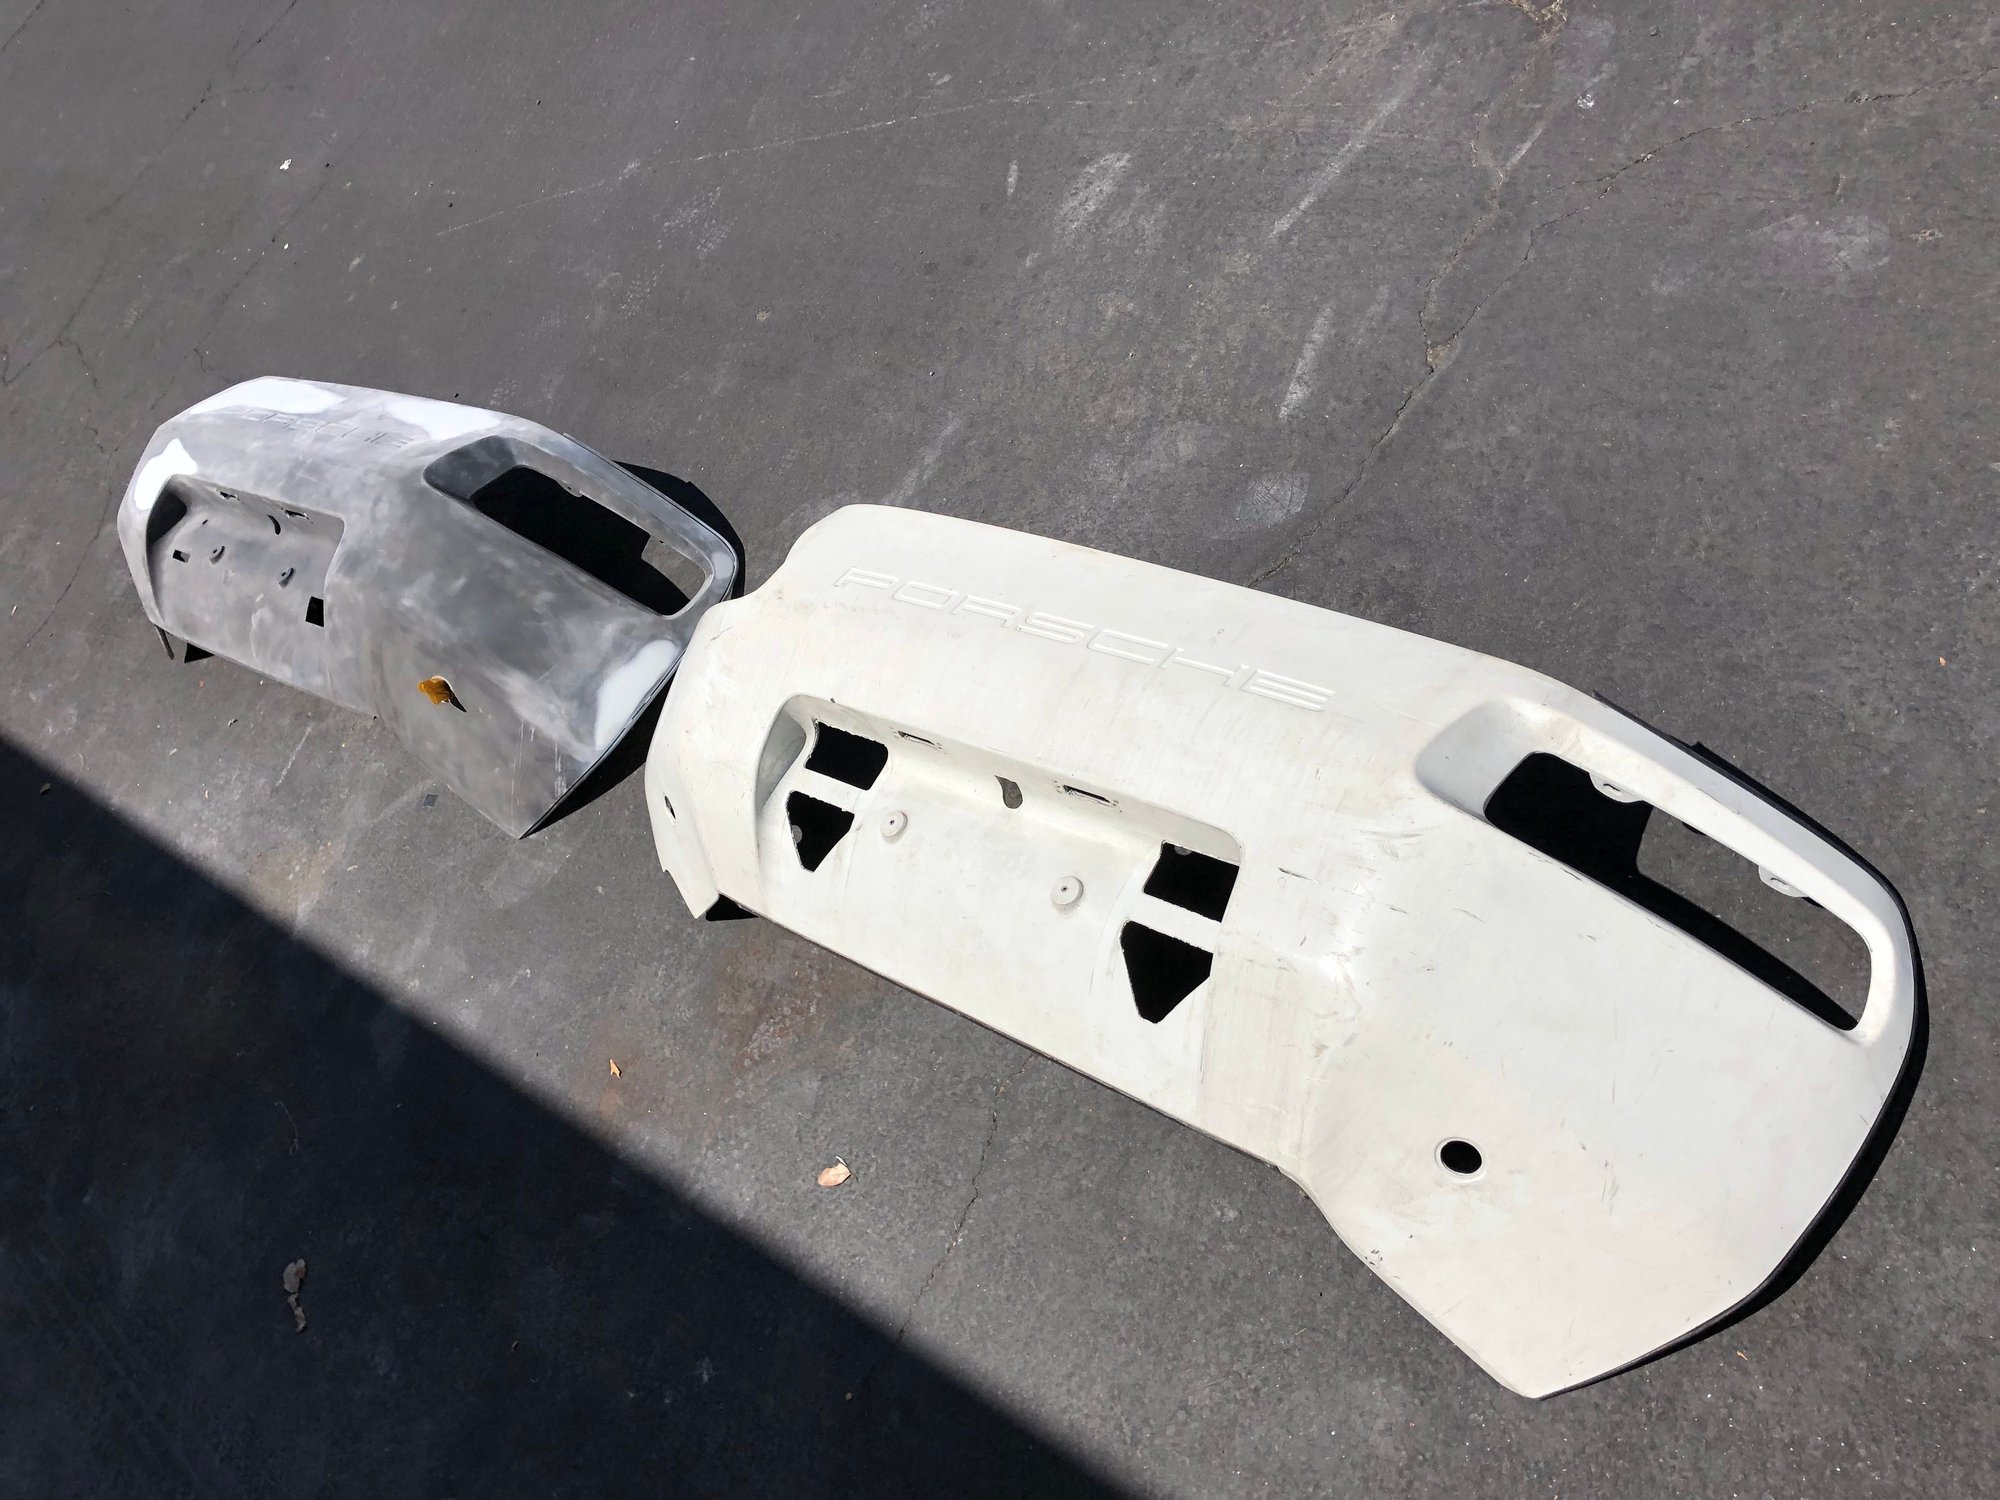
The front bumper covers are always a nightmare. Virtually all of them that I touch get extensive filler work across the top where it meets the hood. They really need to be replaced, but that isn't anymore practical than it is an improvement.. The replacement bumper is sure to do the same thing over a long enough timeline. The good news is that one of my straightened bumpers is still in my possession as it is still on the car that was painted 15 years ago. It still looks very nice!
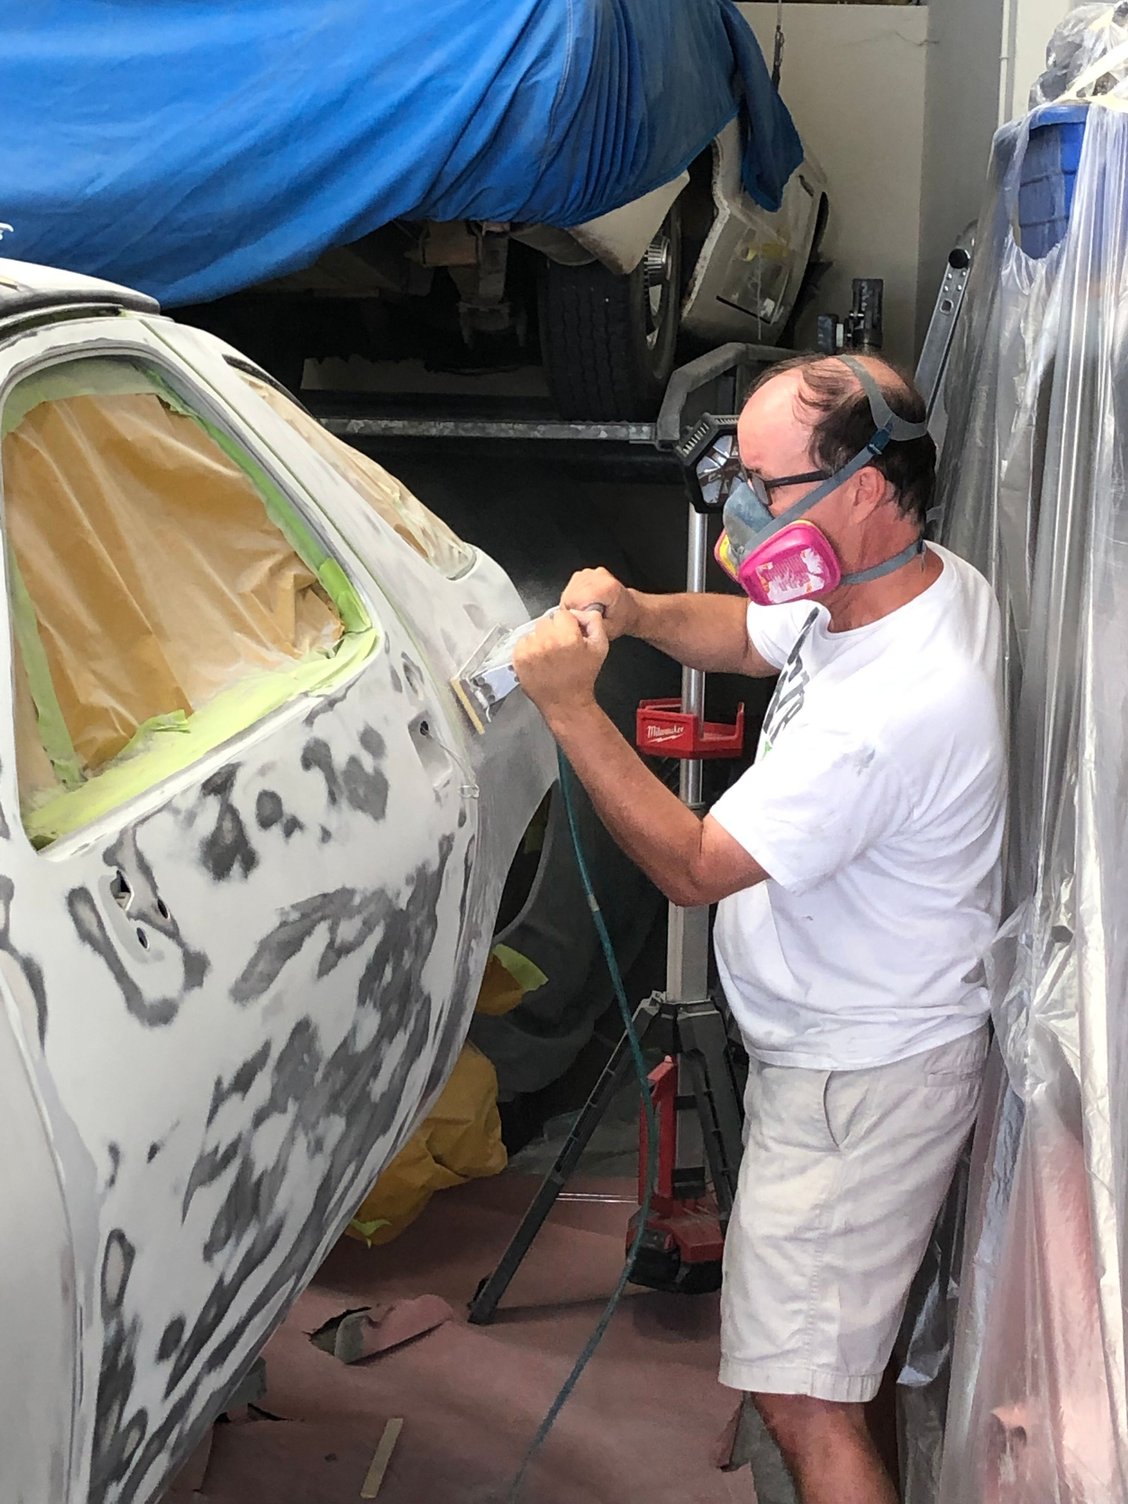
The other team members were putting in hours this week. Edwards is highly recognizable, the other guy is Mike Pelly from the vintage BMW orbit. Both curious enough to jump in and learn. The days they are there working, the progress goes really fast. Thanks to both. Rob did really well as soon as the 6 minutes of training were completed on how to use an airfile and not lose a finger. In this shot he is working the newest experimental tool the 32inch block sander. Its about 95F in the shop. Pelly showing fine sculpting technique makes quick work of the rear quarter Getting the panel just down to the original Porsche primer. First cut using Norton 120 grit.
Only one panel remains to be rough sanded before we apply the two coats of Glasurit high build primer. Gaps looking good all around. (hood is just set in place) LF fender now has coat of etching primer after the baking soda treatment. FBC cover is on Rev. 4. Kiln_Red was spot on about how much work is involved in getting this particular panel correct. Including about where the sink holes occur -right in front of the front edge of the hood. I'll never look at another OB front bumper cover the same again.
We ran into issues after investing 7-8 hours into the rear bumper cover. There was a sink hole on the upper panel Left above the "P" in Porsche and same on the right side above the "E". It was too warped to fix. The next solution was to fabricate some permanent backing material to push these to spots 'out' to the original shape. This was abandon as not being durable over the long term.
Once again, 928 International saved the day. They had a choice of early RBC's to pick from. (10 in fact). This white one was off a Euro model but was in exceptional shape and still wearing the original white paint. You can observe every inperfection with original paint, no hidden sins and shoddy body work. What a pleasure to sand original paint.
"Someday'' OB's are going to be (more) valuable and we will look back on the days when Mark and Tom had 10 RBC's to choose from. This is an extremely complex and difficult part to make. Having some many to choose from solves problems and gets the timing back on track. Thank you to Mark and Tom for the awesome service and selection.
Question for the early OB experts / black underhood
Question for anyone with an original 1978. Do you have flat back on the inside of hood at the rearmost trailing edge? 01117 had original paint in this area was flat black. Is that correct? Thanks.
Last edited by mit Wasser; 08-05-2019 at 12:09 AM.
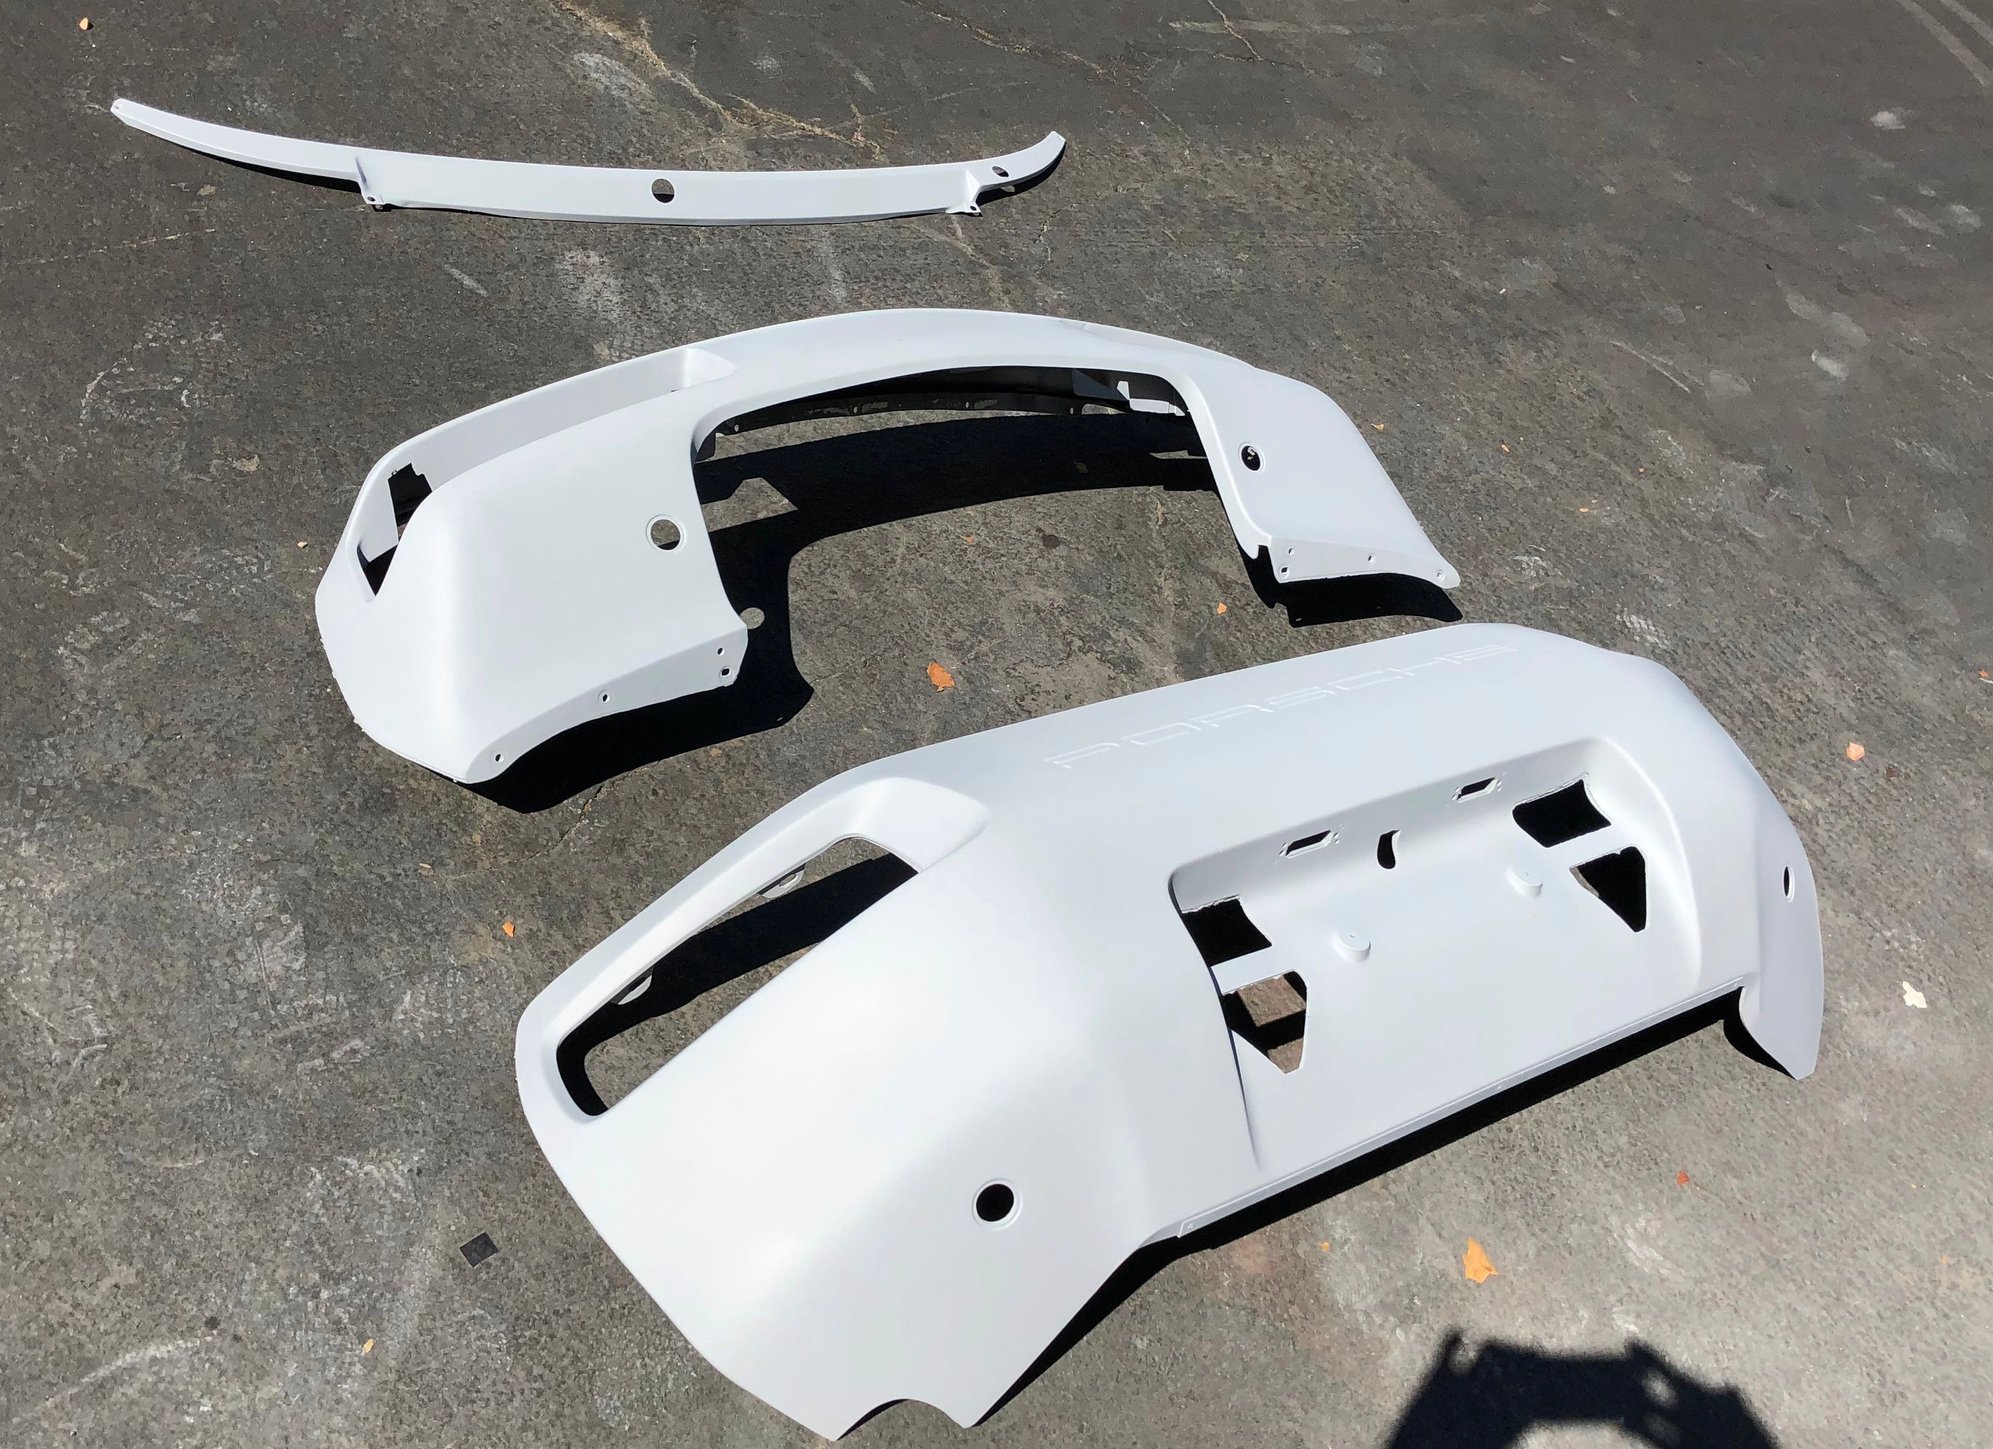
The two round plugs on the front bumper cover have a subtle concave shape to their face. After soda blasting they were primed in with high build. To keep the contour close to the original we did a quick and dirty fixture to sand them into shape.
The gap between both bumper covers and the body is a highly visible indicator of good fit. We are every so slightly grinding down the mating surface on both bumper faces to create a flush surface for re-stapling the rubber gasket.
I have been keeping a log of all the hours to paint 01117. Currently we are at 148 hours of total effort, with 91 hours being for sanding. Out of all the sanding time almost 50% was dedicated to sanding and straightening the two (three) bumper covers.
I know what your first thought is: Wow, this Mit Wasser guy is really slow. And you would be right about that. We are guessing that a professional body worker would be about twice as fast as us ham-fisted amateurs. Granted, they are way down the learning curve and we are not. These hours include shop set up each day, parts runs, and clean up.
Finally after sanding for two + weeks, we are starting to put down some primer. The reality is a lot of of this primer will be sanded off in the first guide coat cut. This is the new rear bumper cover primed. The second part is one of the front grille slats, getting guide coated.
I'm just south of 200 hours on an '85 Euro that I painted recently. Car is still with me for final buff and a little reassembly from there. It's of note, too, that the customer did some of the disassembly. Some of these sharks command serious TLC to get right from the body/refinish standpoint.. I greatly underestimated the work required on my most recent endeavor.


 07-26-2019, 12:56 PM