When you click on links to various merchants on this site and make a purchase, this can result in this site earning a commission. Affiliate programs and affiliations include, but are not limited to, the eBay Partner Network.
I also found that hooking the shop vac up to the cabinet during blasting made a huge improvement. There's an option to just run a filter or a vacuum and it seems the dust doesn't settle very quickly if the vac isn't hooked up. Using the vac just makes it so much easier to see what you're doing.
Small compressors are not good for a high cfm requirement, especially something like a bead blaster.
Compressing air heats air up, then you get high condensation which wets the glass bead, which makes your gun clog.
A high watt flood light type of bulb in the light socket goes a long way in keeping your glass bead dry.
You should have a filter pre-vacuum cleaner, because the bearings inside the motor will not last very long.
T
Yes, I forgot to mention I installed an inline dryer on the blast cabinet to keep the moisture out of the system.
The Eastwood cabinet came with a light inside of it, but it burned out the instant I turned it on. Other people on the 'net seemed to have similar issues with the lights that come in the cheap-O cabinets.
Yes on the pre-filter too. The cabinets come with a small one that's connected to the upstream side of the vacuum port.
Where did you find that cup holder? -does that just wedge between seat and console?
I found it at Meijer, which is like a Walmart of the midwest. It was $7 and I figured worth a shot to see if it solved the cup holder dilemma. It works reasonably well but the cup holders aren't very deep and they're rather large in diameter. For cans or paper coffee cups it works well, but for taller items they tend to flop around a bit. I'm thinking at some point I should 3D print some inserts to choke down the size of the cup holders a bit to snug things up.
Yes, it just wedges between the console and the seat.
Yes, I forgot to mention I installed an inline dryer on the blast cabinet to keep the moisture out of the system.
The Eastwood cabinet came with a light inside of it, but it burned out the instant I turned it on. Other people on the 'net seemed to have similar issues with the lights that come in the cheap-O cabinets.
Yes on the pre-filter too. The cabinets come with a small one that's connected to the upstream side of the vacuum port.
Justin
If you are looking for a regular type bulb replacement for the el cheapo the cabinets ship with, there is a bulb specific for shop use called "rough service".
You can find them at NAPA and other parts stores.
They even have a rubberized type skin over the bulb that minimizes the spread of sharp glass in the event that it shatters inside your cabinet.
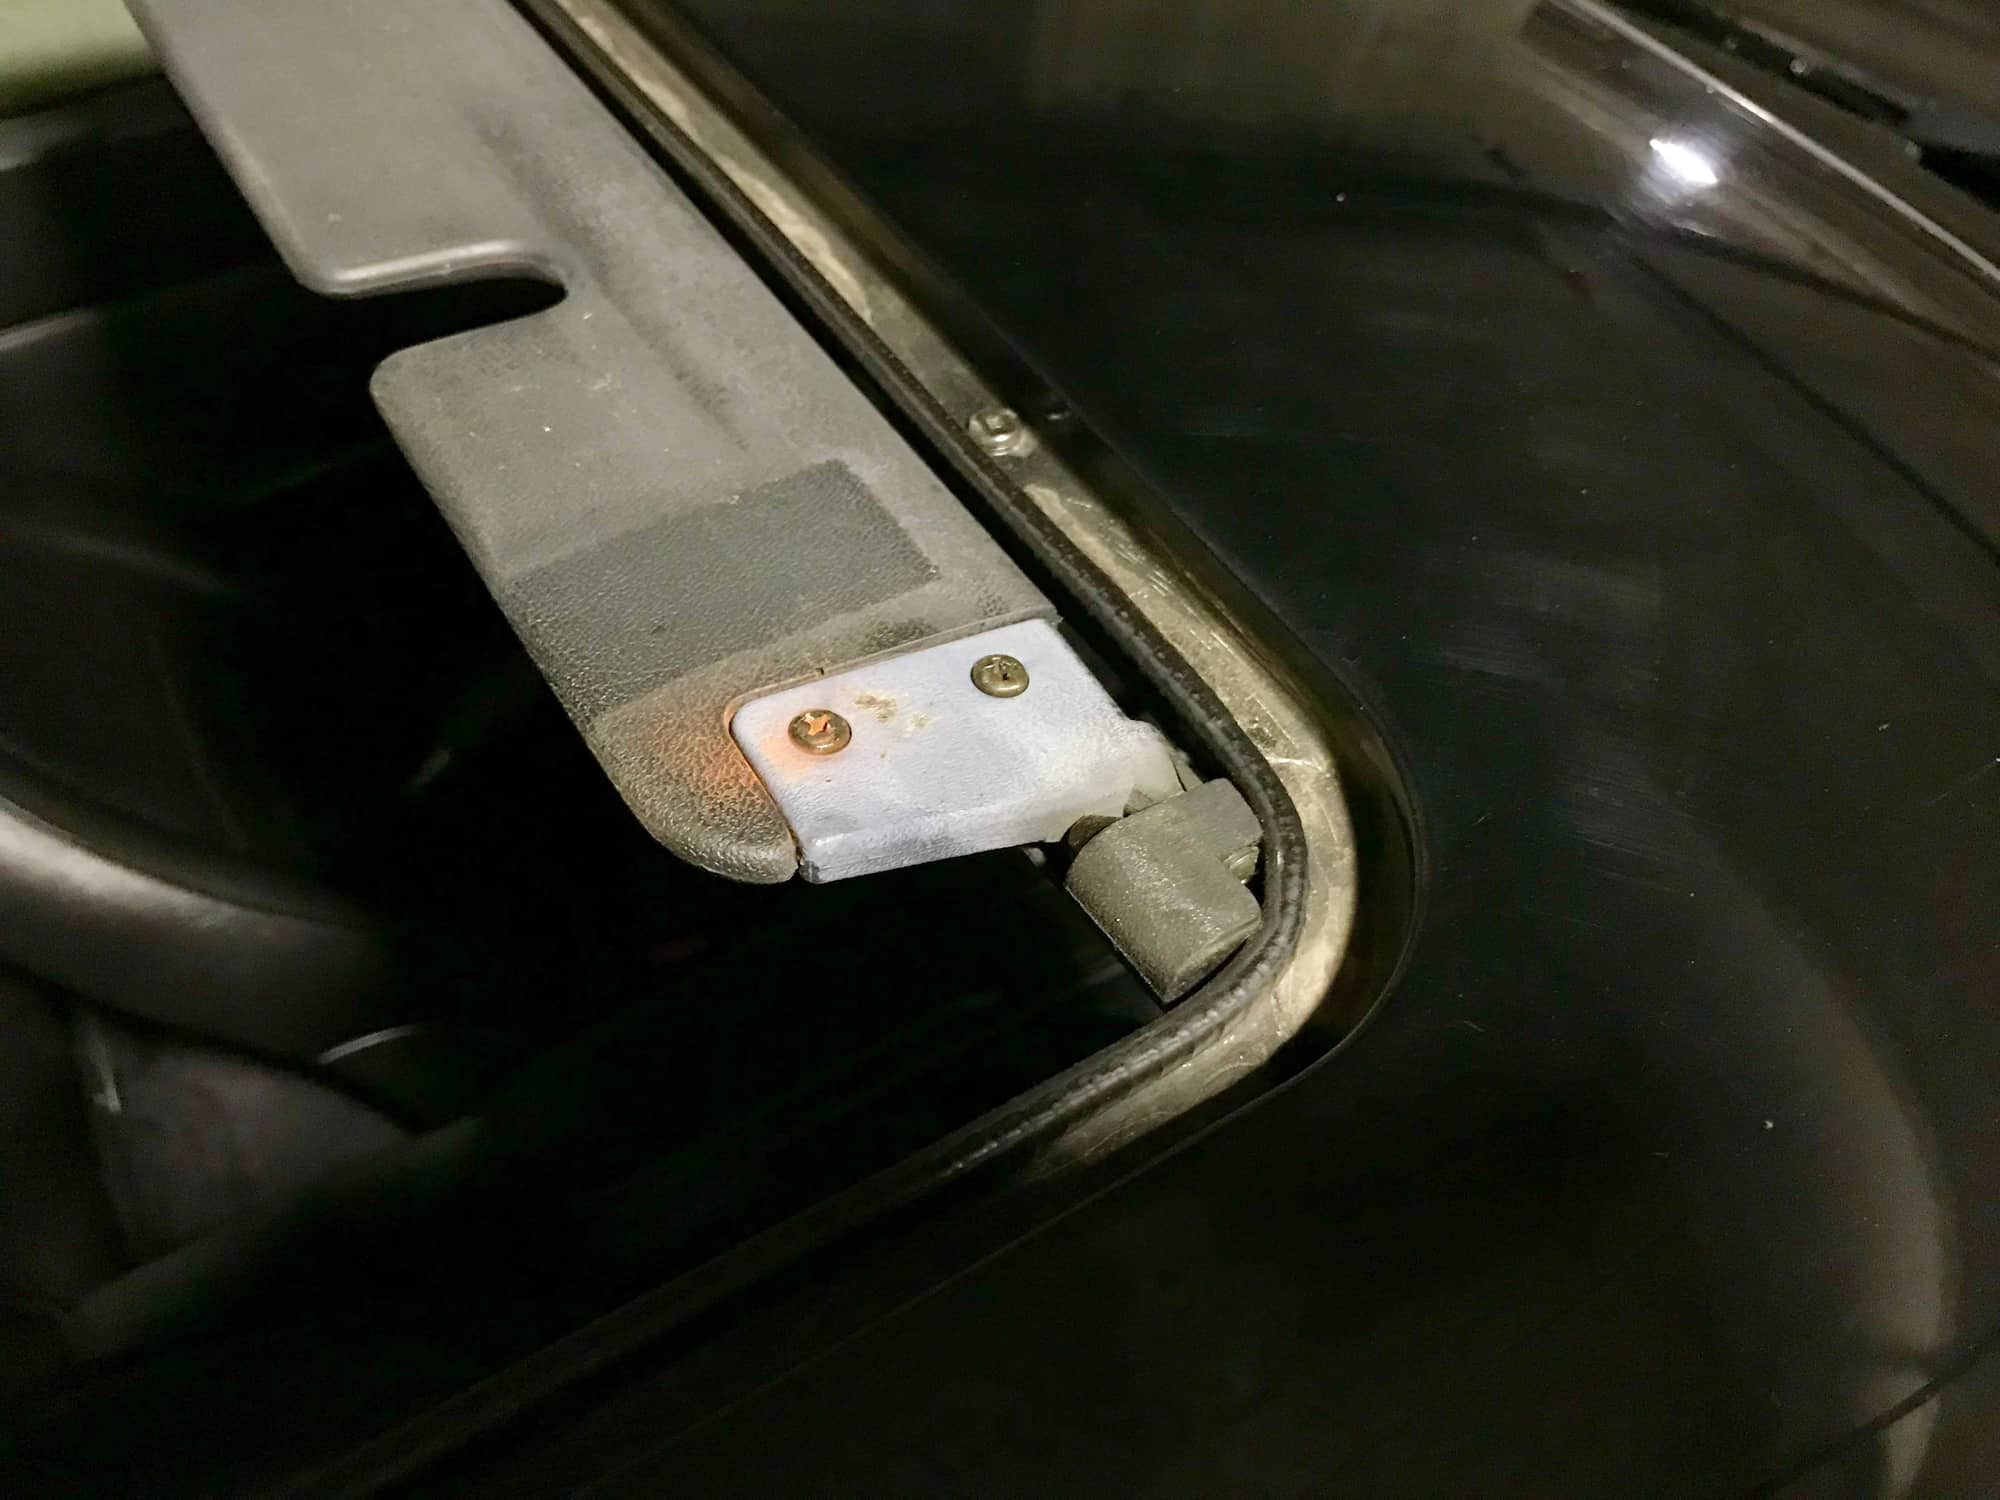
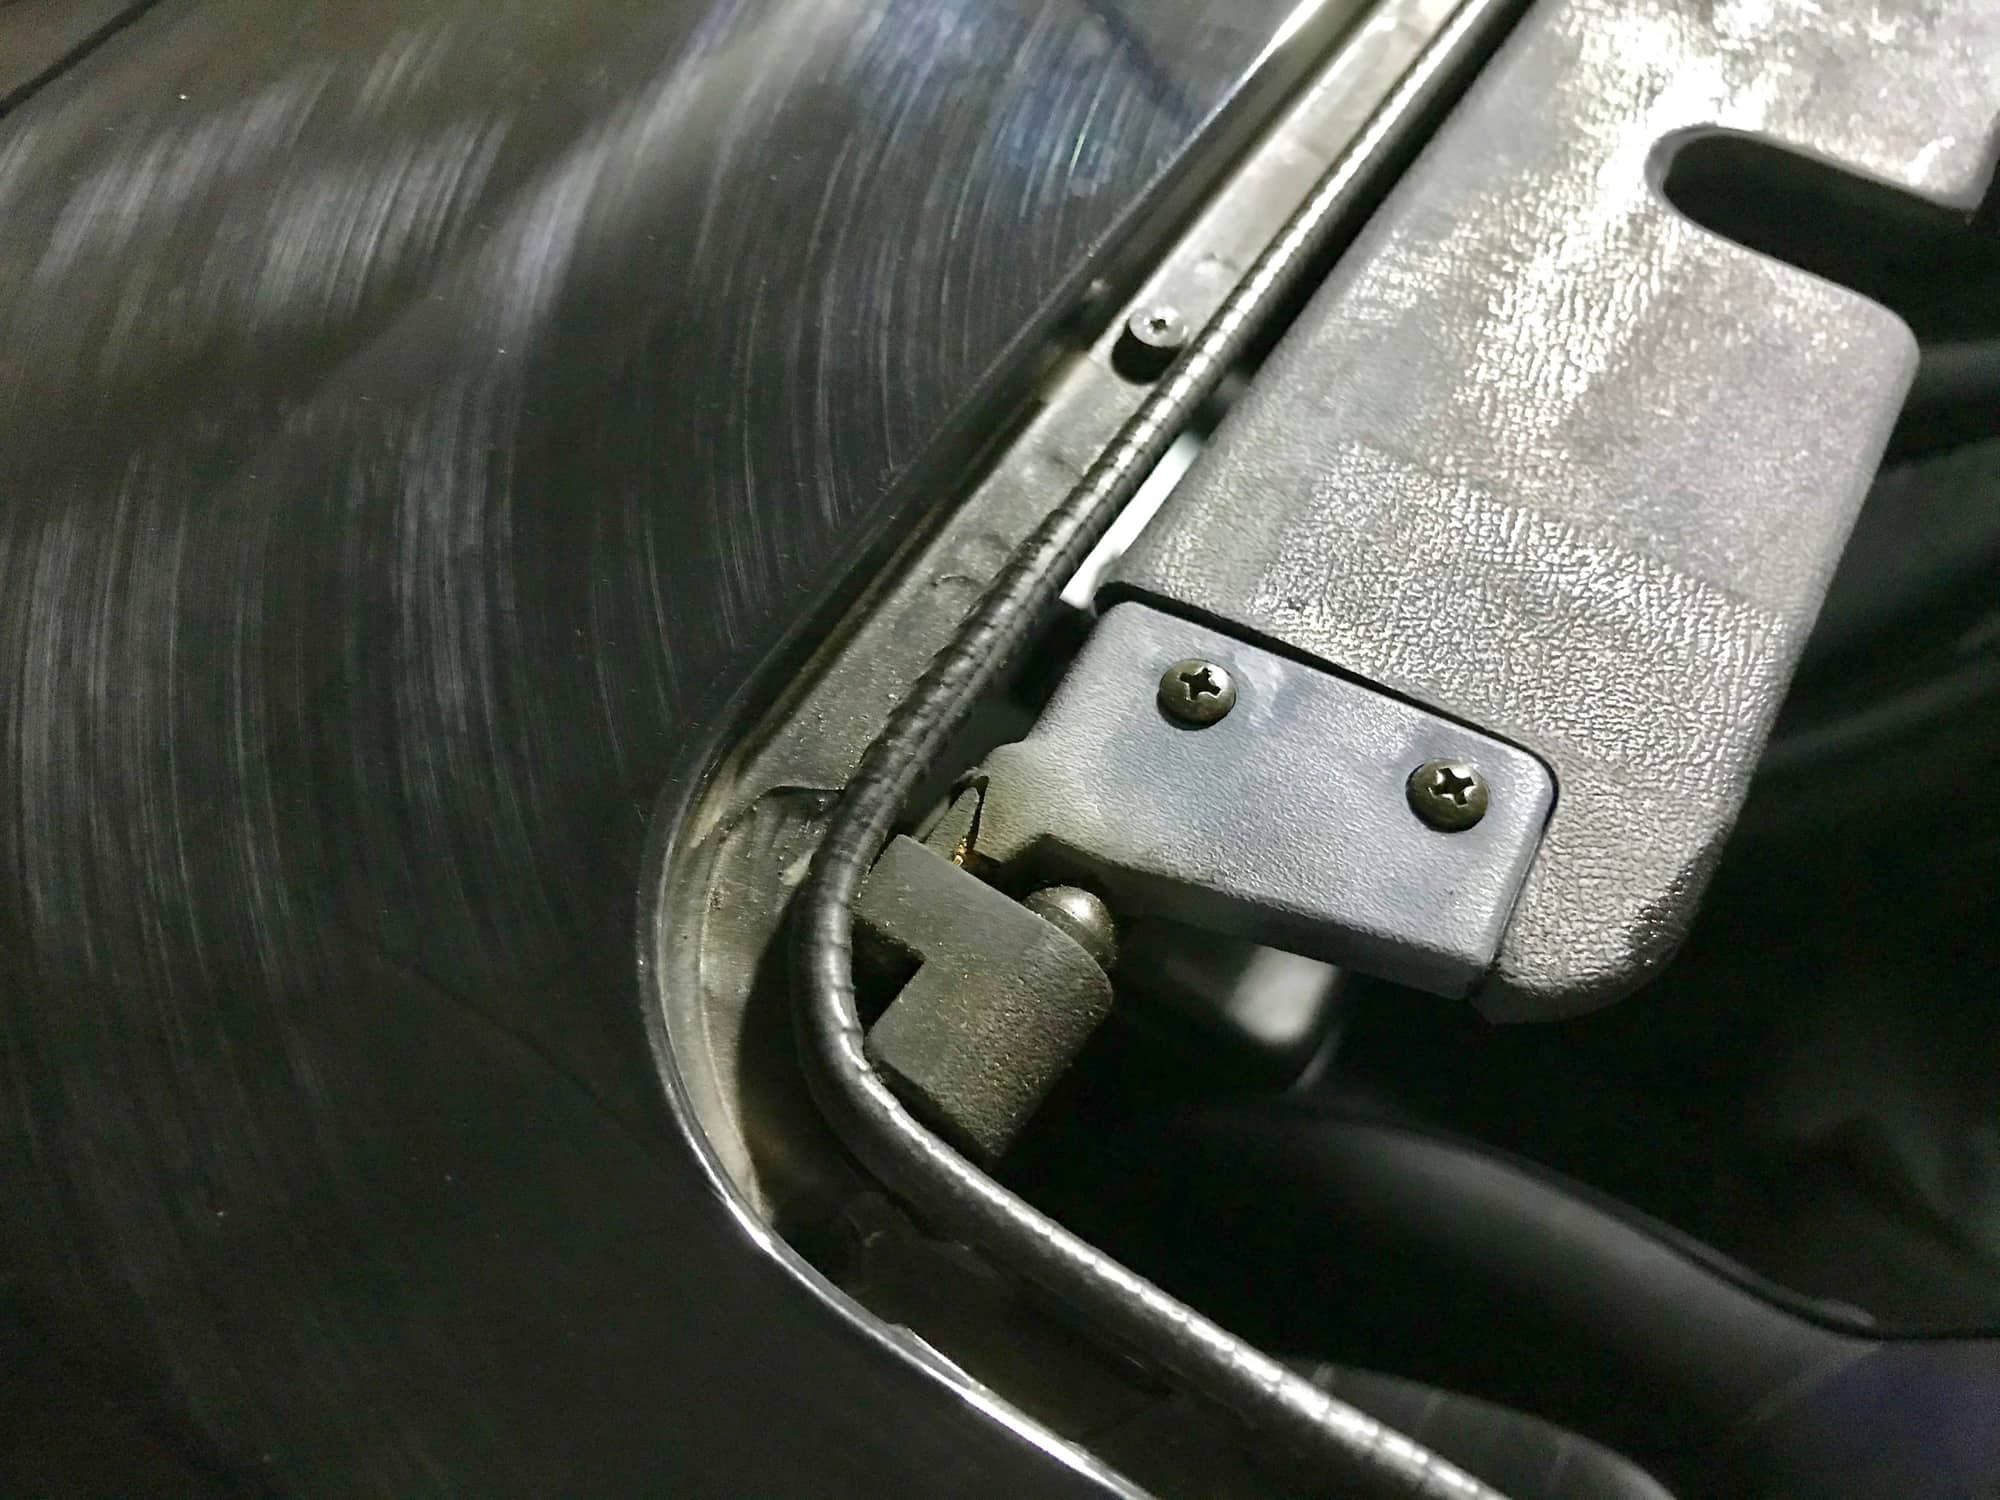
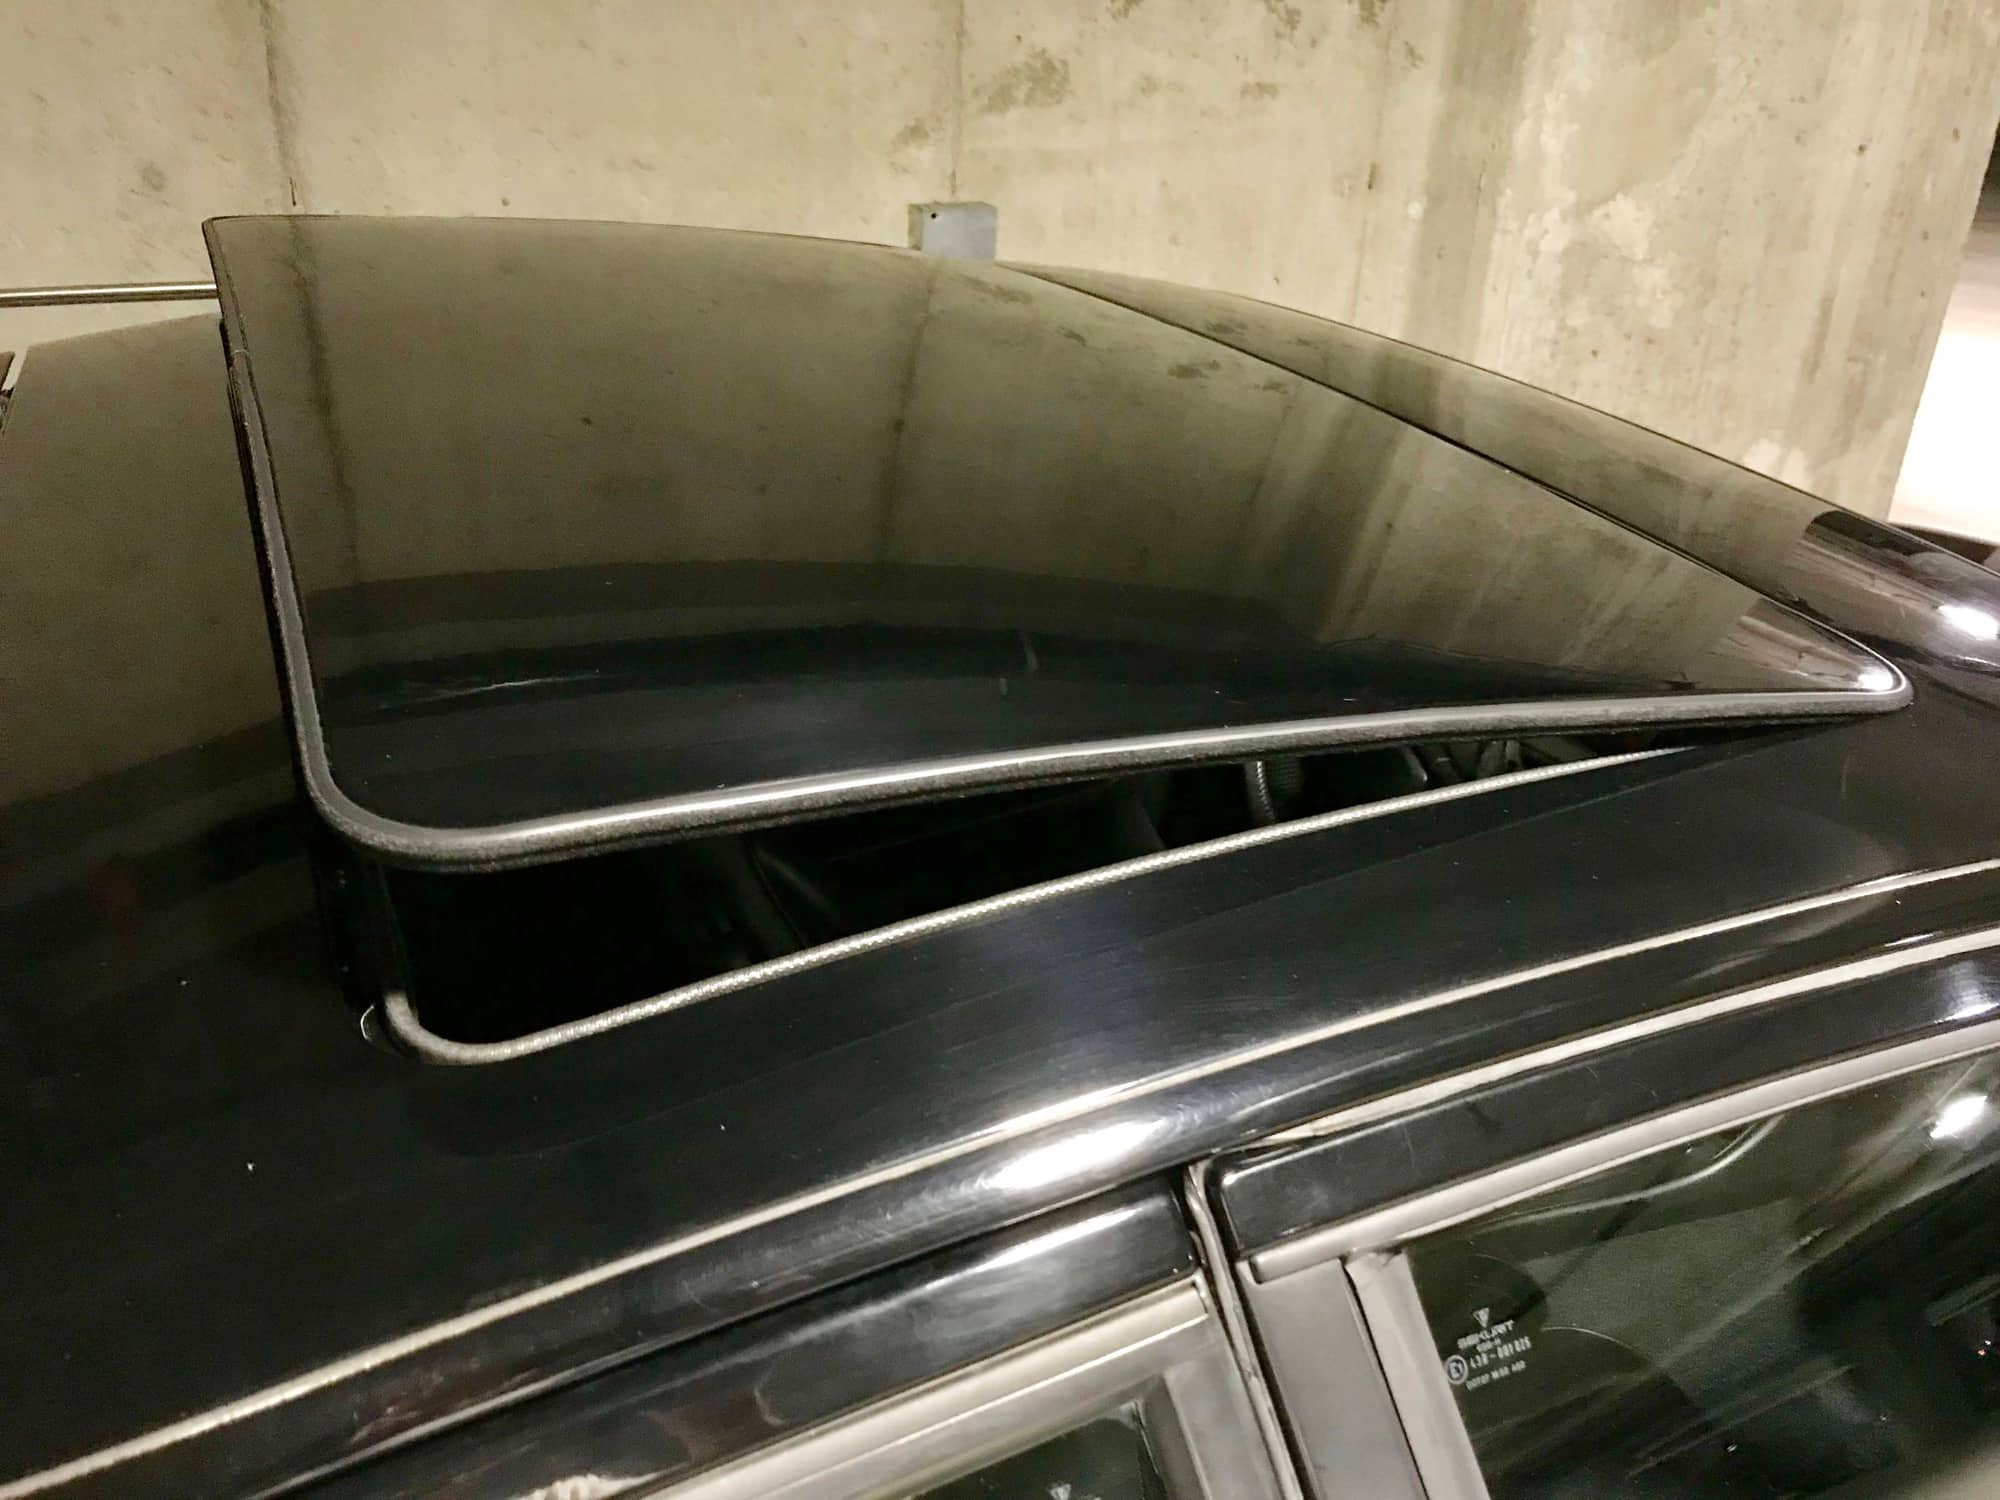
Mini project today - replacing the sunroof seals and deflector hinges. My hinges were rotting and the seals were getting pretty dry and cracked, so naturally it was time to replace. Thanks to Kyle at Only944 for the seals. They were a perfect fit.
Crappy old deflector hinges, one of which was actually broken.
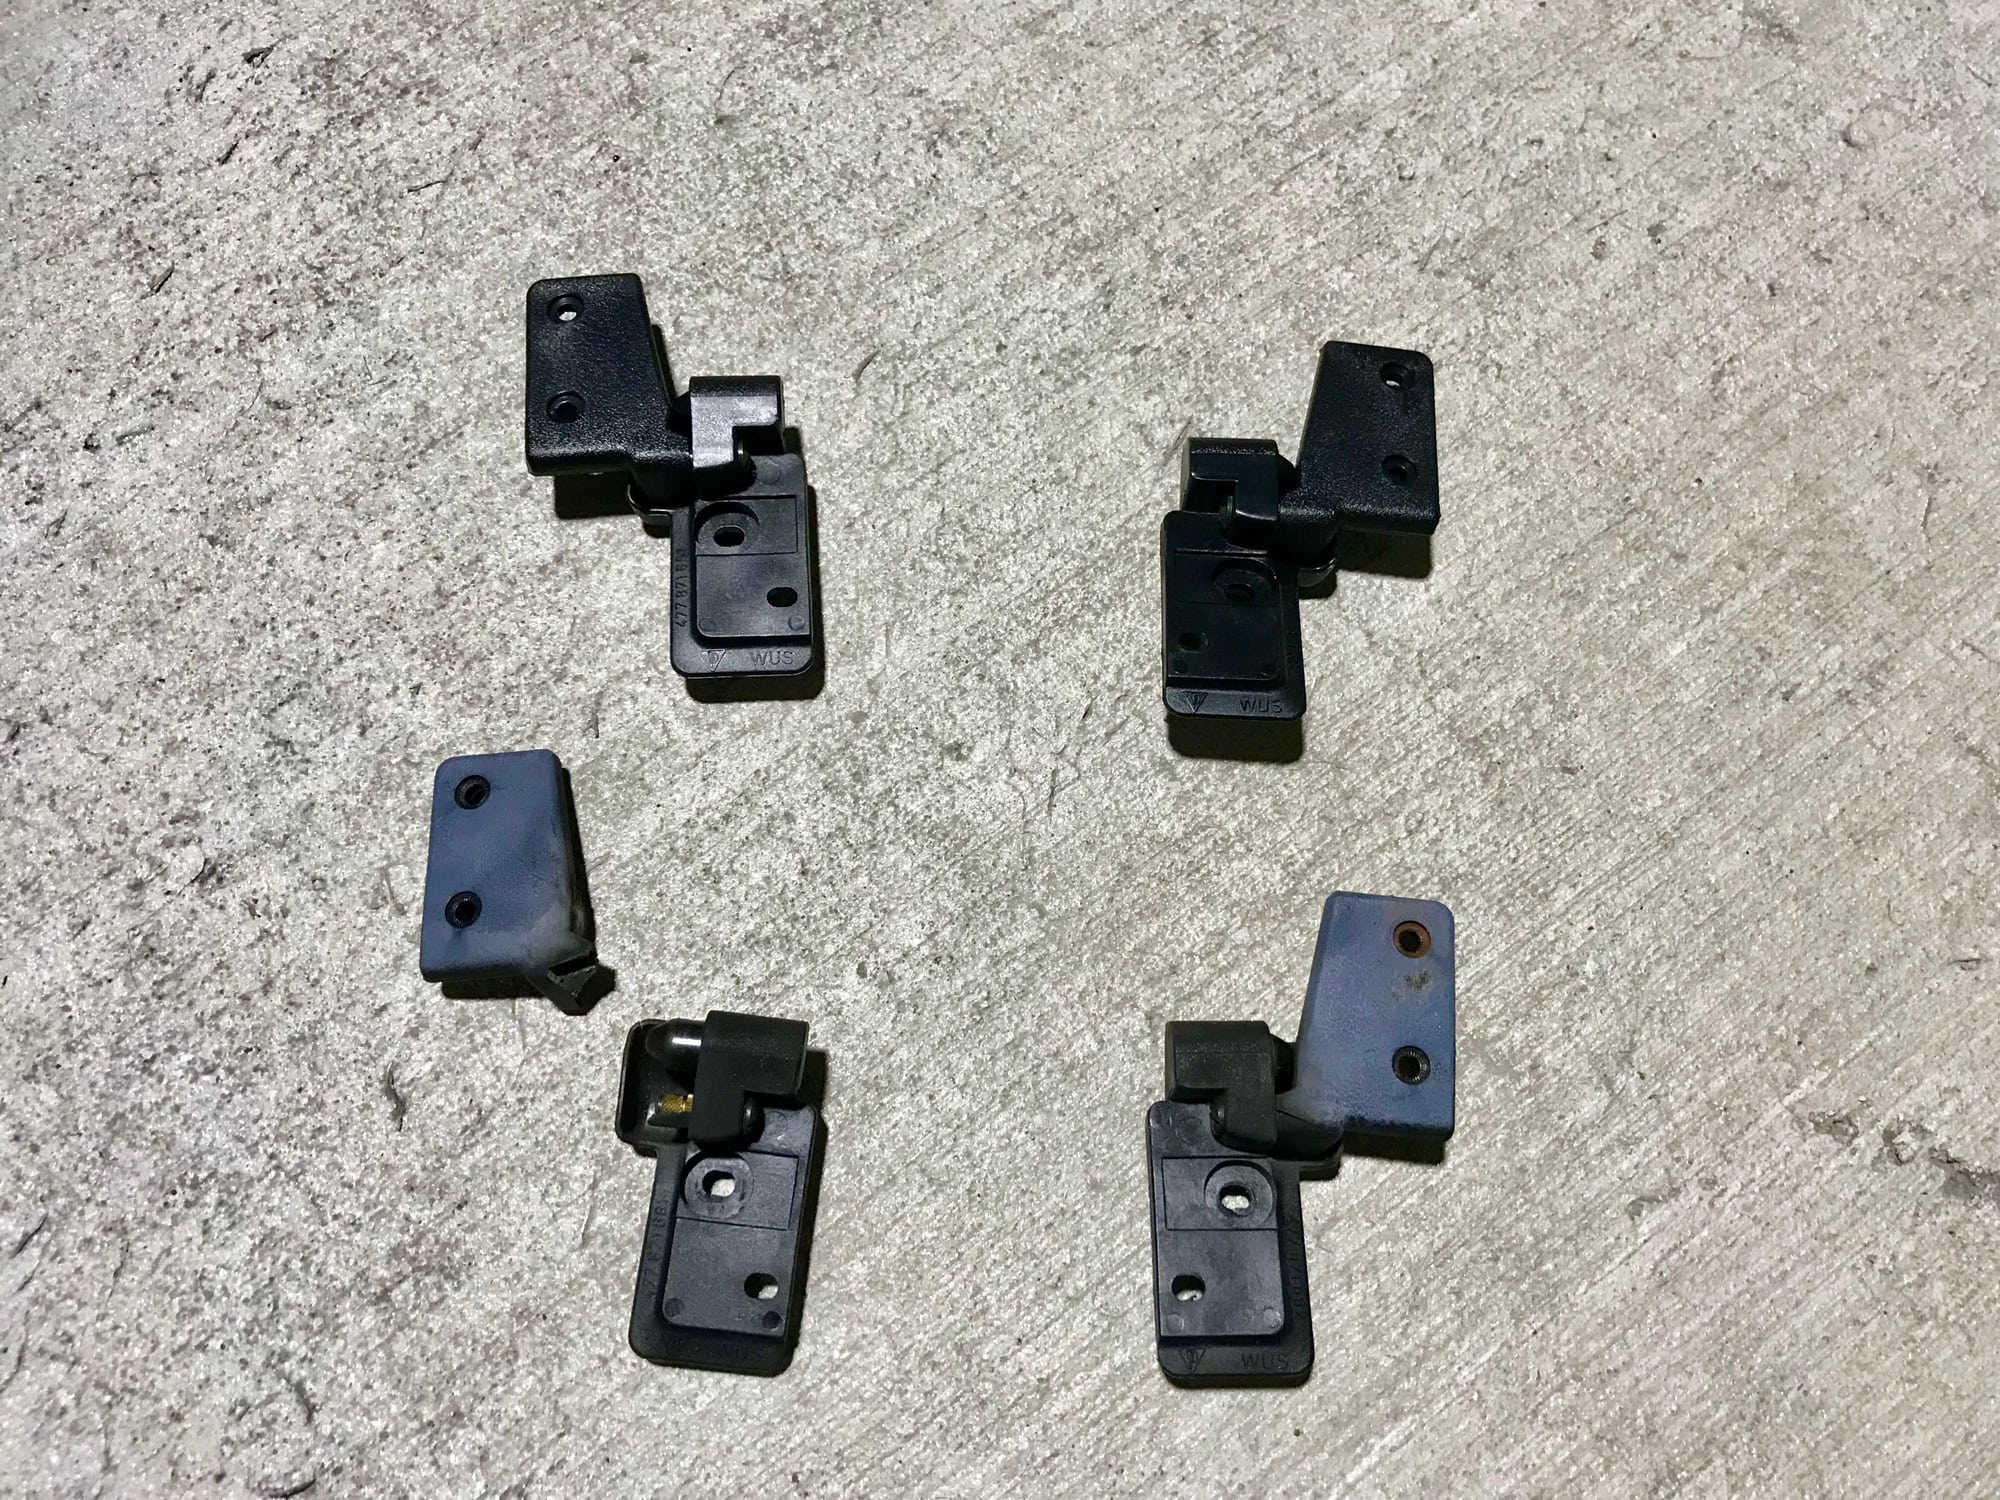
Got a good deal on a new set from eBay. $50 and free shipping.
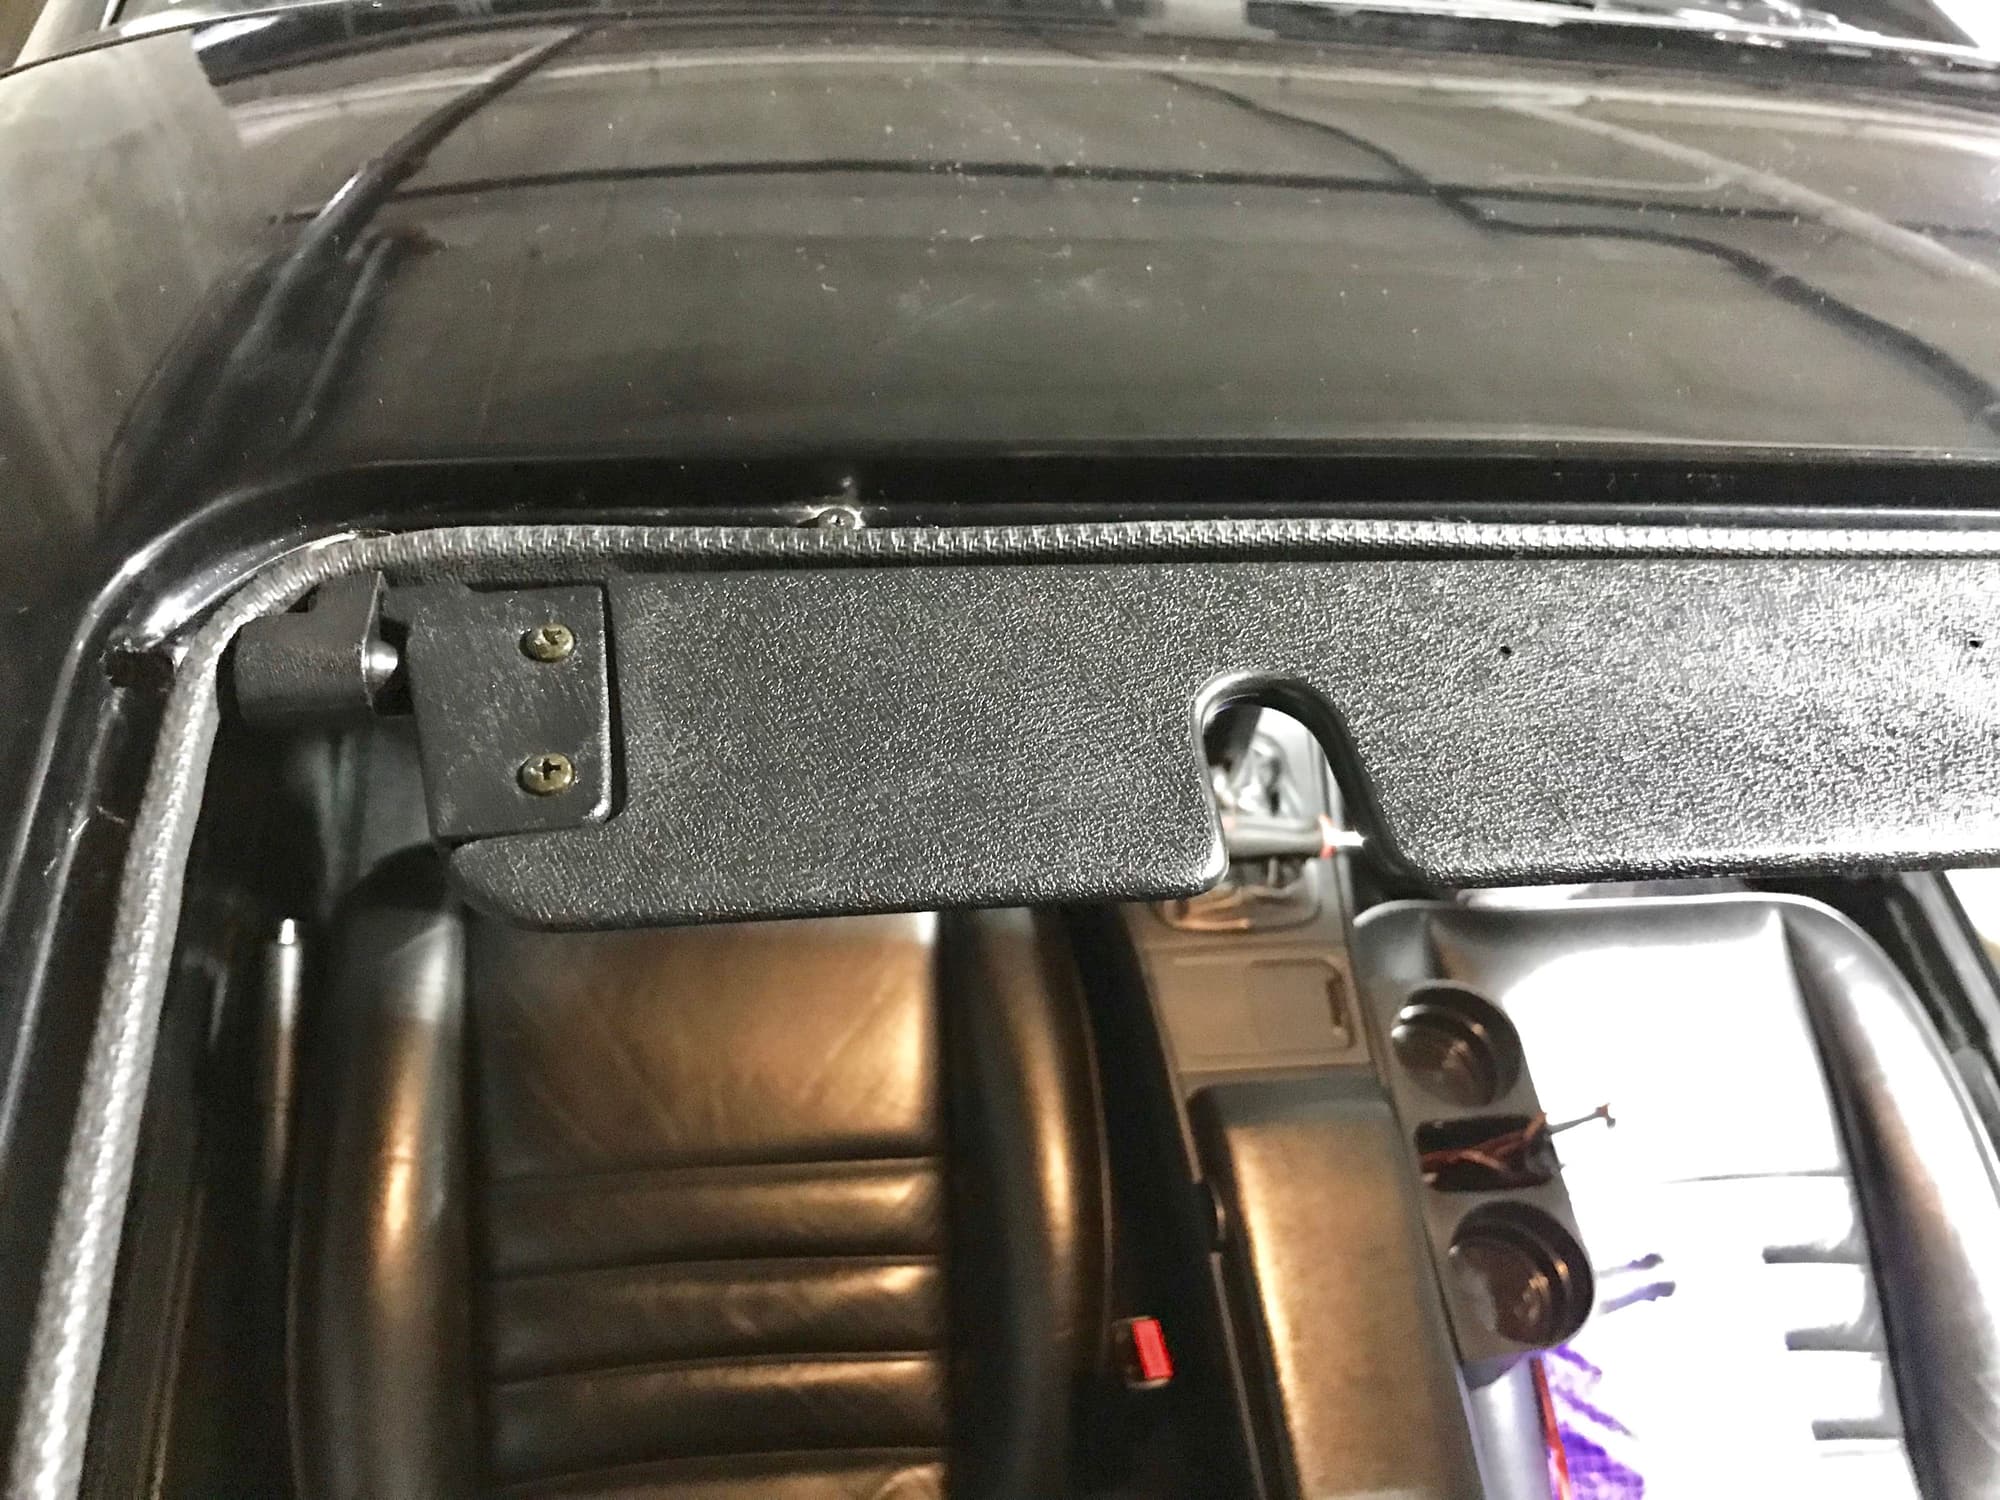
First seal installed and deflector cleaned up a bit. I used some Mequire�s Ultimate Black to freshen up the fading plastic. It turned out pretty nice!
Both seals installed.
I reapplied the vinyl liner to the inside of the sunroof while it was out. It didn�t turn out great, but it turned out okay I guess. I should have used some heat to help stretch it since it definitely shrank a bit over the years. Oh well, good enough for now.
Small update, but a major one in terms of improving driving enjoyment. My shift linkage had quite a bit of slop in it so I decided to rebuild everything. I used Odonnell�s thread and V2Rocket�s thread as guidance, which were very helpful.
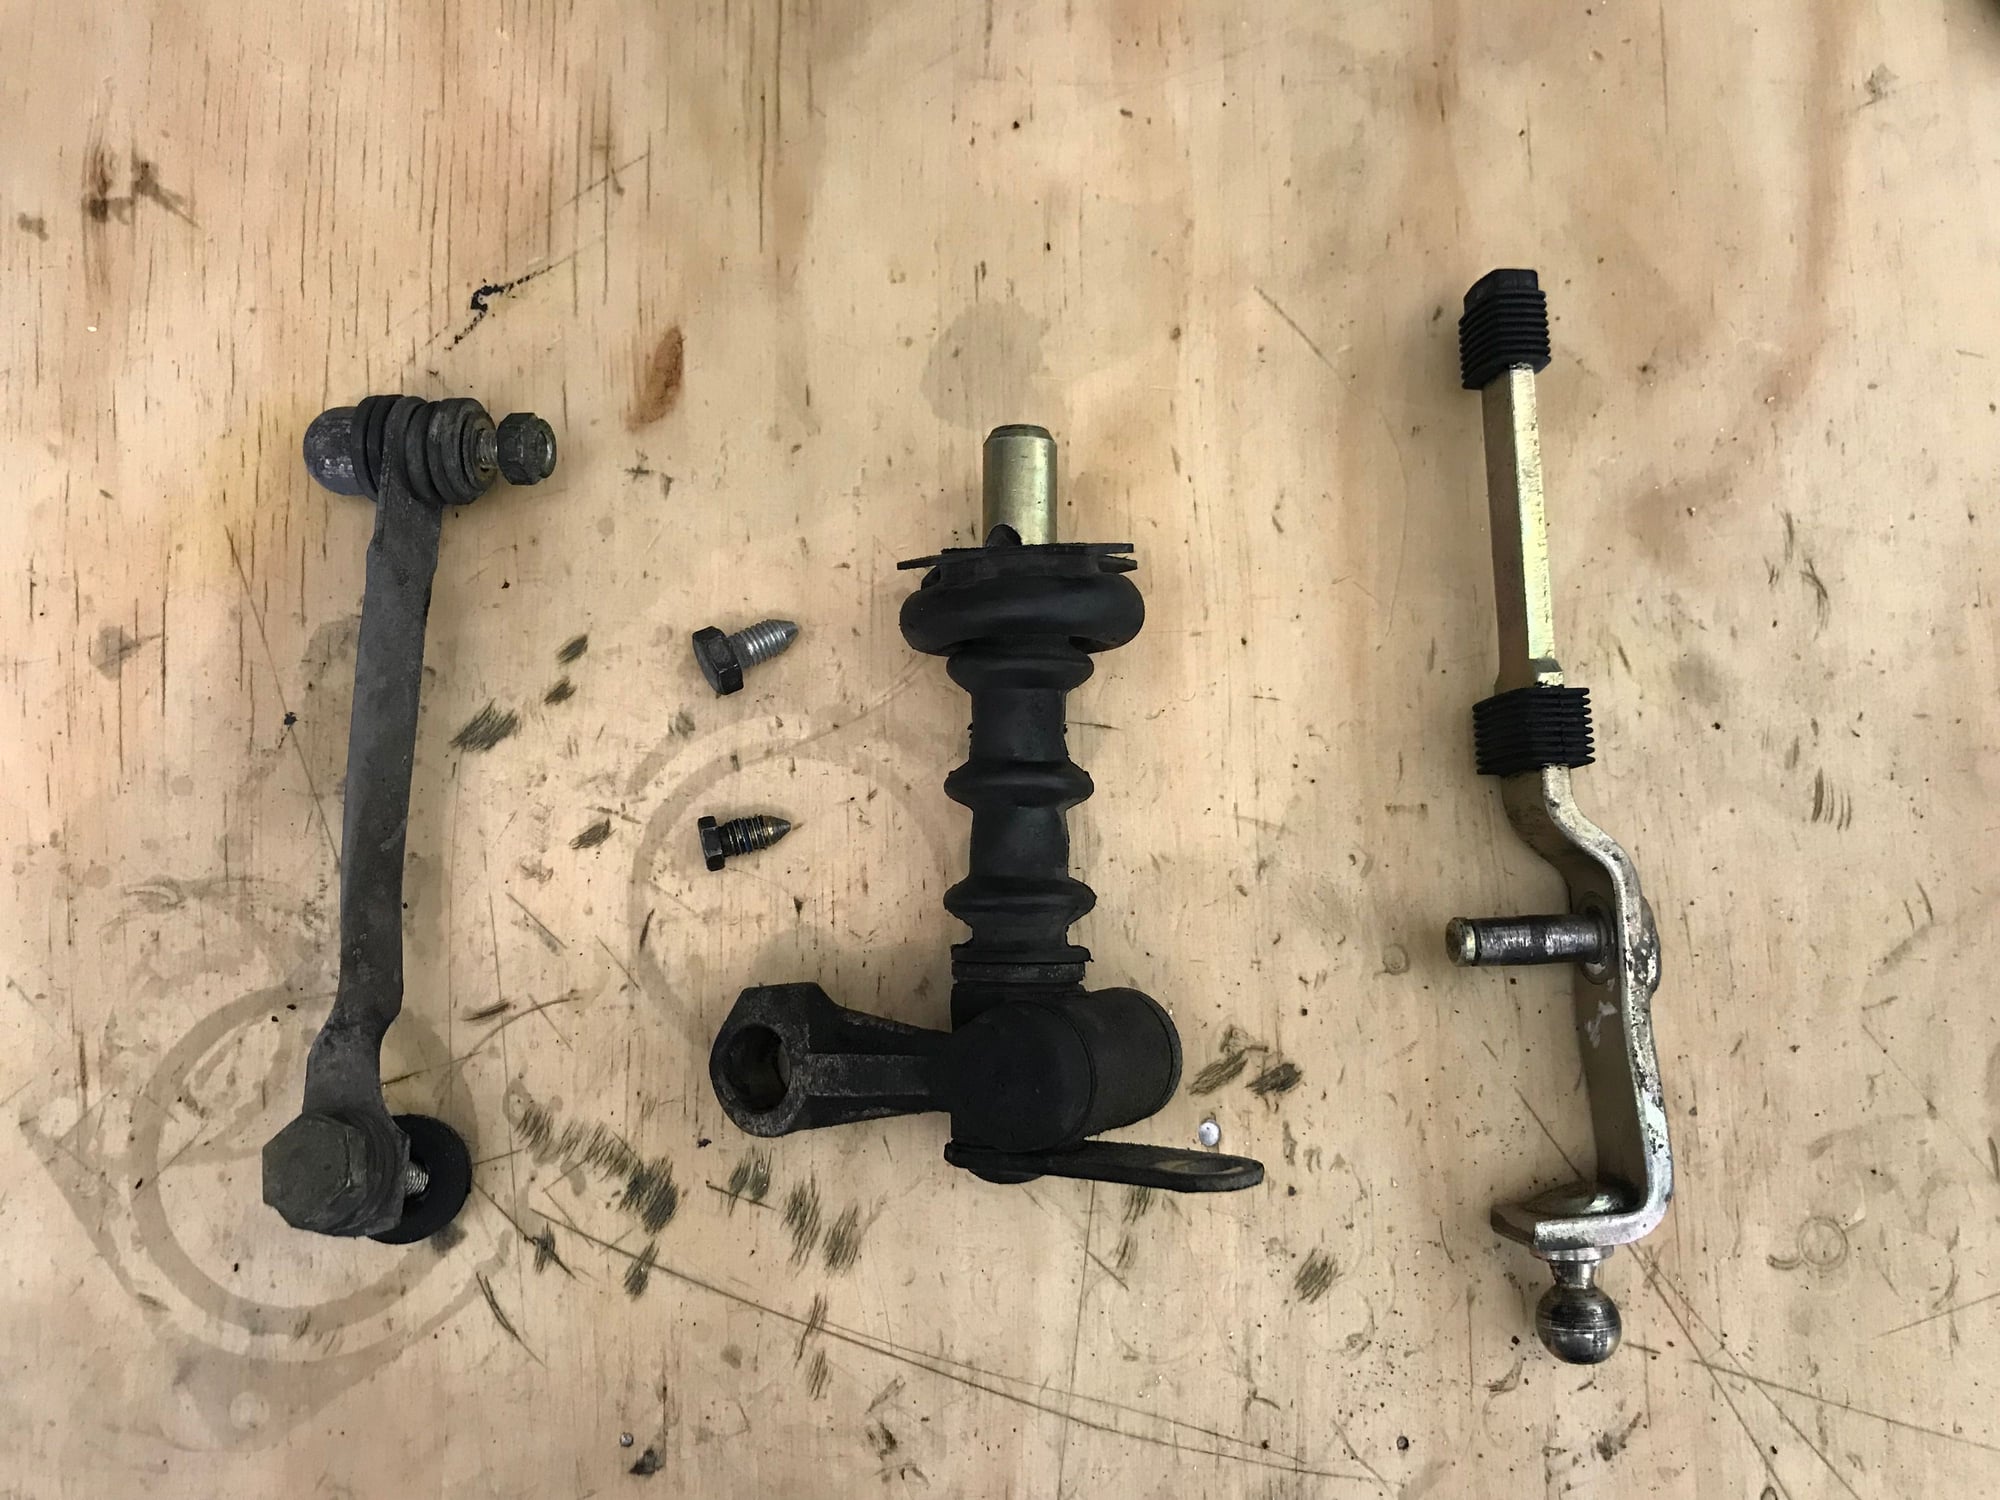
I started by pulling everything to inspect and see what I was working with. The shift lever in the car didn�t seem that bad compared to some, but it was still wallowed out on the ends of the shift pin. The rubber bushings on the linkage arm were super flimsy - no wonder this thing had so much movement!
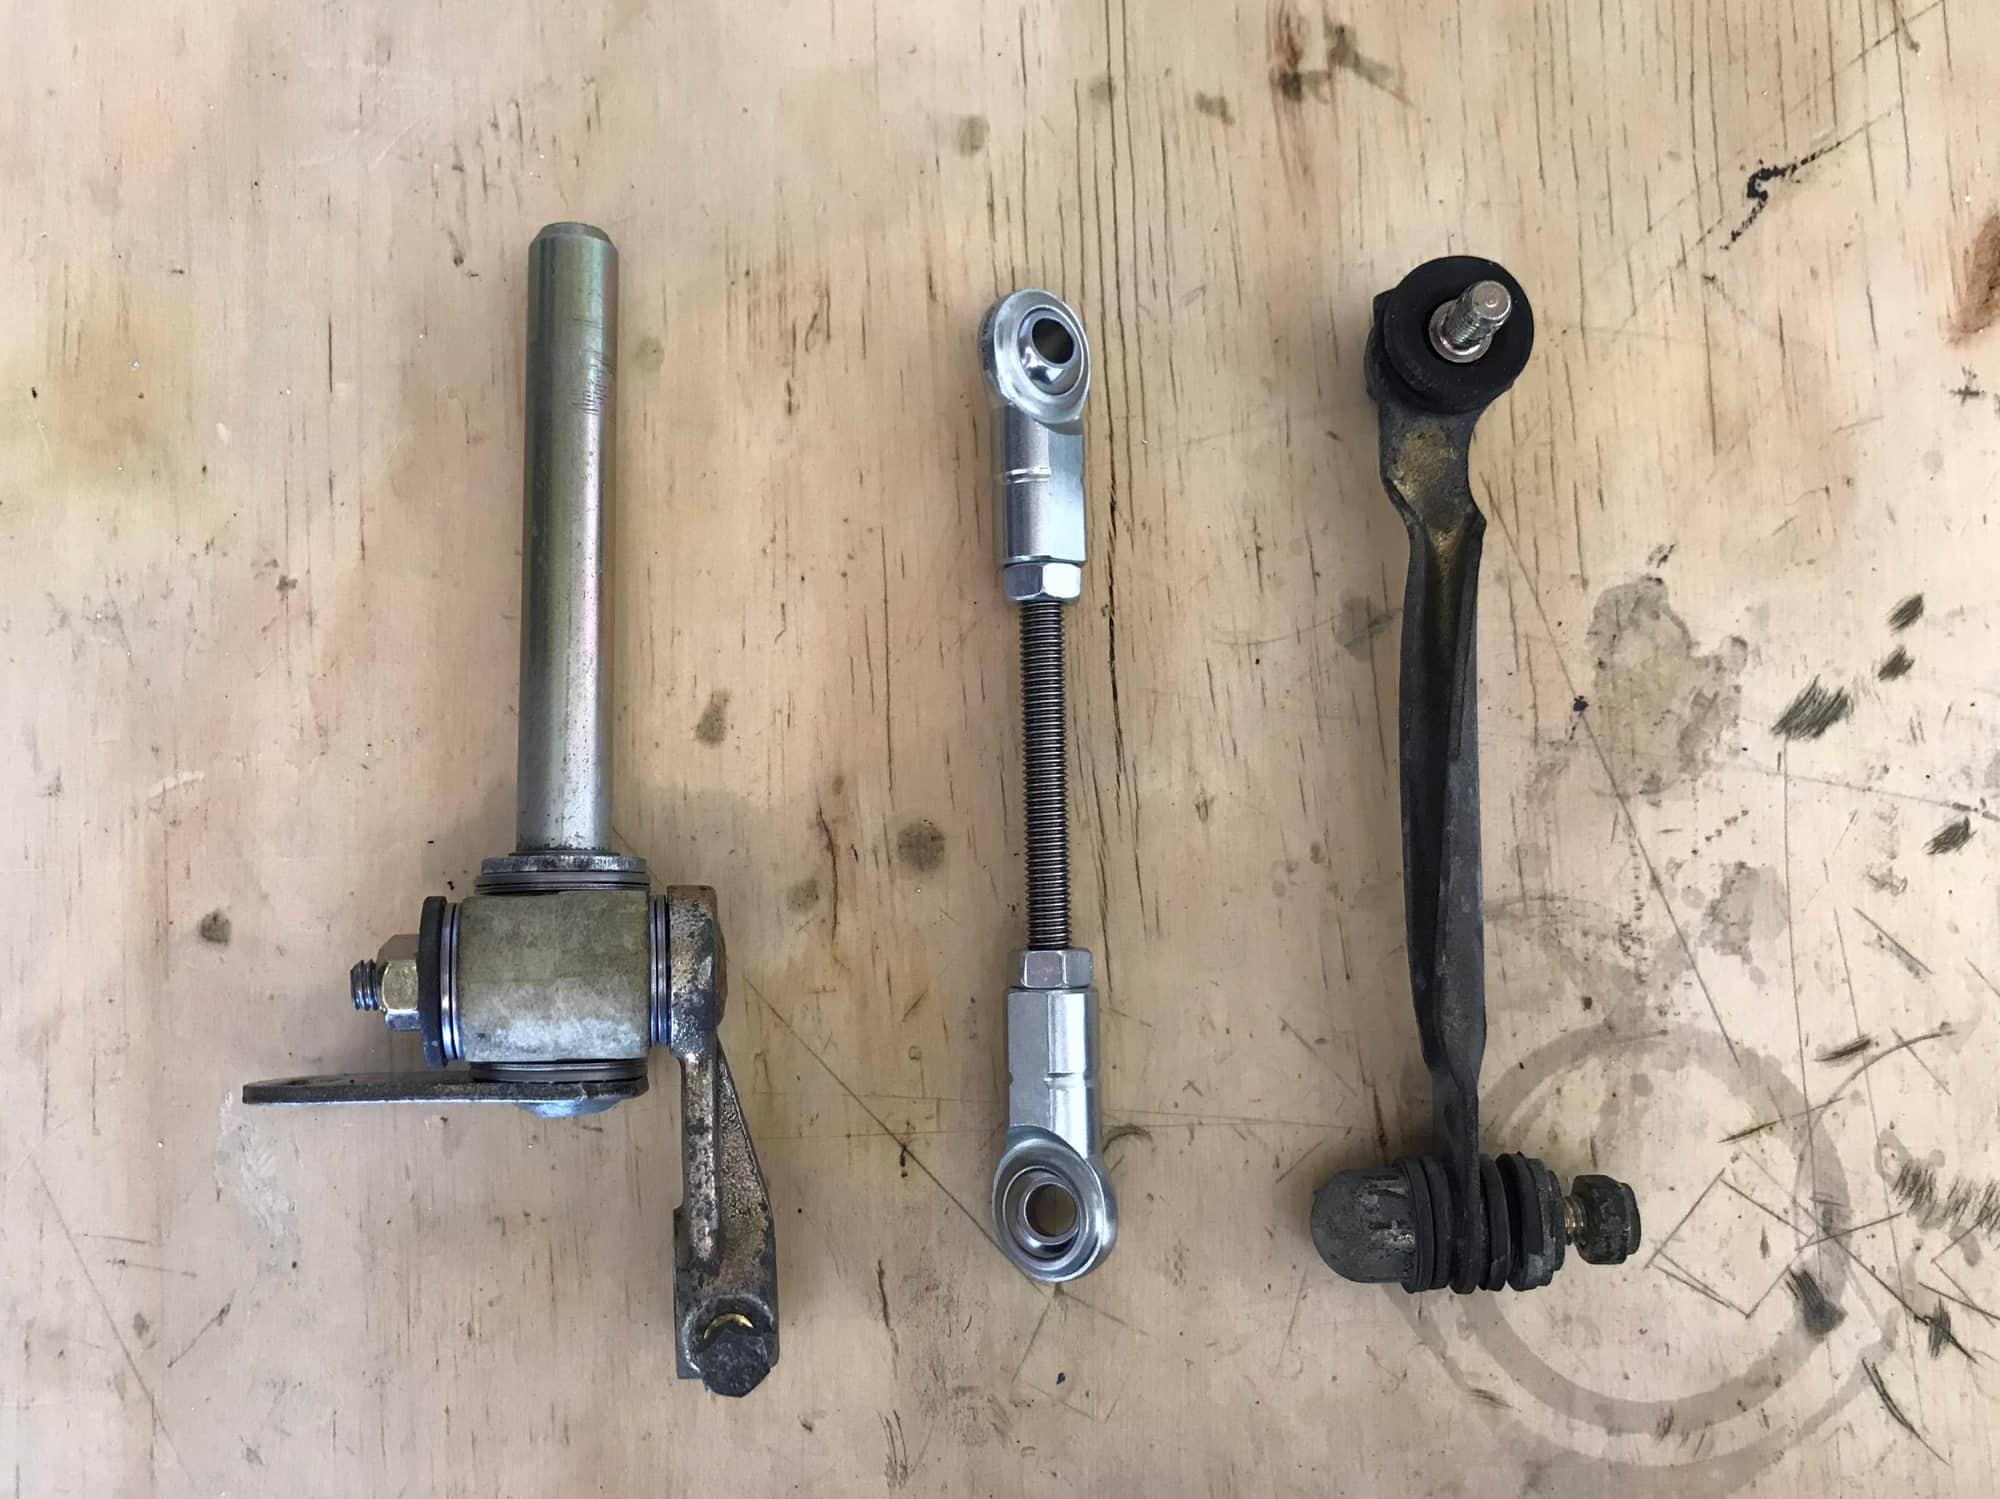
I used the standard procedure of grinding off the weld on the shift lever, knocking out the 10mm pin and replacing it with a 10mm shoulder bolt. I installed the needle roller bearings on either side of the shift rod and buttoned it back up. I modified the delrin bushing on the transmission shift linkage to accommodate needle roller bearings. Instead of using the ball joints for the linkage arm that a lot of people use, I opted to use spherical rod ends instead to make it easier to install the 8mm hex bolt on the passenger side of the transmission. Worked like a charm, though I did have to install a pretty thick 8mm washer on the shifter linkage to get the rod end to clear. Rebuilt linkages shown below next to the old linkage arm for reference.
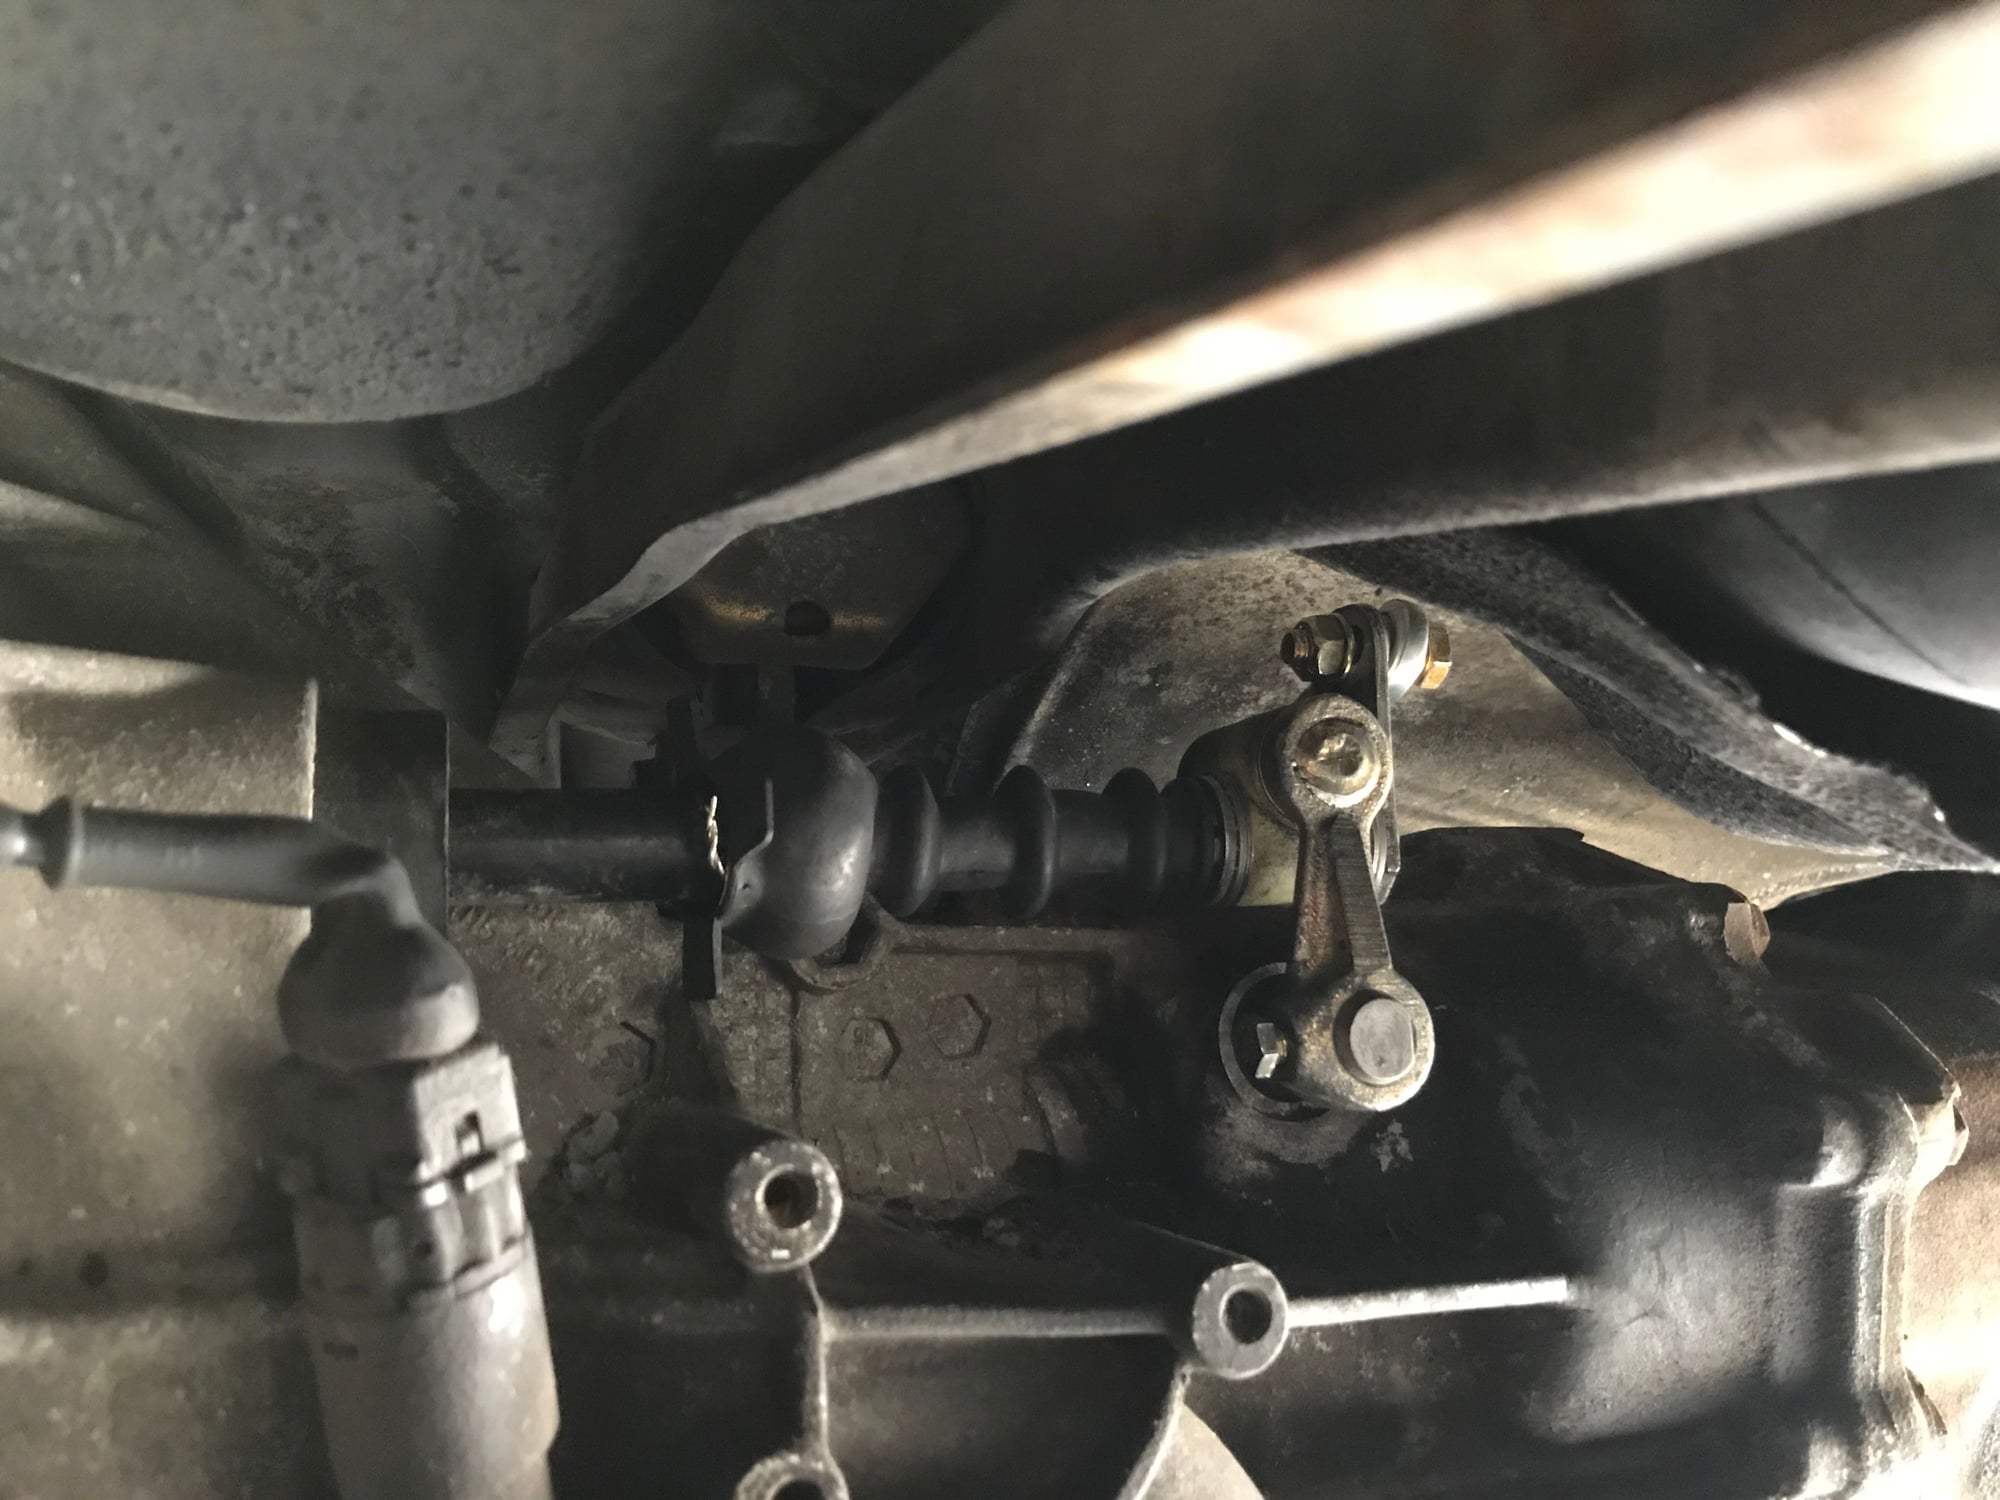
And reinstalled in the car. My shifter used a set screw bolt with a piece of safety wire through it so I reinstalled it the same way. Not sure if that was original or not, but figured the safety wire was probably a better choice than just some Loctite.
Wow, what a difference! I had no idea the shifter in this car could be so precise. It has always been kind of sloppy since I�ve owned it, but I guess you just kind of get used to it over time. Now that everything is nice and tight the standard throw feels like it�s half as long as it used to be. This upgrade was definitely worth the time.
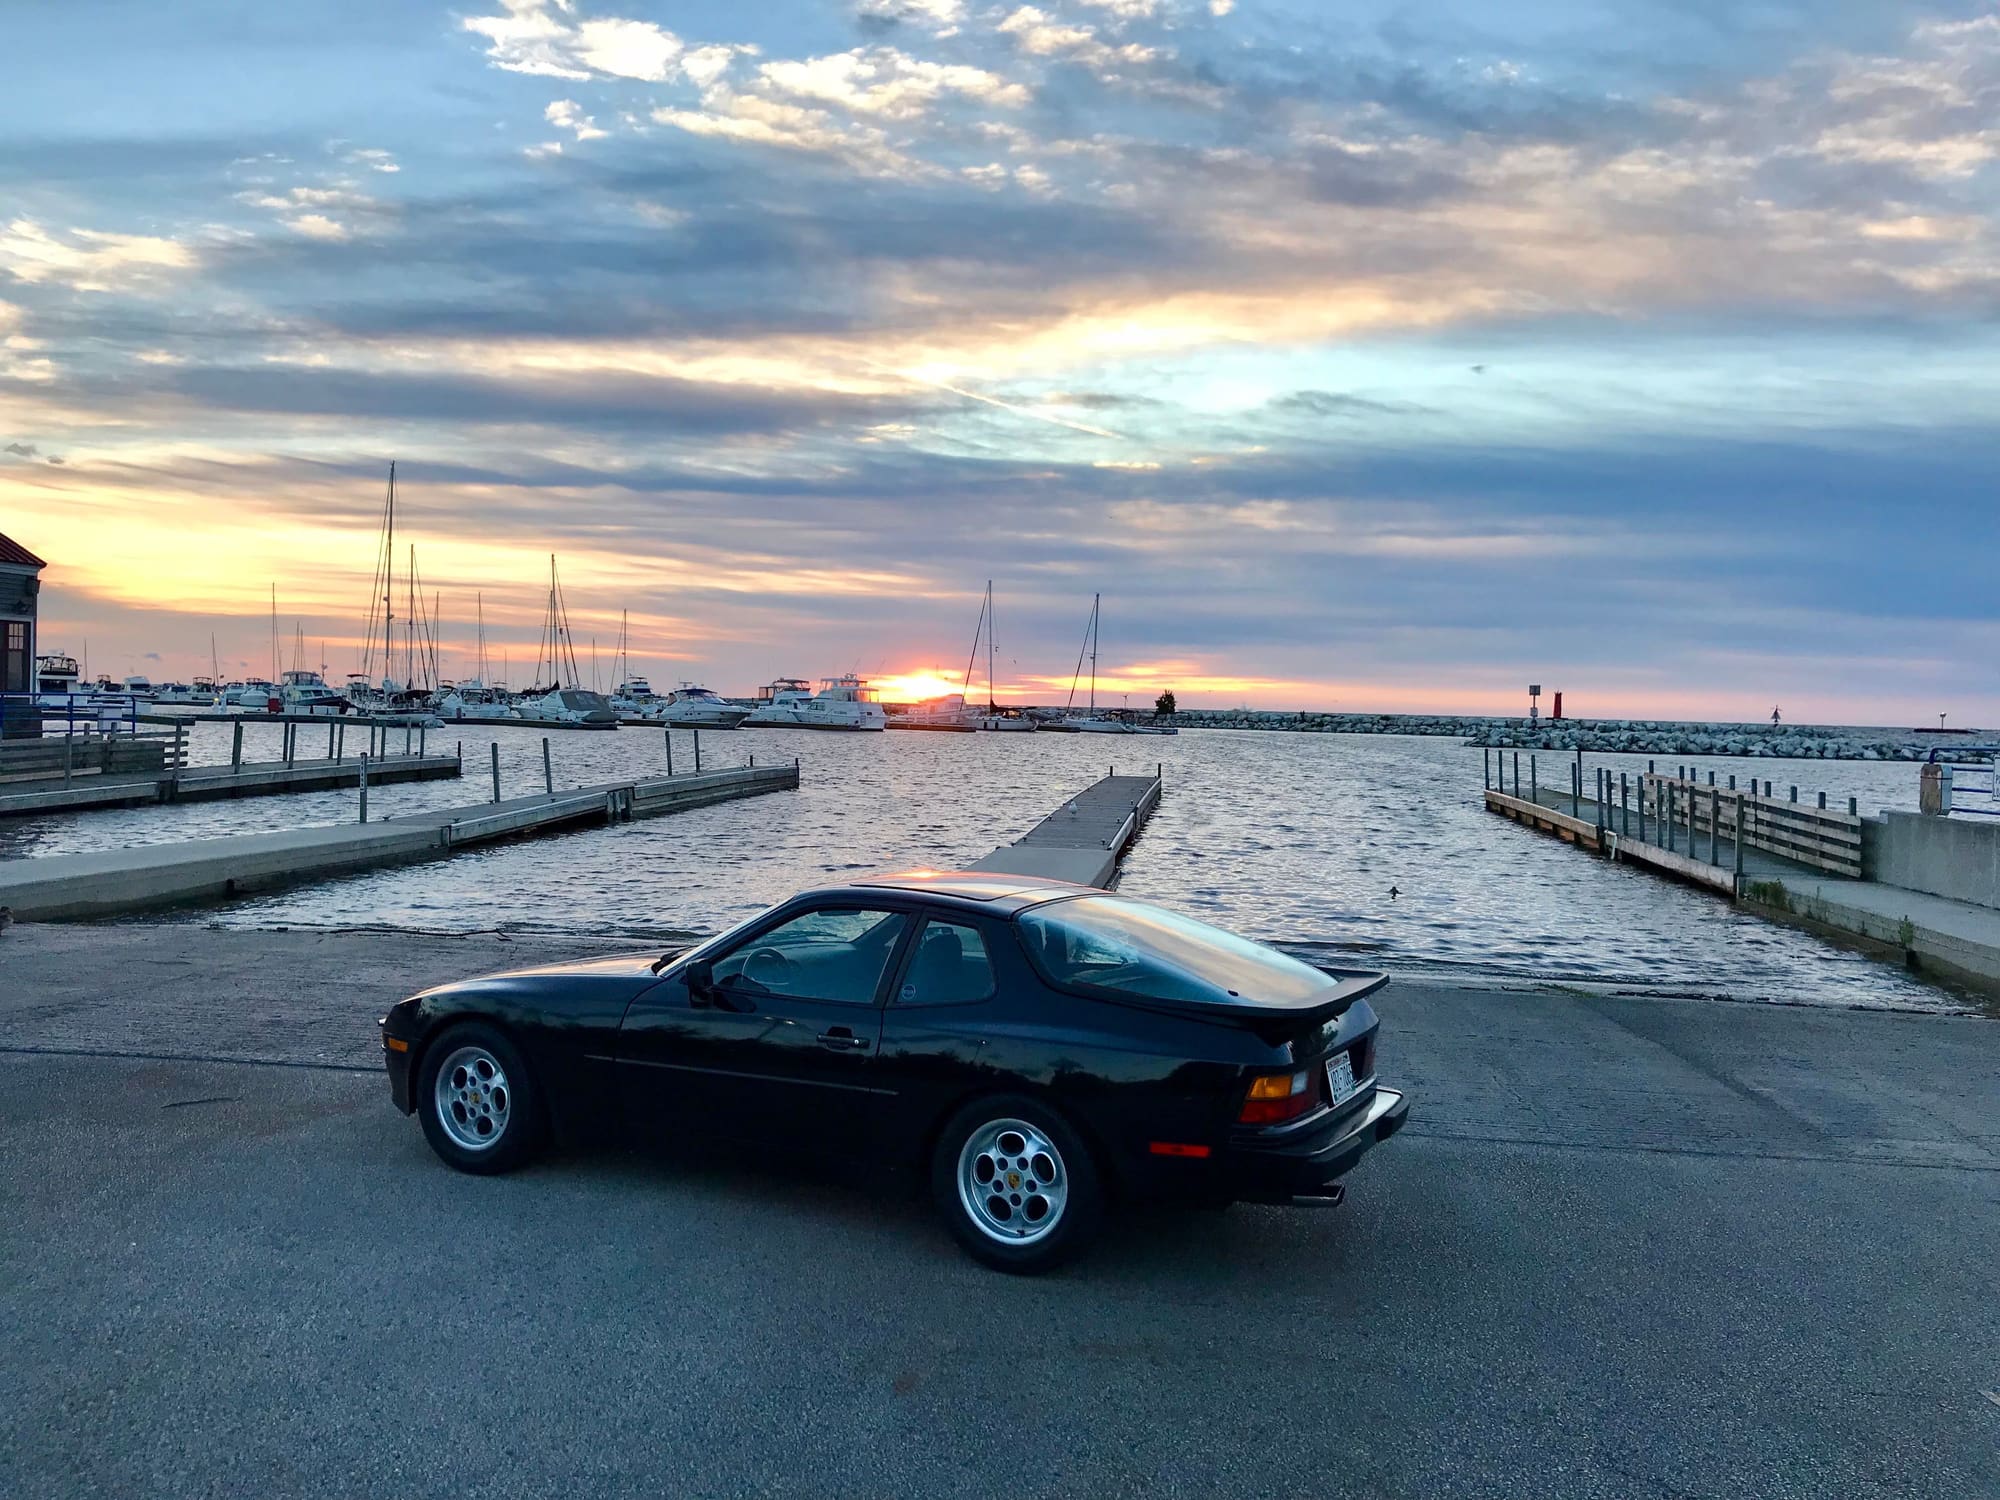
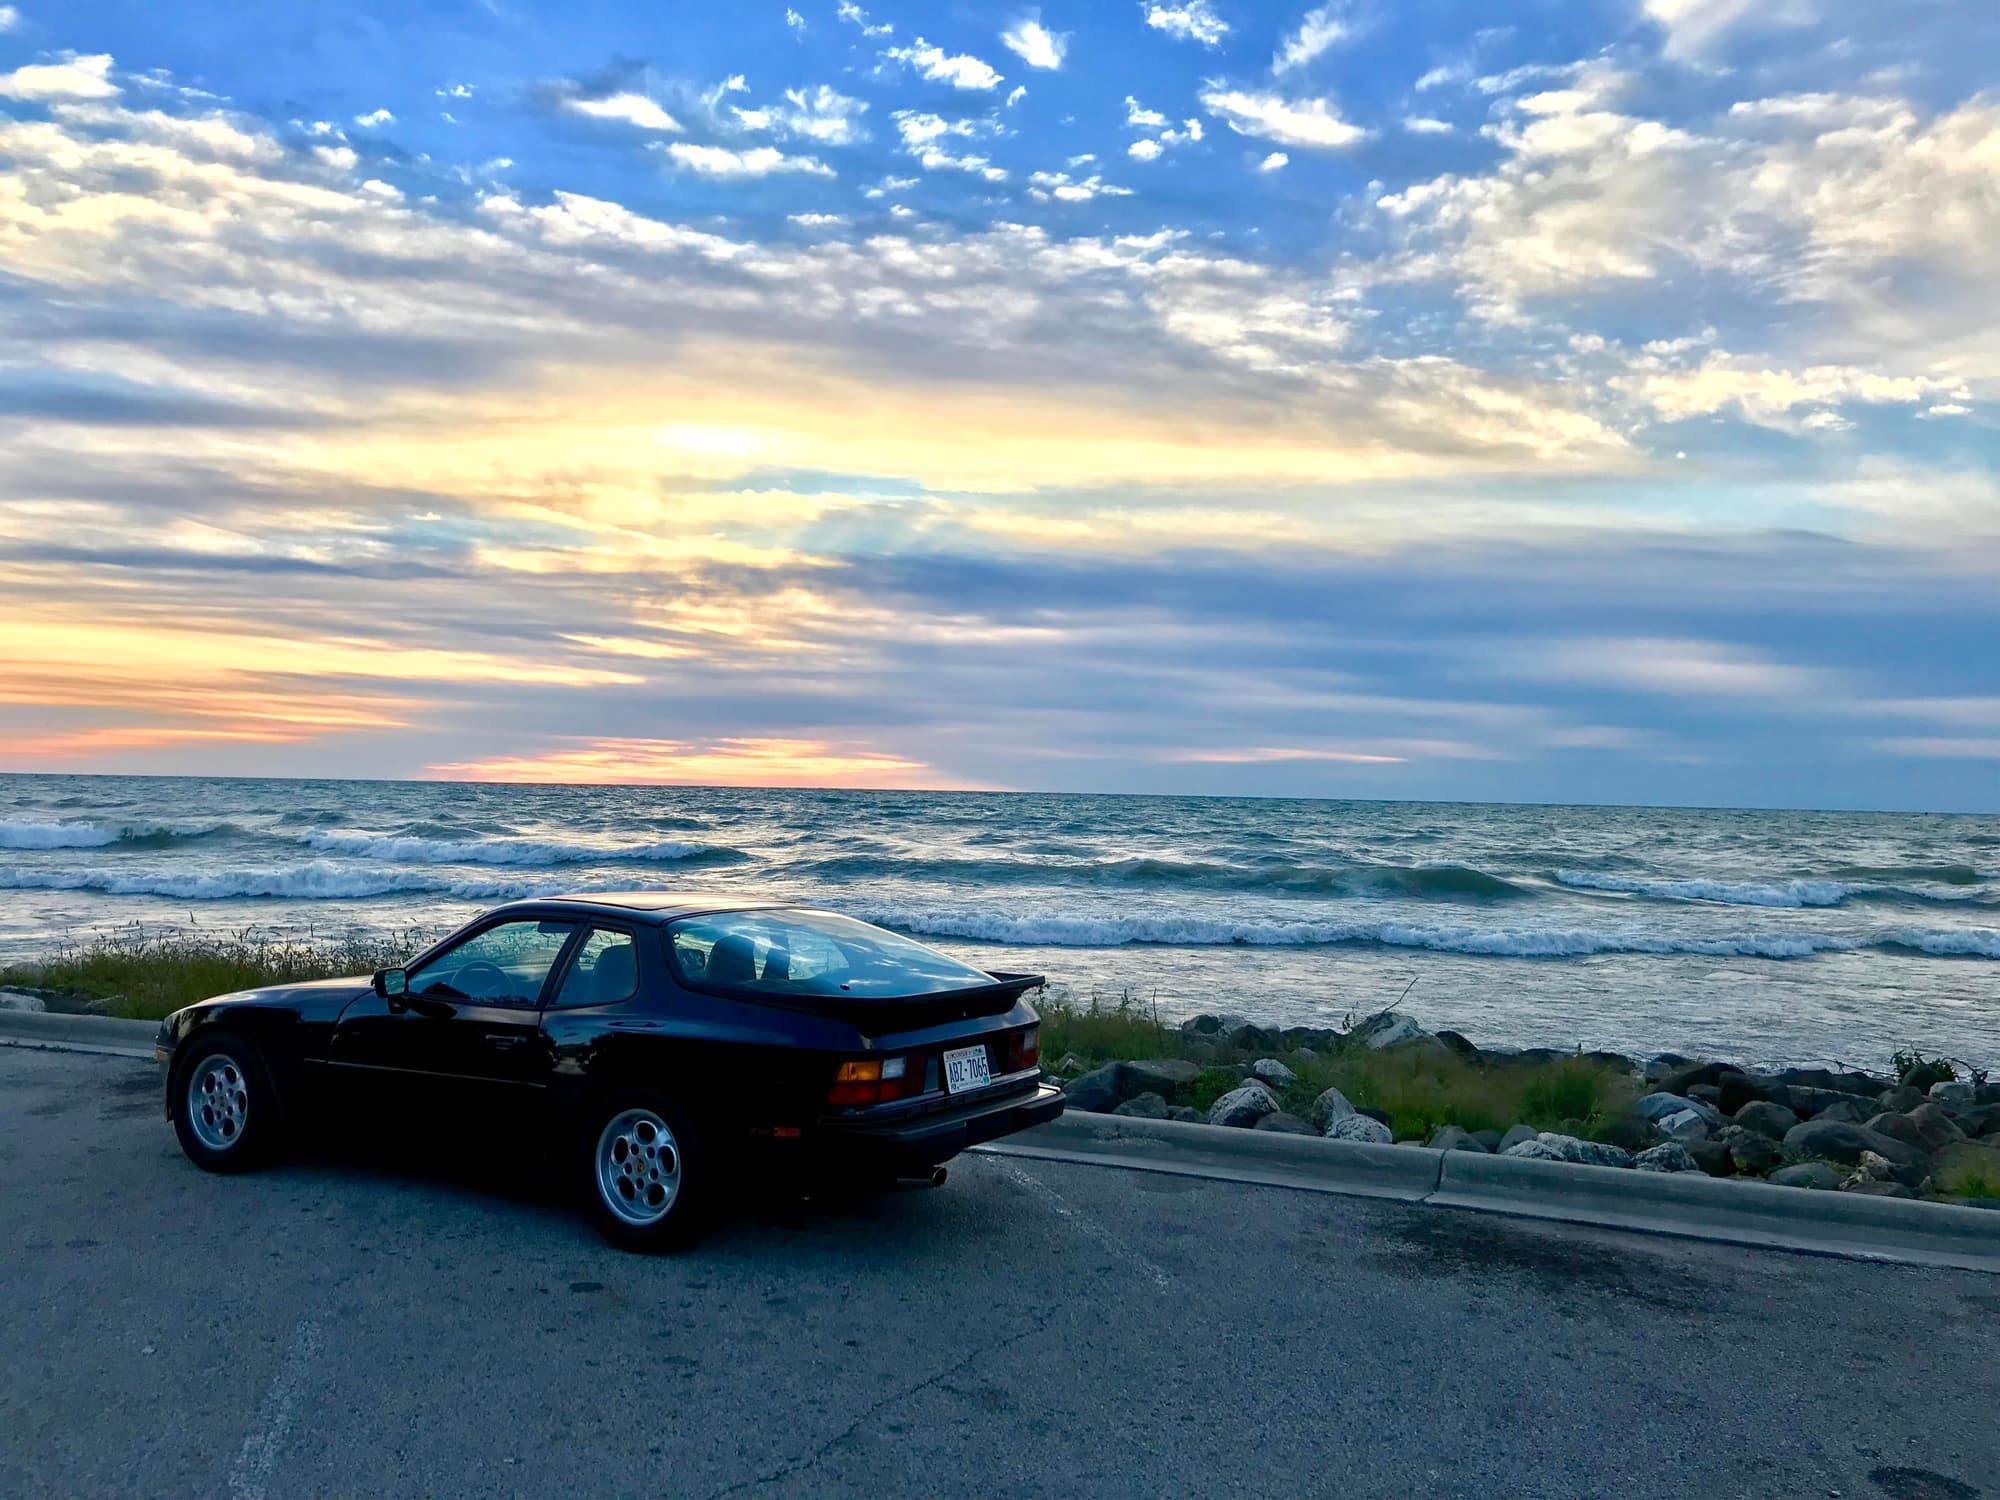
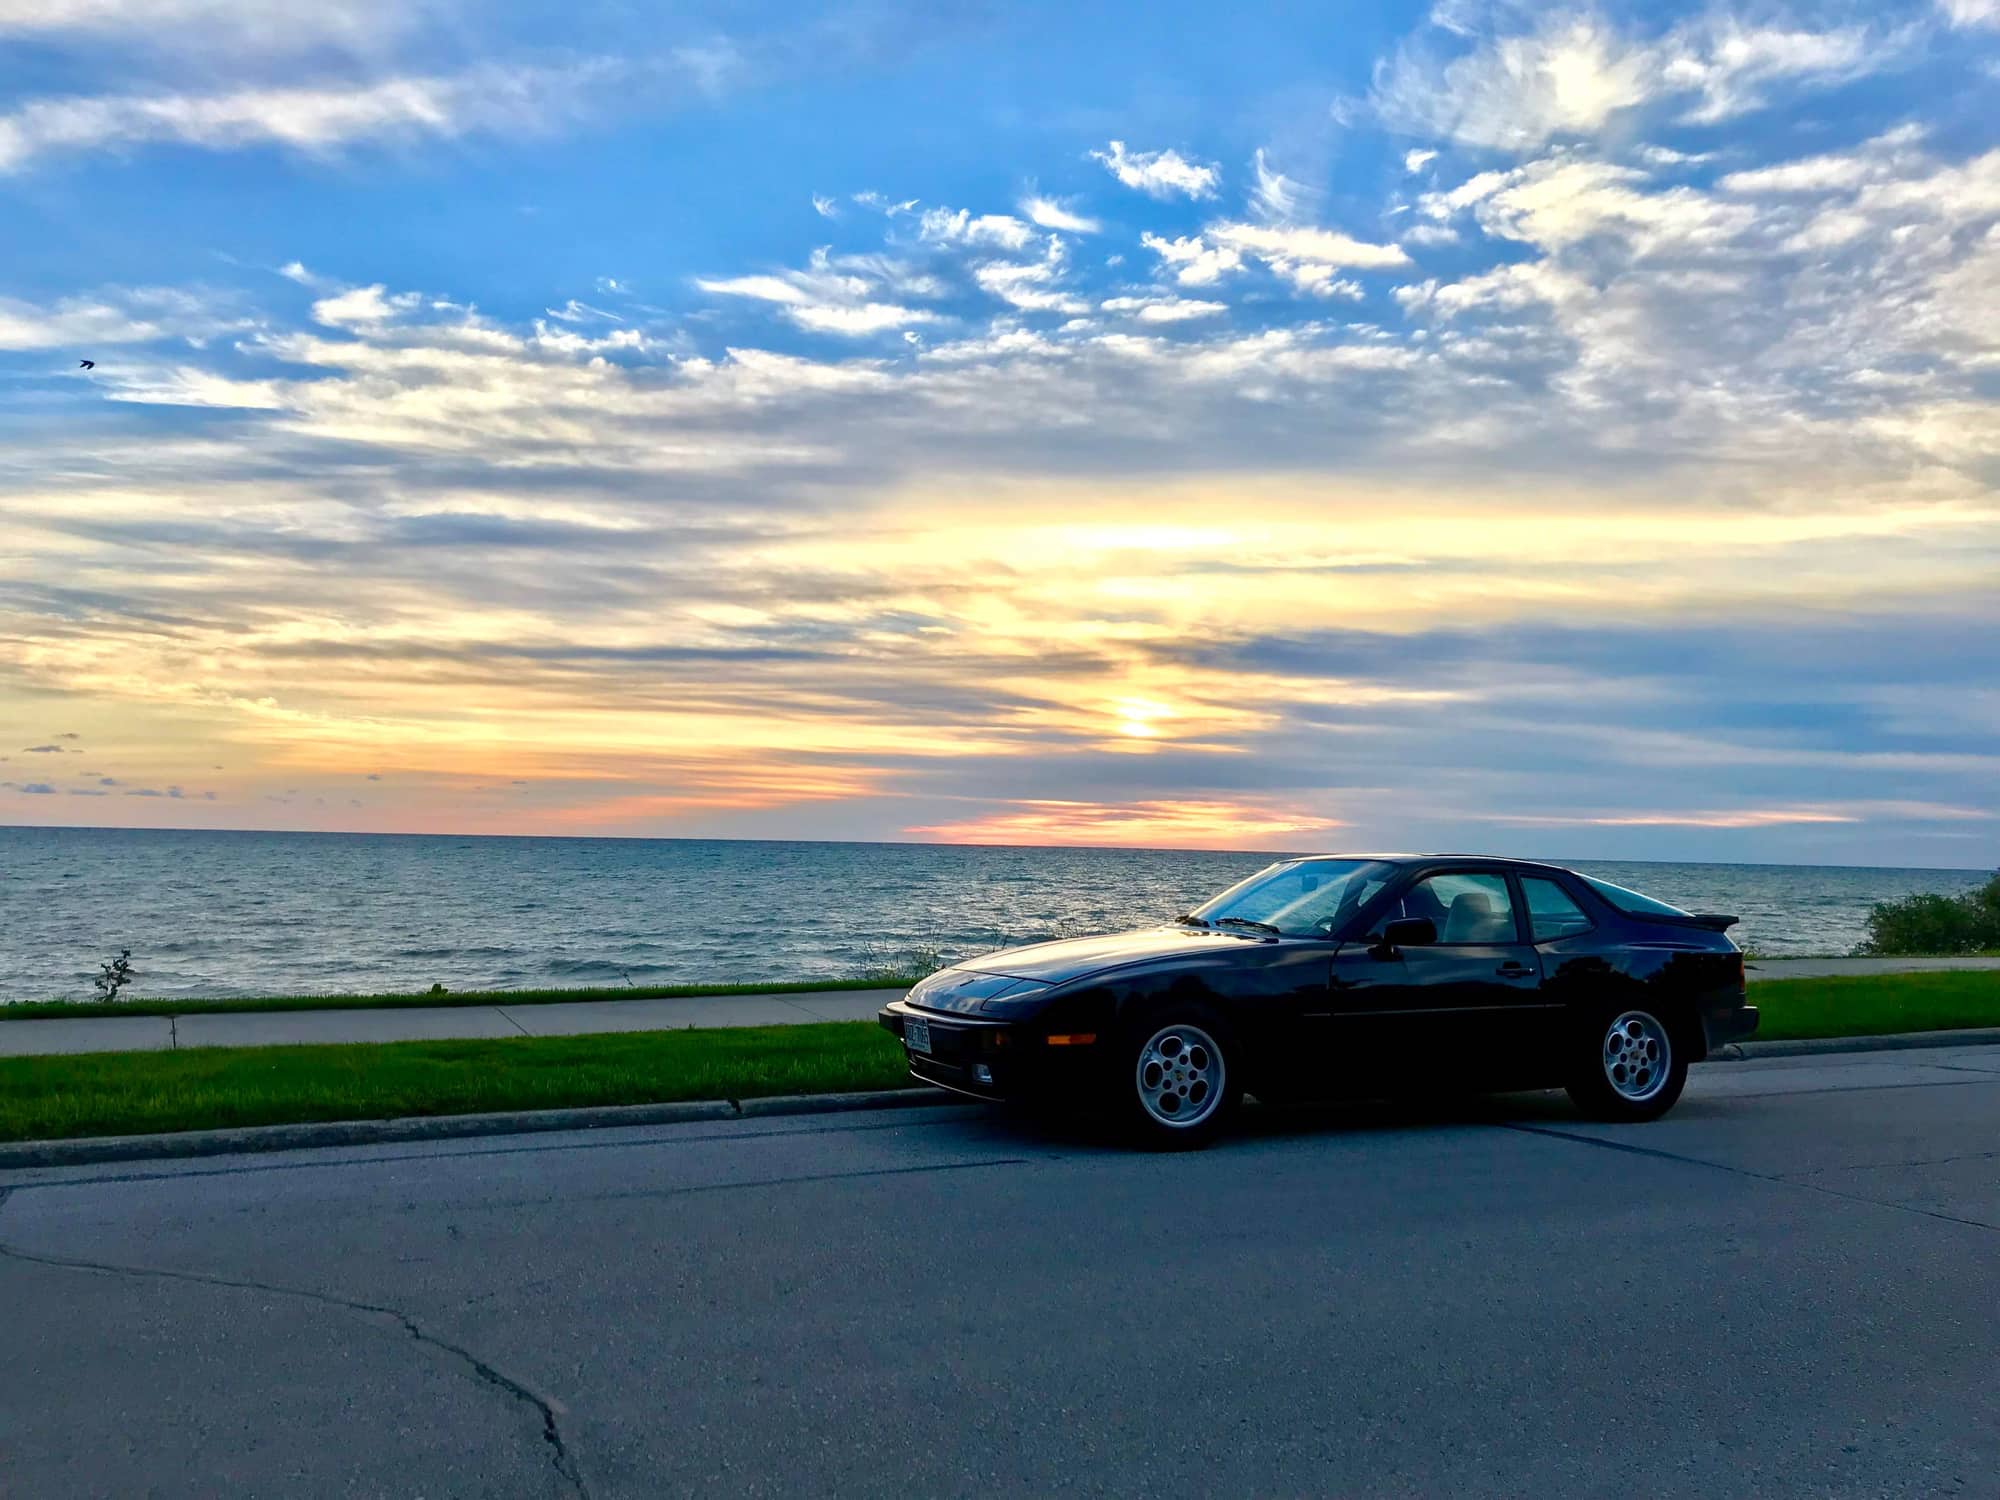
Because driving the car is even more enjoyable now, I decided to go for a sunrise cruise along Lake Michigan this morning. Some photos below for your enjoyment.
Enjoy the week ahead.
-Justin
Last edited by JRP944; 07-02-2021 at 01:05 PM.
Reason: Adding title
Great work! I pulled my n/a engine a few years back and only did the oil cooler and clutch replacement and some deep cleaning. I'm putting the interior back in after a repaint. Slow going with the dash now but I keep at it everyday.
It�s been a while since I�ve updated this. That�s because Wisconsin winters are very long and cold and make it really difficult to do much car related work unless one has a nice, heated garage (which I do not).
The plan for the new year was front suspension bushings and ball joints, refinish the phone dial wheels, get new tires and hopefully a little later in the summer replace my rear shocks and all my rubber brake lines with stainless steel stuff. So far I�ve completed the front end work and I just finished repainting the wheels. I need to get the tires installed tomorrow and then I�ll update with a post showing some pictures.
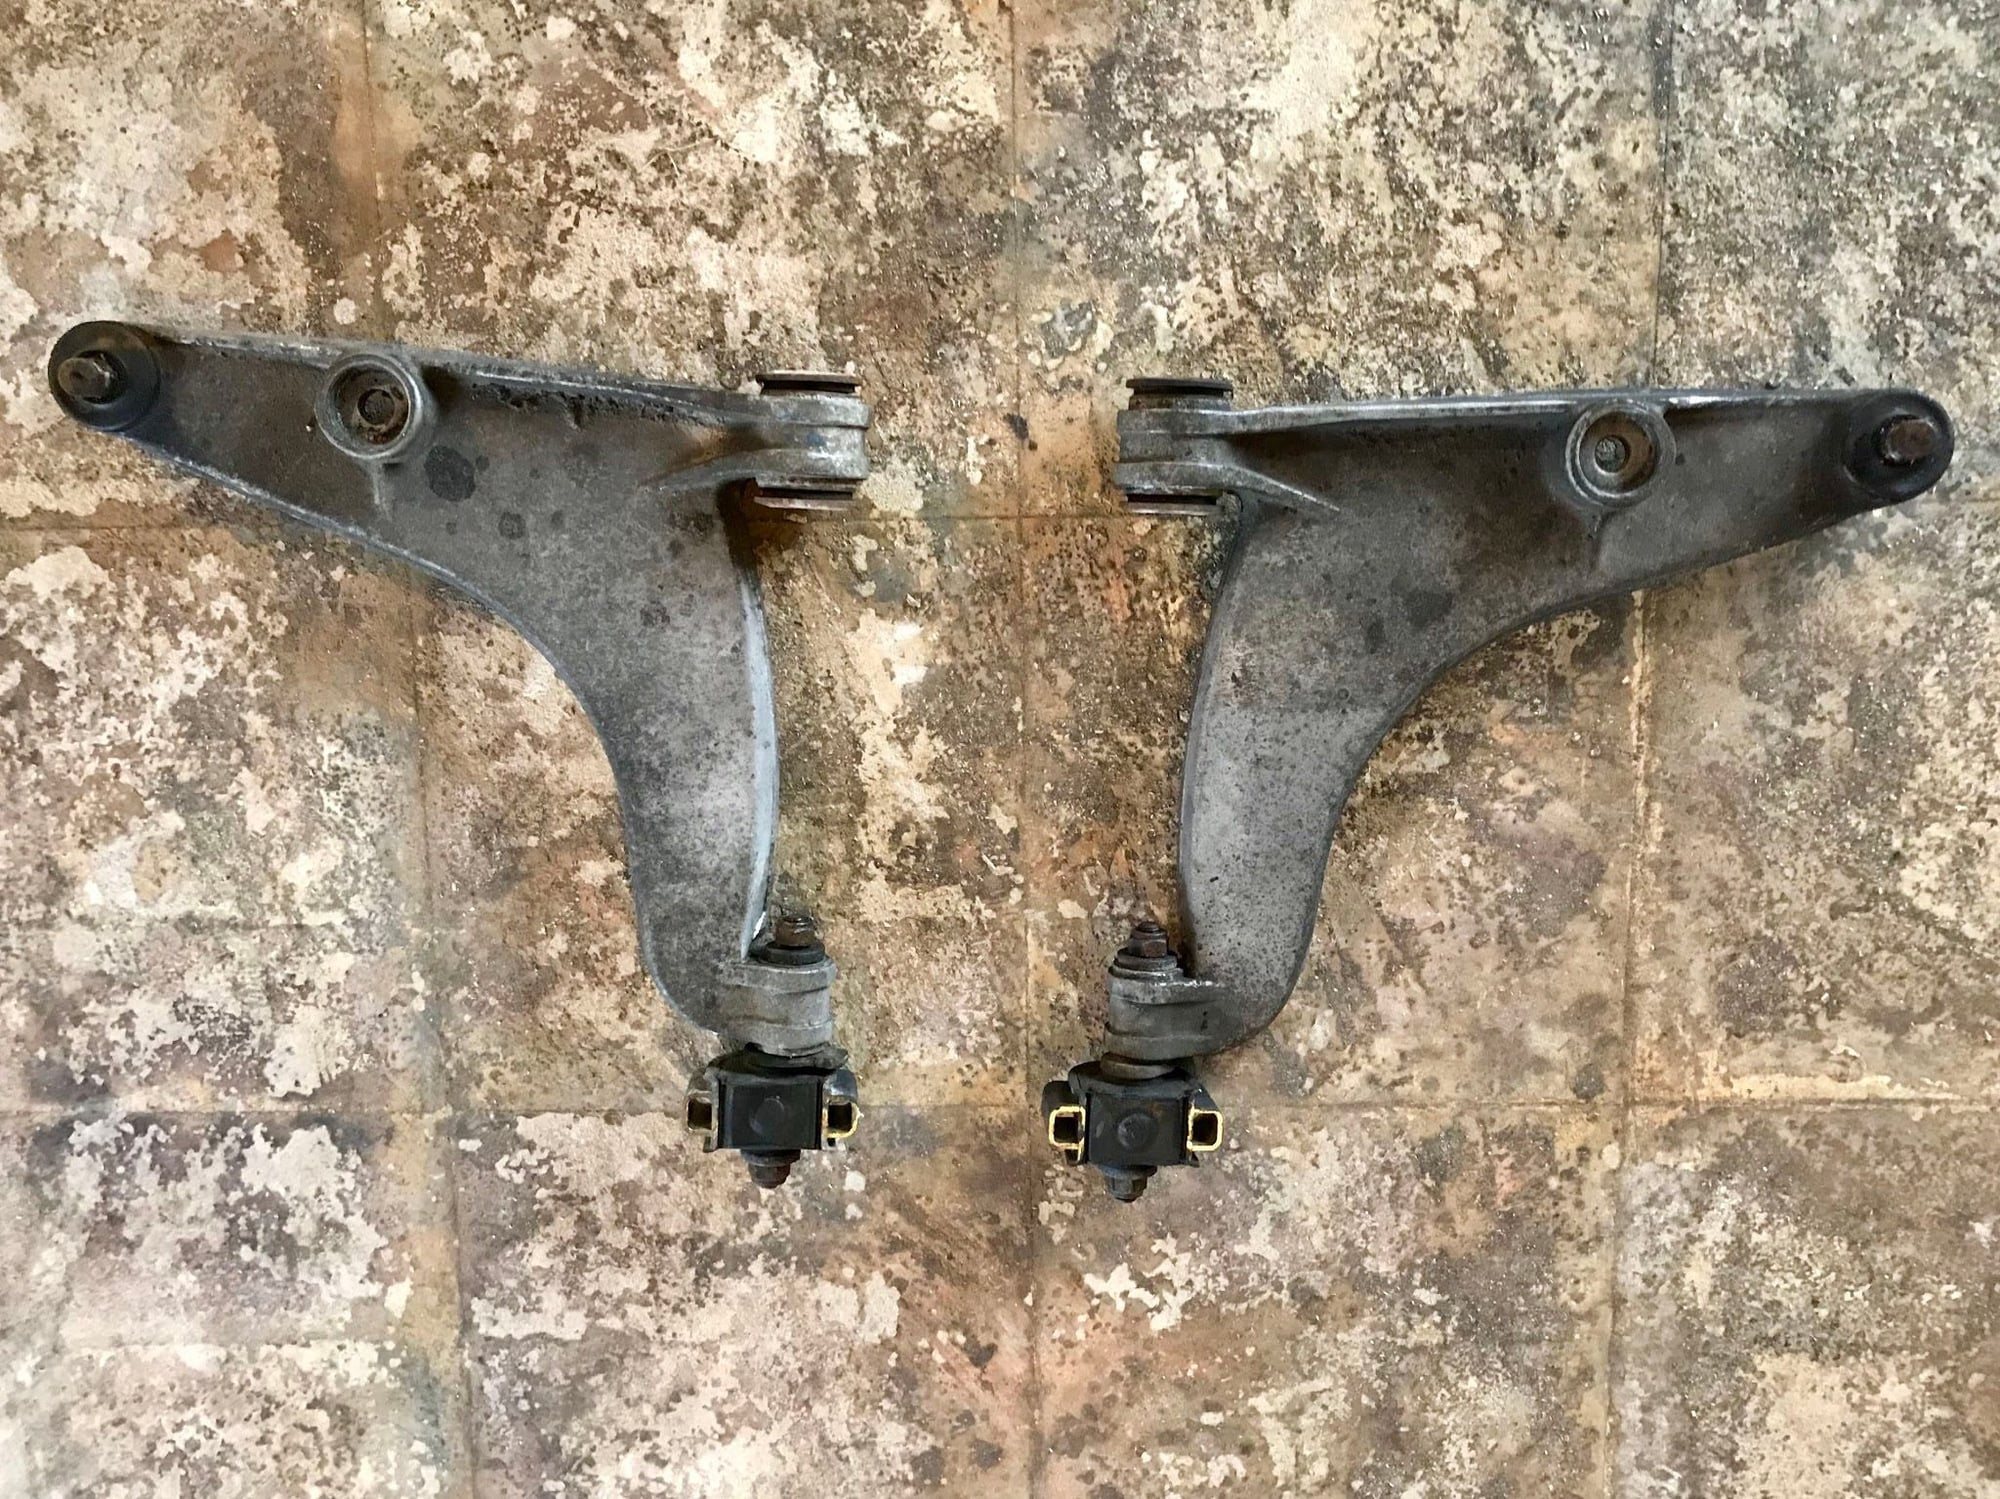
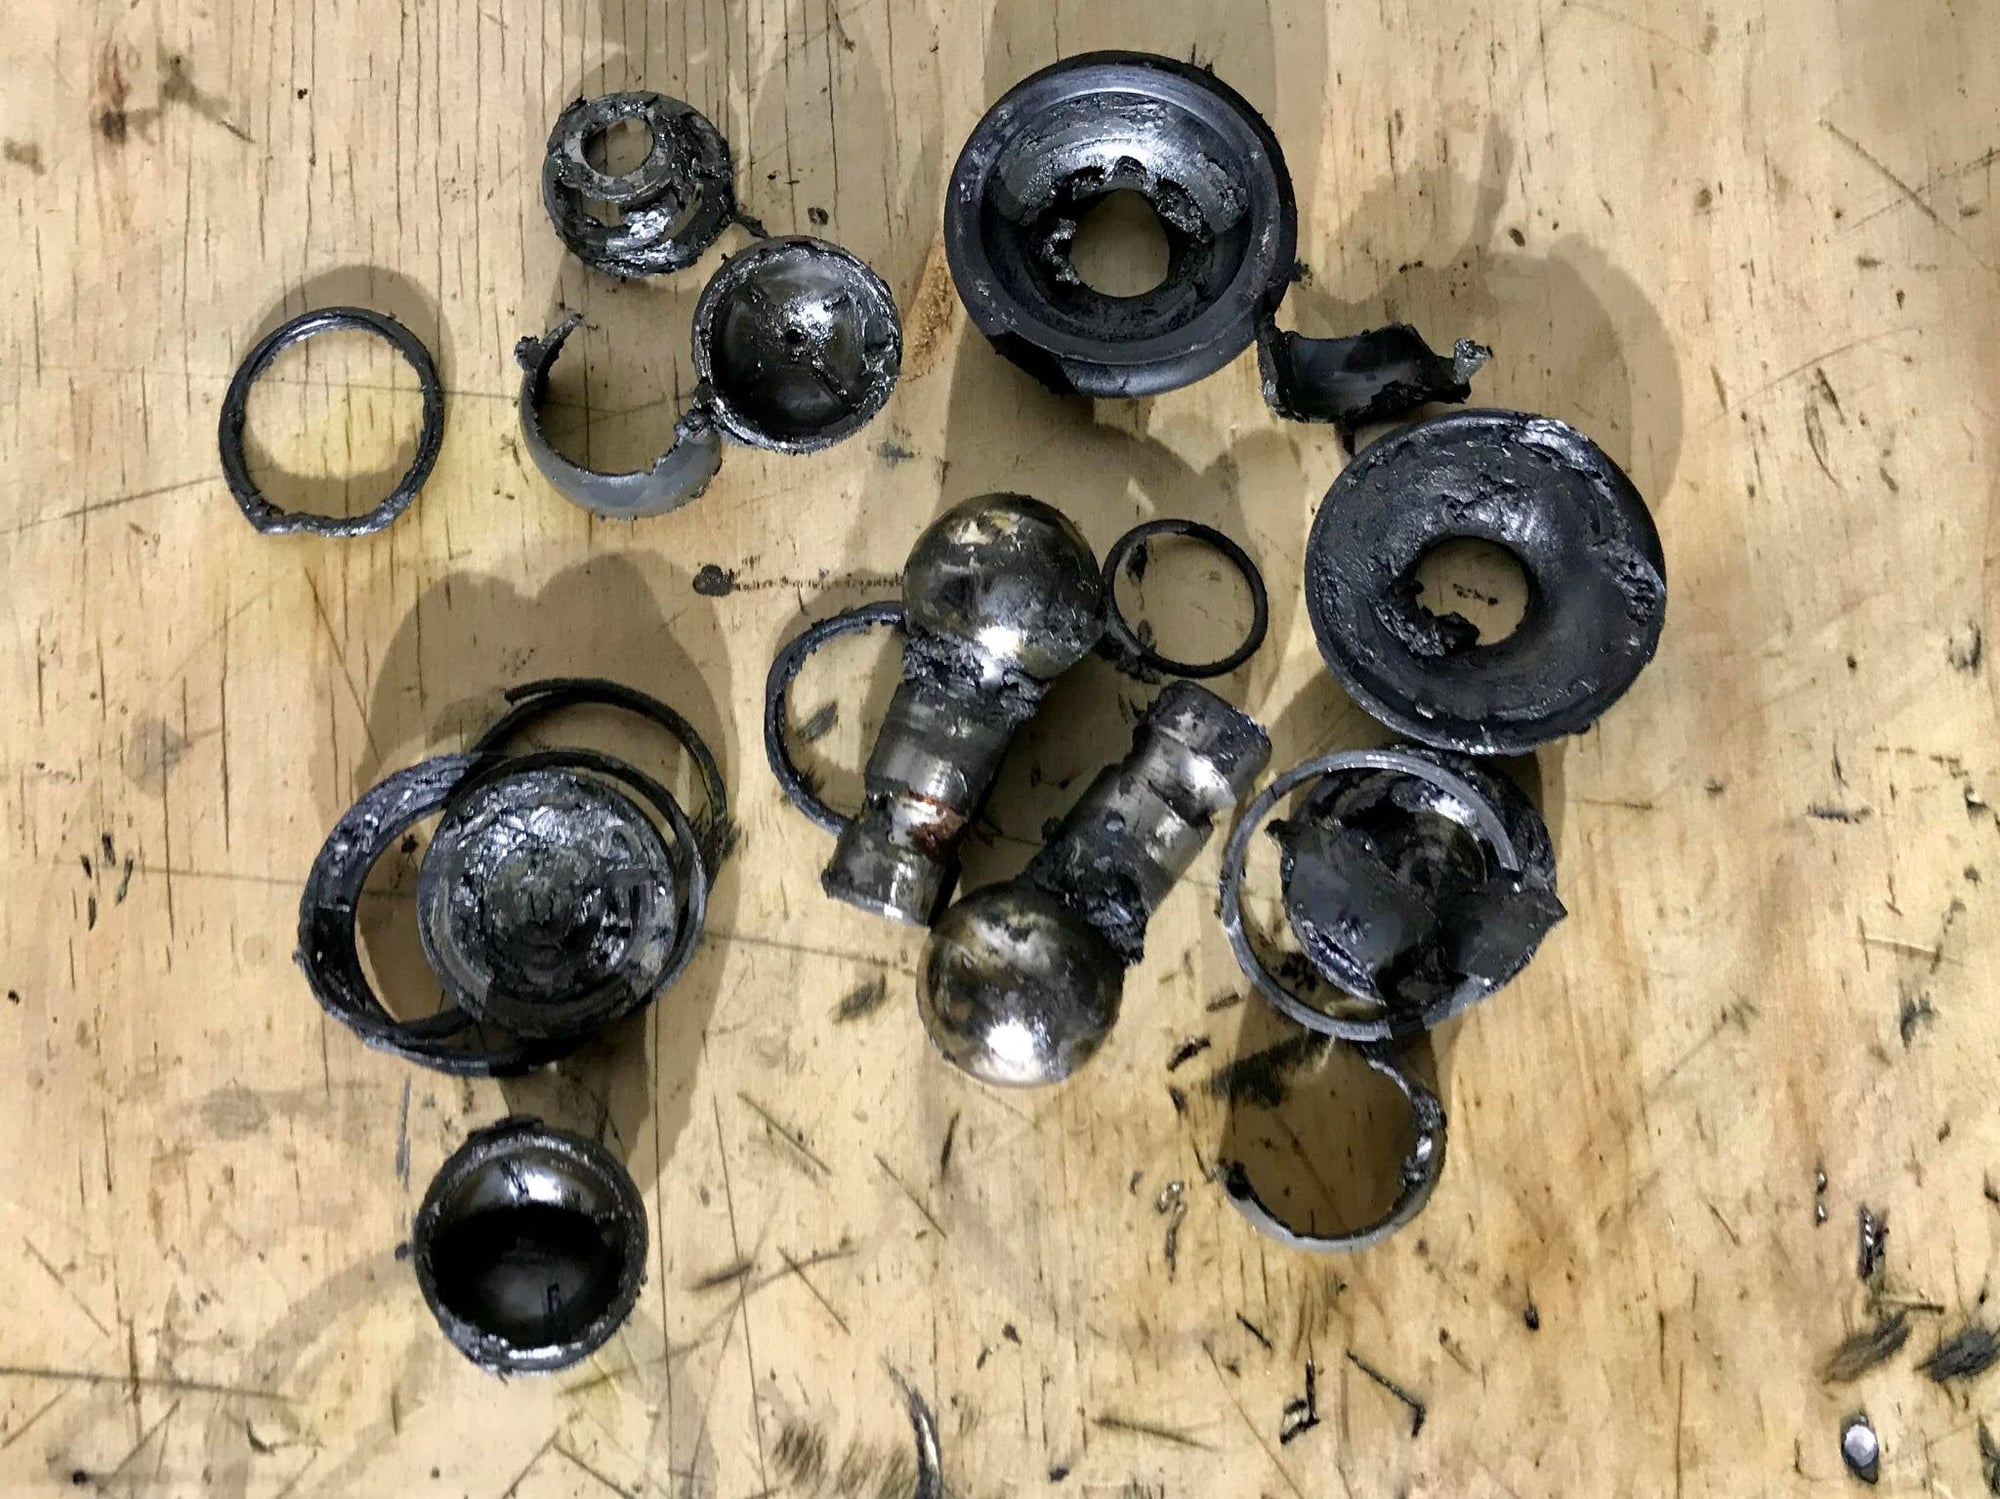
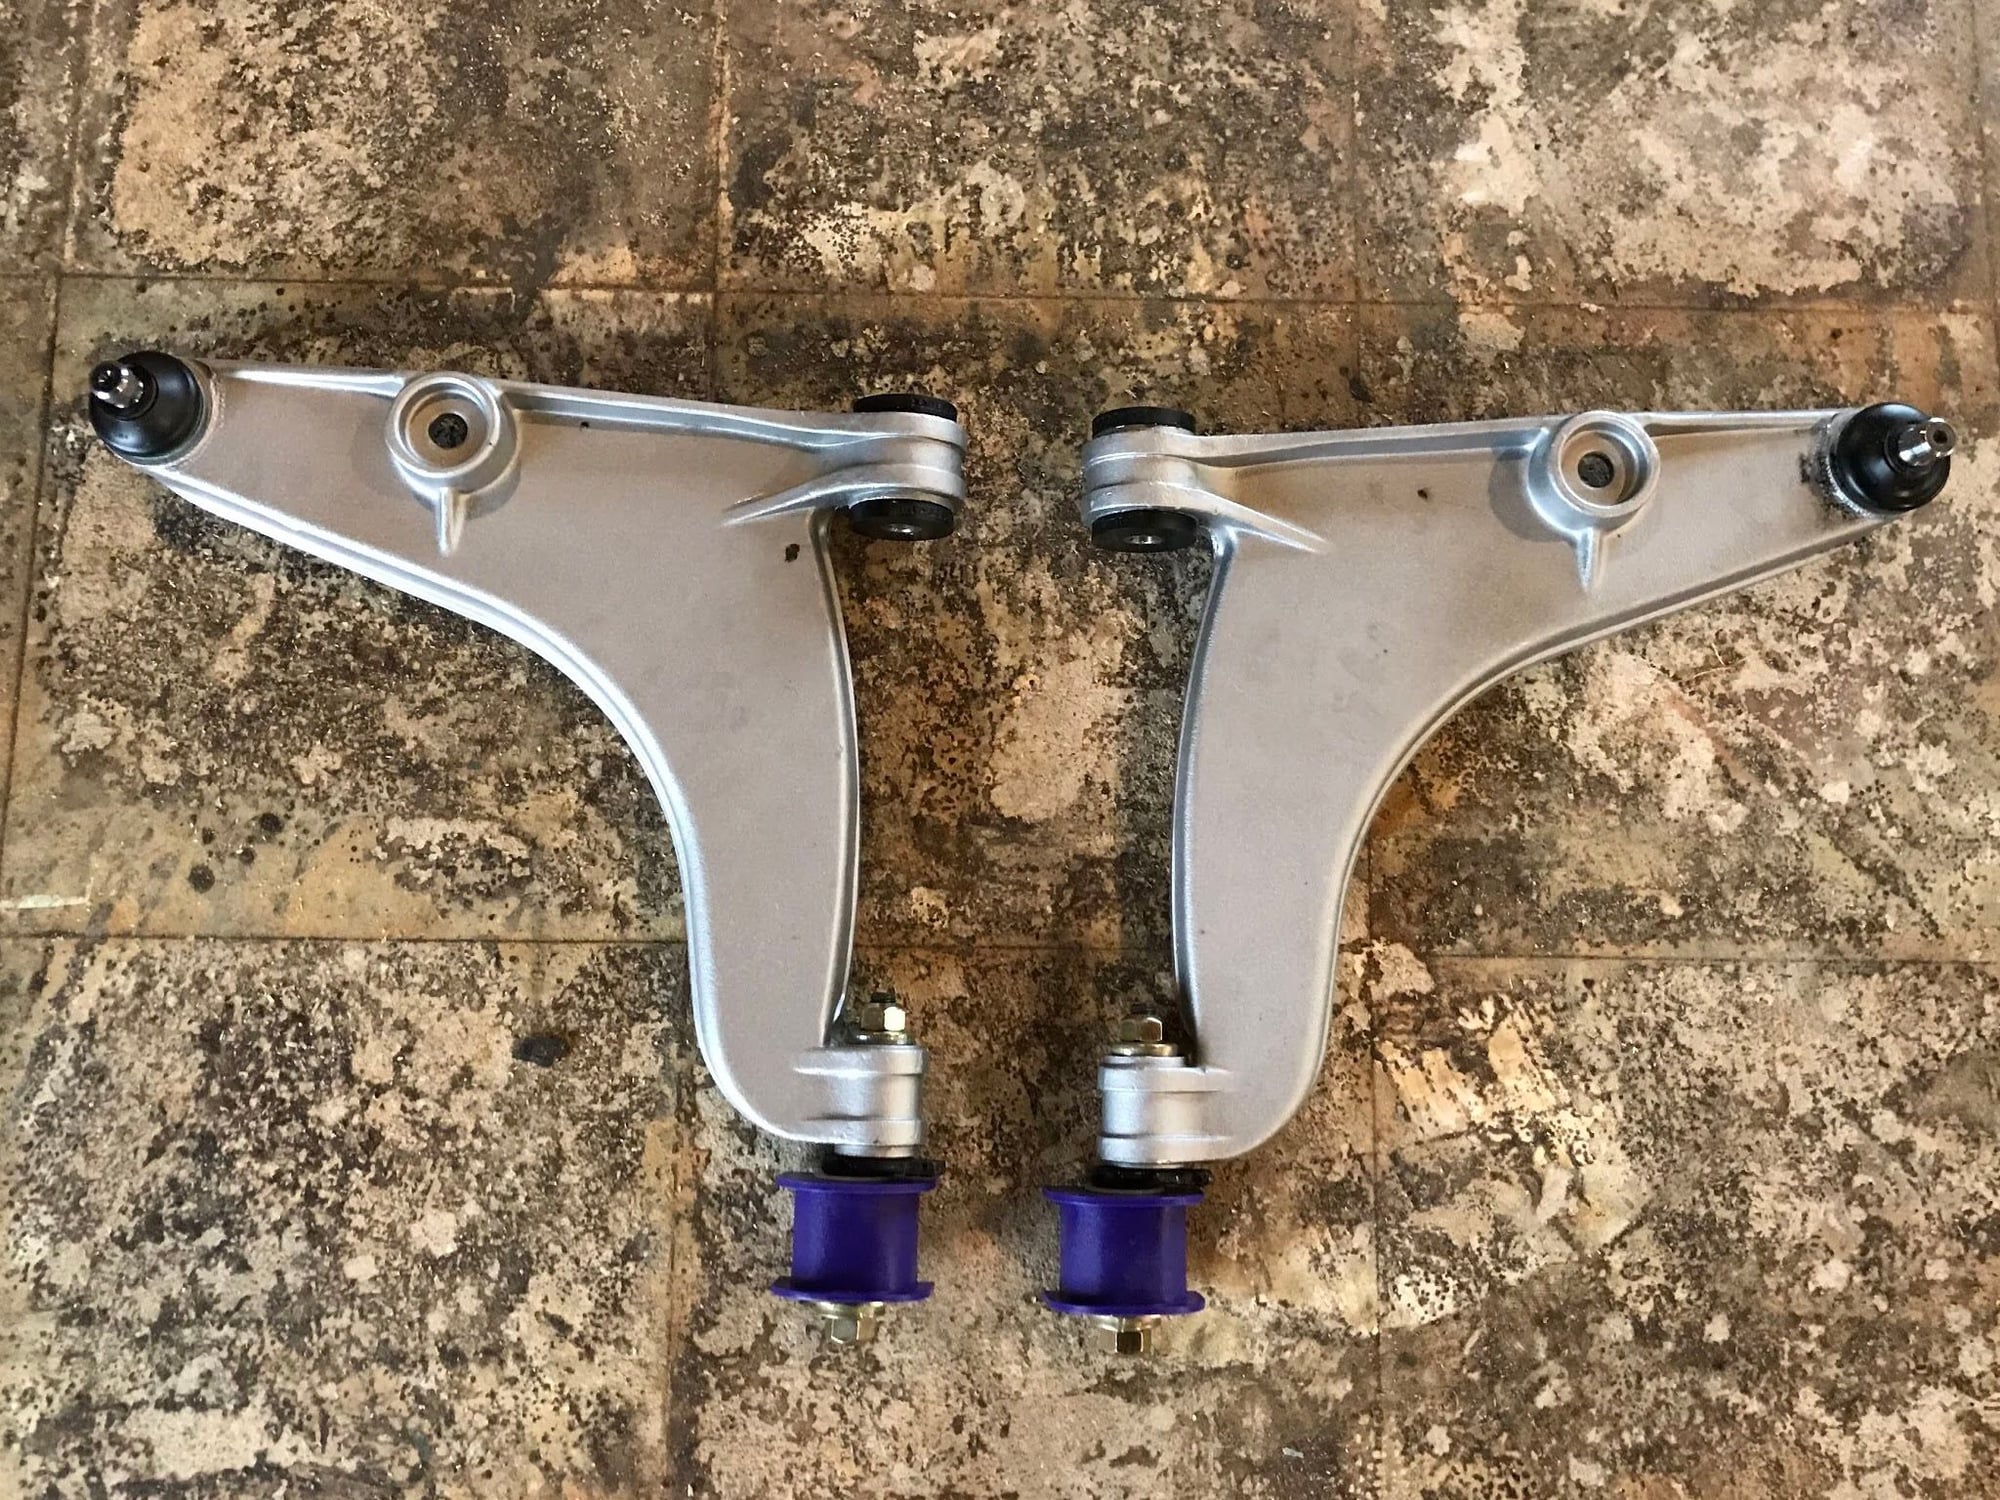
On to some pictures. First, the 33-year crusty control arms with old bushings and ball joints. The front end wouldn�t hold a proper alignment anymore and kept pulling to the left since the bushings were just so worn out.
When I pulled the old ball joints out, the plastic bushings came out in pieces. This certainly explains the front end wobble I would get at higher speeds and going over railroad tracks, etc.
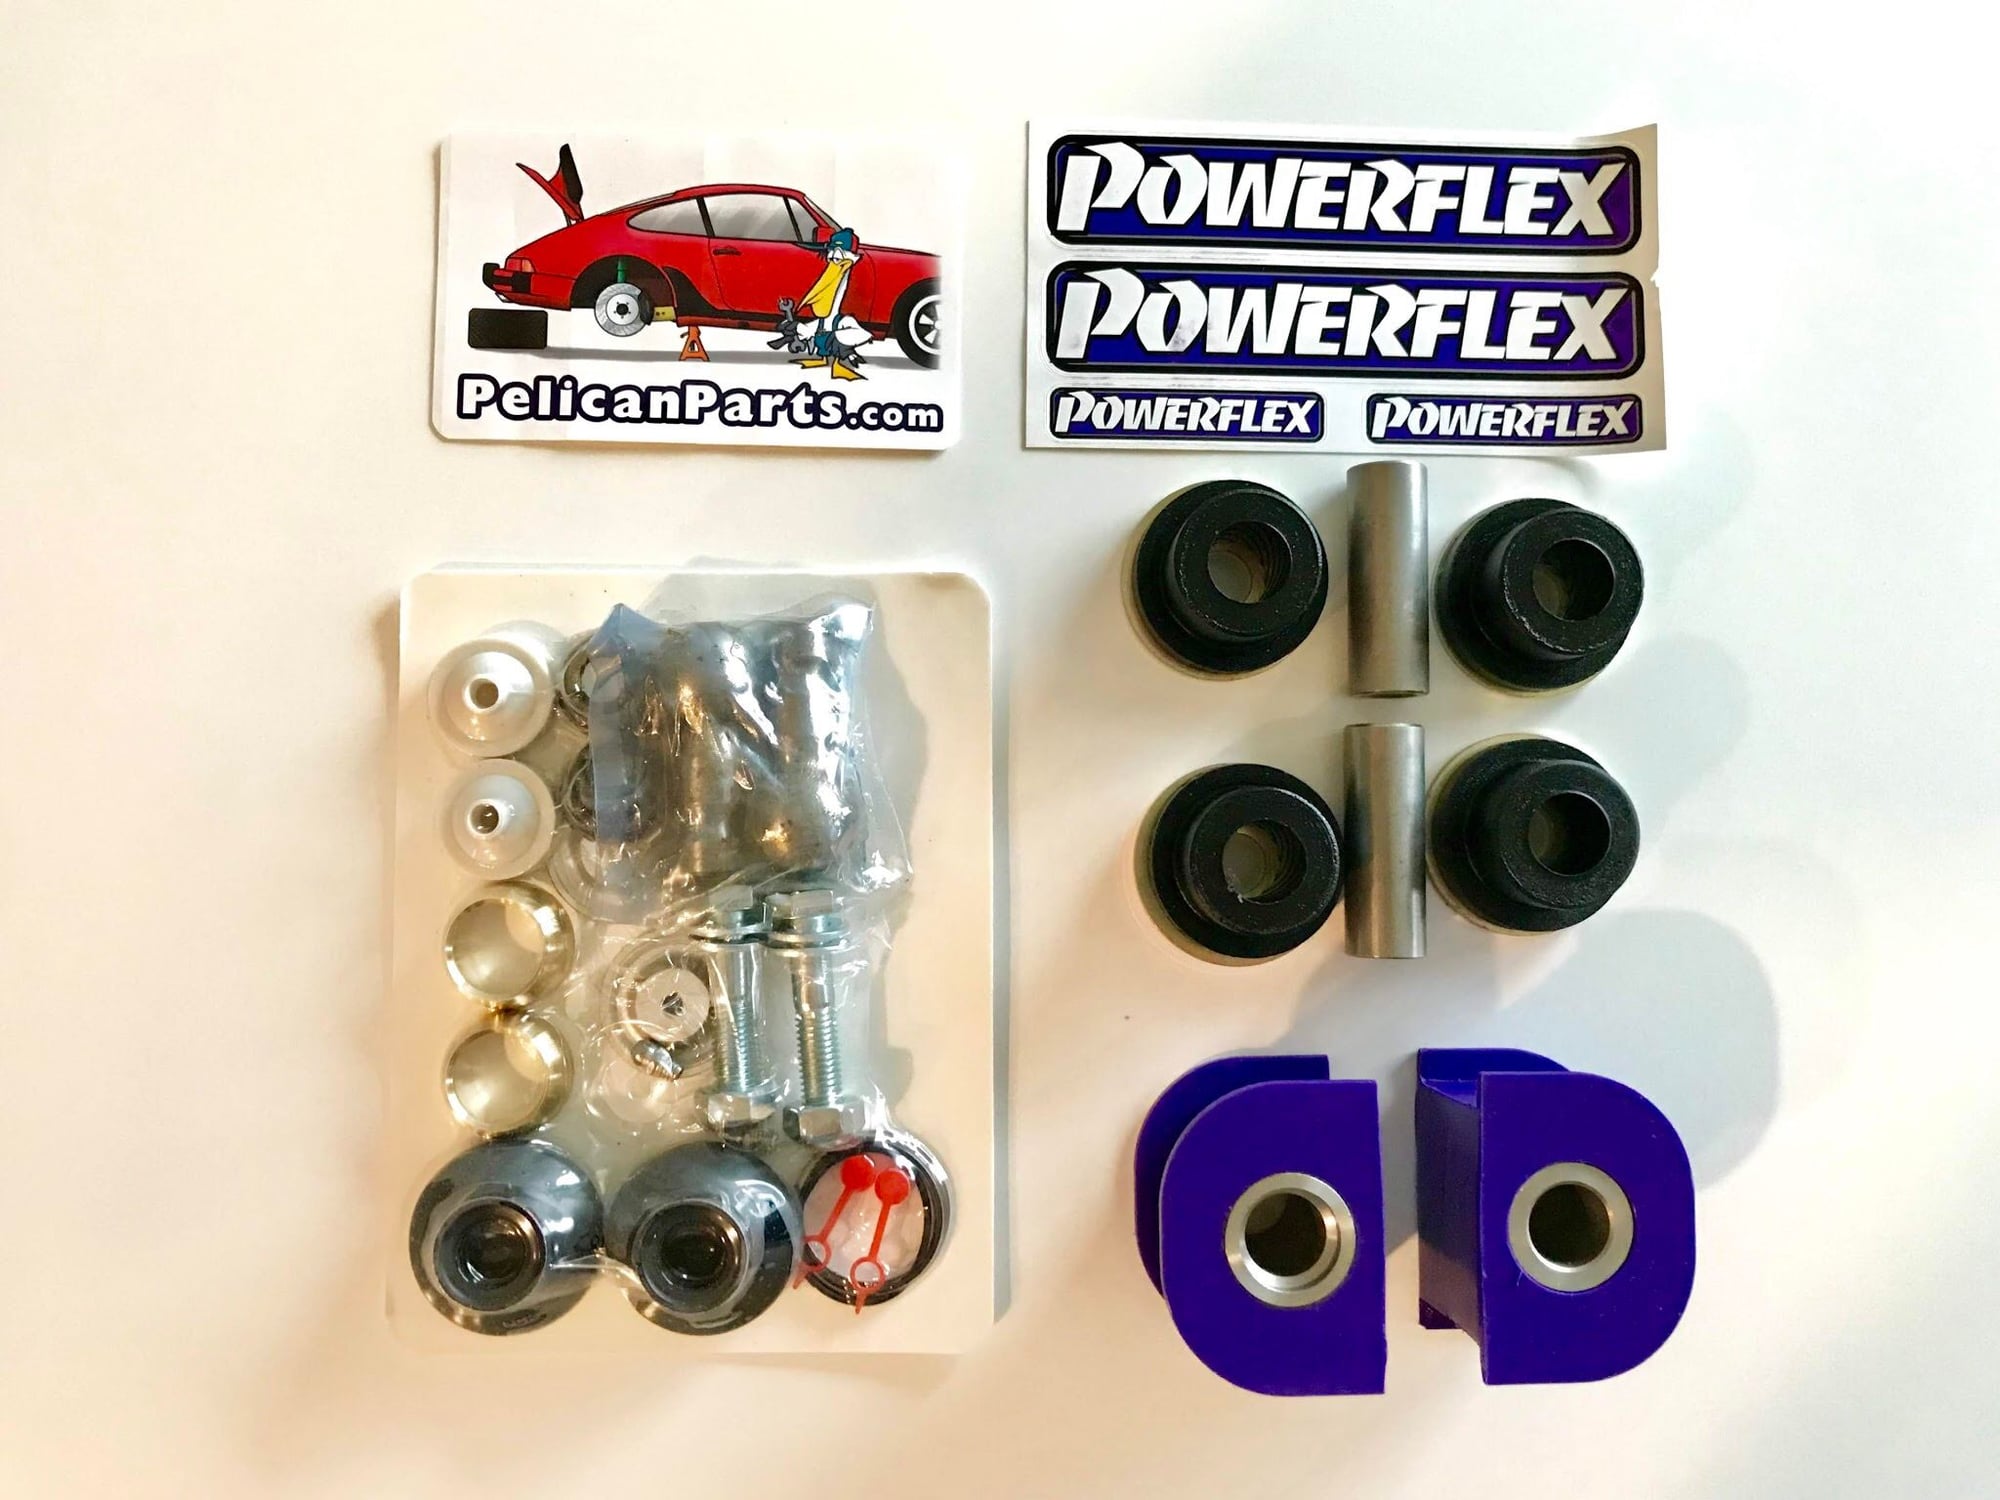
I thought about just replacing the bushings with stock rubber stuff for now, but then decided I probably didn�t want to do this job again any time soon and decided to upgrade to the PowerFlex poly bushings instead. They end up being about the same price as the stock rubbers and should offer a nice handling upgrade. I went with the Rennbay ball joint repair kit.
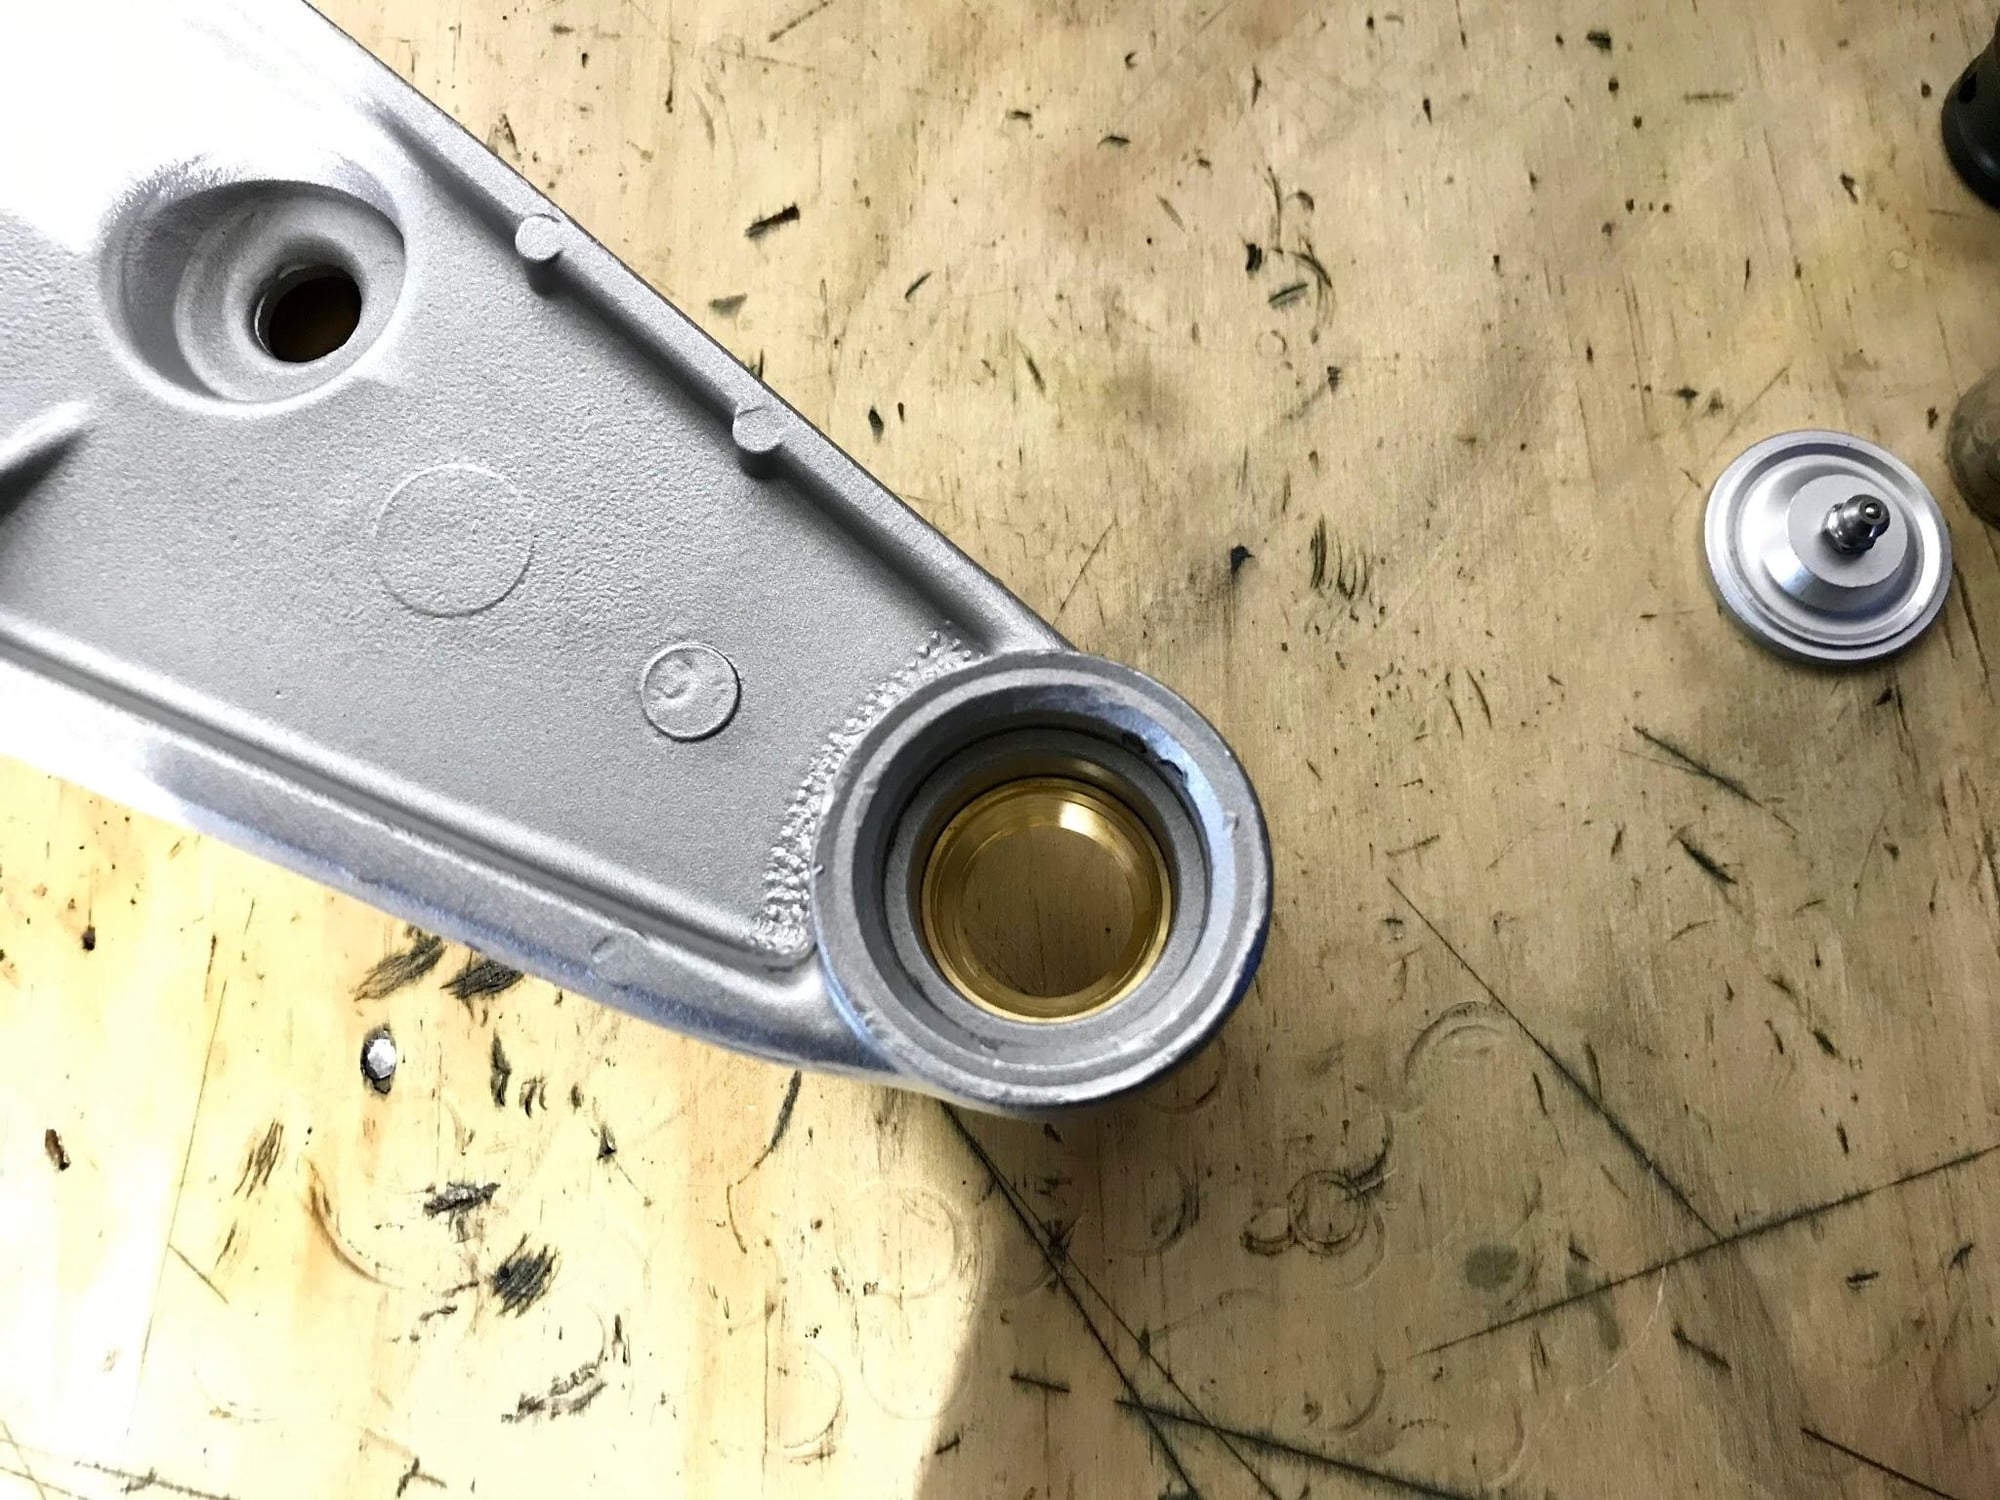
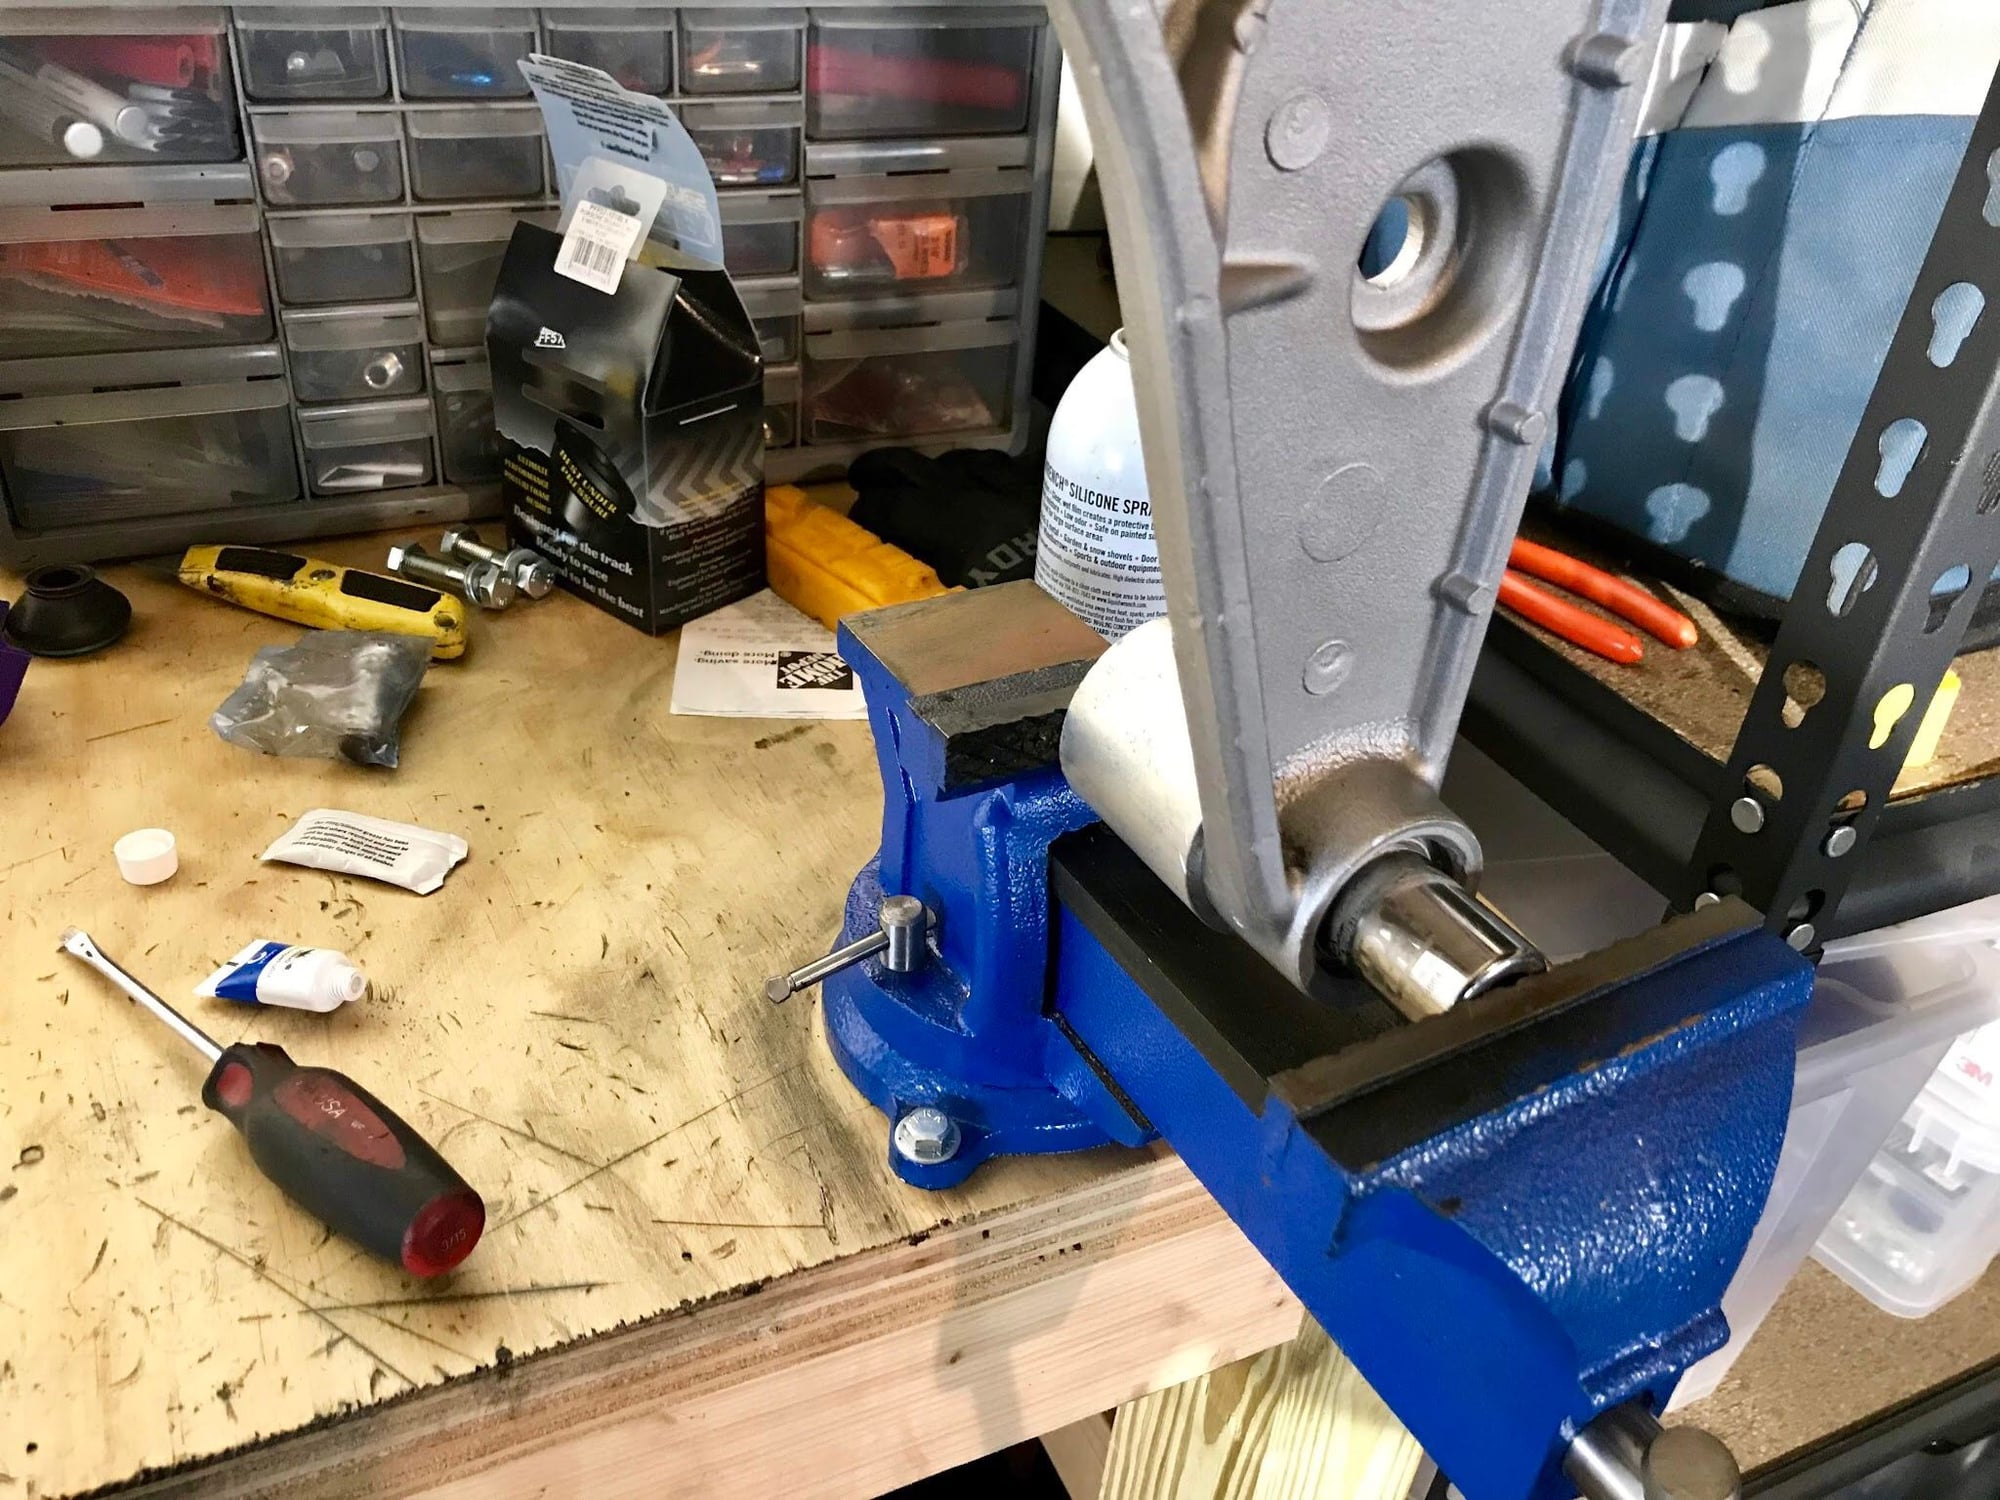
I had the arms sand blasted at work to get all the crust off and to keep things looking fresh in the front end of the car. Then I started the reassembly process. The Rennbay kit really is a quality kit and easy to install. The bushing install was easy too, once I realized the old steel bushing inserts had to be cut out before installing the poly bushings.
The finished product! A little dirty from ball joint assembly, but I cleaned them up a bit more before installing in the car.
At some point I�ll have to upgrade the other bushings in the car to poly as well. The rear end bushings are looking pretty worn so at some point these will get an update if I need to remove and replace any other components. I replaced the front sway bar and steering rack bushings last year with fresh rubber stuff so they should be good for a while.
Once I get the fresh wheels with new tires on the car this thing should once again be a joy to drive. Can�t wait!
Justin
Last edited by JRP944; 07-02-2021 at 01:04 PM.
Reason: Adding title
Very nice work sir!! I really enjoyed seeing the last set of pictures with the car next to the lake. Absolutely beautiful! Will be looking forward to more updates and pictures!
Another update - the wheels are finished and back on the car and I think they look pretty good overall. Not going to win any concours with them, but this is more of a driver�s car than a show car. On to some pics!
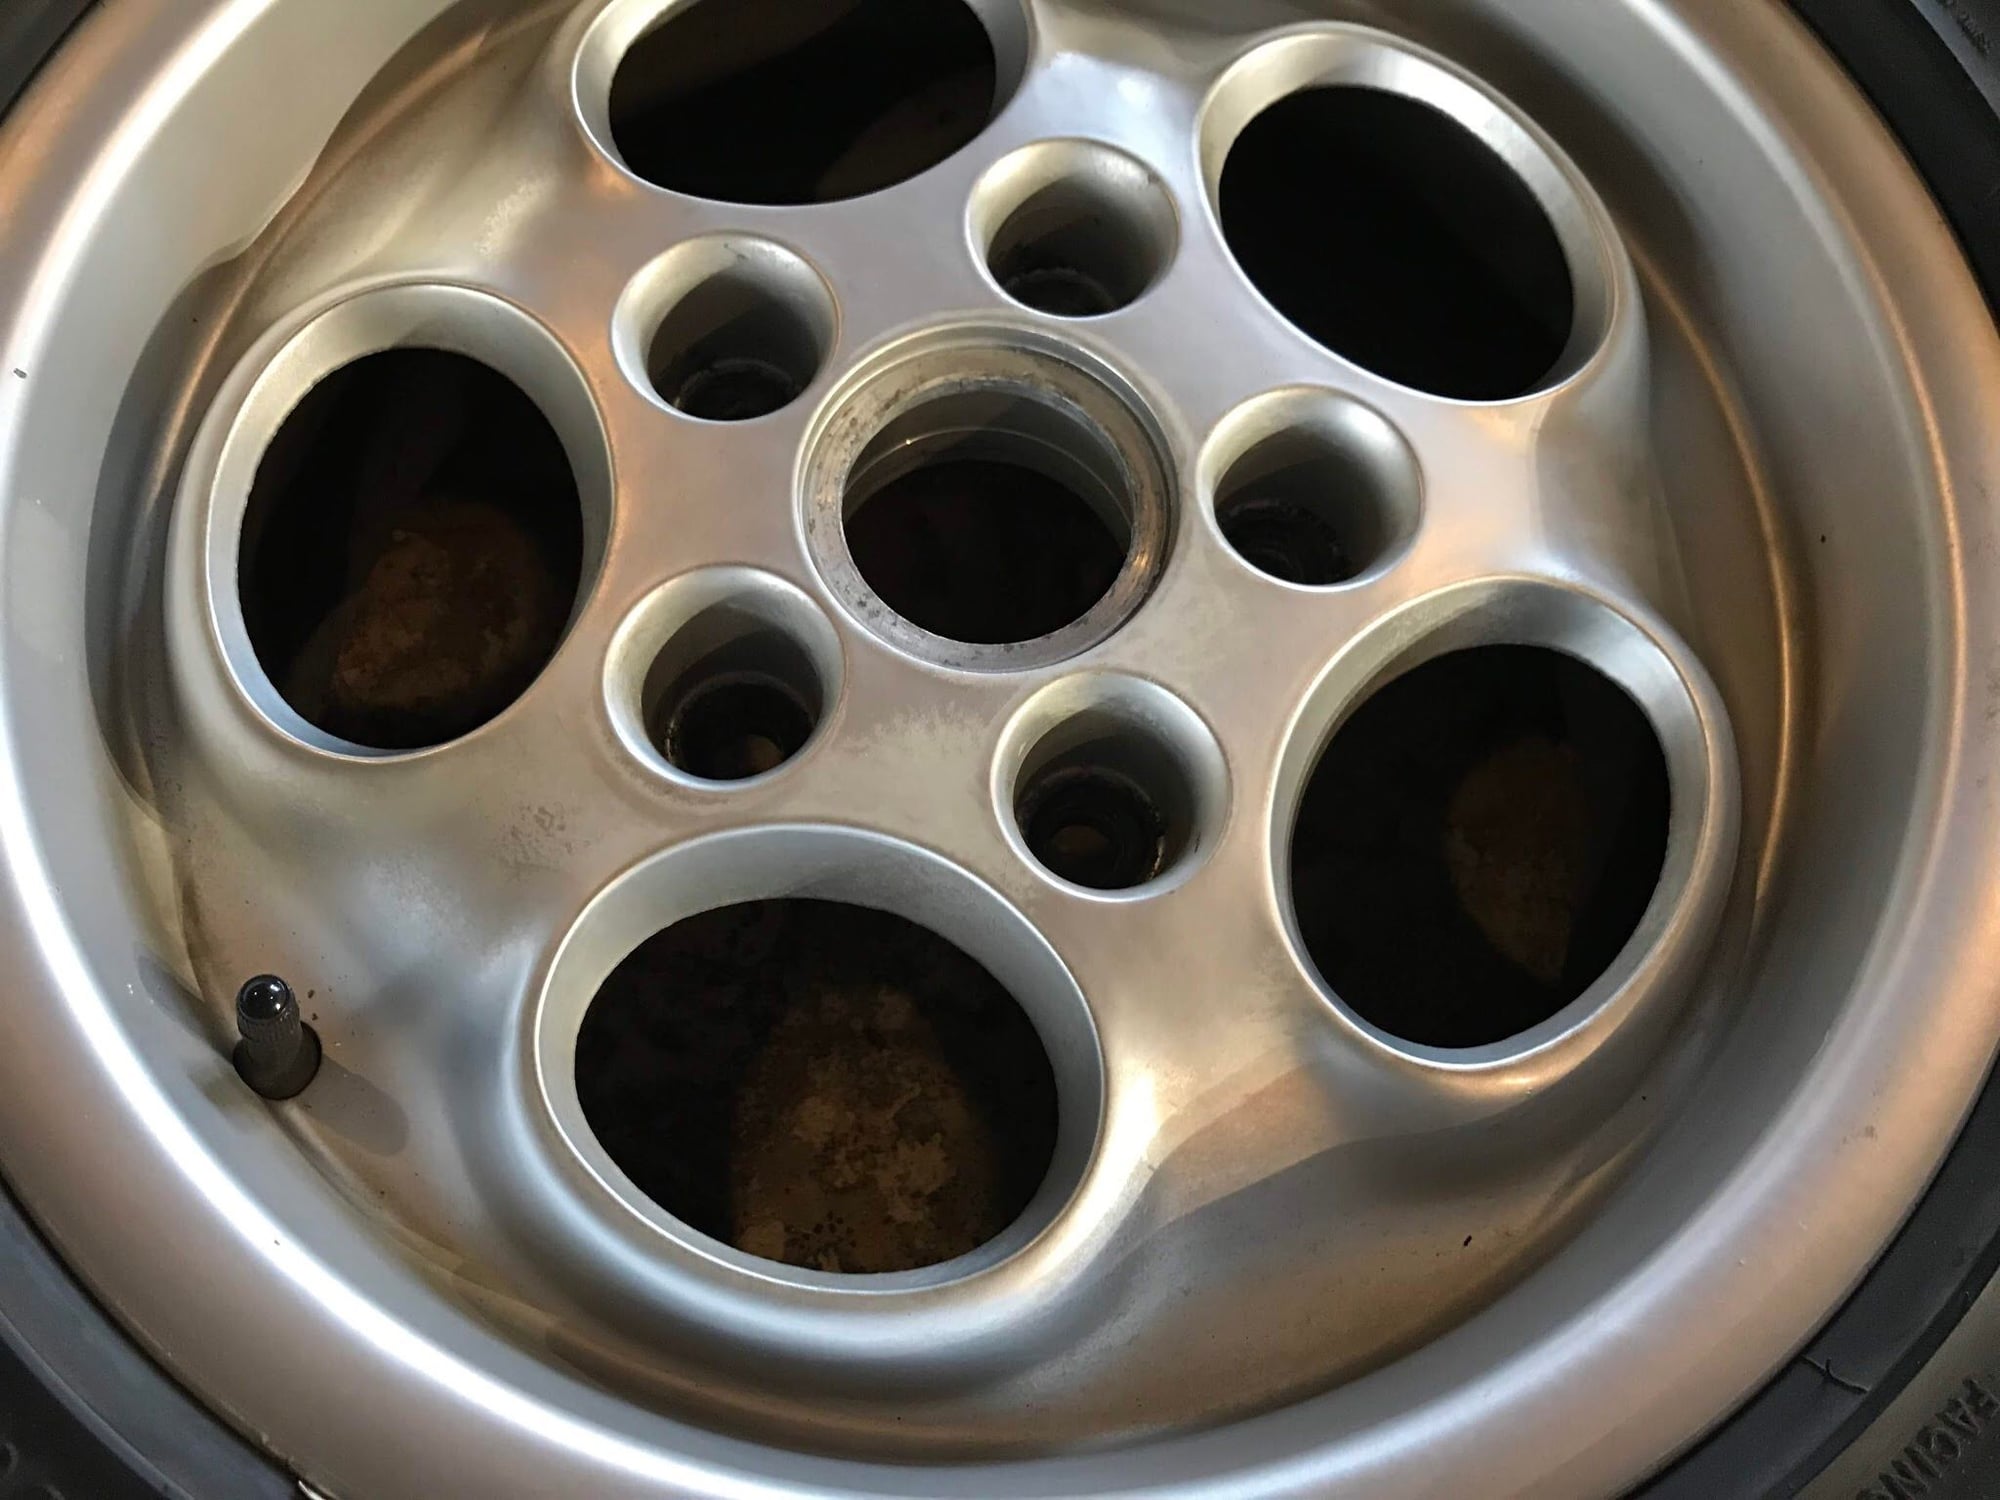
Here�s one of the wheels before refinishing. This was actually one of the better ones - I didn�t even take a picture of the worst one. You can see the paint was wearing off and the primer was showing through.
I took them to a place in West Bend, WI to have them bead blasted so I�d have a clean surface to work with. I thought about trying to just do a lot of sanding myself and then priming them, but it was worth the money having them blasted in my opinion. Cost for blasting was about $280. Ignore the dirty hand prints - I cleaned those off before priming.
All primed up and ready for paint. I used the Wurth self etching primer. It sprayed pretty well but did get a little stringy in spots. If I wanted to really make them perfect, I would have given them a light sanding after priming before laying down the paint. I brushed off the big stuff but there are a few spots where the not 100% perfectly smooth surface is noticeable through the paint.
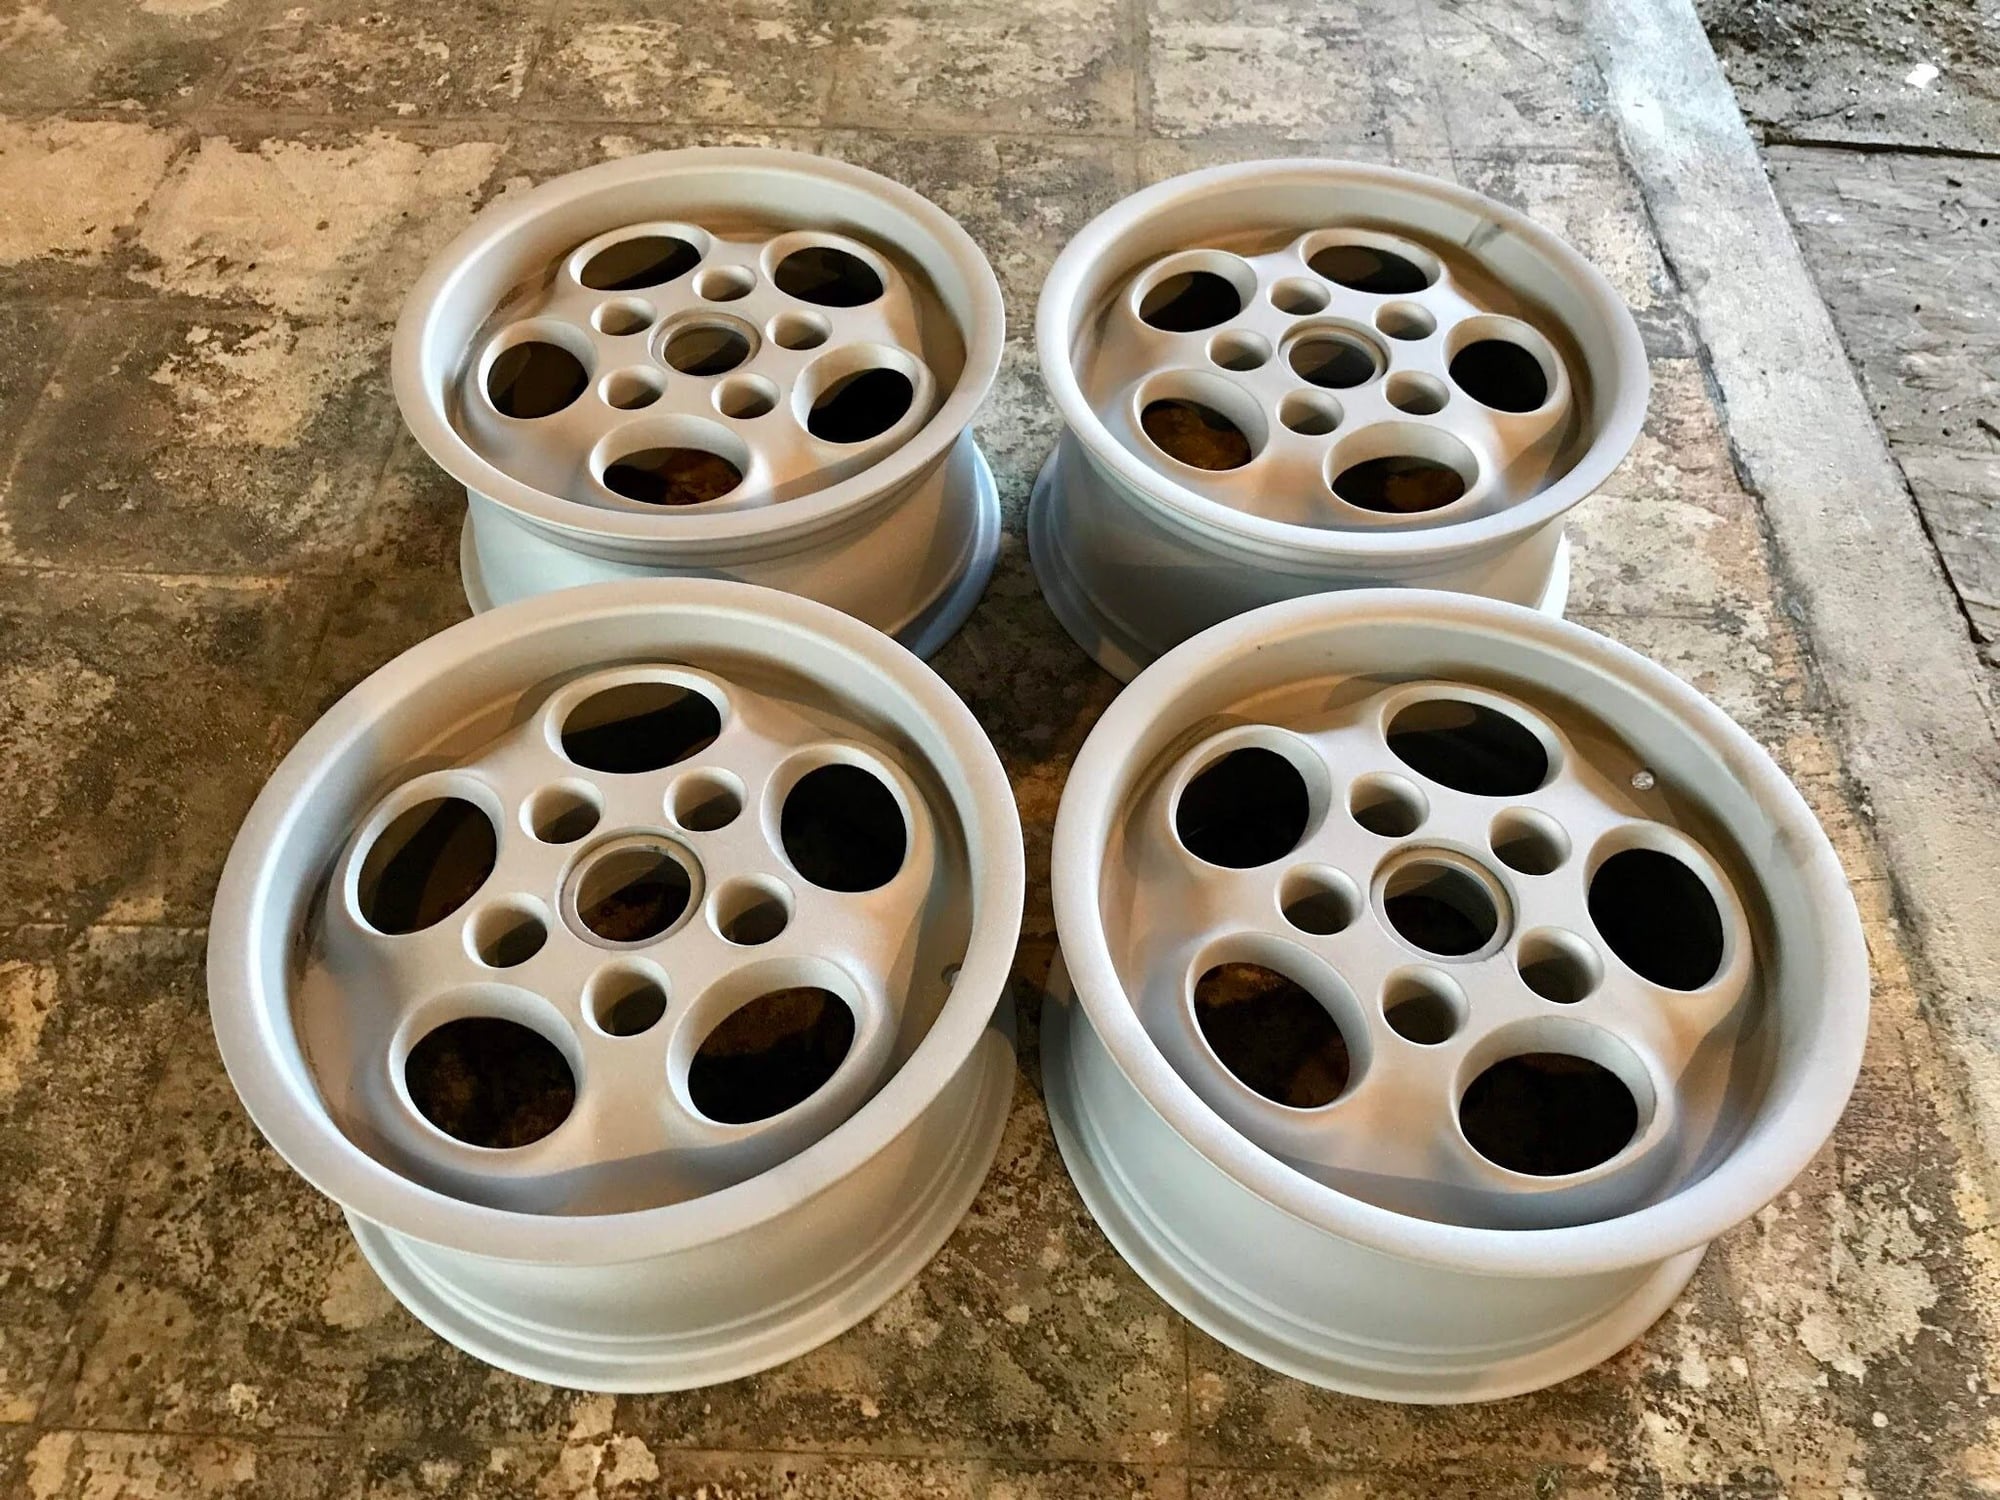
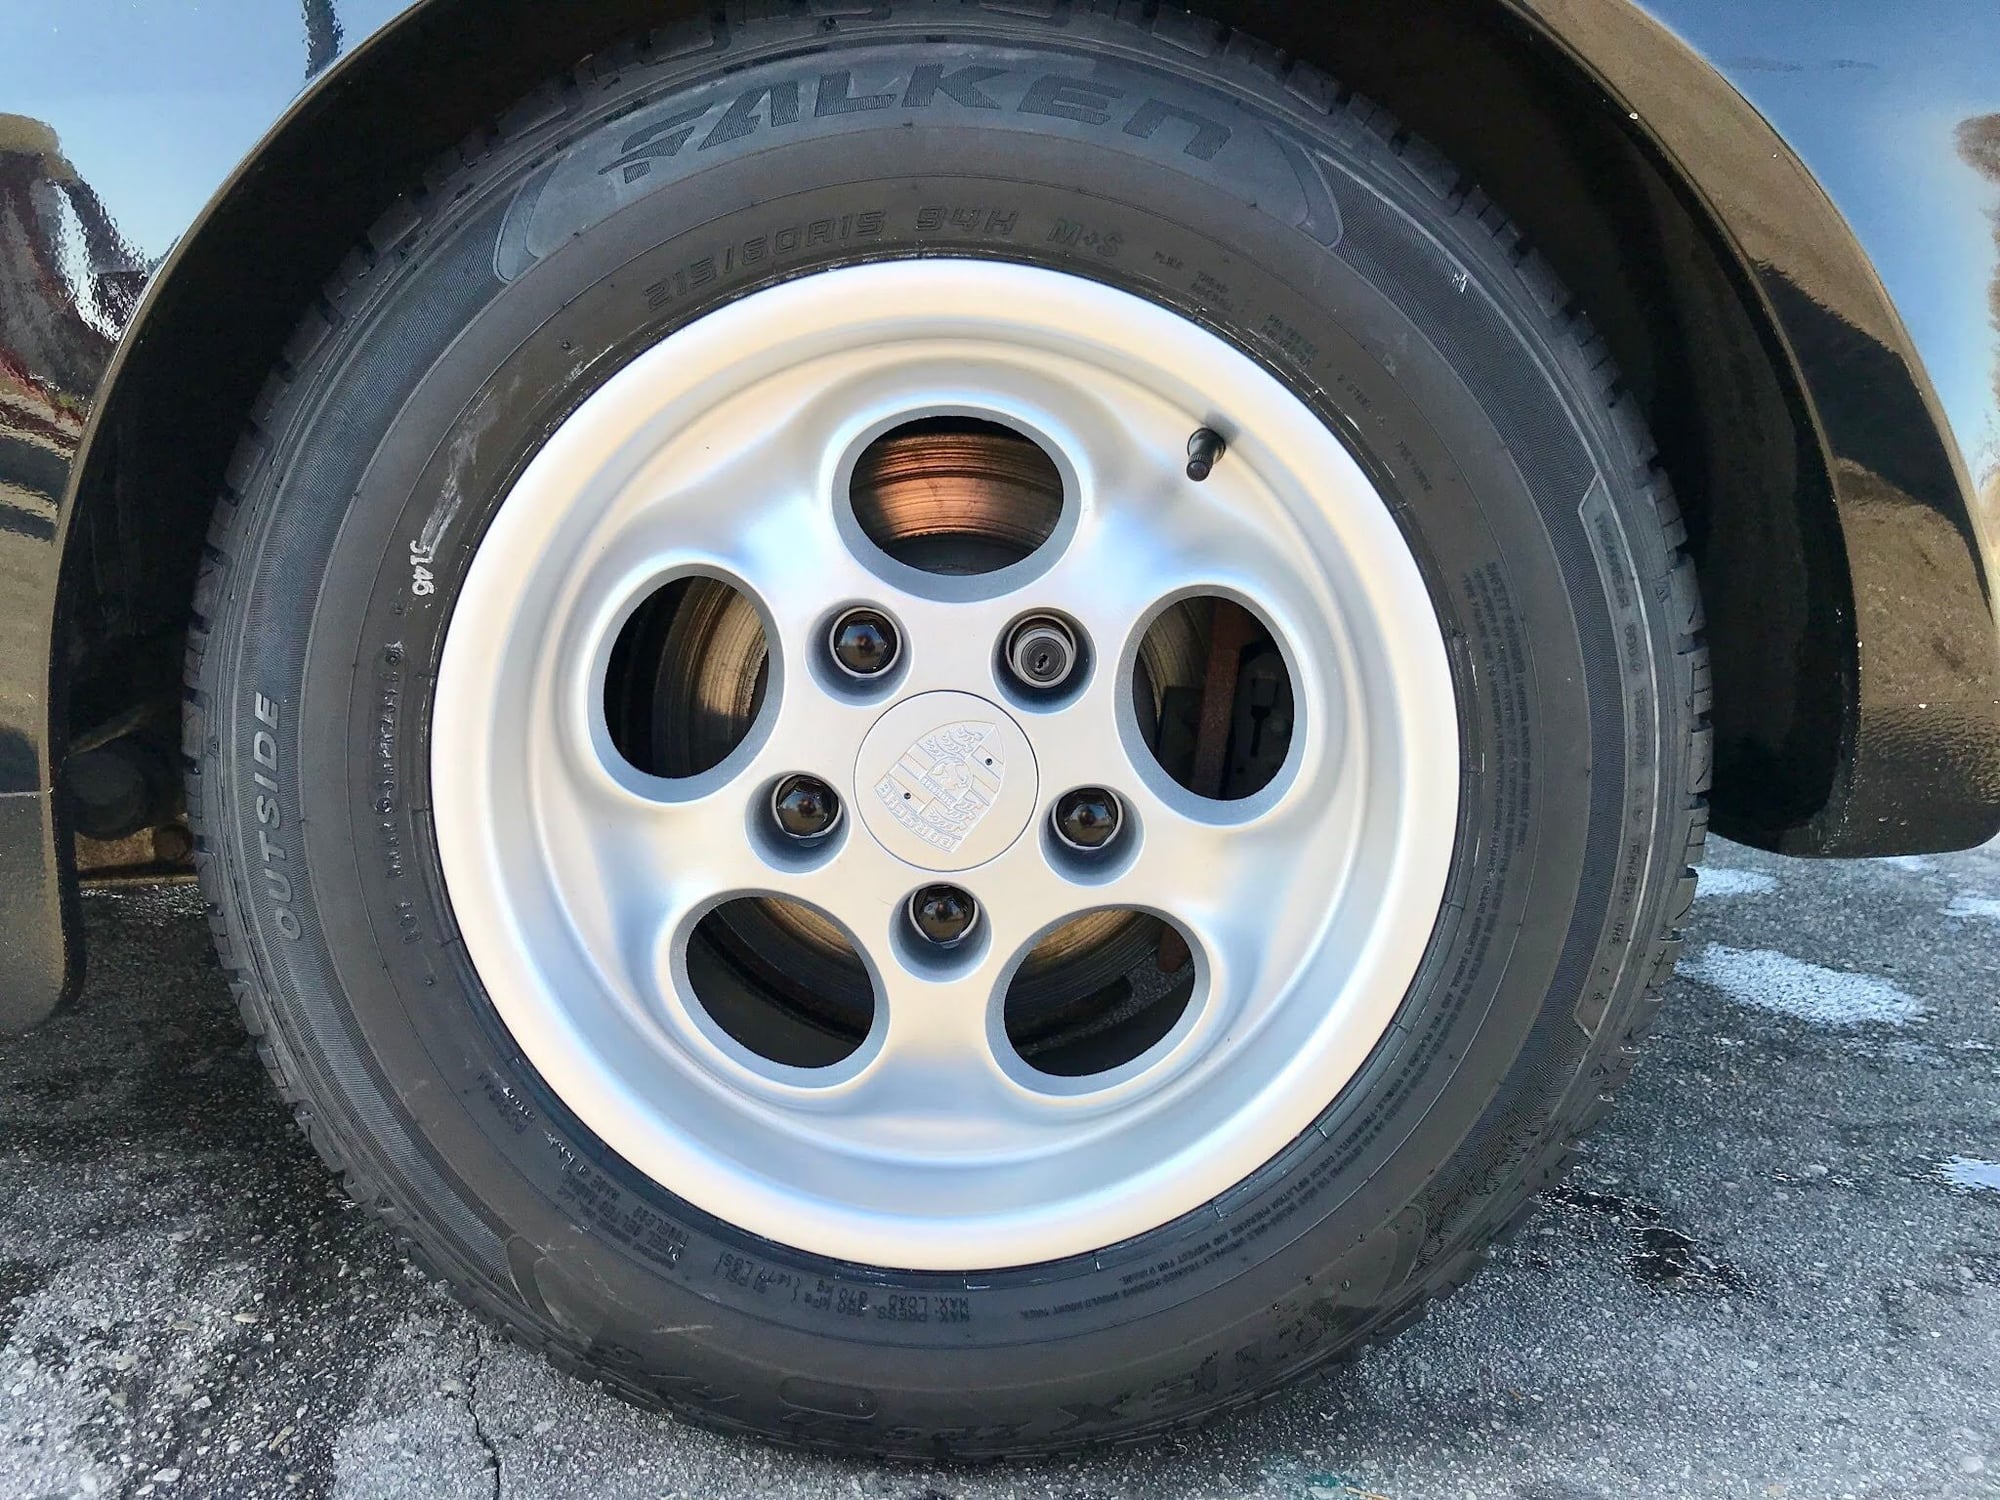
And the finished product, painted with Wurth Silver Wheel Paint and their clear lacquer. I ended up using 3 cans of primer, 3 cans of paint and 3 cans of clear for all 4 wheels.
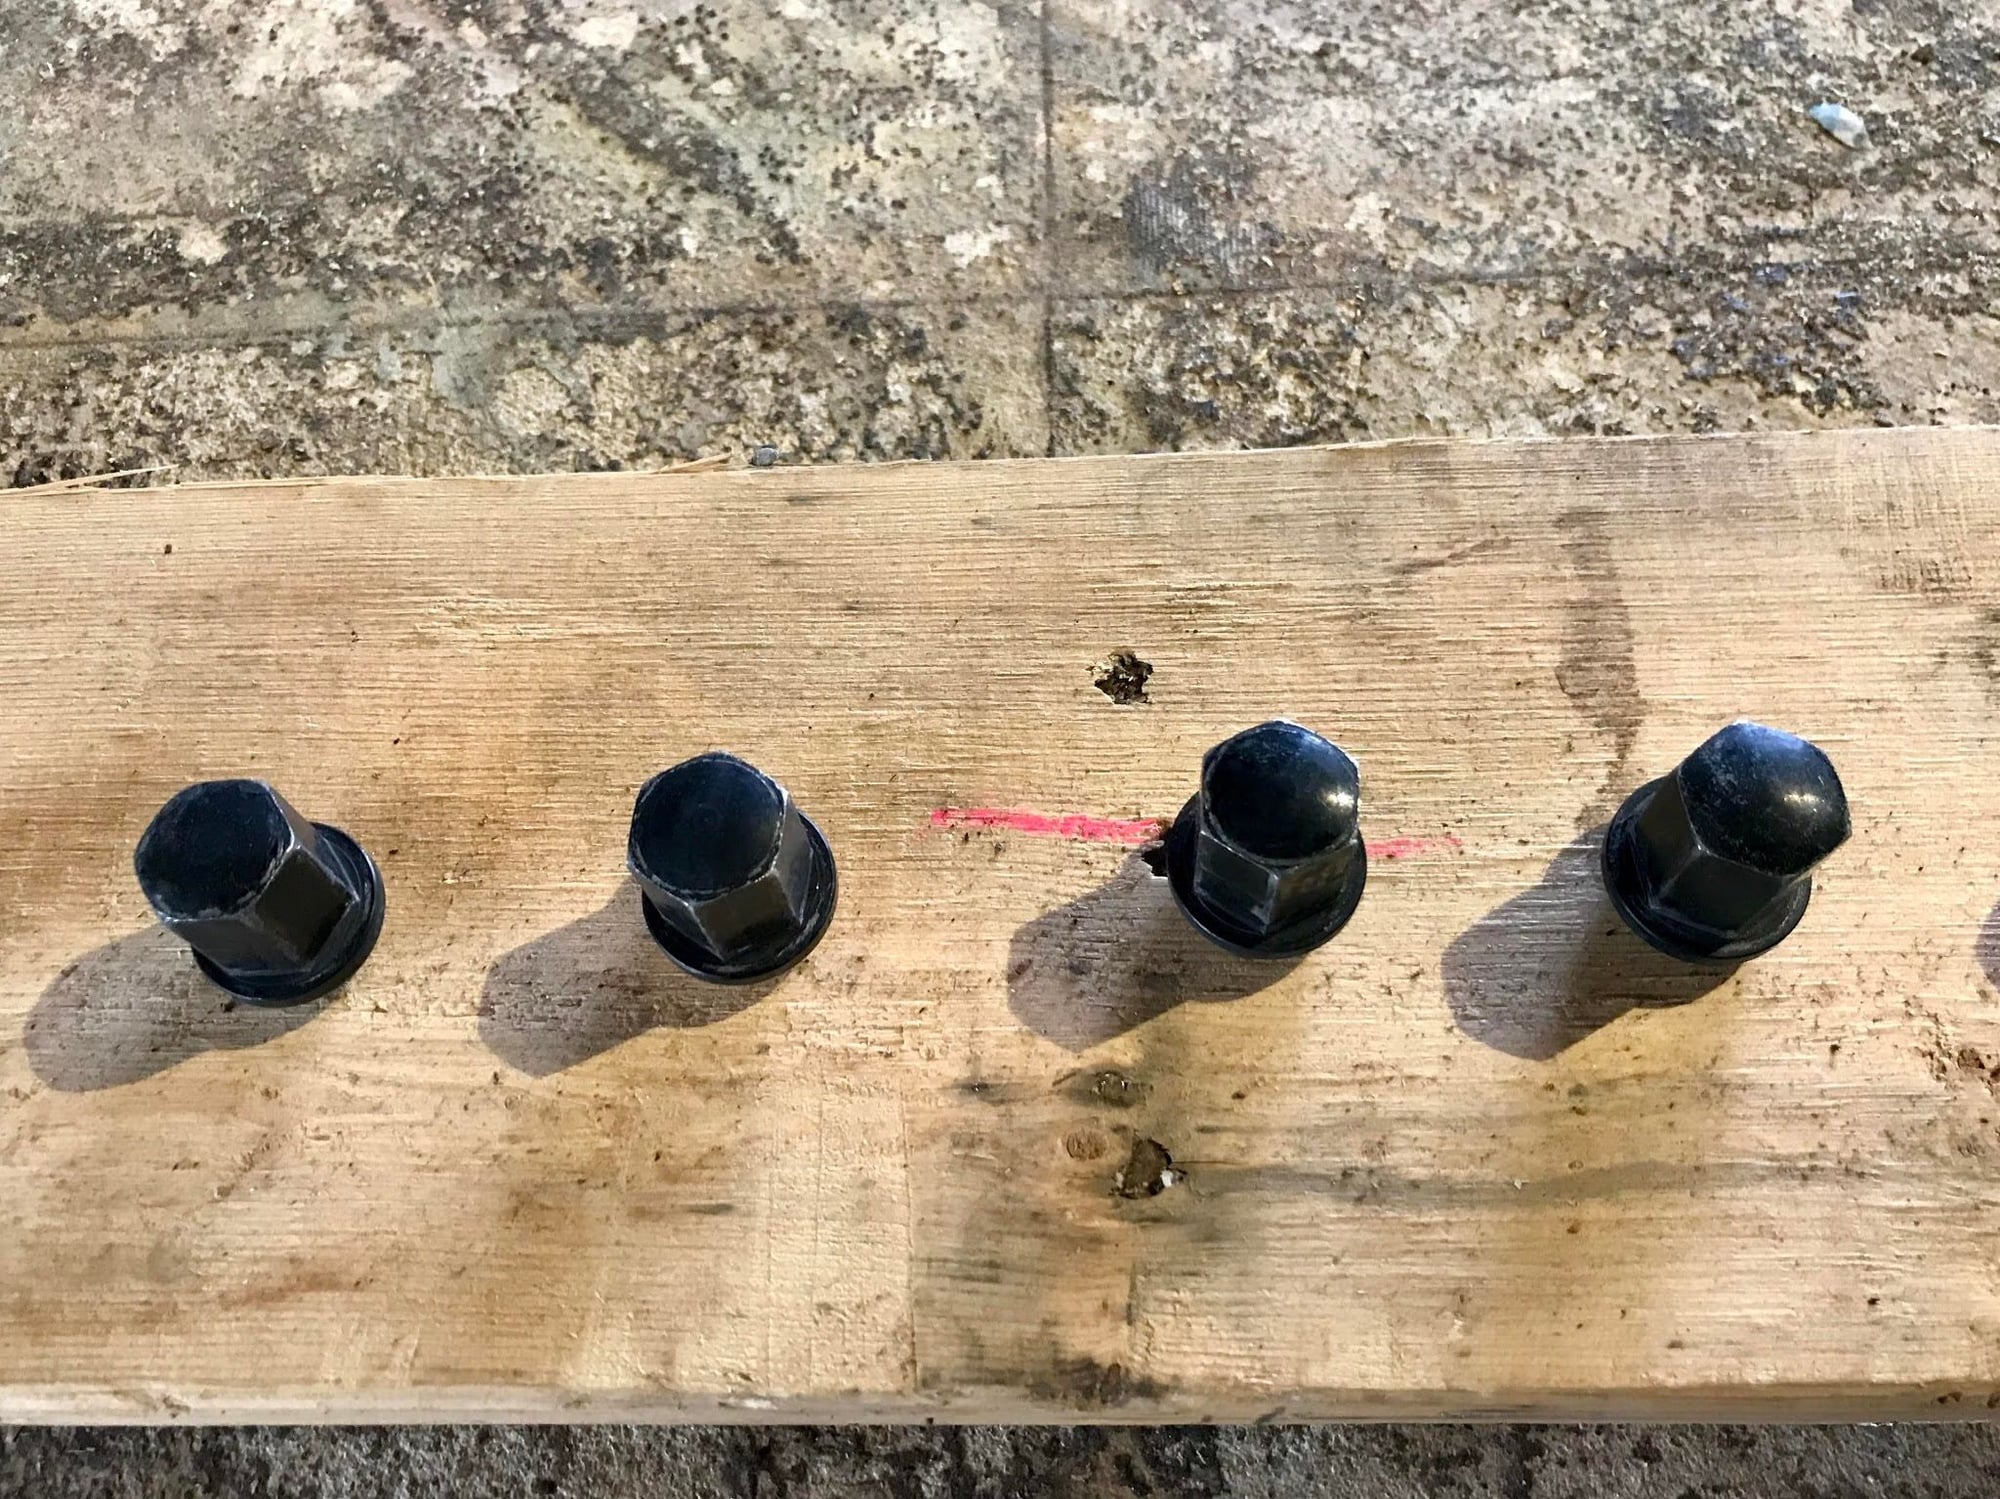
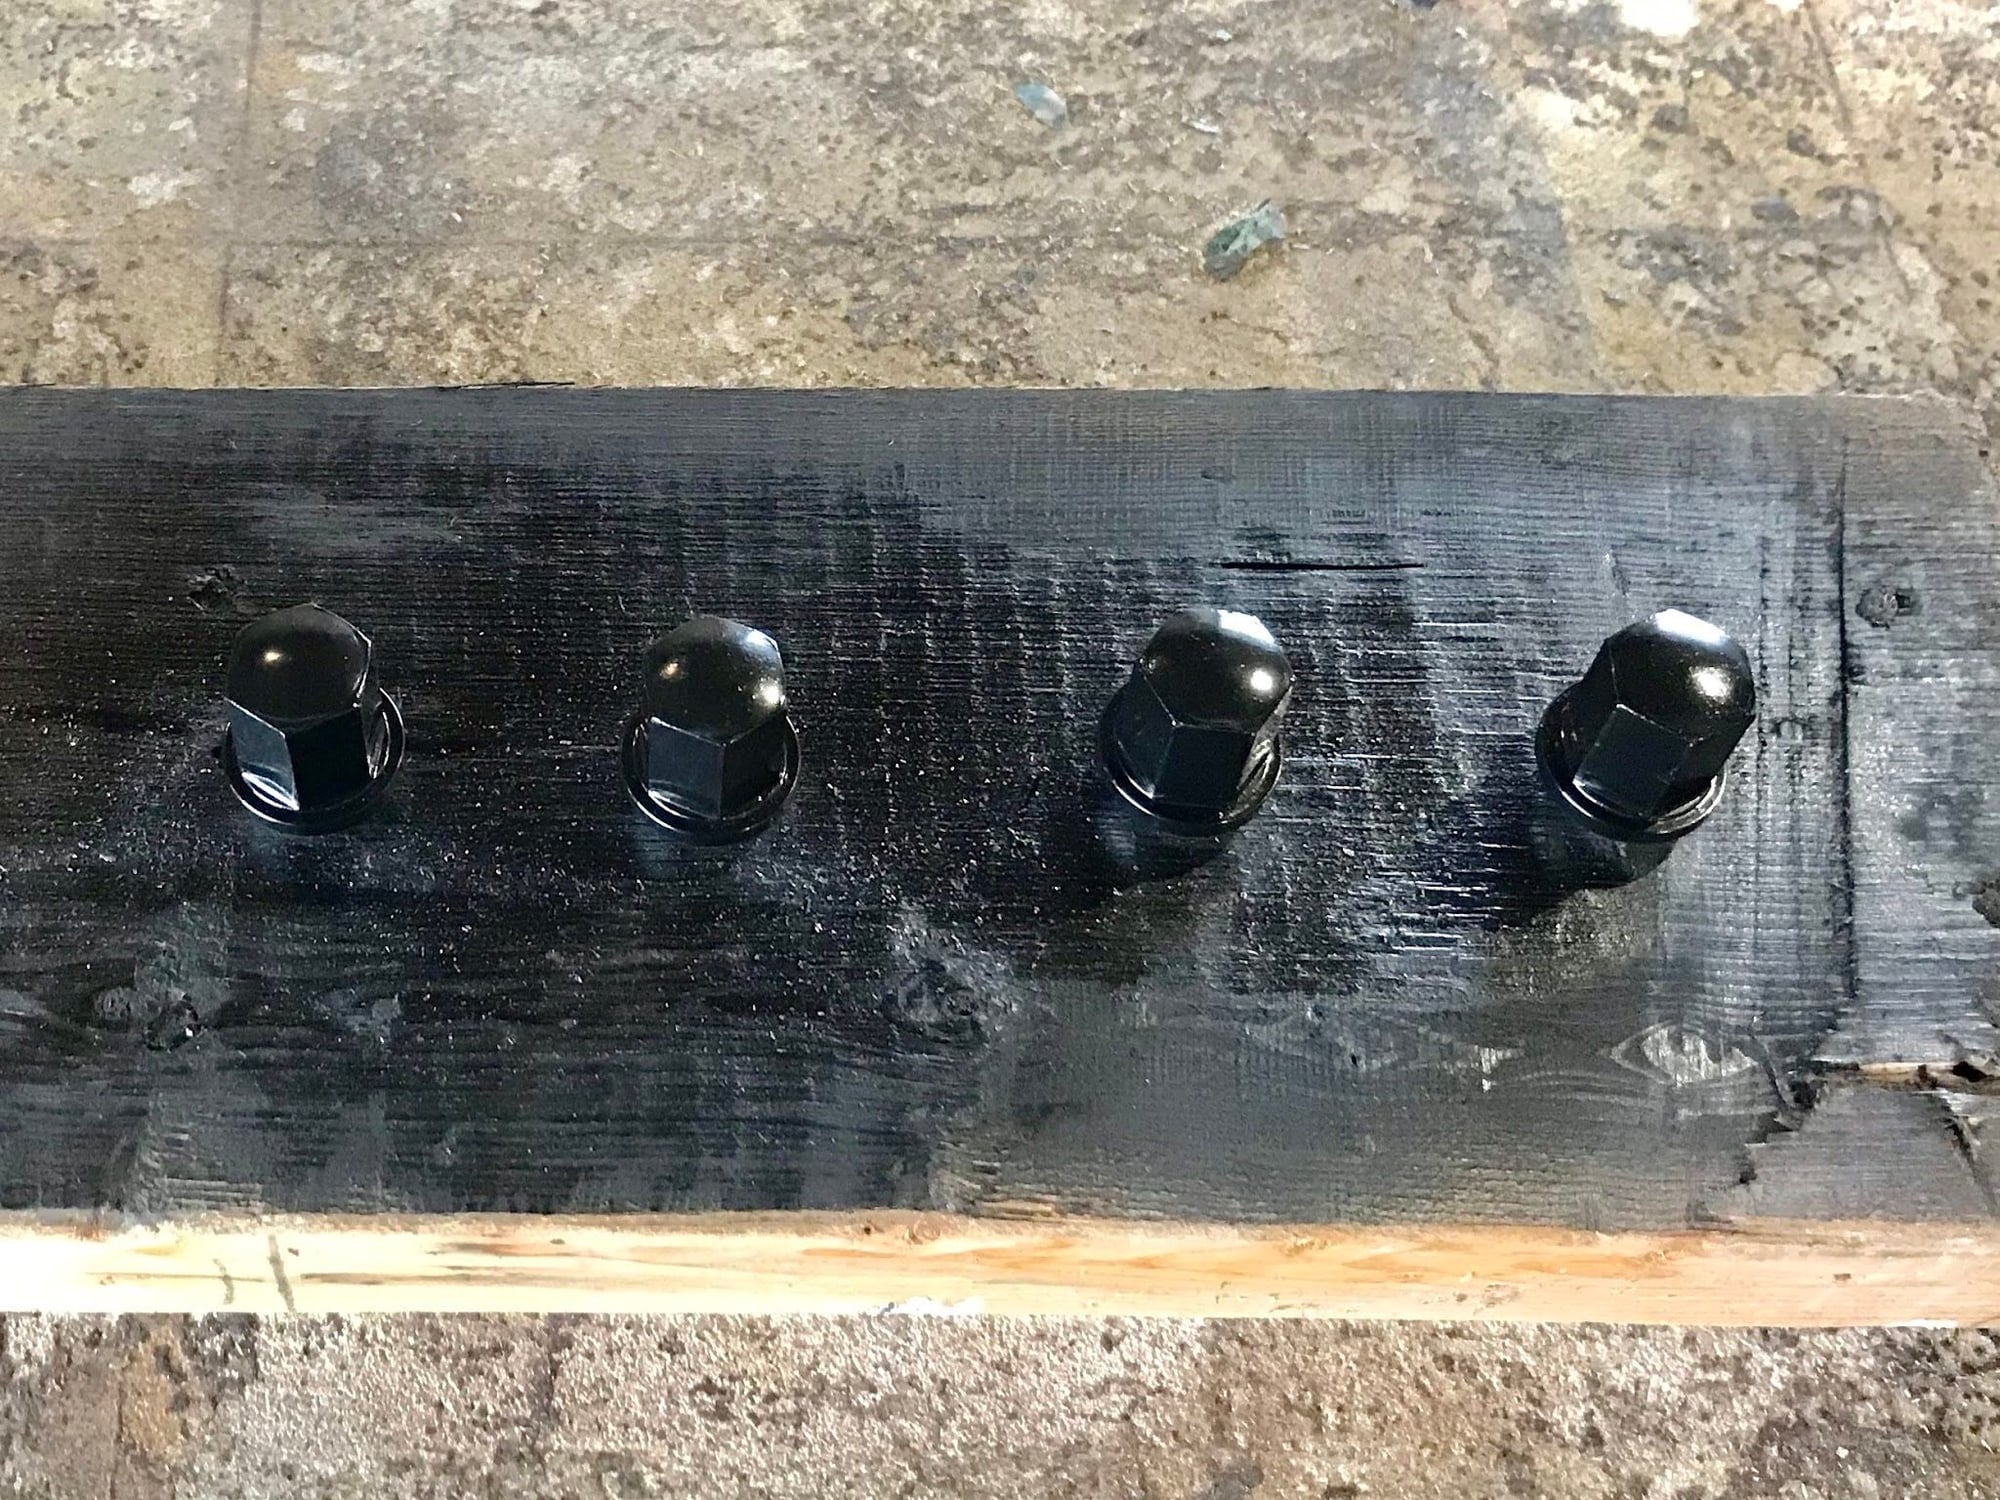
I painted my lug nuts while I was at it with some VHT epoxy paint. Looks like they�re factory black anodized but the paint turned out pretty well and was a lot cheaper than buying a new set of nuts.
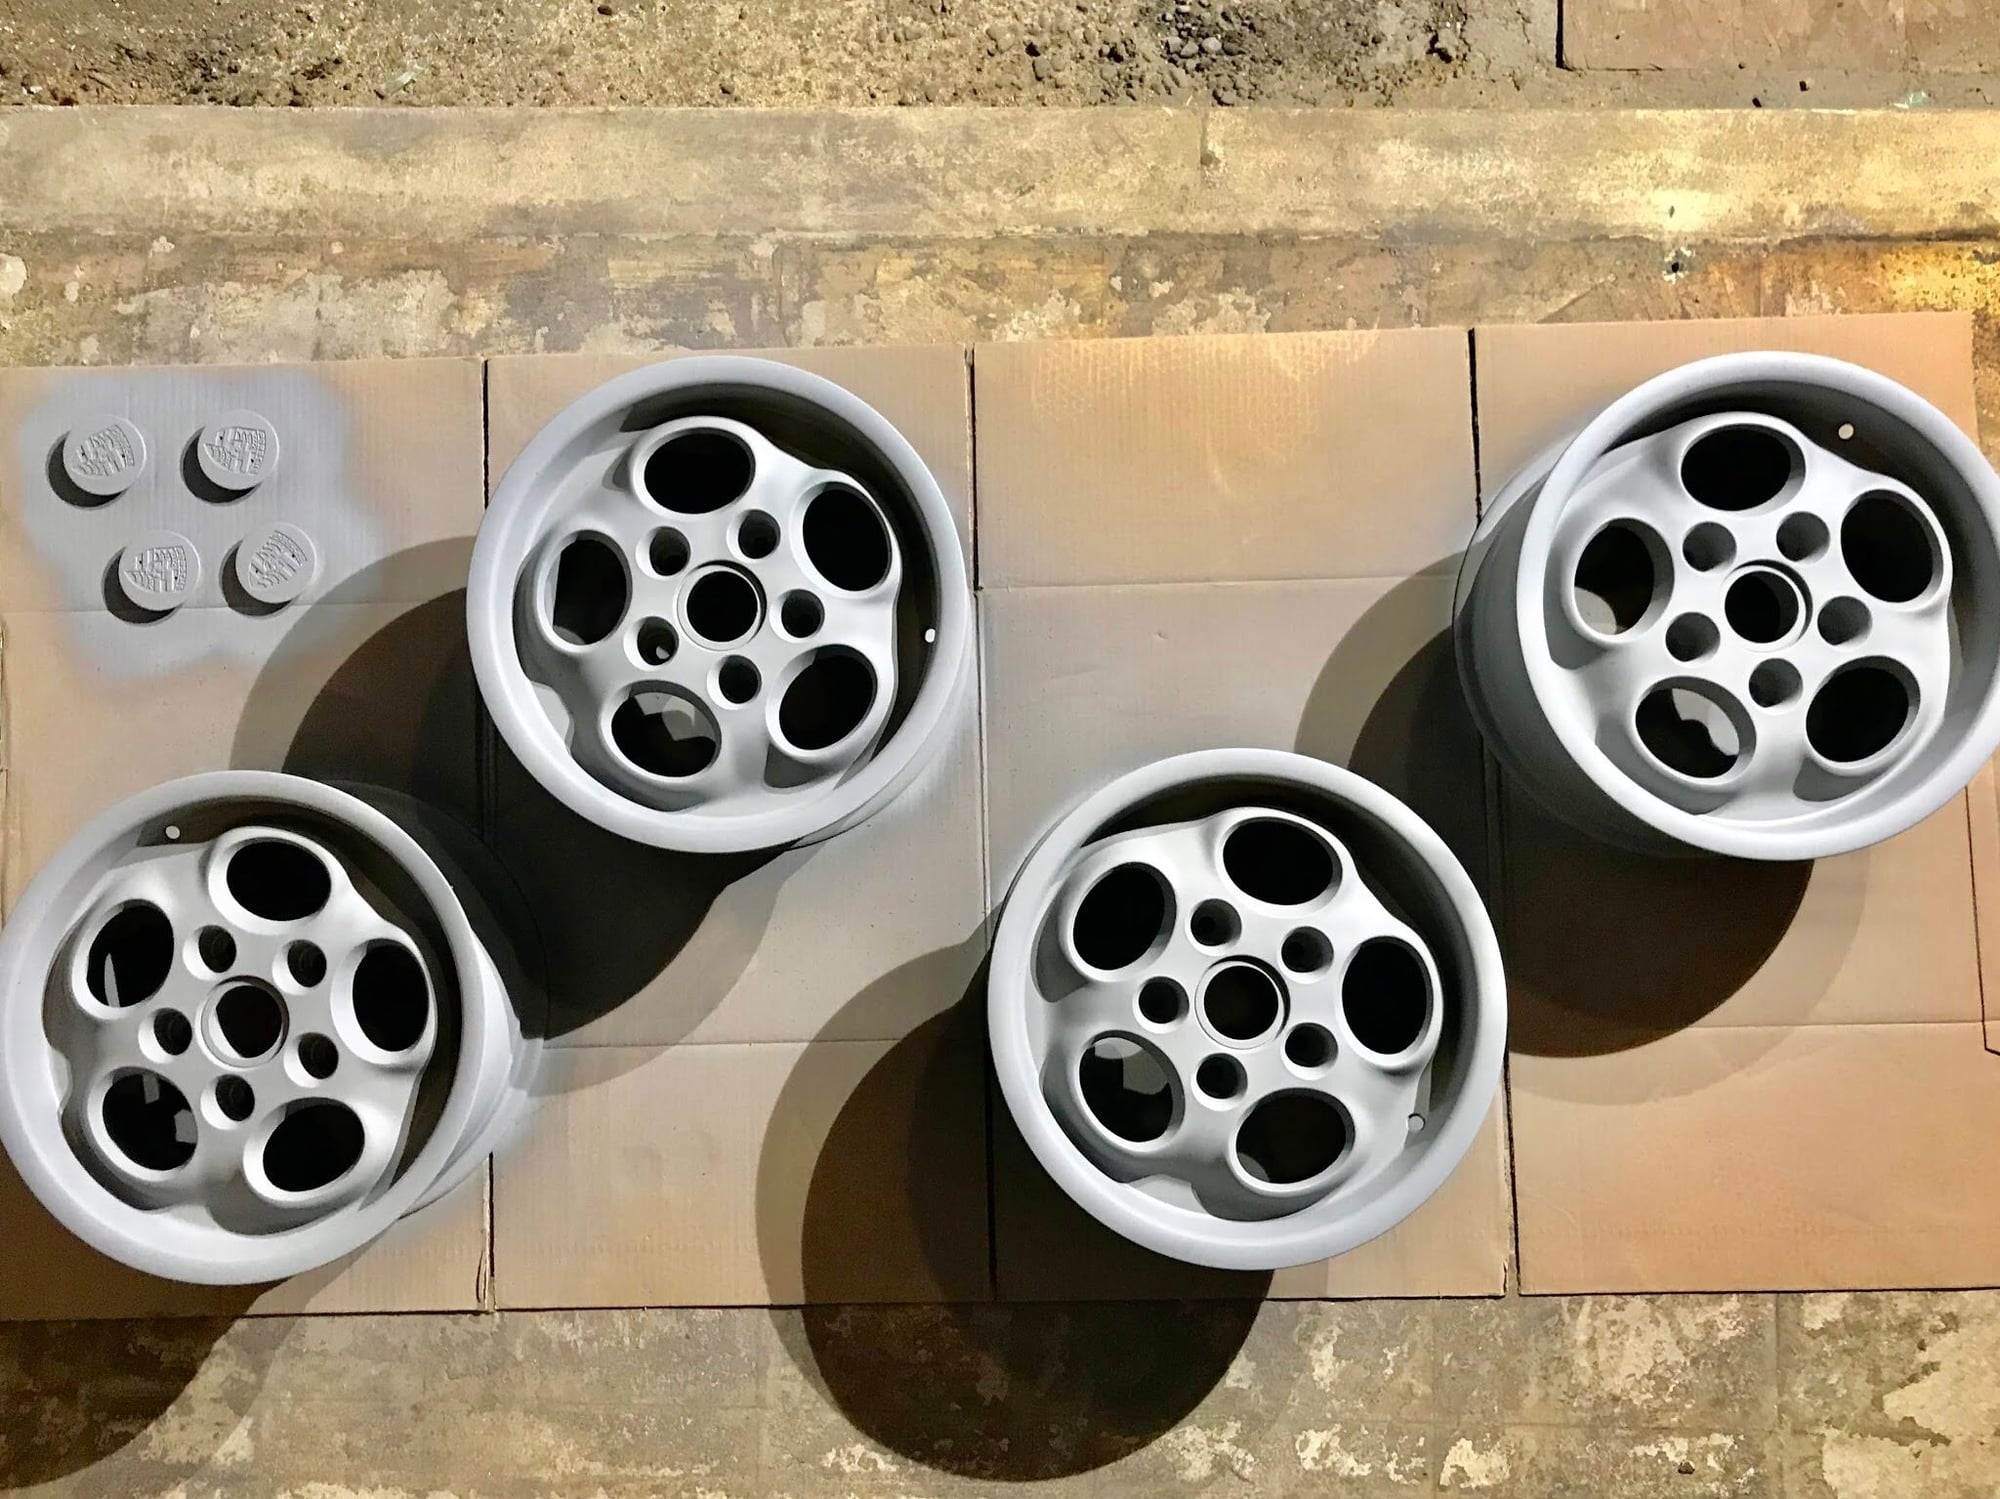
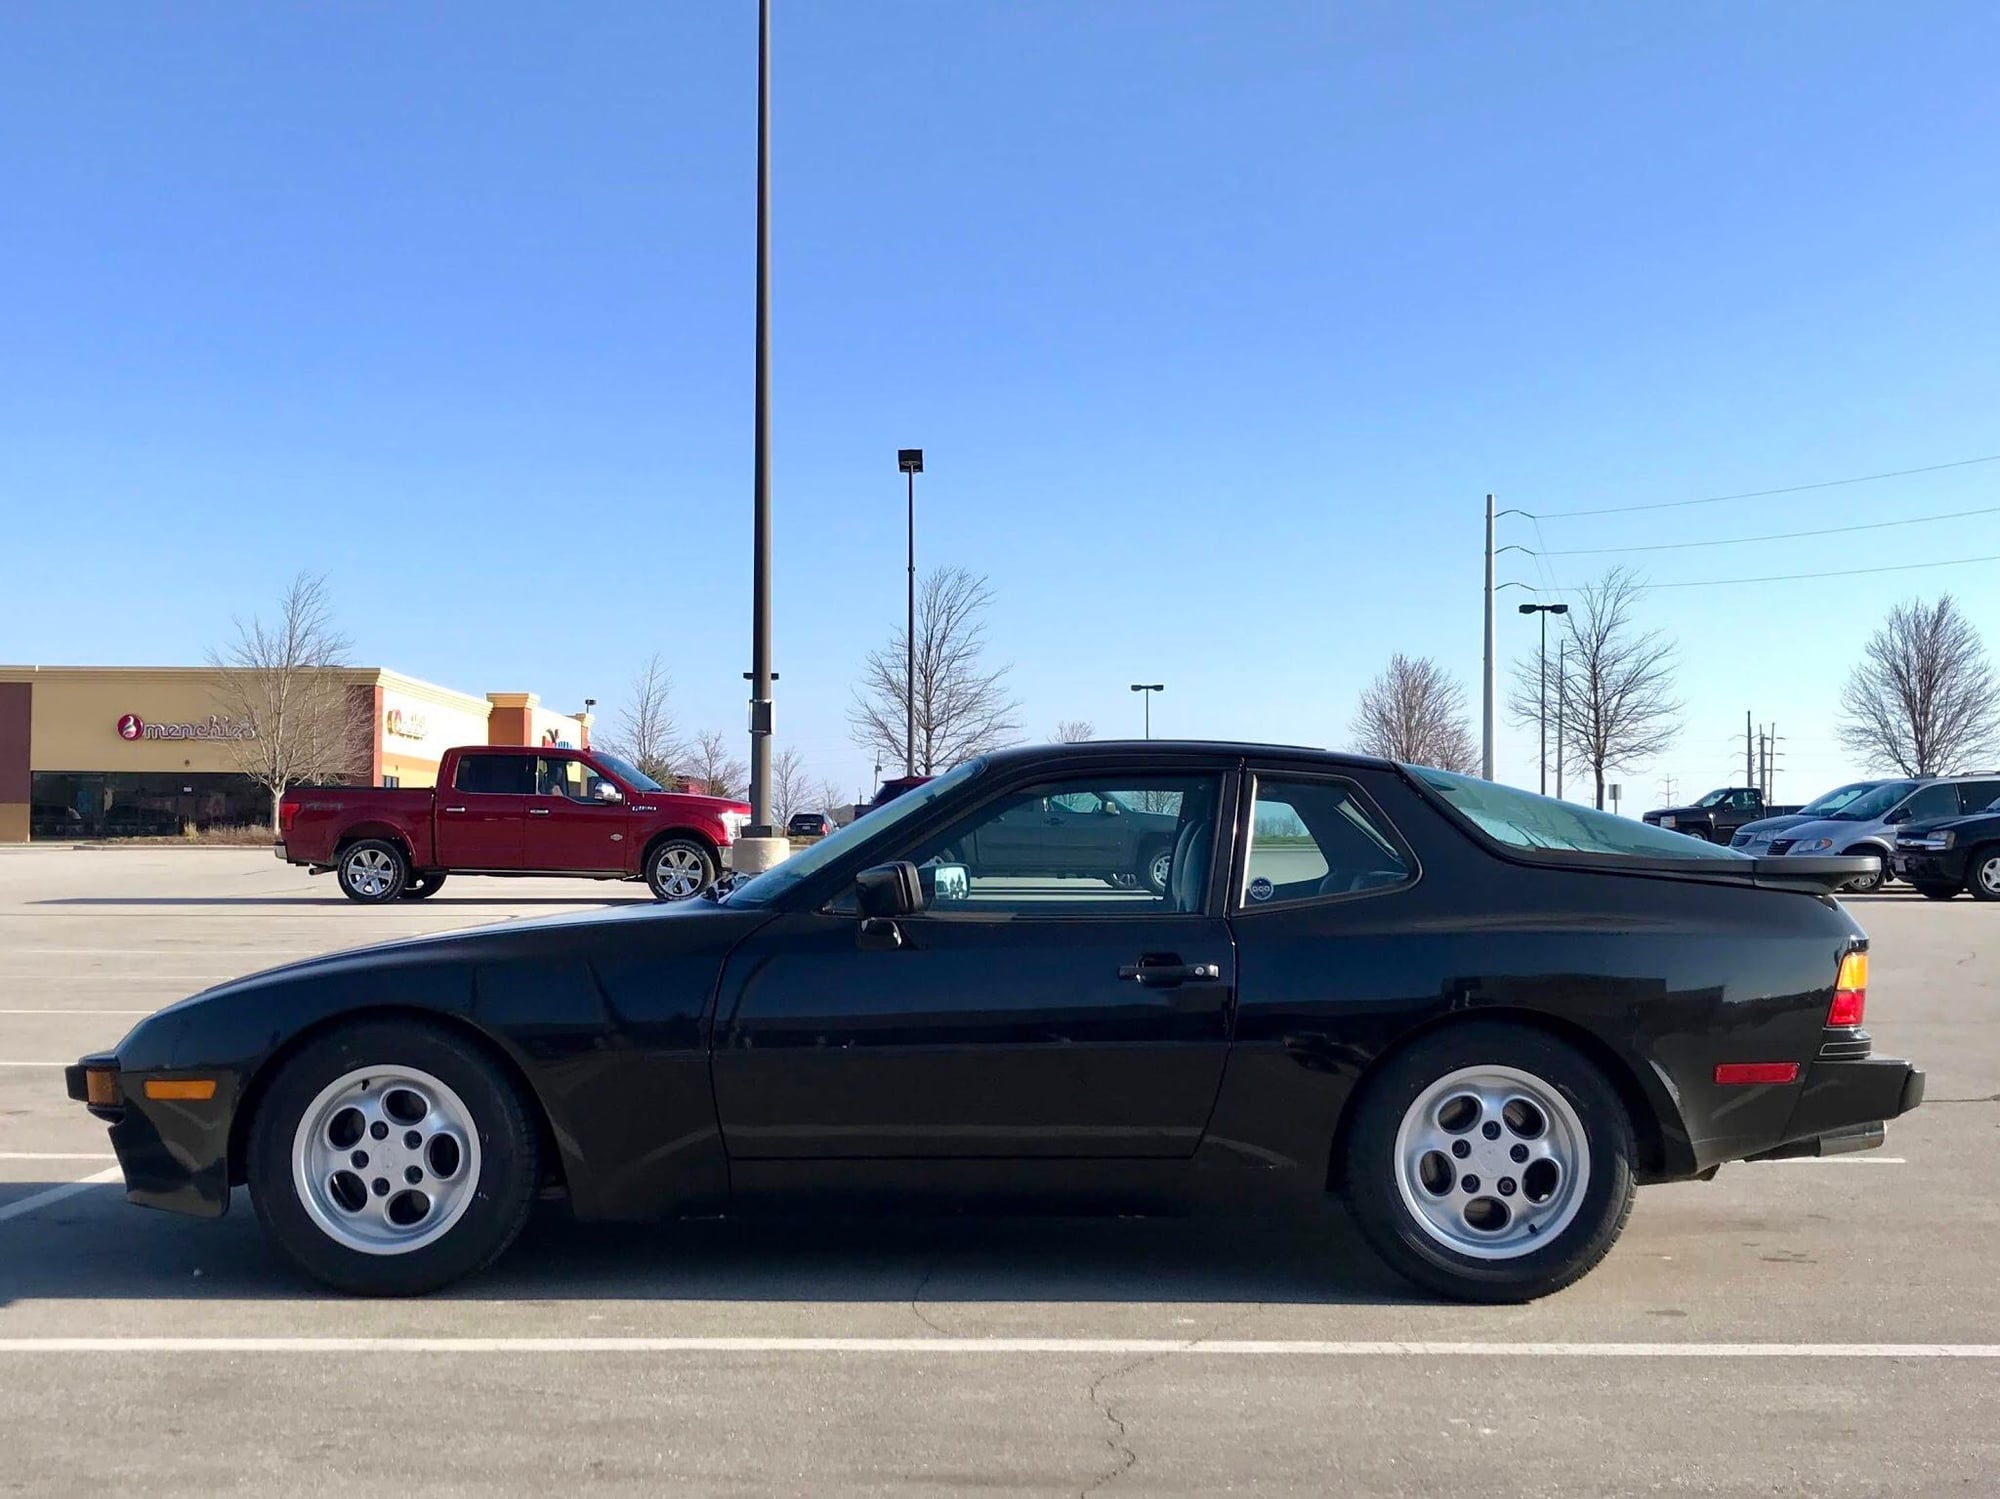
The finished product on the car along with a close up shot. What do ya�ll think?
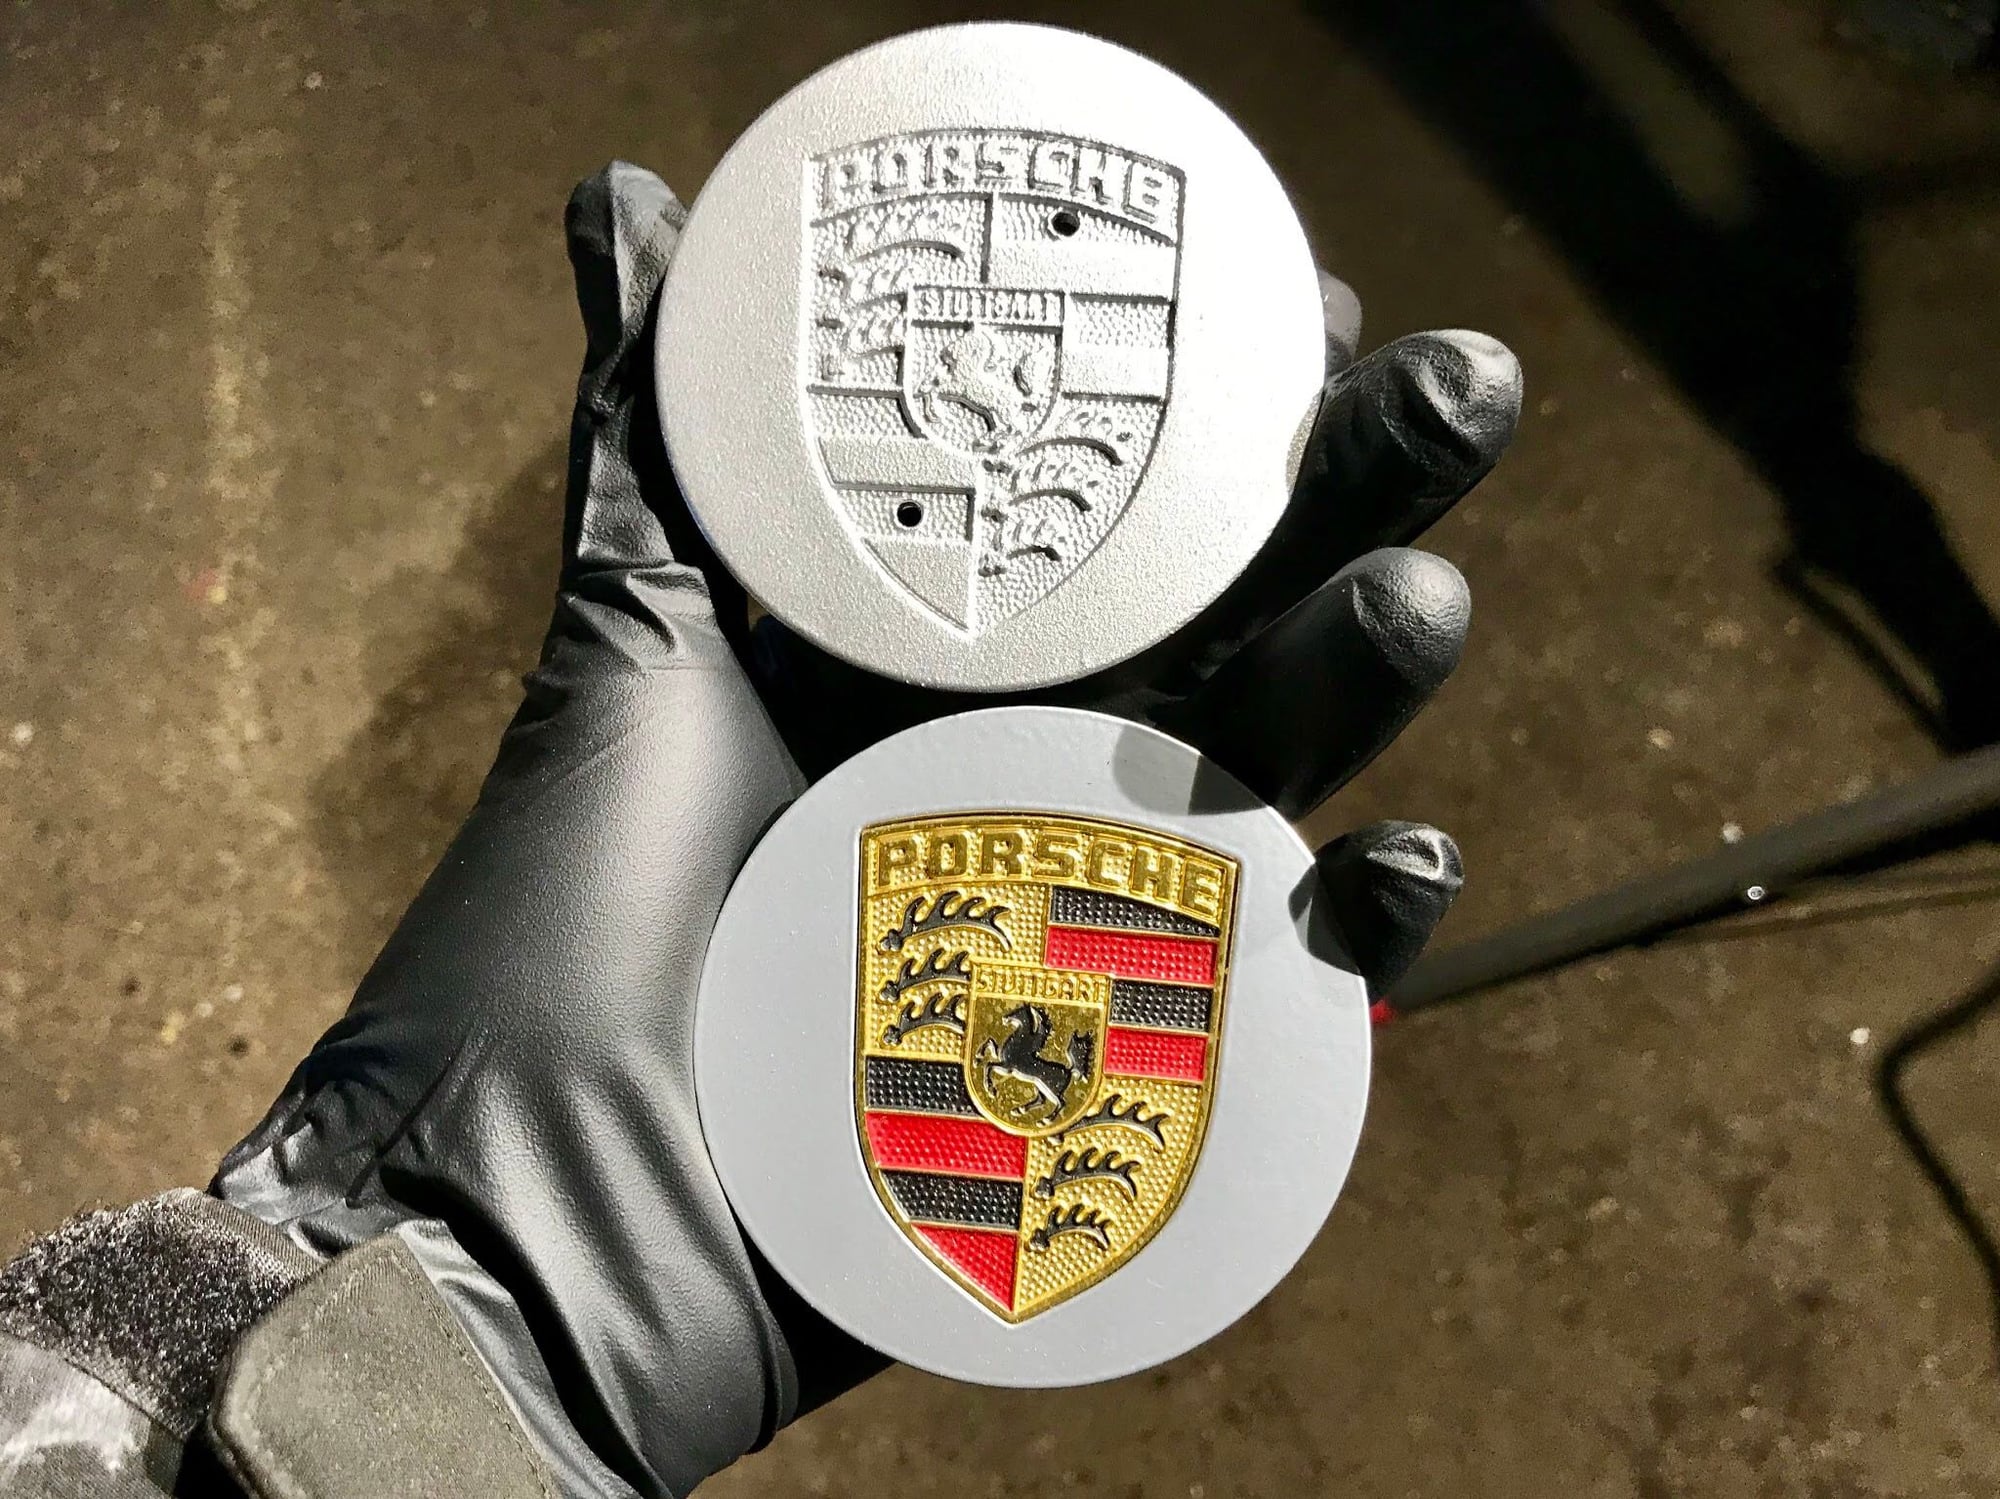
So I have a set of center caps that my wife got for me when I first got the car. I really like these caps because they have the colored, inlaid Porsche crest, but the color of them doesn�t quite match the fresh Wurth paint. These caps didn�t match the original wheels either, but I was hoping once they were repainted the match would be closer. With the older caps being bead blasted they have a bit of texture that the inlaid crest caps don�t have either.
I�m on the fence as to whether or not I should tape off the crests and try to paint the nicer caps to match the wheels or not. I�d hate to mess them up, but I�m sure the different hue and different texture will probably drive me nuts if I just run them as-is with the fresh wheels. (Yes, I�m a little OCD.)
Anyway, that�s all I got. Had a chance to take the car out for a bit yesterday since it was actually nice here in Wisconsin and it drives great. Needs an alignment to finish it off but new bushings, ball joints and tires sure make a difference in how it drives. Just like when I rebuilt the shifter, I didn�t realize how bad it was until it had some new parts in there.
Enjoy the week ahead.
�Justin
Last edited by JRP944; 07-02-2021 at 01:04 PM.
Reason: Adding title
Hard work pays off yet again!! I think the wheels turned out great!! I would personally use the non painted crest center caps as they match the wheels perfectly. I would notice the color difference if it were my car and it would bug me personally. In every picture I would likely notice the difference. But that's just me really. I think they came out great!!
 06-14-2018, 09:27 AM