When you click on links to various merchants on this site and make a purchase, this can result in this site earning a commission. Affiliate programs and affiliations include, but are not limited to, the eBay Partner Network.
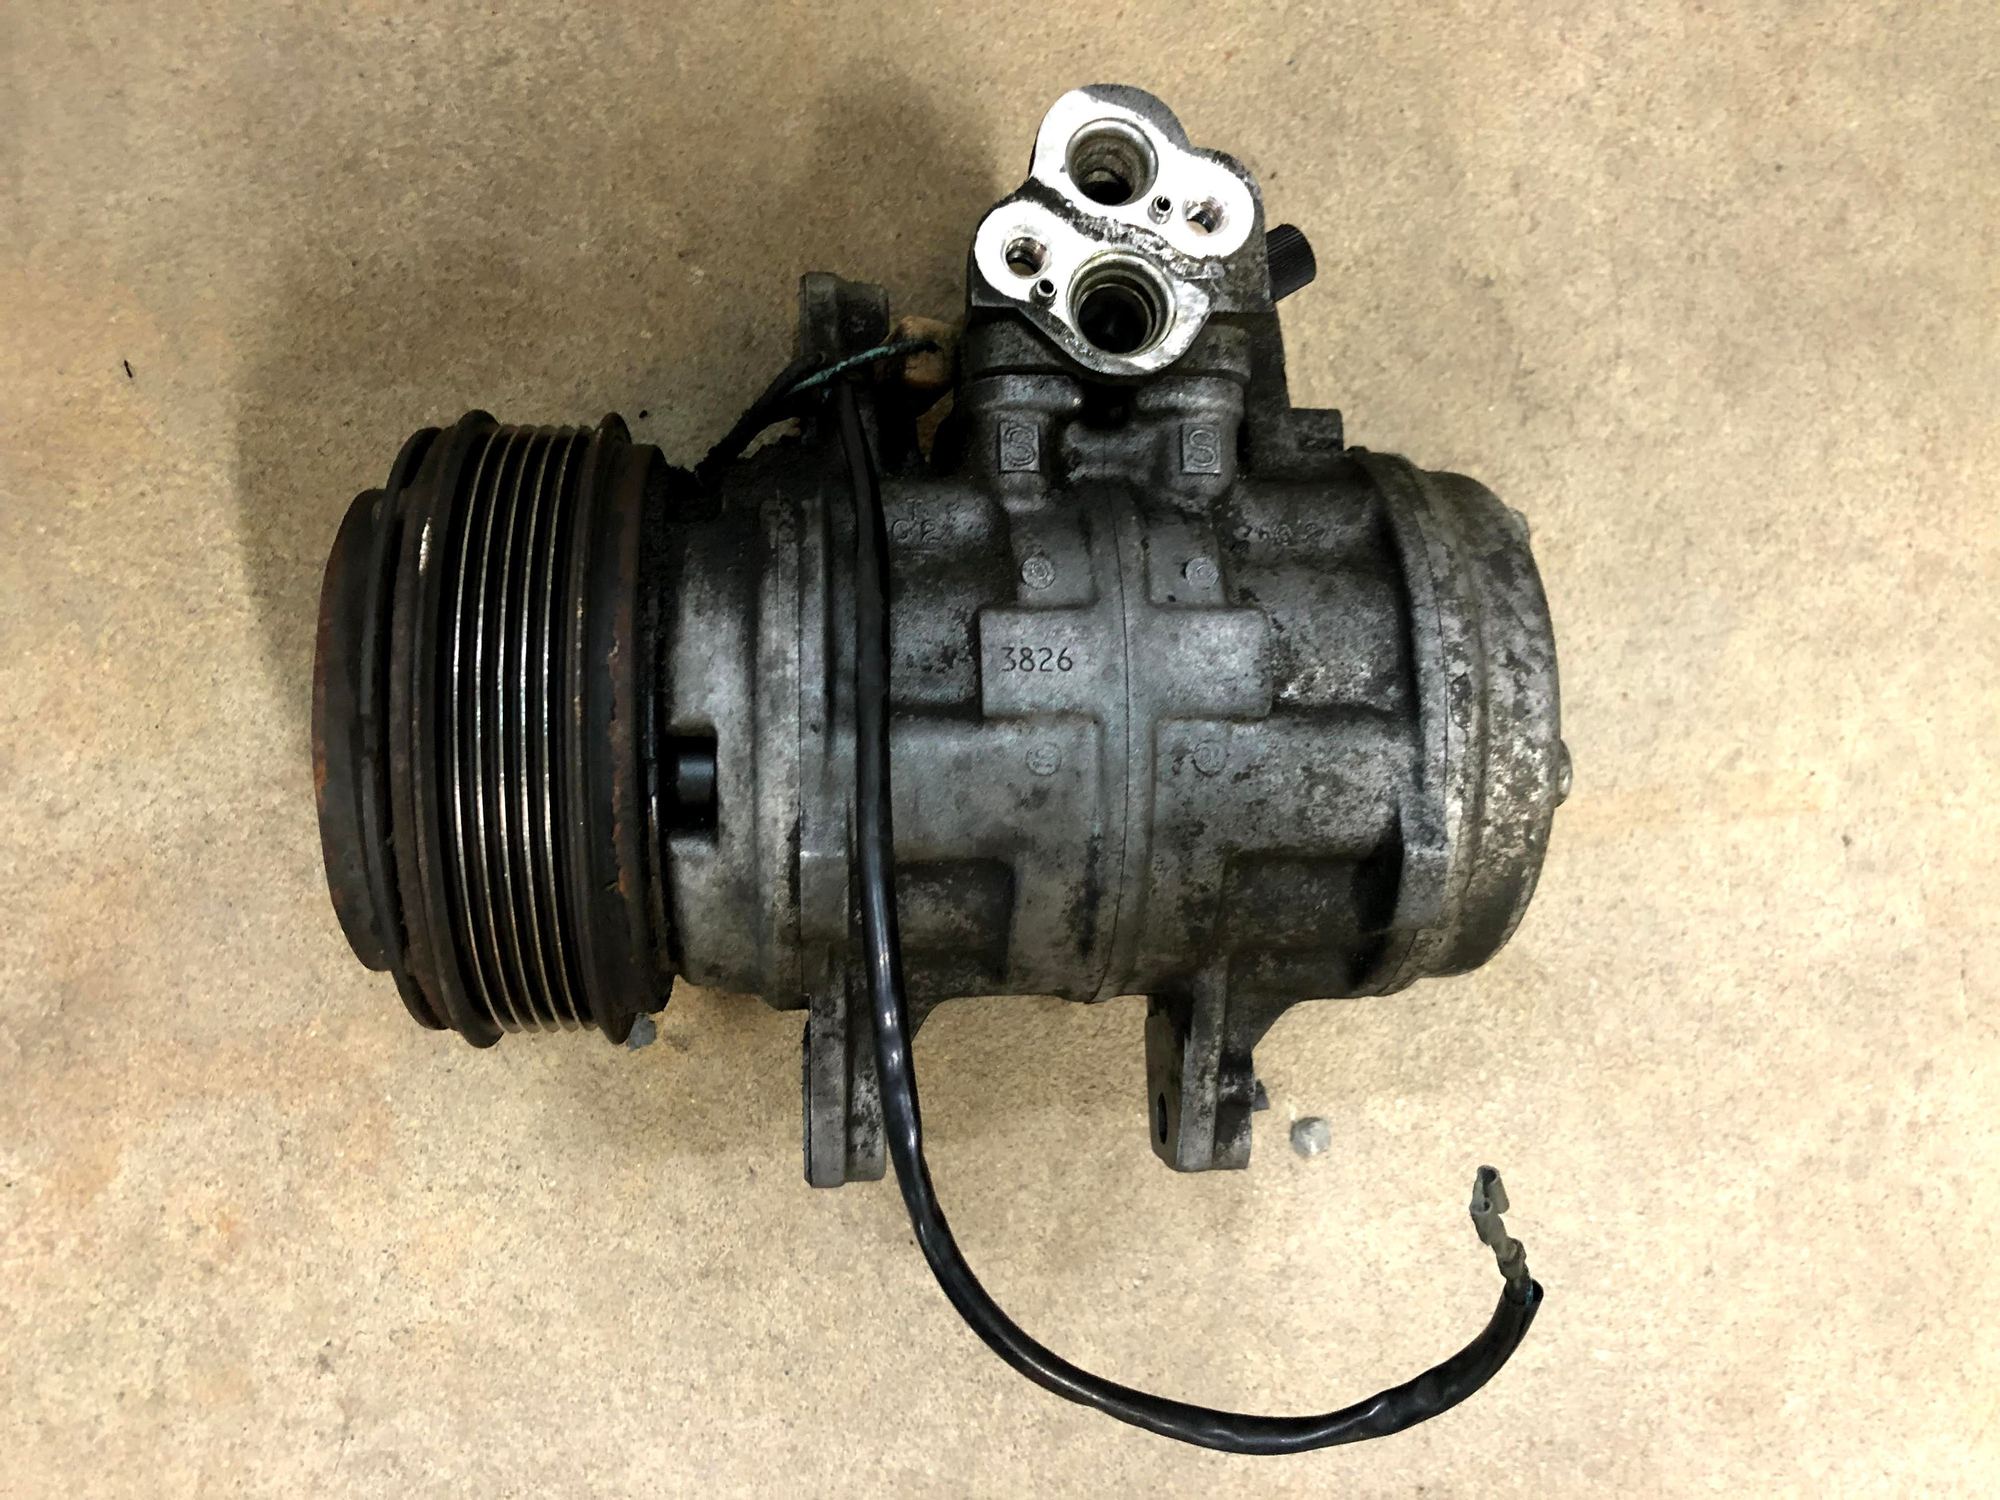
Finally got around to rebuilding my A/C compressor and re-charging the system. I last charged it in 2018 and it worked fine, but within a month of each re-charge everything would leak out via the compressor mechanical seal and the O-rings at the high/low pressure lines on the compressor. Considering I still run R12 in this car, I felt I shouldn't keep letting this refrigerant leak into the atmosphere. I purchased a seal kit and receiver/drier from Griffith's in 2020 and never got around to doing the work. Well, that finally changed...
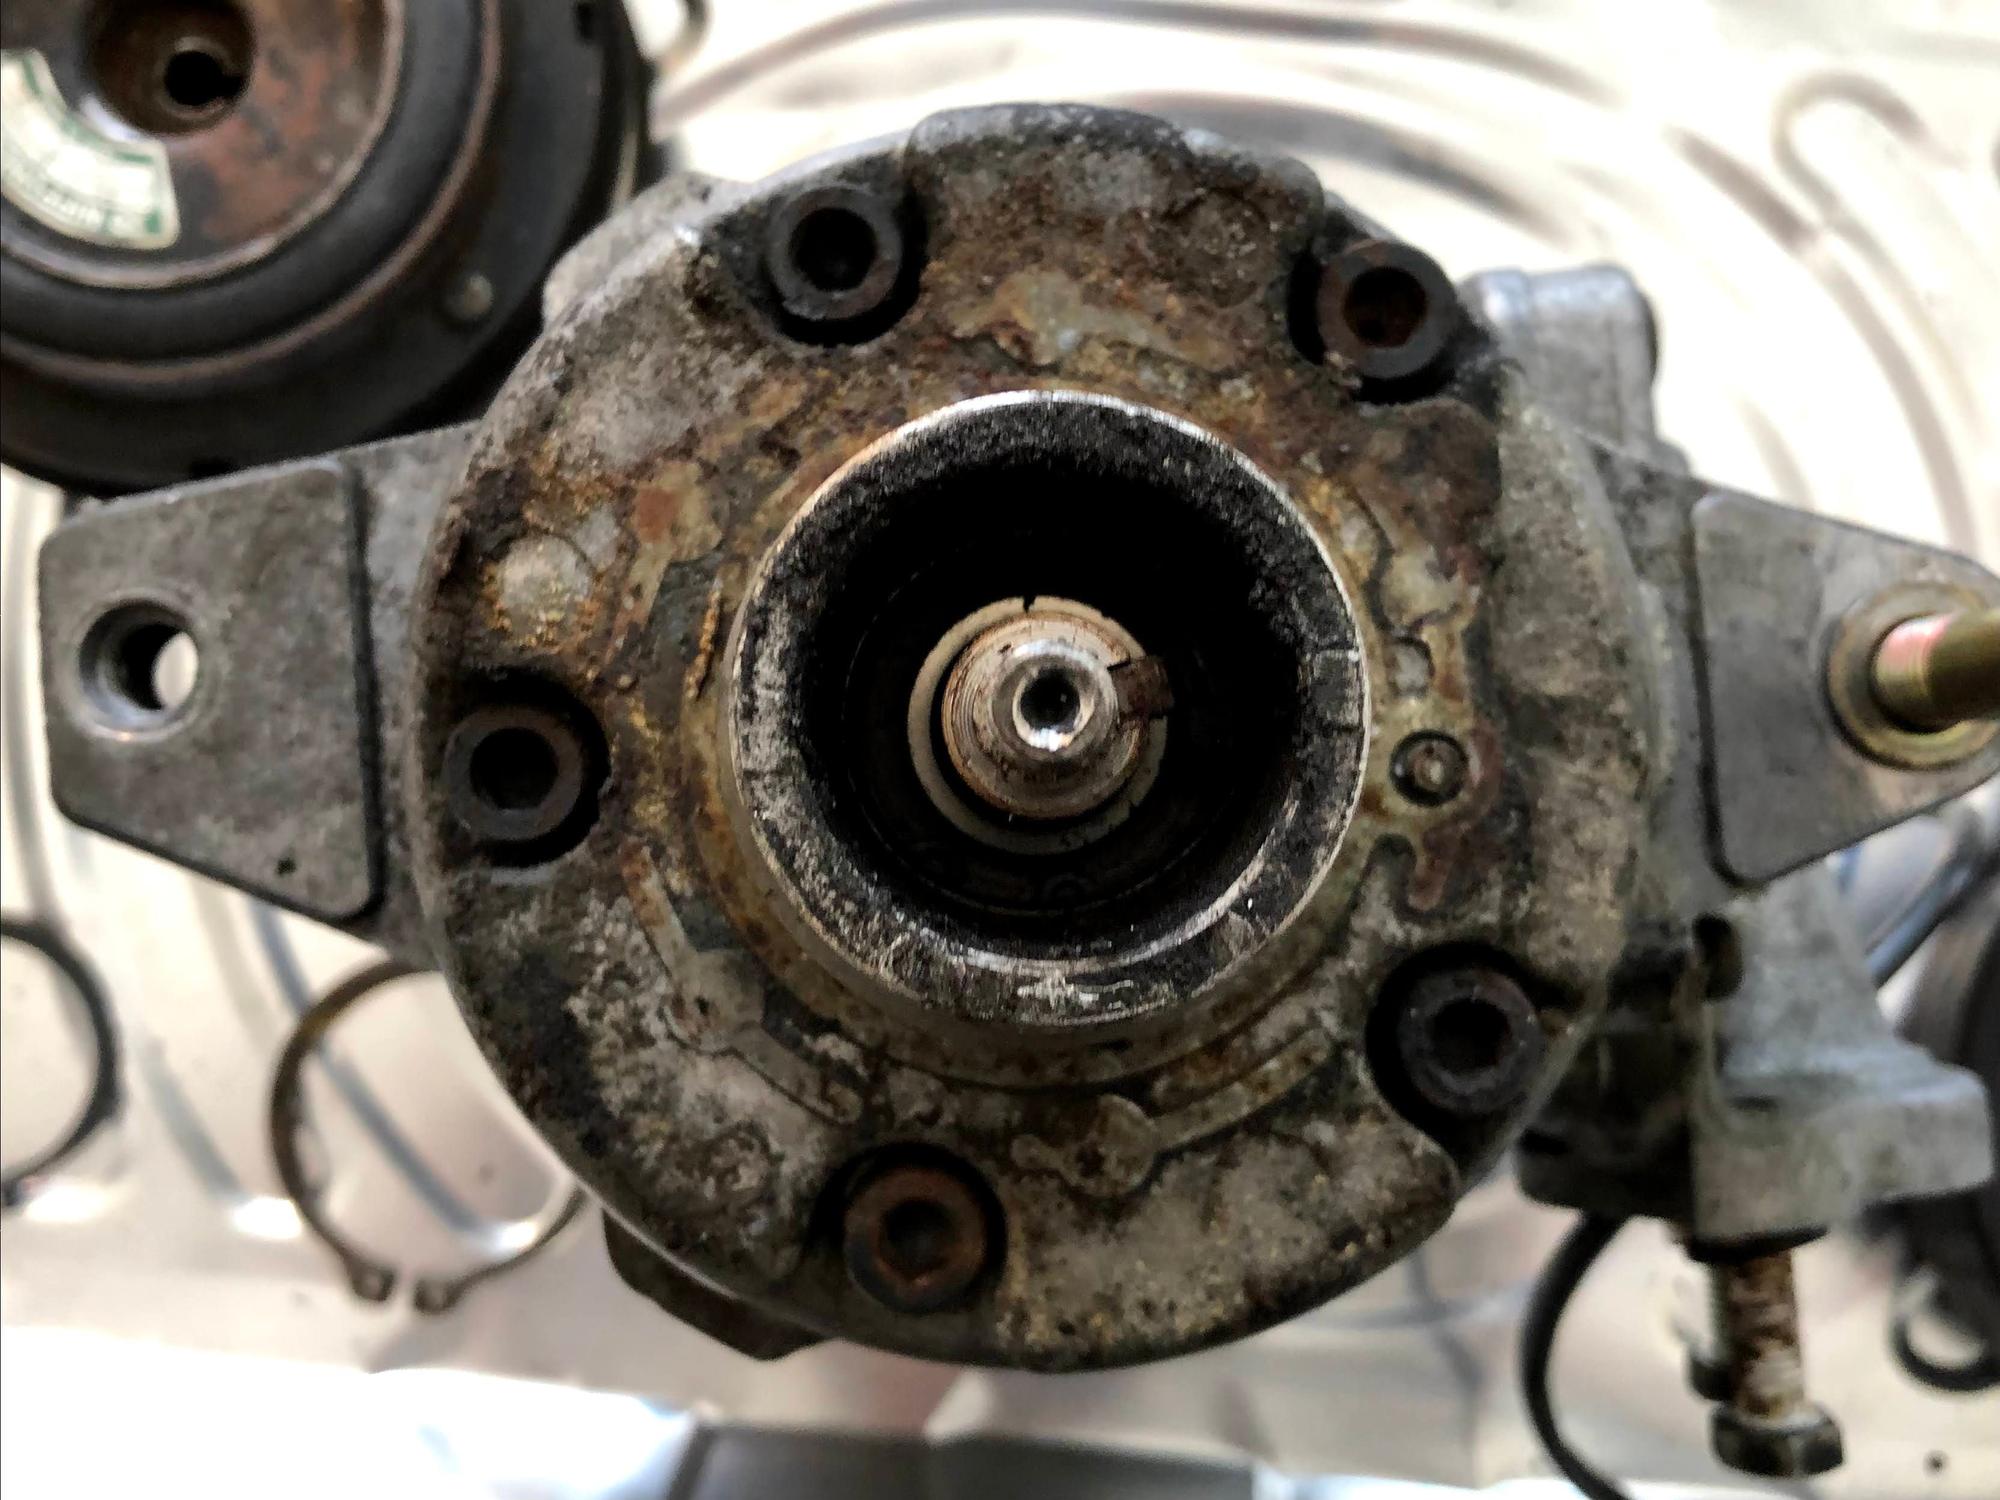
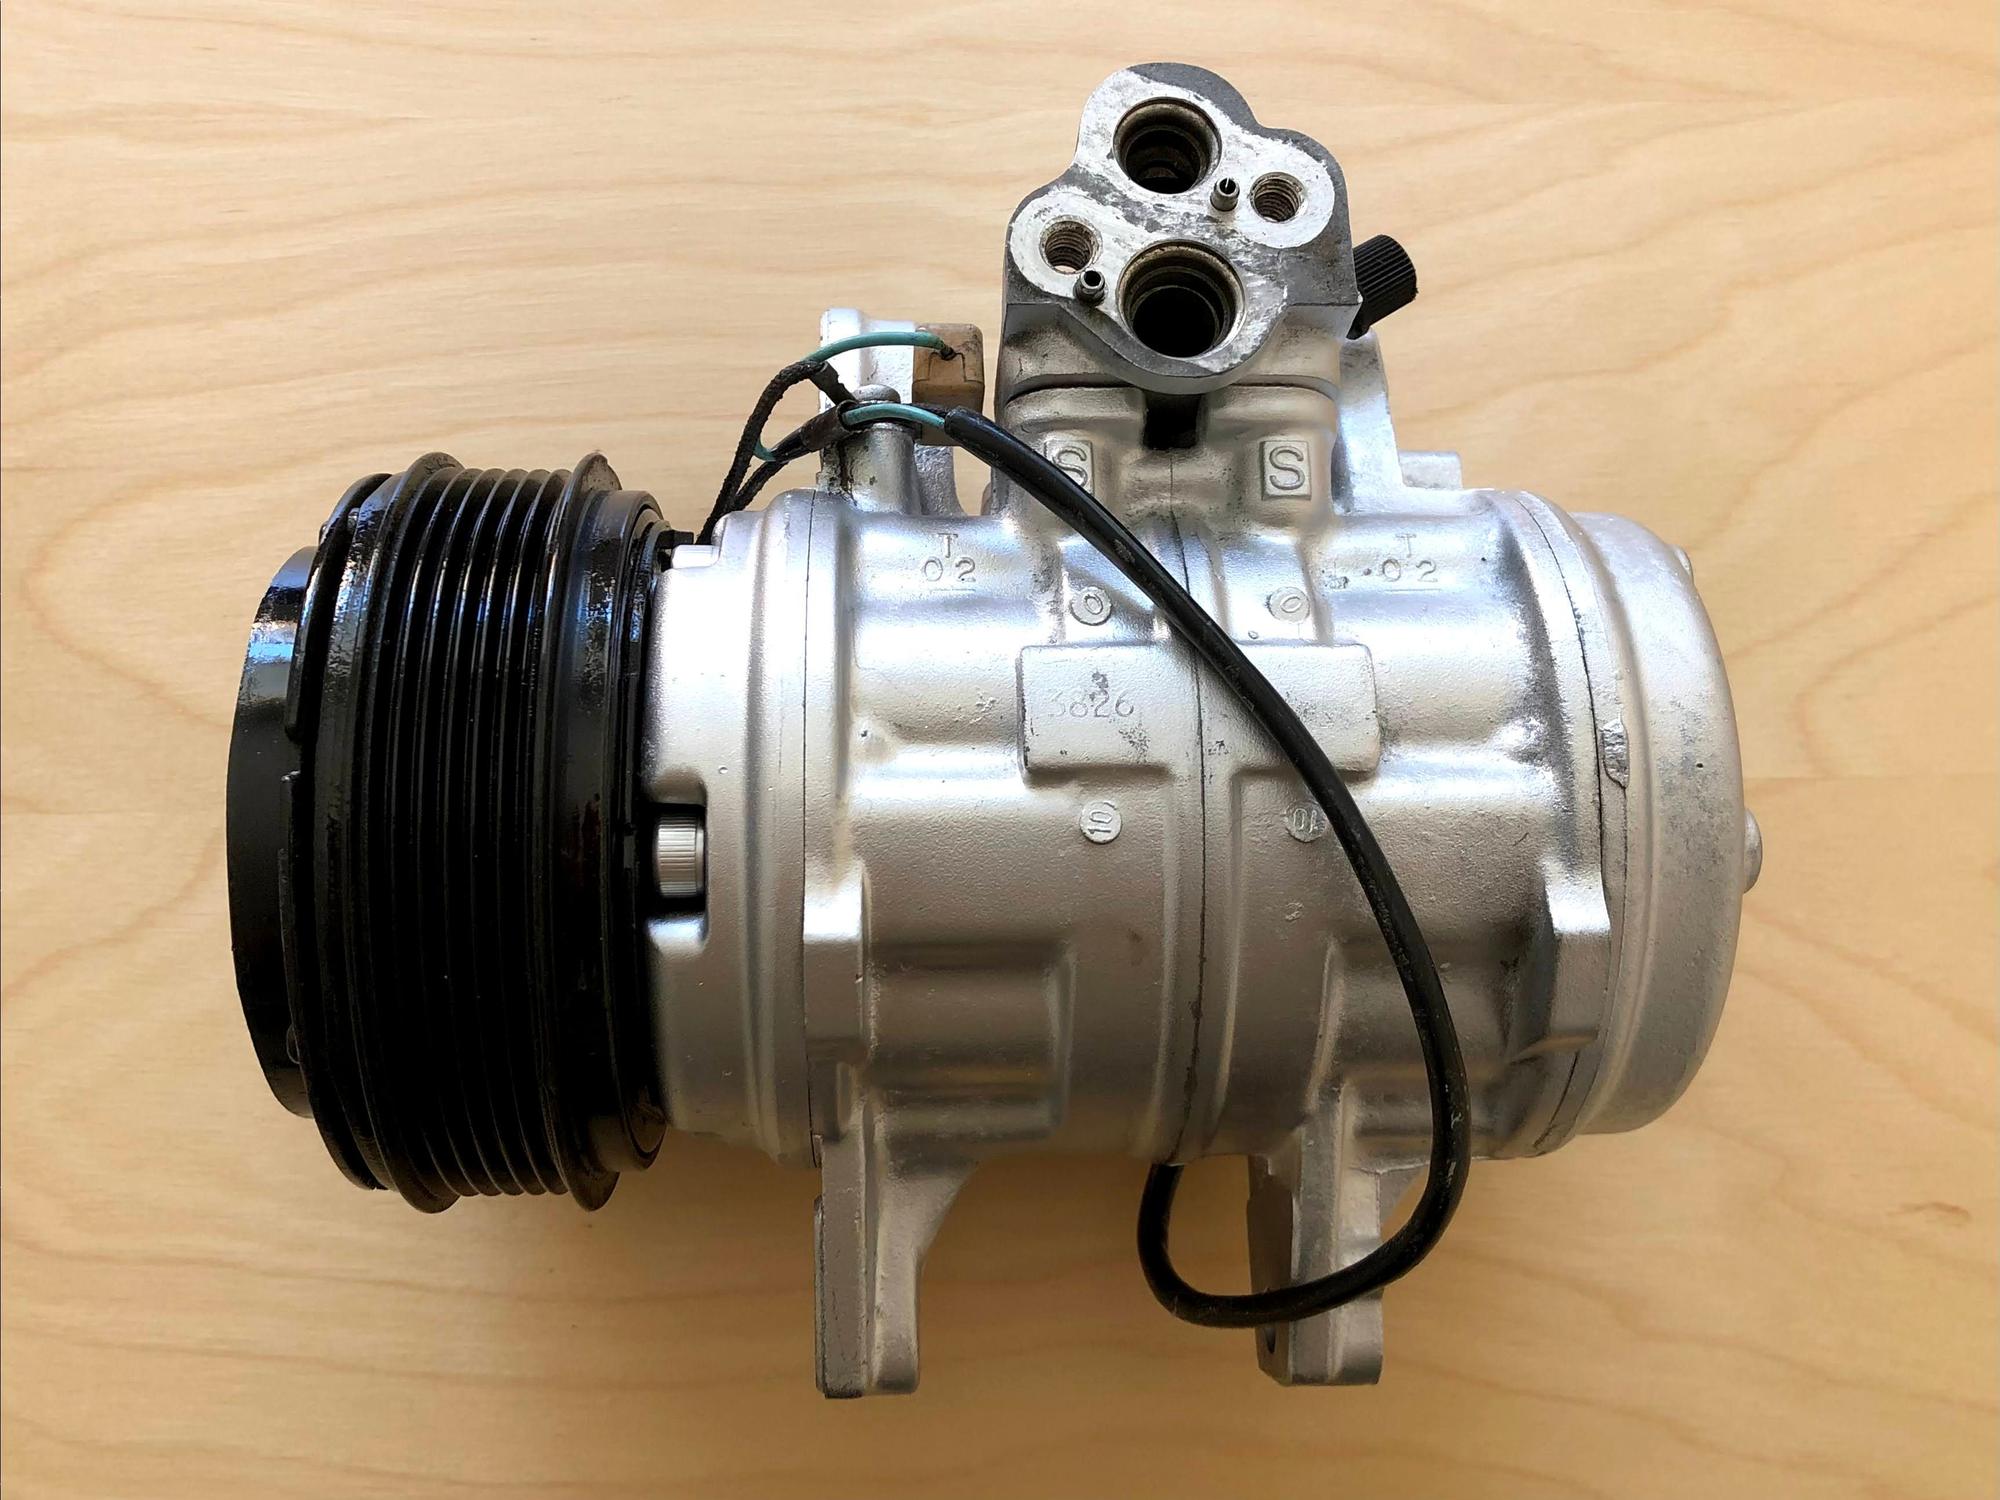
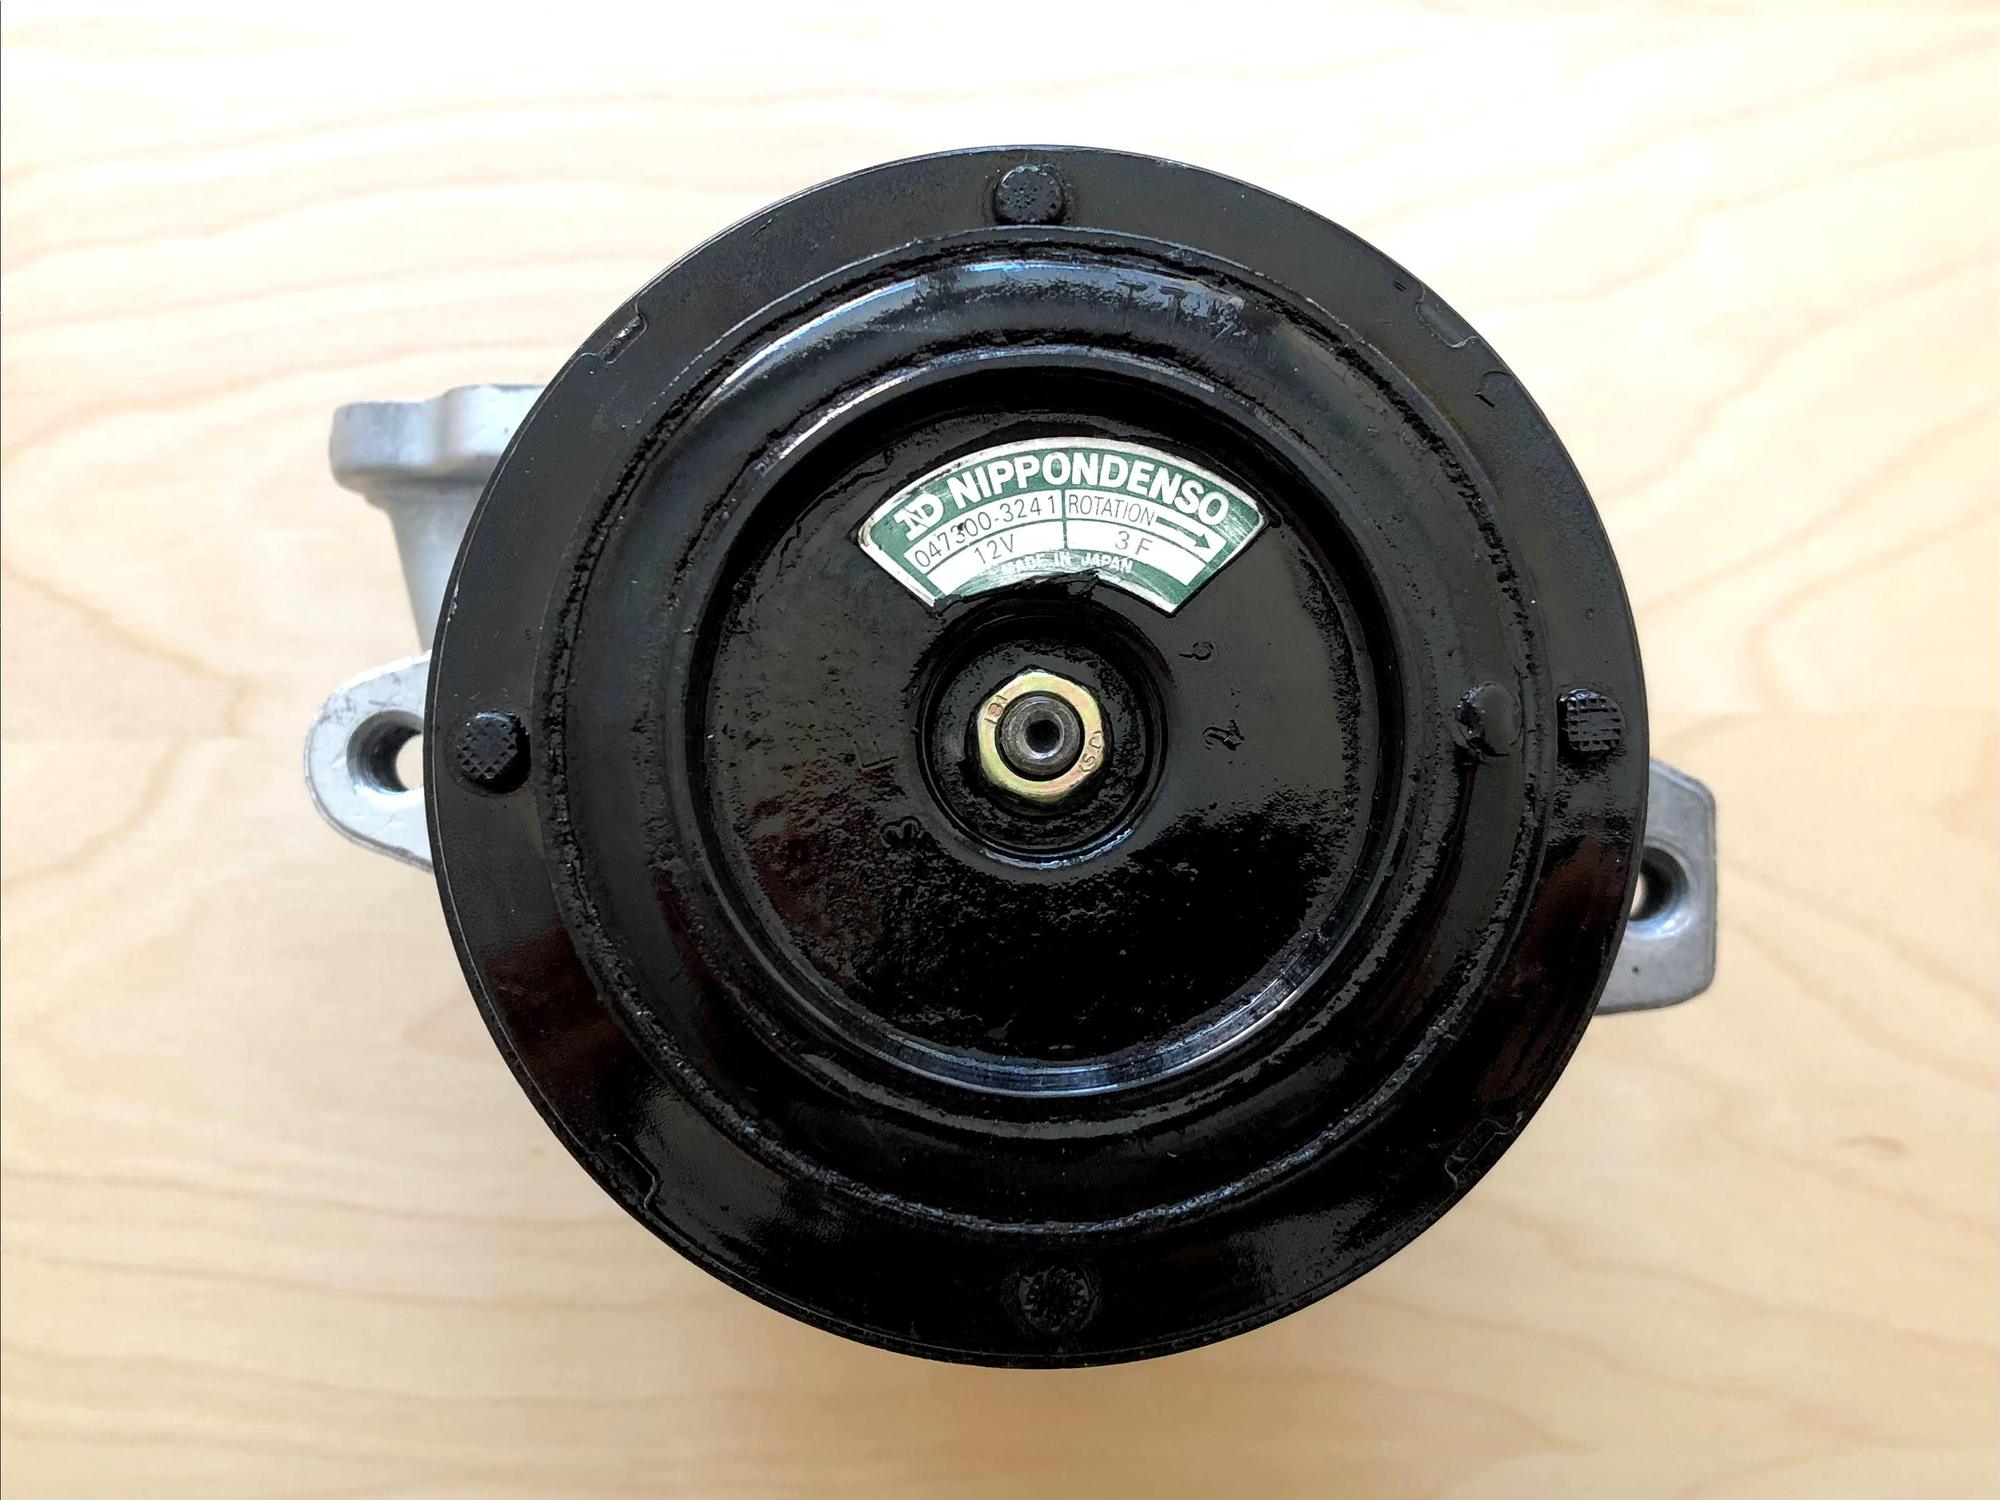
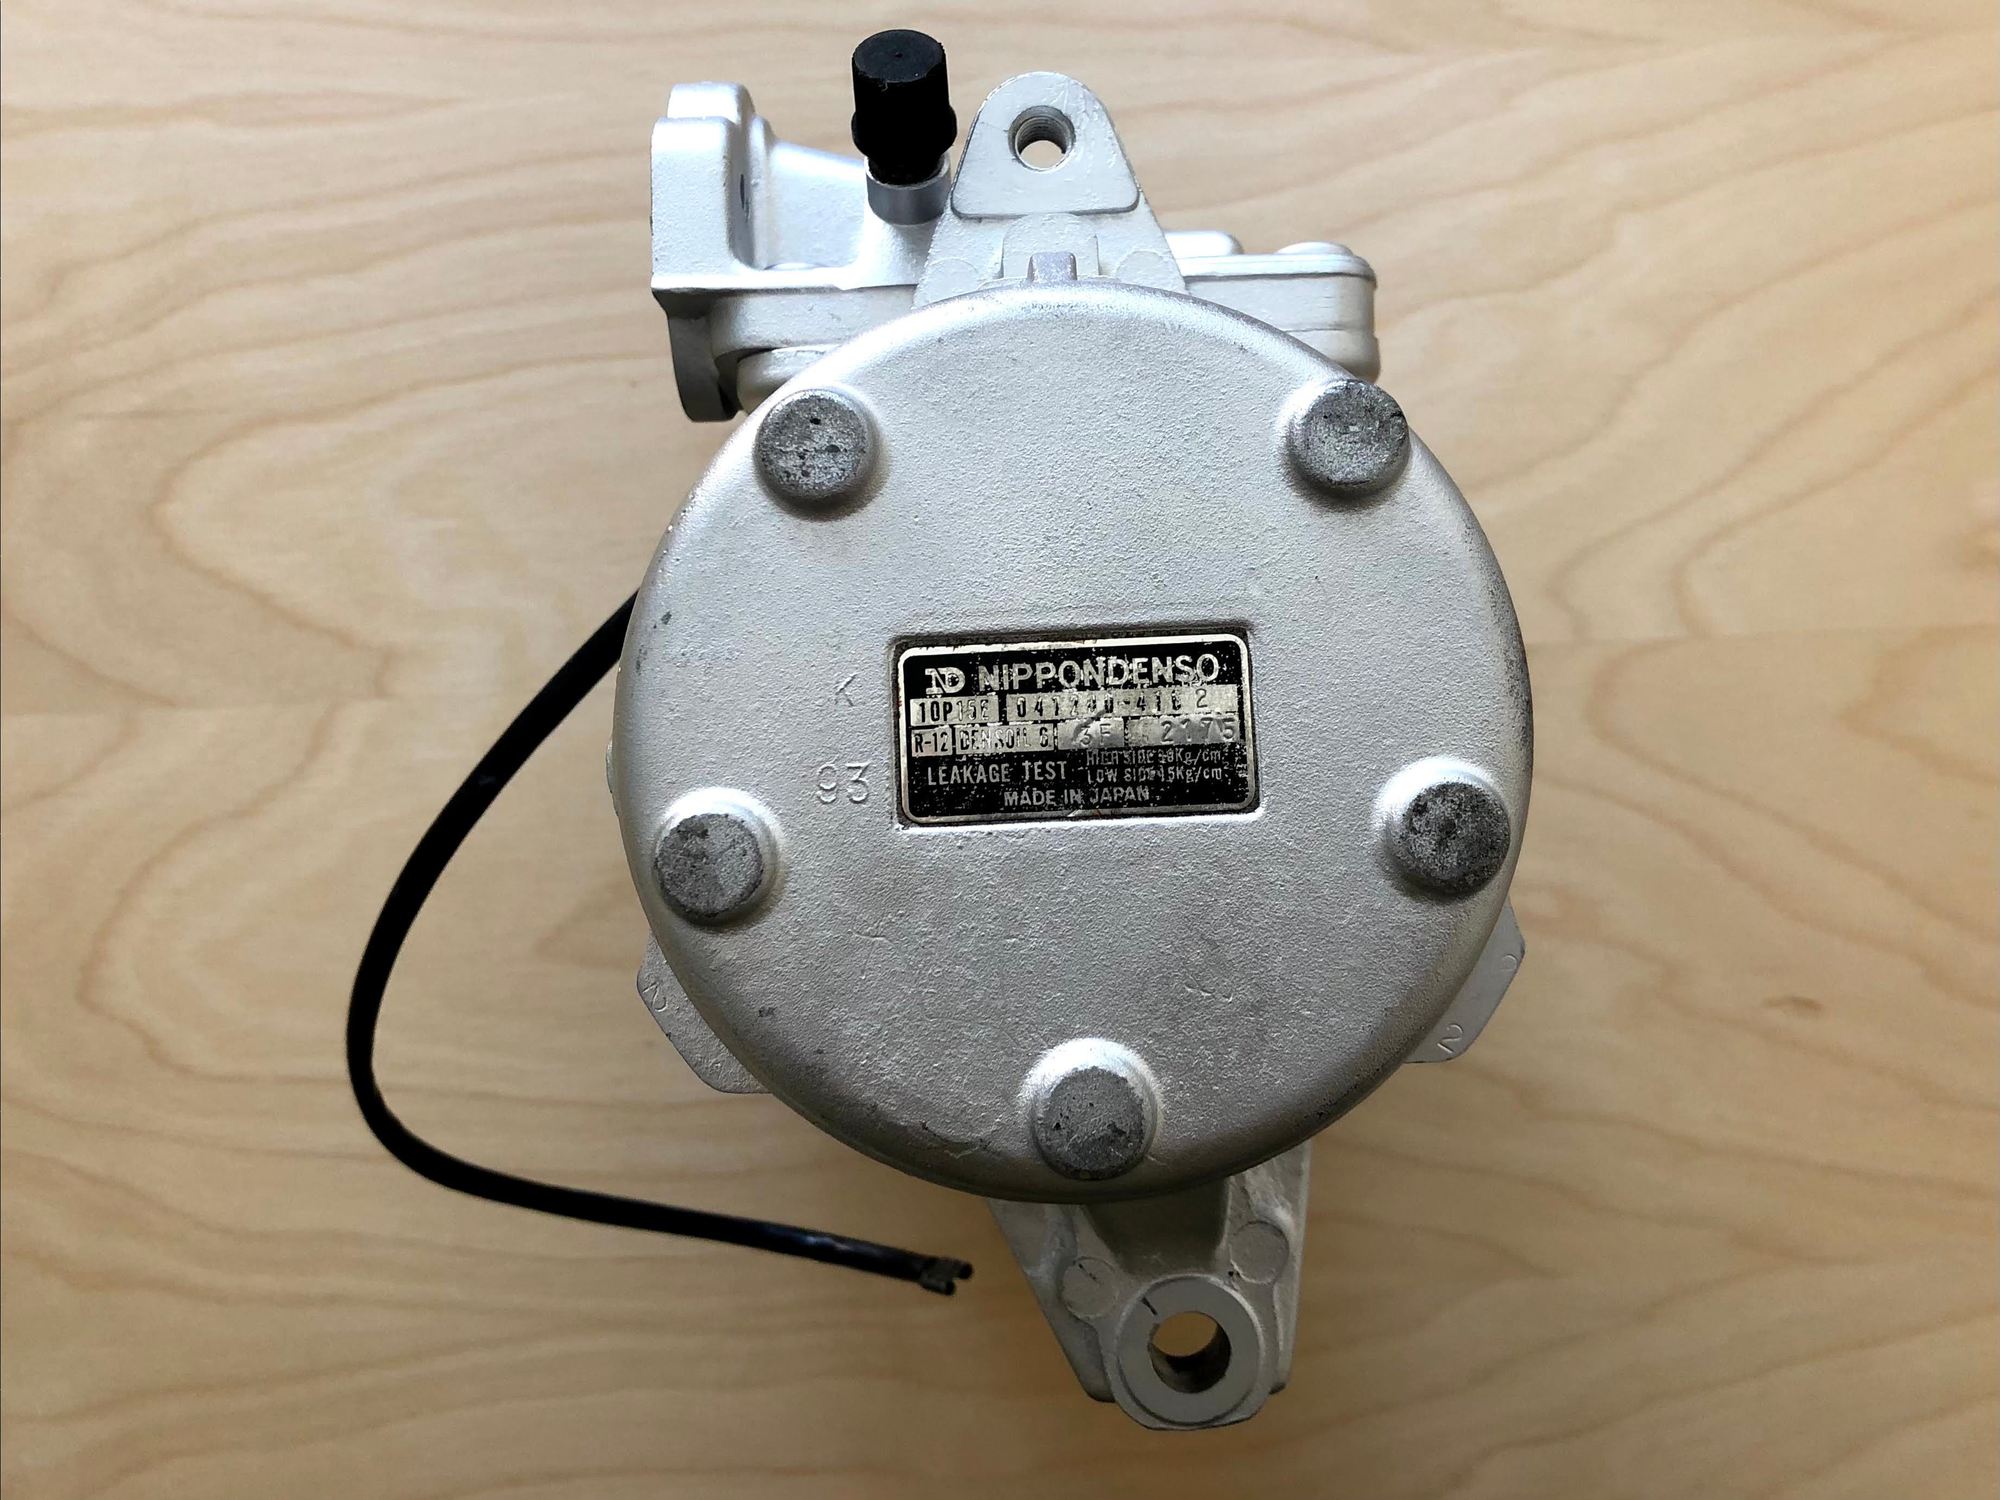
Some photos of the crusty, 35 year old compressor after just being pulled from the car:
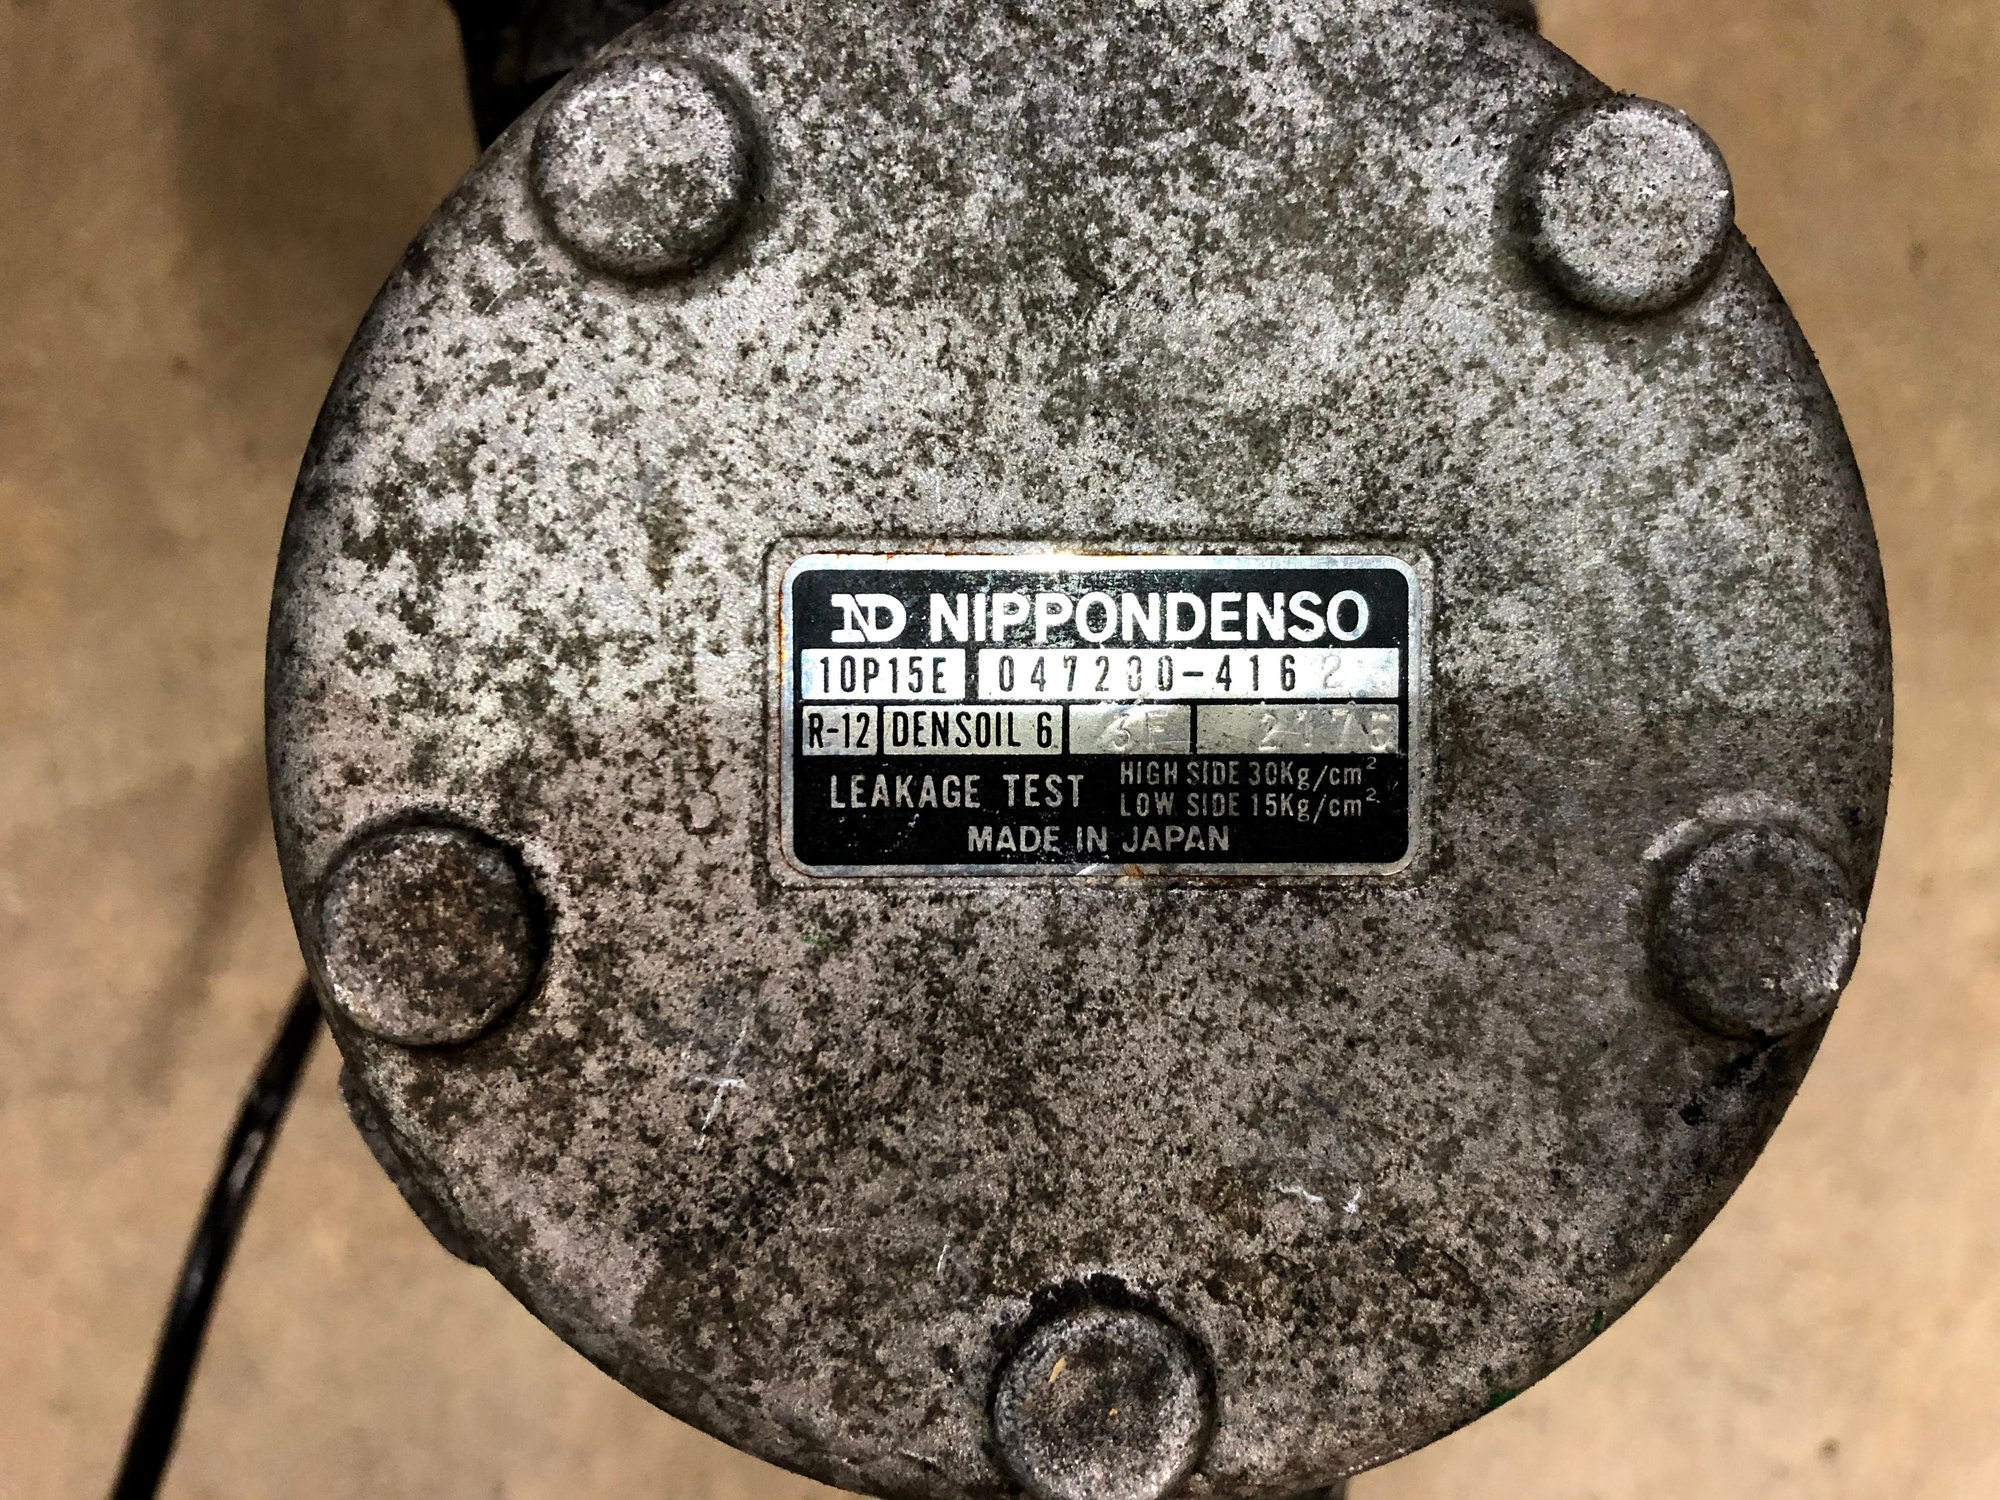
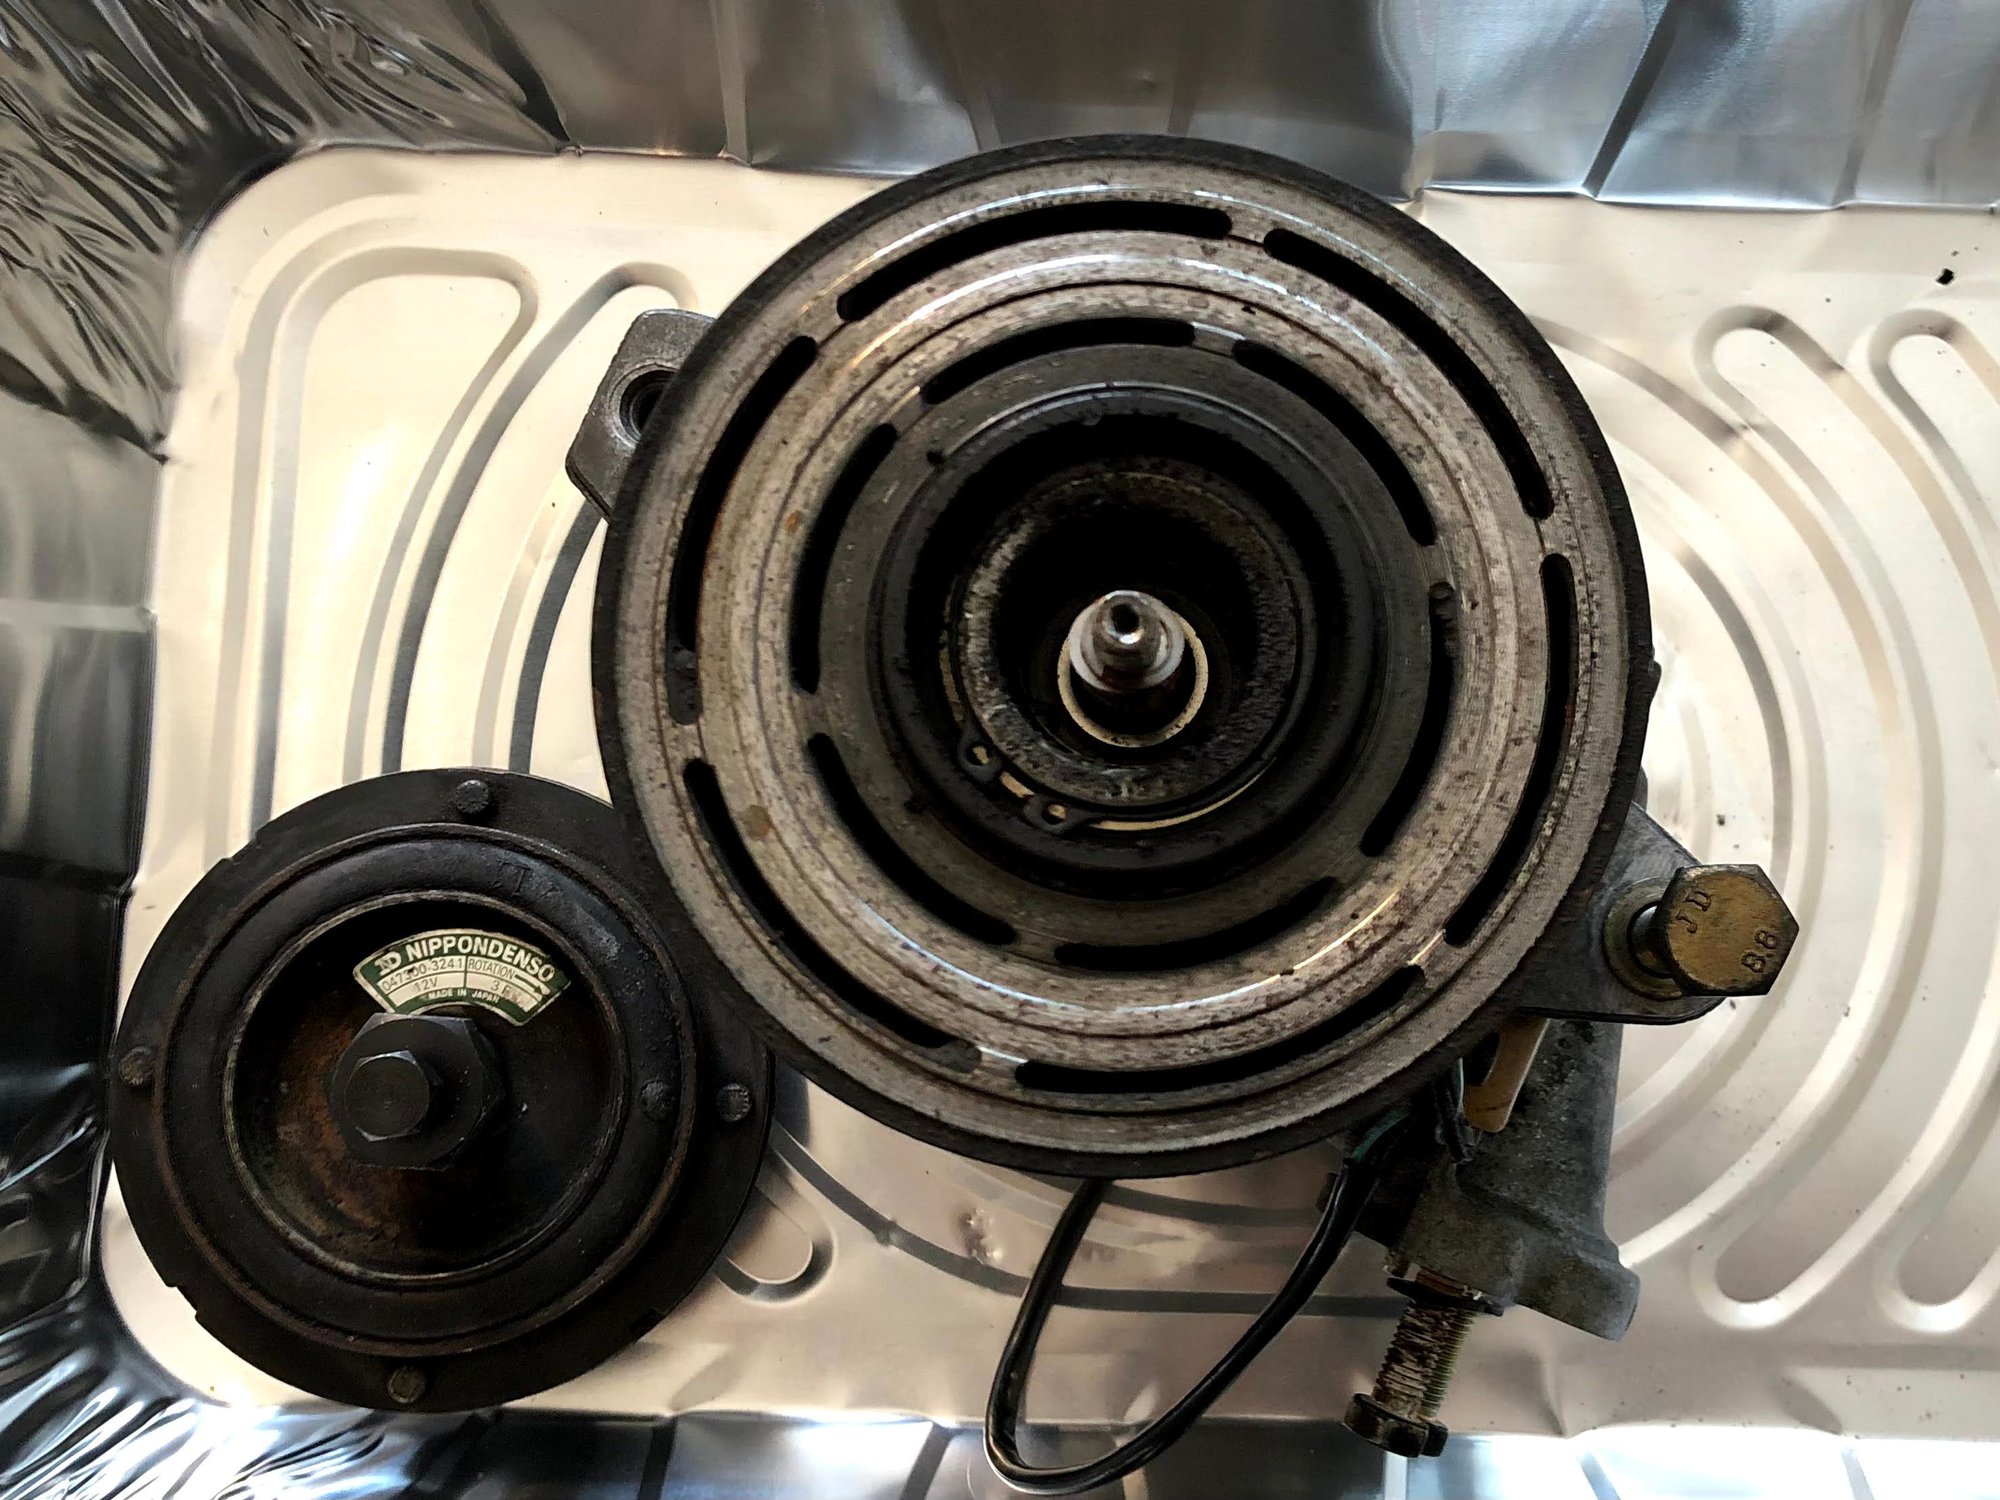
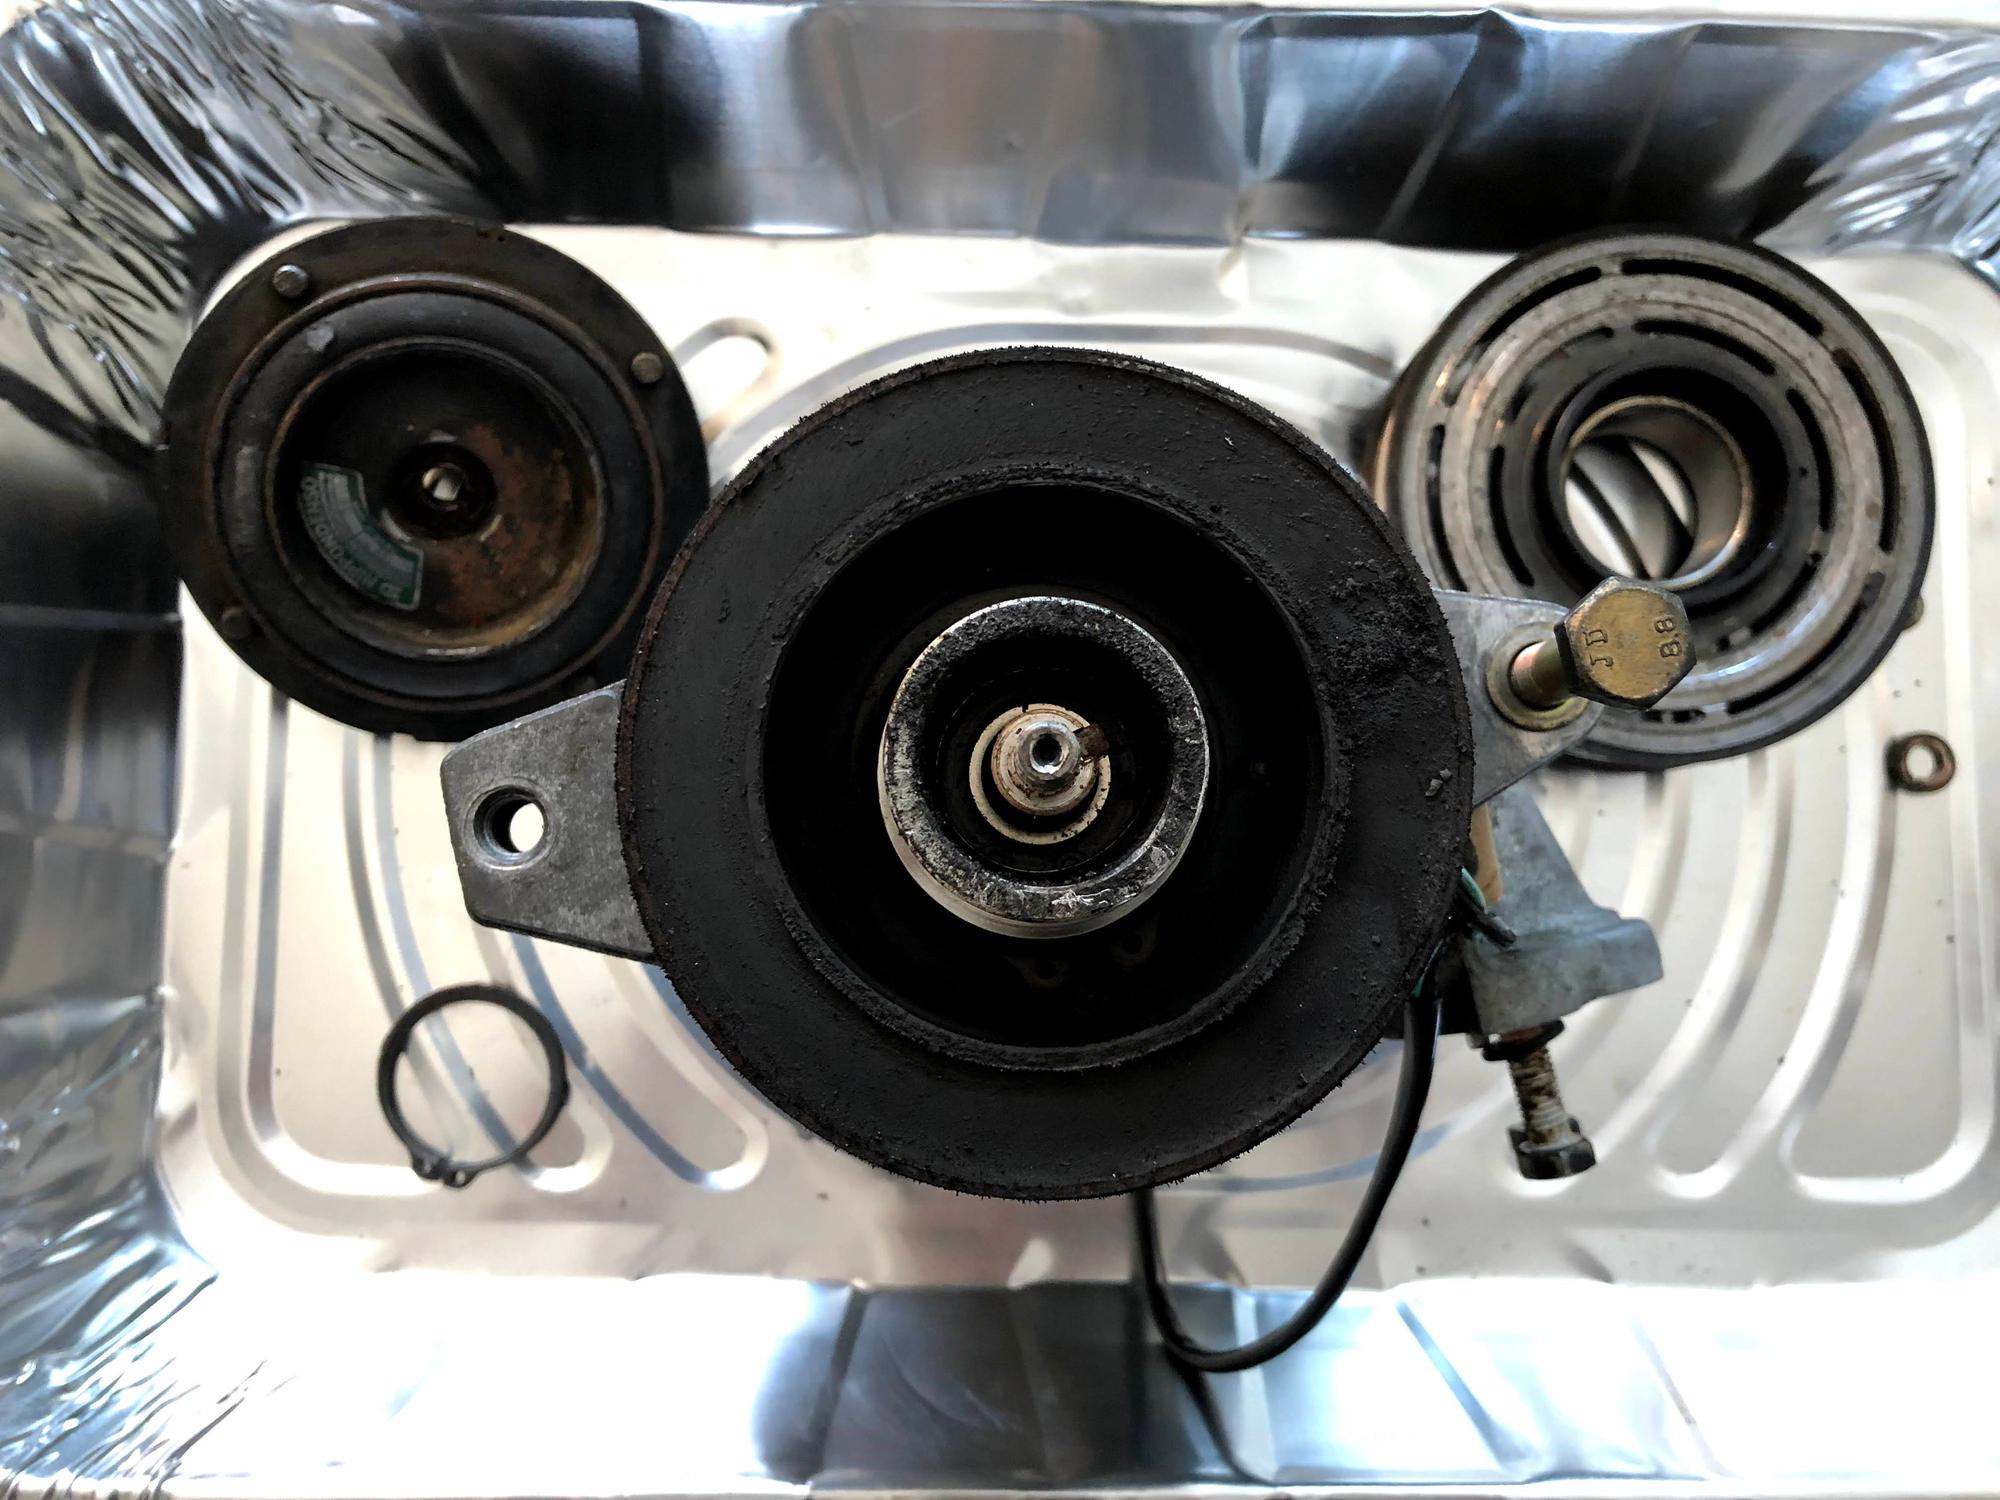
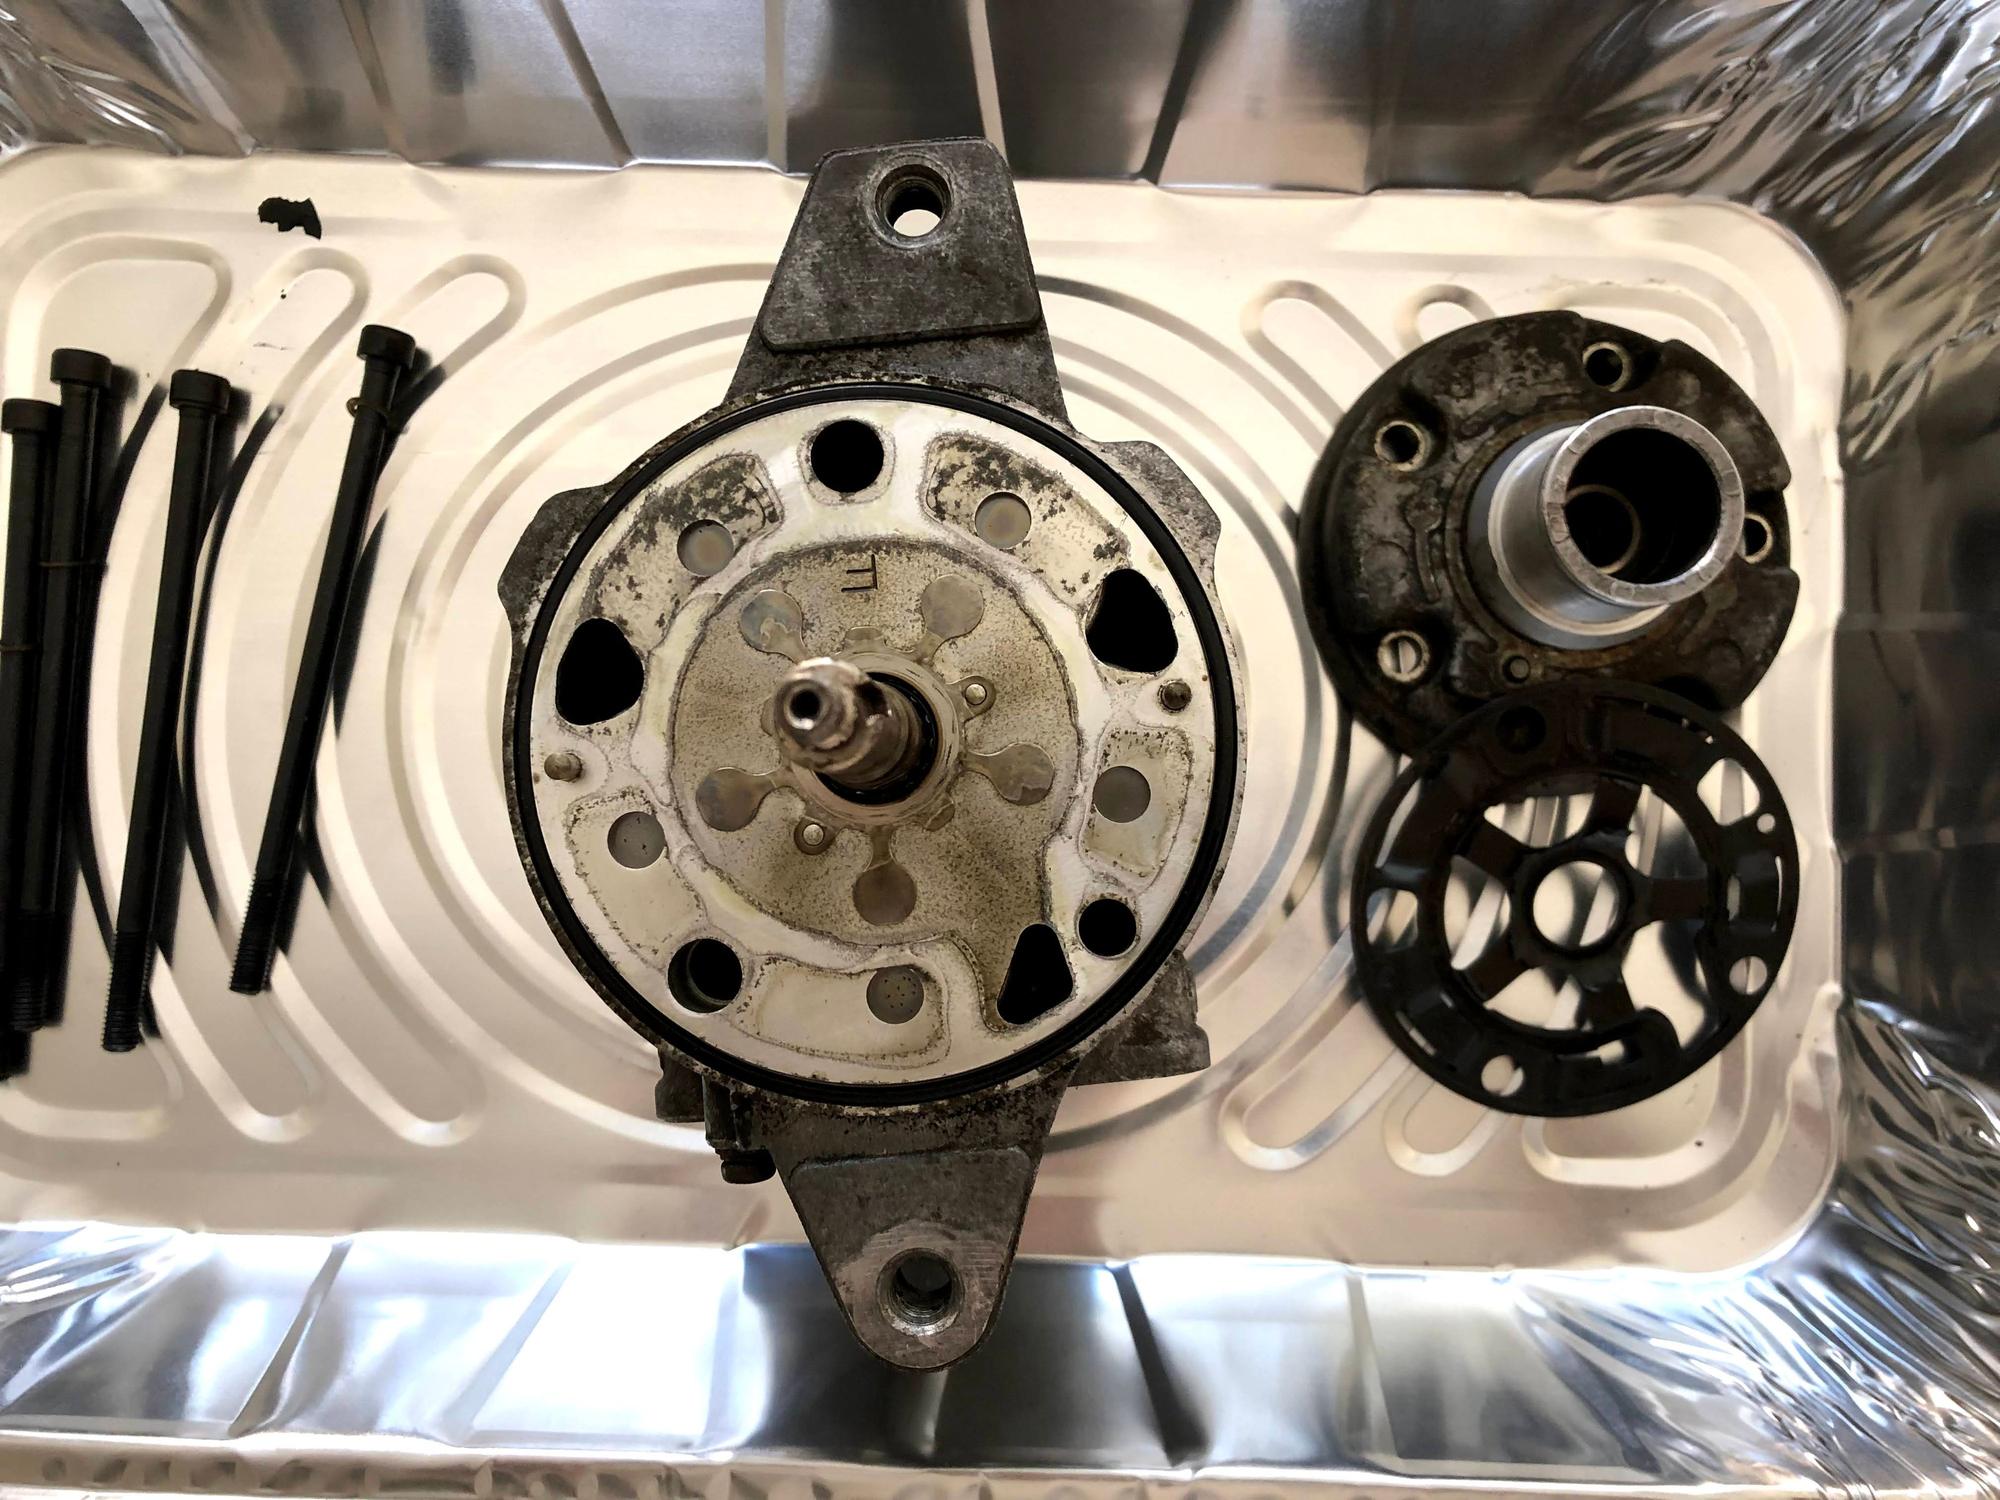
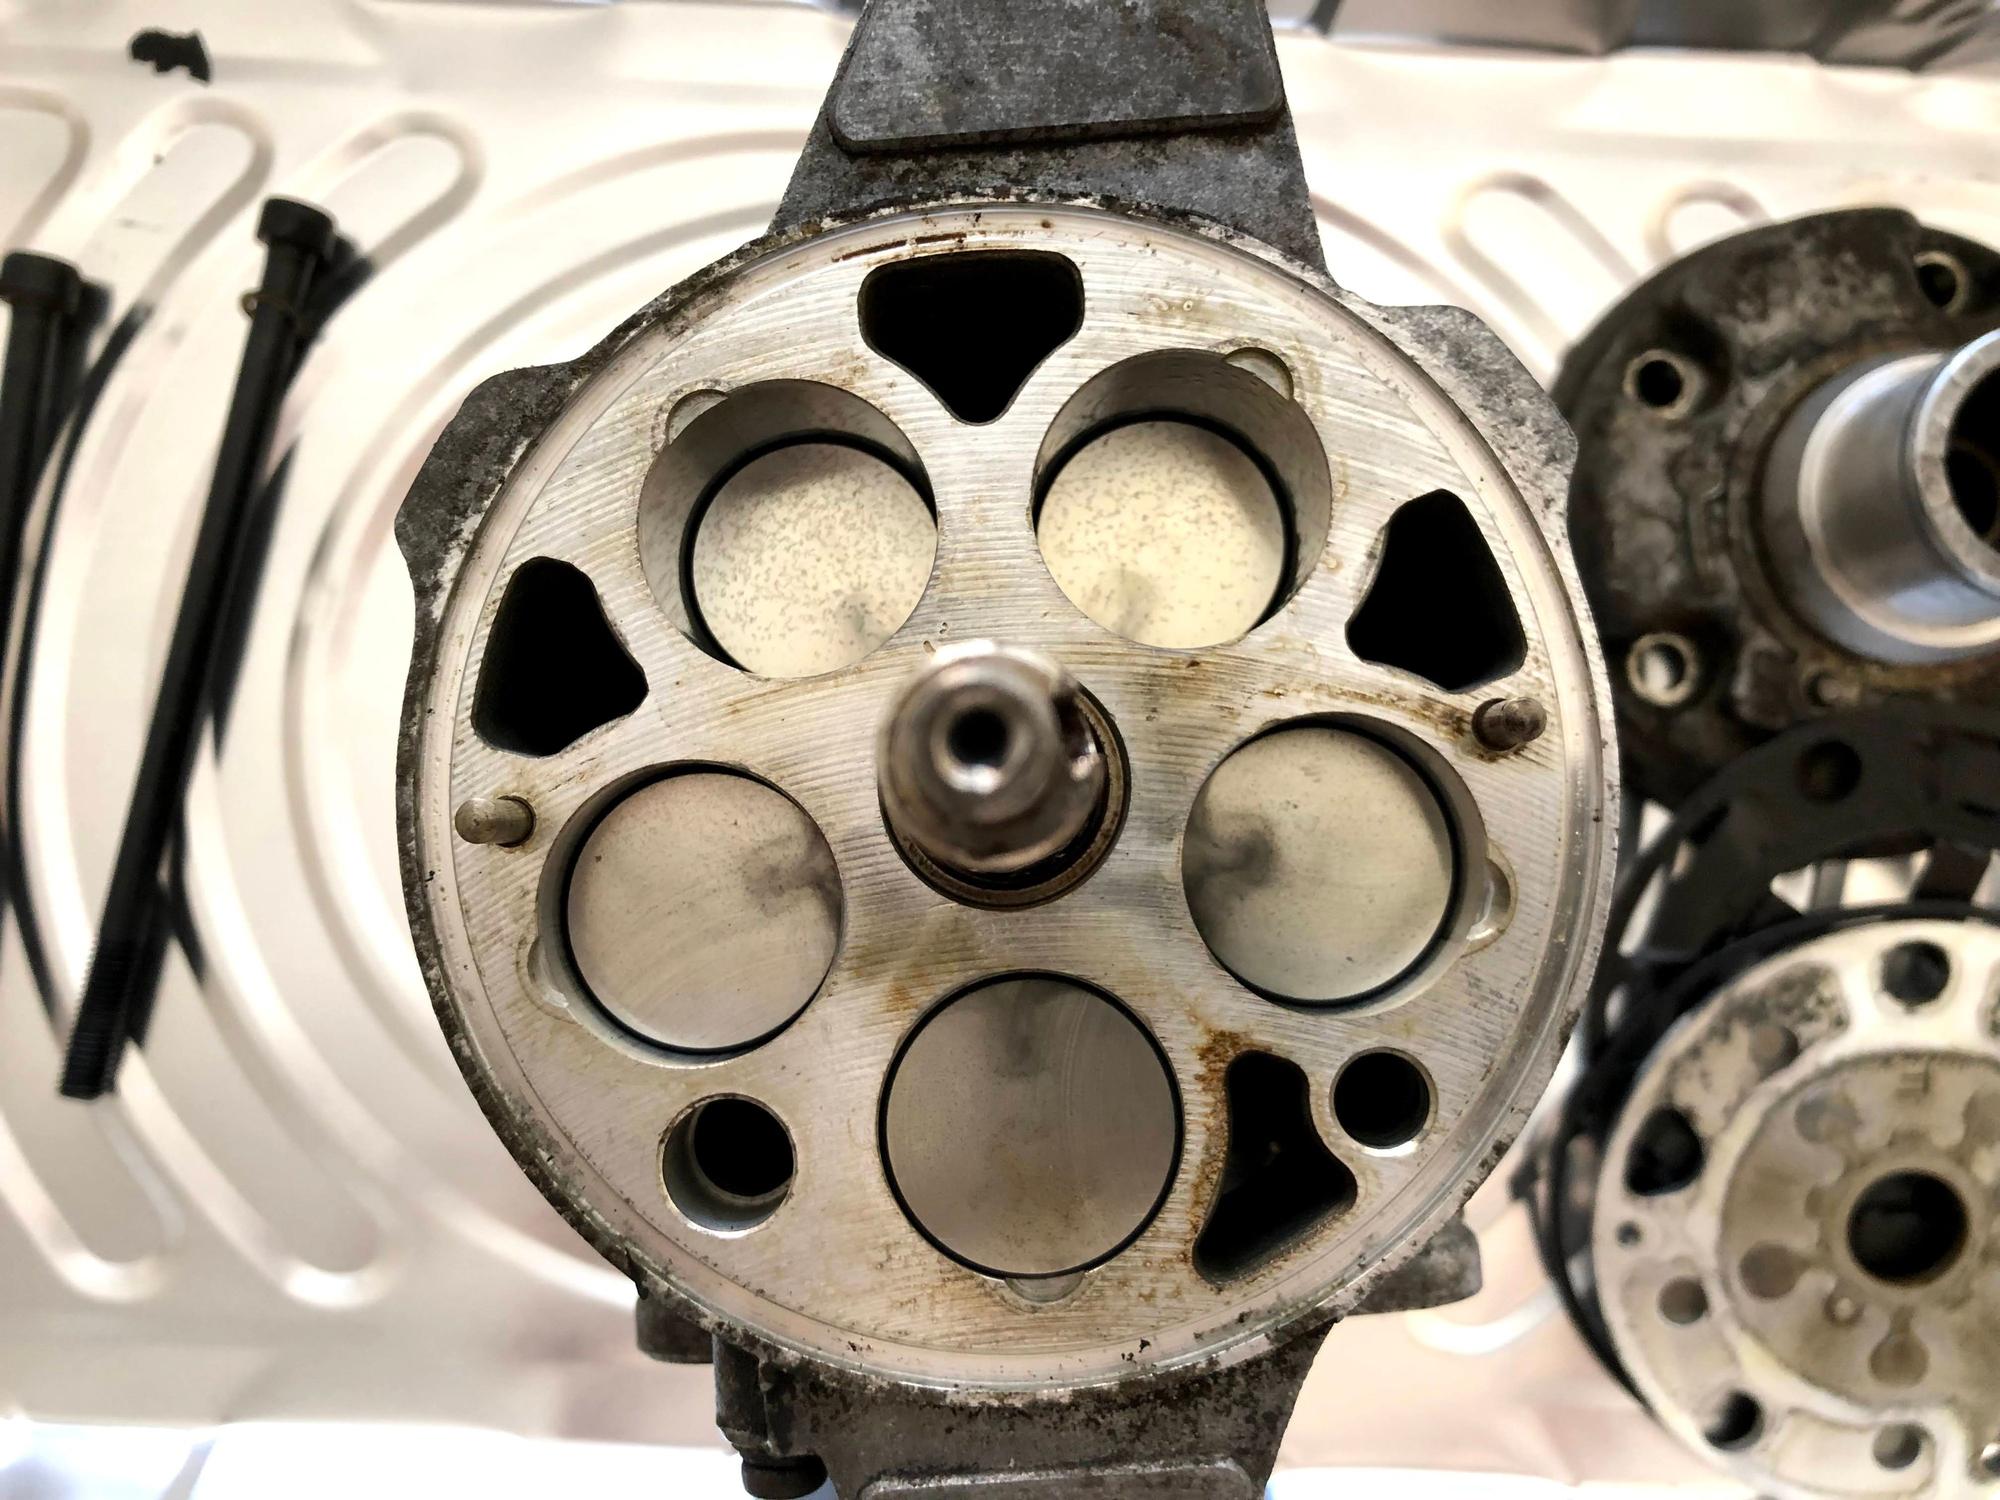
Some tear-down photos. I have more than this if anyone needs anything for reference. Pretty cool swashplate compressor with 10 pistons. I've been working with rocking piston and diaphragm pumps/compressors for almost 4 years now, but have never had the opportunity to tear something like this apart. I will say that I, like some others, opted not to split the case in the middle. The compressor never leaked here so I figured if it ain't broken, don't fix it. I did replace the O-rings at each valve-plate end, the mechanical seal and all the hardware with new stuff. The O-rings in the case were still very pliable and not dried out so I figured I could safely leave the middle O-ring alone.
I should have taken a picture of the electromagnetic clutch after I finished cleaning it. The faces are actually red where the electrical potting is located in the center. This thing sure was dirty. Here it is reassembled with new seals and ready for some silver paint before re-installing the clutch.
I installed a new clutch bearing (Nachi 40BGS11DS for anyone who wants to know) and re-set the air gap once everything was pressed back together. I set my gap at 0.30mm, which is a little tighter than necessary, with the thinking that I'd rather have it be a little tight in case the faces wear a bit more over time. Checked it with a power supply to make sure everything still engaged well post-assembly and voila - a rebuilt A/C compressor for about $125 including seals, bearing, hardware and paint.
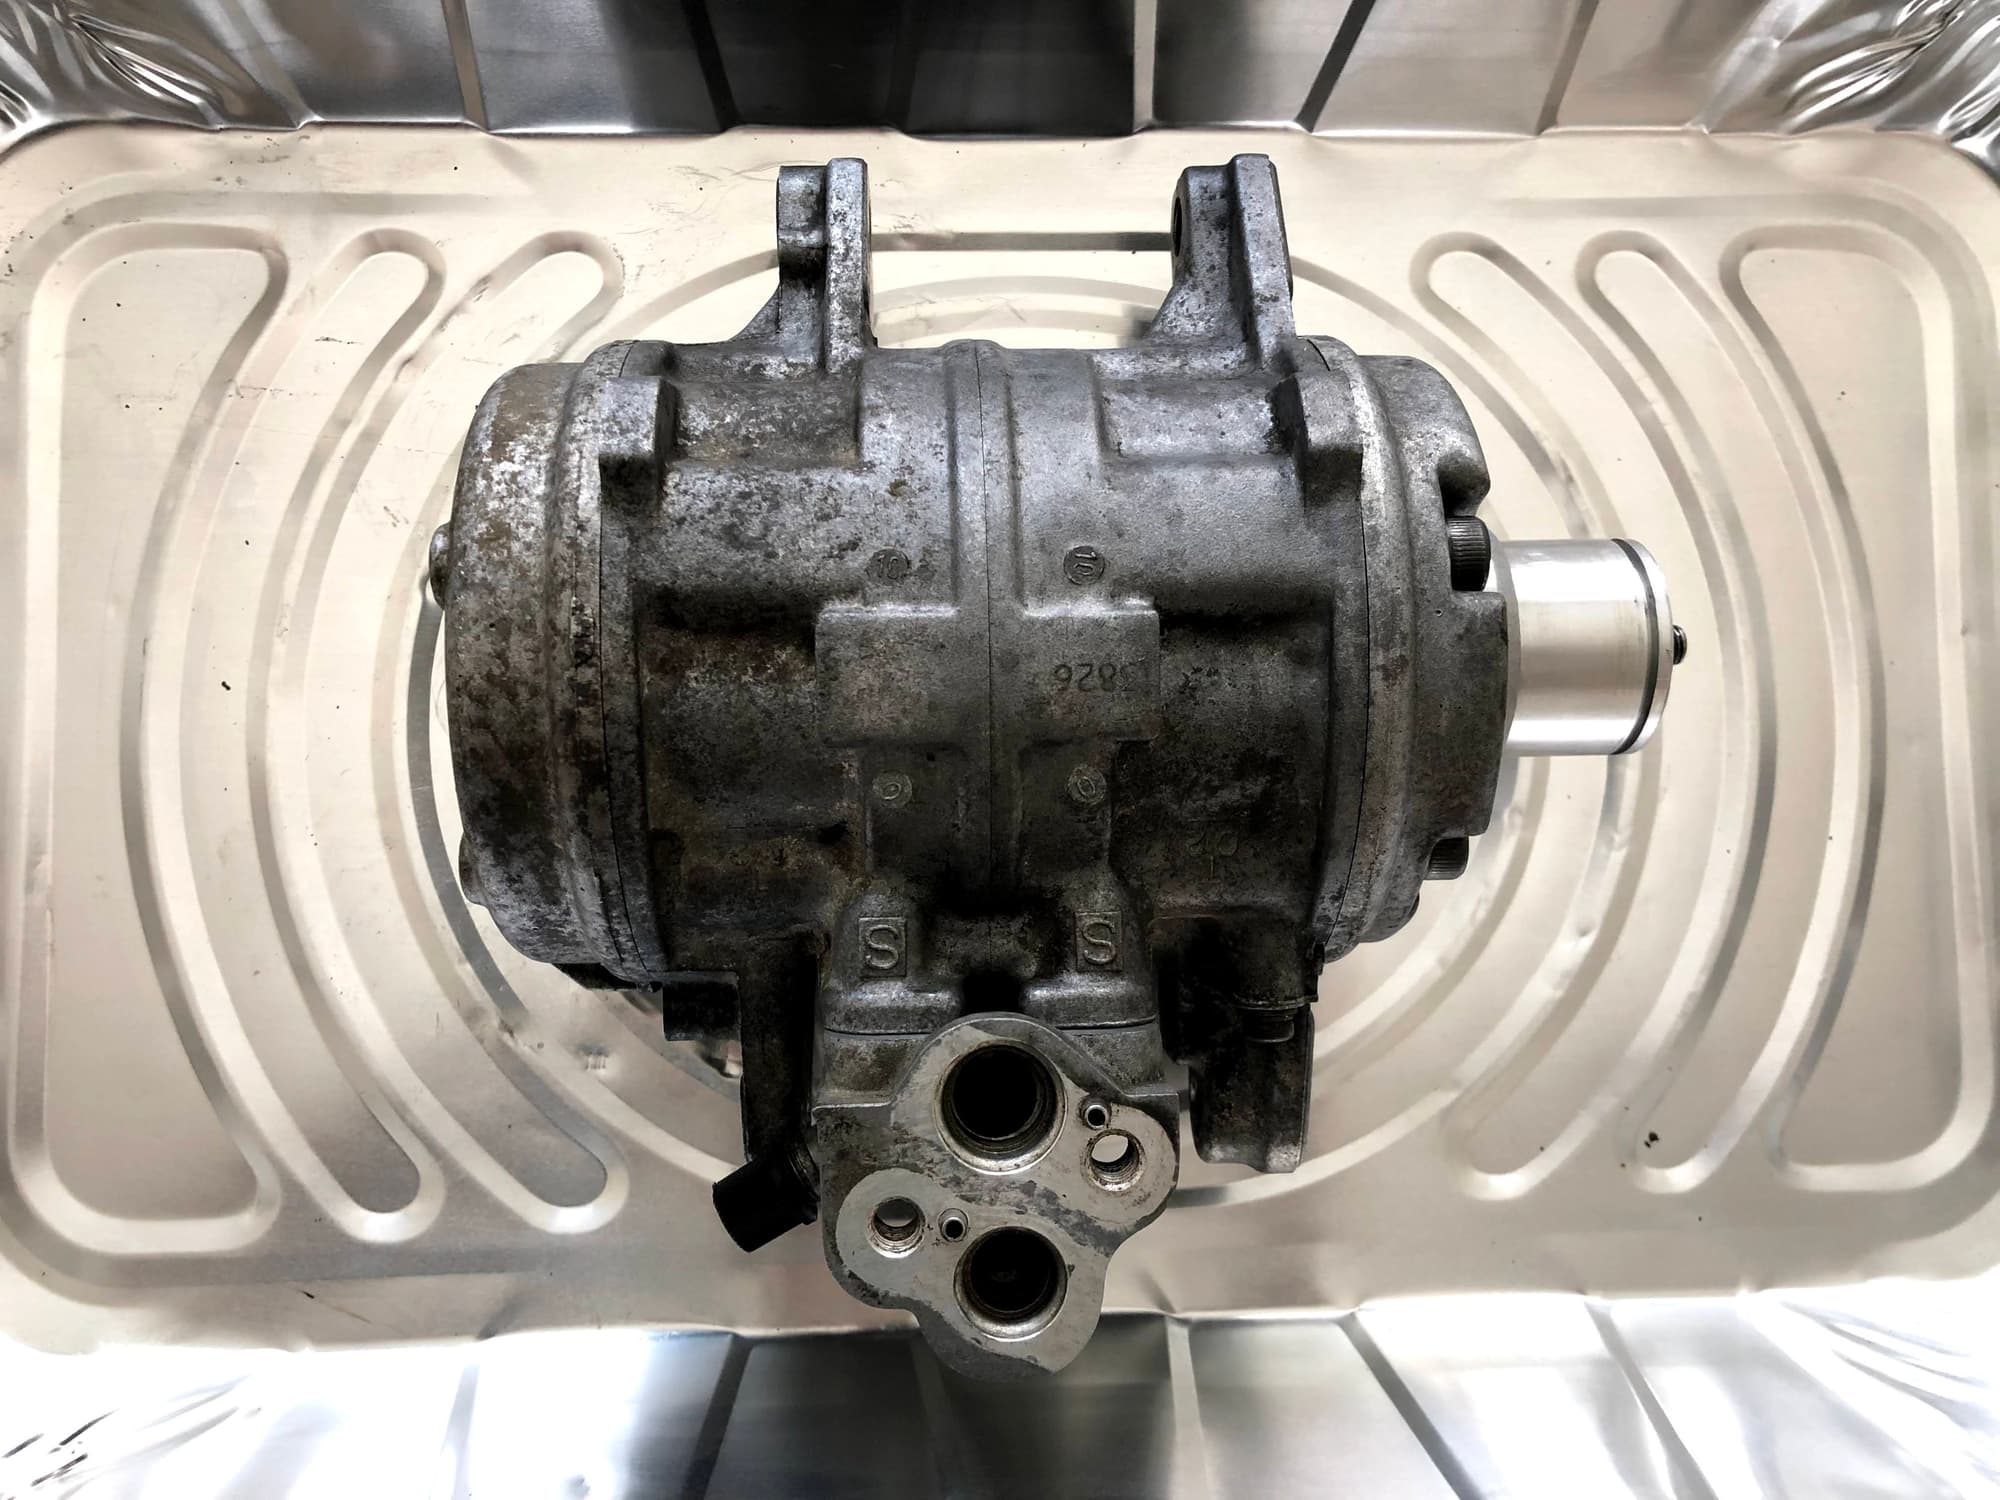
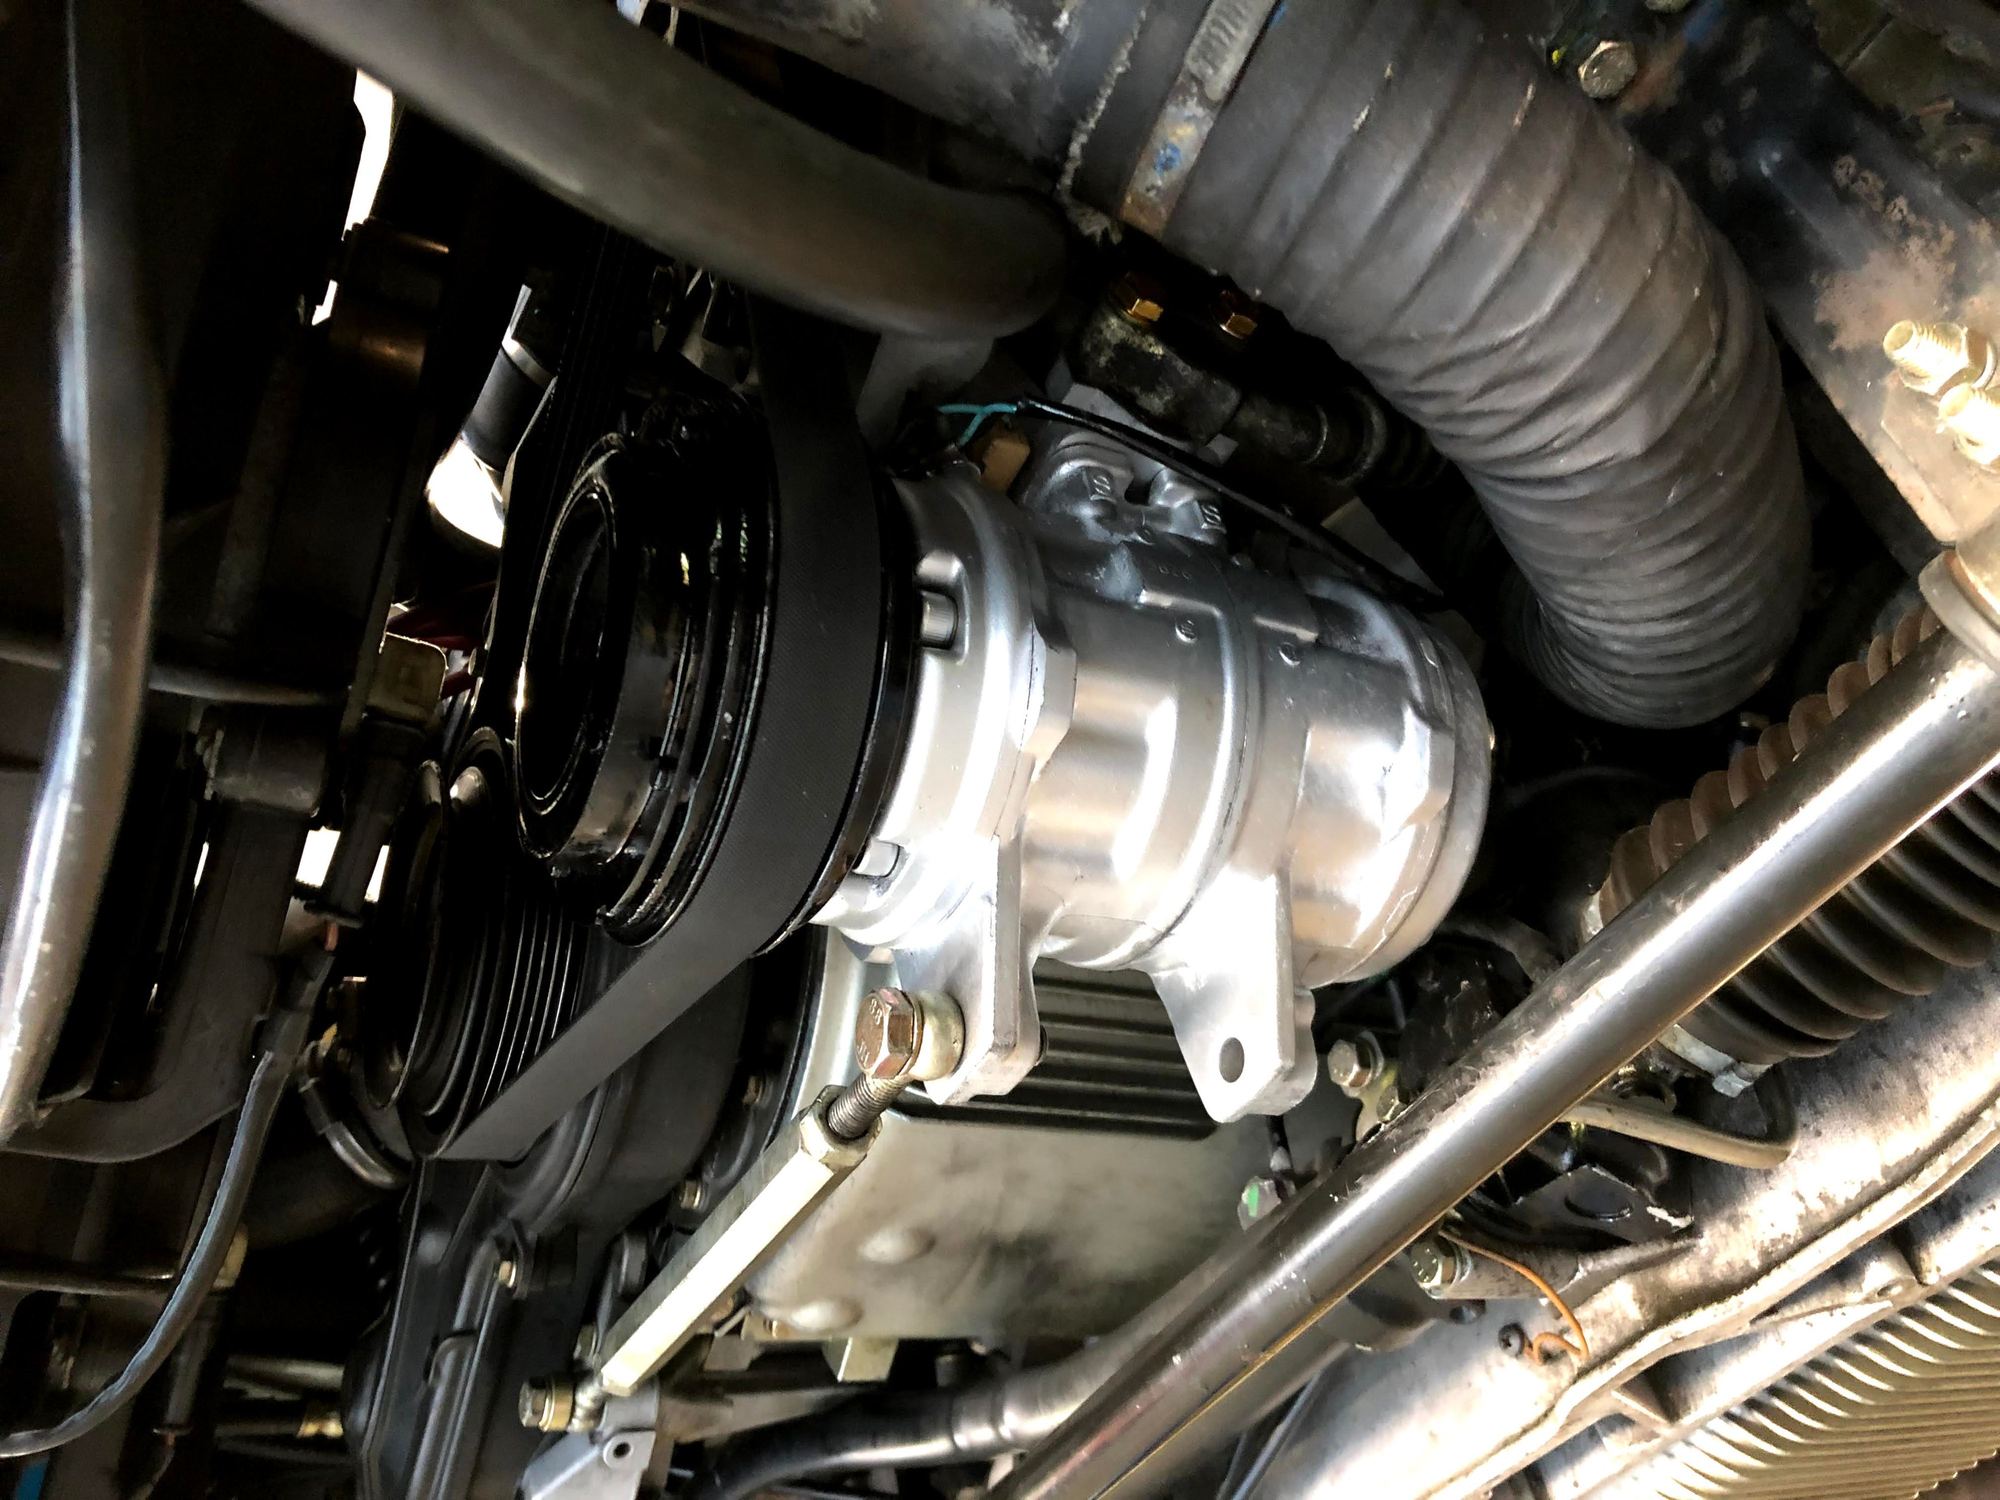
Compressor filled with PAG46 oil and re-installed in the car with a new receiver/drier, also from Griffiths. I also installed a new pressure switch since they're cheap. The new drier was a slightly smaller diameter than the original, so I did have to modify the clamp a bit. I just cut a bit off the end and drilled a new hole to snug it up.
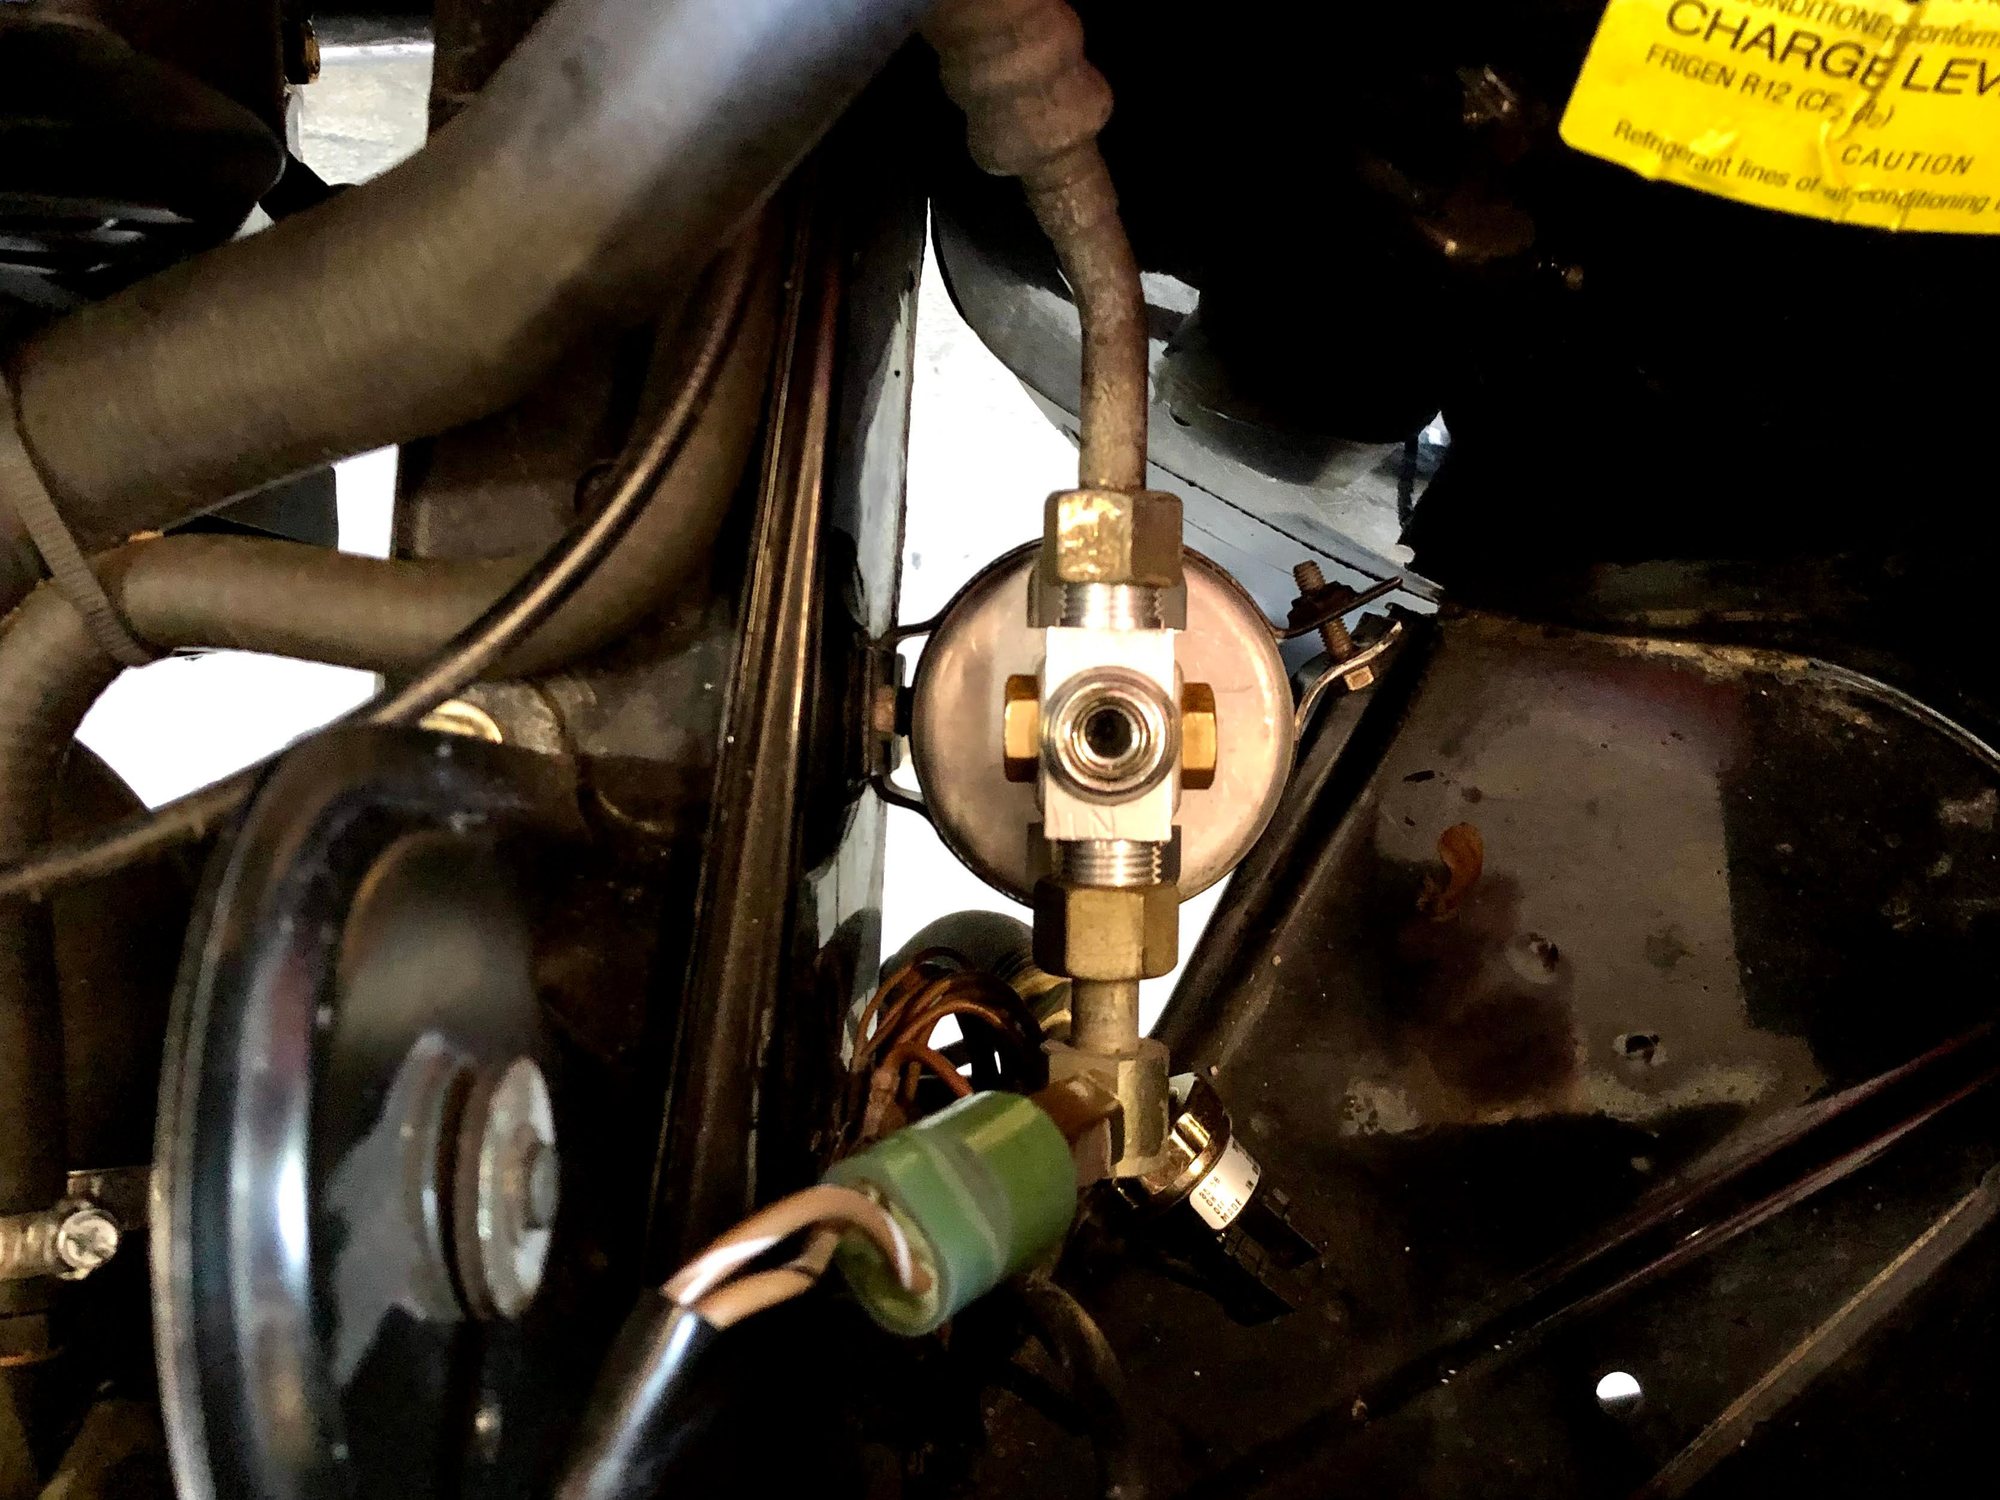
About a year ago I was gifted a full size tank of R12 from my brother-in-law. He got it from an auto shop that had closed and was selling off some old equipment. I'd say it was still 1/2 to 2/3 full, so I will have R12 forever, especially if this system never leaks again. After re-installing everything I pulled a vacuum on the system and re-charged. I was going to attempt to weigh the refrigerant, but my scale wasn't quite sensitive enough. Instead I used the sight glass on the drier and slowly filled while monitoring for bubbles and checking vent temperatures along the way. It was 90�F in the shop when I did the work and after a full fill, I was seeing vent temps in the mid-40s. High side pressure was right around 210 PSIG and low side was around 38-40 PSIG, which is a little high. Wondering if that had to do with the higher shop temperatures, so perhaps I'll have to check it again down the line. In my searching online, it appears I'm one of the fortunate owners with low/high side ports on the lines right by the strut tower. This certainly made this work easier.
I already had A/C gauges for both R12 and R134 systems. The gauge threads are the same between R12 and R134, but R134 typically uses the quick disconnect fittings. What is different between the two is the yellow feed hose threads, so FYI for anyone that wants to work with R12 - you'll need to get an old set of R12 gauges from eBay or the like or you won't be able to connect it to your R12 tank.
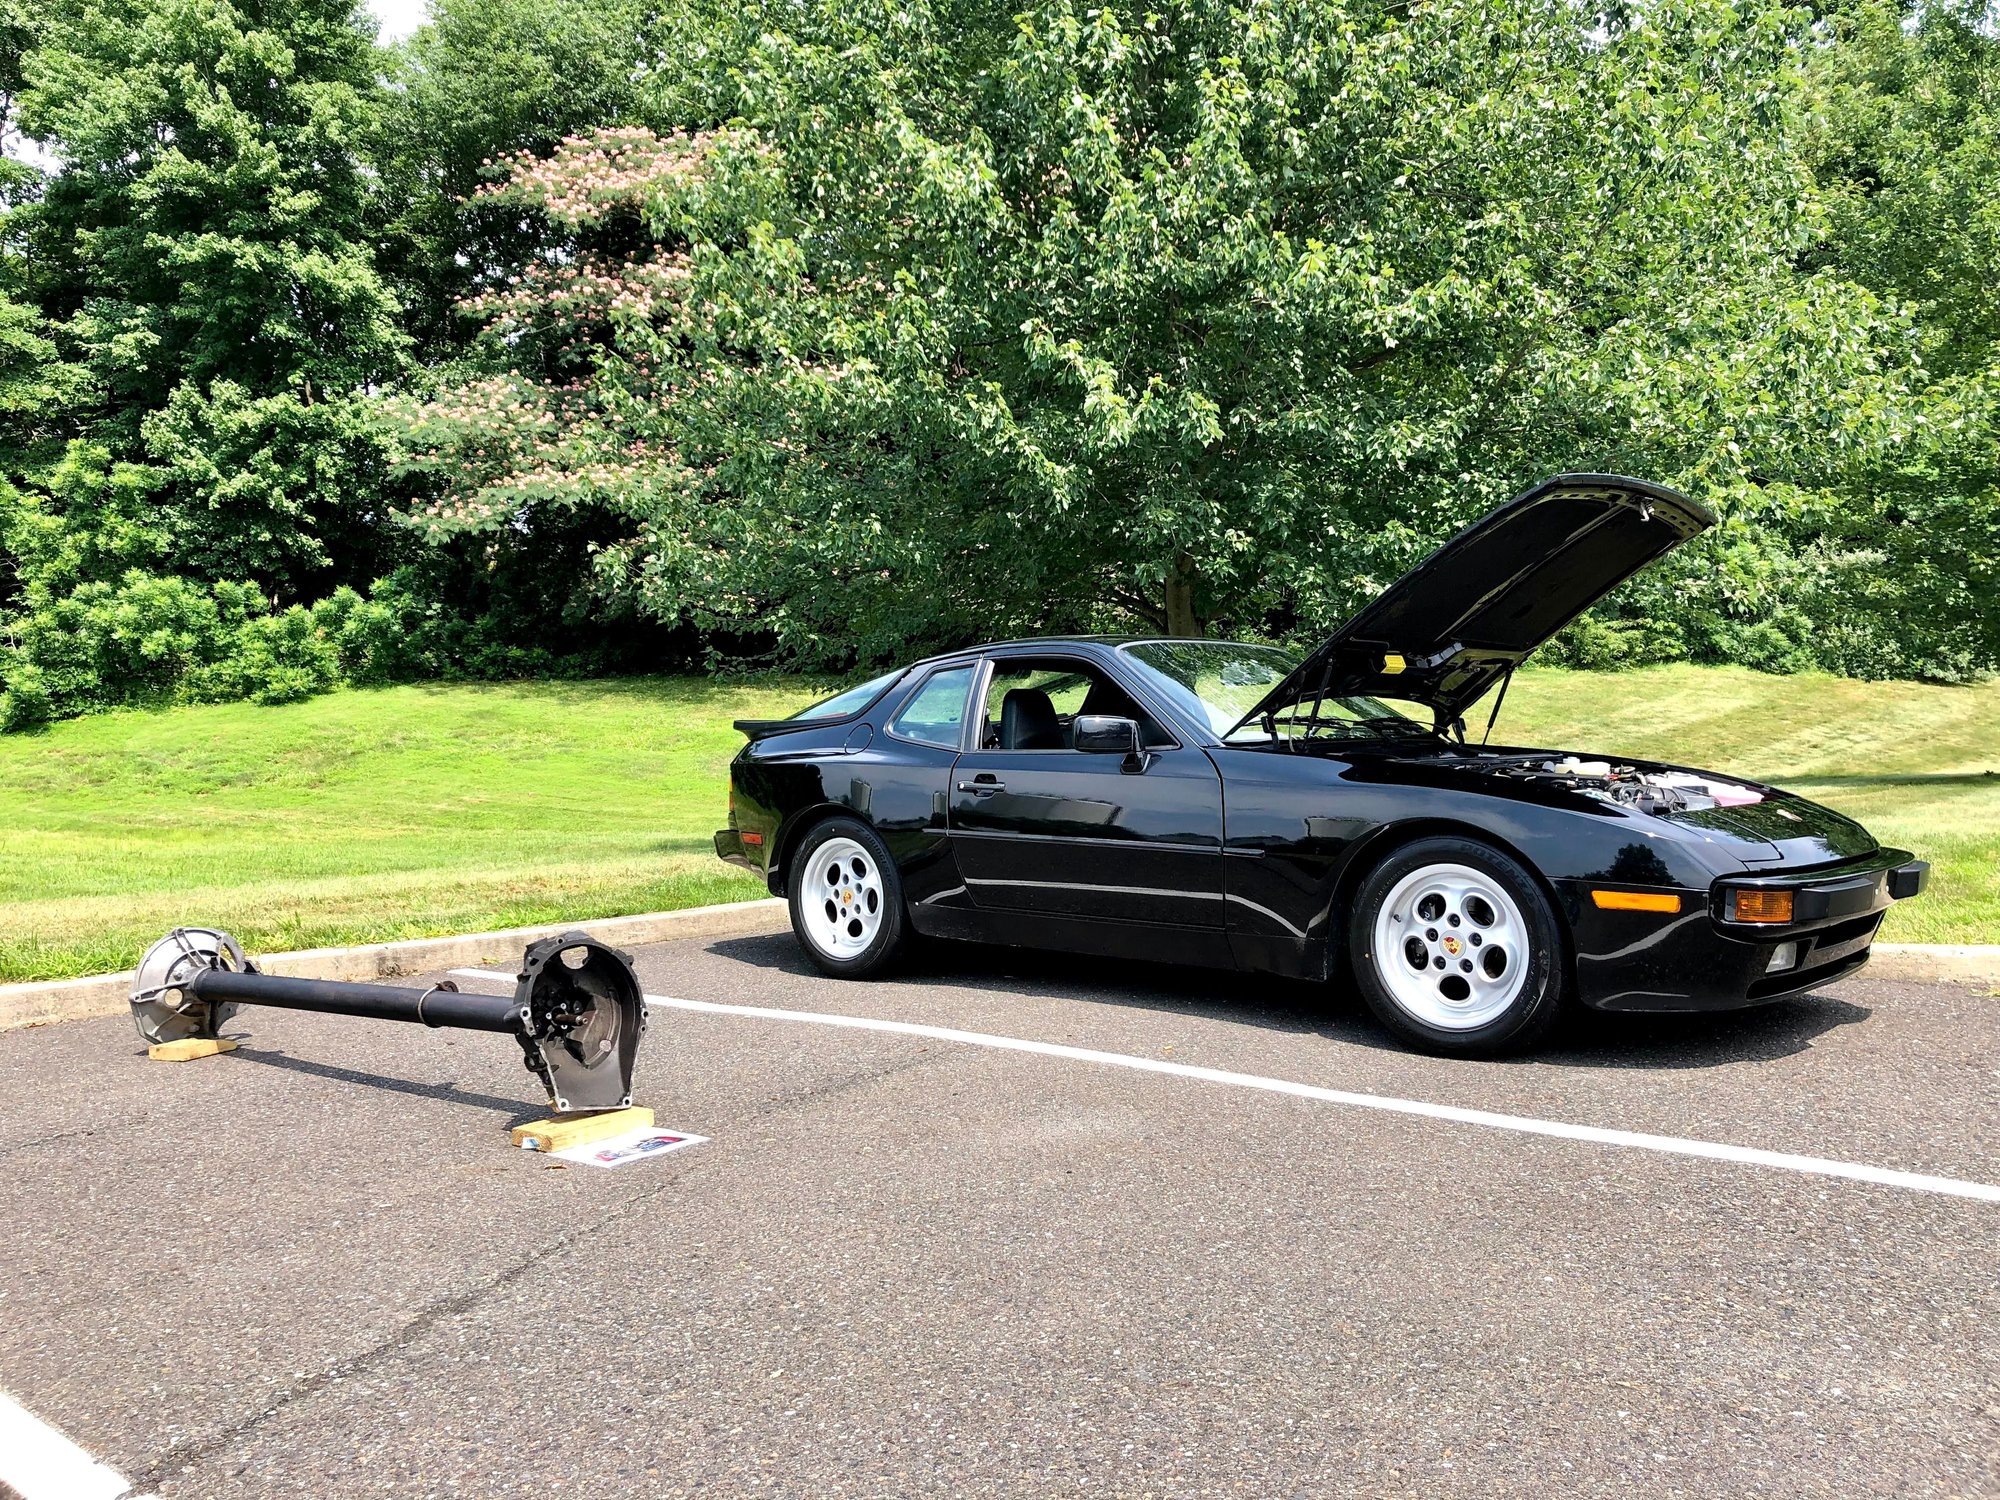
Had a little car show at the office yesterday. A coworker of mine has a 1989 944 that is currently in pieces while he rebuilds the engine and everything else. He brought in his torque tube as his contribution to the show and "parked" it next to my 944.
Hi Guys! Merry Christmas and a soon to be Happy New Year!
For those of you that remember, I replaced the whole power steering system back in May 2018. I bought all brand new OEM lines, a replacement reservoir and rebuilt the pump with a Rennbay seal kit. I contemplated rebuilding the original rack with a Rennbay seal kit, but opted instead to install a rebuilt unit that I picked up on eBay for $220. Unfortunately, in late 2019 the "rebuilt" rack started leaking, of course after the 1-year warranty was up. It got to the point in June 2021 where I finally got tired of it leaving a puddle, pulled the P/S belt and just drove it around sans power steering. Certainly doable, but sucked for parking maneuvers and had terrible and vague steering feel.
I contemplated a few options:
Say screw it and just keep driving it (it was a work-out and definitely took some of the fun out of driving it).
Get a Rennbay seal kit and rebuild it.
Use one of the conversion instructions online and convert it to a true, de-powered rack.
Pick up a manual rack and get rid of some extra P/S crap (re: weight and complexity).
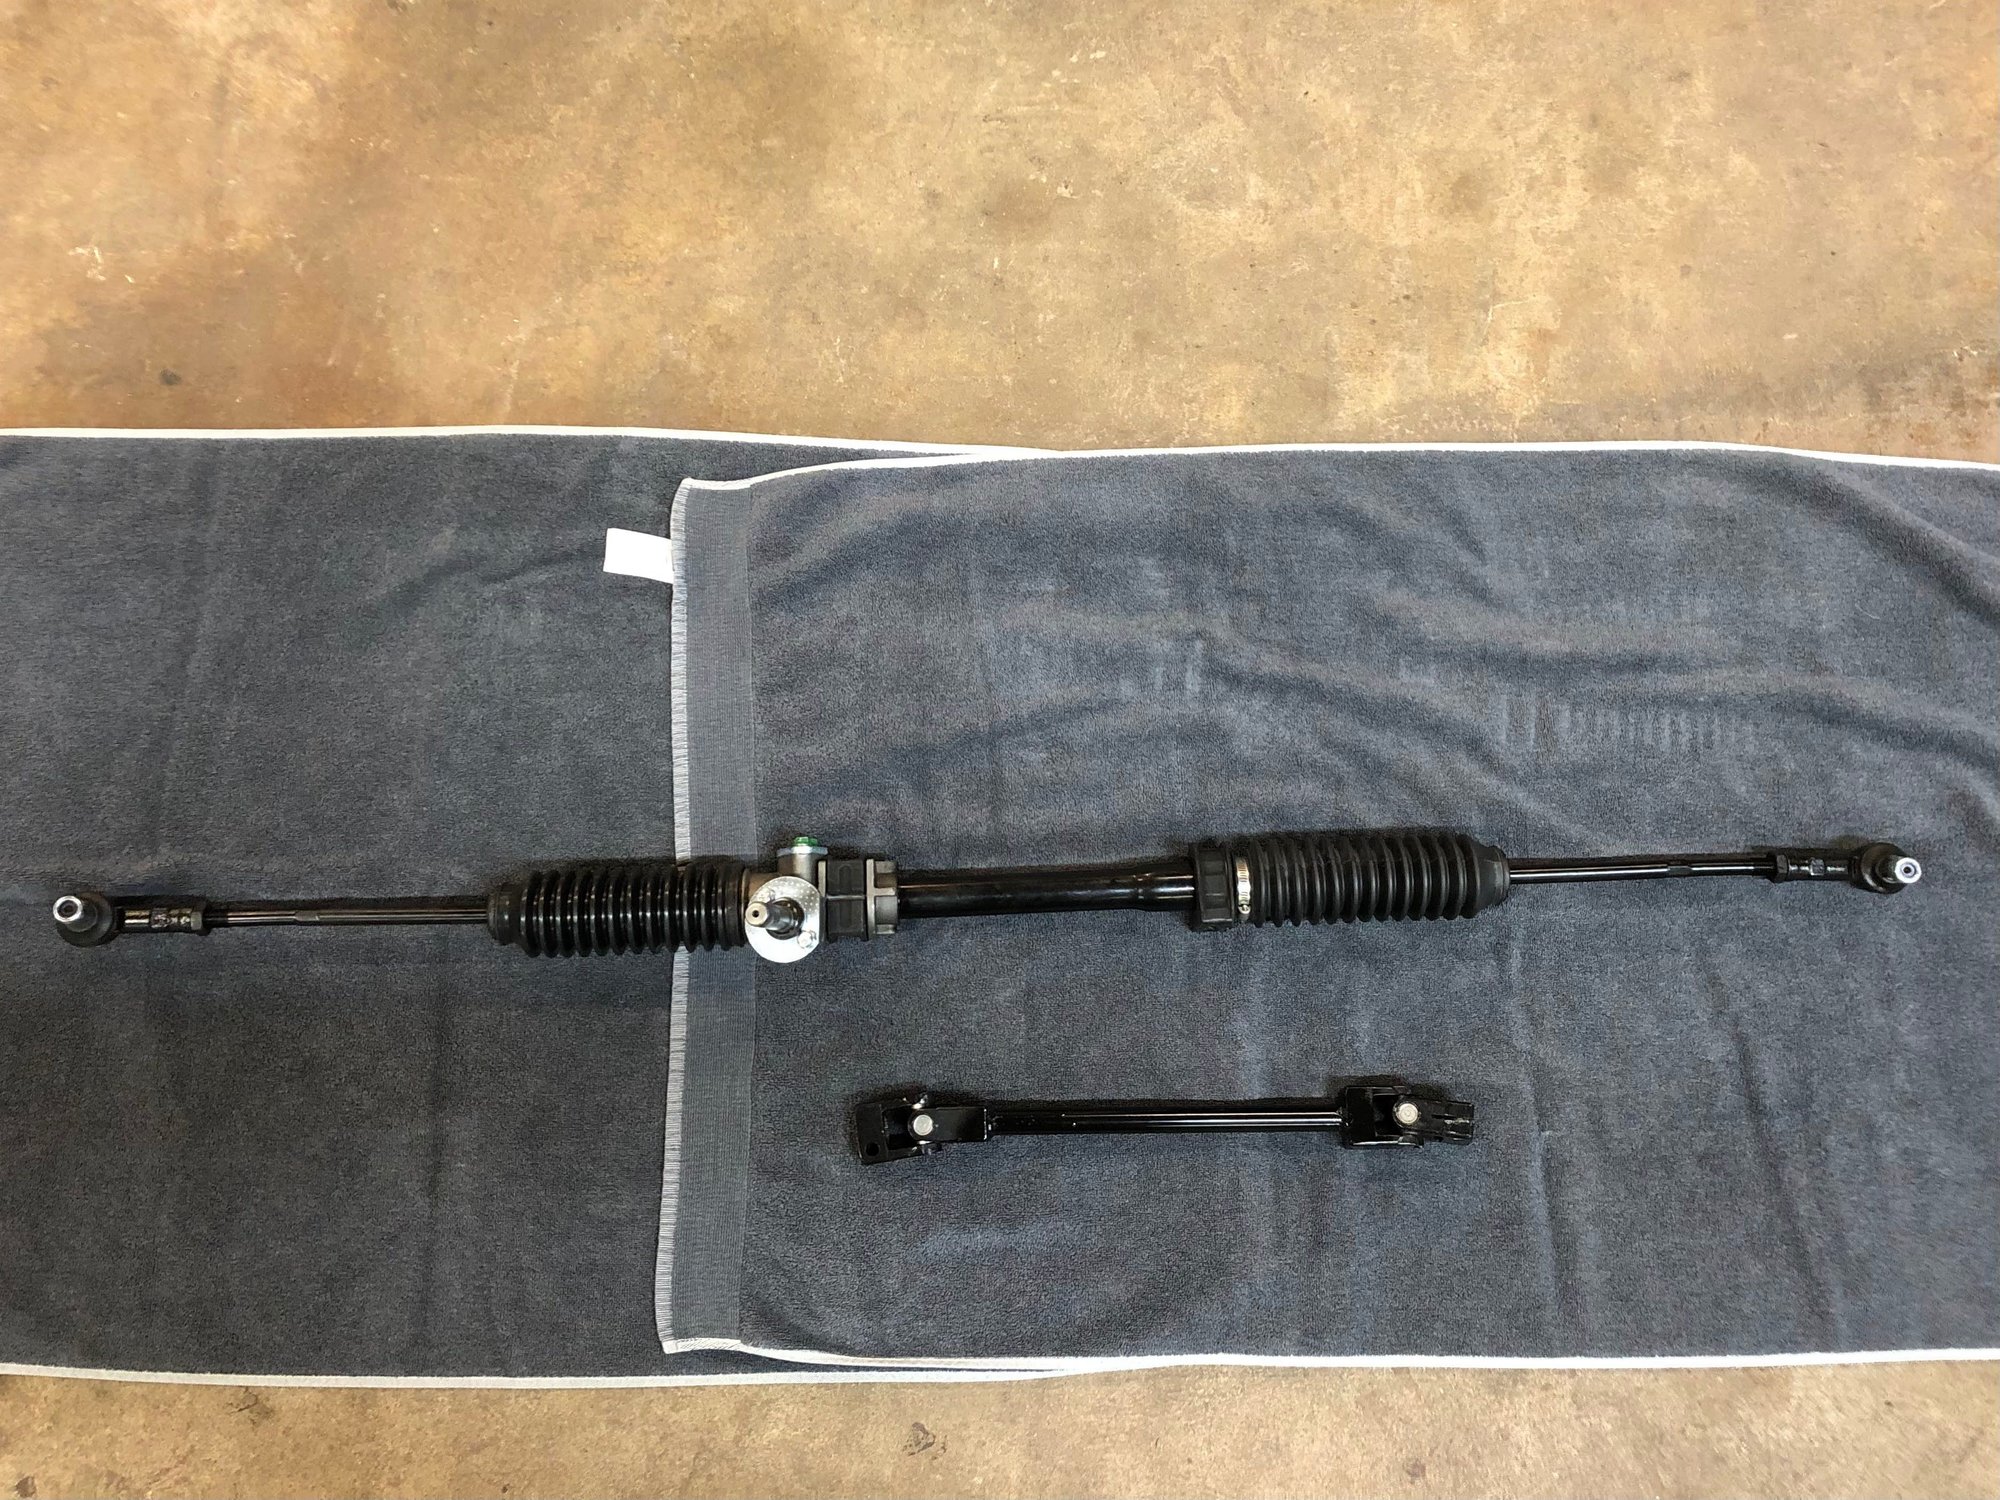
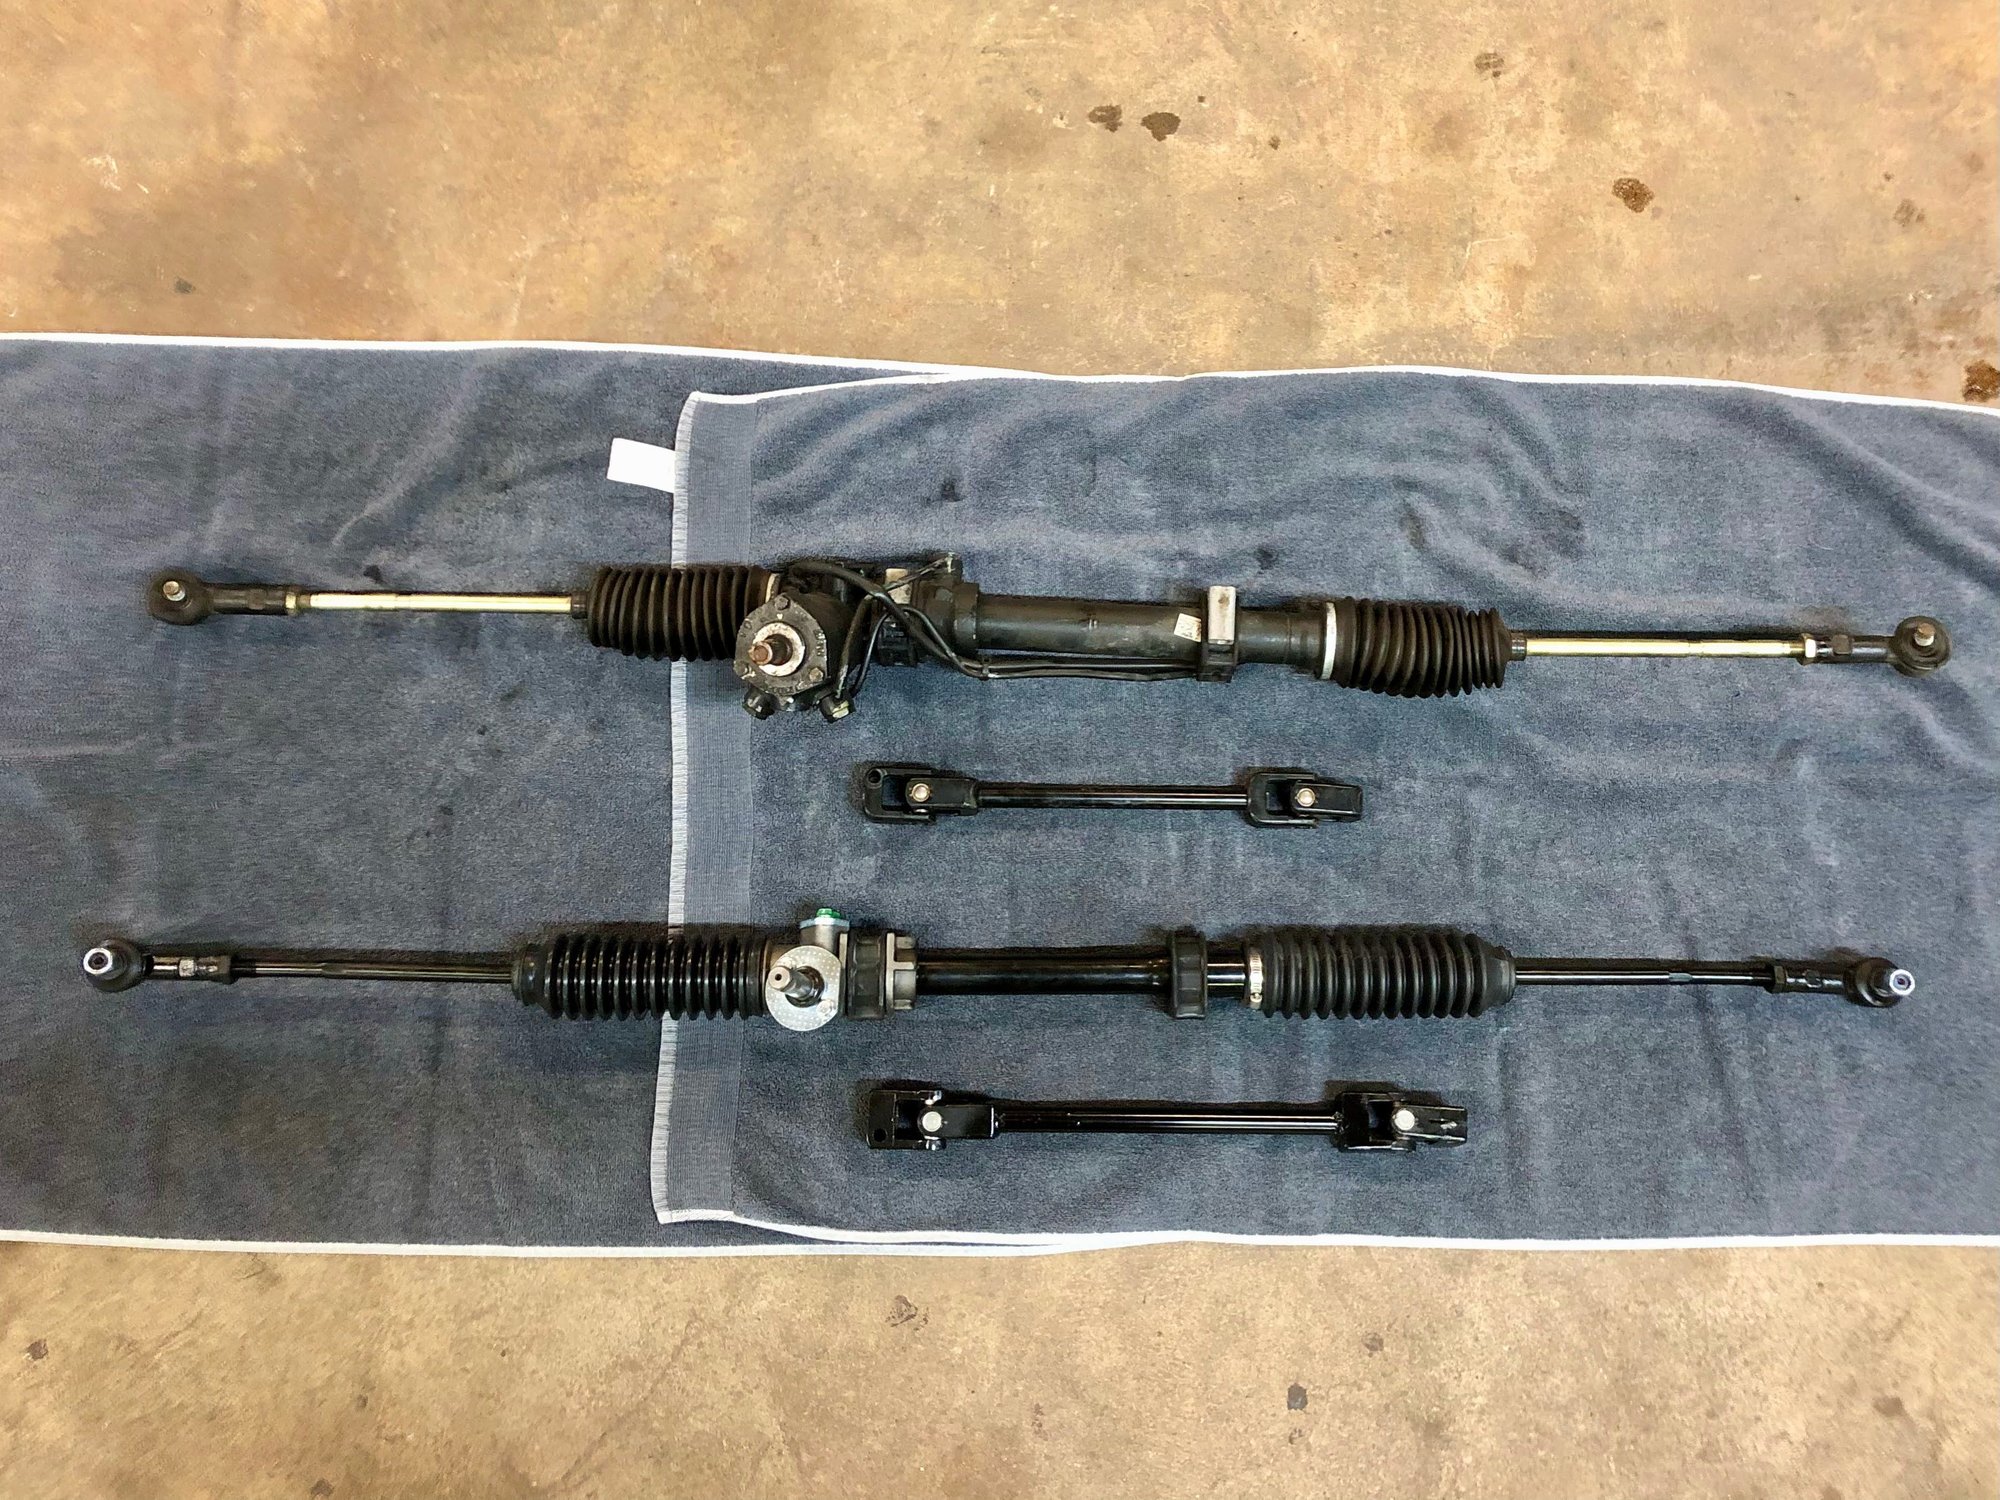
I thought the only option for a manual rack would be to find a used one from an 83 and they can get kind of pricey when you can actually find them. Then I stumbled upon Martin Willis and The Machine Shop in Colorado Springs, CO. Martin builds new 924S/944/968 manual steering racks with the right length tie rods based on your car's wheel offset and he includes the unobtanium manual steering shaft. Shipped to my door for $810. Check it out!
Here it is compared to the power rack. I know the power rack doesn't look too leaky in the picture, but that's because it hasn't had fluid pumping through it in 6 months. You could hear it sloshing around inside the dust boots when turning the wheels before removing it.
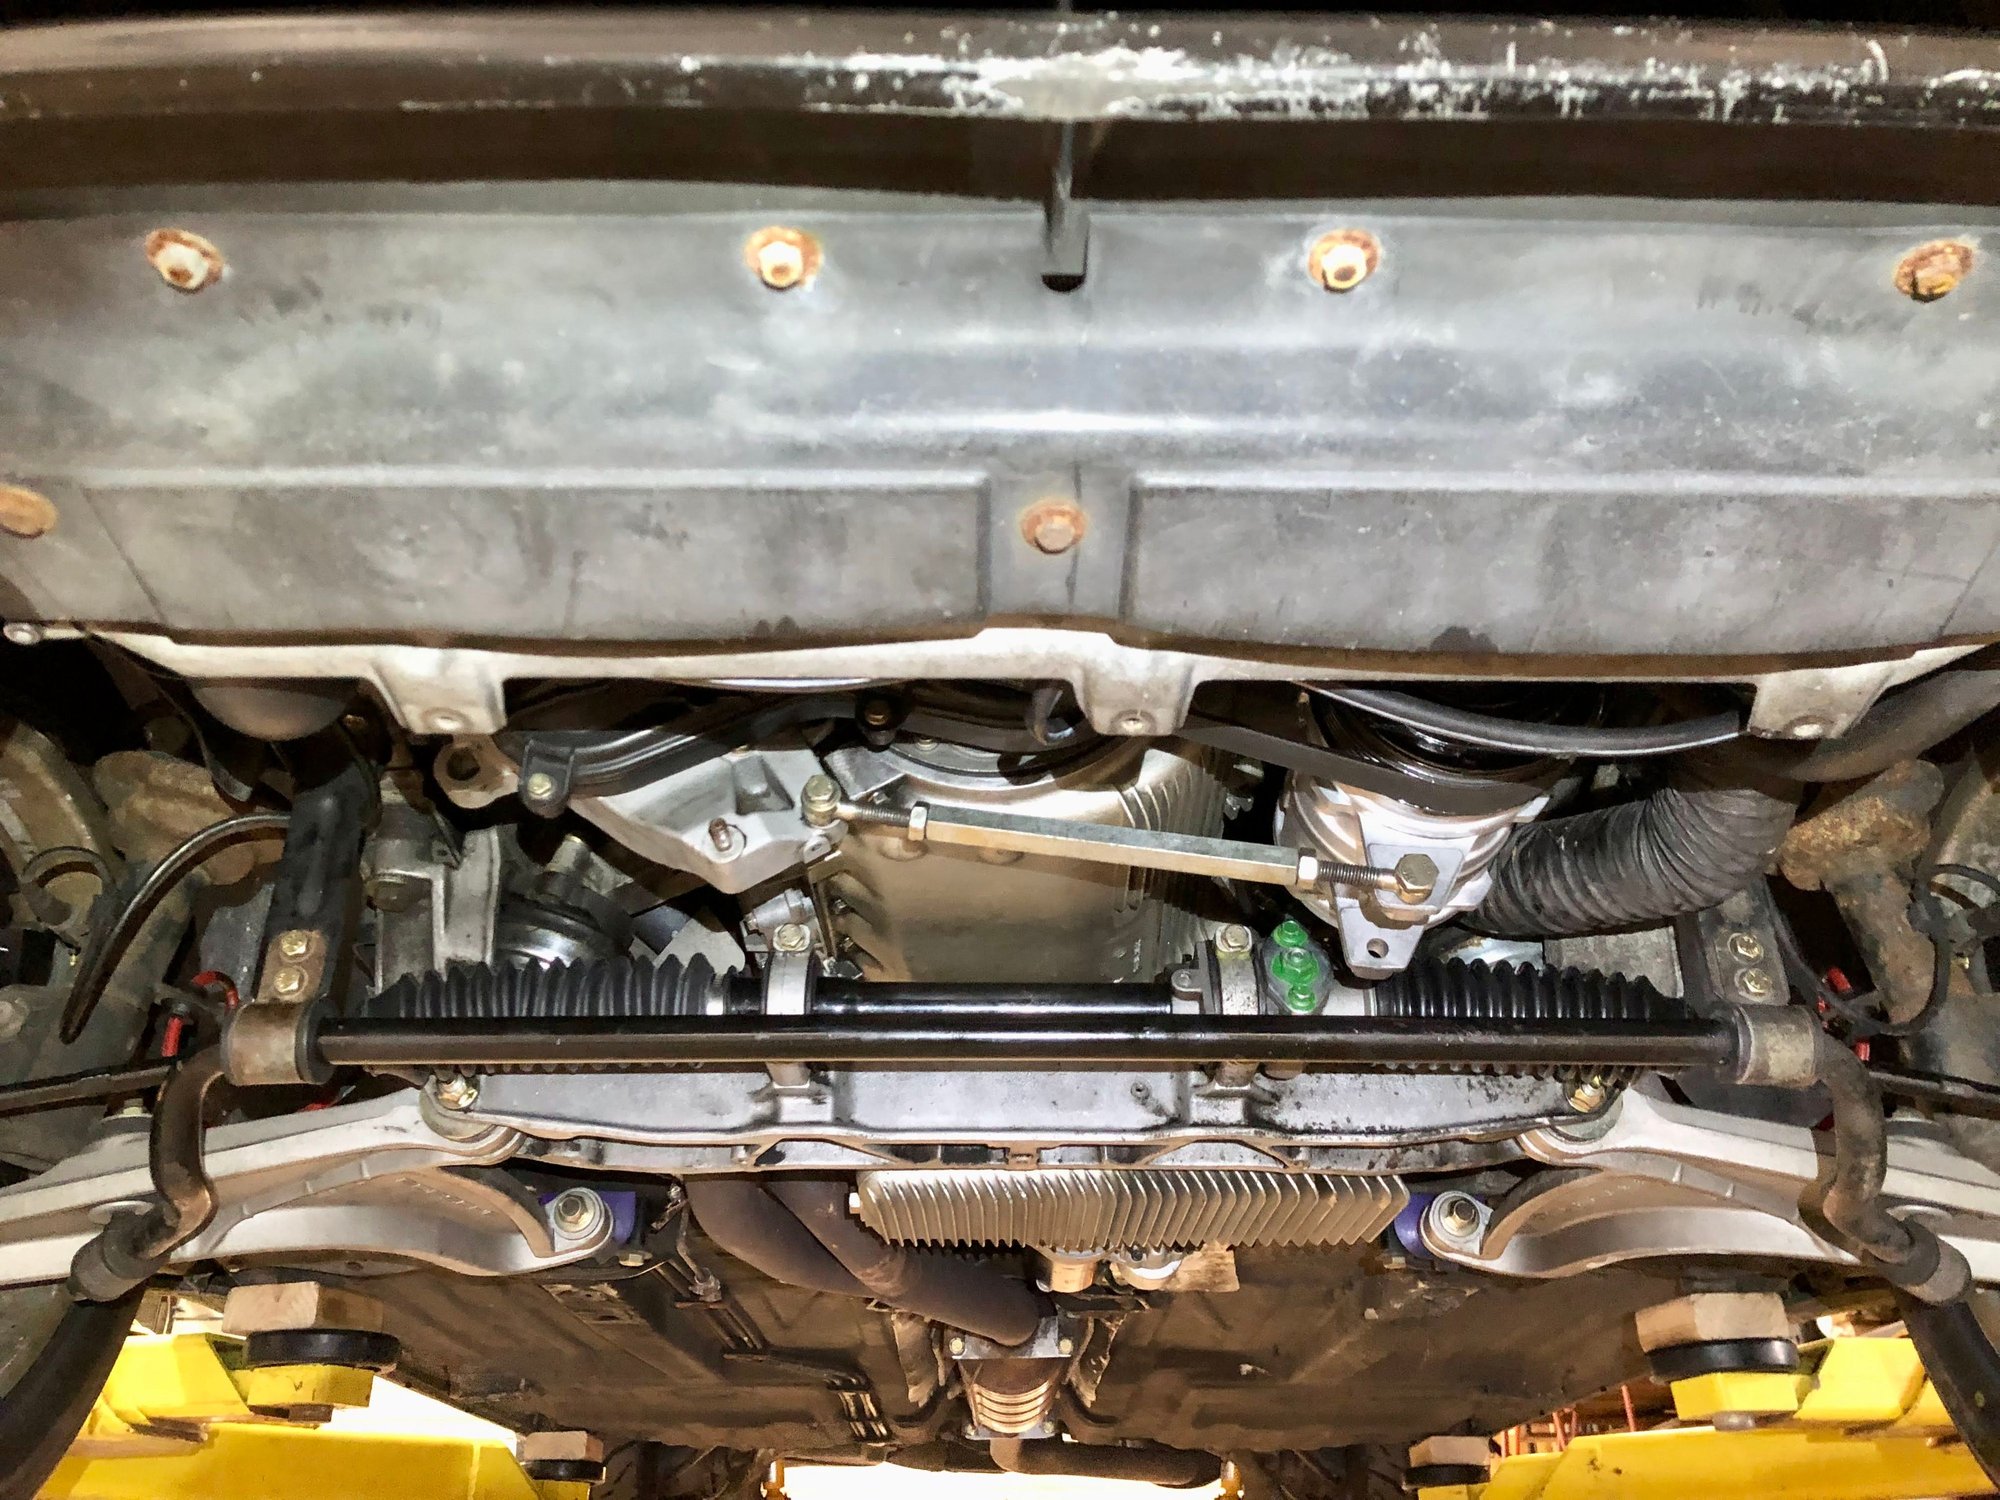
Fully installed in the car with the P/S pump gone! Not having the reservoir by the oil filter should make oil changes easier in the future too.
Without the extra power steering stuff and the lighter weight of the manual rack, it saves 15-16 pounds and some extra space around the engine.
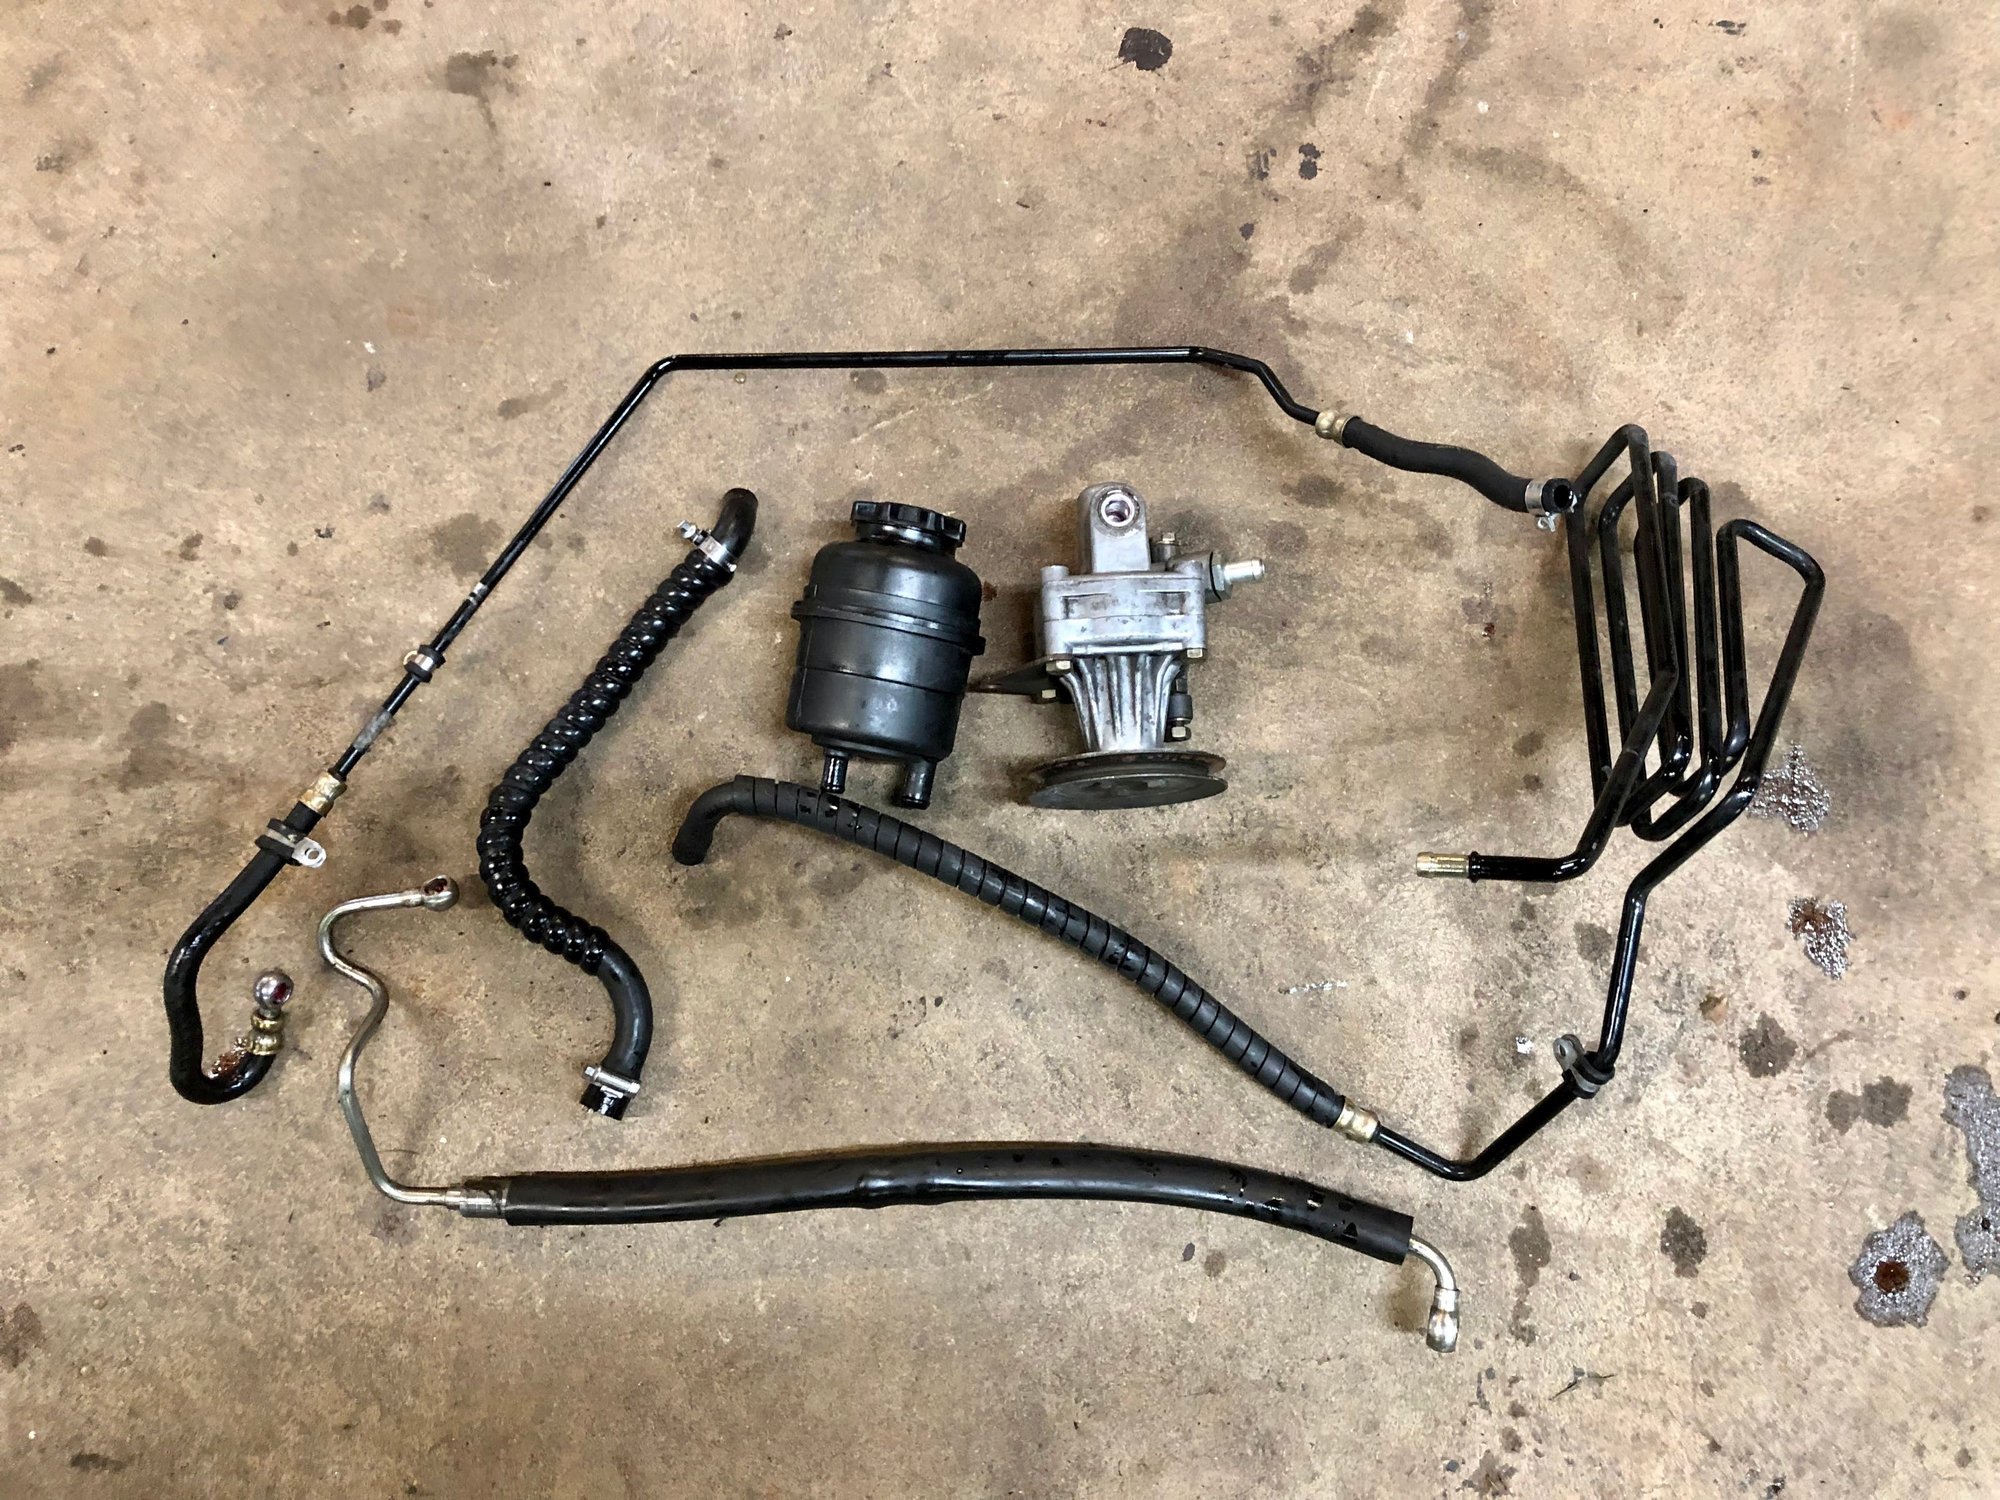
I still have the P/S stuff if anyone is interested (I have some of the 32 year old lines from when I did the job in 2018 that are still in good shape too). I'll probably just hang onto them for now and maybe eventually sell them at a swap meet or something like that for cheap.
I haven't driven the car too much yet as I do have some alignment "tweaking" to do still. Took it for its maiden voyage and without a doubt this is a great improvement to me (though this is compared to a non-powered, power steering rack). I don't mind the slightly heavier steering since it's not a daily driver and I think it simplifies the car and eliminates ever having to do this job again. I discovered my strut bearings need to be done at this point, so I'll plan to do those as well as clean up and re-paint my rusty struts before taking it for a good alignment in the new year. I'll finally have good steering feel again and no leaks!
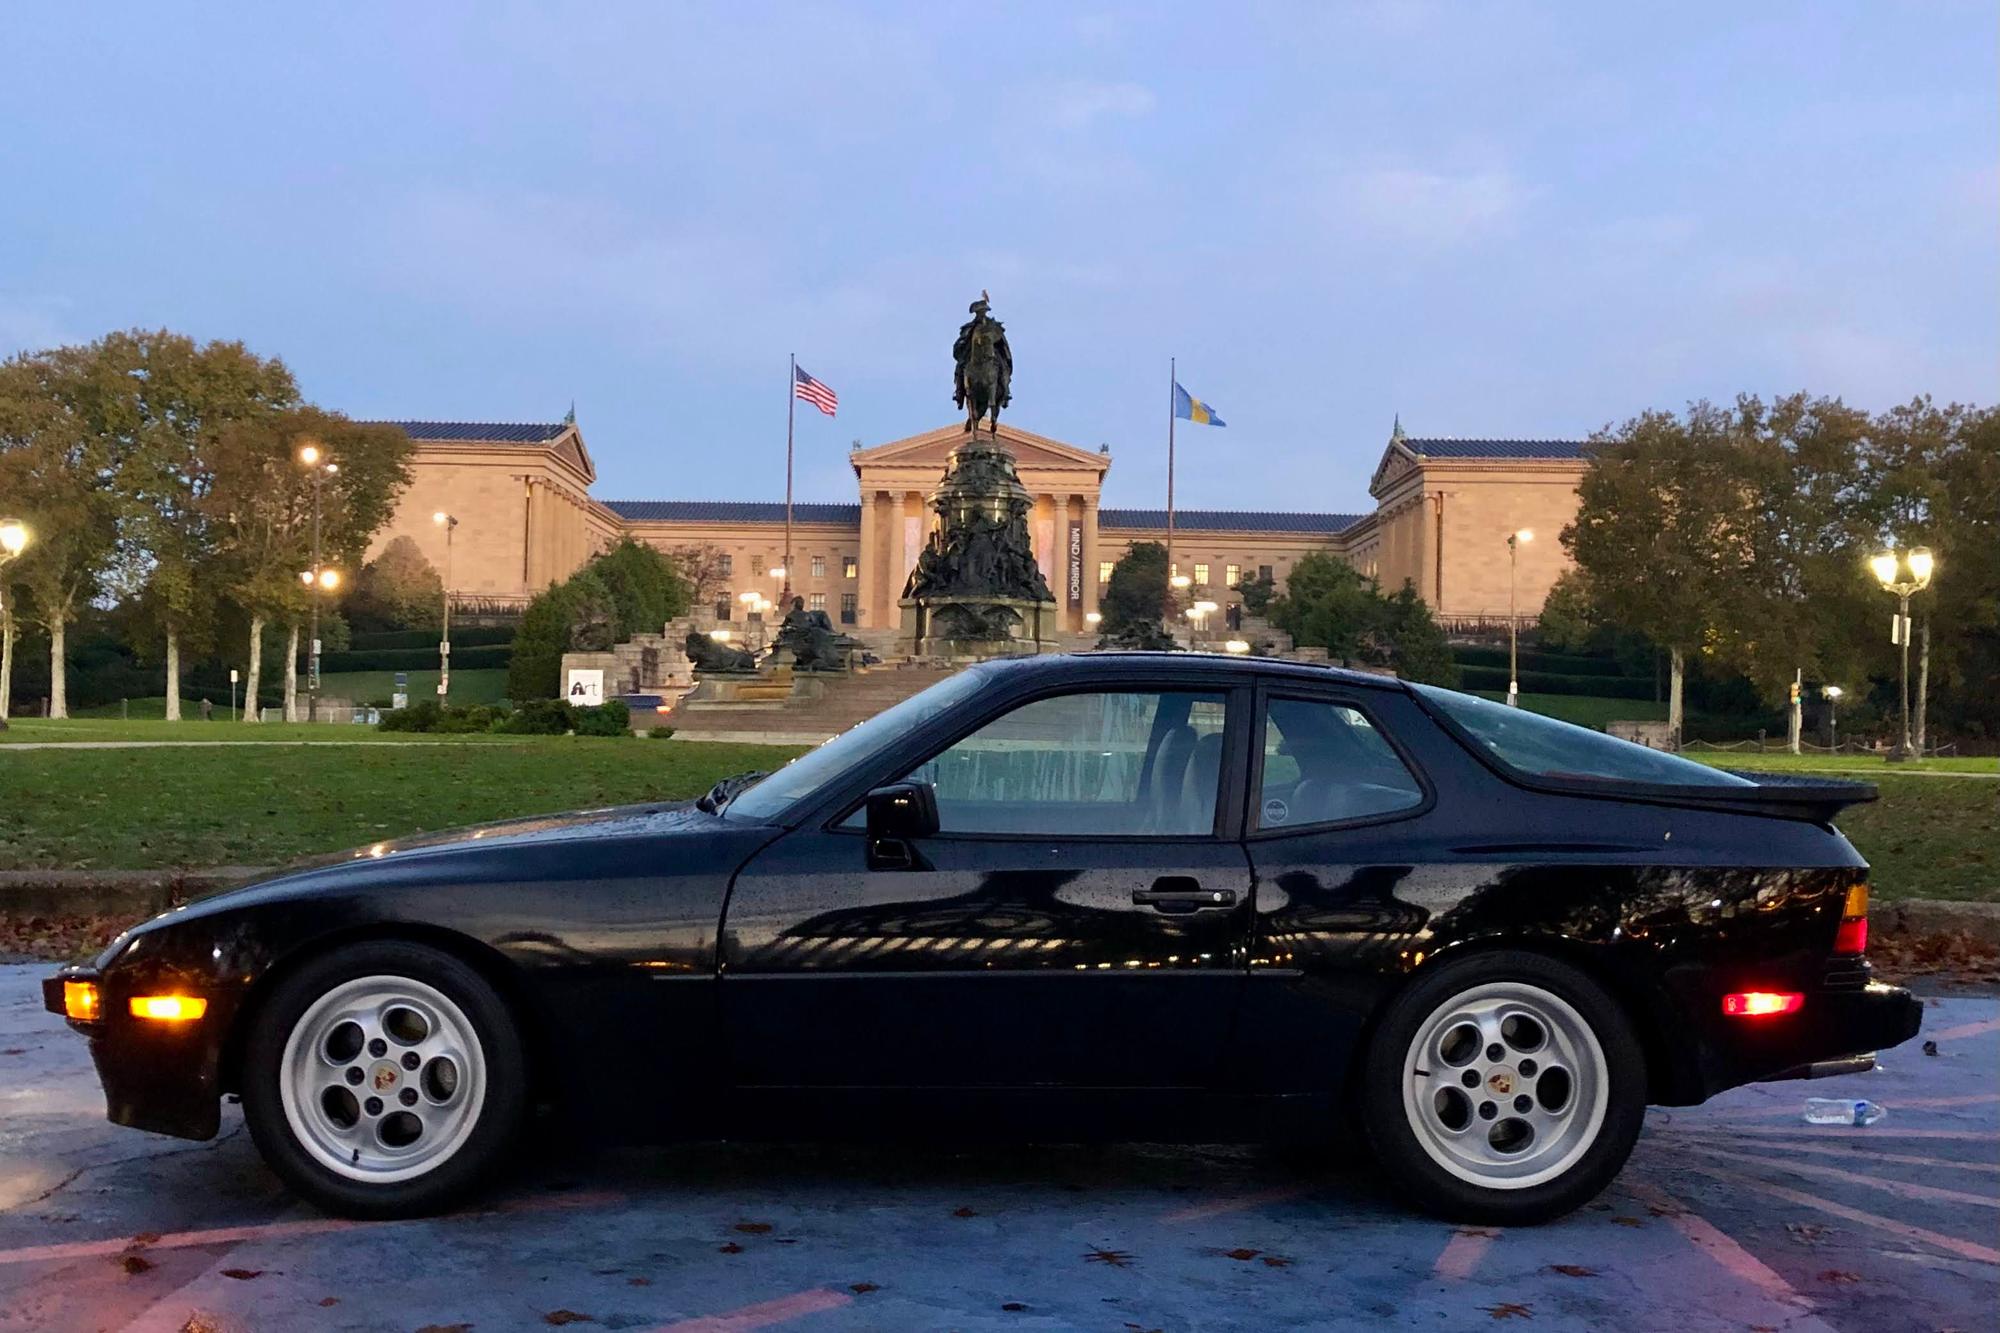
On a side note, here are some pics of the old boy from the morning of the Philabundance food drive in October with the local PCA (photos are pre get-together and food caravan).
And just for fun since it's still the holiday season, here are two houses out in West Chester, PA that love Christmas lights as much as Clarke Griswold himself.
That's all folks. Have a safe and Happy New Year!
JRP
Last edited by JRP944; 12-30-2021 at 07:19 AM.
Reason: Updated web link
Dear JRP: Are those wheel center caps that you have, "factory" or did you paint them? If they are factory, could you supply the correct P/N for them, please? TIA..
Dear JRP: Are those wheel center caps that you have, "factory" or did you paint them? If they are factory, could you supply the correct P/N for them, please? TIA..
Tiger, I'm not sure if they're "factory" or aftermarket to be honest, but I have not painted them. My wife purchased them for me back in 2013 when I got the car and I can't remember at this point where they came from. I'll have to take a look and see if there is a factory part number on them the next time I work on the car (it's 40 miles away from where I live, unfortunately).
Something I have noticed about them is that the silver paint is a shade or two darker than the silver on the factory wheels. I'm not sure if this is because they're aftermarket or if Porsche used a slightly darker silver on the later model wheels.
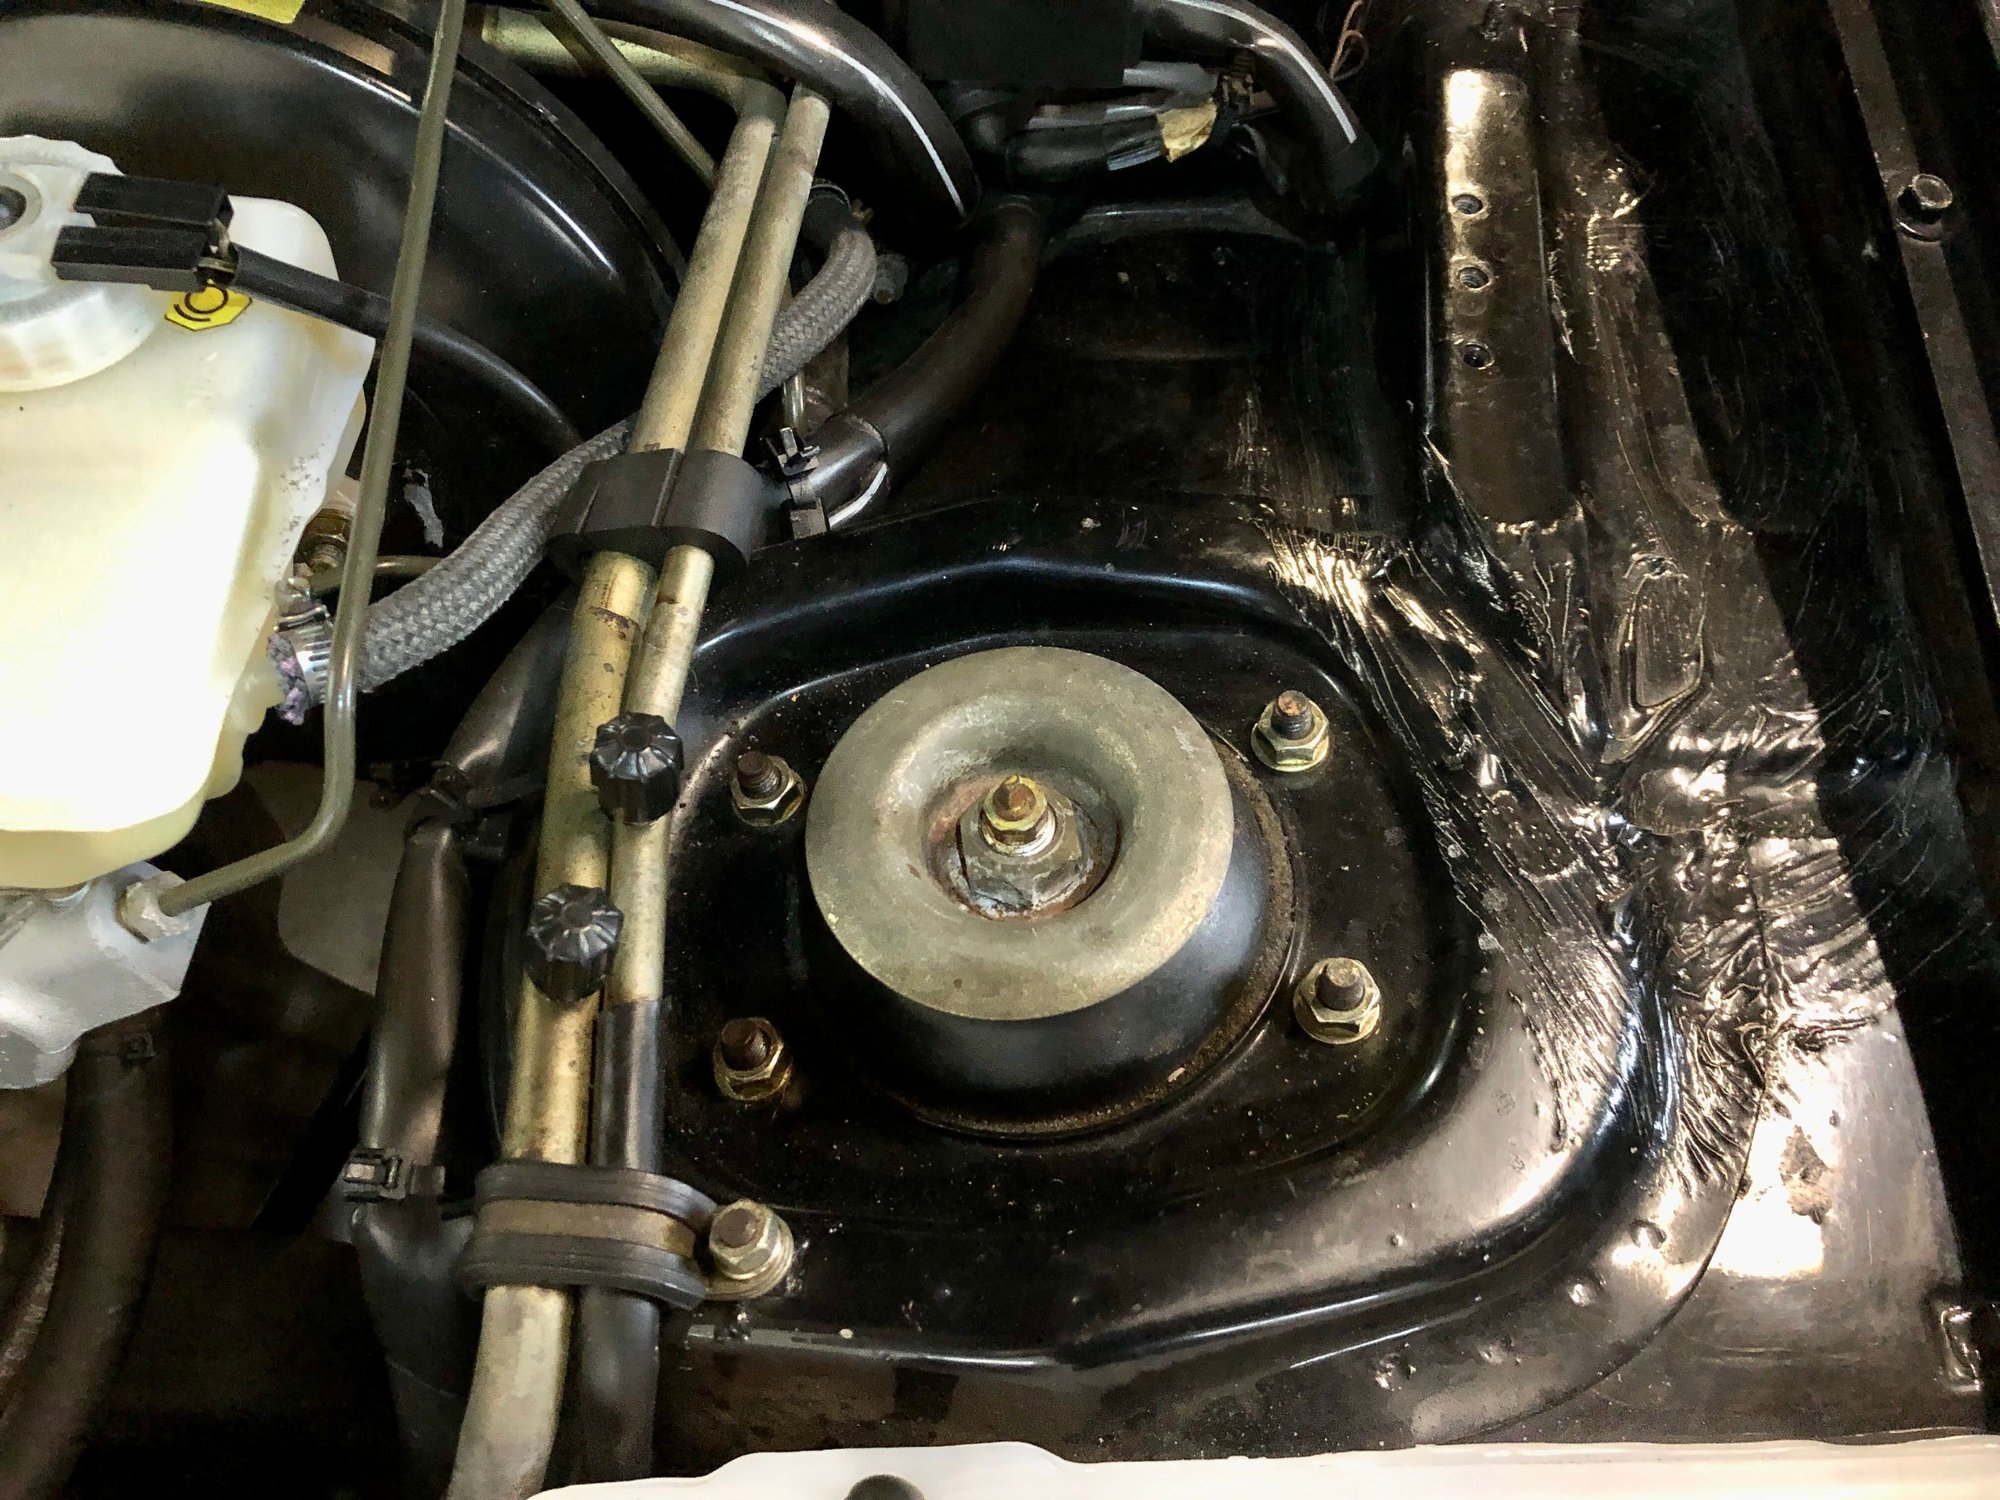
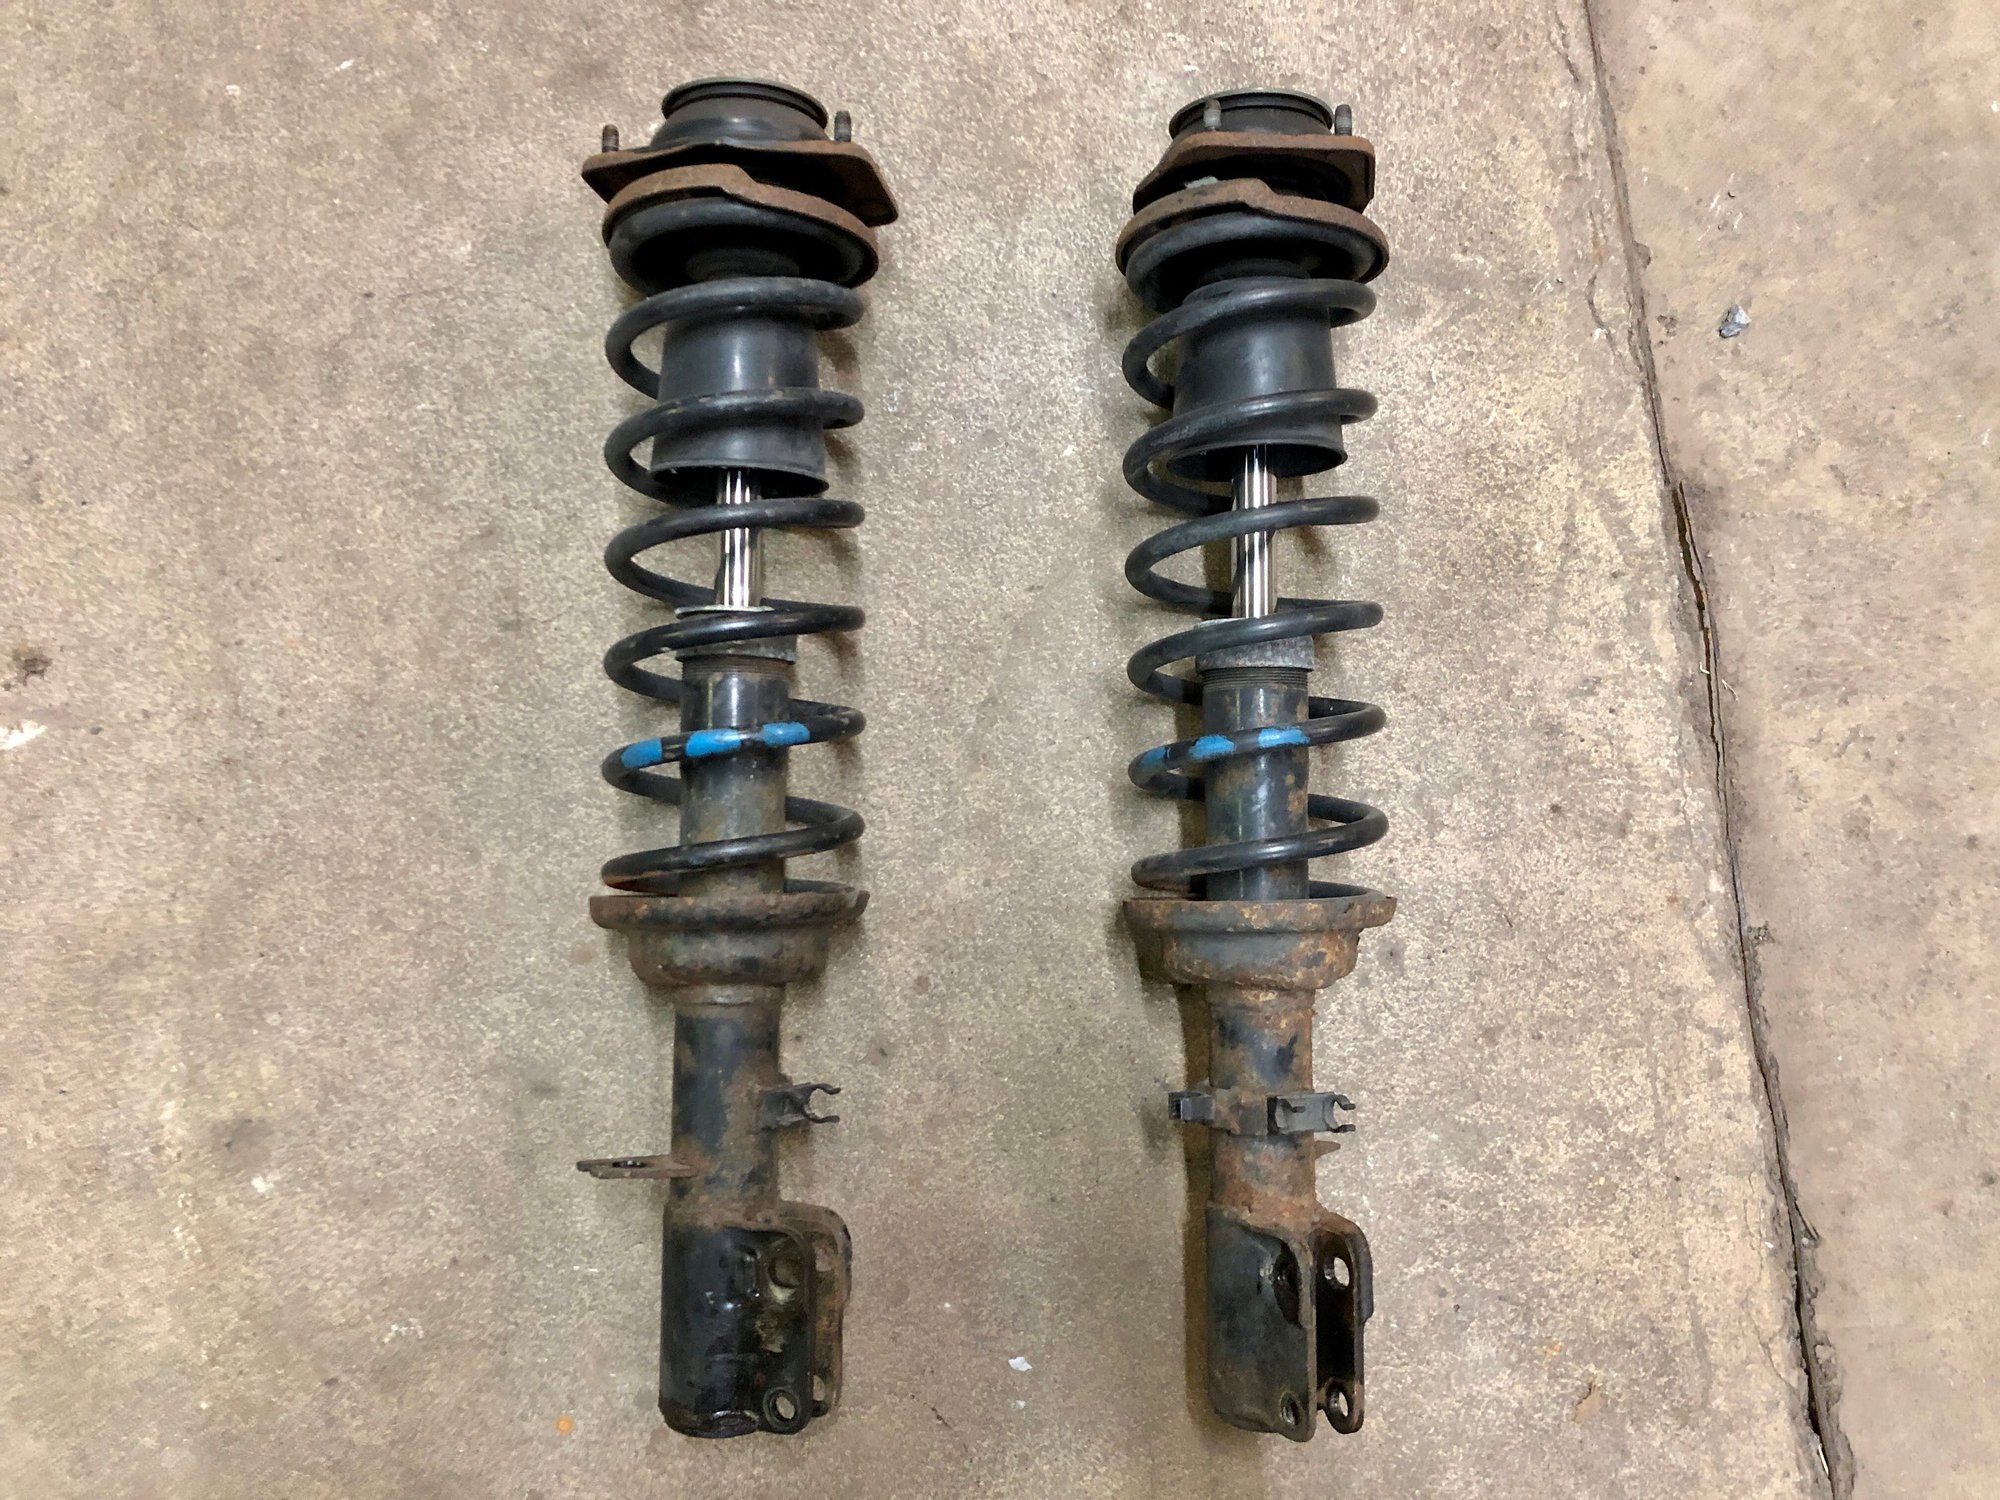
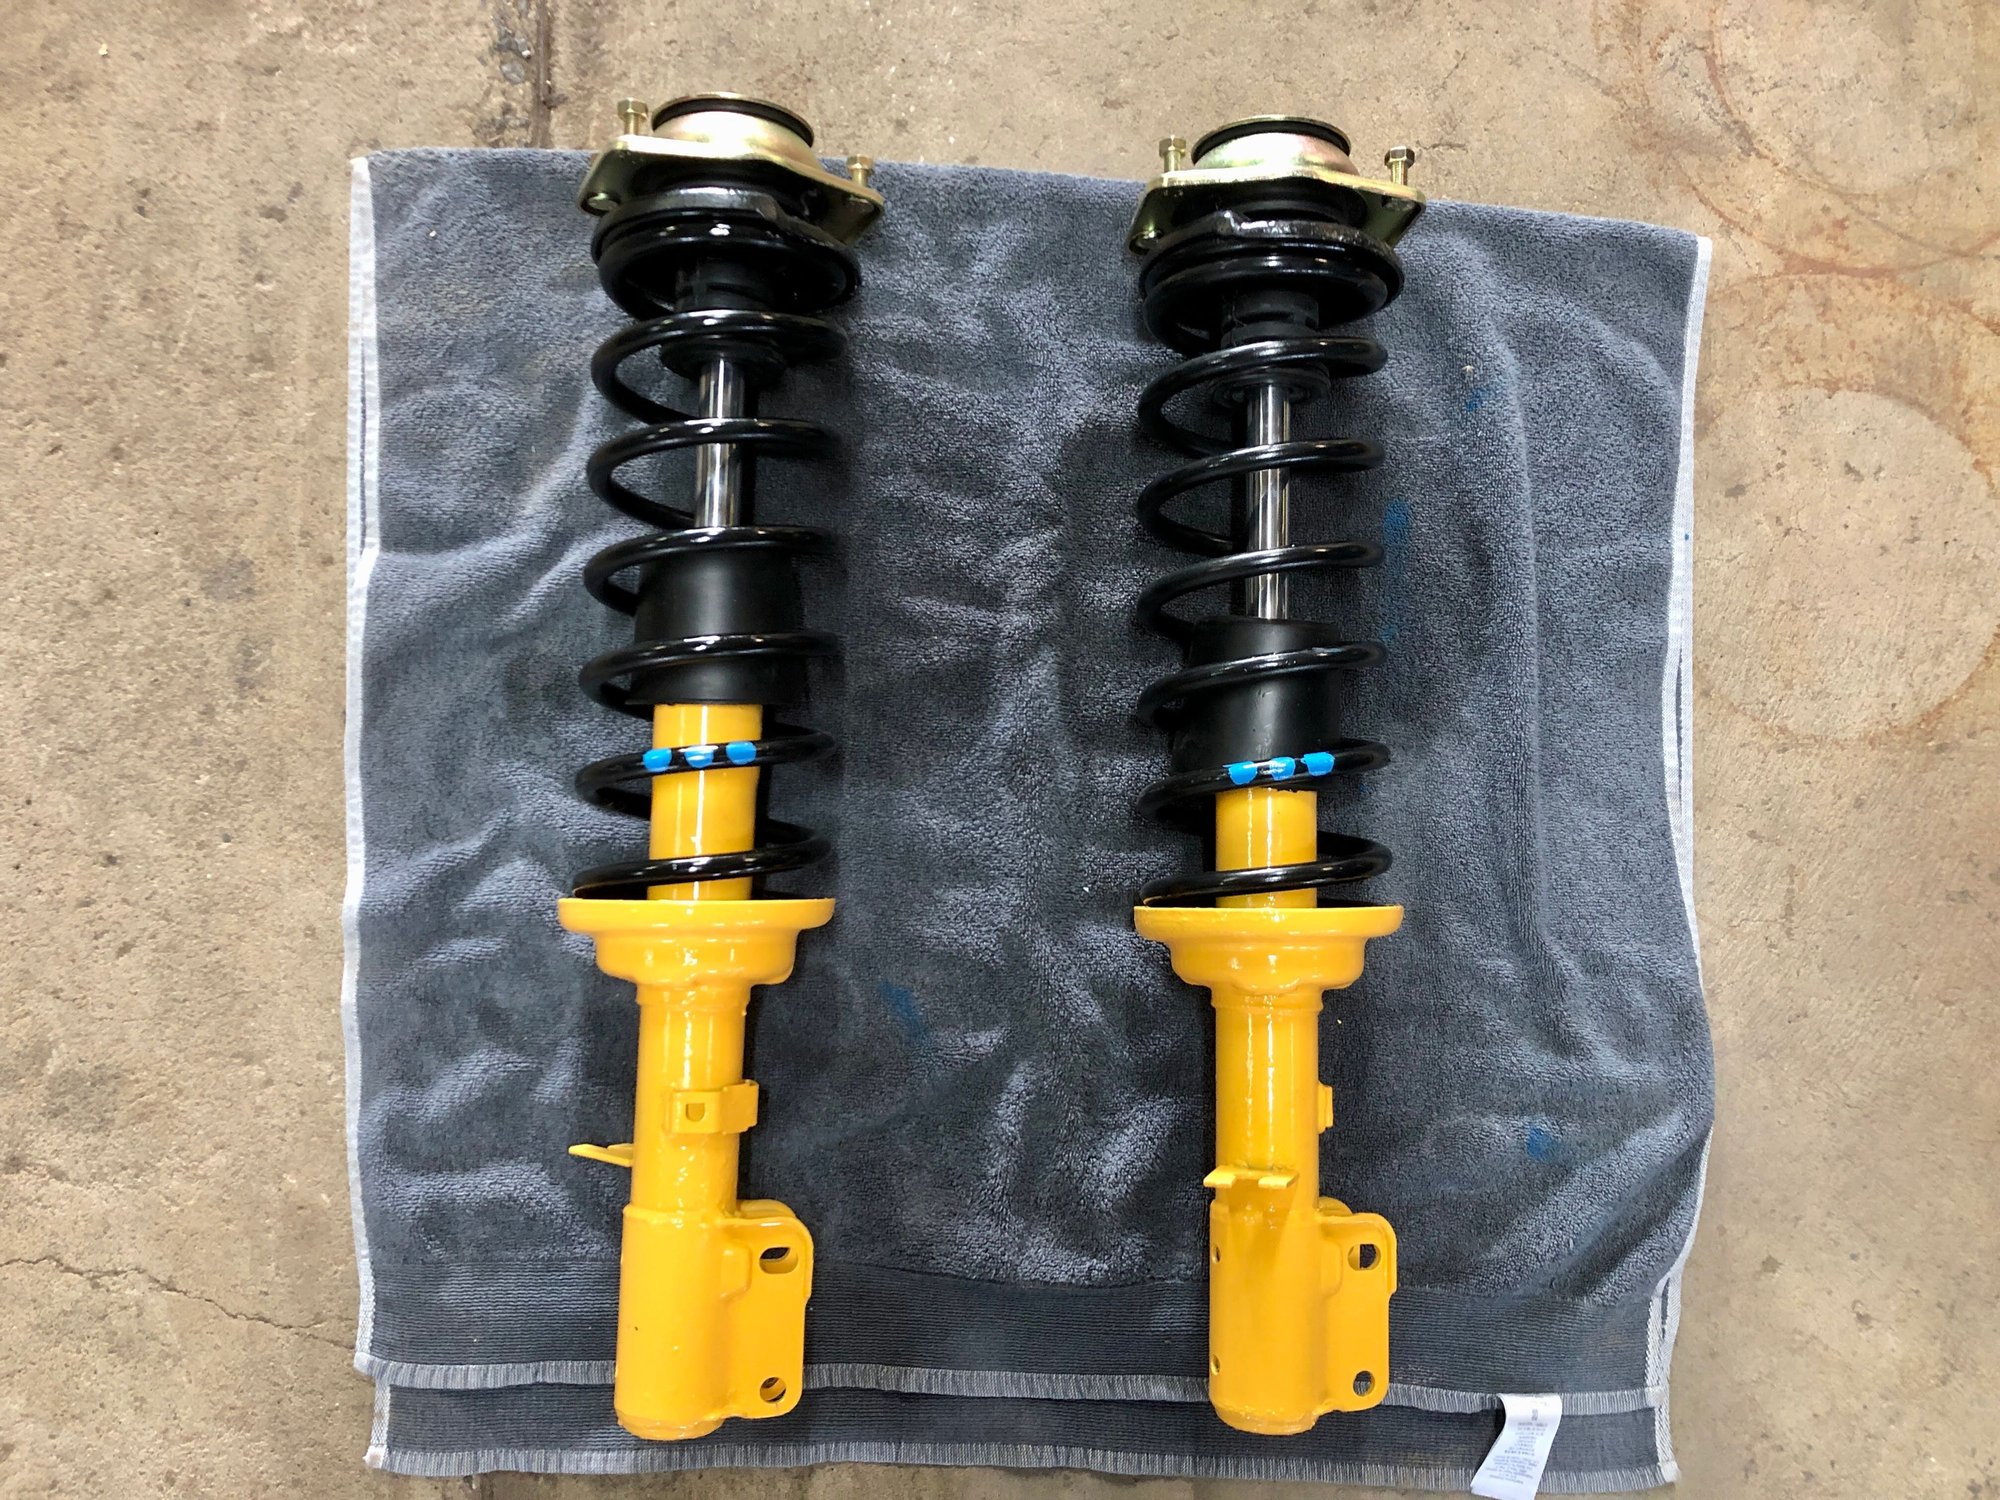
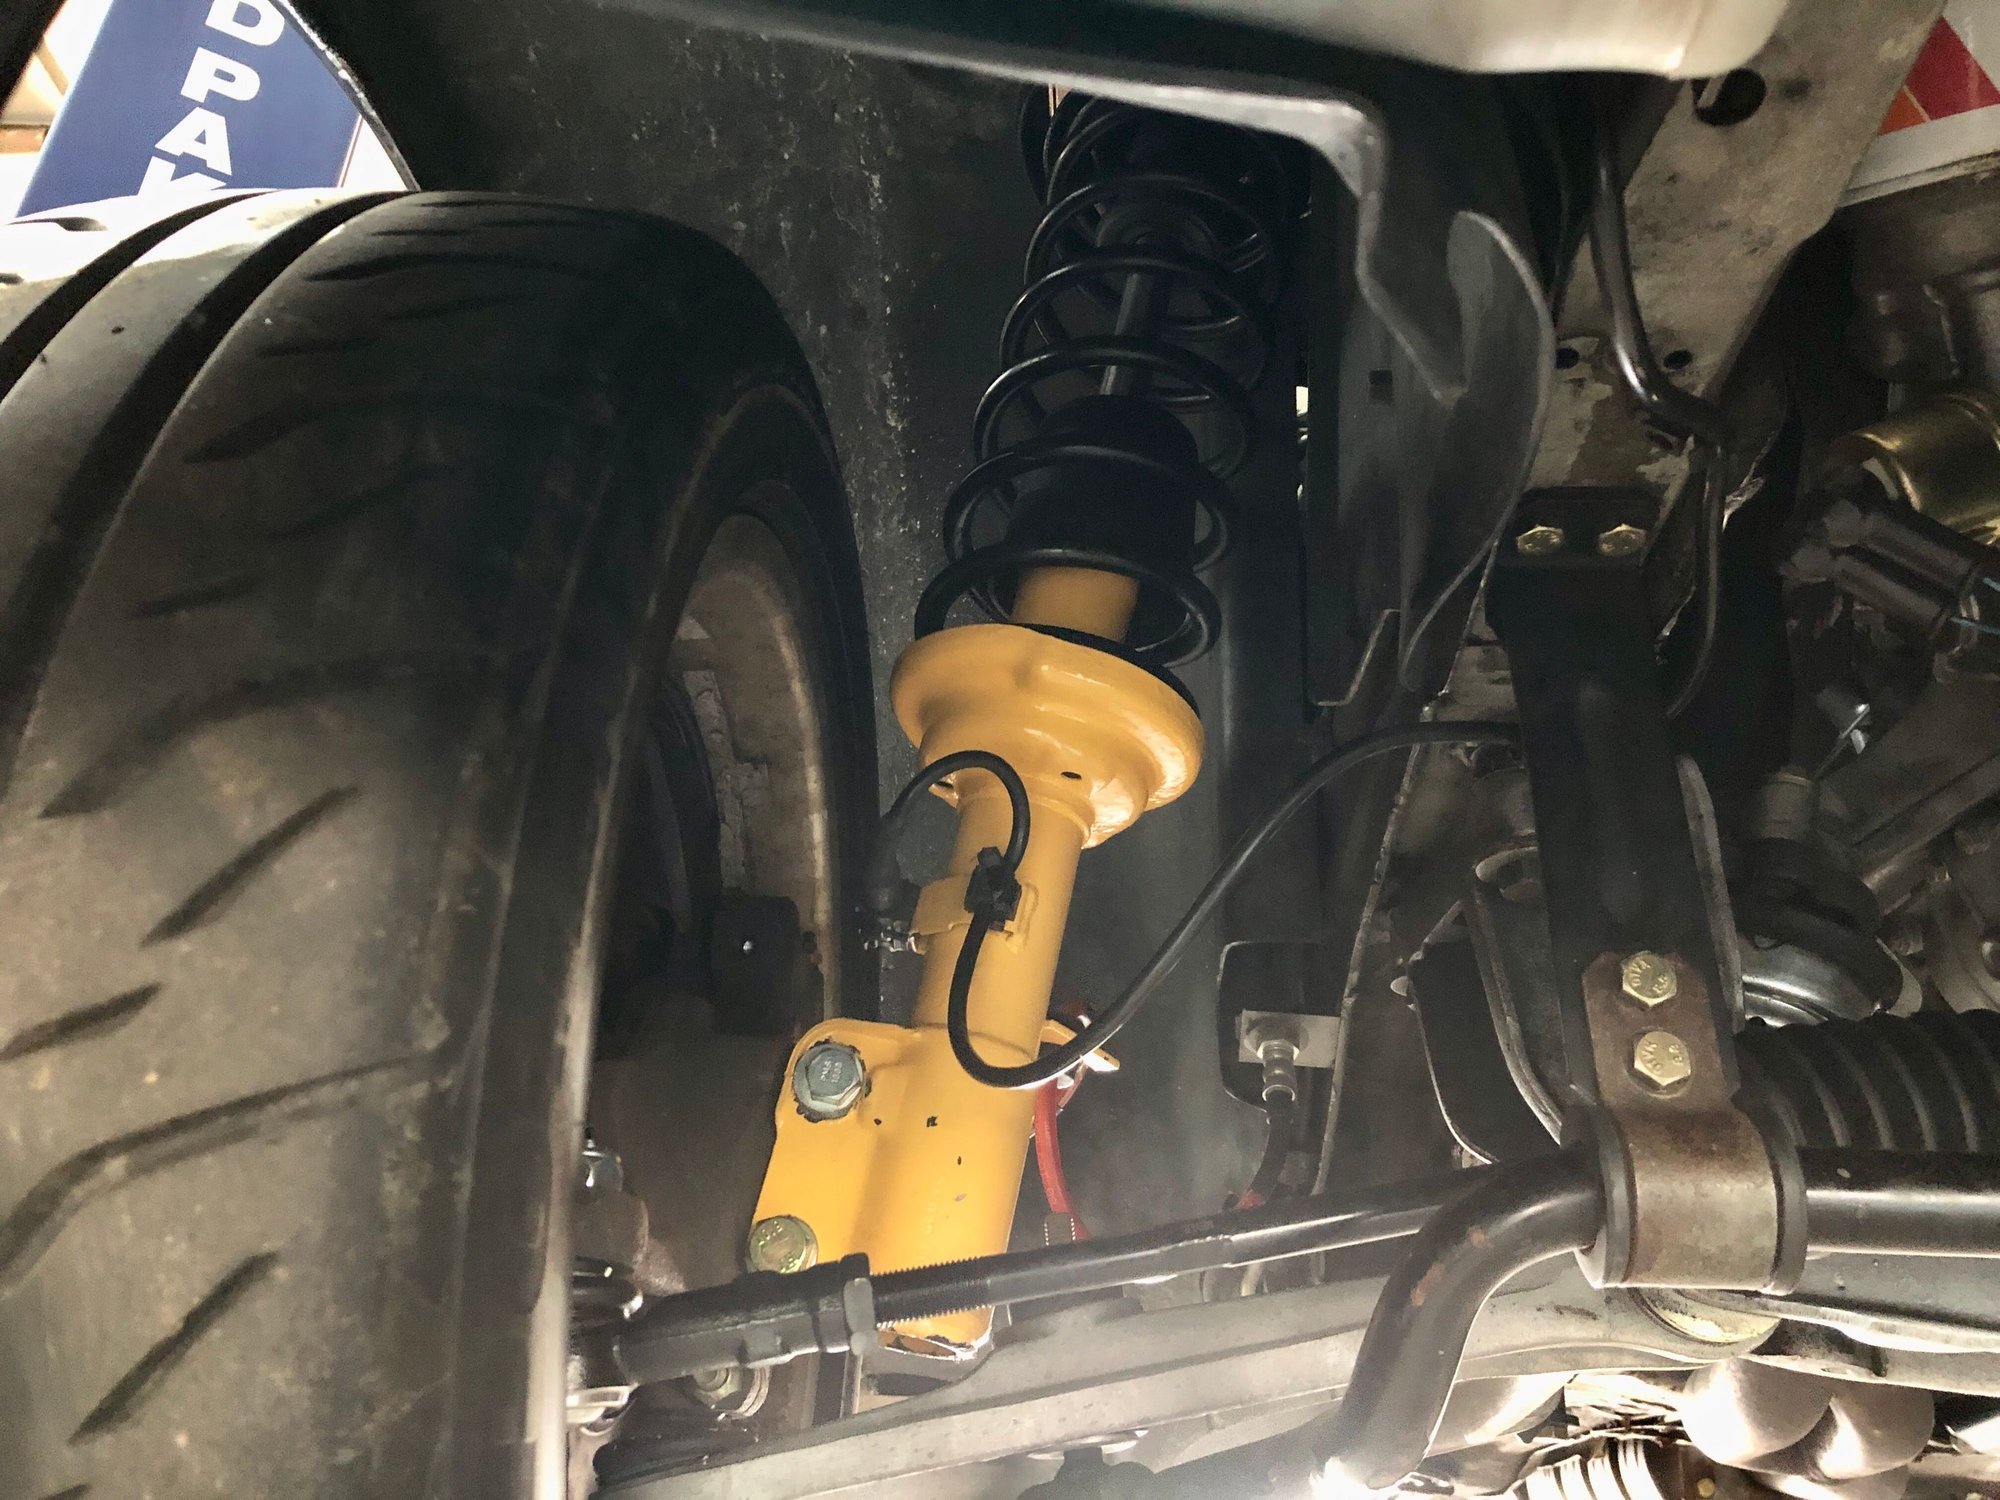
I finally got around to yanking my front struts, replacing the strut bearings and hardware and painting the strut housings to match the Koni rears. The lower washers on both of my strut bearings were cracked, so that certainly explains the clunking under turning and the vibrations at speed. Everything is super tight and feels great now, just like it should. Dare I say it - it feels like new! Well, new for 1986 anyway. I'll let the pictures do the talking.
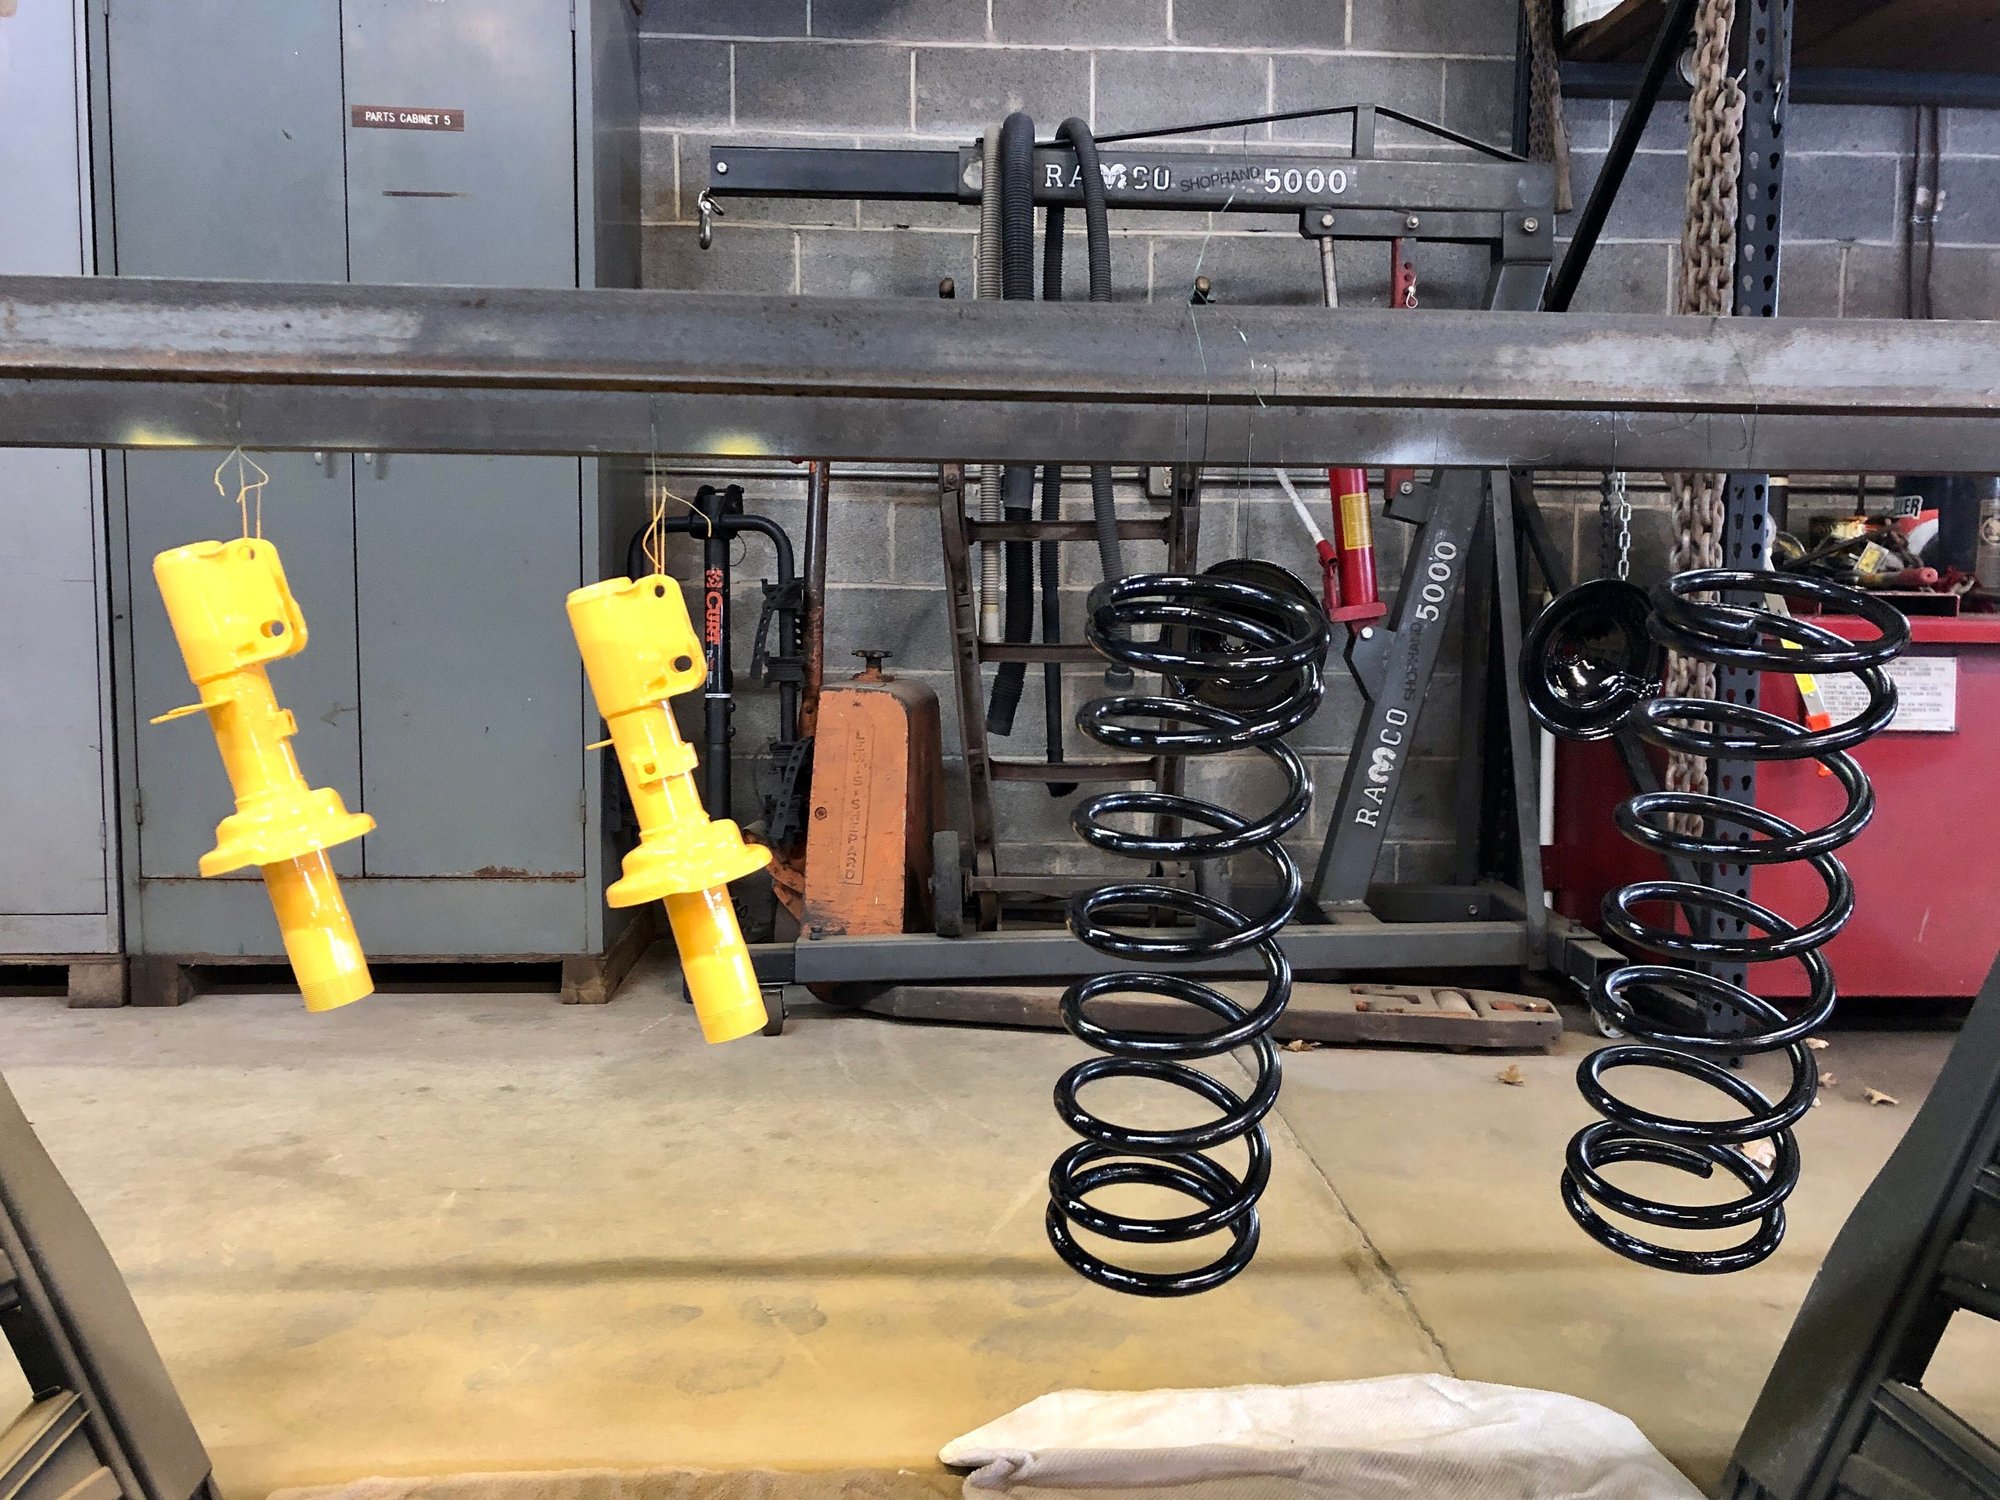
Cleaned up and repainted. Nice and fresh!
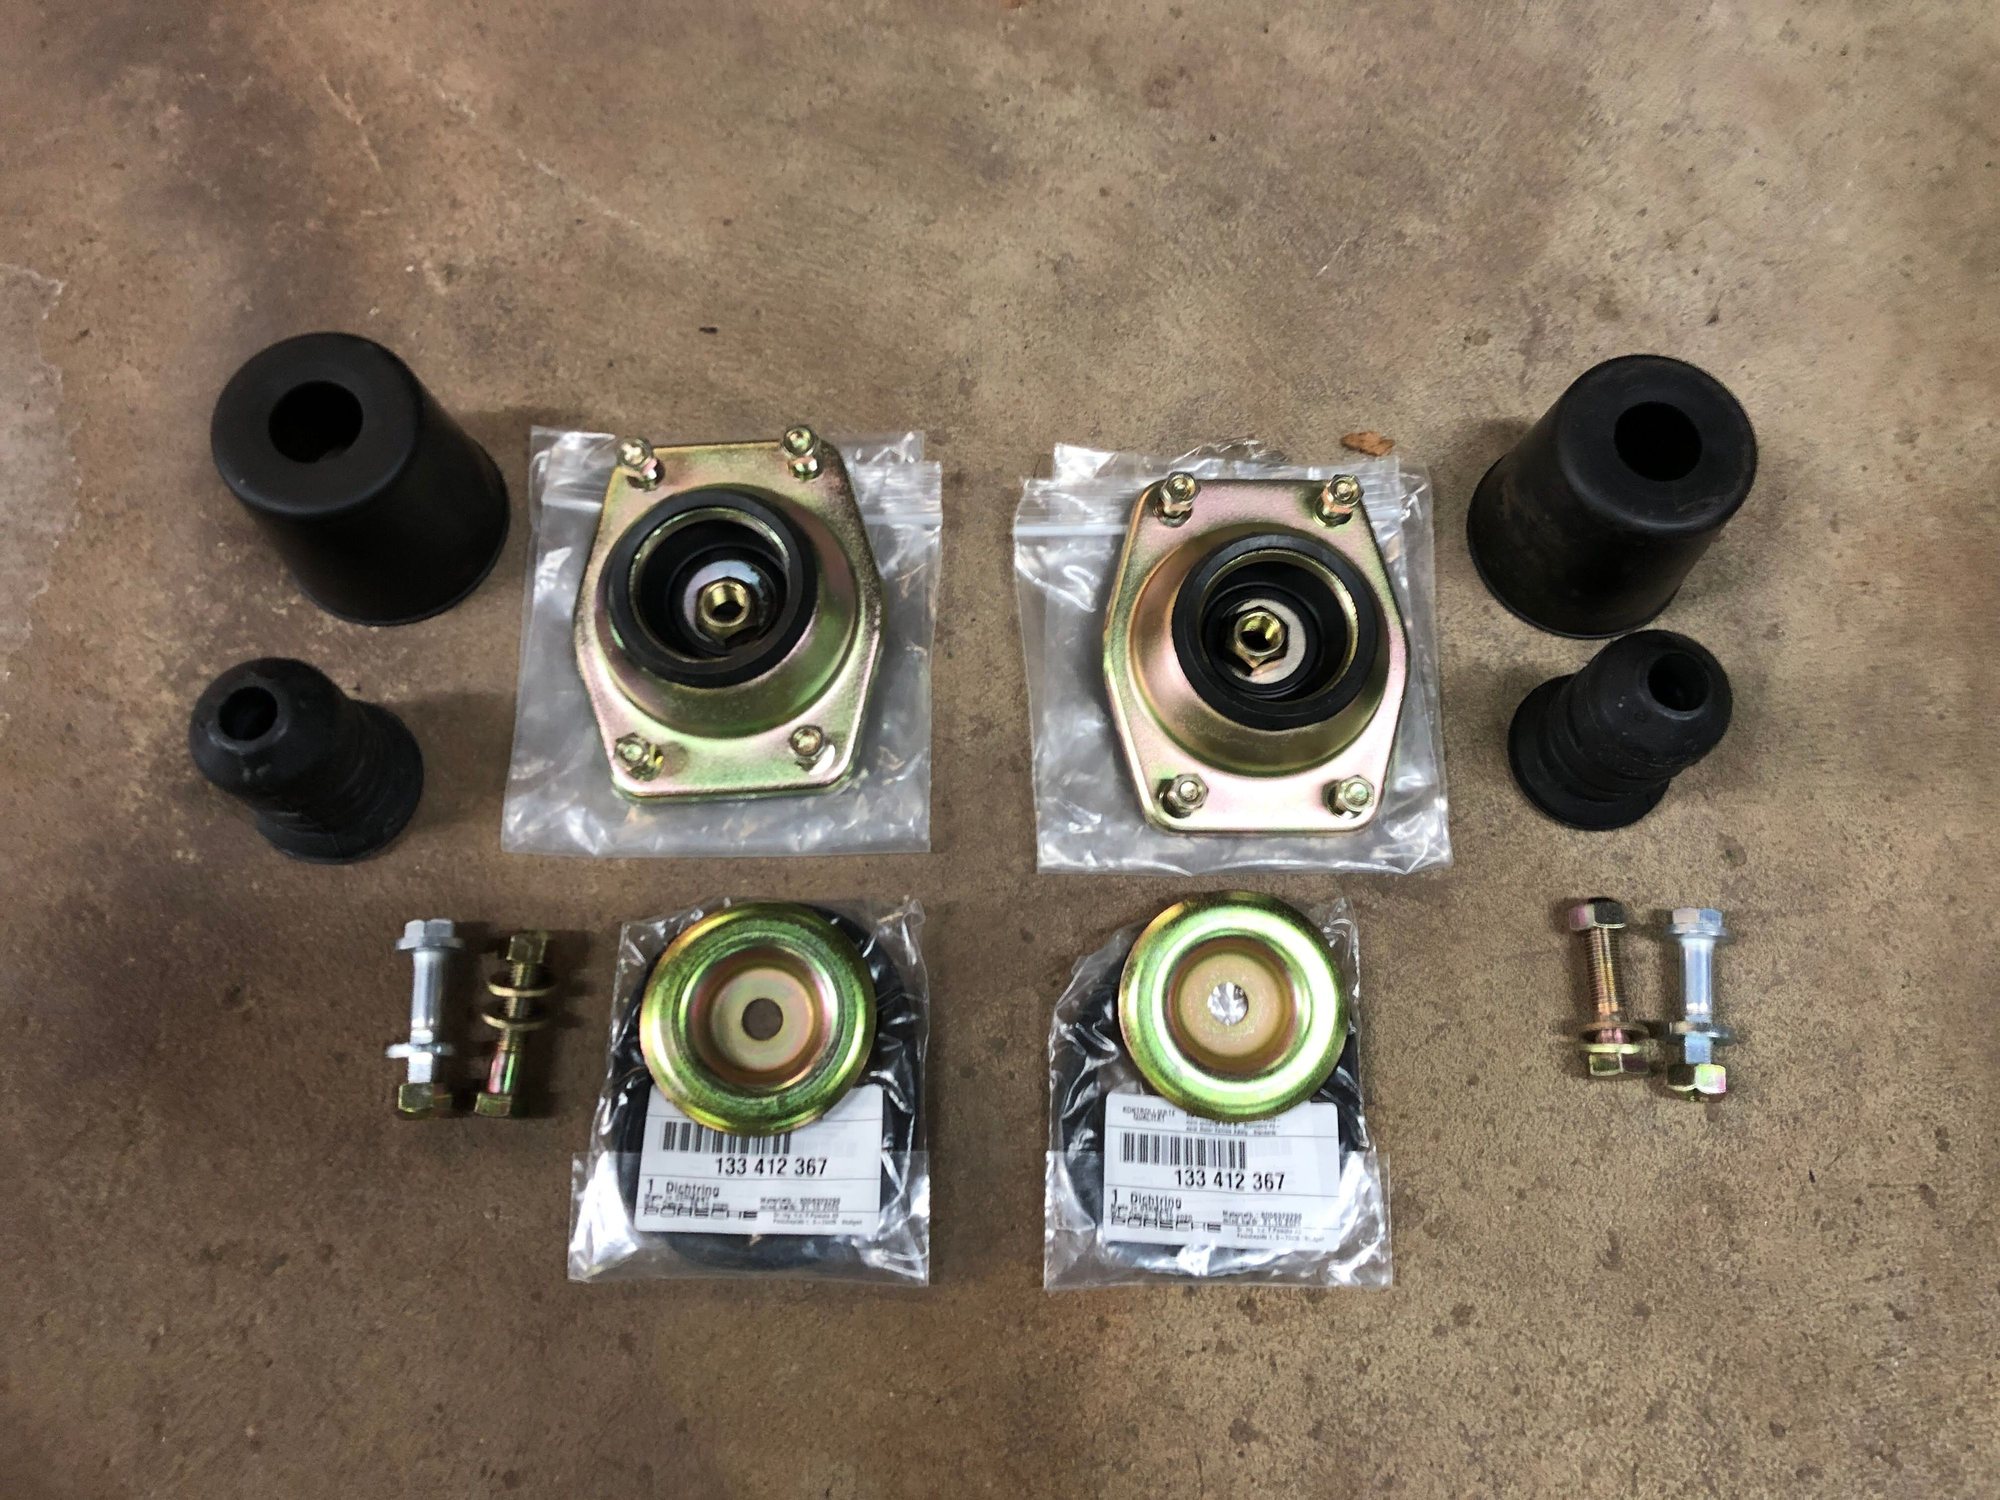
Purchased the strut mounts and hardware from 944Online. Excellent price for the replacement mounts, bearings and top hats. And I love the look of fresh yellow zinc-plated hardware on an older car.
Rebuilt, re-installed and ready to rock.
And that's all for now. Off to the alignment shop!
The rebuilt struts look great!! What paint did you use that matched the Koni yellow on the rear shocks? My car is in need of front struts and seeing your progress has given me motivation, thank you!
One warning: I did a lot of research to match Bilstein yellow only to find out that there are at least 3 (and I still don't know if they're period-specific, factory-specific, or they just use whatever yellow they have at hand).
Anyway, not saying Koni is the same, but don't take it for granted that there *is* a Koni yellow....
What paint did you use that matched the Koni yellow on the rear shocks?
I used Dupli-Color School Bus Yellow. It is very close in color to Koni yellow, but definitely not a 100% match. You'd probably only notice the difference if you had a front strut and a rear shock side by side.
Realized I haven't updated this thread in a while. That's probably because I've been spending more time driving the car! I moved out of Philly back in June so now I have access to the car every day and can drive it whenever I please. I've logged about 3500 miles in the last 9 months (compared to the previous 1000 or so per year I was doing before).
I did replace my rear brake pads and rotors back in September. I went with the Zimmerman rotors and Hawk HPS pads. Also replaced the caliper hardware and the parking brake shoes. Probably could have skipped the parking brake shoes, but I figured WYIT, right? I neglected to take any before and after pictures, but I think we all know what brake pads and fresh rotors look like.
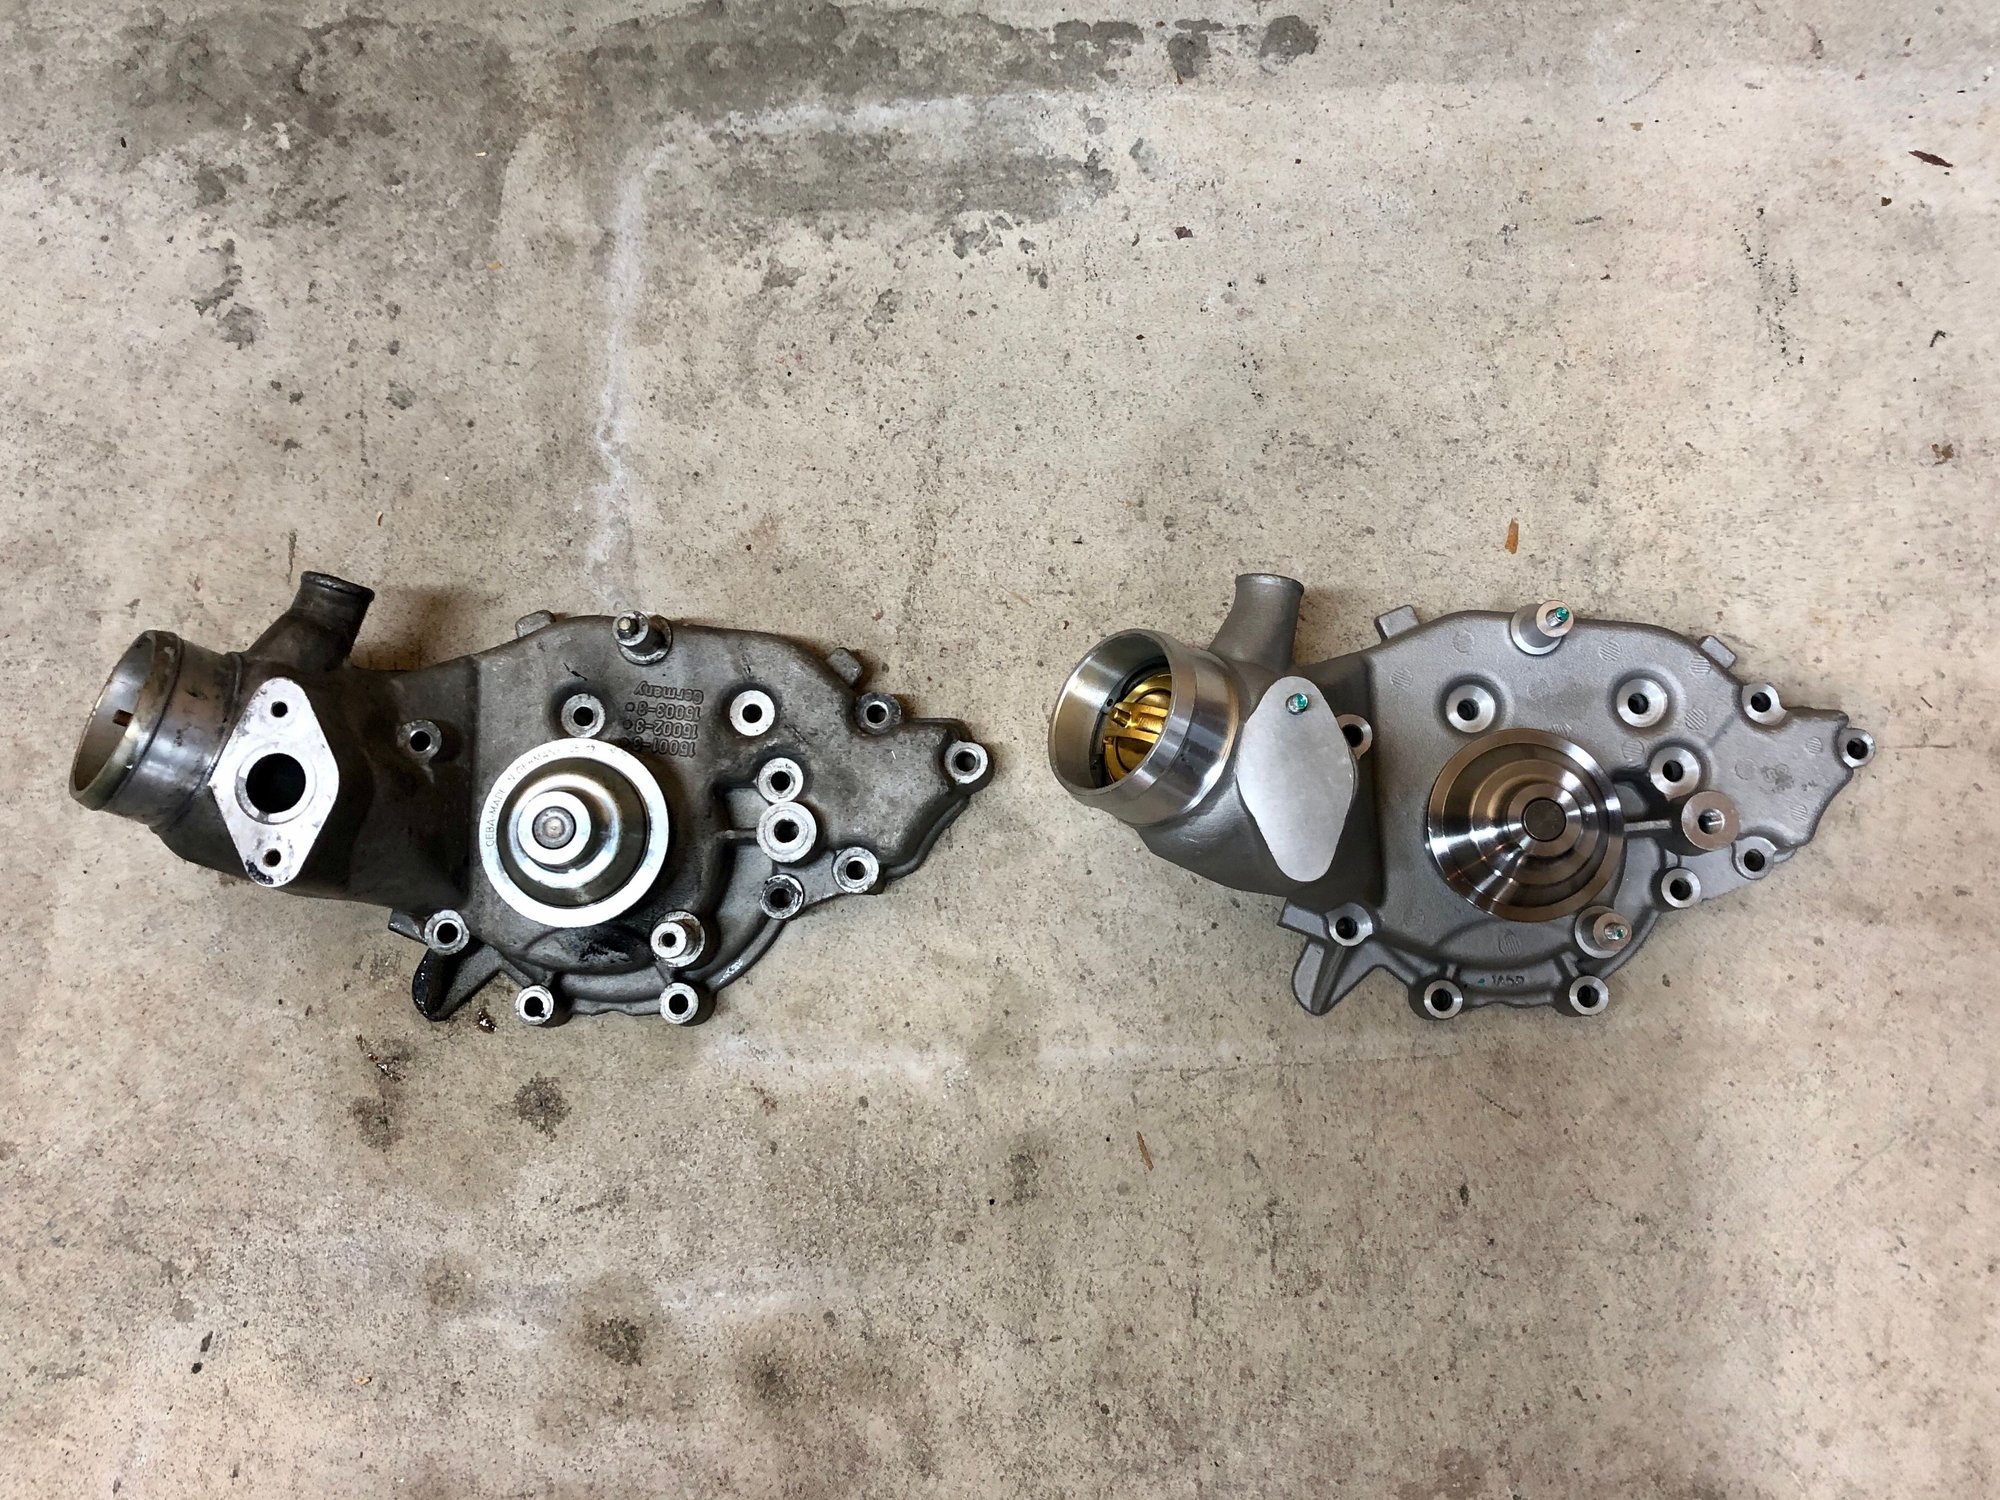
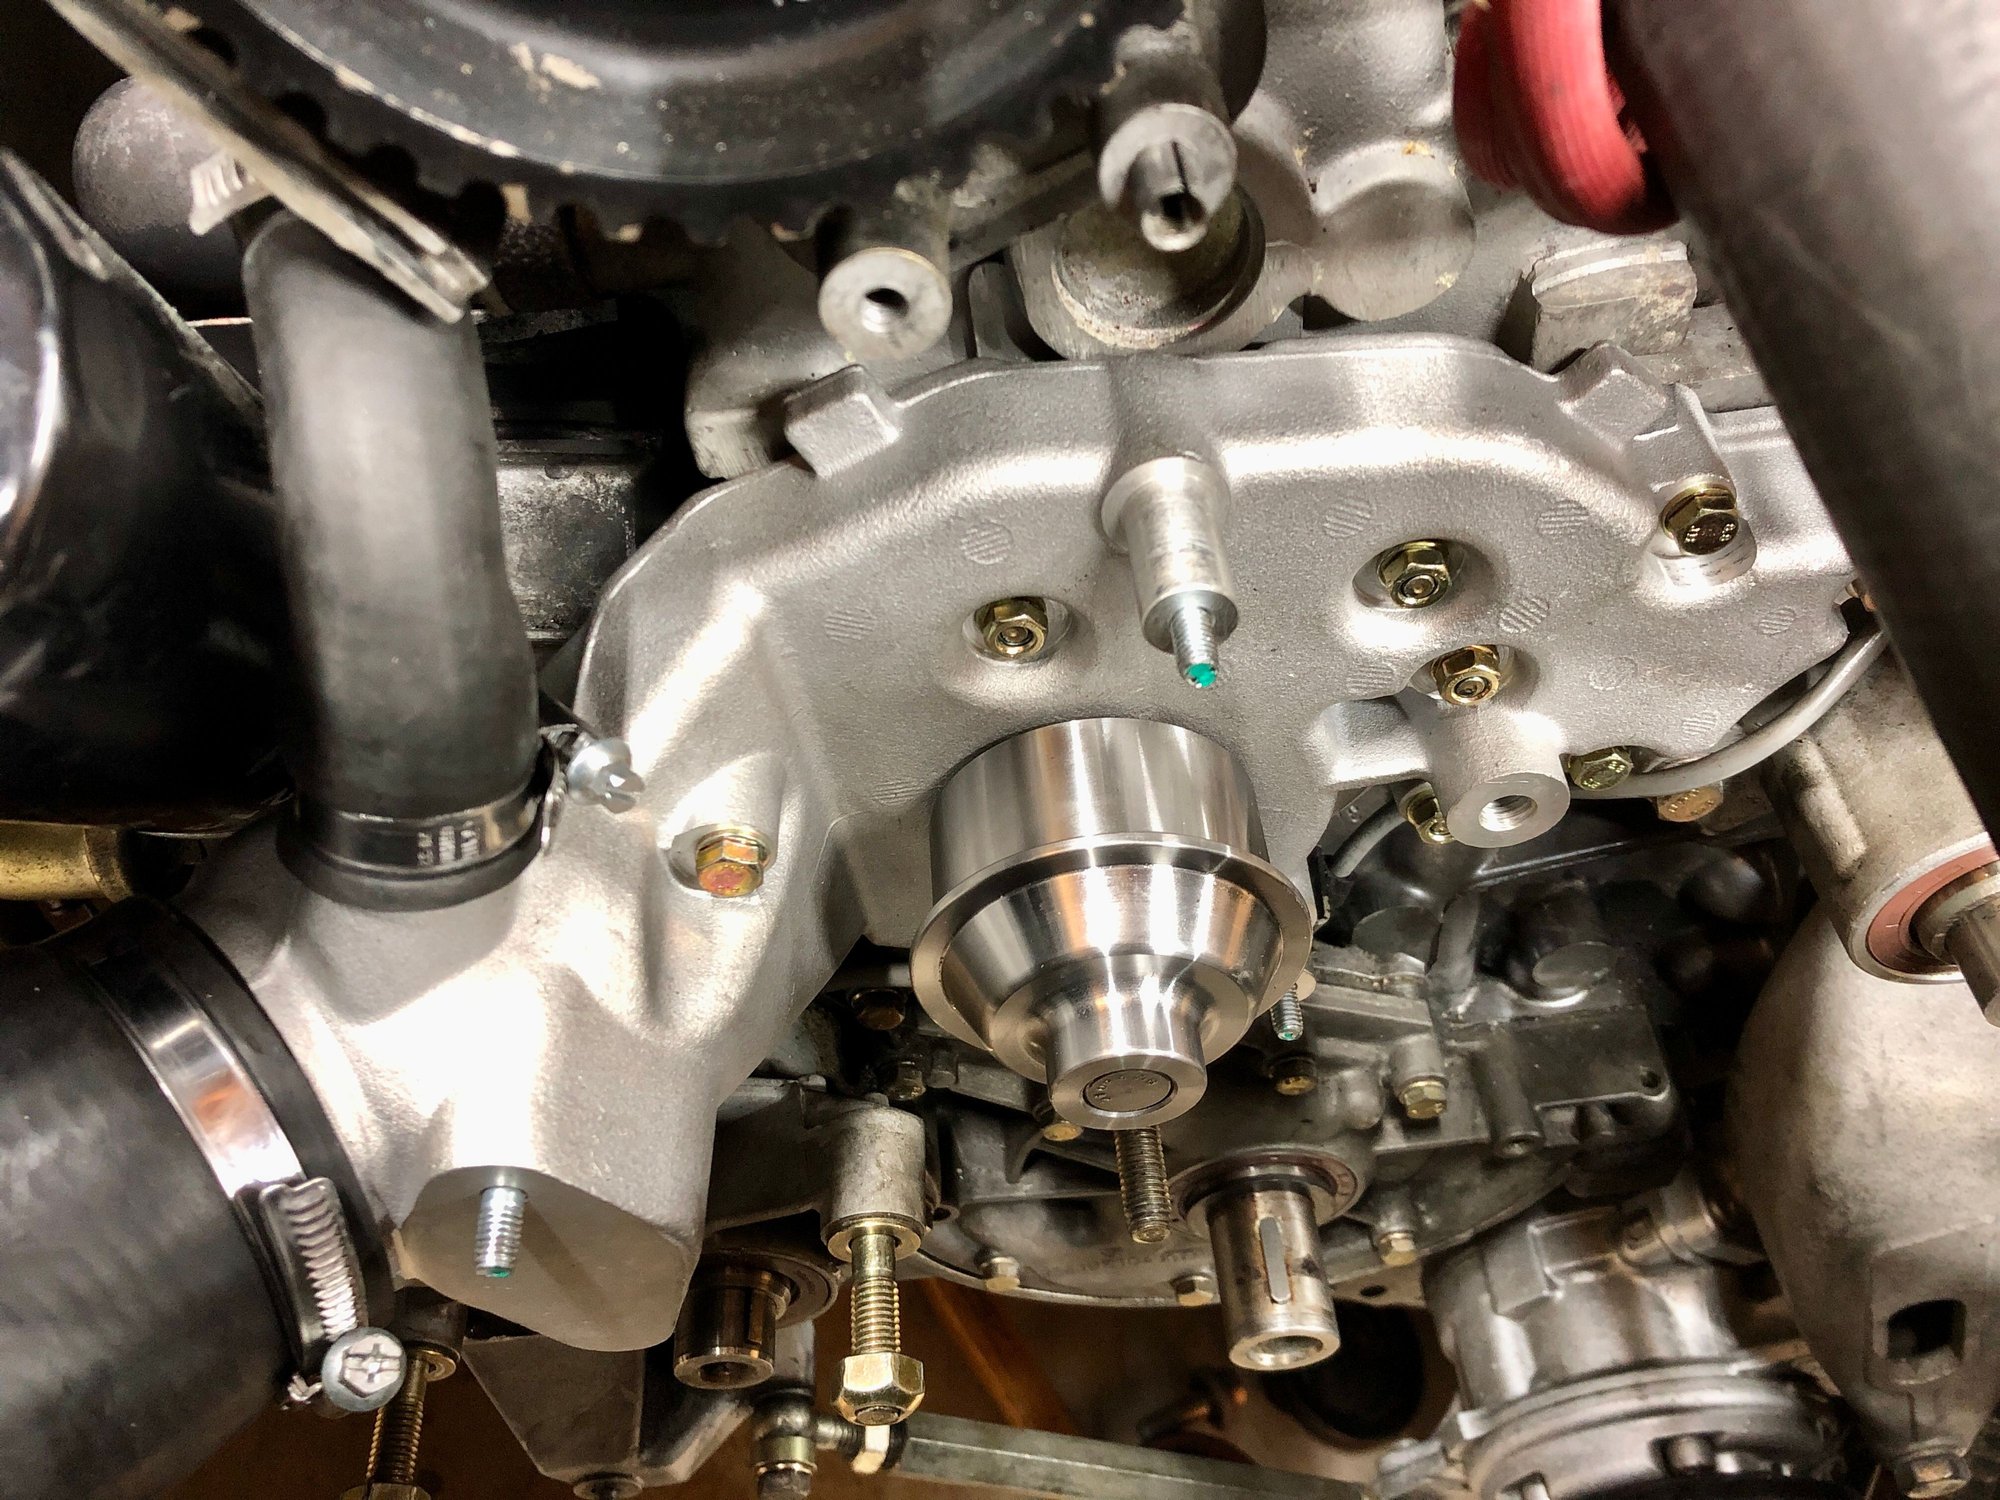
Over the holiday break I replaced my belts, rollers and water pump. The water pump was from 2014, but only had about 30k miles on it. I replaced the belts and rollers and all the seals when I did the motor re-build back in 2017. I've since only put about 13k miles on them, but figured they were ready due to age.
Old and new pump. Went with the aftermarket version from 944Online instead of a German O.E. unit.
Love the look of fresh parts!
Naturally I replaced the thermostat, radiator fan switch and gave it some fresh coolant as well. No pictures of that stuff though.
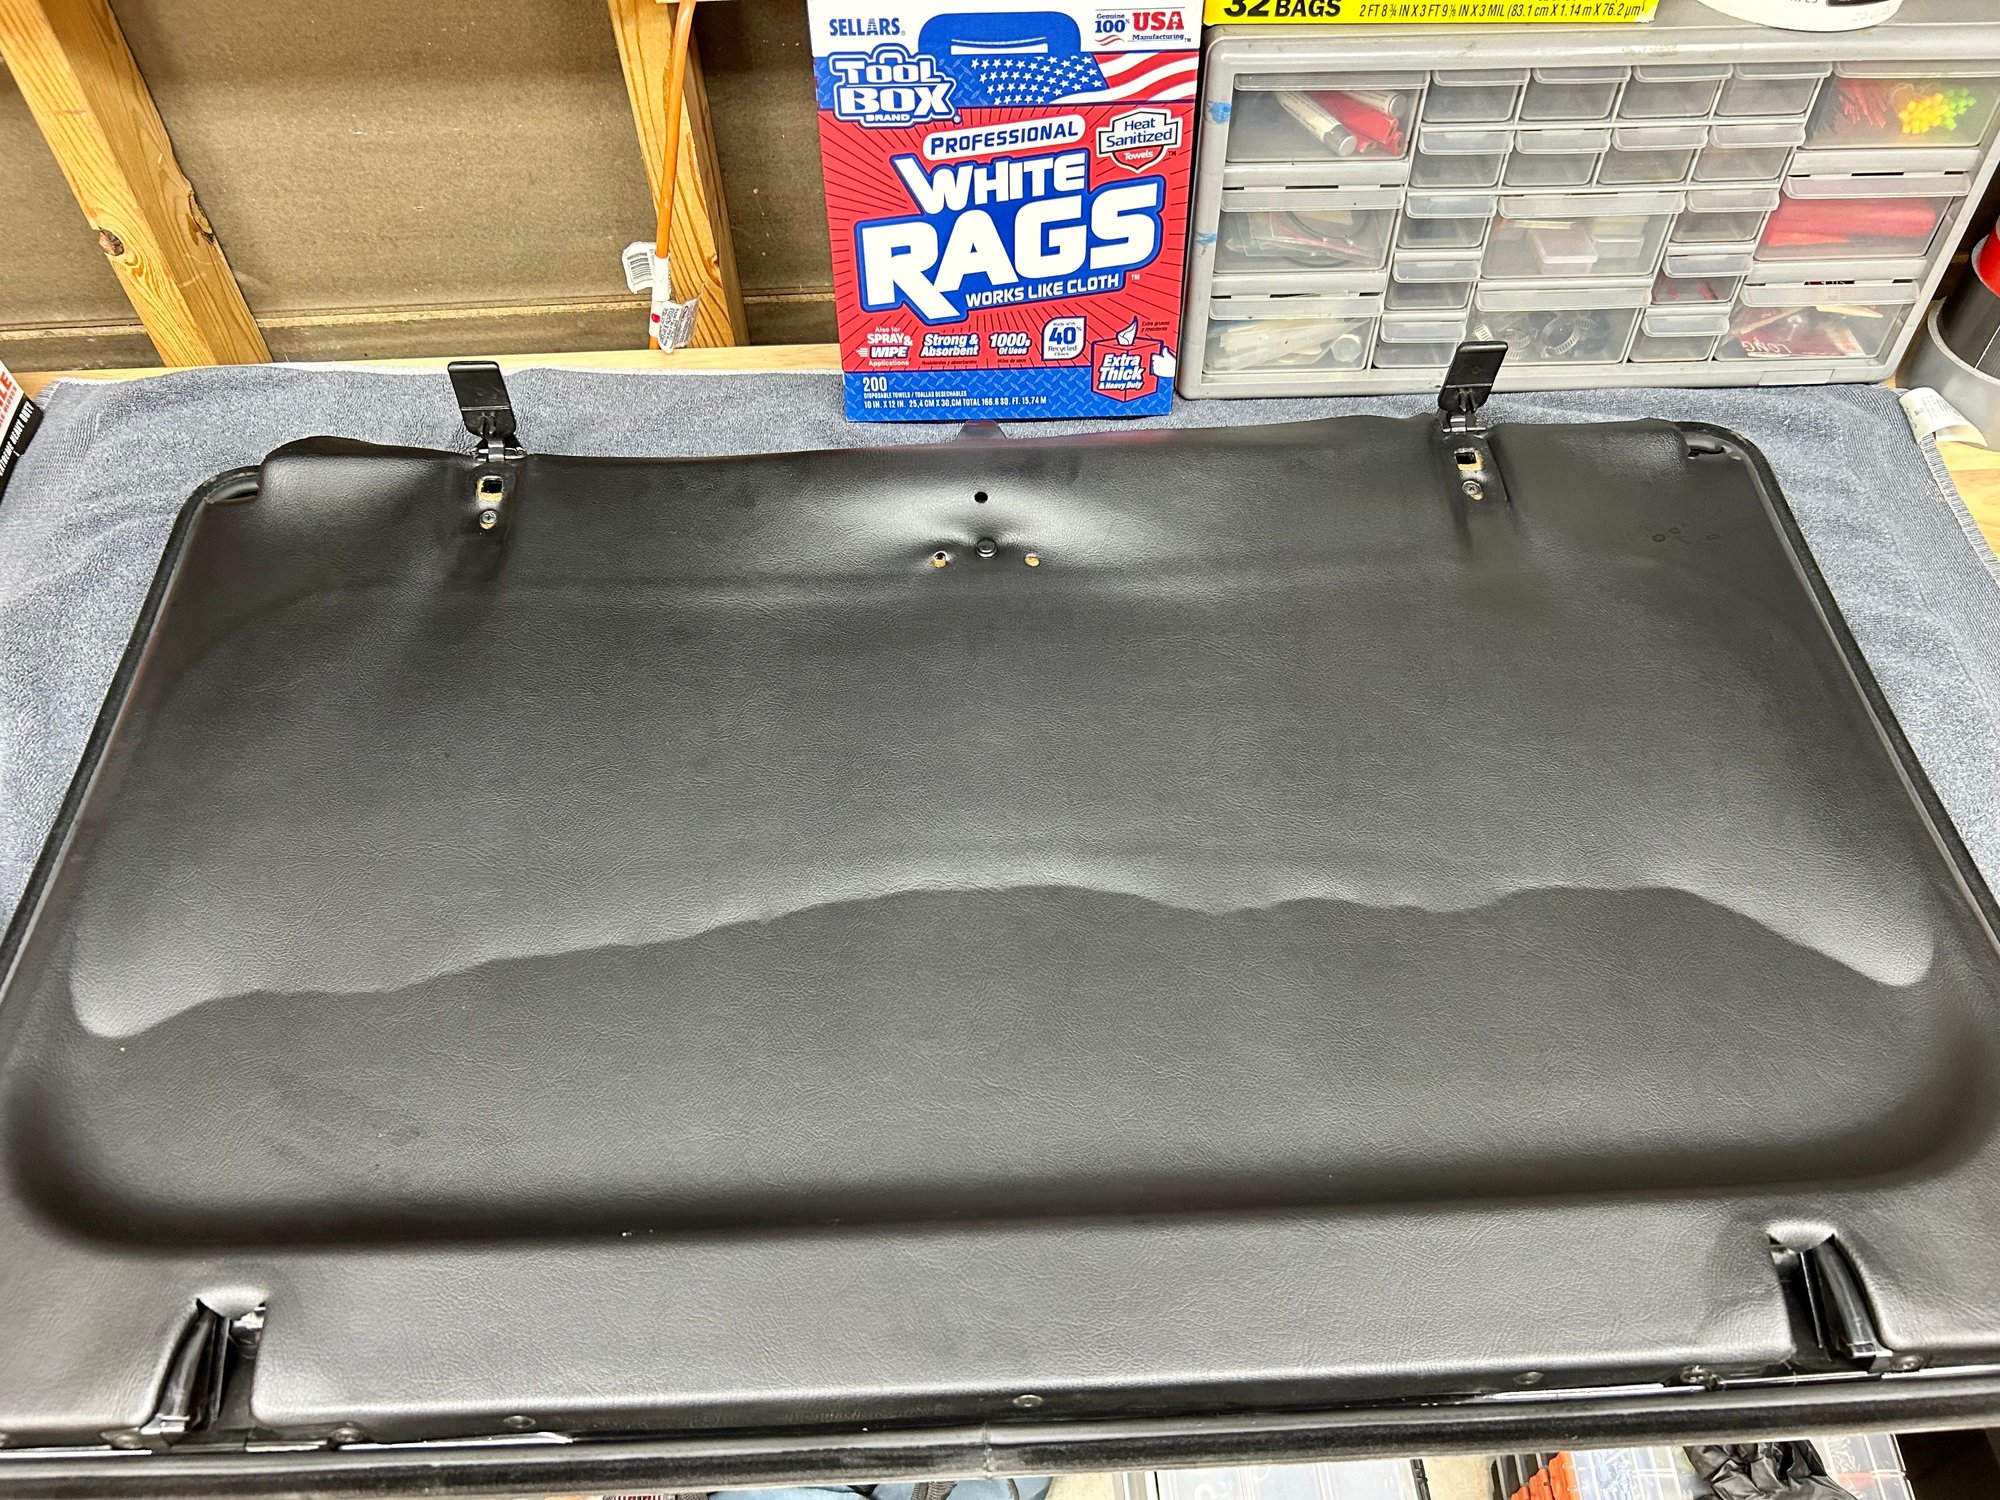
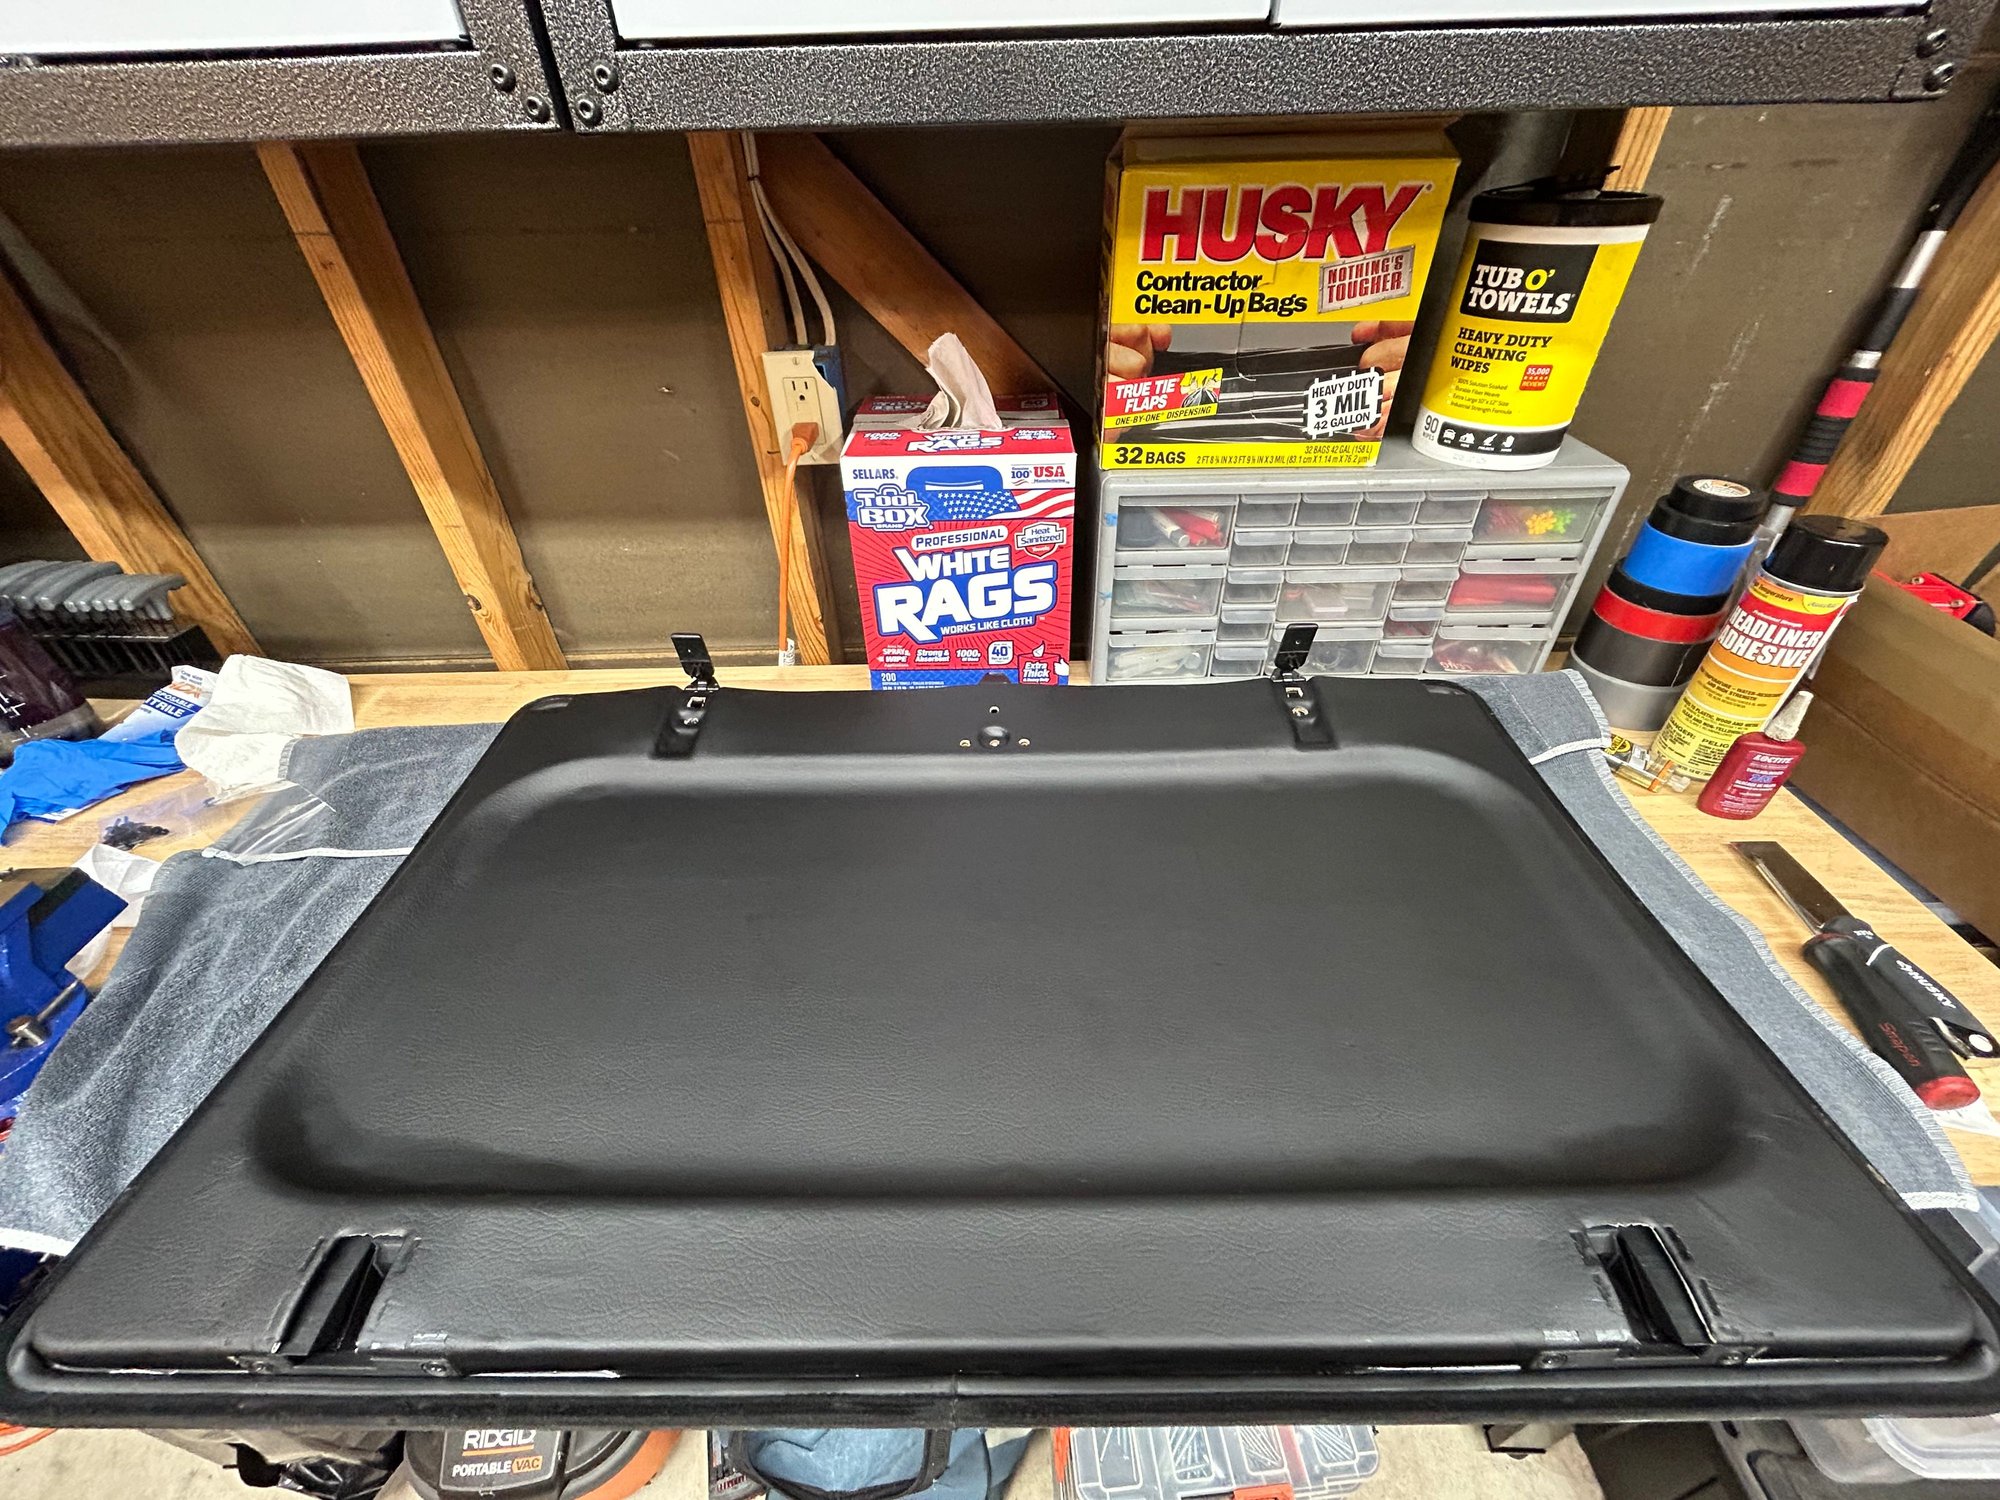
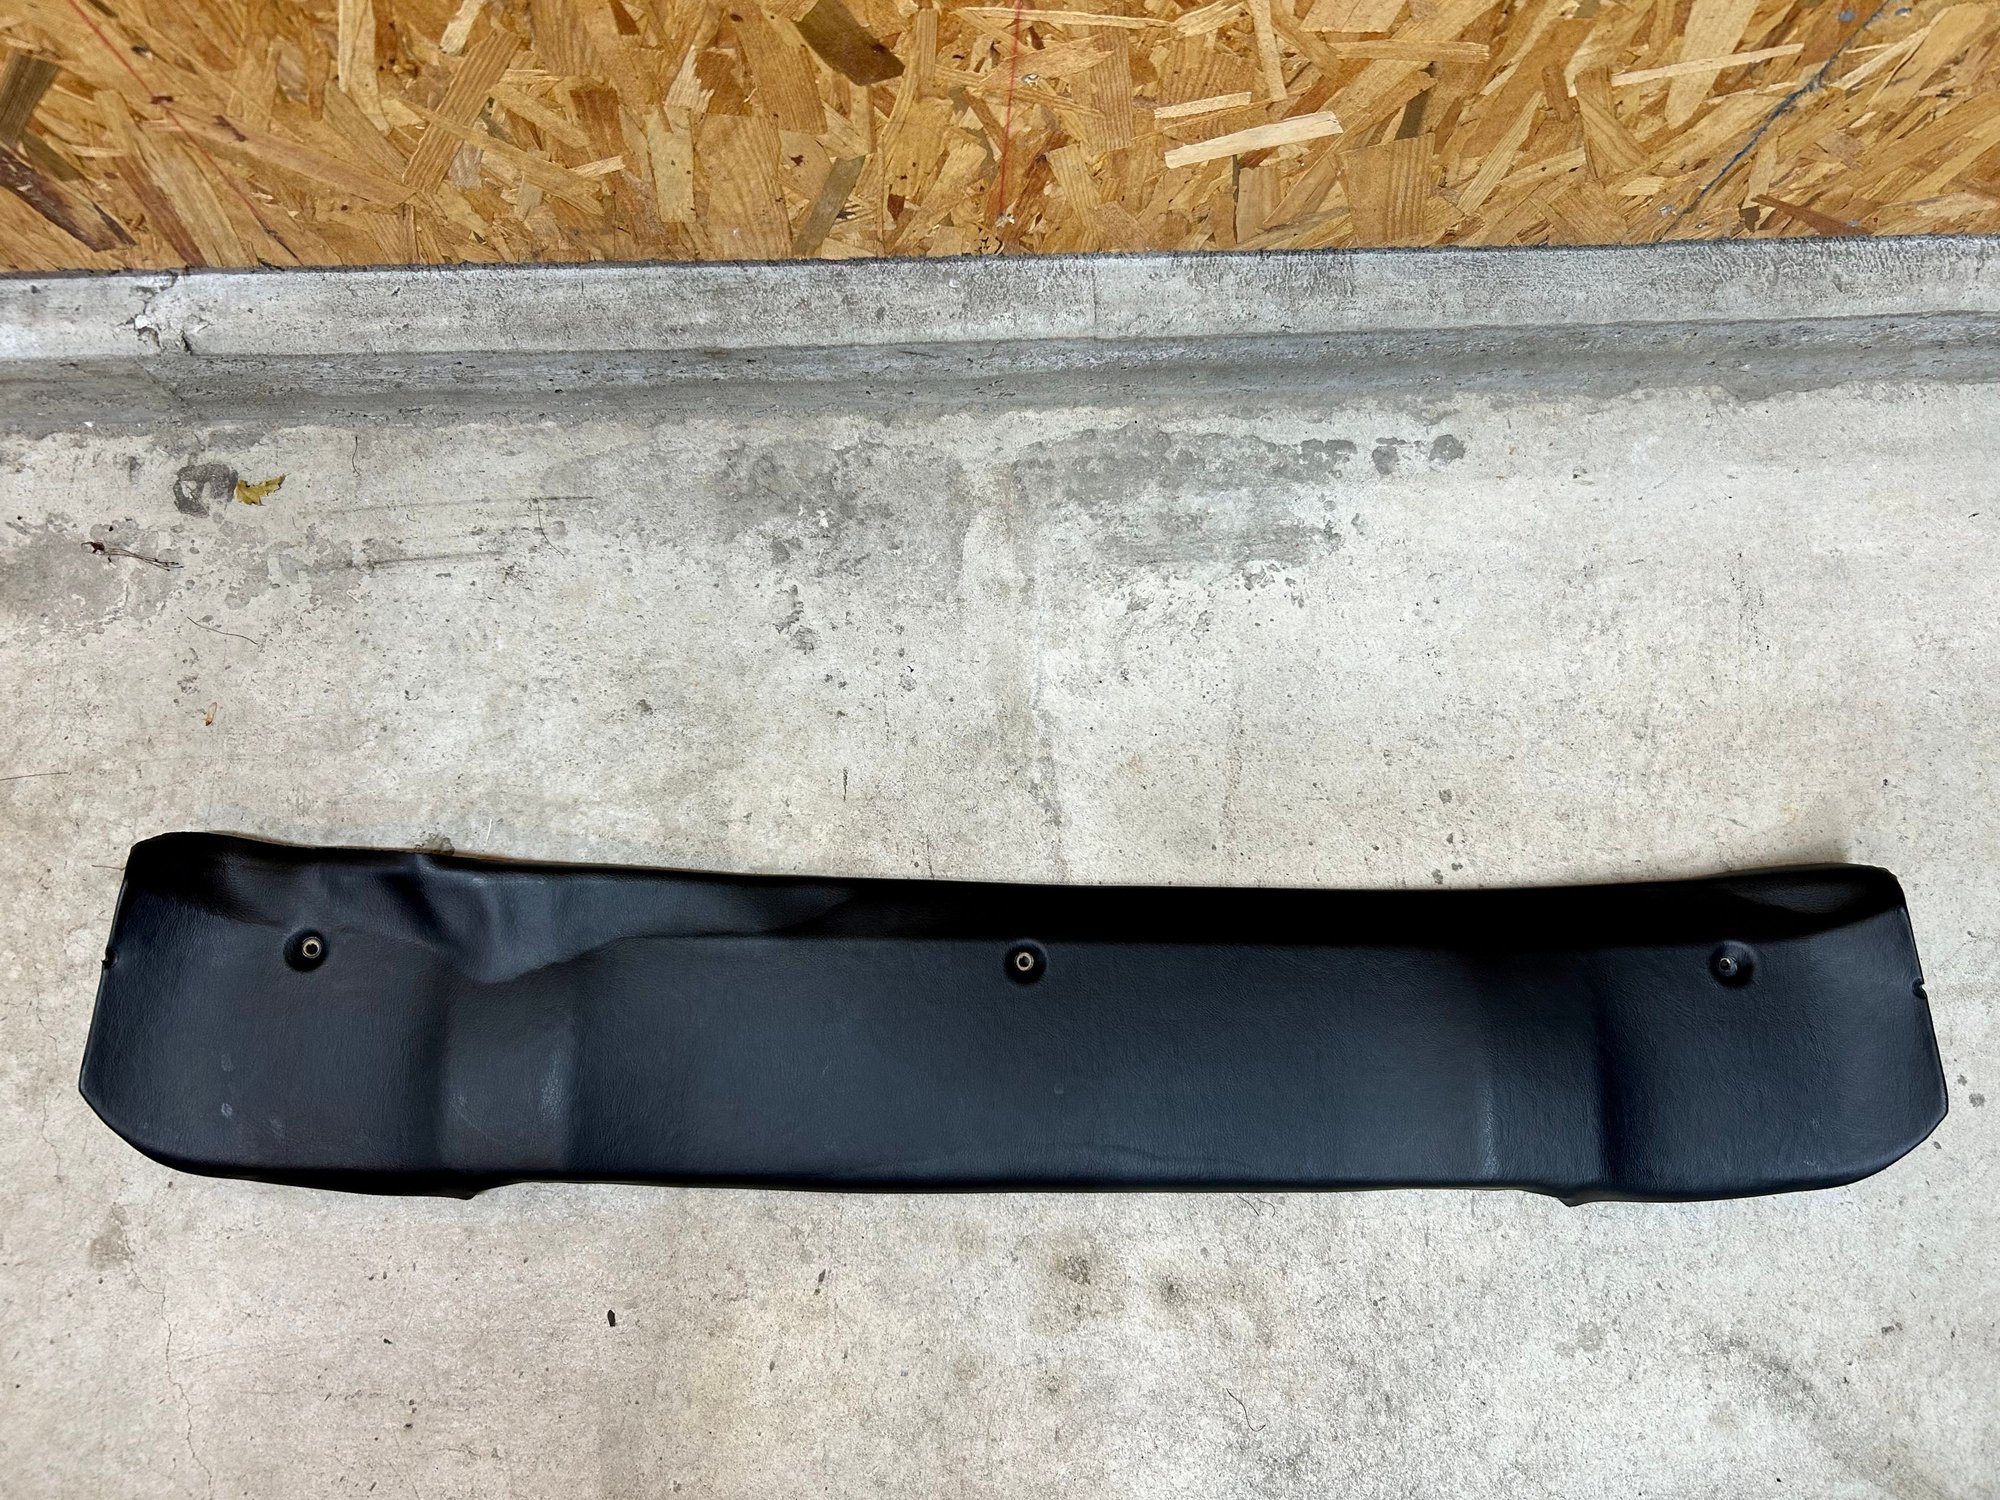
Back in 2018 I made a half-assed attempt to re-glue the vinyl on the sunroof headliner when I replaced the sunroof seals and the deflector hinges. Naturally, because it was a bit shrunken then and continued to shrink over time, it didn't work so well and ultimately looked like this again.
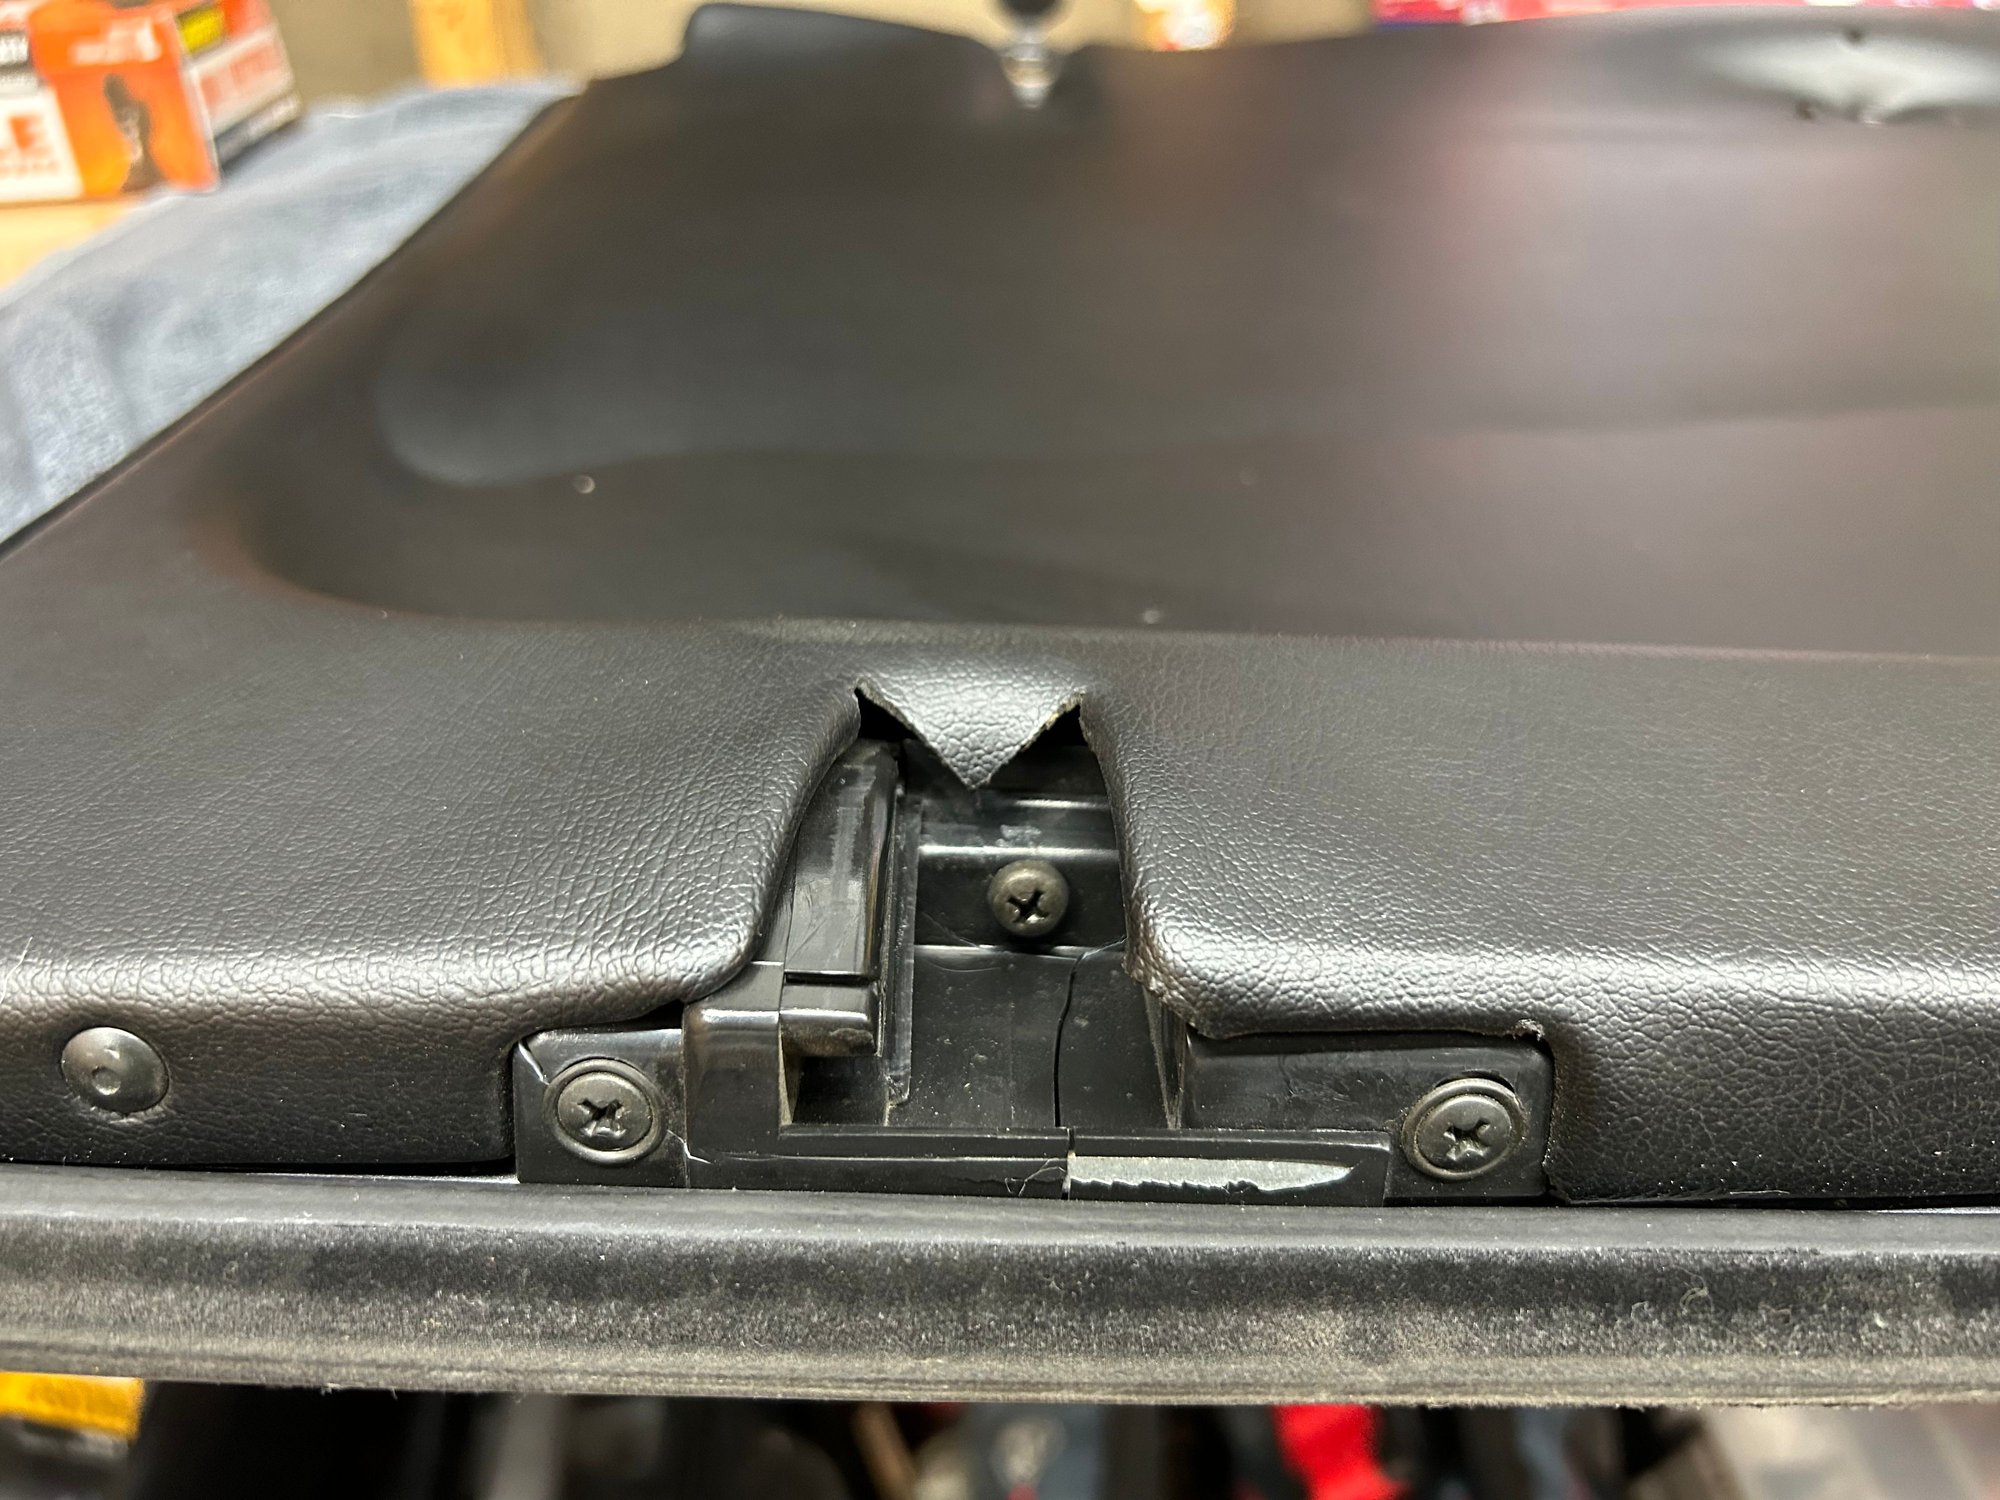
The sunroof hinges and the rear receivers were also not in the greatest shape after 37 years of use.
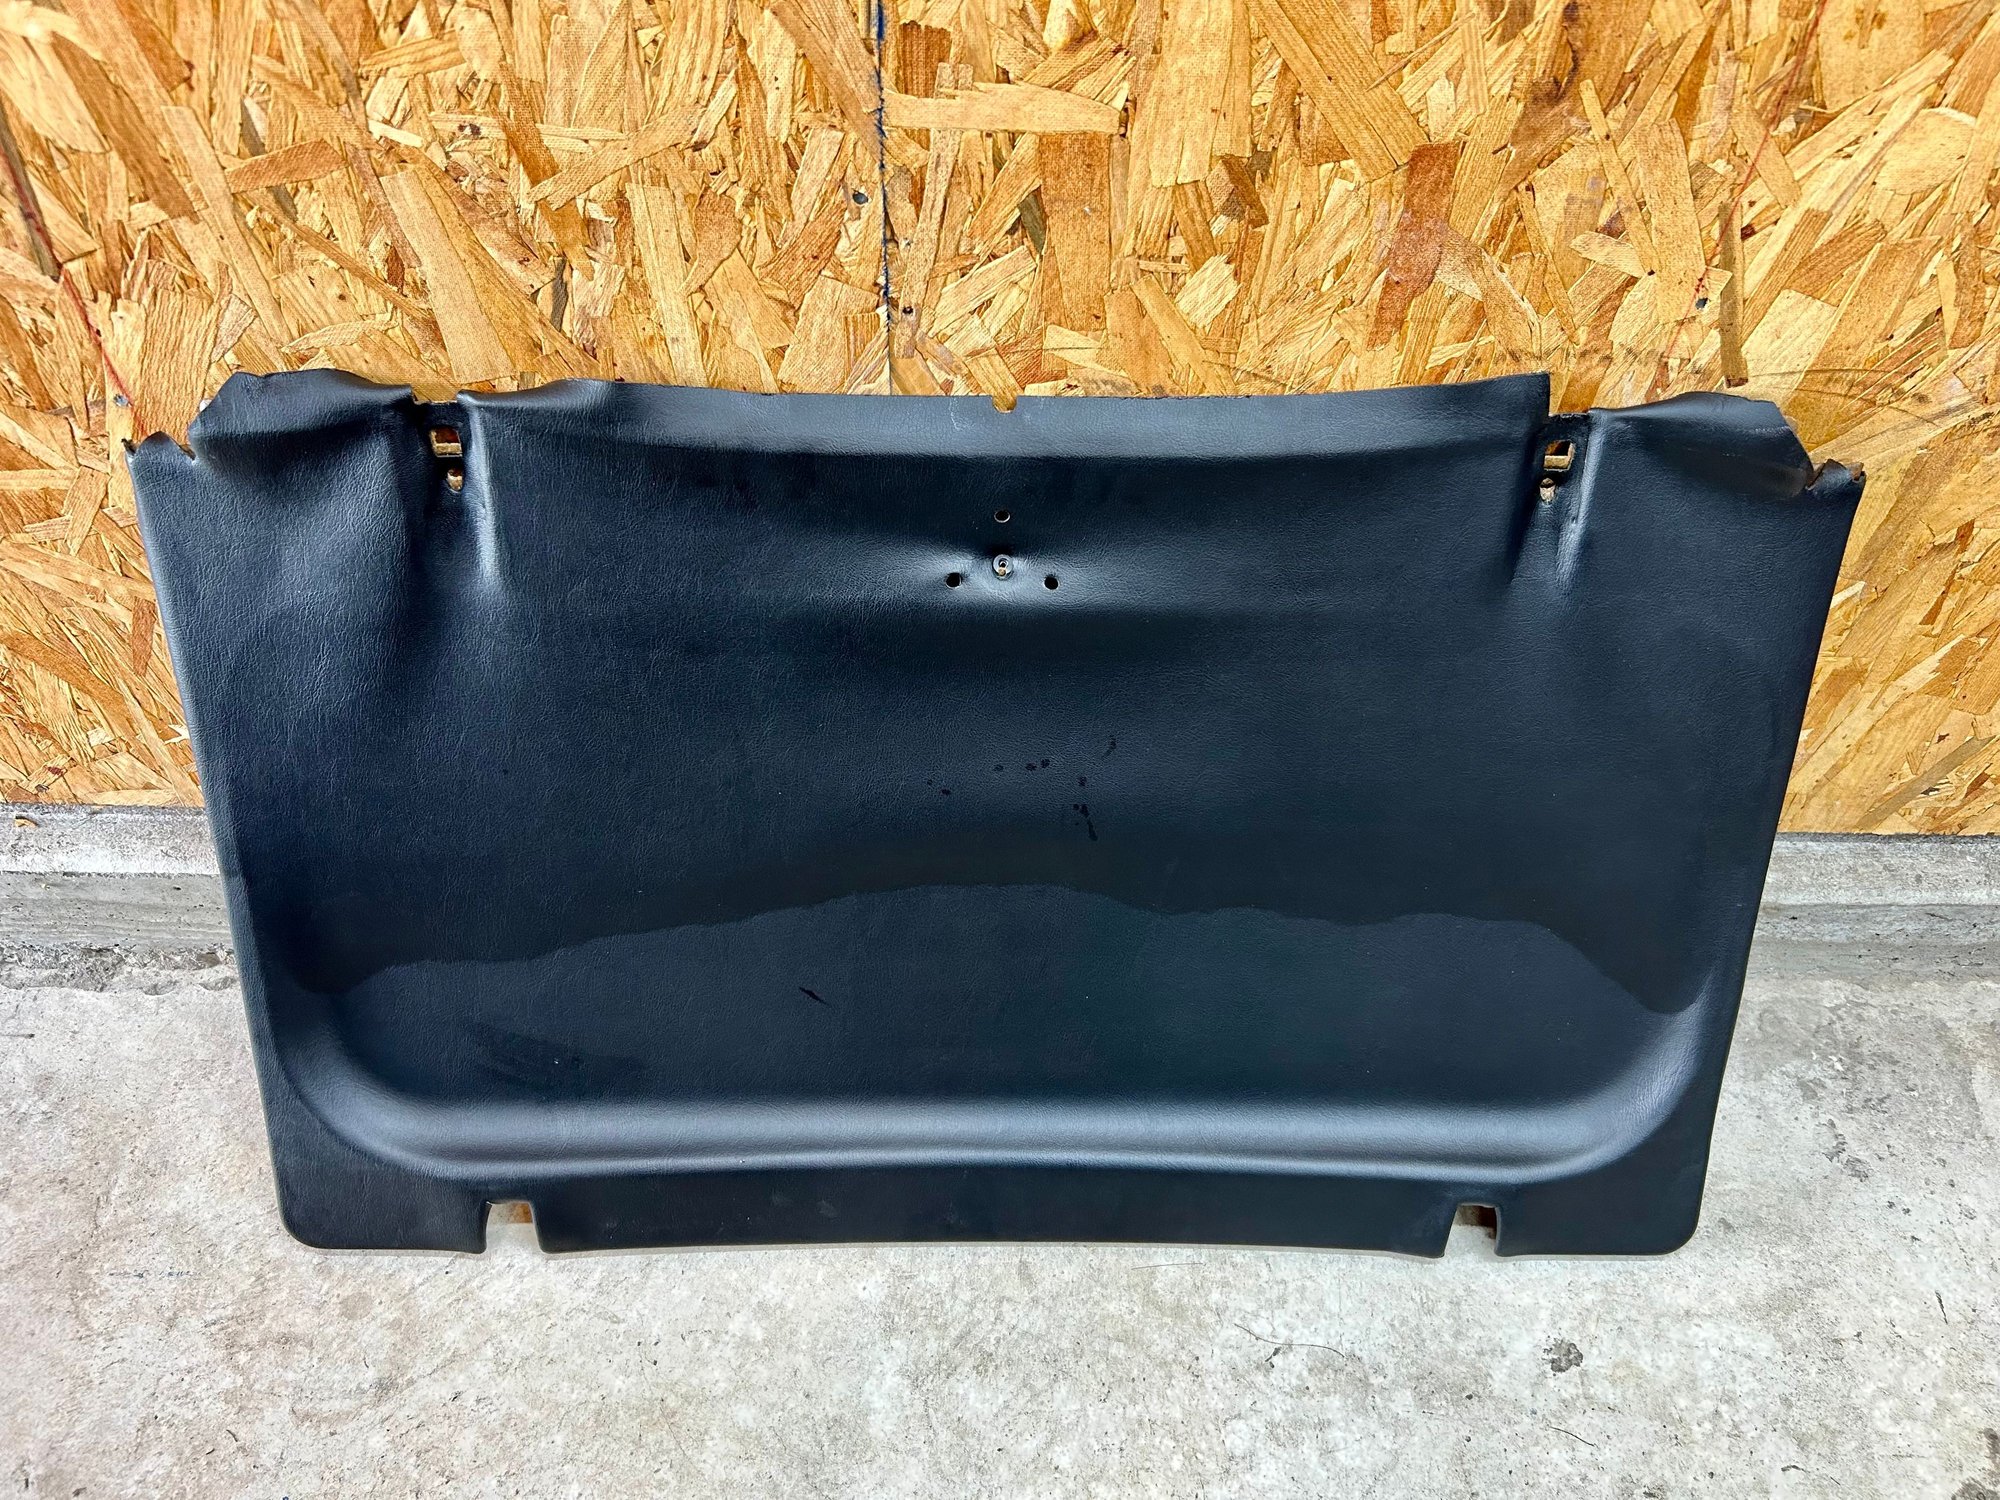
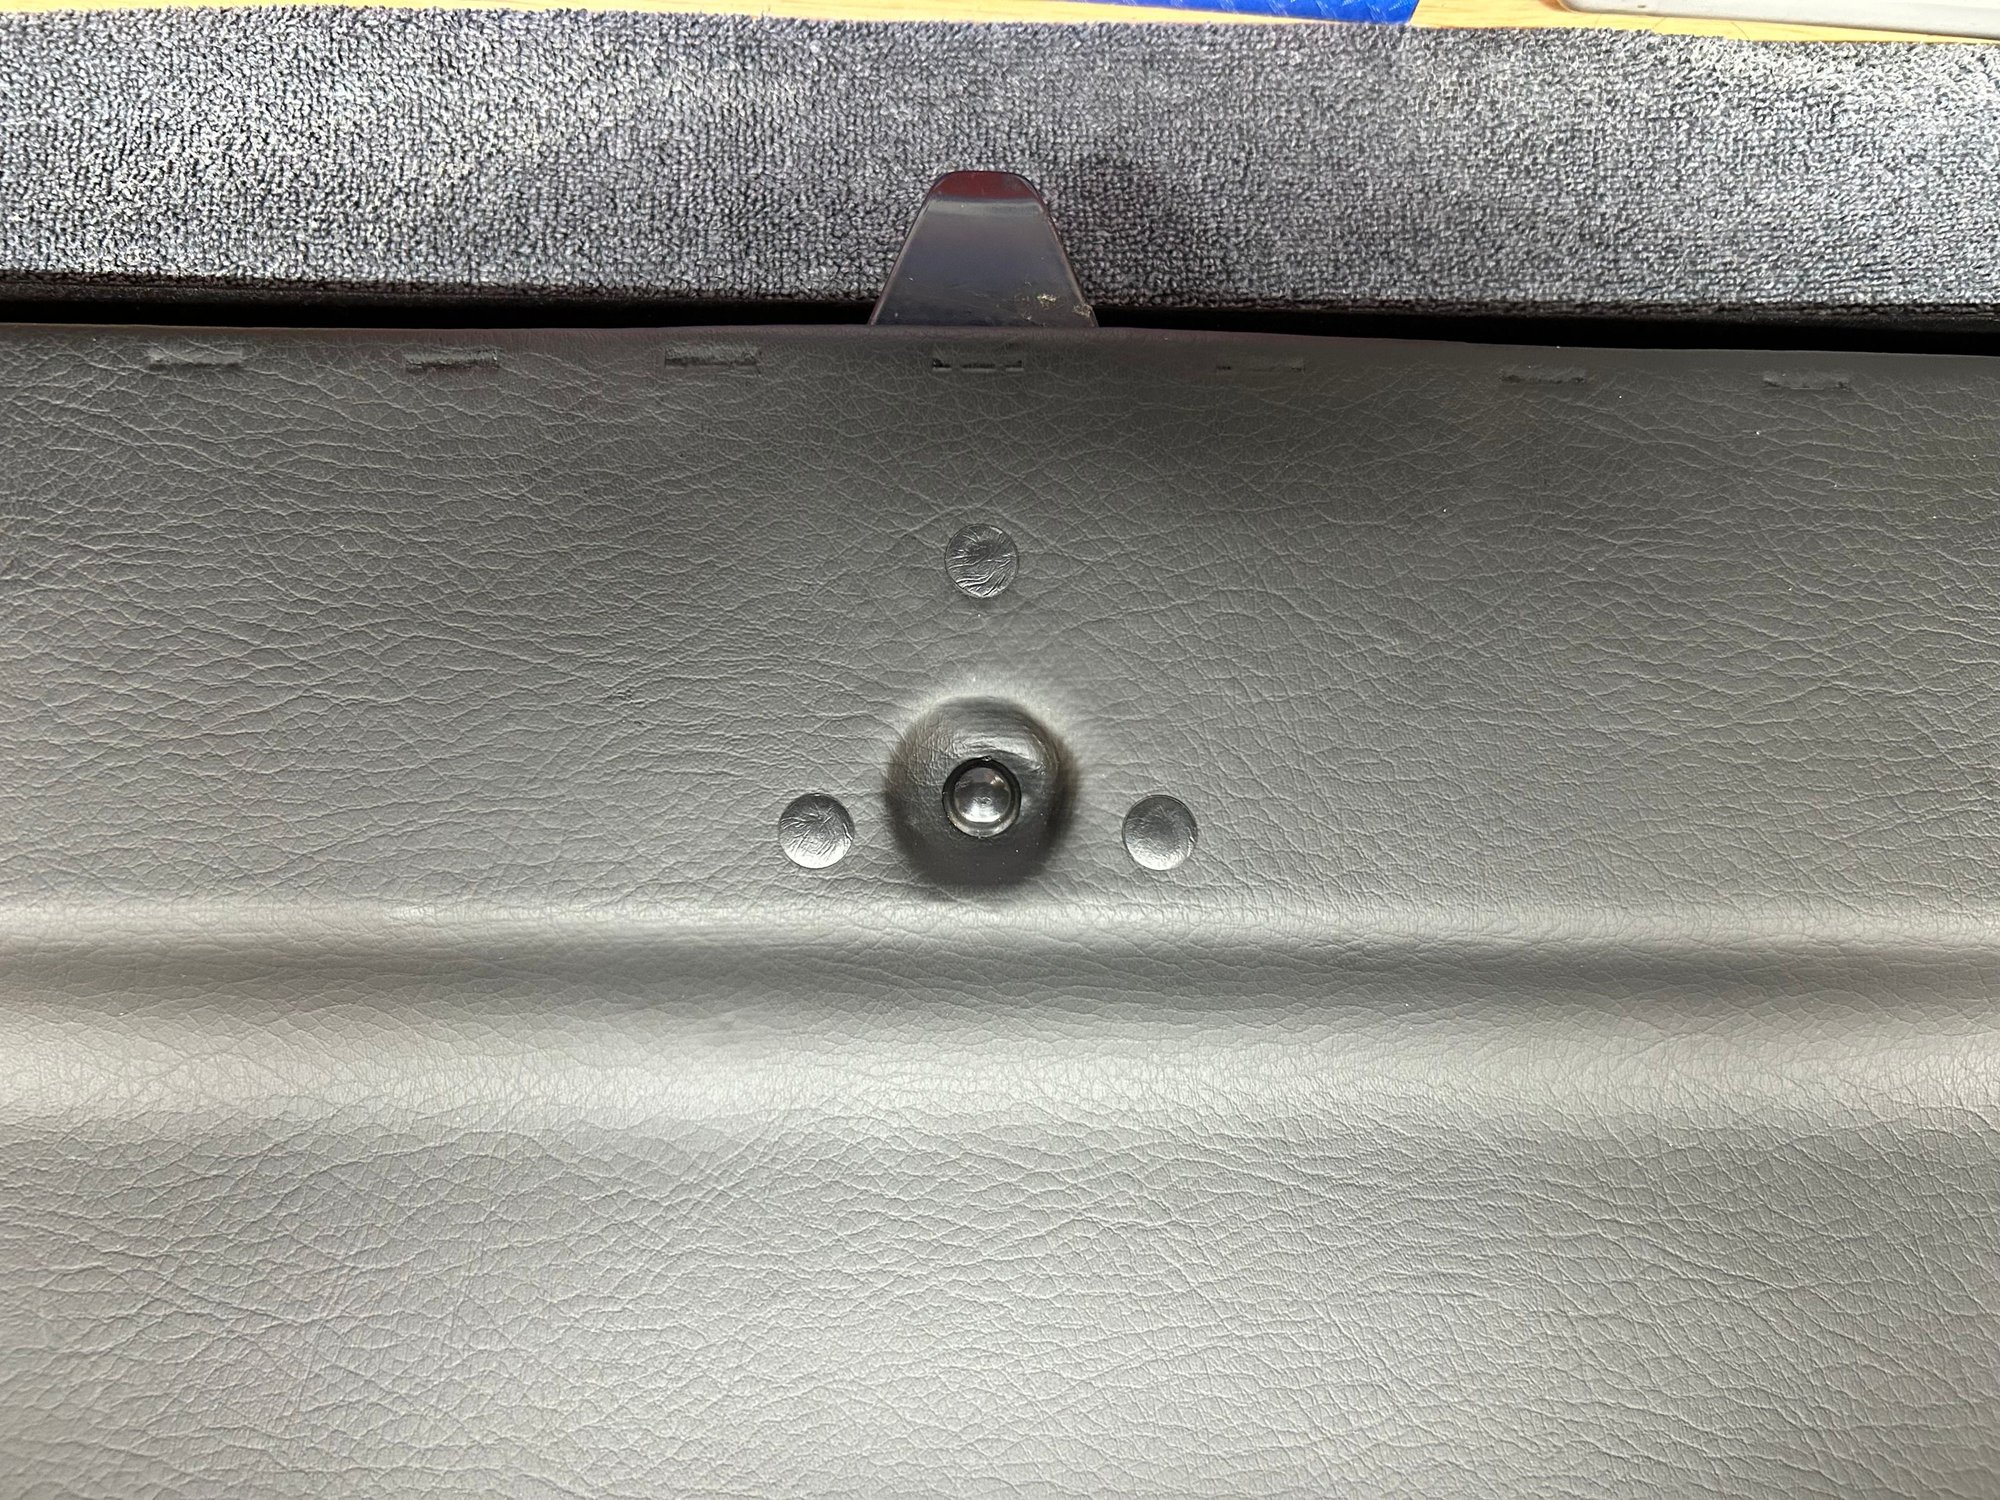
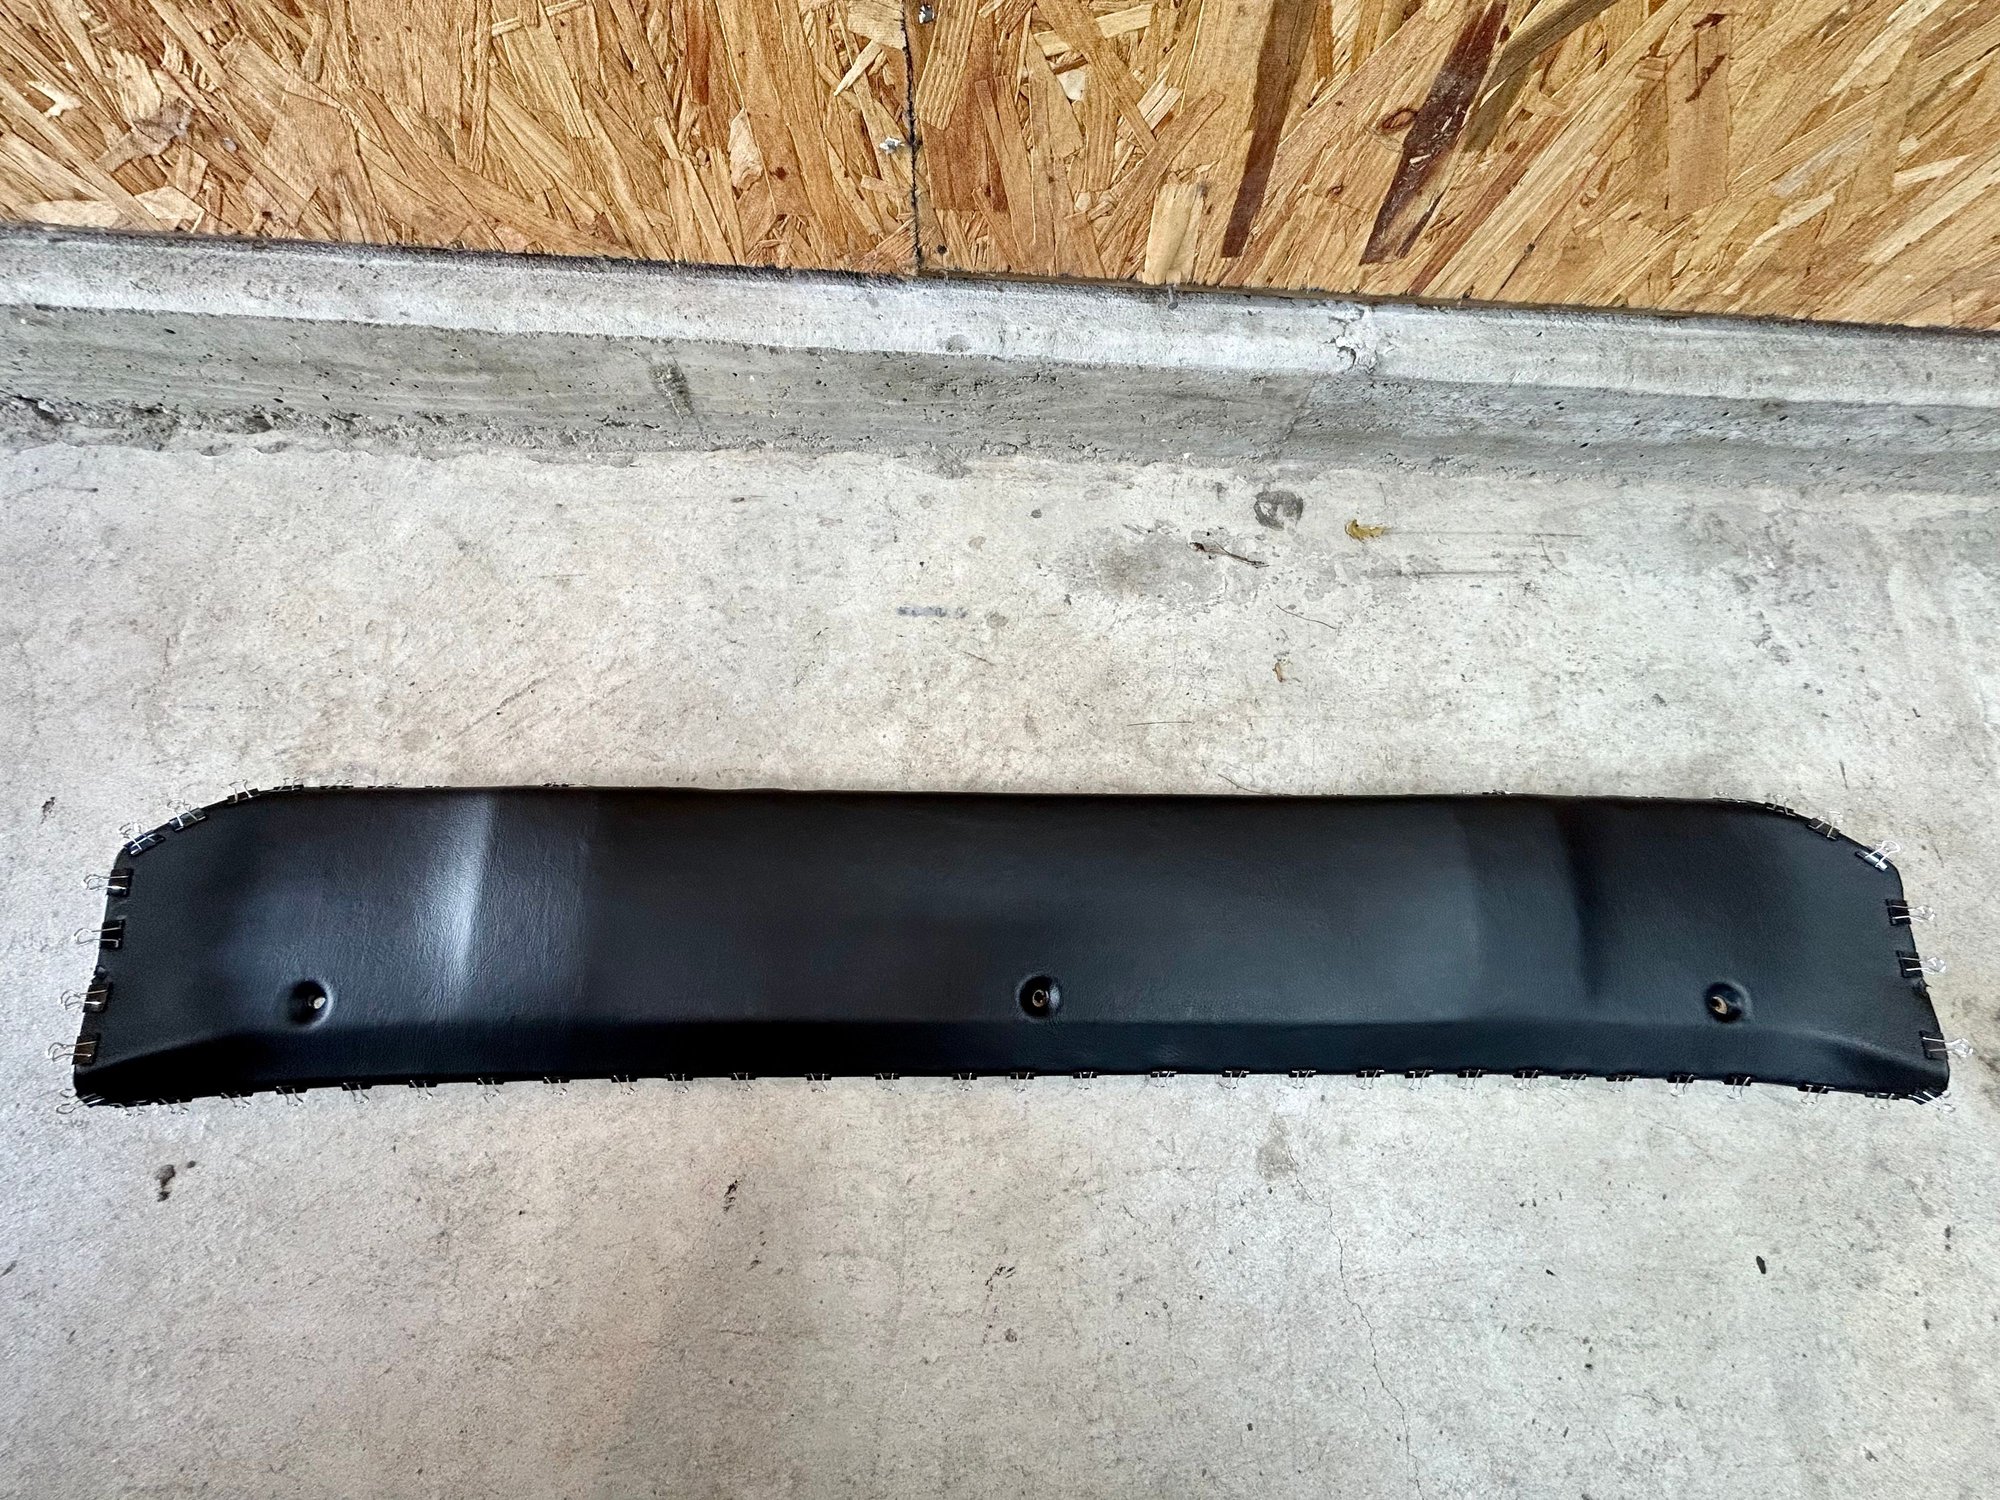
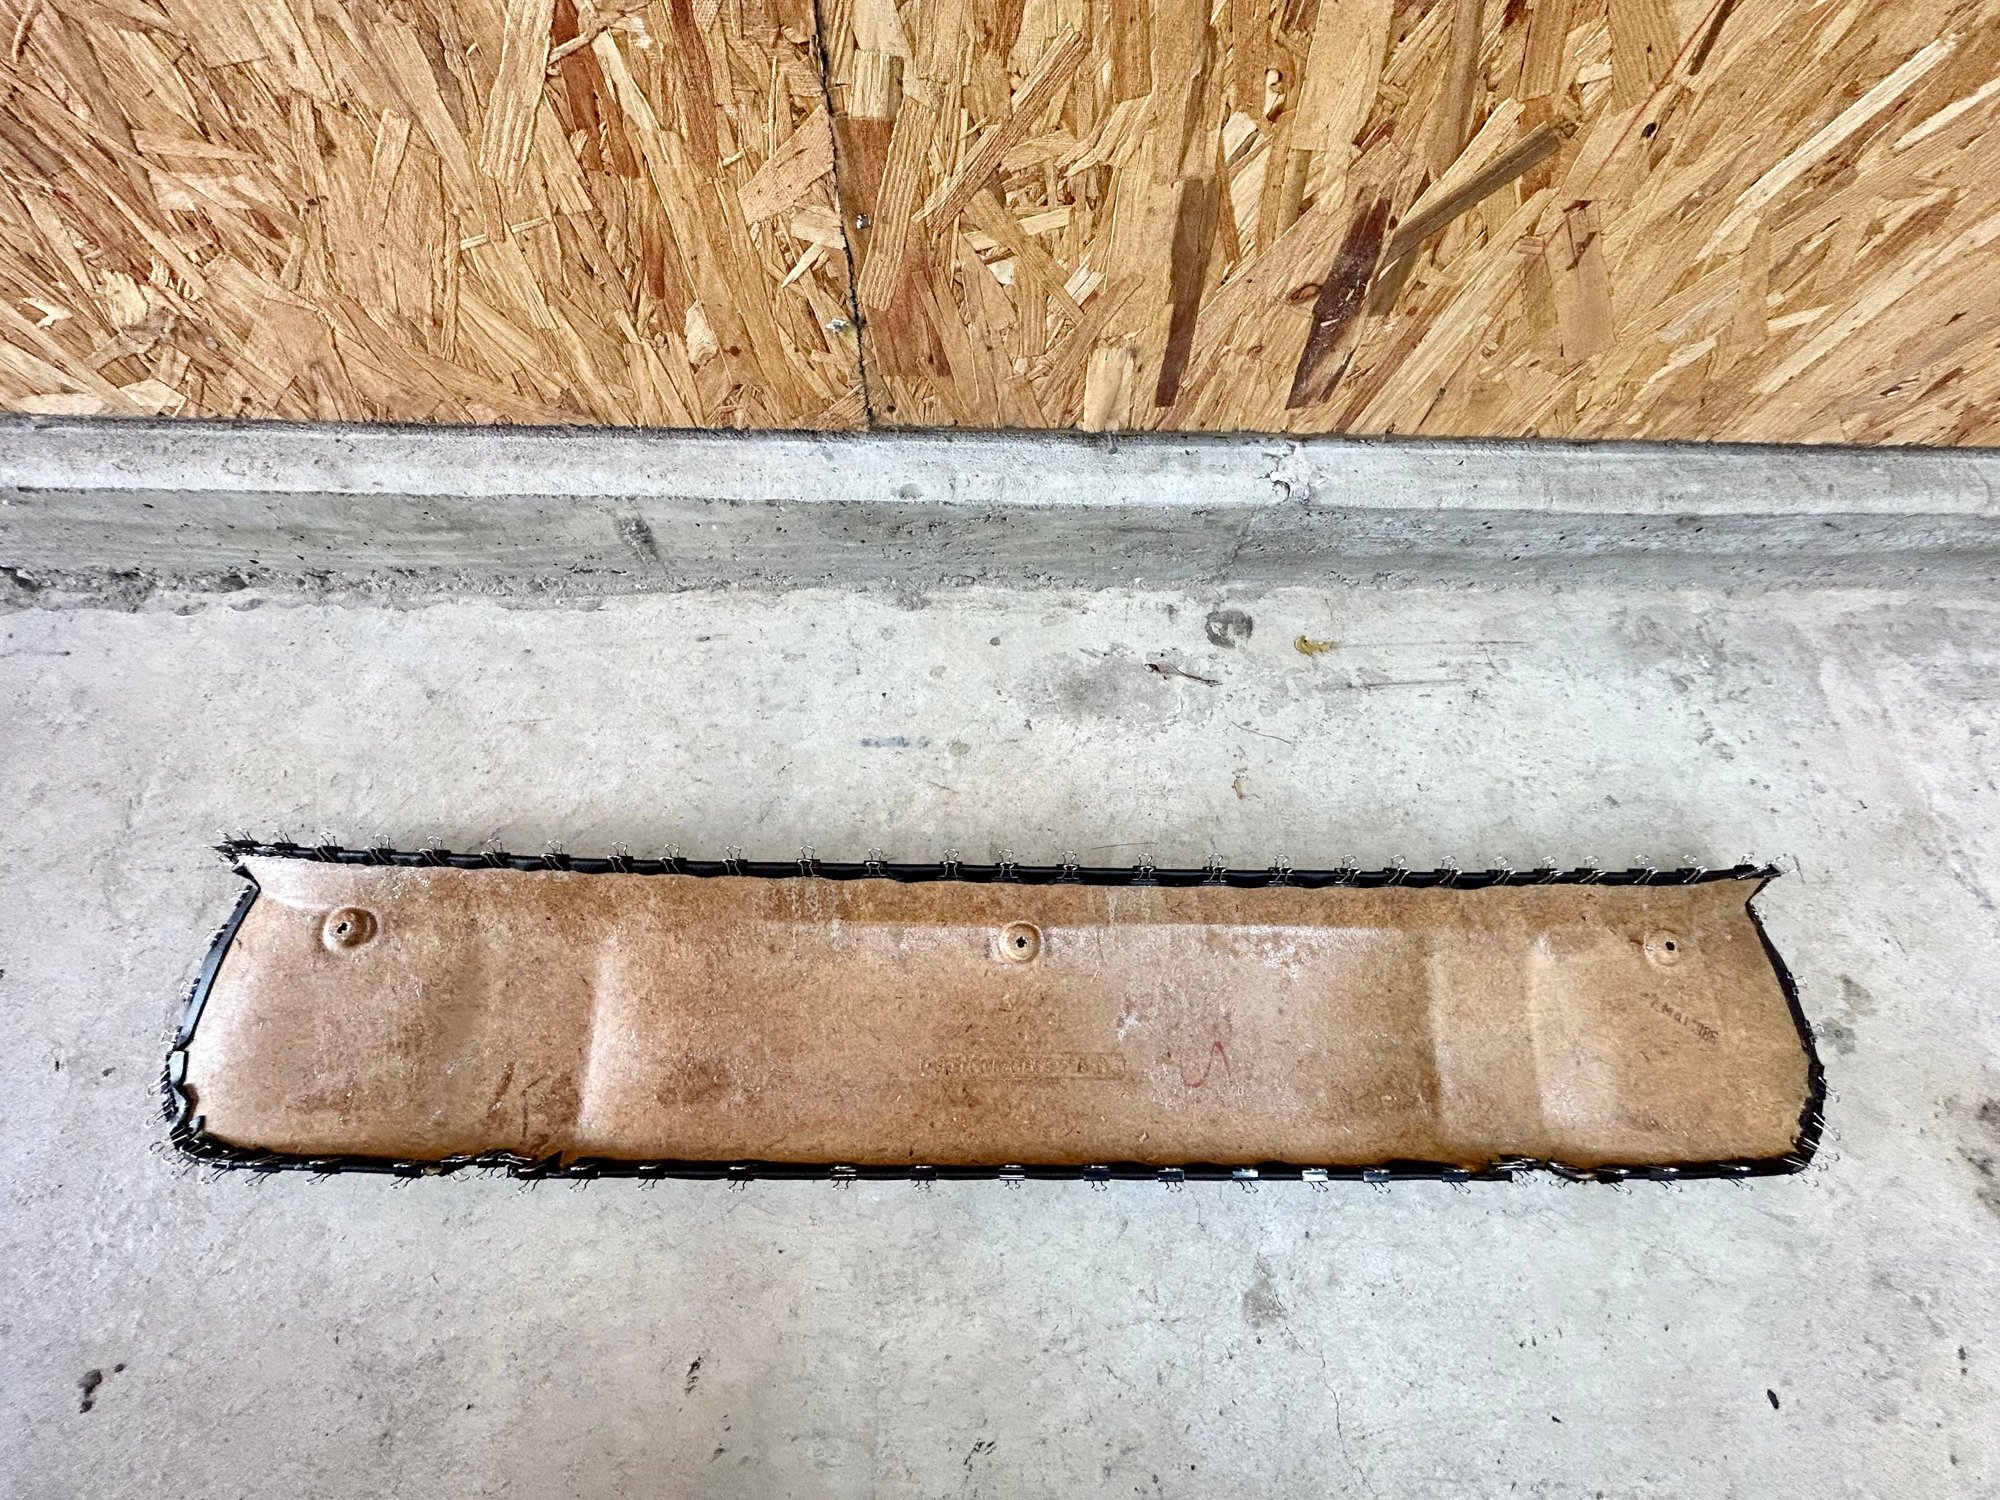
I pulled the old vinyl off, fixed up a few cracks in the headliner panel and purchased some new vinyl at JoAnn fabrics. Using headliner adhesive and very methodically applying the new vinyl with some heat in areas that required stretching yielded the following.
I cut the holes for the fasteners before the adhesive had fully dried. I probably shouldn't have done that as the holes got a little bigger once dry, but everything fit back together pretty well. I used a million little binder clips to hold the vinyl in place until the adhesive was dry and they did leave some imprints in the vinyl. I think these will disappear over time though.
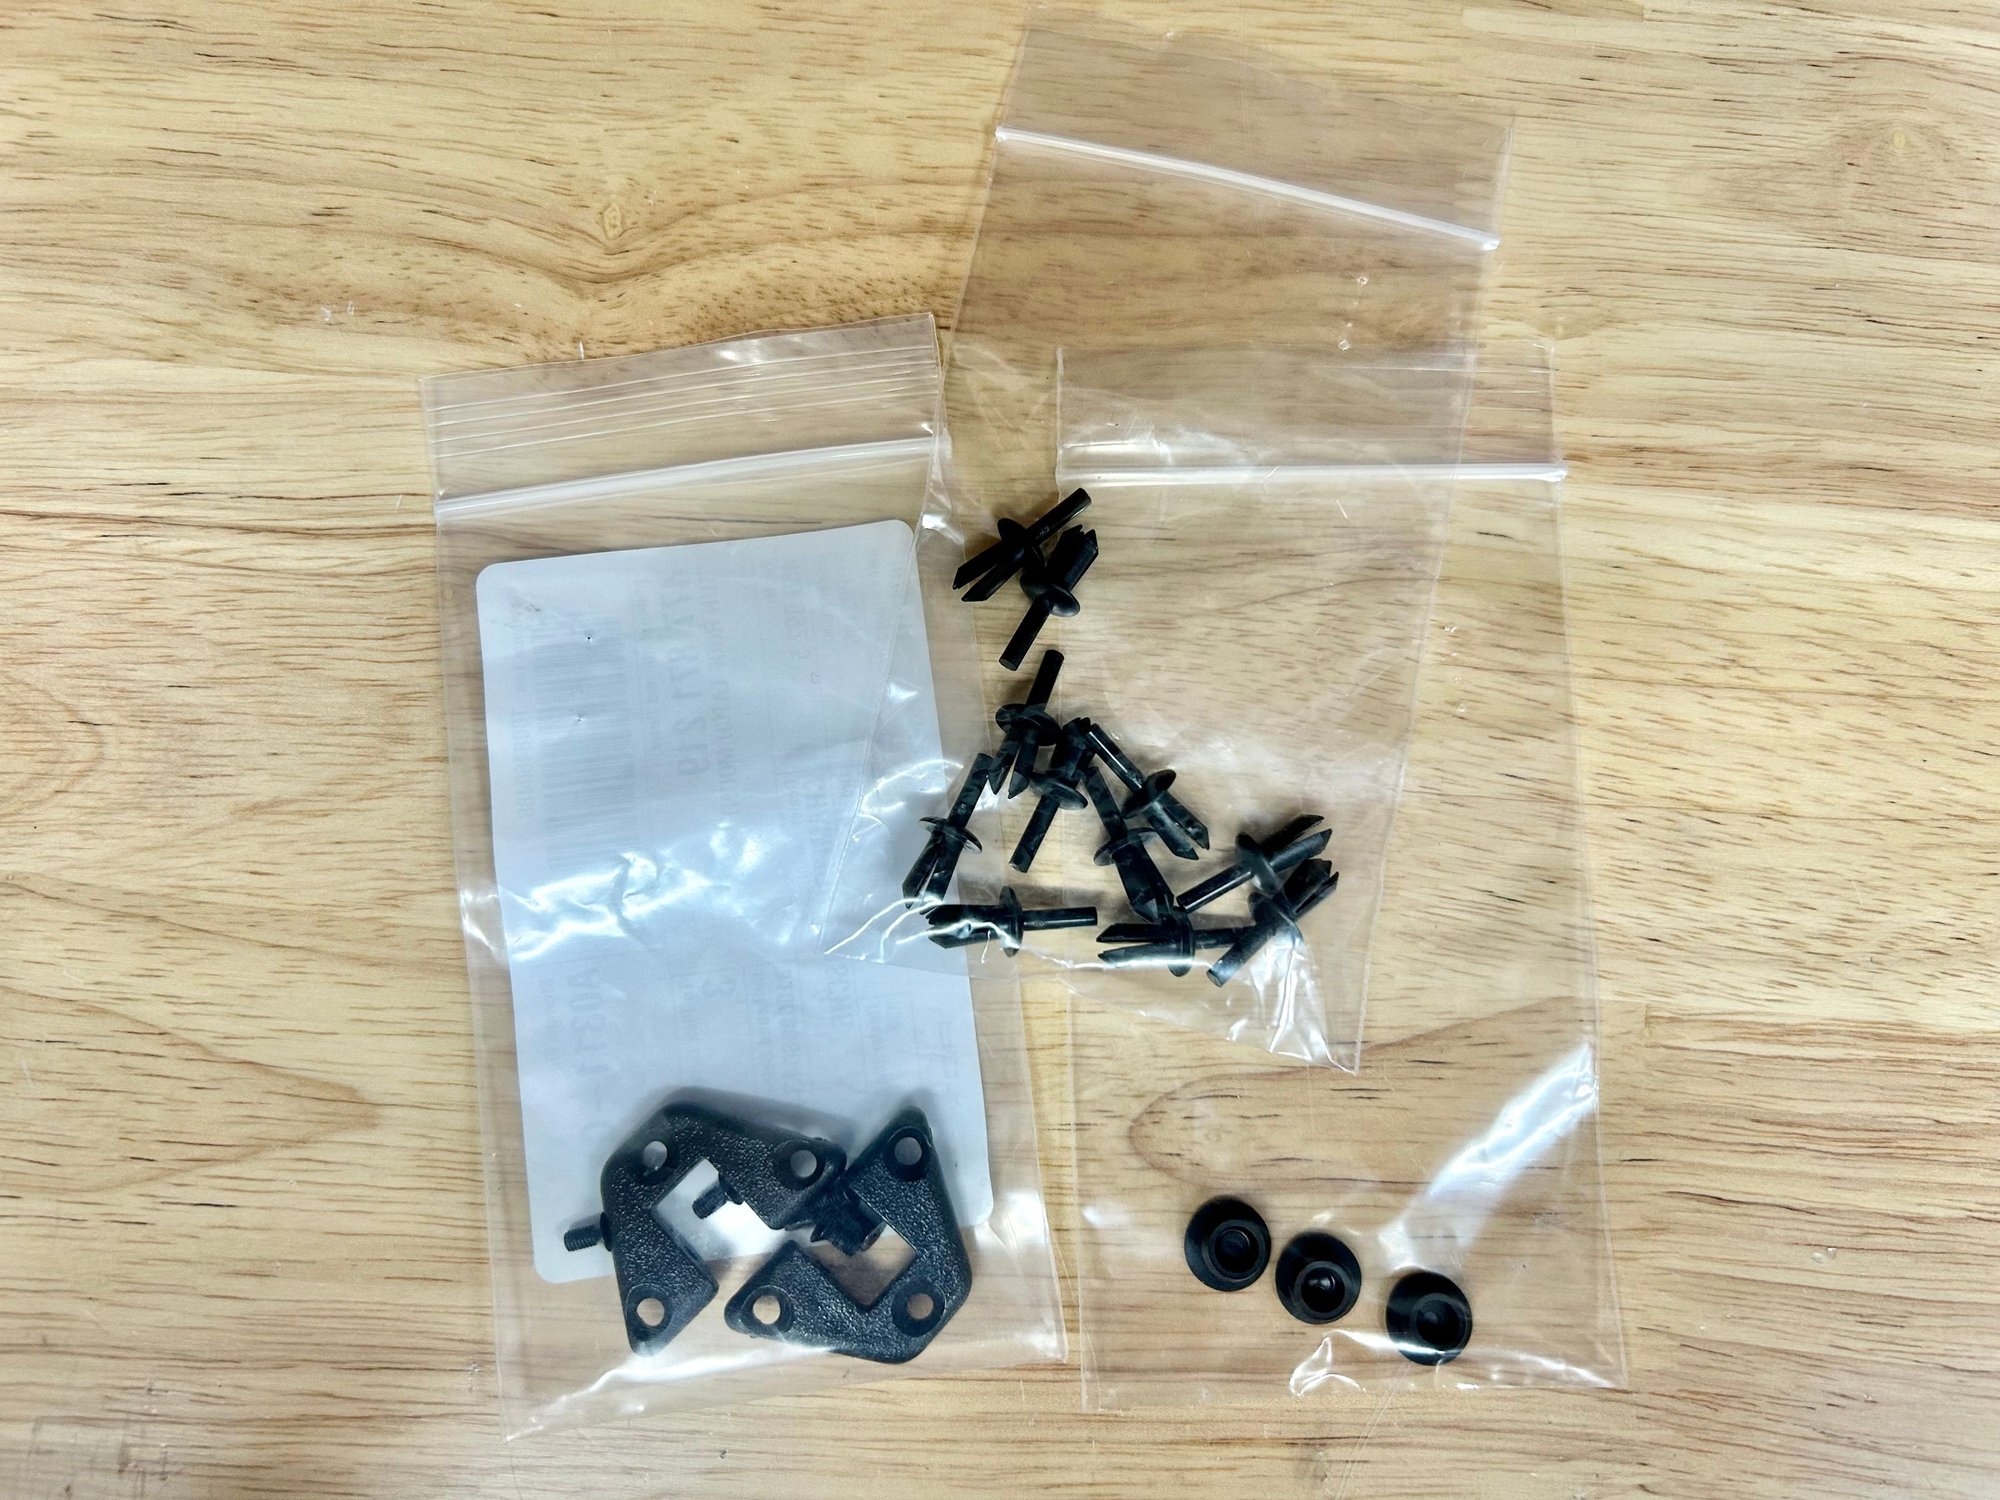
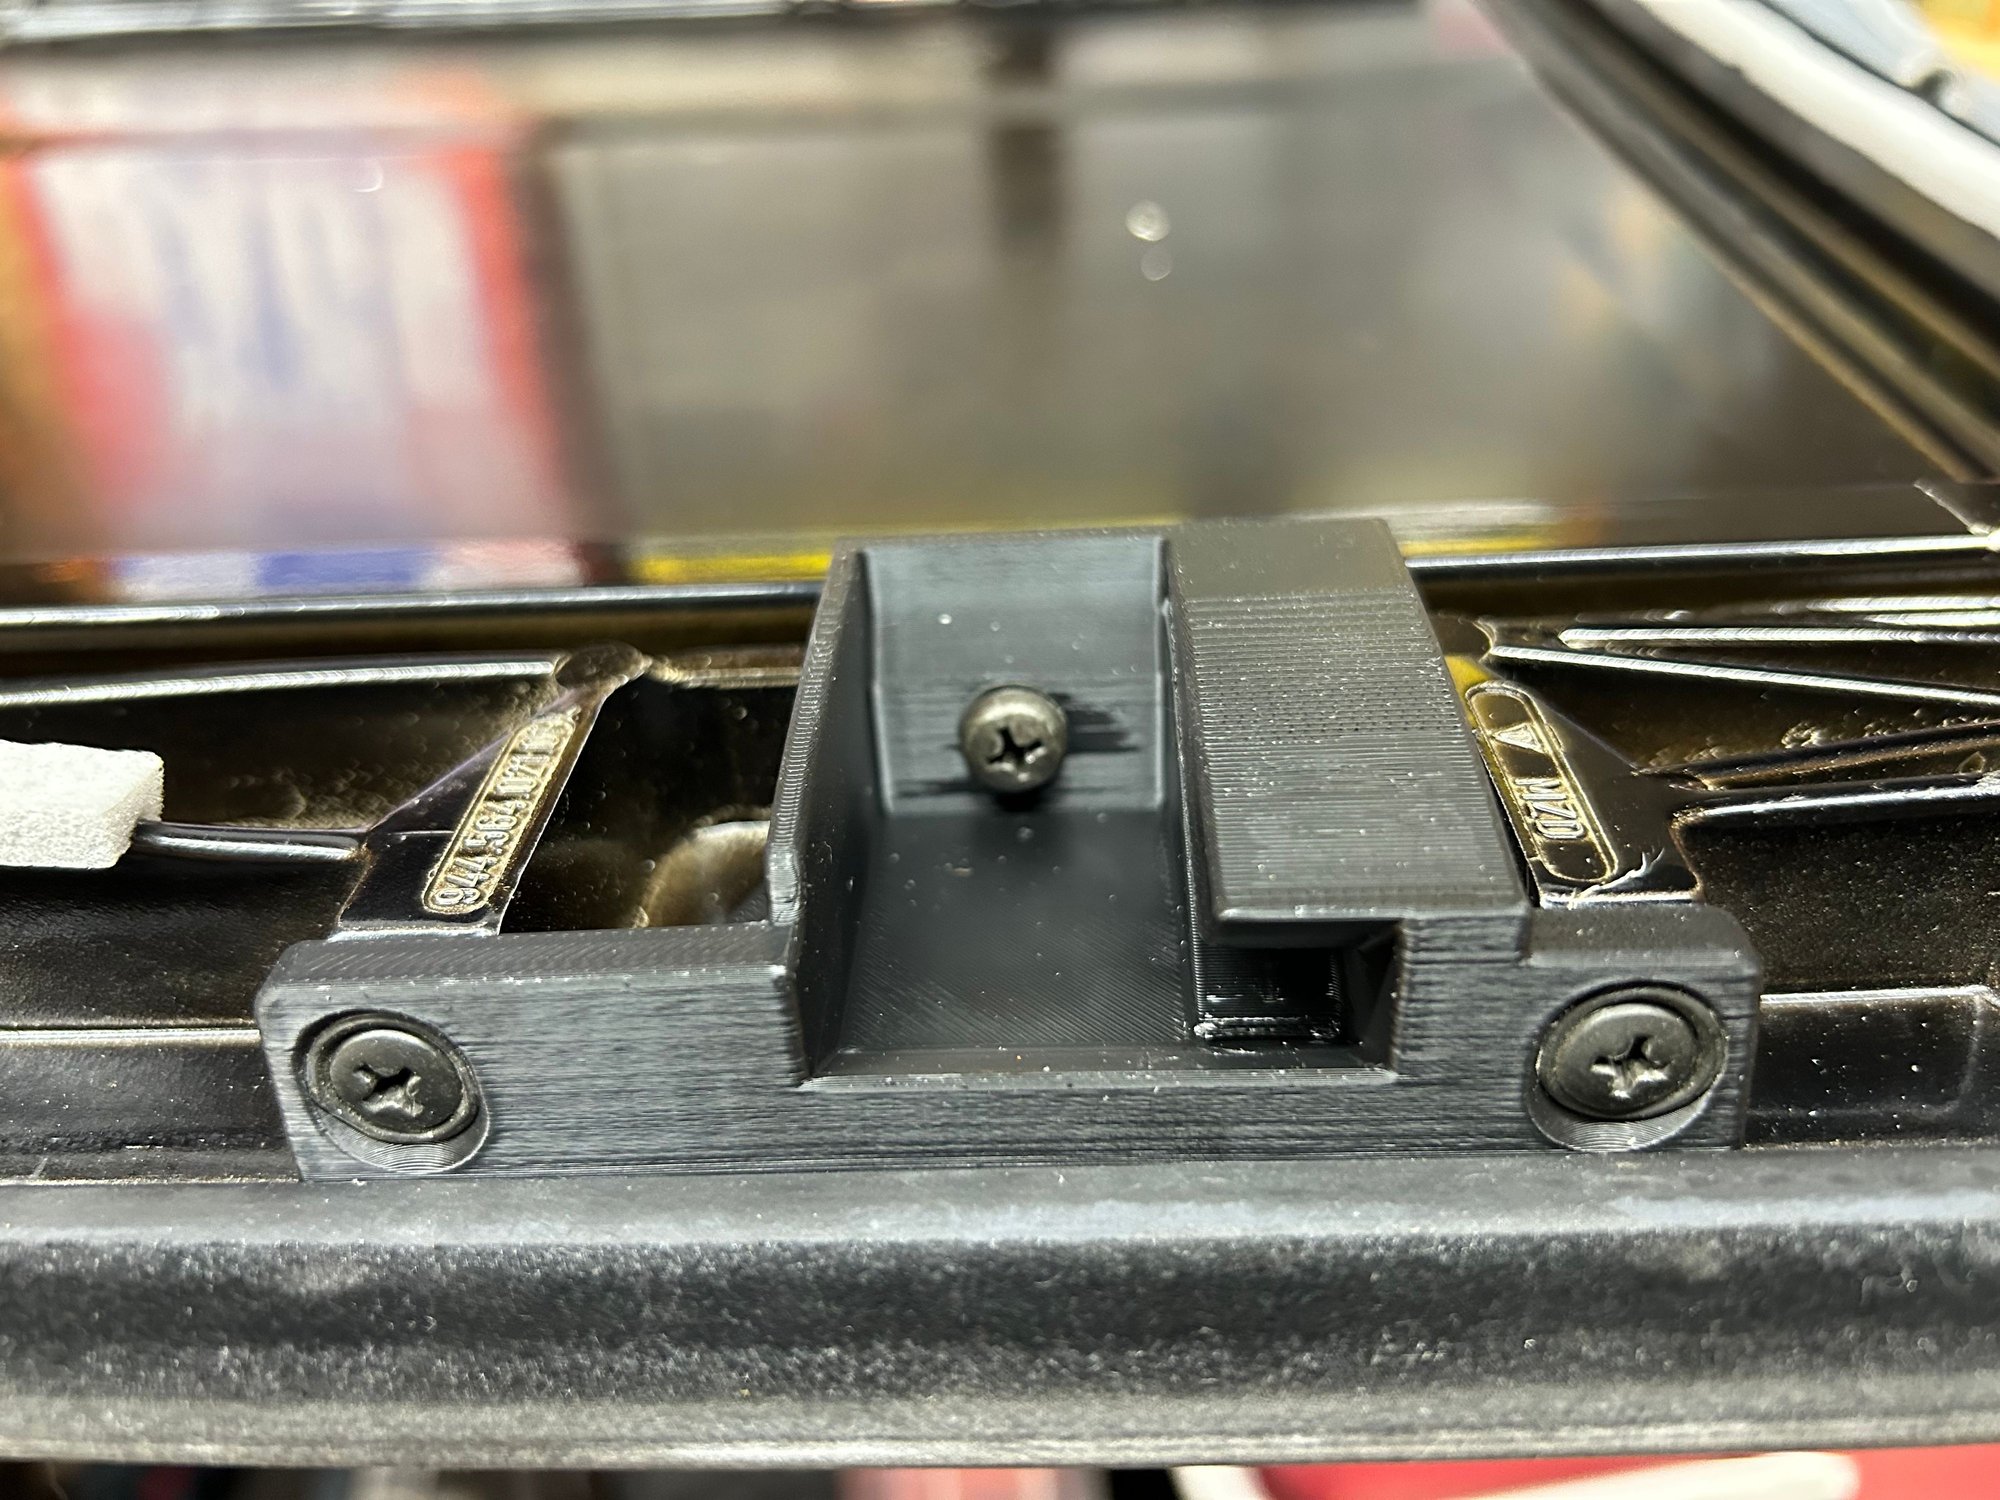
I purchased new hinges, trim plugs and push rivets from 944Online and receivers from eBay seller cantjustquit. The OEM replacement receivers are rather expensive at $76 each, so I decided to try some 3D printed ones for $50 for the pair. Hopefully they'll hold up over time.
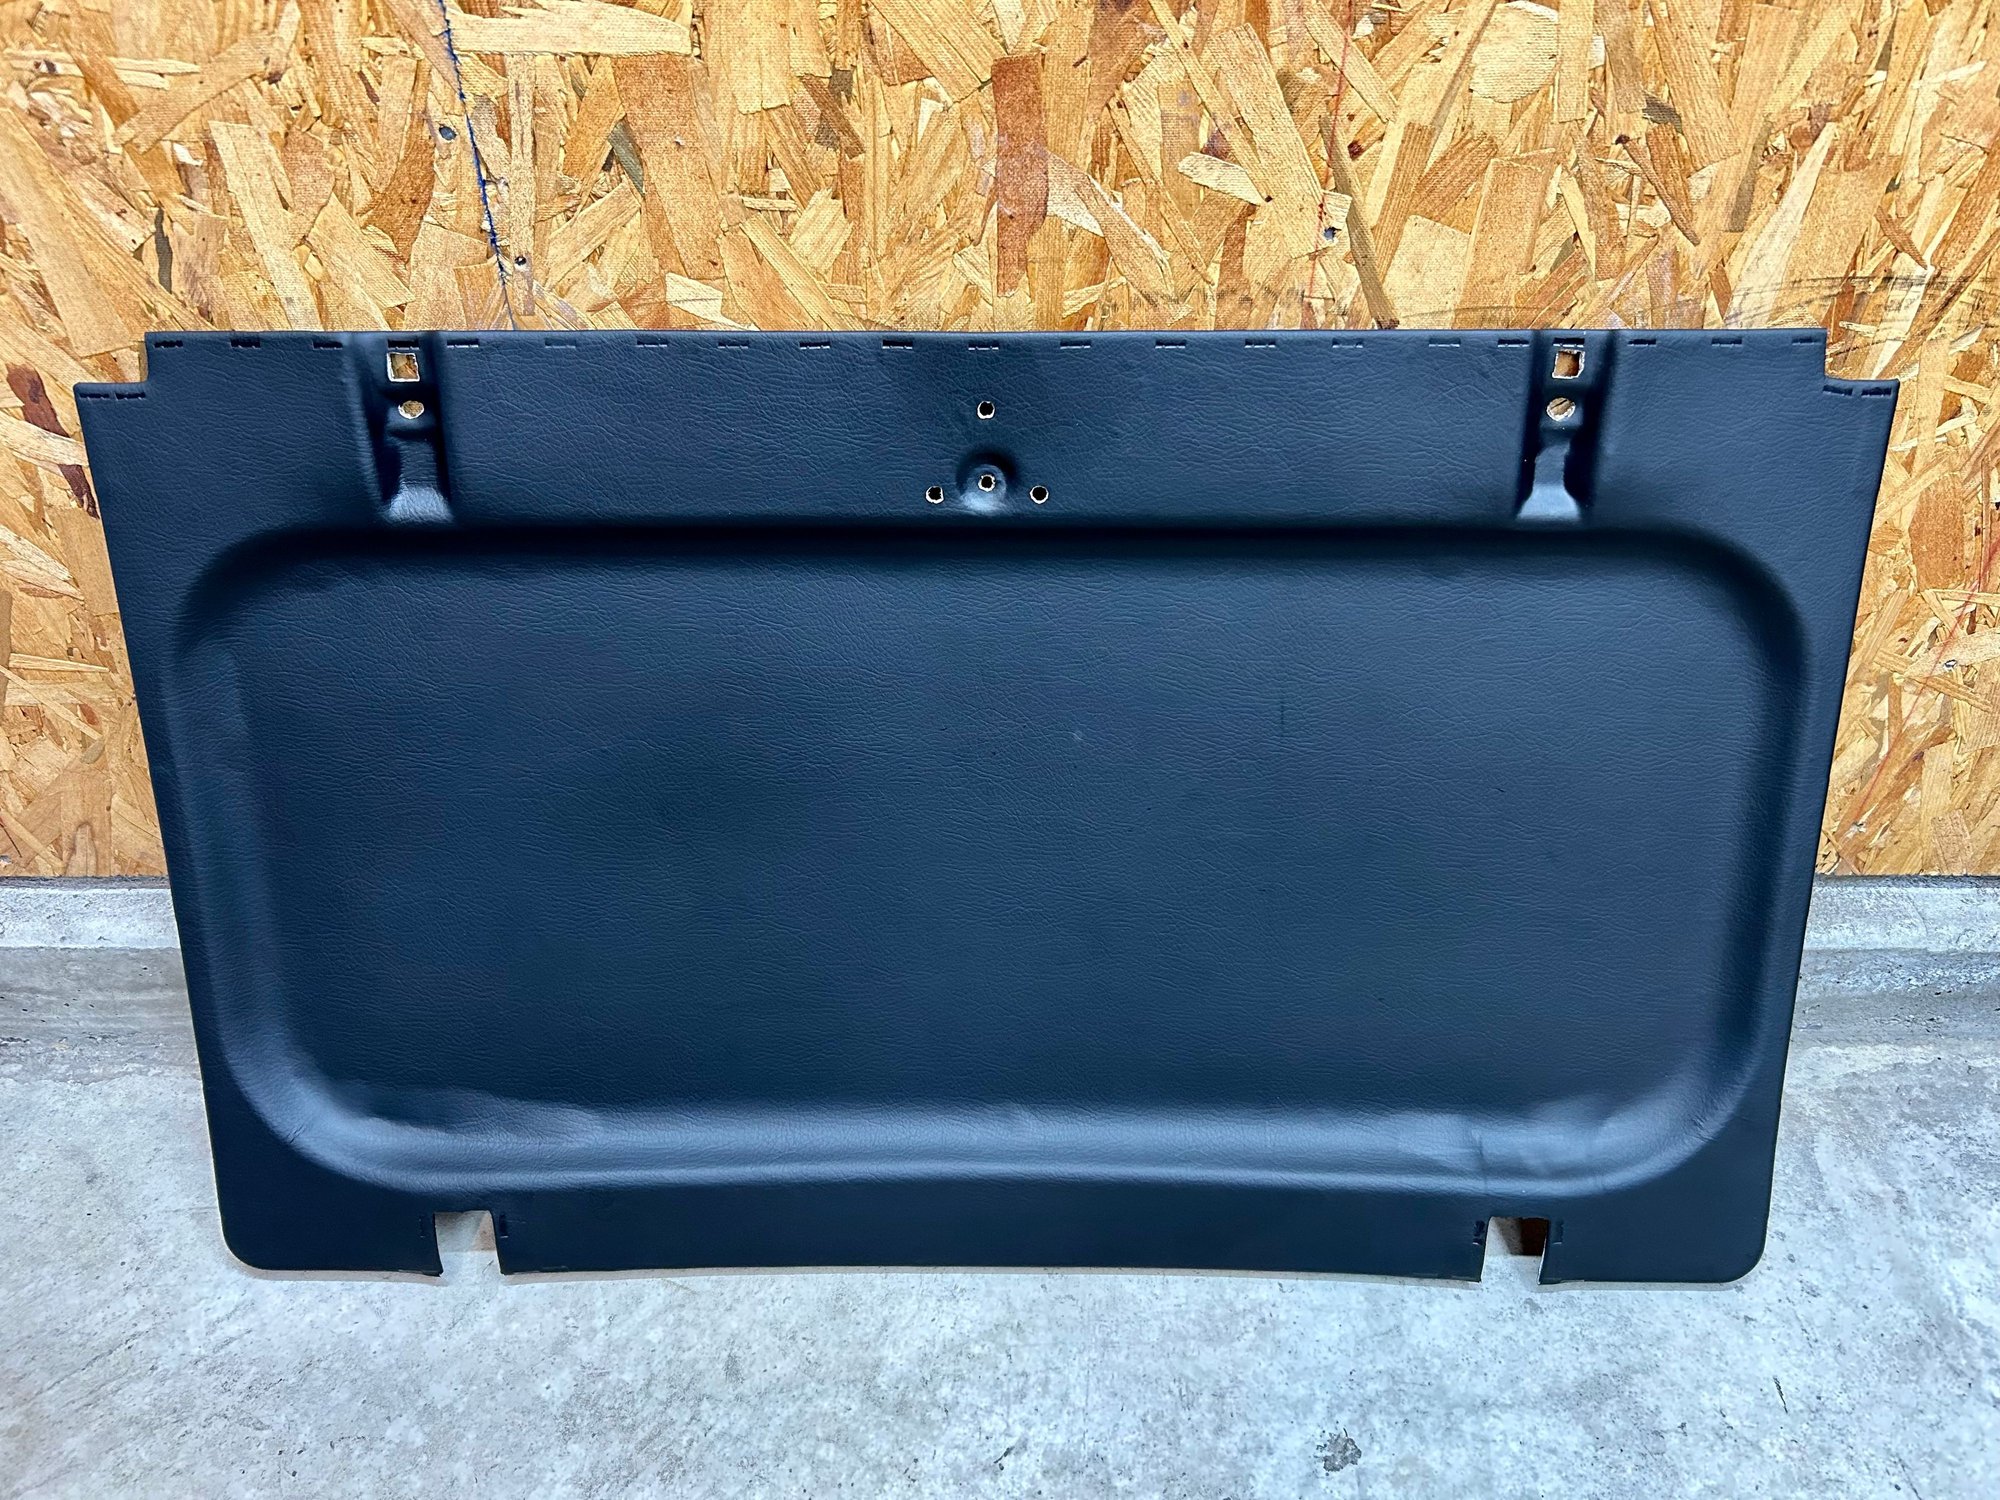
I also recovered the rear headliner panel that butts up against the hatch. I decided to just reuse the original vinyl on this one (it was actually my test piece before I did the sunroof headliner) and it seemed to work out okay. I figured the worst that happens is it loosens up and I have to recover it down the line. Not a big deal since it's such a small panel that's easy to remove.
And that's it. Total cost for everything was around $200 so I'm pretty pleased with the results.
Haven't posted an update here in a while. I had been posting on my ITB Development thread over the last 1.5 years as that was where most of my focus with this car was.
And now, after 11 years of ownership, I have decided it's time to sell the 944. See the For Sale post for details.
Haven't posted an update here in a while. I had been posting on my ITB Development thread over the last 1.5 years as that was where most of my focus with this car was.
And now, after 11 years of ownership, I have decided it's time to sell the 944. See the For Sale post for details.
JRP
A shame to hear you are selling up! I've been along for the journey whilst I do similar restoration on my turbo.
Best wishes and good luck with the sale, a lovely car which has had many hours of quality time poured into it!

 07-02-2021, 09:12 AM


 I'll let the pictures do the talking.