When you click on links to various merchants on this site and make a purchase, this can result in this site earning a commission. Affiliate programs and affiliations include, but are not limited to, the eBay Partner Network.
Looking good Justin, your inspiring everyone to get to work on their 944's! I use my '88 as a daily driver, I put over 70mi. everyday round trip to work. Rebuilt the engine a couple years ago, still running great! I have a project '84 I need to get busy on!
Did you notice the engine running cooler with the new radiator?
Even though I bled the system, it seemed to take about 150-200 miles of driving and topping off the overflow 1-2 times for it to really settle. I had it out this morning and was idling for about 30 minutes. Previously the temp gauge would have crept up to like 5/8 while sitting there but this morning it didn't even touch the 1/2 mark. Hopefully it's not just a fluke.
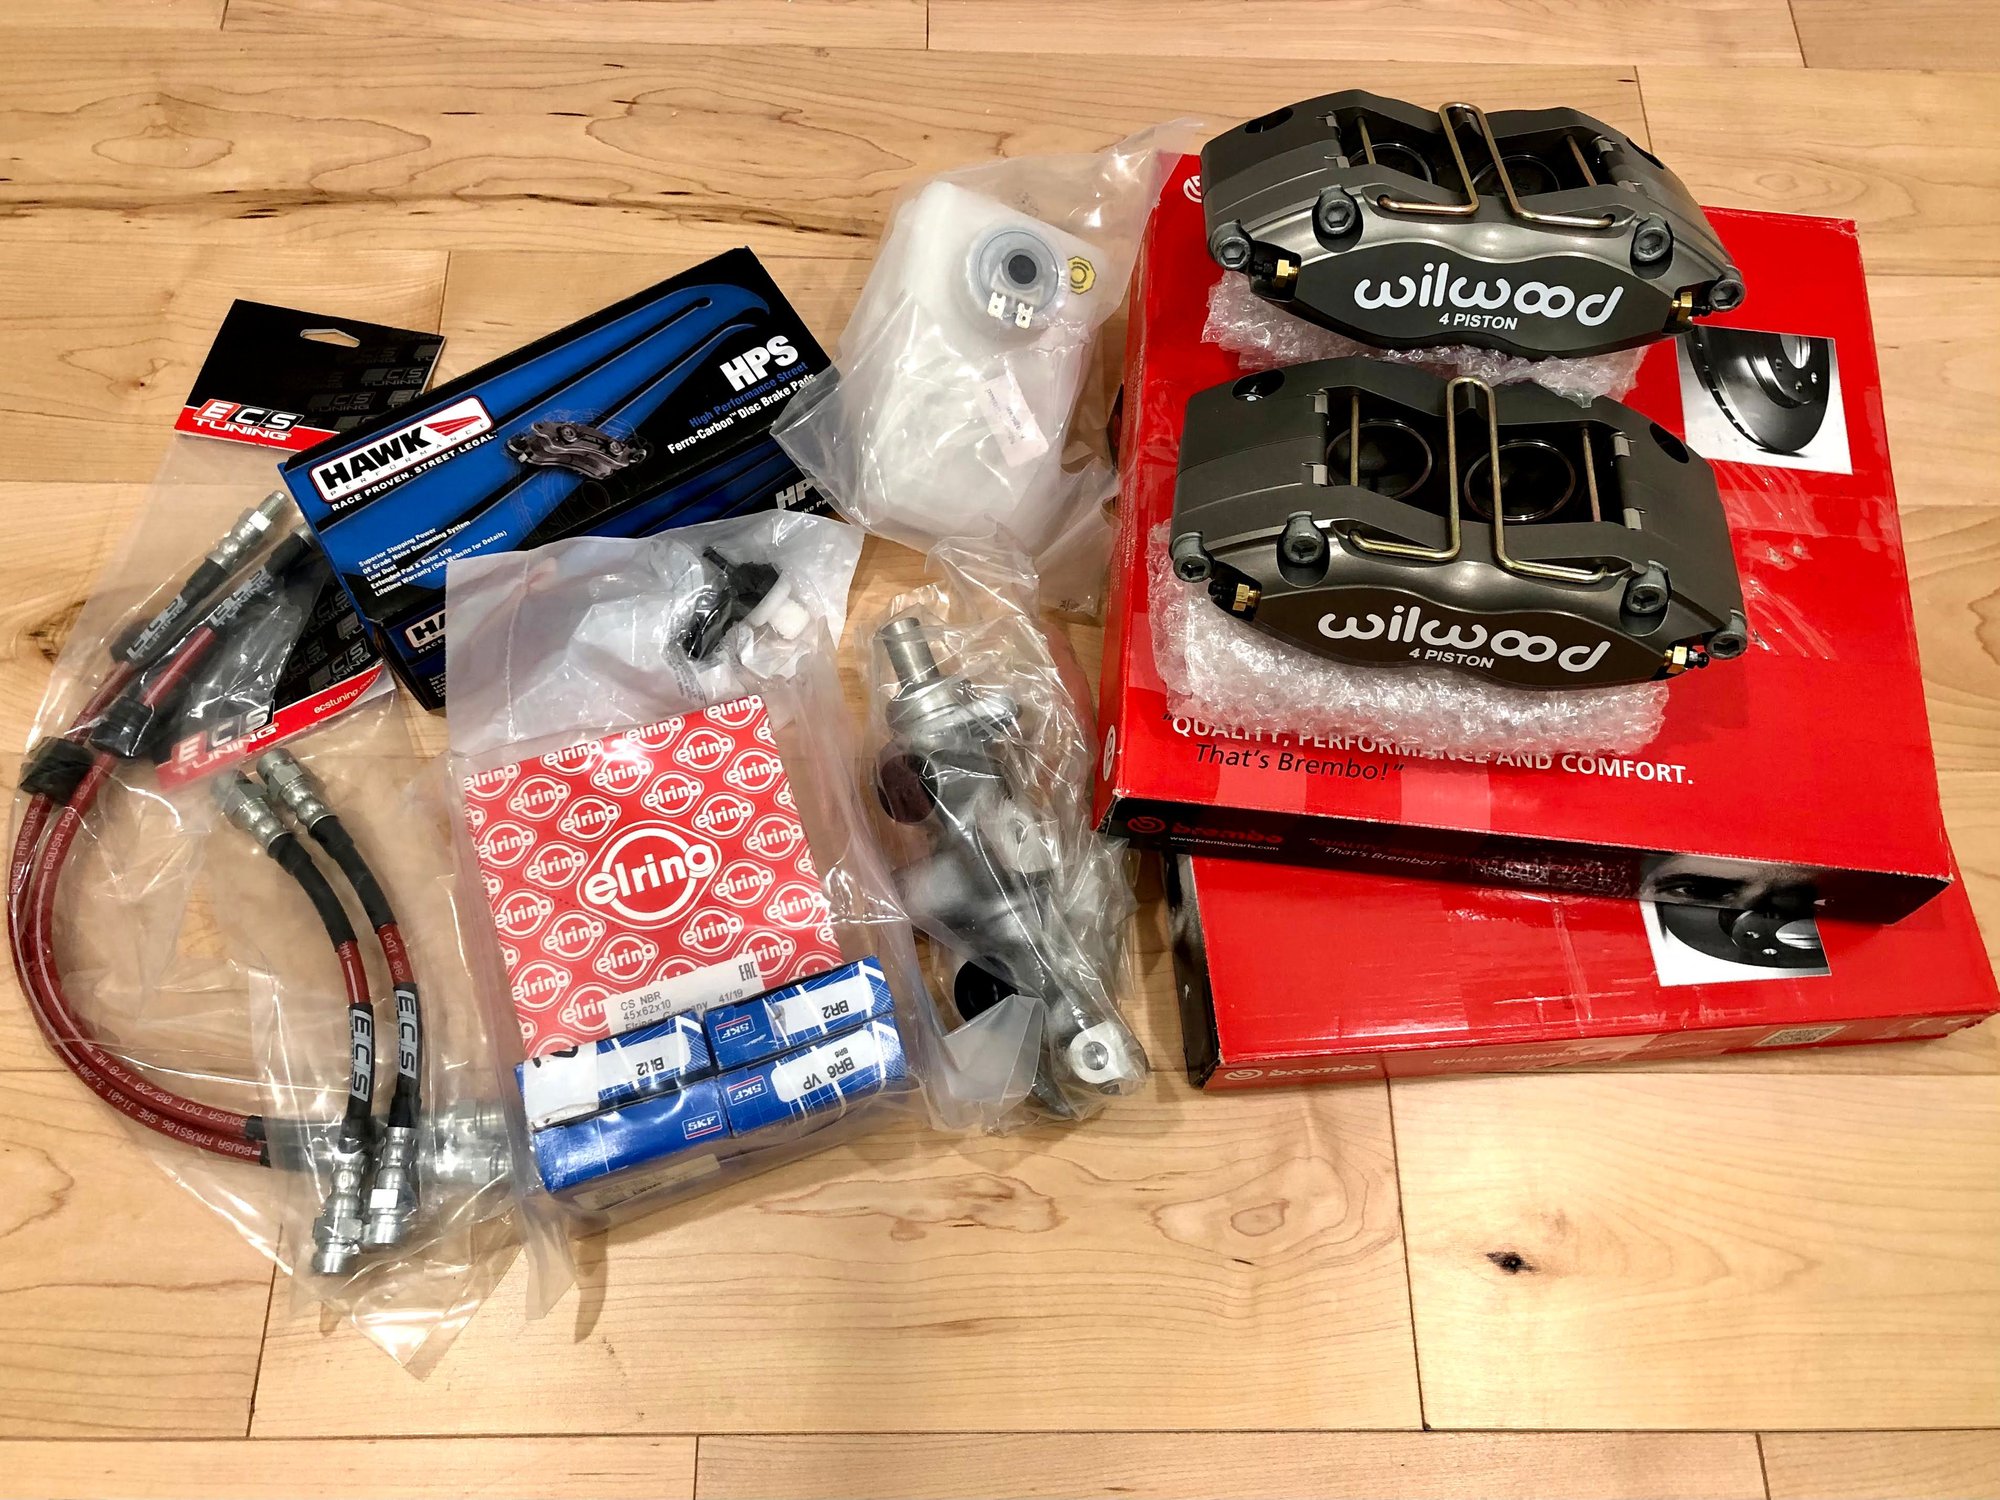
It's been some time since I have updated this thread. That's because I haven't done all that much until recently. I took it out for a few drives here and there over the summer and into the fall, and I replaced the battery back in June when it finally stopped holding a consistent charge. I had plans to do some work to the car to get it ready for the 2021 season and I finally purchased some parts back in December. Little teaser below of what was in store...
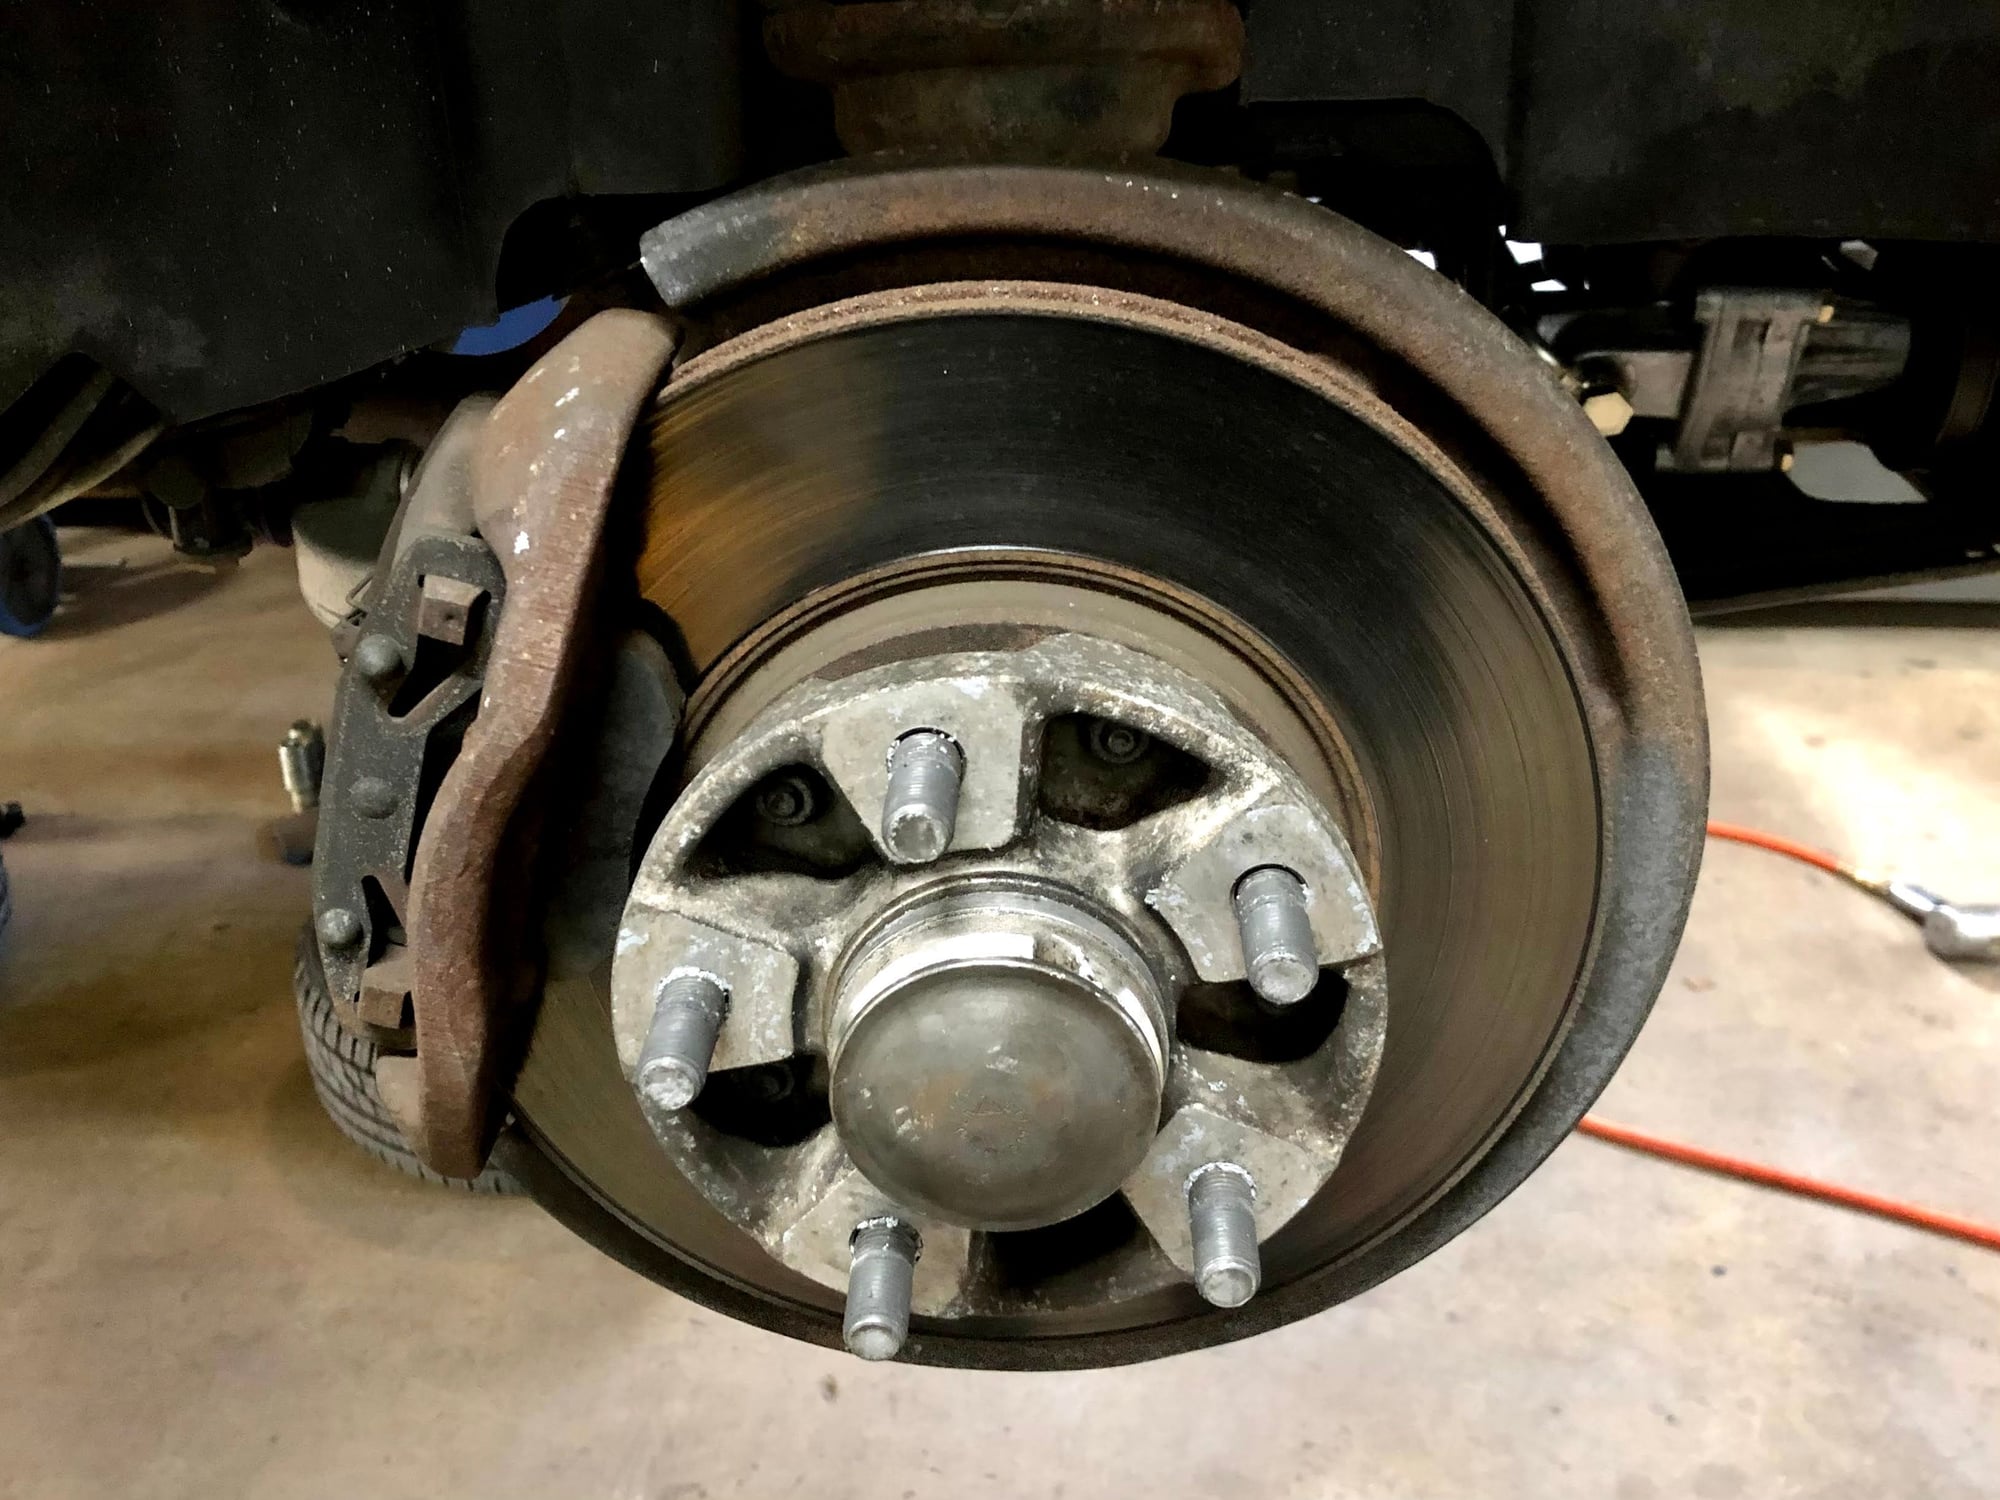
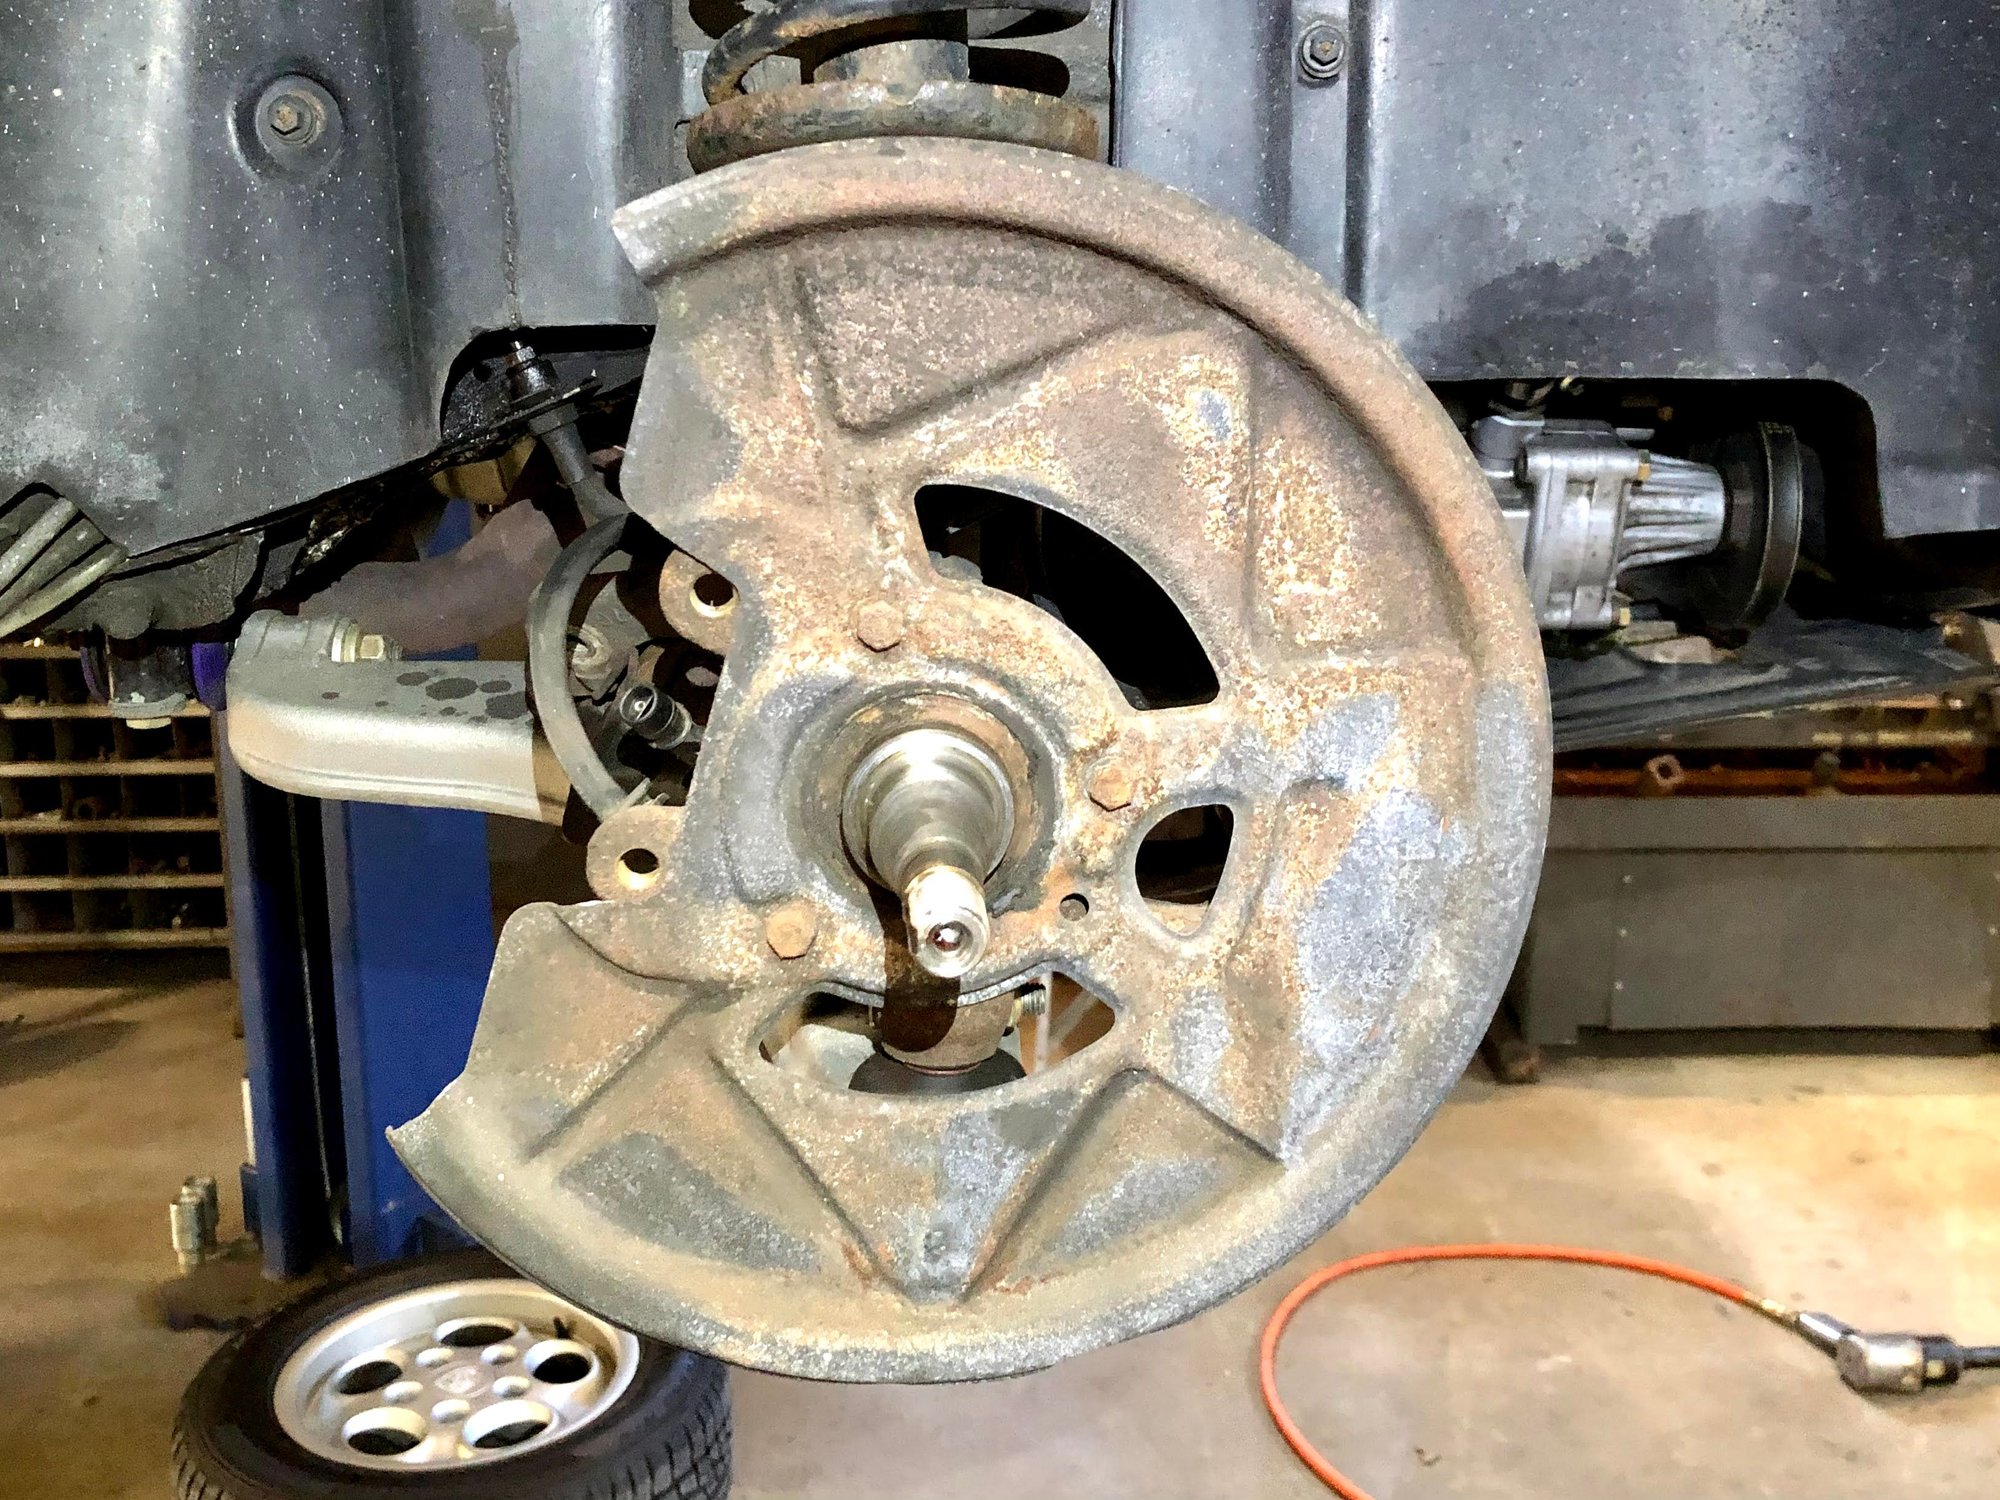
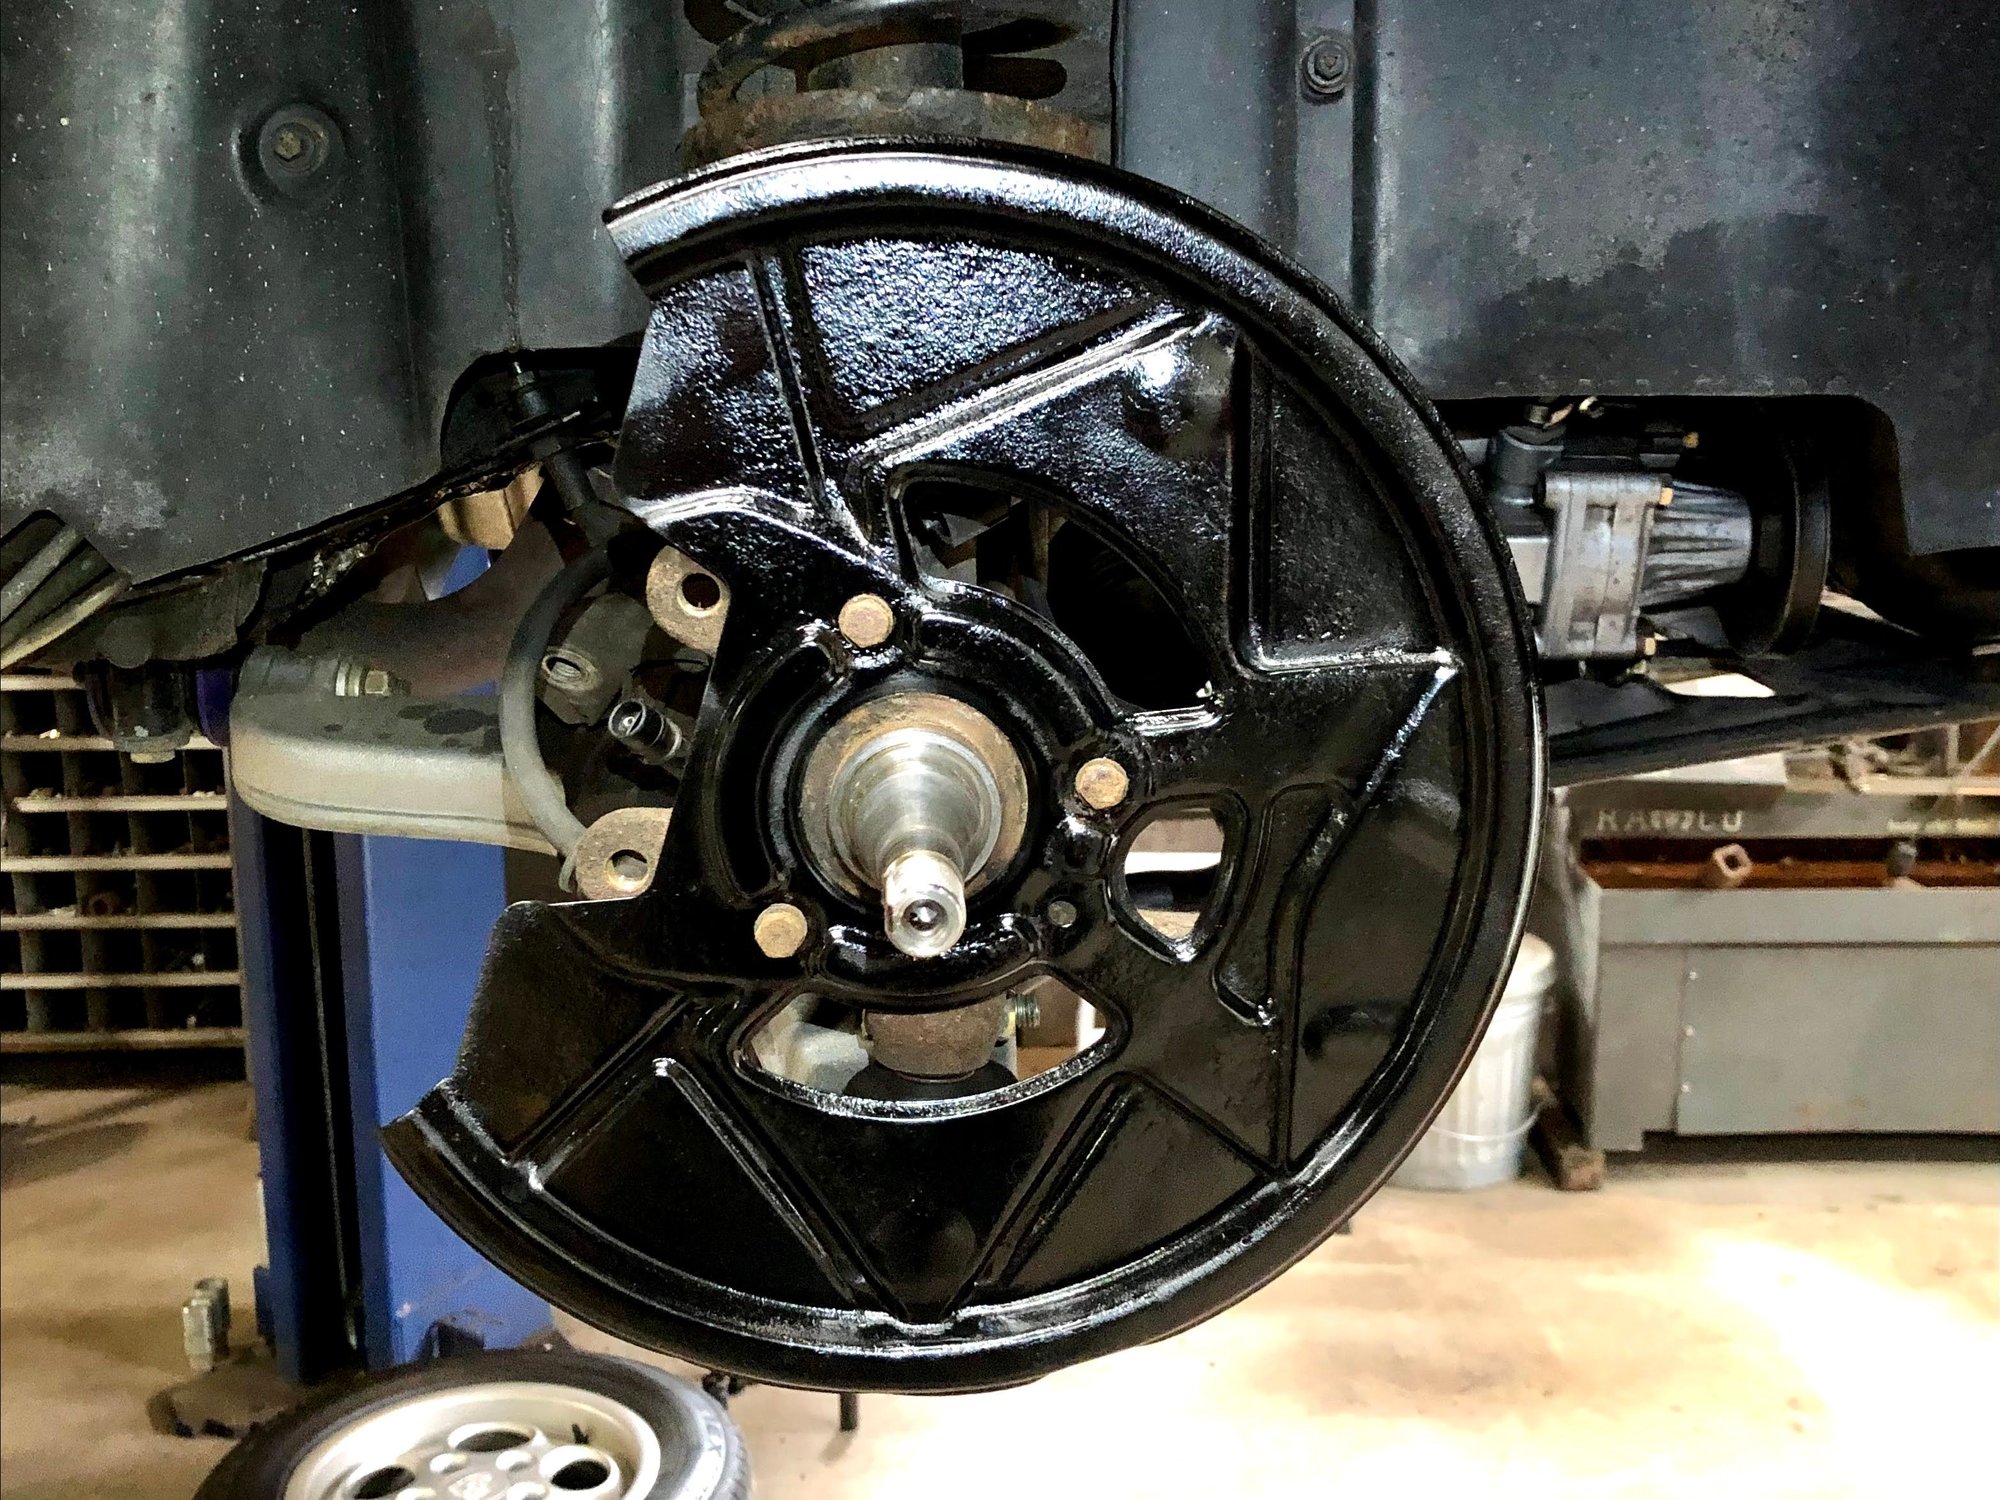
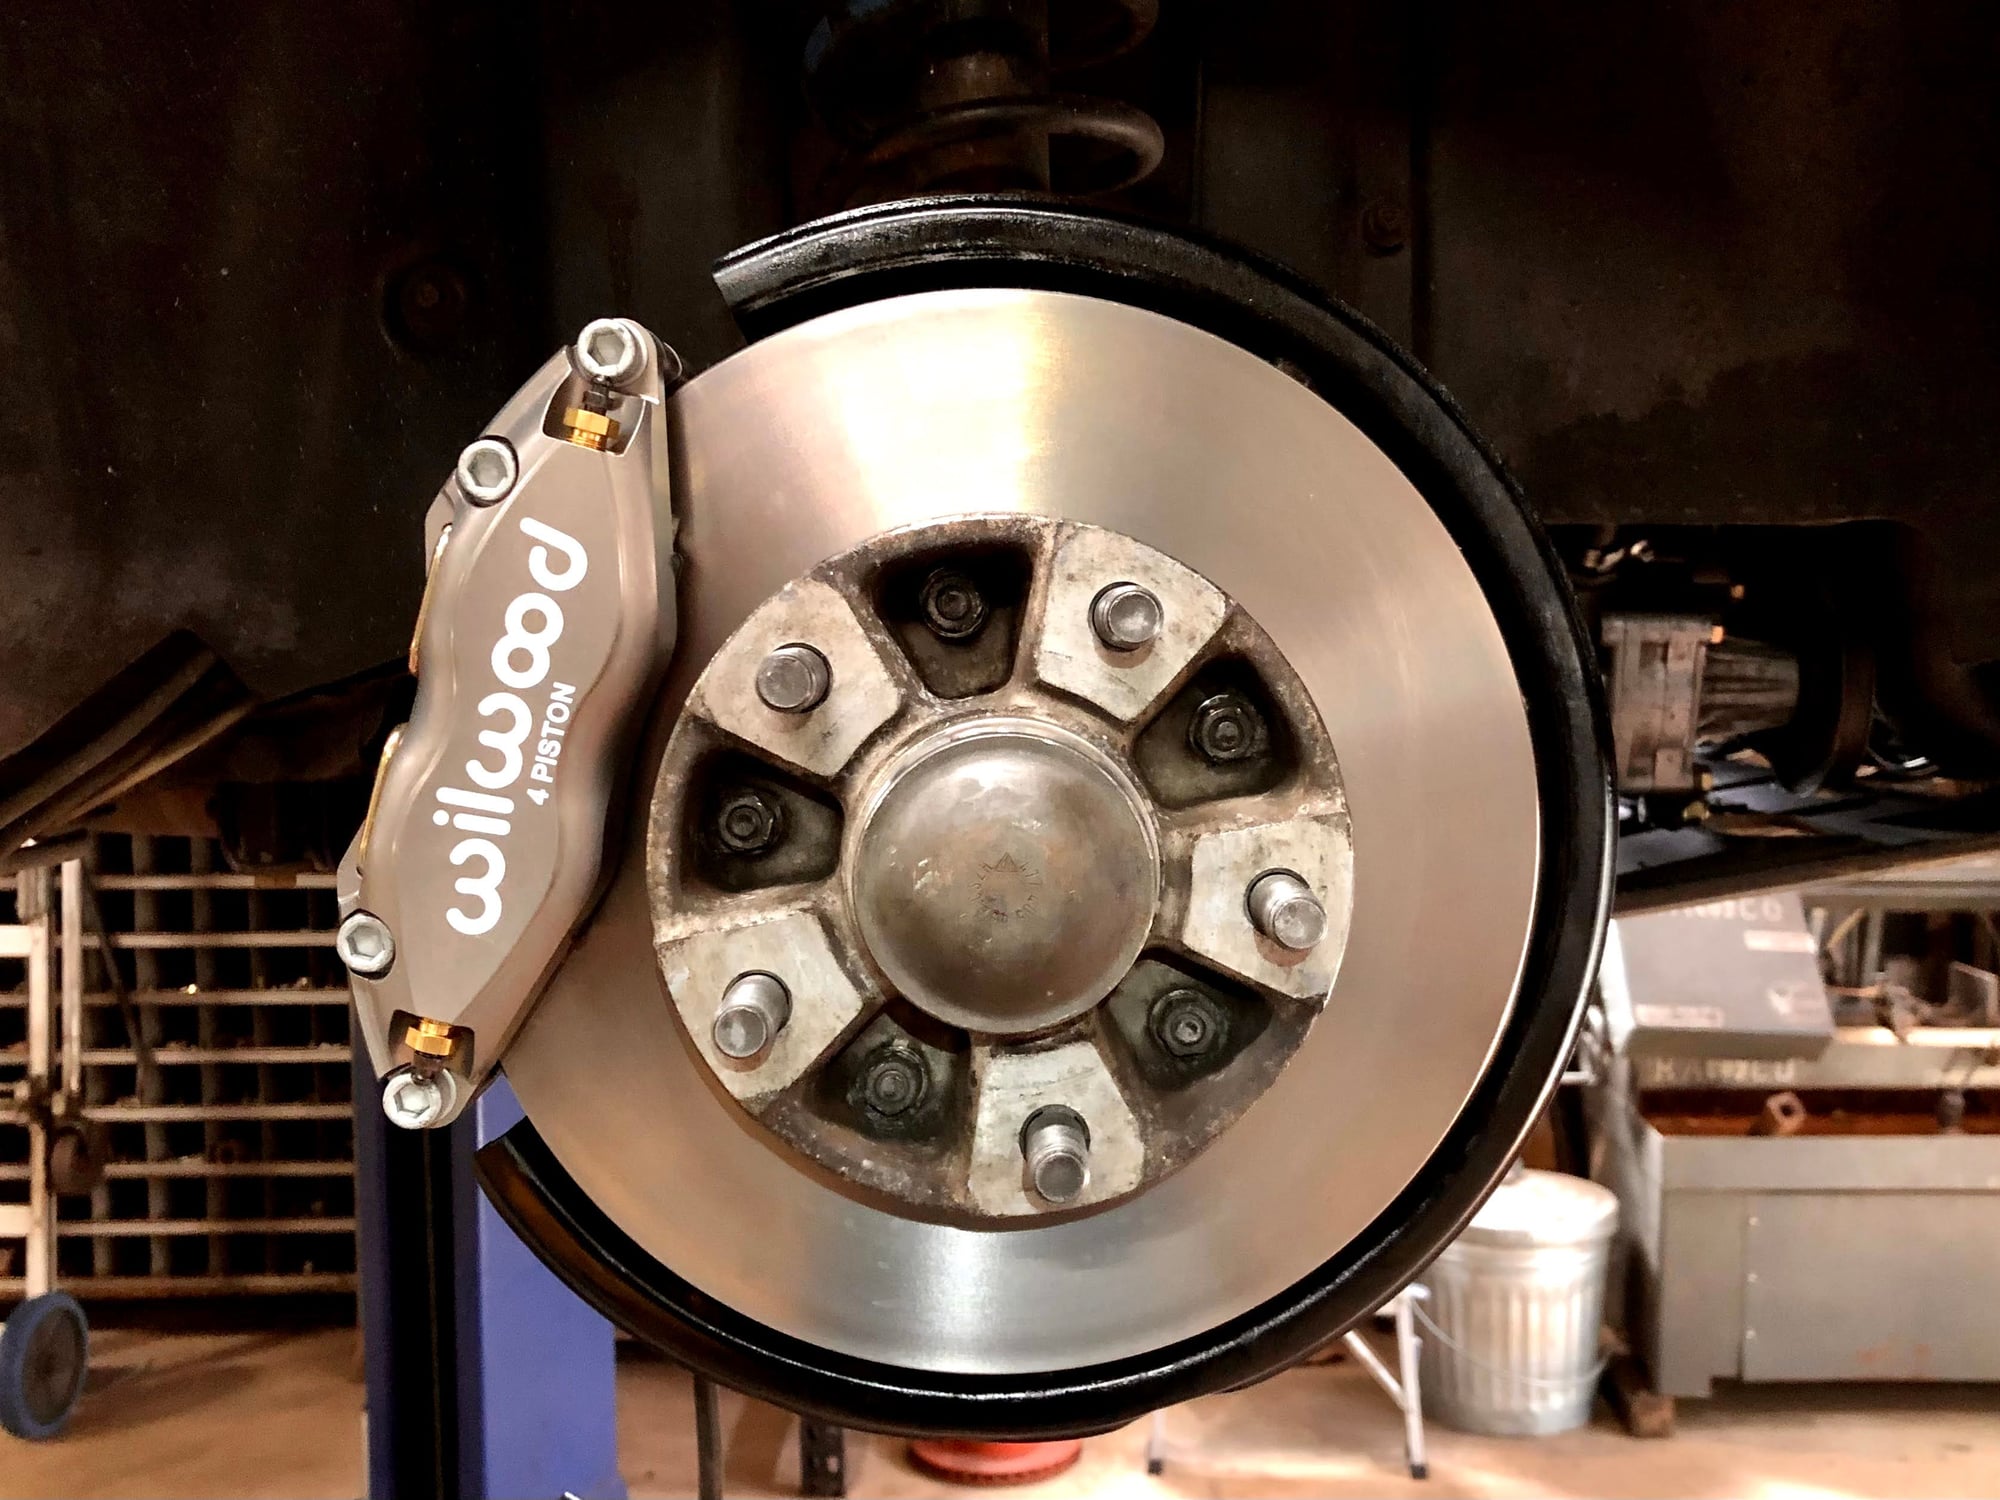
I know there are mixed opinions on whether the NA needs a Wilwood upgrade, but I figured since I was due to refresh the brakes now was the time to upgrade if I wanted to. I do like that the Wilwoods are quite a bit lighter than the stock calipers and they do look downright cool. I also was due for a new master cylinder (was starting to leak a little) and reservoir as well. I figured since I was taking the rotors and hubs off, I'd replace the wheel bearings and seals. The old ones came out looking surprisingly good, but for 35 years and almost 114k miles I figured they could withstand a refresh. Parts were purchased from Rennbay, 944Online and ECS Tuning.
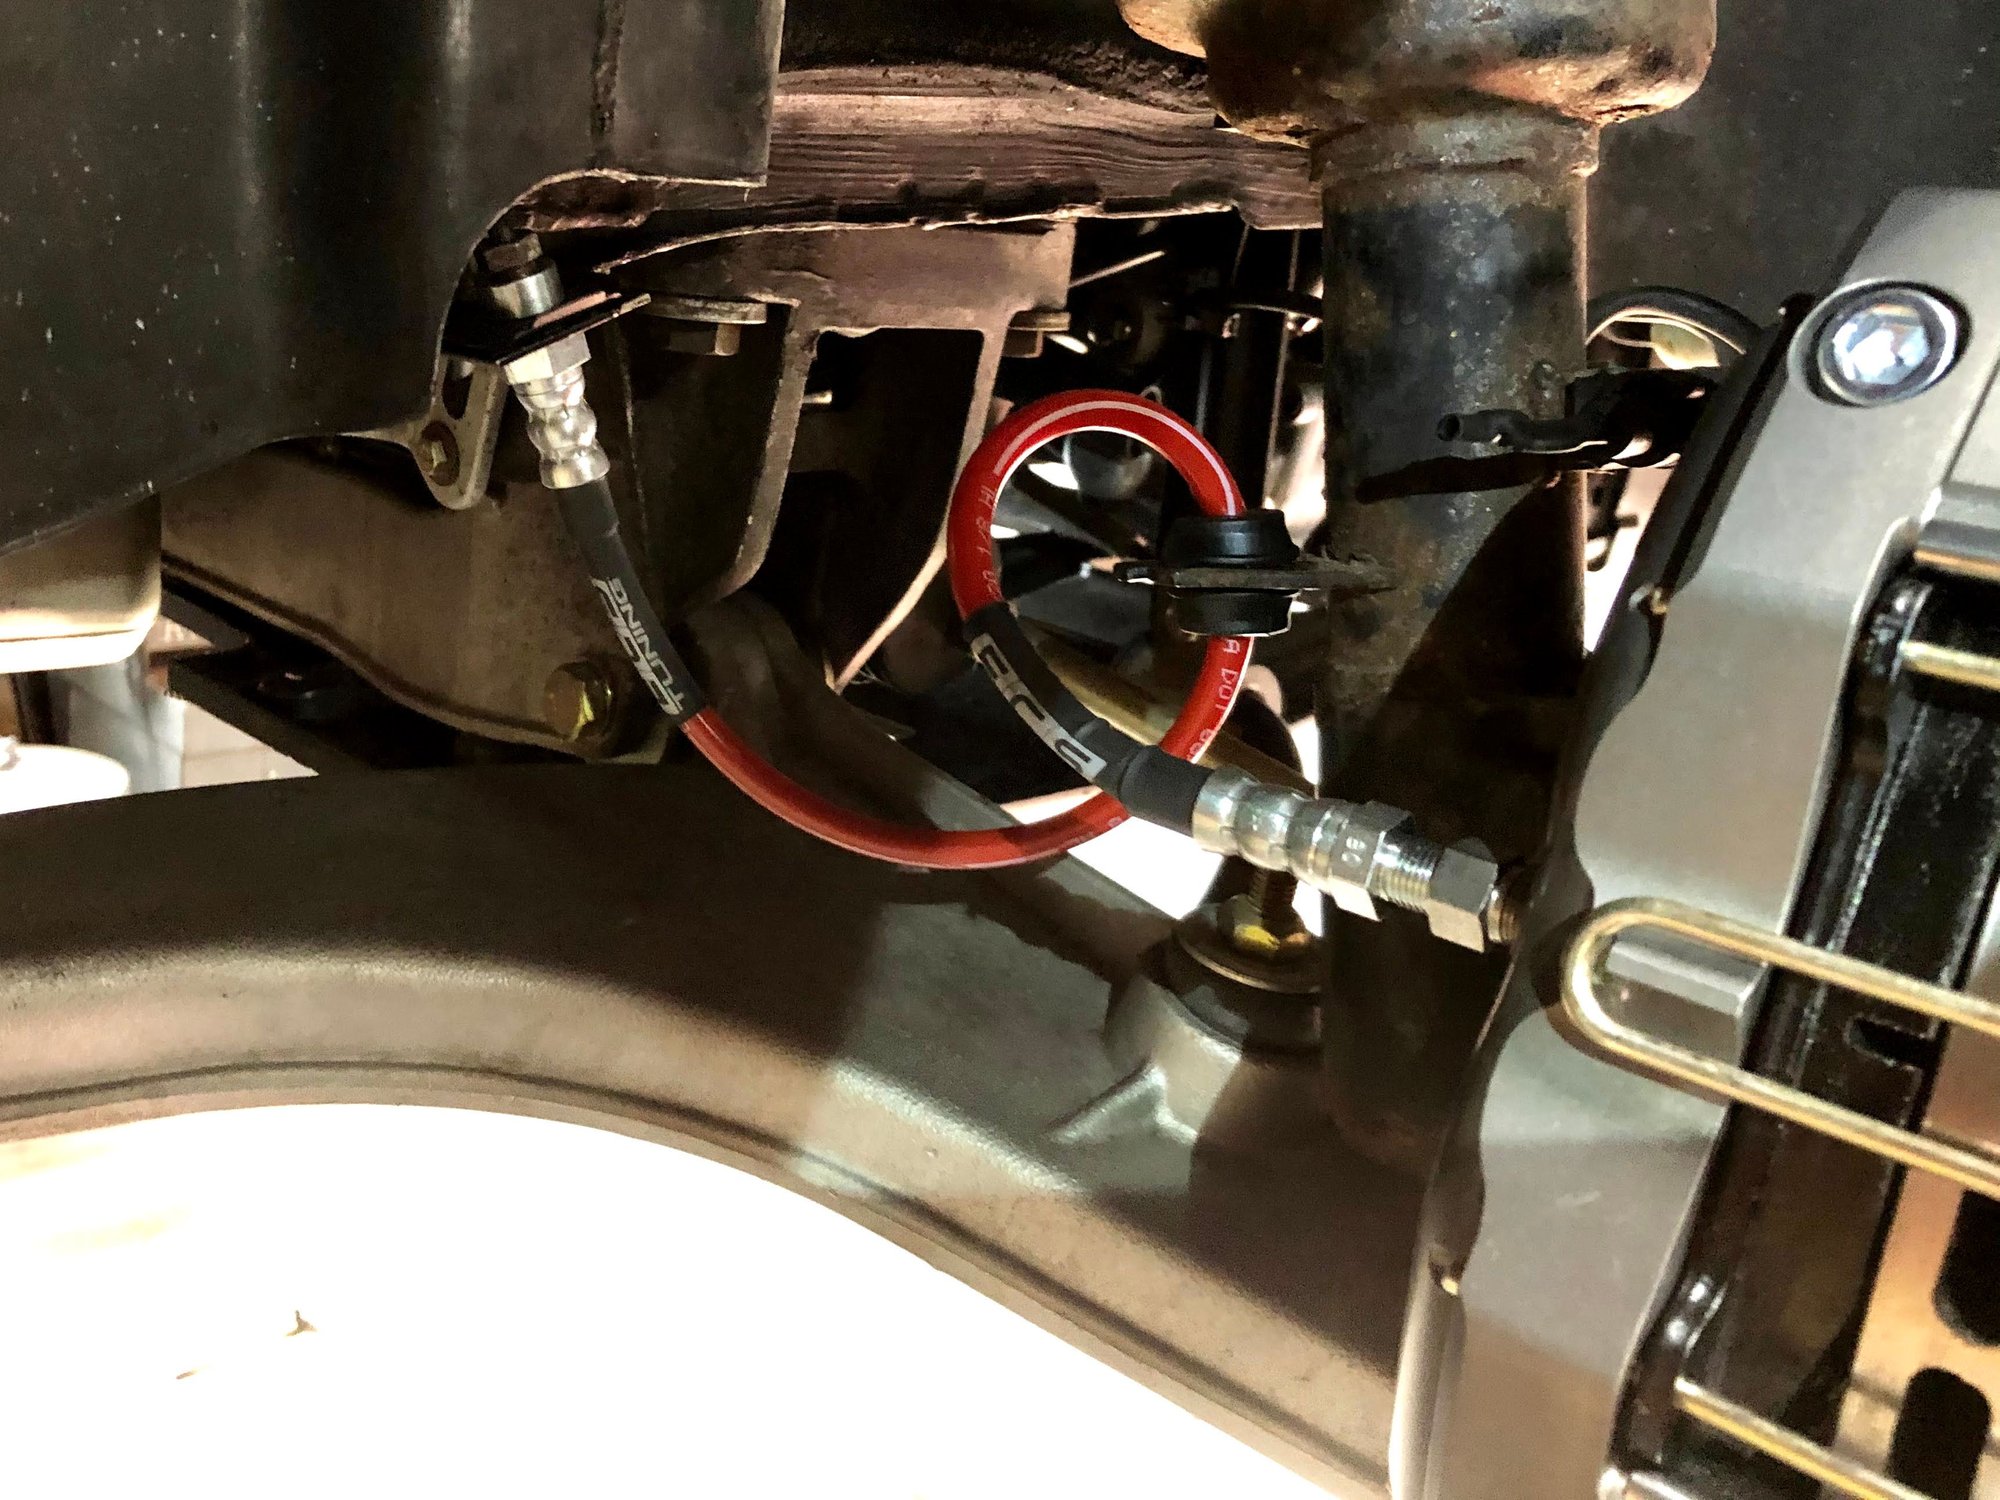
I opted not to use the brake lines that Travis supplies in the Rennbay kit and instead used the ECS Tuning exact fit brake lines. This was easily accomplished by purchasing an Earl's adapter fitting to adapt the 1/8-27 NPT Wilwood caliper to the M10-1.0 bubble flare on the end of the stock and stainless steel brake lines. I do wish the M10 threads on the adapter would have been a bit longer to account for the flare at the end of the brake line, but overall everything seemed to go together okay with no leaks and no binding of the brake lines when turning the wheels. The ECS brake lines use a slightly longer than stock male thread on the caliper end of the brake line, so visually it looks like there are a lot of threads sticking out of the Earl's adapter.
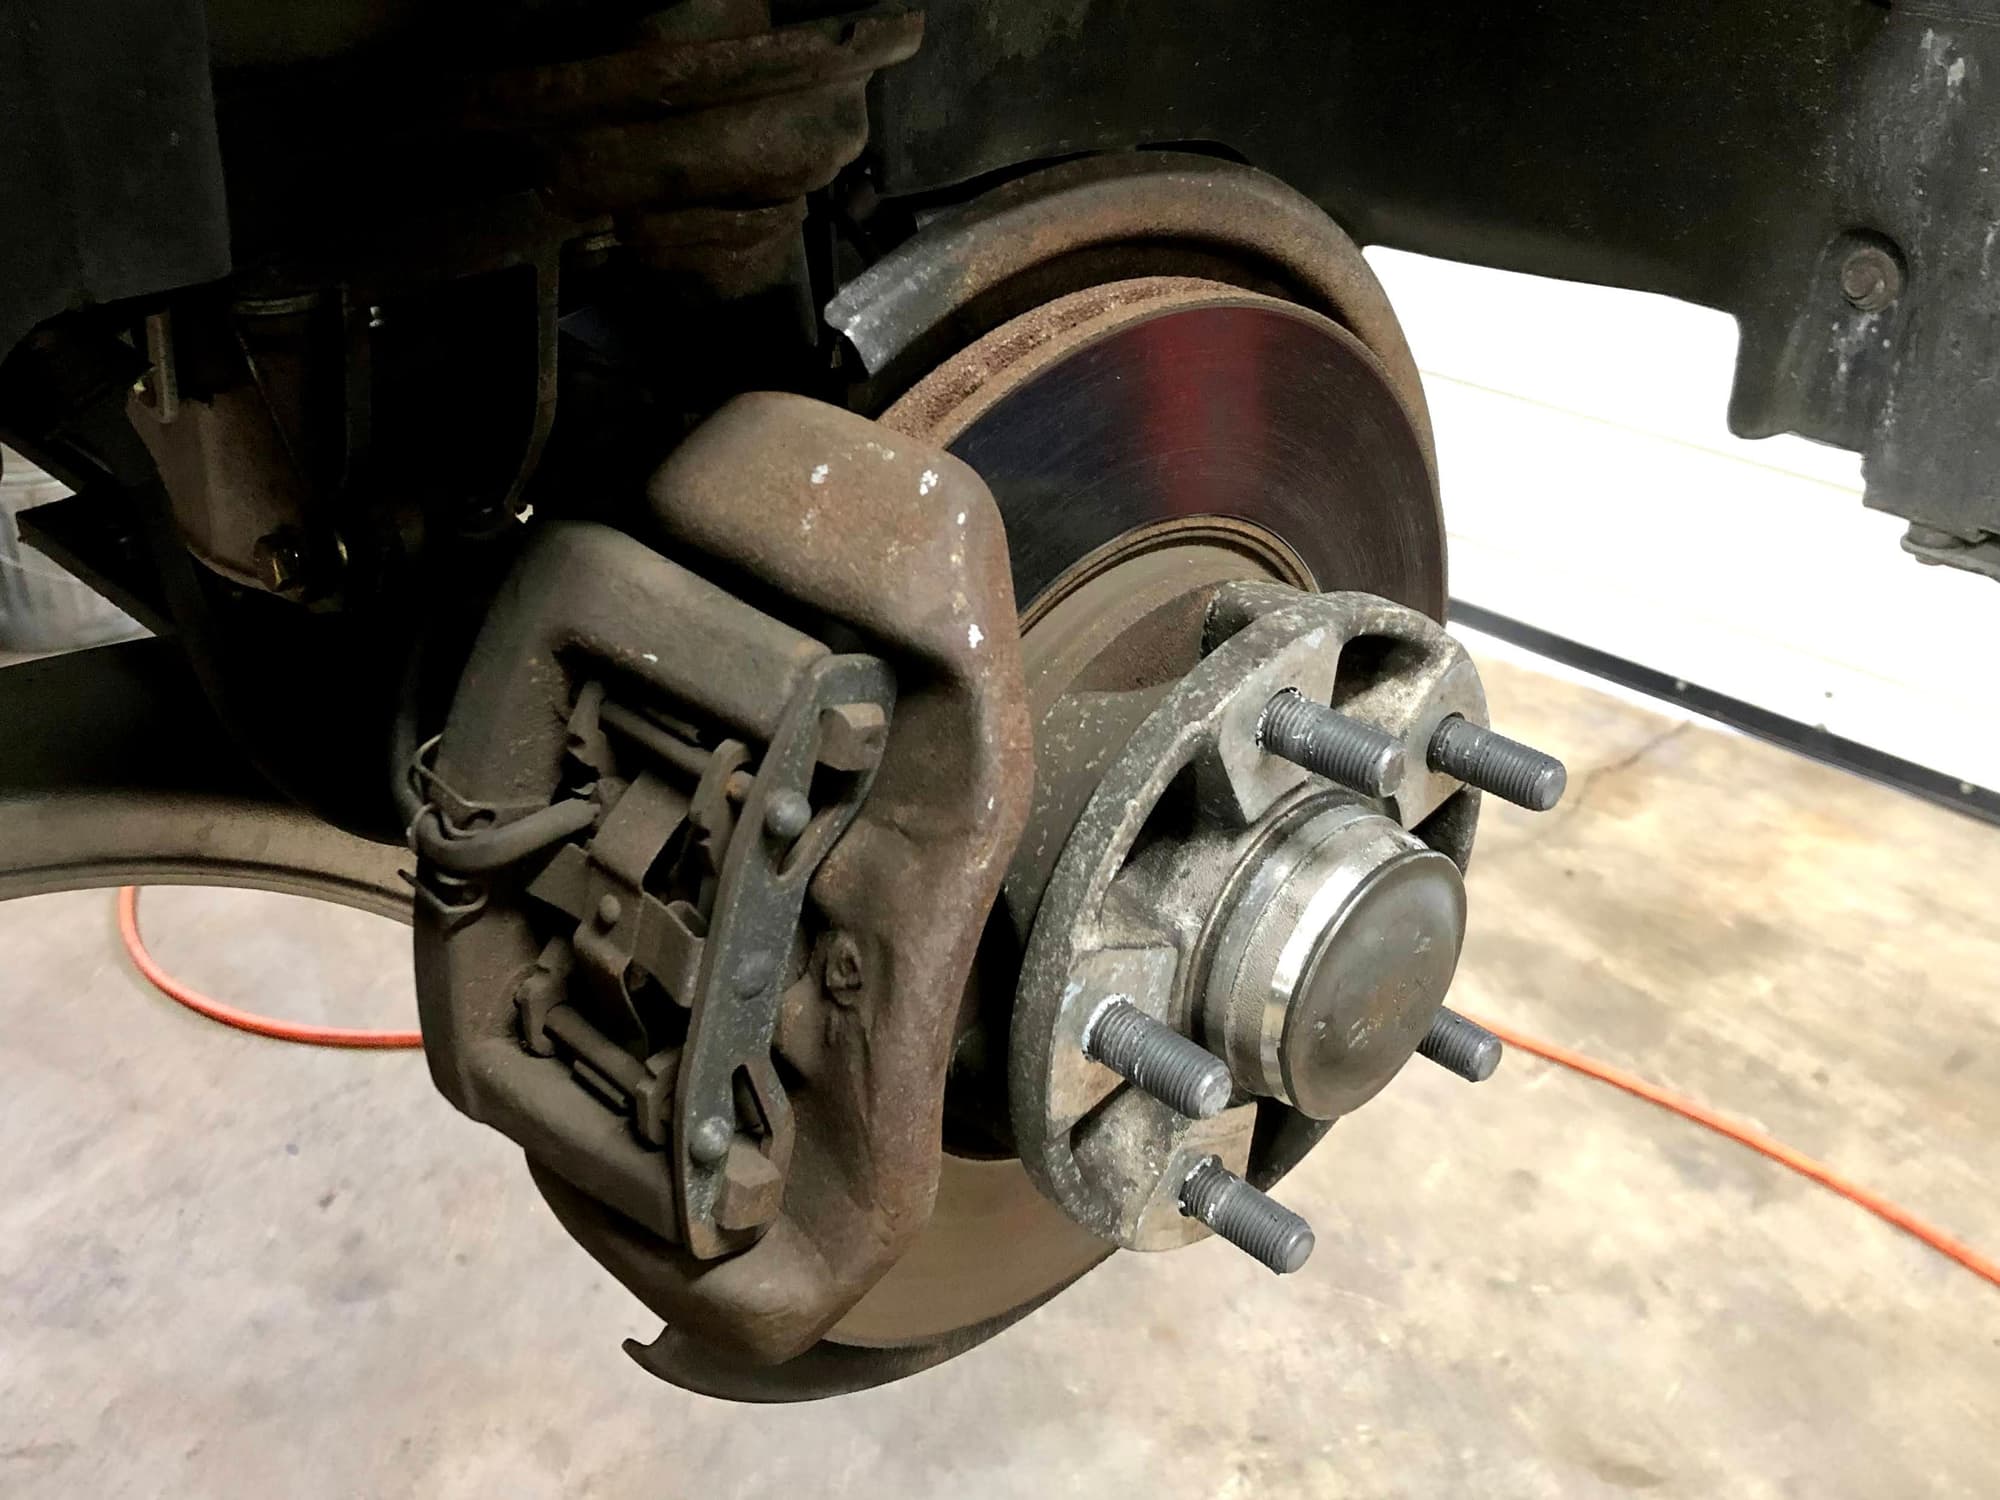
I also replaced the rear brake hoses while I was at it, but for now left the stock pads, rotors and calipers alone. I'll have to rebuild the rear calipers at some point and get some matching Hawk HPS pads.
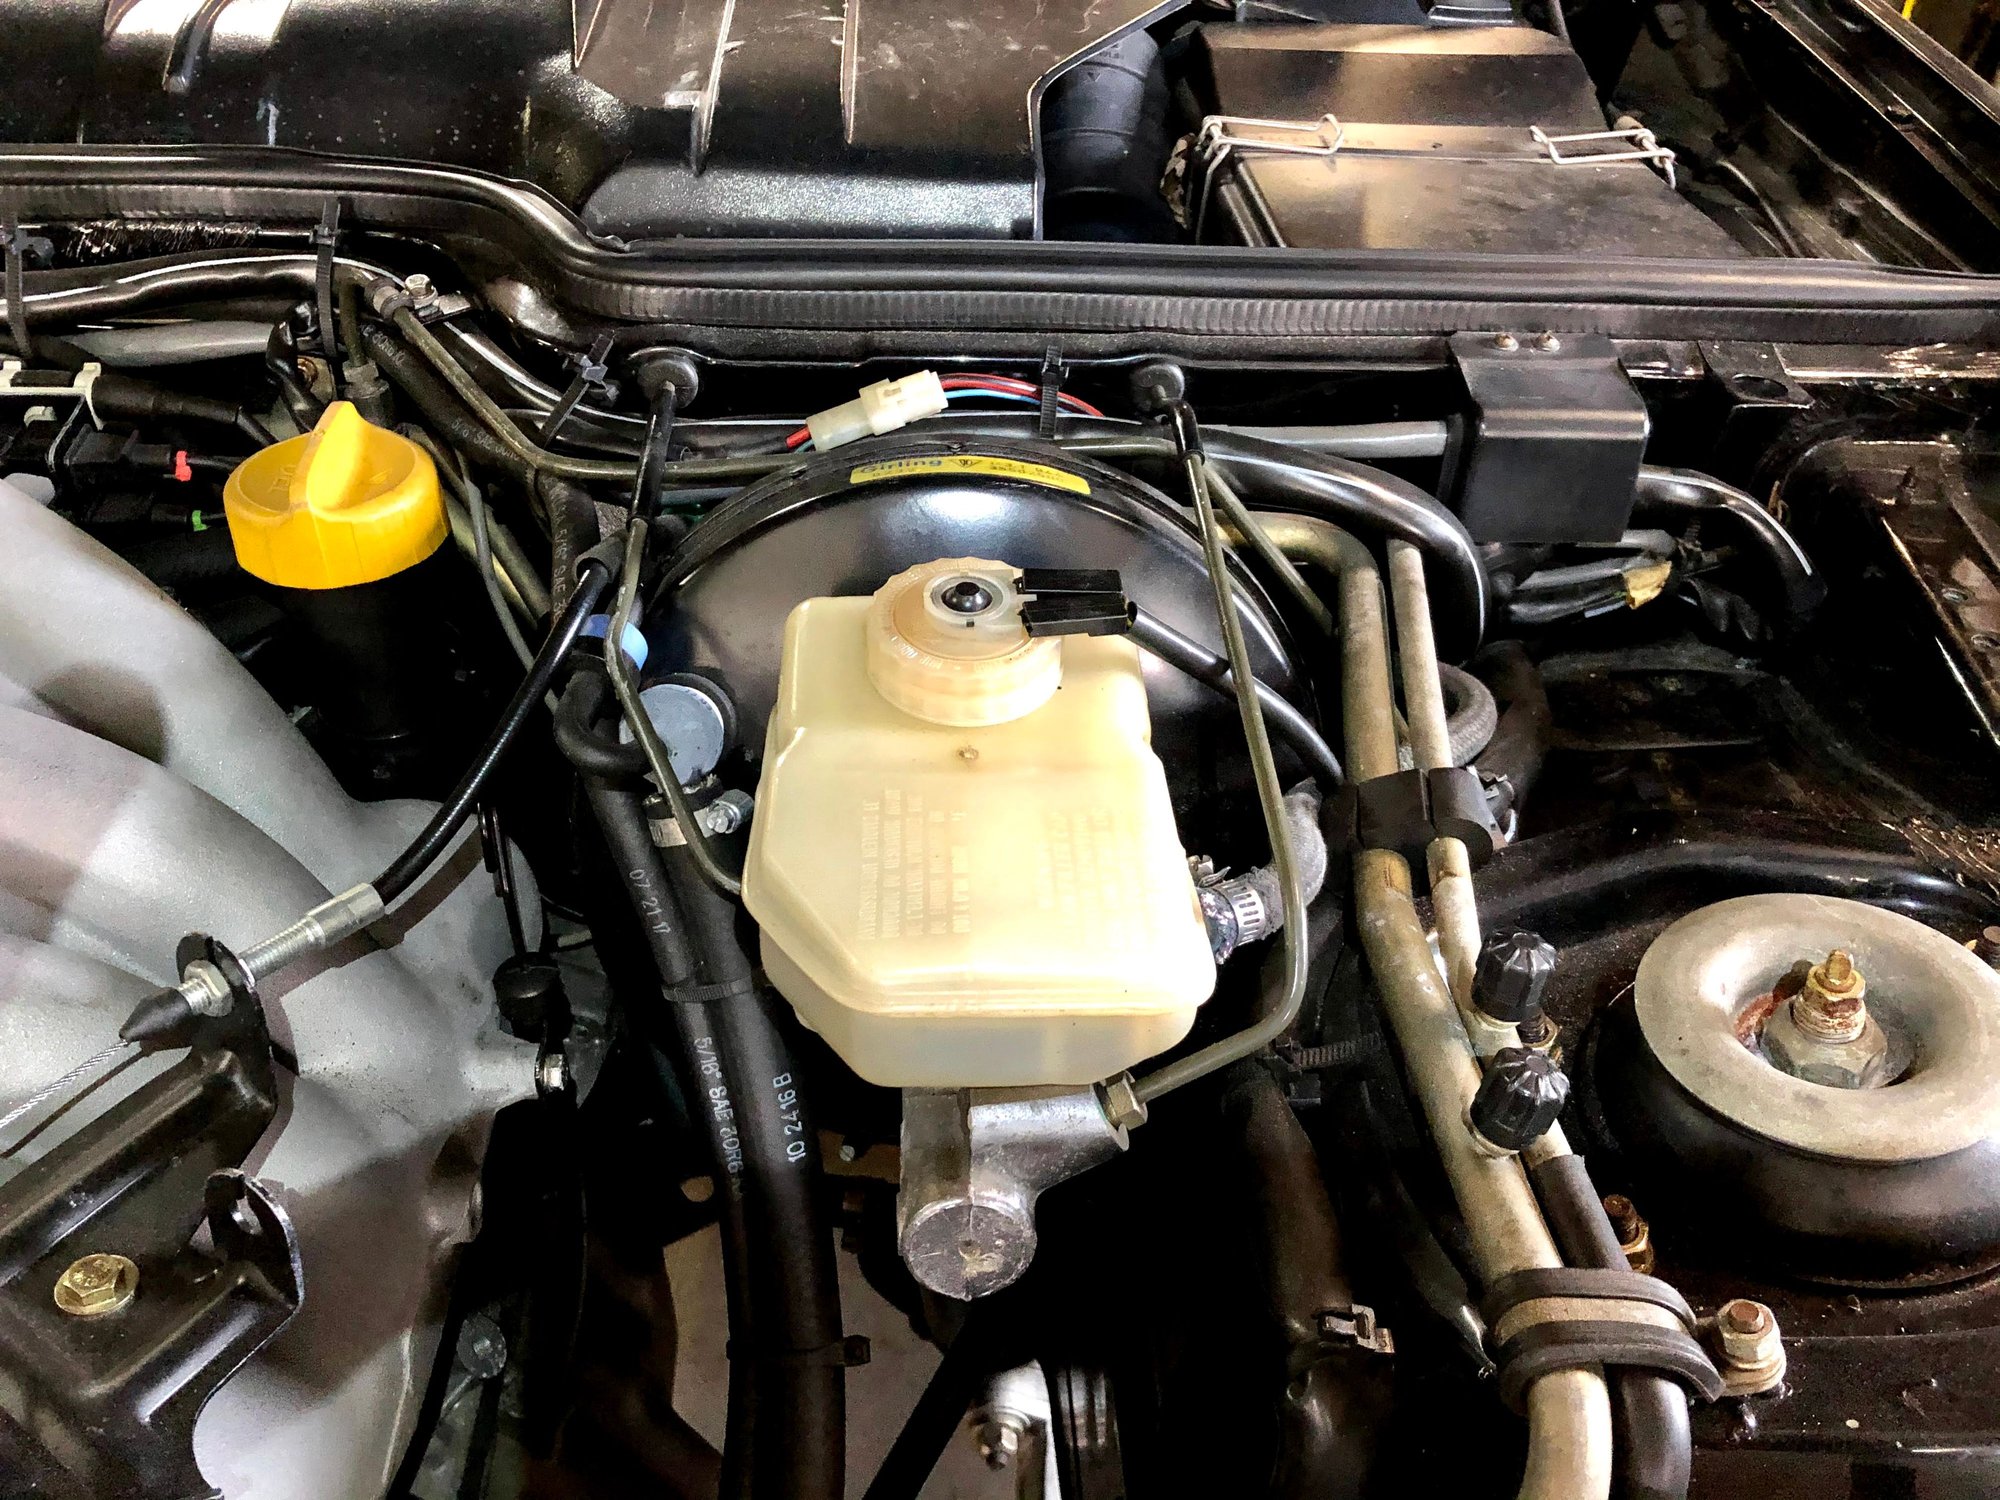
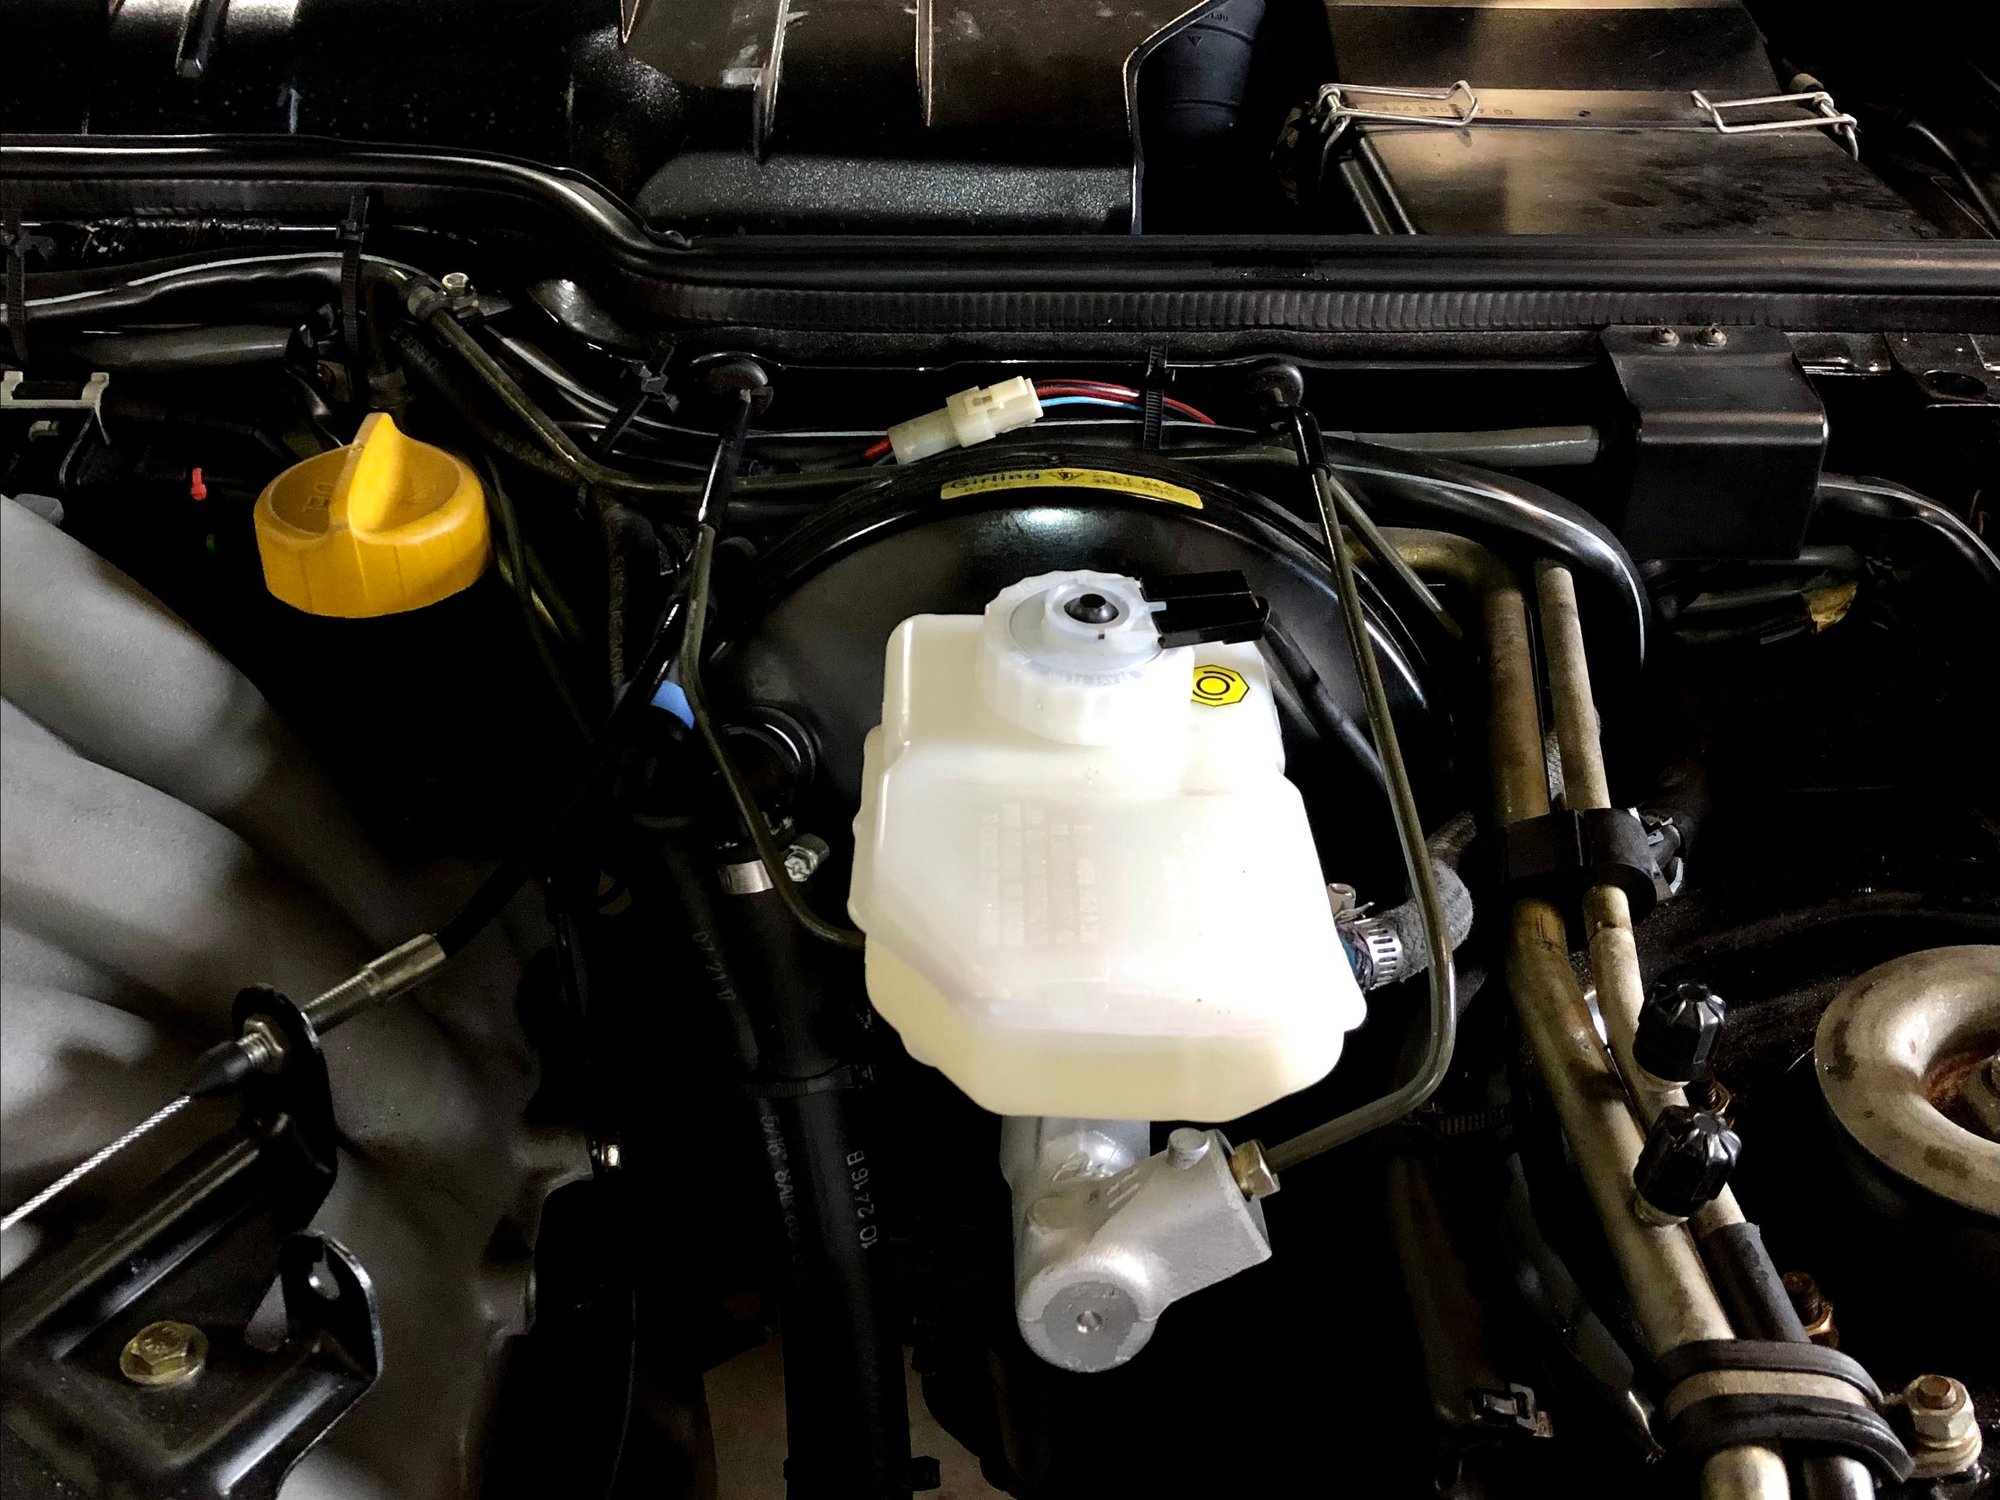
Replaced the master cylinder, reservoir, brake booster check valve and gave the booster a quick shot of black paint where it was worn off due to leaking brake fluid. I thought about saving myself some dough and going with the steel master cylinder Ian at 944Online sells instead of the aluminum version, but I figured I was already spending a bunch of money - what's another $100 or so to have the same one as factory installed.
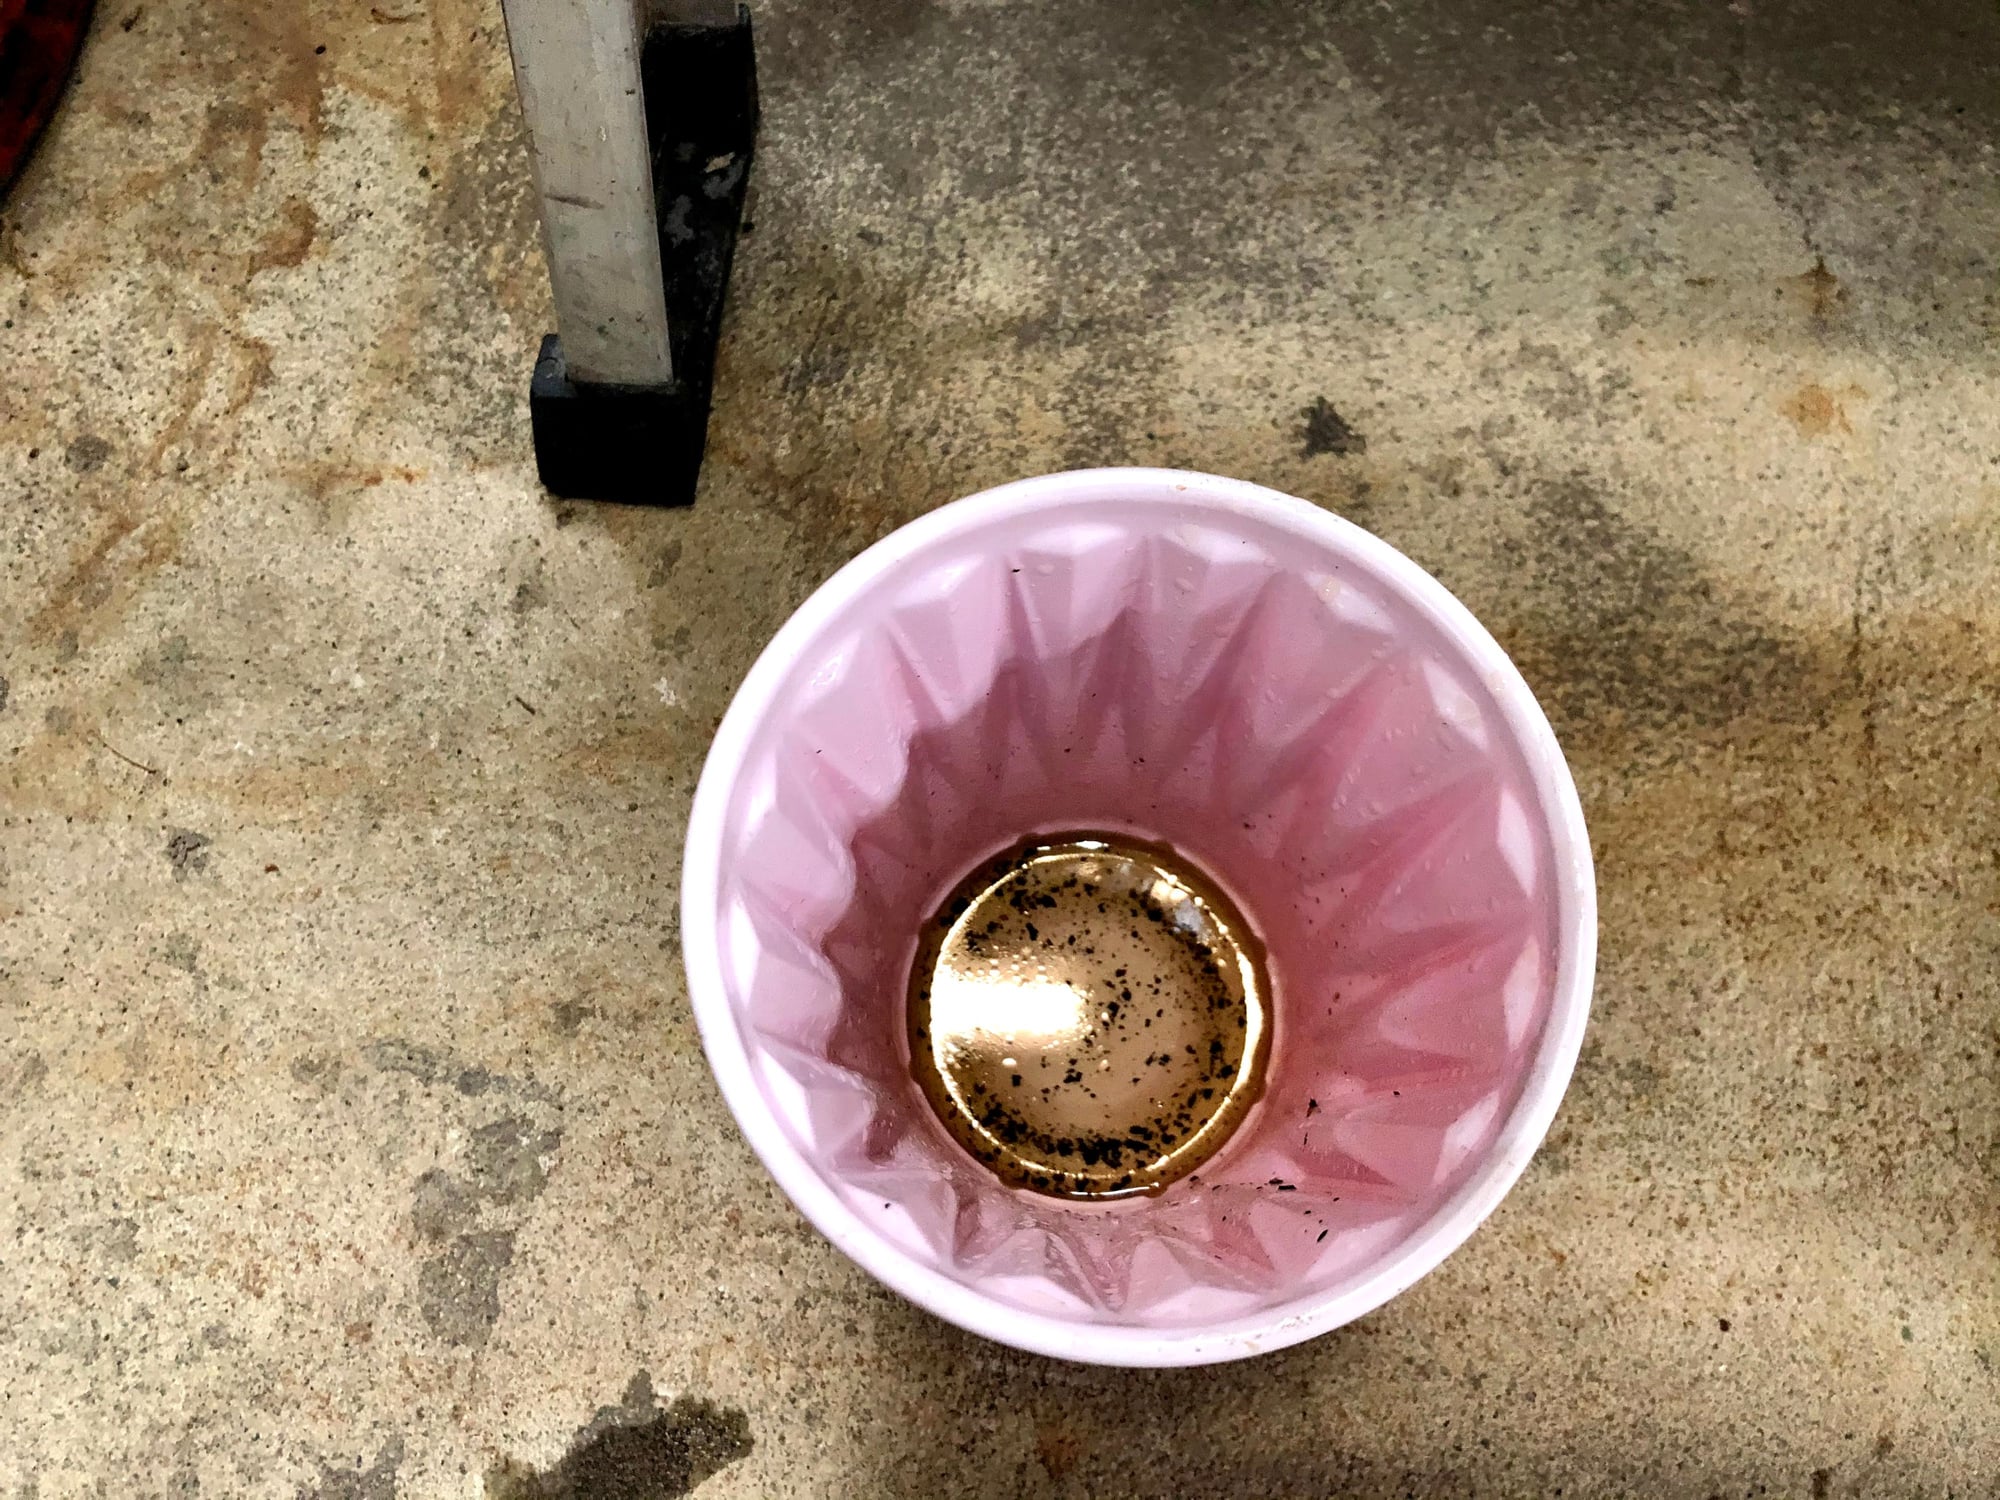
Good thing I replaced the reservoir, because there sure was a lot of nasty black crap in the old one. What's in the cup is only a fraction of it. I suppose I could have tried to clean it really well when I had things apart, but the yellowed plastic was an eyesore compared to the new radiator overflow tank I replaced last year and again, at 35 years old I figured it had done its job.
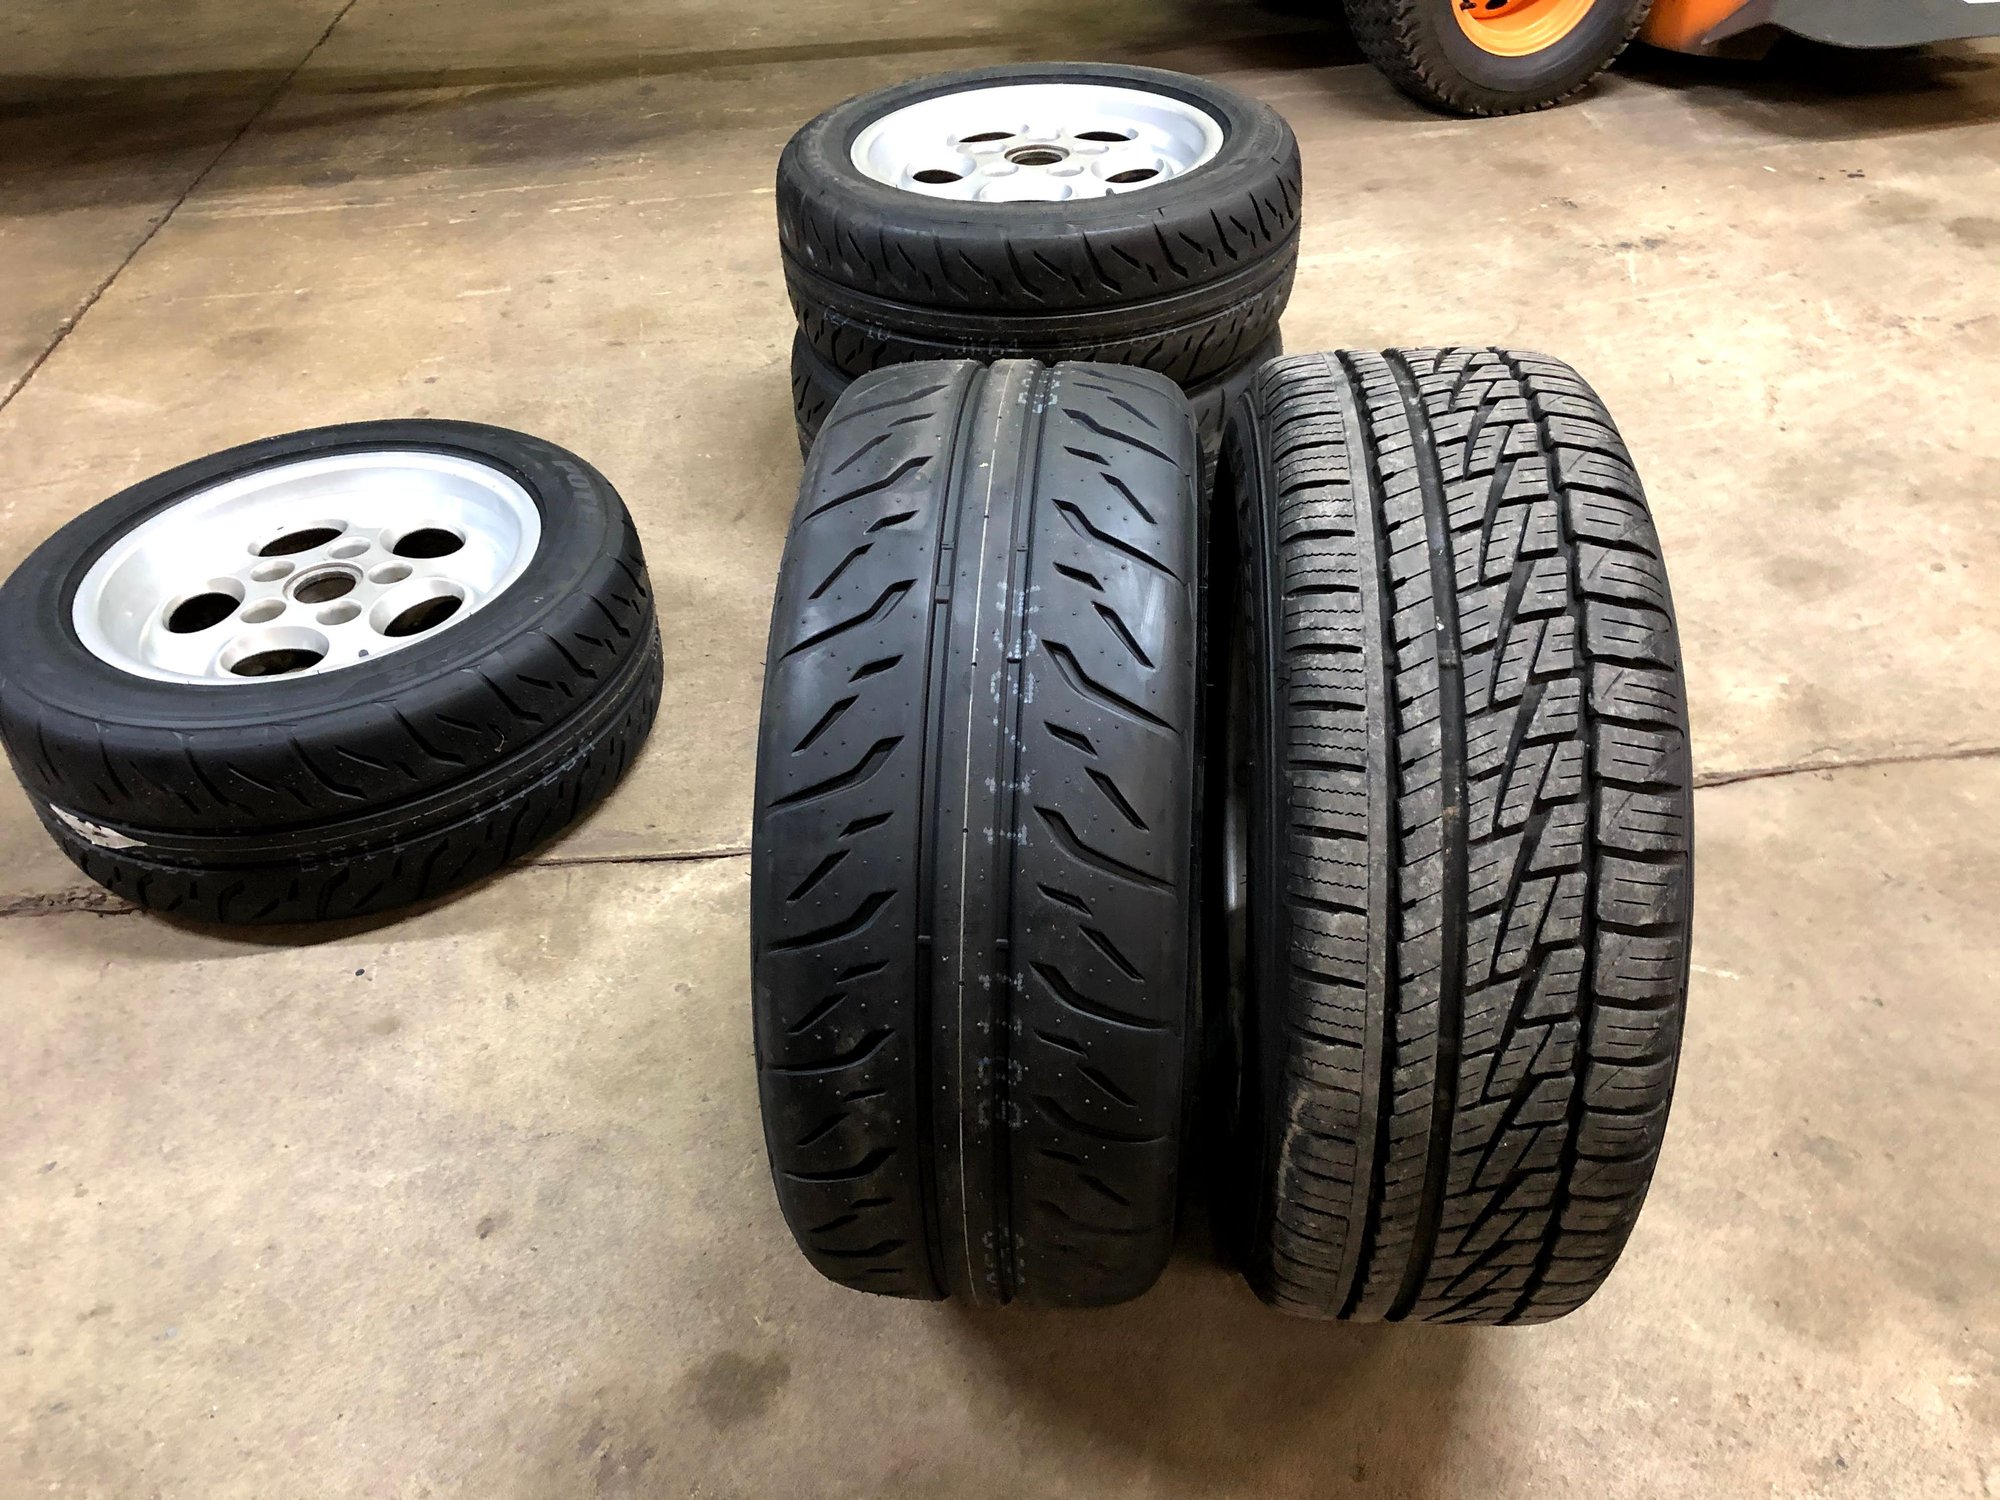
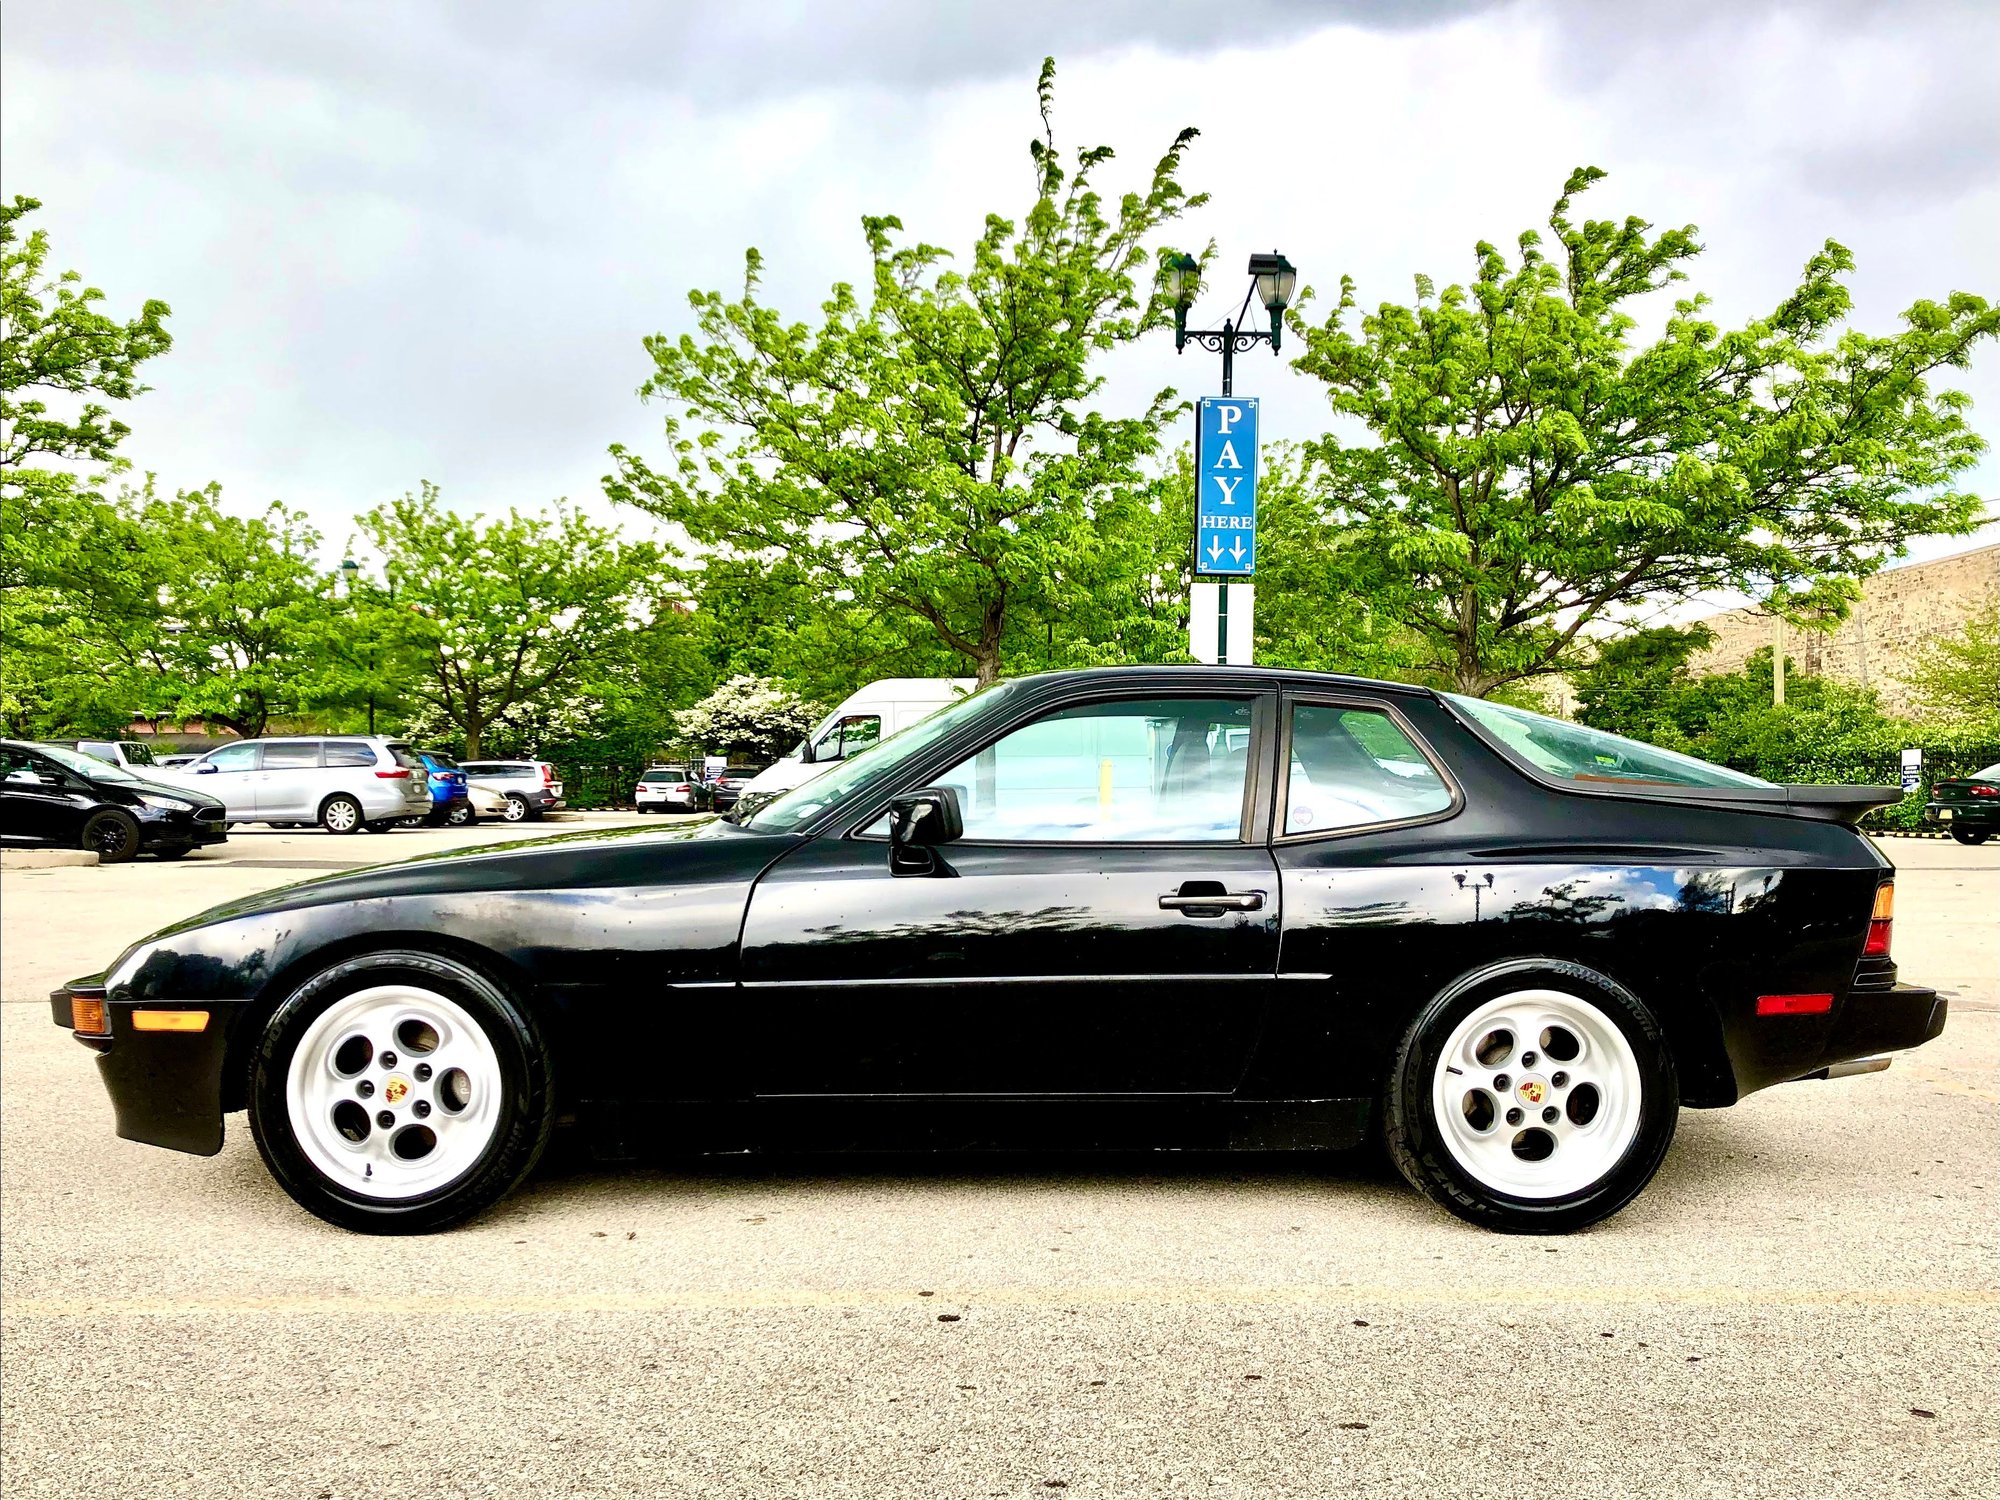
And finally, I purchased some new tires for the 16x7 and 16x8 phone dials I bought back at the end of 2019 and never installed. I had been deliberating between the Potenza RE-71R and the Advan A052 and also deliberating on whether or not I should run the original staggered fitment of just go for square fitment. Looking on Tire Rack, the staggered A052s were a little more expensive than the RE-71Rs and the RE-71Rs were on closeout, so I bought the RE-71Rs so I can try them out before they're phased out in these sizes. I neglected to take a final pic of them on the car, but here they are compared to the Falken ZE950s I had on the 15x7 phone dials.
So, overall impressions? Well, I only drove around a little bit yesterday and it was only in the high 20s out, but the RE-71Rs definitely feel more planted to the road than the ZE950s. The ZE950s are just too hard with them being a 60k mile A/S tire and I will say they were not great on the track when I drove Road America in 2019. I also had worn rear shocks at the time so that wasn't helping, but just in regular street driving the ZE950s never felt all that great when trying to push it. I noticed almost right away that the RE-71Rs are louder on the road, which a lot of people have said, and they also kick up more little rocks when driving around.
As for the brakes - right now I don't have very good pedal feel. I bled them thoroughly with a pressure bleeder, but am thinking I need to do it again now that I had a chance to road test it a bit. I also think I might need to tighten up the front wheel bearings a bit more as it seems I get some movement when I jam the pedal to the floor and the calipers grab. I will say that when jammed hard enough, the brakes sure do grab - it just takes a lot of pedal to do it right now. When I next work on the car I'll have to take care of this - then it'll be all ready for some HPDE events this year.
Have a great weekend everyone. Don't forget to watch the Rolex 24!
Justin
Last edited by JRP944; 07-02-2021 at 09:18 AM.
Reason: Adding title
Just read through this entire thread and like many others I'm super impressed with your work @JRP944 . Well done!
I have an '87 924S and am just getting started on timing/balance shaft belts and water pump replacement. Your approach, work & end results are inspirational! Thanks for documenting along the way.
I just remembered I have a question for you @JRP944 . Reading through some earlier posts you removed the rat nest of emissions junk on the driver side firewall and charcoal canister? What is entailed in this work? I did a couple searches here in the forum but came up empty. It's not a priority for me right now but I see that mess of vacuum lines and hoses that are now 34 years old and I just know they are going to cause me problems one day.
Reading through some earlier posts you removed the rat nest of emissions junk on the driver side firewall and charcoal canister? What is entailed in this work? I did a couple searches here in the forum but came up empty.
I removed the charcoal canister, control valves, the thermo-switch on the coolant pipe at the back of the head, the venturi and I installed a catch can to to keep the nasty oil vapor out of the intake manifold. The catch can is a recirculating type from Mishimoto so I don't get any oil fumes when driving. I mounted it in the same spot as MAGK944 on the inside of the fender near the steering shaft. It's tiny but it seems to do the job pretty well.
The hose for the brake booster comes directly from the intake manifold from the front port that faces the radiator, located right underneath the "swan neck" portion of the manifold that connects to the throttle body.
The fuel tank vent line was extended from the firewall and connected to the intake system right before the AFM using an adapter made out of aluminum. Its purpose was twofold as I wanted to eliminate the air box while still supporting the AFM and having an open port to connect the fuel line to. The adapter and AFM are actually supported by a 3D printed bracket (HP multi-jet fusion PA12 w/glass bead) connected to the alternator top mounting bolt located directly below.
Hope that helps!
JP
Last edited by JRP944; 07-02-2021 at 09:18 AM.
Reason: Adding title
Be sure that you take a bunch of pics of them before disconnecting!. I also eliminated a bunch of them and am now running a breather off the top of the AOS. Too much old, hard, spaghetti for me. I used the takeoff from the Brake booster to the Vac reservoir. I also eliminated the venturi and the charcoal canister. Hope this thing runs. But mines an '83 so all the hoses are different..
Last edited by Tiger03447; 02-09-2021 at 11:45 PM.
Reason: Additional info
I will 2nd, 3rd, and 4th @Tiger03447 and advocate for taking as many pictures as possible of your standard vacuum lines, where they're connected, and where they attach. I made the (foolish) mistake of thinking that the sticker on my hood would guide me when the time came to get everything back together and, wow, was that ever wrong.
@JRP944 : Can you talk a little about the 3D printed piece up there? Did you send that out to be done commercially? Would you share what kind of time and $ that took to make? It's really cool.
Can you talk a little about the 3D printed piece up there? Did you send that out to be done commercially? Would you share what kind of time and $ that took to make? It's really cool.
Cheers
@Zirconocene I had the aluminum adapter made first. I thought about trying to have a sheet metal bracket made to hold it in place, but I wanted to see how a 3D printed piece would work instead. I initially took some measurements and cut out a cardboard template to get a rough idea of how things would sit. Then I sketched up the bracket in Fusion 360 and had it printed with a company called Re3DTech in Grayslake, IL (I was living in Wisconsin at the time and these guys were some of the first to have the HP multi-jet fusion printers). I had the part printed in PA12 with a 40% glass bead fill for extra strength.
It flexes a little bit fore and aft since it's only held to the alternator with the one mounting bolt in the front, but it gives no indication of being in danger of breaking. The platform where the AFM adapter sits is also a tad too high as when I close the hood the black electronic box on top of the AFM squishes the under-hood pad and has left a permanent indentation.
The STEP files are attached for anyone that wants them. Note, that the AFM adapter doesn't have the M6 mounting holes on the bottom (used to hold it to the bracket) or the 1/8 NPT hole on the back (can't see it in the image above) tapped. I hand tapped these myself to save a couple bucks when I had the part machined. I used an online company called MakeTime, which was bought out by Xometry in late 2017. I have since used Xometry for a handful of compressor parts at work (both 3D printed and machined) with great success.
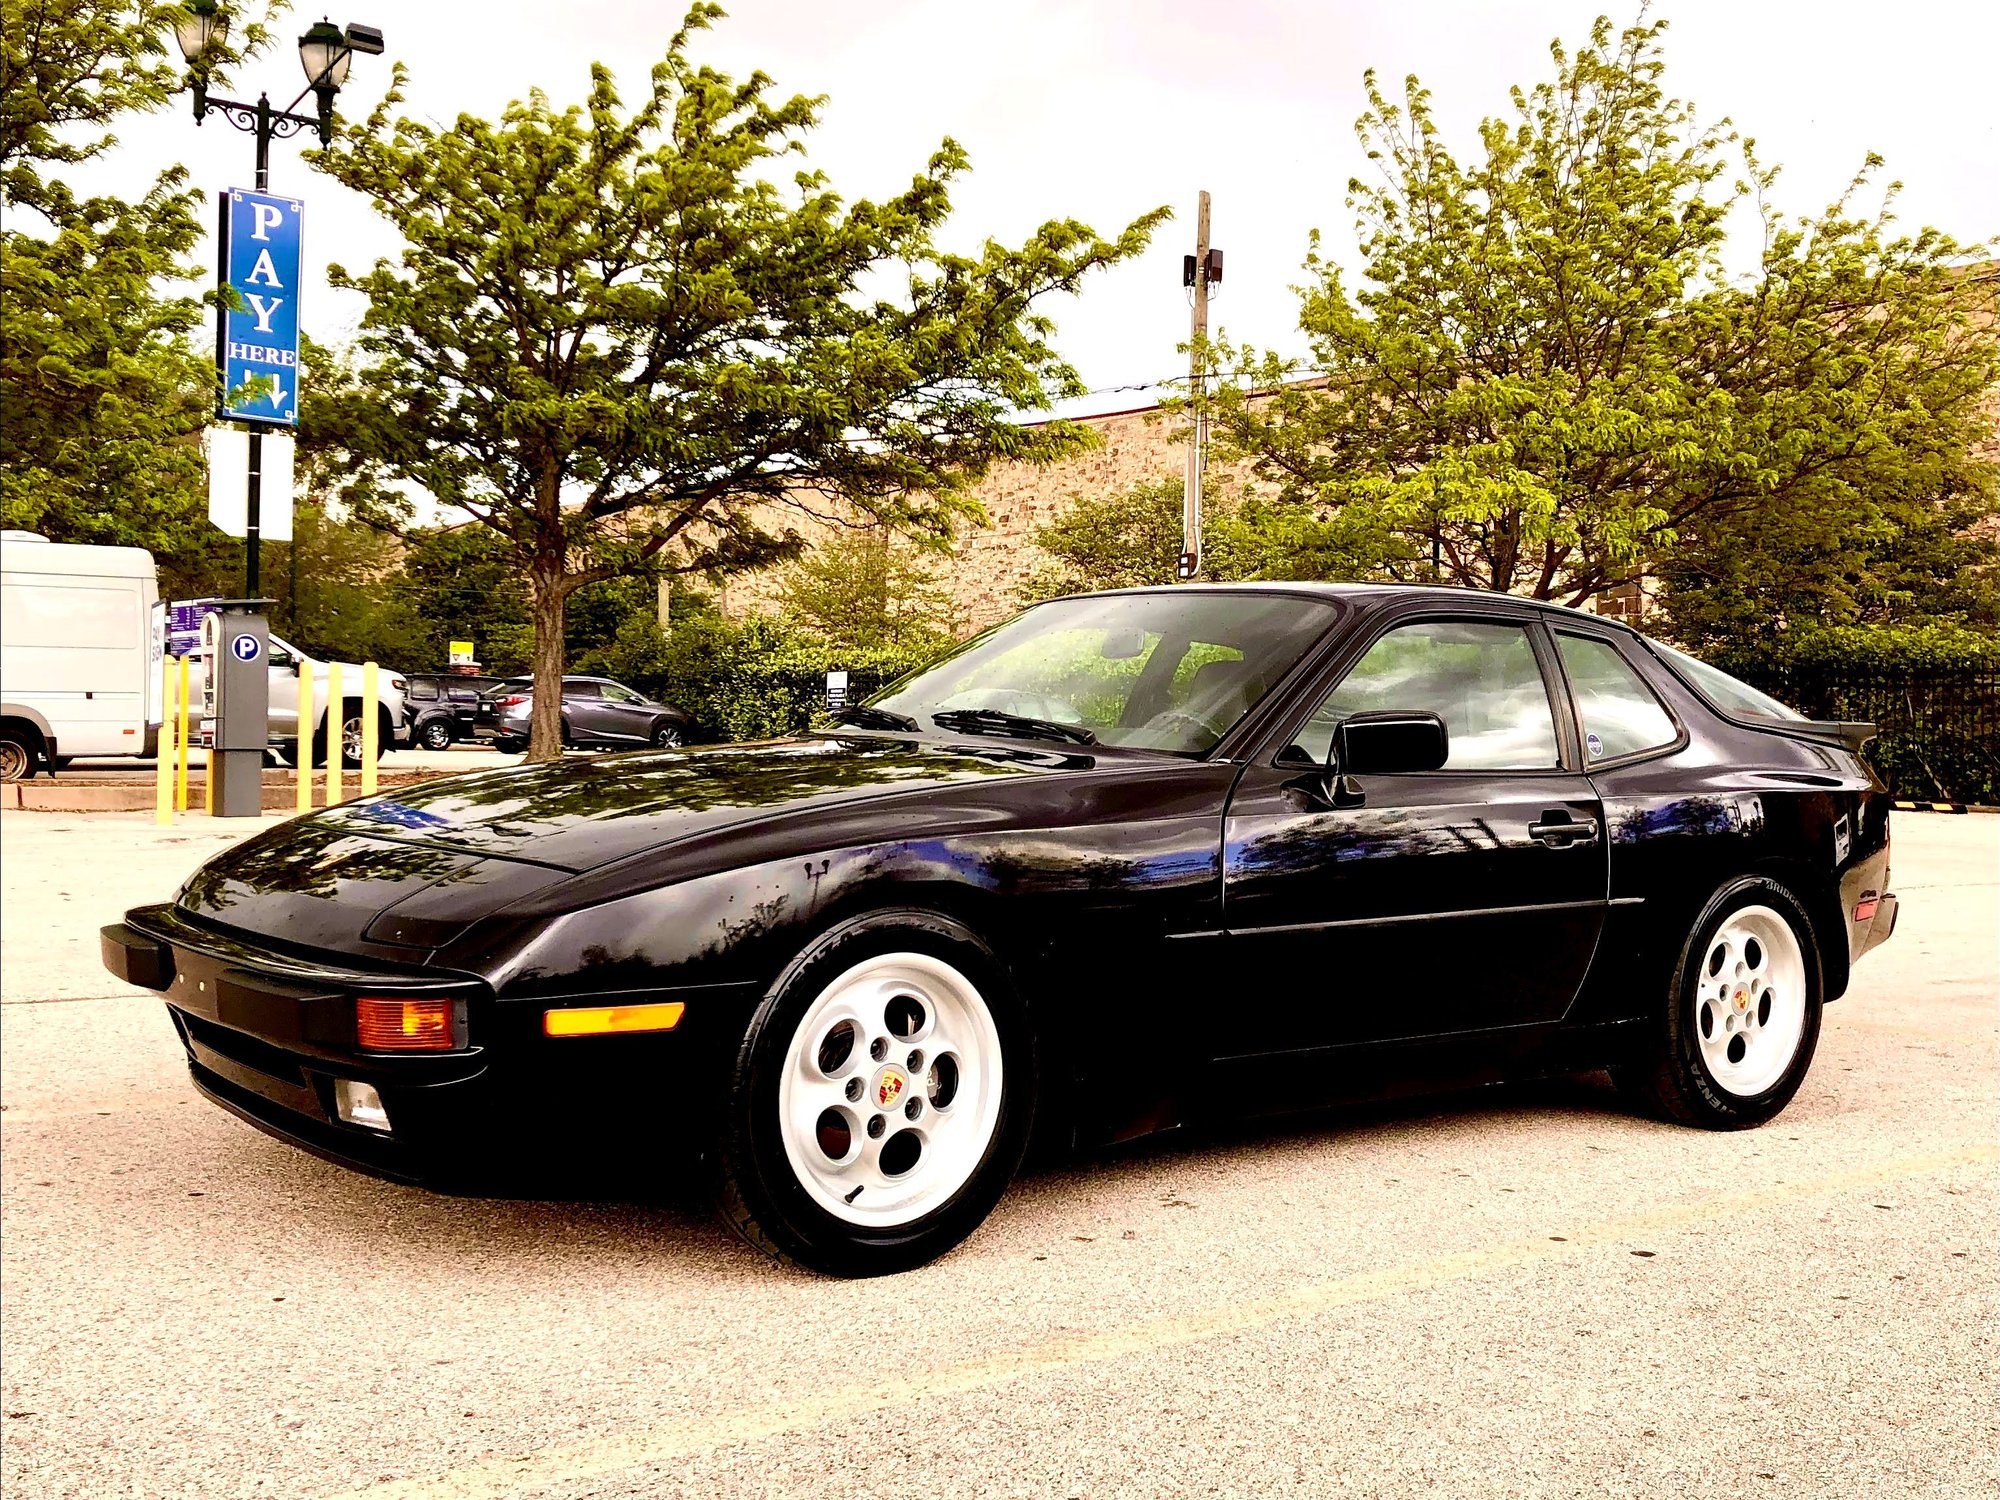
Went out to the Porsche swap meet in Carlisle, PA yesterday and finally had a chance to actually put some miles on the new brakes and tires. The brakes are grabbing really nicely (finally was able to get all the air bled from that clutch line) and the car feels very planted on the road with my Koni yellows set at half-stiff and the new RE-71R tires. I will say though that the tires are damn loud on the highway! After the 200+ mile round trip out to Carlisle and back in the '44, jumping into by E91 BMW was like being in a vacuum.
Two pre-event pics after a much needed washing:
Still need to either re-paint the later model center caps to better match the current phone dials, or transfer the caps off my 15 inch phone dials instead. I just like the look of the colored Porsche crest of these caps.
Justin
Last edited by JRP944; 07-02-2021 at 09:17 AM.
Reason: Adding title
 05-05-2020, 06:59 PM