Notices
914/914-6 Forum 1969-1976
Sponsored by:
Sponsored by:

After a 25 Year Break, 914 Ownership Again

Thread Tools
 
Search this Thread
 
Old 06-21-2020, 11:31 PM
  #421  
bkrantz
Rennlist Member
Thread Starter
 
bkrantz's Avatar
 
Join Date: Oct 2012
Location: SW Colorado
Posts: 6,012
Likes: 0
Received 1,091 Likes on 652 Posts
Default

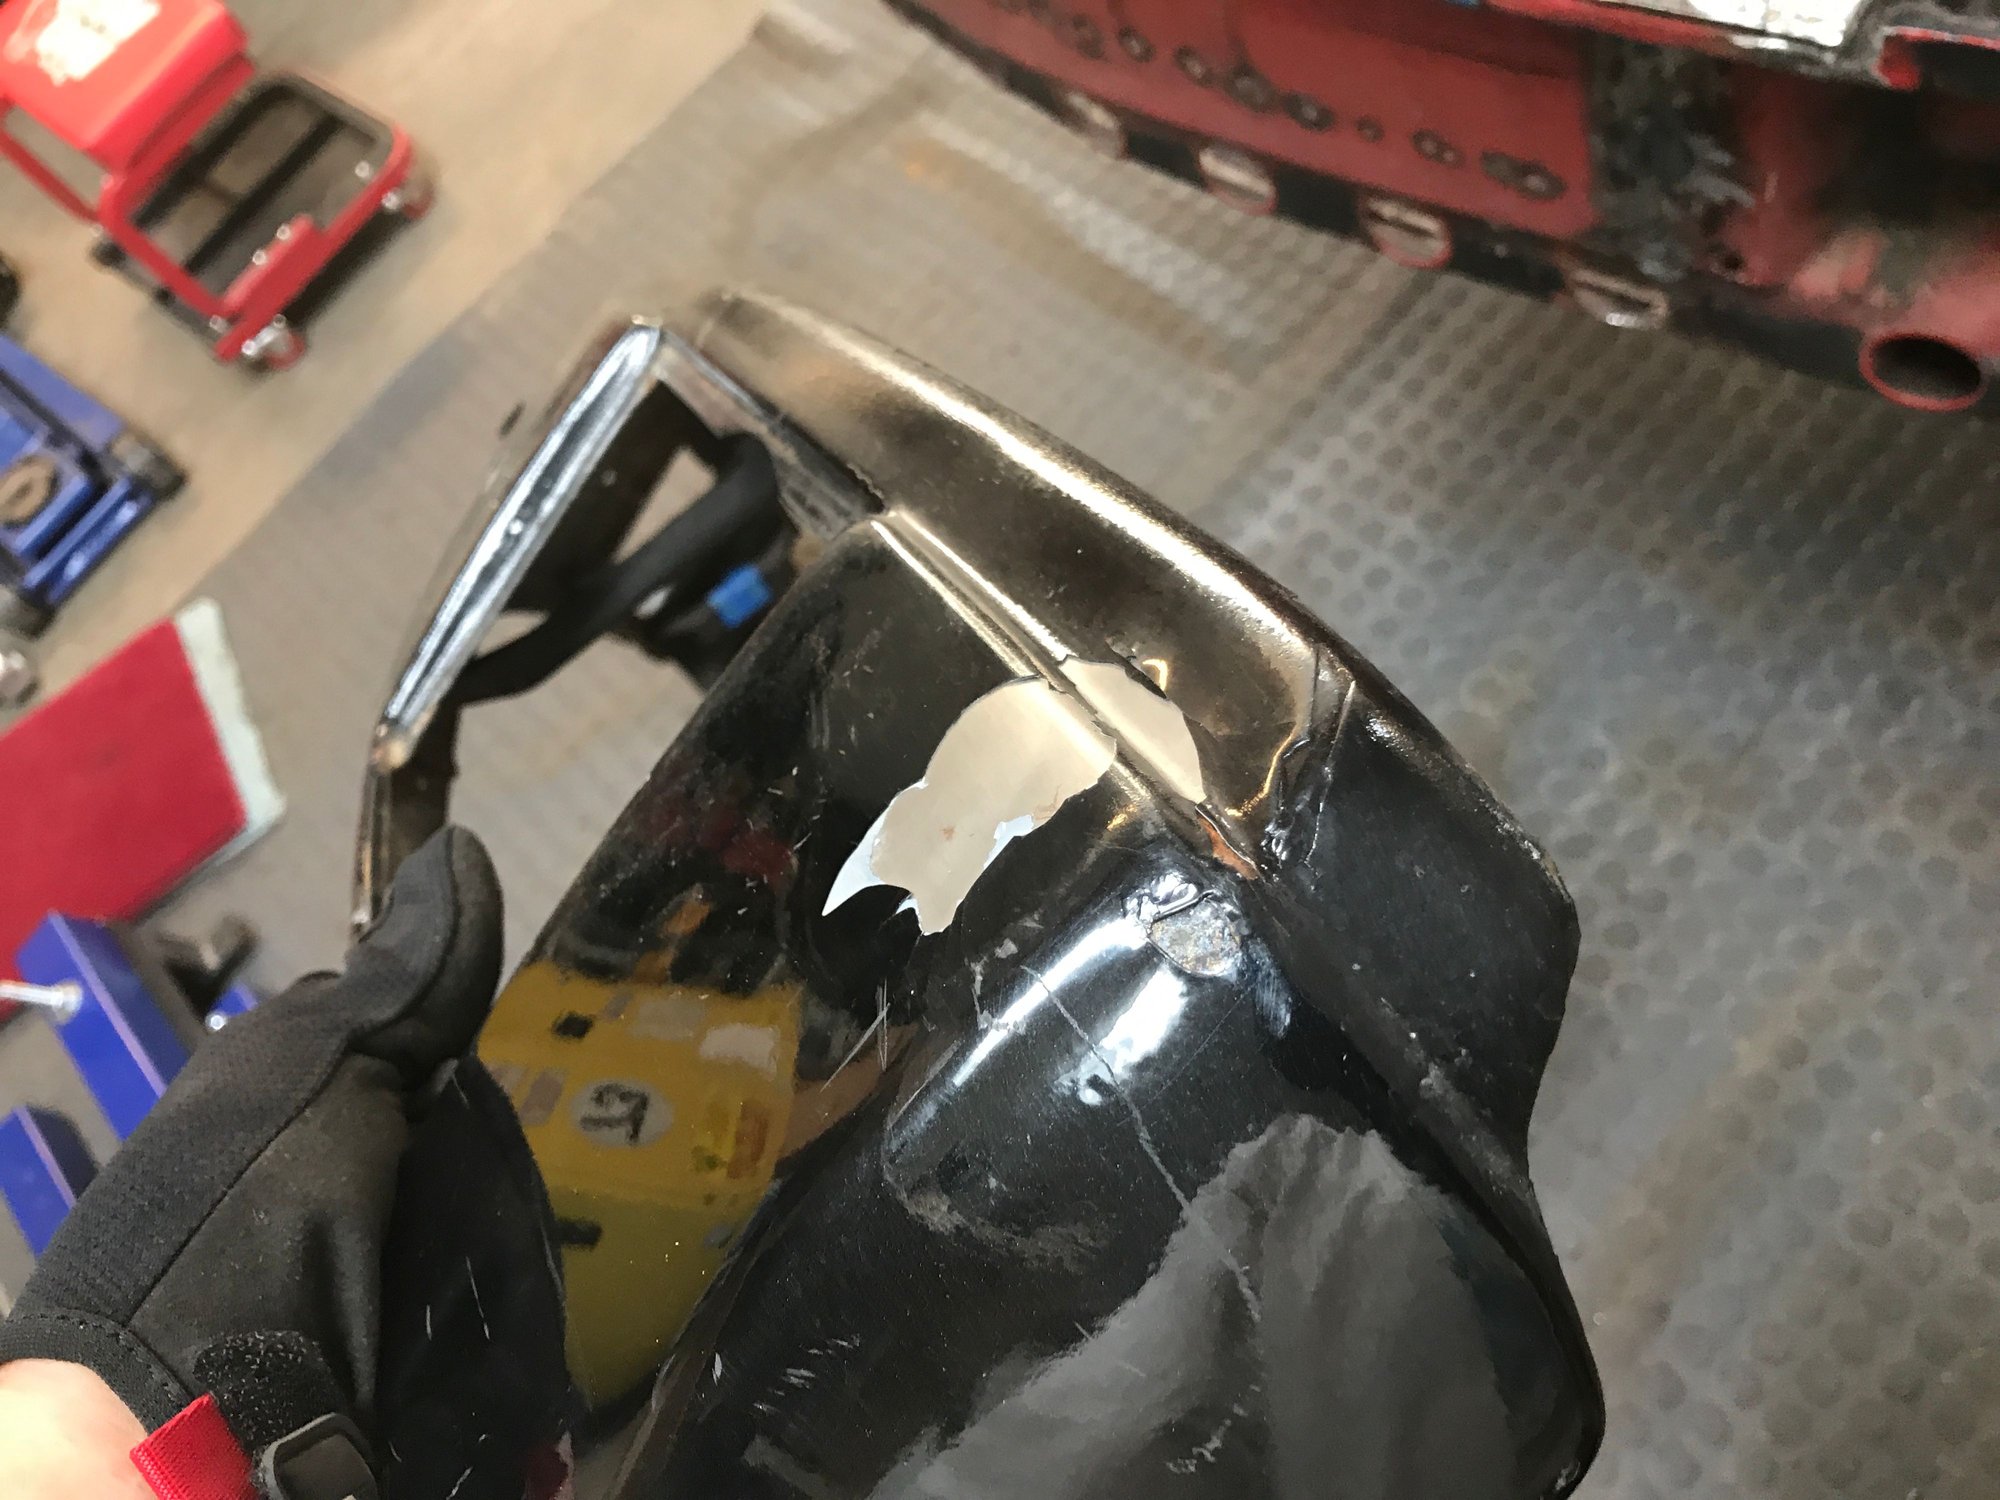
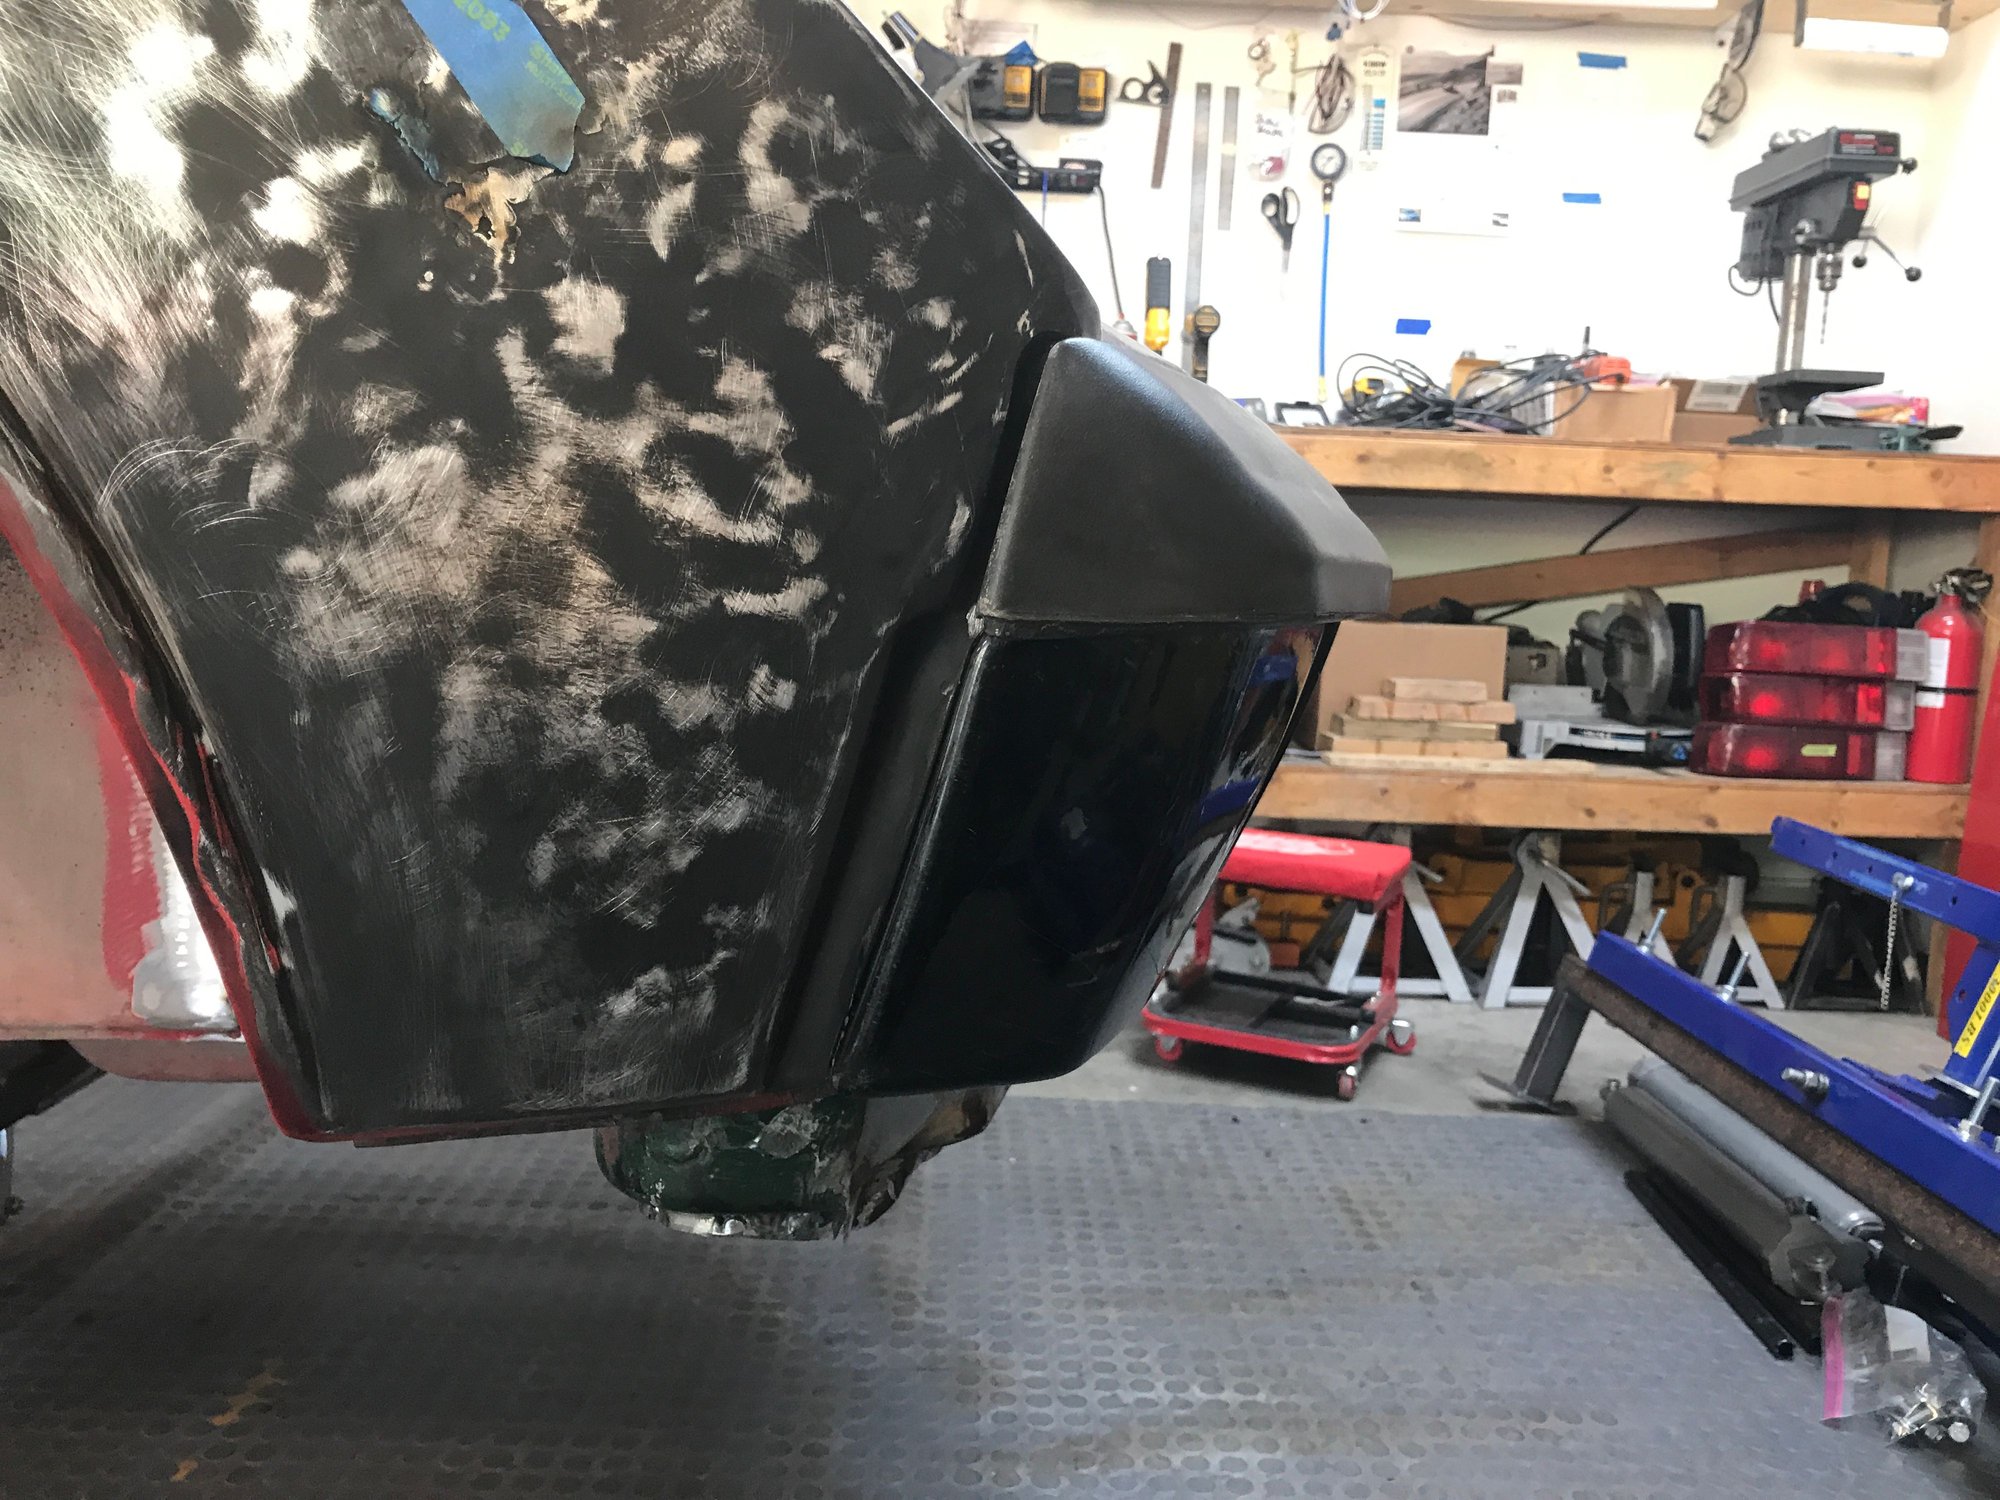
For the front, the straightest bumper candidate is painted (black) and has a small but distinct dent just inboard of the left end.


Before fitting, I had to remove the dent so the top cap would sit properly. After some work with the press and hammers, I got it to 90%--good enough for checking the bumper fit.


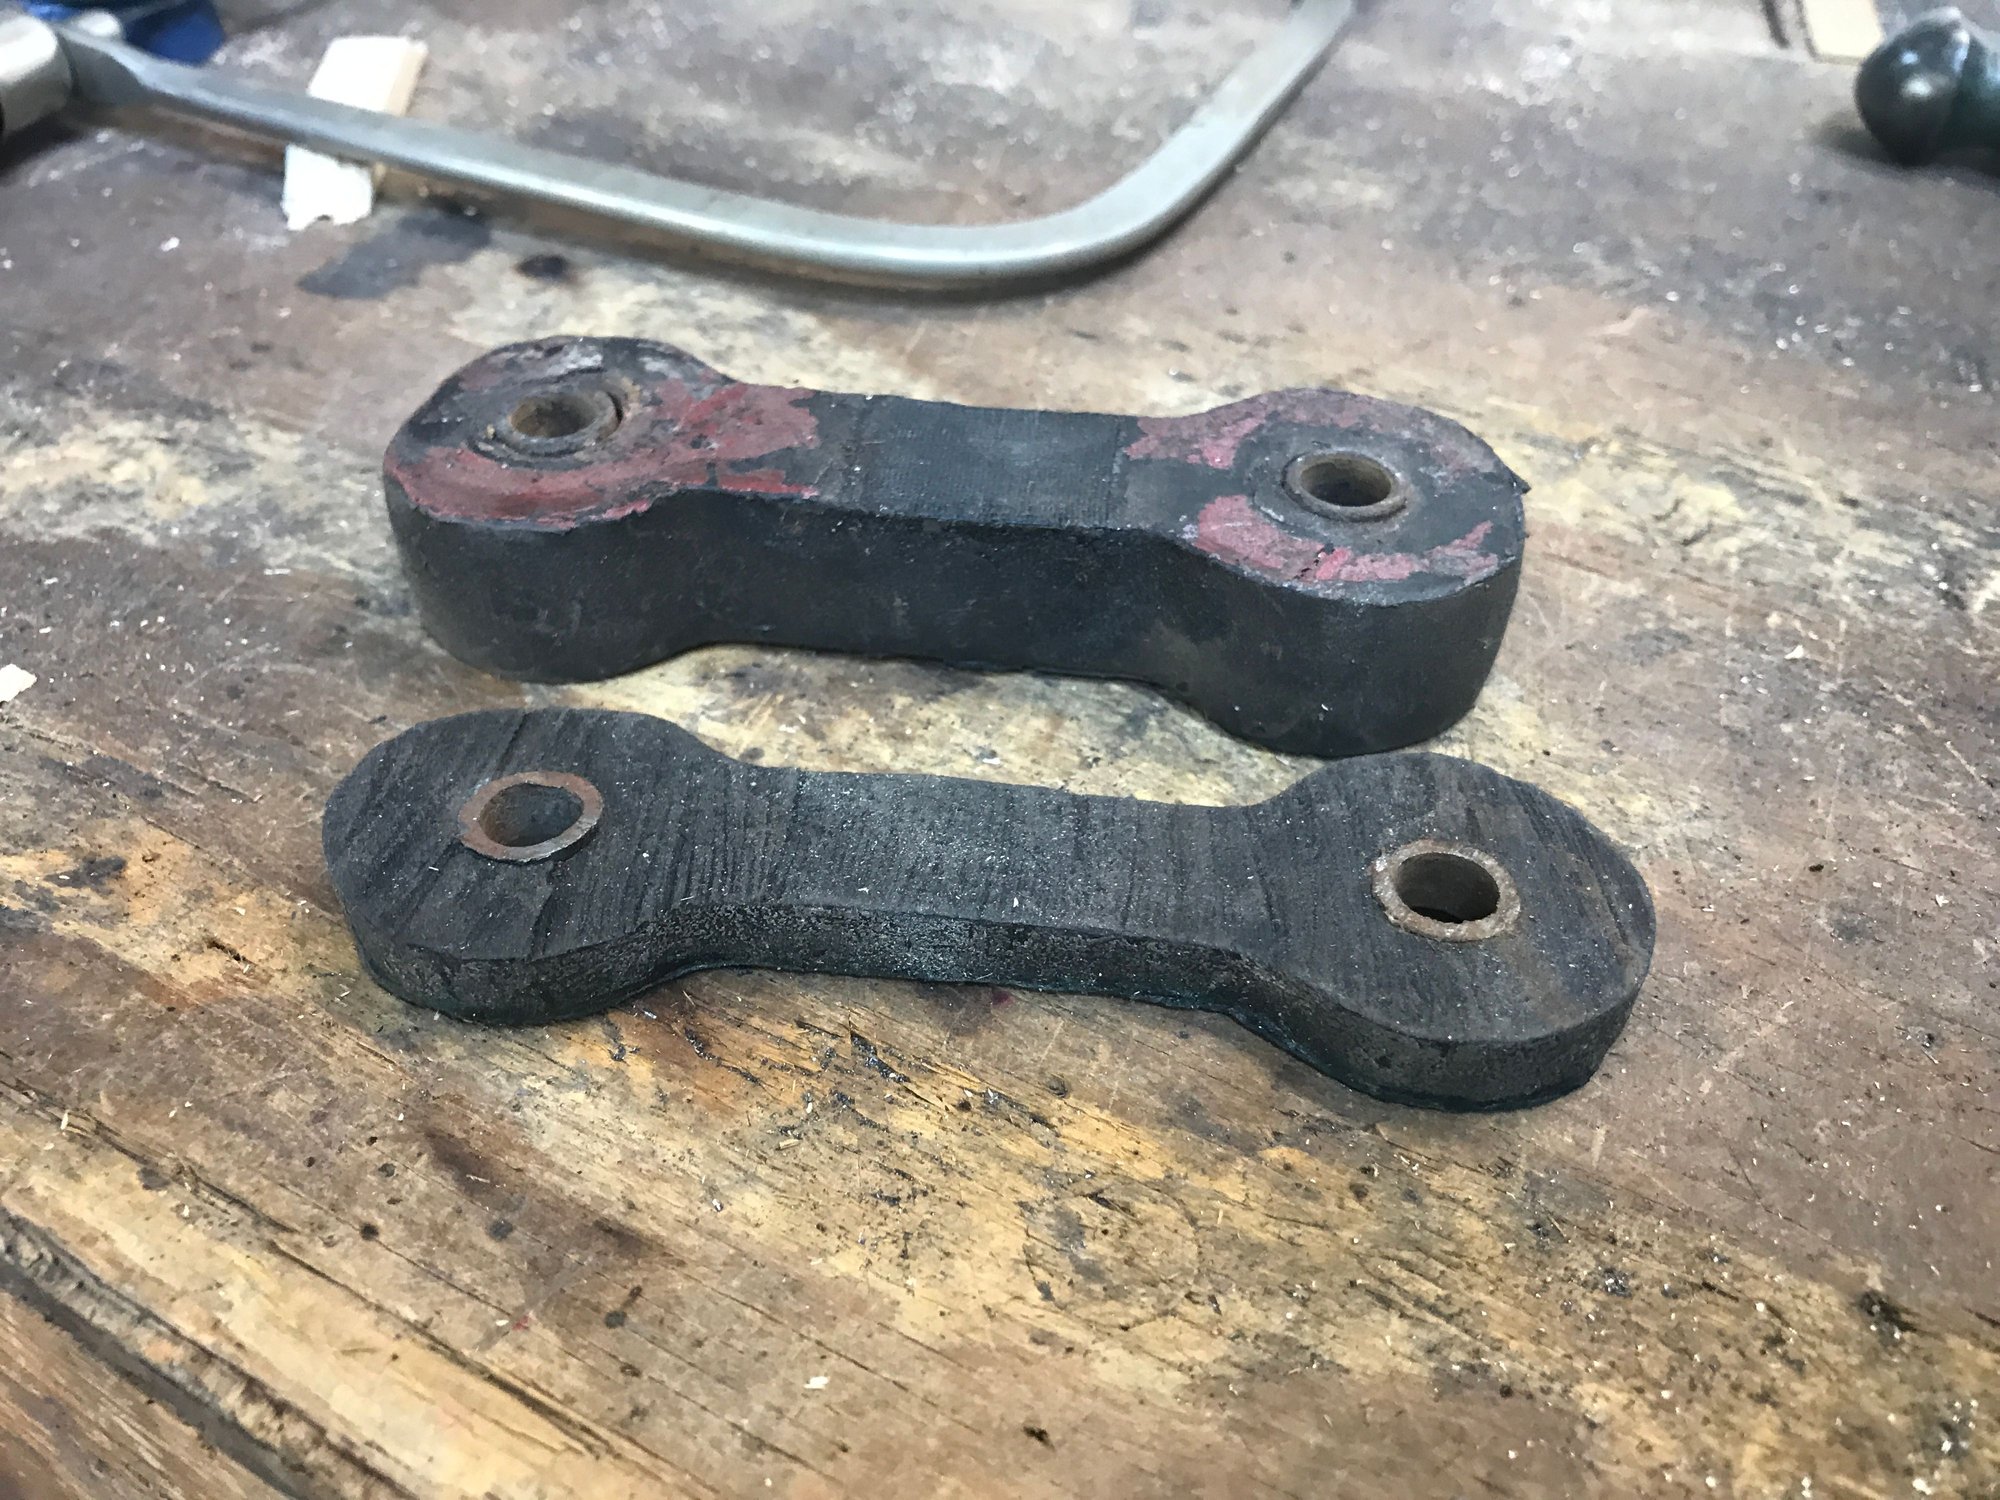
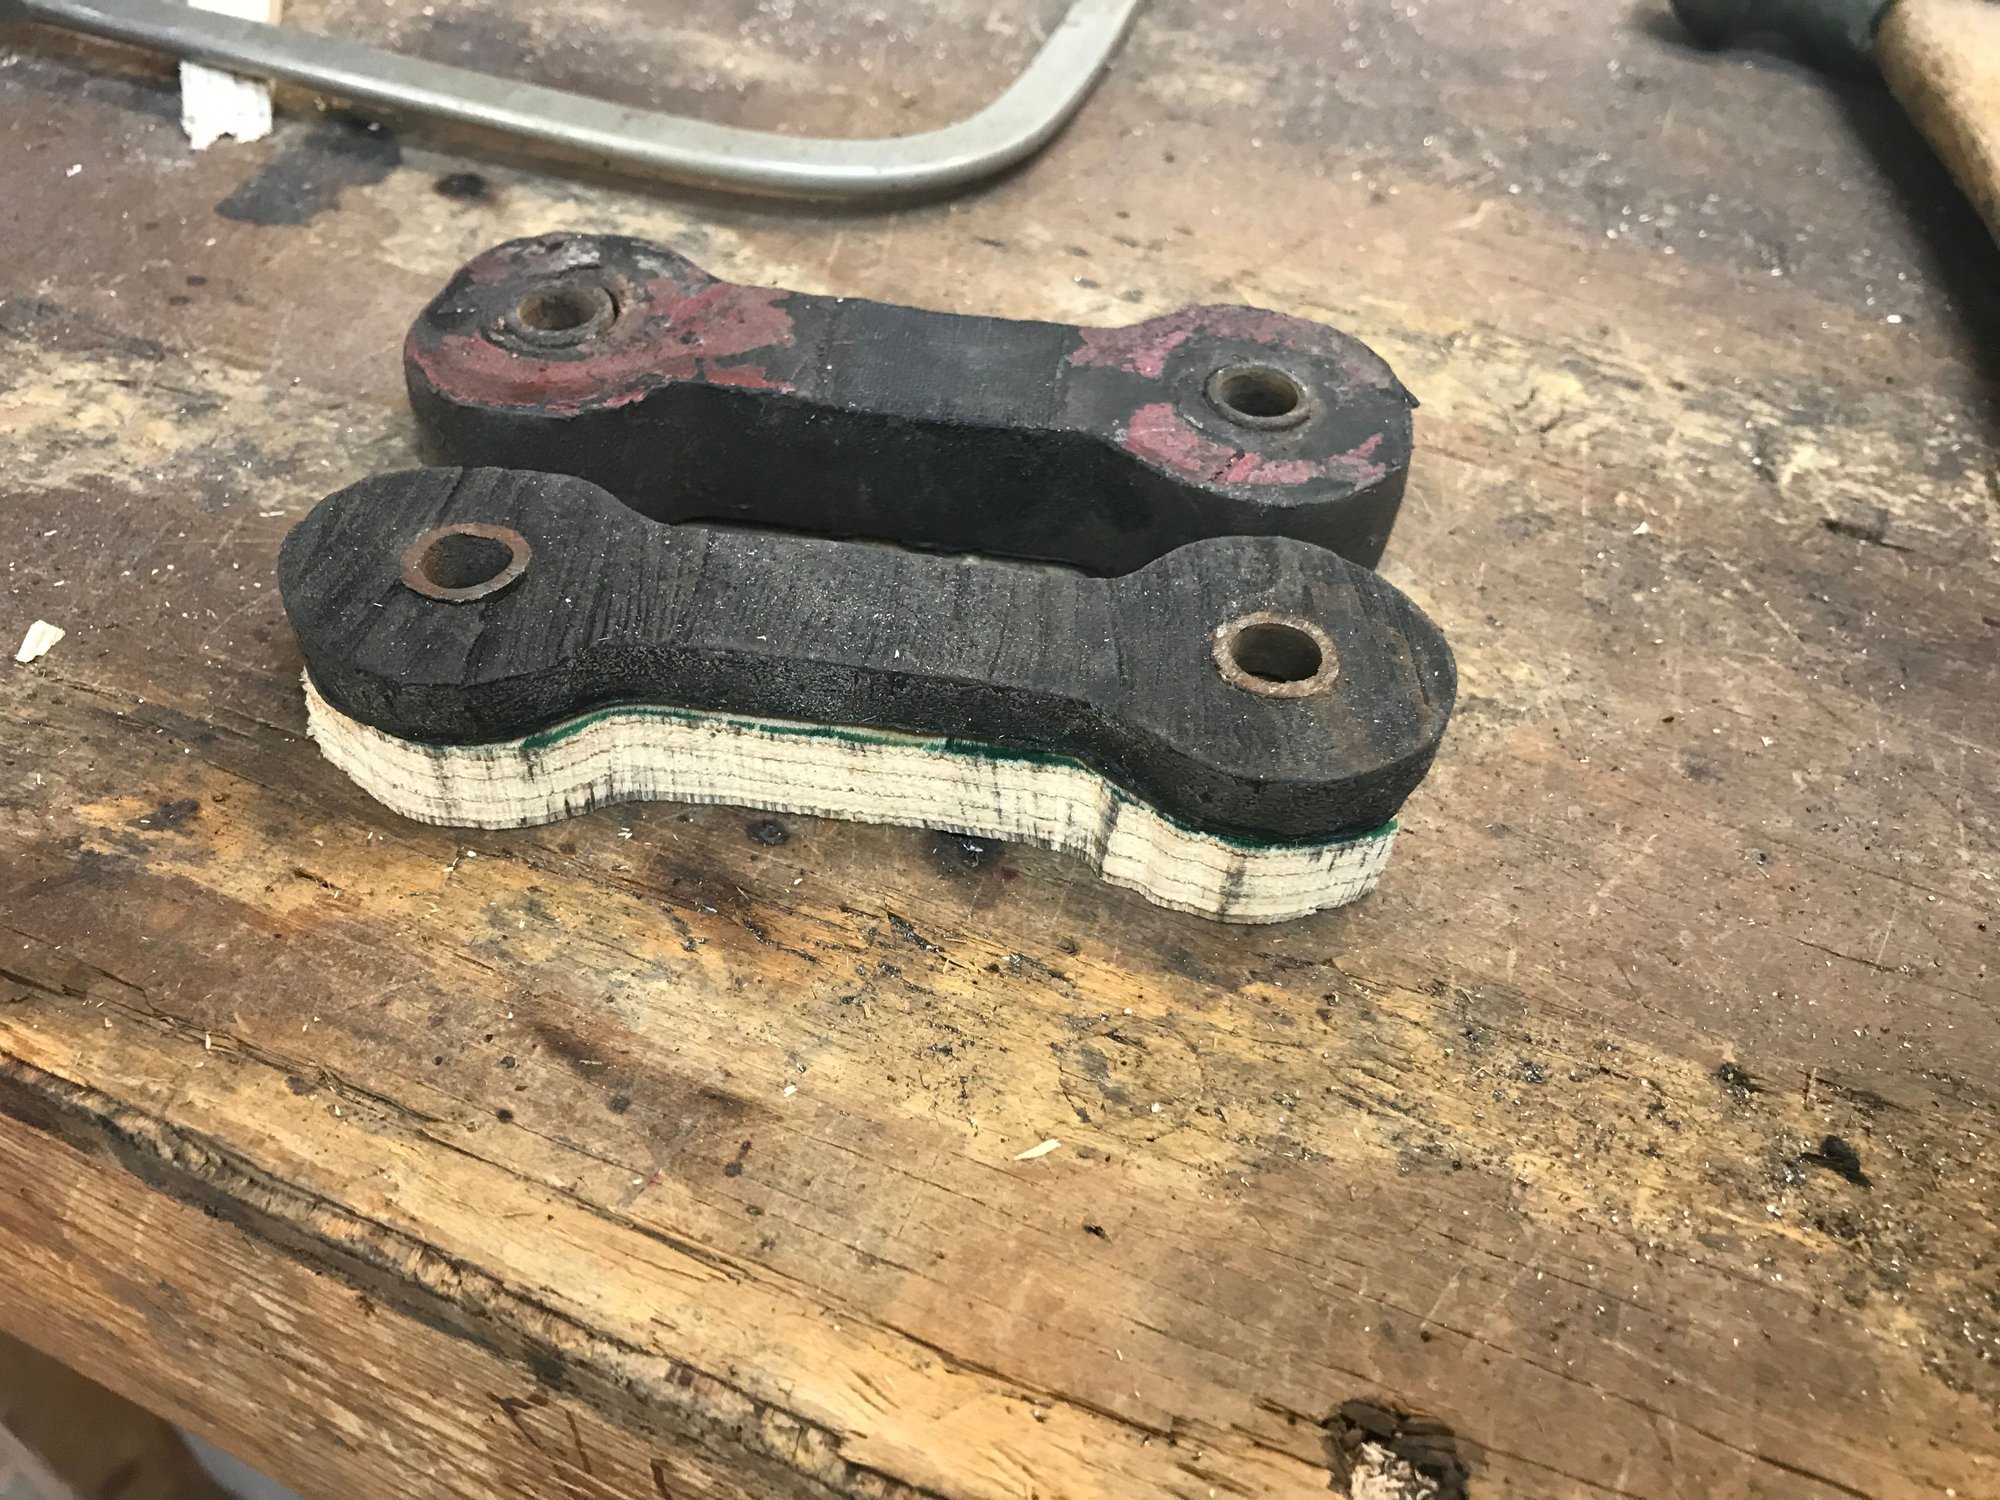
My other problem was the "skinny" front dogbone, that a PO had cut to 1/3 of original thickness to adjust for the crappy repair on the right front fender.


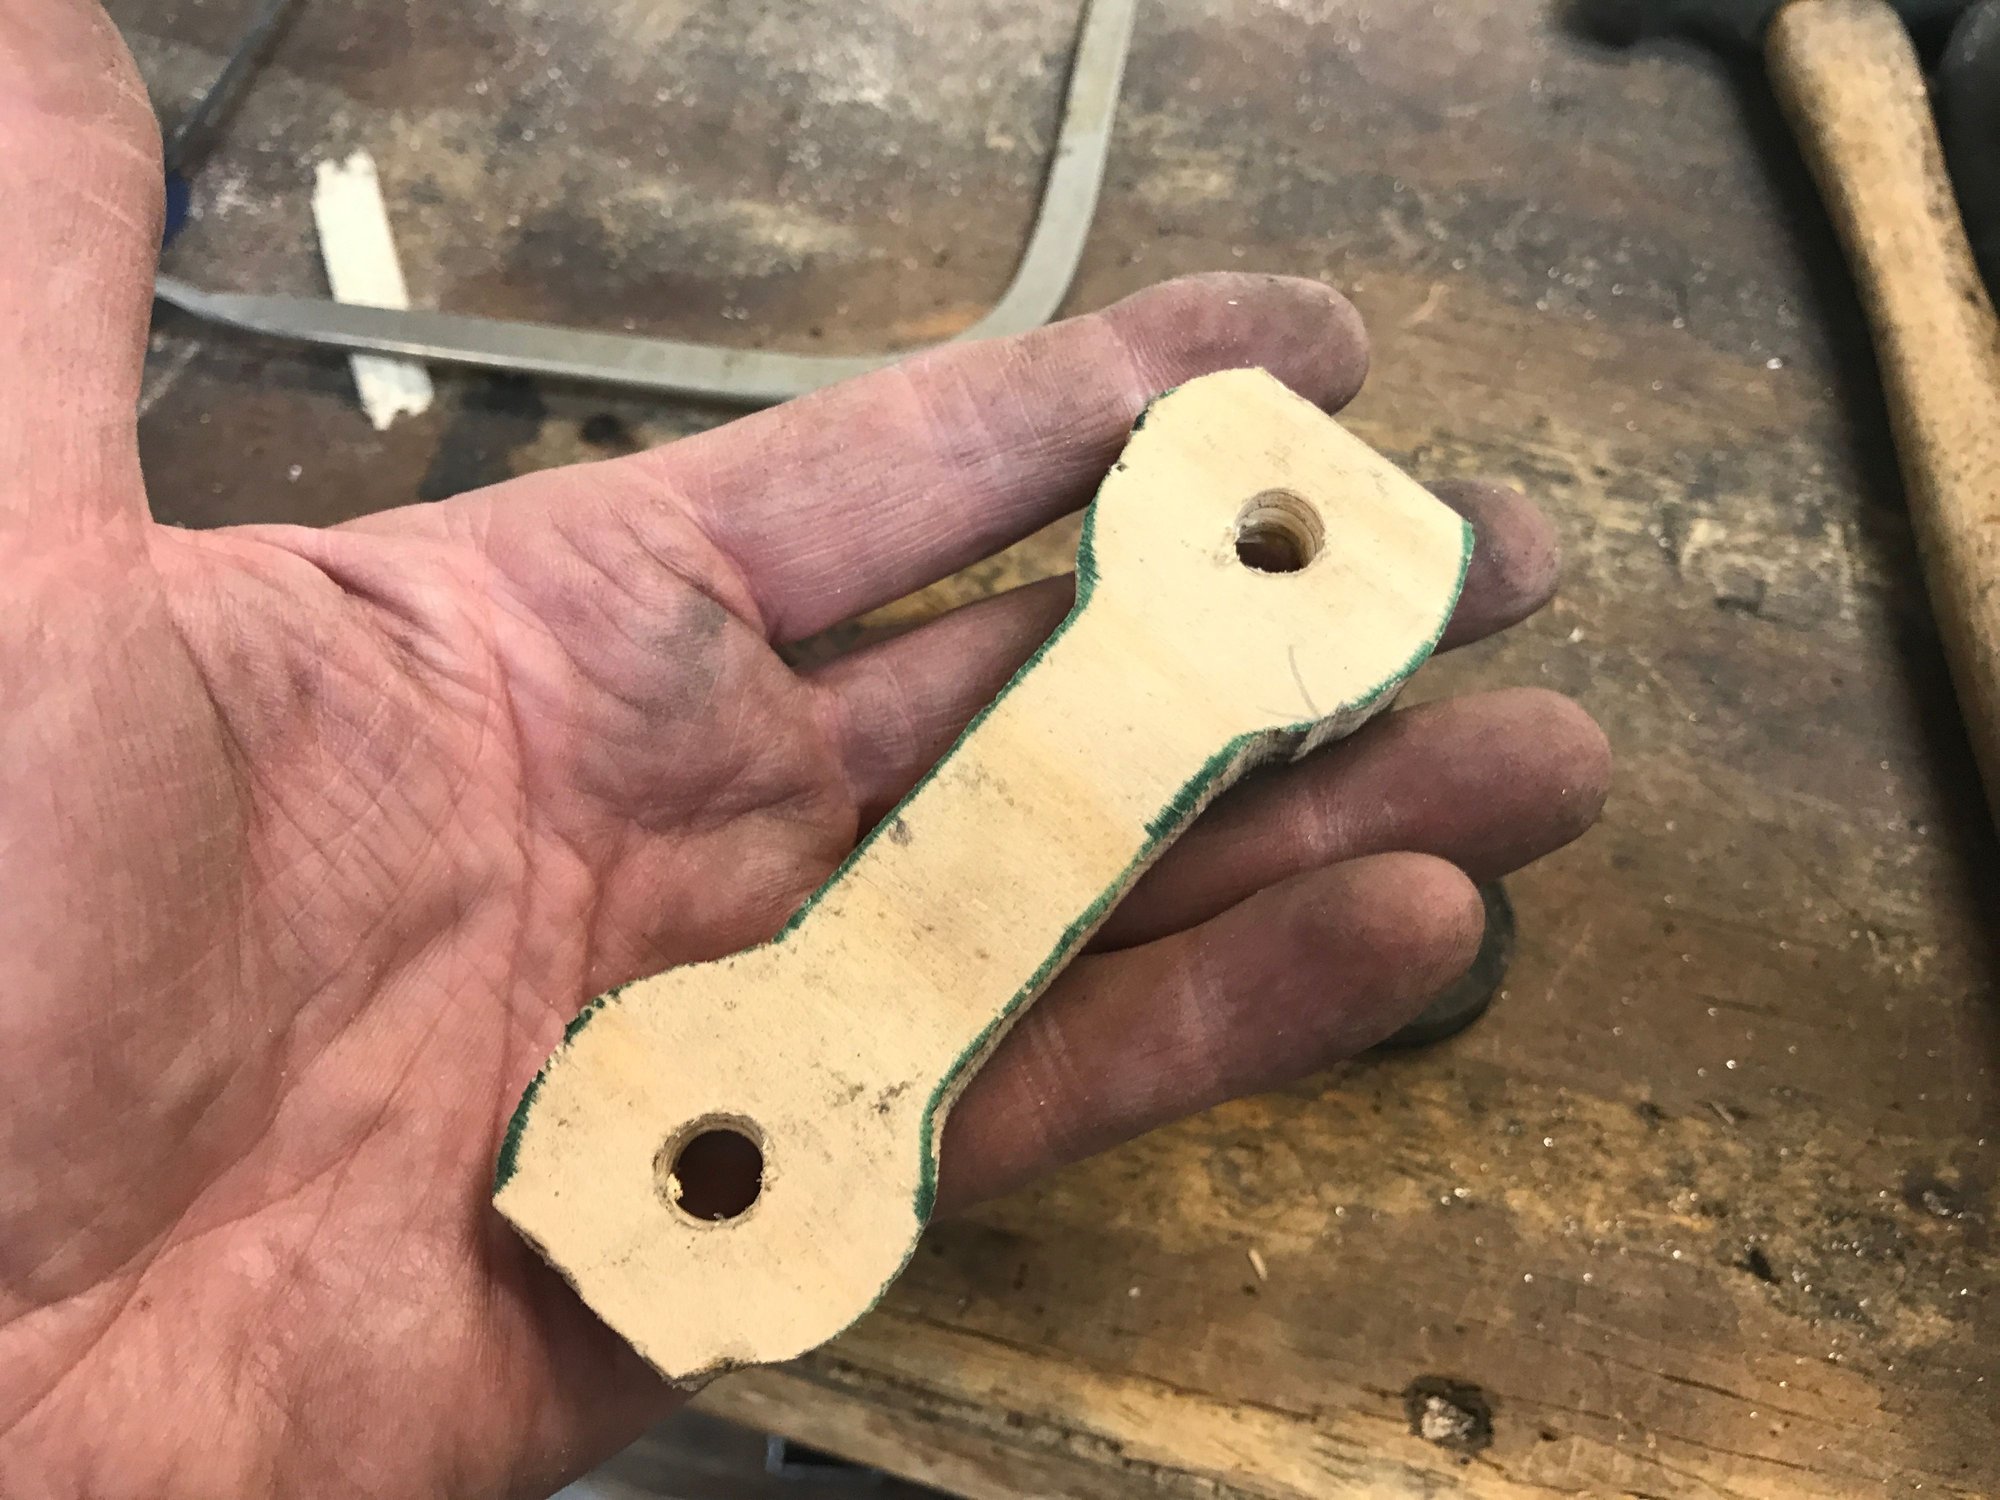
I did not have a spare, so I made an auxiliary dog bone spacer.


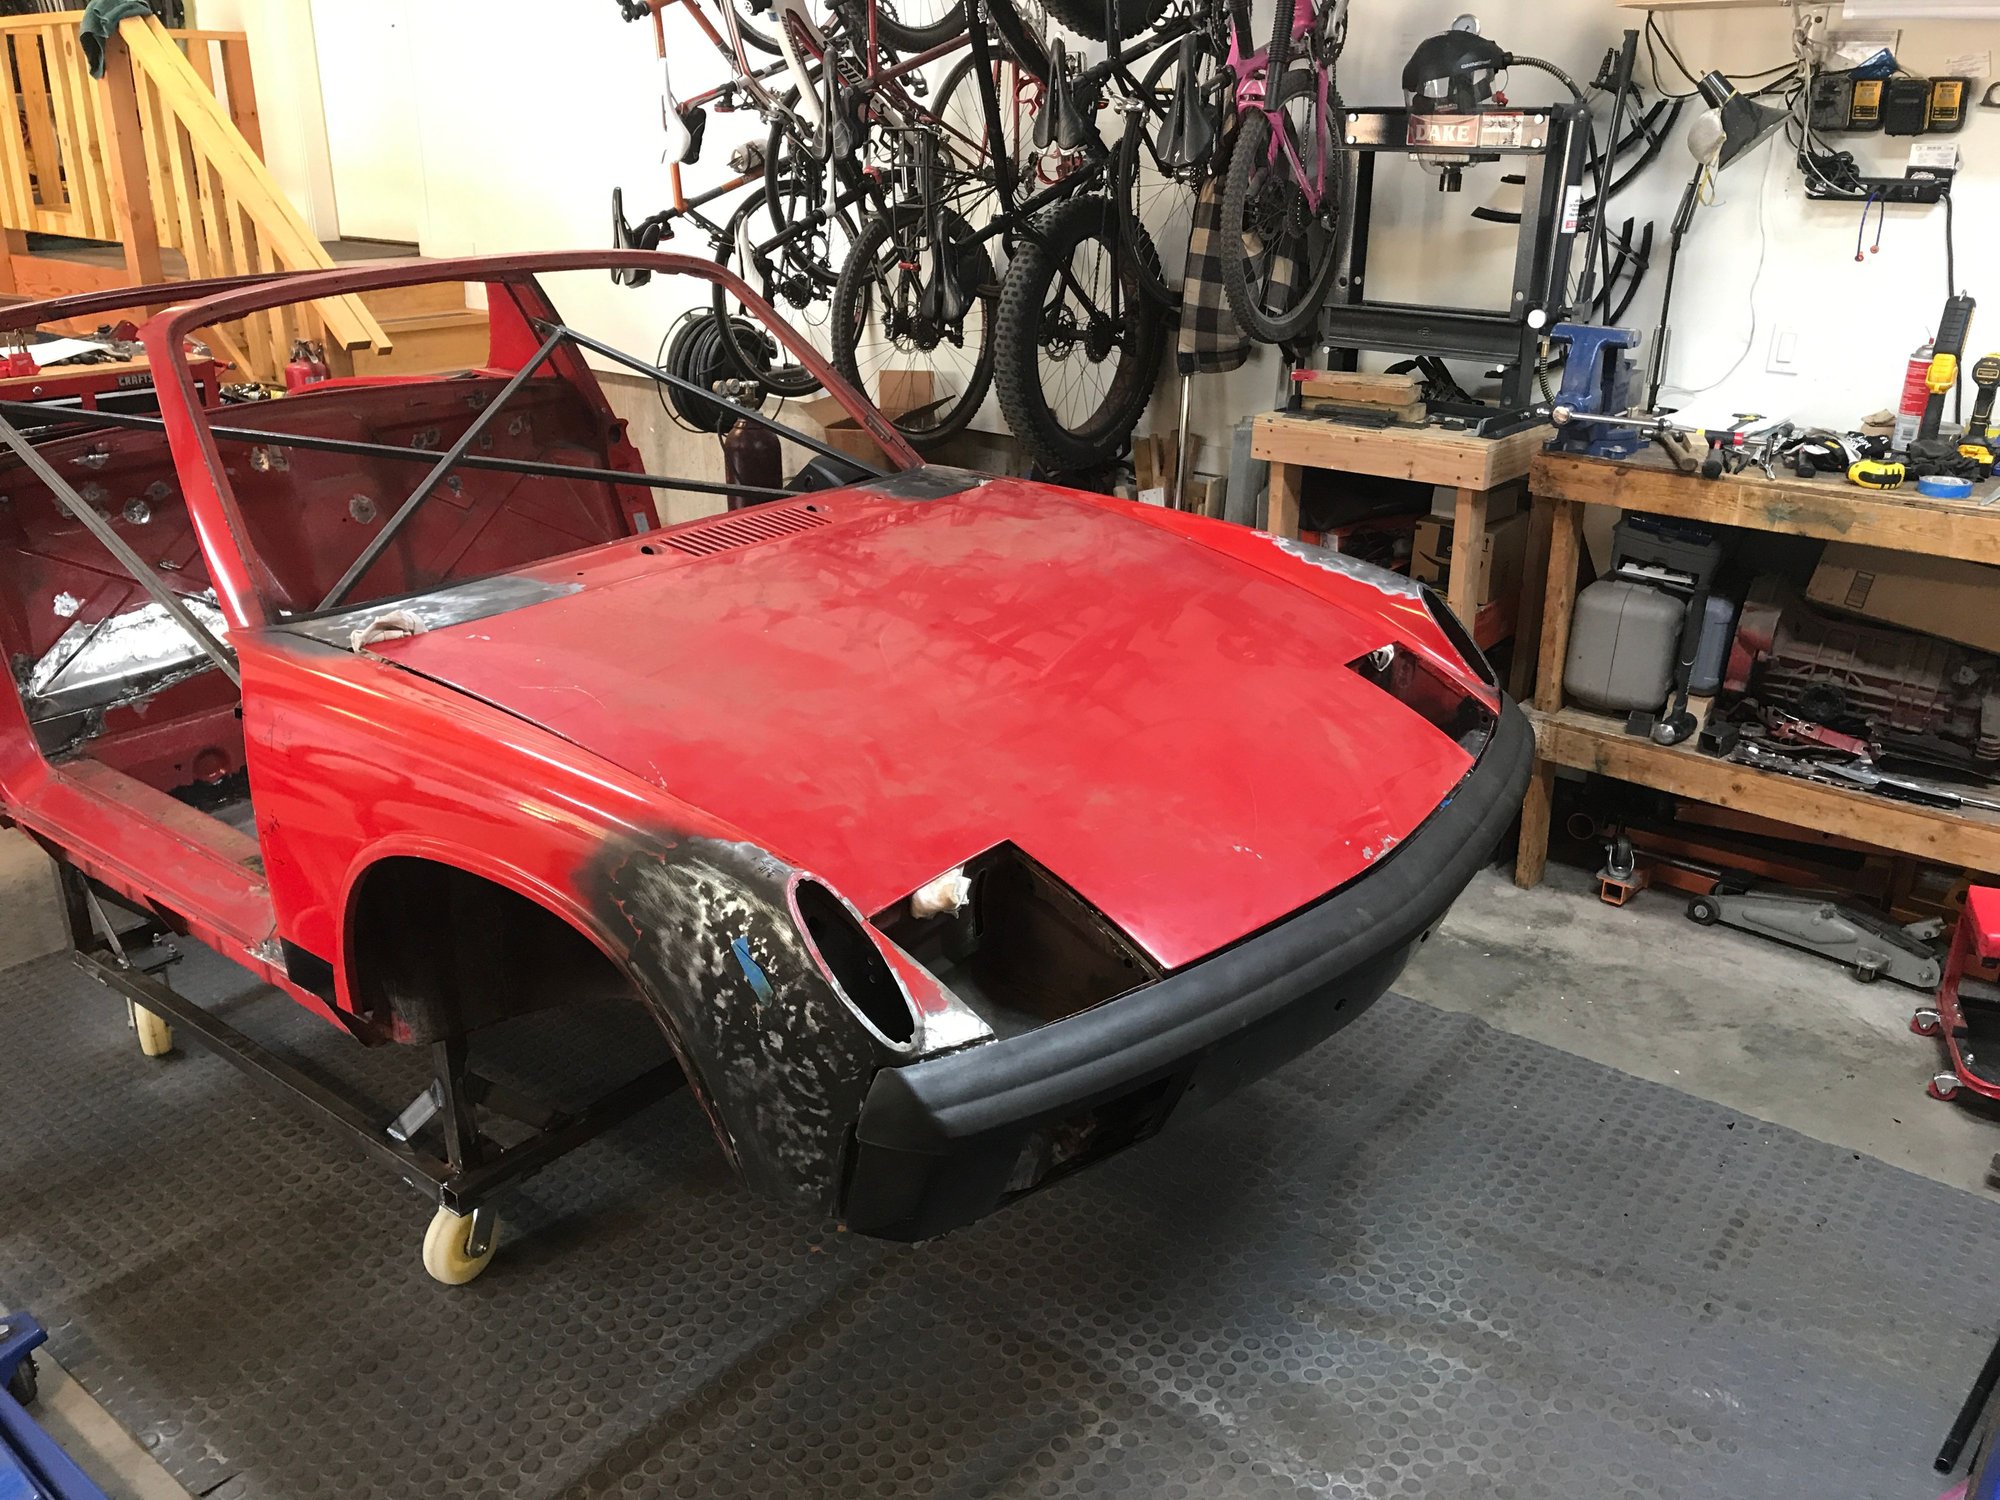
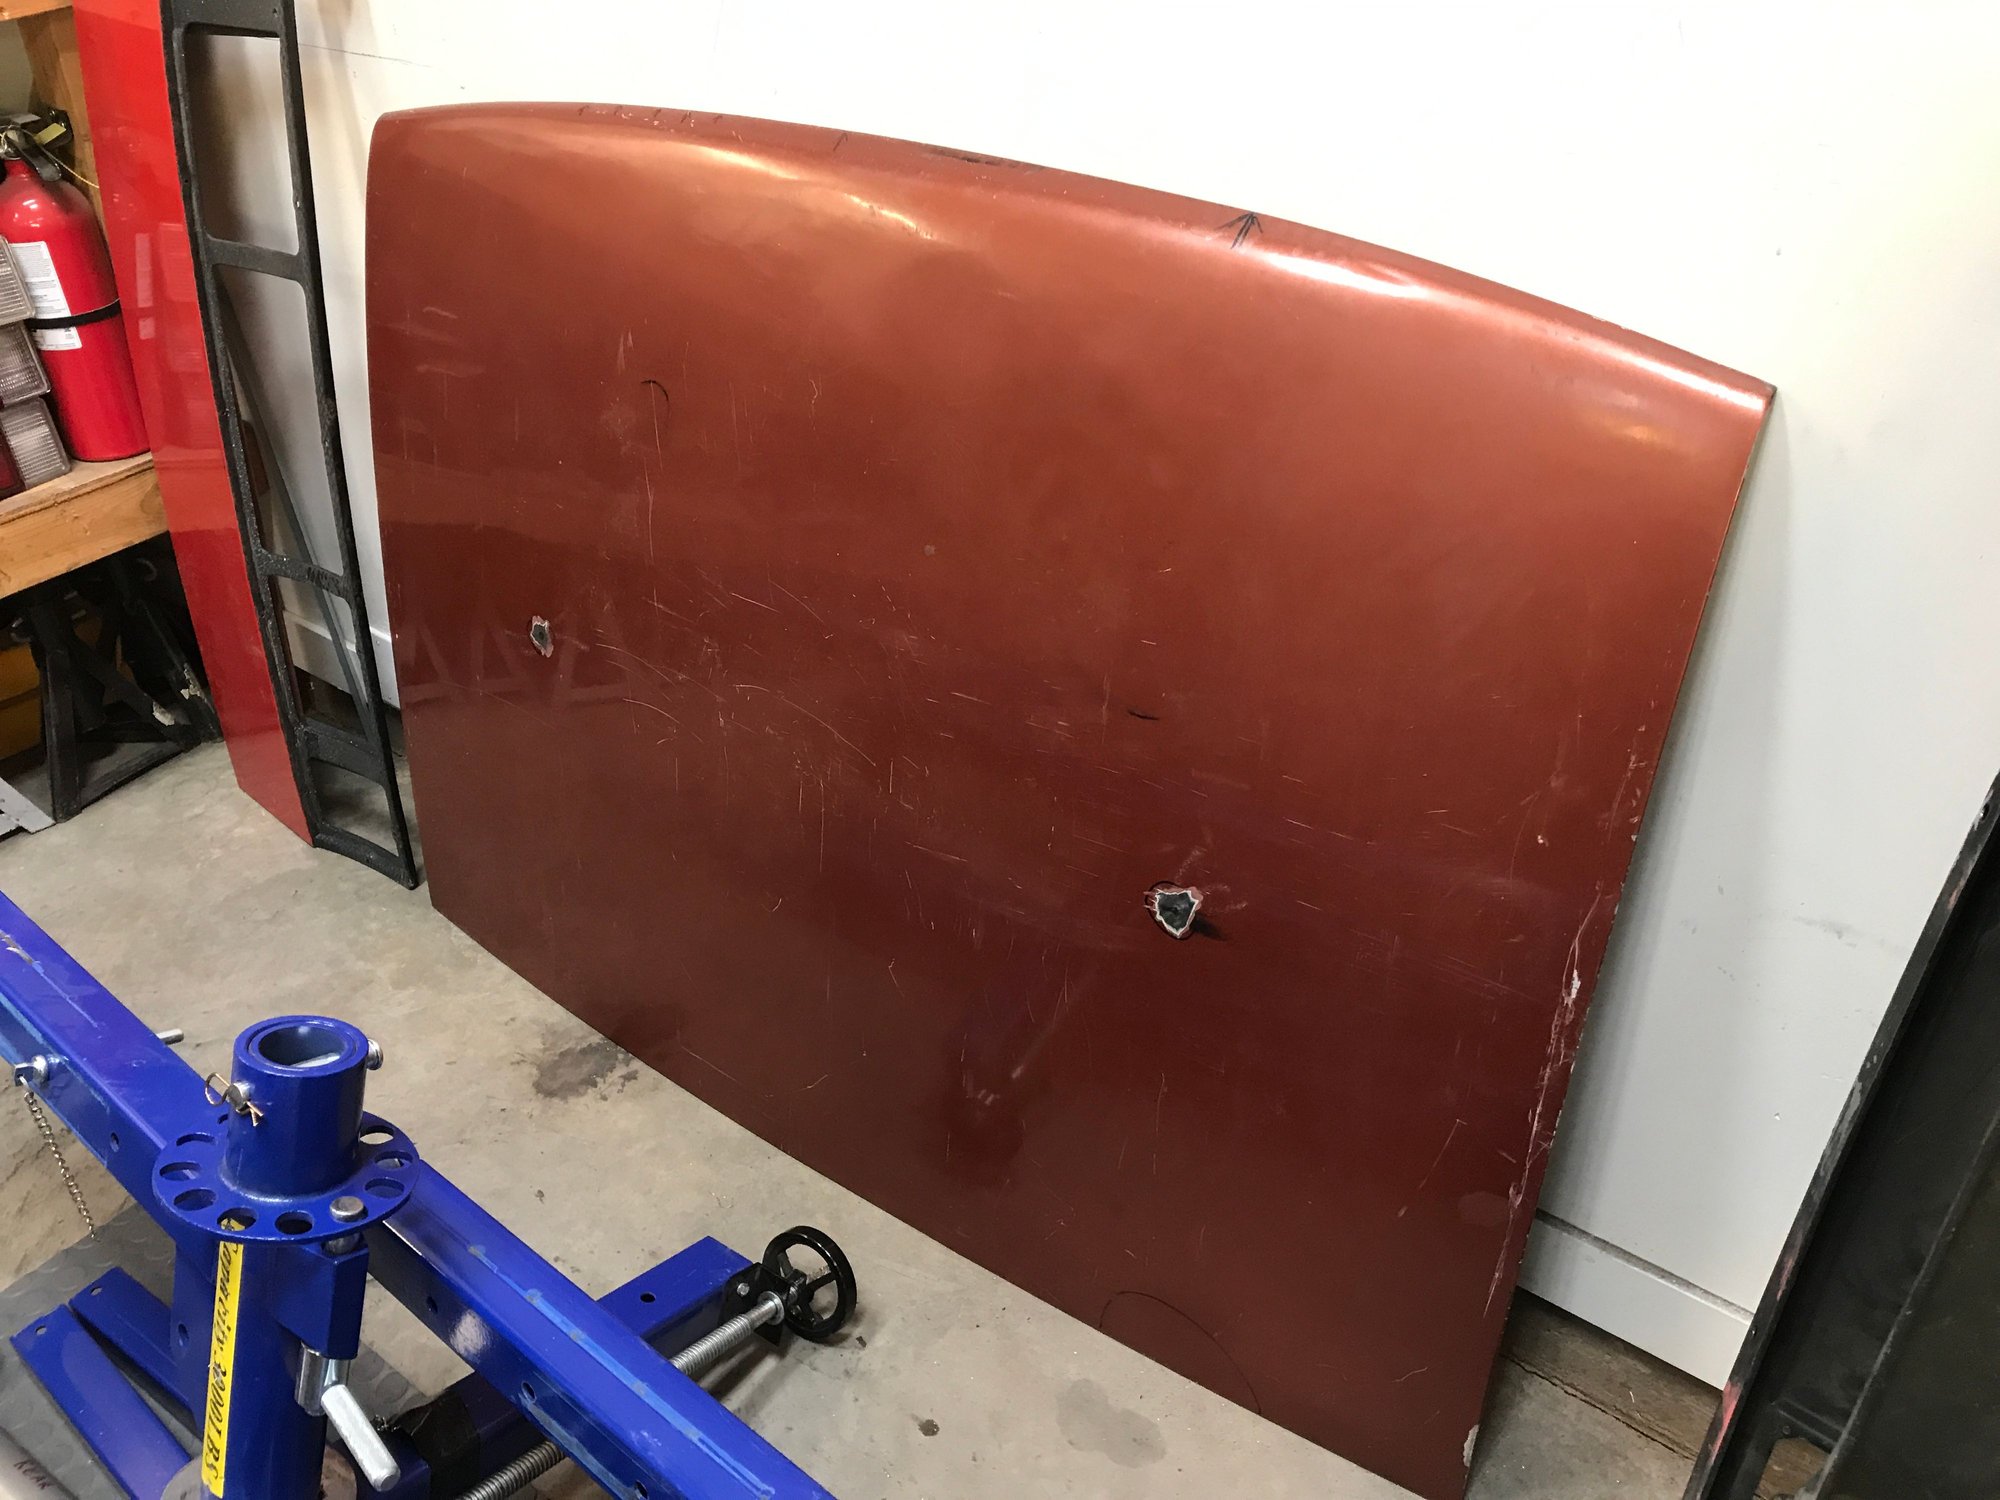
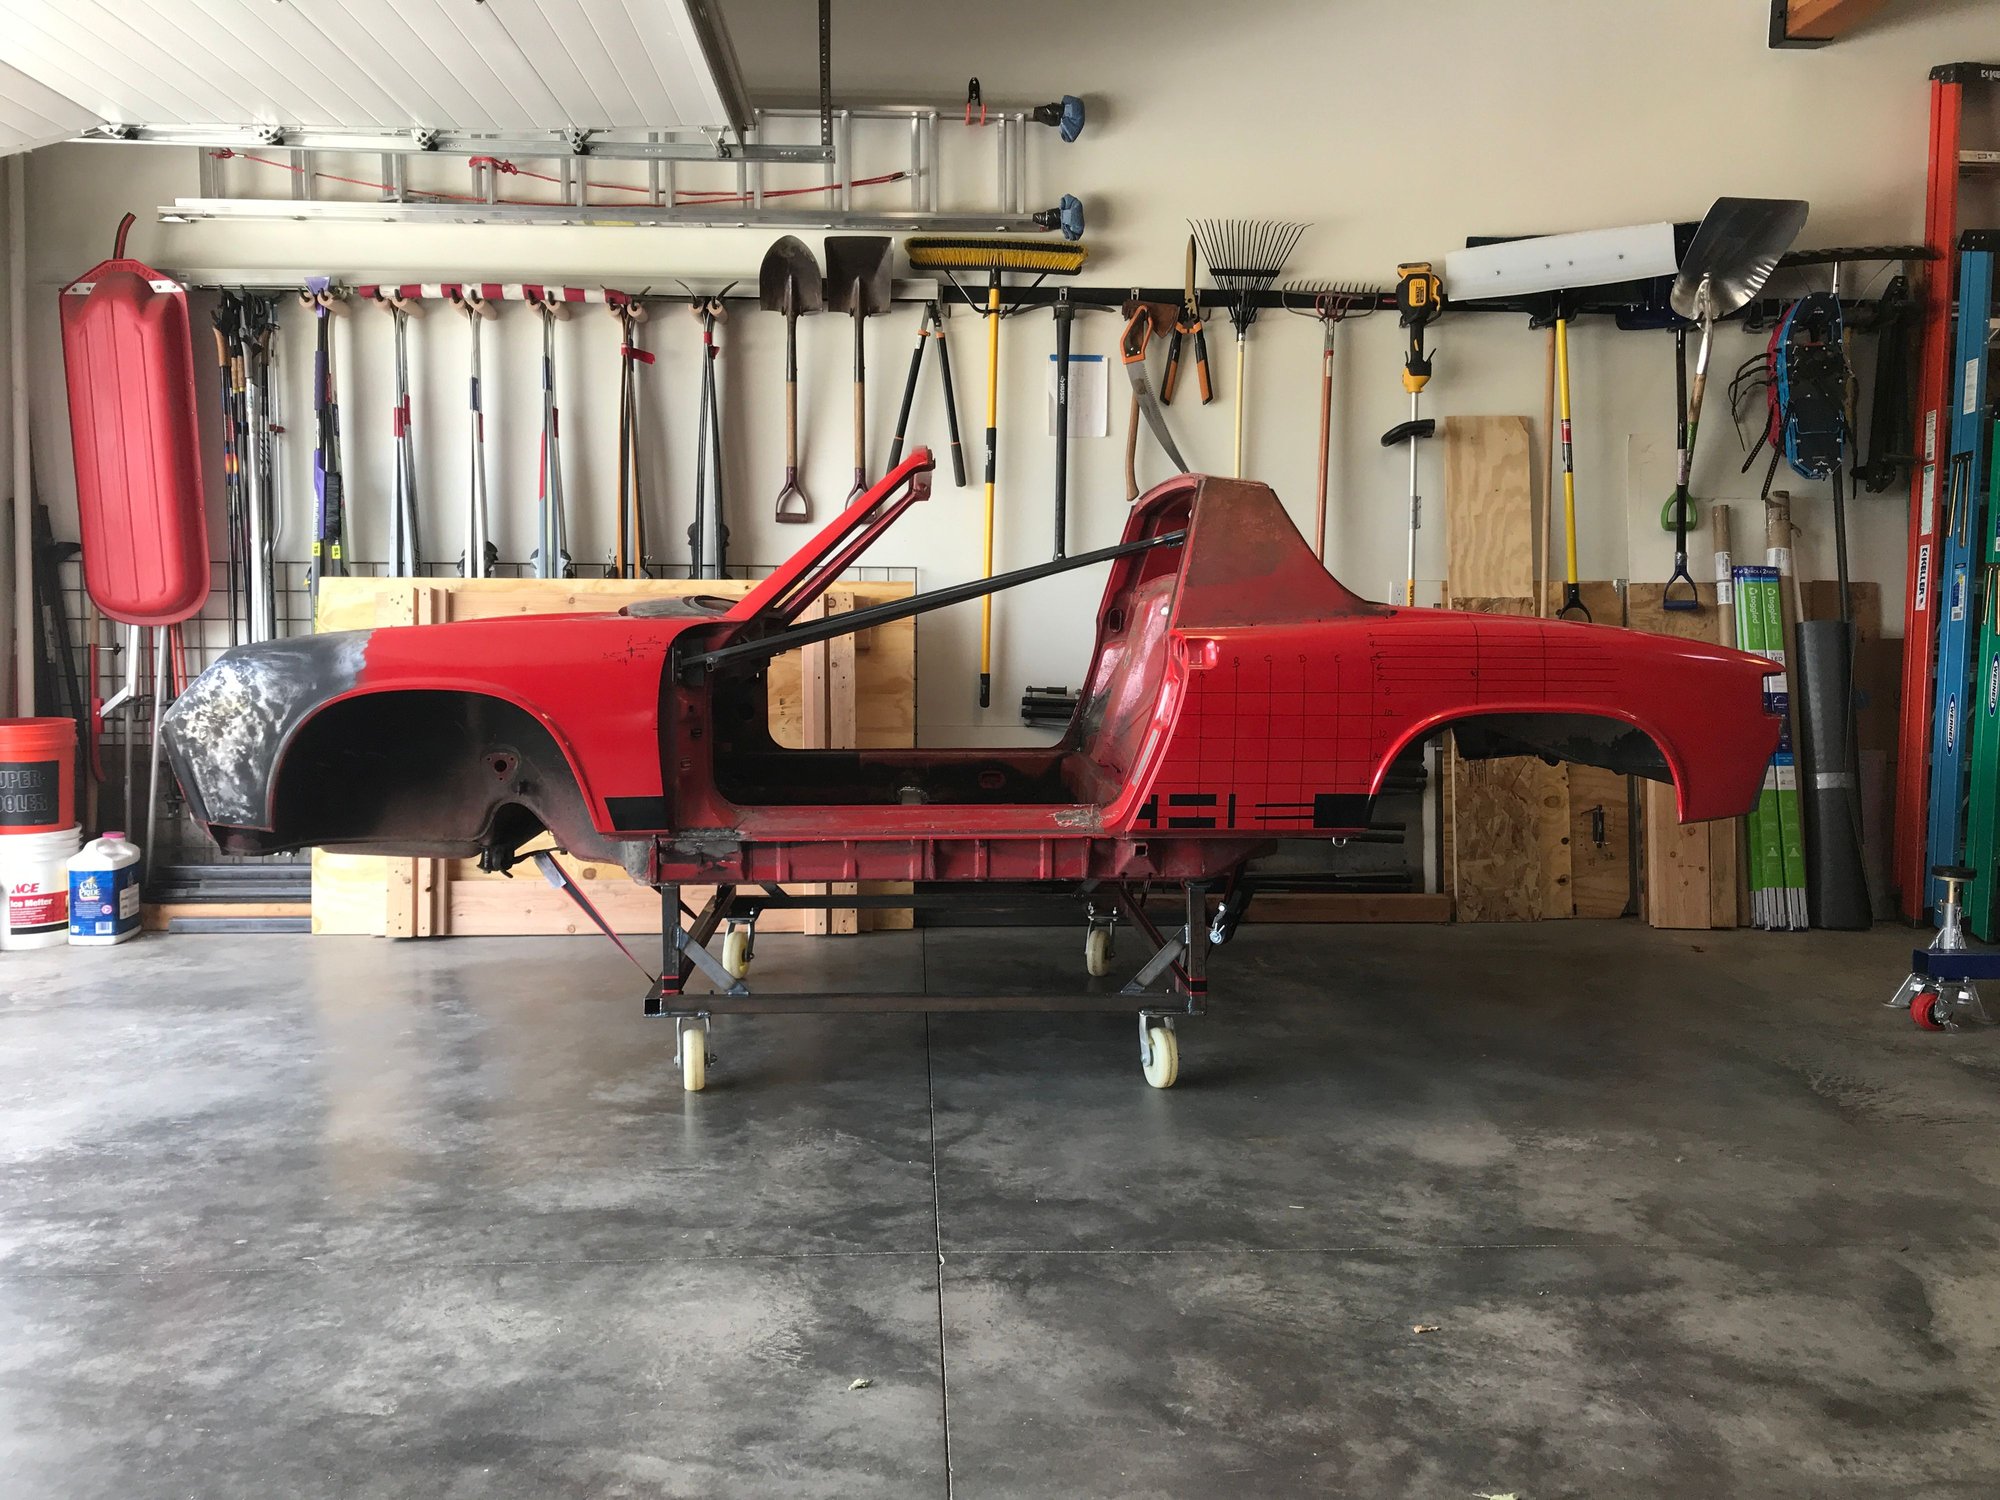
Here's the bumper on the car, with the frunk lid propped in place.


Fit on the left.


And on the right--the "bad" side.


I had one round of fit adjustment, making the holes in the front panel a bit wider so the bumper could shift left, but lots more to do.
Old 06-22-2020, 10:19 PM
  #422  
bkrantz
Rennlist Member
Thread Starter
 
bkrantz's Avatar
 
Join Date: Oct 2012
Location: SW Colorado
Posts: 6,012
Likes: 0
Received 1,091 Likes on 652 Posts
Default

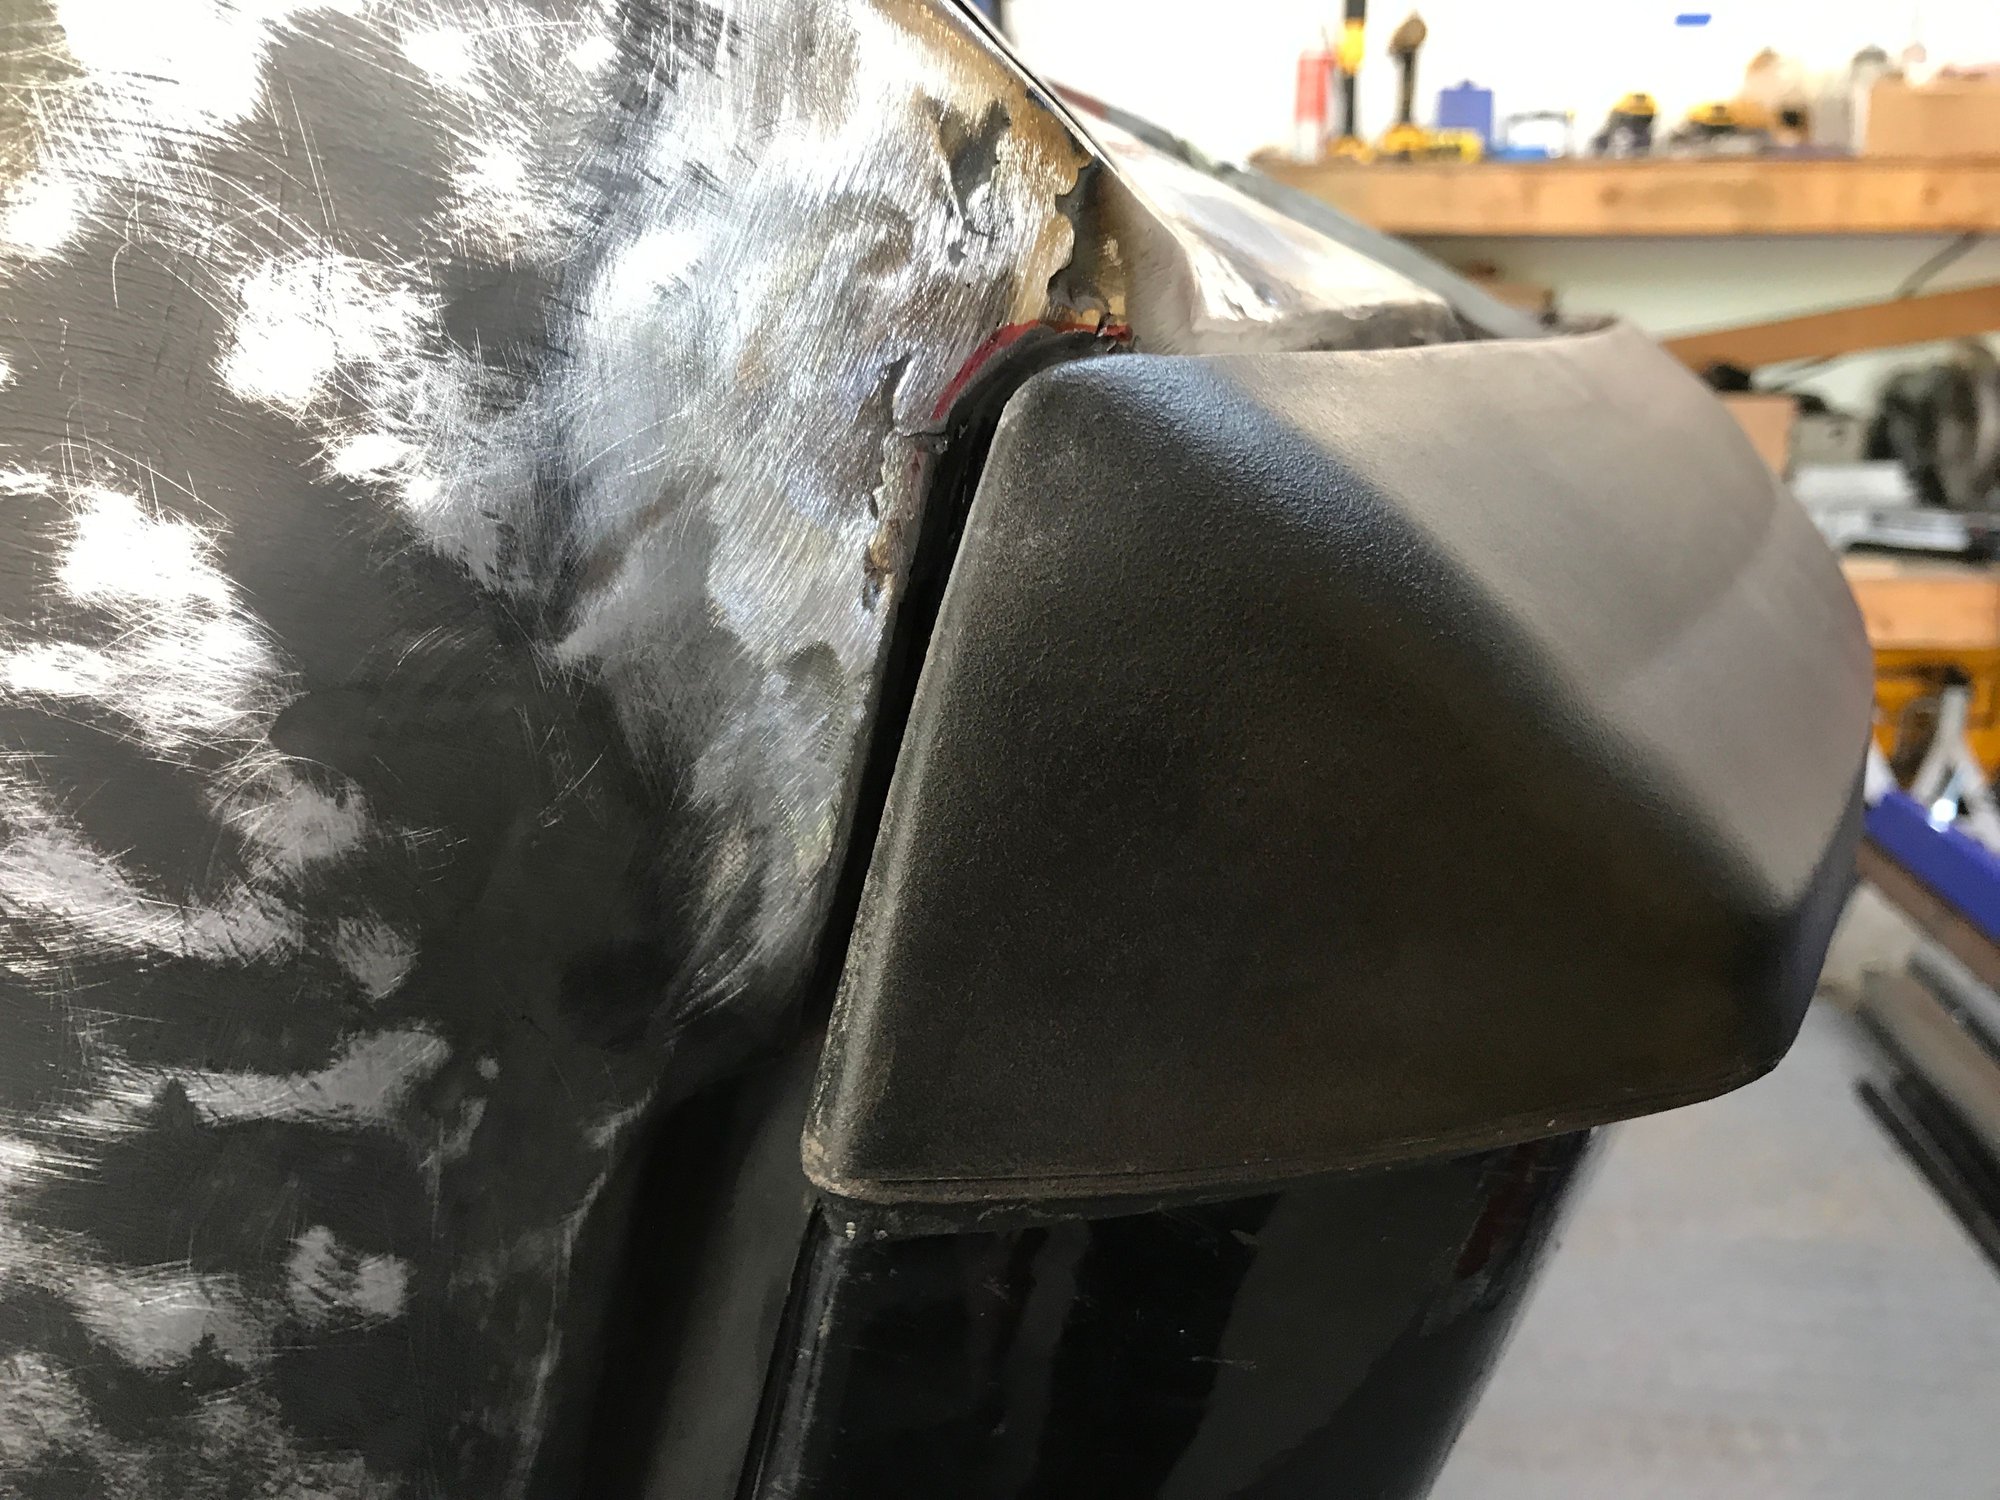
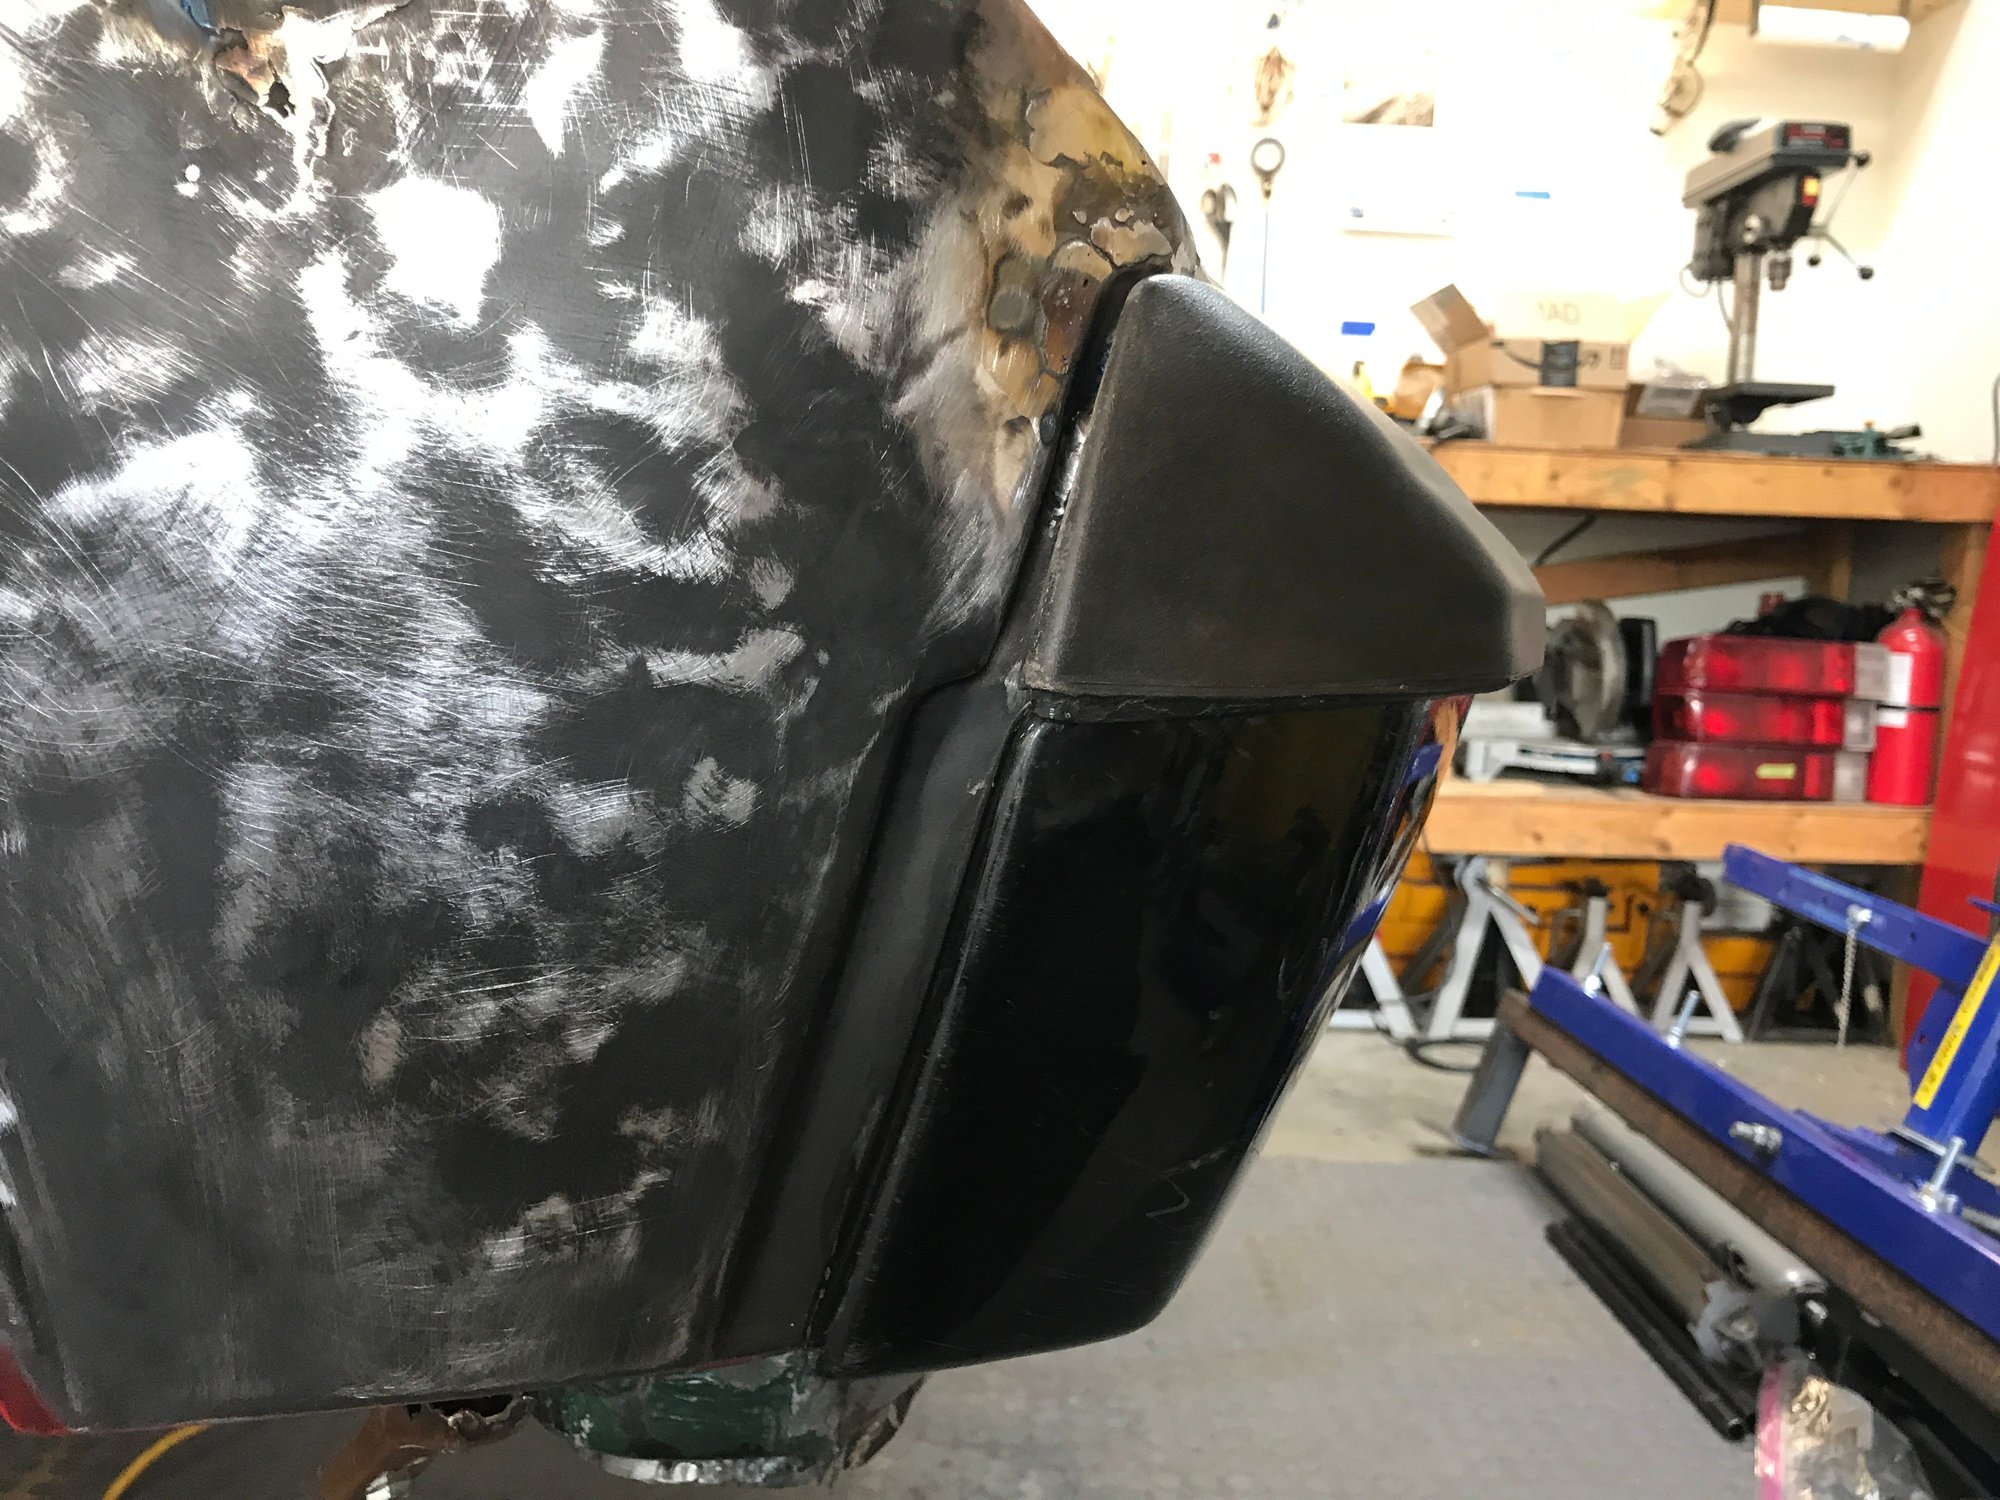
More bumper work today. I refit the rear, and made the height better. In the front I redid the profile of the recess on the fender to better accommodate the corner of the top cap.


Old 06-22-2020, 10:22 PM
  #423  
bkrantz
Rennlist Member
Thread Starter
 
bkrantz's Avatar
 
Join Date: Oct 2012
Location: SW Colorado
Posts: 6,012
Likes: 0
Received 1,091 Likes on 652 Posts
Default

With the welder out, I got my son to lay on his back under the rear and weld on the bracket that supports the center of the rear bumper cap.


Old 06-22-2020, 10:30 PM
  #424  
bkrantz
Rennlist Member
Thread Starter
 
bkrantz's Avatar
 
Join Date: Oct 2012
Location: SW Colorado
Posts: 6,012
Likes: 0
Received 1,091 Likes on 652 Posts
Default

And we also redid part of the front panel seam repair, by replacing a badly welded bit with a patch.


After a rough grinding.

Old 06-23-2020, 10:54 PM
  #425  
bkrantz
Rennlist Member
Thread Starter
 
bkrantz's Avatar
 
Join Date: Oct 2012
Location: SW Colorado
Posts: 6,012
Likes: 0
Received 1,091 Likes on 652 Posts
Default

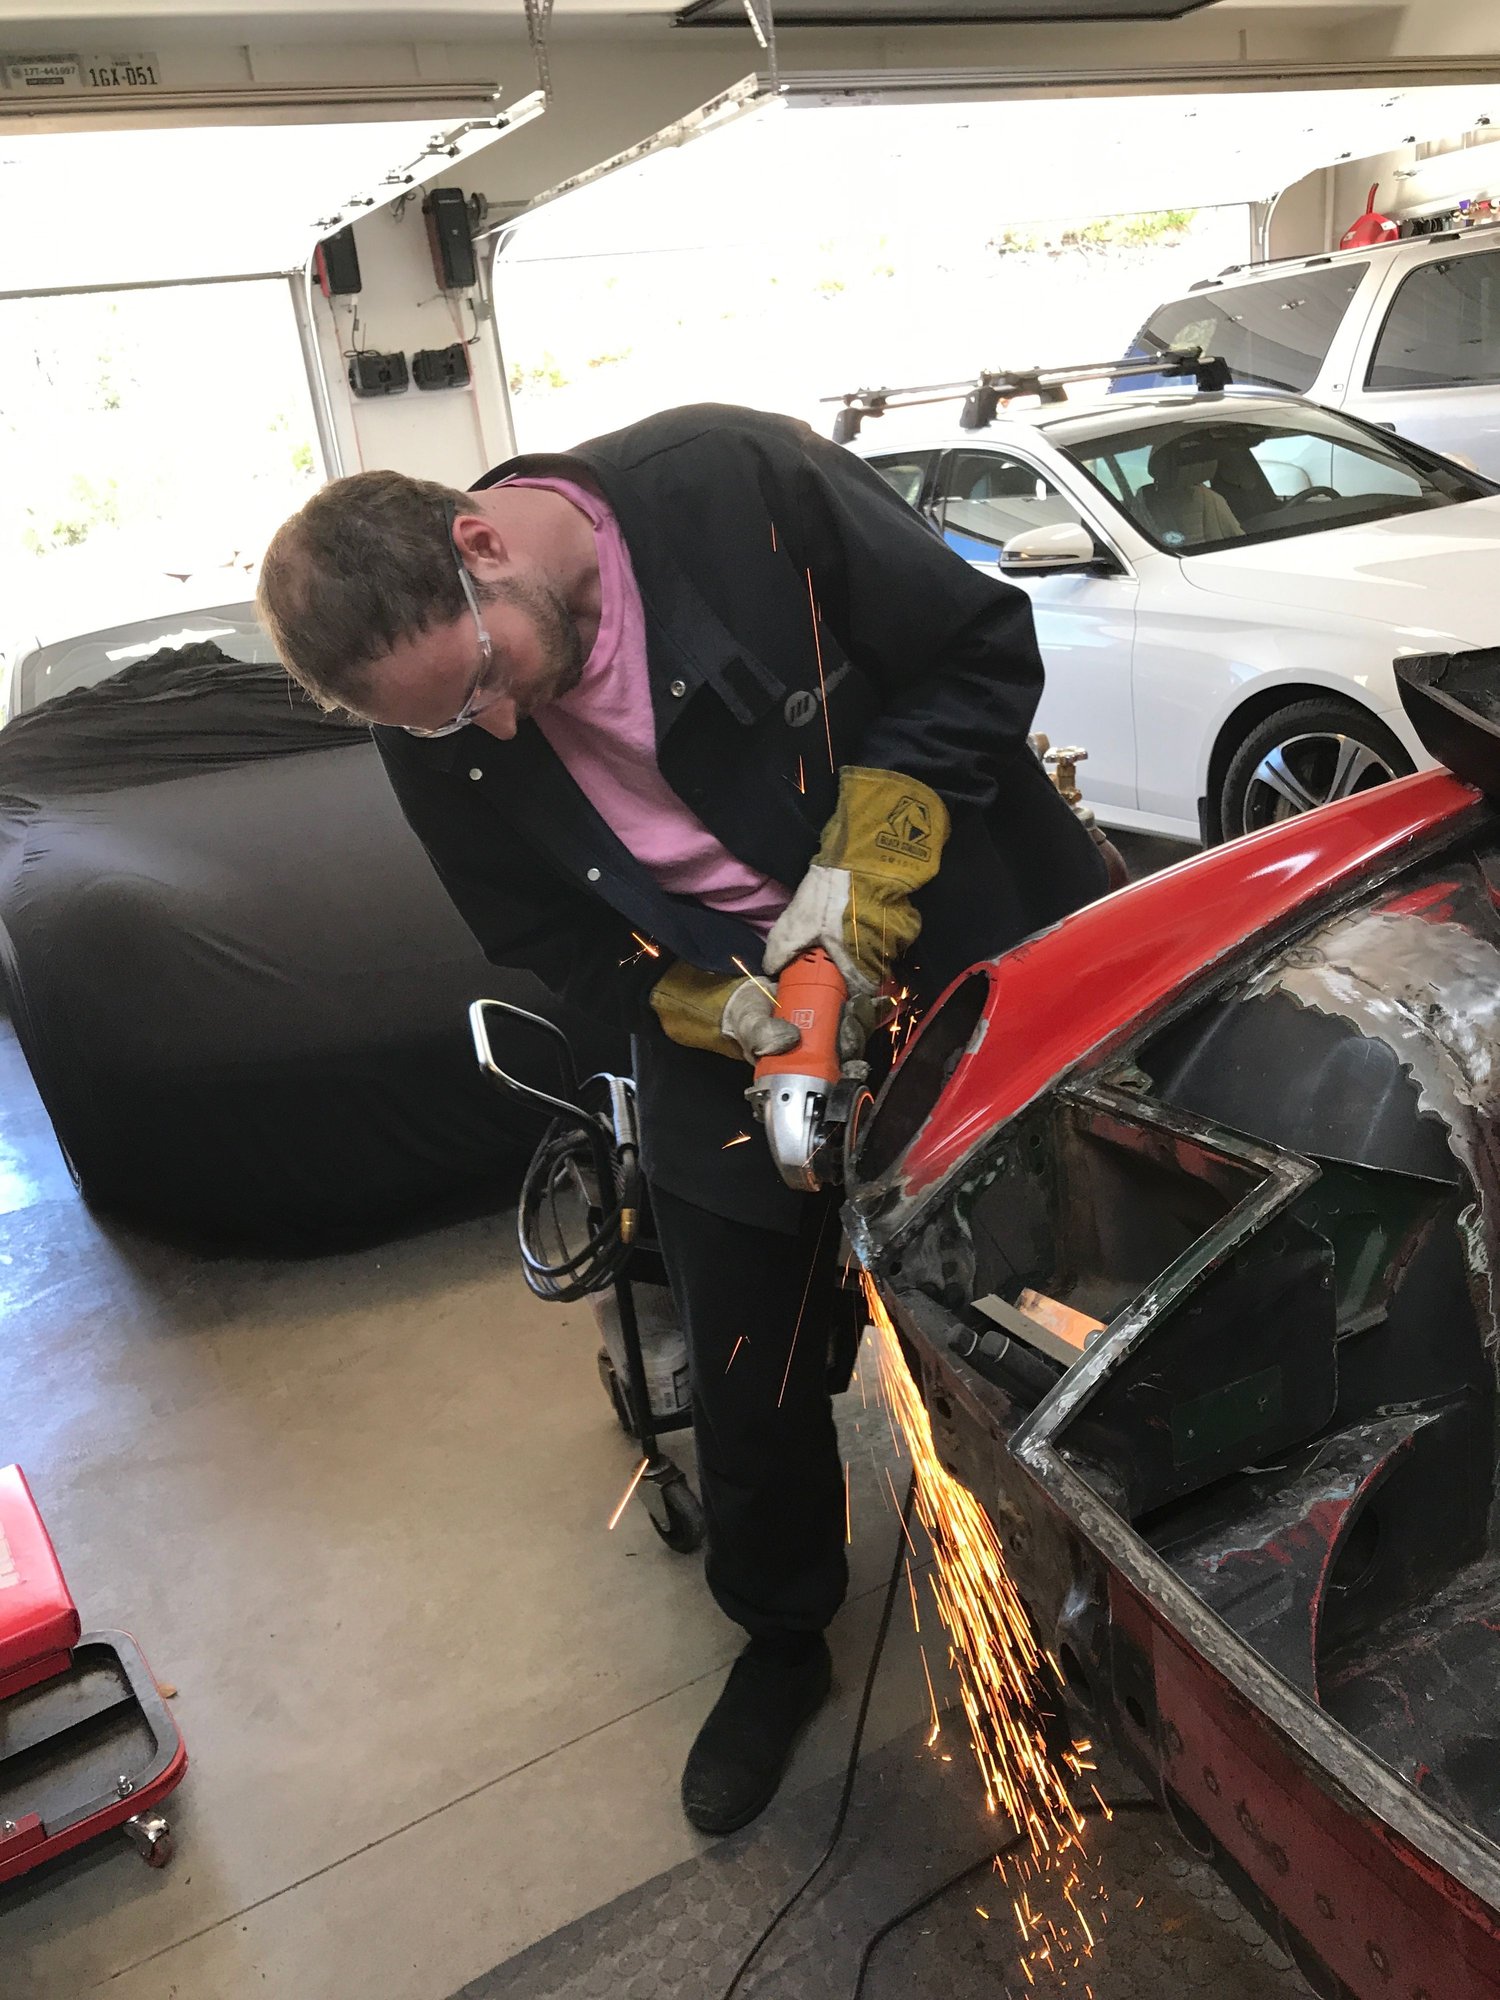
Back to work on bumper-related work, mostly on the front right fender corner. After the grinding I did yesterday to get the proper recess, the metal got thin and started to crack. That led to another round of welding and grinding. Here's a shot of my son getting it done.


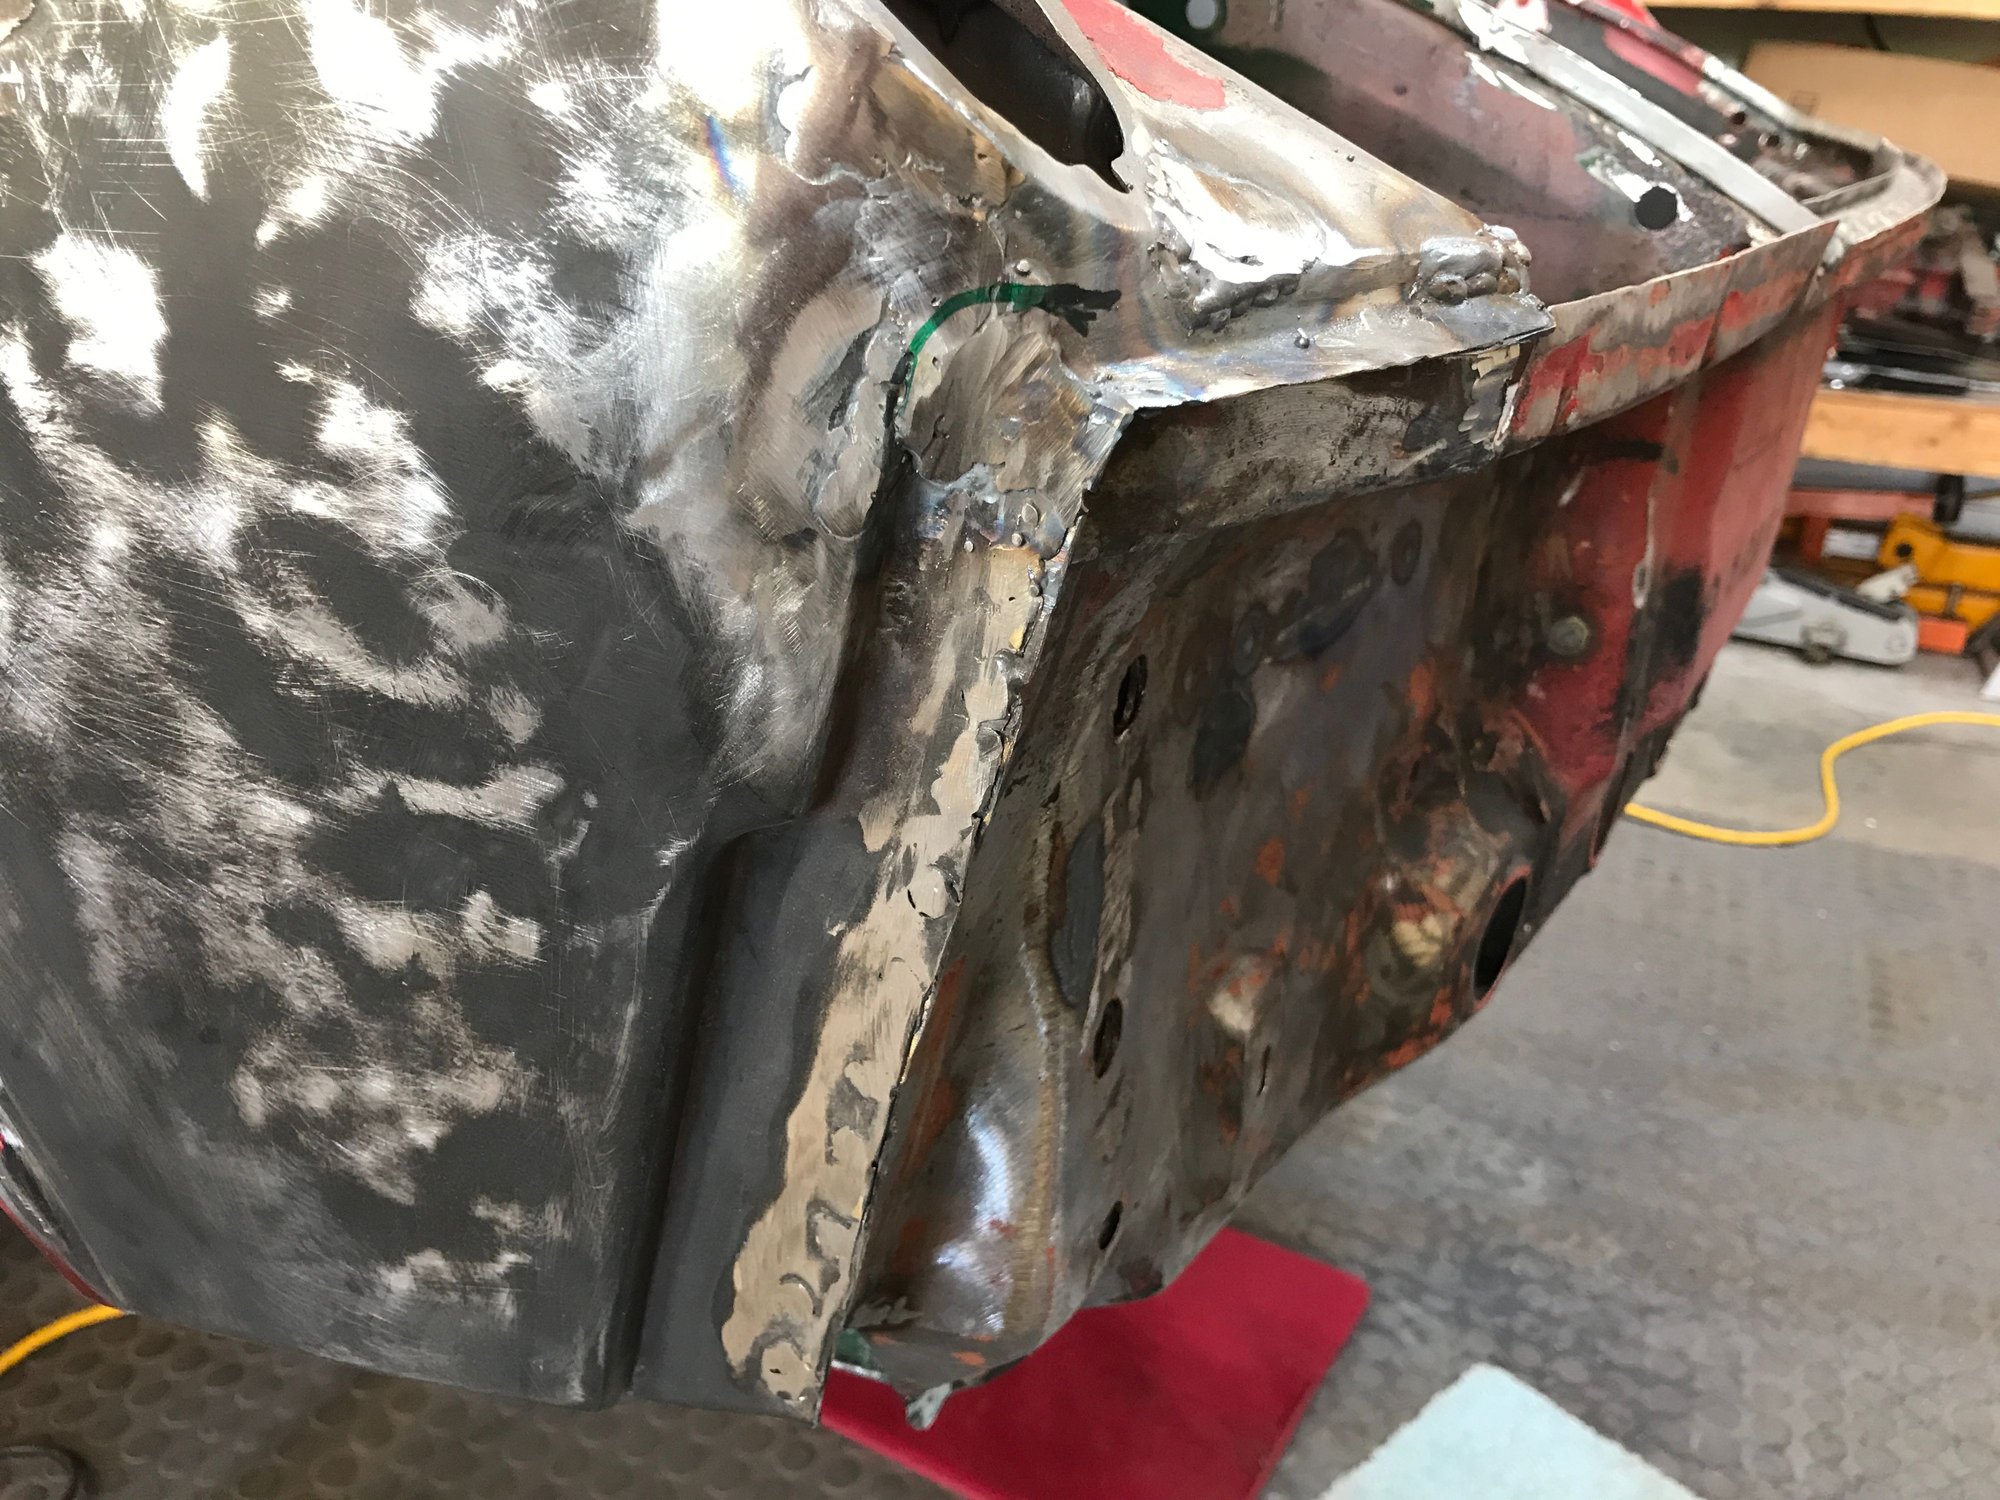
And a close up as the upper recess gets rebuilt.


After 2 more rounds of welding and grinding, the final form is set.


Old 06-23-2020, 11:00 PM
  #426  
bkrantz
Rennlist Member
Thread Starter
 
bkrantz's Avatar
 
Join Date: Oct 2012
Location: SW Colorado
Posts: 6,012
Likes: 0
Received 1,091 Likes on 652 Posts
Default

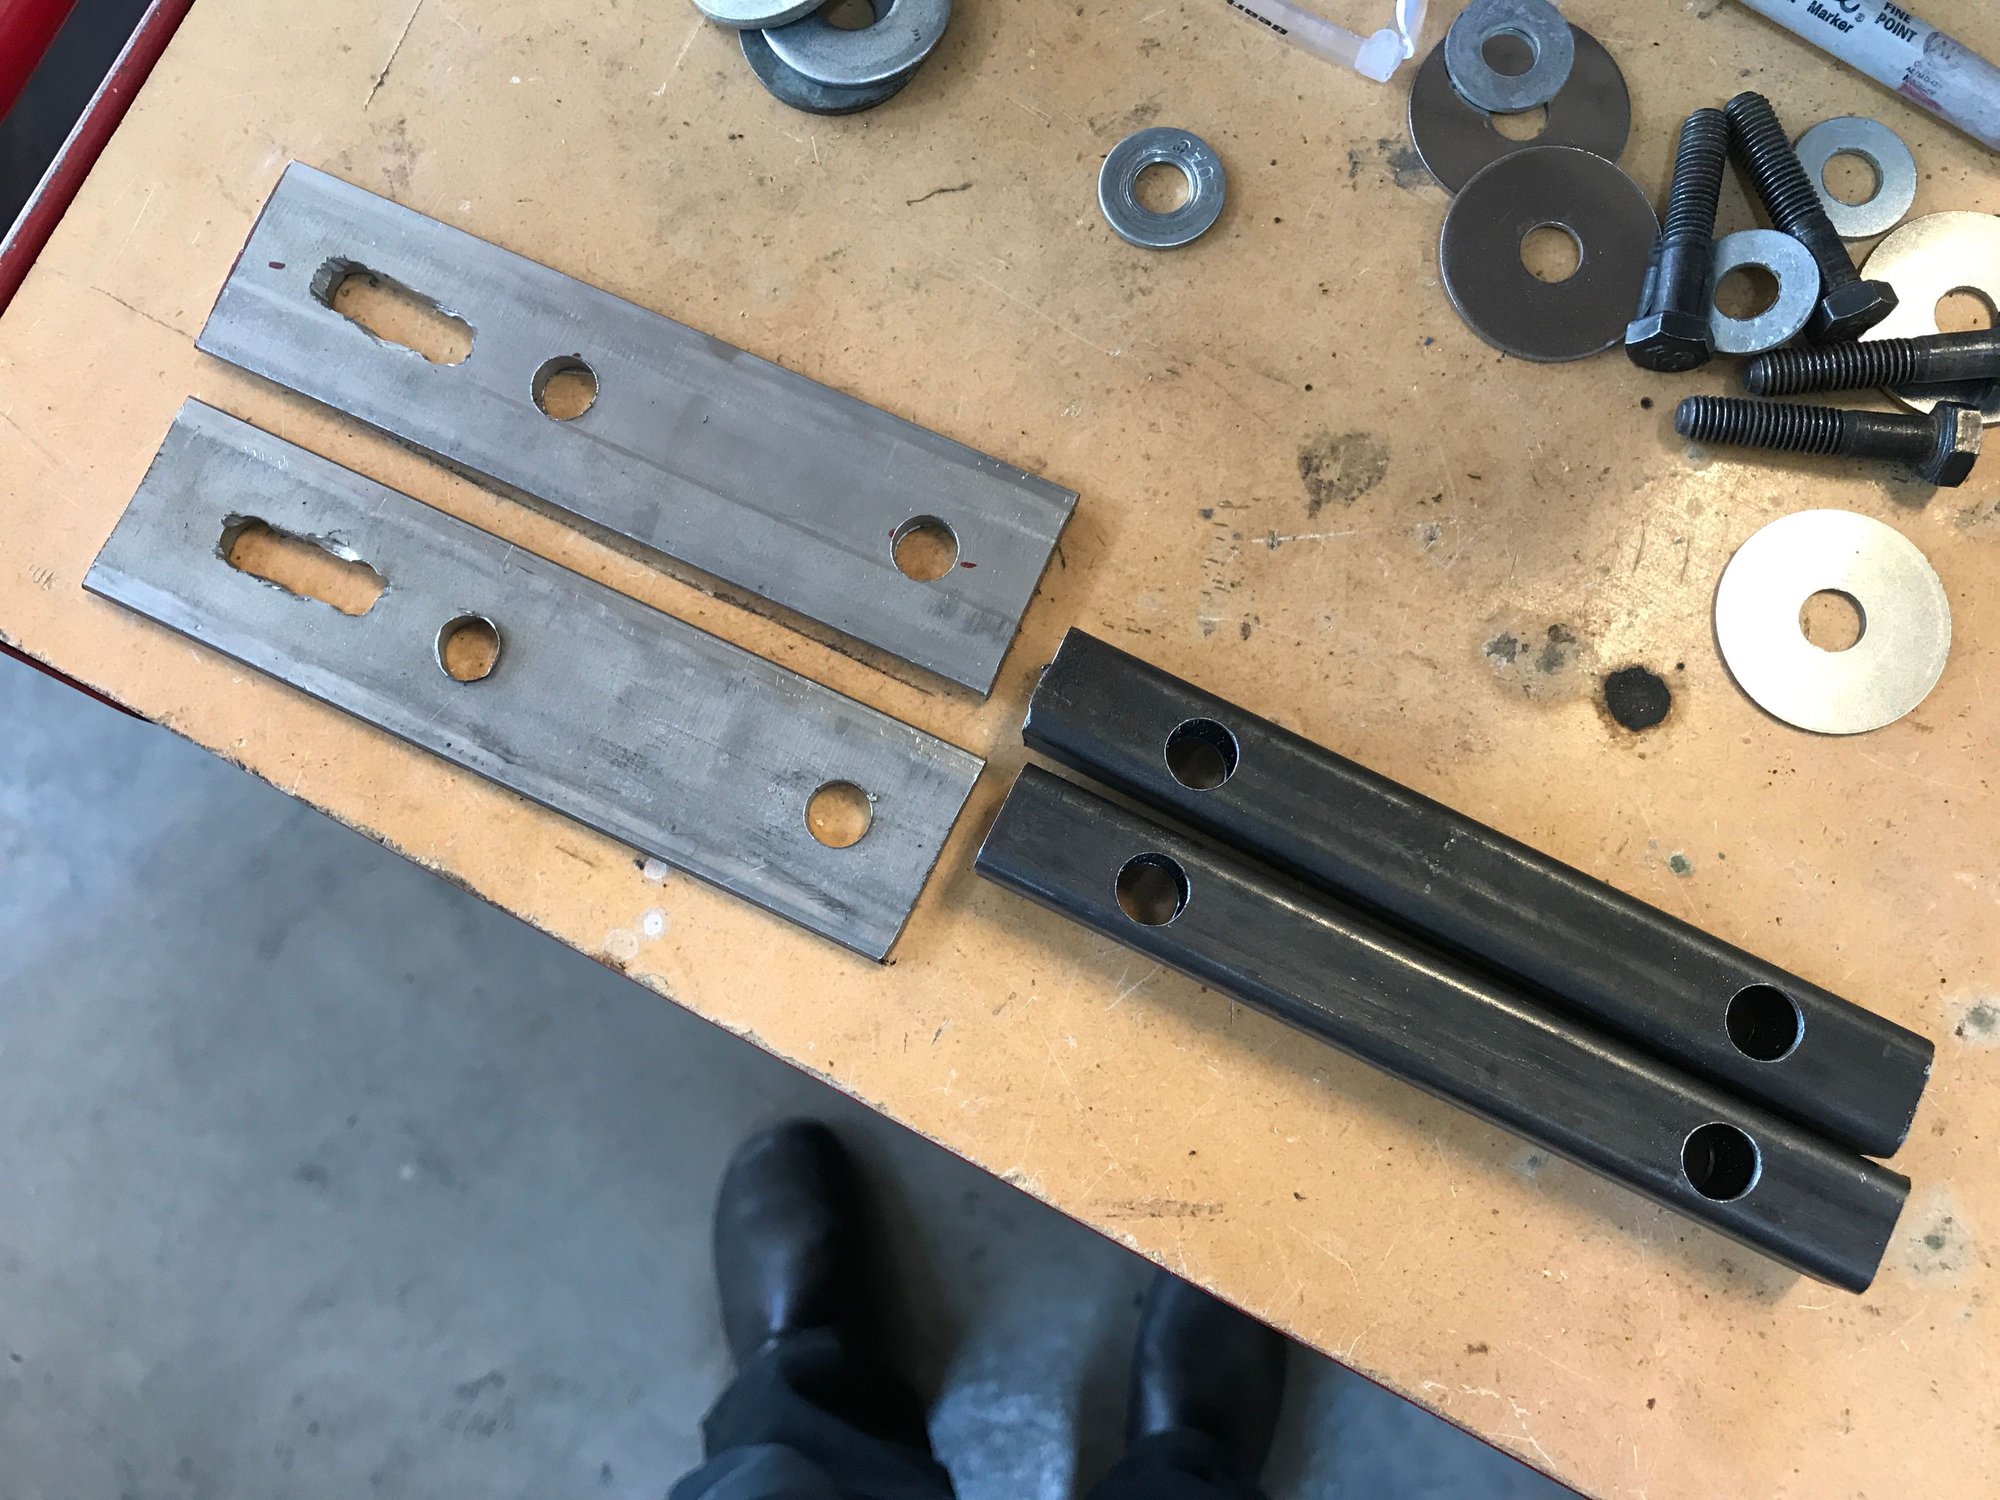
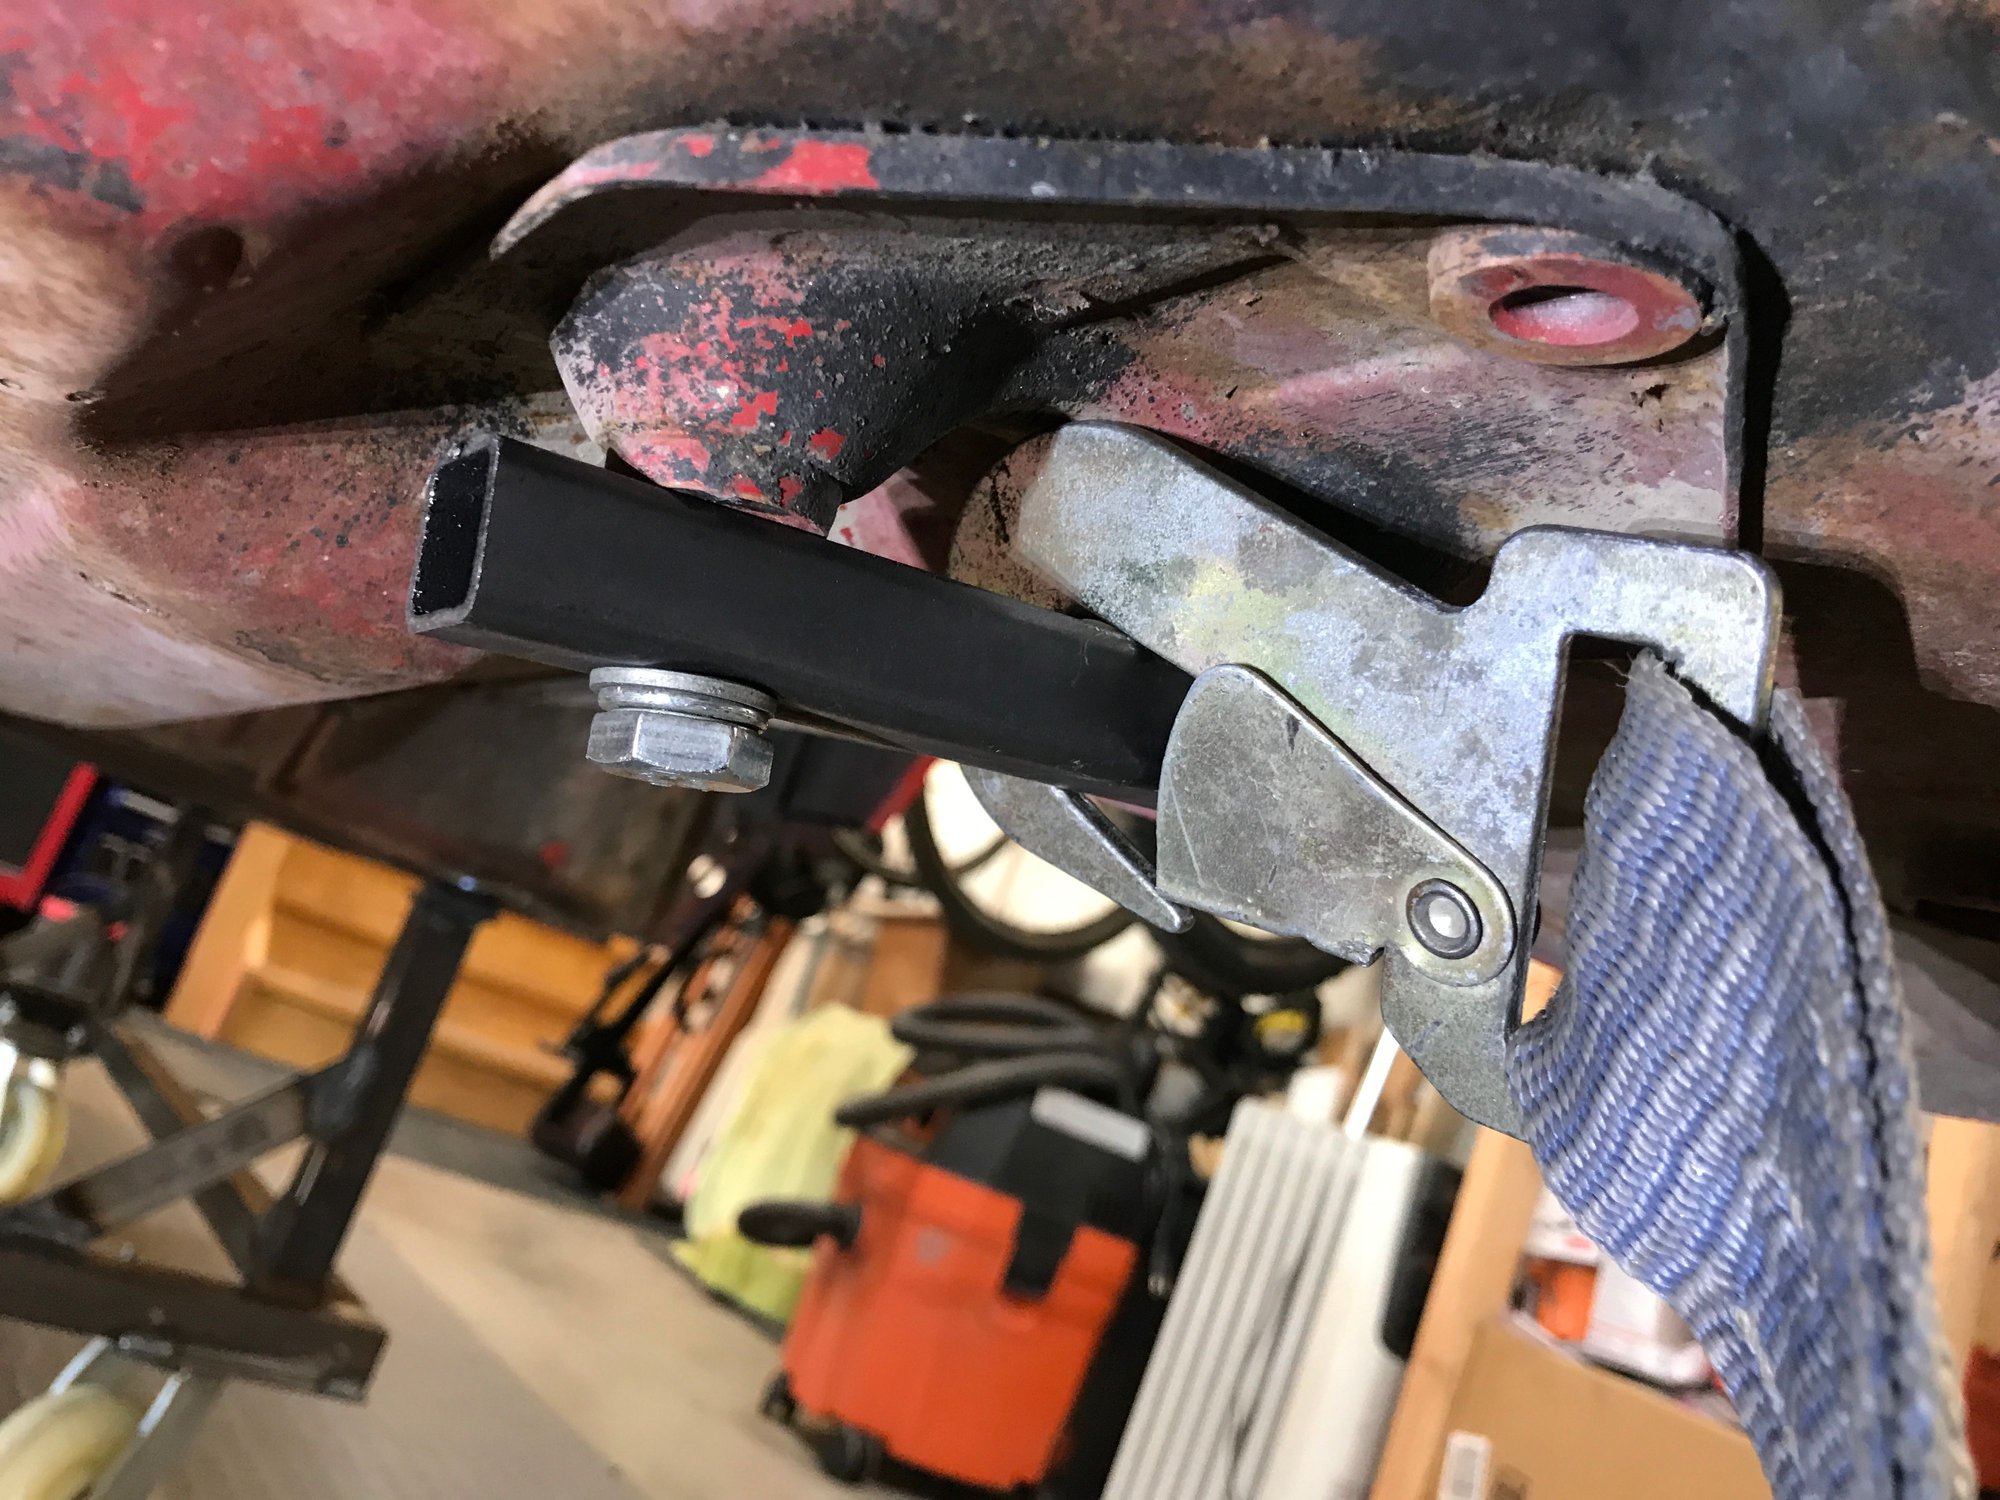
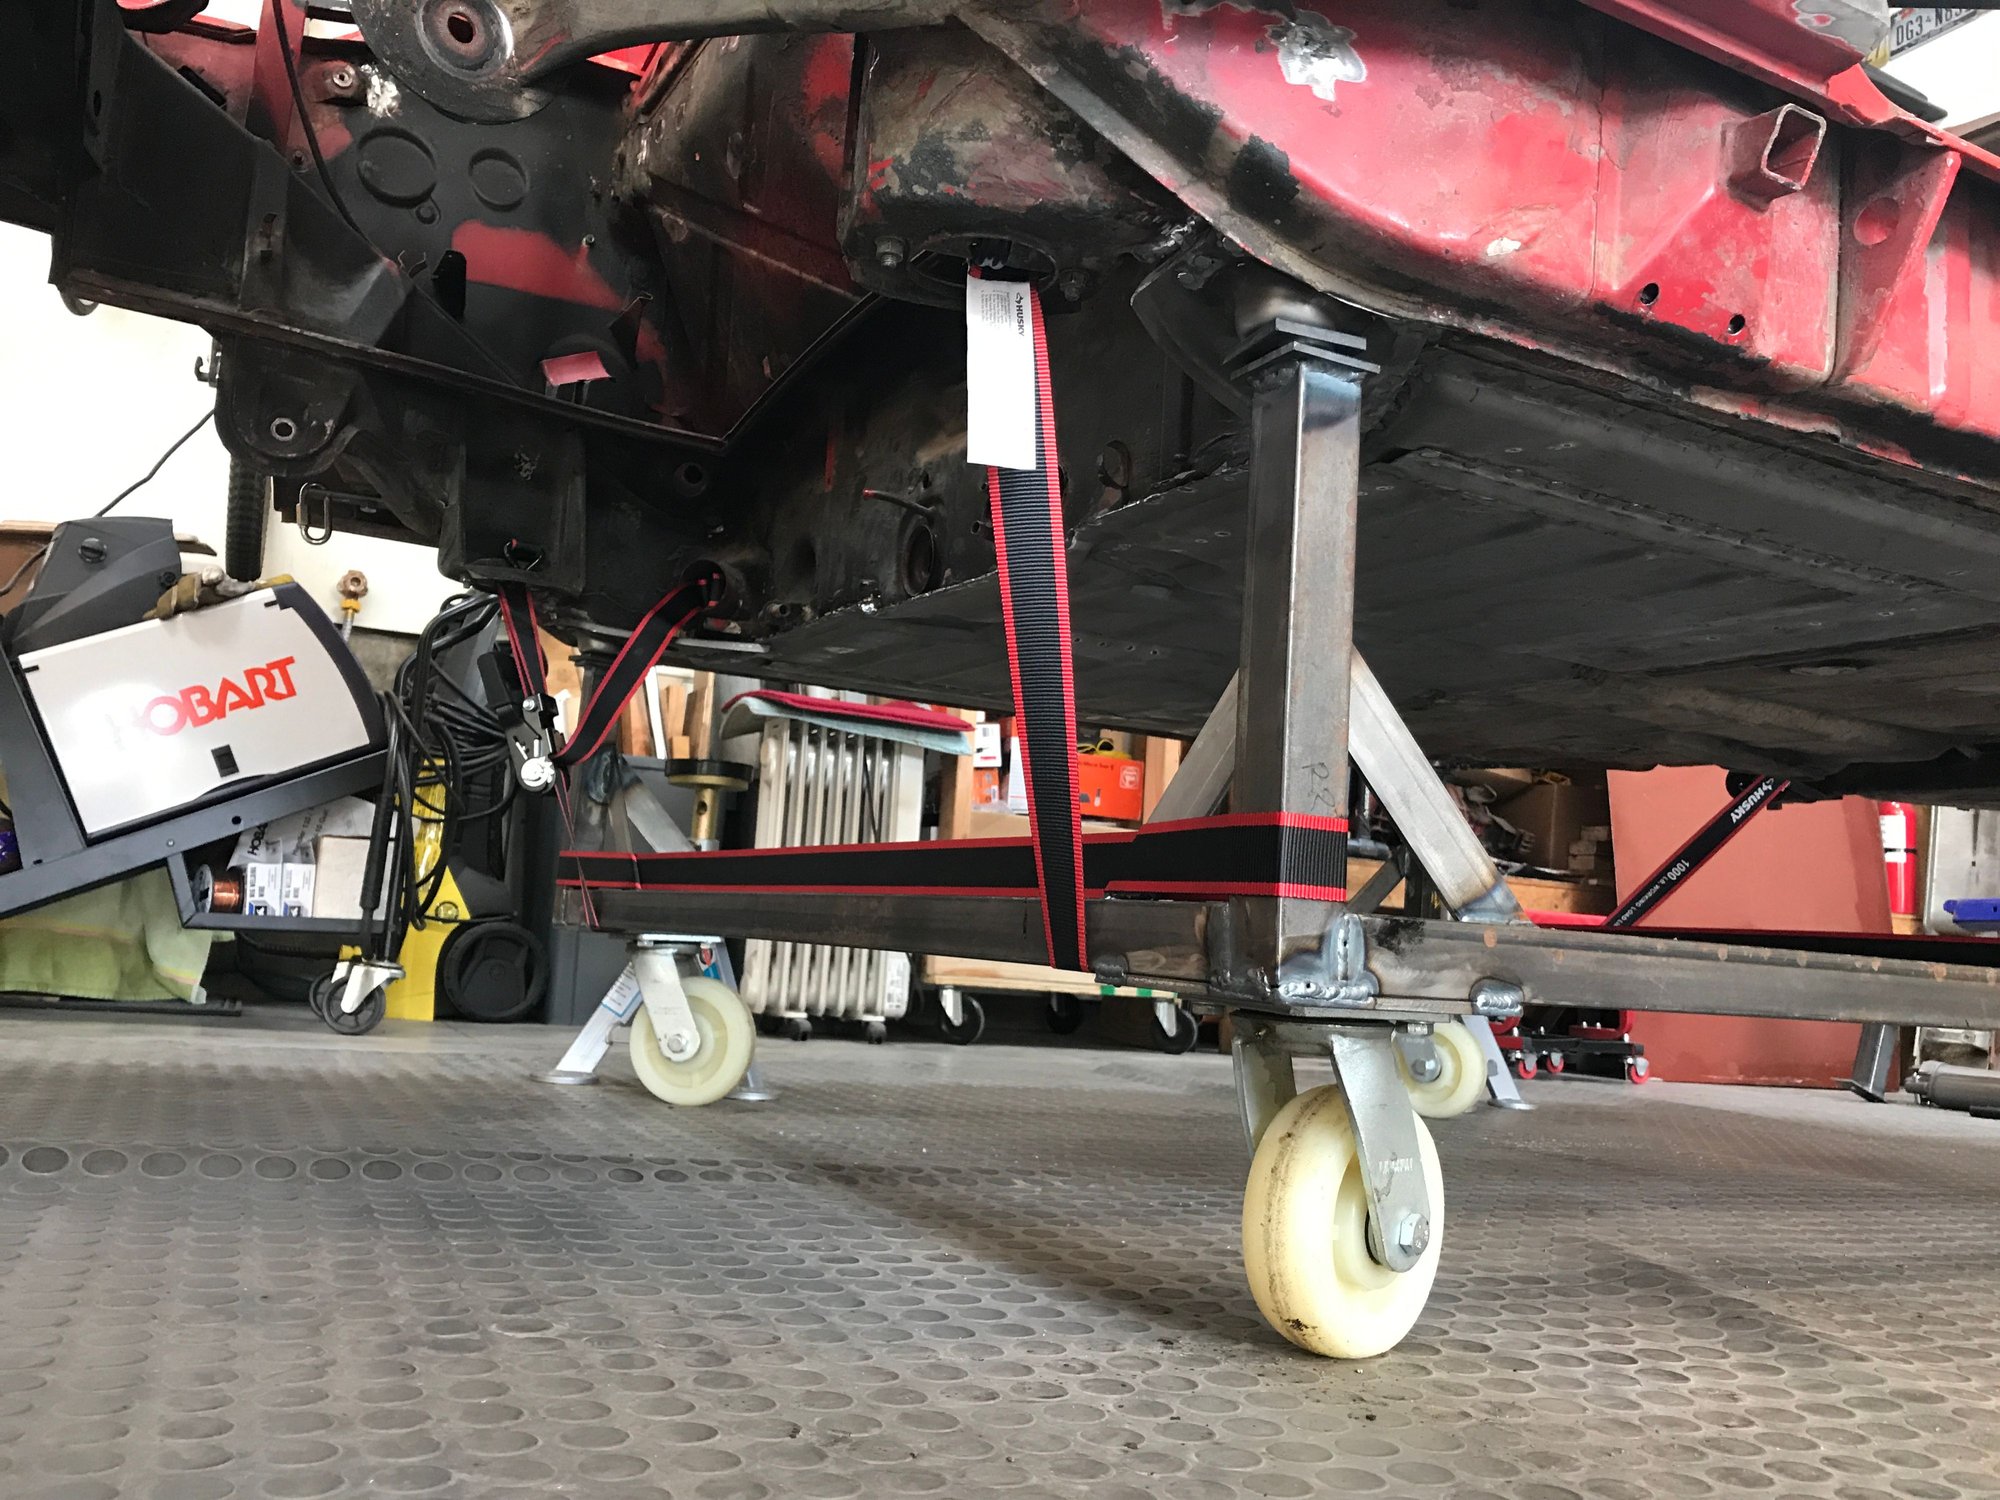
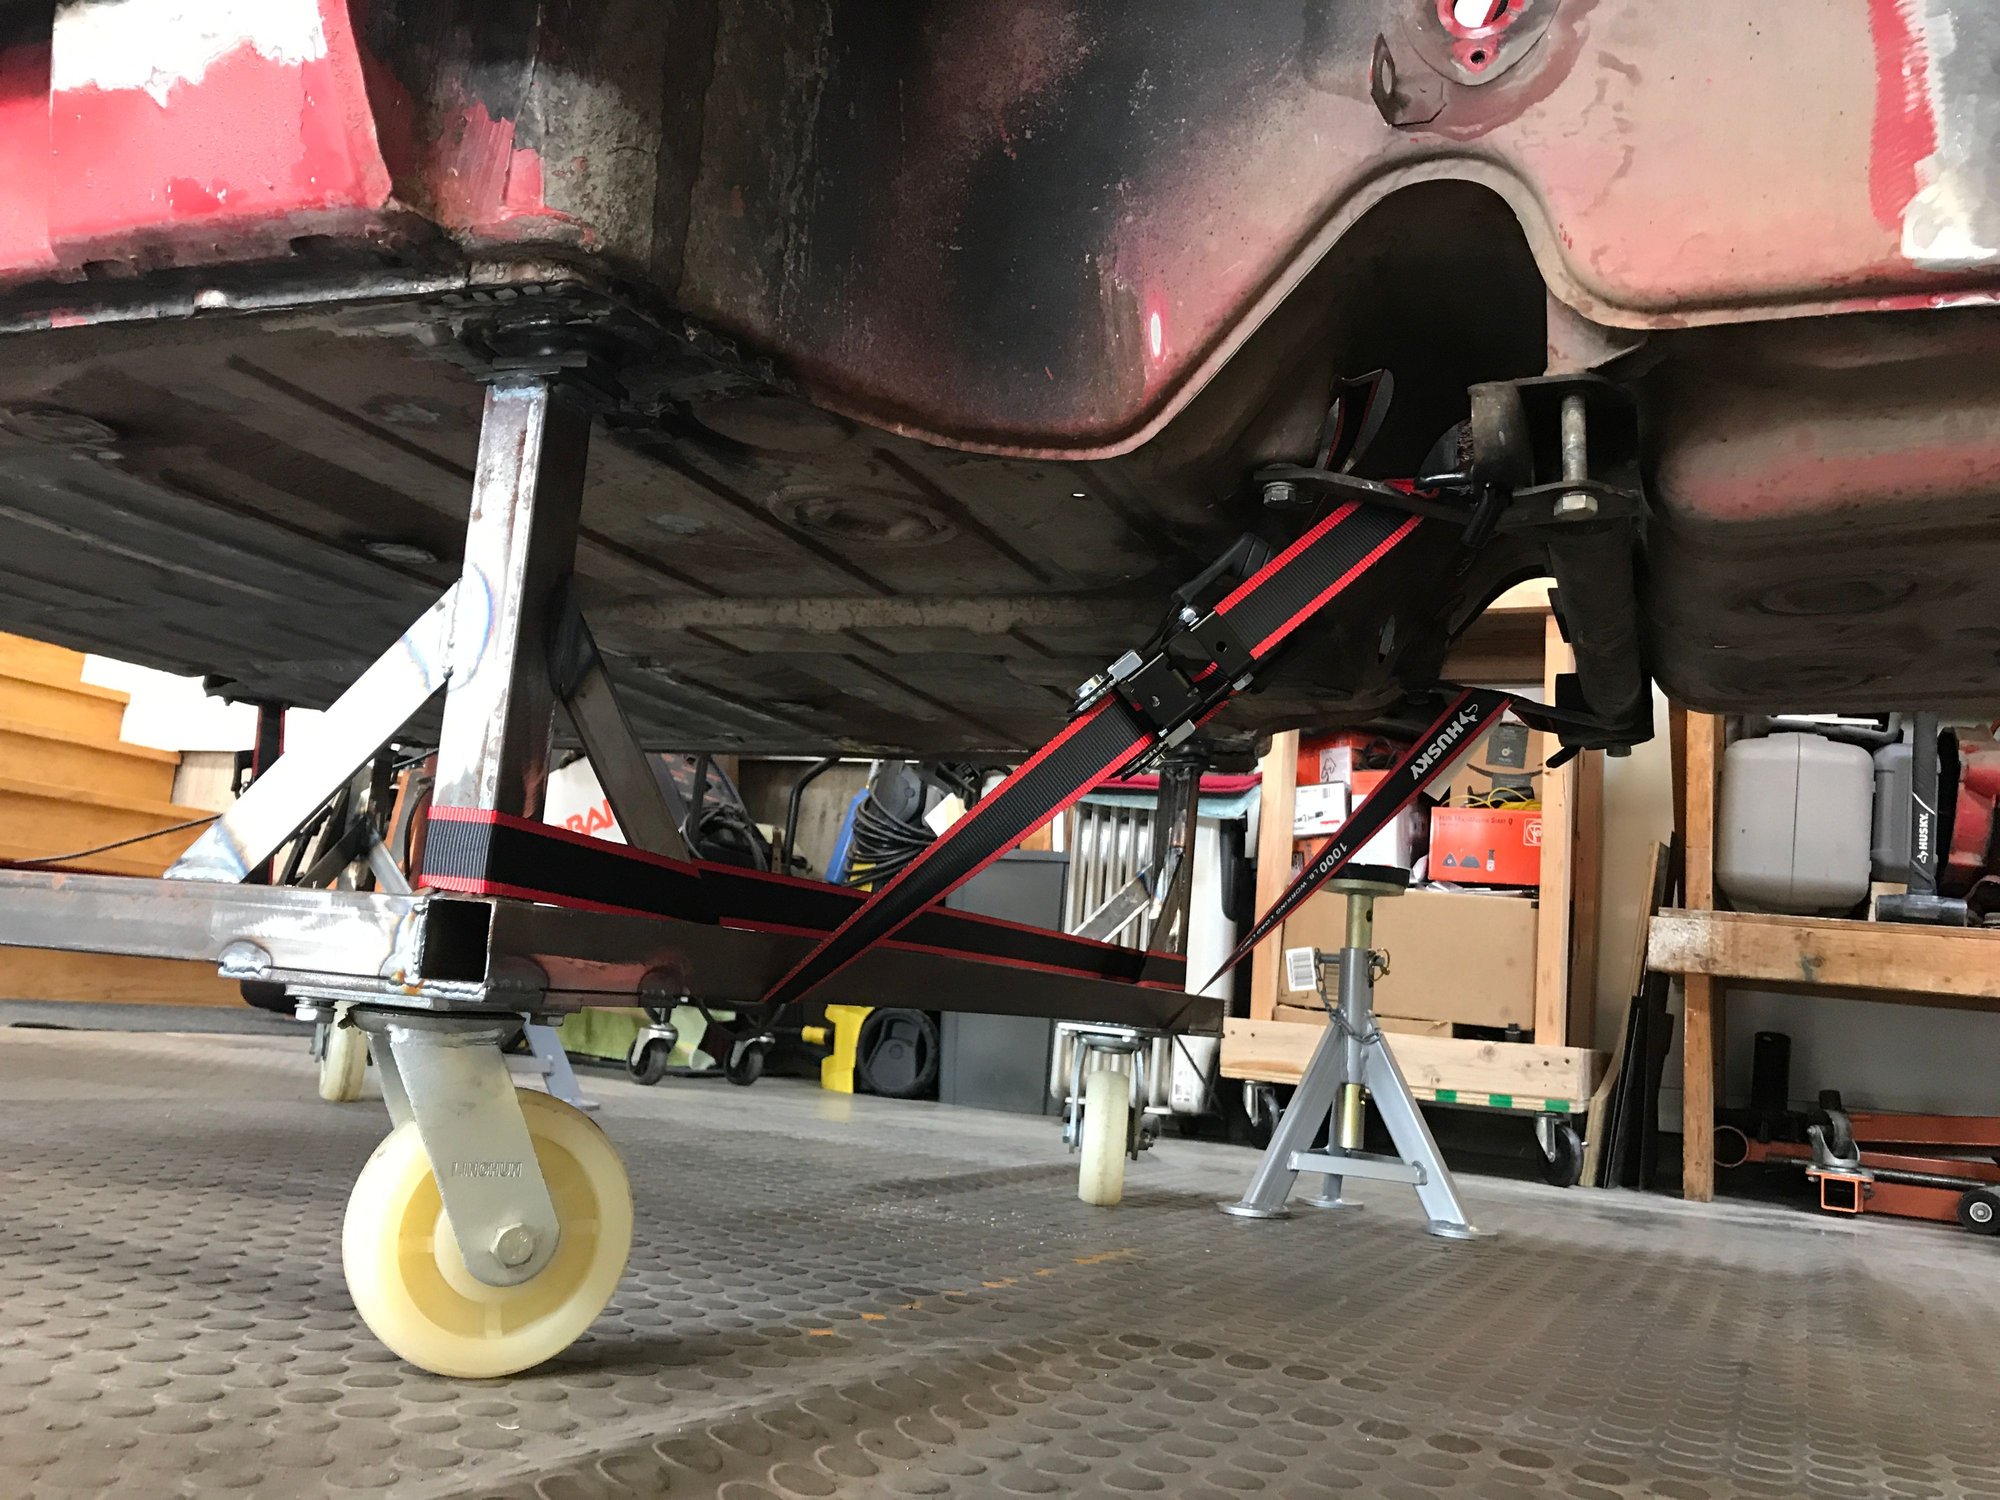
We also started to prepare for transport to the paint shop. I wanted some tie-down points that do not touch paint (looking forward to bringing the car home someday). Here's the solution:


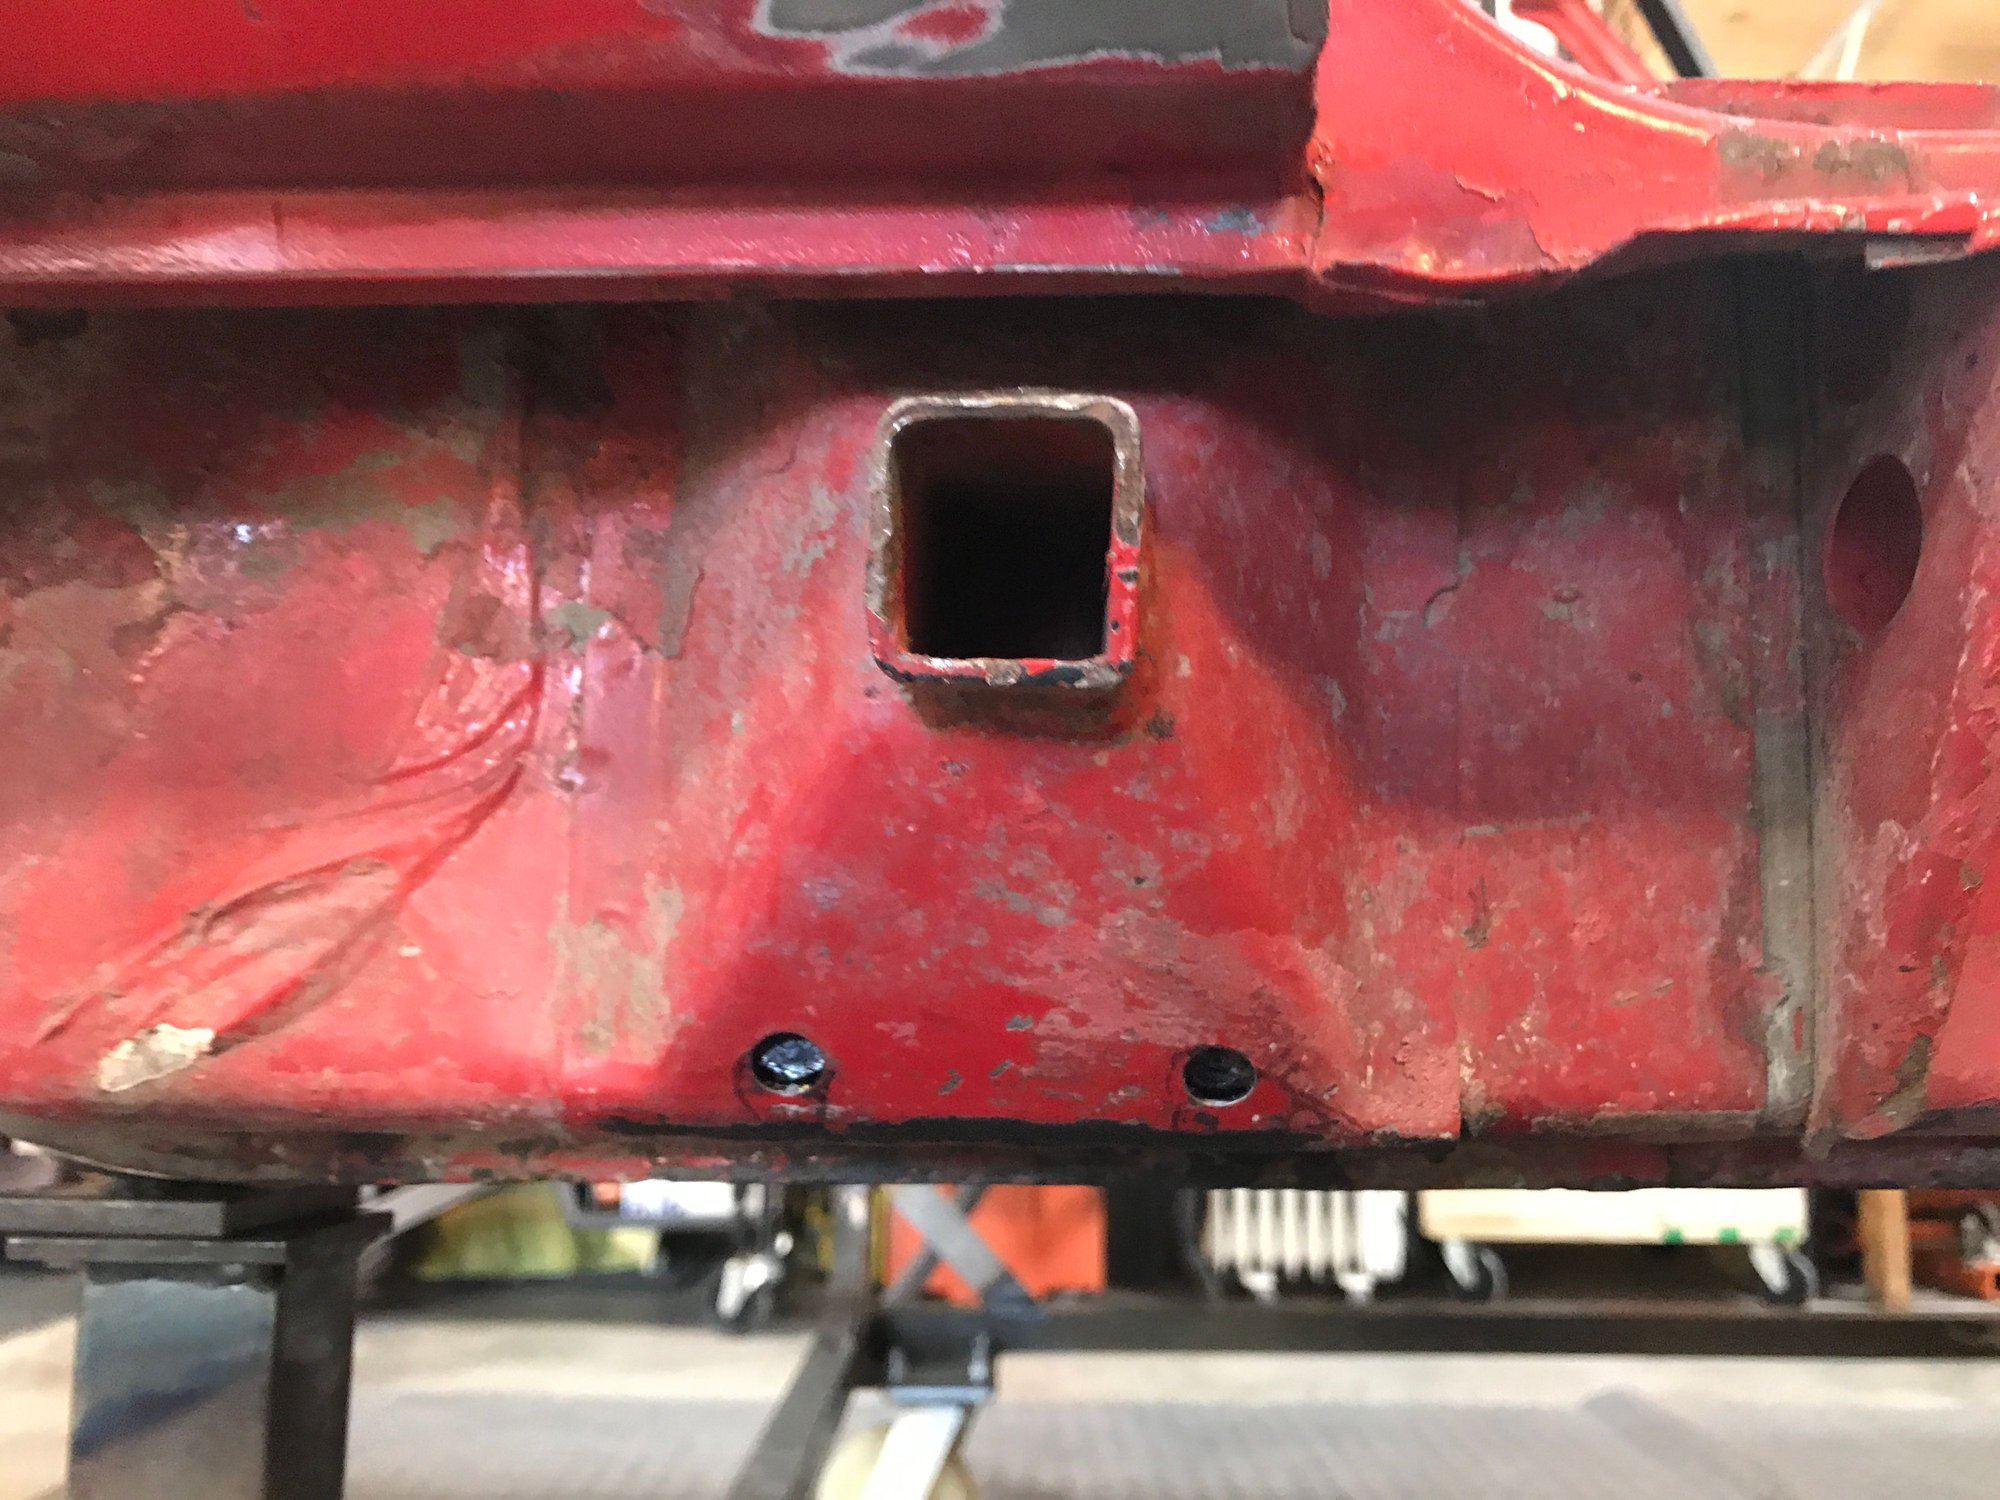
For the front, the square tubes connect across the front torsion bar bolt holes.


Old 06-23-2020, 11:02 PM
  #427  
bkrantz
Rennlist Member
Thread Starter
 
bkrantz's Avatar
 
Join Date: Oct 2012
Location: SW Colorado
Posts: 6,012
Likes: 0
Received 1,091 Likes on 652 Posts
Default

Definitely the final count down.


Old 06-24-2020, 10:17 PM
  #428  
bkrantz
Rennlist Member
Thread Starter
 
bkrantz's Avatar
 
Join Date: Oct 2012
Location: SW Colorado
Posts: 6,012
Likes: 0
Received 1,091 Likes on 652 Posts
Default

With the right bolts, I was able to mount my rear tie-downs. I added a quick link so a strap can attach at a reasonable angle.


Old 06-24-2020, 10:29 PM
  #429  
bkrantz
Rennlist Member
Thread Starter
 
bkrantz's Avatar
 
Join Date: Oct 2012
Location: SW Colorado
Posts: 6,012
Likes: 0
Received 1,091 Likes on 652 Posts
Default

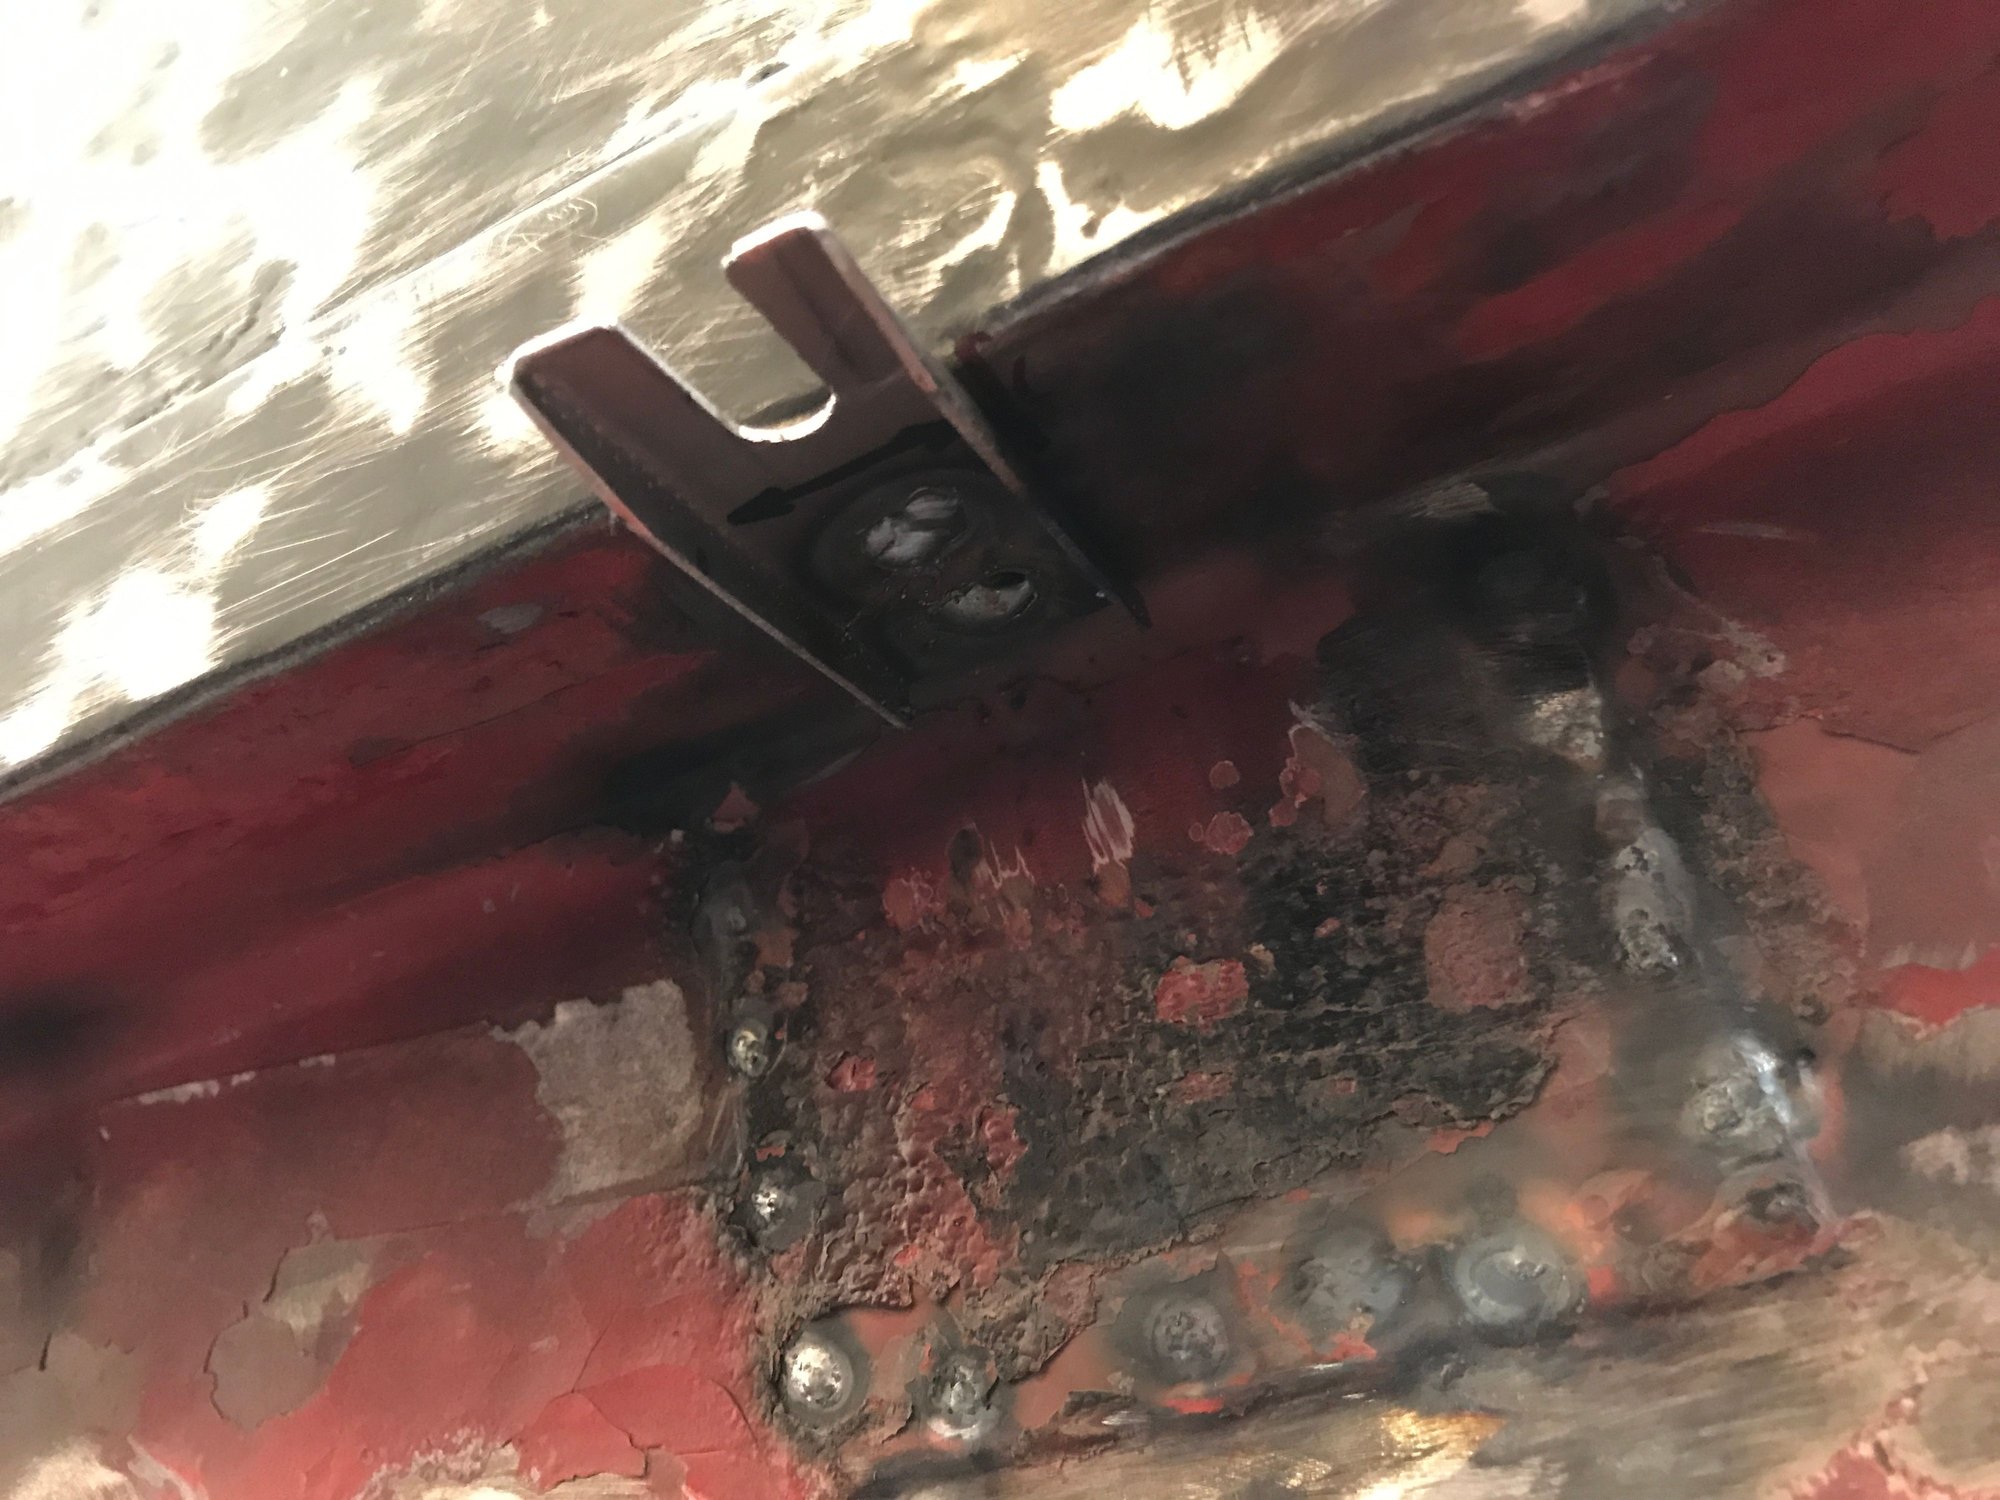
The big task today was targeted rust treatment. I decided to use Corroseal, after comparing results to Osopho on some rusty 914 bits. The Corroseal did a better job in creating a black coating.

With my son's help, we started with the trunk lid rear edge, pouring in about a cup of Corroseal, and then tilting the lid in different directions to get complete coverage inside the rear internal rib. We then propped the lid up to drain and dry.


Next we did both doors, again pouring in some Corroseal and coating the bottom internal seam--hoping it will penetrate and fix any rust.


Last, I injected Corroseal into the jack point covers, including the second drain holes I added.


Old 06-24-2020, 10:33 PM
  #430  
bkrantz
Rennlist Member
Thread Starter
 
bkrantz's Avatar
 
Join Date: Oct 2012
Location: SW Colorado
Posts: 6,012
Likes: 0
Received 1,091 Likes on 652 Posts
Default

That's about everything on the list. The main task for tomorrow is prep for getting the car and dolly on the trailer, scheduled for Friday morning.


Old 06-25-2020, 01:09 AM
  #431  
skl
Official Wednesday AM Red Bull F1 test driver
Rennlist Member
 
skl's Avatar
 
Join Date: Apr 2003
Location: North Scottsdale
Posts: 10,002
Received 953 Likes on 580 Posts
Default

Congrats!! Want to see pix at the paint shop... this has been quite a ride... and the best rides are ahead!
Old 06-25-2020, 10:52 PM
  #432  
bkrantz
Rennlist Member
Thread Starter
 
bkrantz's Avatar
 
Join Date: Oct 2012
Location: SW Colorado
Posts: 6,012
Likes: 0
Received 1,091 Likes on 652 Posts
Default

Just a few photos of the prep for loading. First, I strapped the body to the dolly front and rear.


Then we moved the car over to the garage door side.


And loaded the doors and lids into my Suburban.


Old 06-25-2020, 10:54 PM
  #433  
bkrantz
Rennlist Member
Thread Starter
 
bkrantz's Avatar
 
Join Date: Oct 2012
Location: SW Colorado
Posts: 6,012
Likes: 0
Received 1,091 Likes on 652 Posts
Default

Originally Posted by skl
Congrats!! Want to see pix at the paint shop... this has been quite a ride... and the best rides are ahead!
Will do. Still a bit of work to do, even before I get the body back.
Old 06-26-2020, 05:14 PM
  #434  
Whitezulu
Instructor
 
Whitezulu's Avatar
 
Join Date: Dec 2014
Location: Germany
Posts: 176
Received 15 Likes on 6 Posts
Default

After this incredible work, you must be relieved and anxious to see the paint process coming....
cant stop admiring your work!
Old 06-26-2020, 11:24 PM
  #435  
bkrantz
Rennlist Member
Thread Starter
 
bkrantz's Avatar
 
Join Date: Oct 2012
Location: SW Colorado
Posts: 6,012
Likes: 0
Received 1,091 Likes on 652 Posts
Default

Originally Posted by Whitezulu
After this incredible work, you must be relieved and anxious to see the paint process coming....
cant stop admiring your work!
Thanks. Paint prep and work about to start...


Quick Reply: After a 25 Year Break, 914 Ownership Again


All times are GMT -3. The time now is 09:22 PM.