When you click on links to various merchants on this site and make a purchase, this can result in this site earning a commission. Affiliate programs and affiliations include, but are not limited to, the eBay Partner Network.
this interests me as I was about to pull the trigger
go ahead. I deleted of shame of an user error hahaha. One of the vacuum hoses for the left side valve disconnected on the T-splitter that sits on top of the transmission case. Just plugged it back in and it’s working fine.
Chiming in to say thanks to the previous posters for mentioning and helping with this mod. I just plugged the each of the valves with a couple M6 grub screws. I can’t quite tell a huge difference honestly, but I feel better now knowing the valves are open all the time.
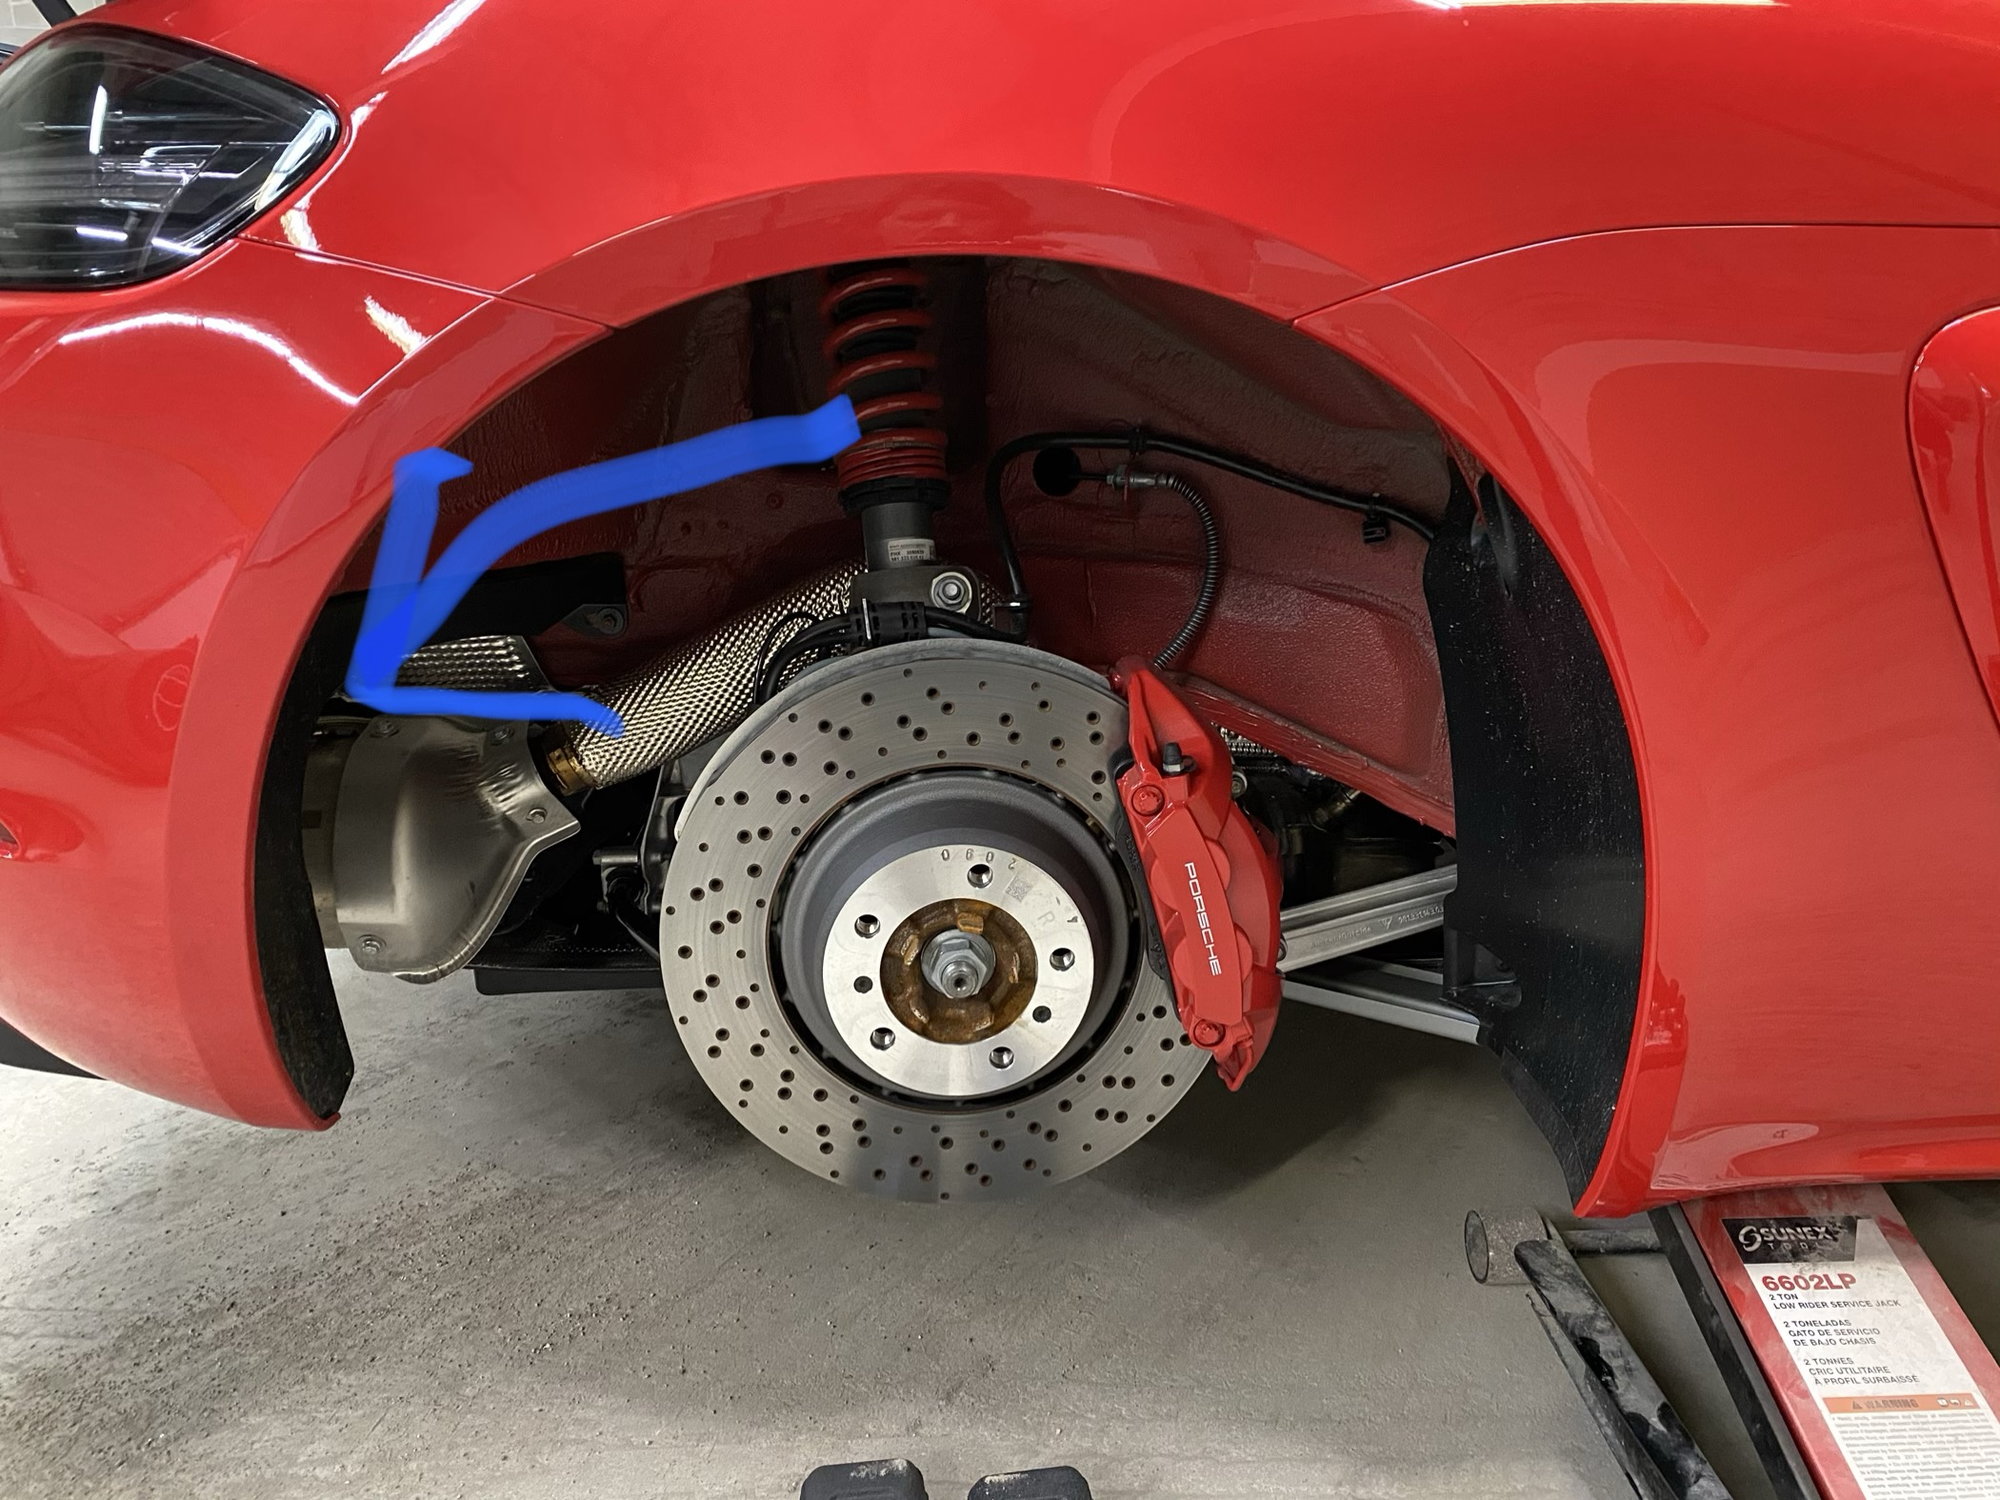
Since this is the very first time I’ve “worked” on a Porsche it was a little a scary to just start pulling and plugging stuff. If anyone else comes across this thread and hasn’t worked on a P-car before either I thought I’d attach some extra pictures to show exactly where things were located as it wasn’t super clear to a new person like me:
I took off the wheels to do this. It’s not required, but since I didn’t know where or what I was looking for I thought it would help. I only took an additional 10 minutes to pop the tires off and on so I’d still recommend doing so for simplicity sake. Blue arrow indicates where to look for the vacuum lines:
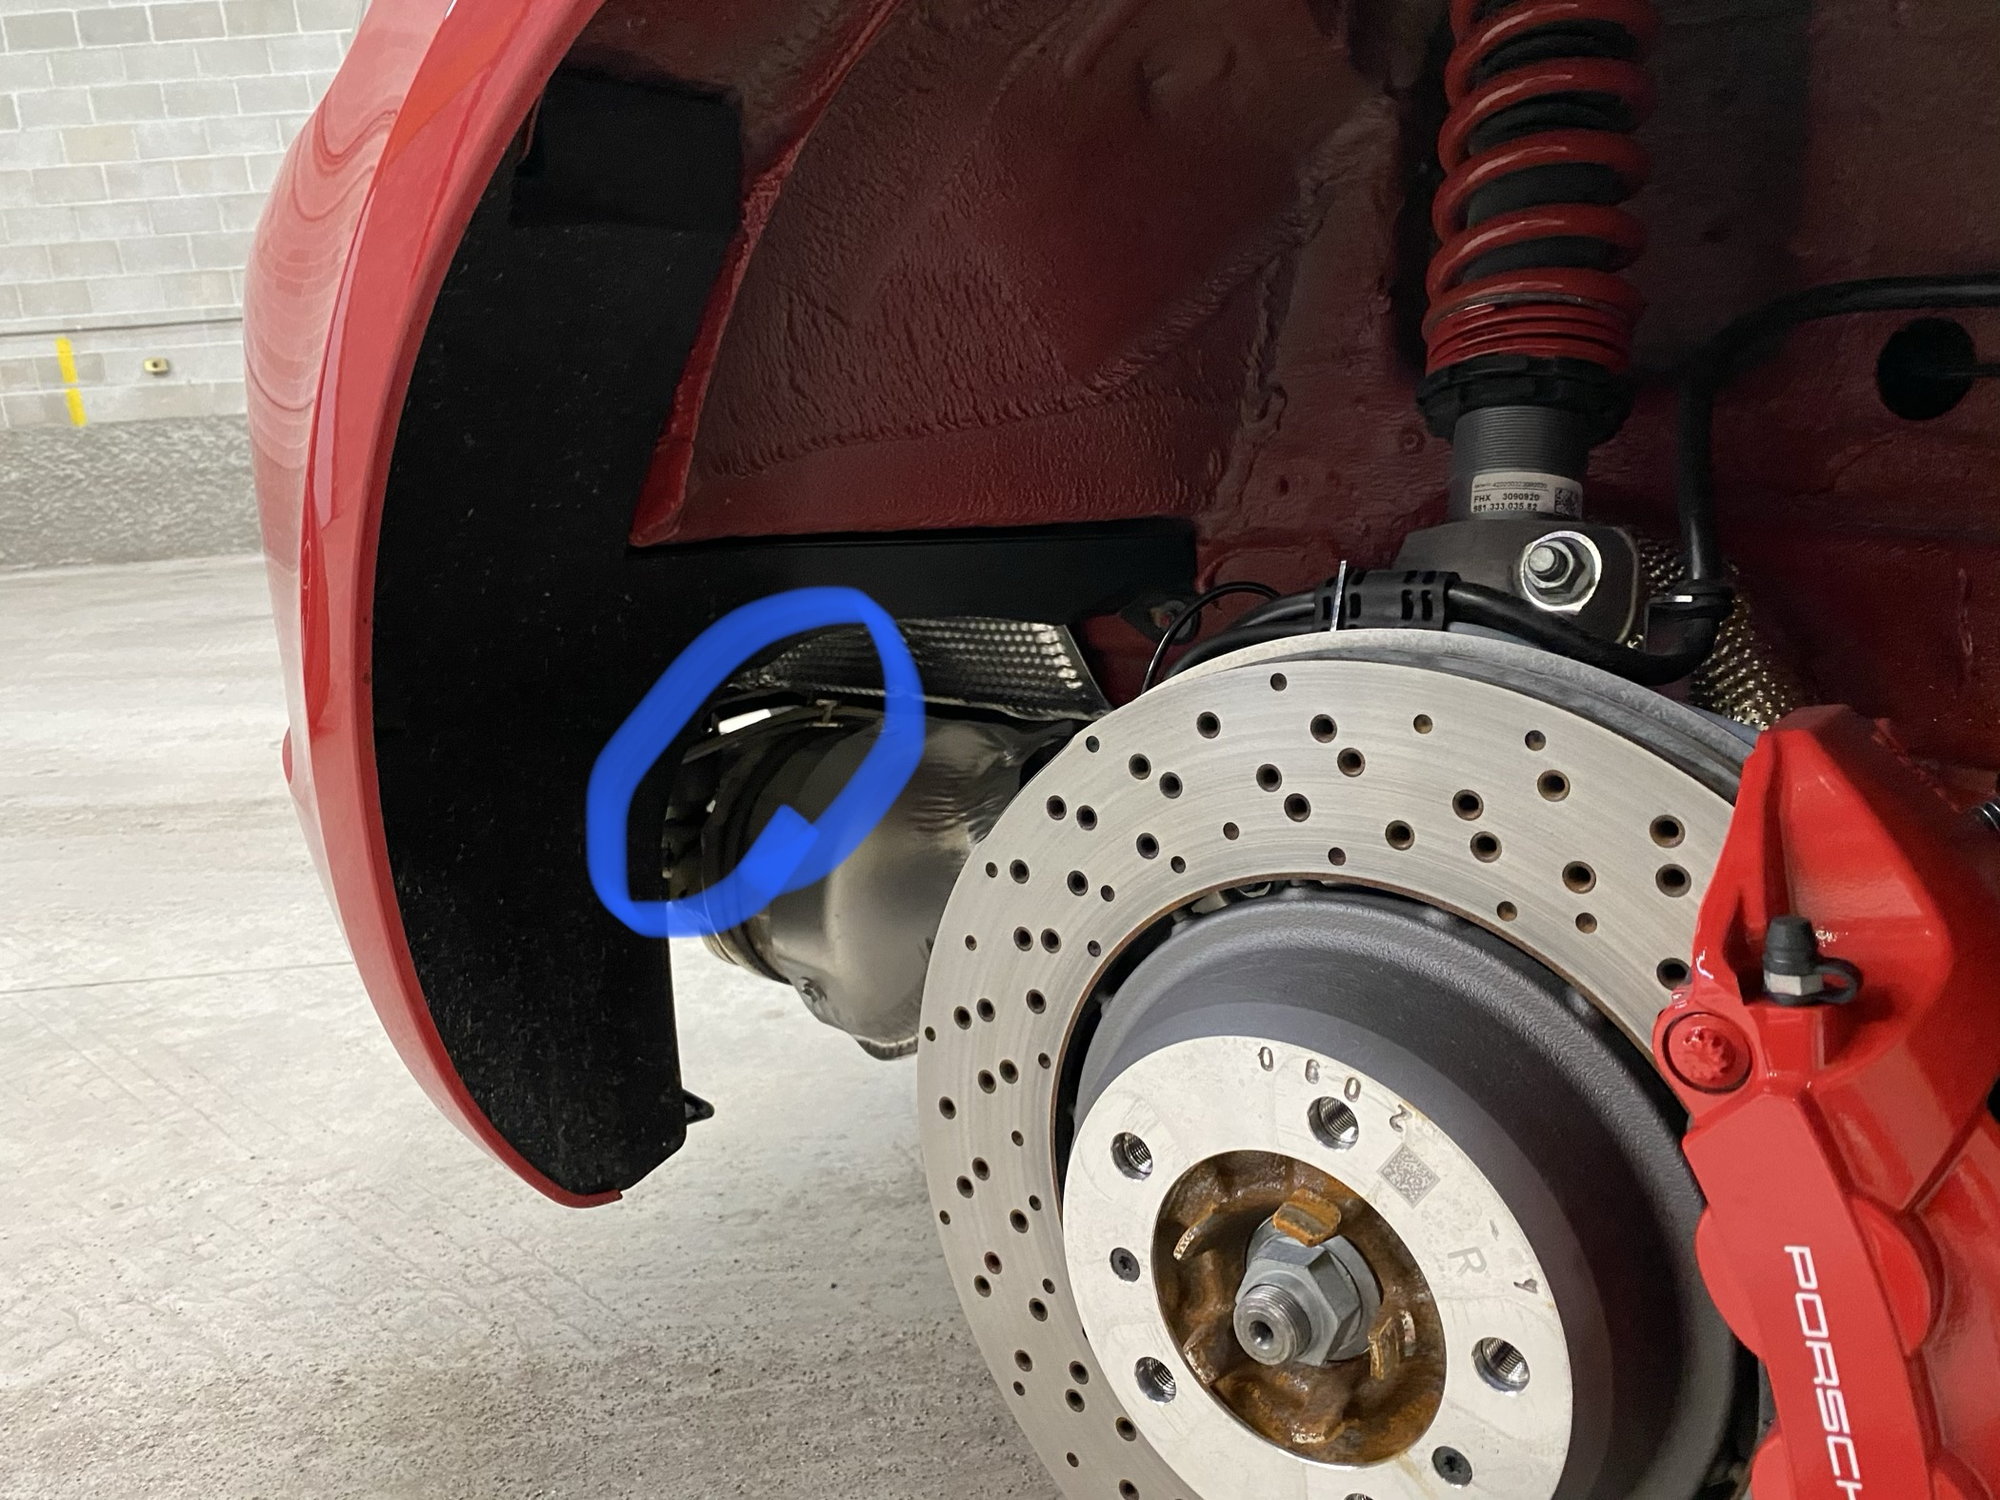
An alternate closer view with the area circled:
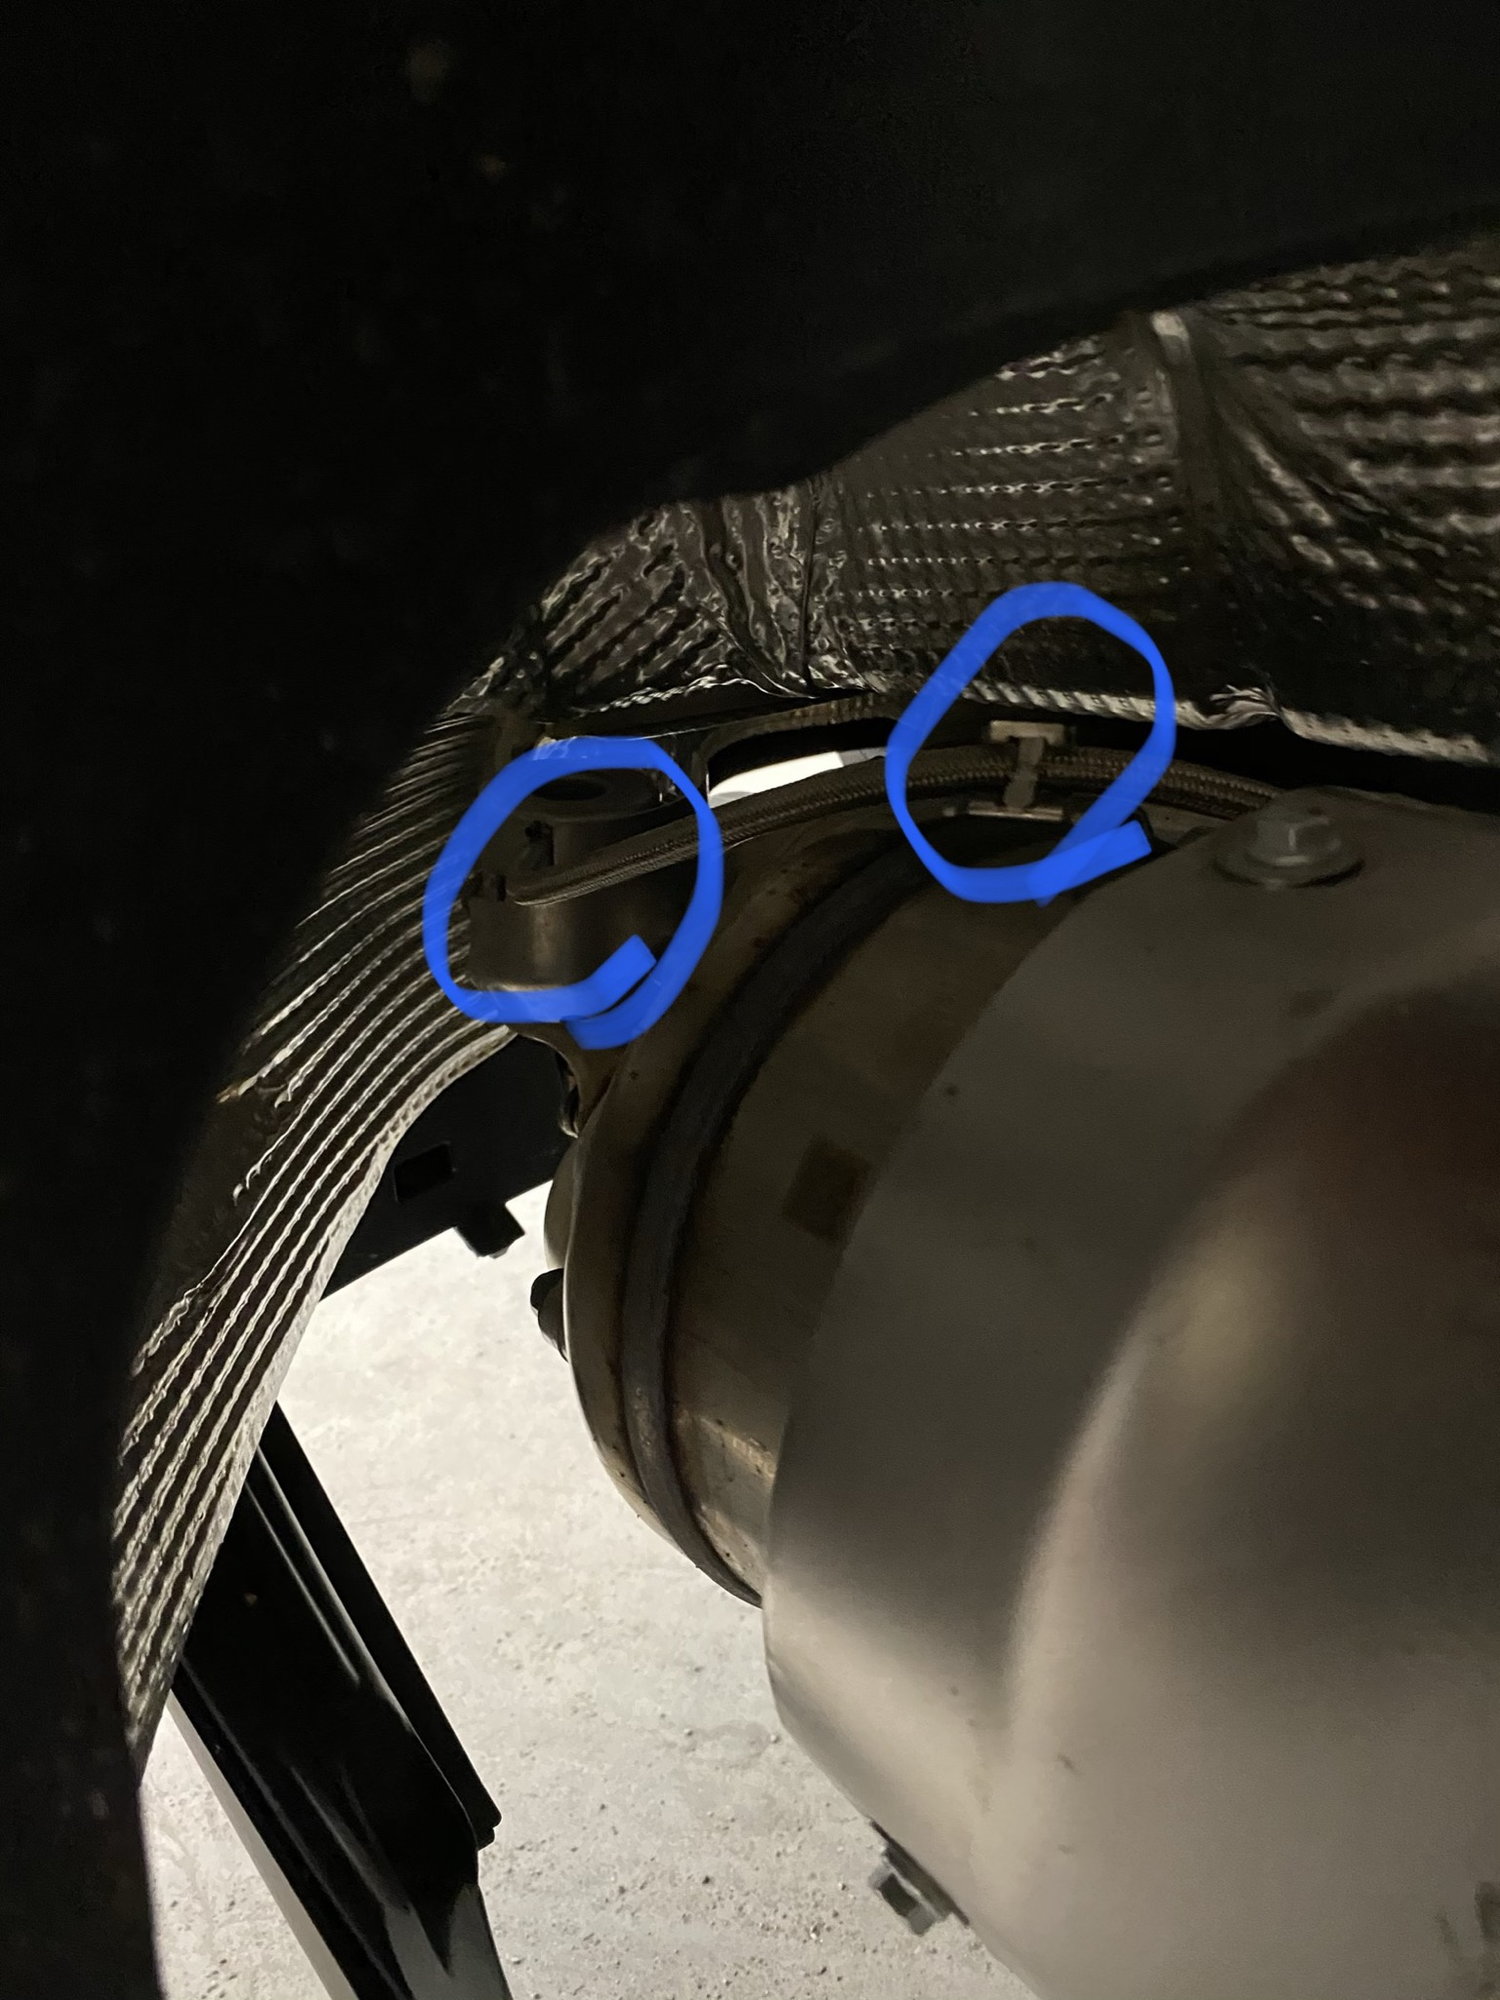
Last but not least a close up of everything. Left circle is where you pull the vacuum lines off the exhaust valves, plug with a screw, then put back on. Right is the retaining clip you can undo in order to free more of the vacuum
line to work with.
Guys, I wired strapped the actuator arms to the open position. It takes 1 min per side. Far far easier.
Open is the default position with the engine off.
I used some 1.6mm enameled copper wire. But I see no reason why you could not use say 1mm steel wire.
To remove the mod cut the wire off which takes 10 seconds.
I can get a pic if anyone wants or does not understand...
Darn too late for me, but I’m curious how you did it. Like I mentioned above, I’m a total rookie to Porsche’s so a pic would be very helpful!
Guys, I wired strapped the actuator arms to the open position. It takes 1 min per side. Far far easier.
Open is the default position with the engine off.
I used some 1.6mm enameled copper wire. But I see no reason why you could not use say 1mm steel wire.
To remove the mod cut the wire off which takes 10 seconds.
I can get a pic if anyone wants or does not understand...
Great idea! Does the actuator get hot? a good old tie wrap would melt? I have some SS ties that could work. Too late for me since I grubbed the lines last week, but a friend is waiting for a Spyder (delivery friday) so he might want to do it this way!
Guys, I wired strapped the actuator arms to the open position. It takes 1 min per side. Far far easier.
Open is the default position with the engine off.
I used some 1.6mm enameled copper wire. But I see no reason why you could not use say 1mm steel wire.
To remove the mod cut the wire off which takes 10 seconds.
I can get a pic if anyone wants or does not understand...
Not familiar with the schematics of the system, but wouldn't this put strain/wear on whatever is trying to move the actuator arms in the closed position?
Not familiar with the schematics of the system, but wouldn't this put strain/wear on whatever is trying to move the actuator arms in the closed position?
No, the actuator is subject to the same vacc pressure regardless of its end position.
I did the “Metalone Mod“ with the M6 screws last evening (thanks !). Took about 10 minutes total... VERY easy.
As per metalone, here is process:
1-Lift to make your life easier. Could be done without.
2-Pull hard on the vacuum lines to unplug it (no tools required, just pull hard with hands and dont be afraid)
3-screw the M6 screws in the lines, deep enough in the line to give room to replug it (nipples are about 1/2 inch long)
4-Replug
5-Enjoy
Please report back with your impressions about the mod.
I did the grub screw mod to keep the valves open and took her out for a drive. It's a subtle difference but there is at least a small voice from the exhaust now below 5K. Still a bit too quiet for me, Soul race exhaust is next to try.
The SOUL valve controller should sound basically equivalent to the screw mod or wiring the valve to open ? (thanks @GAZZ )
The remote just allows you to control the open/close function instead of fixing it to open.
Stuck in open with the OEM exhaust is no issue as its not loud. But wanted manual control for a loud aftermarket system.
I got the Cargraphics one, but it failed. So now I have a new one to install later this week. At least their support is very good.

 08-20-2020, 04:23 PM