When you click on links to various merchants on this site and make a purchase, this can result in this site earning a commission. Affiliate programs and affiliations include, but are not limited to, the eBay Partner Network.
If by top, you mean bottom, then yes. You use a filter tool from below to remove the canister, change the filter insert and reinstall. It is messy, so the pan idea is a really good one.
LoL top/bottom .... Can you drill into or pierce the canister while it's still in situ to allow it to empty first before you unscrew it? Works well on b!$tch filter in 993.
LoL top/bottom .... Can you drill into or pierce the canister while it's still in situ to allow it to empty first before you unscrew it? Works well on b!$tch filter in 993.
I suppose you could, but then you'd have to replace the reusable plastic filter housing. Better to get the correct wrench for removal and a big drip pan.
LoL top/bottom .... Can you drill into or pierce the canister while it's still in situ to allow it to empty first before you unscrew it? Works well on b!$tch filter in 993.
You can if (1) you have a long enough drill bit and (2) are willing to buy a new reusable plastic canister. I.e., the actual filter is an insert.
If you are buying filters from a dealer, it is actually cheaper to buy the kit with the canister, filter, and o-ring (PN 9A110702400) than the filter and o-ring separately.
I changed my oil yesterday, and drilling a hole in the bottom of the canister worked GREAT. I started with a 3/16 hole, but had to open it up to 5/16 in order to overcome internal suction. I managed to get only one drop of oil on a frame member...
Great! Did you need an usually long drill bit or is access pretty easy? Should one aim to pierce any particular part of the plastic canister (i.e. is there a way to damage anything if you aim wrong)?
Take filter housing off slowly. Use rubber gloves to protect your hands from the hot oil. All you'll feel is warmth through the gloves. Quite pleasant actually,especially if it's cold out.
It will drip...it might splash a bit...it's an oil change not a high precision timepiece assembly.
Once done use a spray can of brake clean. Spray liberally where oil has come into contact with frame or suspension components. Brake clean completely disintegrates oil. It will leave the surface nice and clean...and most importantly not oily. Wipe with a rag if you want to be OCD.
Done.
Drill...housing...etc....gee...extreme complication for an easy task.
I haven't gotten the car up on a lift yet so I'm having a hard time understanding what the major issue with the filter housing is?
I take it there is a cross member or suspension component that blocks direct access to the canister from below? So the canister has to be unscrewed, then tilted and maneuvered around before you can get it completely out from under the car. While doing this, oil in the canister will be spilling out all over the place.
I've done several oil changes on the 987.1 Cayman S and that filter location was a straight shot from the bottom.
Great! Did you need an usually long drill bit or is access pretty easy? Should one aim to pierce any particular part of the plastic canister (i.e. is there a way to damage anything if you aim wrong)?
Access is pretty easy. I used a standard length drill bit and my Makita. I drilled the hole about 2/3 of the way from the center of the canister. I believe there is bypass valve in the center bottom of the canister, which I tried to avoid. That said, I don't think you would damage anything if you hit it since it will be replaced with the new canister. I was more worried about drilling the hole in a place that wouldn't allow the oil to flow freely. I suggest looking at the inside of the new canister before drilling the hole just to see the layout.
It took me about 10 seconds to drill the hole. Even thought the canister is almost vertical and can be clearly accessed, it would have taken MUCH longer to clean up all of the oil that is captured above the canister and that is released when you unscrew it without draining it first.
I've been changing my own oil for 30+ years, and I will definitely use the same process next time. It was very clean and easy.
I finally completed my oil change this weekend at 1200 miles. I used the drill method described in this thread and it worked great. I almost succeeded in a mess free change except when I was removing the filter and housing, the housing came off but the filter was not coming off easily and I did not want to force it. I removed the housing first (leaving the element in place) and that resulted in a few drips of oil hitting the cross member. The filter did come right off when I grabbed it directly. Clean-up was still very easy and much better than the inevitable drenching that would have occurred. I am confident that I can do it with no mess next time.
A few takeaways:
1. The 37 ft-lb torque for the drain plug is a lot. It felt wrong but all went well. I re-used the plug but have a spare if I ever need it.
2. The old oil takes forever to drain out. A LOT of oil comes out in the beginning at a very high rate but then it continues in a slow stream for what seems like forever. Leave a lot of time for this step and maybe go off and do another chore to kill time.
3. The Porsche oil level measurement process is a PITA. I am used to the BMW system which was so much quicker and easier. Of course a dipstick would still be preferred... I ended up using 7.5L and it showed perfectly filled.
Here are some photos:
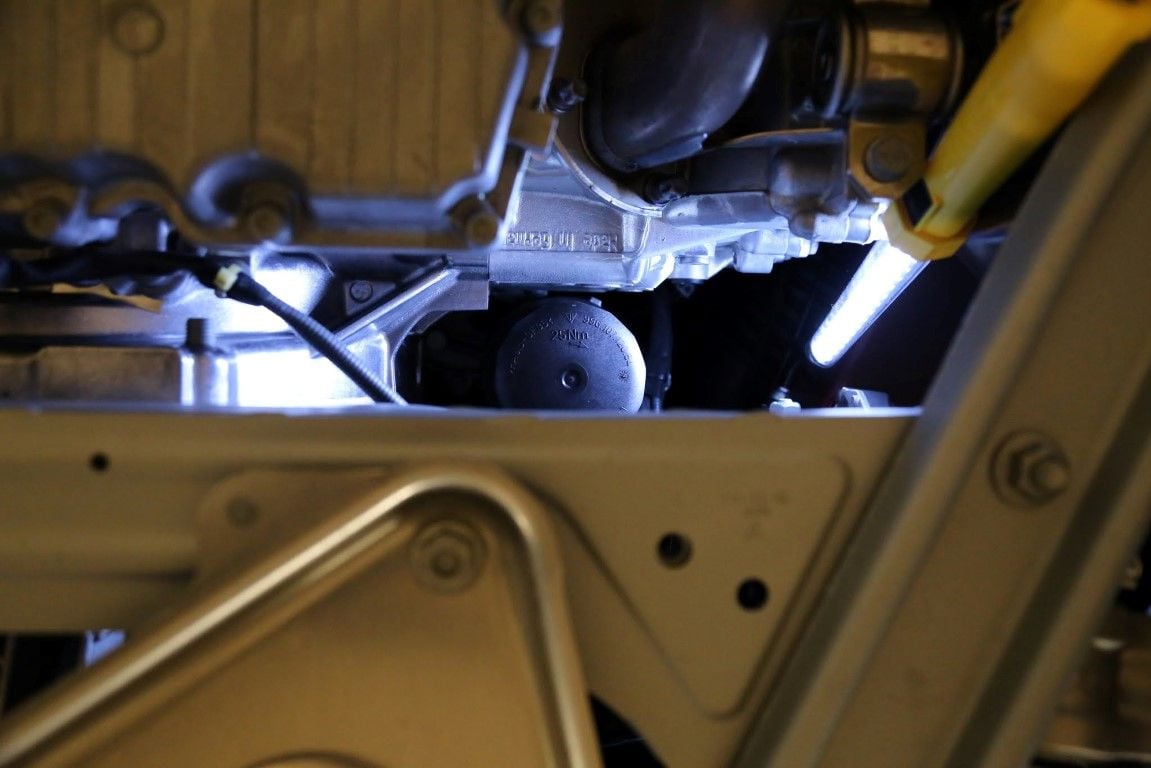
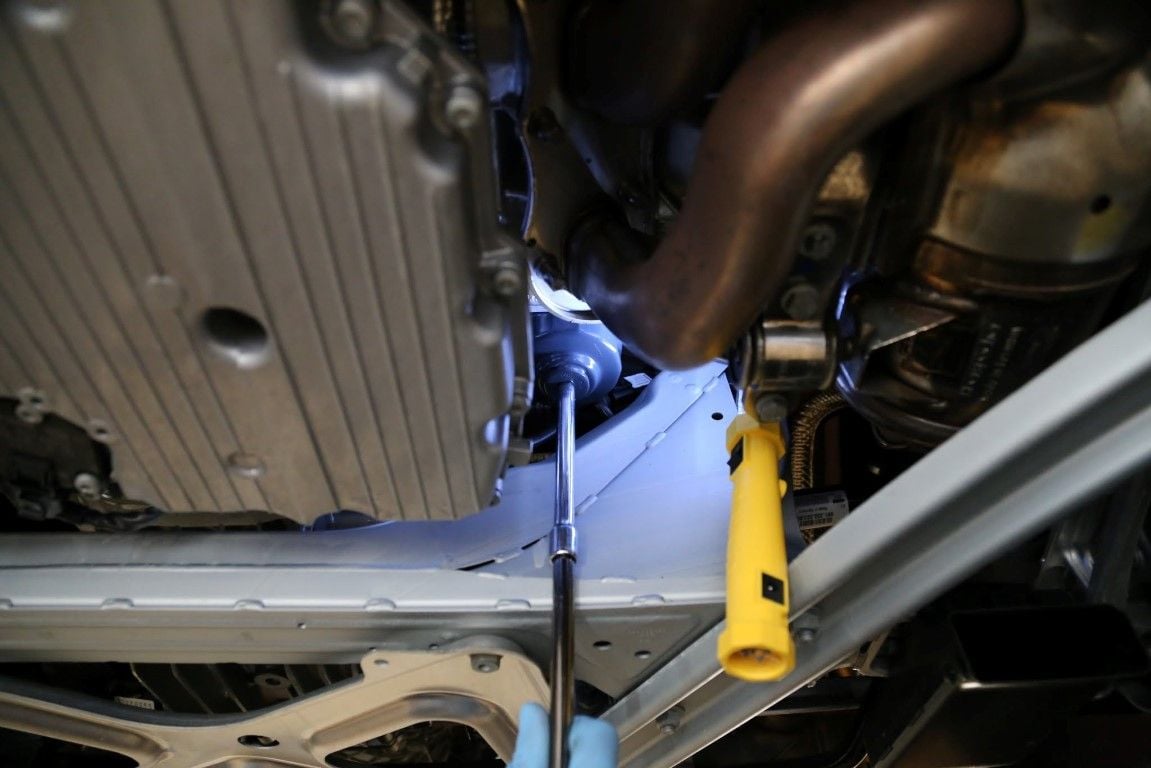
This is what the filter looks like from below showing how the cross member sits below the housing.
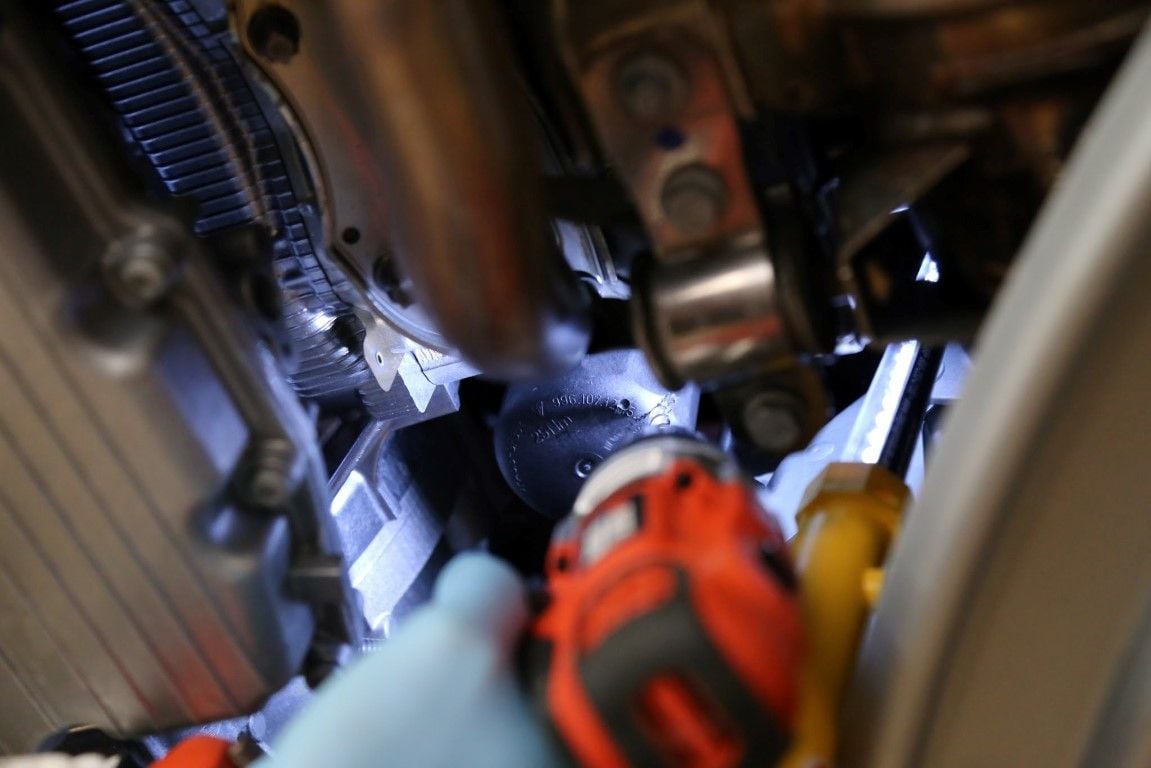
This is how and where I drilled using a 5/16" drill bit that had a pilot tip.
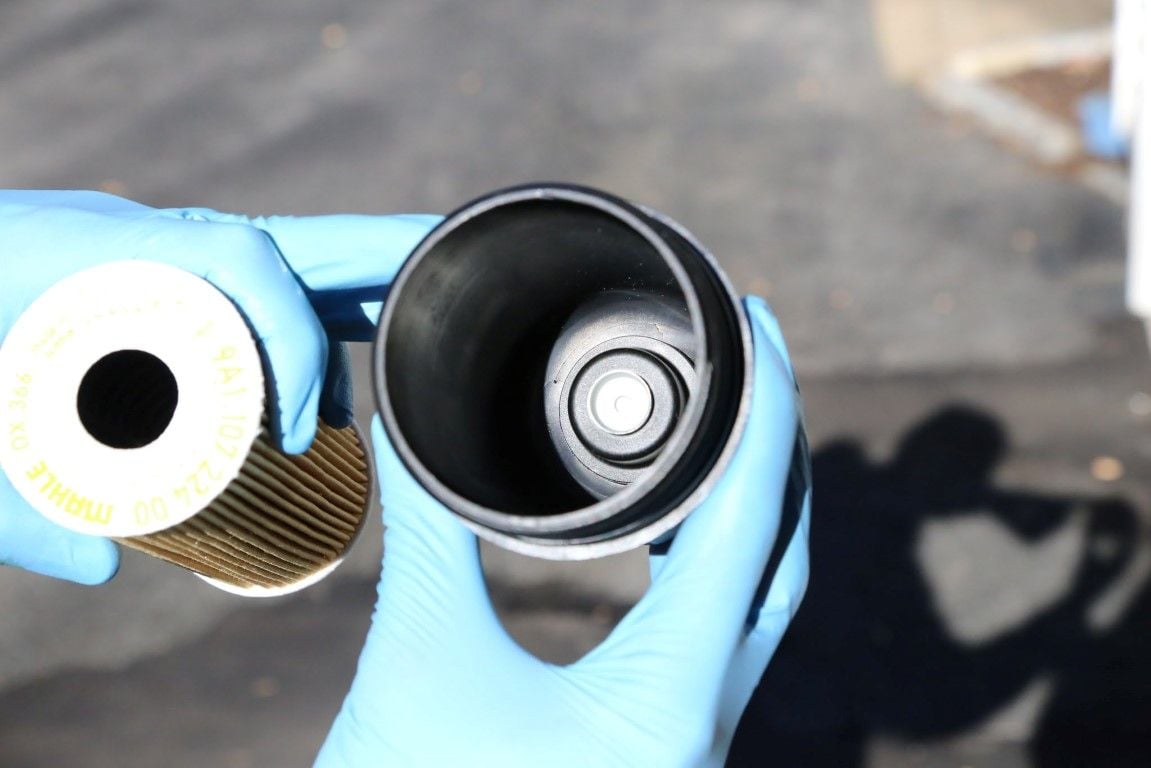
This is what the inside of the new filter housing looks like. There is a thin area around the outer edge that is clear for drilling.
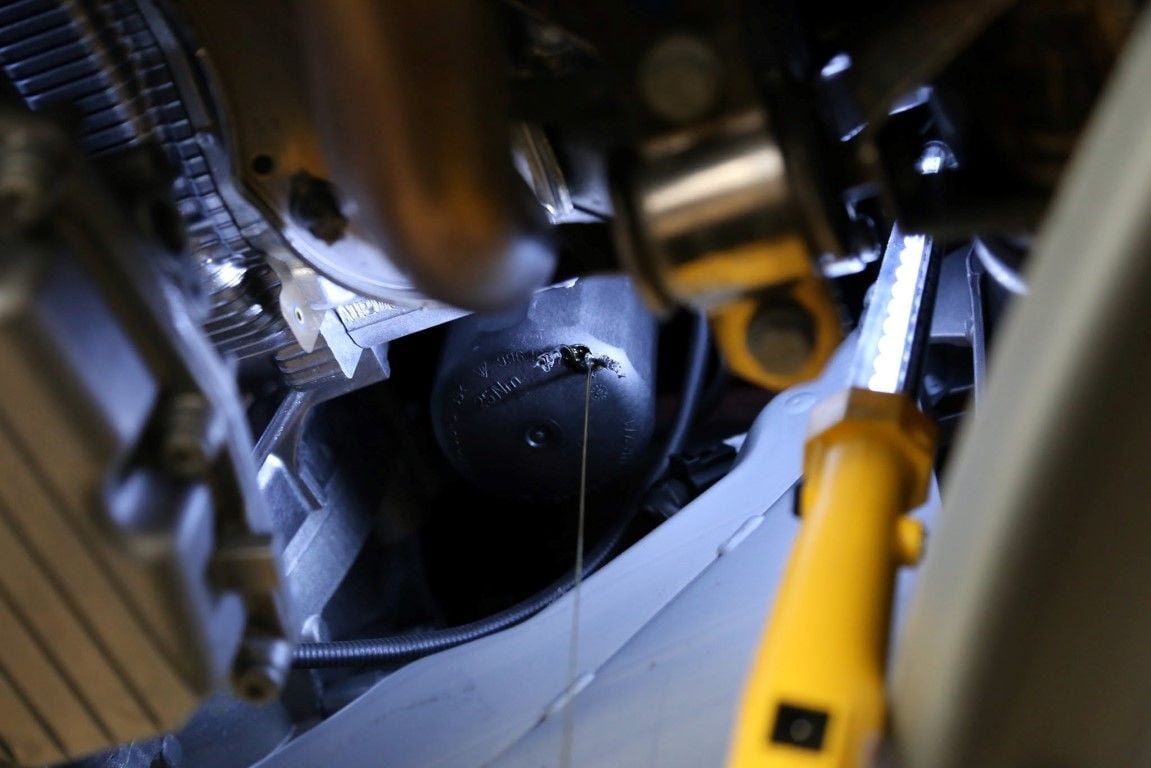
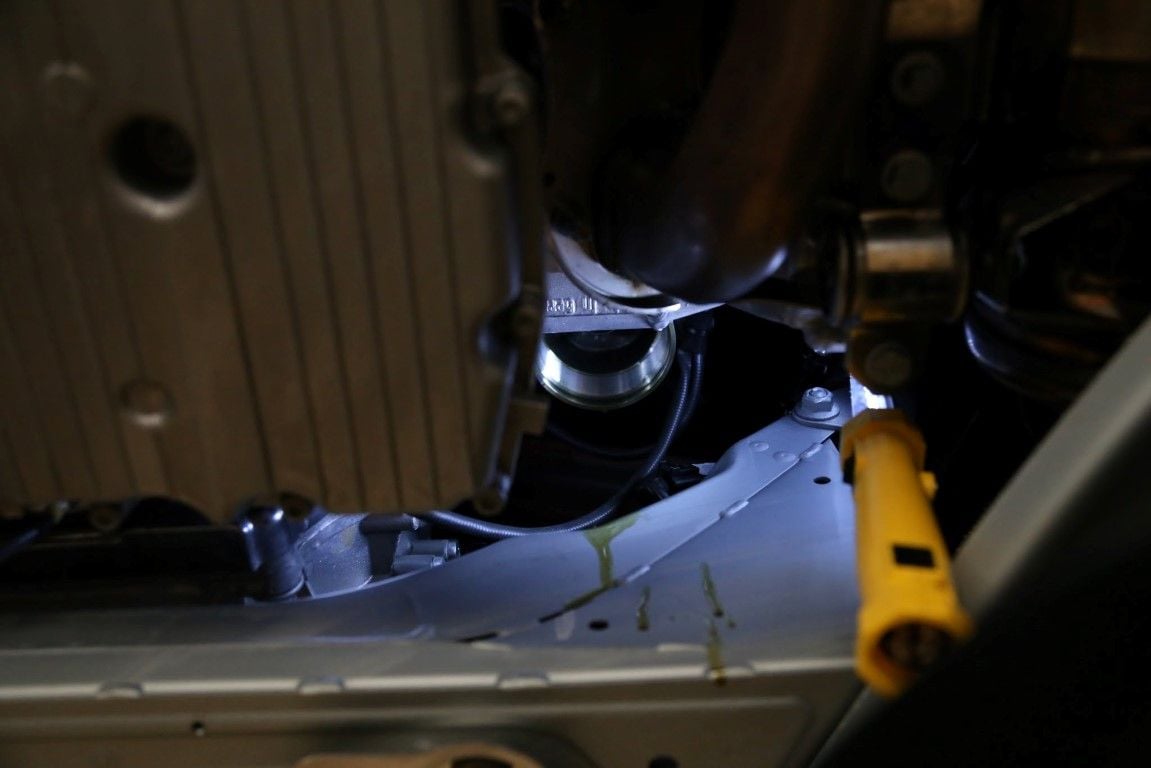
This is the oil draining from the drilled hole and not getting on the cross member.
This is the housing being removed with the tool from Amazon suggested in this thread by Accel Junky. It fit fine.
This is with the filter housing and element removed showing the few drips that I could have avoided but were very easy to clean up.
2. The old oil takes forever to drain out. A LOT of oil comes out in the beginning at a very high rate but then it continues in a slow stream for what seems like forever. Leave a lot of time for this step and maybe go off and do another chore to kill time.
The tech who did my PDI with me advised to allow a FULL HOUR for the oil to drain, FYI.
Great post and photos! Thank you very much. I will do this in a week or so, weather permitting me to get the last few miles in....
I finally got around to changing my oil and I would say everything went pretty smooth thanks to this thread and all the other advice given here.
About the only new thing I think I can add is that like others I put the rear wheels on ramps. I actually jacked it onto the ramps rather than try and drive up them. Of course that put the car on an angle. After draining most of the oil "nose down" I decided to take the ramps out and let it finish while sitting level. What I discovered is that you actually get more oil out by allowing it to drain with one corner up and one corner down. This was even after fully draining it level. When I went to put it back up on the ramp once I put the right rear up I got a lot more oil out in that configuration. Not a big deal.
Now my problem. Once everything was put back together I put 7 quarts in and then went to check the level. I'll be damned if I can't get this stupid thing to read old level now. I have good pressure so I am not worried but I know it will need at least a little more. I even drove it around the block and tried to check it again. Still won't give me a reading.
Gmaki, you are at least one quart low. My car was level when I drained the oil, and it took exactly 8 quarts.
As far as checking the oil level, you need to get the car to FULL operating temperature, park, shut it off, wait one minute, and then check the level.
If the rear hatch was opened with a cold engine, the system will not report an oil level until the engine has reached full operating temperature. See page 165 of the manual.
 11-22-2015, 11:27 PM