When you click on links to various merchants on this site and make a purchase, this can result in this site earning a commission. Affiliate programs and affiliations include, but are not limited to, the eBay Partner Network.
damn Tom that car looks wild rolling with that wing, love it. I aspire to reach your level of detail someday. keep up the good work!
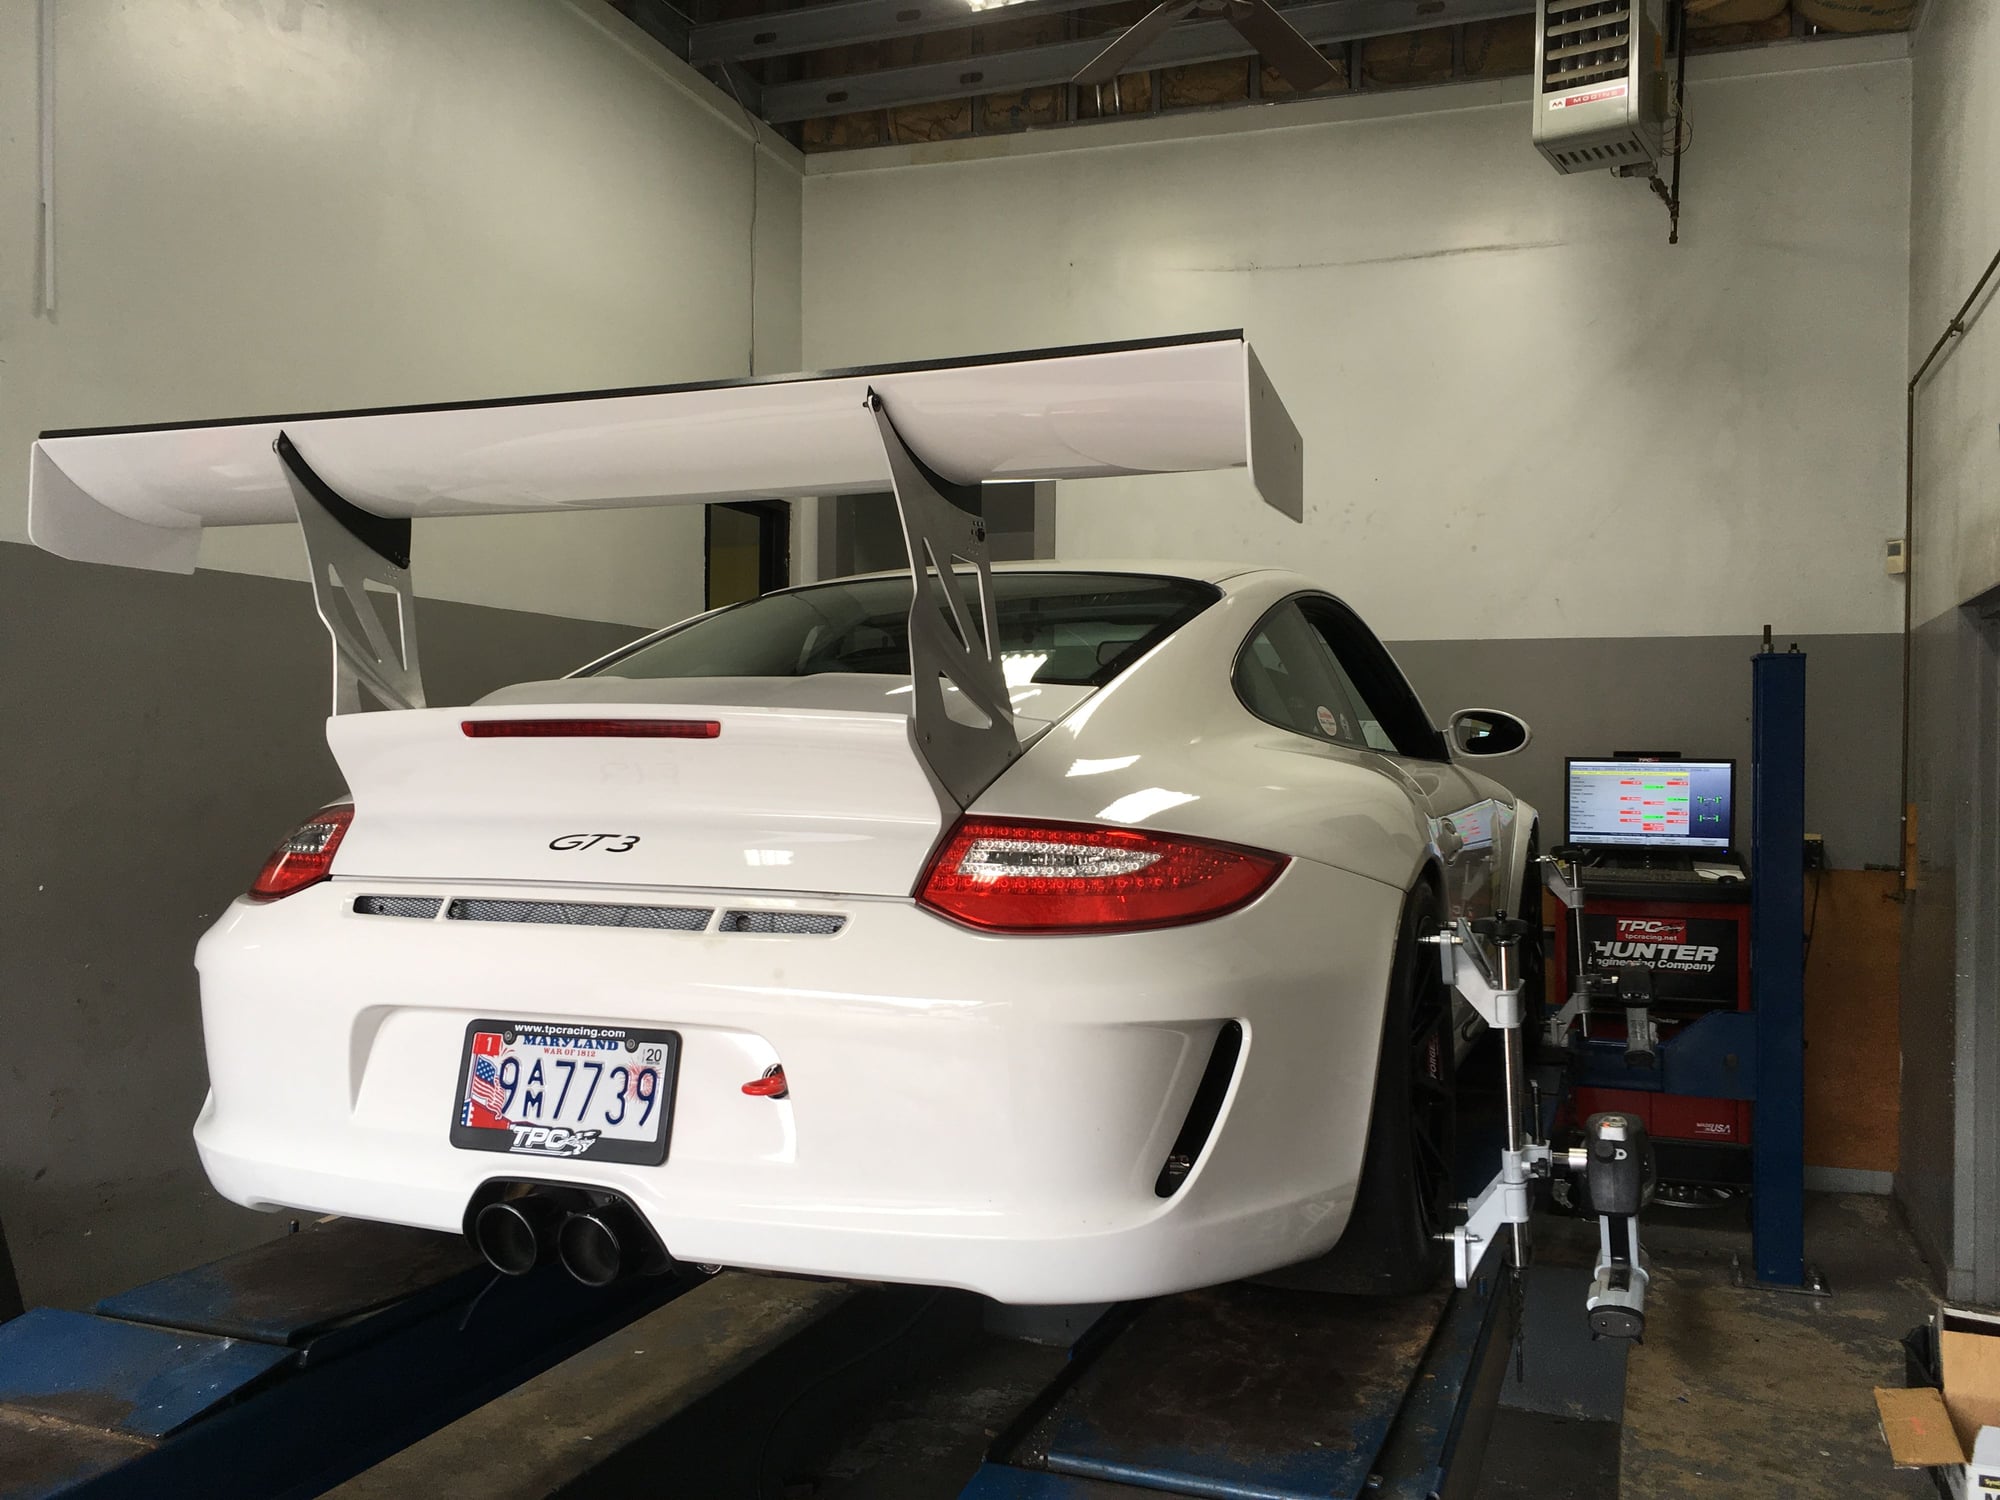
Thanks! Funny story about that wing, I got used to the size of the previous much smaller wing so today when I wasn�t paying attention I shut the deck lid quickly and with force of fury to overcome the spring tension of the latching mechanism, the new bigger wing hit my head so hard I was seeing stars! Left my forehead bruised.
Originally Posted by Steve2k1116
also apologize if I slowed you down with all my header questions! haha
No problem at all. I answered your questions during business hours.
So Tom, did you order bumper beam part number 997-505-121-92?
There seems to be conflicting information about whether the bumper beam comes with the heat shield (in that other thread). It looks like yours came with the heatshield. Since I�m doing some of the same mods, I�d love to know that I�m getting the right items.
Yes, I ordered 997-505-121-92. Mine came with the heatshield.
__________________
PCA National Instructor
TPC Racing stats:
2023 Porsche Sprint Challenge 992 Cup Am Champion
2023 Porsche Sprint Challenge GT4 Pro-Am Team Champion
2022 Porsche Sprint Challenge 992 Cup & 991 Cup Champion
2020 IMSA GT3 Cup Challenge 2nd Championship
2018 IMSA GT3 Cup Challenge 2nd Championship
2016 IMSA GT3 Cup Challenge Champion
2013 IMSA GT3 Cup Challenge Champion
2006 Rolex-24 @ Daytona GT Champion
2004 Grand-Am SGS Class Champion
It has been a long 10 months since the incident at the track. Its time for a major push to get the car back to shape. With the TPC race team away from the shop racing four 991 Cup cars at Circuit Gilles Villeneuve I have the shop to myself for the weekend. I started at 9am Saturday and pushed straight through 1pm Sunday. The following photos represent the sequences of the things I did. Disclaimer: These photos are for illustrating the amount of work involved for each tasks and for entertainment purpose only. These are notDIY instructions. There are more than one method for performing these tasks. These tasks should be performed by professionals.
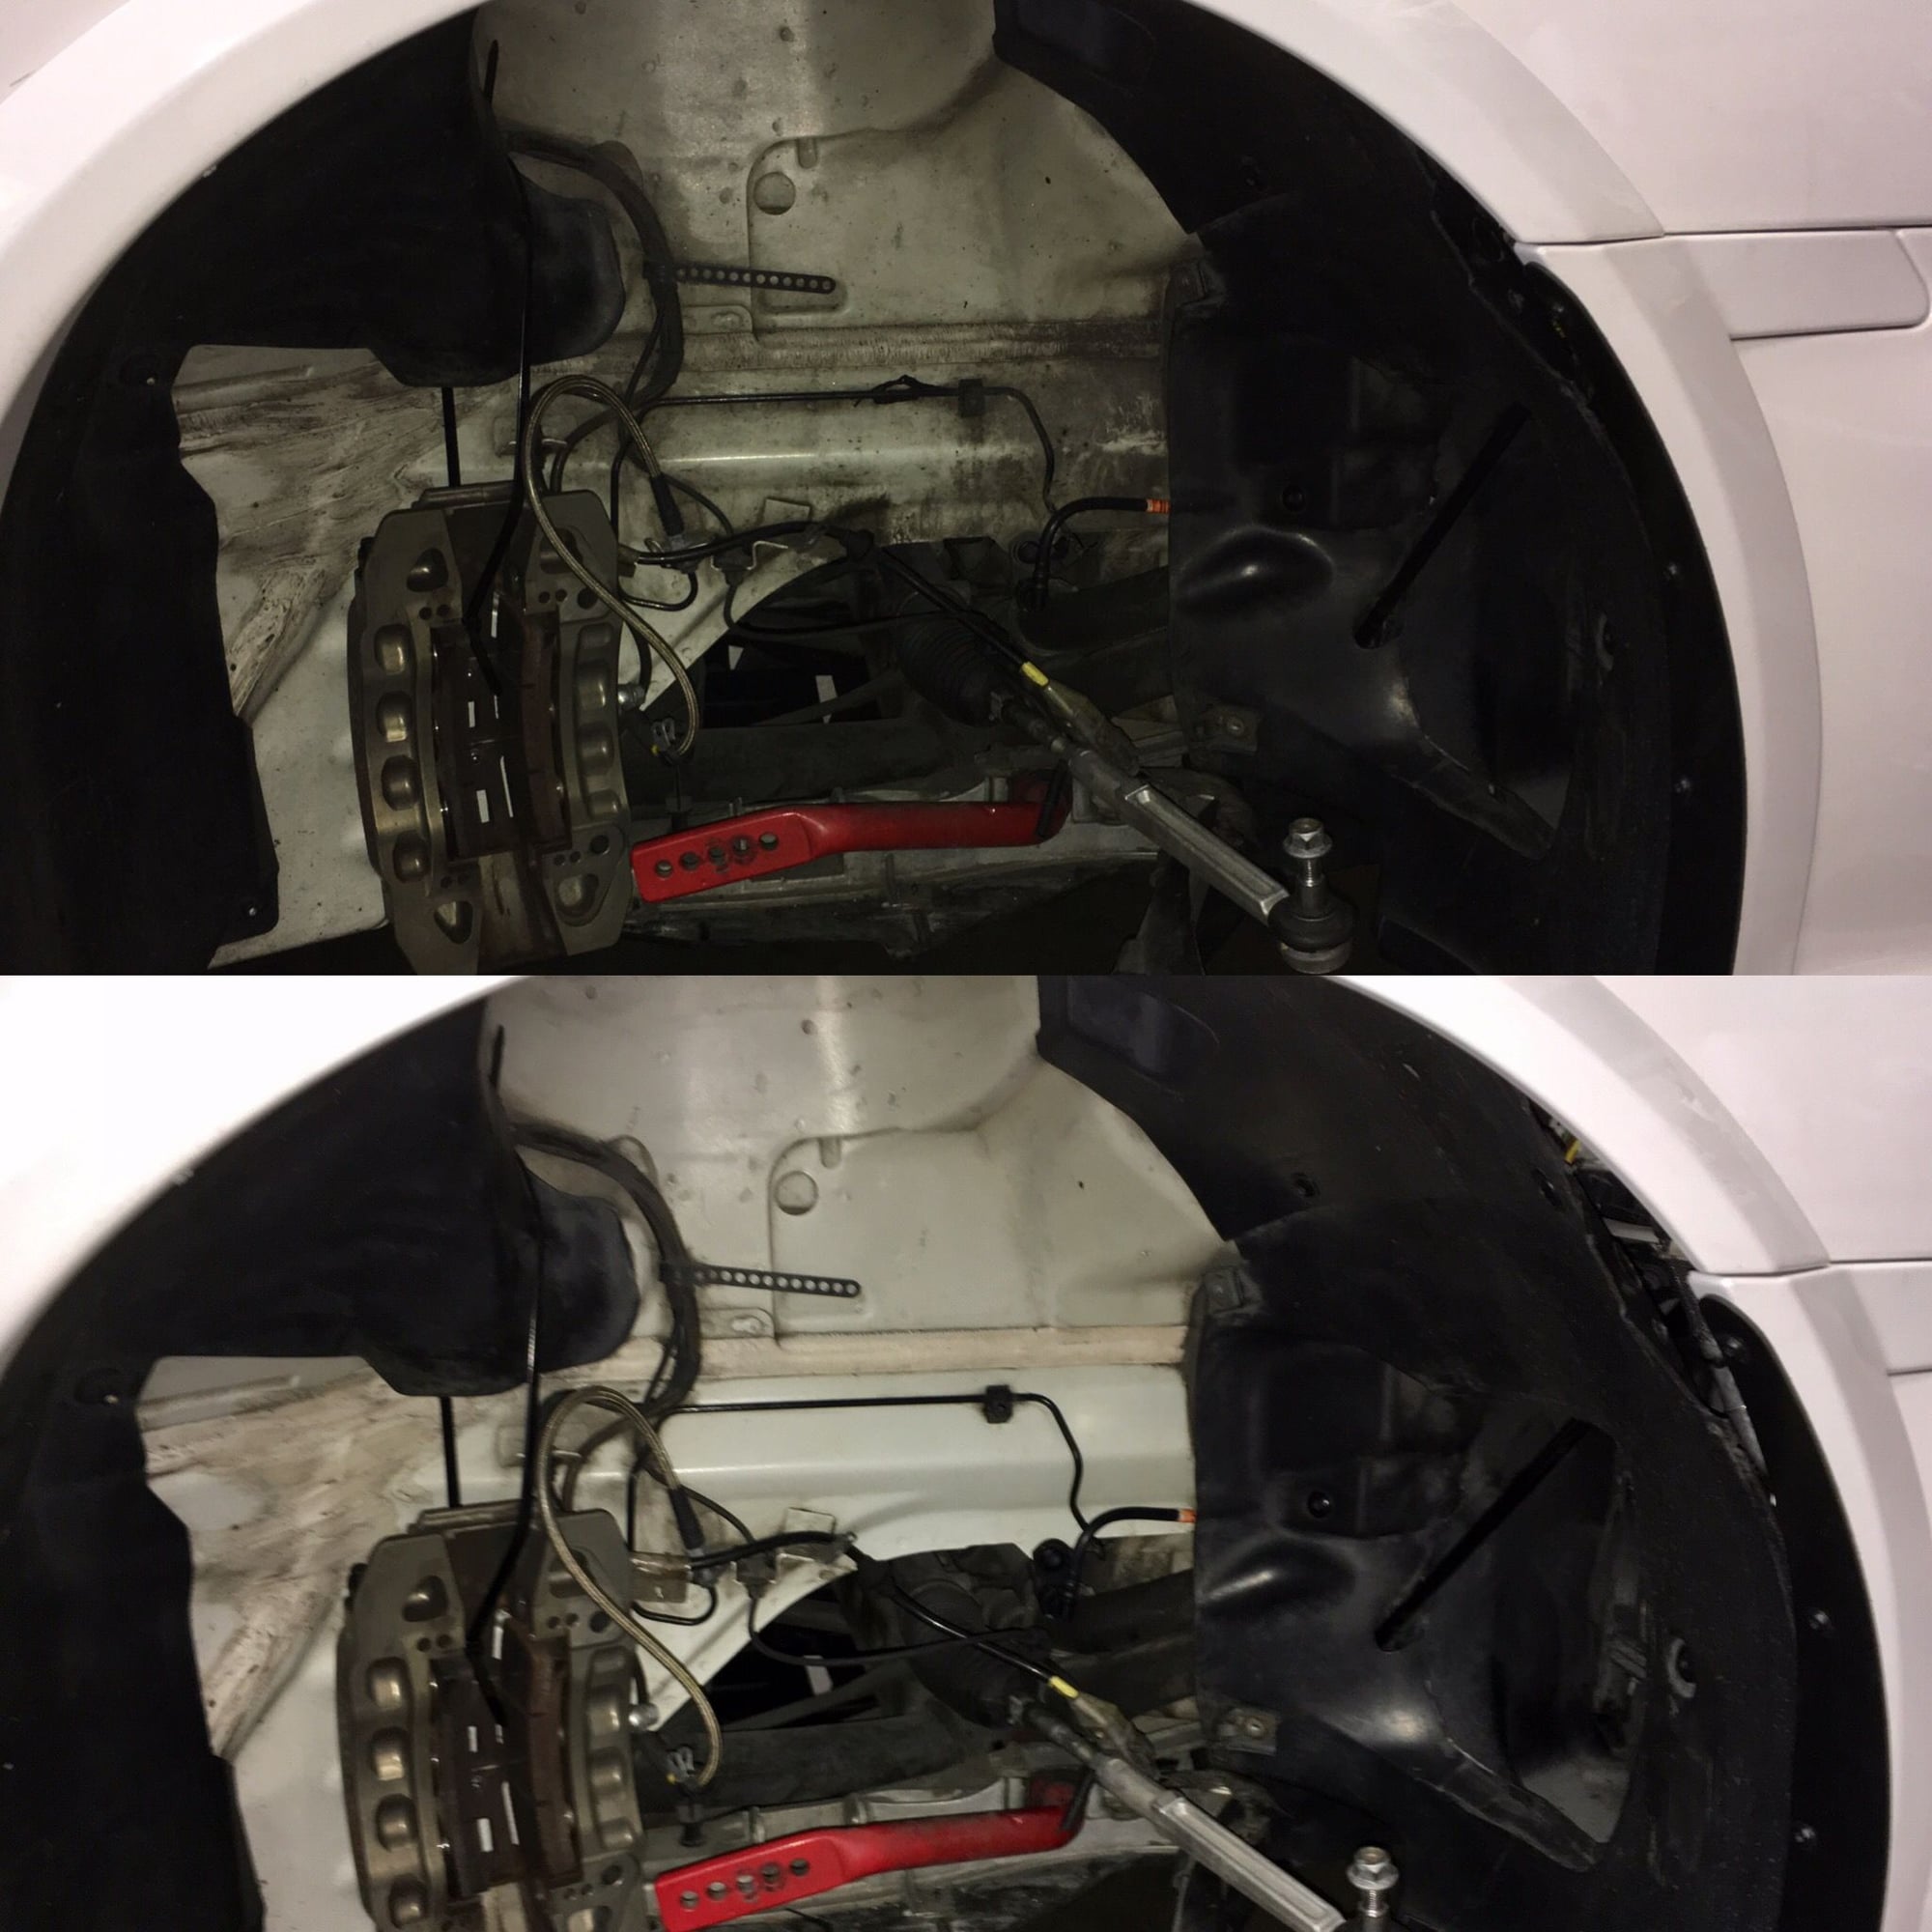
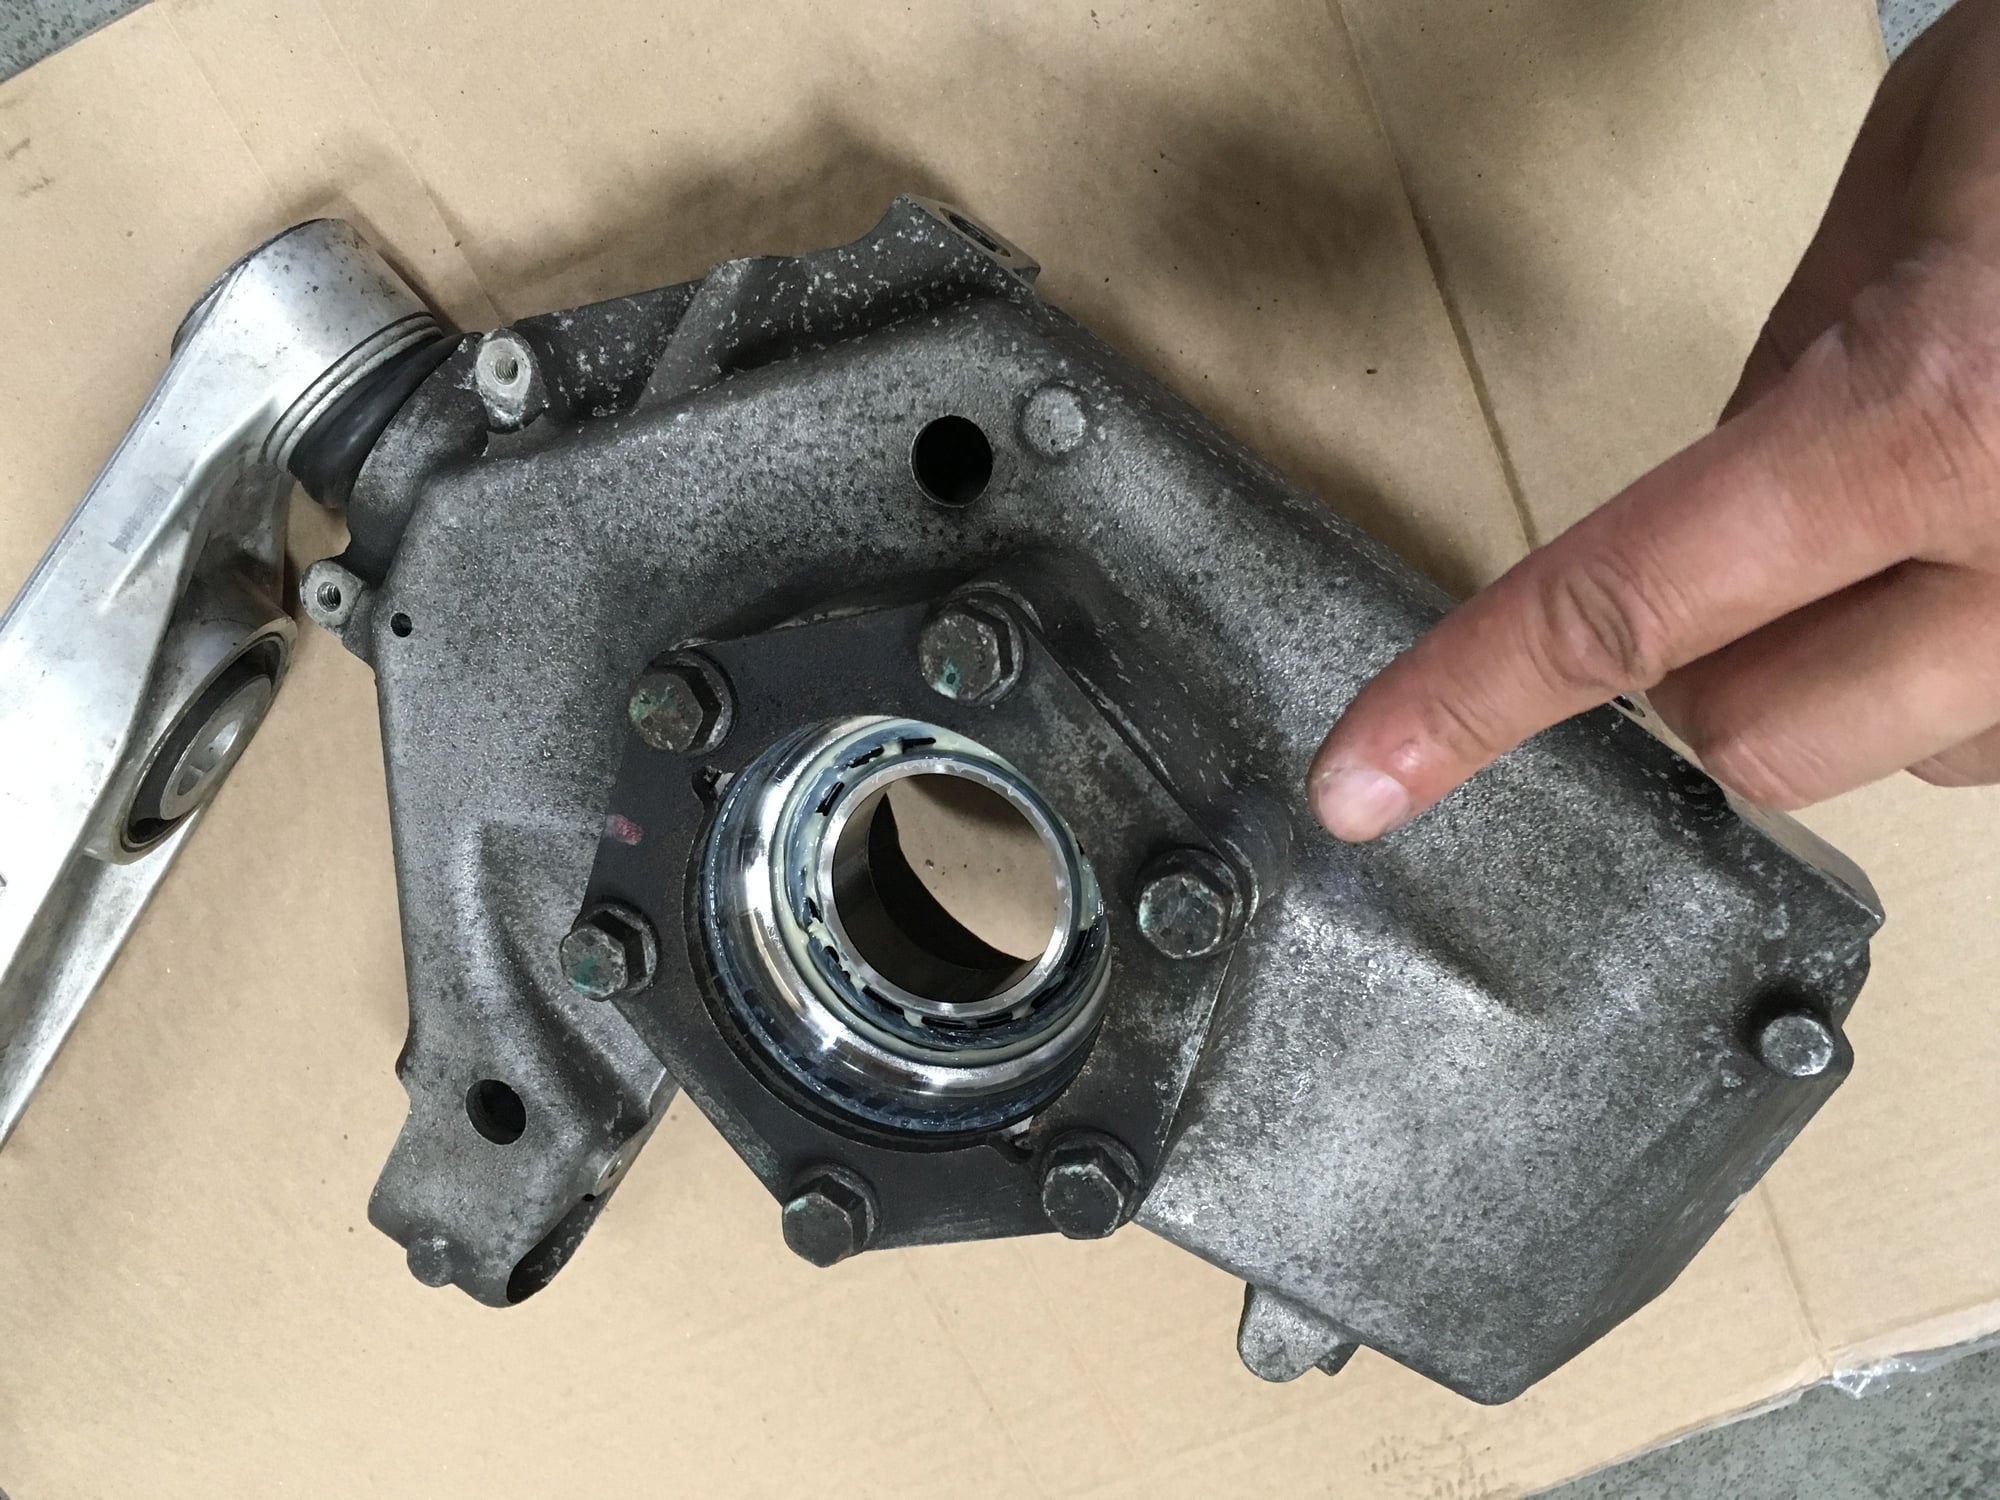
First task, front uprights(aka wheel carriers) and front wheel bearings. Starting with the right front, this is the side with the bad wheel bearing that I noticed previously.
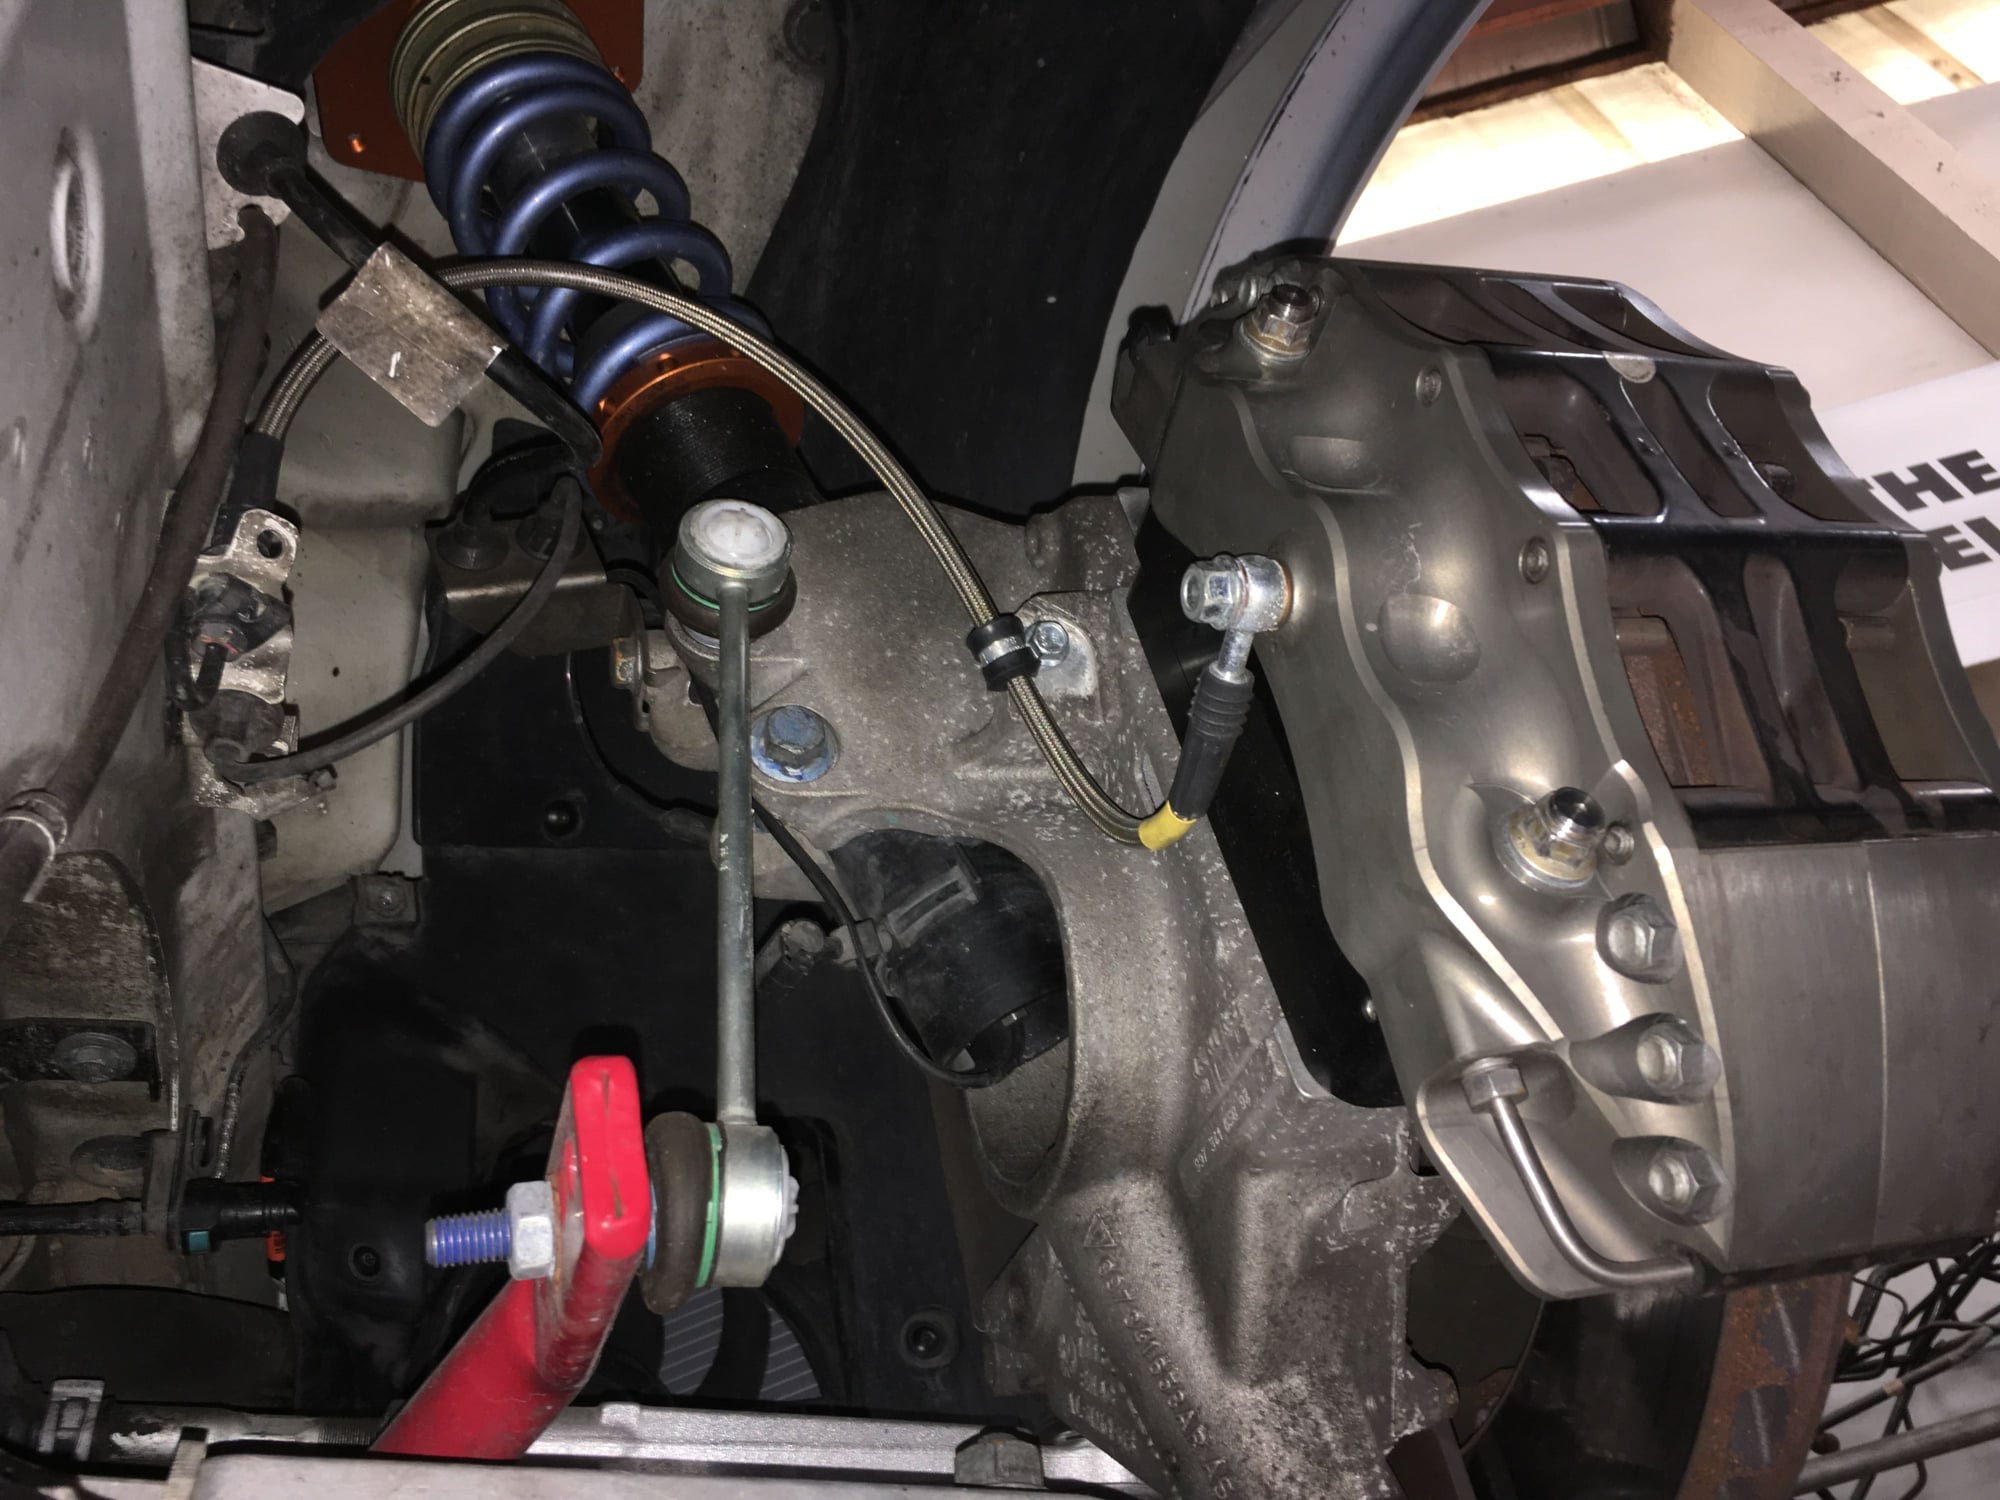
Brake caliper and rotor off exposing the upright. From here all the external "accessories" have to be removed and then transferred to the new uprights once they are prepped.
Next is to disconnect the sway bar link from the TPC 29mm front bar. This front bar has been serving me well for 5+ years.
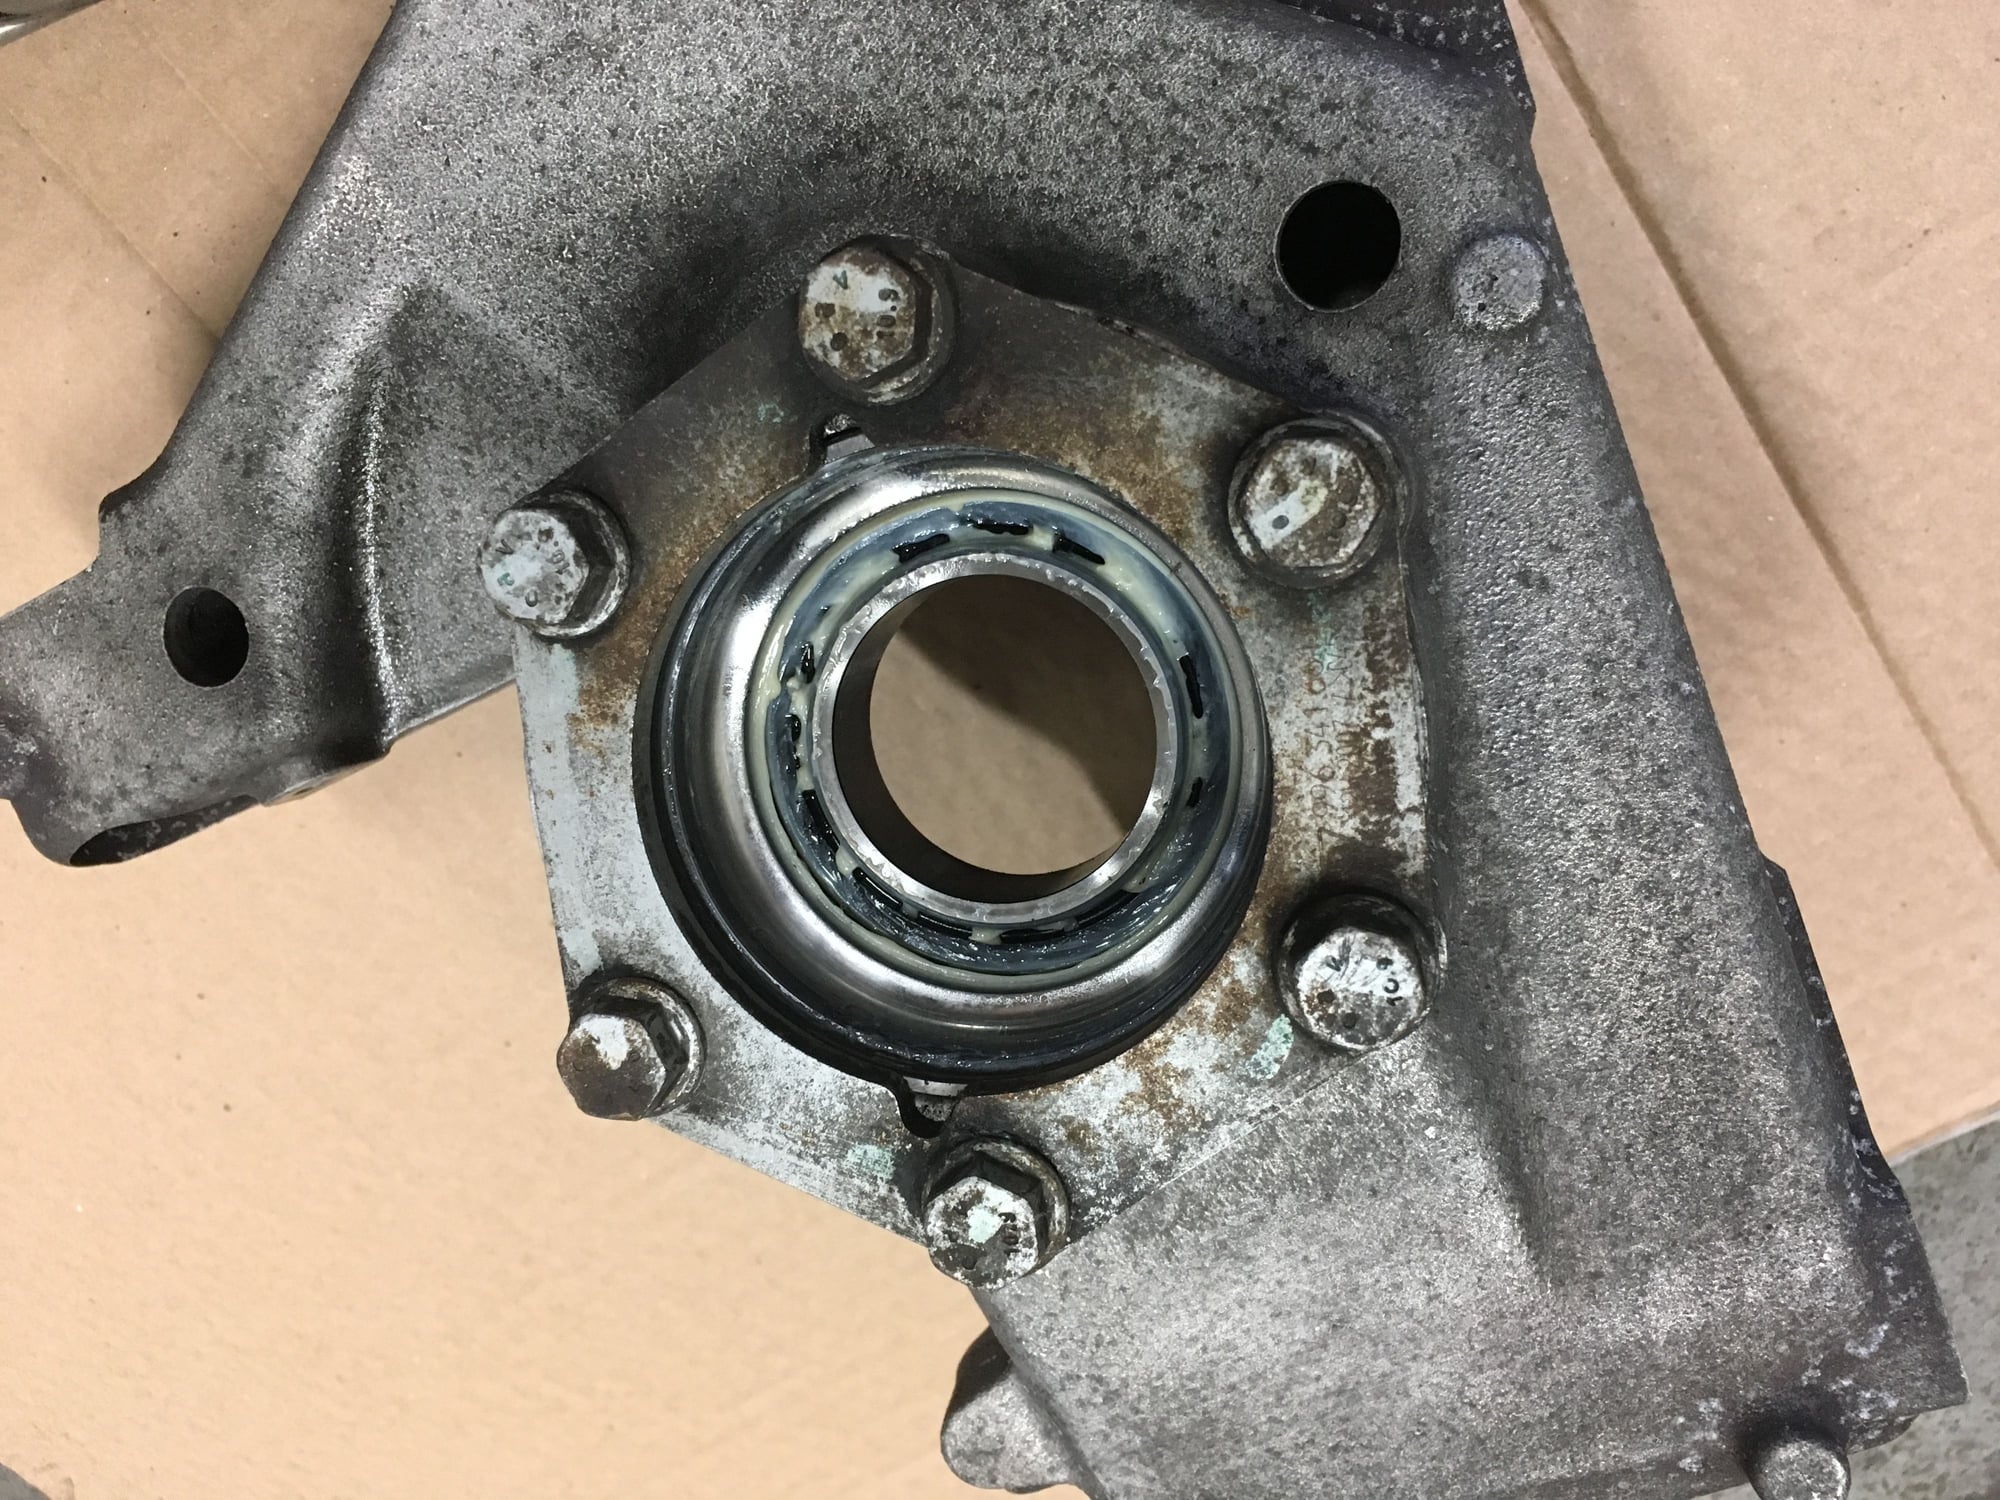
The backing plate definitely have signs of contact from wheel bearing deflection.
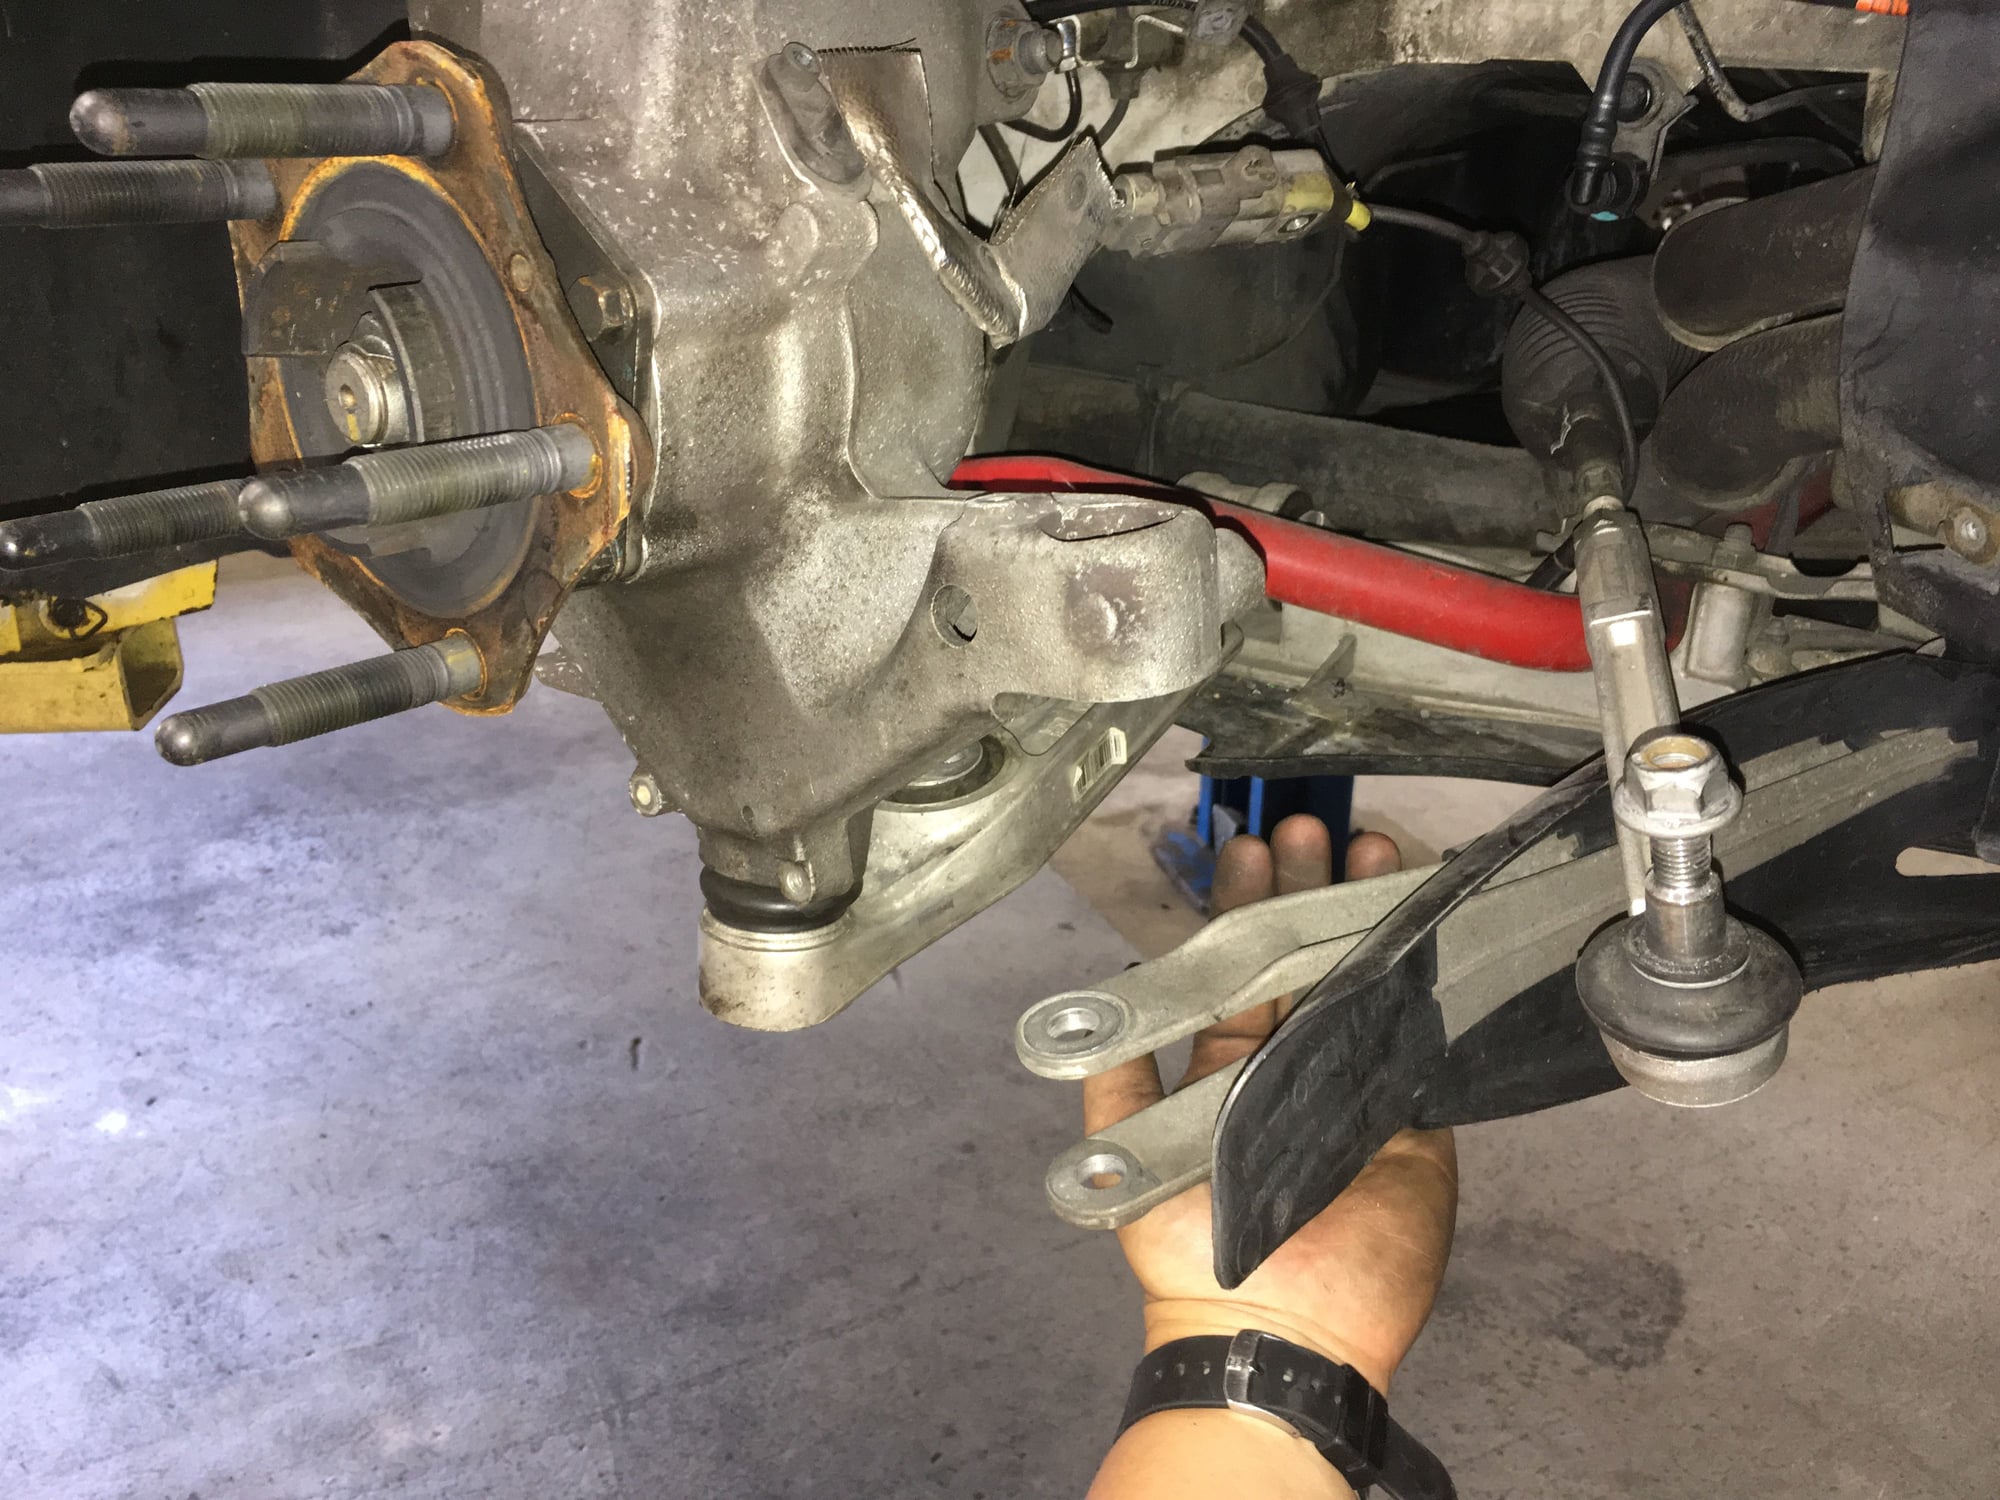
Separating tie rod end from the upright.
Separating thrust arm(aka compression link) from the LCA caster bushing.
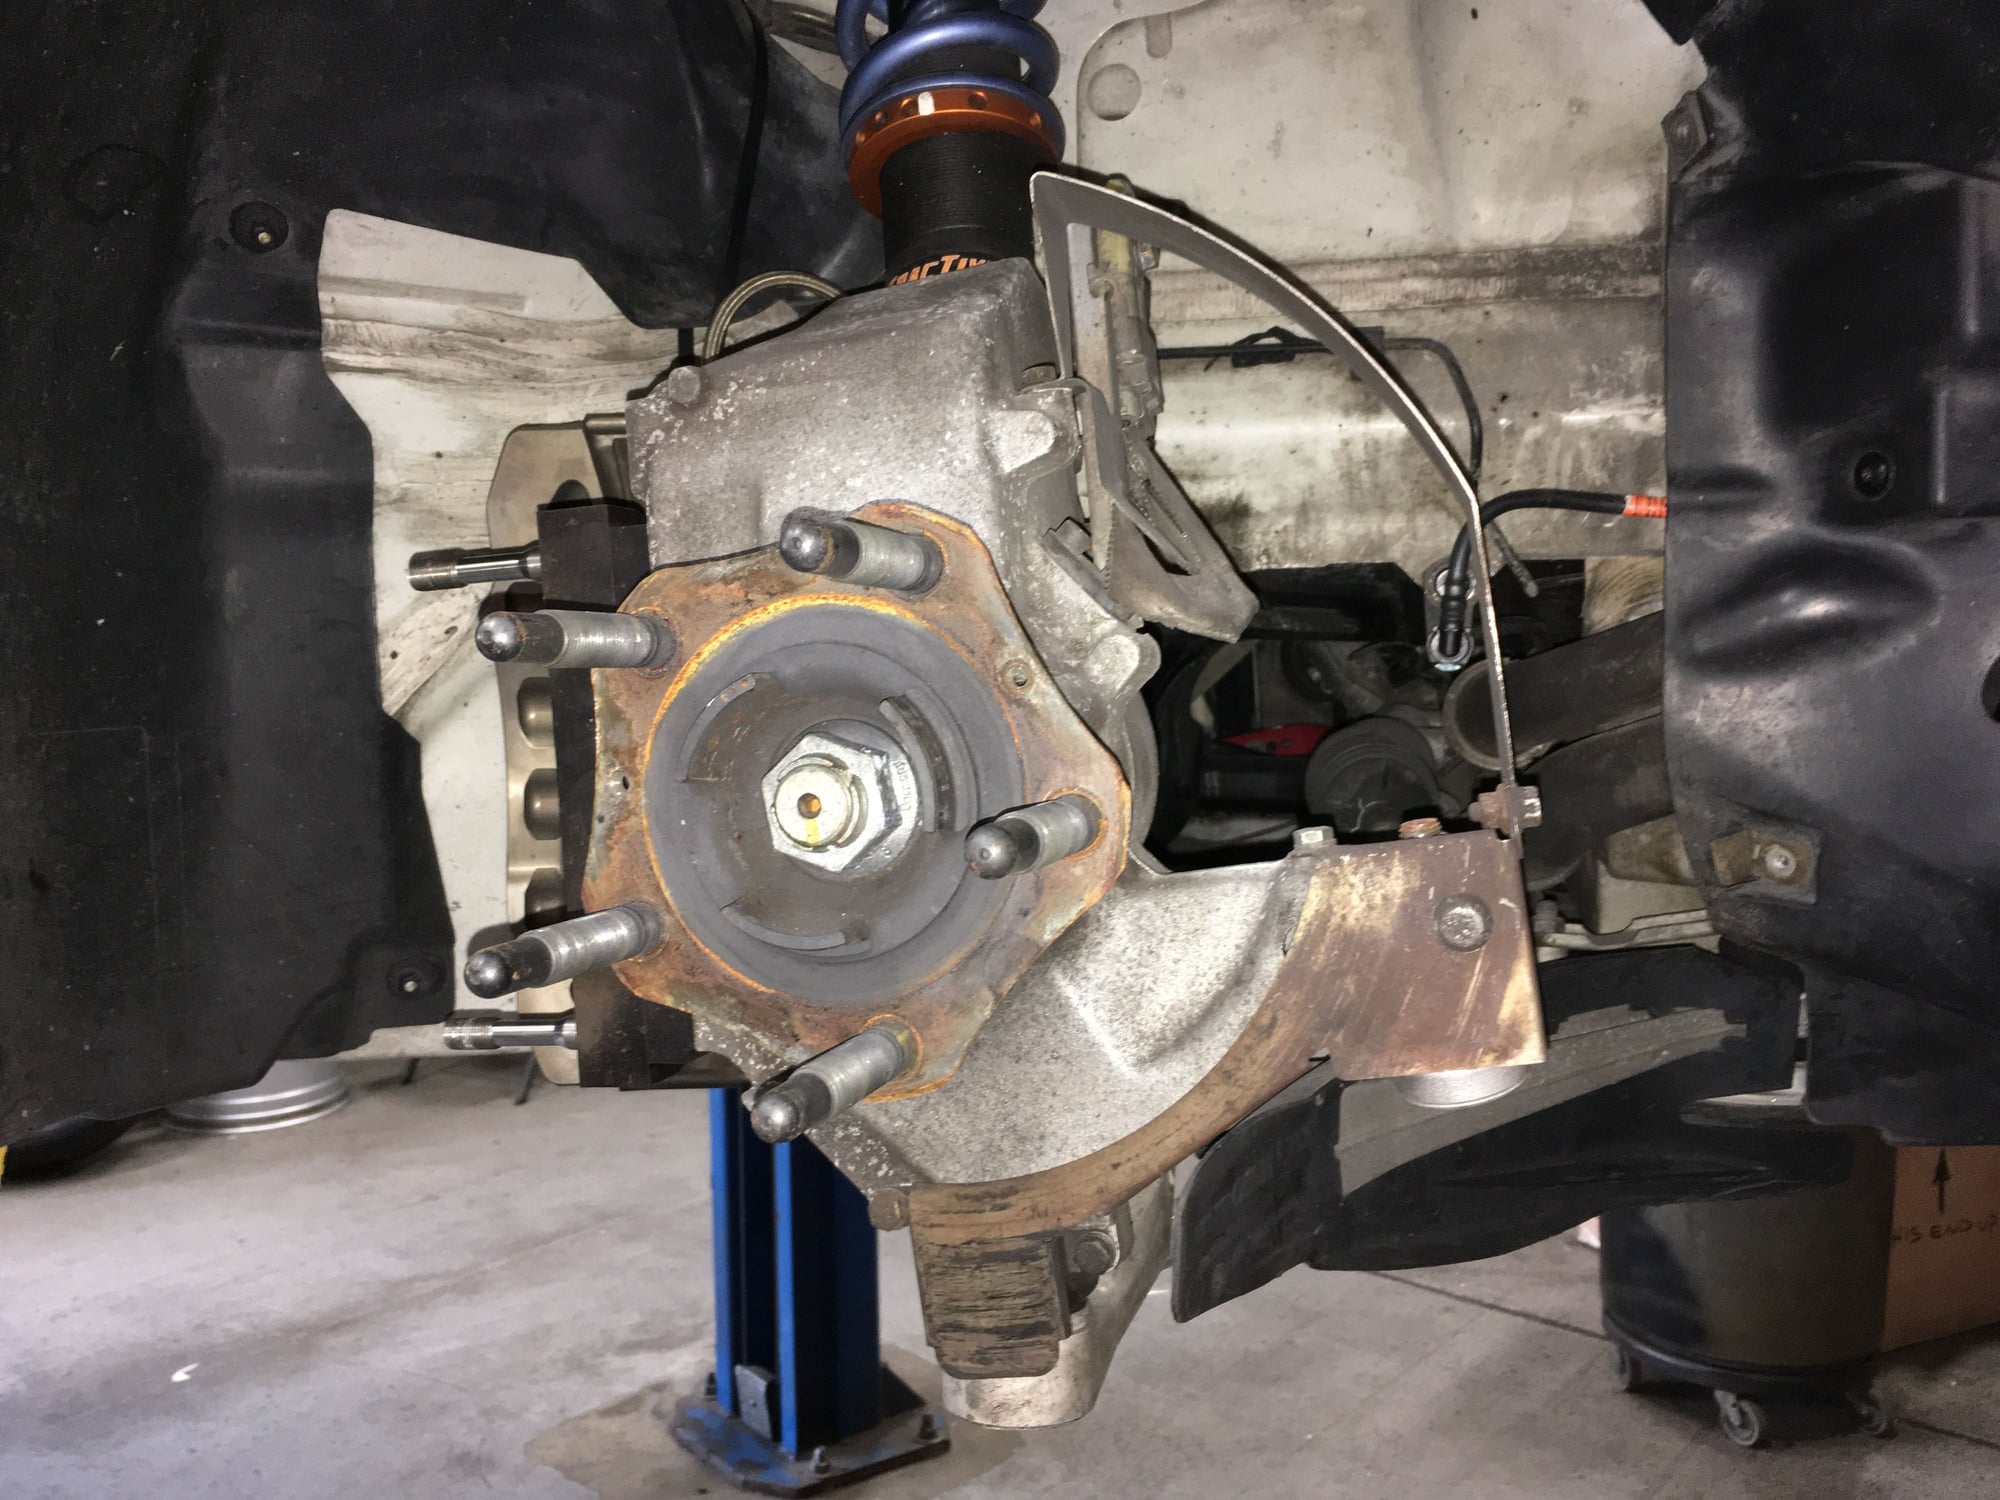
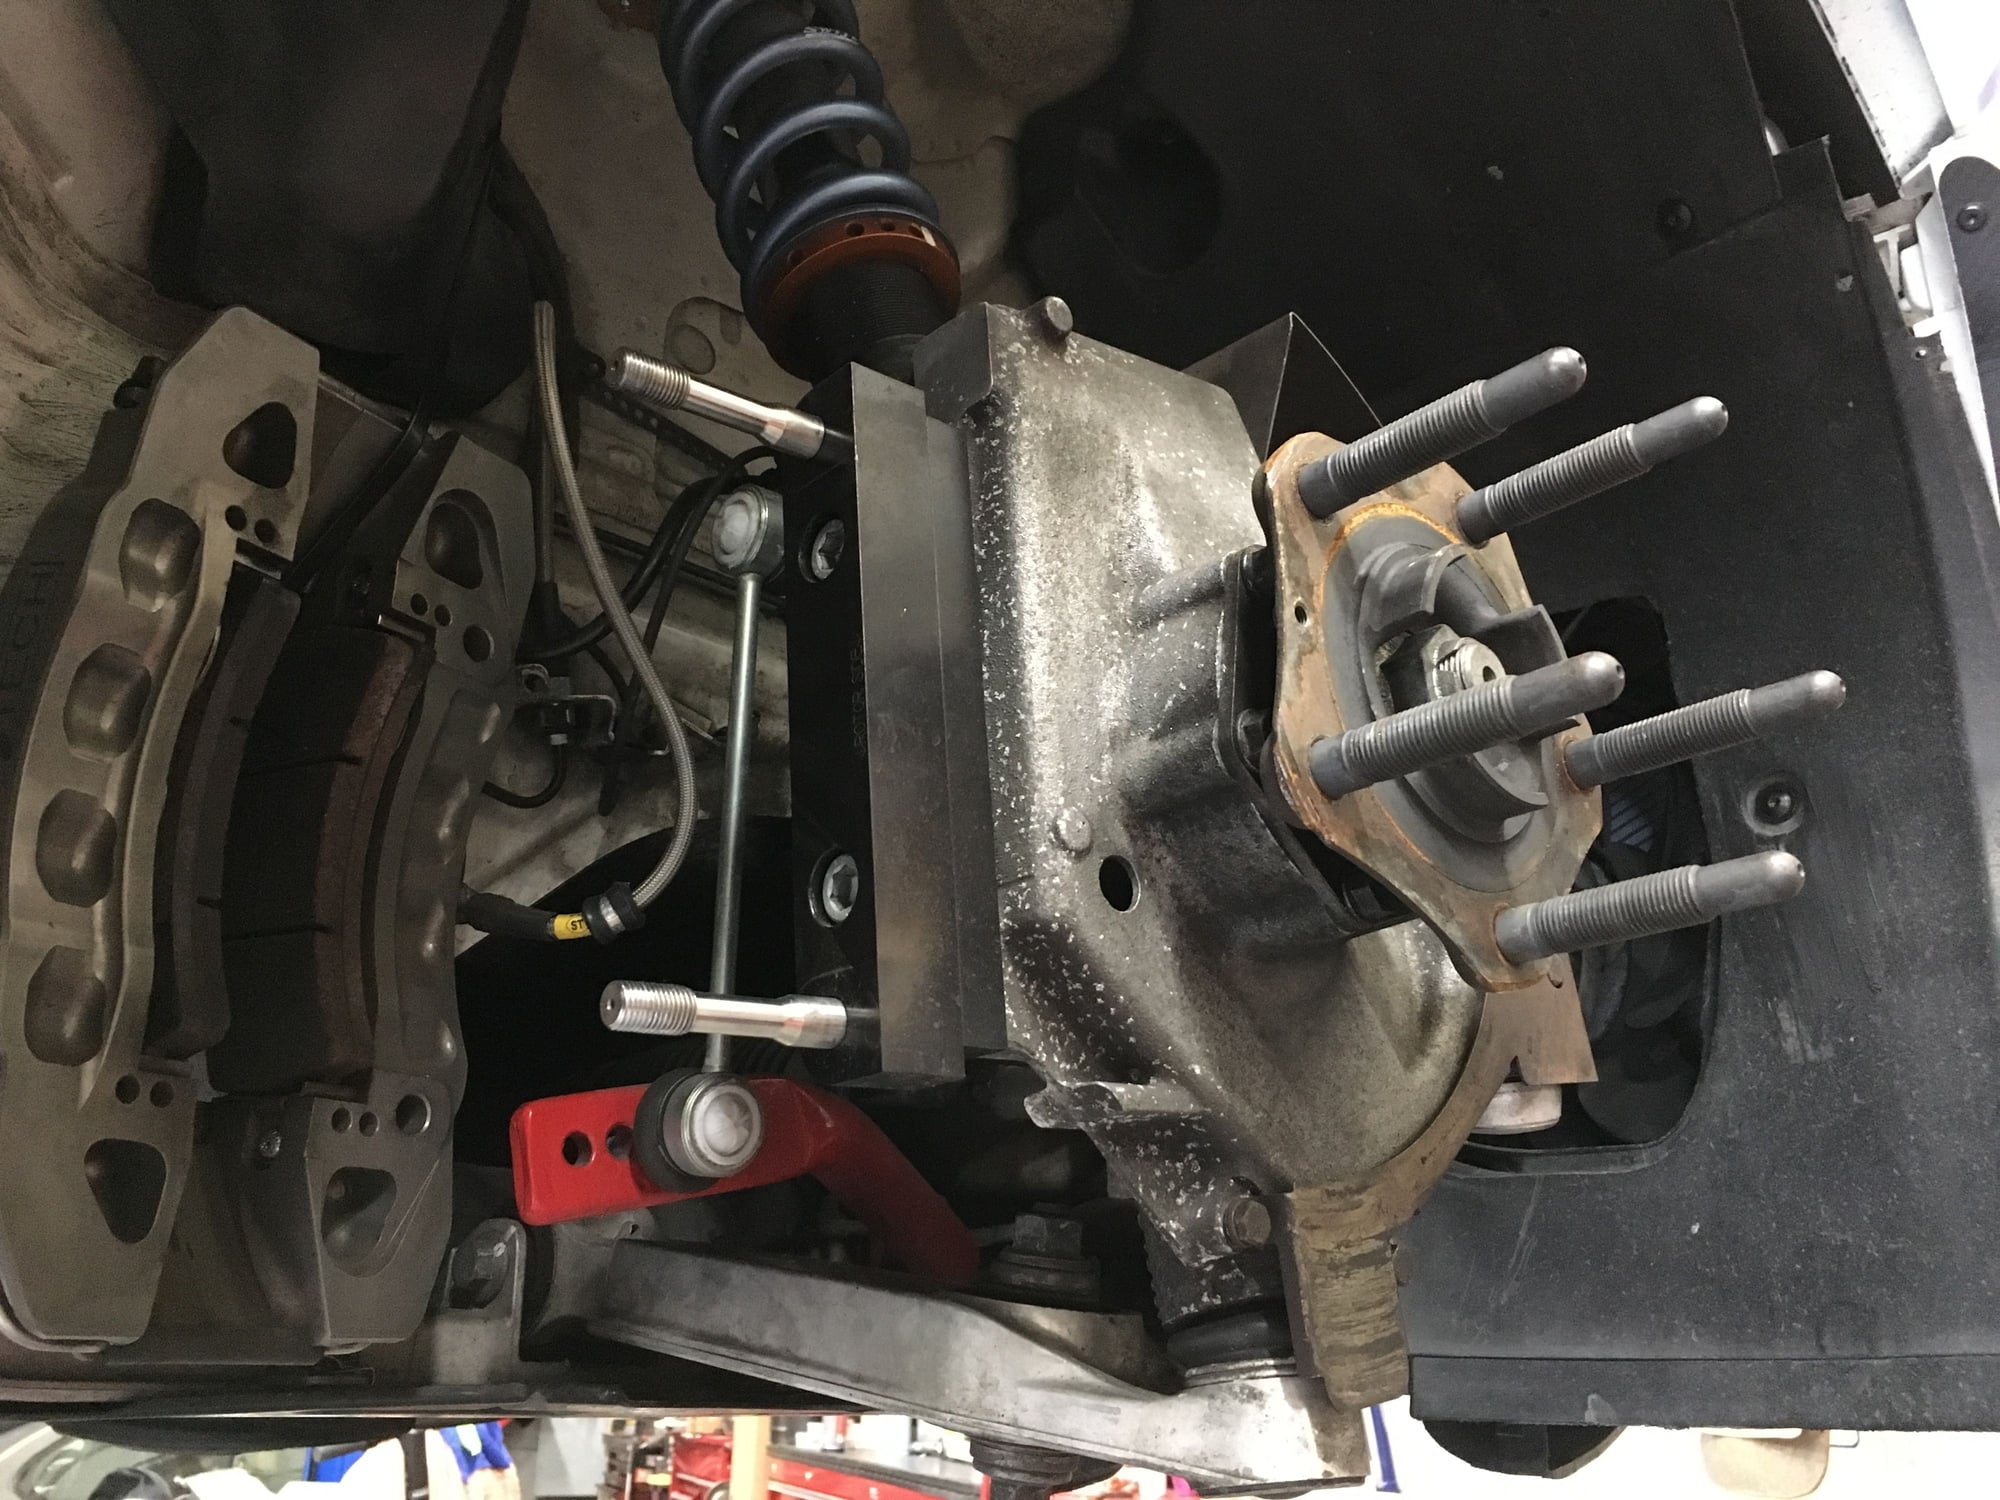
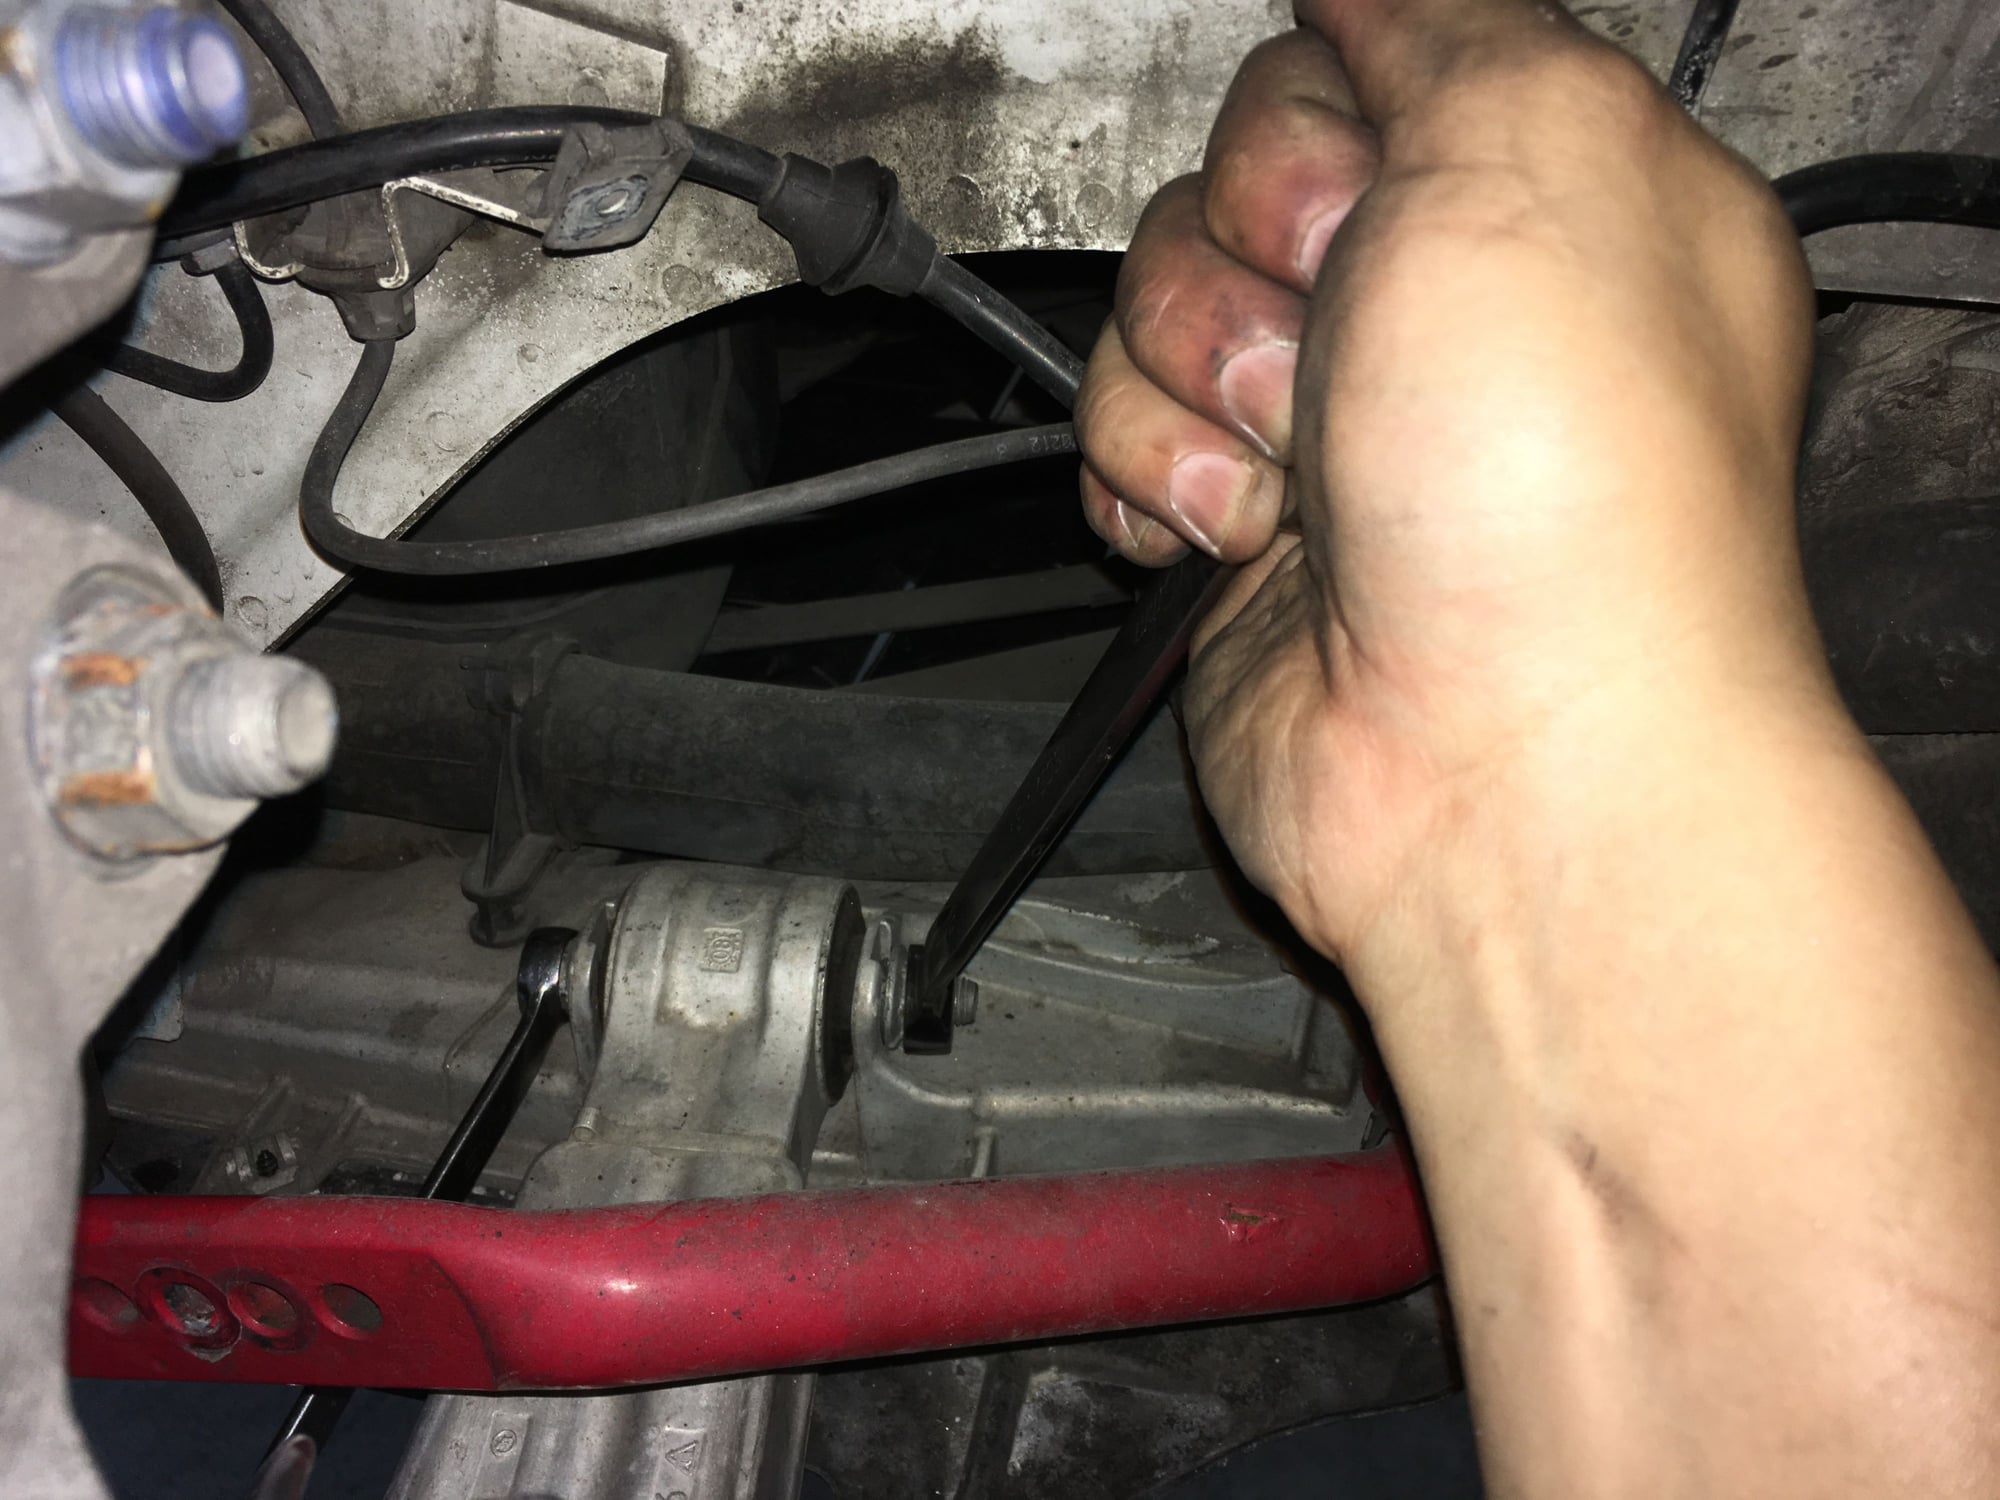
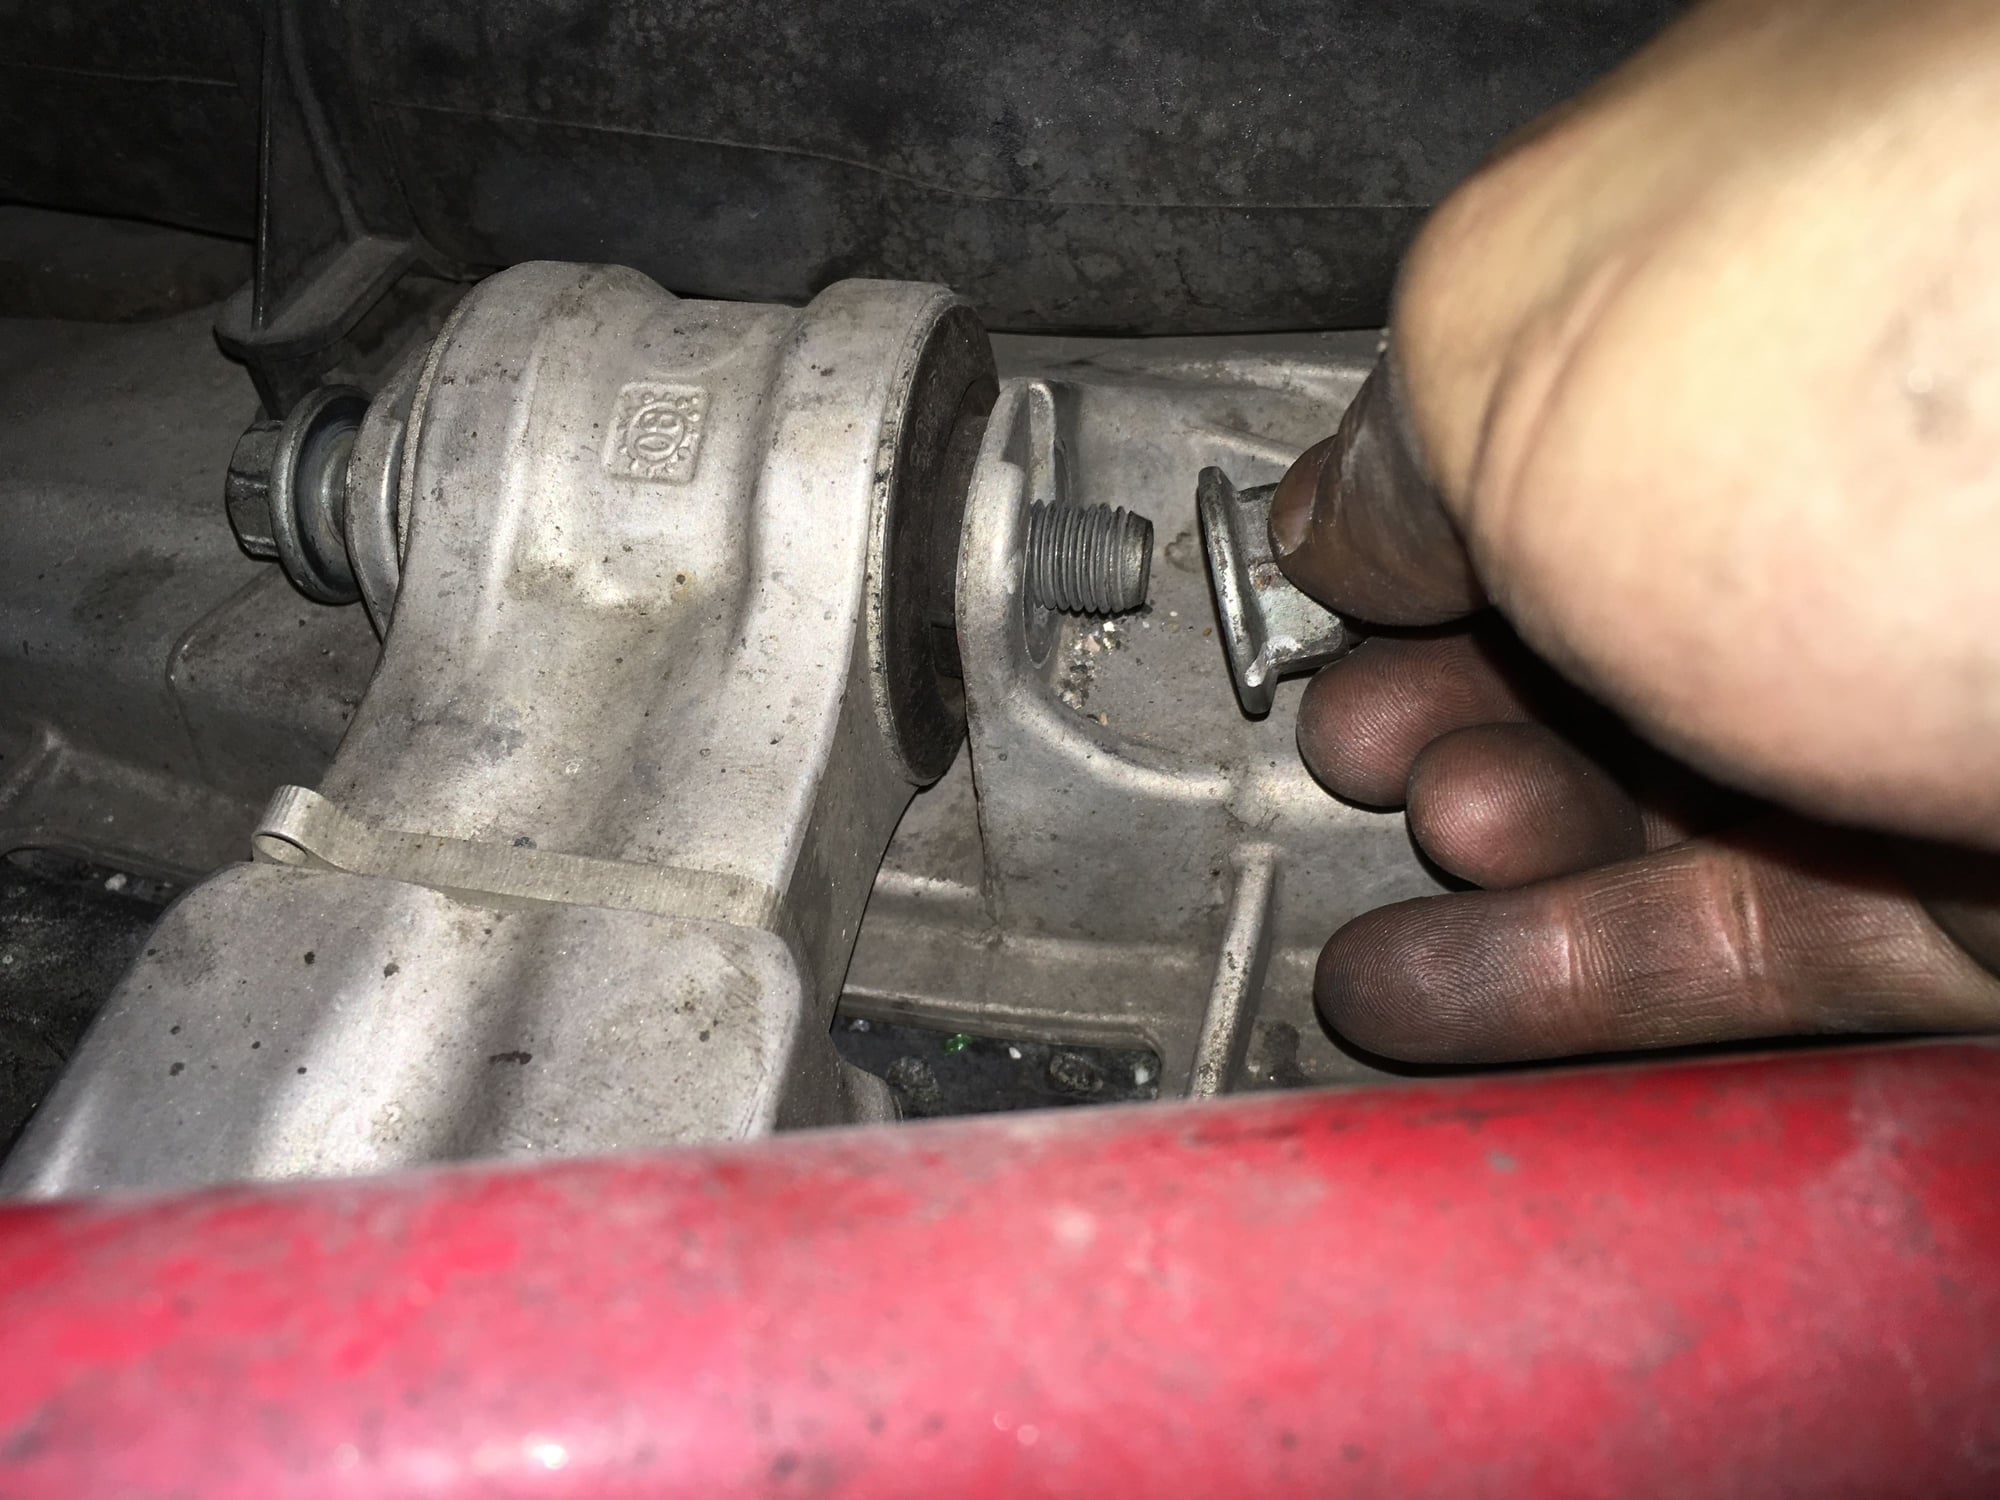
Removing the LCA inner bolt. On 997 GT3 and 997 Cup uprights it is not possible to separate the LCA outter while the upright is still on the car. Where as on 996 GT3, 996 Cup, and on 997 non-GT model the LCA outter can be separated while the upright is still on the car.
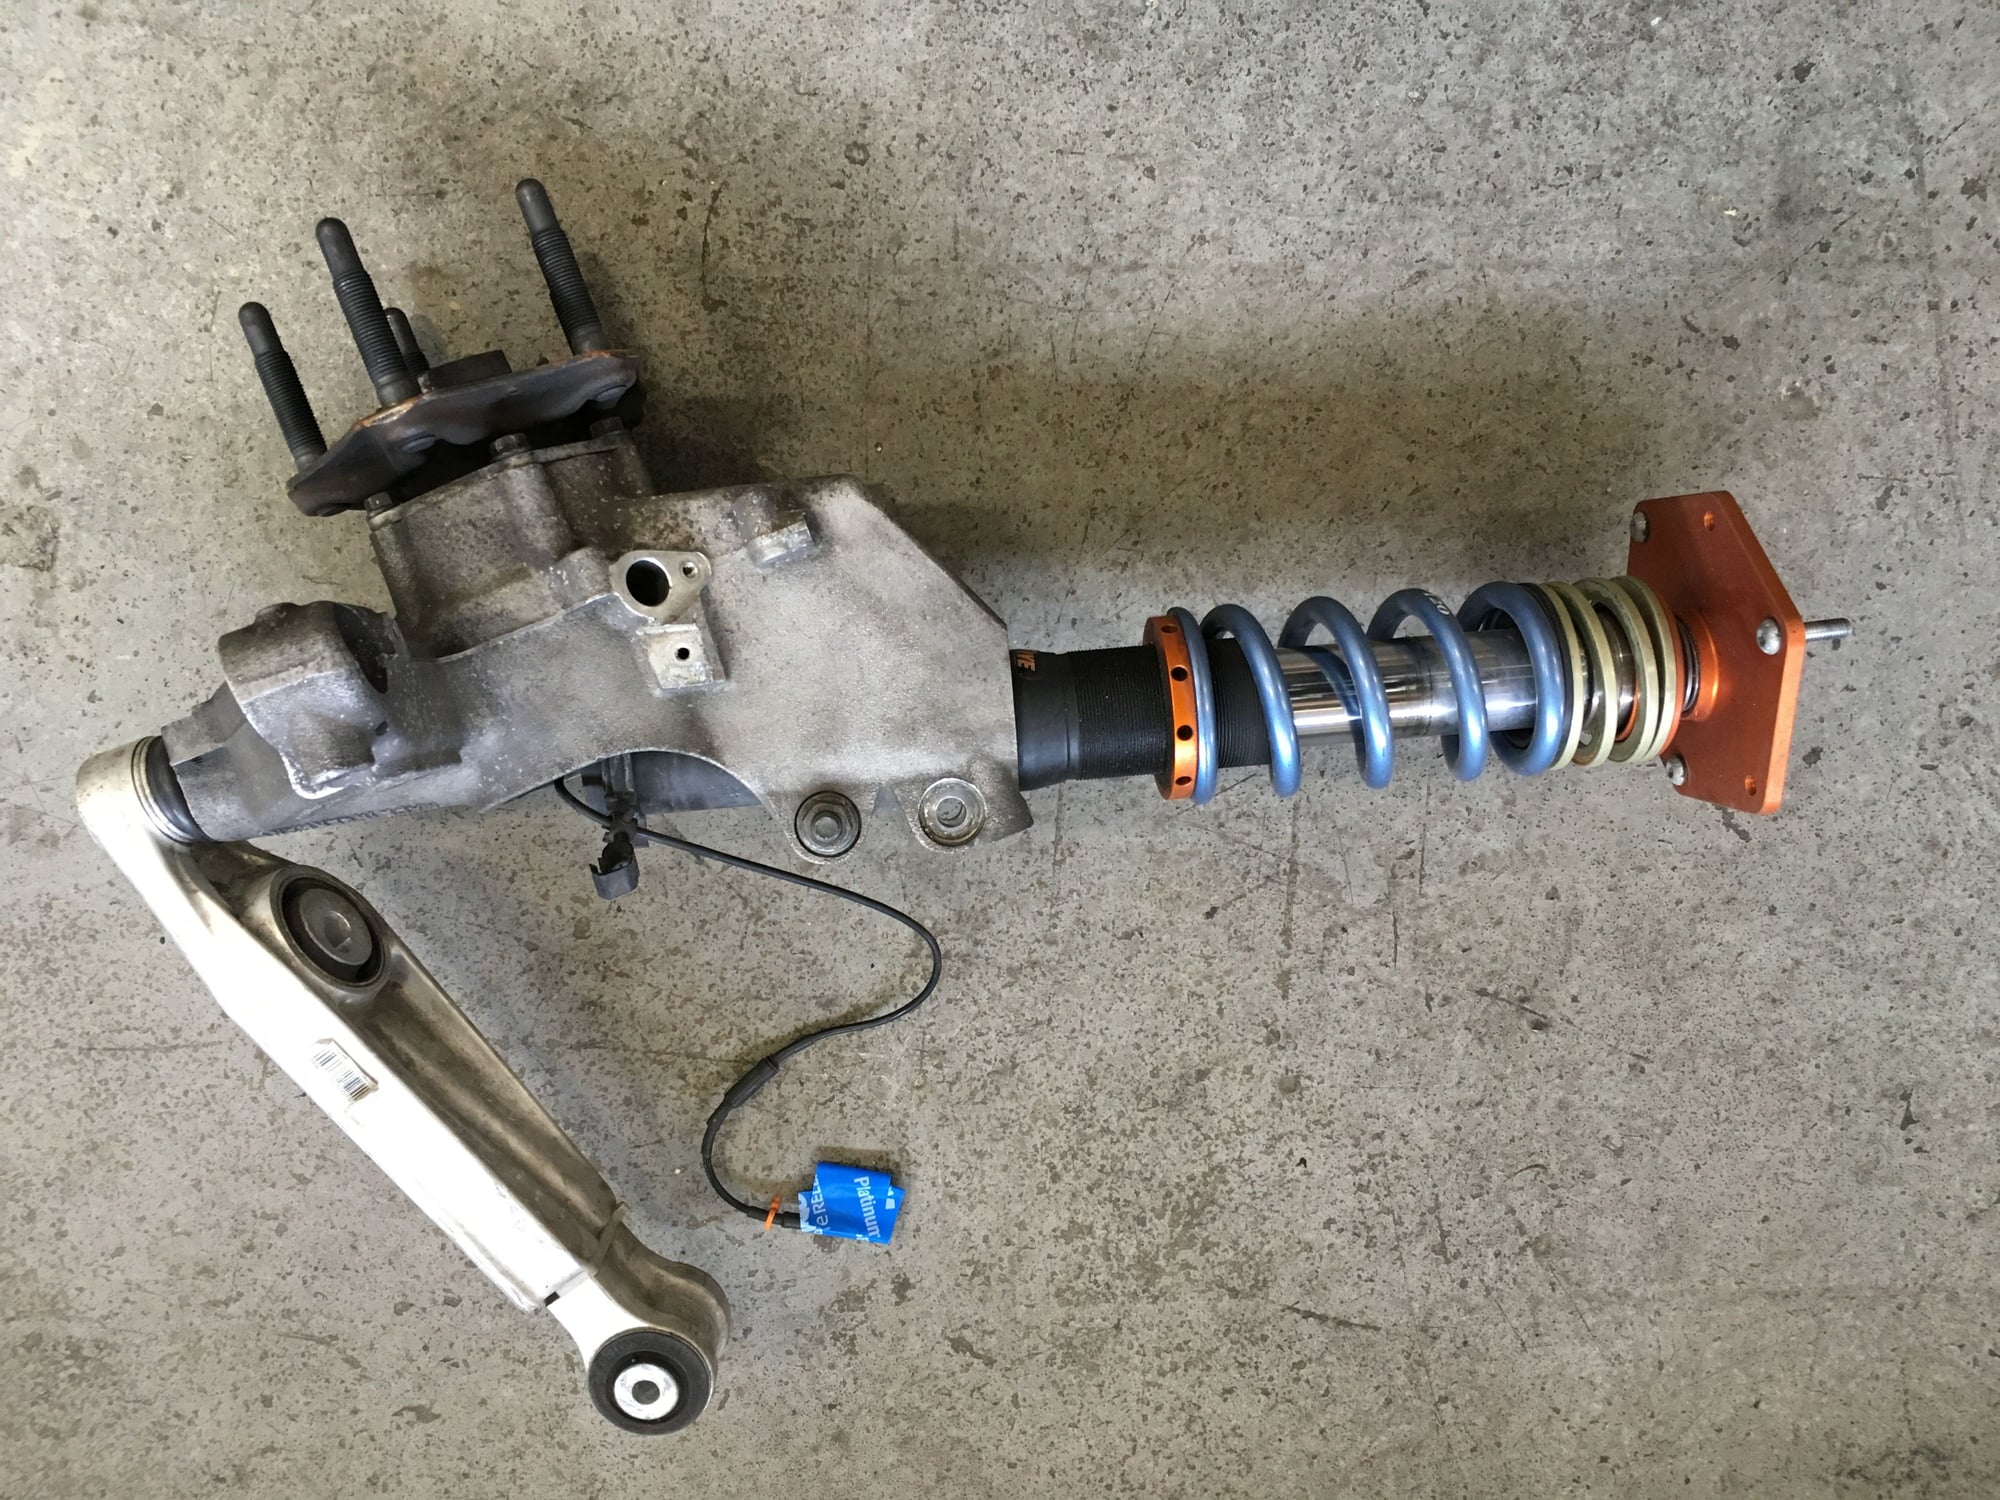
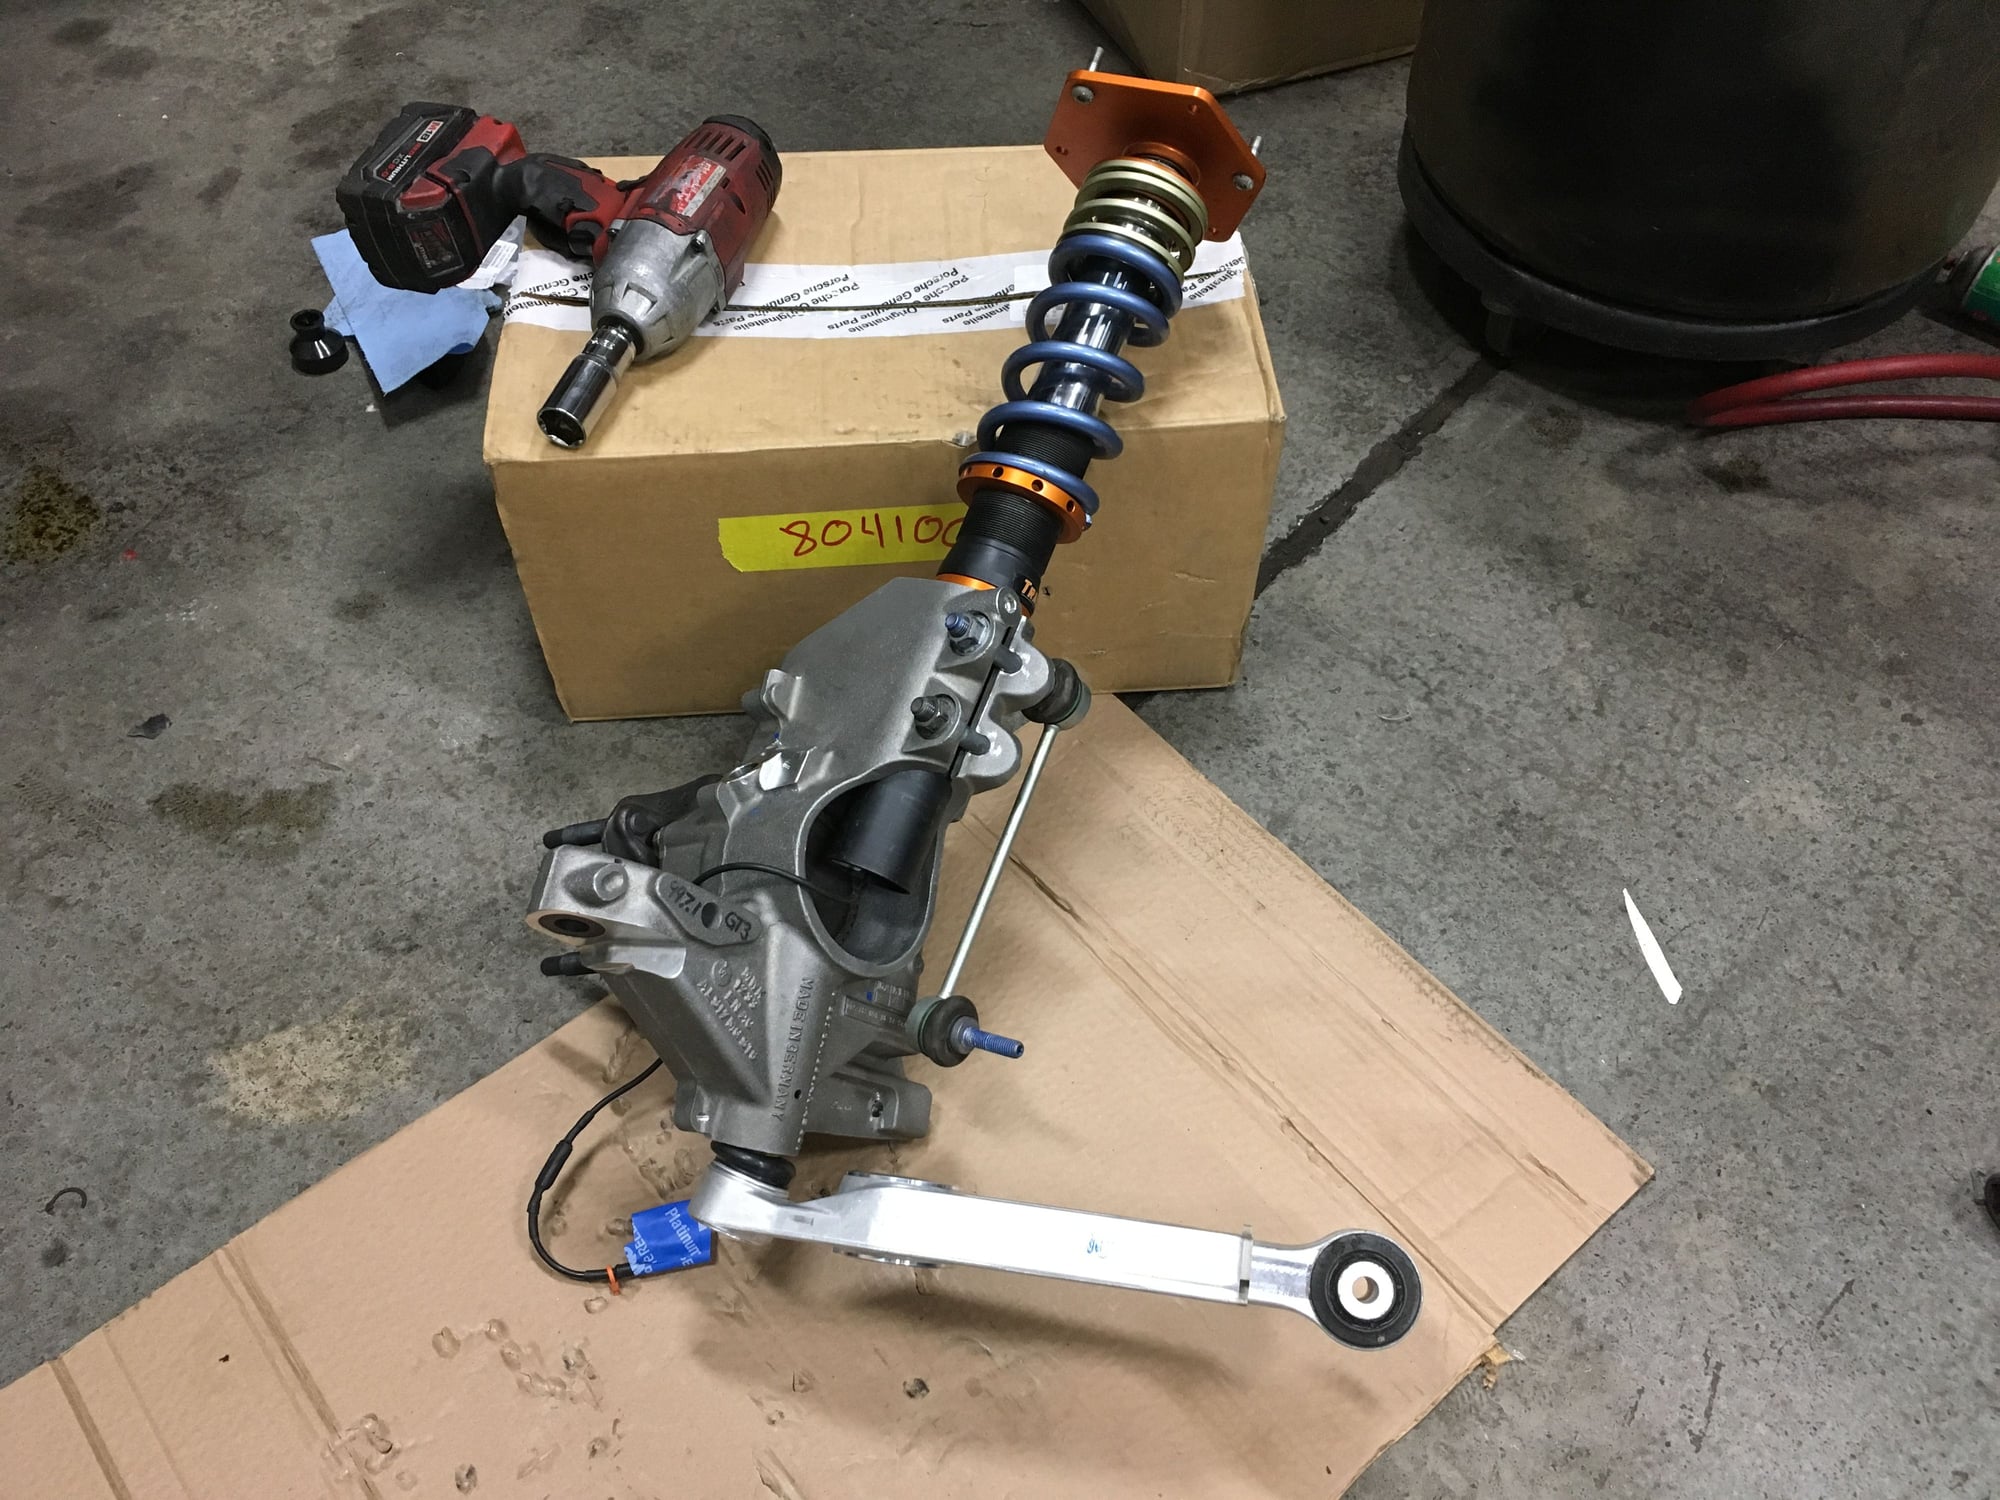
Once this bolt is pulled out the whole assembly is only held in place by the top mount nuts. I have the car lowered enough that I am using my knee to support the weight of the upright/shock/LCA assembly while loosening the last few threads of the top mount nuts by fingers. Then the whole assembly drops.
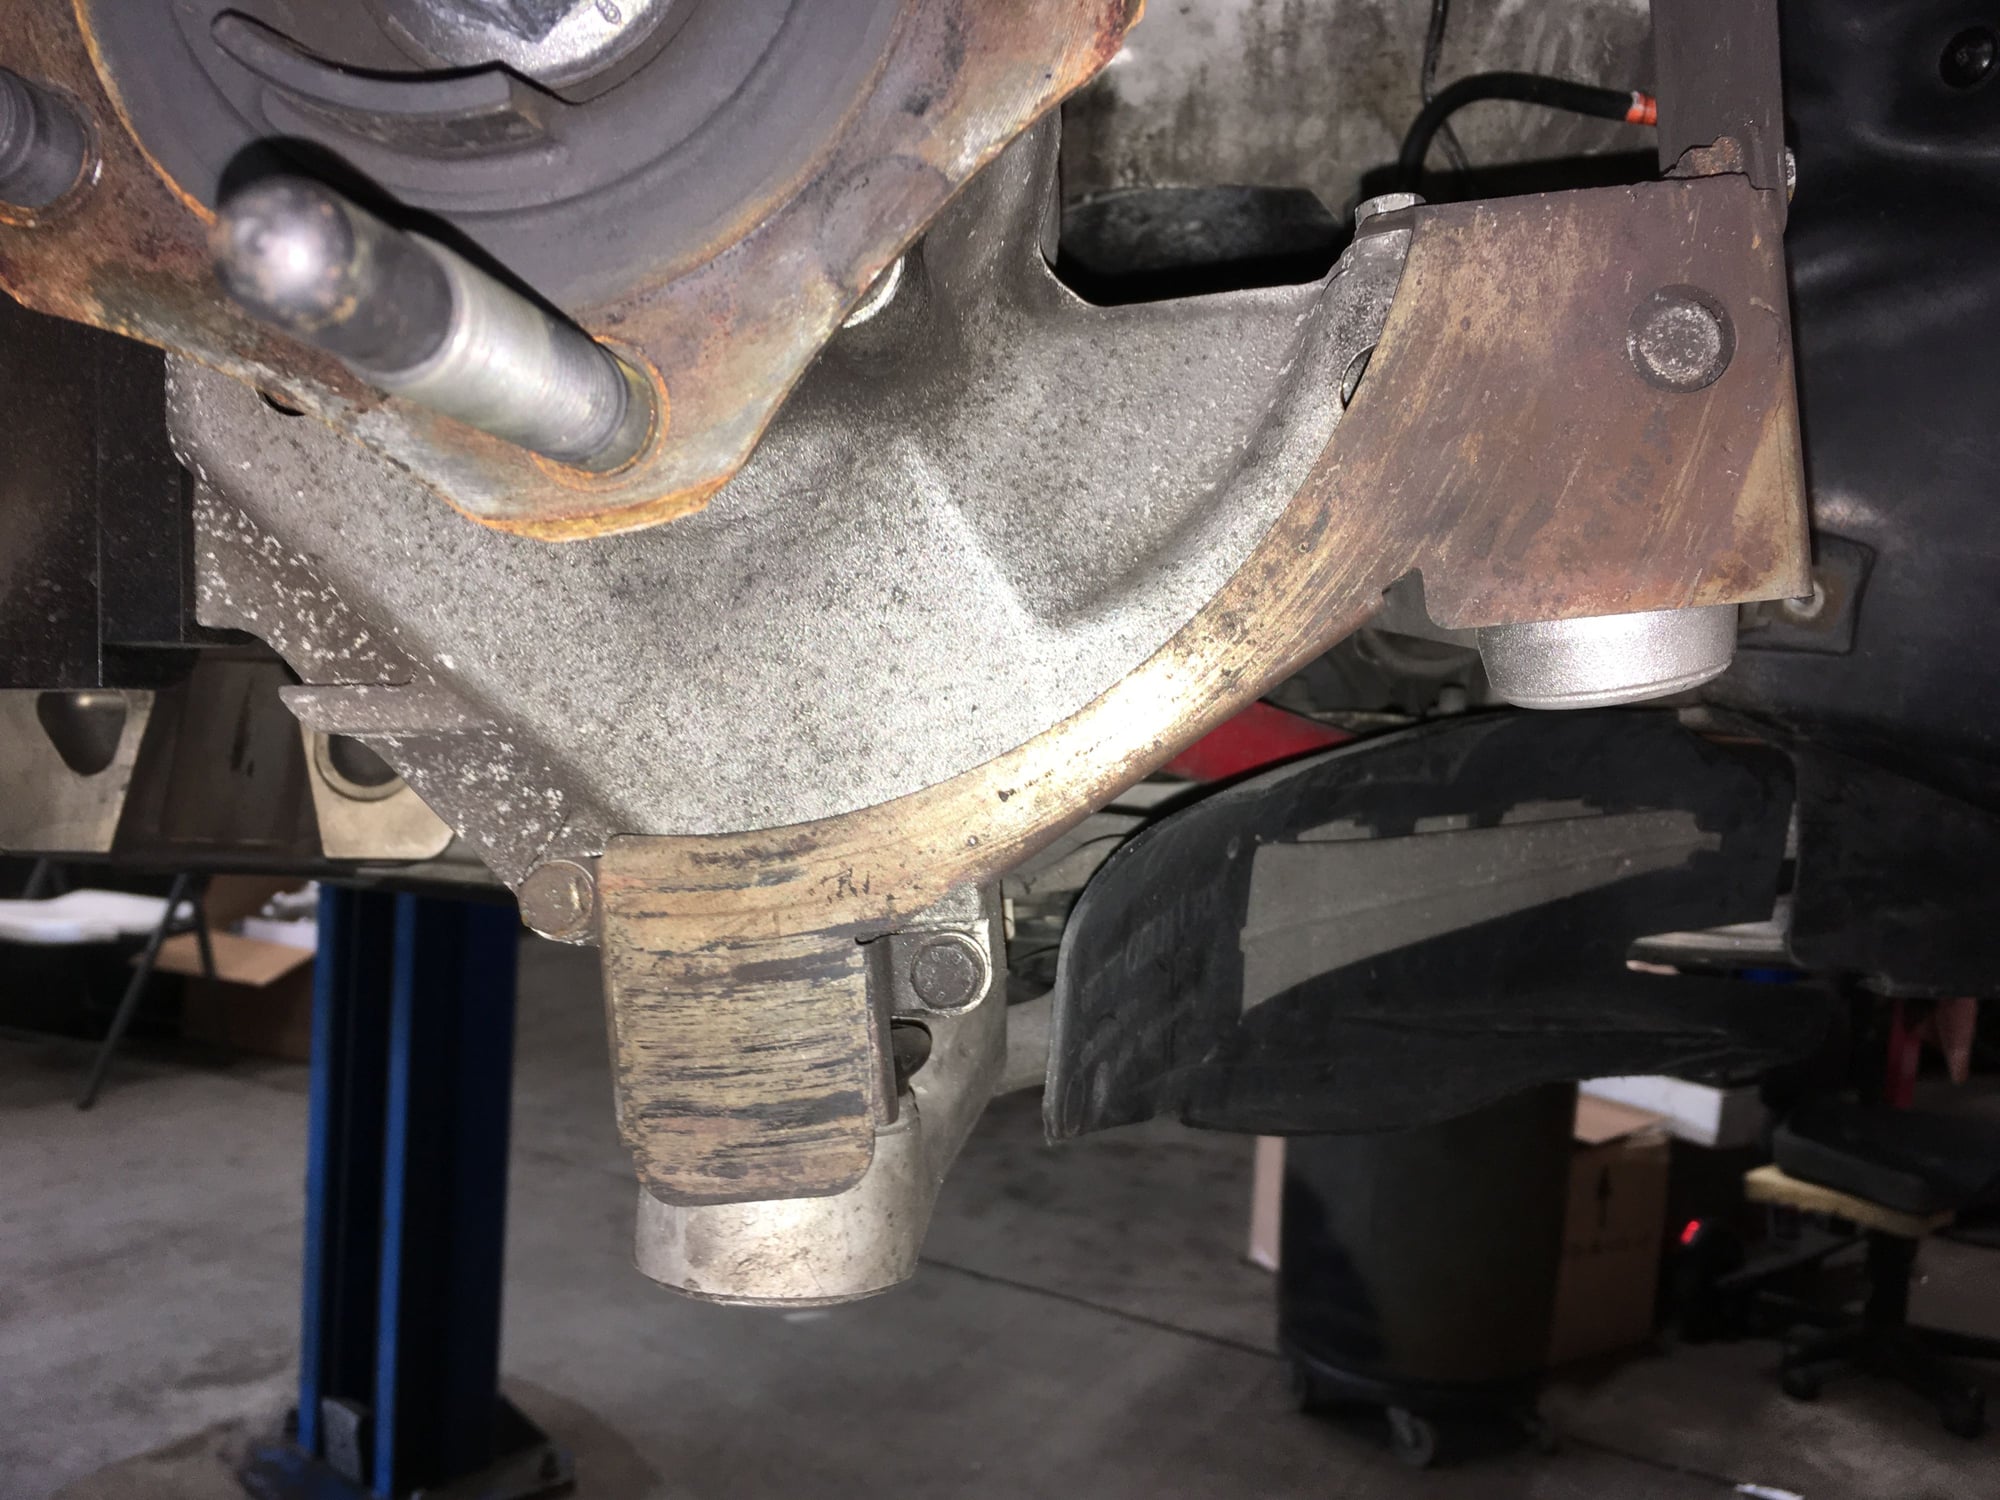
Here's the upright/shock/LCA assemble on the floor.
While the assembly is out its a good time for cleaning.
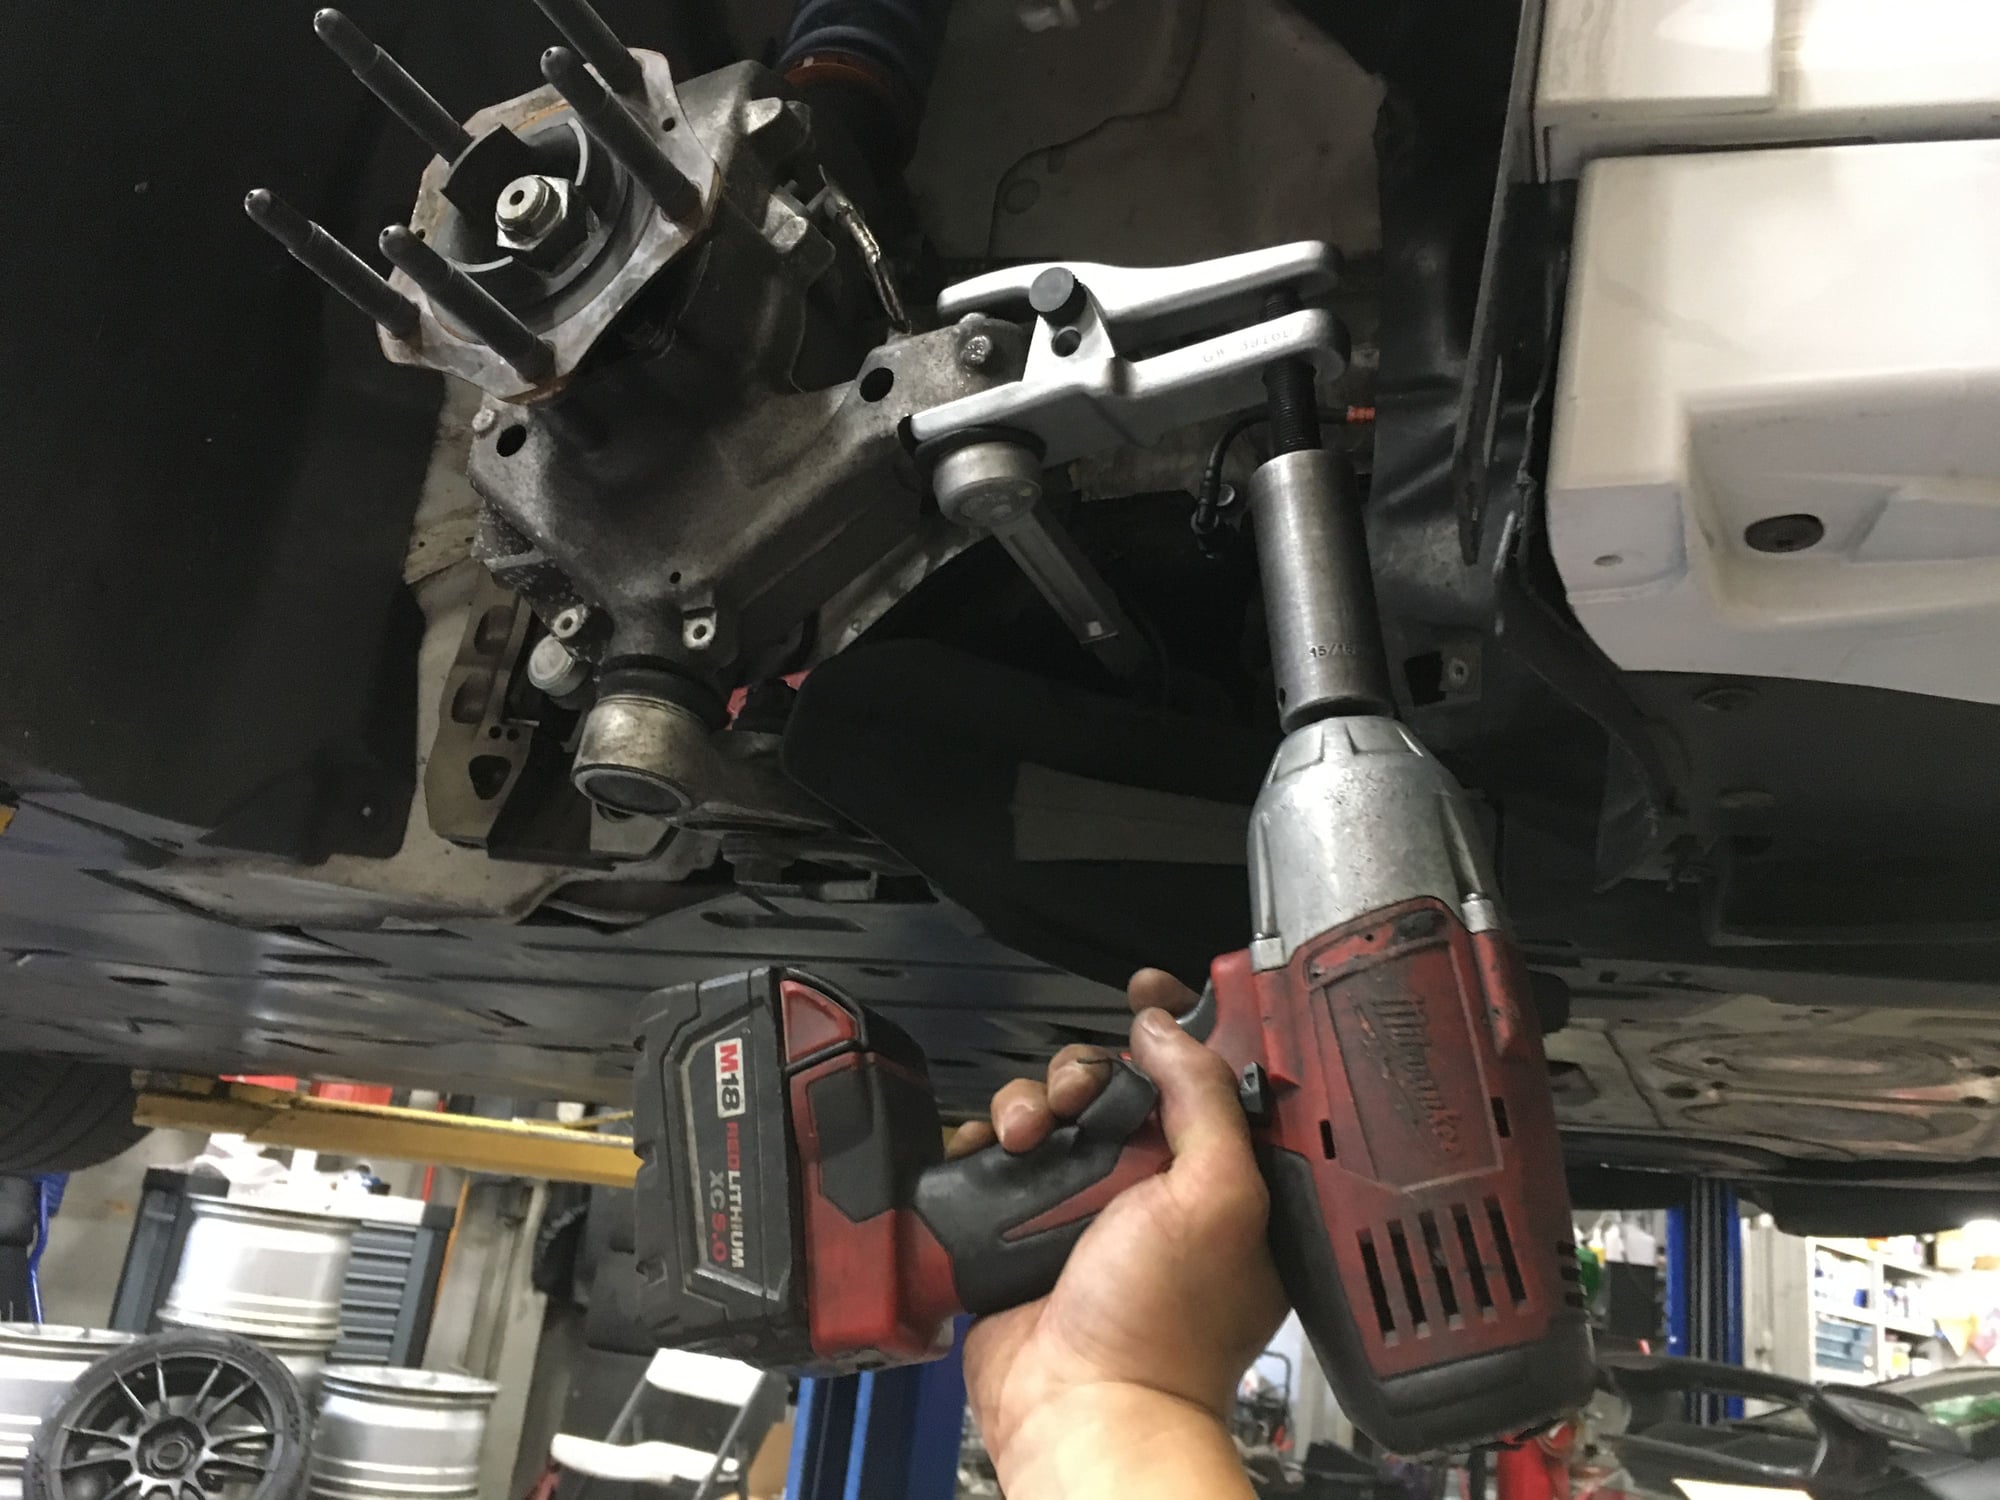
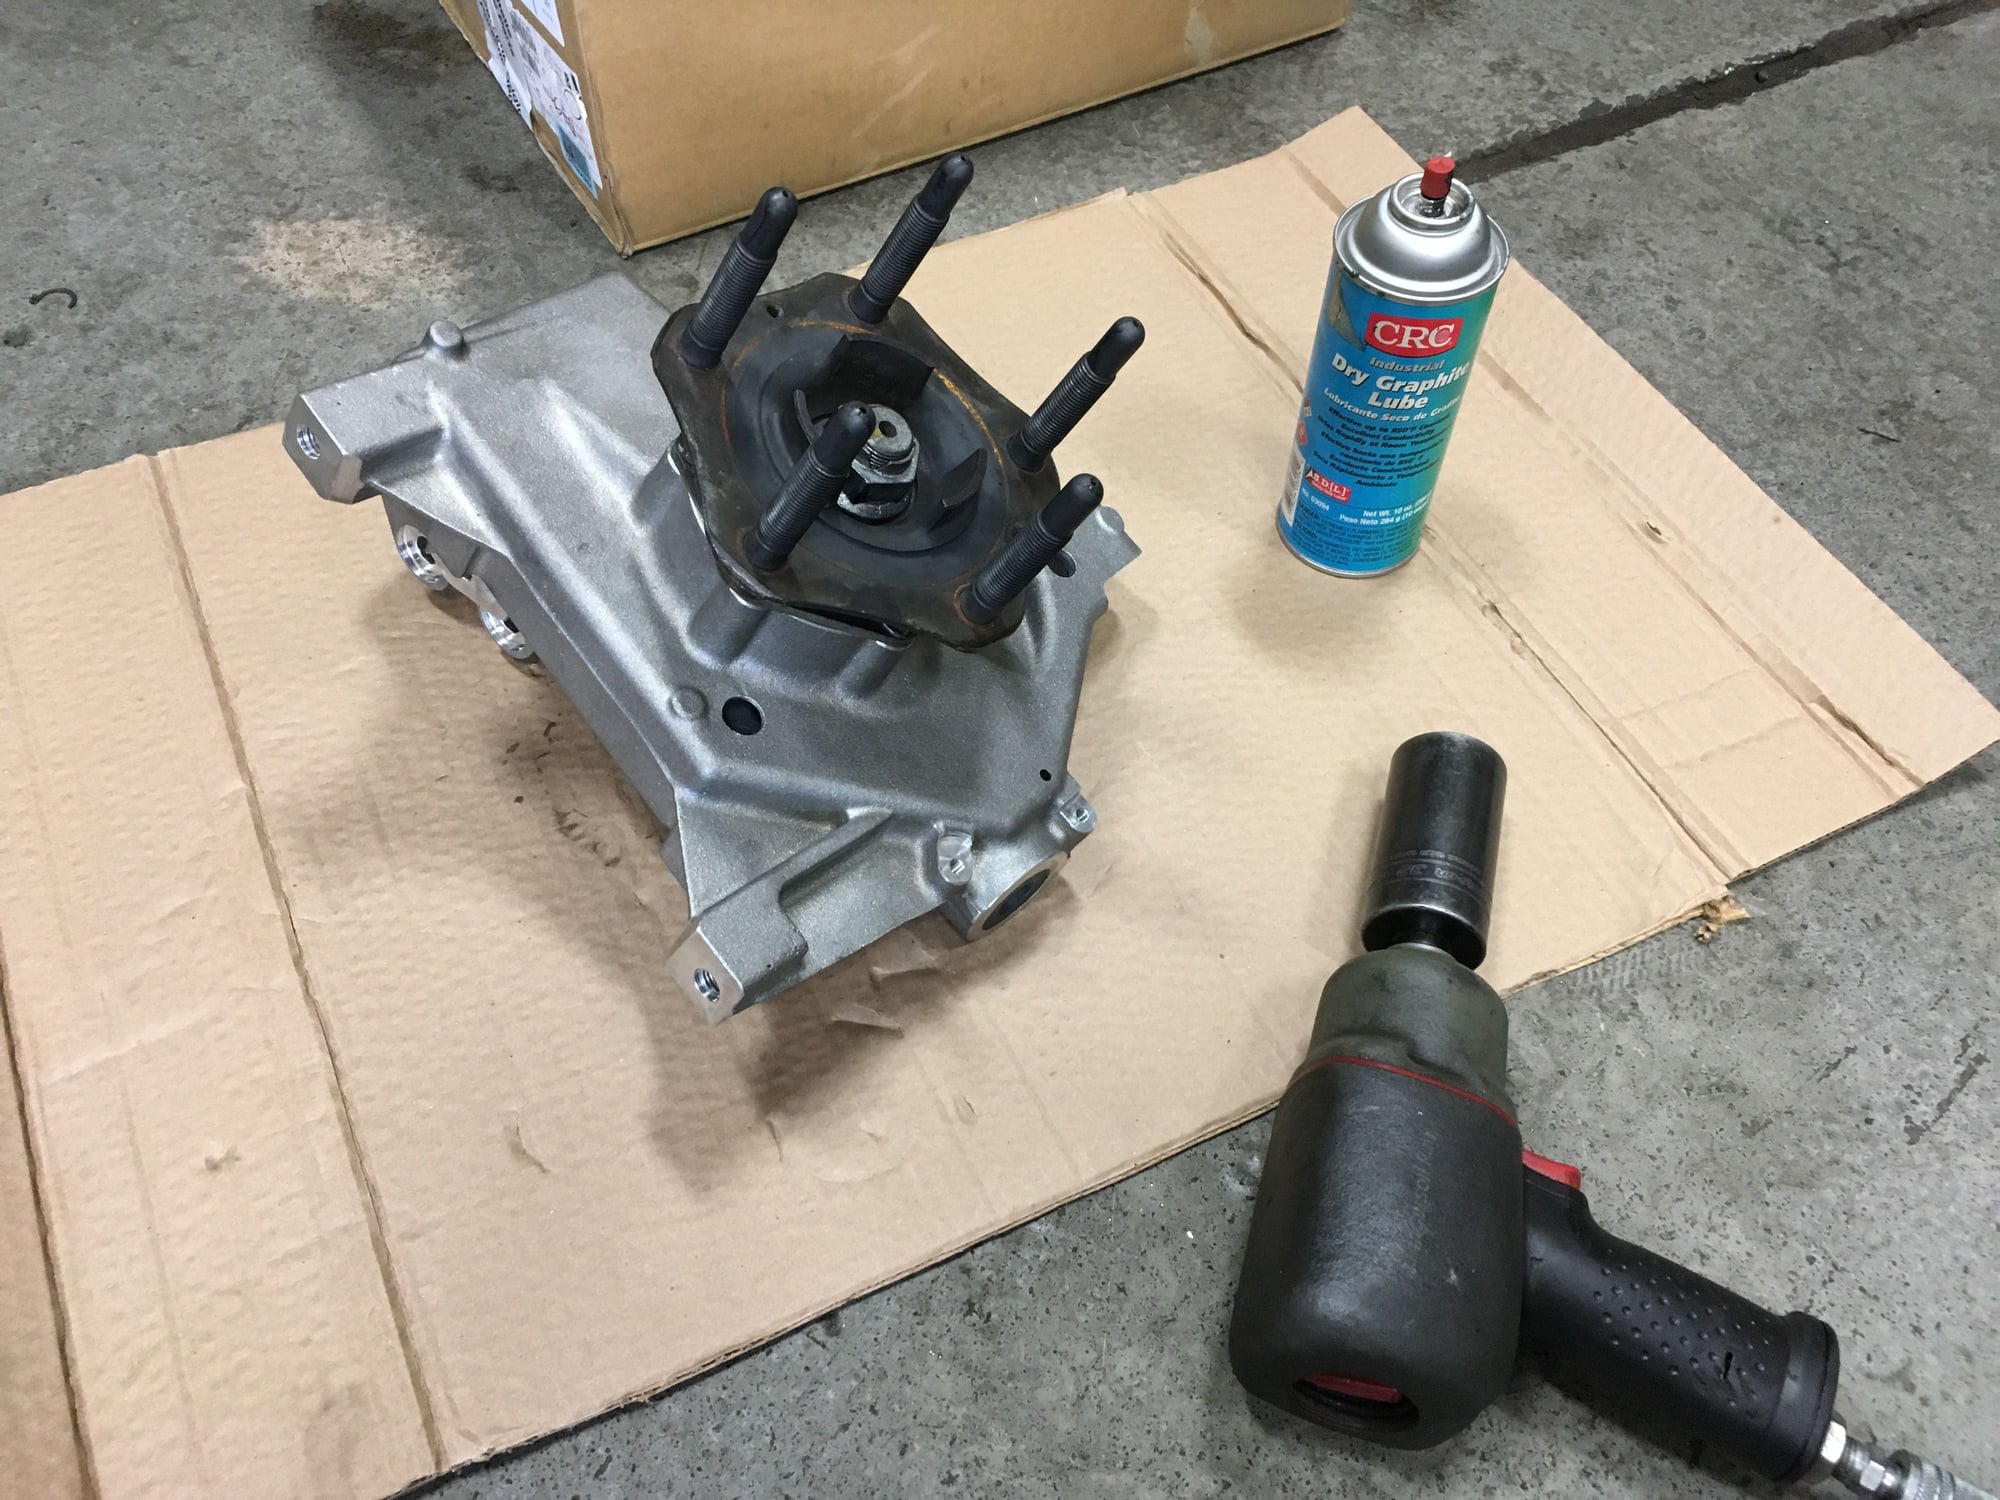
Stub axle nut removed. Need an impact gun to undo 300+ ft-lbs of torque.
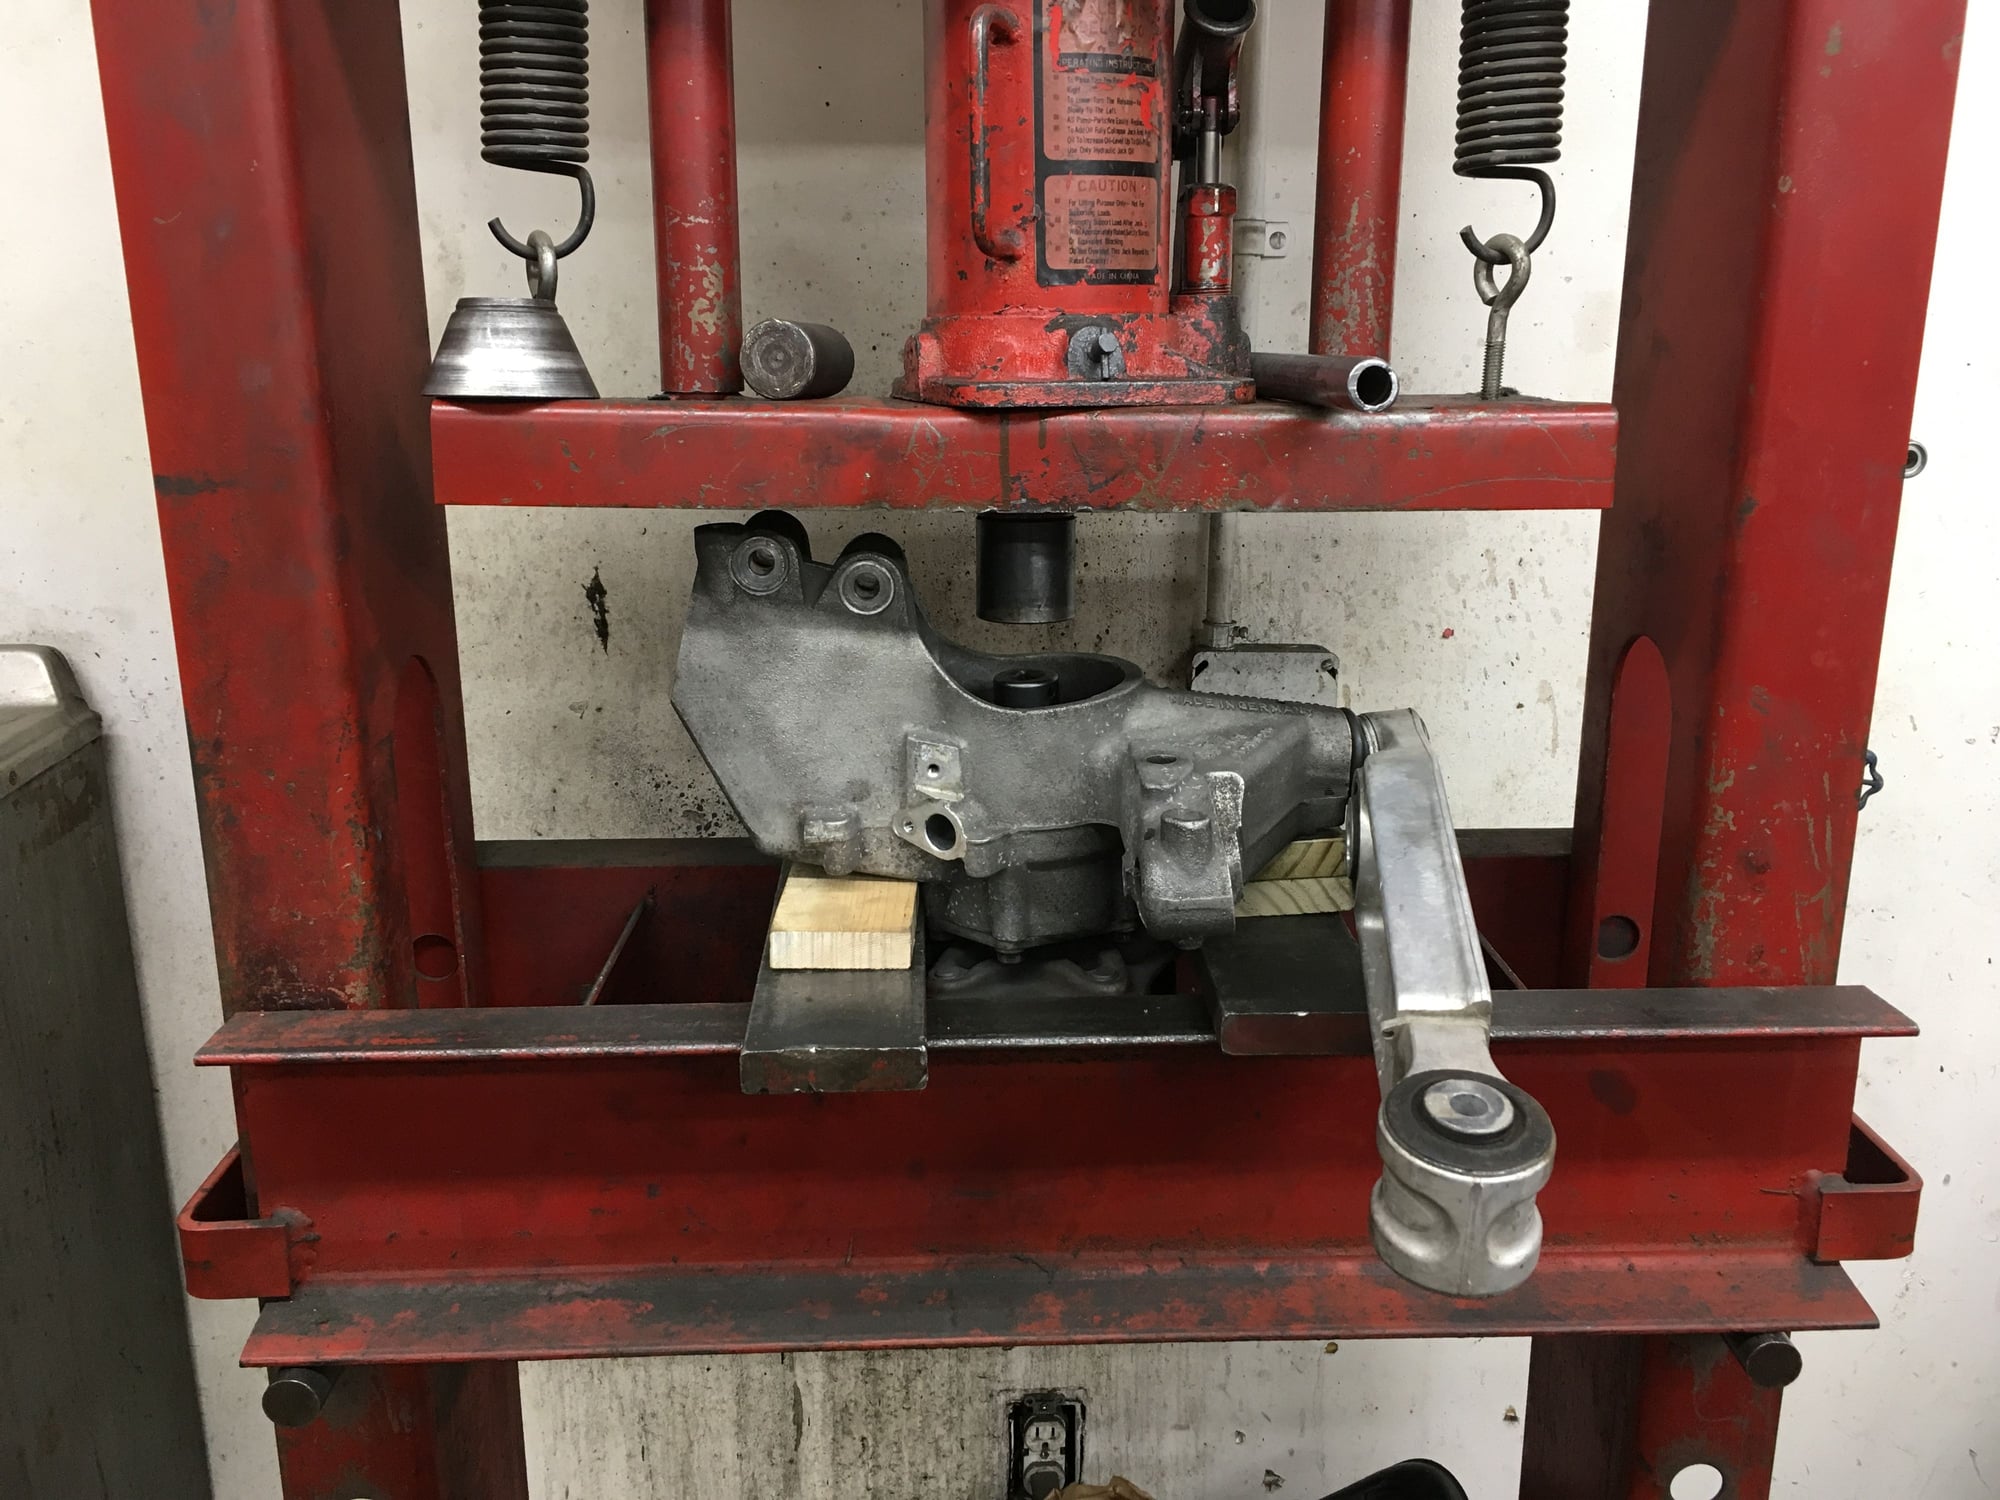
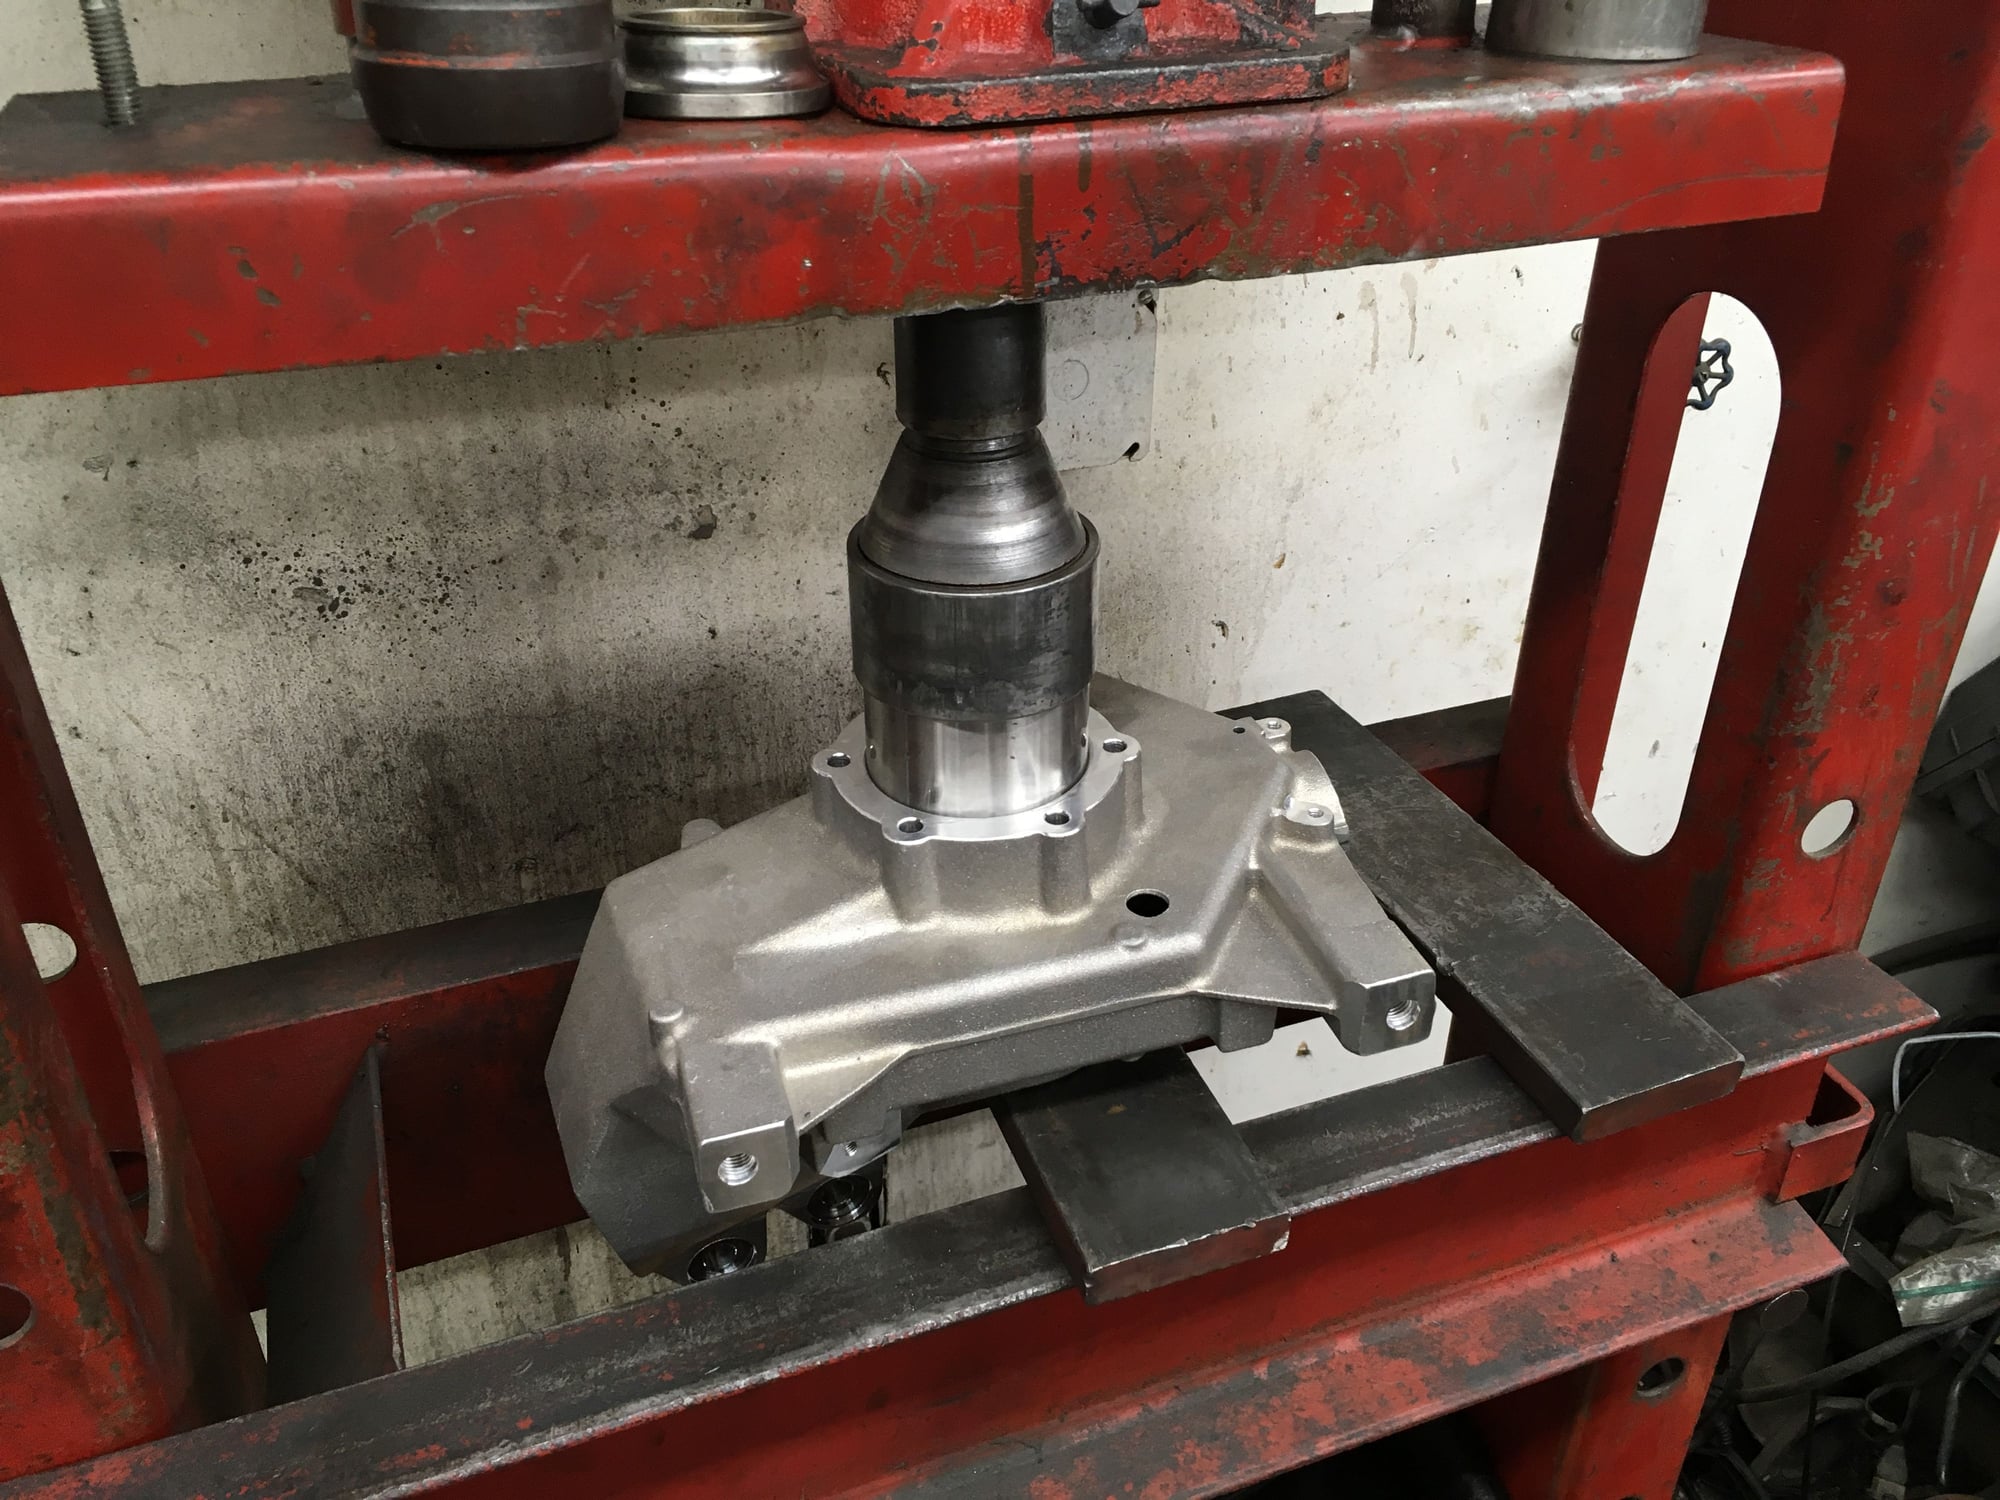
Its time to play with the hydraulic press.
Pressing wheel bearings sounds pretty simple, but it is not (except for those who do this routinely). Pressing wheel bearings is a multi-phase task.
Phase 1 is to extract the stub axle without damaging it and the upright. A proper size die is needed.
Once the stub is safely pressed out pieces of the old wheel bearing will be stuck to it. These pieces need to be removed, again without damaging the stub, unless you plan on buying new stubs.
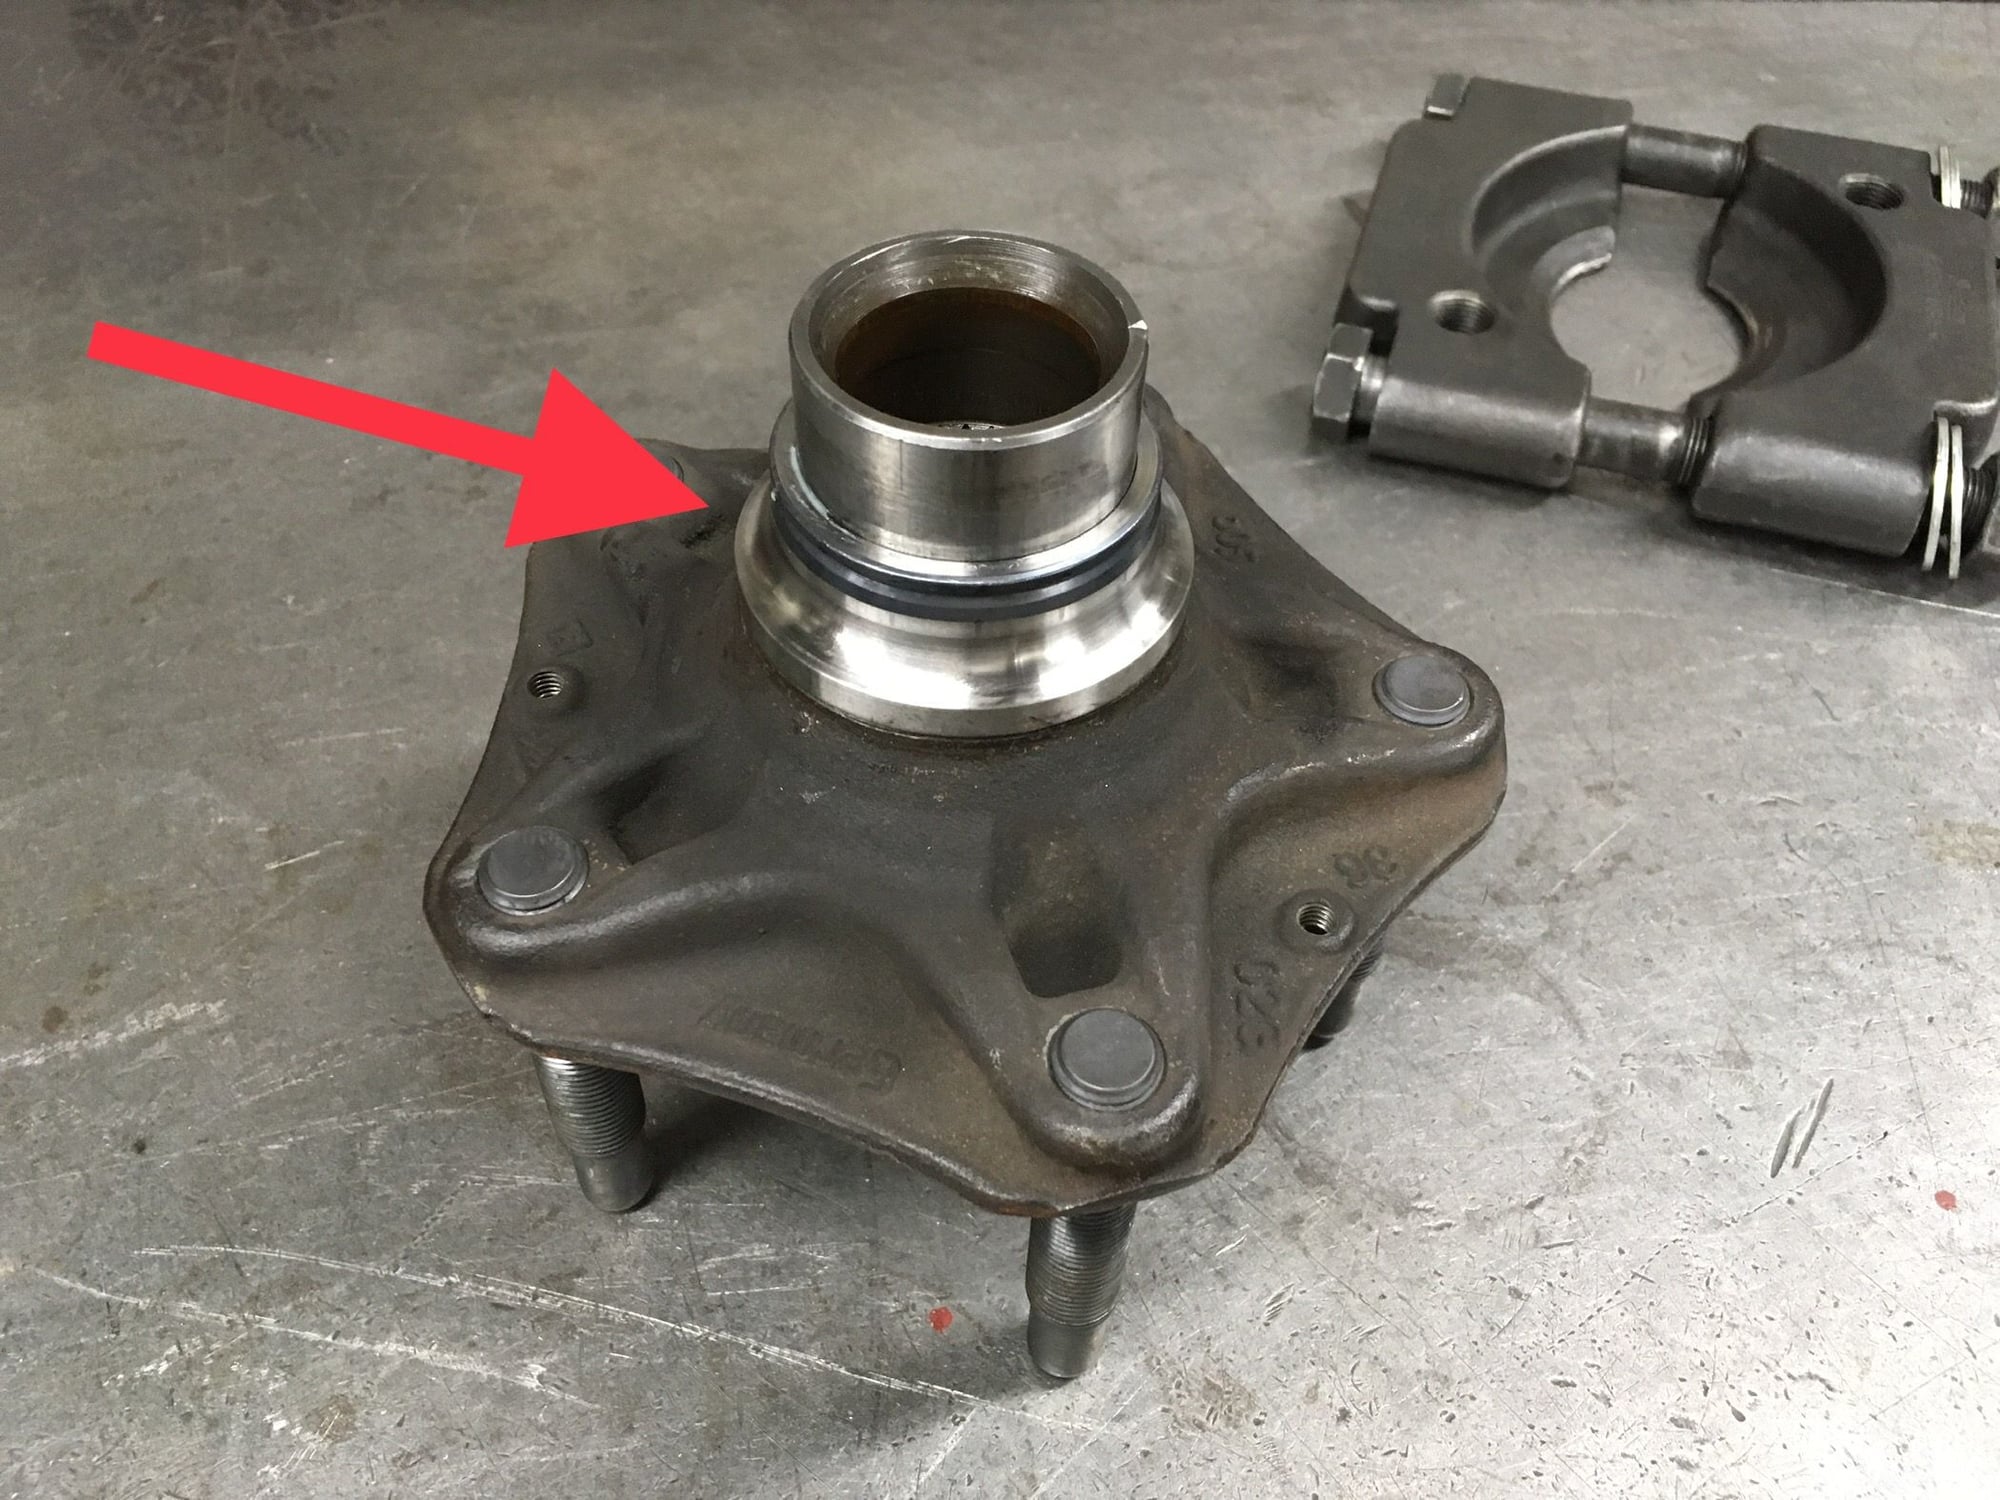
Removing this bearing seal is easy.
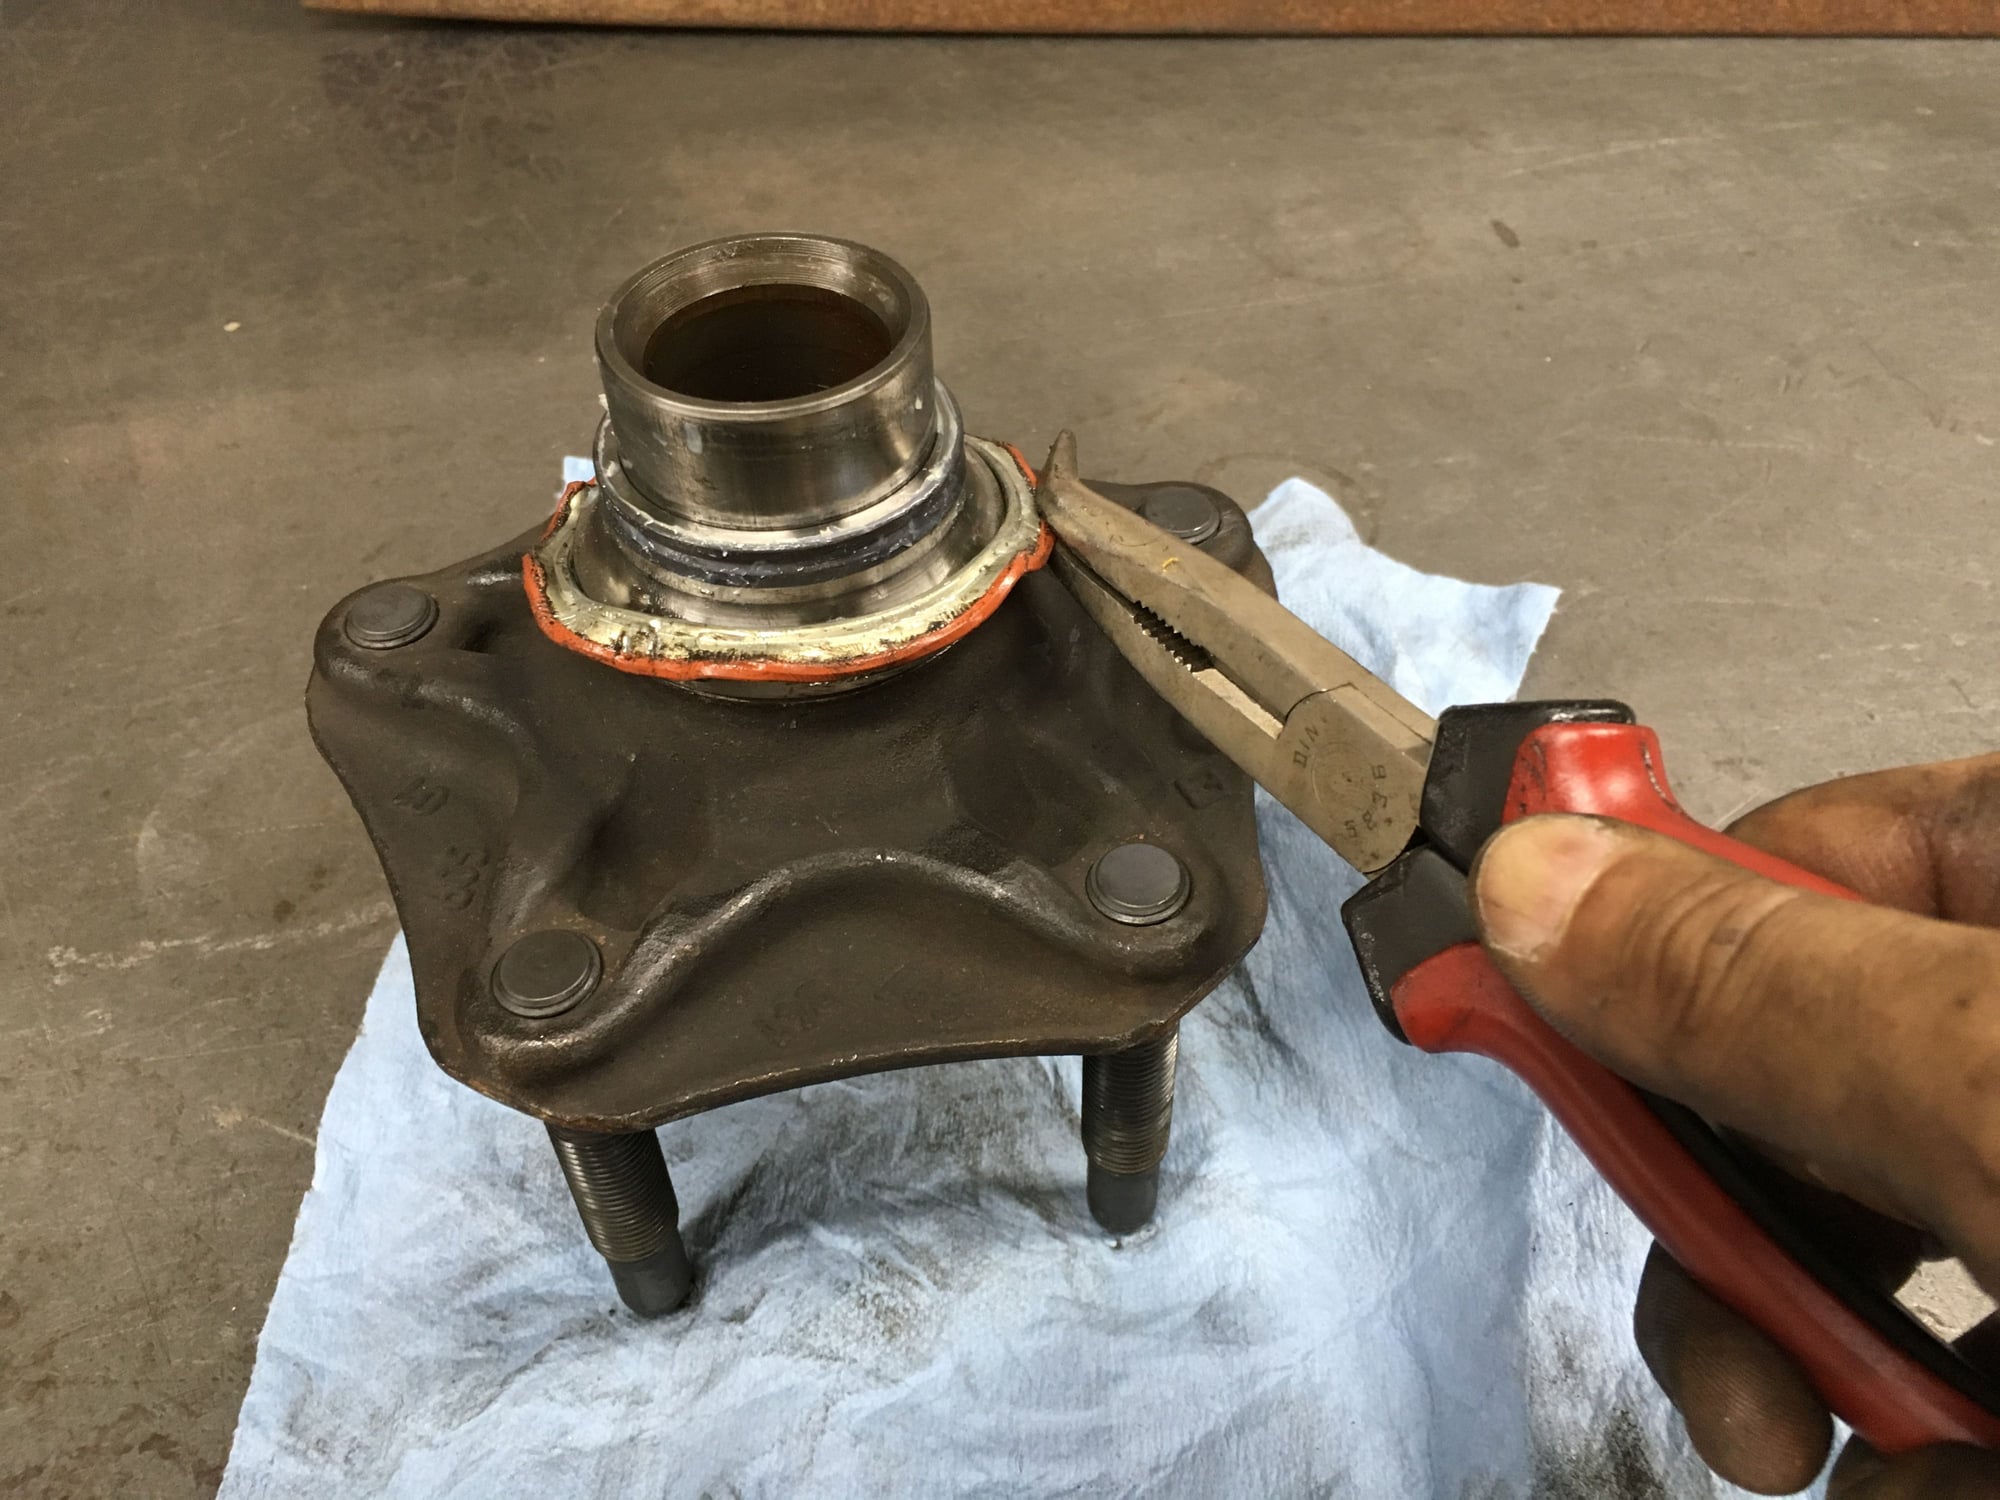
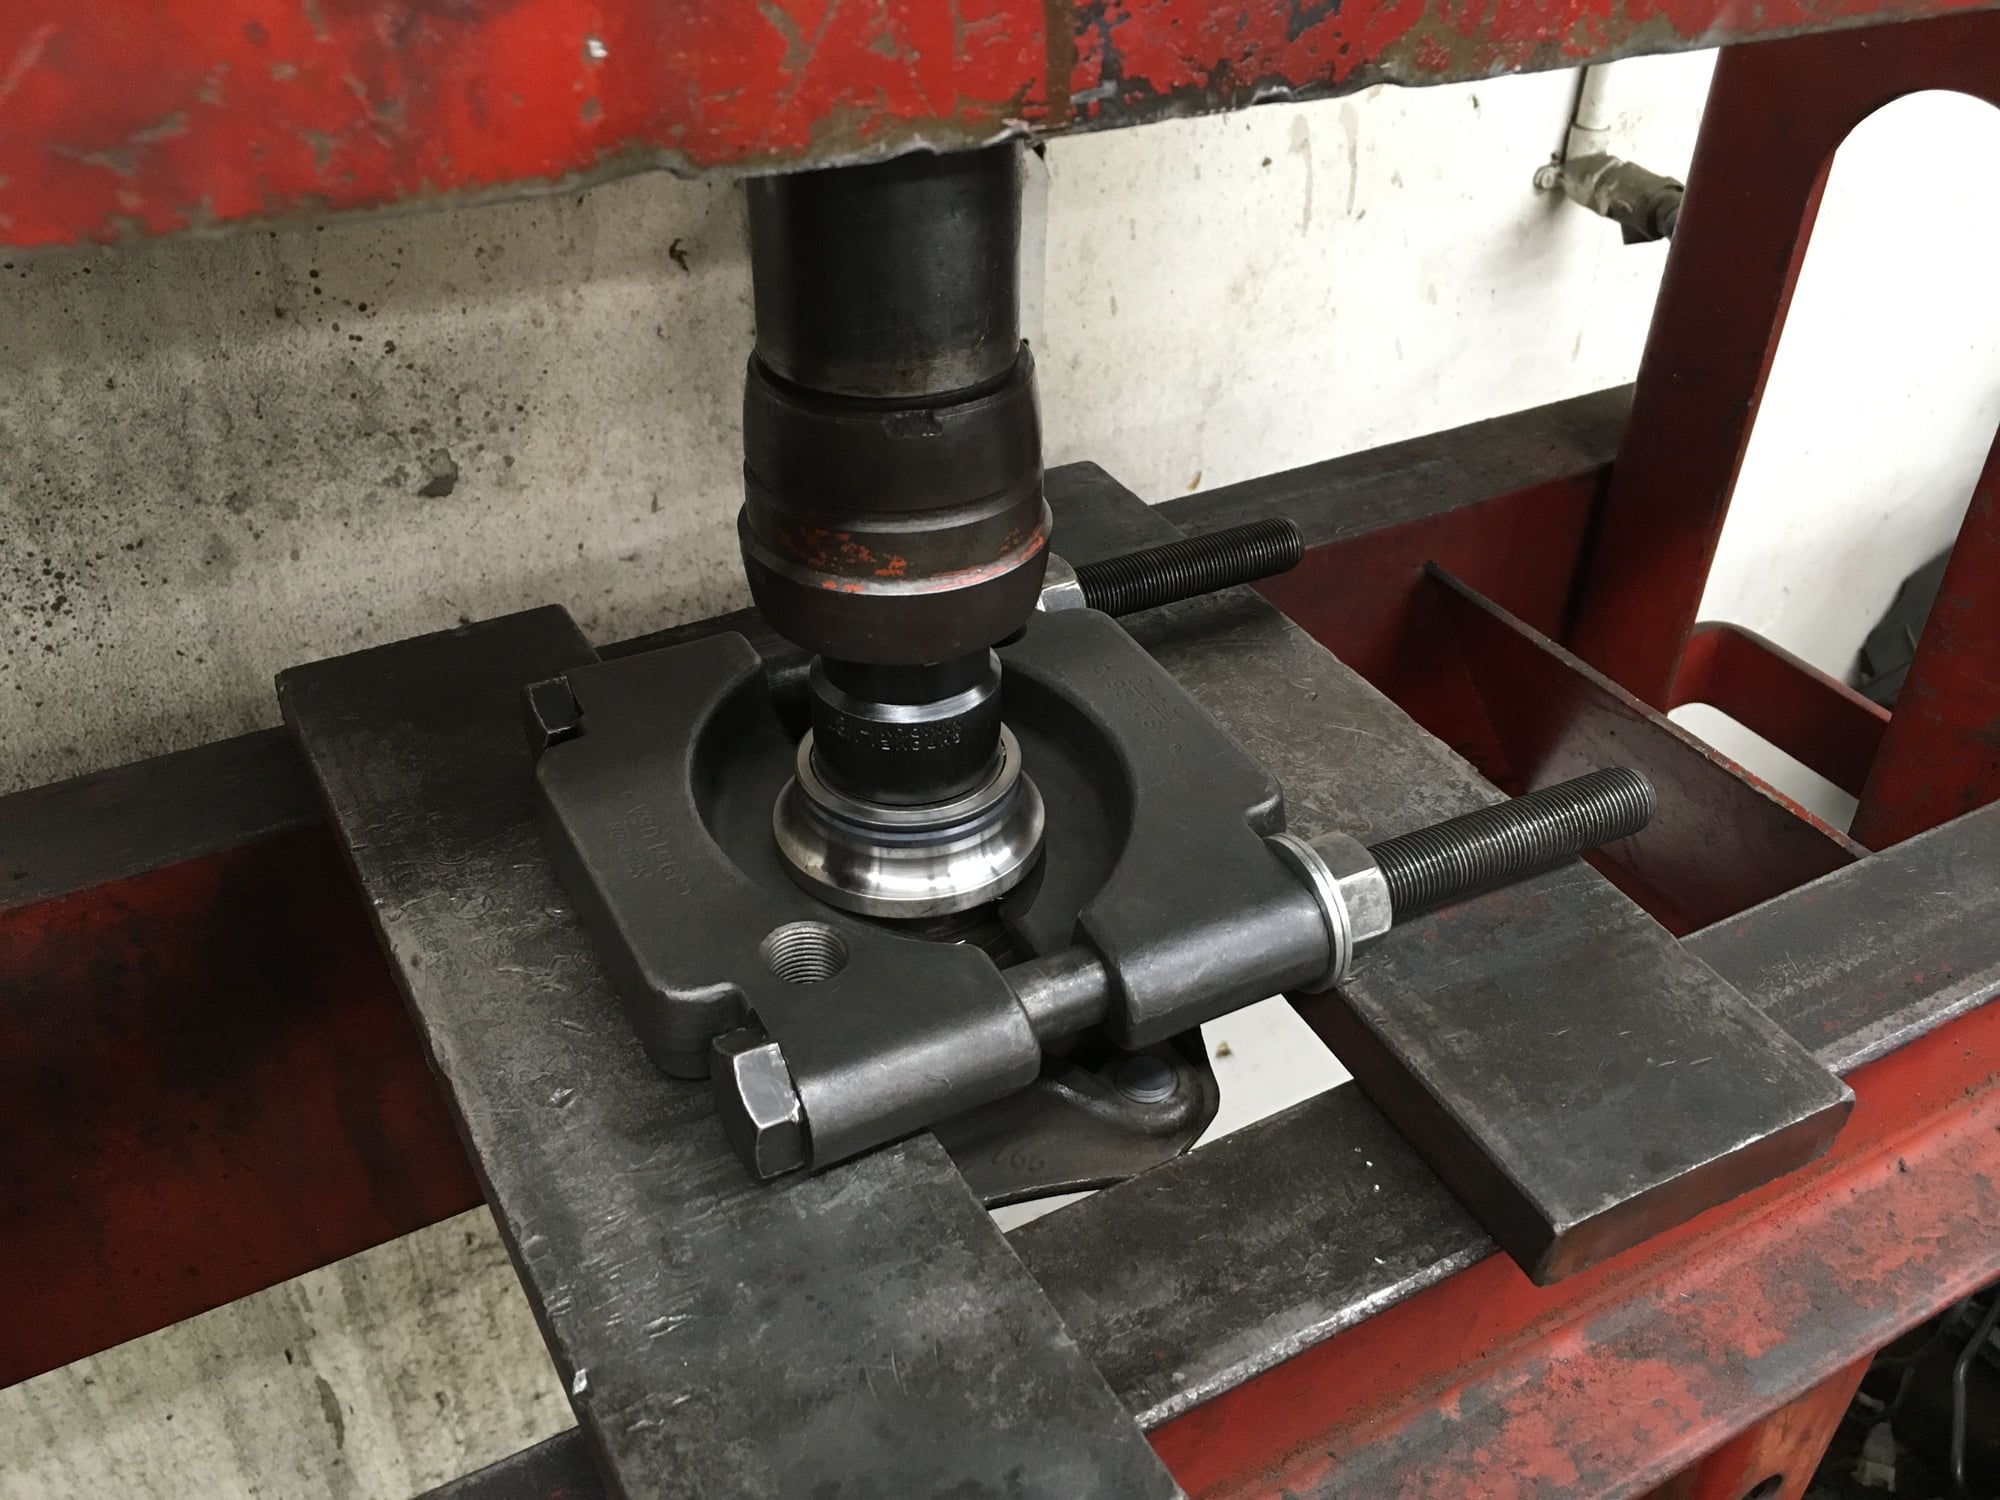
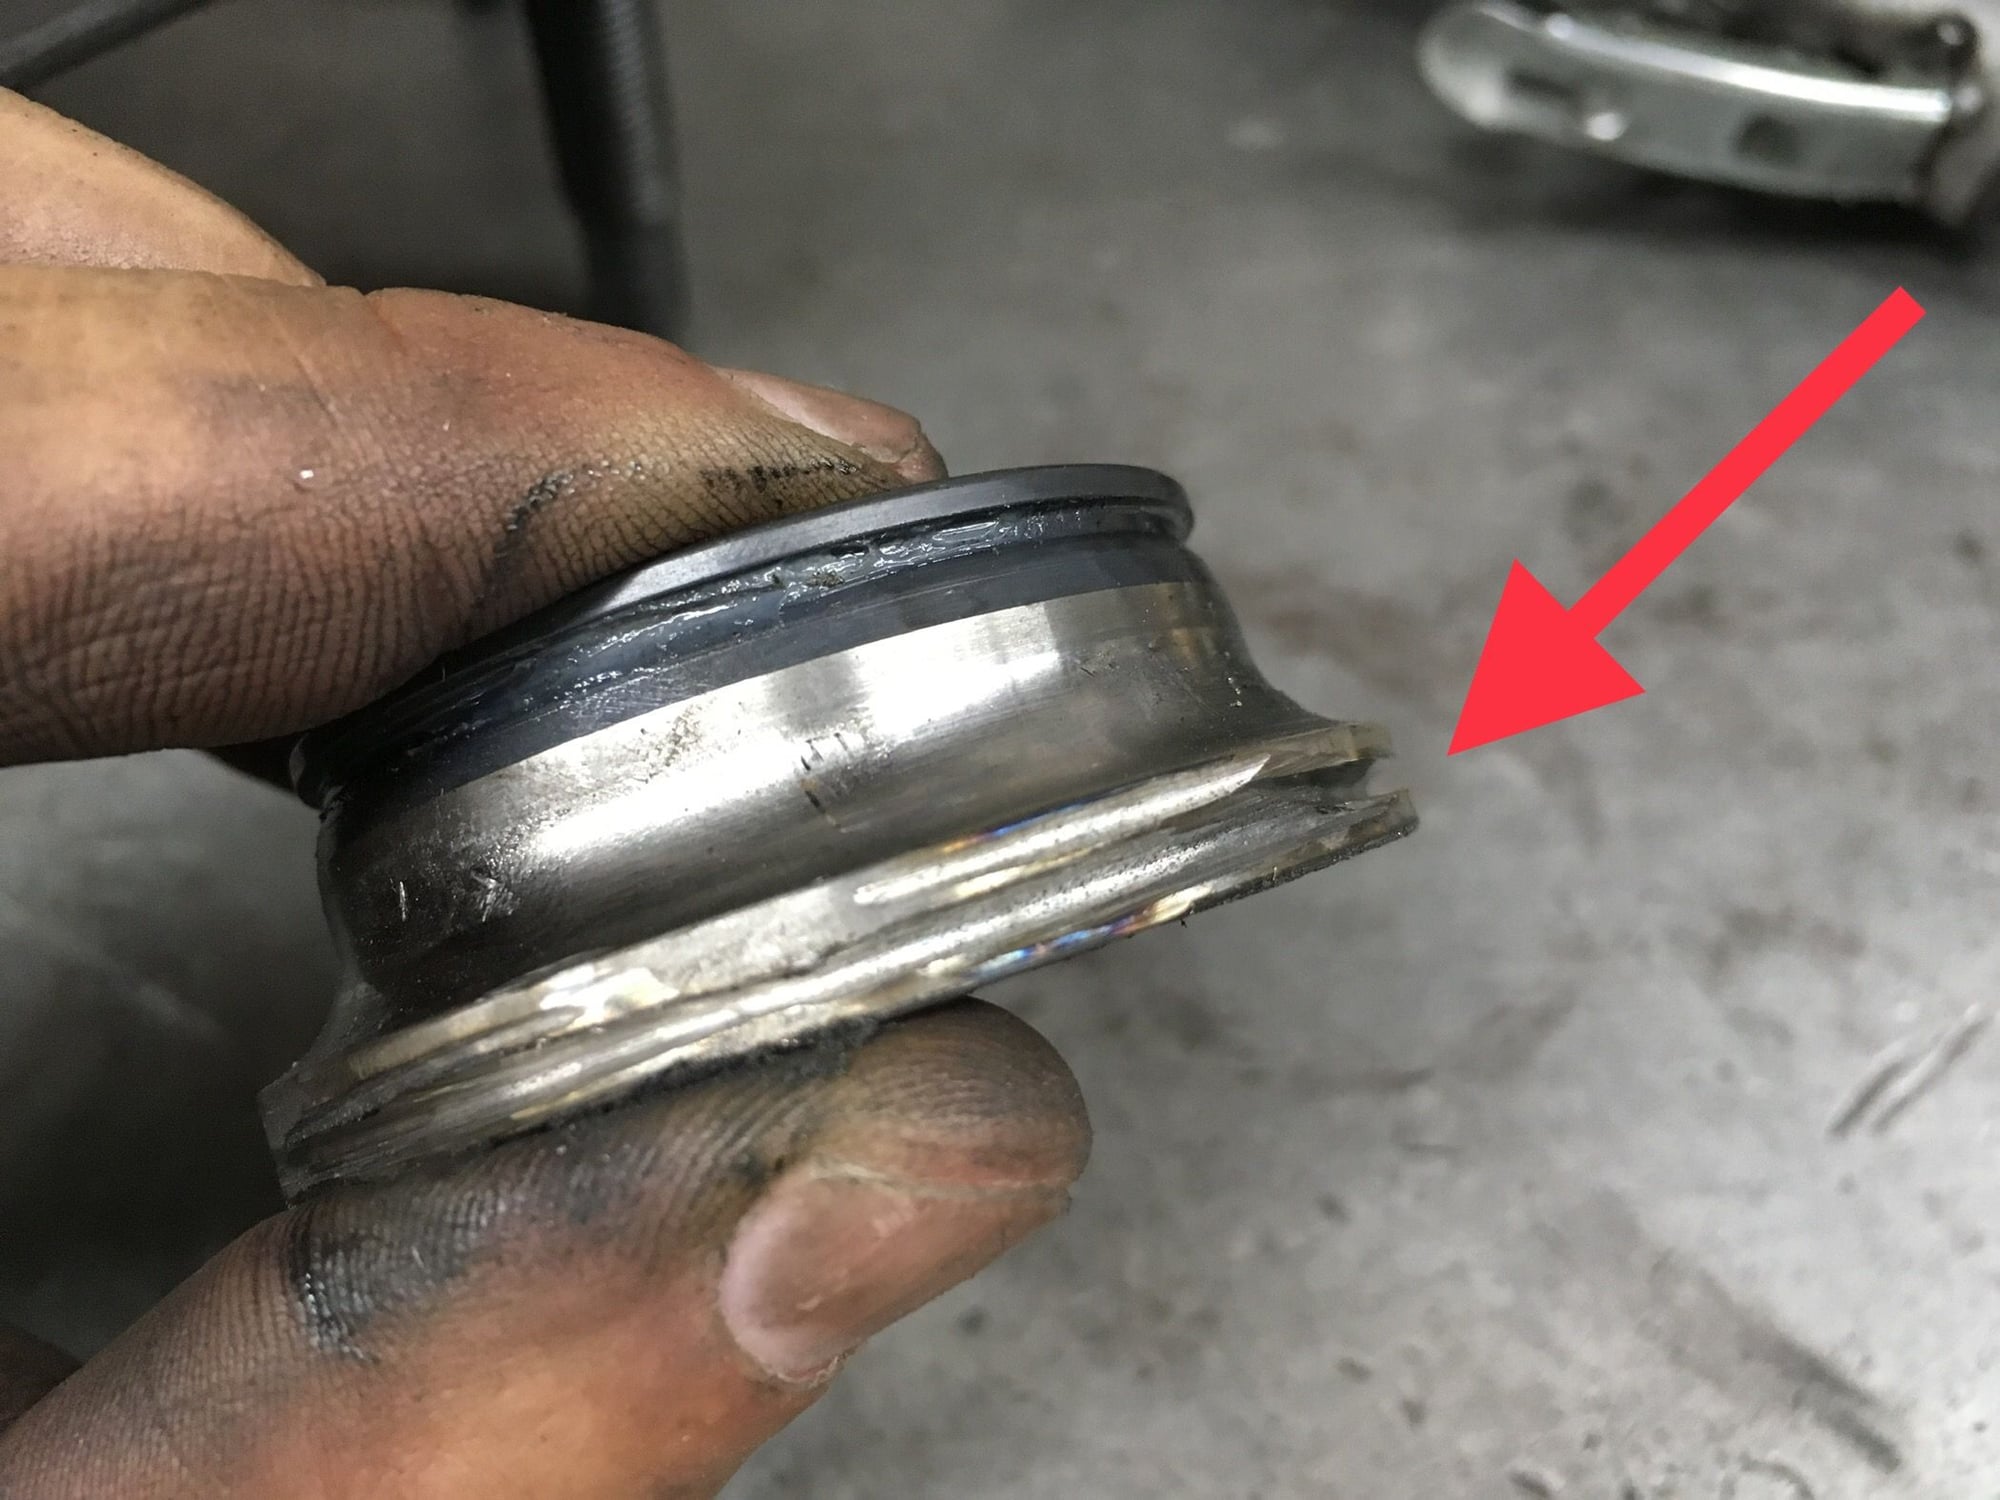
Now removing this bearing collar is harder. It is an interference fit, for those who don't know what interference fit is, it means its on there really MF'ing tight! The heavy duty clamp in the background is used to separate the collar from the stub at the thin-as-hair split line.
Here's the heavy duty clamp at work.
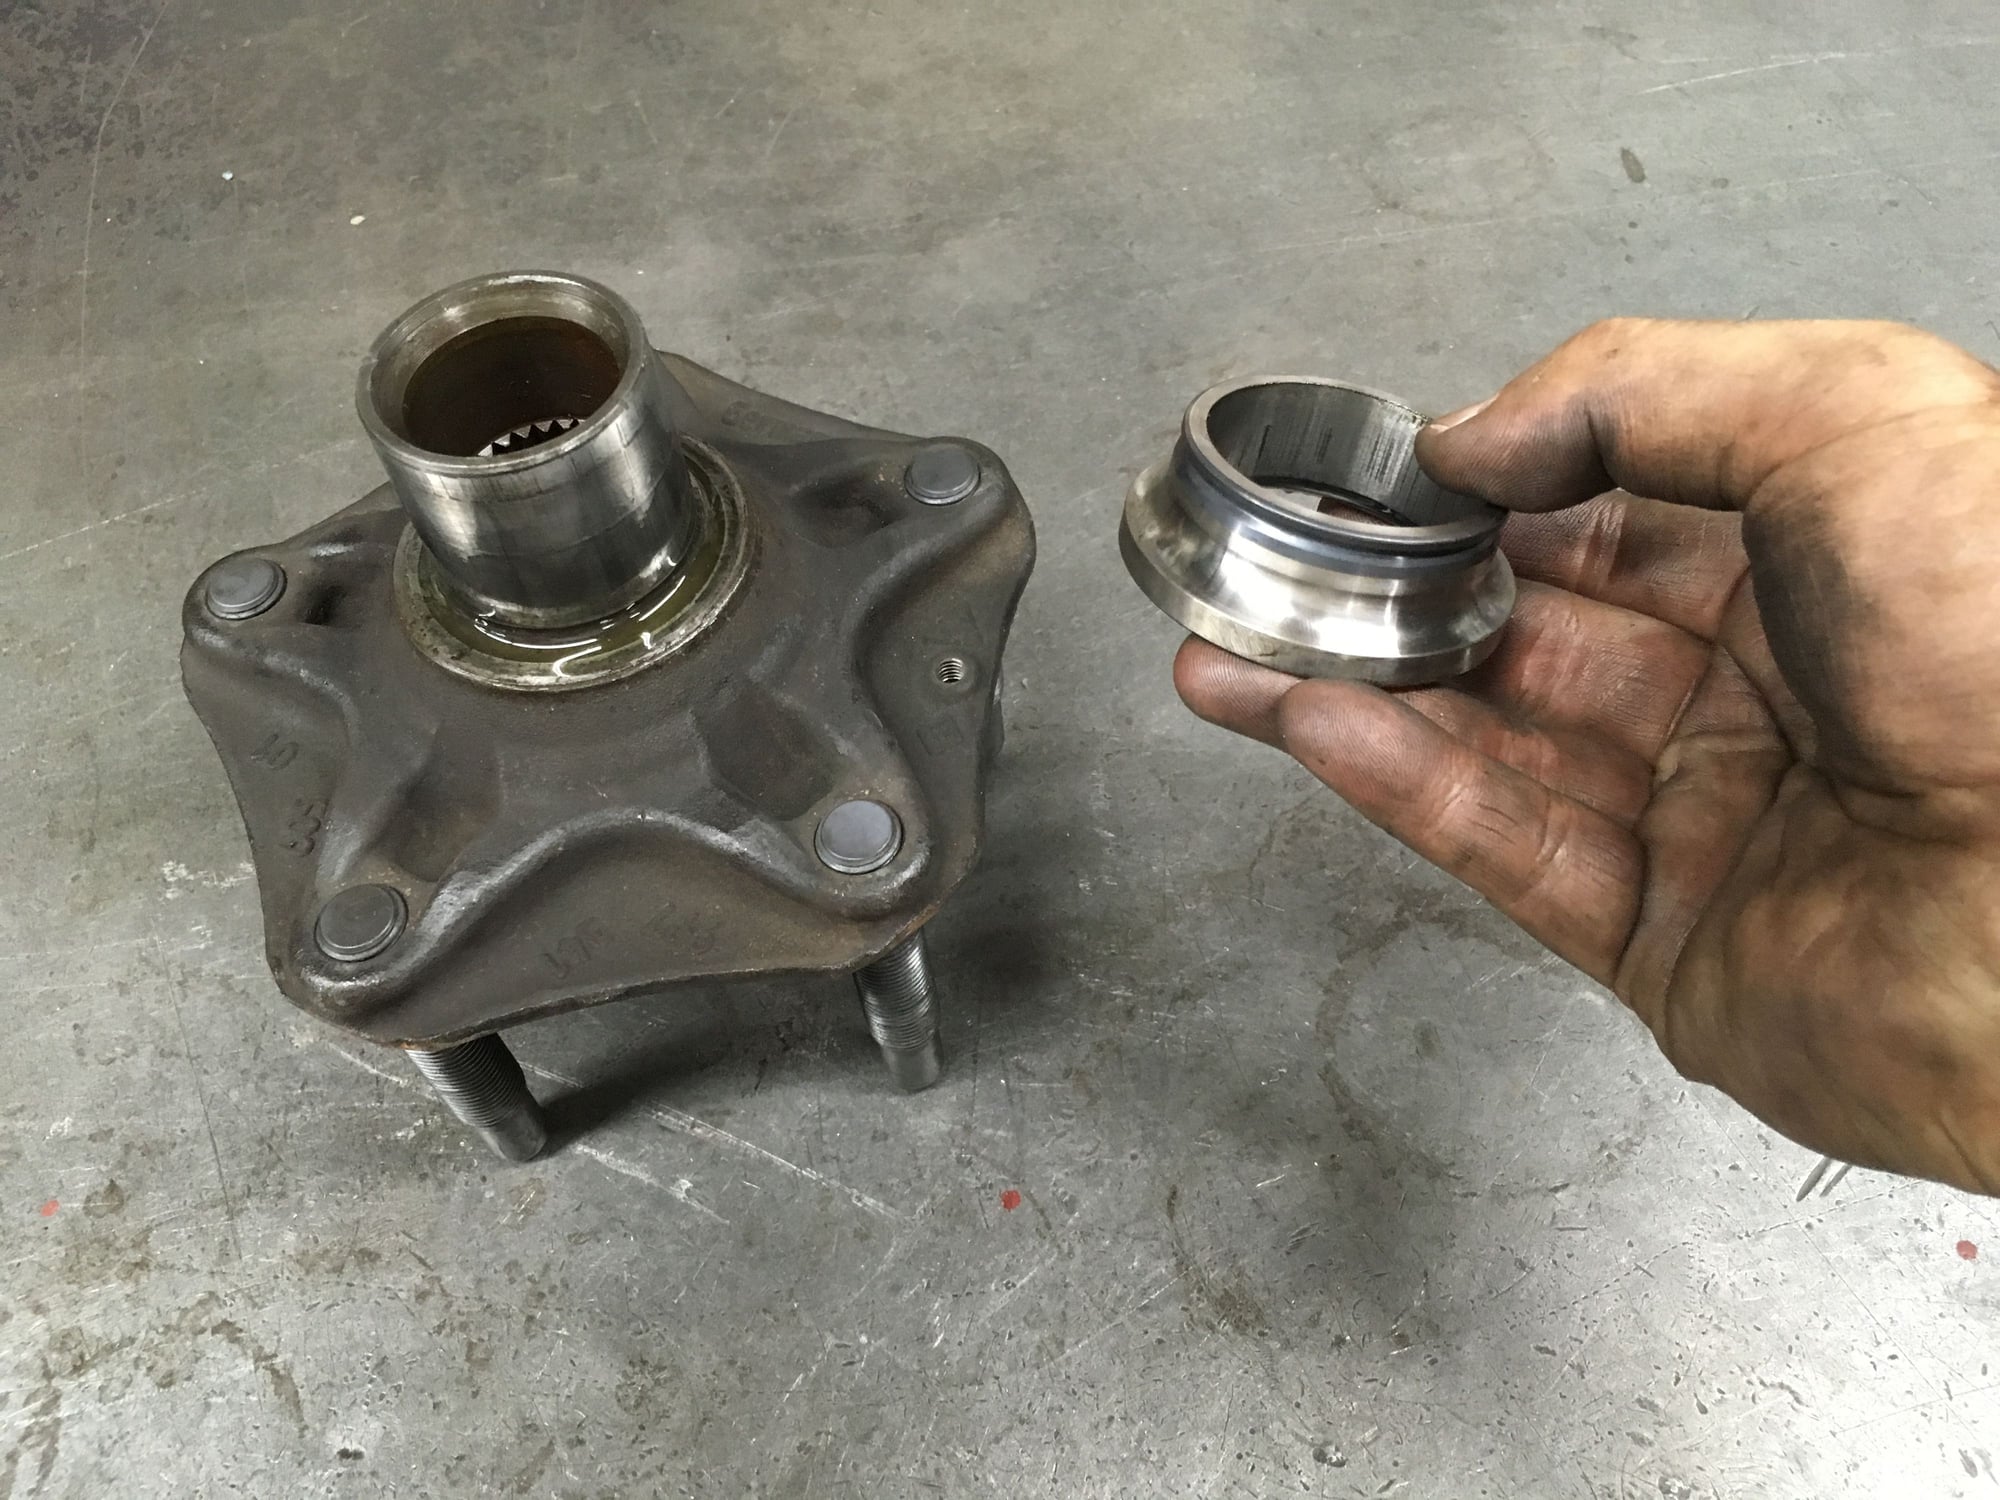
Separation completed without damage. This phase is completed.
Next phase is to remove the wheel bearing cover plate held by 6 bolts, then extract what remains of the old wheel bearing.
Before moving on I cleaned the cover plate as much as I can but some of the road grime is permanently on the surface. The road grime won't affect performance. If I was doing a concourse restoration I'd buy new cover plates.
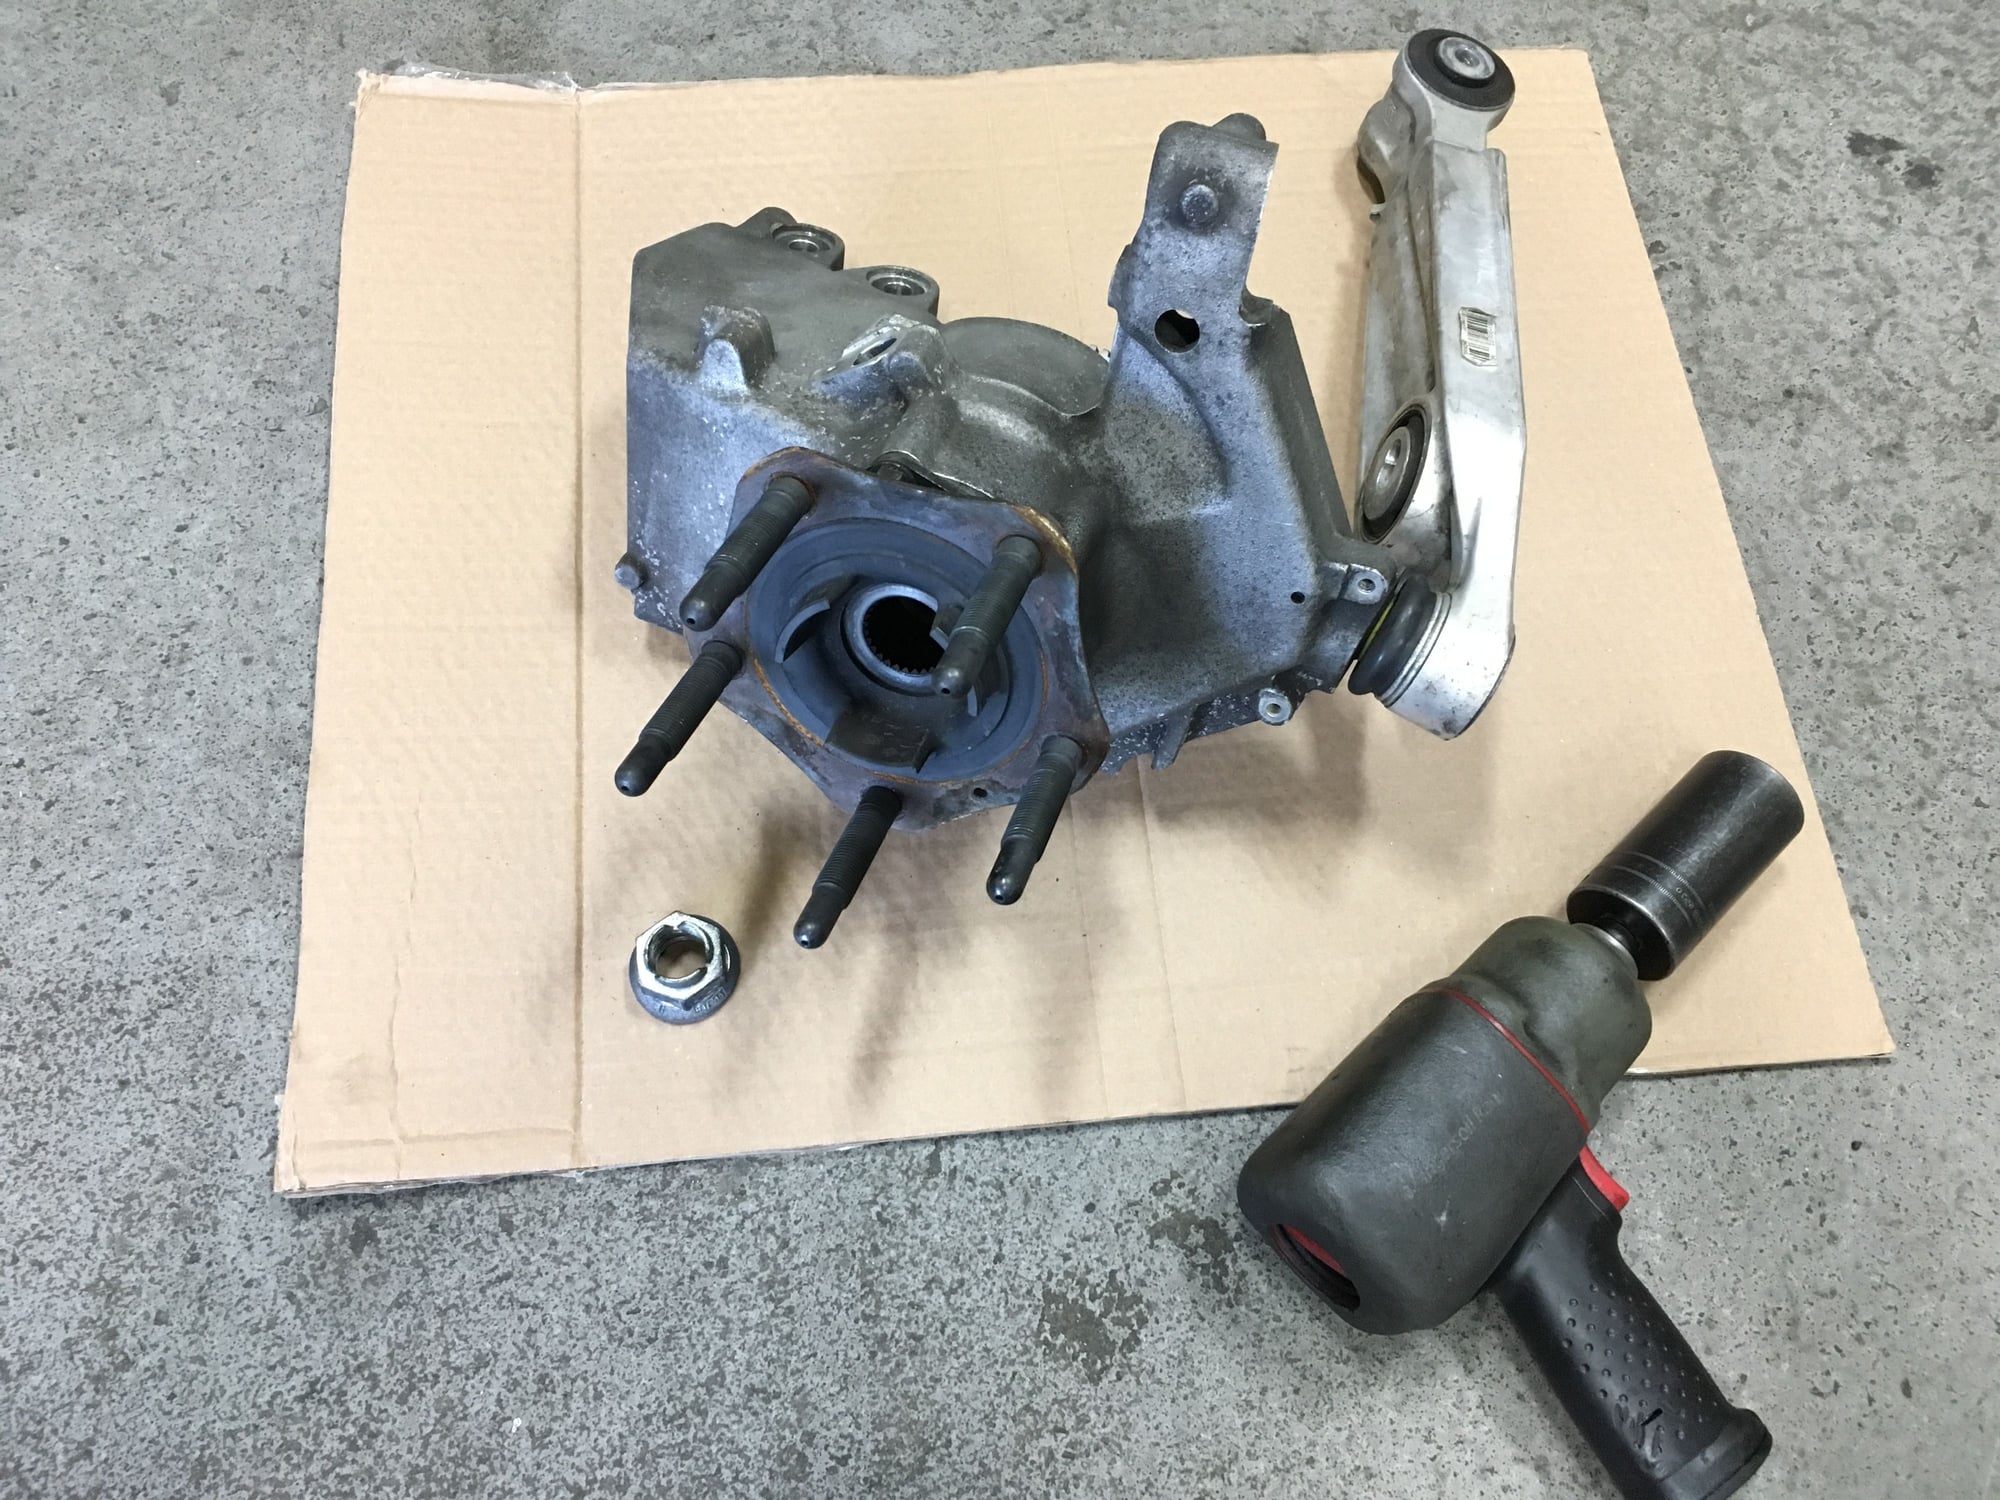
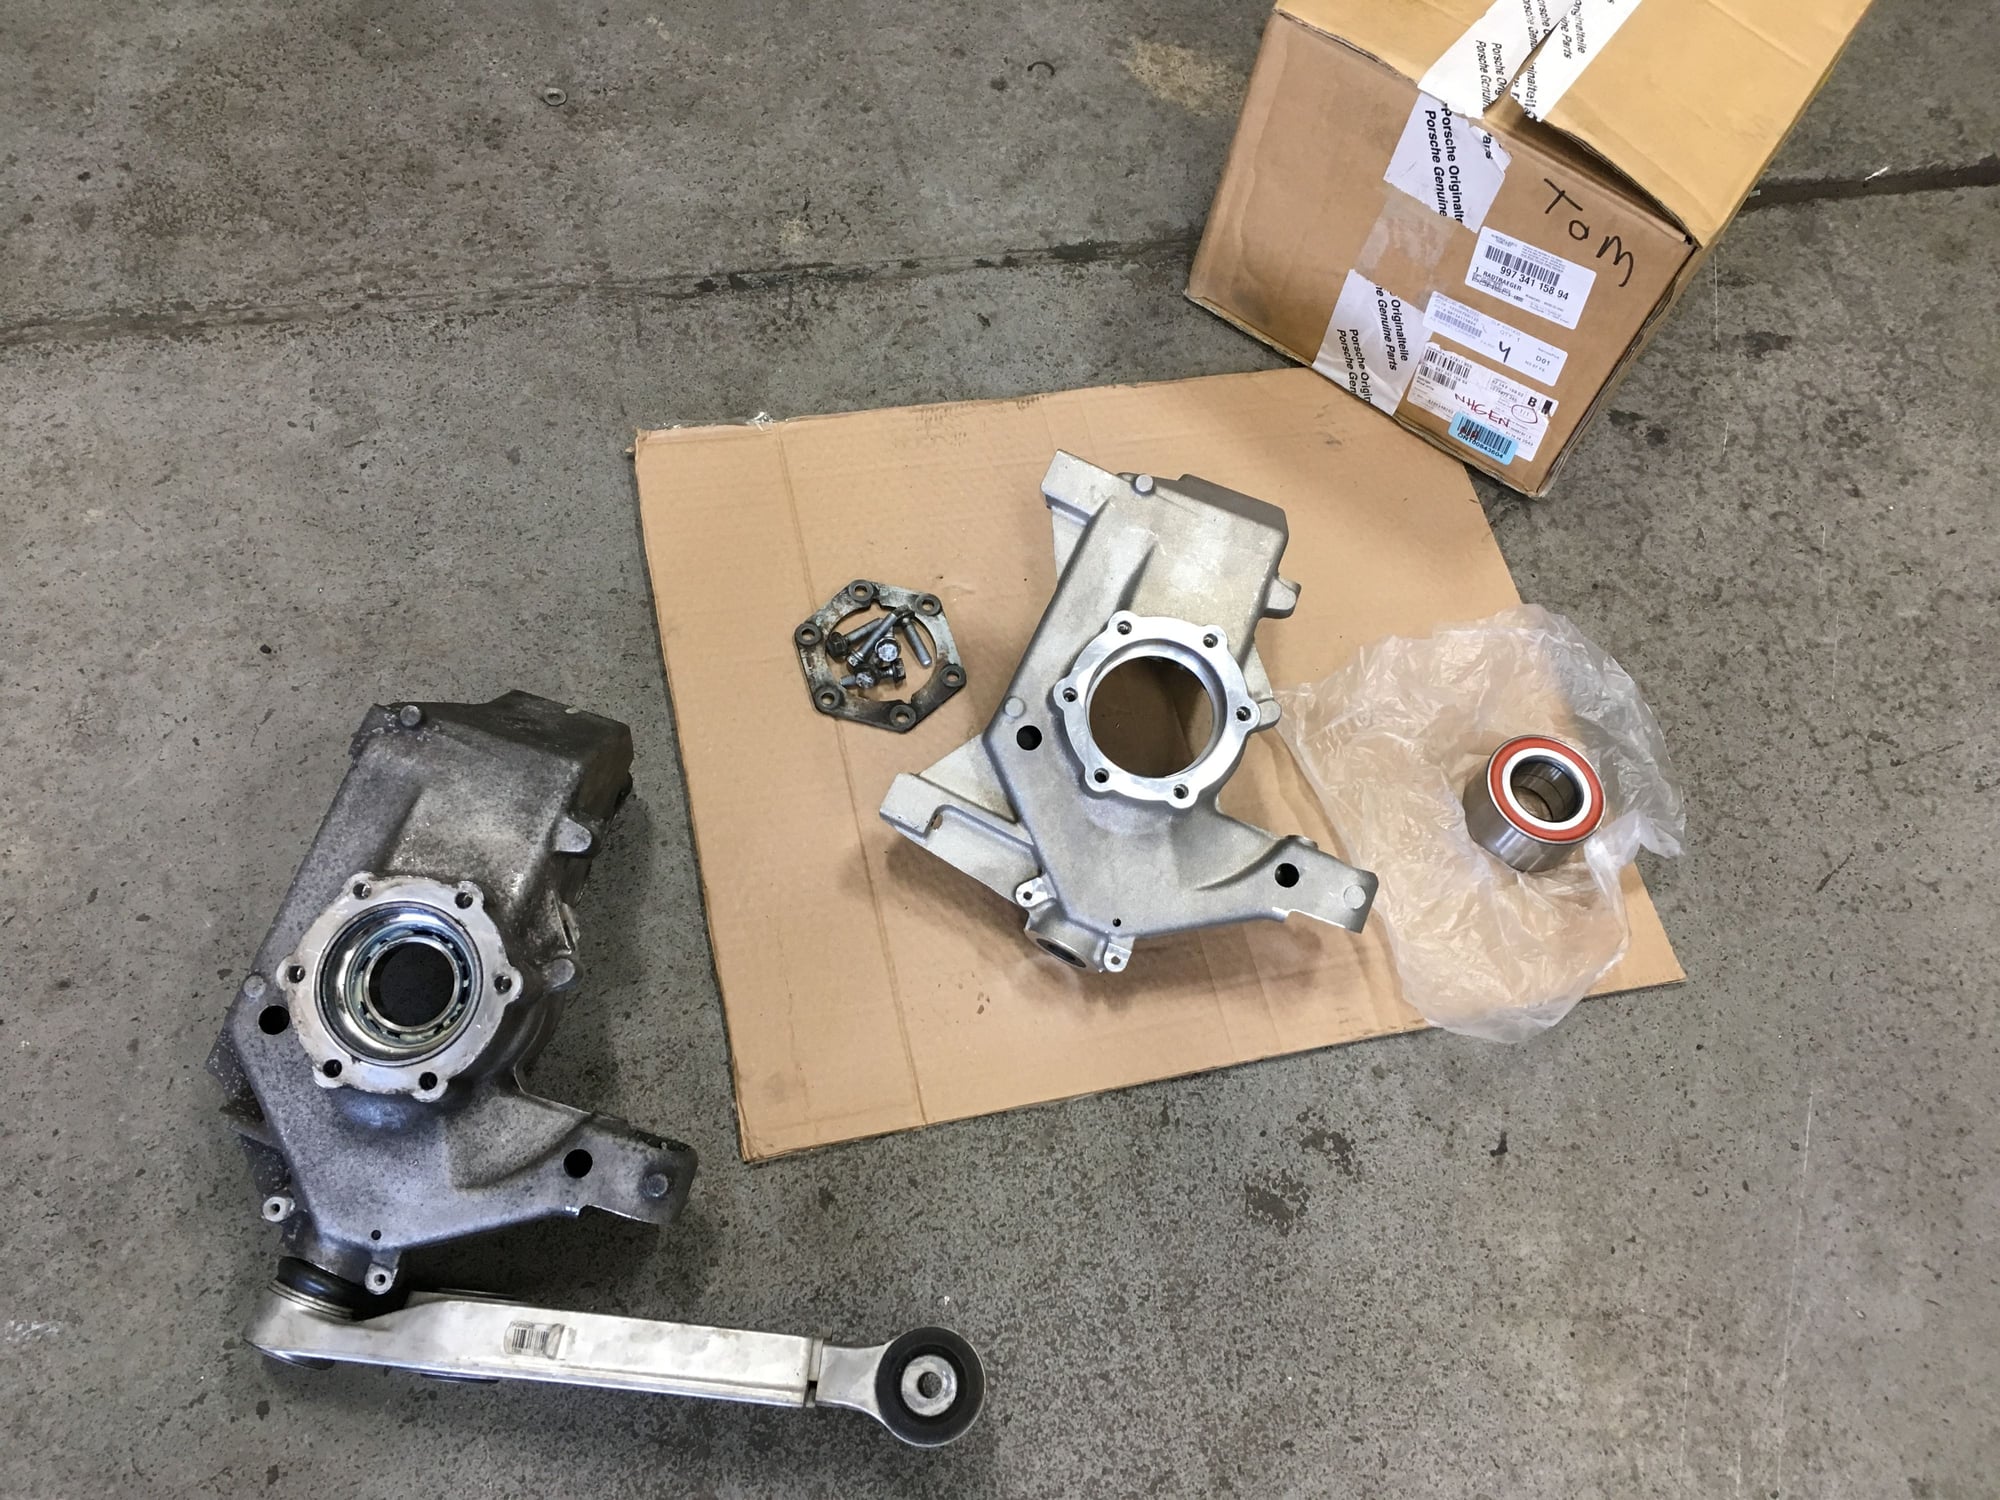
Old upright next to the new. I should've bought new stubs but hindsight is always better...anyway having the extract the stubs allows for better illustration of a routine wheel bearing change.
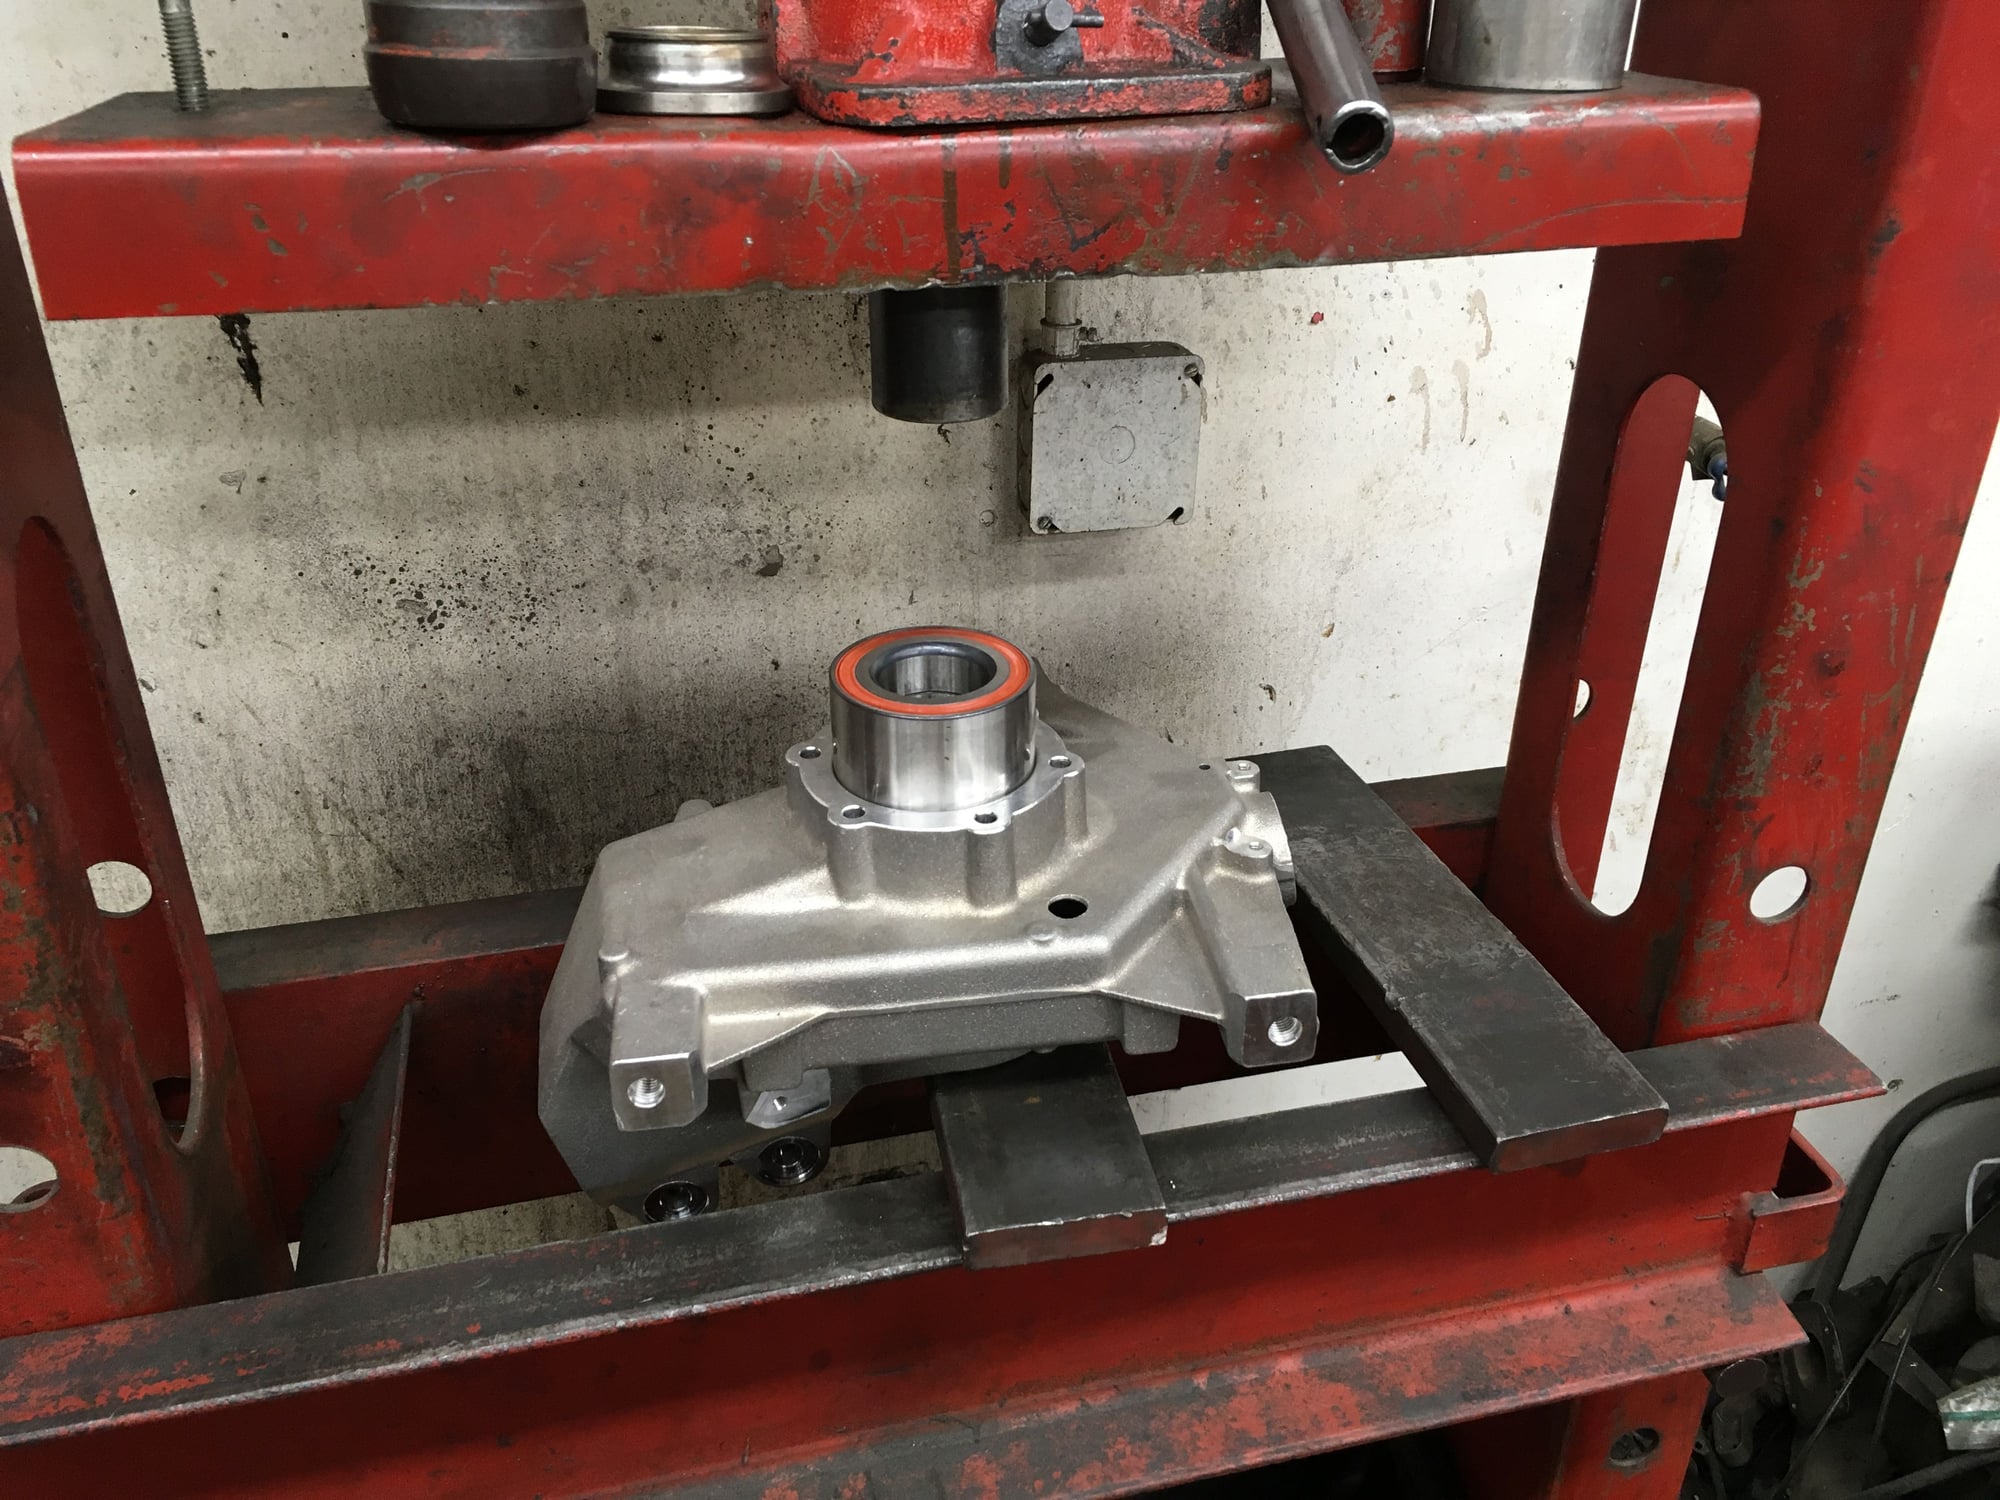
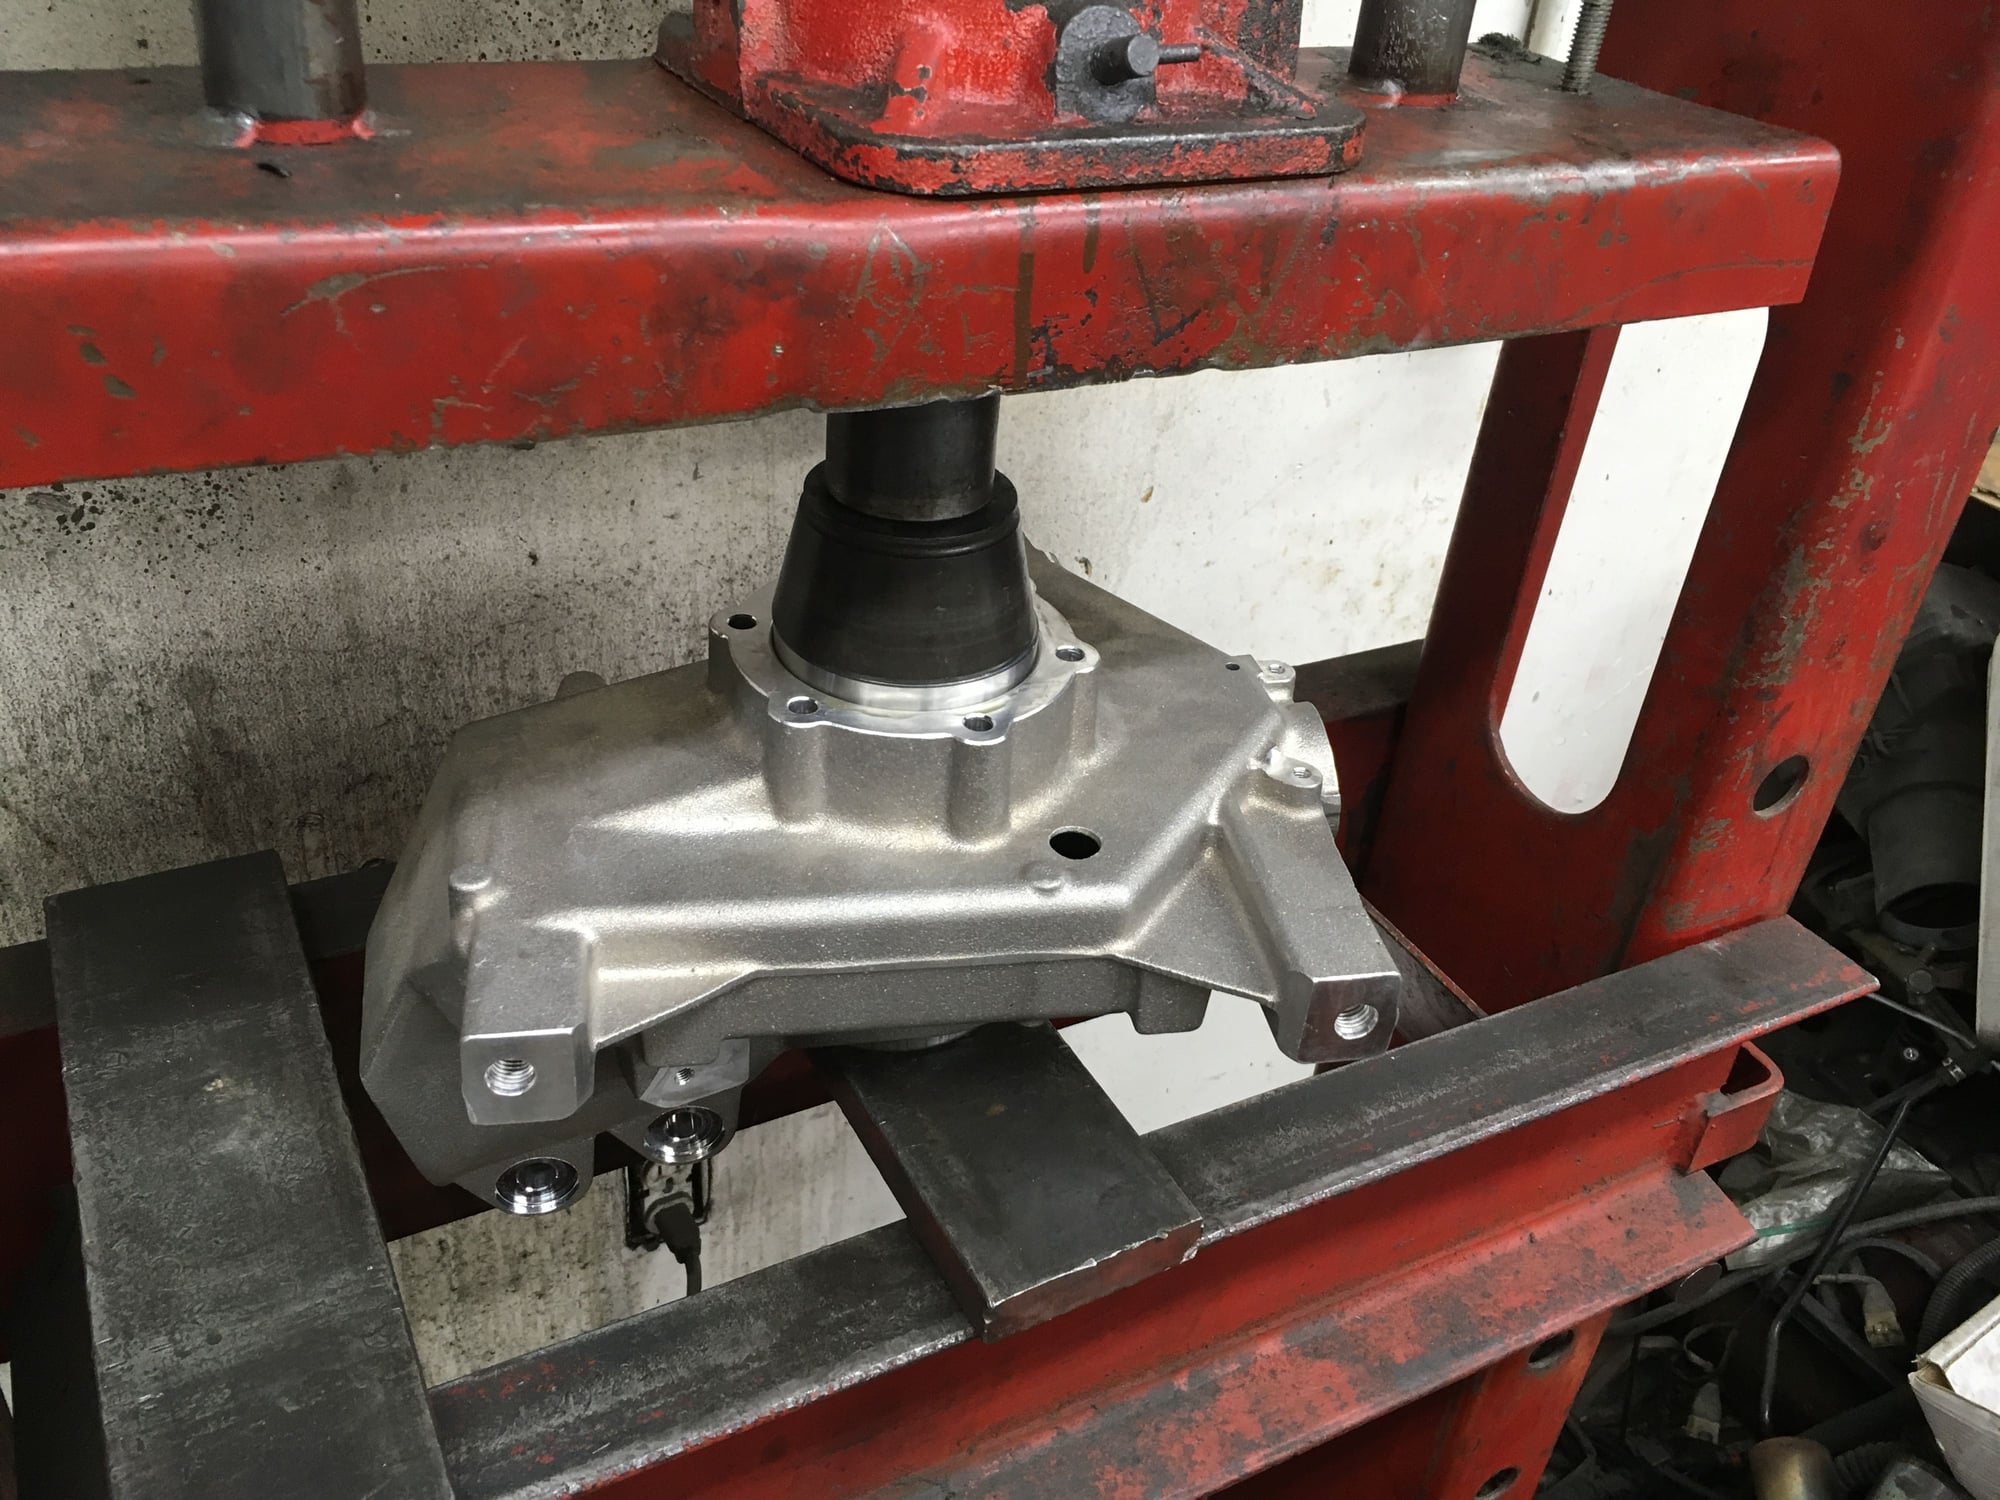
Back on the hydraulic press. Normally I'd extract the old wheel bearing from the upright but in this case I have a new upright so we can skip that phase and go on to pressing new on new.
Pressing in progress. Getting the new bearing "square" into the upright is critical.
Almost all the way pressed in. In this phase experienced and feel is necessary. You have to know when to stop because the hydraulic press is powerful enough the break the uprights. Referring back to the disclaimer, there's more than one method of doing this. Some people heat up the right enough to expand the metal then push in the new wheel bearing by hand or tap it in with a hammer.
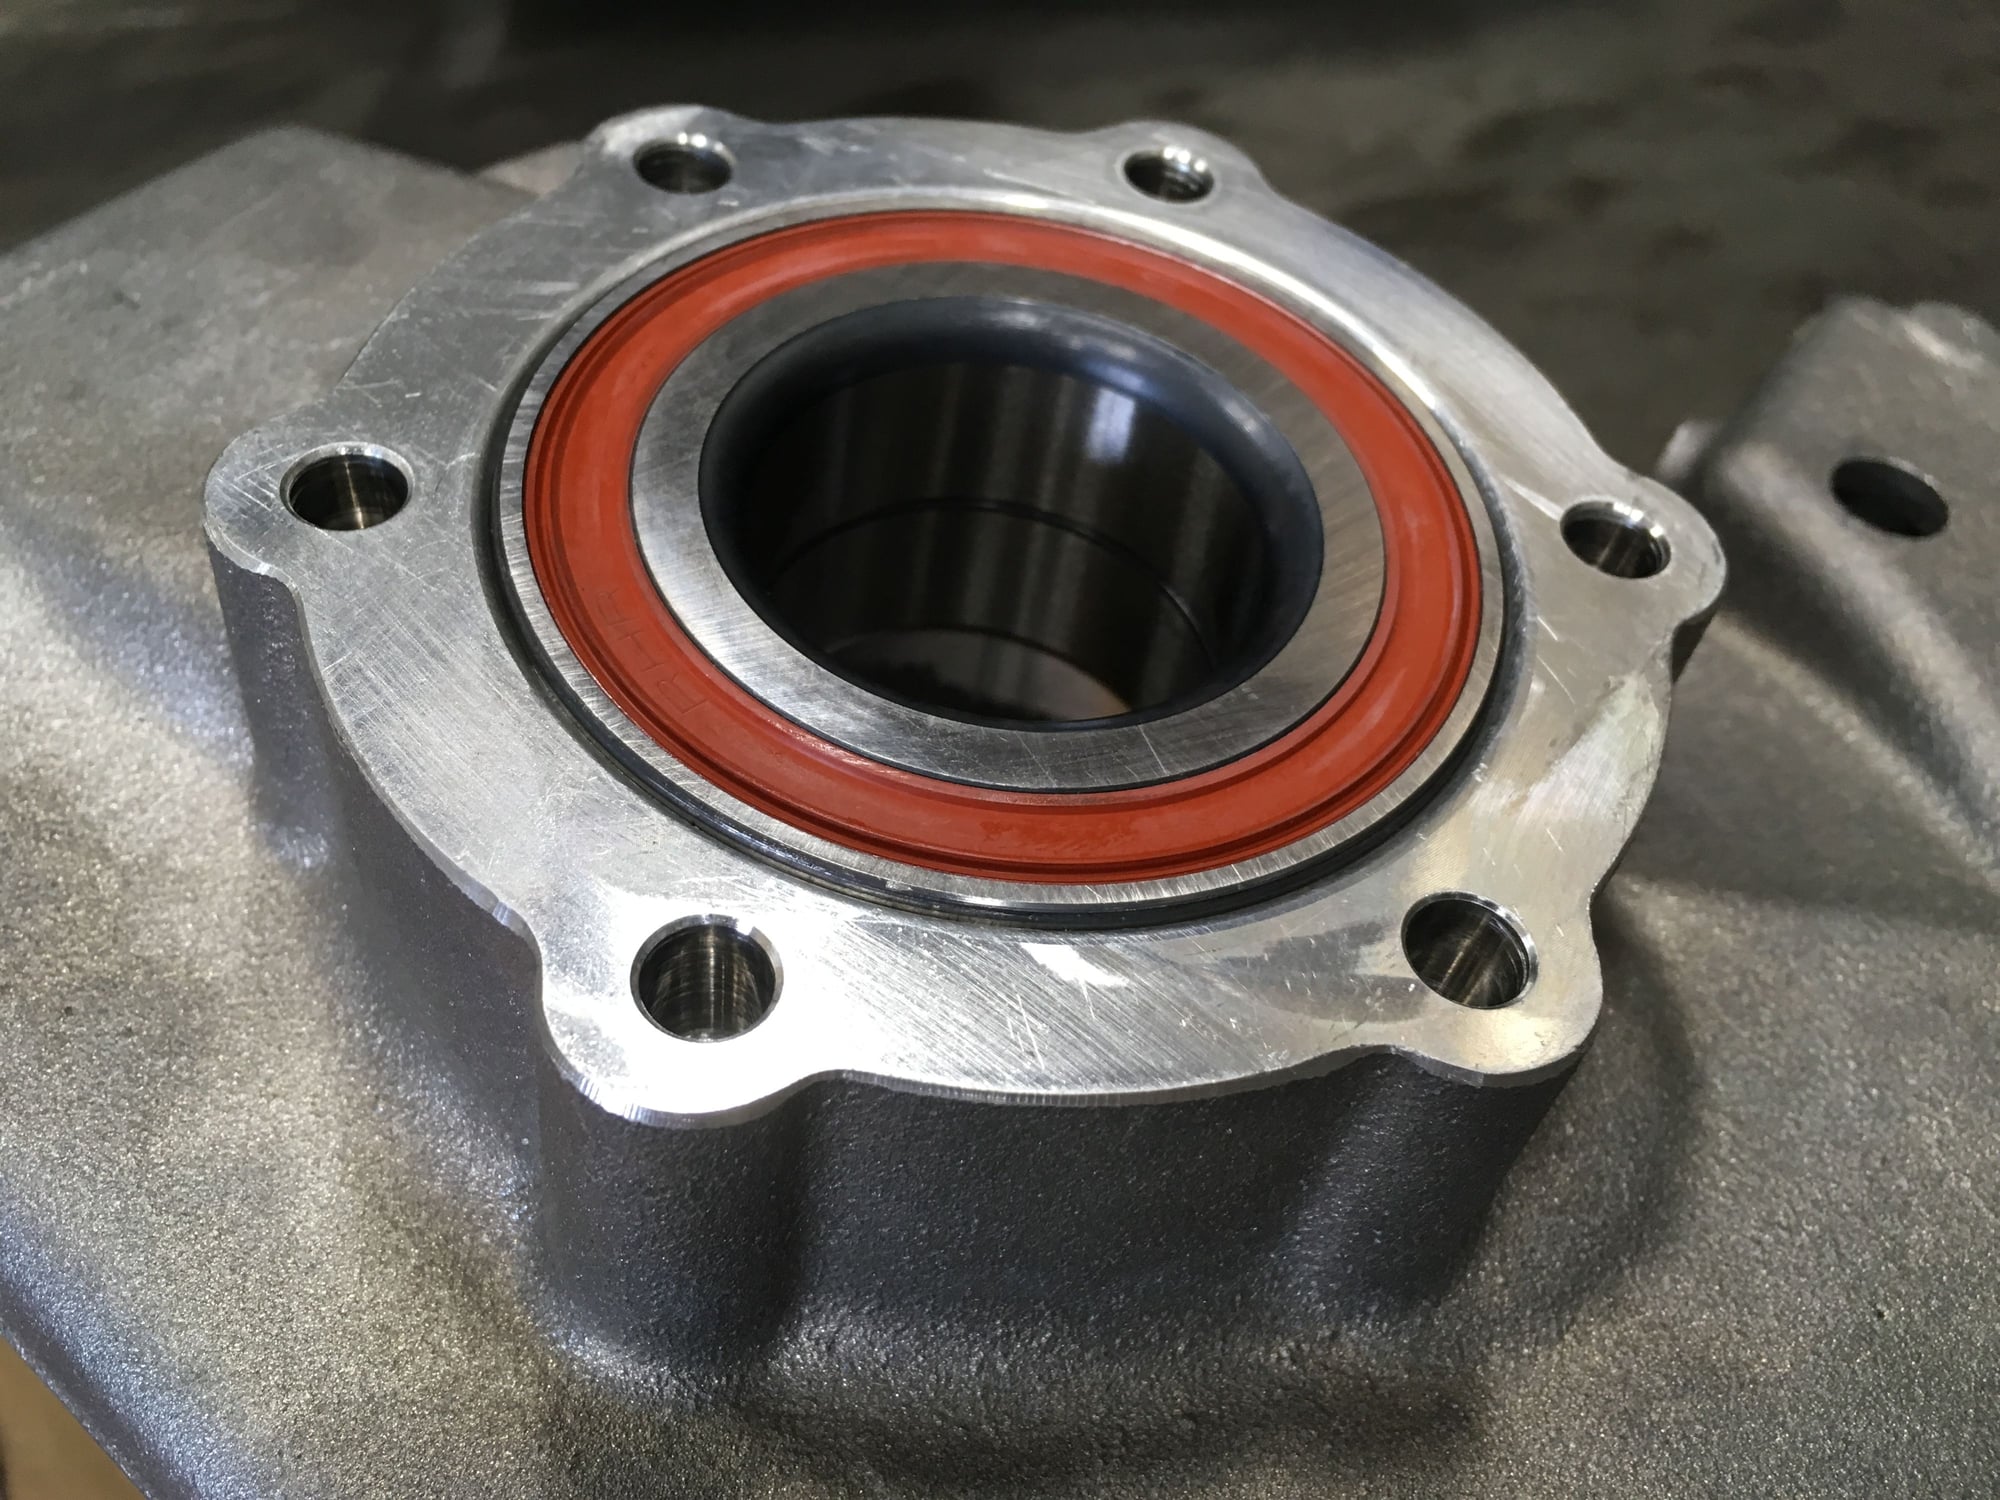
Even though the new bearing is all the way pressed in the top of the bearing shell does protrude above the upright surface. So how do I know its all the way in??
The back side of the upright has a notch cut in by the factory to show the bearing shell seated all the way in.
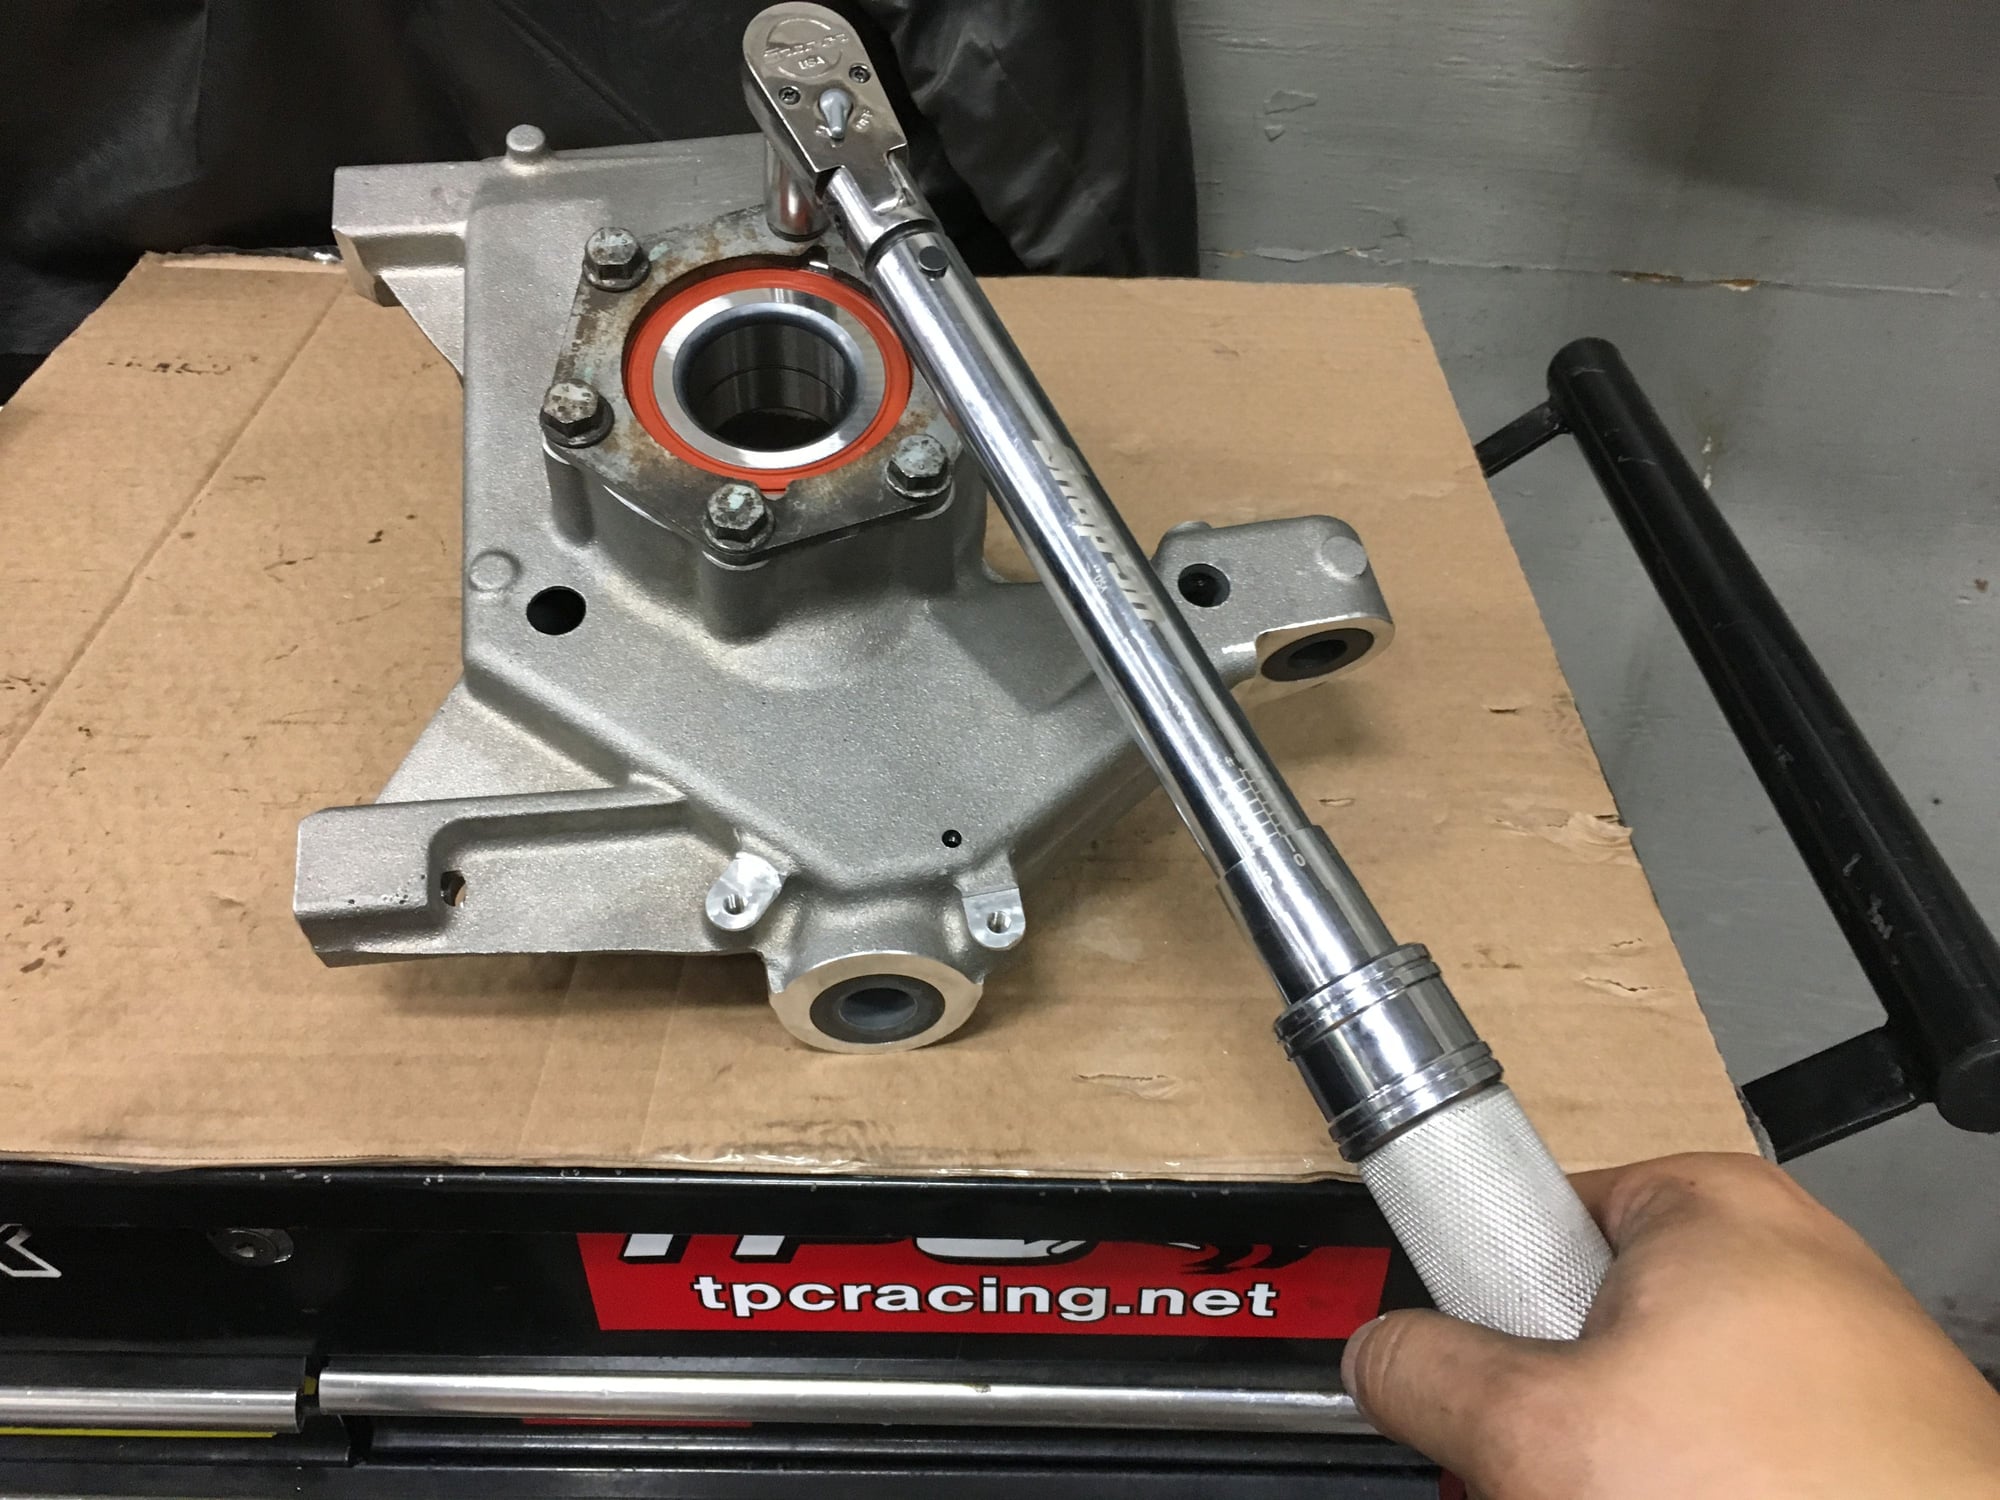
Install and torque cover plate.
Stub pressed on and nut installed. Sprayed dry film lube on the wheel studs. One upright prepped.
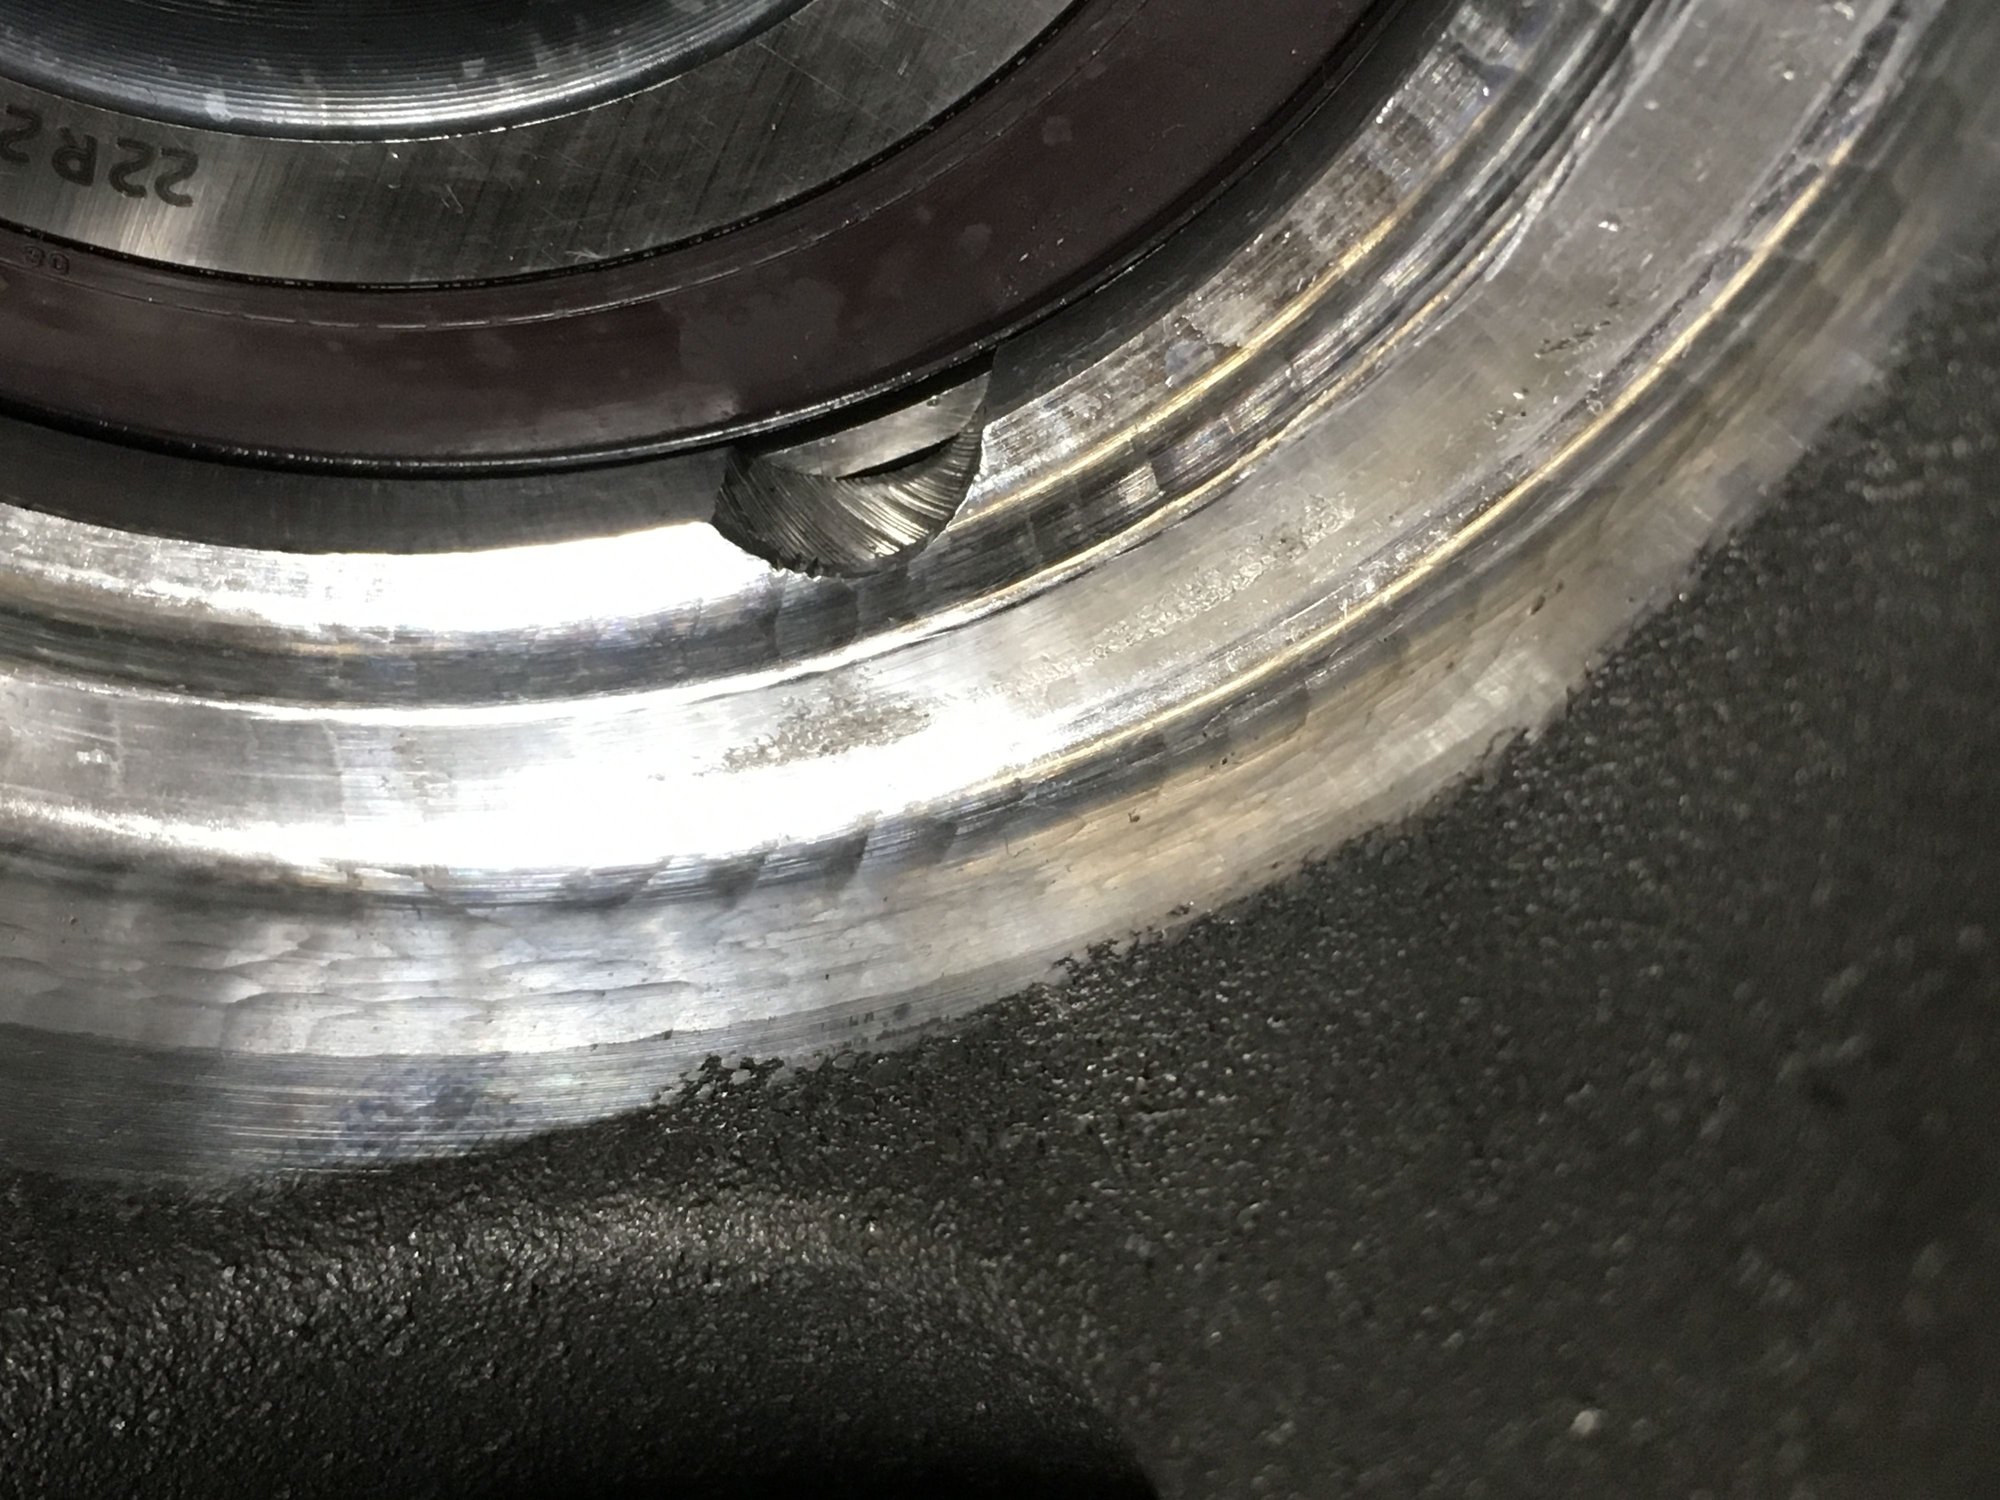
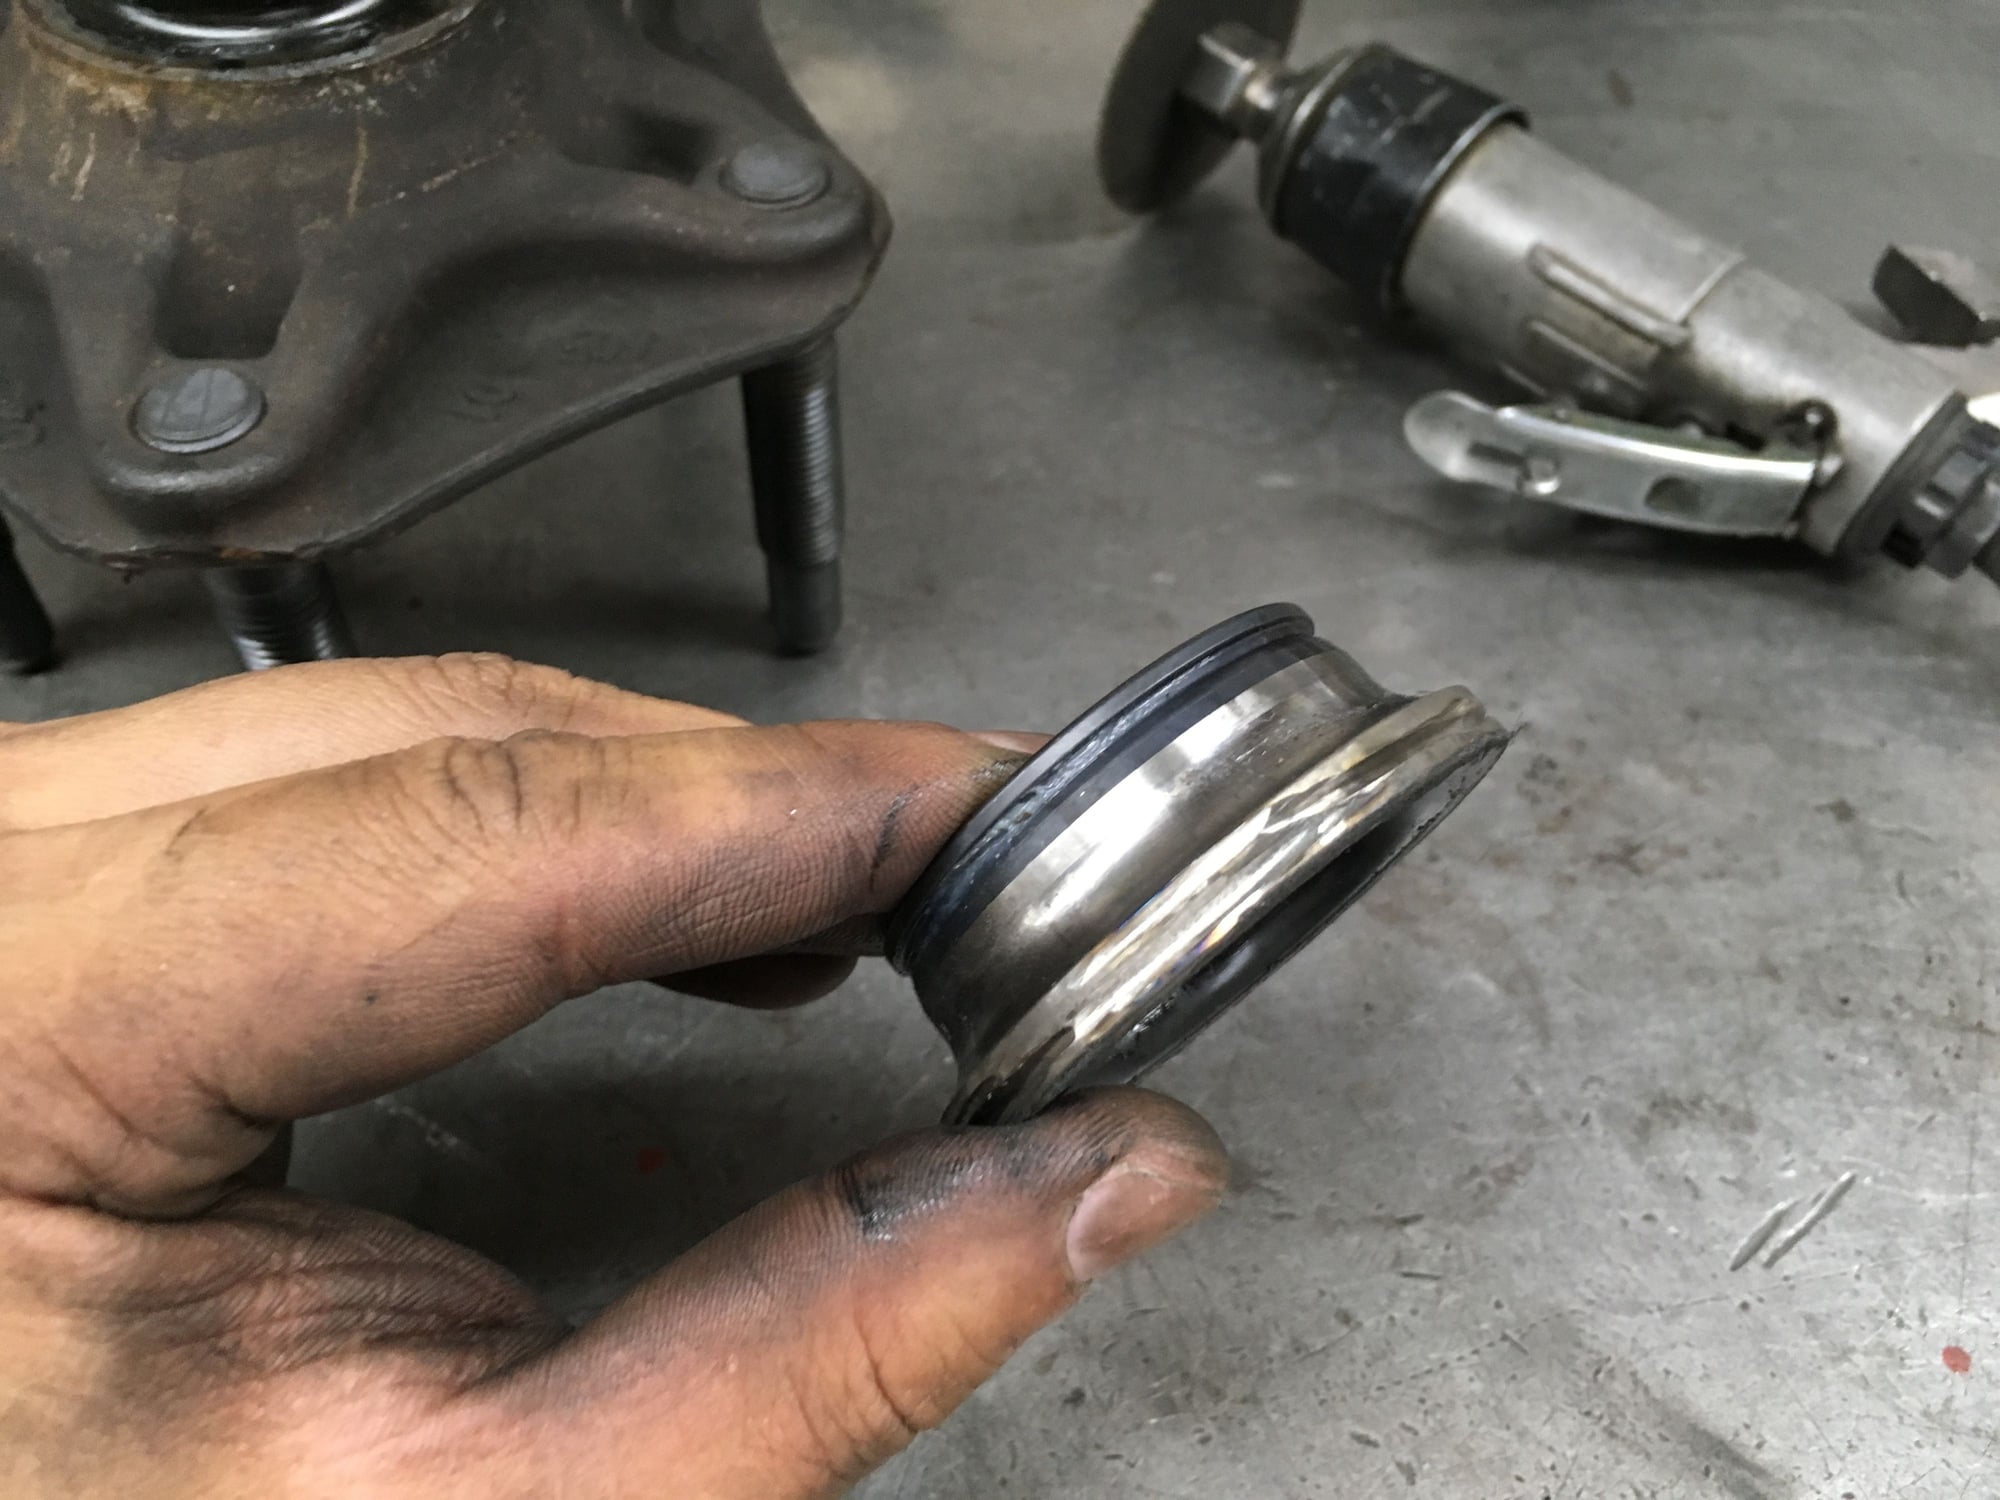
I started the work on the Right side of the car, now repeating the process on the Left side. Things were going smoothly until the bearing collar doesn't want to separate from the stub despite multiple attempts using the heavy duty clamp and hydraulic press. Both the collar and the stub go through the clamp no matter how tight I crank down on the clamp. So cutting a groove on the collar for the clamp to grip was the solution. I forgot to take a photo when I was cutting the collar while it was stuck on the stub. Here's a photo after.
Close up of the cut that saved the day.
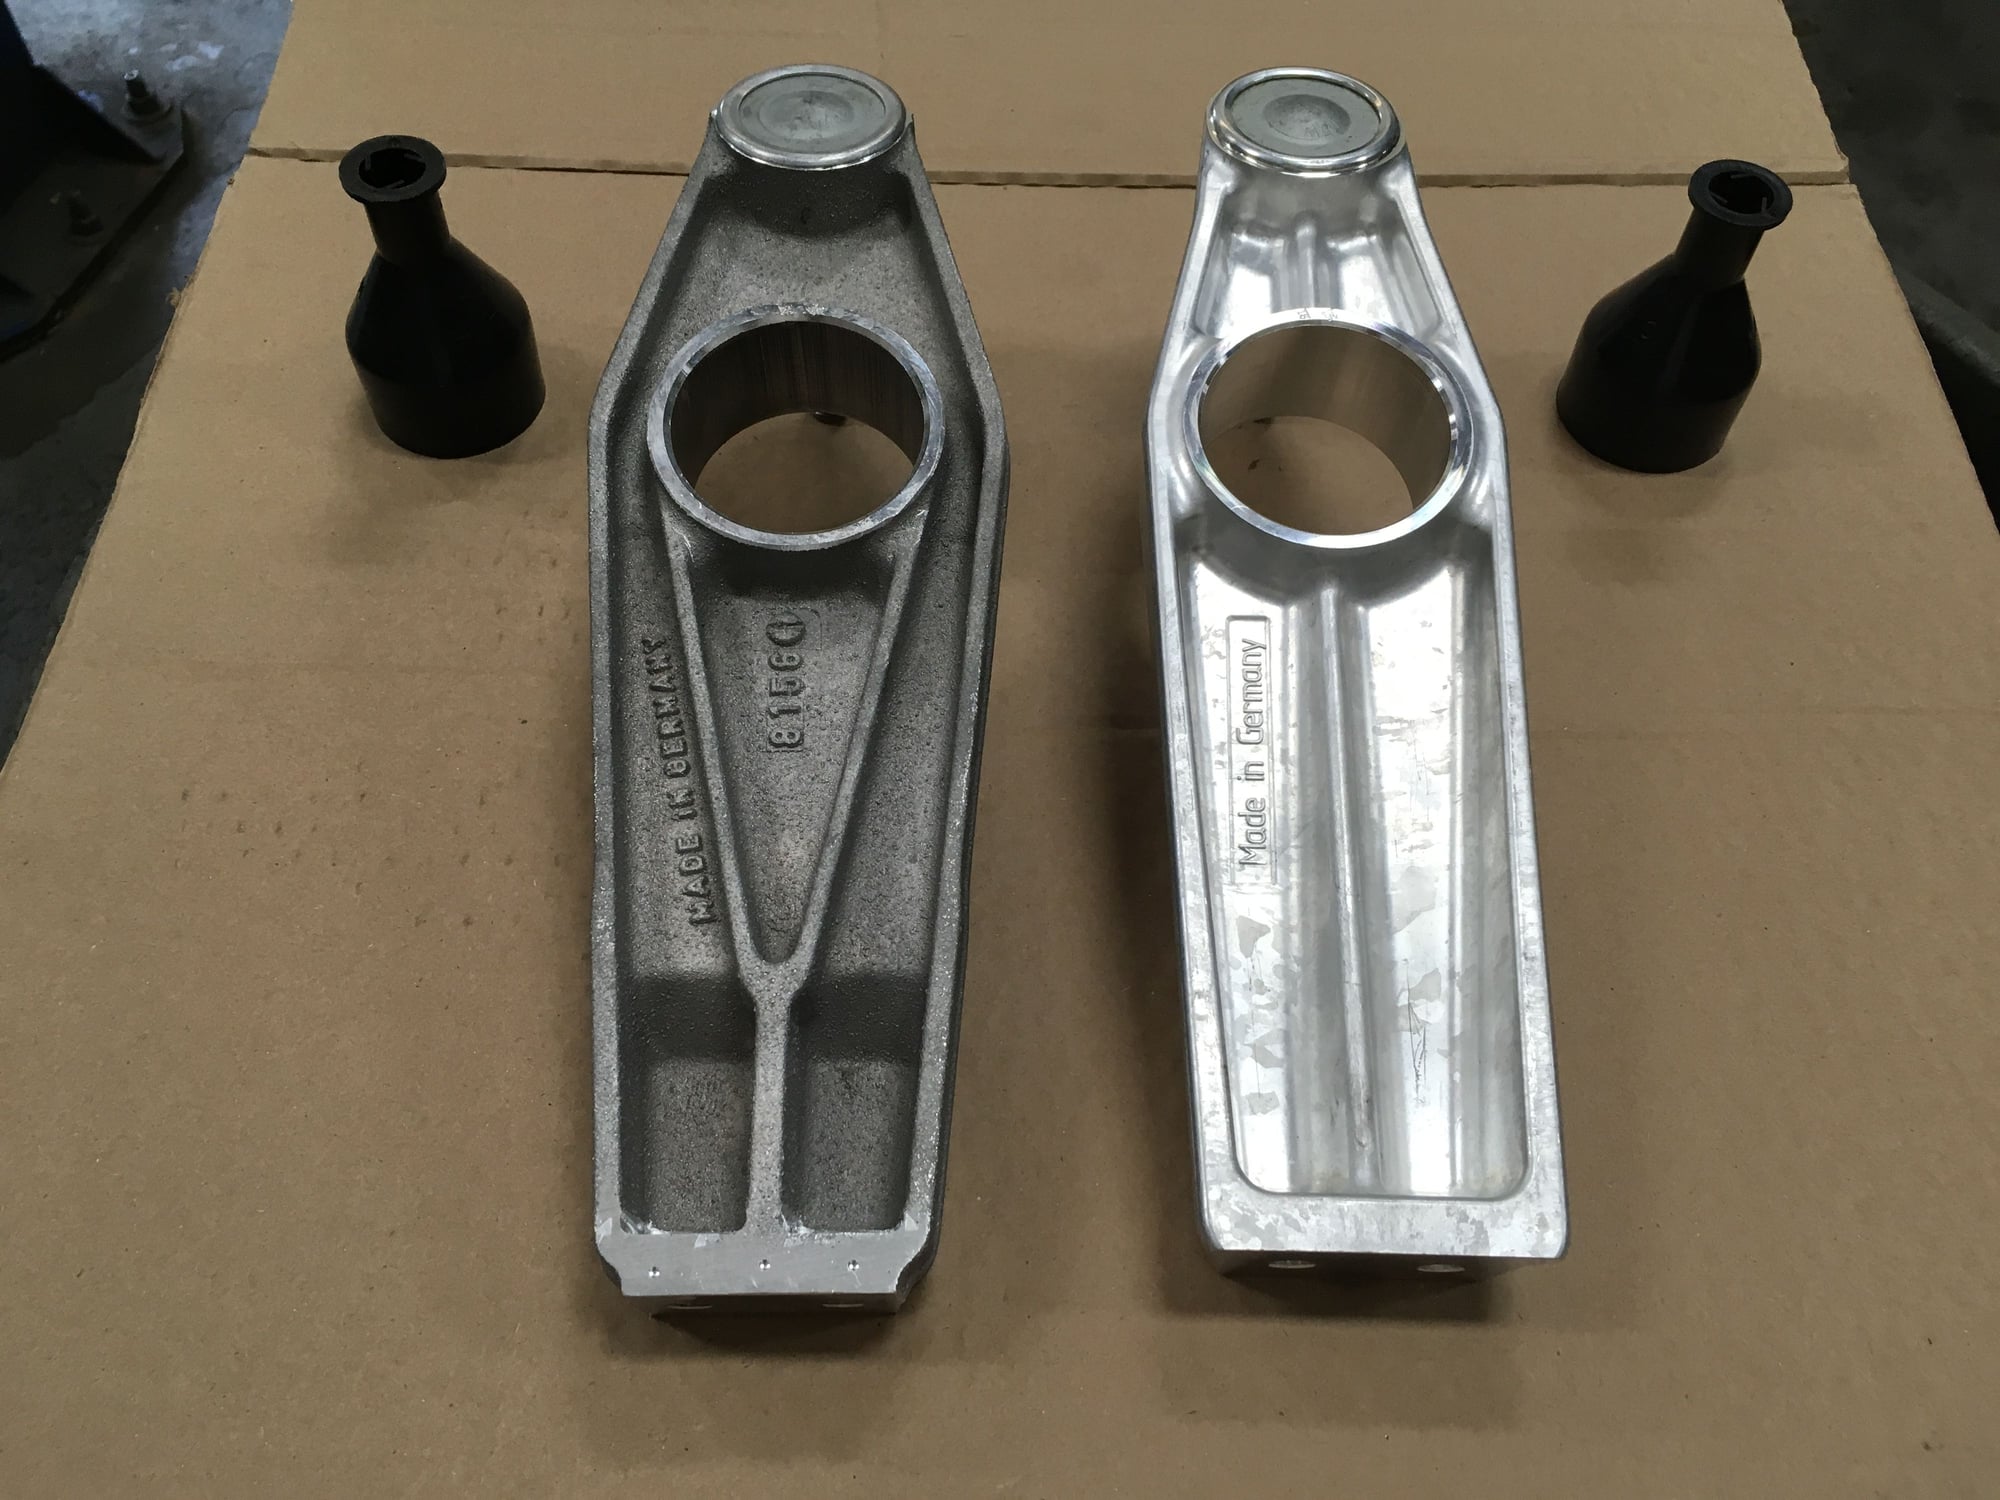
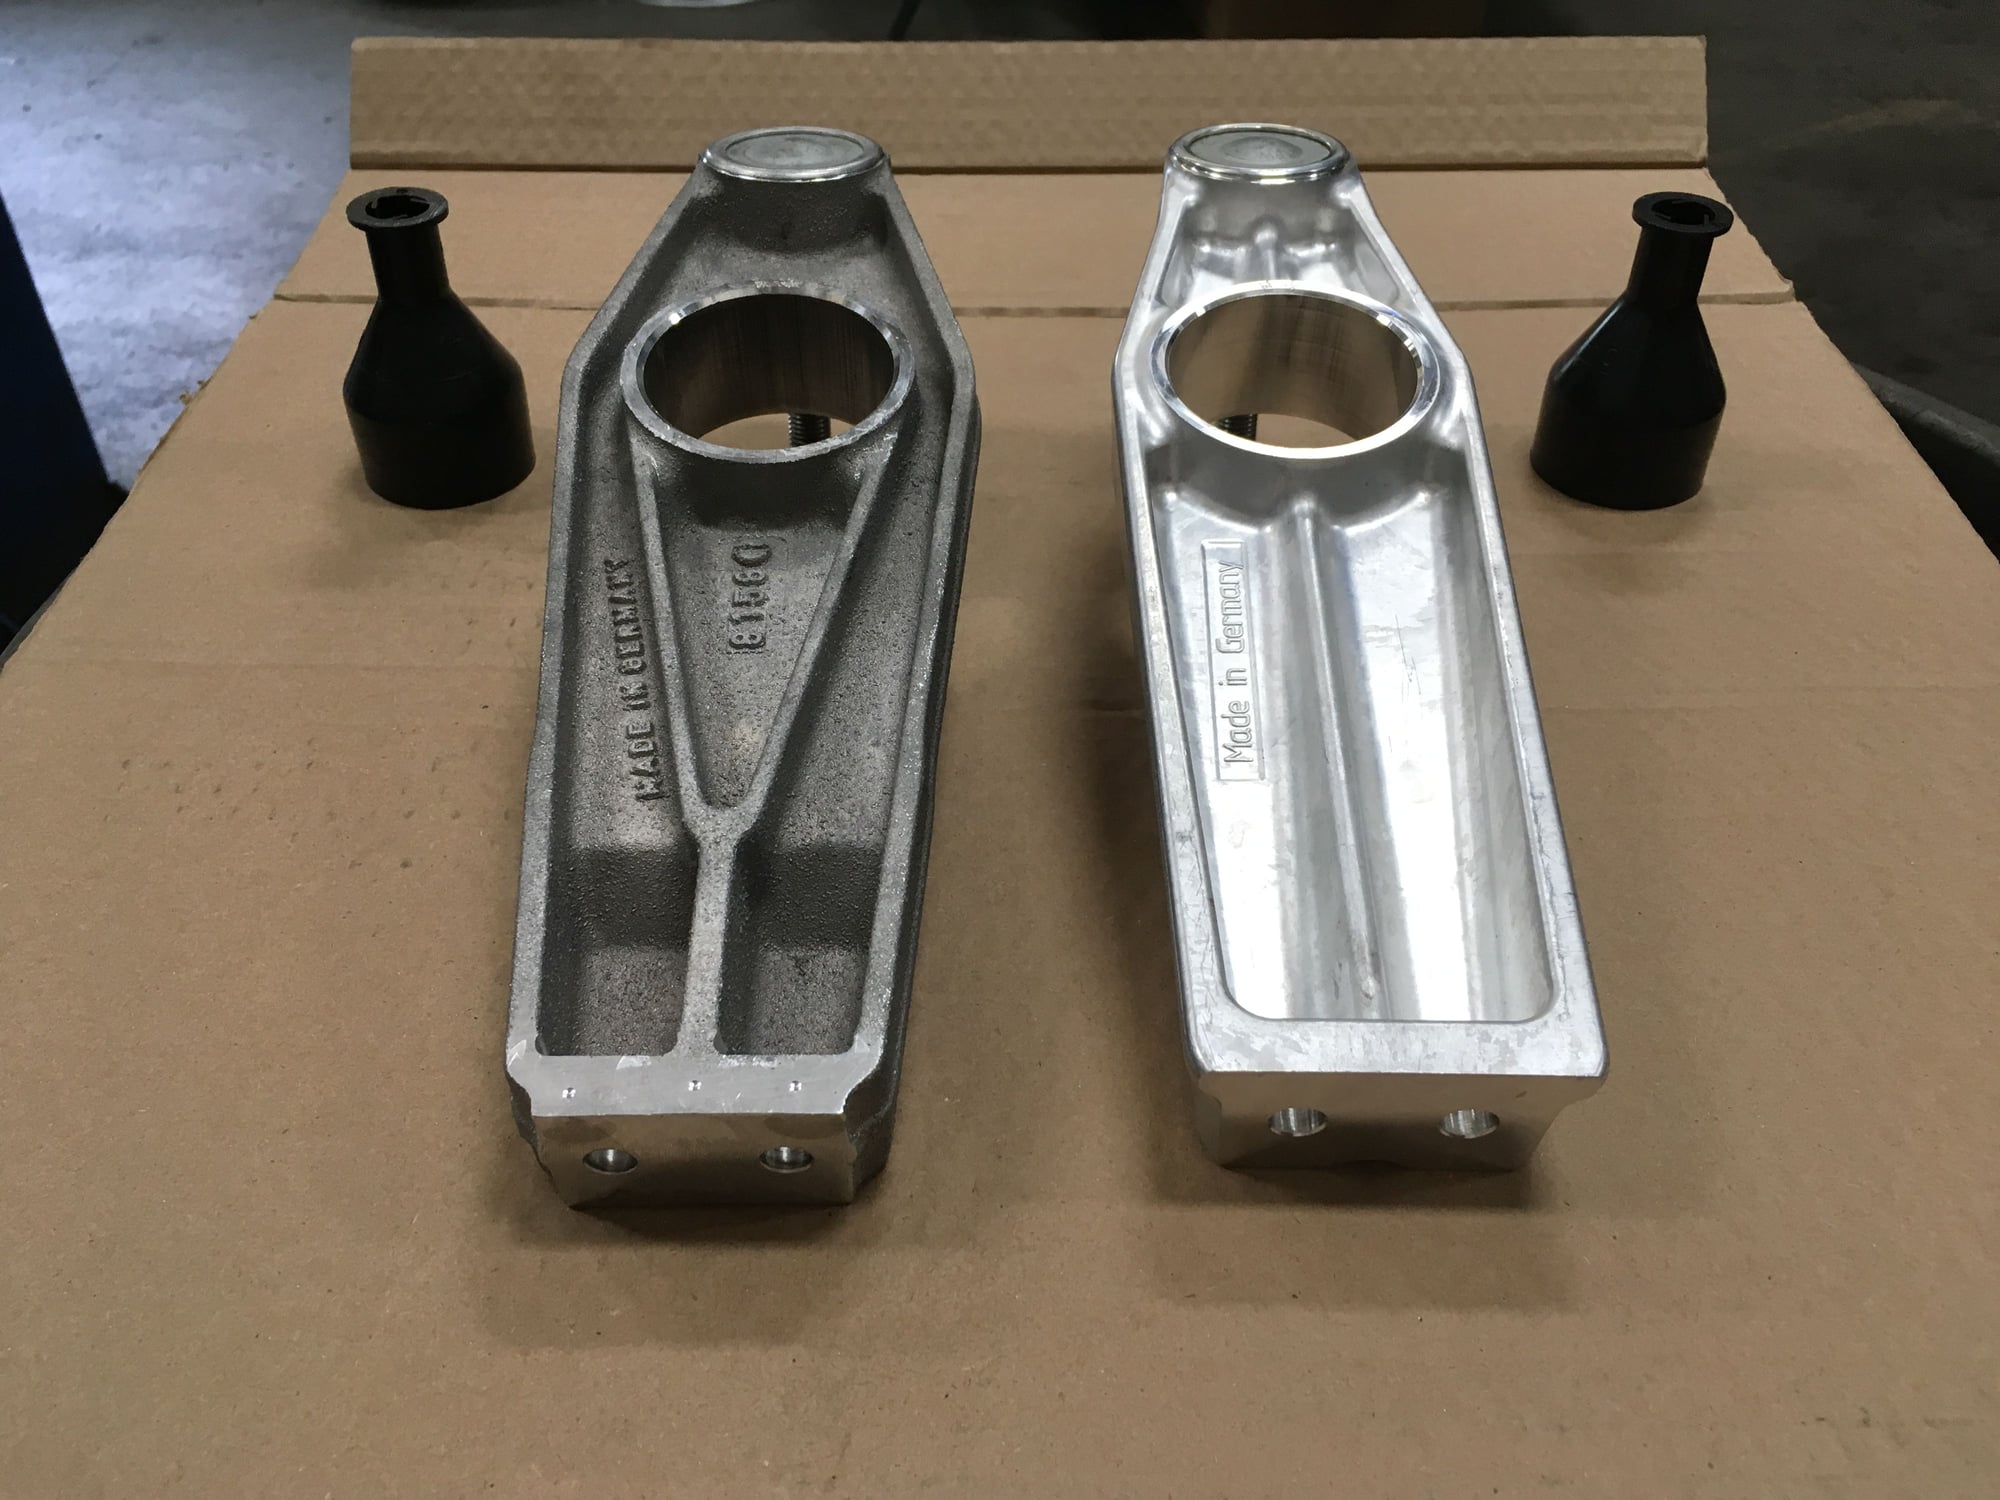
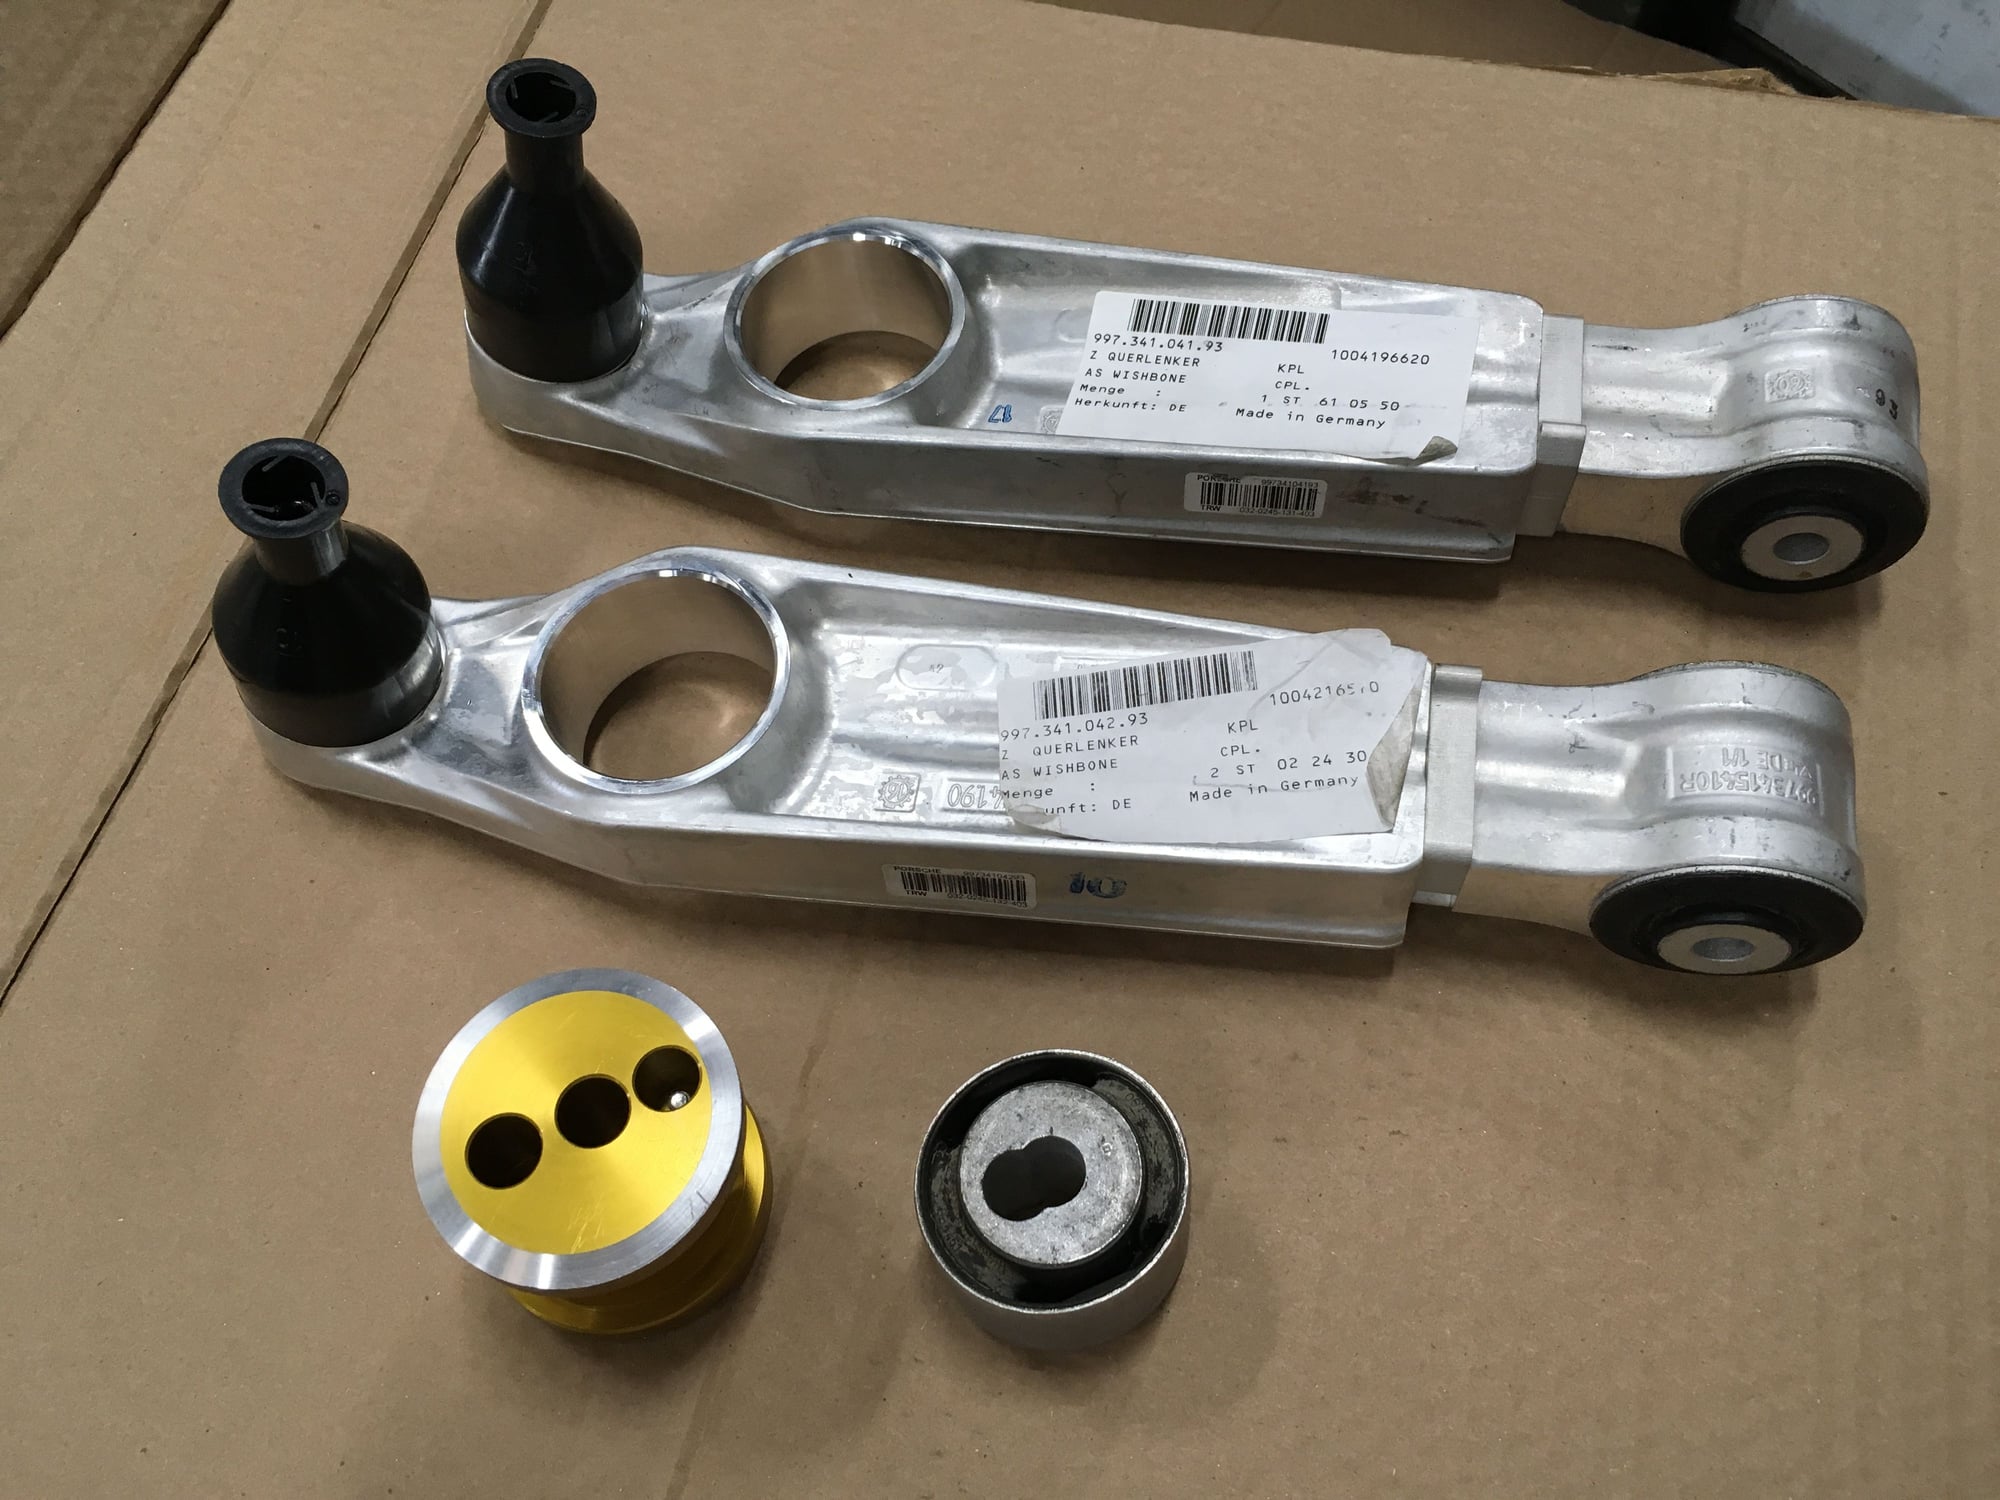
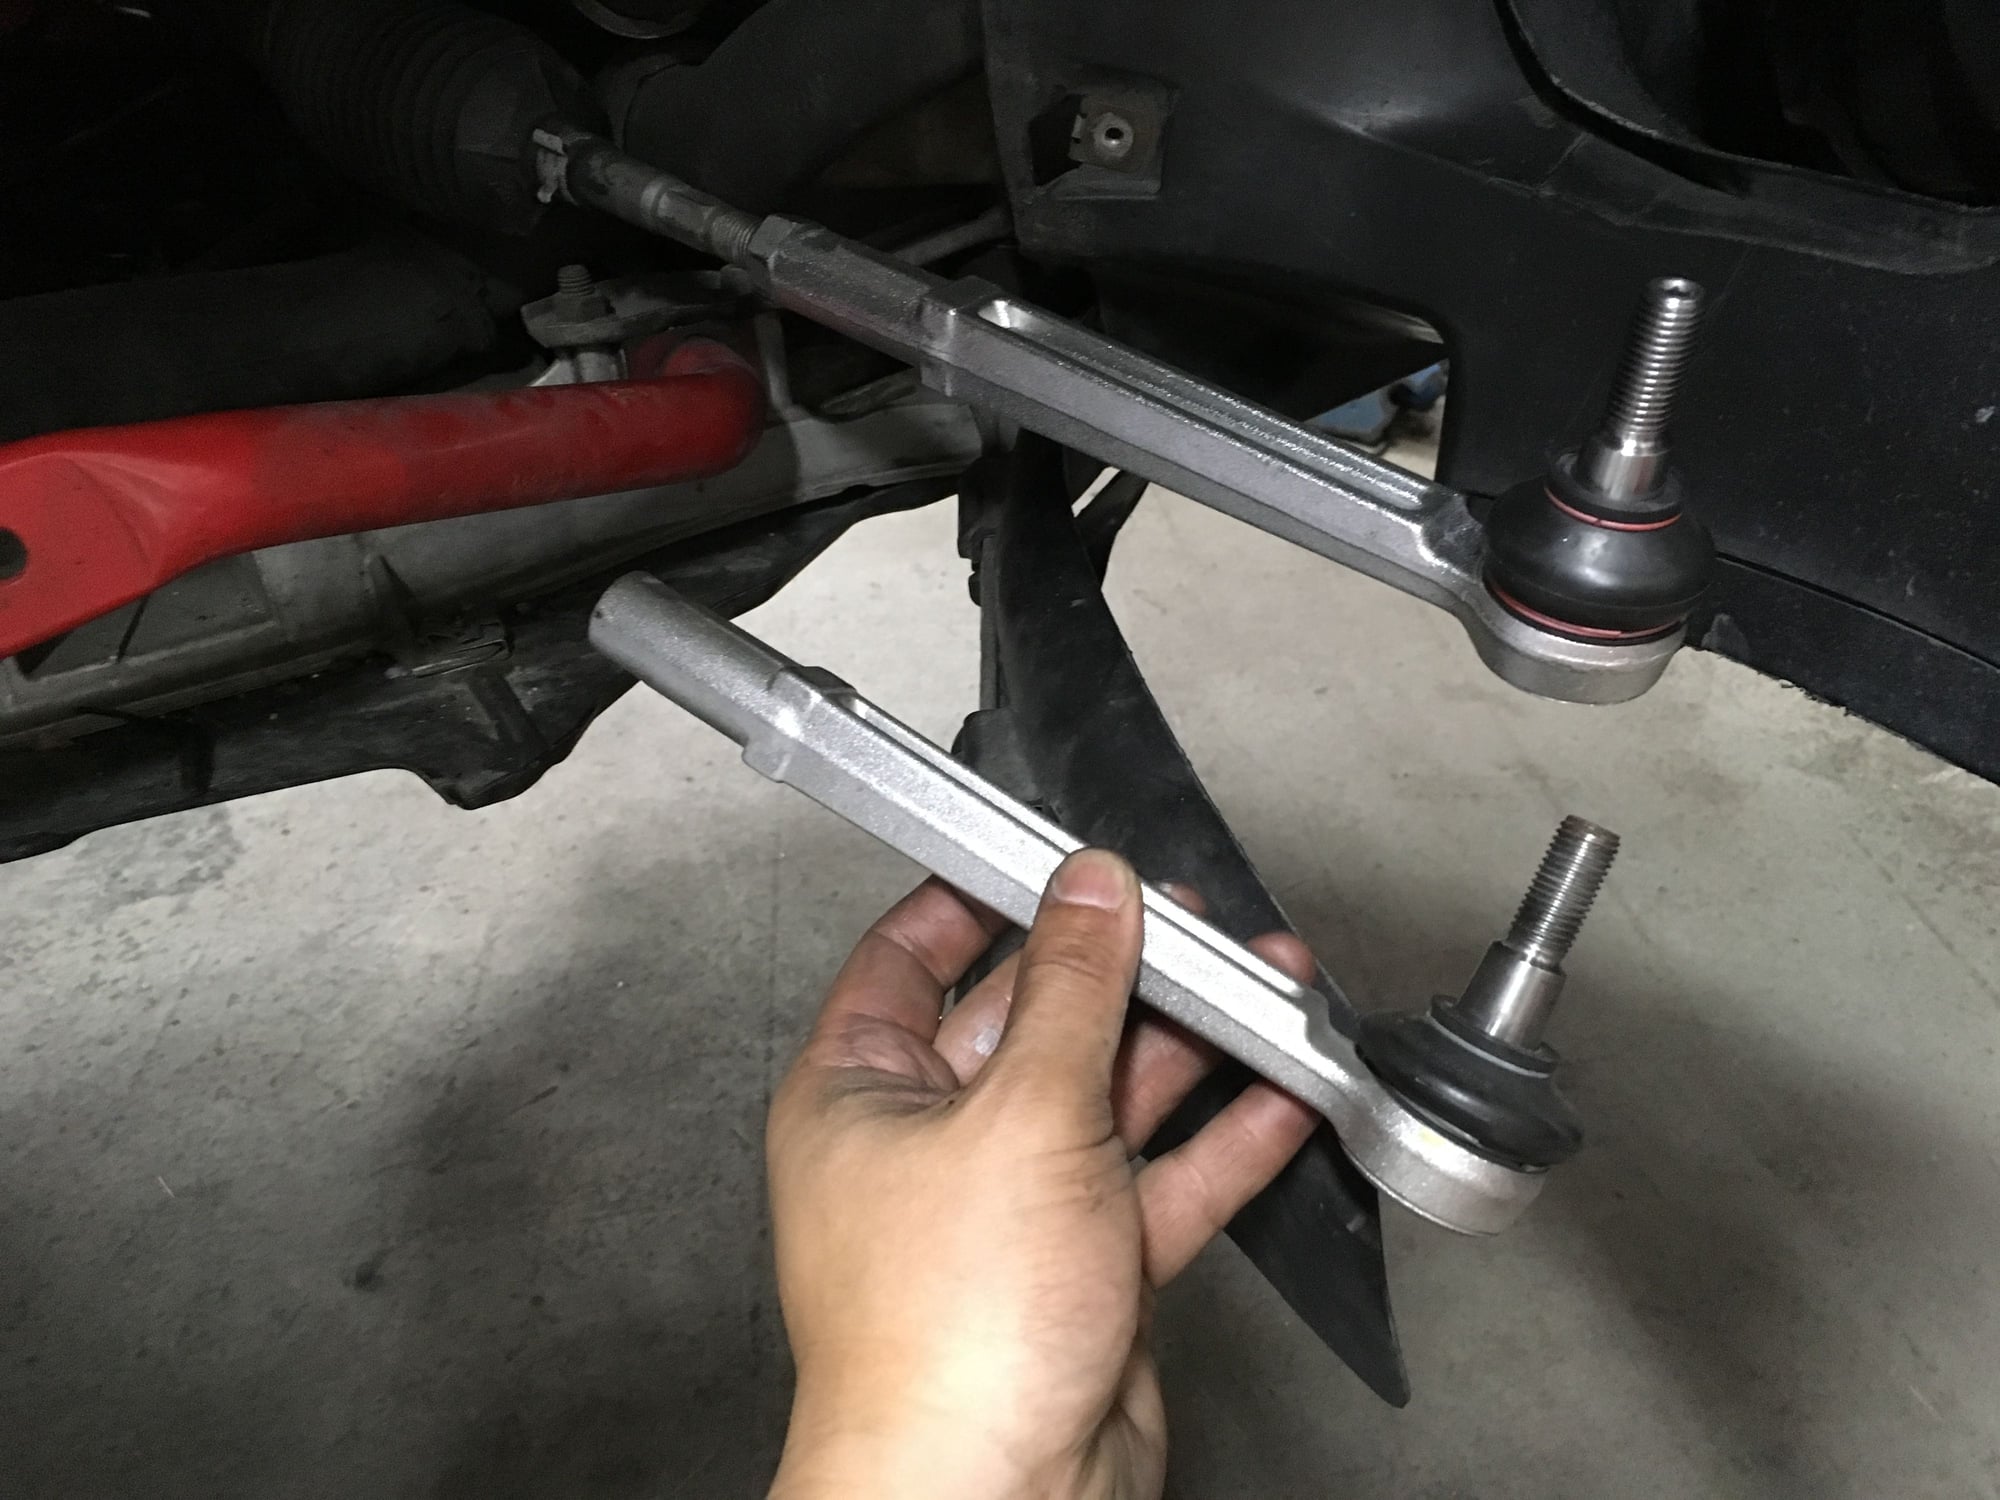
Next is to install new LCA's on the new uprights. There are many options for LCA's, I prefer factory outters, that's just a personal preference. As far as factory LCA outter's go there's basically two types, they are the 996-type and the 997-type (see image below).
The 996-type(Right of image) is characterized by a coarse surface finish, wide cross-section, V-shaped ribbing on top and bottom, and its 5mm longer so less shims are required. Factory equipped on 996 GT3/Cup with rubber caster bushing, the 996 GT3R/RSR have solid caster bushing.
The 997-type(Left of image) has lighter color smooth surface finish, narrower cross-section, single line ribbing only at the bottom, and its 5mm shorter. Factory equipped on 997 GT3/RS/Cup '06-09 with rubber caster bushing, on '10-Cup/R/RSR the ball joint pin is modular and have solid caster bushing.
You can clearly see the 997-type is a shorter LCA.
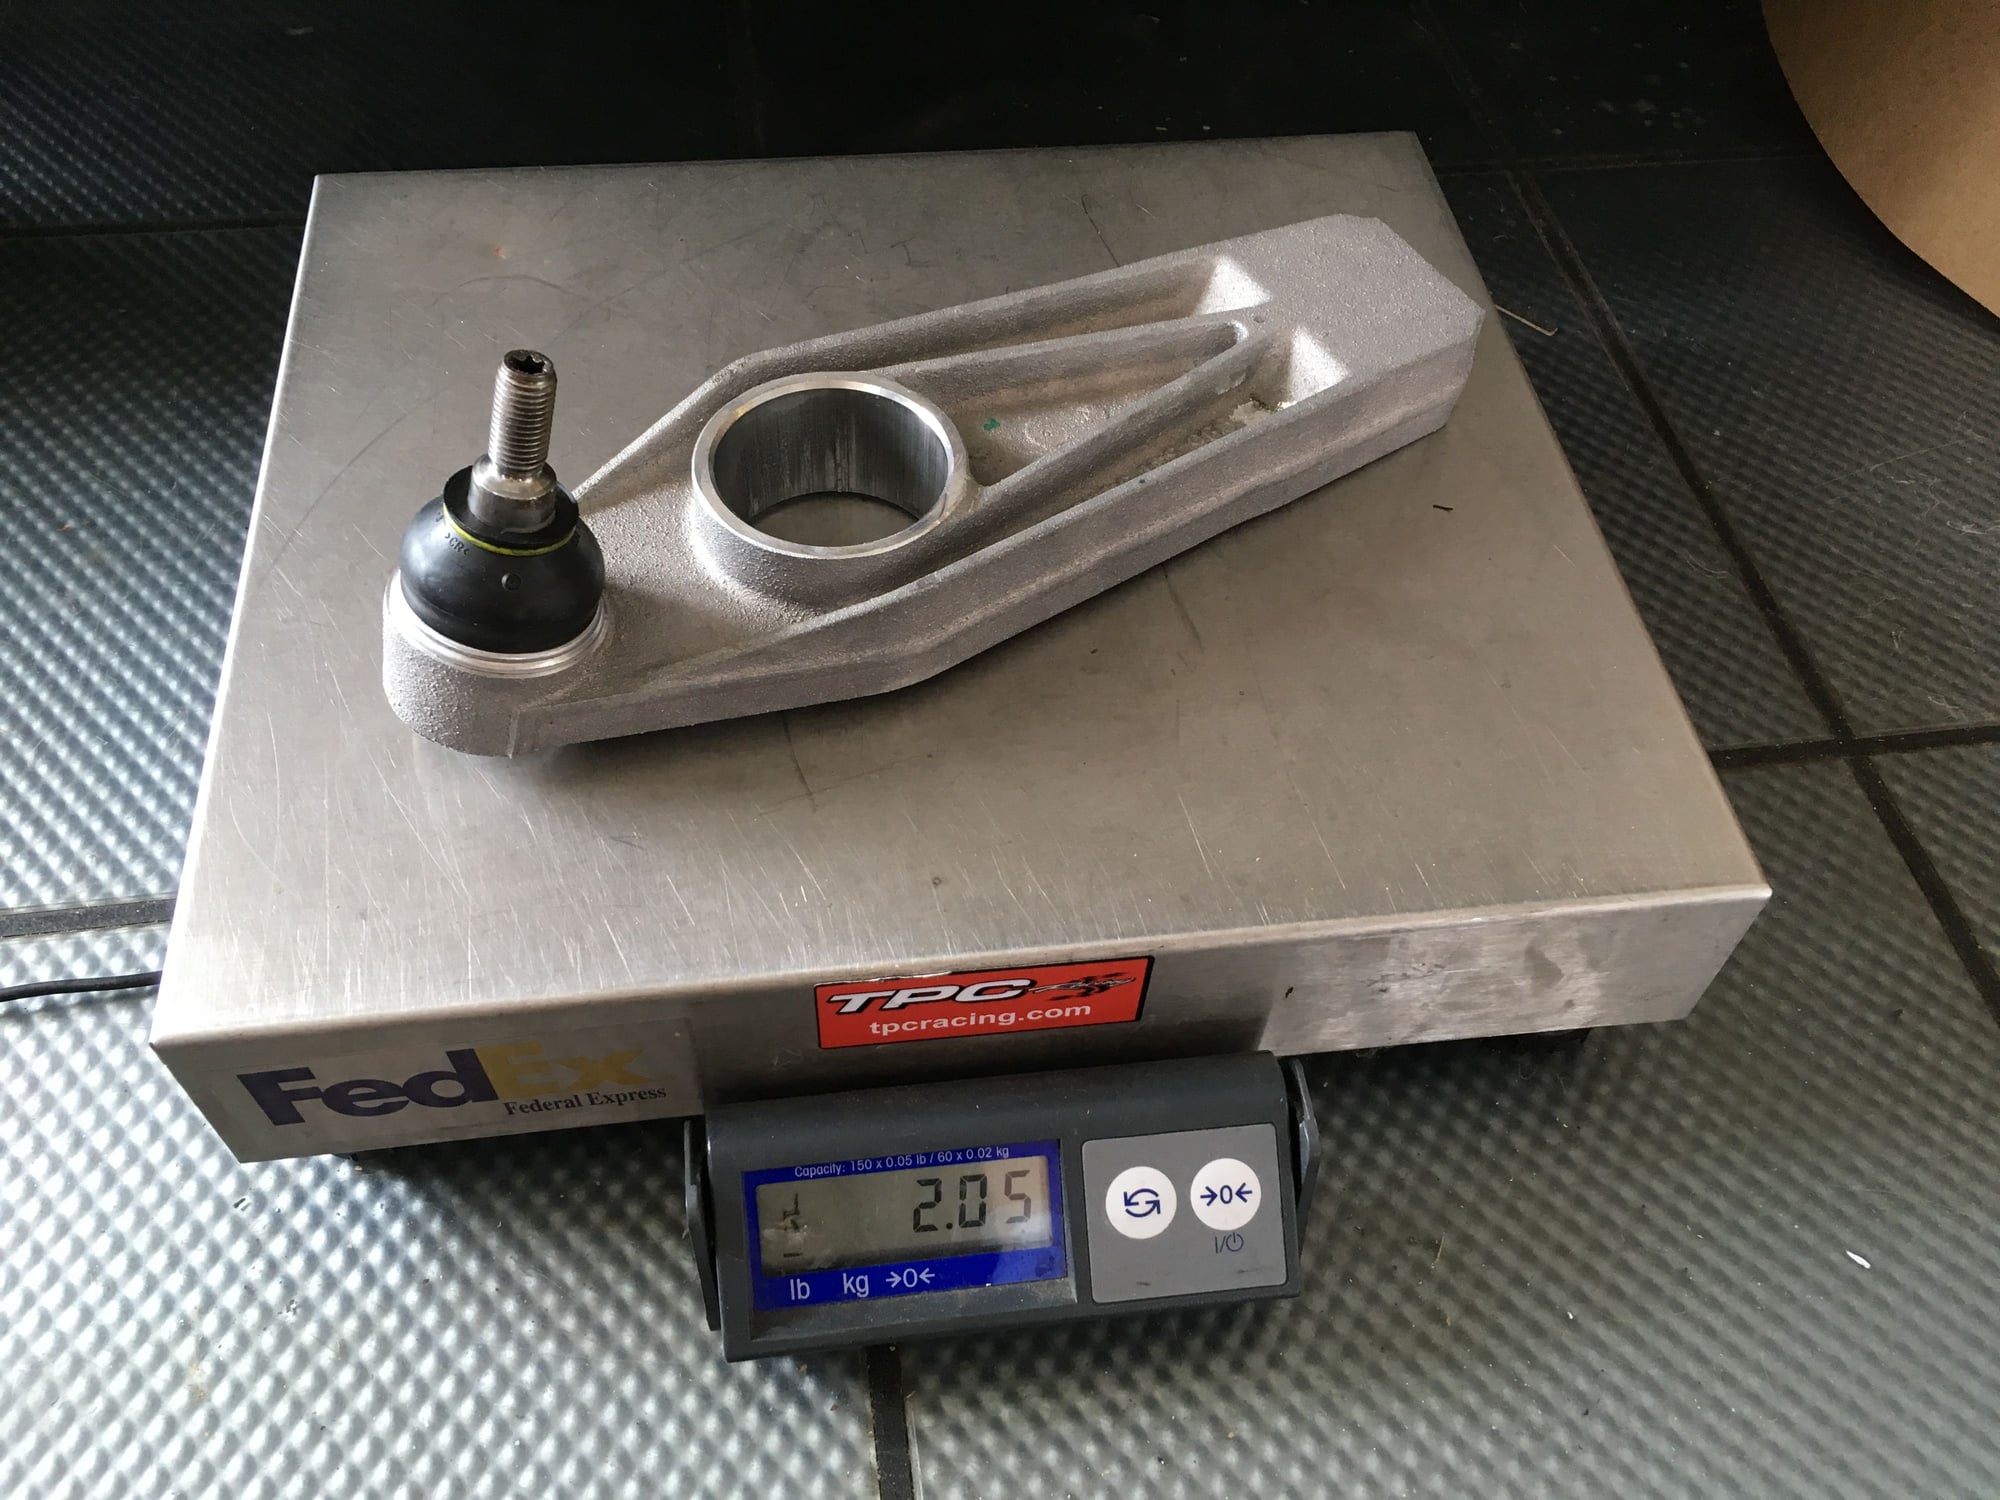
It is very impressive the amount of force either version can take considering their weight.
In my opinion, one type is not superior to the other as far as the construction of the arm itself goes, I have first hand experience being on the race team witnessing either version successfully completed in 24-hour pro racing.
Most vendors(including TPC) have been offering the 996-type with solid adjustable caster bushings added on because it is a good and proven product. Very recently the 997-type has gotten to be more readily available and more competitively priced to the 996-version so buyers now have another more option for LCA's.
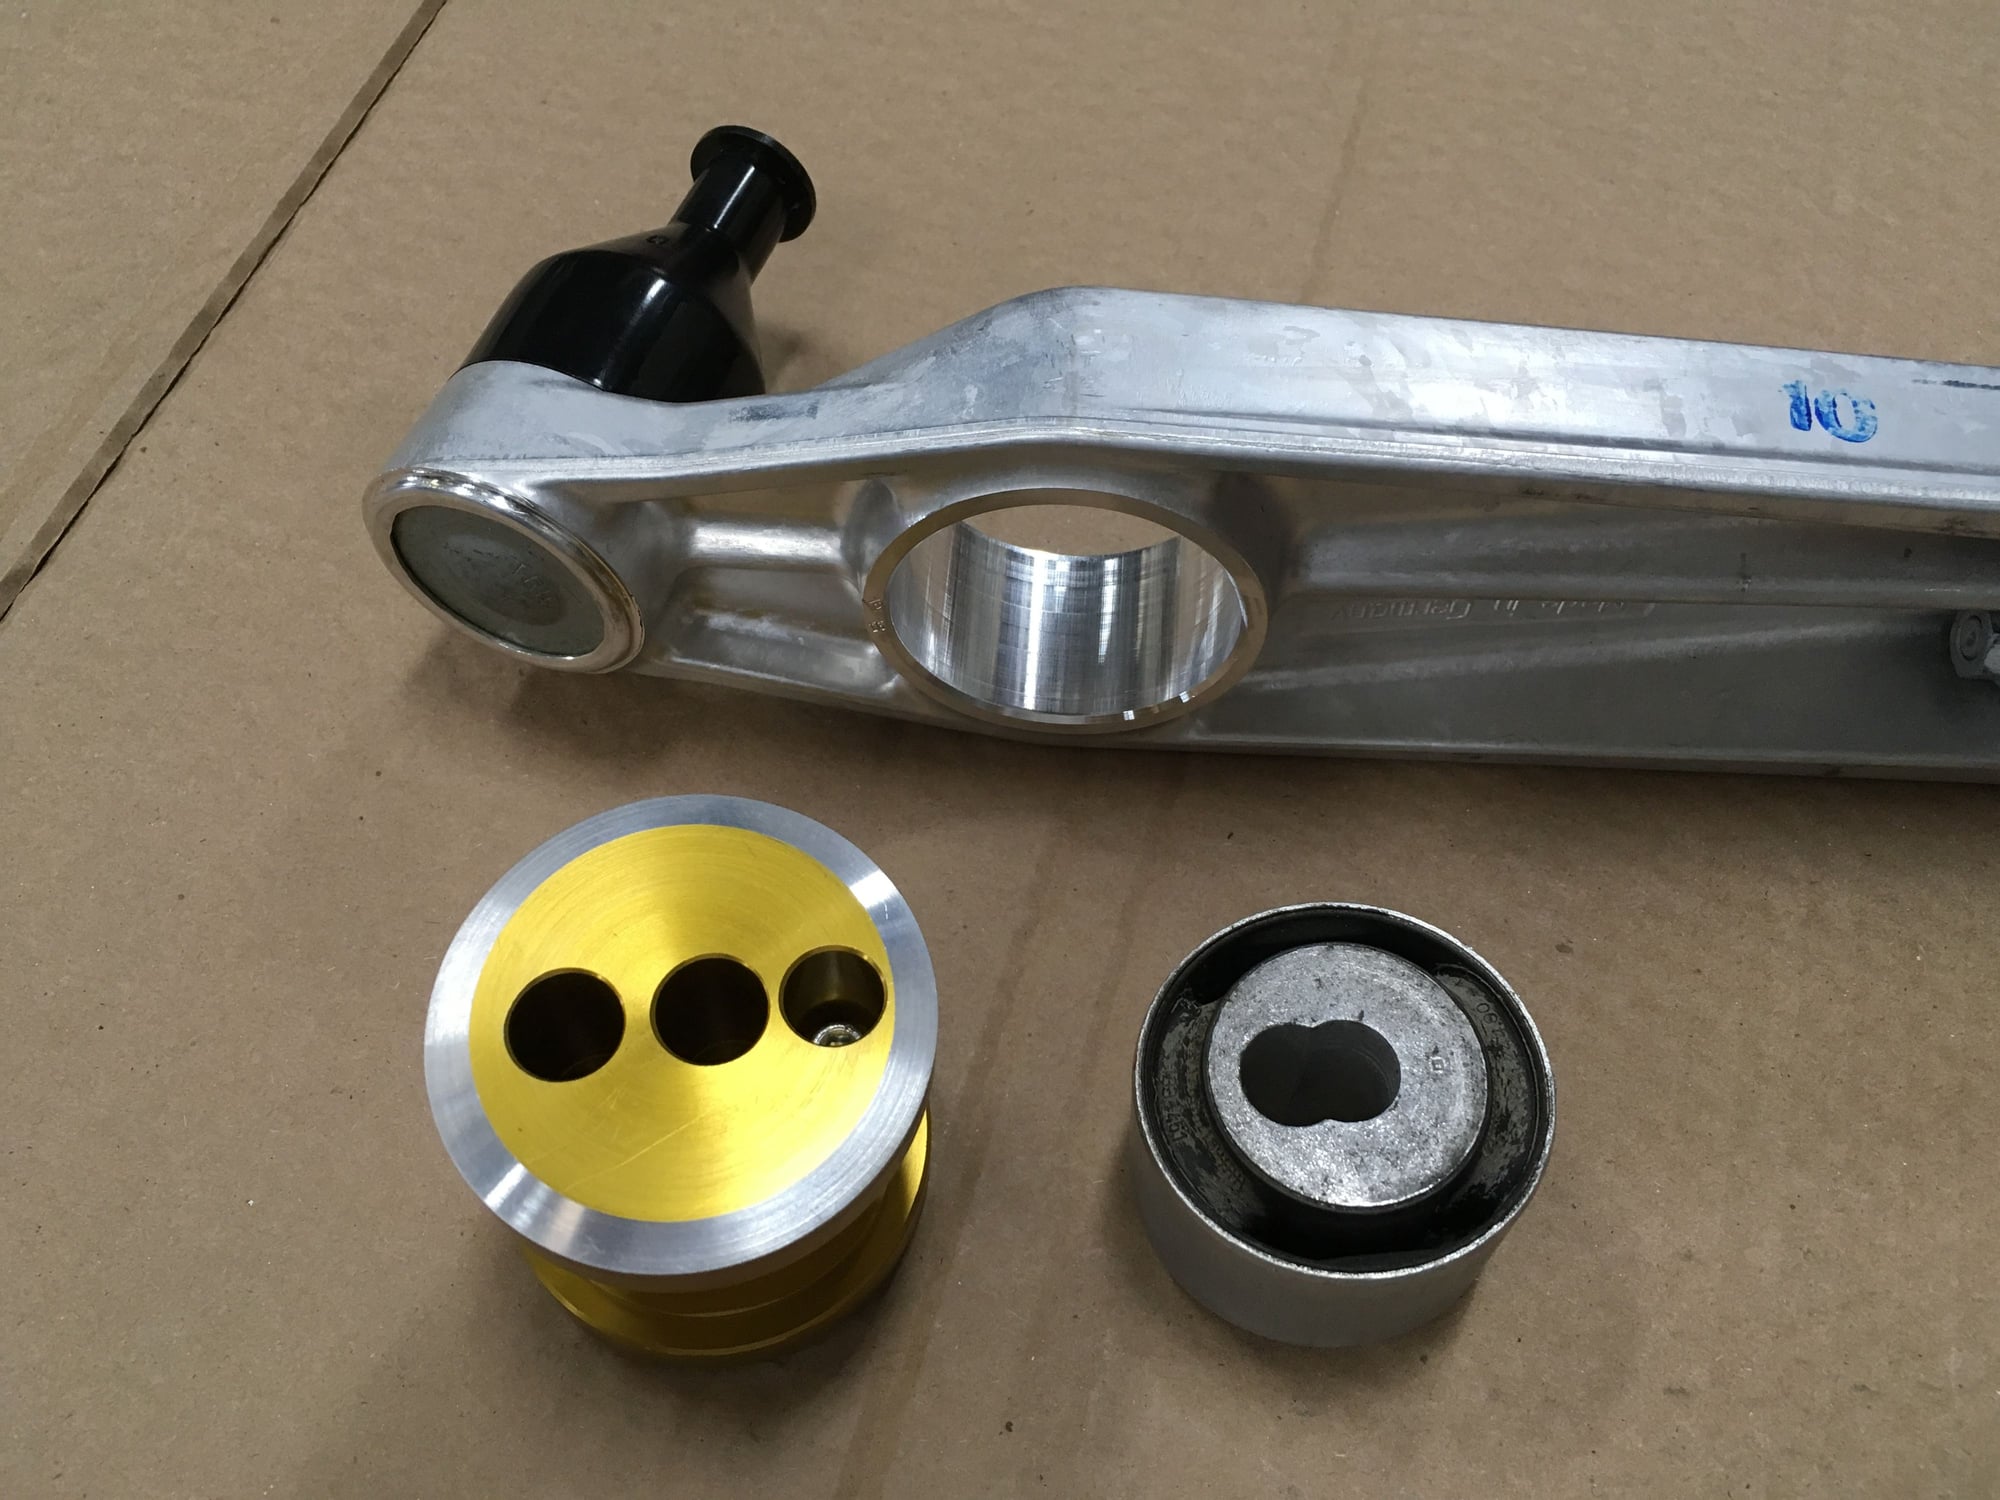
I am using this pair of 997.1 Cup LCA's because I acquired them a few years ago. I did press out the factory rubber caster bushing that has the "figure 8" holes in favor of TPC adjustable solid bushings.
There's option for monoball LCA inners too from TPC. But I'm going to stick with the rubber bushing inners that came with the 997.1 Cup LCA's because as I take parts off the shelves it comes out of my pay check.
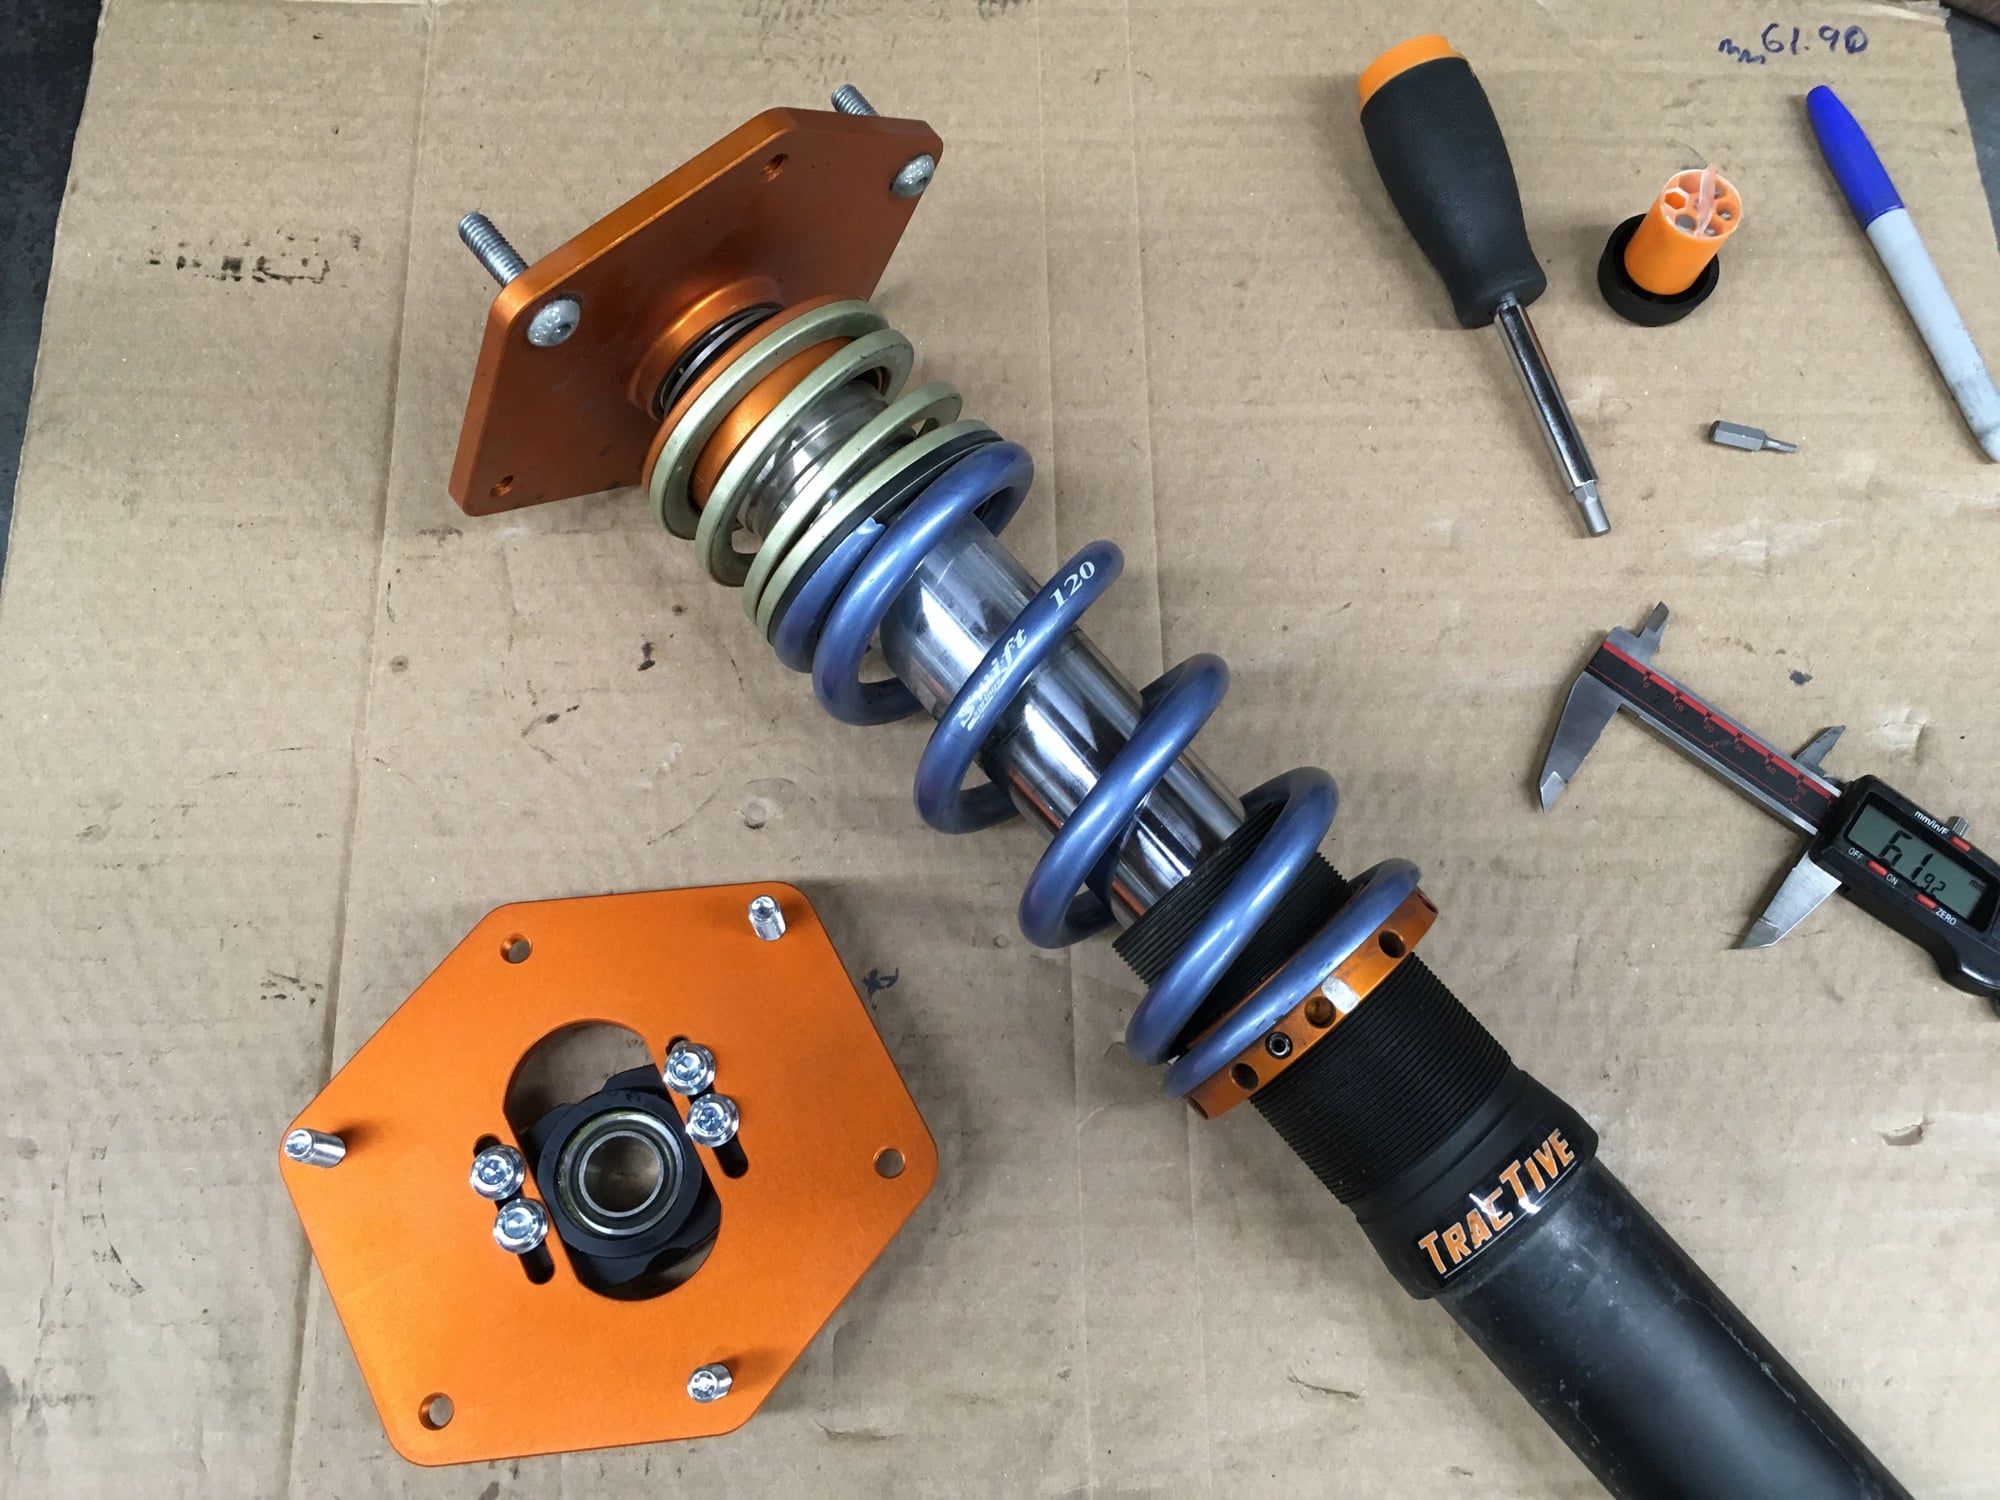
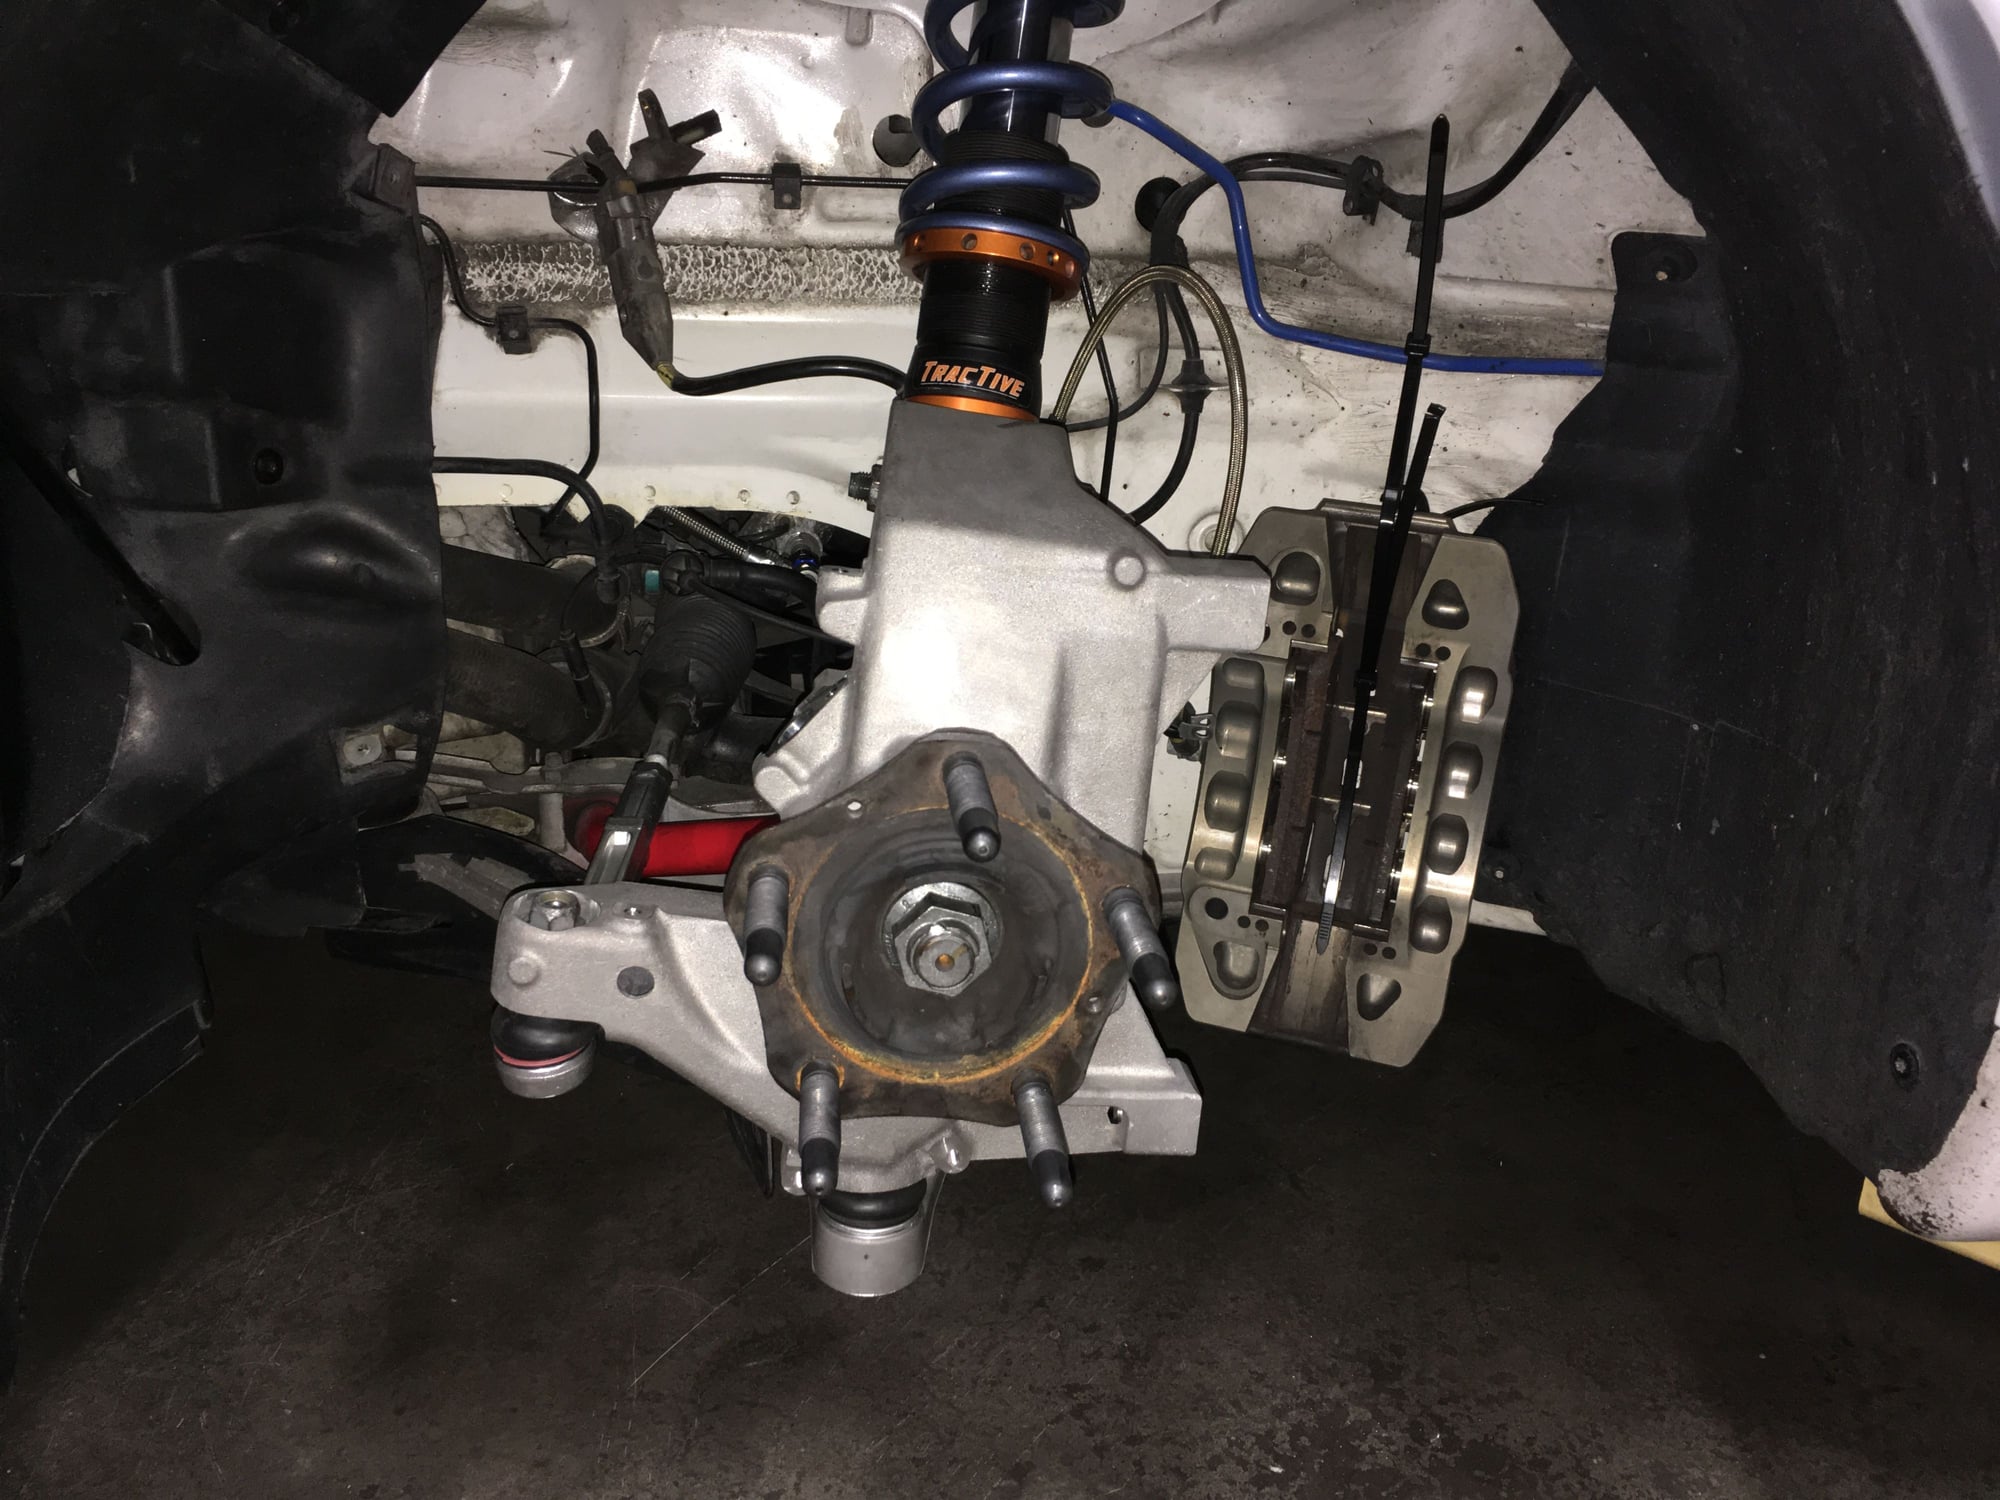
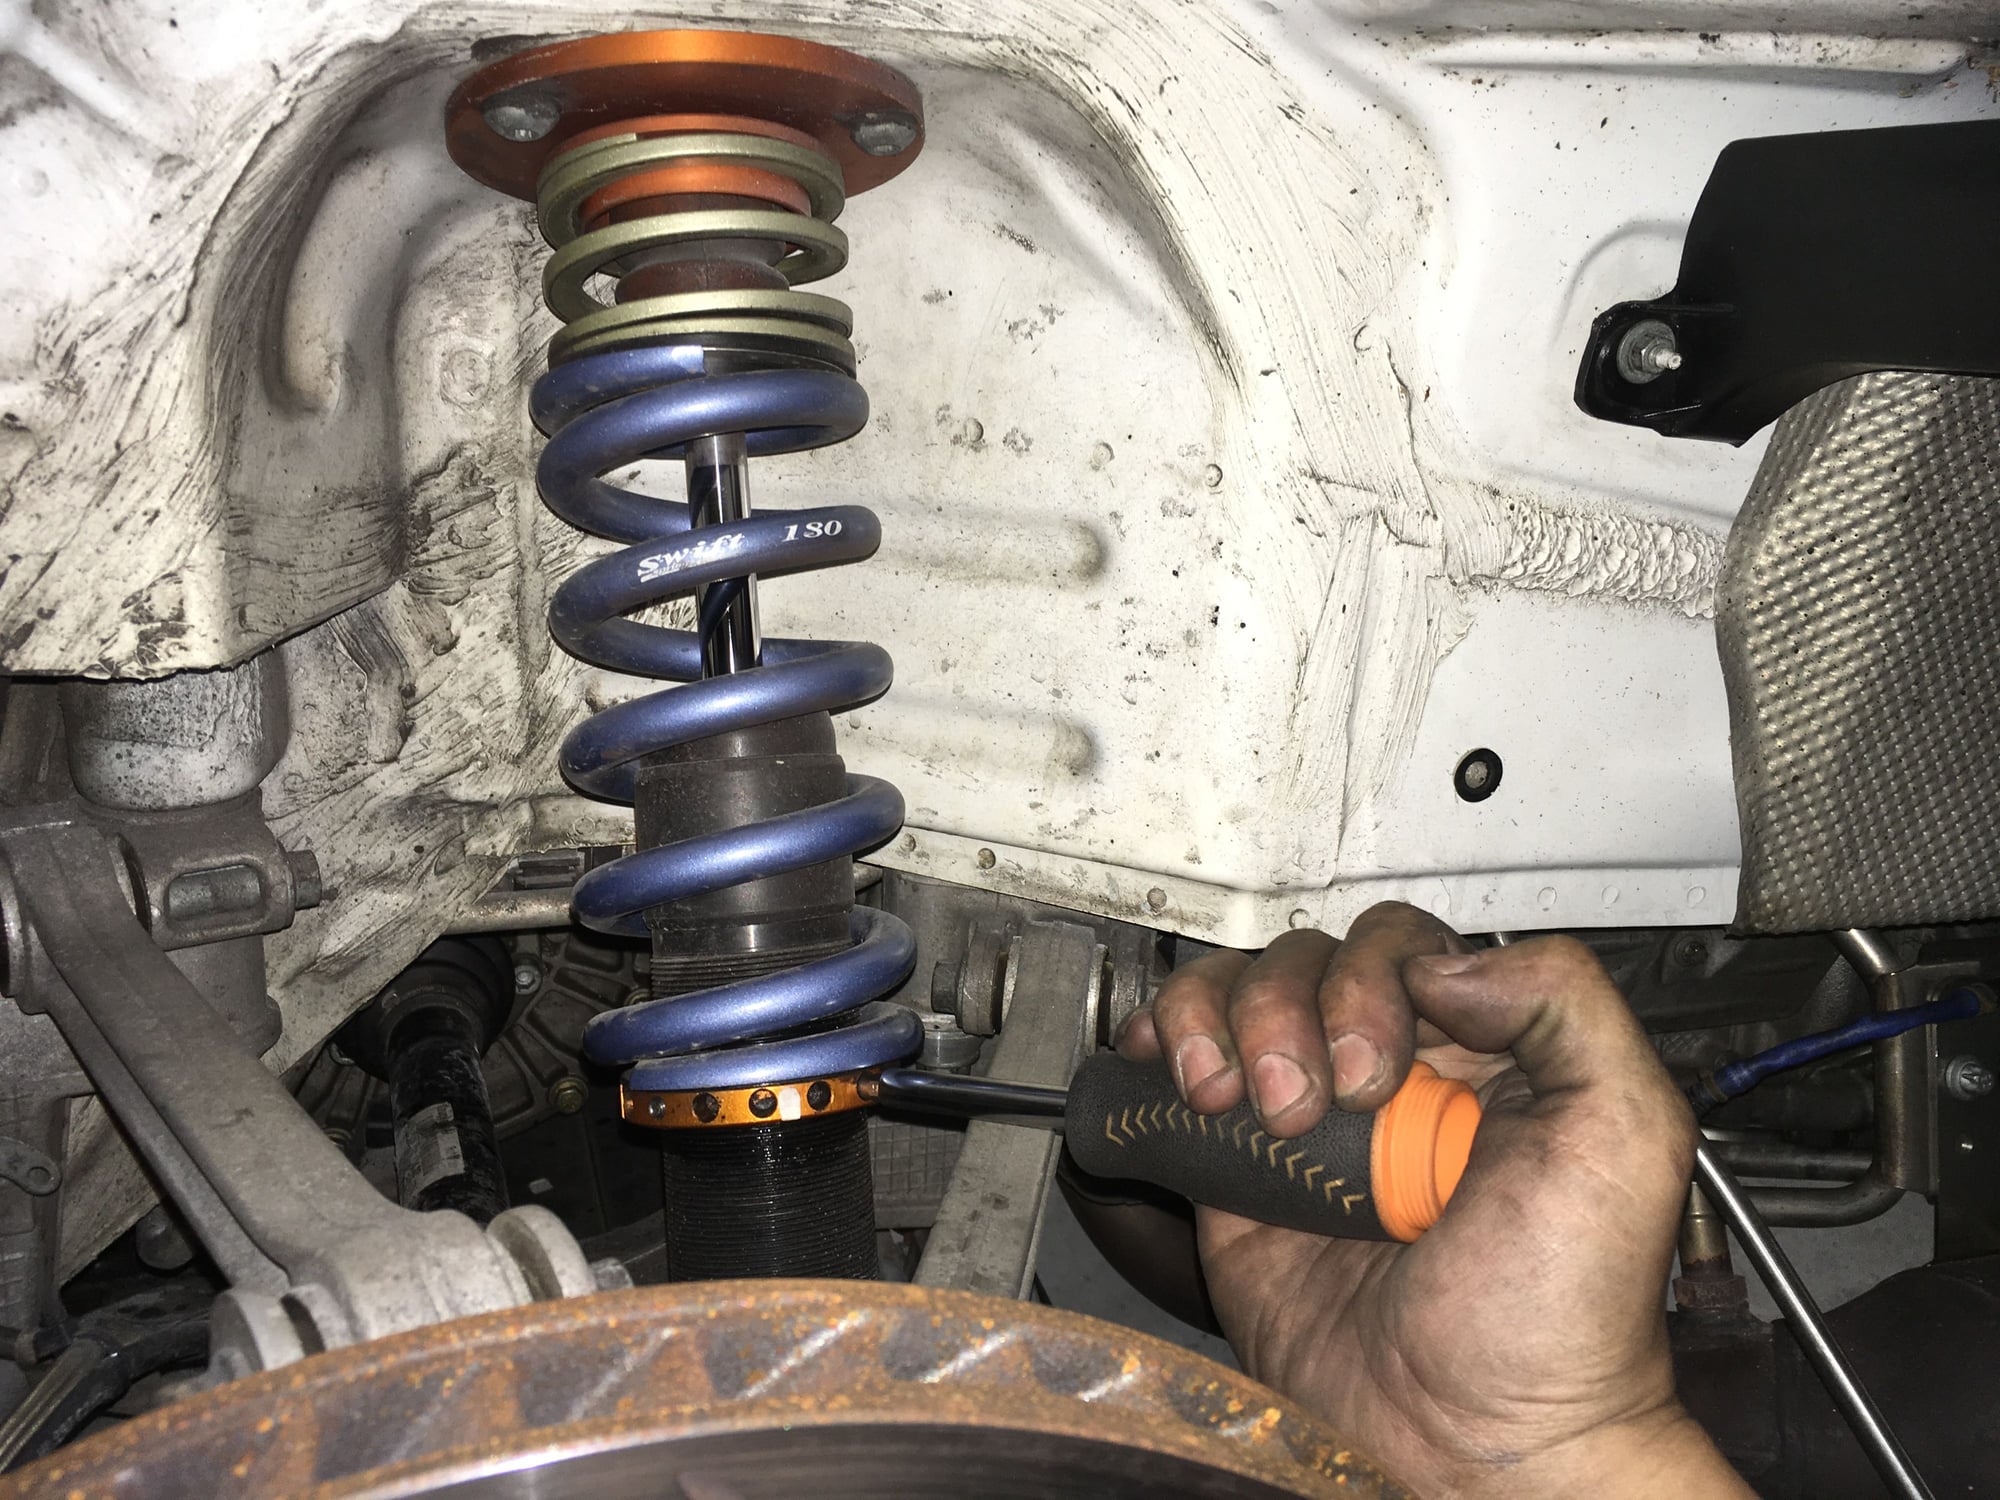
Have the LCA's under control. Next is the coilovers. I have been using these Tractive coilovers for 4 years. They have been working flawlessly. Just doing a tearing down of the external pieces for cleaning and inspection.
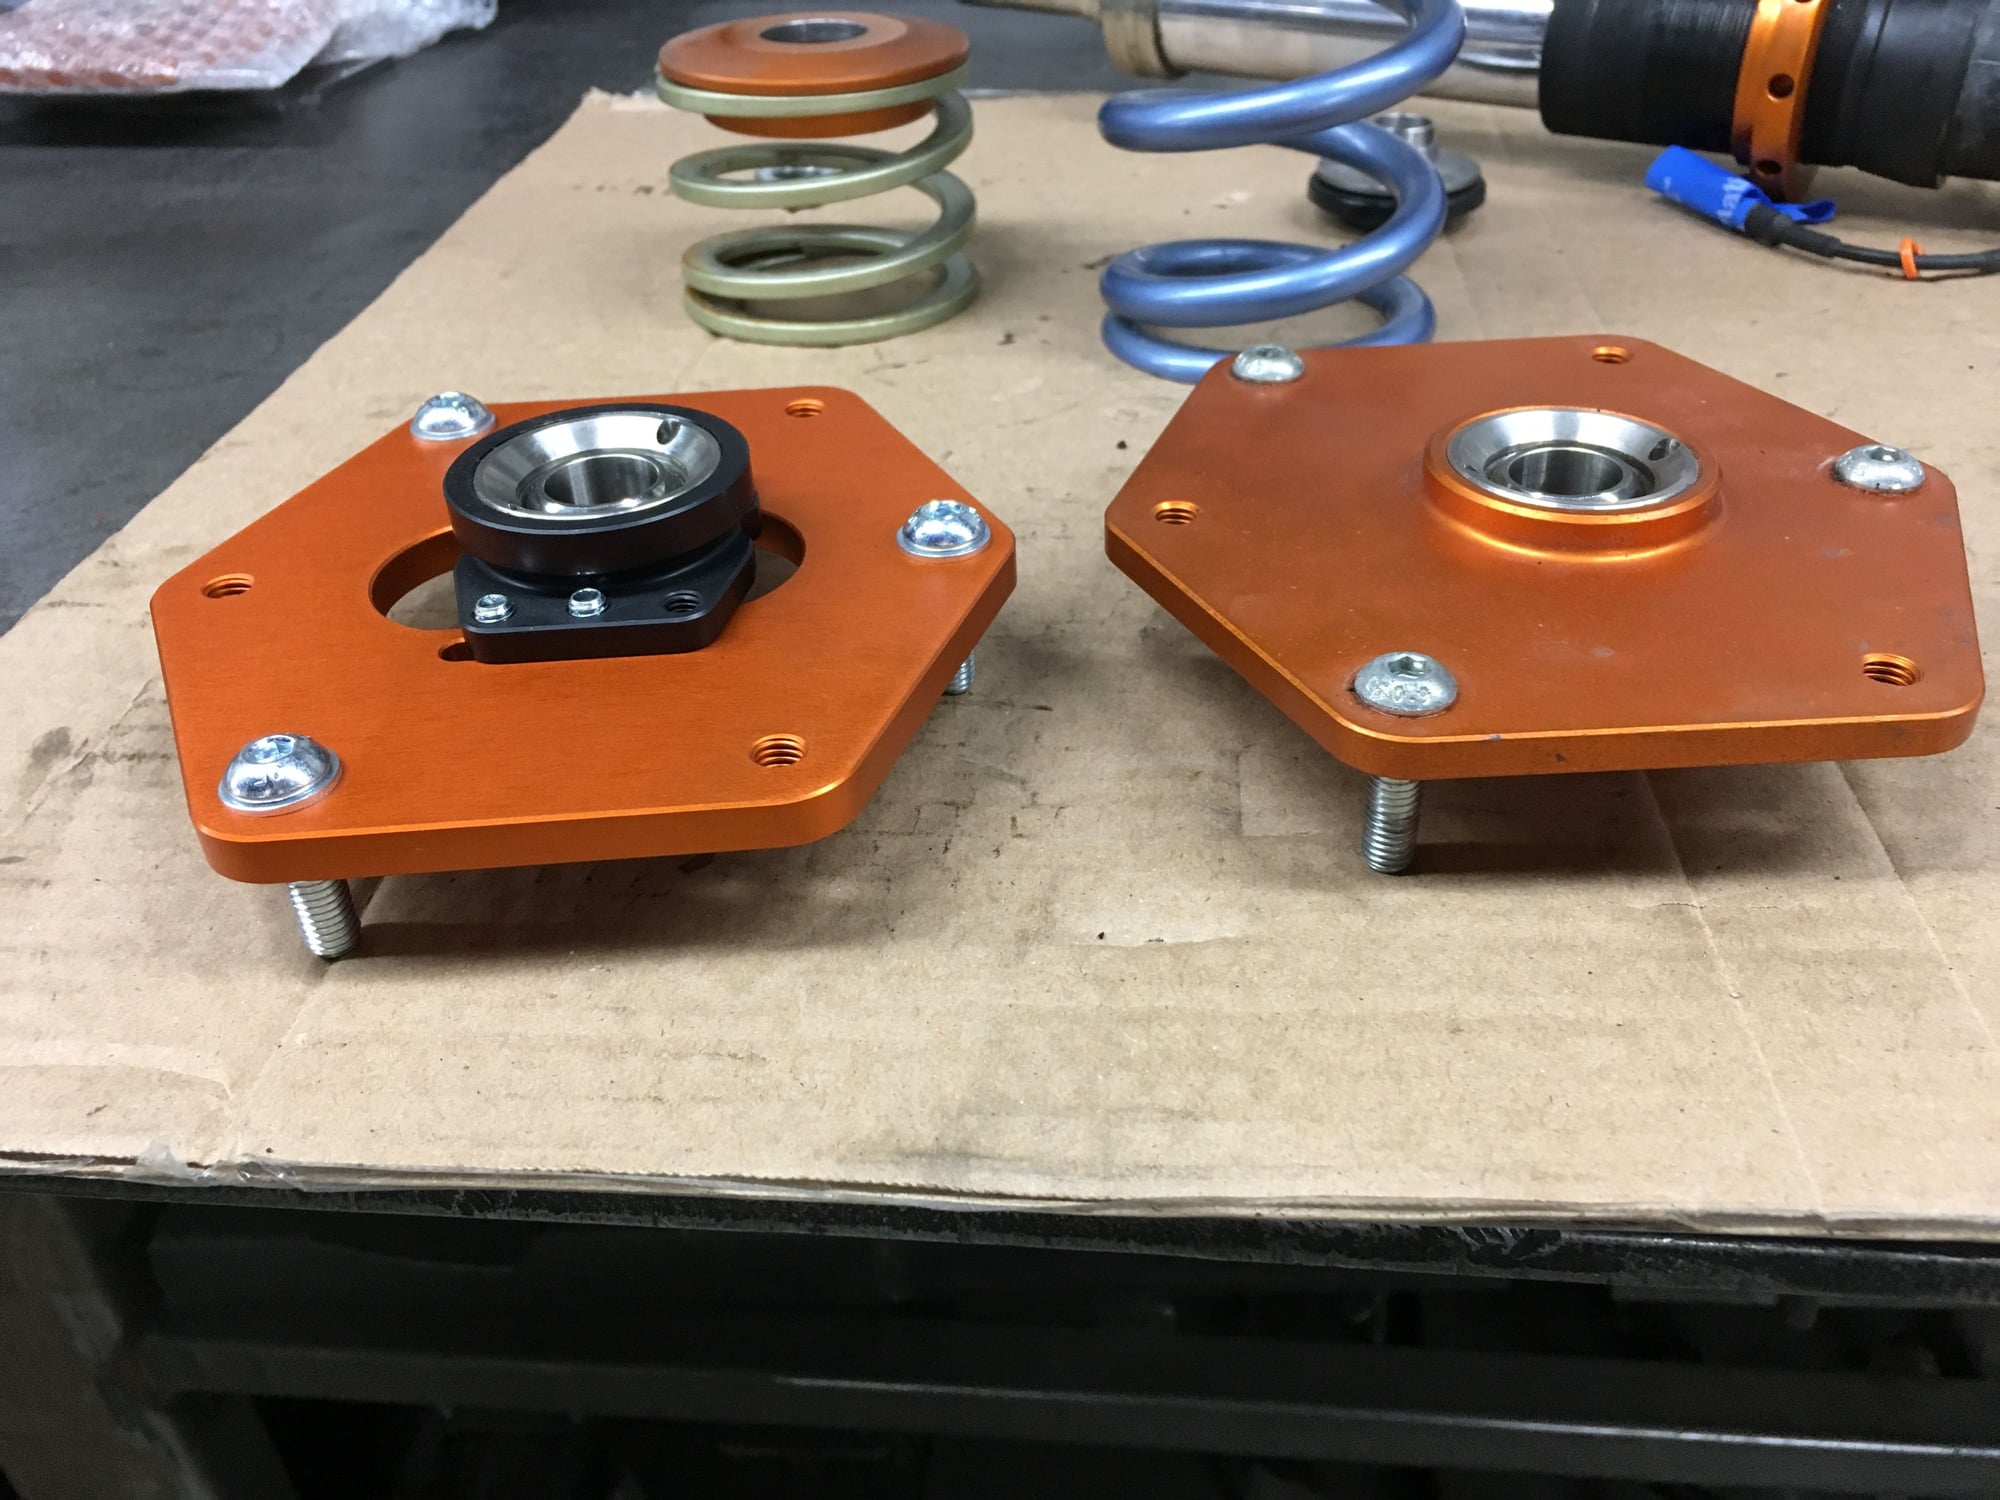
Noticed the new Tractive 2019 design camber plate in the left bottom of the image. The new design features two-piece construction for increased range of camber adjustment. I had to take one off the shelf for a looksie.
In addition to more camber adjustment the new design has more "depth" to increase the suspension droop. I wanted more droop since the Tractive shocks are close to Cup shock length.
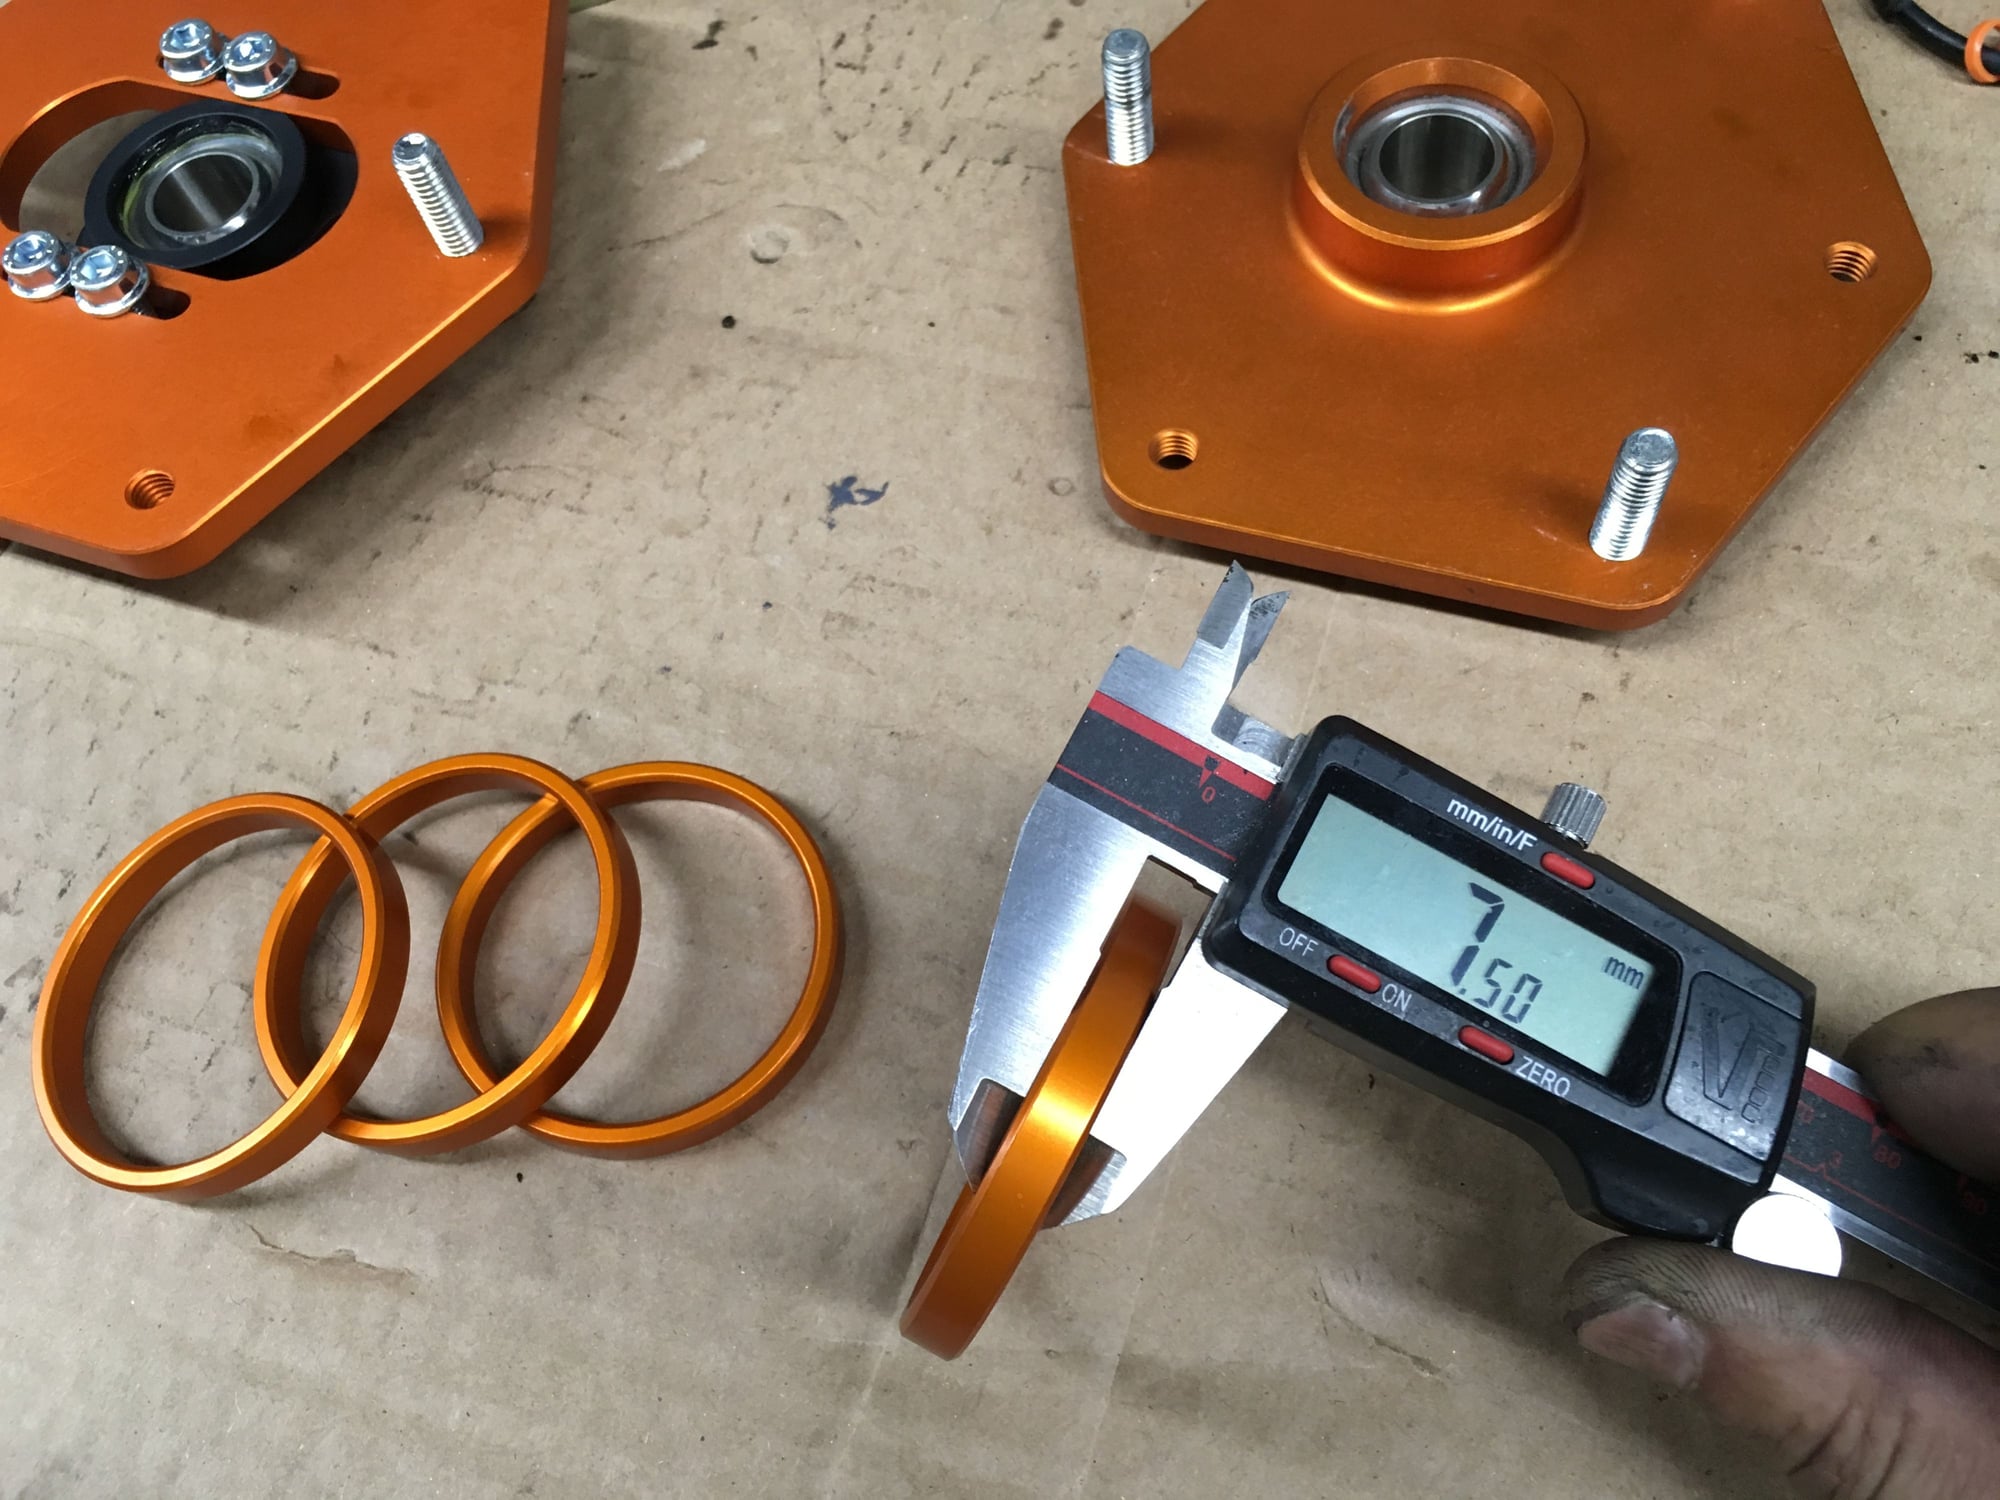
Decision time- As much as I wanted the new camber plates I put them back on the shelf and re-use the old plates. There's nothing wrong with the old plates. I am going to increase suspension droop by using the droop spacers that Tractive made. They are designed for custom tuning suspension droop at 3.0mm and 7.5mm increments. And they're a lot less money coming out for my pay then the camber plates.
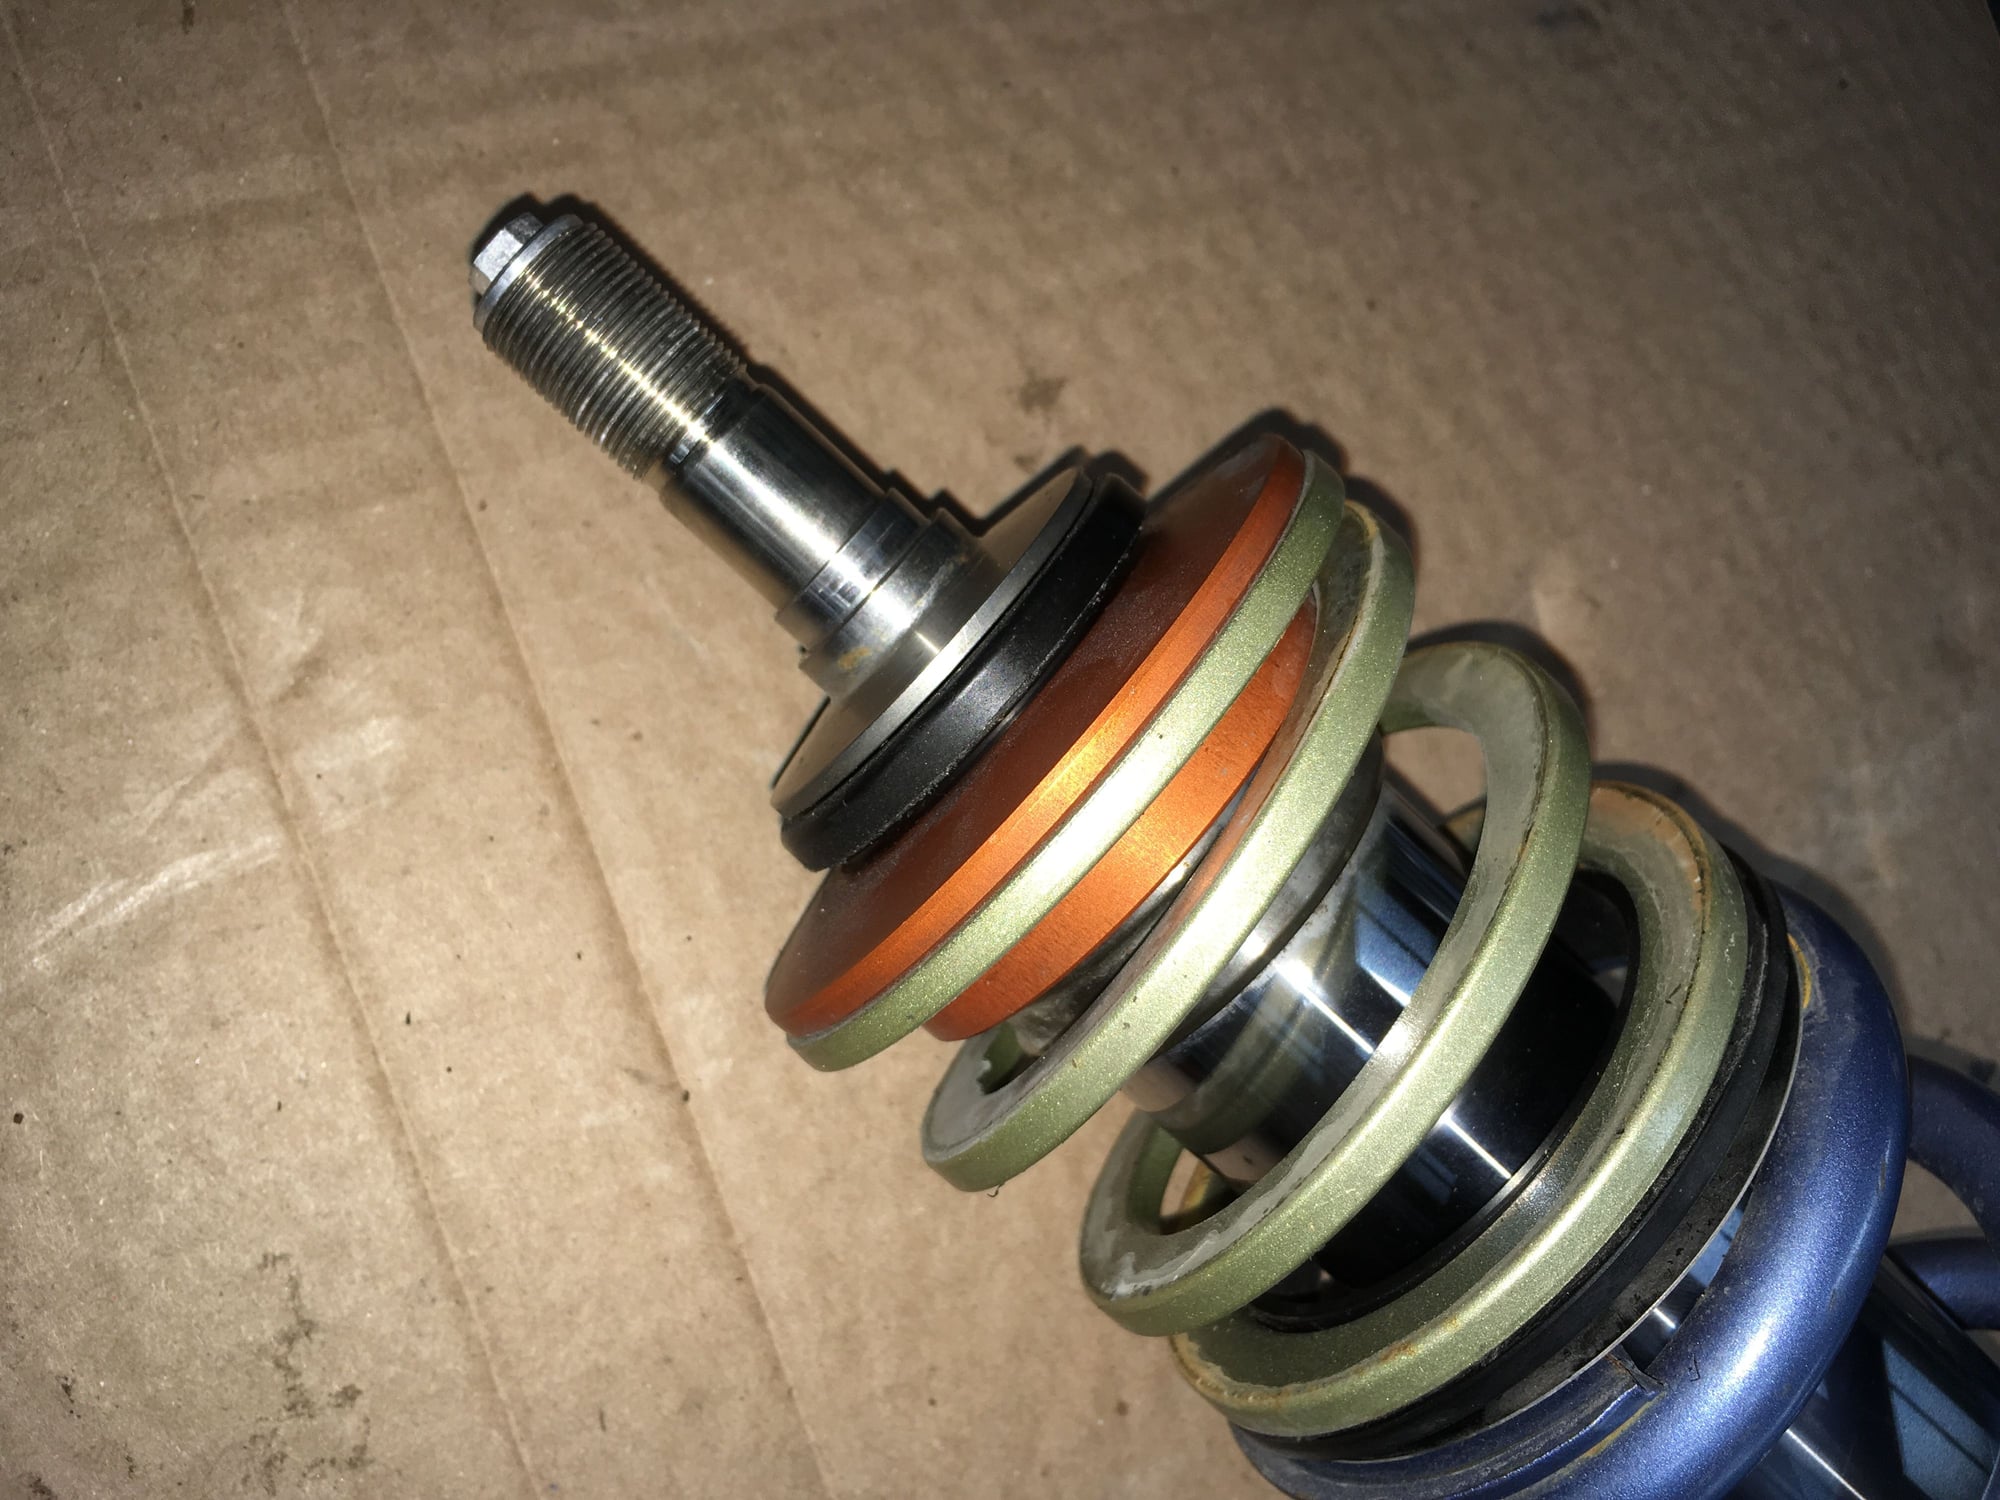
A good cleaning and inspection before re-assmebling the coilovers. After 4 years of use the stout 43mm inverted tube only needed a wipe down with a towel.
The axial bearing is in perfection condition still.
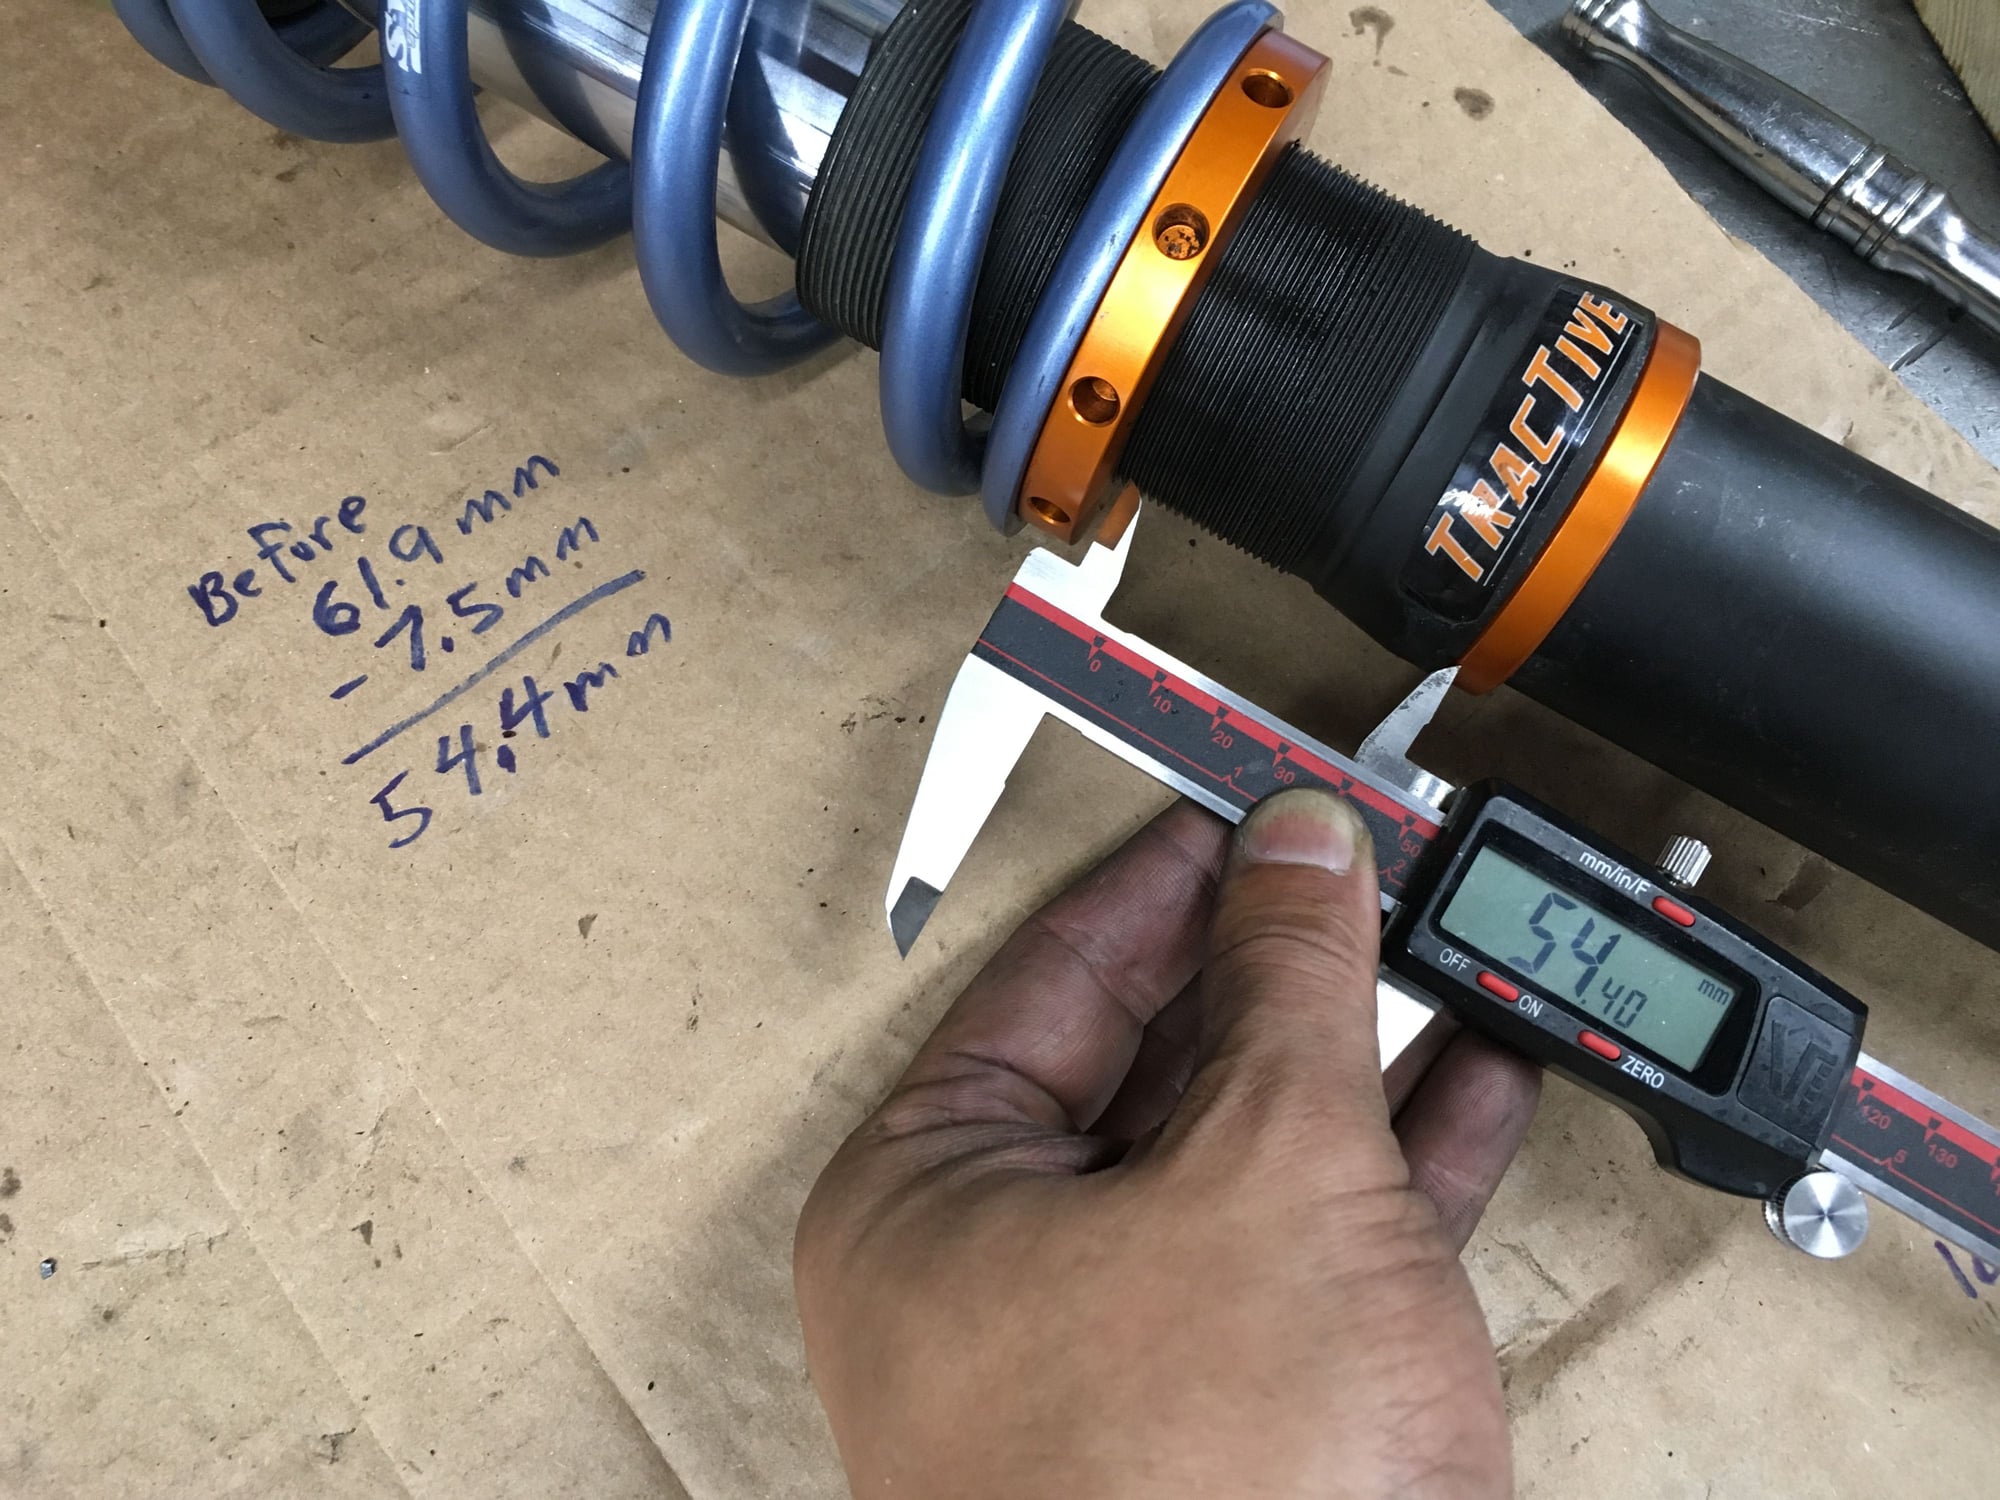
Pre-setting the ride height to my calculation.
Complete assembly ready to go back on the car.
While I'm there might as well replace the tie rod ends.
Yeah, I've learned to pay extra attention when engaging the socket to the 6-pt nuts. I keep spares nuts in my tool box. Good idea on the 12-pt nuts. Thanks!
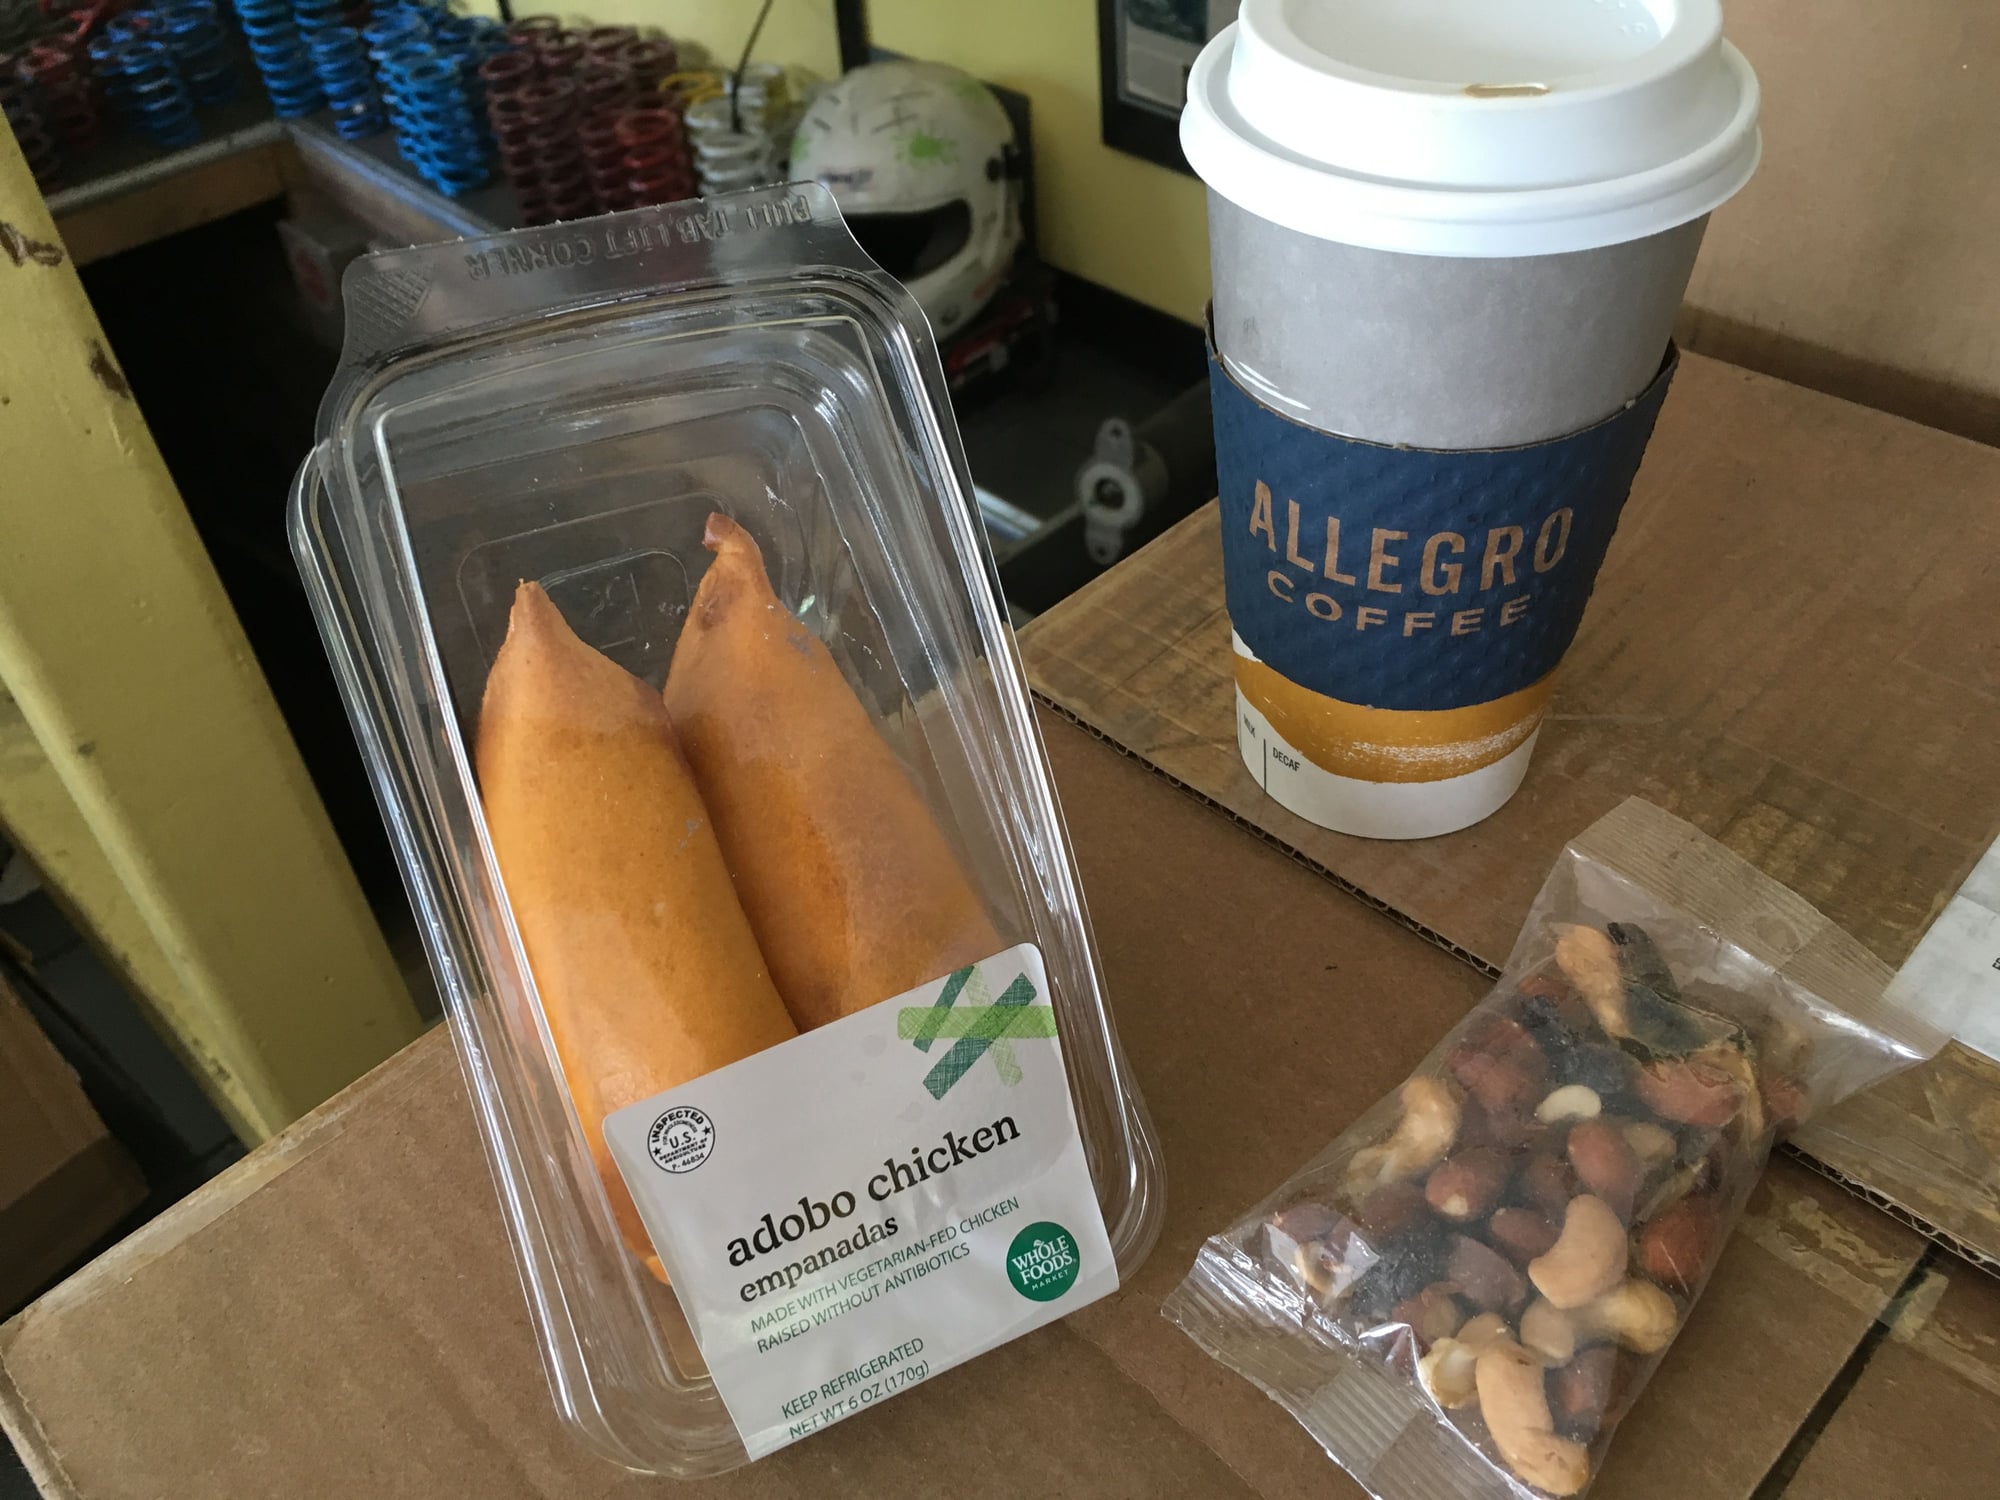
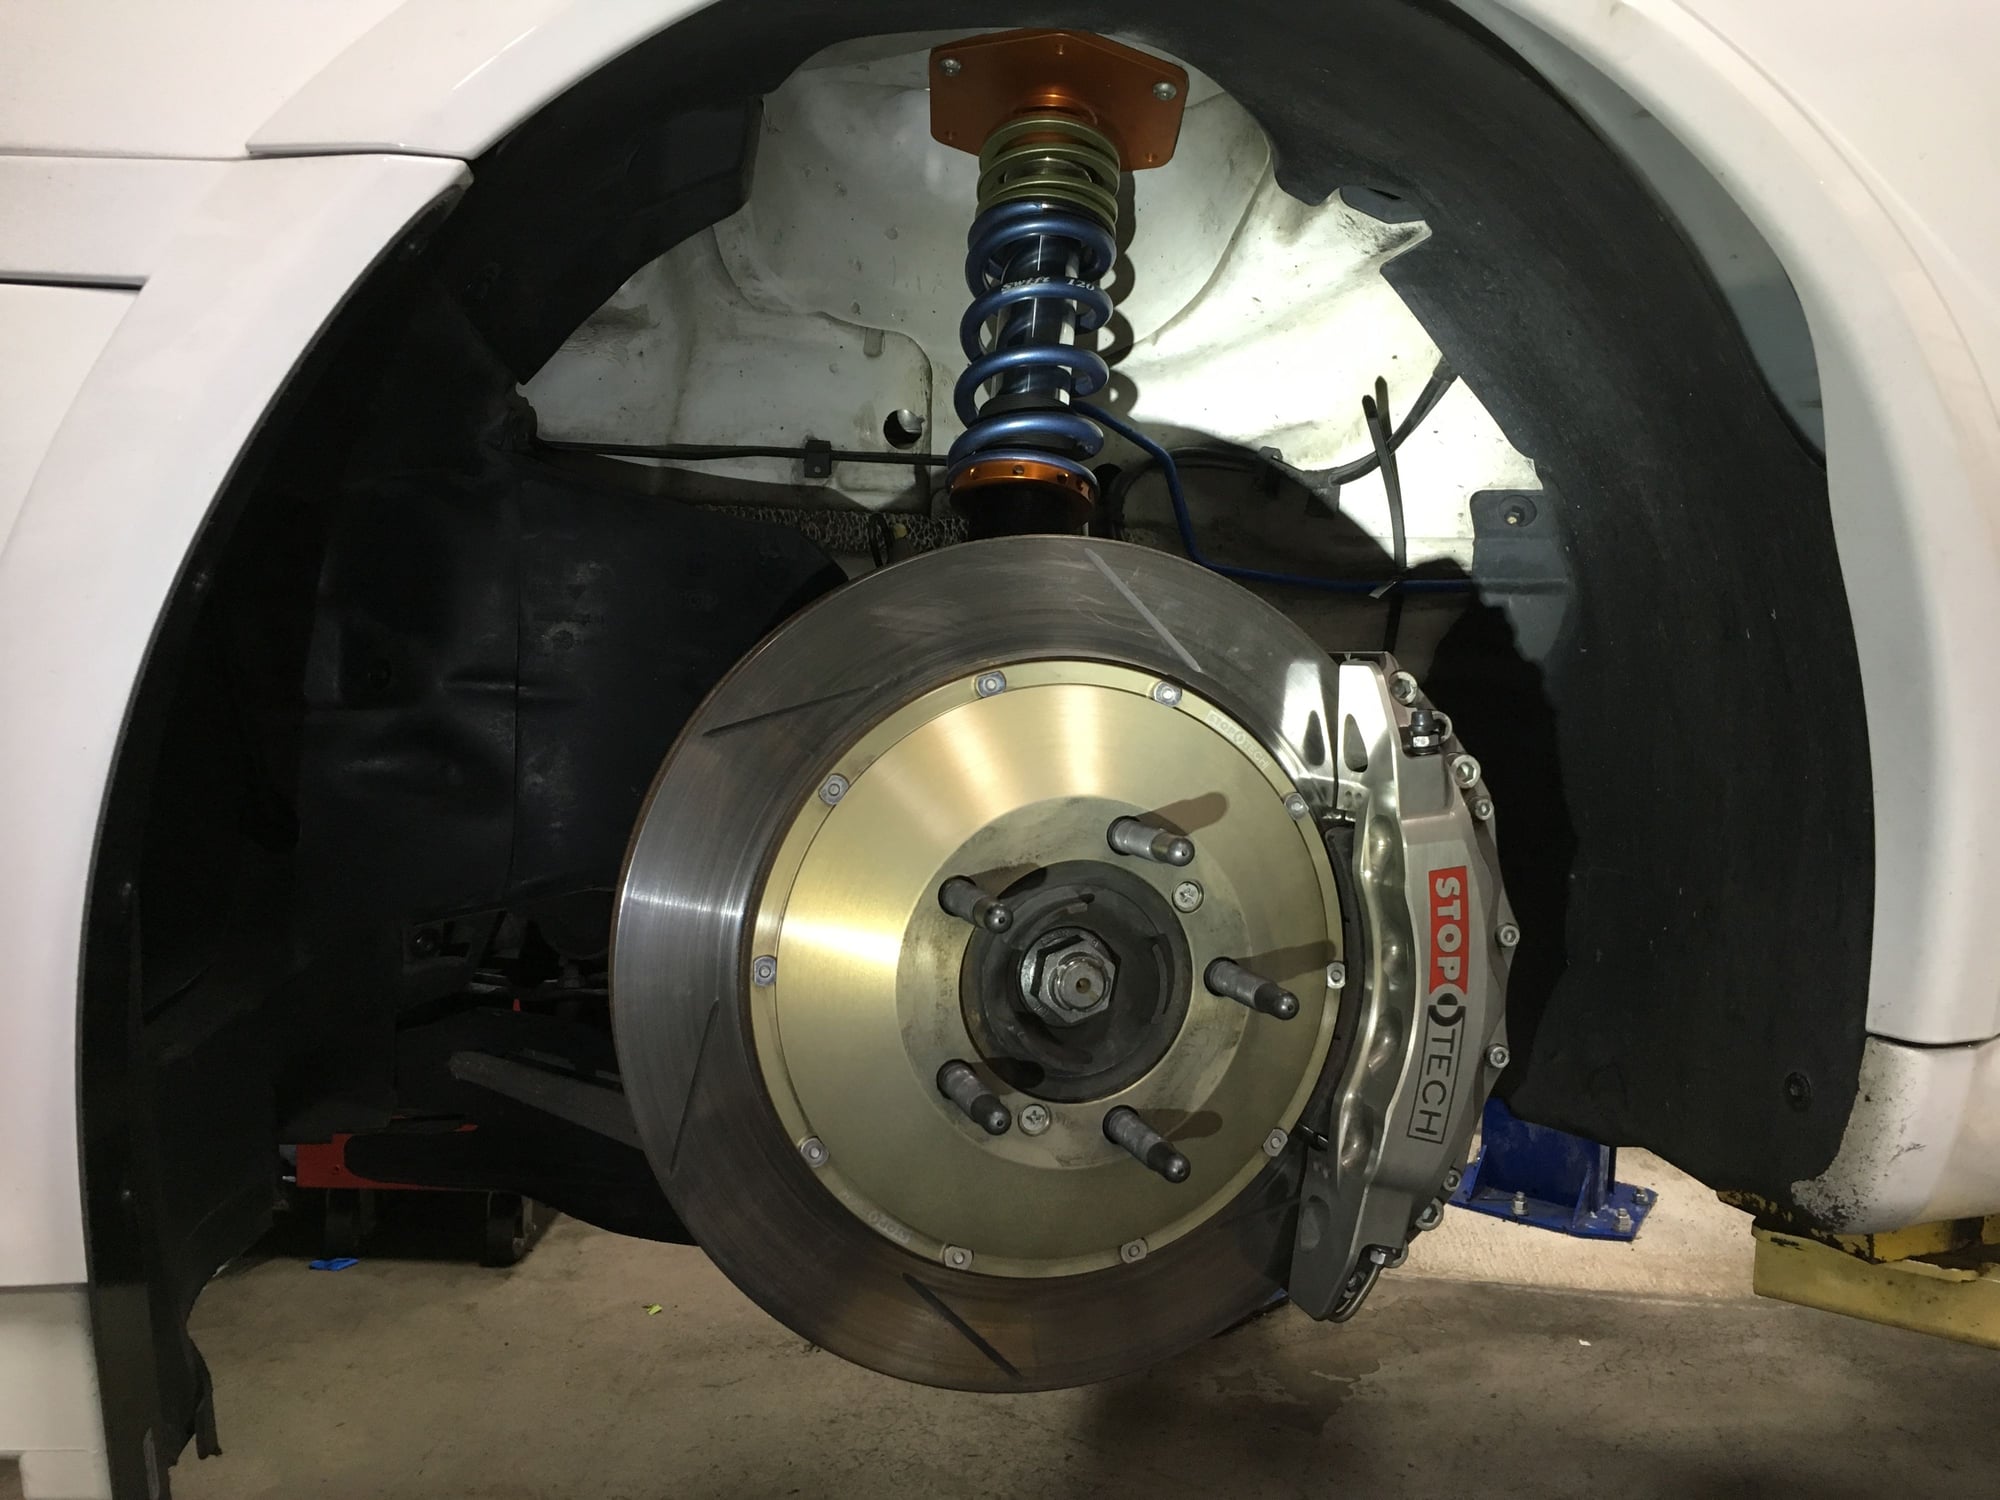
Pushing the final hours of this work session into dawn all jacked up on sugary snacks. Front wheels and tires ready to go on.
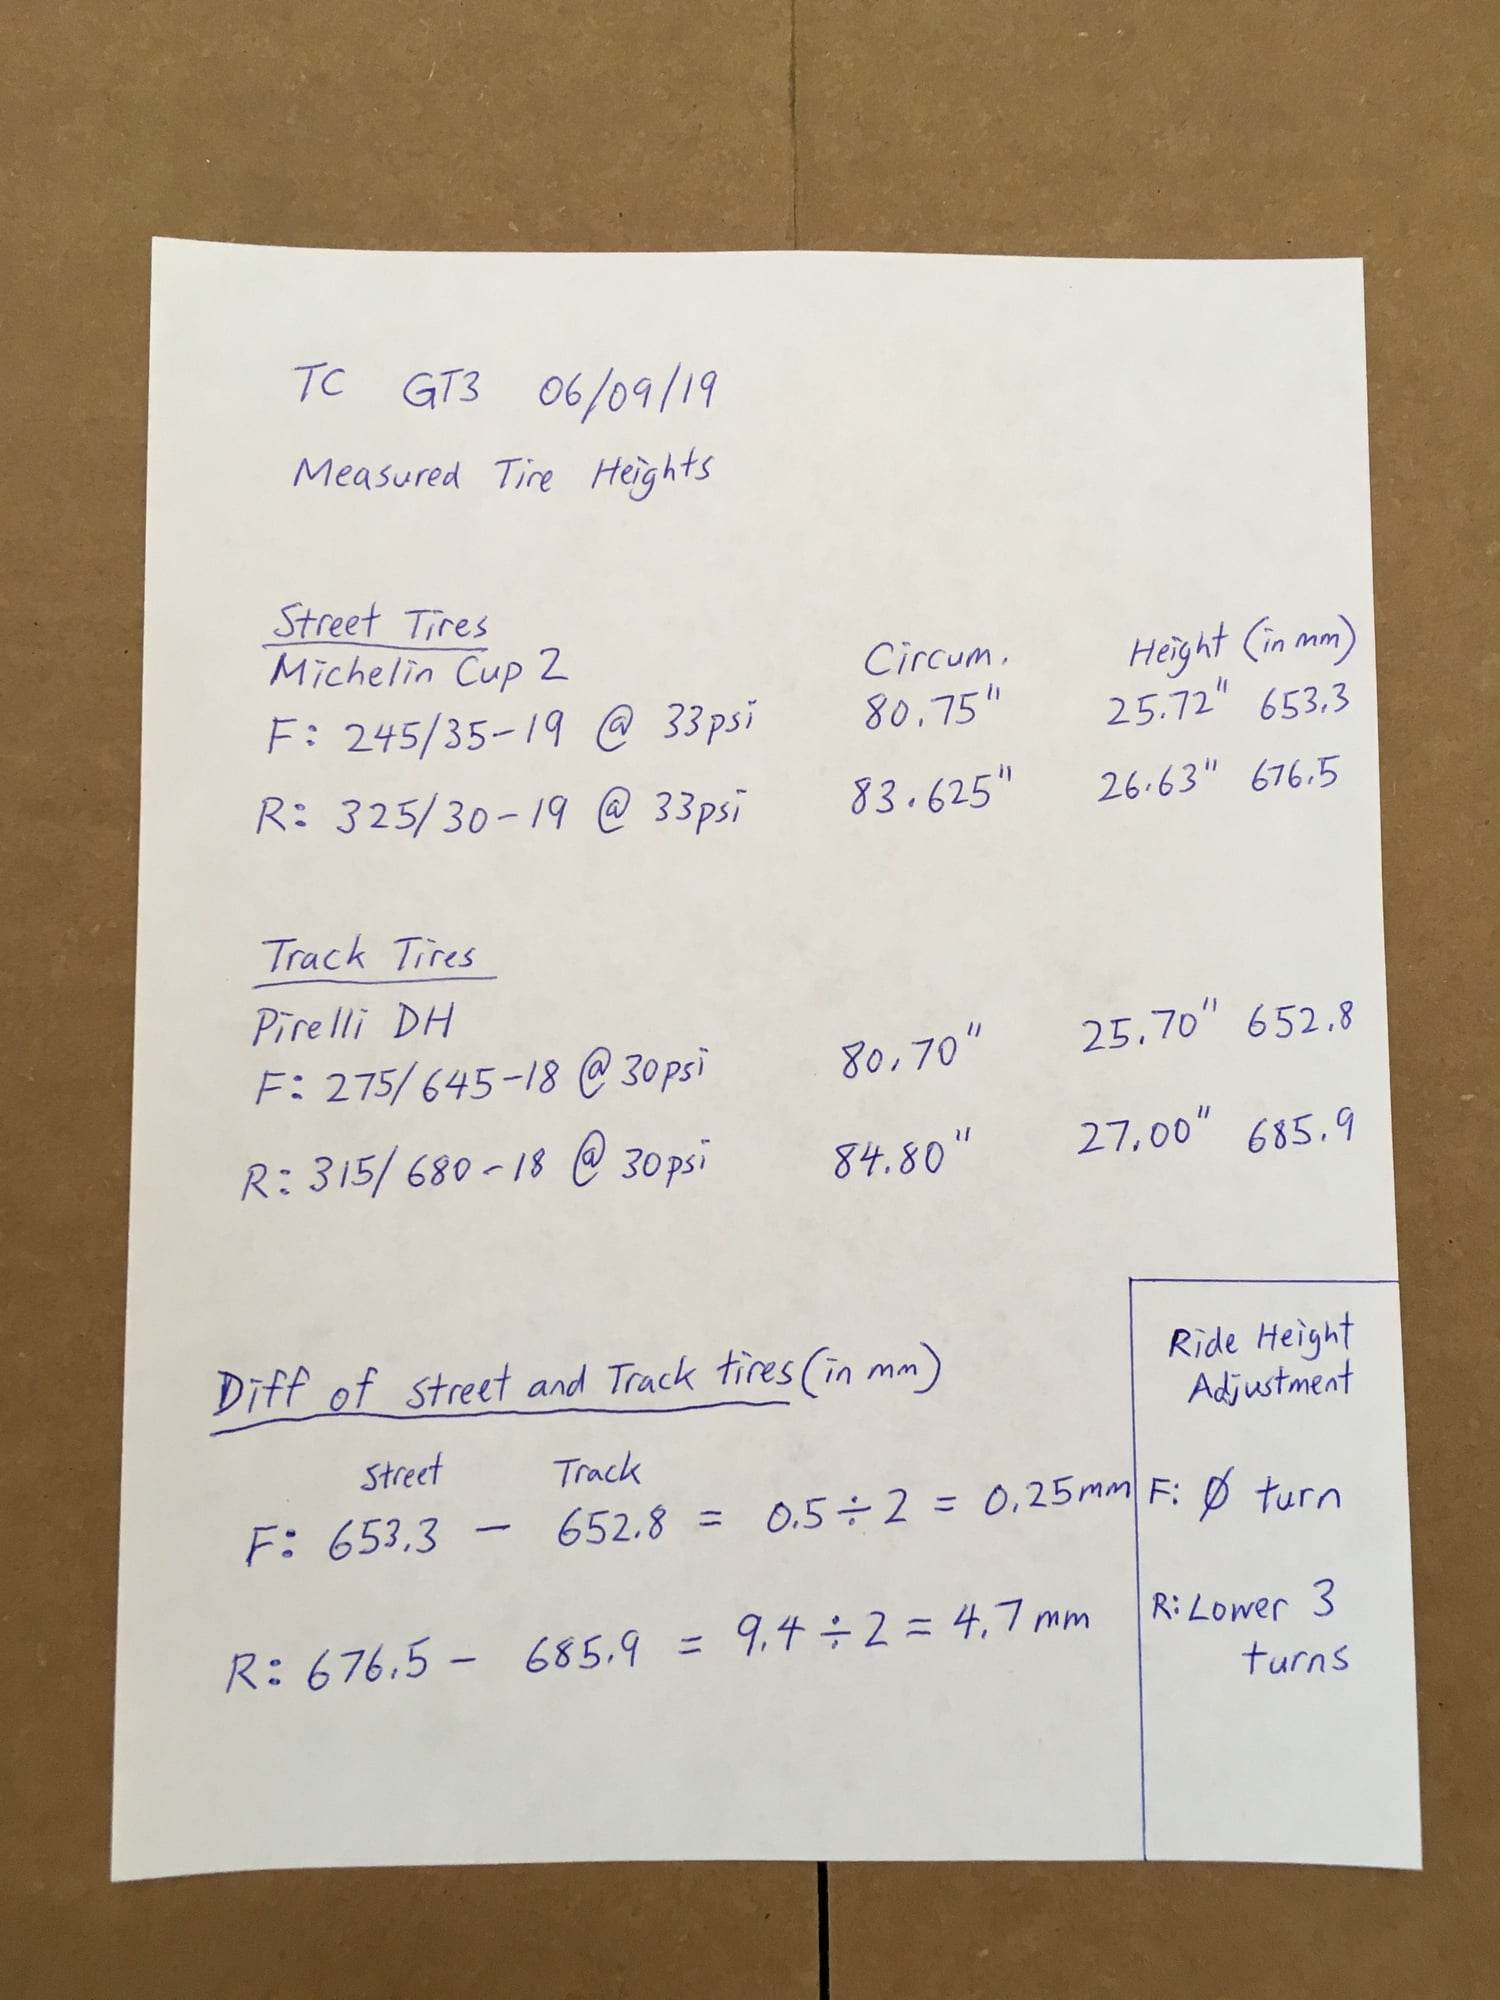
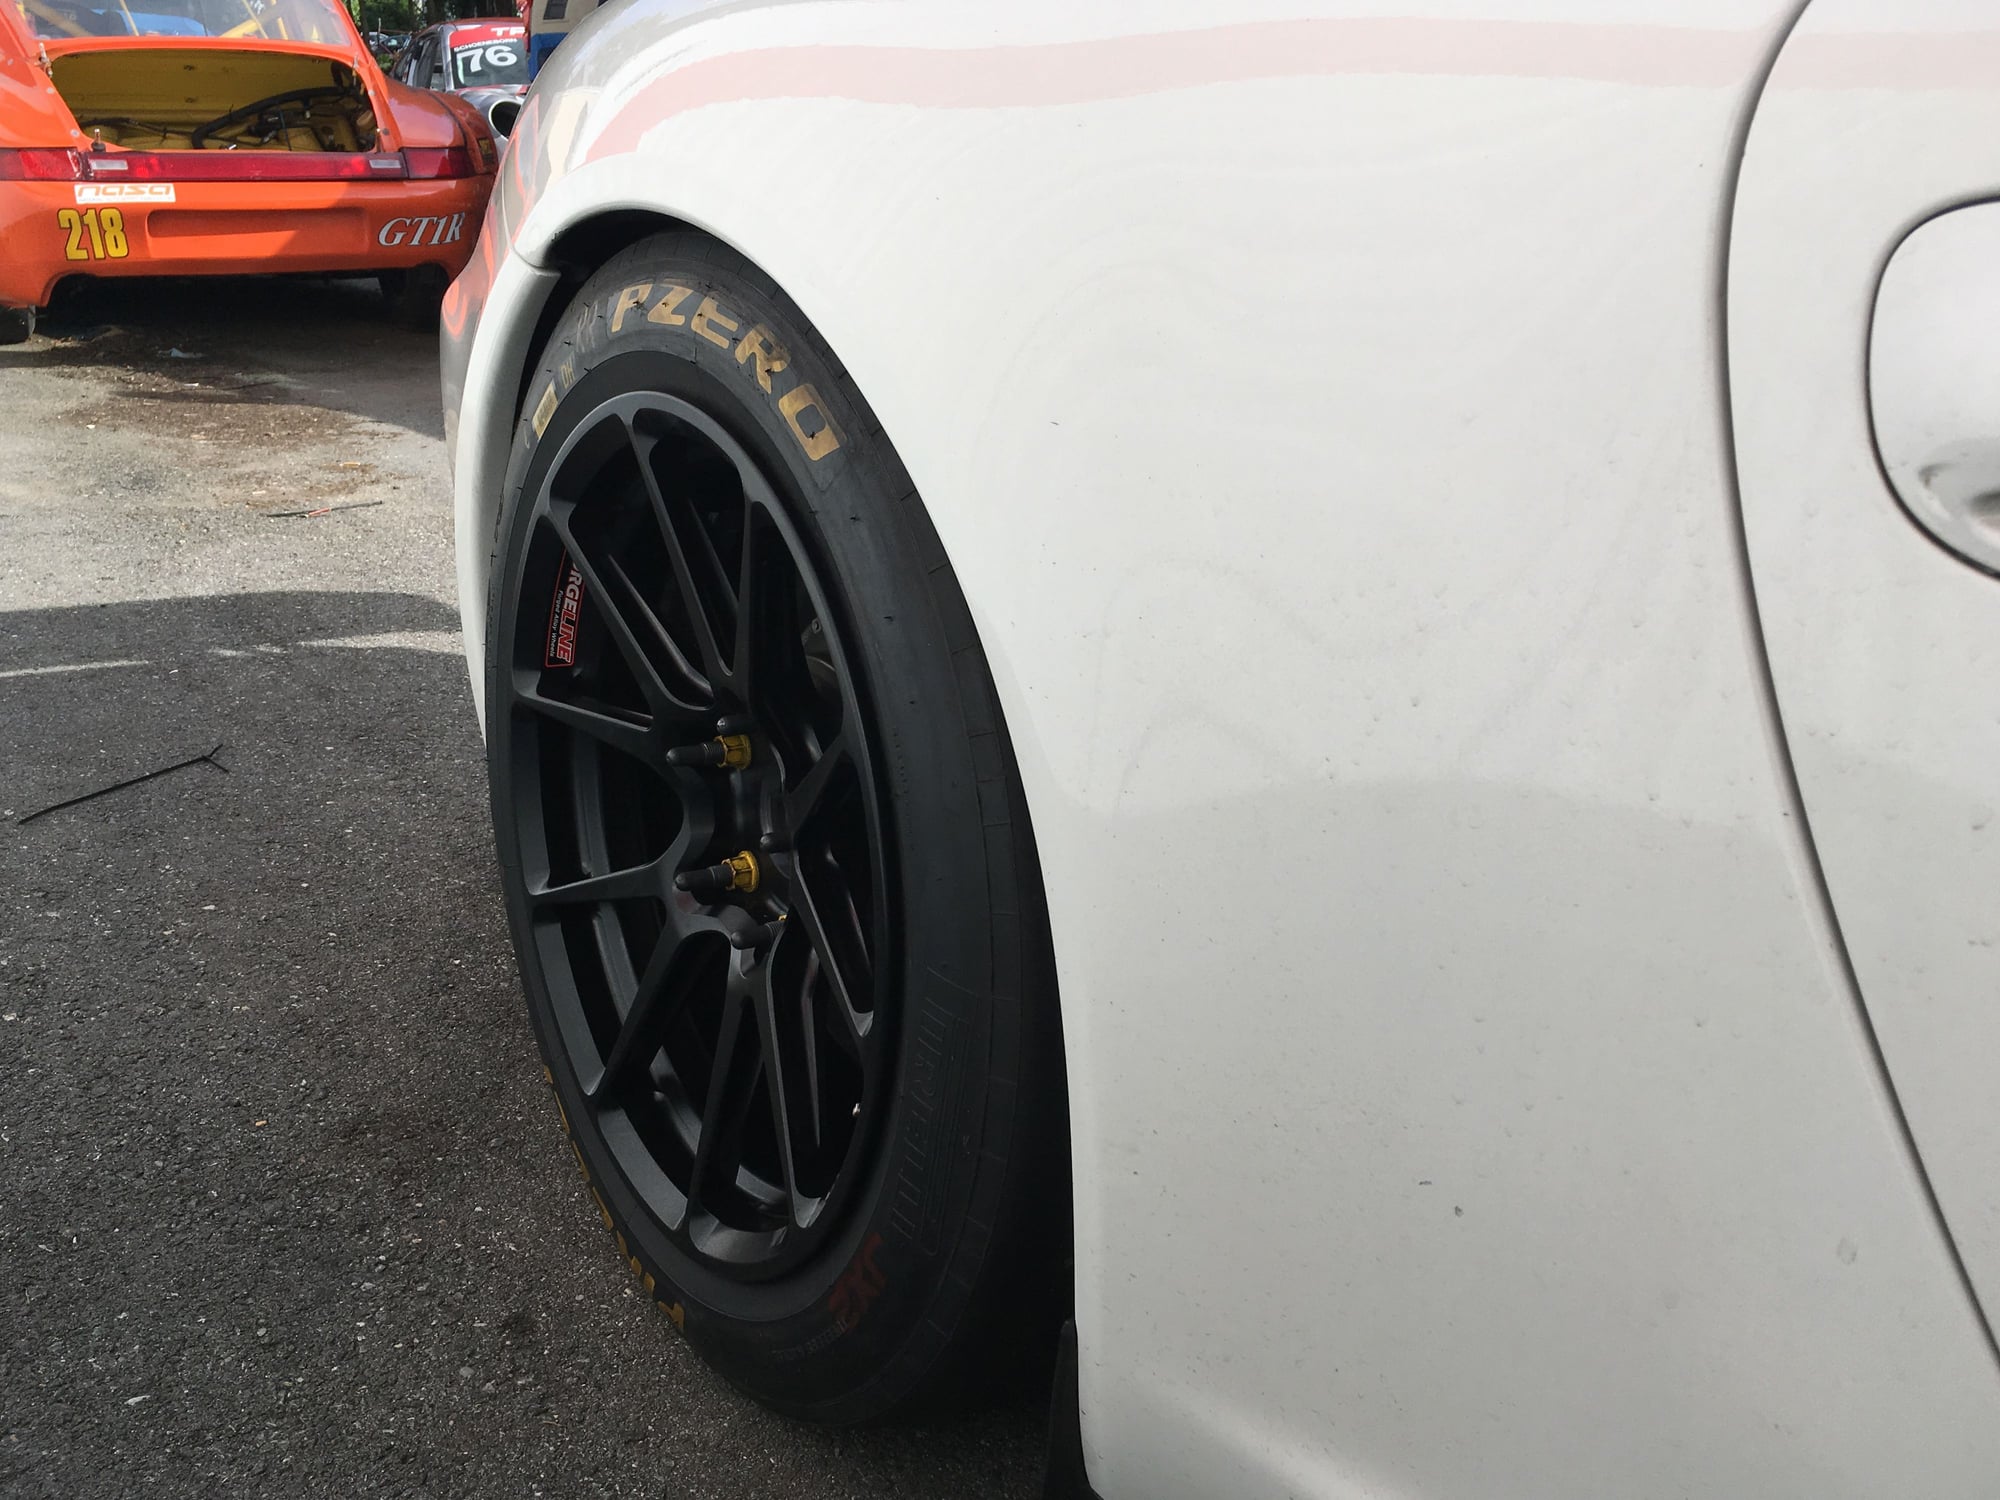
Speaking of tires I have a set of slightly used Pirelli DH slicks that I want to try. They are 275/645-18 fronts and 315/680-18 rears. These are Pirelli GT3 Cup Trophy spec sizes for 997.2 Cup(wide body). Crossing my fingers they fit on my narrow body car. As far as tire heights go here's my measurement and calculation. The bottom right corner of the paper shows my projected change for initial ride height. I measured the tires with a thin tape ruler like the NASCAR boys do.
Based on my calculation no ride height change is needed in the front for height-wise. Width-wise, they fit. Barely. Thanks to the .2 Cup fender flares and custom offset Forgeline wheels.
Easy peasy making the rear height adjustment by lowering 3 turns(1.5mm per turn x 3 = 4.5mm) with the Tractive tool. Just go around 3 times to the white marking. I am crashing from the sugar rush so going to defer the rear wheel well cleaning for another time.
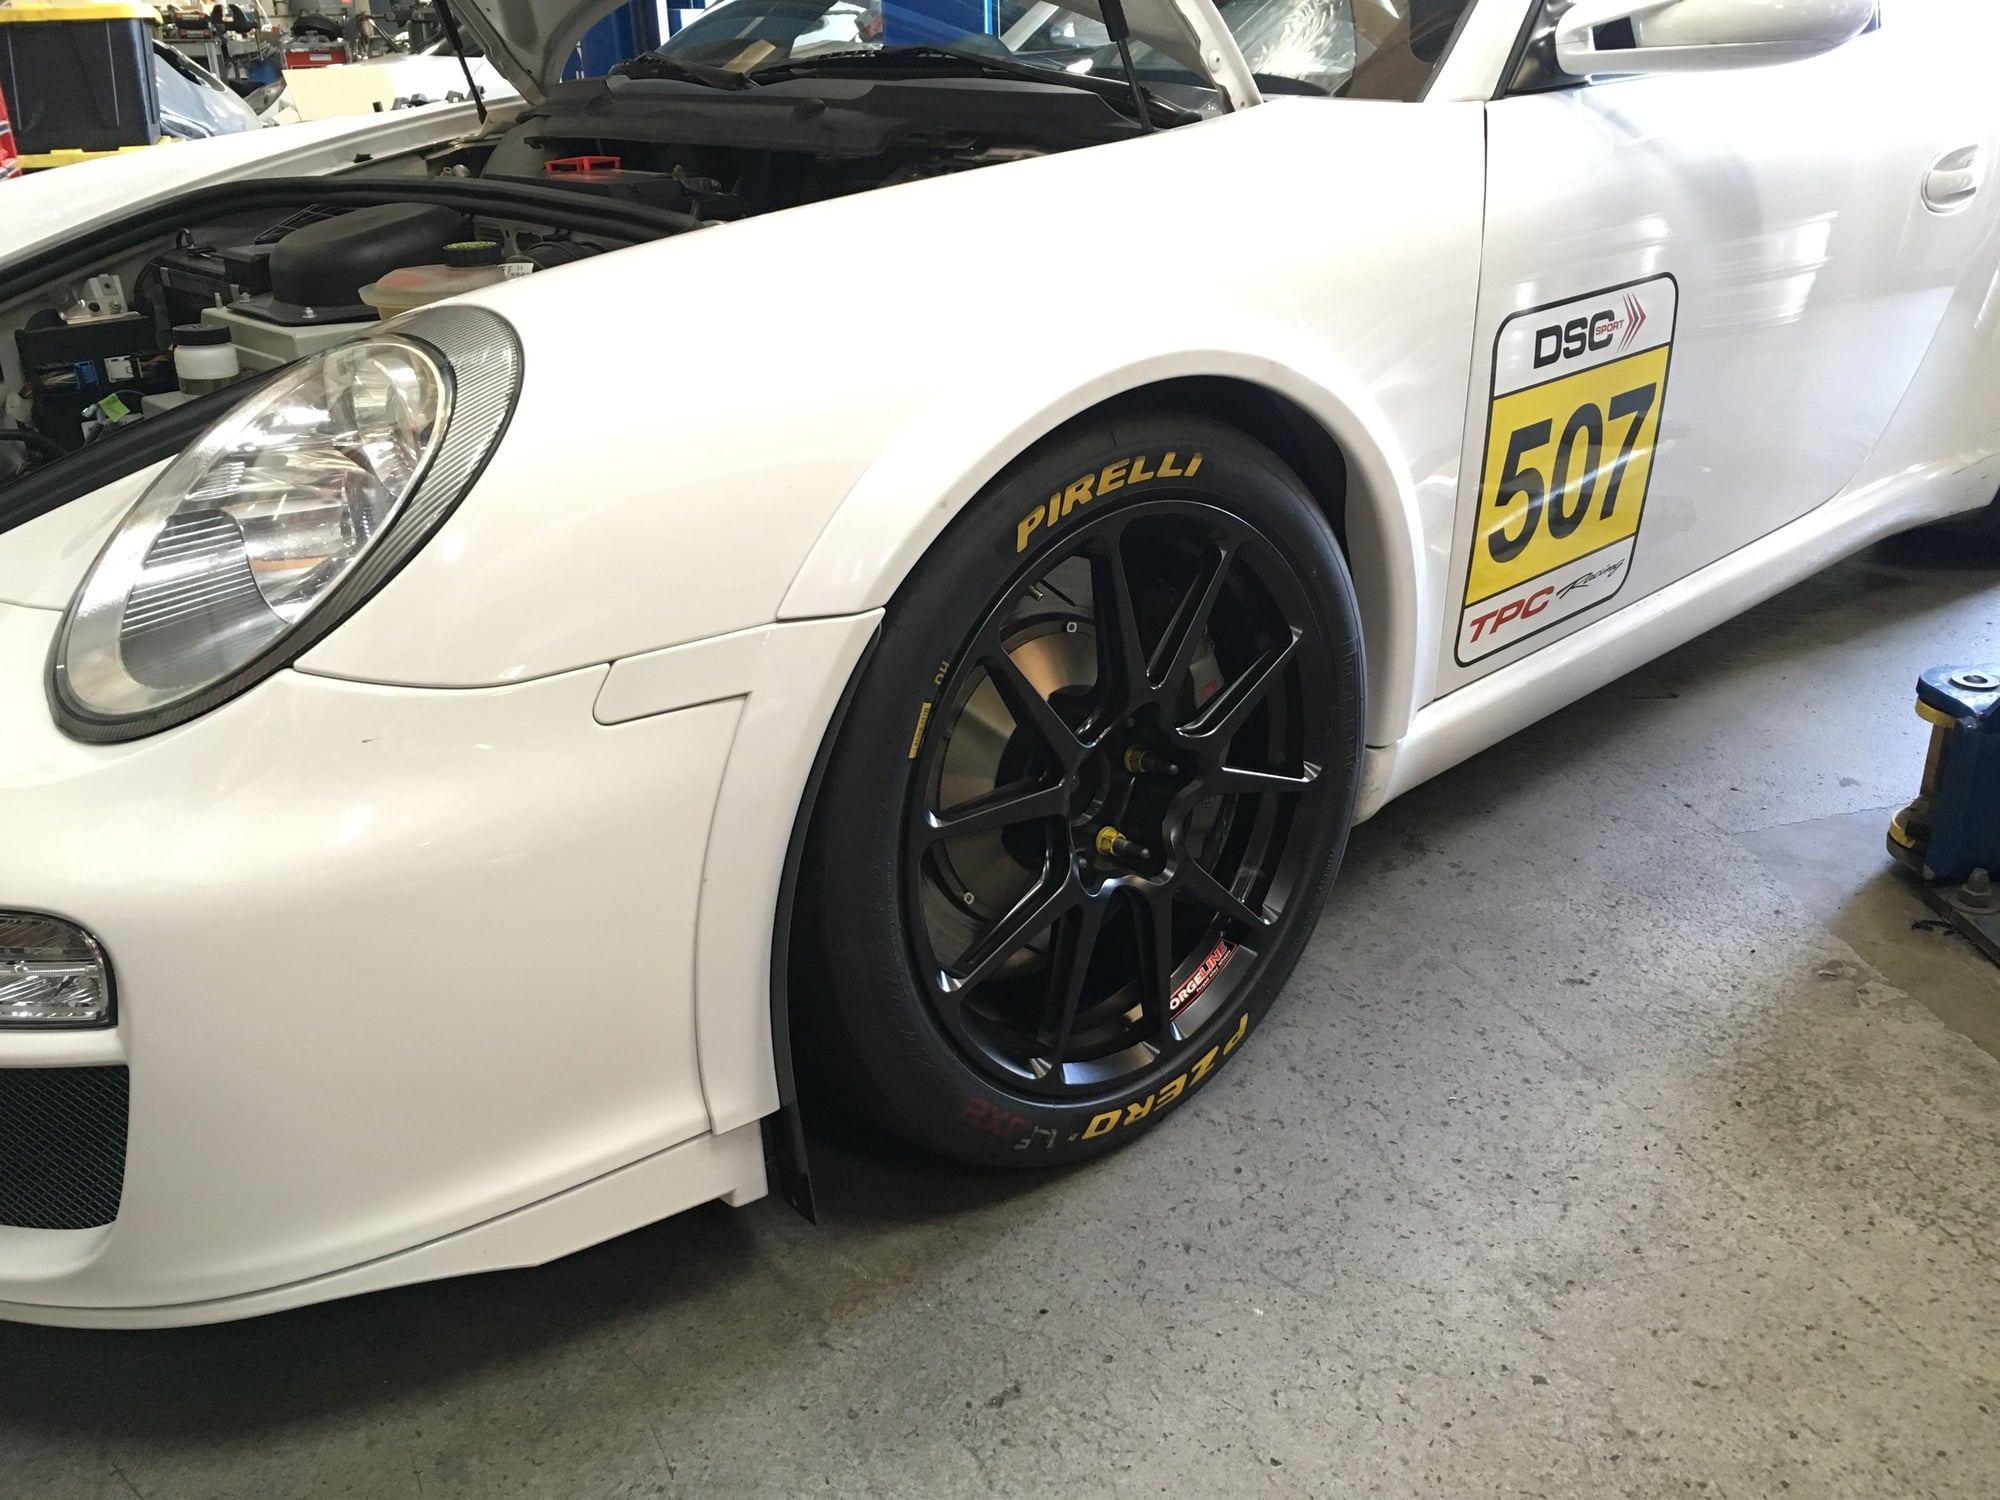
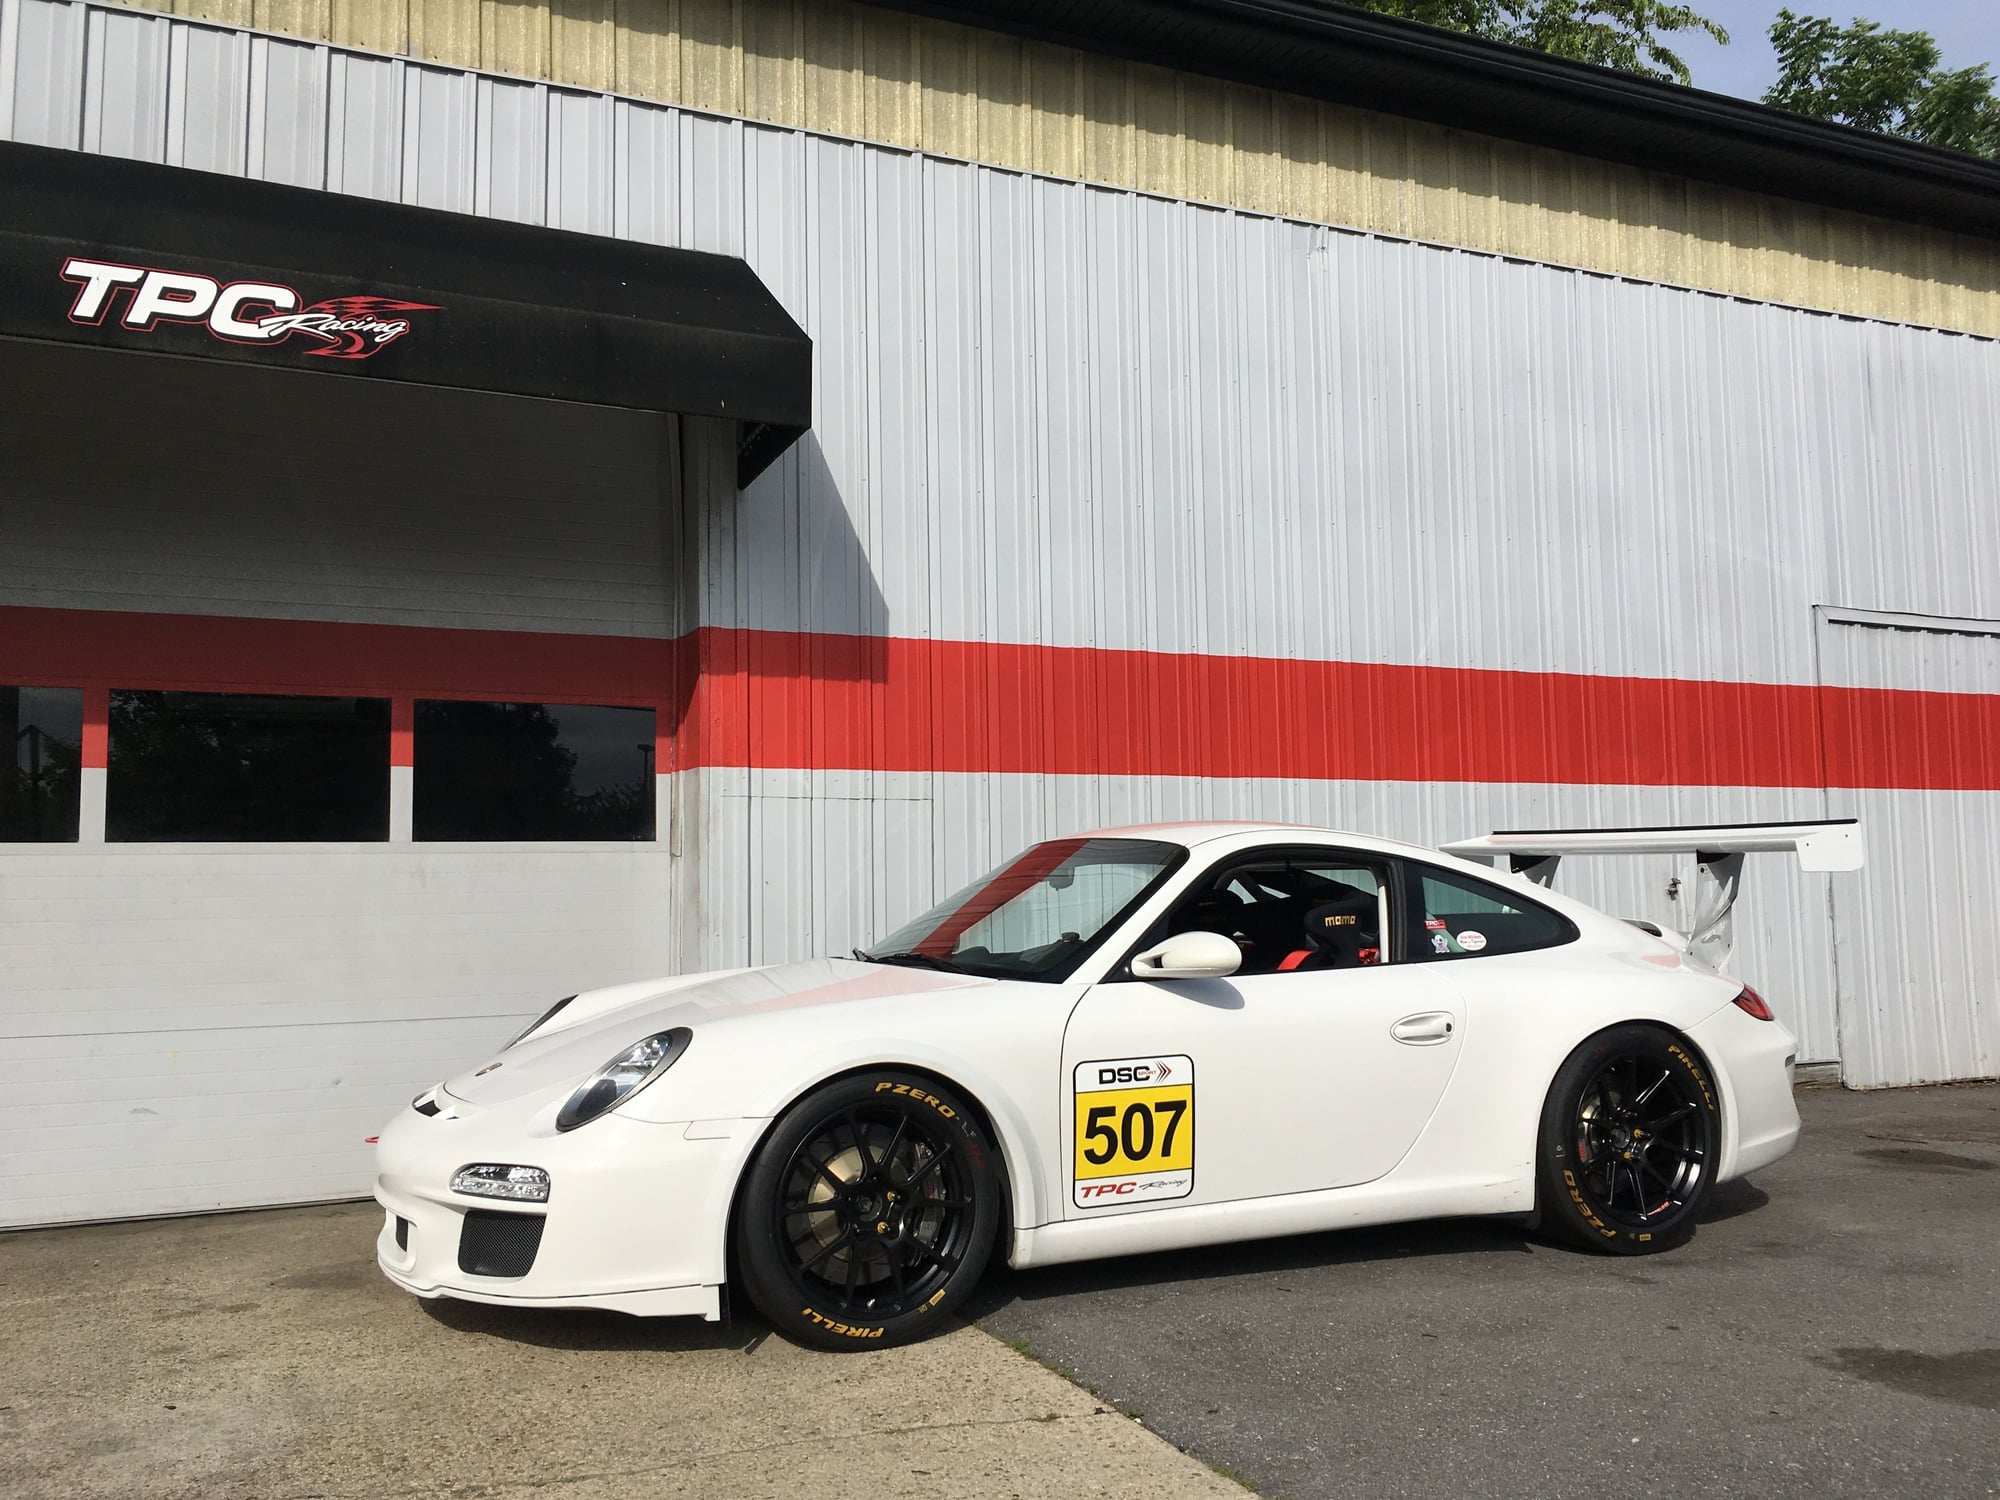
Lets roll this thing out and see how it looks in daylight.
The rear fender rolling I did last year certainly increased clearance.
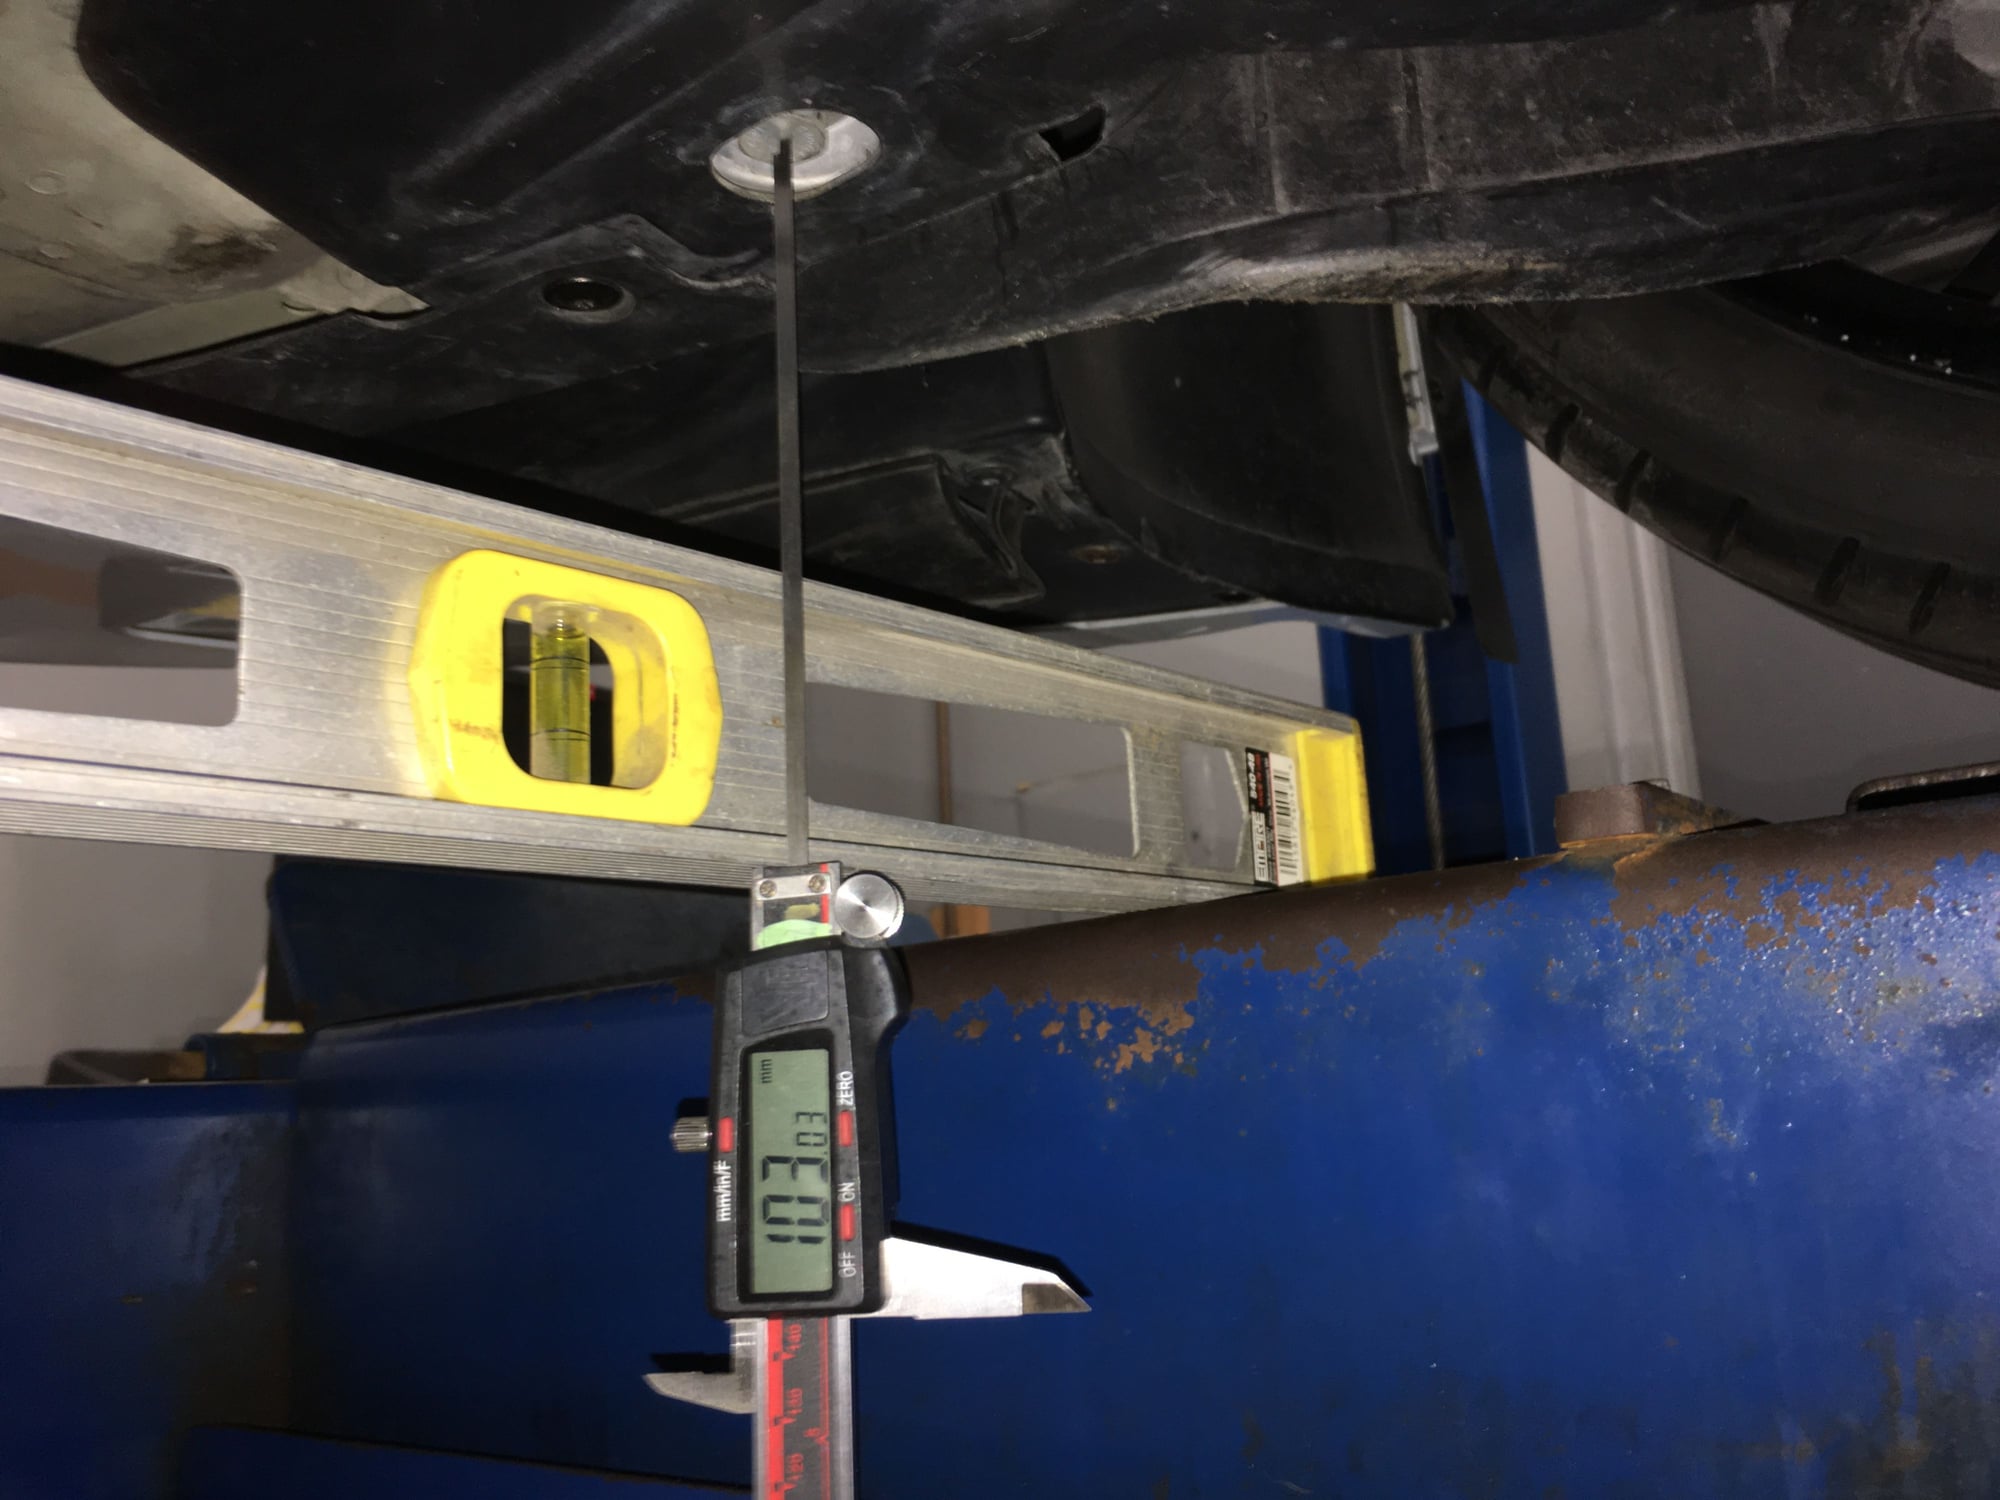
Pushed the car back and forth a bunch of times to settle the suspension before going on the alignment rack.
Ride height checked at the chassis points. Starting to feel delirious so its a good thing I took pictures so I can prove I did things okay.
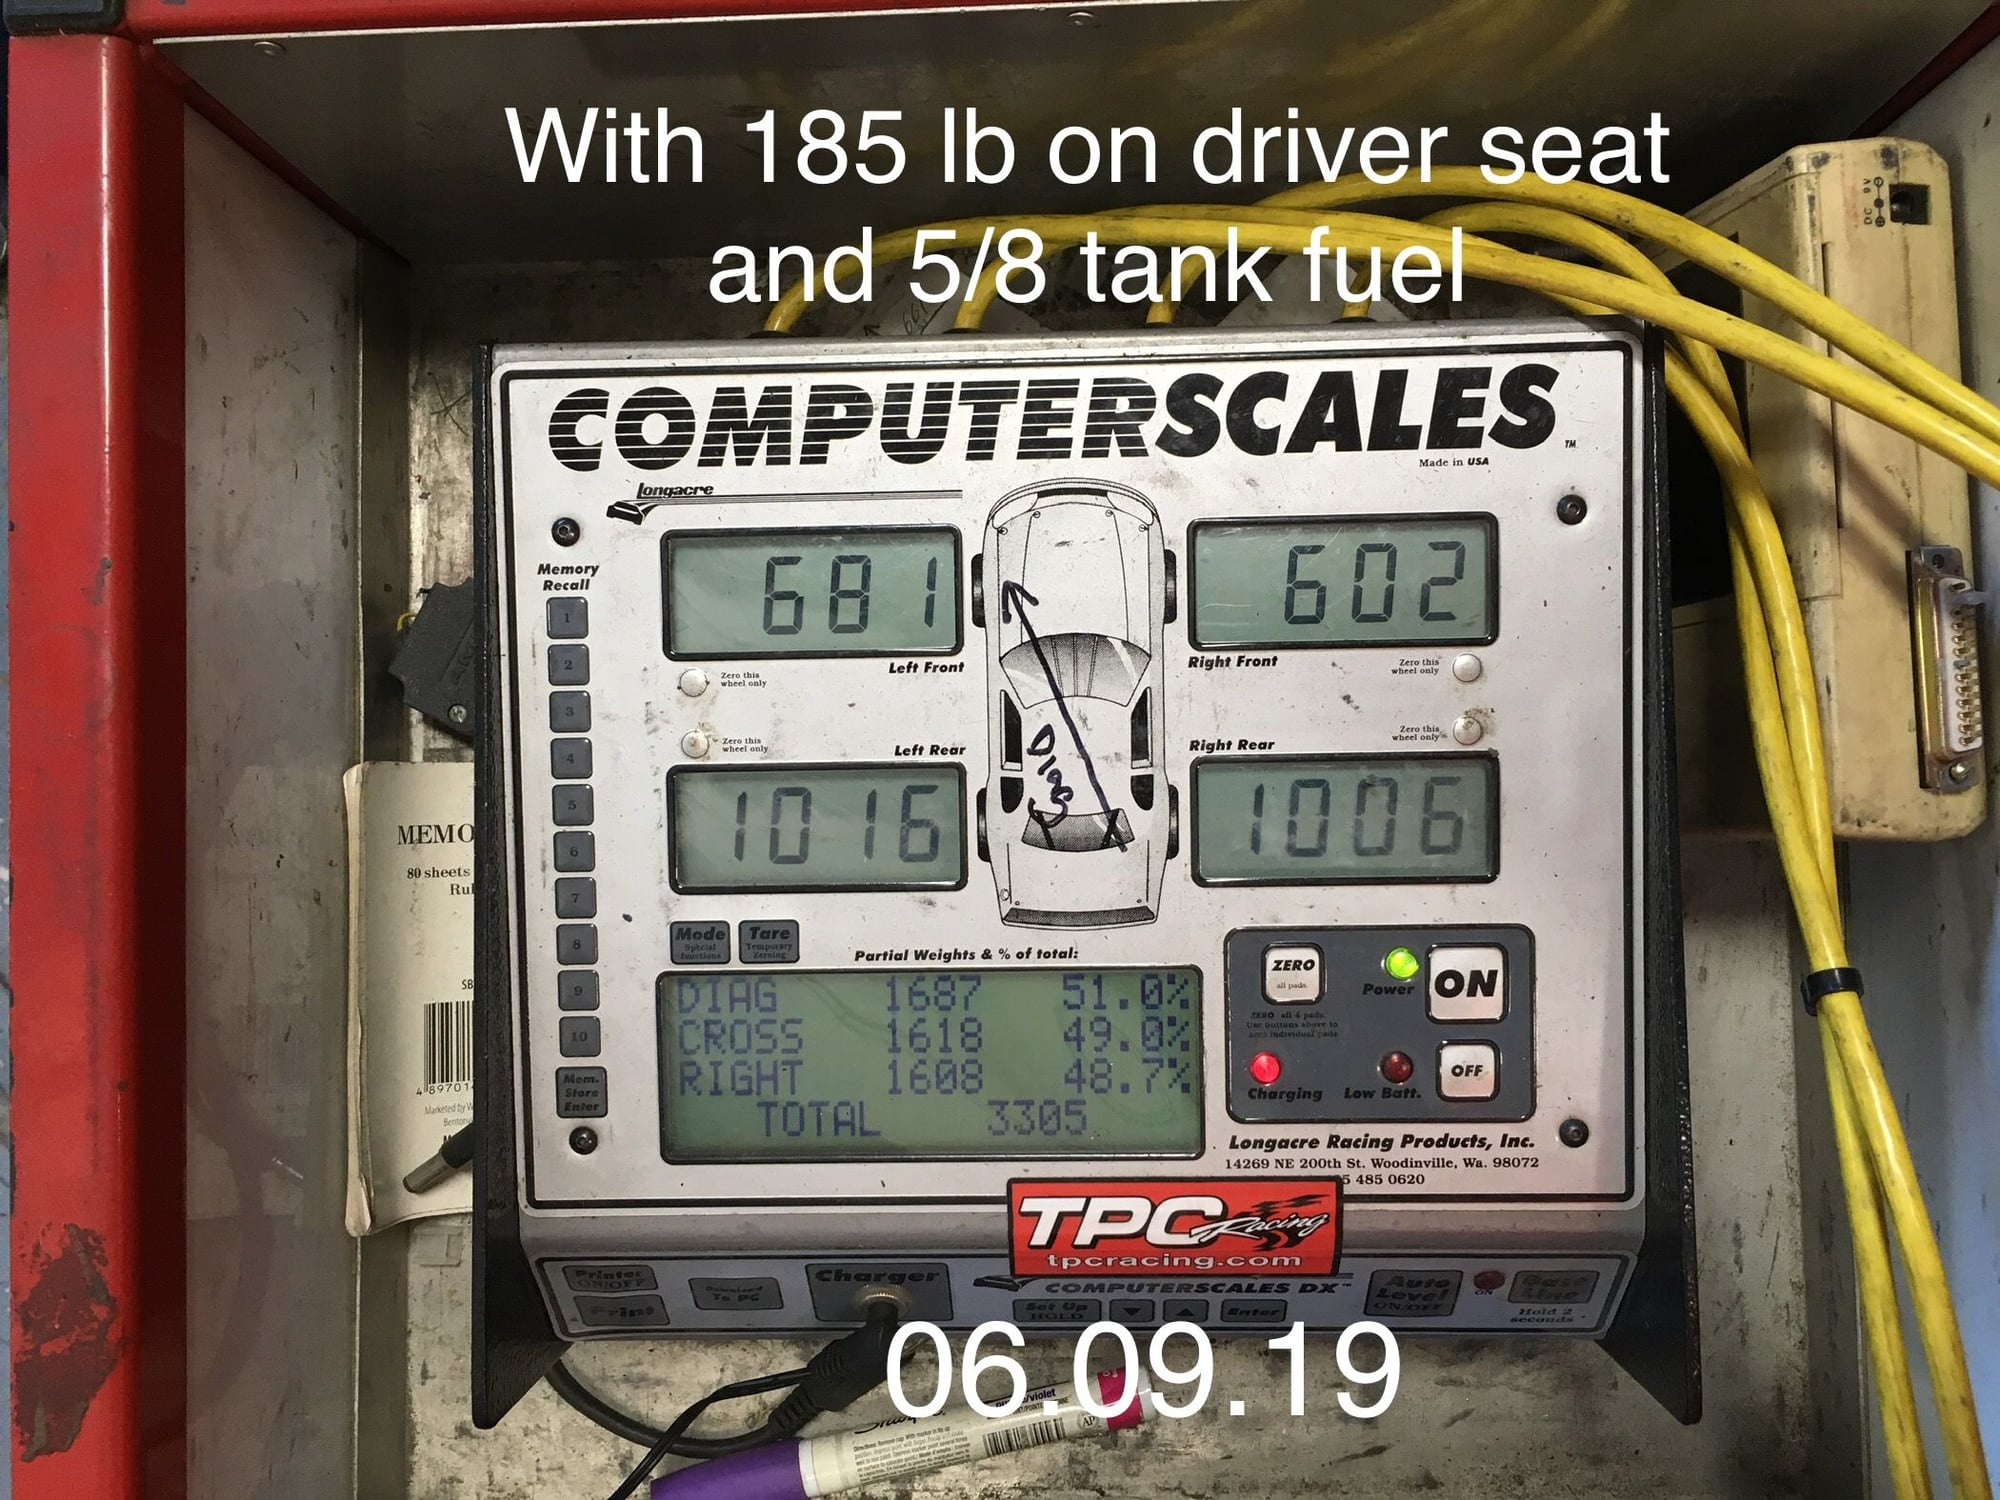
Couple hours into corner weighting. I could have raised the Right Front to make the numbers look better but the front sway bar was on the verge of having preload with the non-adjustable OEM drop links so I left it as it is. These static numbers aren't a showstopper. It'll somewhat balance out when I take a passenger and/or add fuel load. I just wanted to make sure it isn't a couple hundred pounds out of balance. Its plenty good for today and for shaking the car down.
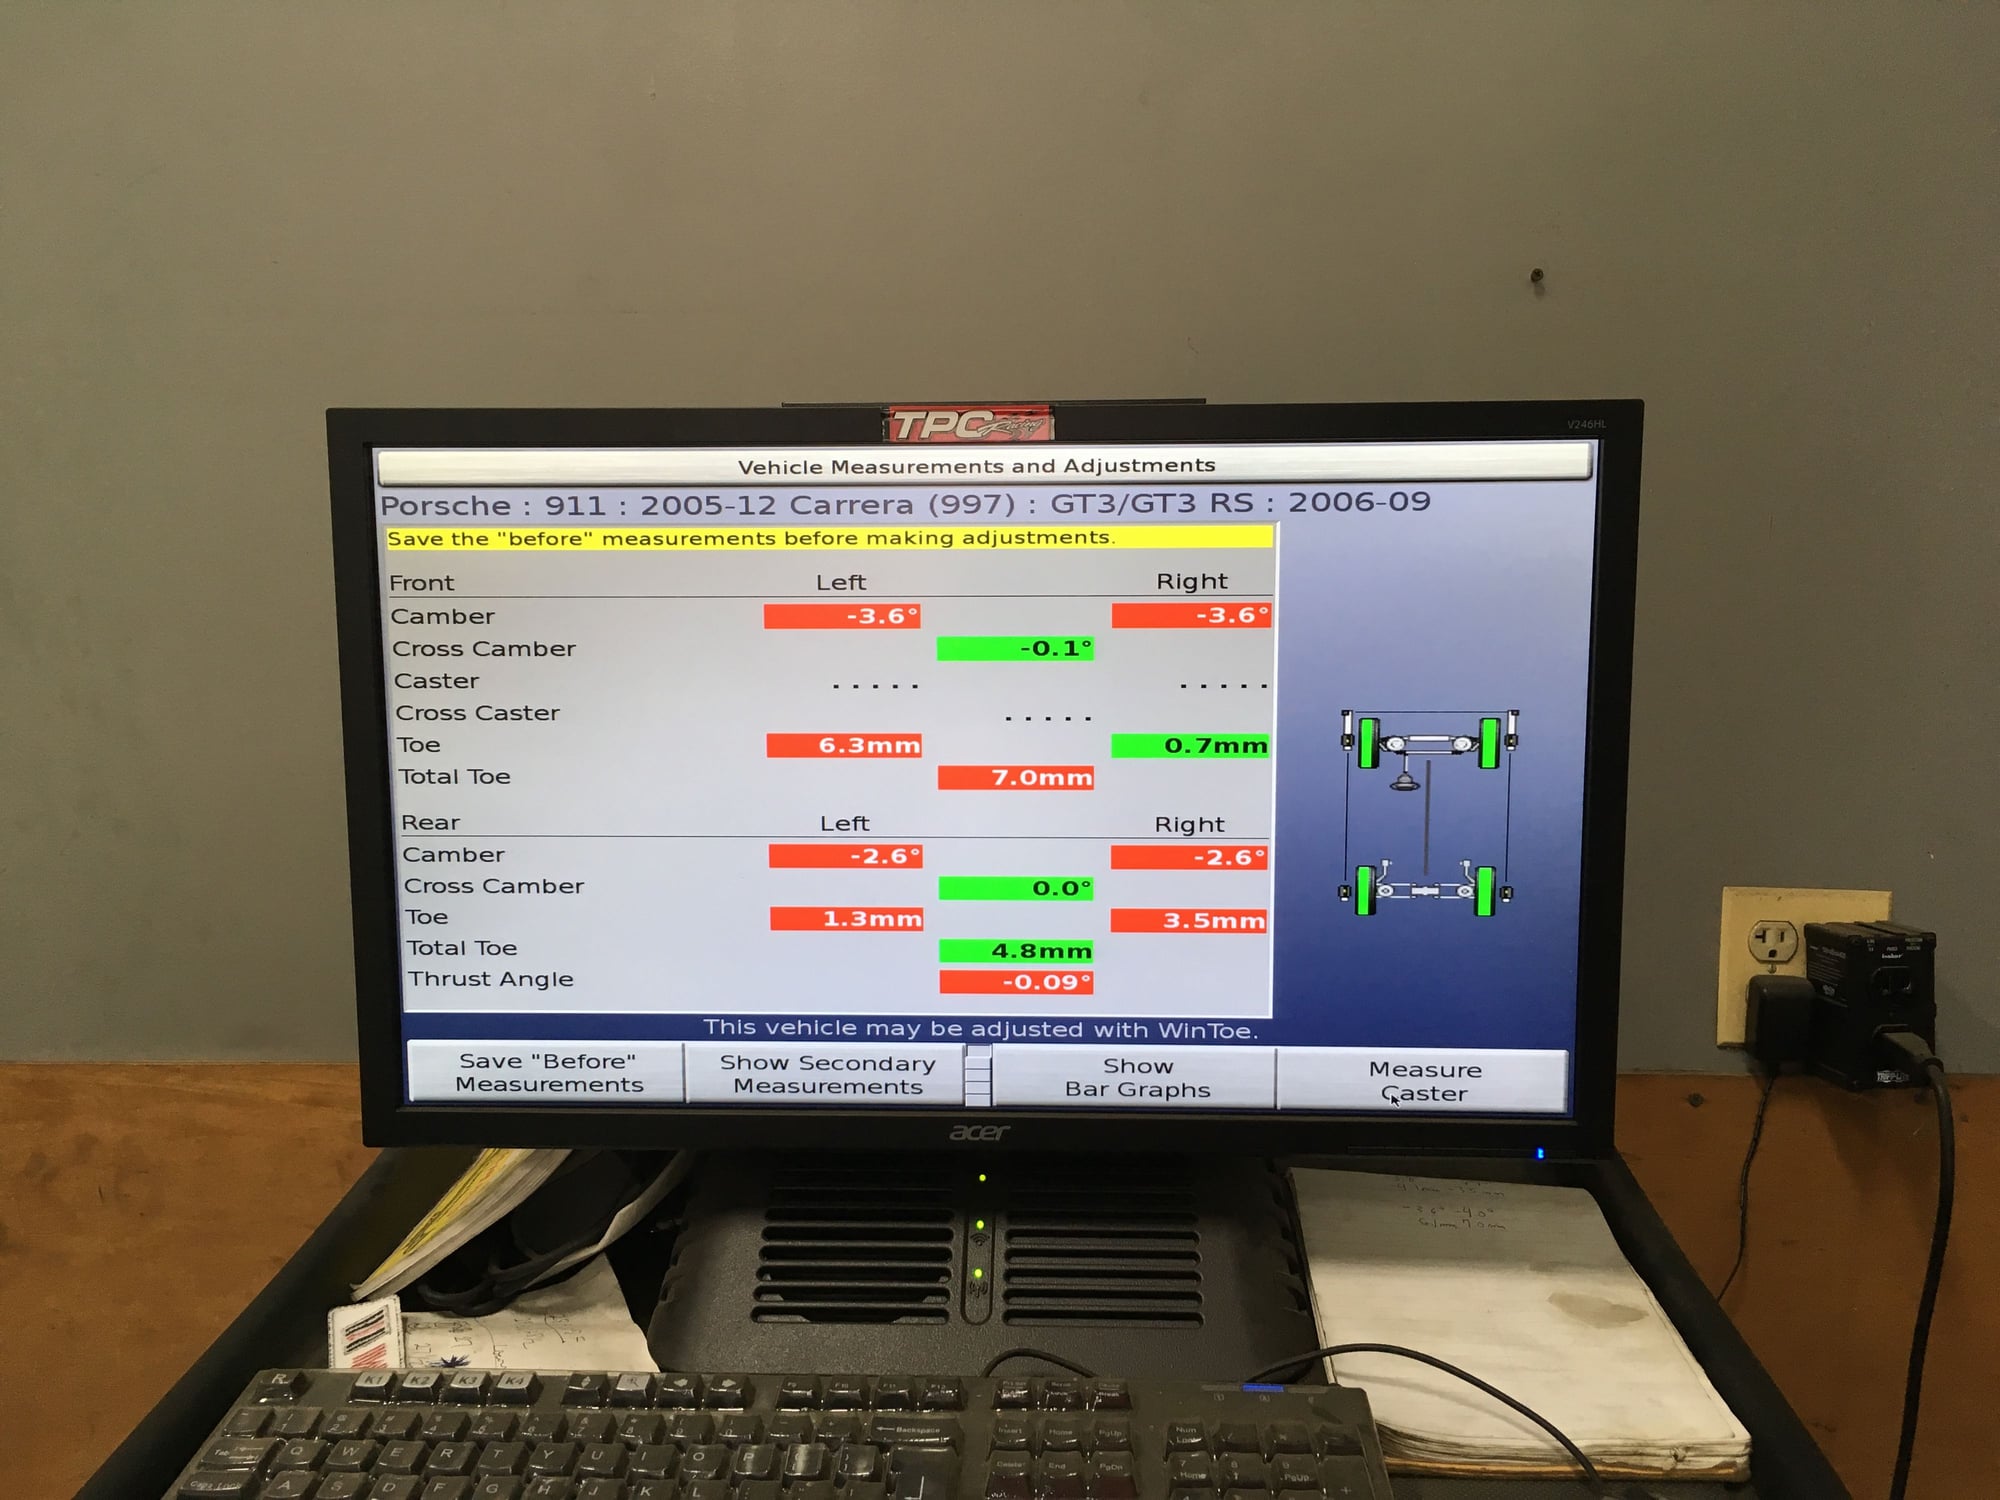
Alignment time.
EuroPros did a damn good job of straightening the frame! I know because the camber numbers are perfectly symmetrical prior to ANY camber adjustment!!! This is the first time this car's been on an alignment rack since last year's incident. That's Amazing! Well done EuroPros!
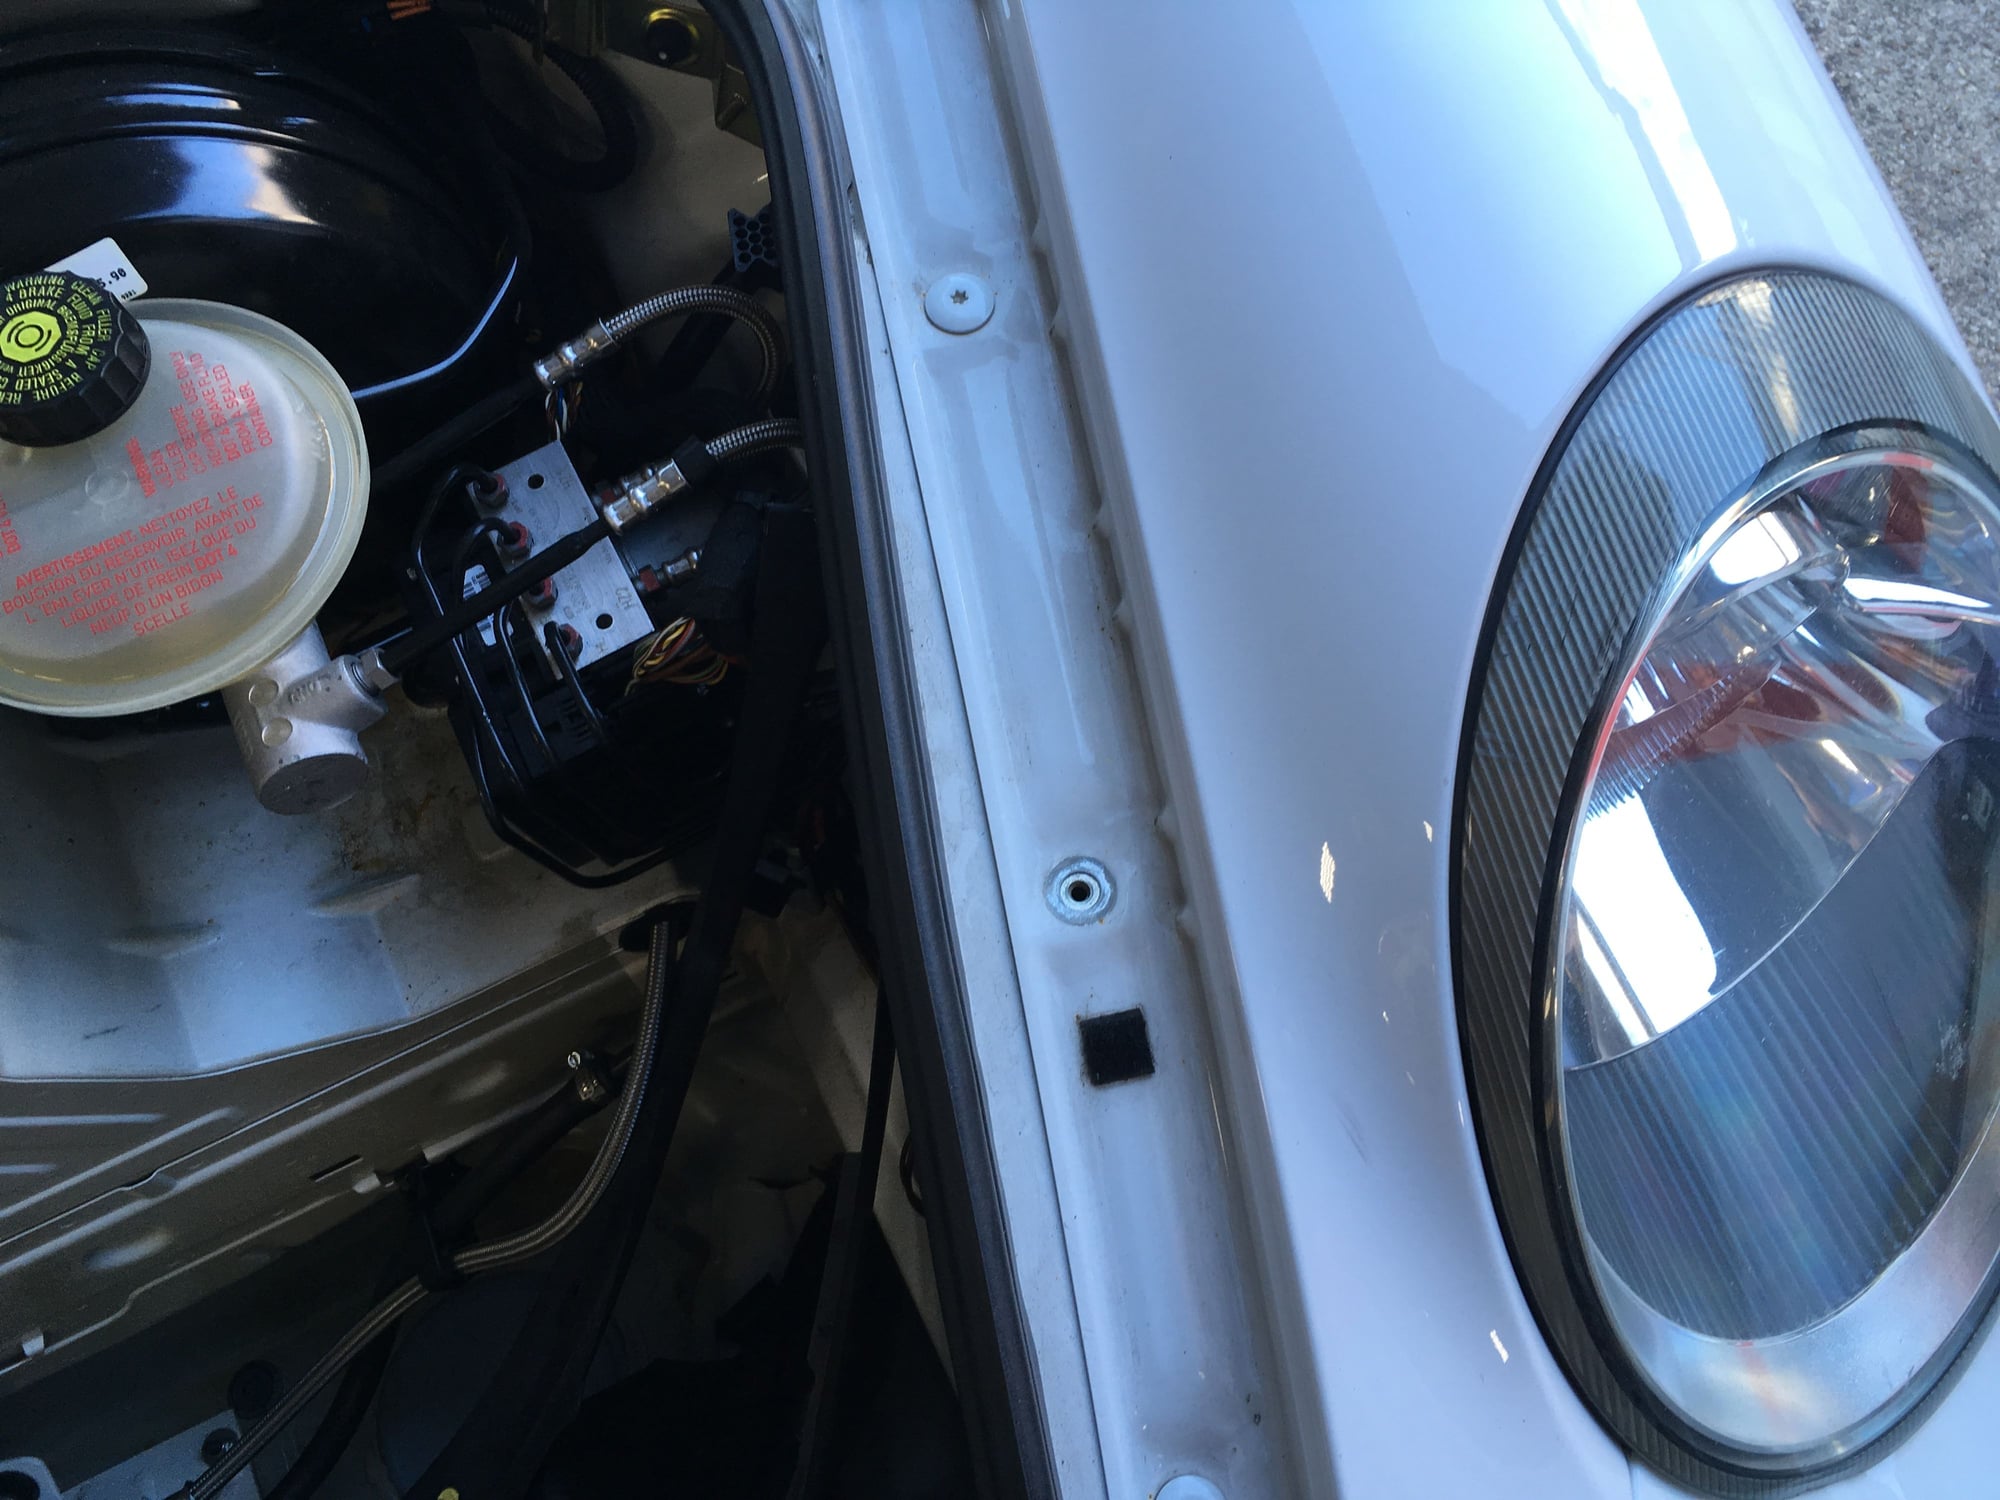
Because of this level of perfection of chassis repair by EuroPros I am going to totally going to overlook that they "borrowed" one of my fender screws while the car was in their shop. I go for the performance and forget the little stuff.
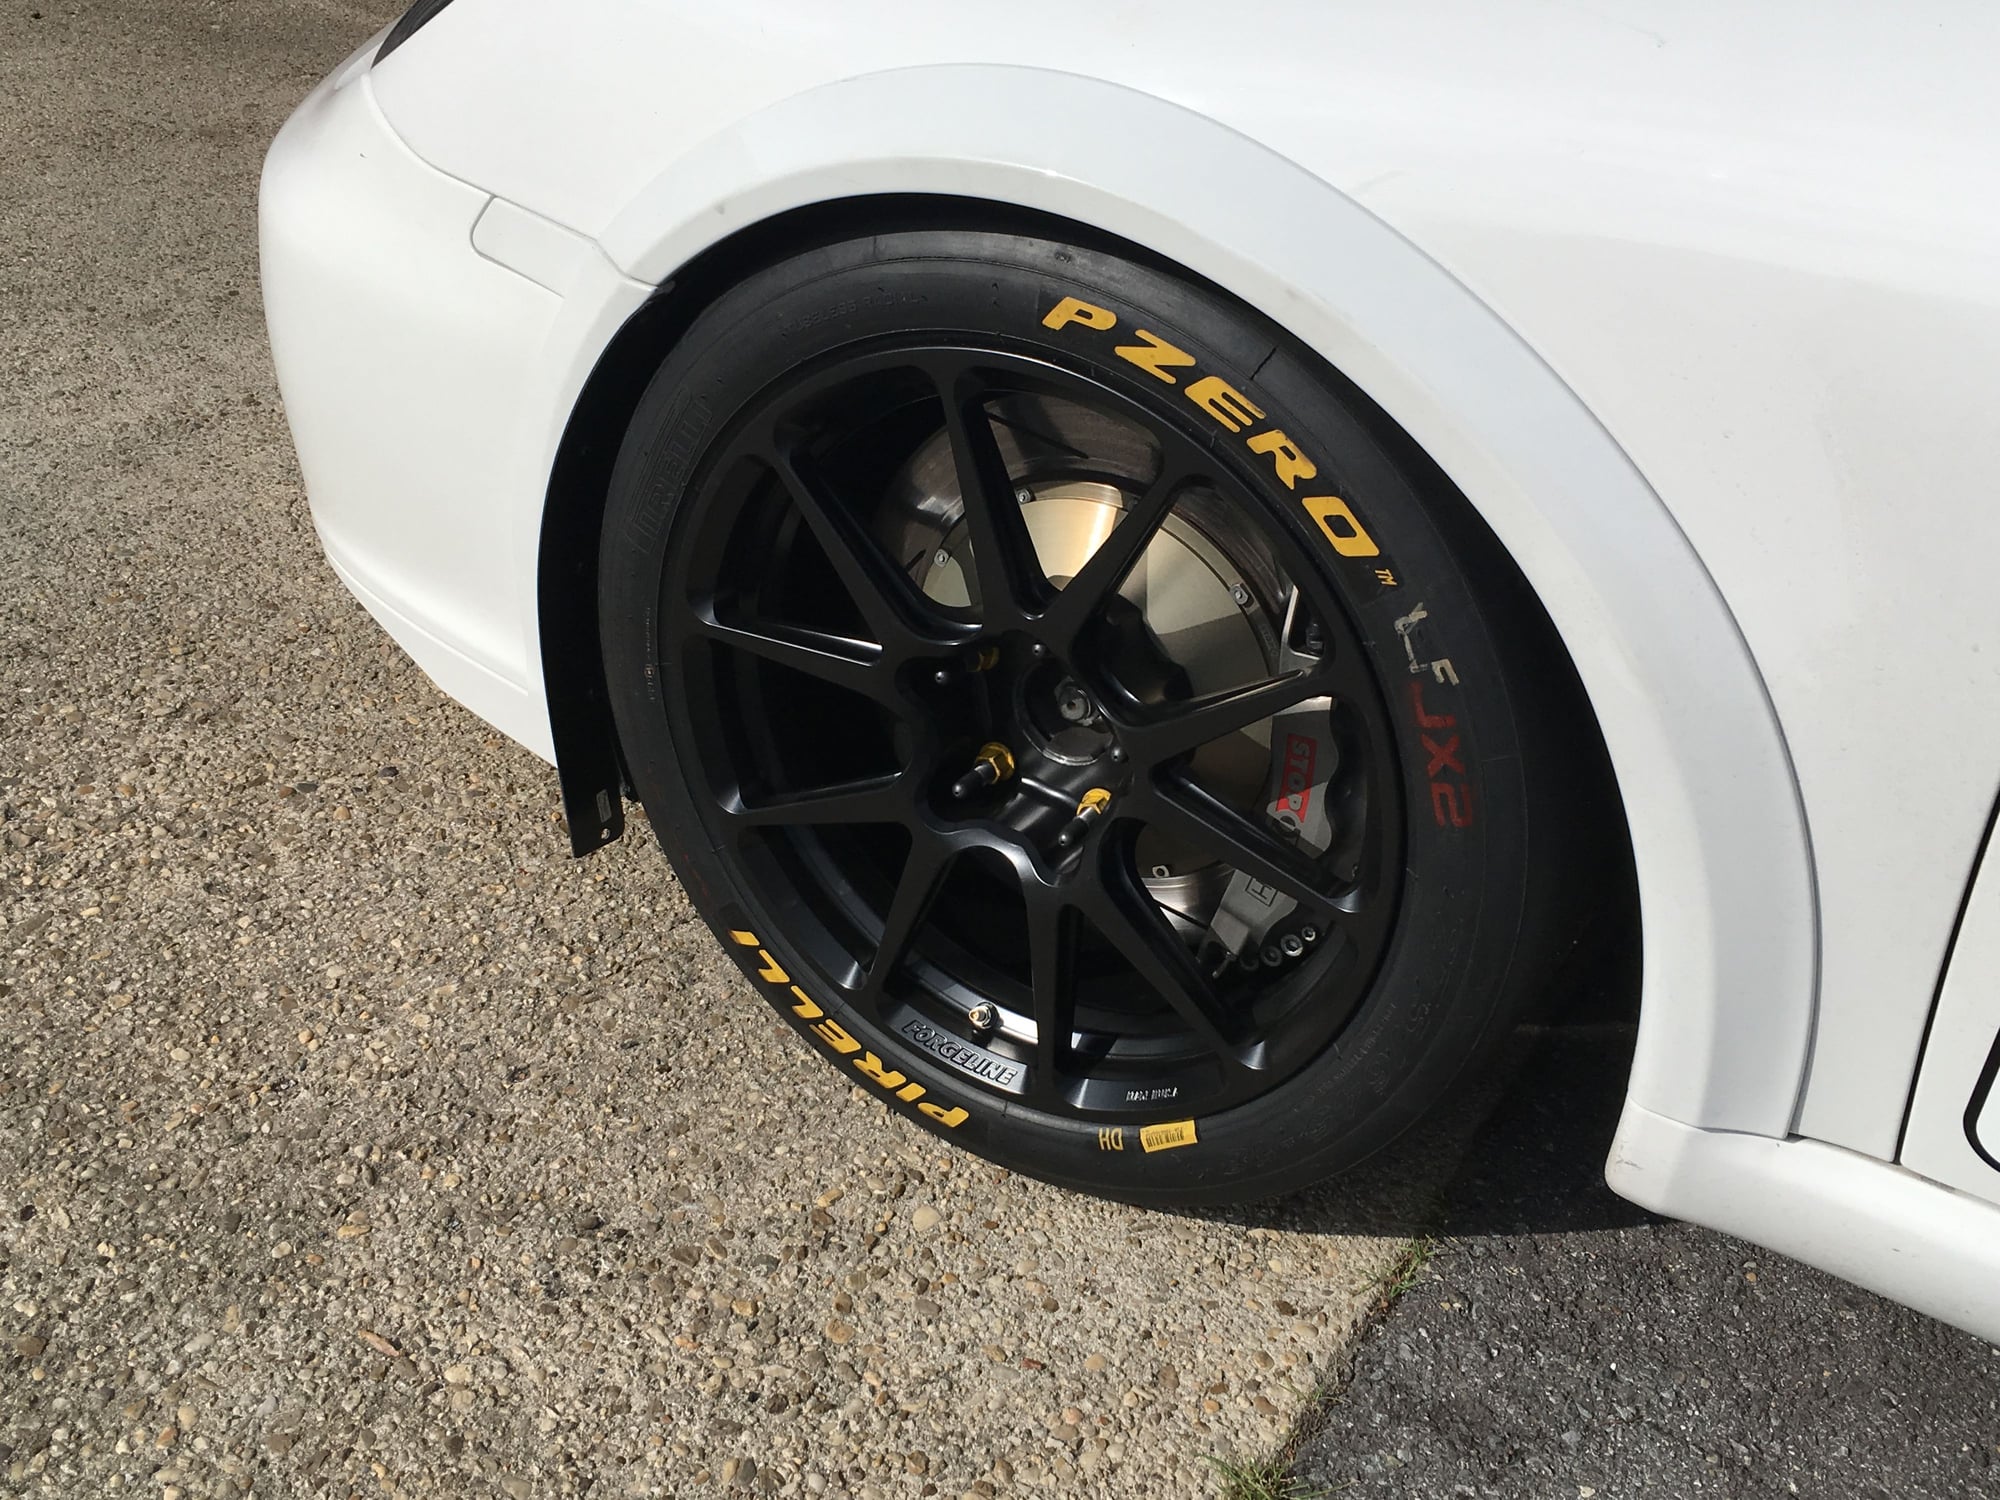
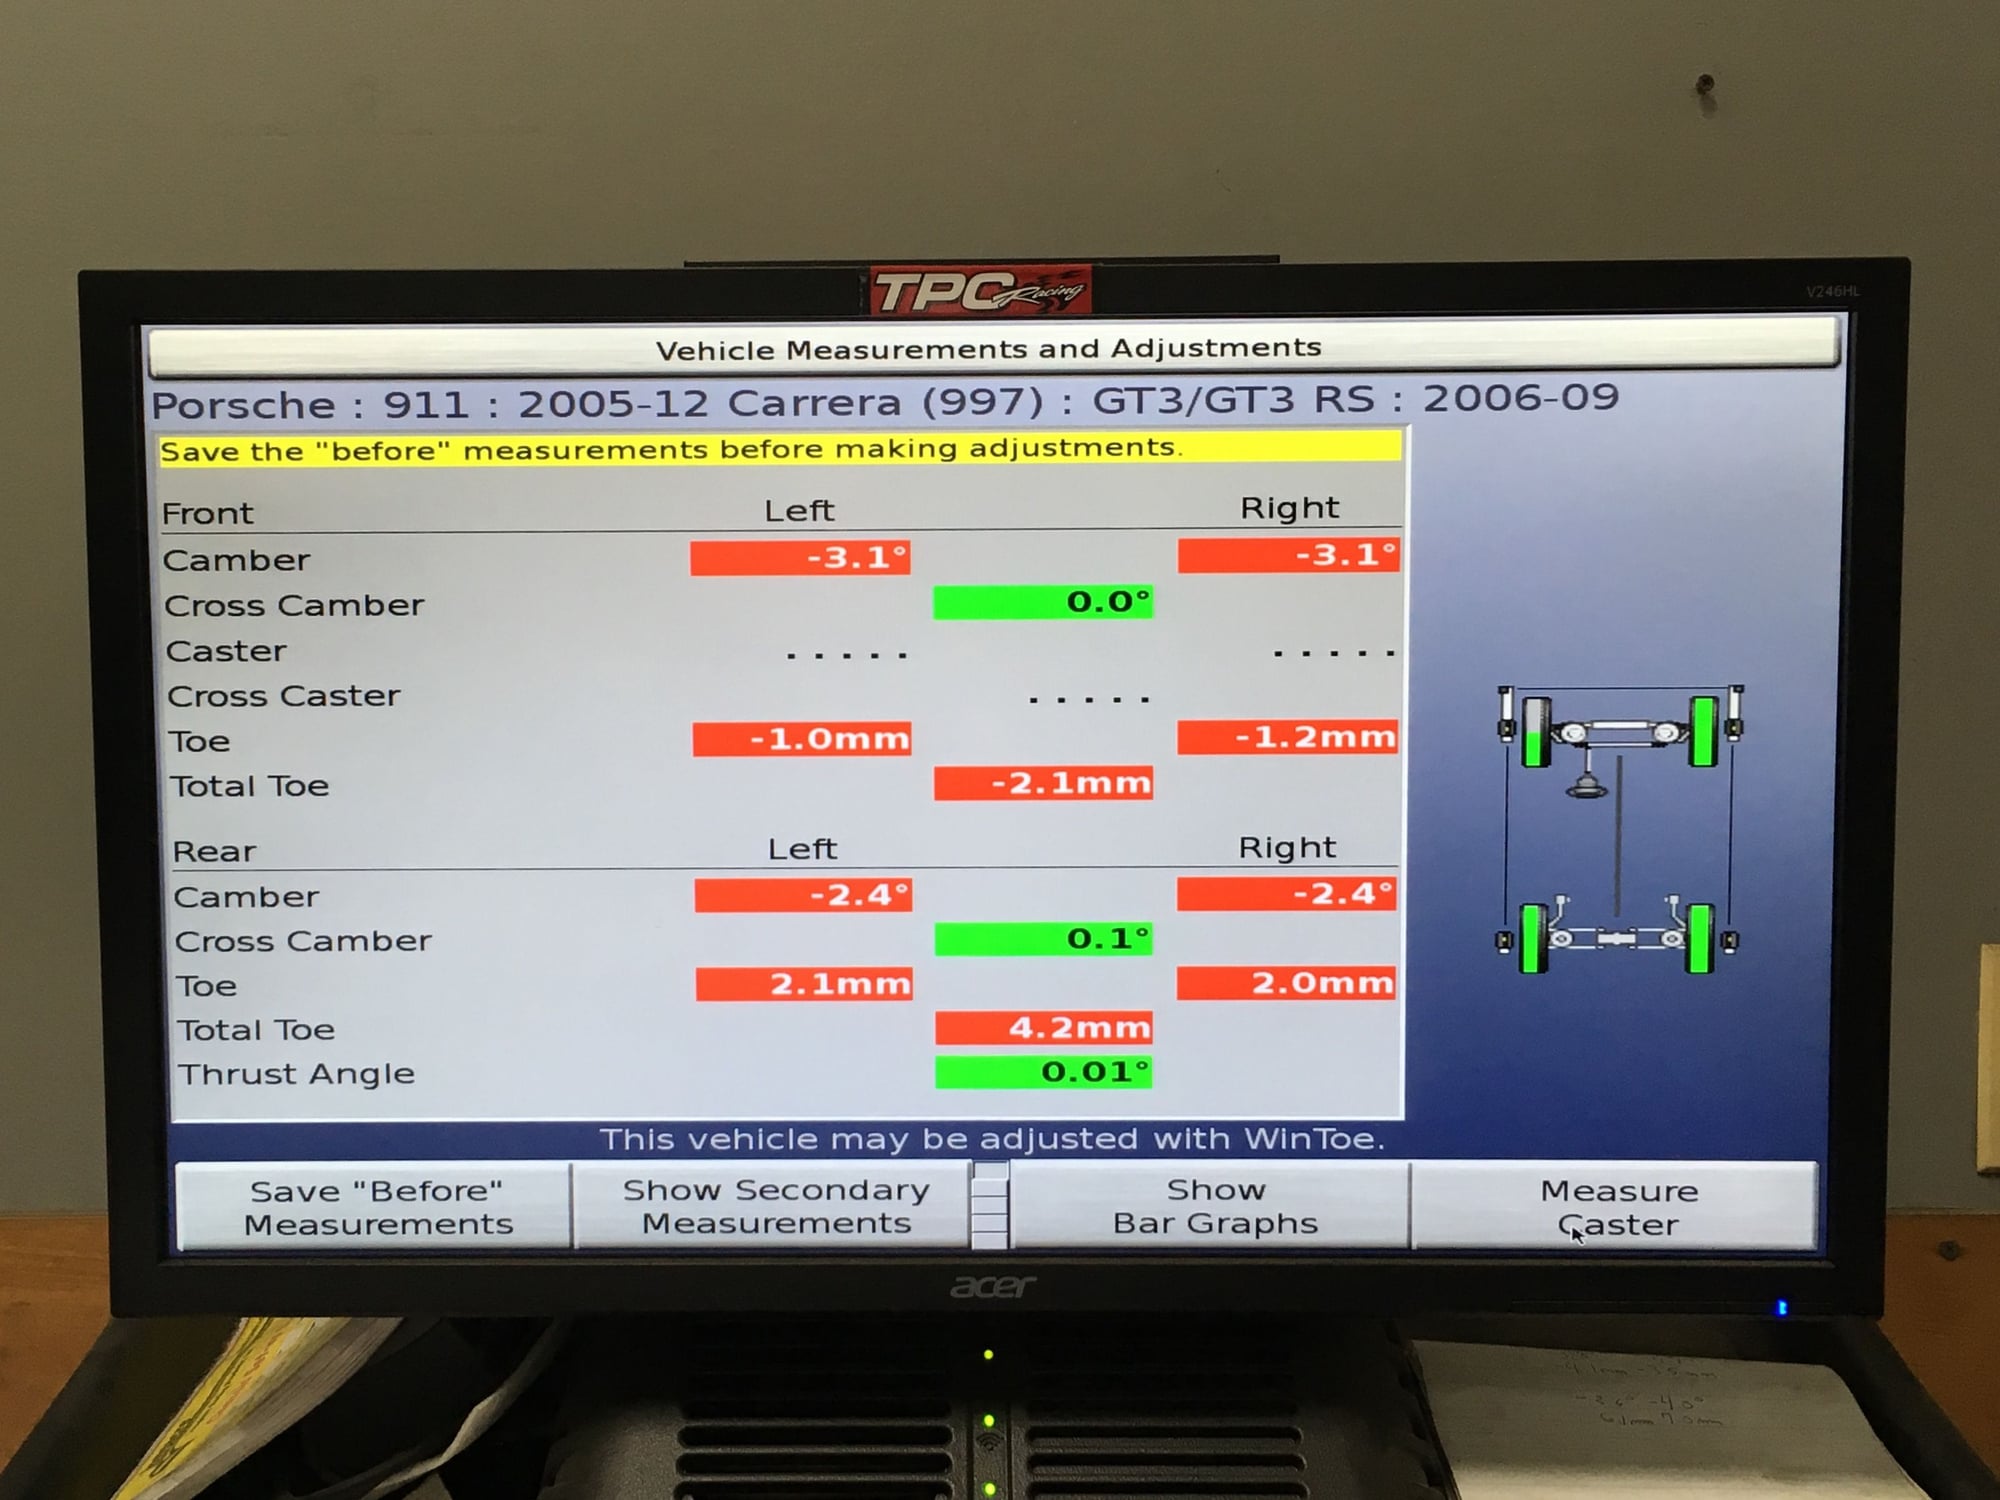
Done. The camber numbers are in the low range for slicks and in the high range of street R tires which gives me the flexibility to run both.
That's a wrap for the 28-hour push. More to come on taking care for some loose ends. Time to get some ZZZ's. Thanks for reading.
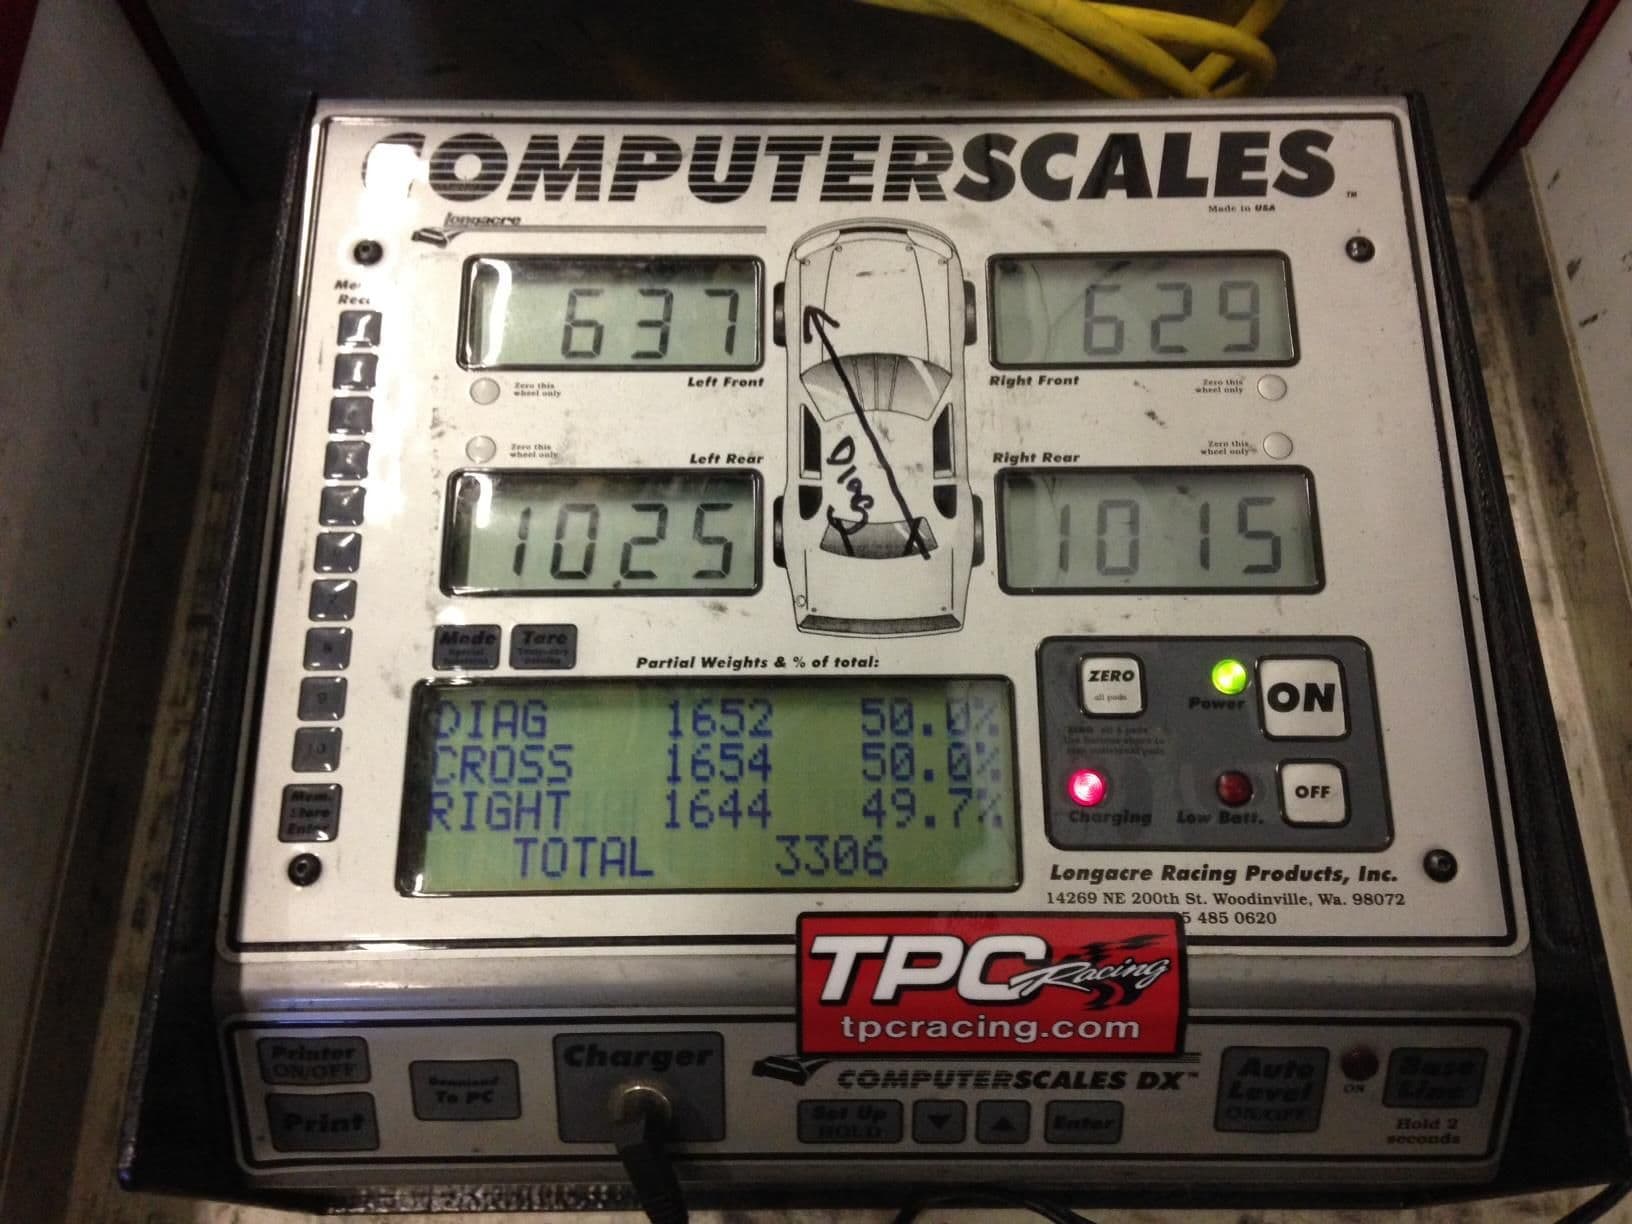
Just thought it'd be neat to show the total weight from 2014 to now.
March2014: Within a month of owning this car the LCA's, rear toe links, front springs, front sway bar, and air box was changed. These mods didn't change the total weight much because they replaced OEM parts that have very similar weight.
No weight on seat. 1/2 tank of fuel. 3306 lbs.
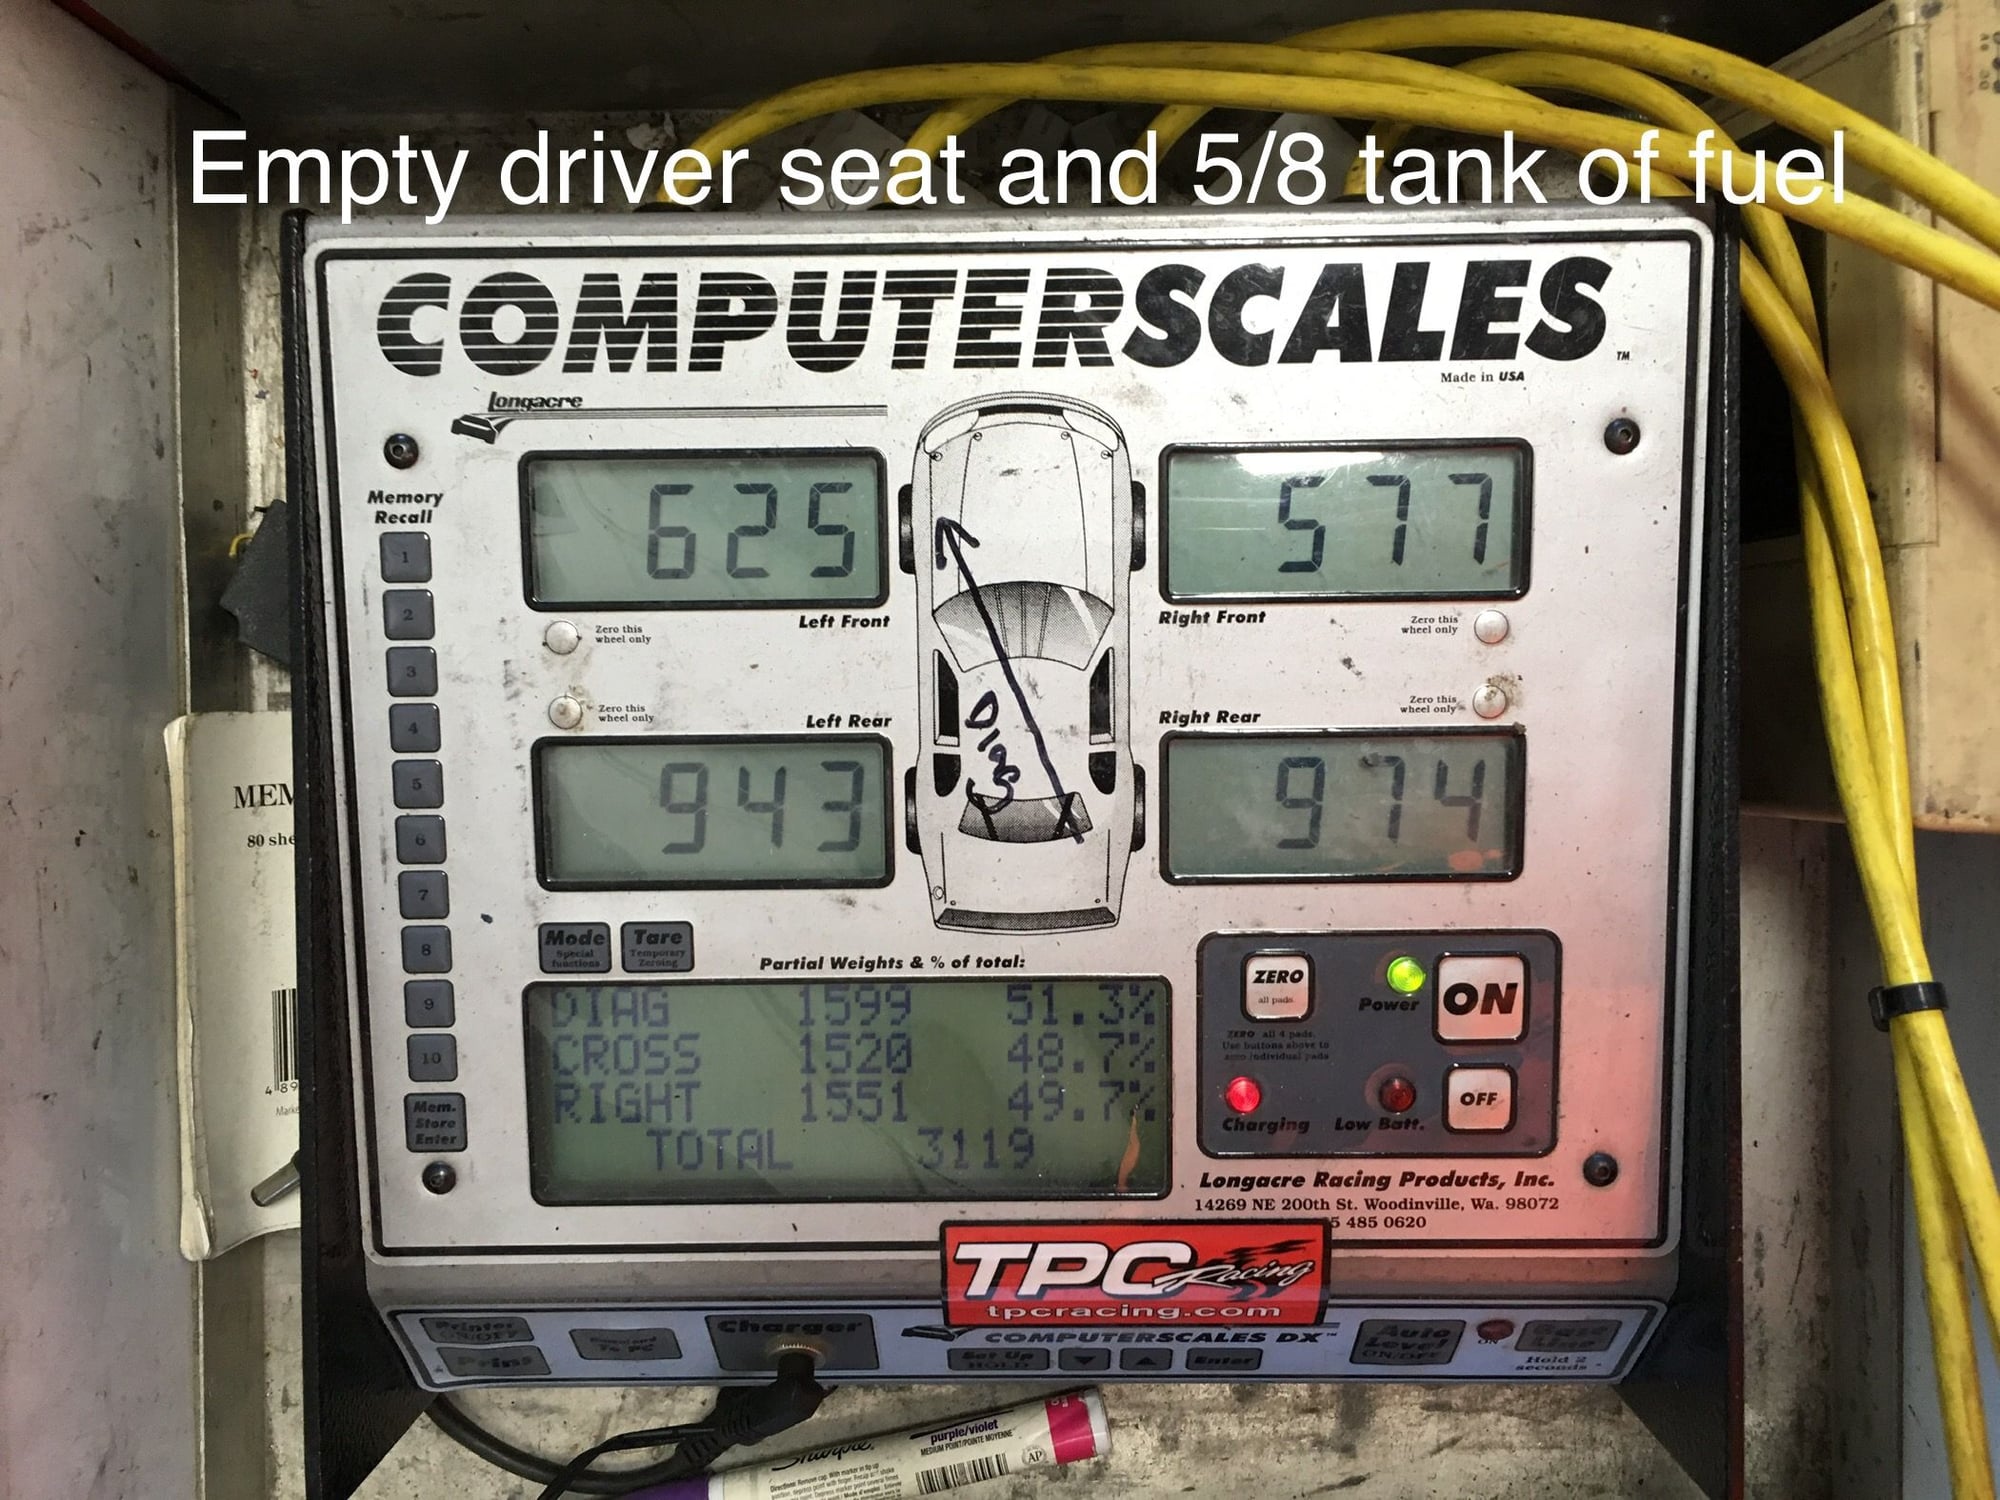
June 2019: Side muffler delete, RS Ti center muffler, RS LWFW, Cup crank pulley, sunroof & headliner delete, replaced OEM seats with MOMO racing seats, DAS Sport bolt-in roll bar, door panels delete, sound system & NAV delete, air bag delete, front trunk plastic trim delete, headlight washer delete, engine compartment fan delete, lighter weight Stoptech brakes.
No weight on seat. 5/8 tank of fuel. 3119 lbs.

 06-07-2019, 08:27 PM