When you click on links to various merchants on this site and make a purchase, this can result in this site earning a commission. Affiliate programs and affiliations include, but are not limited to, the eBay Partner Network.
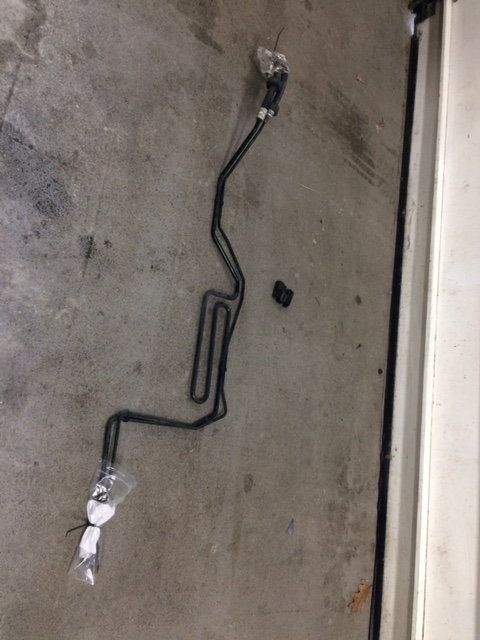
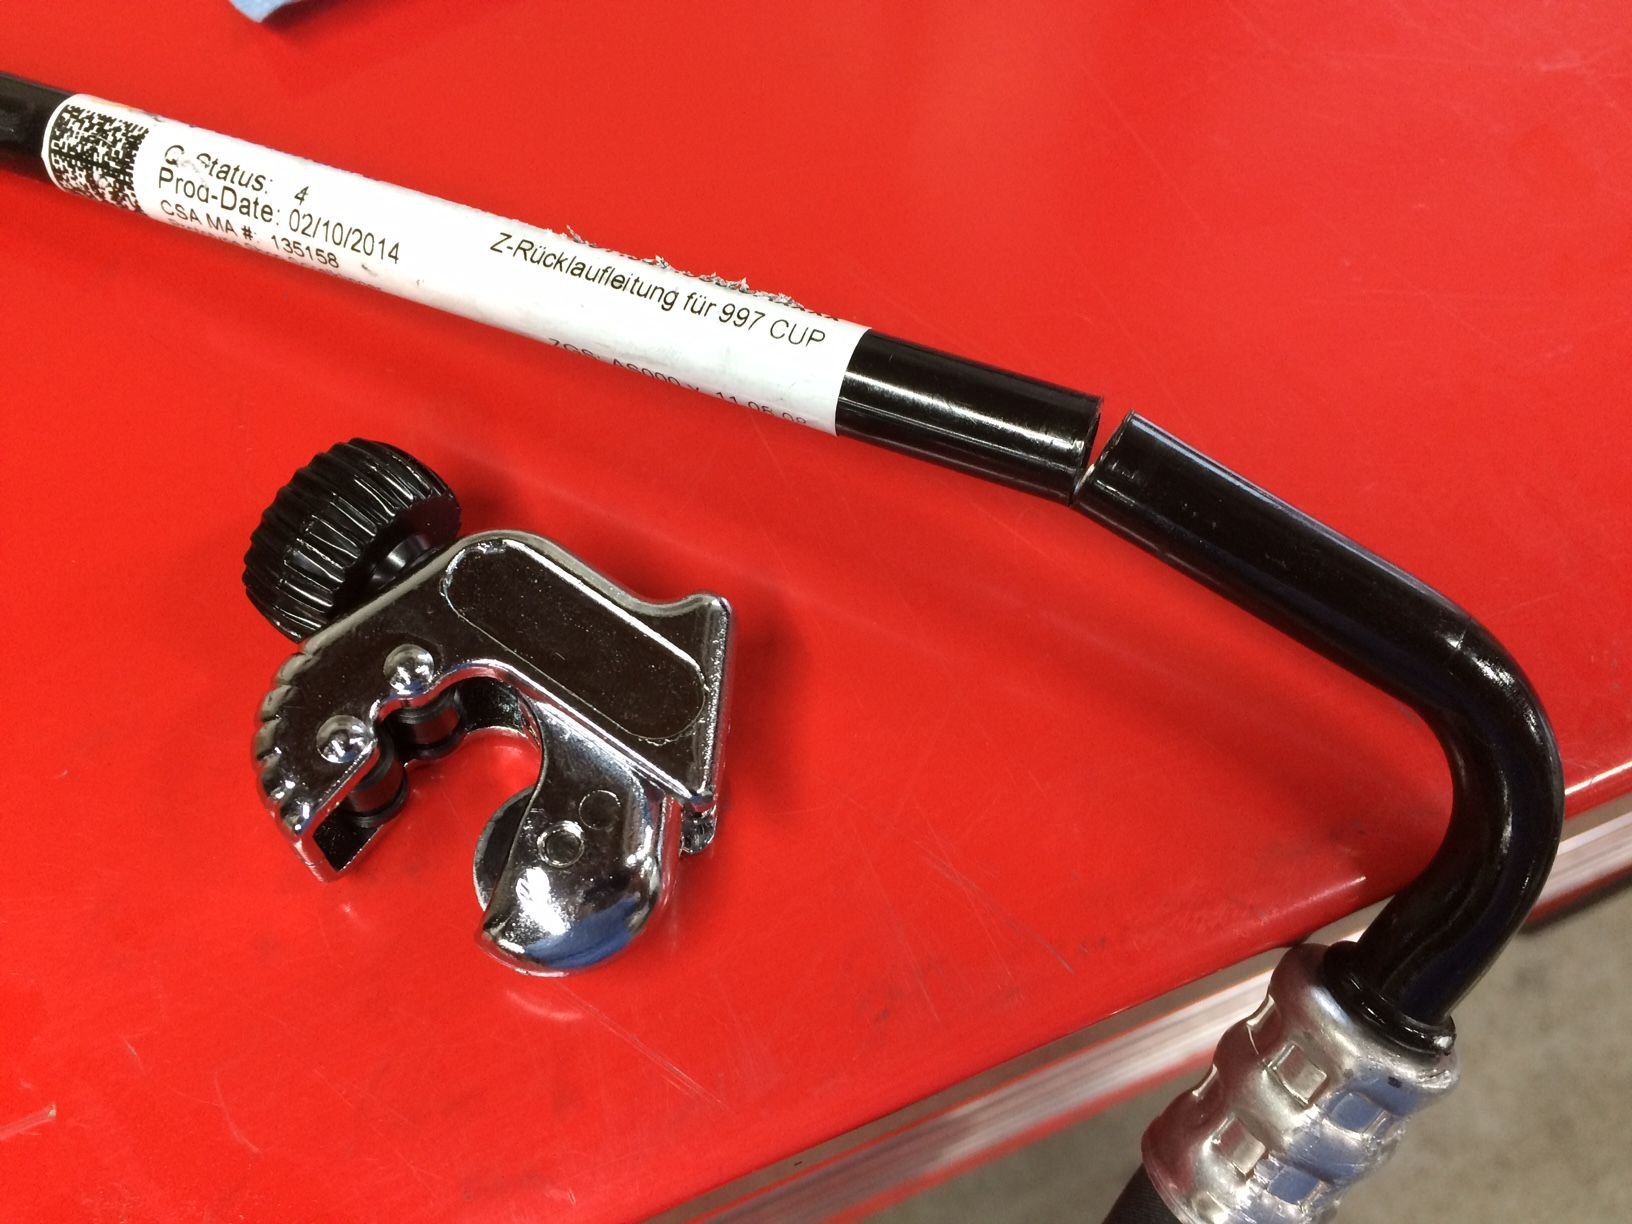
As I've mentioned before I am in love with how refined the steering fluid lines are routed on the 997.2 Cup so I sprung the 500 bucks to buy the two genuine 997.2 Cup steering fluid lines(there's the upper high-pressure line, and the lower low-pressure line).
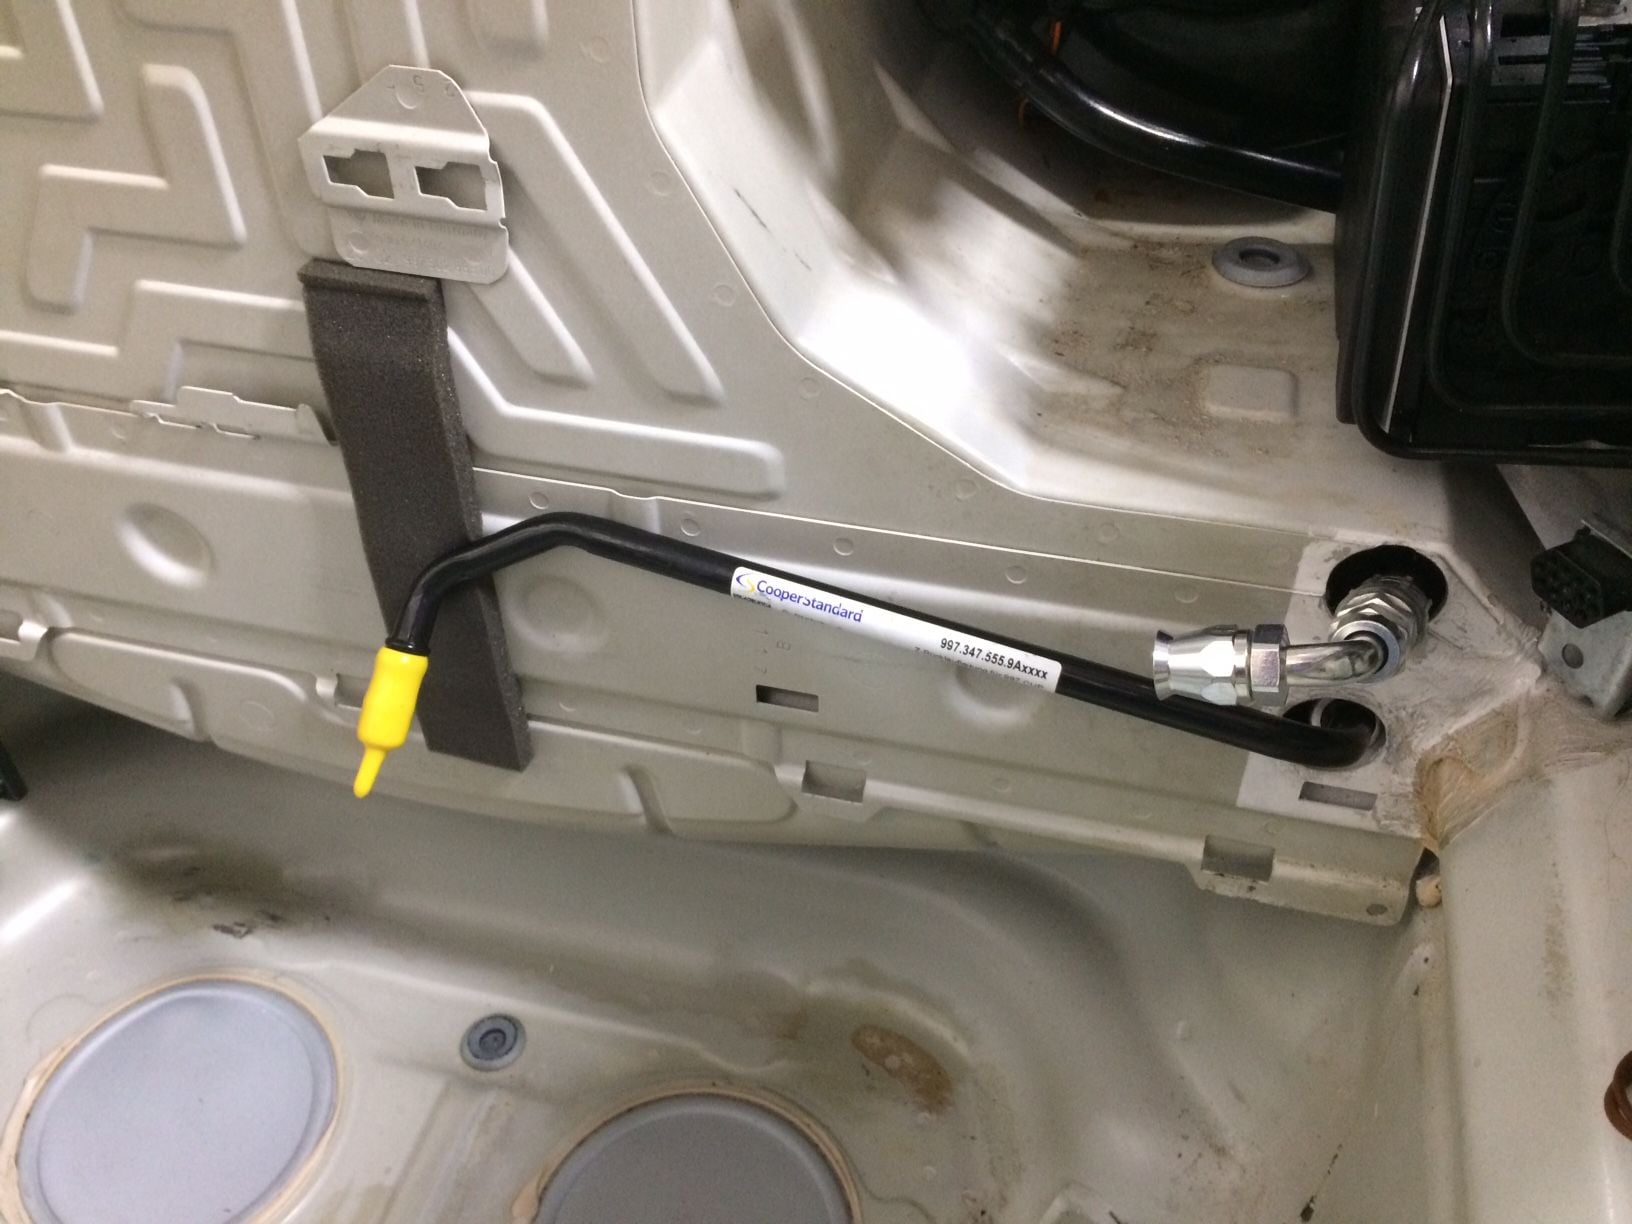
Here again is an image of the neatly routed 997.2 Cup steering fluid lines-
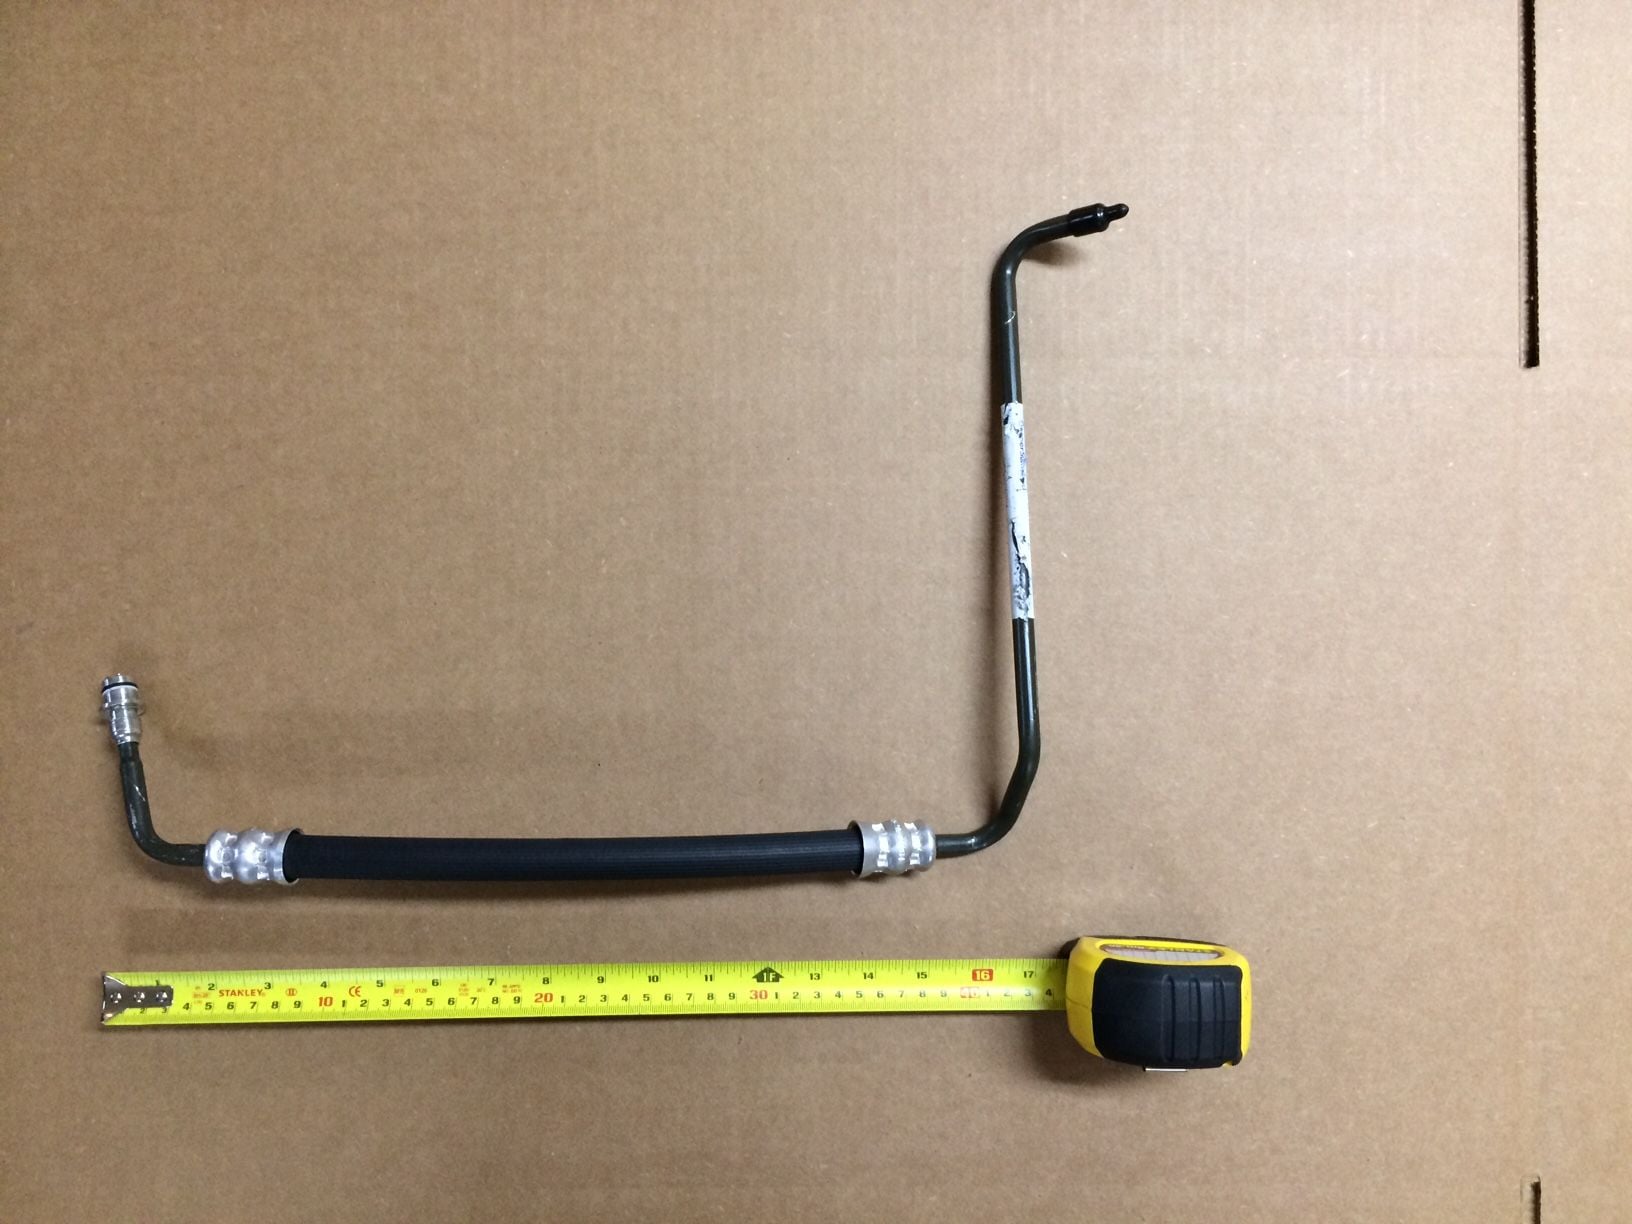
Here what the 997.2 Cup upper hi-pressure line. Does it look like its worth 250 buck? ...don't need to answer that.
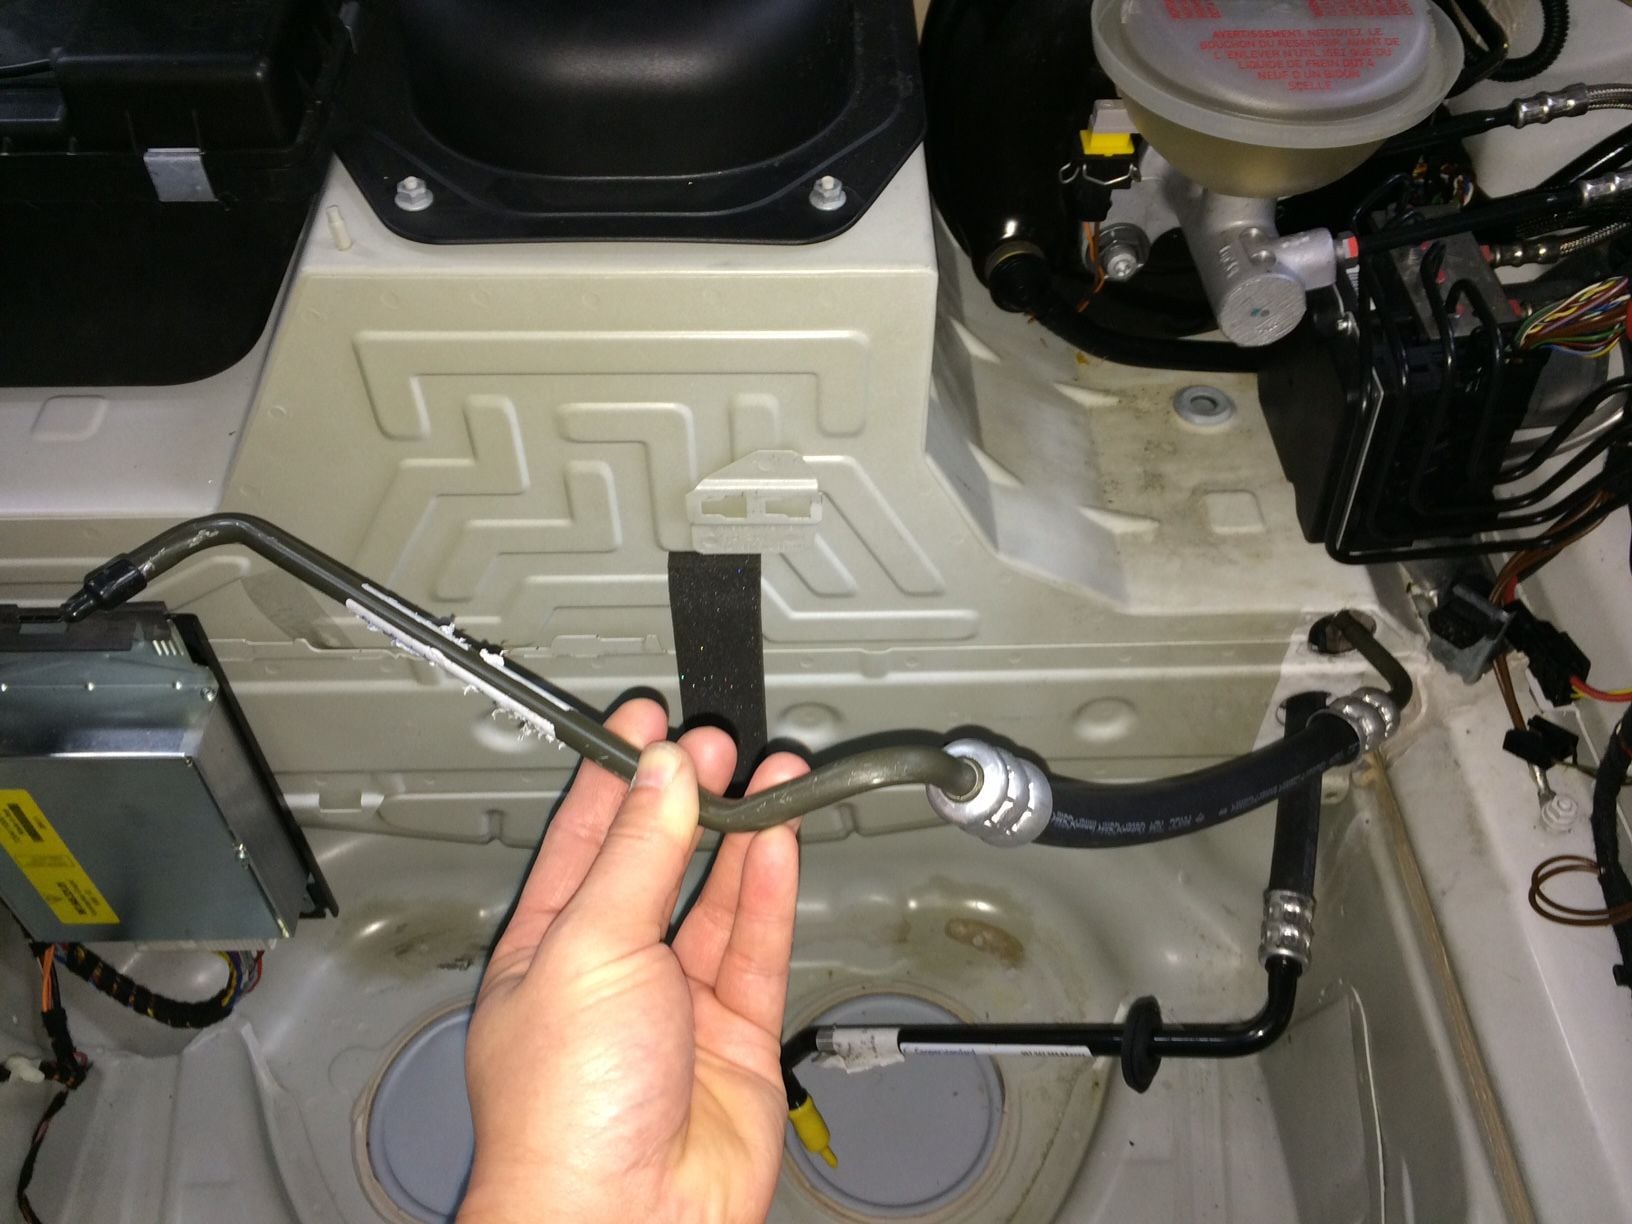
Well, I thought the tricky part was to sneak the preformed shape of the hard metal line through the upper 30mm hole, but I was wrong. It turns out the diameter of the factory aluminum crimp collar is bigger than the gap between the body of the car and the street car gas tank!!!
Here's couple photos of my attempts. The lower line goes in pretty easy BTW.
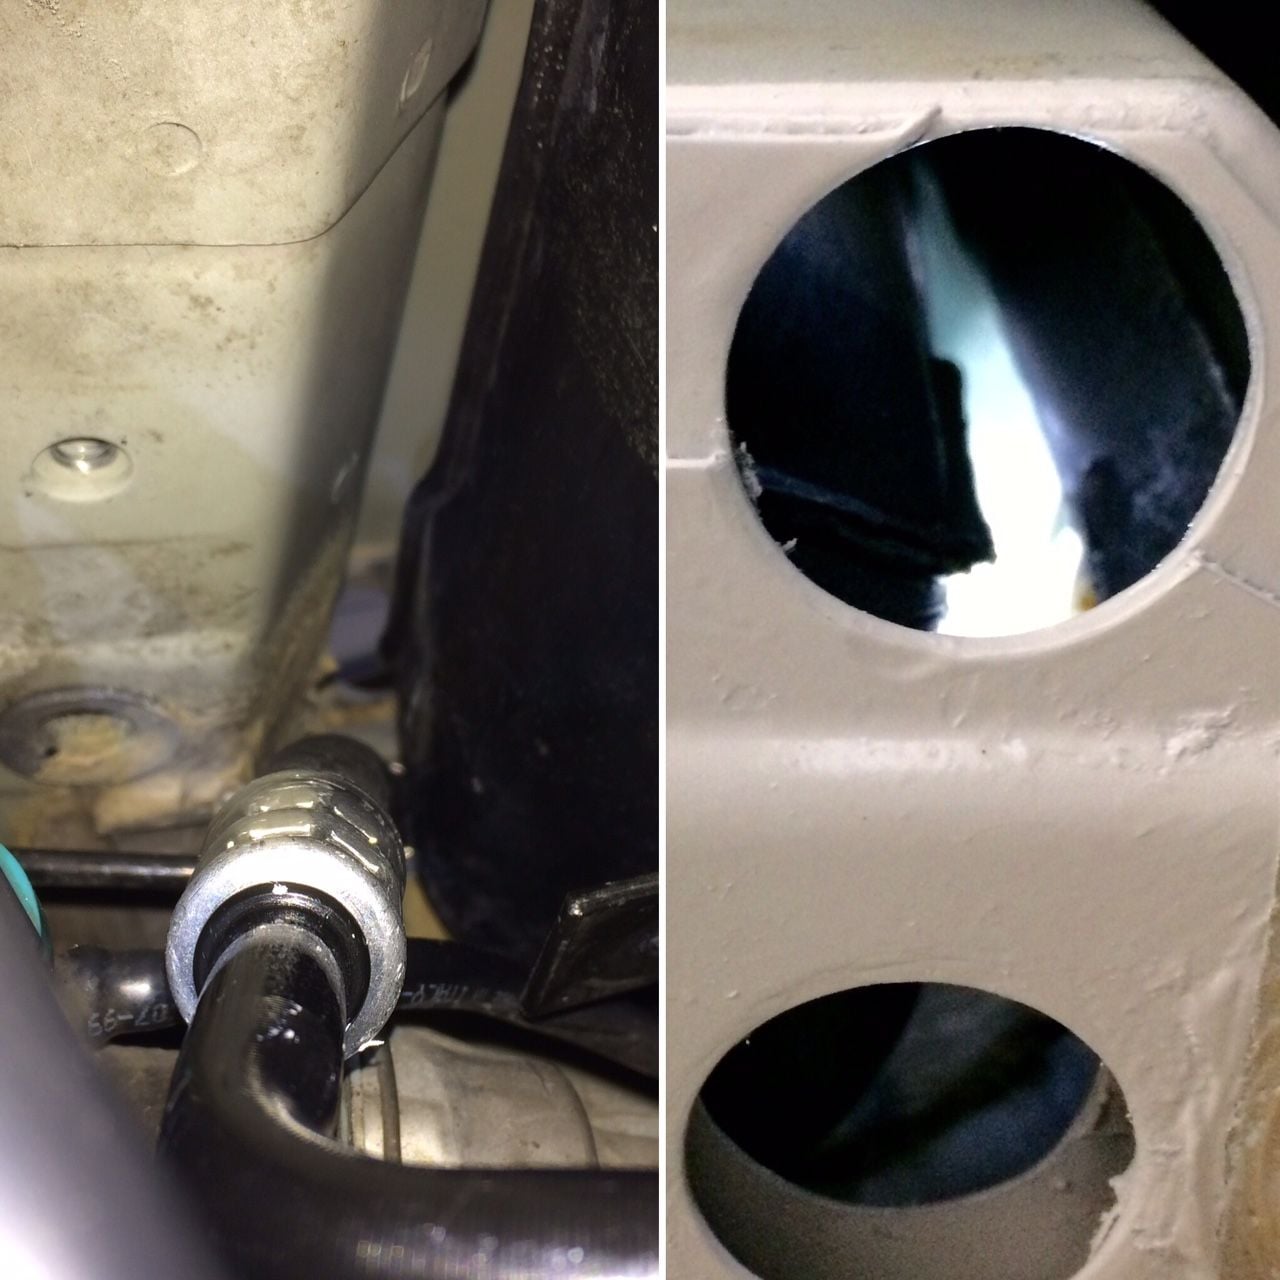
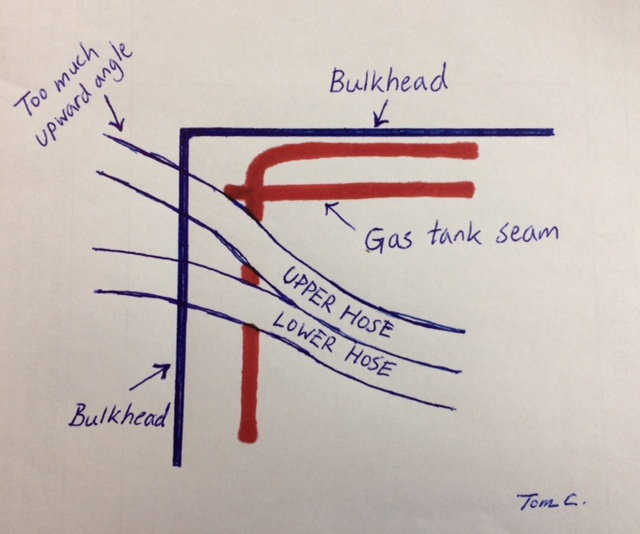
Here's a split image to show how tight the gap is. In the right side portion of the image you can see the narrow gap with the light shining through and that the street car plastic gas tank has an external seam that prevents the collar from going through. The Right side of the image is an attempt to feed the line through from the inside and you see the hole in the background. FYI- Cup cars have fuel cell that's shaped way different than street car plastic gas tank! Oops, didn't think of that...)
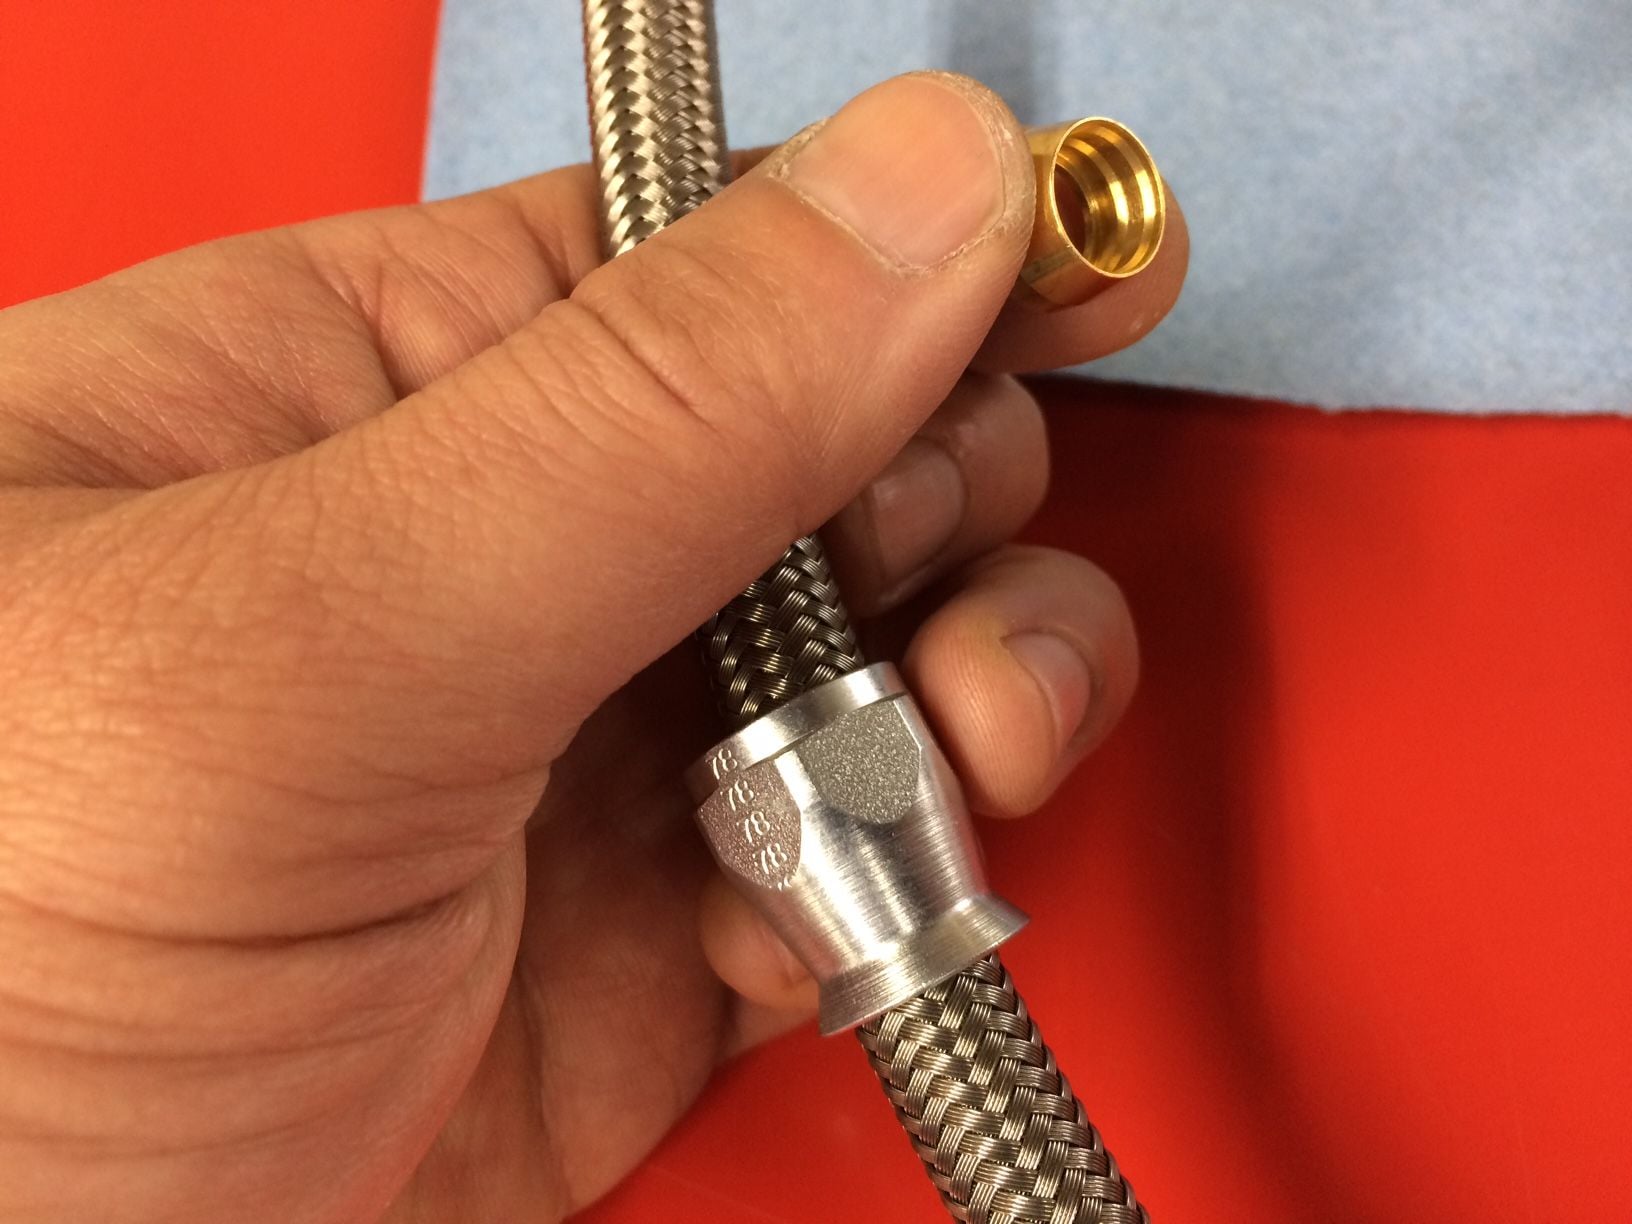
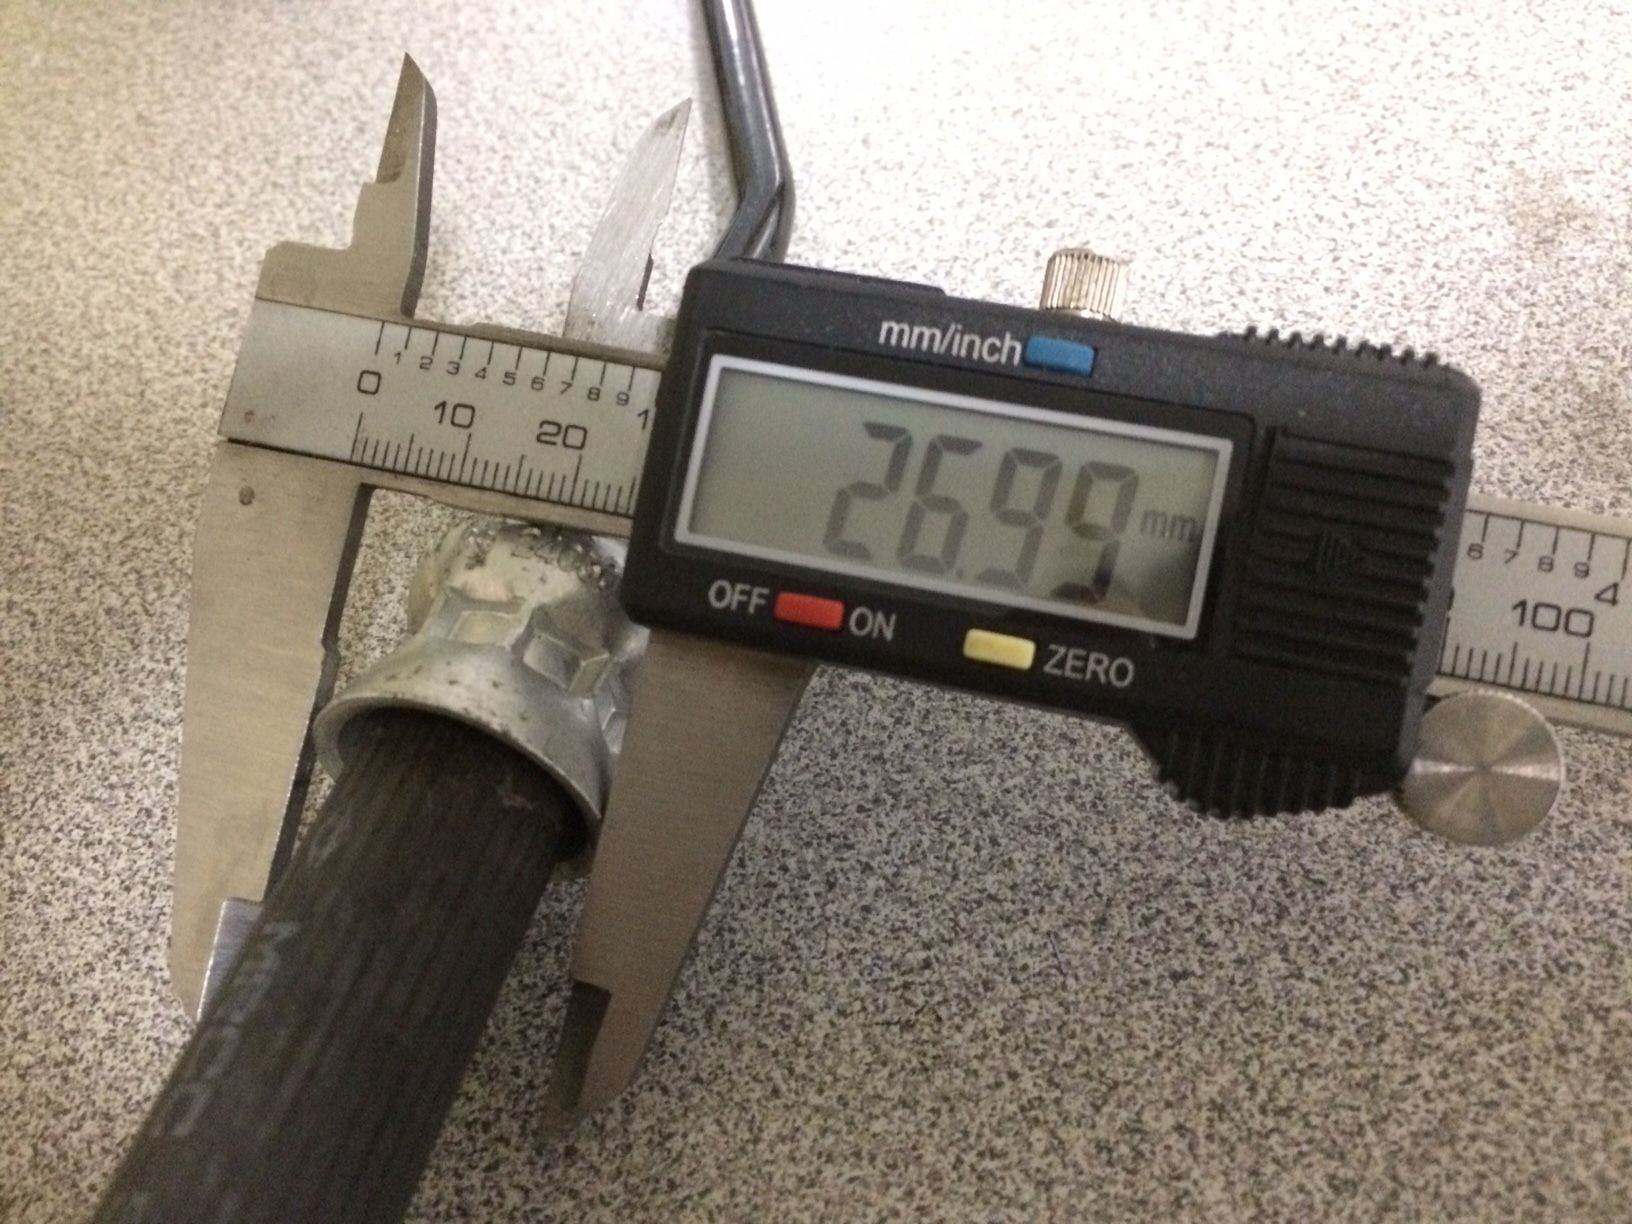
OD(Outside Diameter) of the crimp collar. 27mm or 1.06 inch.
I tried for hours feeding the line in from both directions, I even unbolted the straps holding the gas tank to lower it, and push the gas tank to the right to increase the gap enough to squeeze the collar through. I was feeling desperate as the clock approaching midnight, and I was cranky from skipping dinner, I grind the flare off the collar to reduce the OD hoping I can force through the gap. I gave it a good effort and it went through the gap. But the tight fit put more pressure on the line than I prefer to have. No doubt it would have functioned fine but the pressure against the tank and body won't allow the trunk portion of the line to be routed to the pump as intended. So, an entire night wasted. Well, at least I found out how I don't want the high pressure line installed.
PS- For those who are wanting to do this with factory .2 Cup lines, may I suggest drilling the holes on the body BELOW the street car gas tank seam! There is enough room to drill lower. If I do another one I would make the current bottom hole the top hole. This will make this MUCH easier. Or use .1 Cup lines instead of .2 Cup lines. I already made my bed this way, so I have to sleep in it.
End of Part 1. Stay tuned for Part 2.
__________________
PCA National Instructor
TPC Racing stats:
2023 Porsche Sprint Challenge 992 Cup Am Champion
2023 Porsche Sprint Challenge GT4 Pro-Am Team Champion
2022 Porsche Sprint Challenge 992 Cup & 991 Cup Champion
2020 IMSA GT3 Cup Challenge 2nd Championship
2018 IMSA GT3 Cup Challenge 2nd Championship
2016 IMSA GT3 Cup Challenge Champion
2013 IMSA GT3 Cup Challenge Champion
2006 Rolex-24 @ Daytona GT Champion
2004 Grand-Am SGS Class Champion
After 5 hours of sleep the high pressure line saga continued on the next day. I came to the conclusion after sleeping on it(literally), the idea that as much I want to have the exactly look of the .2 Cup its not going to happen. I have to cut the .2 Cup lines that I paid over 500 bucks for. Now that this was accepted in my mind, a visit was made to a nearby industrial hydraulic hose & fitting shop. They make high pressure hoses for heavy construction equipment like Caterpillar dozers and cranes so a pressure hose for sports car is no big deal.
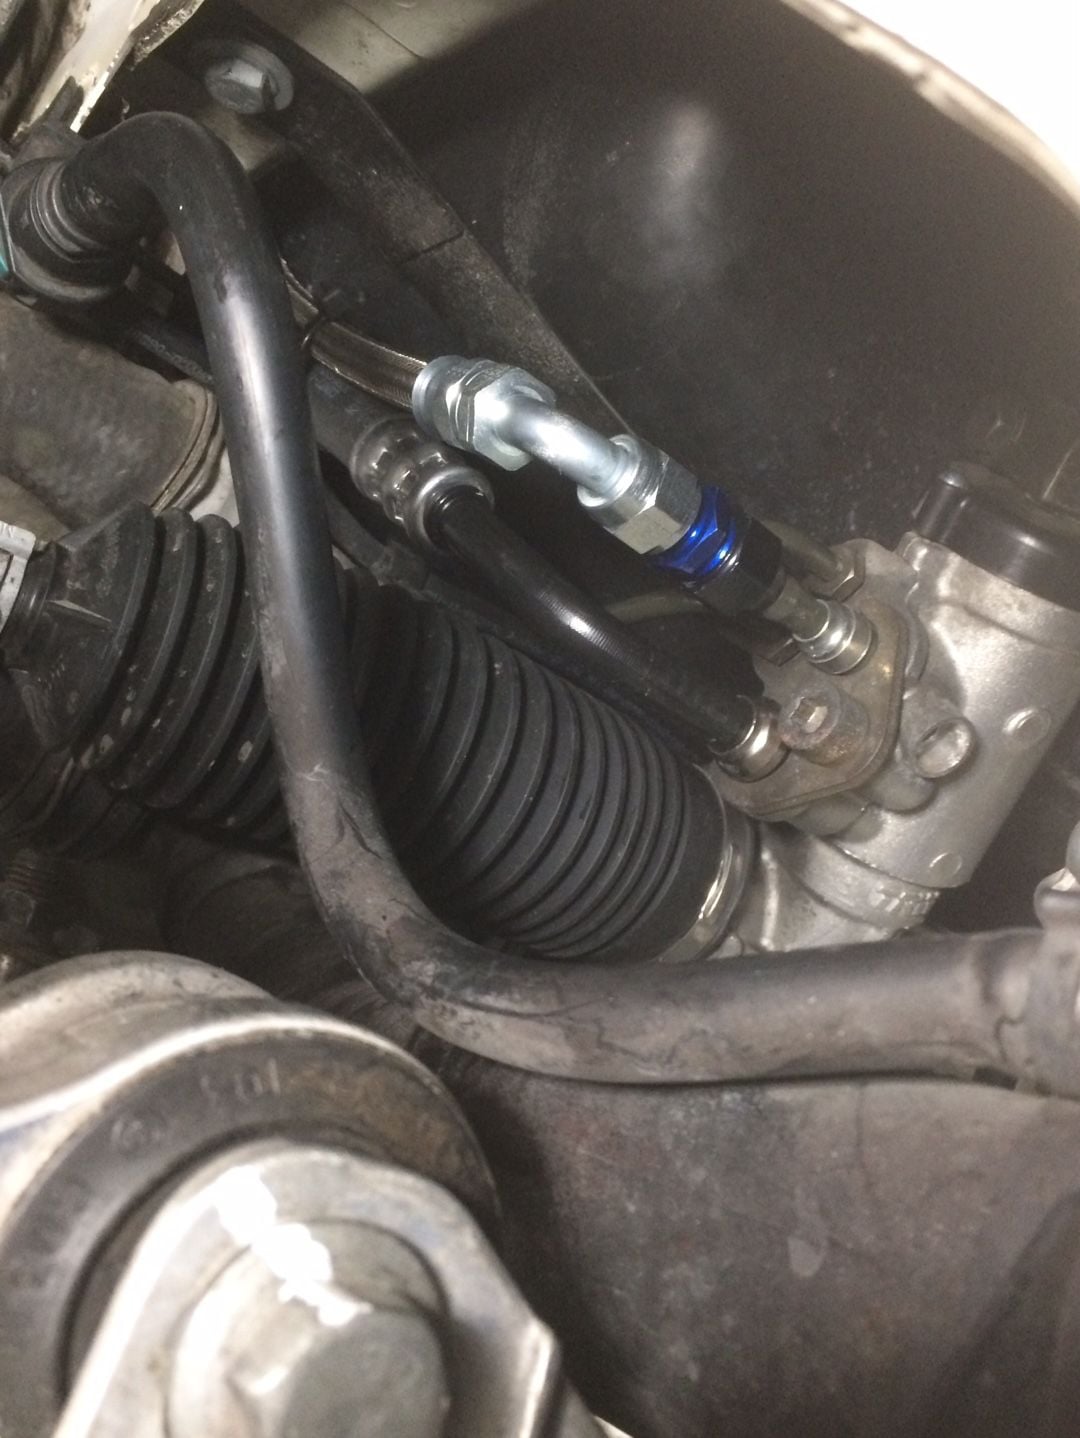
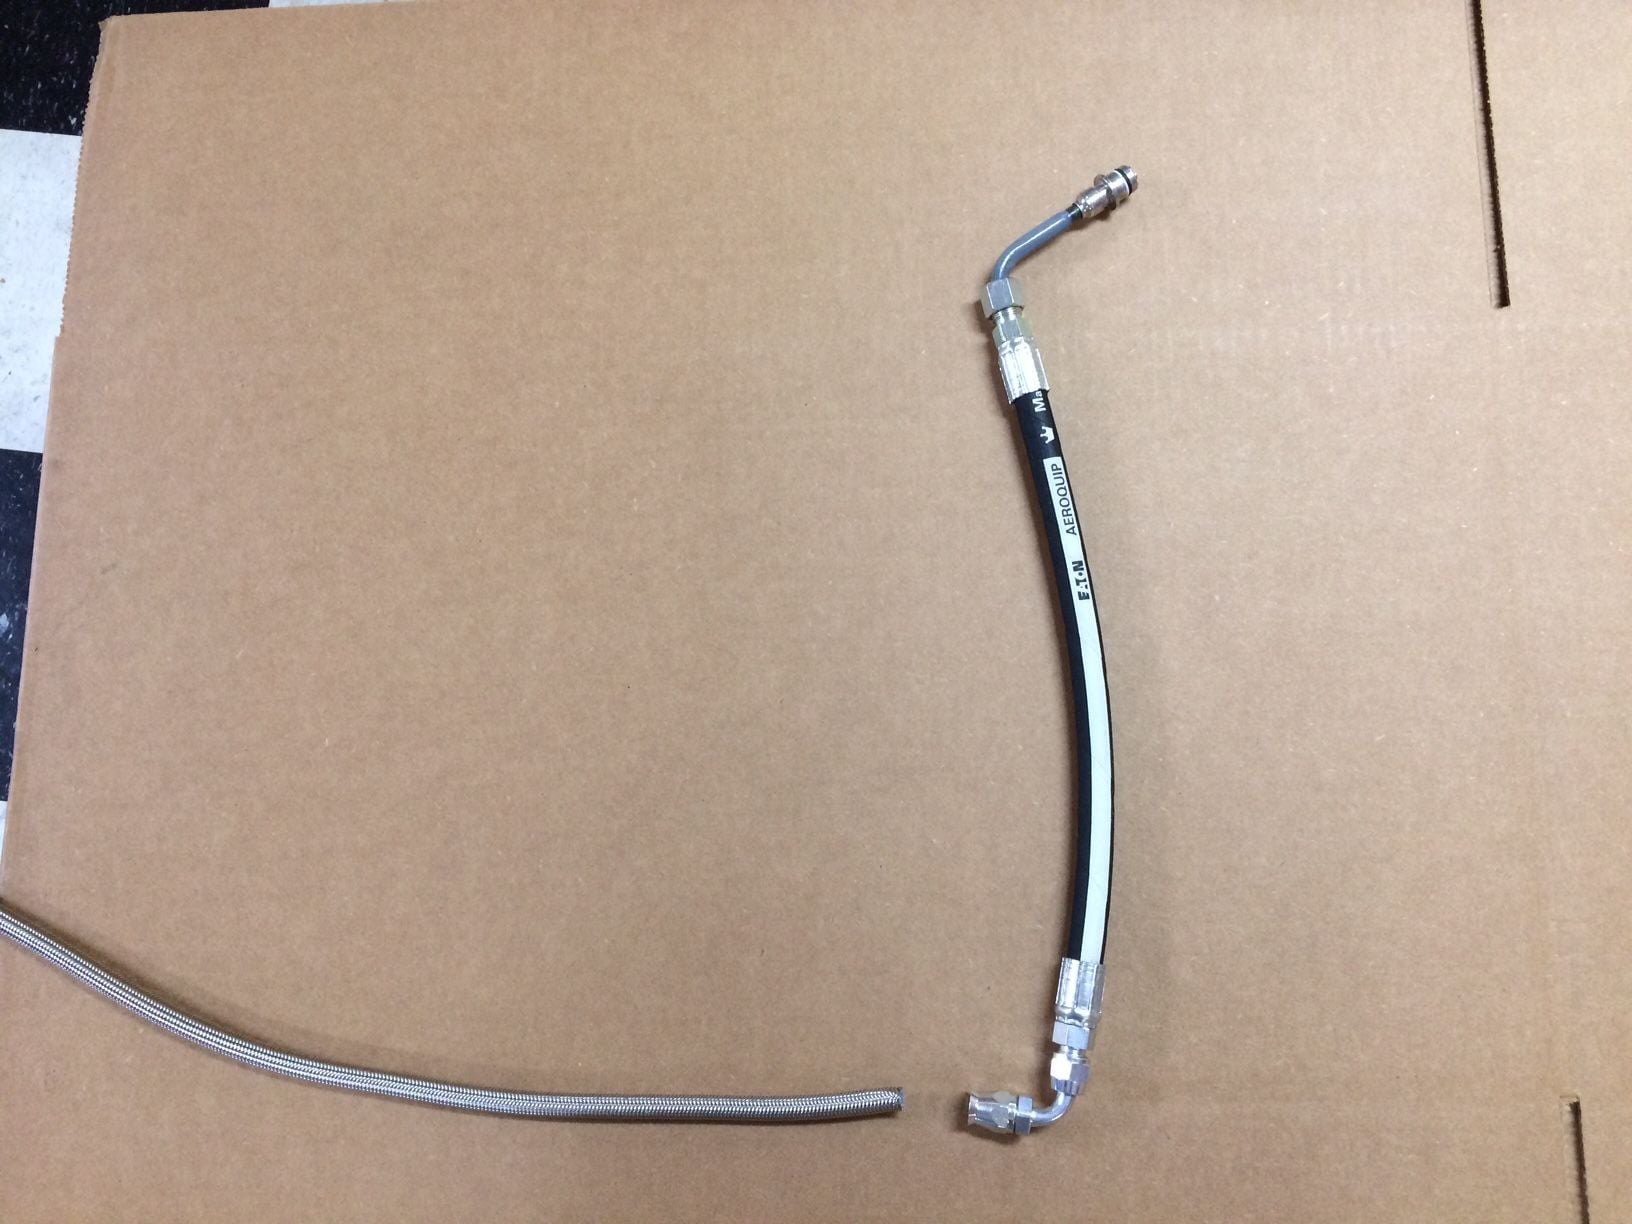
The OE proprietary end that goes into the steering rack was cut and then a compression fitting was used to seal and merge the end to an industrial hydraulic hose then to AN(Army Navy) -6 fitting 90-degree. This industrial hose and collar have smaller OD than the .2 Cup so fitment will be better through the gap between the gas tank and the body.
The good news is the smaller OD collar barely squeezed through the gap...using serious grunt force(and that's with the gas tank unstrapped while another person pushed the tank away from the body). This was not a one person job. Regardless, one end of the hose/collar went through the gap. Ever so barely. So I thought I was home free... but not quite. In order for the hose end to come out of the bulkhead at the desired angle to then connect to the pump, a sort of "S" shape must be formed by the heavy duty rubber portion of the hose. That's just not happening with the rigidity of the industrial strength rubber by itself let alone by installing the lower hose.
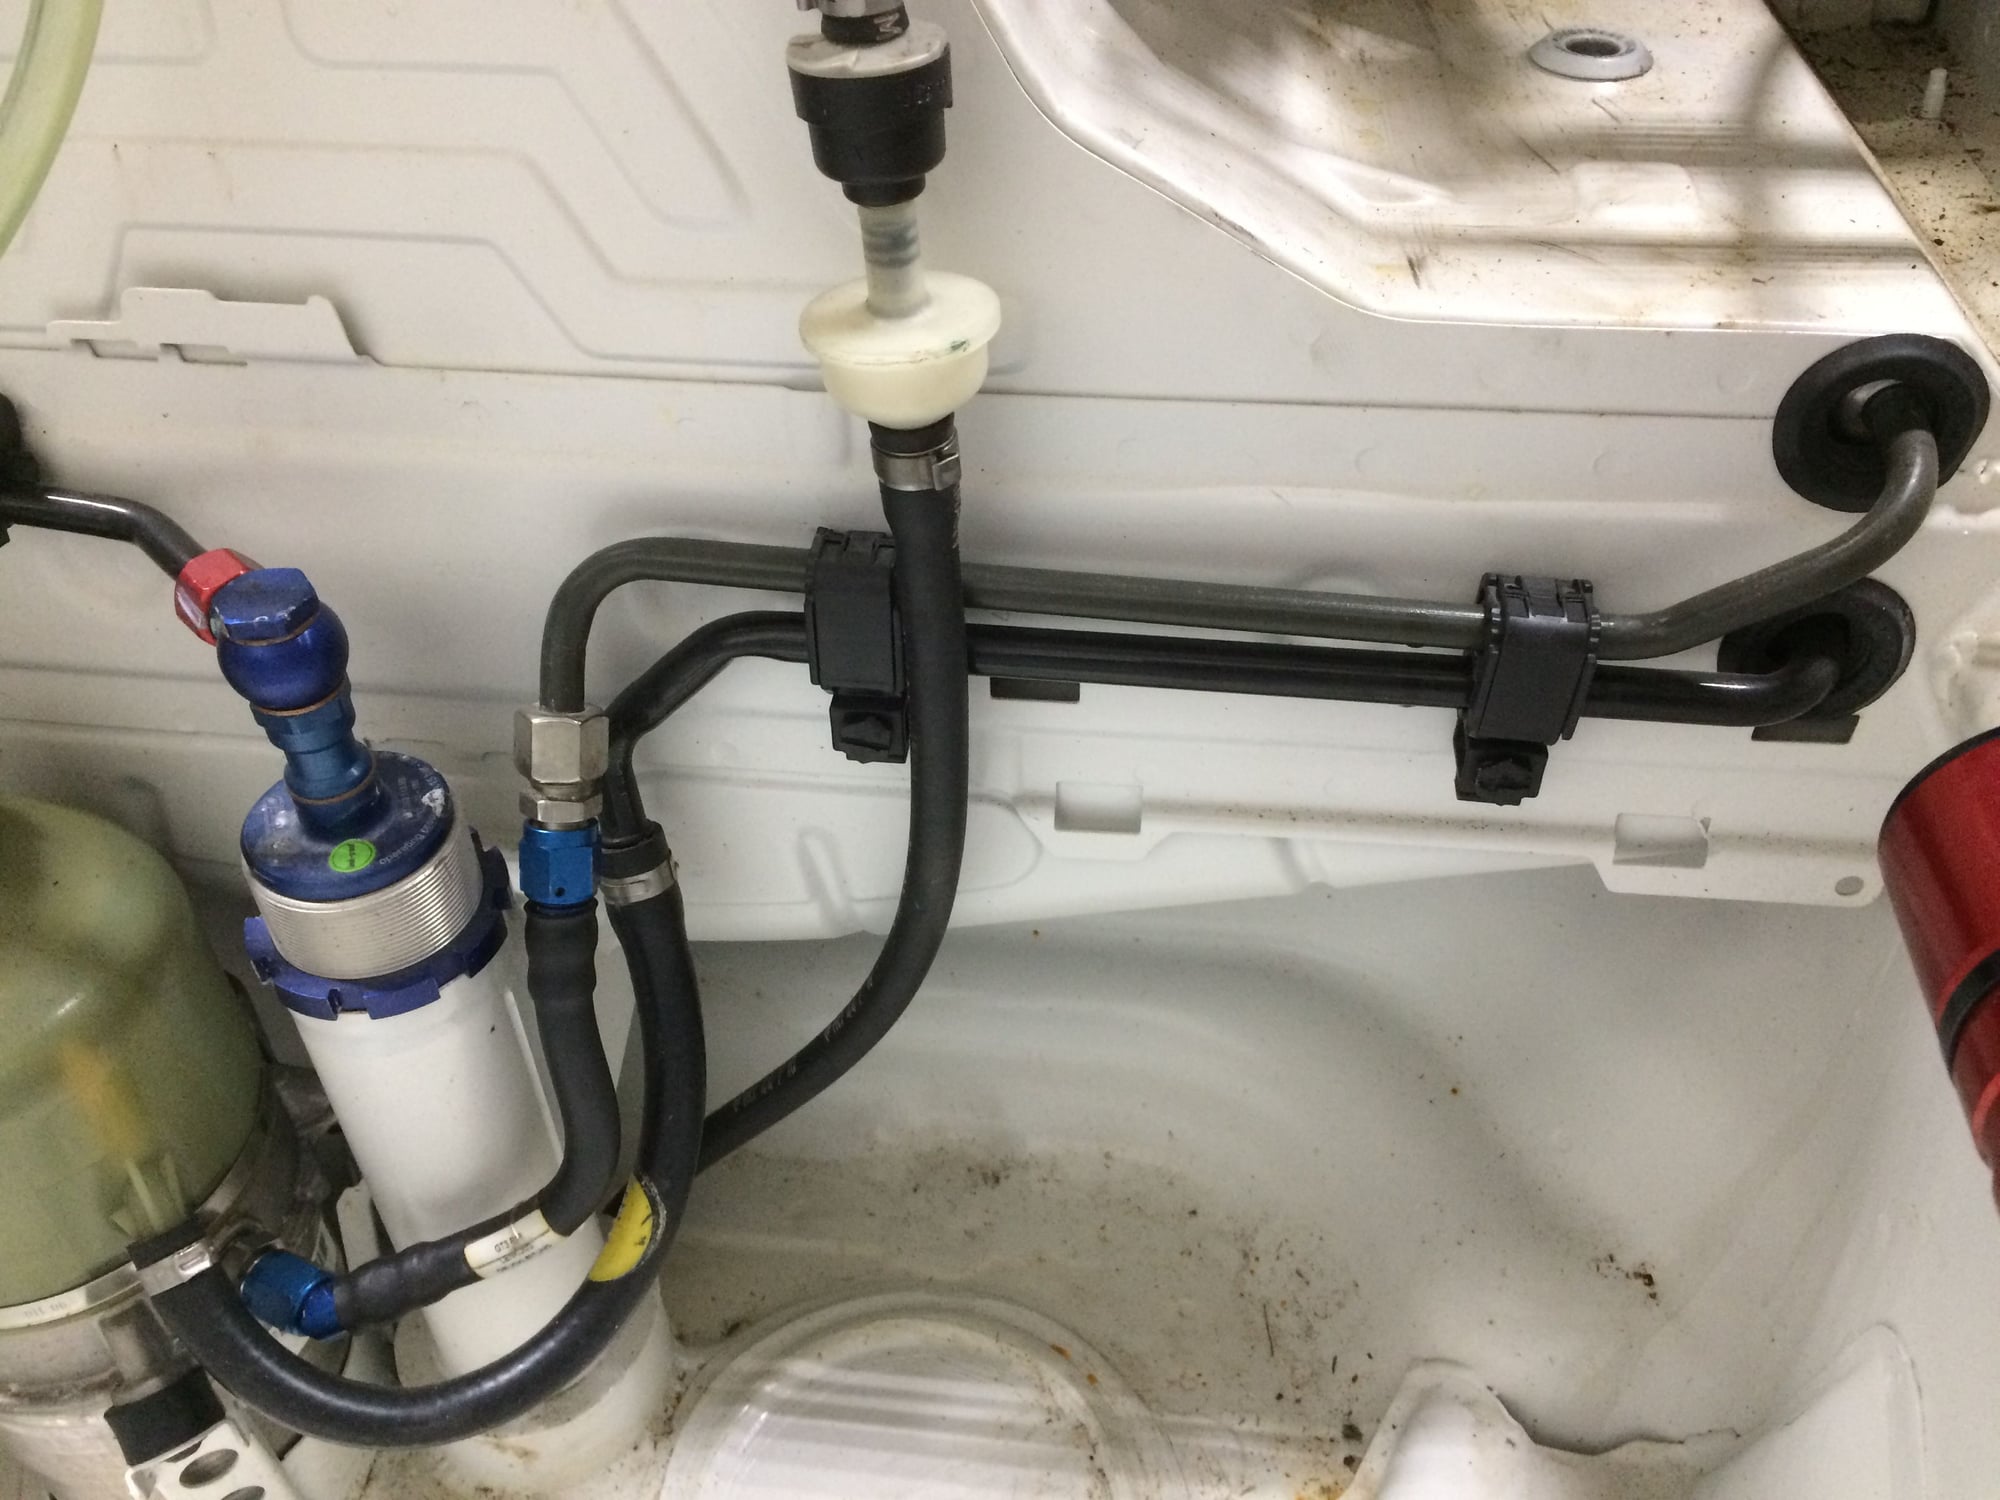
With the lower hose installed its just very tight and forces the upper(high pressure) hose to point upward at approximately 45-degree angle coming out of the bulkhead. Its hard to explain so here's a drawing. *This is a revised drawing to better depict the relation between the hoses, the street car gas tank seam, and Cup car hole locations.
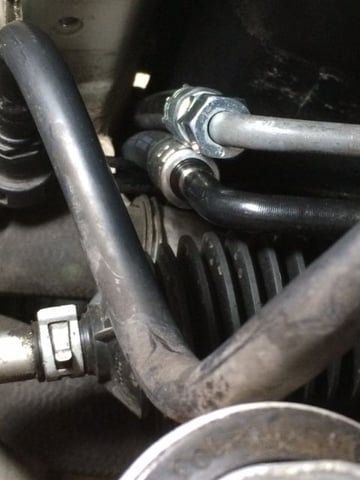
And here's how it looks from the back side. Very tight indeed.
Another trip to the hydraulic shop for a shorter hose. The plan at the time was to use the shorter industrial strength hose then convert to AN-6 that has more flexibility while still rated to withstand over 1000psi of line pressure.
Thought that was a home run until the thought occur to me that there'll be a junction(a potential leak point) behind the bulk head, at a place that can't be seen nor have access to. Not that industrial strength hydraulic fittings fail often but just the thought of this being my idea/design I can't do it, had to abort. It would have worked but the OCD in me kicked out this idea. Hydraulic rule #1, minimize number of junctions to minimize potential failure points.
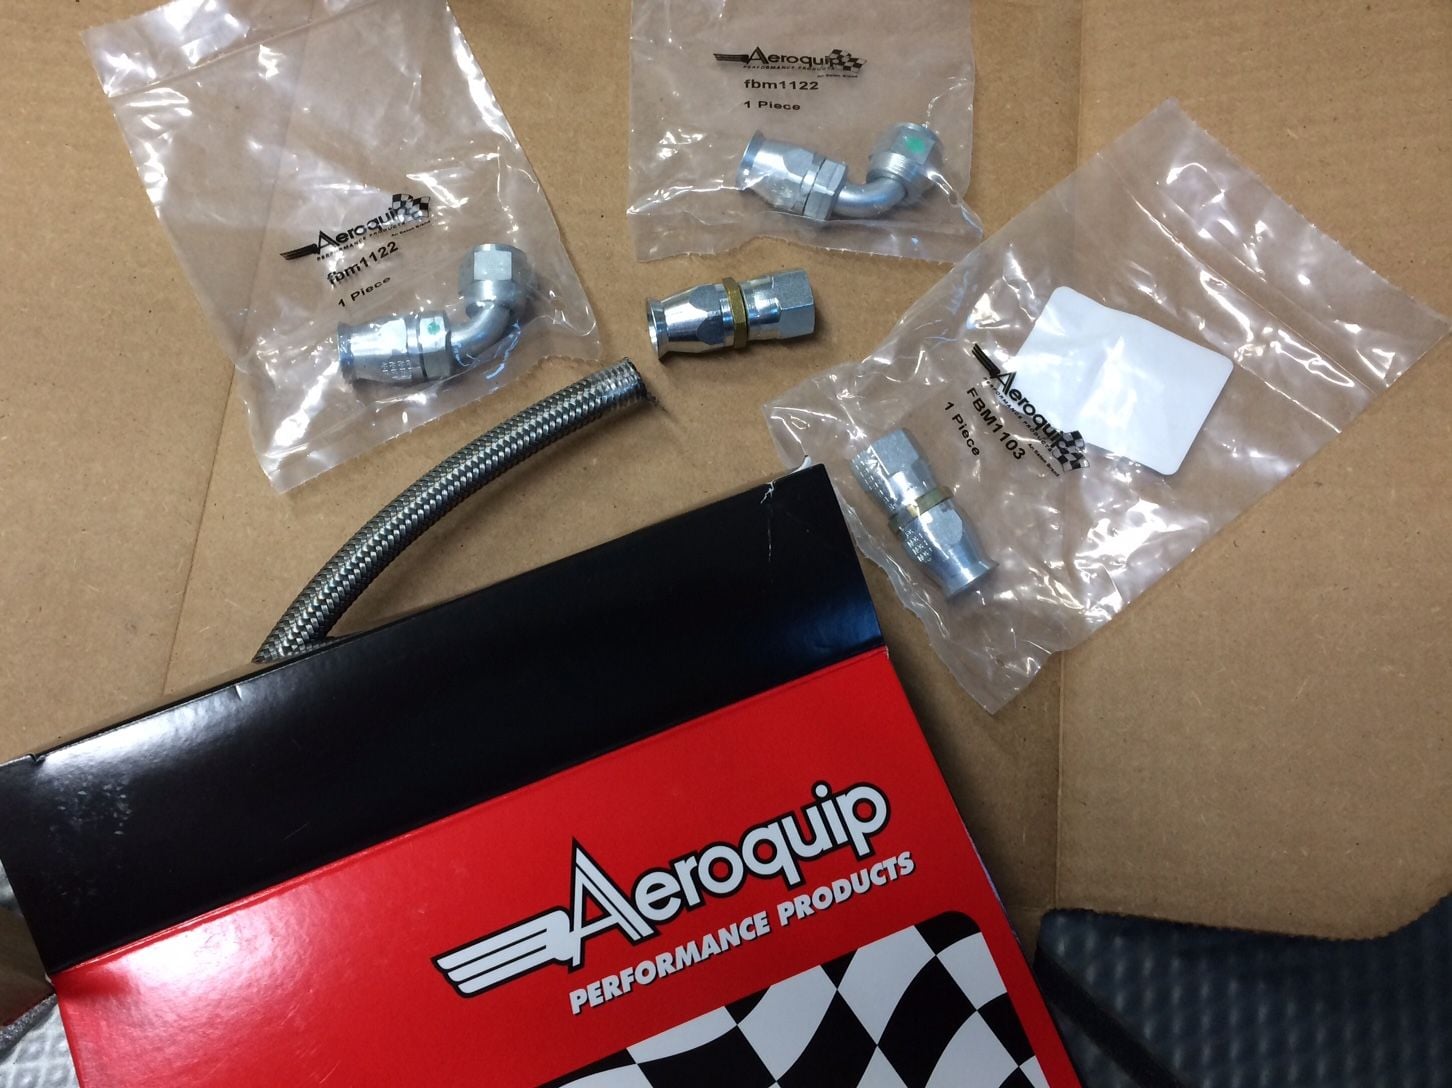
Next idea- this brings me back to my 20's hot rodding Camaro's and Mustangs, the idea is AN-6 hose from OE end to the pump.
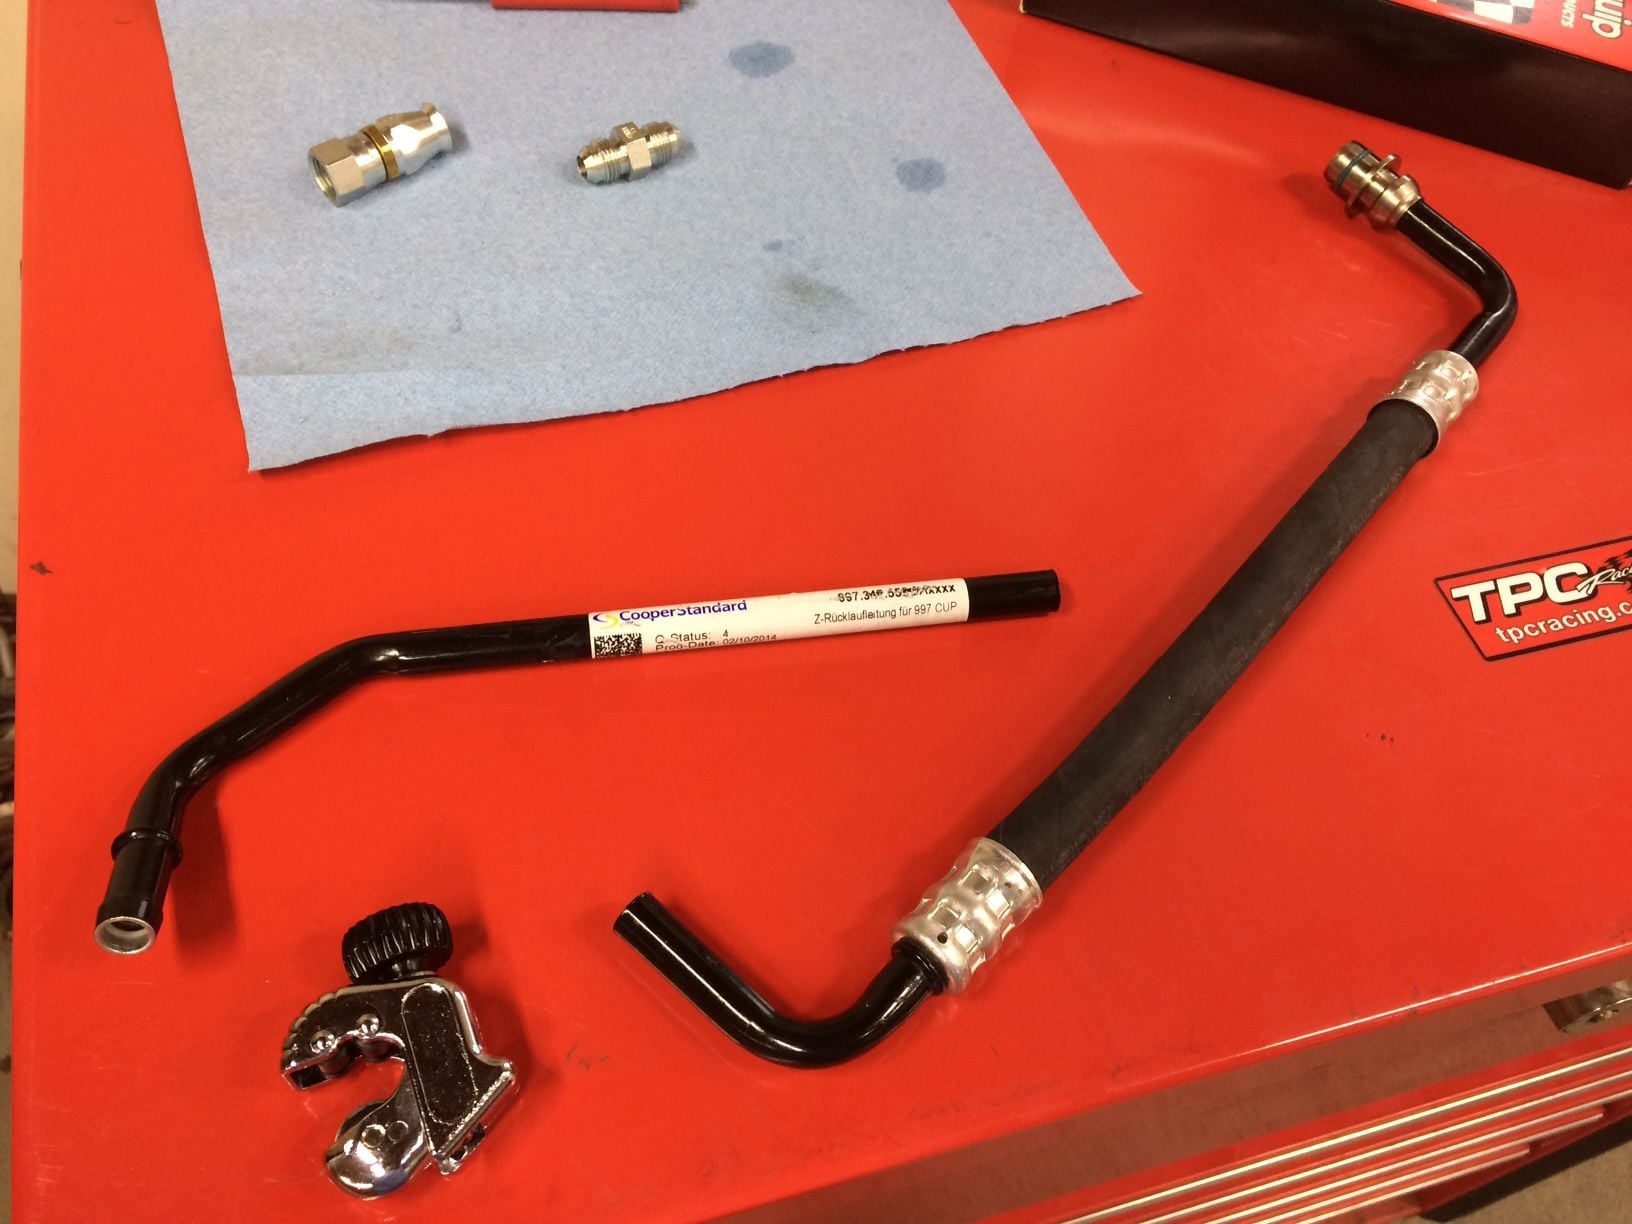
The .2 Cup pressure line got shorter after each attempt. It started out at 20-some inches long, now its down to 2.75 inch, its just the head and the compression fitting. There's no more to go after this. And I happen to have PMNA compression fitting to convert to AN-6.
I ordered the AN-6 hoses and fitting twice because the first attempt I made the high pressure hose as two-piece with the 90-degree fitting at the bulkhead and just wasn't happy with it. Again, would have worked just fine. My OCD minimizing number of junctions.
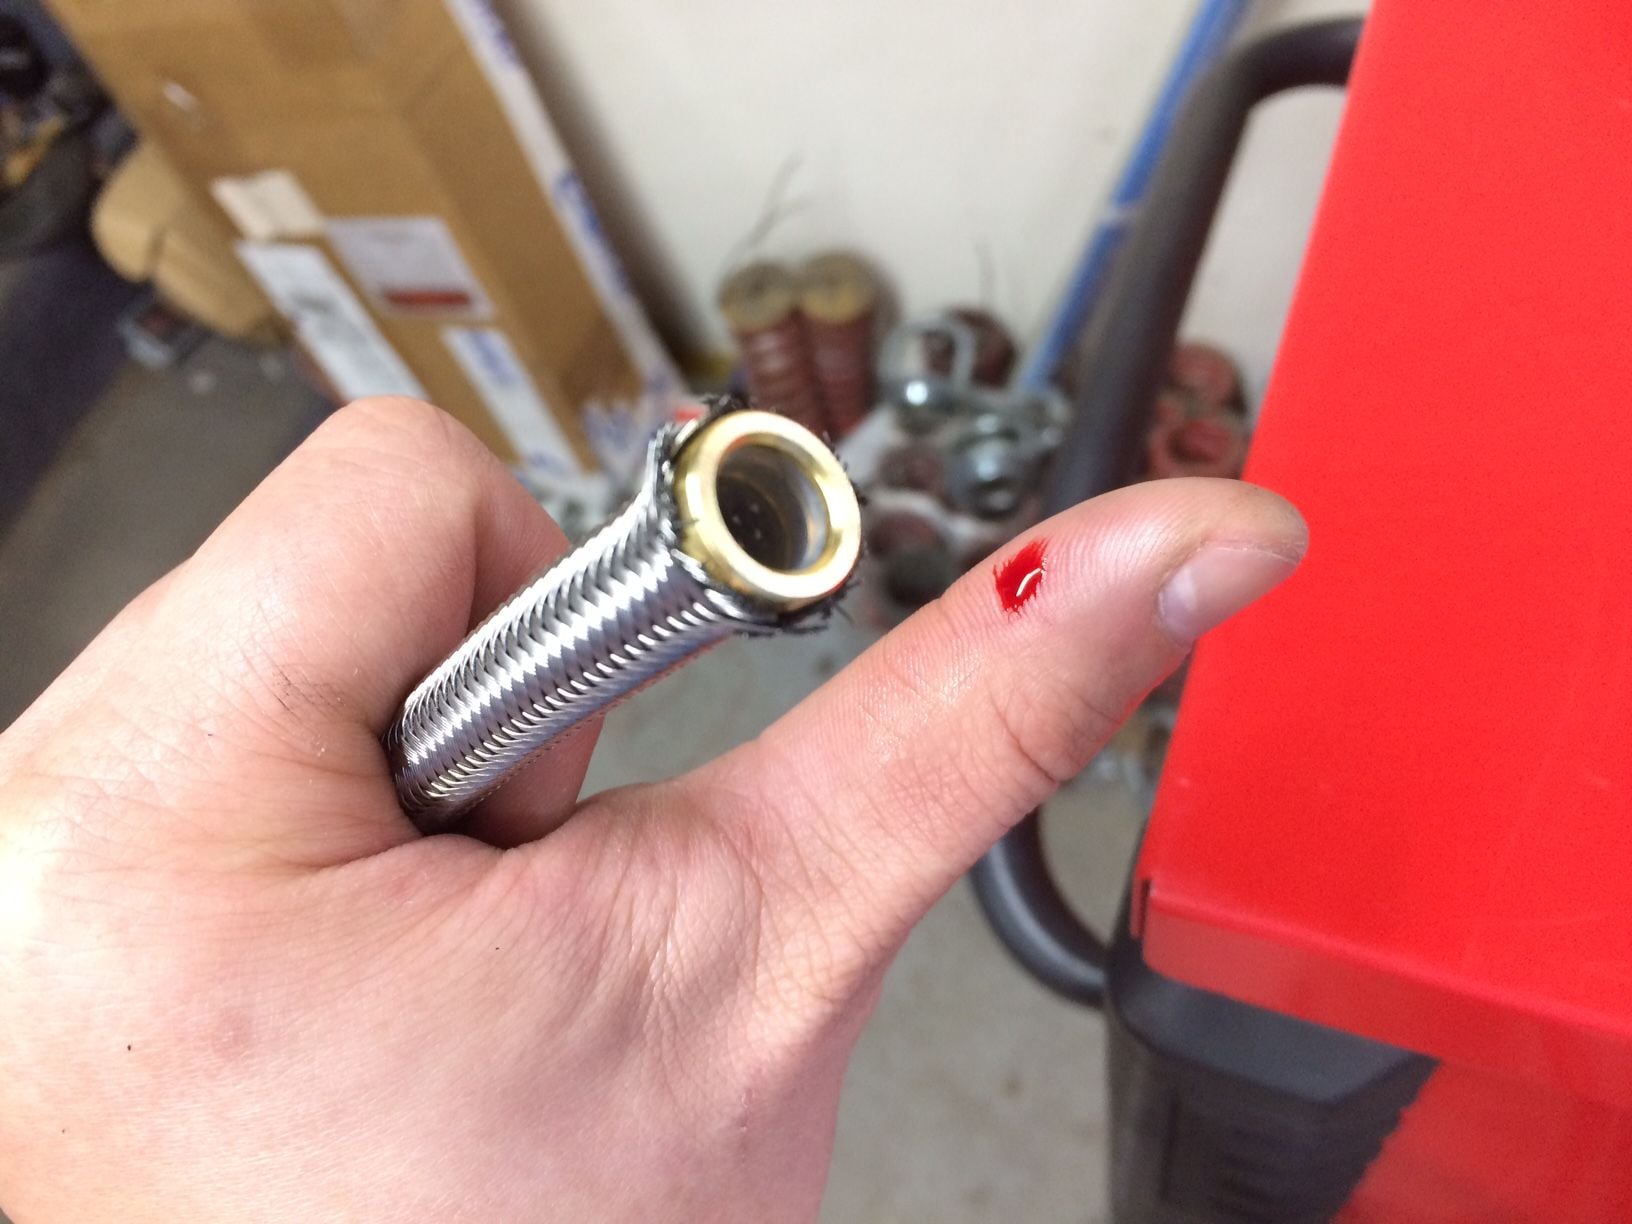
Stainless steel braided AN hoses always draws blood. No exception here.
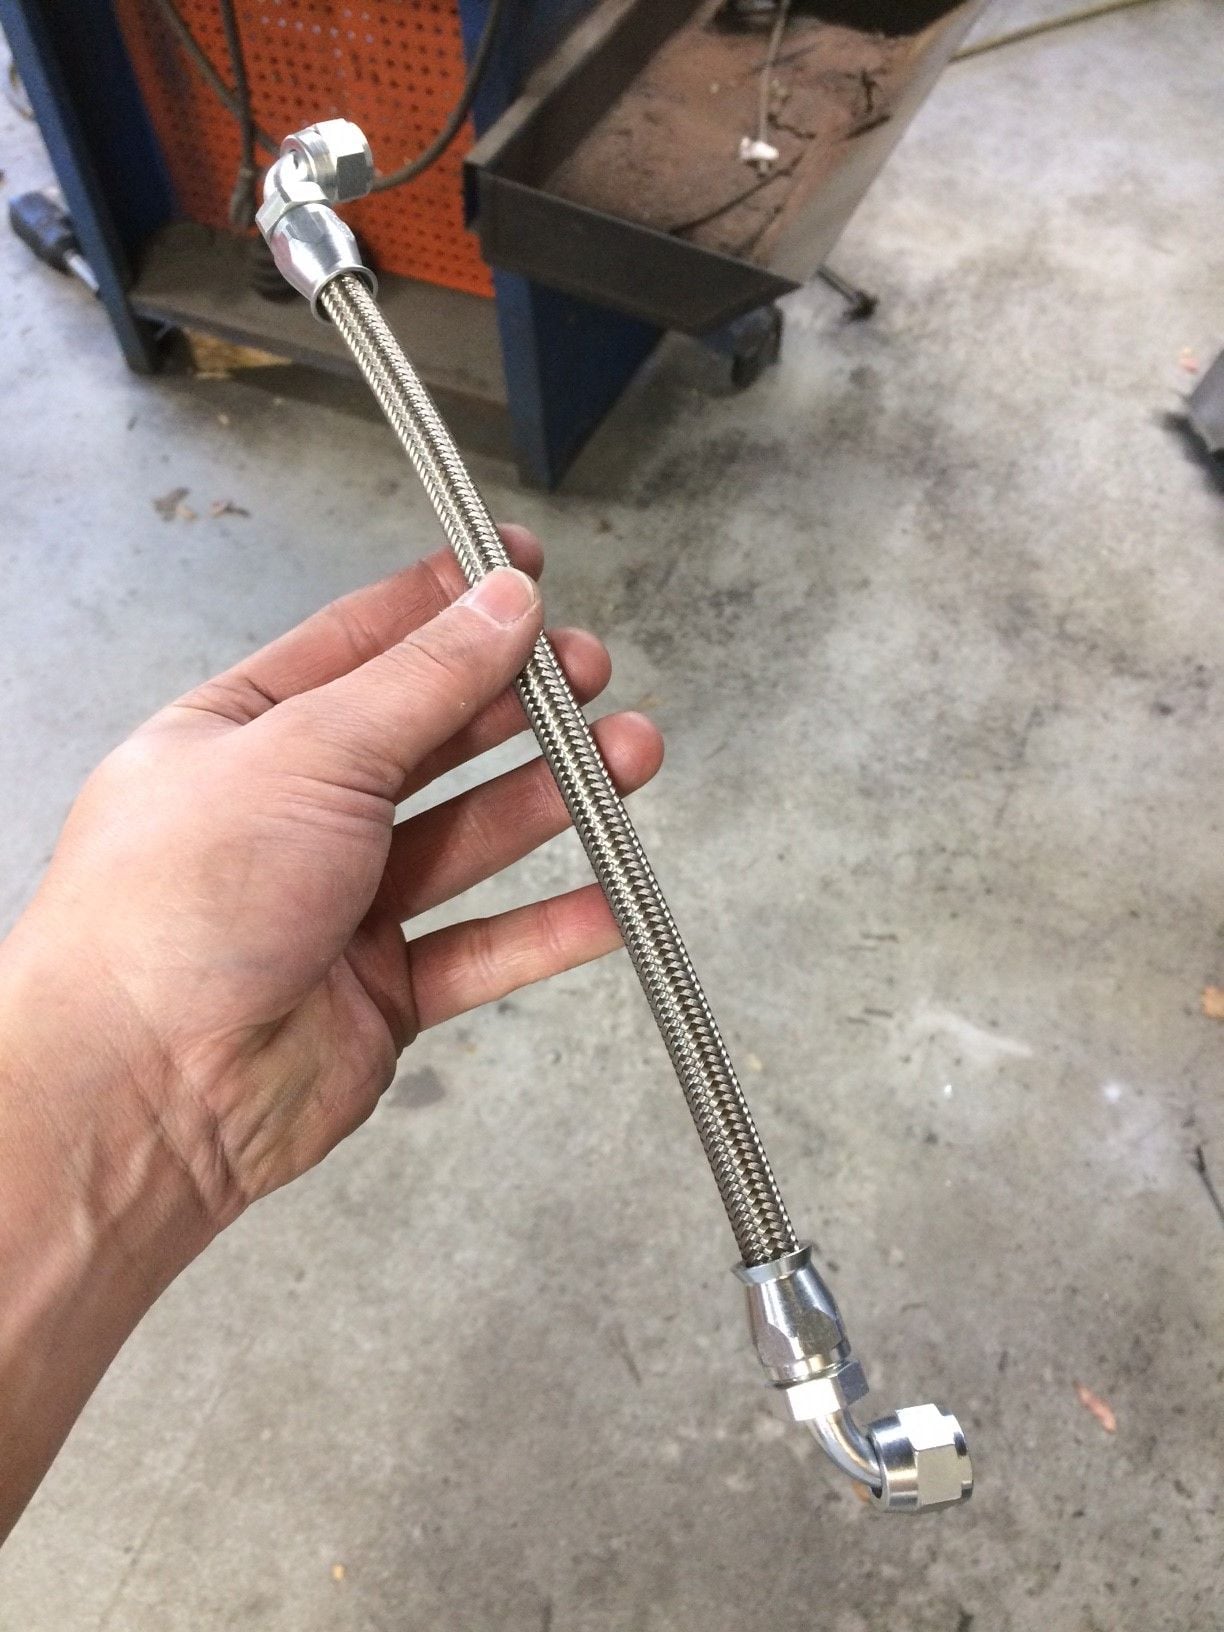
Idea 3.2, the one-piece AN-6 hose. No connections in between. AN-6 OD is 1/3rd the OD of the .2 Cup. Fits very nicely at the rack.
See the difference.
Alright, time to cut the .2 Cup lower line...
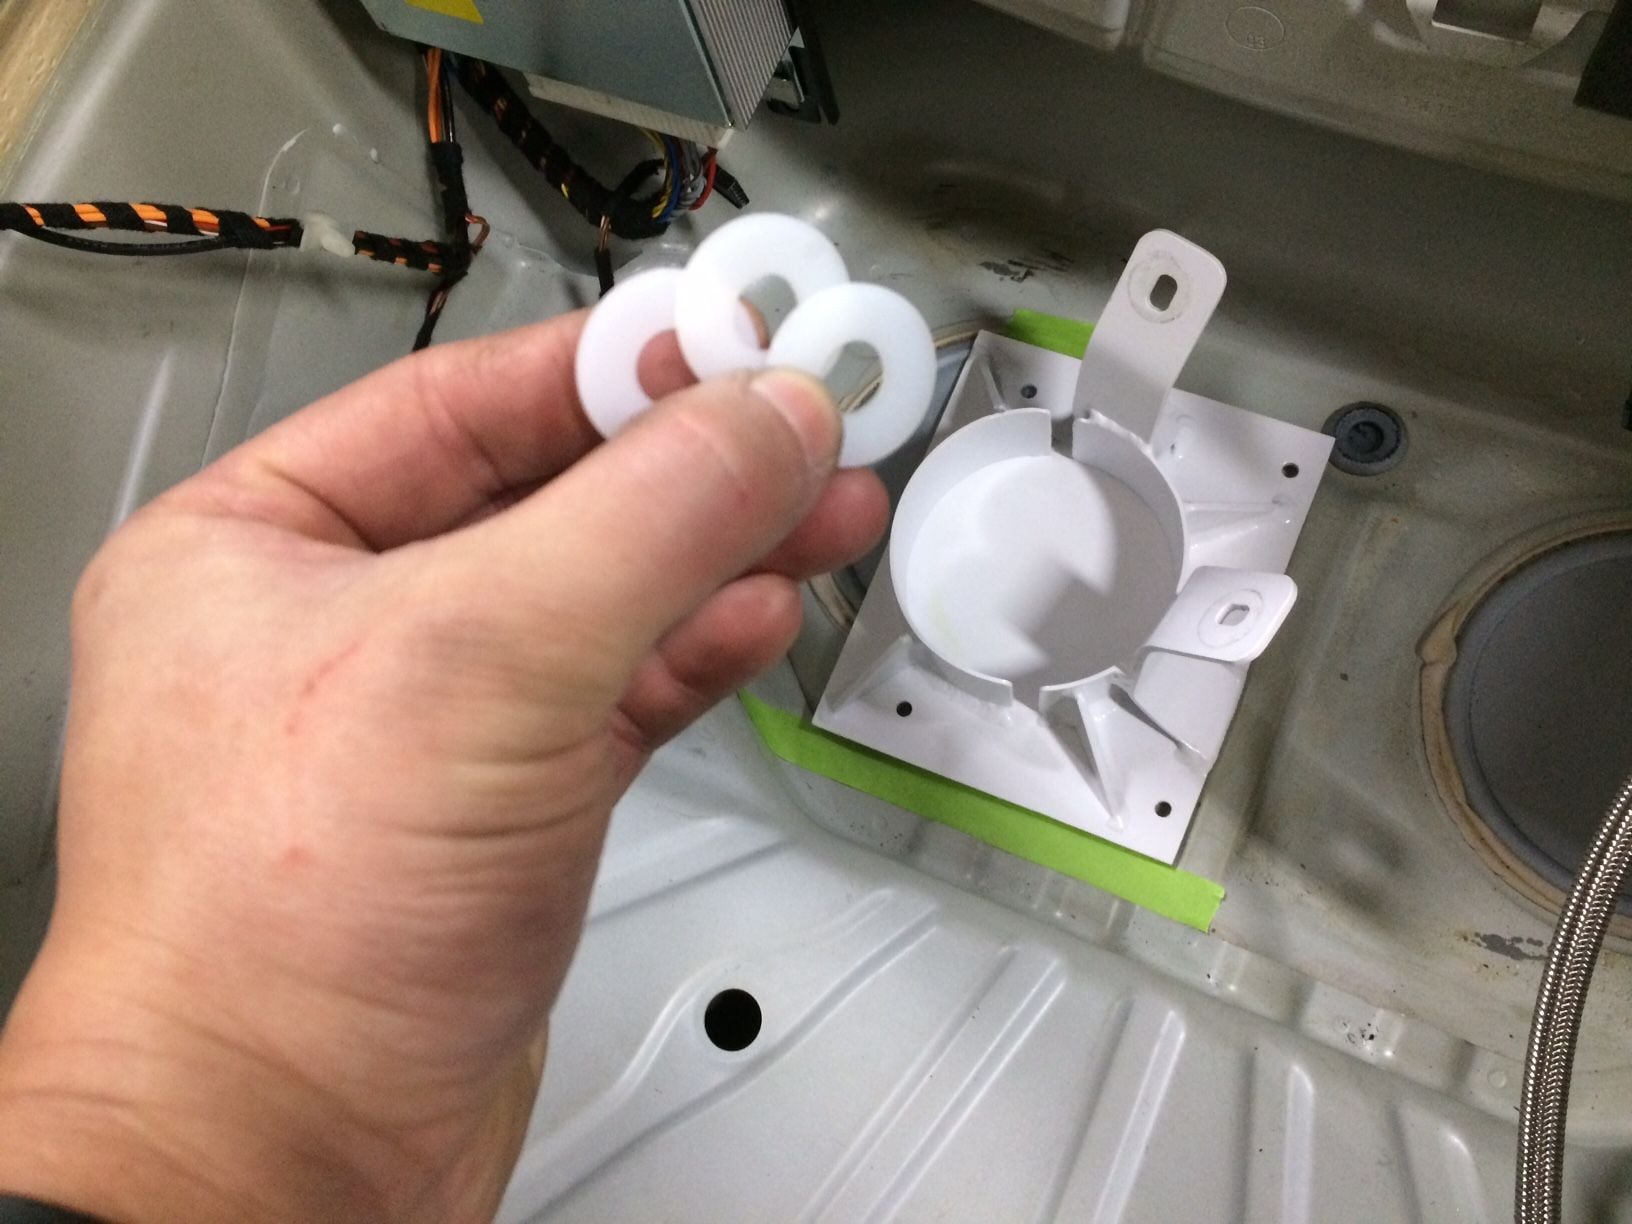
Here it is. Phase 3 completed. BTW, the rubber grommets that I got from amazon fit better than the PMNA grommets for this car.
Last edited by Tom@TPC Racing; 02-14-2017 at 11:41 AM.
Reason: *Revised drawing
Kudos for your always excellent documentation. If you are like me and don't turn wrenches it has still been interesting and an education on functions of the car. Thank you.
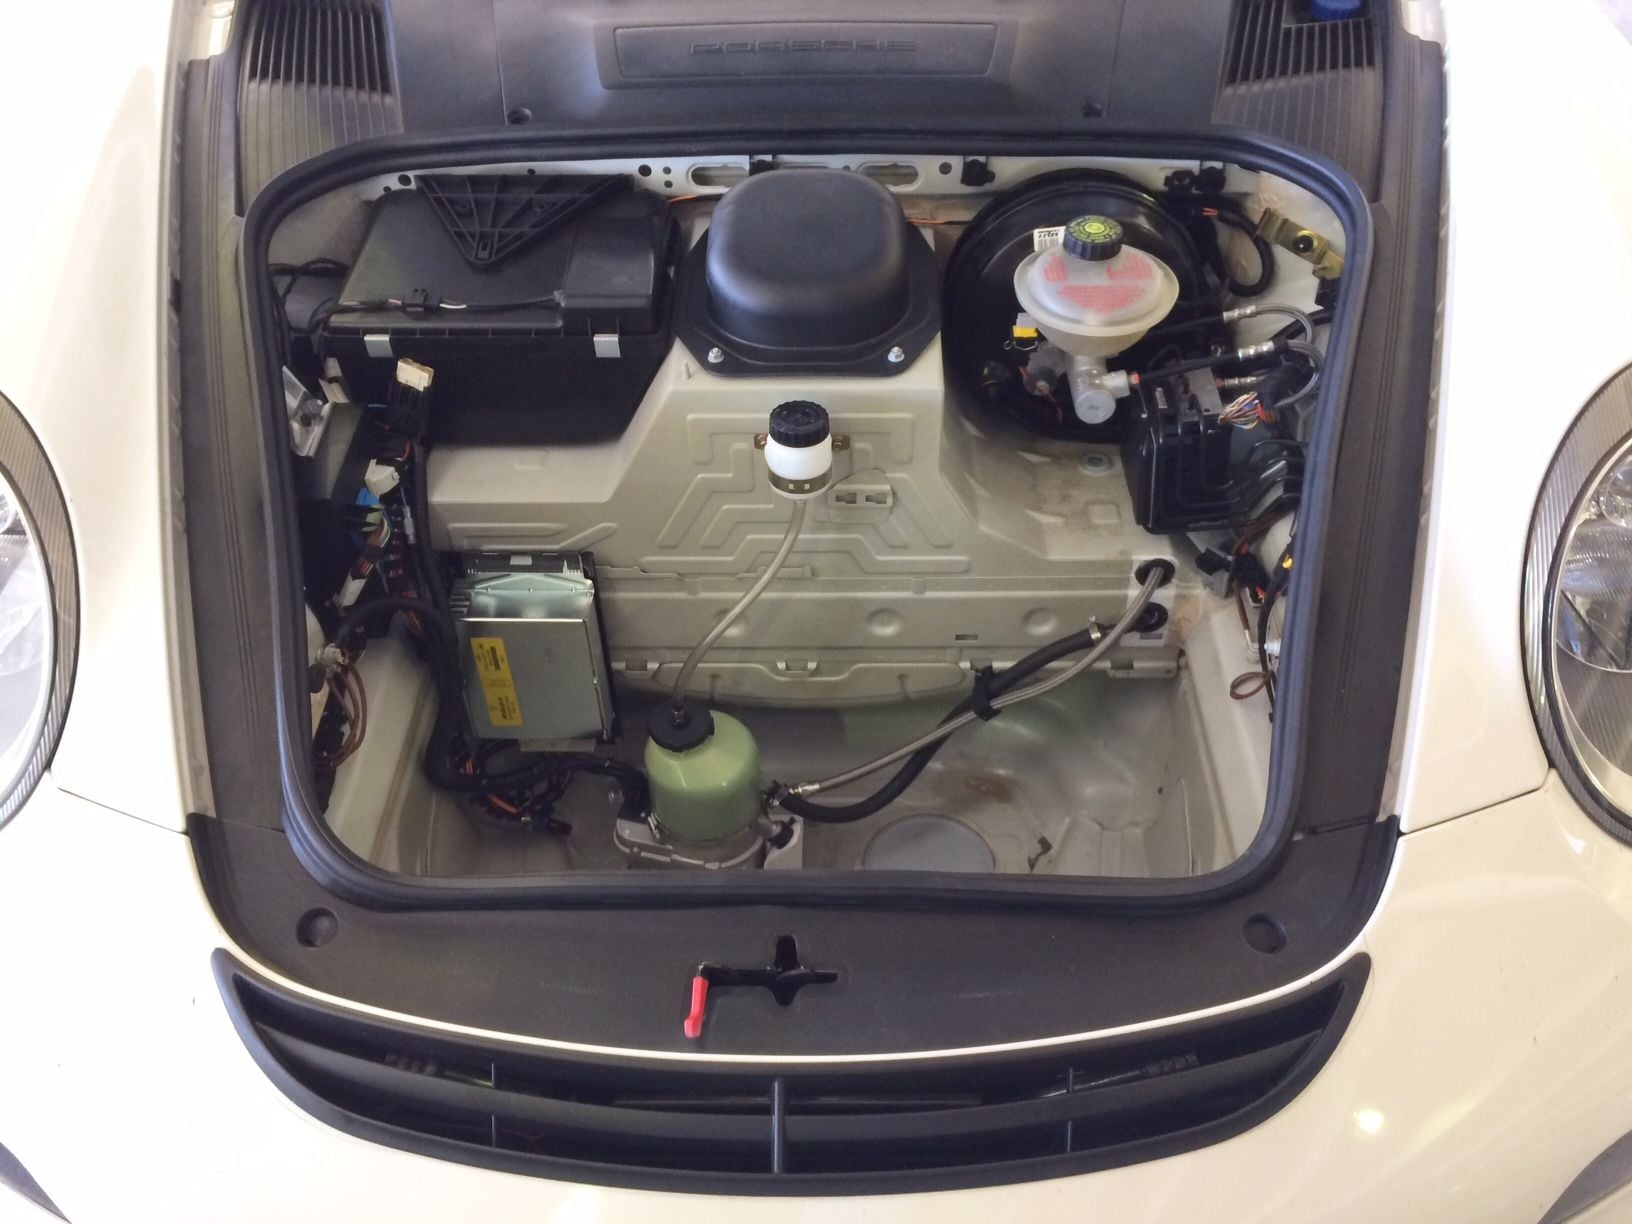
Phase 4, - Mounting the goods...4th base, Finally!
Entering the final phase of this project, I must admit have questioned myself during the previous phase with line challenges: Why am I doing this? Will it make a difference at all on a street car? Will I regret it and want to convert back? We all have doubts some times, I guess. But thrill of the achievement far overcome the doubts. And then there's the whole "passed the point of no return" cliche. Well, lets get on with it.
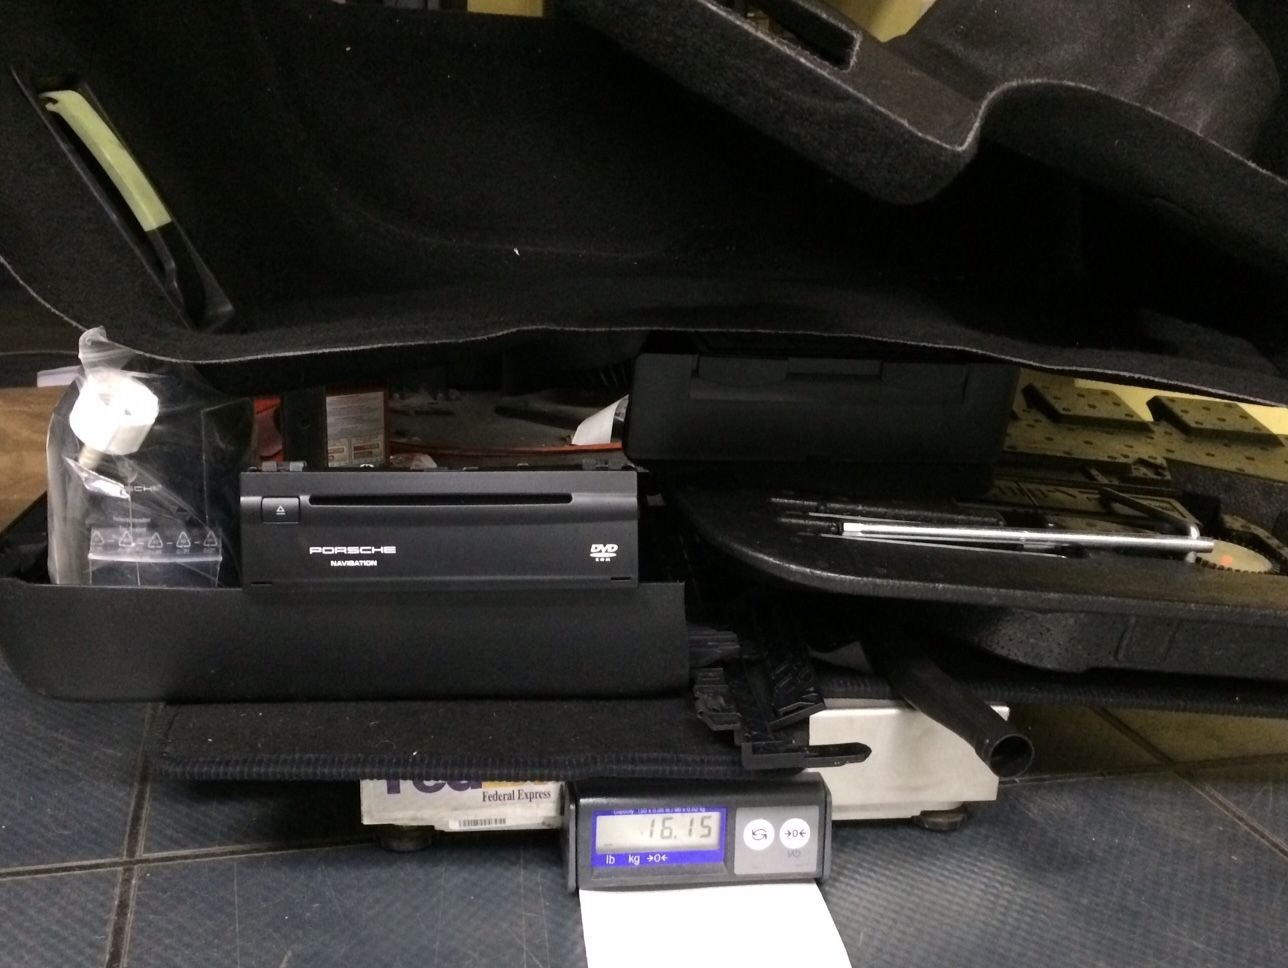
Starting with something easy, but tedious and dull- Removing the useless foam and glue residue. Street cars don't have proper paint in the trunk to match the exterior, instead they have a very thin layer of primer which by rubbing with Simple Green cleaner will wipe off the primer! Goof Off cleaner will wipe off the primer as well. After finding this out on certain spots I then used a heat gun to remove most of the stuff, then chased it with water-diluted brake cleaner. No metal scraper, plastic only.
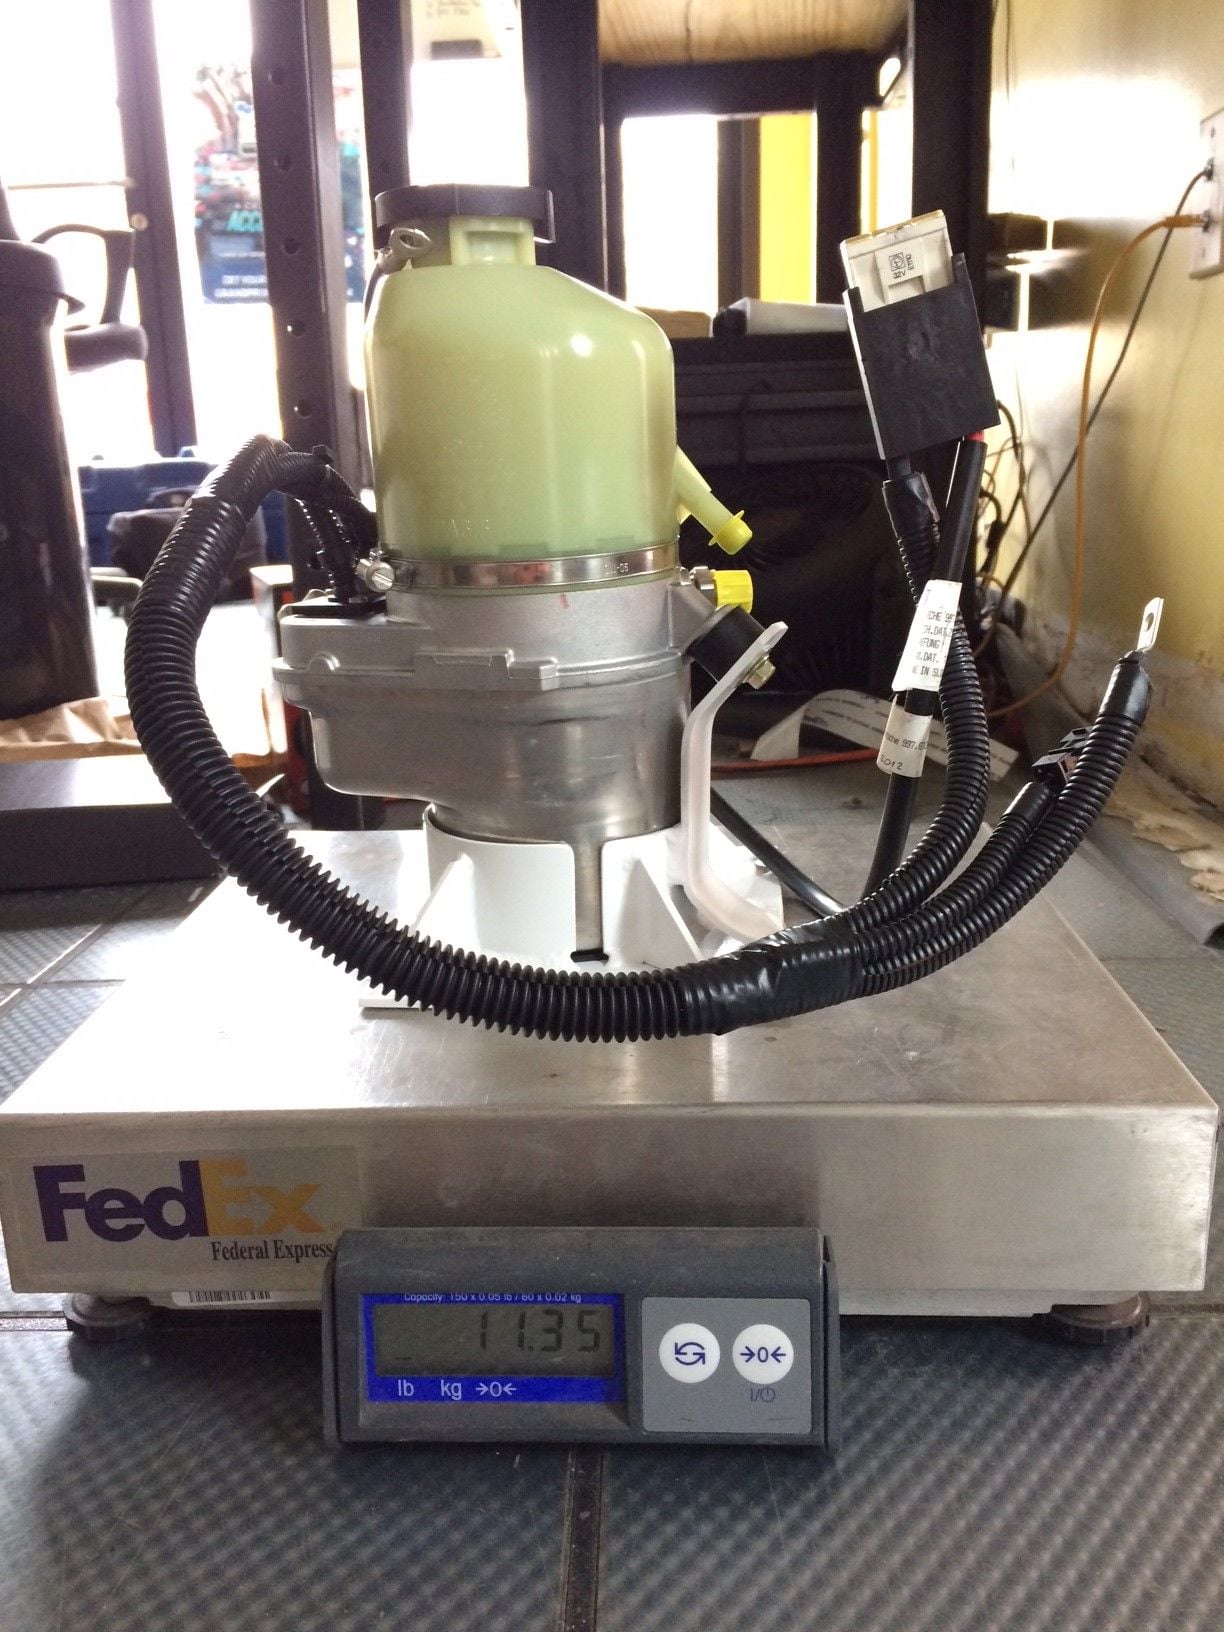
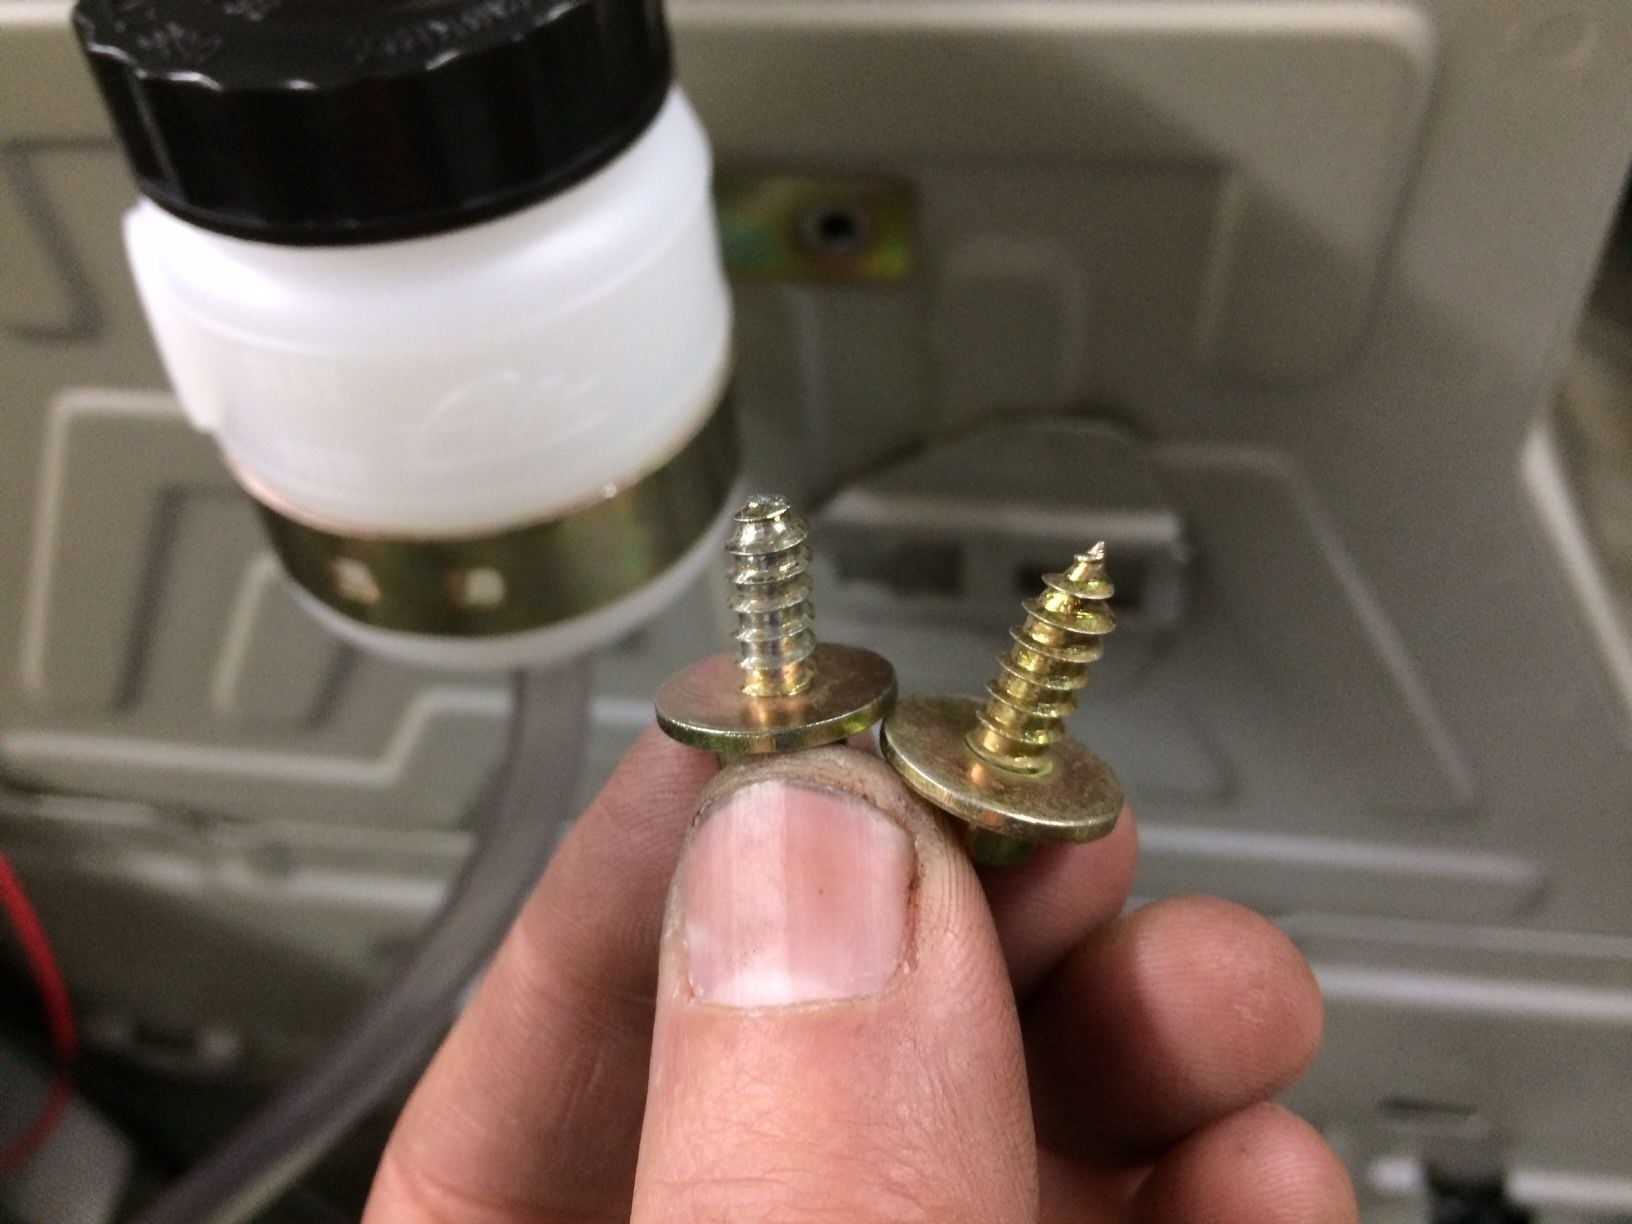
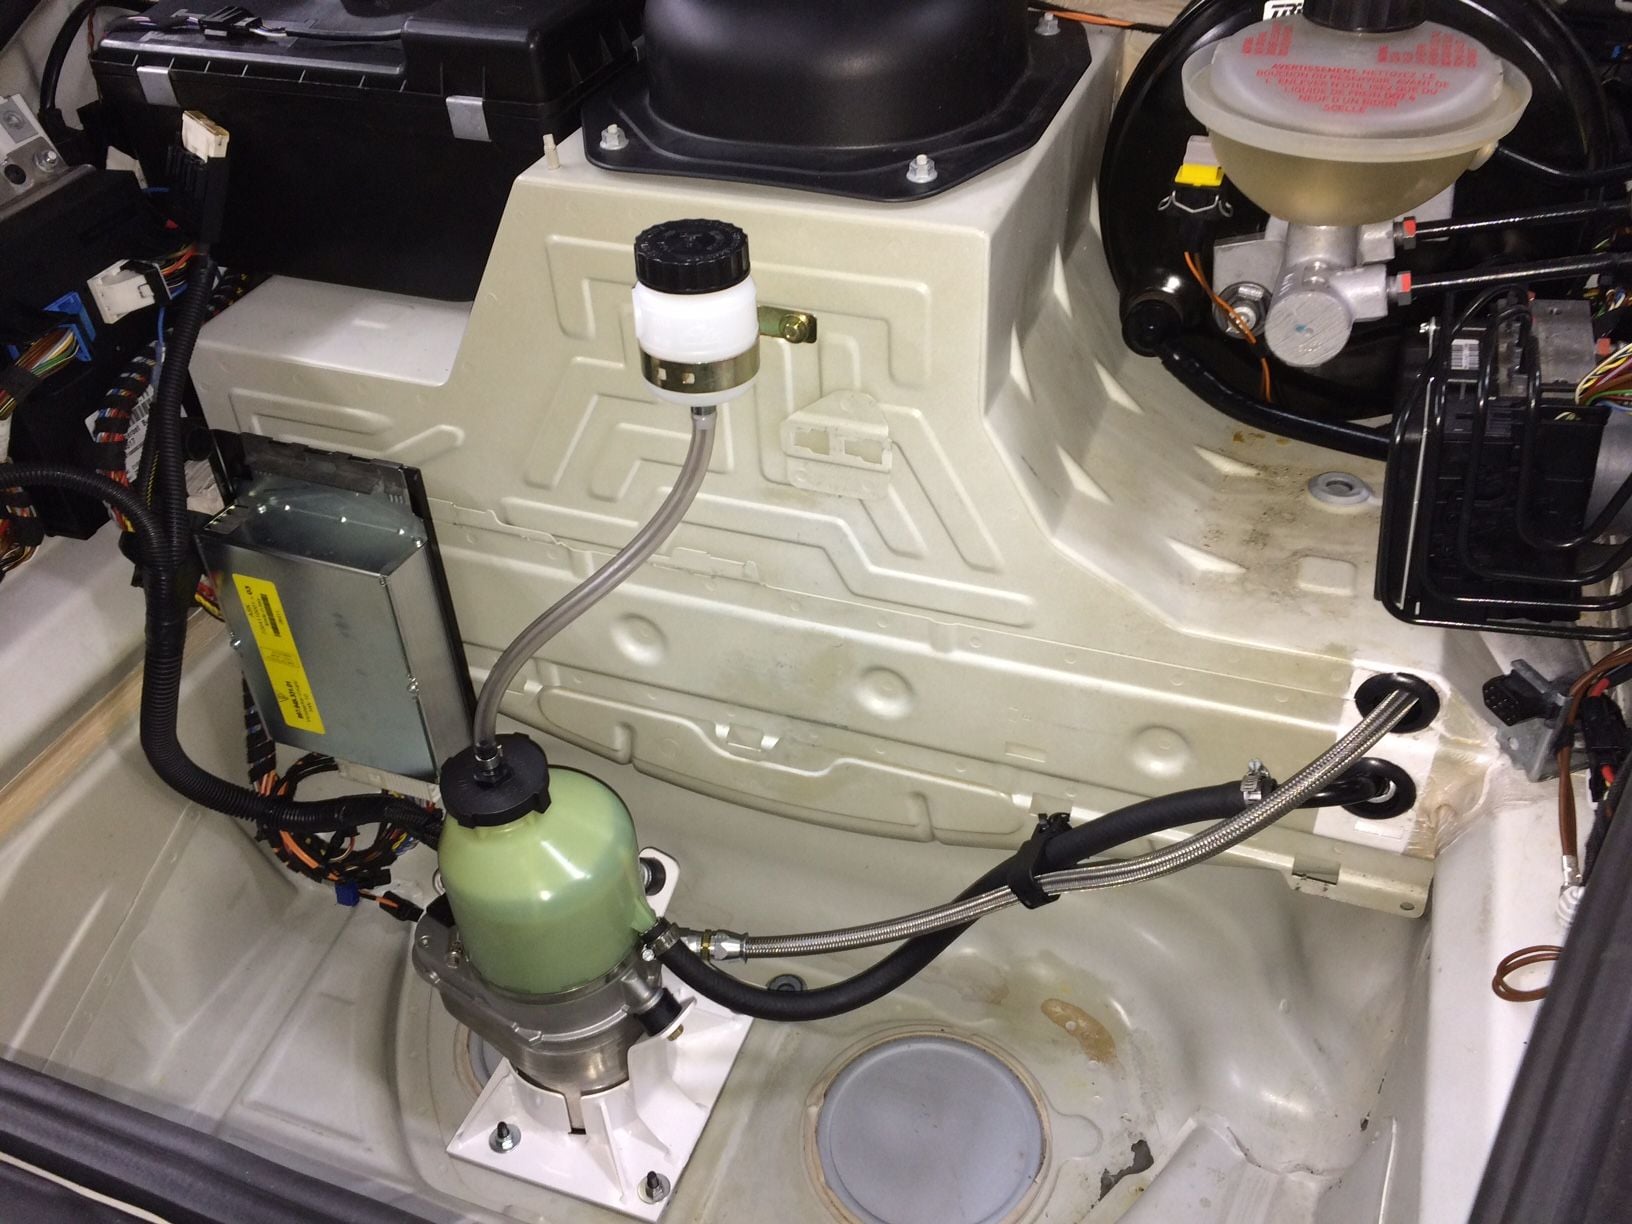
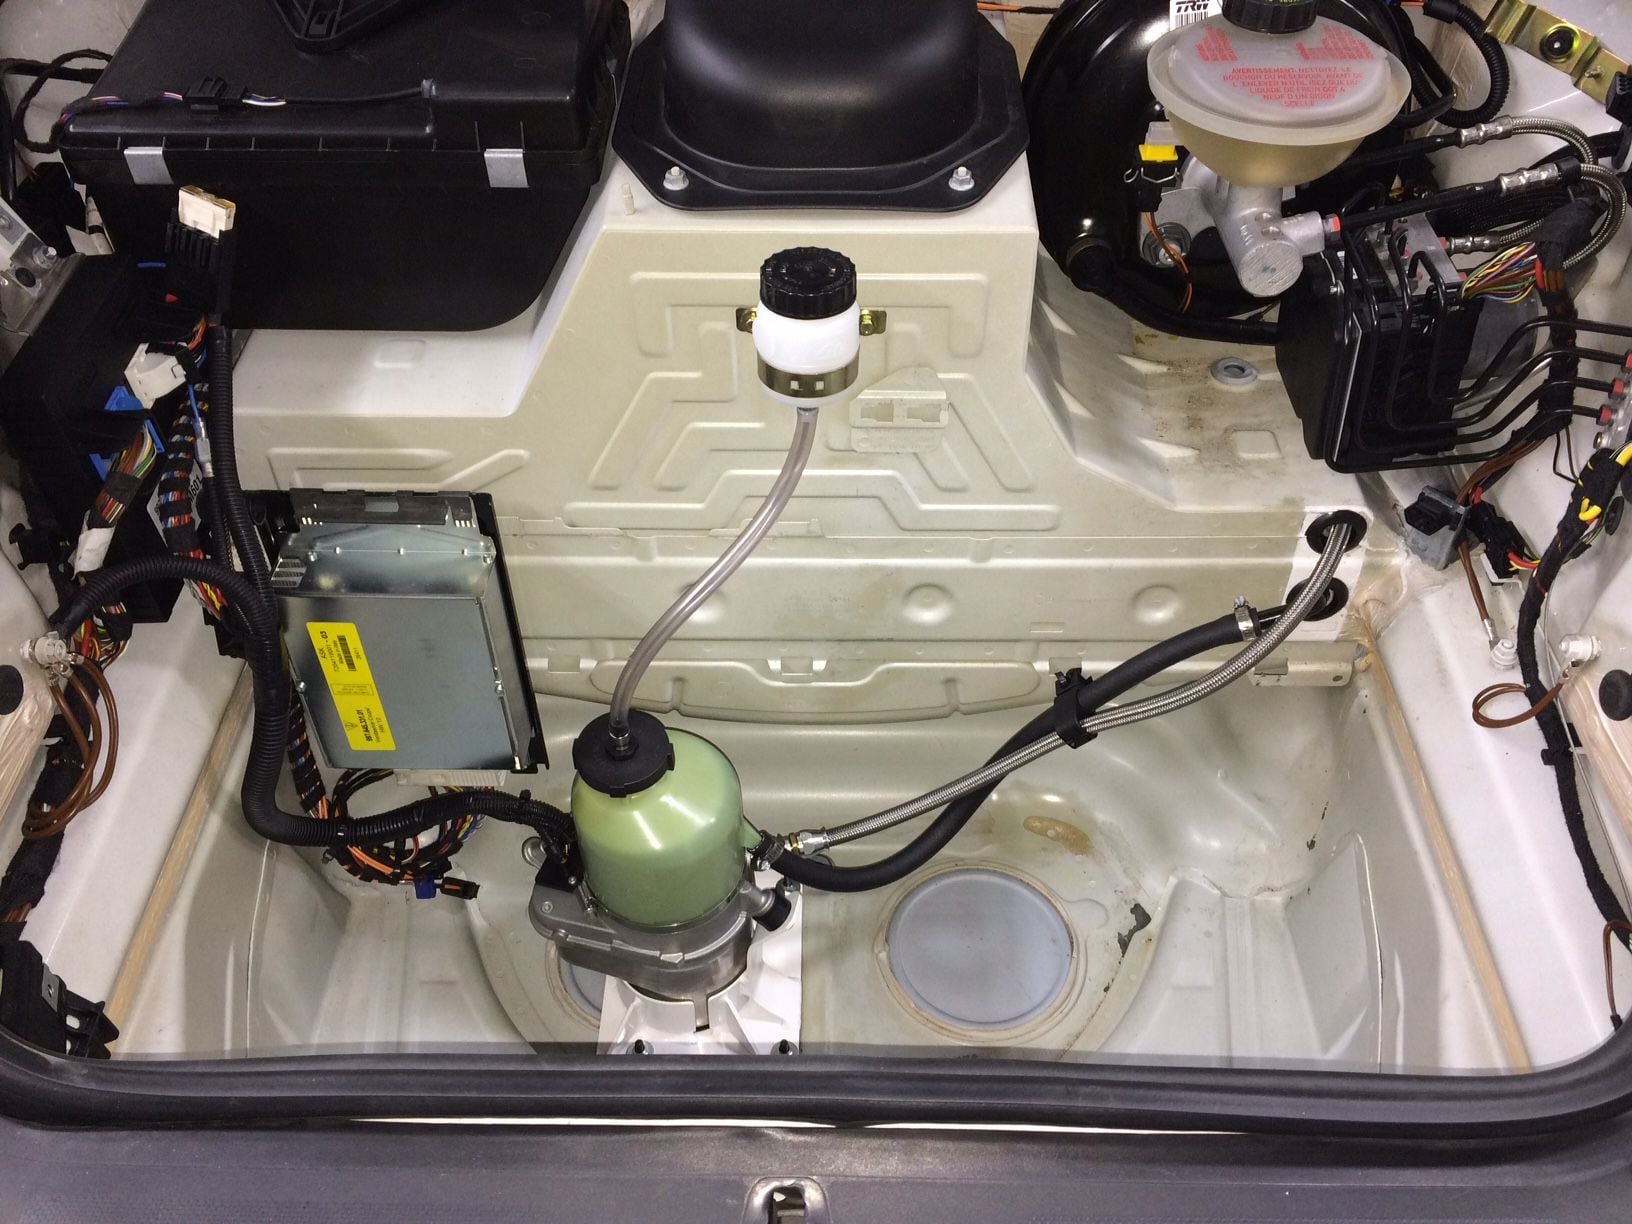
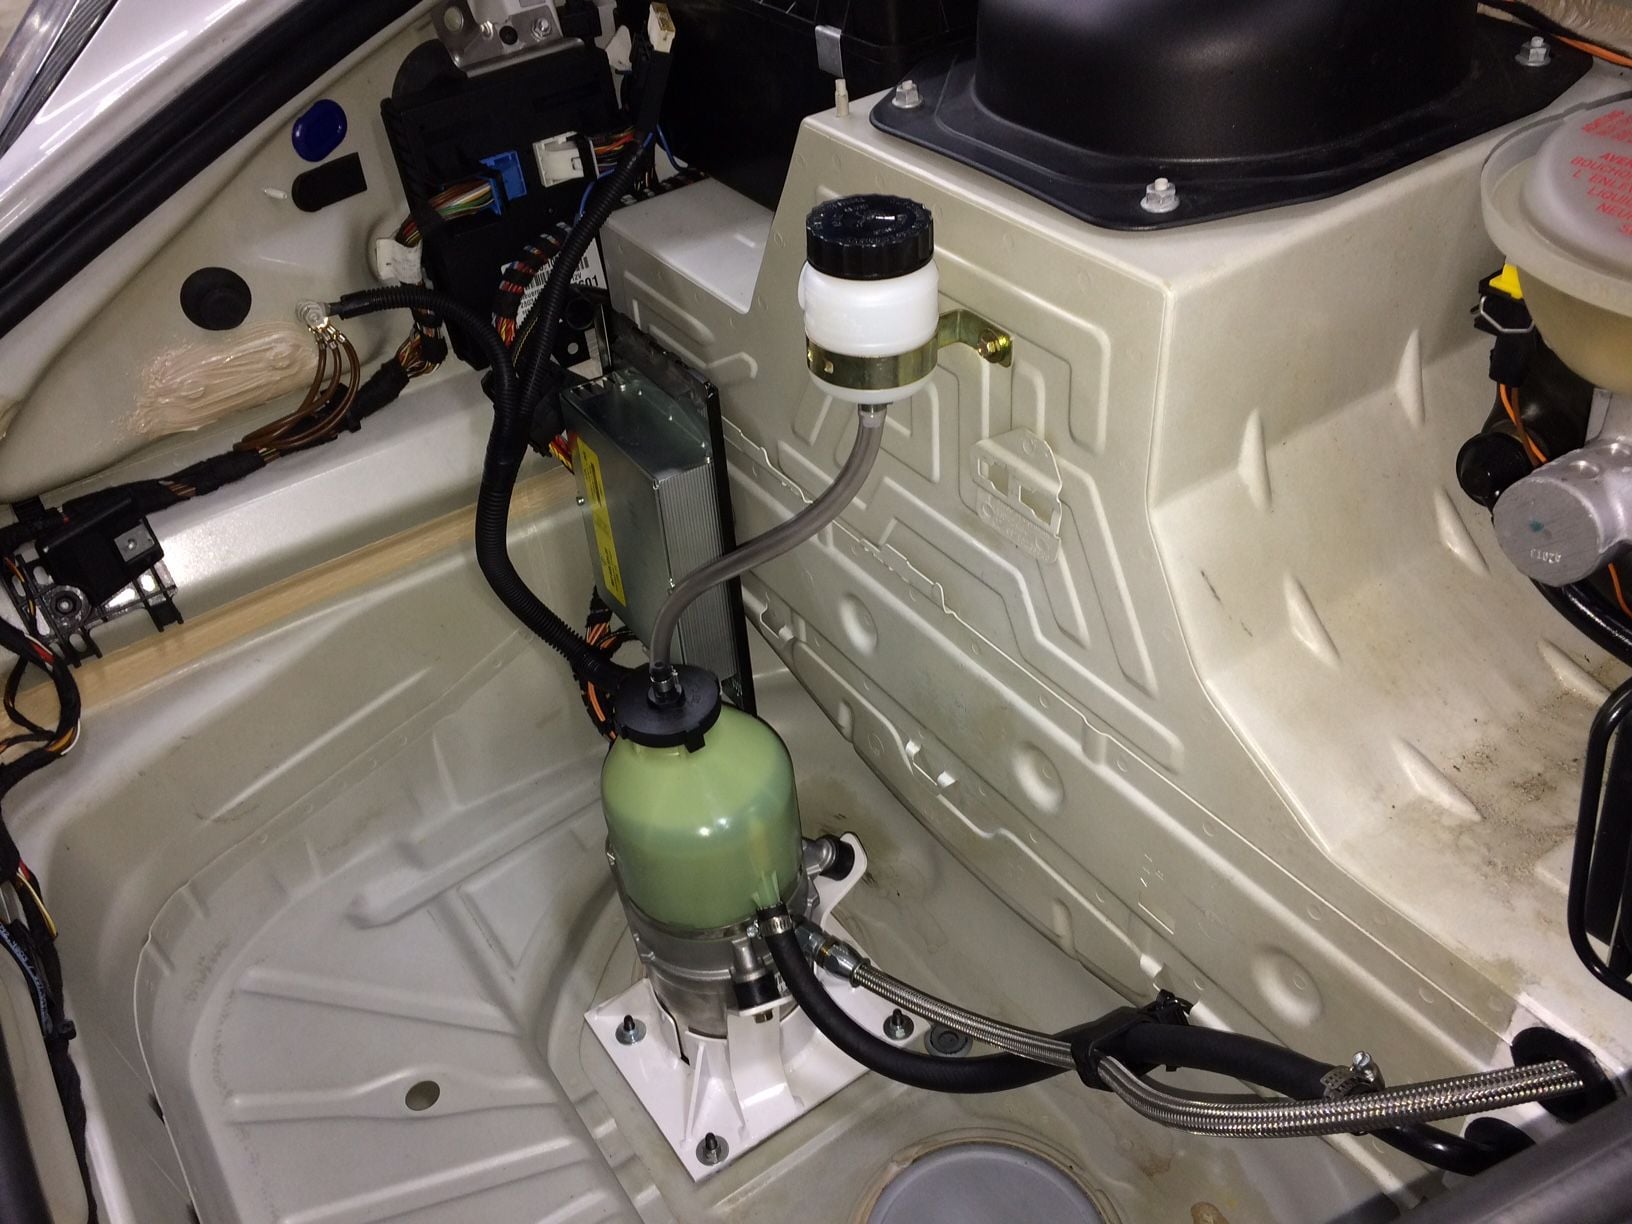
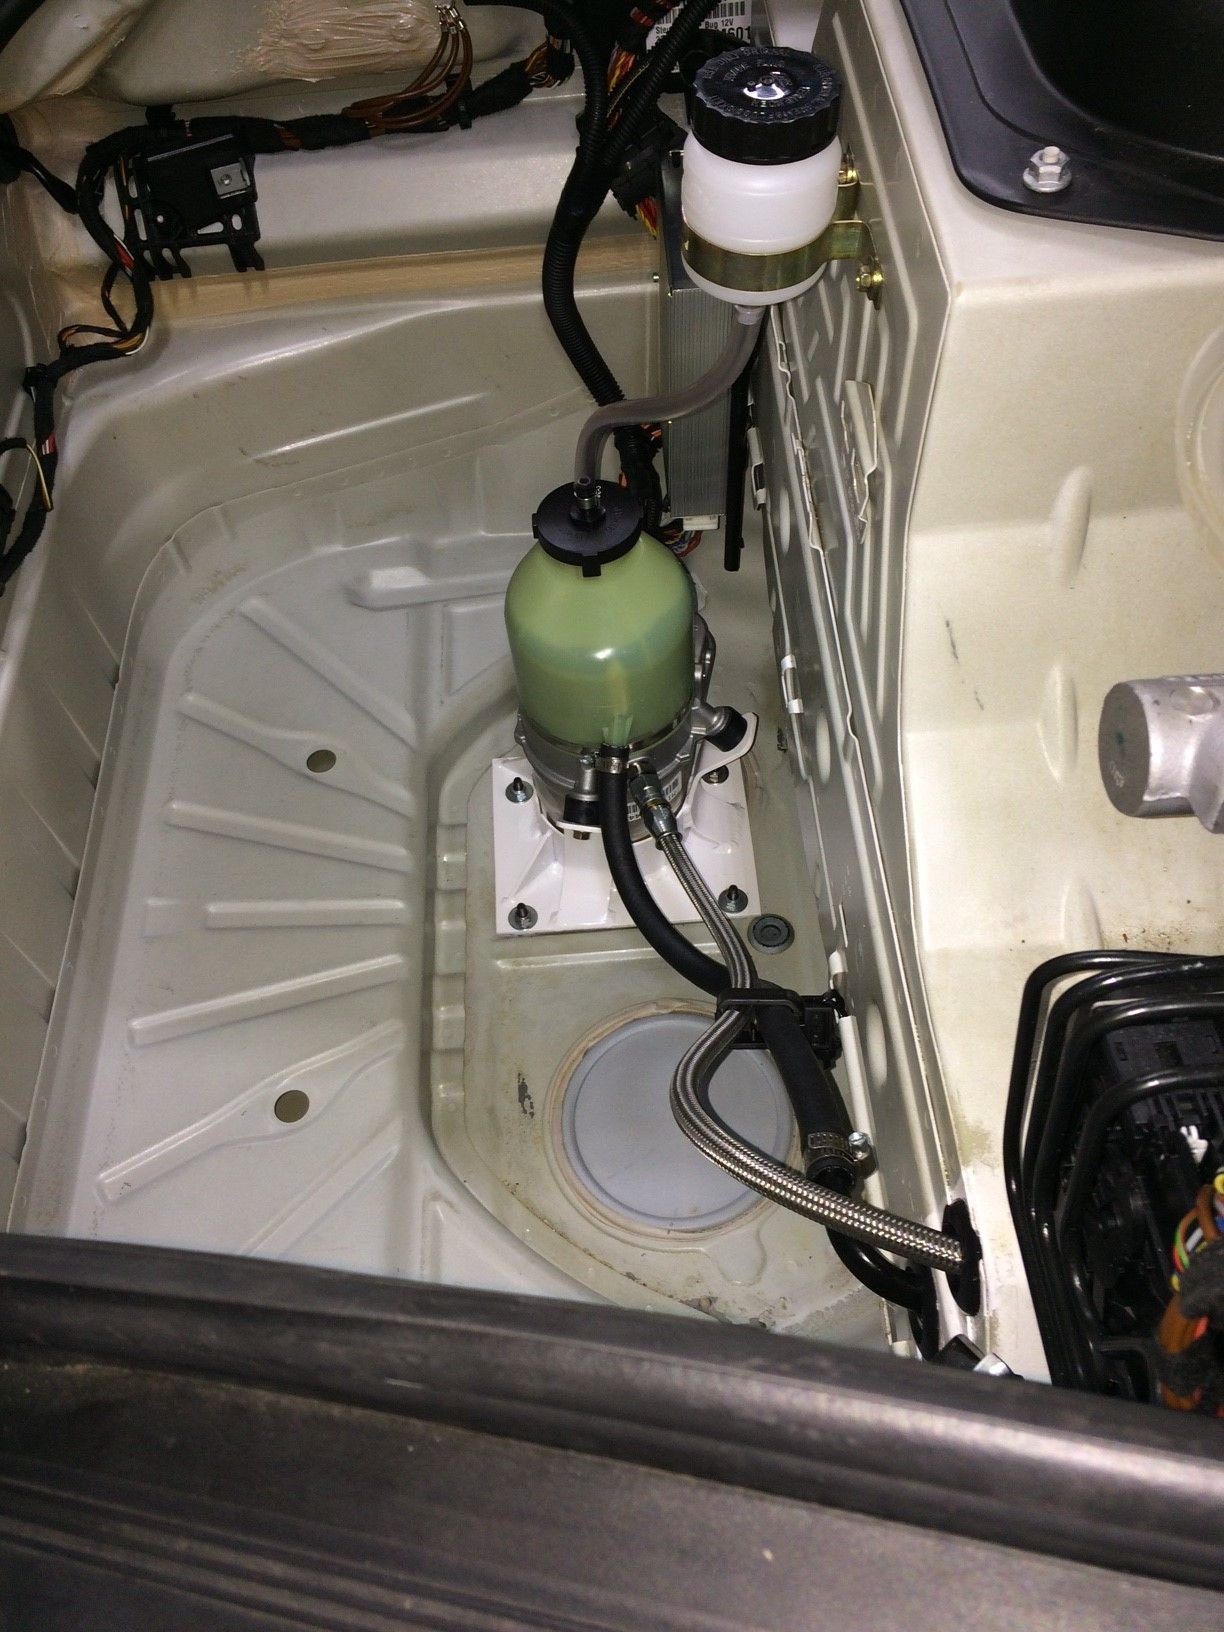
The custom made mount is an overkill design. But only weights 0.75 pound. I made the floor plate of the bracket bigger than necessary for extra margin of stability. Since the floor of the trunk isn't exactly flat, I used an assortment of nylon washer as wedges to keep the floor plate flat and stable, and the nylon "might" reduce some vibration.
Special ordered grade 10.9 Wide Pan Head bolts were used to distribute the load to the trunk floor better.
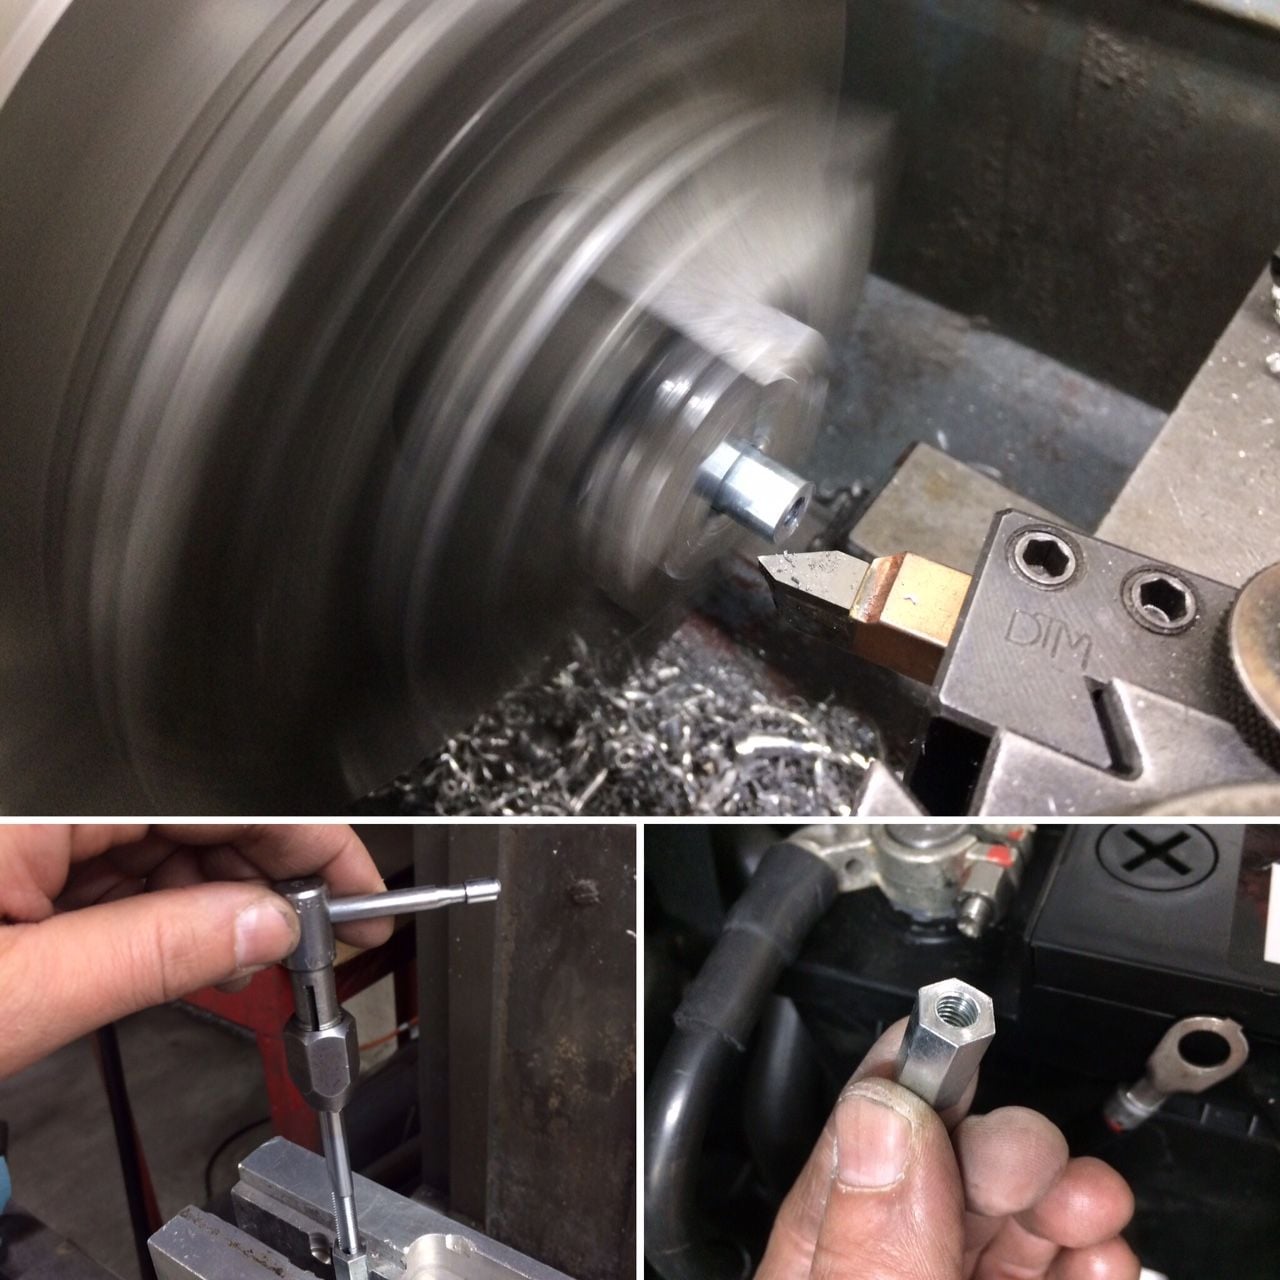
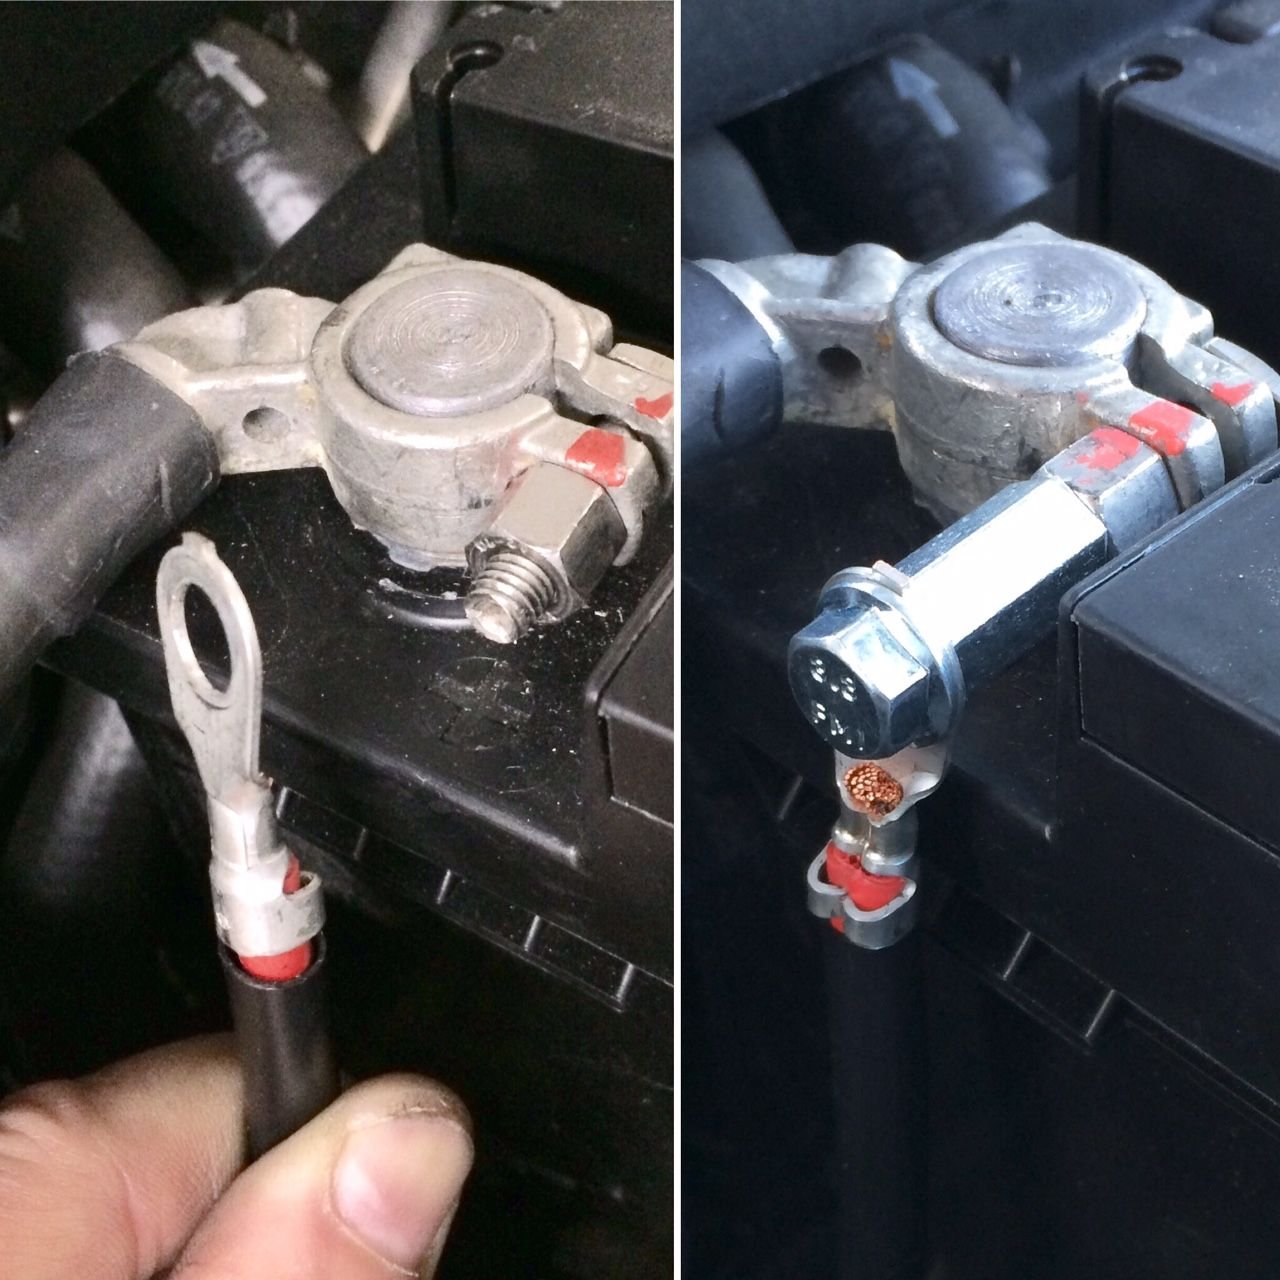
Another setback, this one is minor, on the main power wire of the pump to the battery, I didn't want to bend eyelet so I whipped up an extension from metal hex stock.
The tip of the screws of the expansion tank is little close to the plastic gas tank, I think it'll be fine but I shaved off the tips of an extra 2mm of clearance.
At last-
Its not the 997.2 Cup look, but I AM proud of it when I open the trunk and hear it run. Here a video of the pump running. Sounds like a jet engine powering up.
My summary of the project and driving impression coming in the next post.
Hey Tom,
Going back to your hydraulic line routing diagram...if you had drilled the holes lower, instead of where the cup car has the holes, would it have been easier to route the lines through the frunk wall towards the steering rack?
Hey Tom,
Going back to your hydraulic line routing diagram...if you had drilled the holes lower, instead of where the cup car has the holes, would it have been easier to route the lines through the frunk wall towards the steering rack?
Yes. I wrote this in post #617 and will elaborate when I write my summary. "PS- For those who are wanting to do this with factory .2 Cup lines, may I suggest drilling the holes on the body BELOW the street car gas tank seam! There is enough room to drill lower. If I do another one I would make the current bottom hole the top hole. This will make this MUCH easier."
Entering the final phase of this project, I must admit have questioned myself during the previous phase with line challenges: Why am I doing this? Will it make a difference at all on a street car? Will I regret it and want to convert back? We all have doubts some times, I guess. But thrill of the achievement far overcome the doubts. And then there's the whole "passed the point of no return" cliche. Well, lets get on with it.
...
The Installation Summary
I spent a total of 43 hours on this project from start to finish, this includes making the bracket from sheet metal, and of course includes all the ideas/attempts that didn't make the cut. I wanted to clarify that I could have gotten the whole thing working by slamming it together in less than one-quarter of that time and it wouldn't function any differently than spending the full 40+ hours. Which boils down to three-quarter of that time was spent making the end product look pleasing and feel satisfactory for my very own personal preference. I am stating this because this is very cool mod, and disclosing to those who might want to do this mod that it won't take 40+ hours if you learn from my mistakes. Learning from my own mistakes, here's what I'd do differently on a customer's 997 GT3 street car:
1. Cut the two holes in the bulkhead lower than the holes on a Cup car. By making my current lower hole the higher hole that'll route the hoses almost straight out and well below the street car gas tank external seam.
2. Don't buy the .2 Cup hoses. They could work by cutting the hole like 50% bigger but the hoses might still need to be cut.
3. The .1 Cup hoses can work.
4. Its even better by transferring OE proprietary fittings off of the OE street car steering hoses to custom hydraulic hoses made by an industrial hydraulic hose shop. Or make your own AN-6 stainless steel braided hose.
5. Try to avoid the use of compression fittings(aka Ferrule compression fitting or compression coupling fitting) if possible. Also try to avoid mixing mating material such as aluminum fitting to steel fitting because there's the potential of damaging the softer metal to get the harder metal to seal. After I had the pump running to pressurize the rack for the first time, got a little drip, drip from the compression fitting so I tightened it 1/8th turn more. This stop the leak. The next time I ran the pump, right next to the compression fitting is a female aluminum AN-6 fitting that connects to the female steel AN-6 fitting that seeped a little so I tightened it more with fear of stripping the aluminum. Then the third cycle I had to tightened the compression fitting another 1/16th of a turn. The compression fitting is a one-time use only item. Had I striped it out before sealing the leak then I'd have to spend another 300 bucks and more time.
6. Don't waste time looking for Ignition Switch ON 12-volt wire in the trunk to trigger the pump(unless you want to tap an ABS wire, which I advise against). All other power wires in the truck are either Battery 12-volt or Accessory 12-volt. I know because I spent an hour testing every wire expect for ABS. Trust me, its easier just to wire to the fuse box.
A few people have asked me about it, so TPC might offer a kit that would streamline the installation by providing a bracket, template for cutting the holes, proper length hoses. We'll see...
The User's Experience
The questions to myself during the challenging and frustrating times were- Why am I doing this? Will it make a difference at all on a street car? Will I regret it and want to convert back? After driving with the Cup electric steering pump mod I can definitively answer these questions - Why? The normal boring reasons- better weight distribution and might produce more engine power...bla bla bla...mostly I did it because it seemed like a cool mod, like who doesn't Cup car parts in their street car. Now, every time I open the trunk I have something that I am proud of and that not every GT3 street car has. Makes my car special. The jet engine-like sound from the pump is super cool! Yet, not loud and obtrusive. When I turn the ignition ON, I welcome the jet sound and savor it for a moment before starting the engine. Ahhhh. Feel the difference? I feel my car accelerates a little bit faster and the acceleration feels especially "crisp" or lively during initial throttle application when coming out of a turn(aka getting the jump), probably because the parasitic loss at the engine is gone. The unexpected and extremely pleasant surprise is how good the steering feels. The amount of power assist is now based on the current steering load instead of whatever the engine rpm is that's driving the steering pump when making a turn. The electric steering pump adjust its motor speed for the current steering load, not relative to the engine rpm. Like a DSC for steering! Love it! Regret and convert back? Not a freak'n chance!
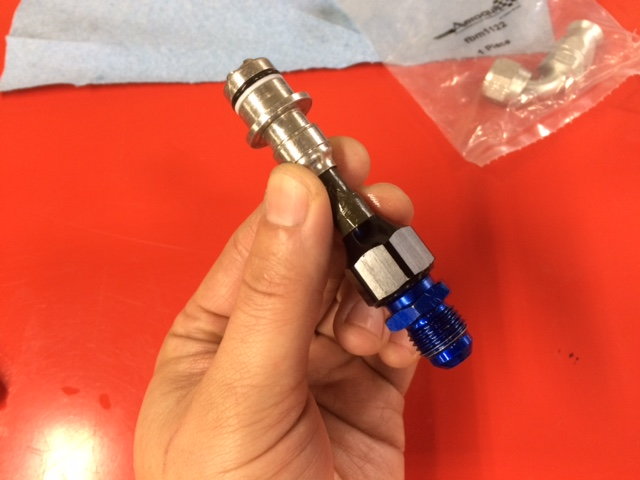
Random Outtake Photos w/ Commentary Aeroquip AN-6 hose and compression fitting combo is a very nice fit.
The brass Ferrule nut being compressed and purposely deformed is what seals over 1000psi of hydraulic pressure. Amazing.
Is a 250-dollar hose worth 125 each when cut into two? LOL
Front section of OE steering lines removed.
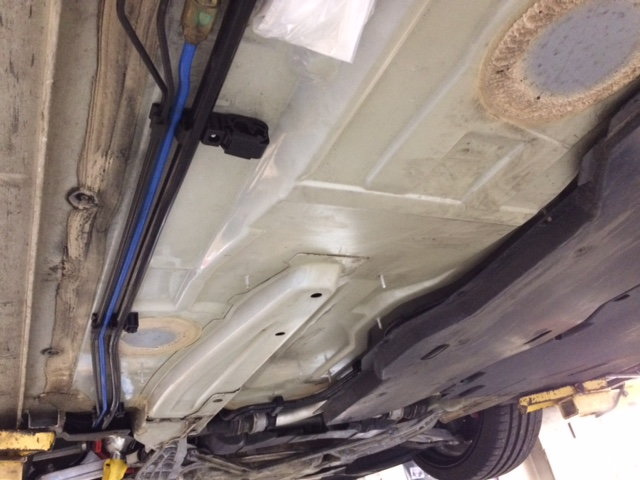
The under carriage looks cleaner w/o the lines.
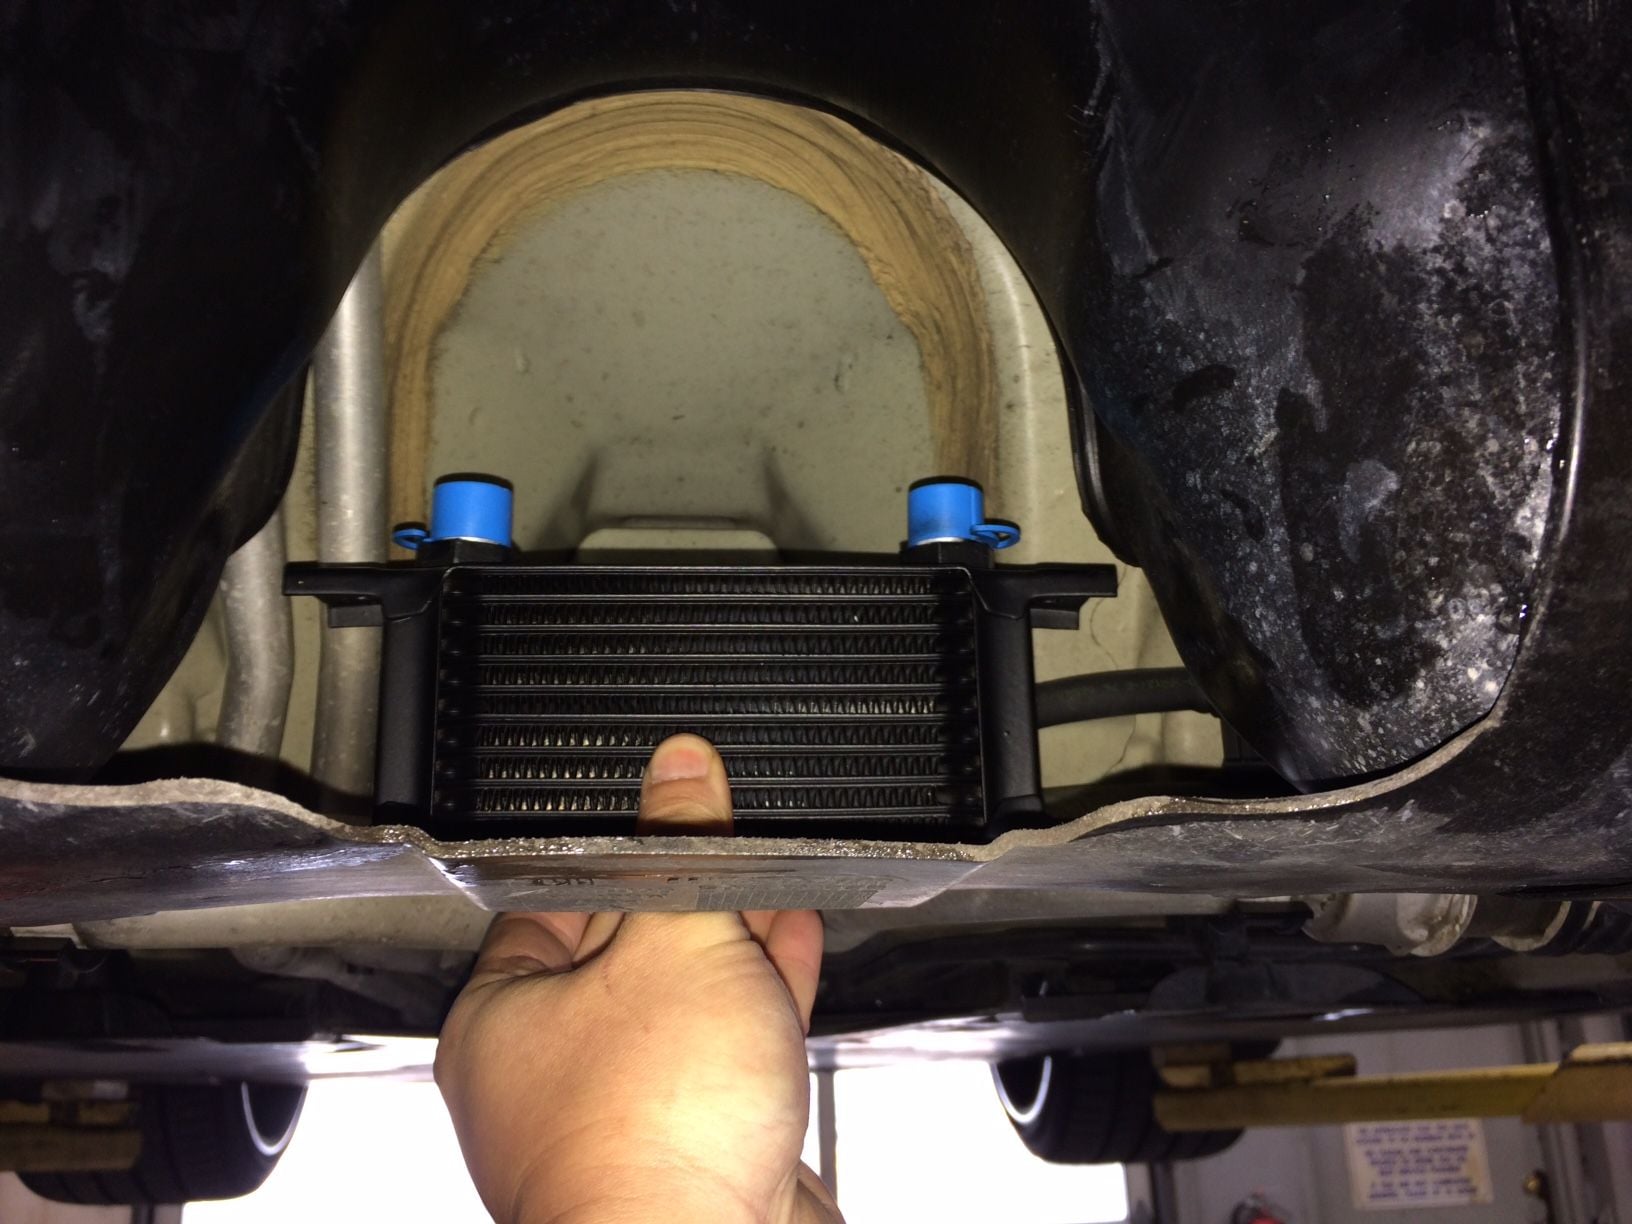
If I ever need to install a steering cooler this cavity under the gas tank would be an ideal place. But shouldn't need a cooler since Cup cars don't need it.
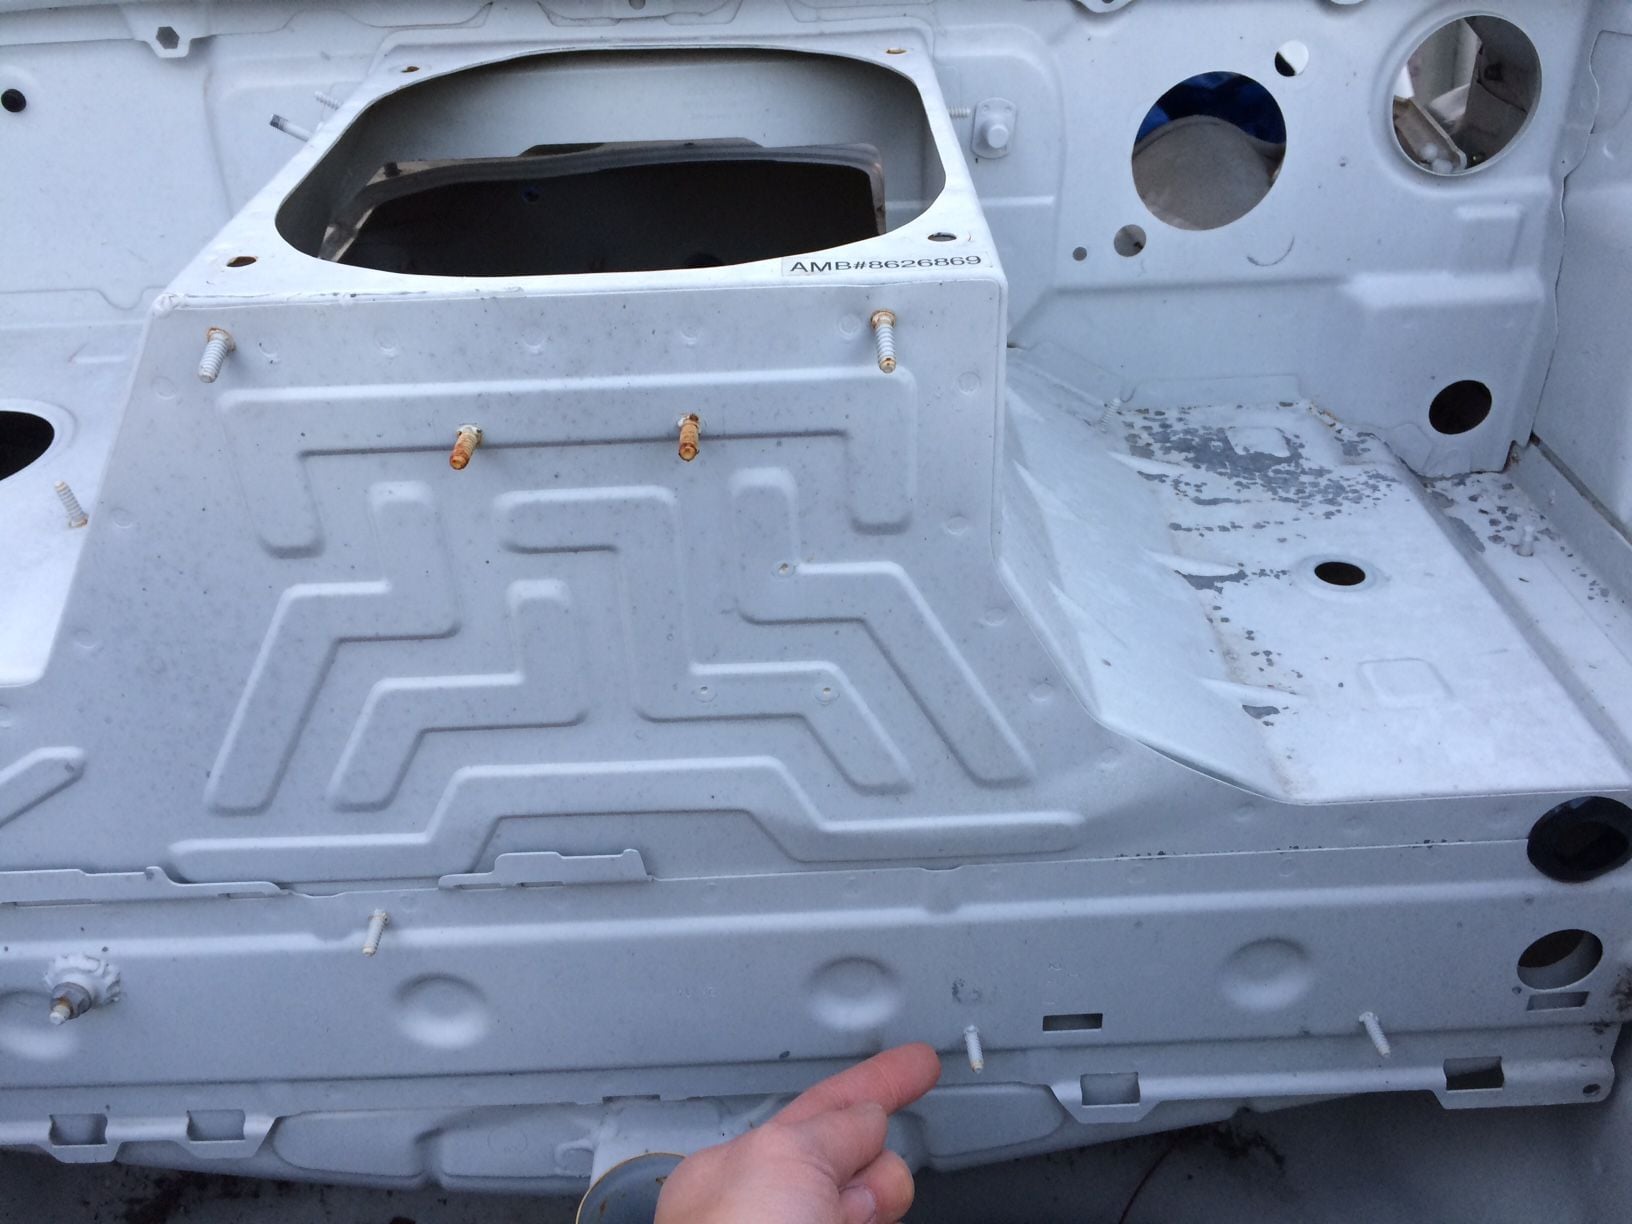
The .2 Cup car trunk has studs welded in multiple places so going for the exact .2 line routing as a bolt-on was just a pipe dream anyway. And yes, Cup car trunk has proper paint, unlike out street cars.


 02-09-2017, 07:48 PM


 Beautiful and functional.