When you click on links to various merchants on this site and make a purchase, this can result in this site earning a commission. Affiliate programs and affiliations include, but are not limited to, the eBay Partner Network.
Does anyone have a video or more detailed instructions in removing convertible switch button and/or leather lid? I can't figure it out and don't want to break anything.
Guys what about just leaving the plastic finish that is underneath? I just used a degreaser to remove the soft touch off the cigarette lighter lid and the base plastic is nicely contoured and looks quite good - it's got a bit of texture to it. Will be easy to keep nice with a vinyl wipe. Could be an option. Although the body colours do look nice.
I removed and disassembled but did not prep, my CC for drop off at the best shop for this stuff (which is also used extensively by PP Porsche here in my neighborhood). $300 for them to do it all. I�m debating doing it myself for that much money, especially if I can easily get Arctic Silver Metallic auto paint. I do not mind the prep at all and I�m good at spraying with patience and understanding humidity etc. might as well save myself $300. If rather have a shop respray bumpers and my rocker panels. One question, while sanding using an orbital how much is it removing/be careful obviously.....?
Yea you�ve already done the hard work removing it. Prep and painting was pretty easy.
As for sanding, you need to get the soft touch off. I had areas that started to show the white base plastic underneath. I used an orbital attachment on my drill that had been used for polishing headlights. It made quick work of it.
If you are doing a black matte coat i really don�t think it�s worth paying somebody. It�s dead simple and very hard to make any mistakes. Just do multiple very light coats 2ft away.
If your going body color or gloss finish the complexity increases so might be worth getting a pro.
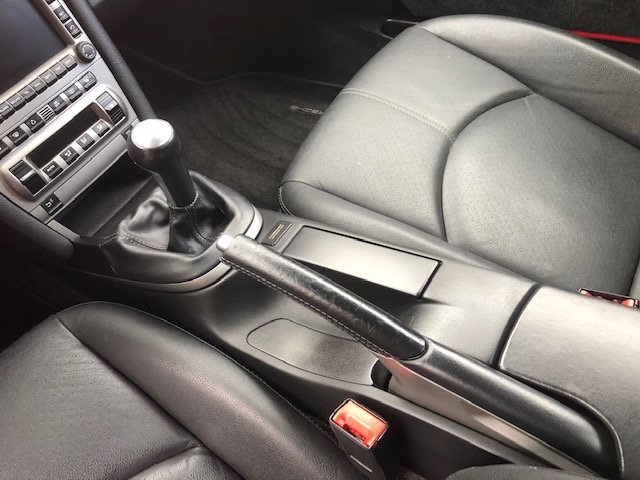
I�m just going to do it as you did in black, same paint and will make sure I sand between coats. Less textured would be nice. You used the orbital between coats? No handwork? I�ve removed the center console so many times it�s not funny. I prefer no center console but the alcantara gt3 shifter flopping around looks silly, and not in the mood to get another **** for it. Matte finish black is fine. Wiping down dust with wet wipes or compressed shop air?
I�m just going to do it as you did in black, same paint and will make sure I sand between coats. Less textured would be nice. You used the orbital between coats? No handwork? I�ve removed the center console so many times it�s not funny. I prefer no center console but the alcantara gt3 shifter flopping around looks silly, and not in the mood to get another **** for it. Matte finish black is fine. Wiping down dust with wet wipes or compressed shop air?
Between coats I just lightly hand sanded with some 800 grit I think.
I've got a few days off next week to do some tinkering... the first thing I'll do is likely the centre console respray. I think I'll keep it with a satin black finish the same as OP, I just have one question. Should I lacquer it as well or not? I see that satin finish lacquers are also available, I'm just not sure if it's necessary or not for this?
I'll toss in that if you're going to rattle can something black - Dupli-Color FB105 Flat Black Bumper Coating is by far the best I have used.
Over the years I've painted interior parts for a handful of cars with it, and the characteristics are ideal.
* It is flat black, so doesn't suffer from the splotchy, variable shine characteristics of glossier paint.
* easy to get an even looking coat, no sanding necessary (unless you get end of can spatter rather than mist)
* Made for plastic bumpers so has good adhesion to plastics, and can flex without cracking.
* does not require primer.
* Biggest advantage - surface strength. Most spray paints, when you accidentally brush a fingernail or car key across them, you'll get a permanent mark. Not so this stuff. It's about as scratch resistant as body paint.
I've tried other "bumper coating" sprays including from "better" quality manufacturers like VHT and SEM, but FB105 definitely performs the best. Amazon doesn't seem to carry it in flat black anymore, they have some other Duplicolor bumper coating variant that I have no experience with. Hopefully they did not change the formulation for good or anything. Jegs and a few others still have FB105. I haven't ever seen it in a brick and mortar, but it's worth the shipping wait.
I'm also going to add my two cents as I'm just wrapping this up.
The step by step removal is perfect, the shifter **** was ridiculously hard to get off and I ultimately had to look up another how to on "removing 997 shift ****"
Even though the soft touch finish looks thick, it sands very easy. I would recommend you start with 400 wet or dry, use it wet, and then move to 600. I went too aggressive and it caused too much unnecessary additional work.
Don't use Rustoleum products, which are great in my experience, but in this use, they don't dry fast enough, and don't cover quite the same. I started with a satin black from Rustoleum and moved to matte black Krylon ColorMaxx. If I had started with the krylon product, it would have been done in one day! Duplicolor option in the post above me looks like a great one to try also.
Always wet sand, use air compressor to blow the excess water off, then wipe down.
There's three different sizes of screws, put the screws in the holes after you've pulled them out so you know where they go when you reassemble
Buy a short shift kit and do that too while you're at it
@MrClean good tips! Yea the shift **** sucks. I just pulled on it as hard as I could and it eventually popped off. I was shocked I hadn't broken anything in the process.
I will add unfortunately the matte black does mar. Trying a matte clear then if that doesn�t work, the Duplicolor bumper finish. Then if THAT doesn�t work, Krylon satin. I think the matte looks best personally but it needs to not be visibly marked easily.
You bet TheBruce! Hopefully this weekend...You and I have the exact same car except for color!
*update - The Krylon matte black with matte clear is a terrible option. I'd suggest sticking with the Krylon Satin, or the Duplicolor bumper paint.
**2nd update. Done! There should be a warning to not put your key in the ignition while the center console wiring is removed. Air bag light now!!! I will add unfortunately the matte black does mar. Trying a matte clear then if that doesn�t work, the Duplicolor bumper finish. Then if THAT doesn�t work, Krylon satin. I think the matte looks best personally but it needs to not be visibly marked easily.
You bet TheBruce! Hopefully this weekend...You and I have the exact same car except for color!
*update - The Krylon matte black with matte clear is a terrible option. I'd suggest sticking with the Krylon Satin, or the Duplicolor bumper paint.
**2nd update. Done! There should be a warning to not put your key in the ignition while the center console wiring is removed. Air bag light now!!!


 03-14-2019, 12:58 PM