When you click on links to various merchants on this site and make a purchase, this can result in this site earning a commission. Affiliate programs and affiliations include, but are not limited to, the eBay Partner Network.
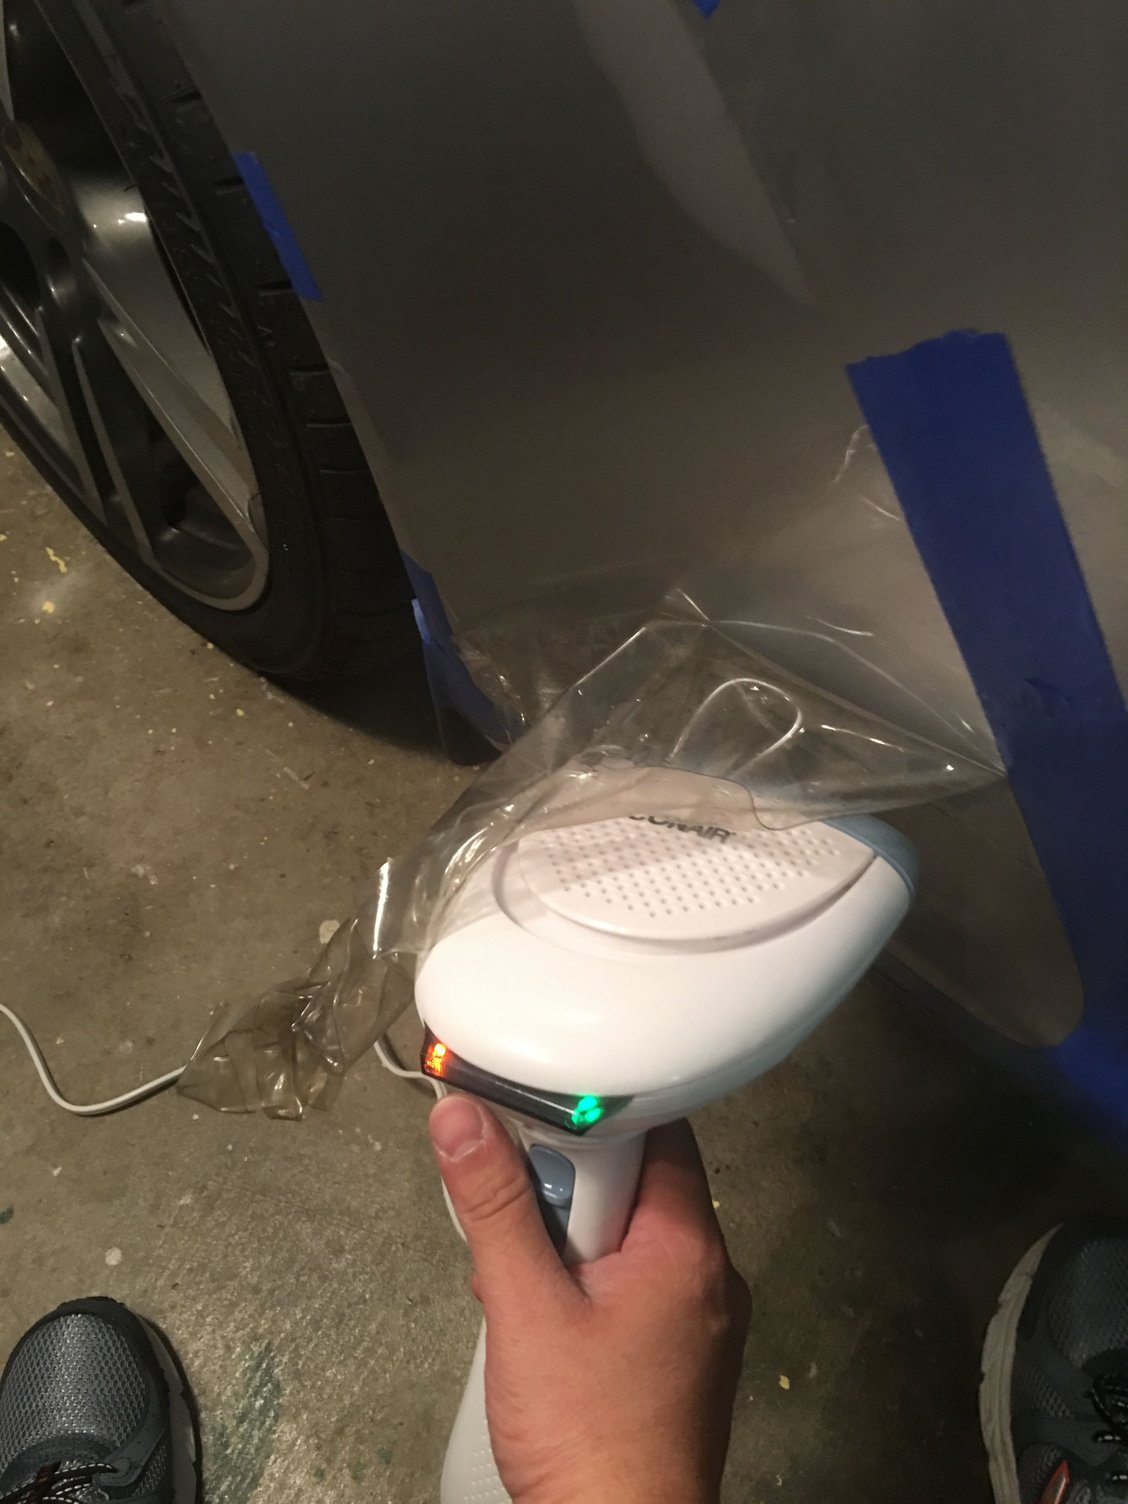
I took my time with it since I did not want to damage the paint. It was actually pretty easy with the Conair handheld fabric steamer, and it left little to no adhesive residue to clean up. I got the tip for the steamer from here and from a removal video on YouTube.
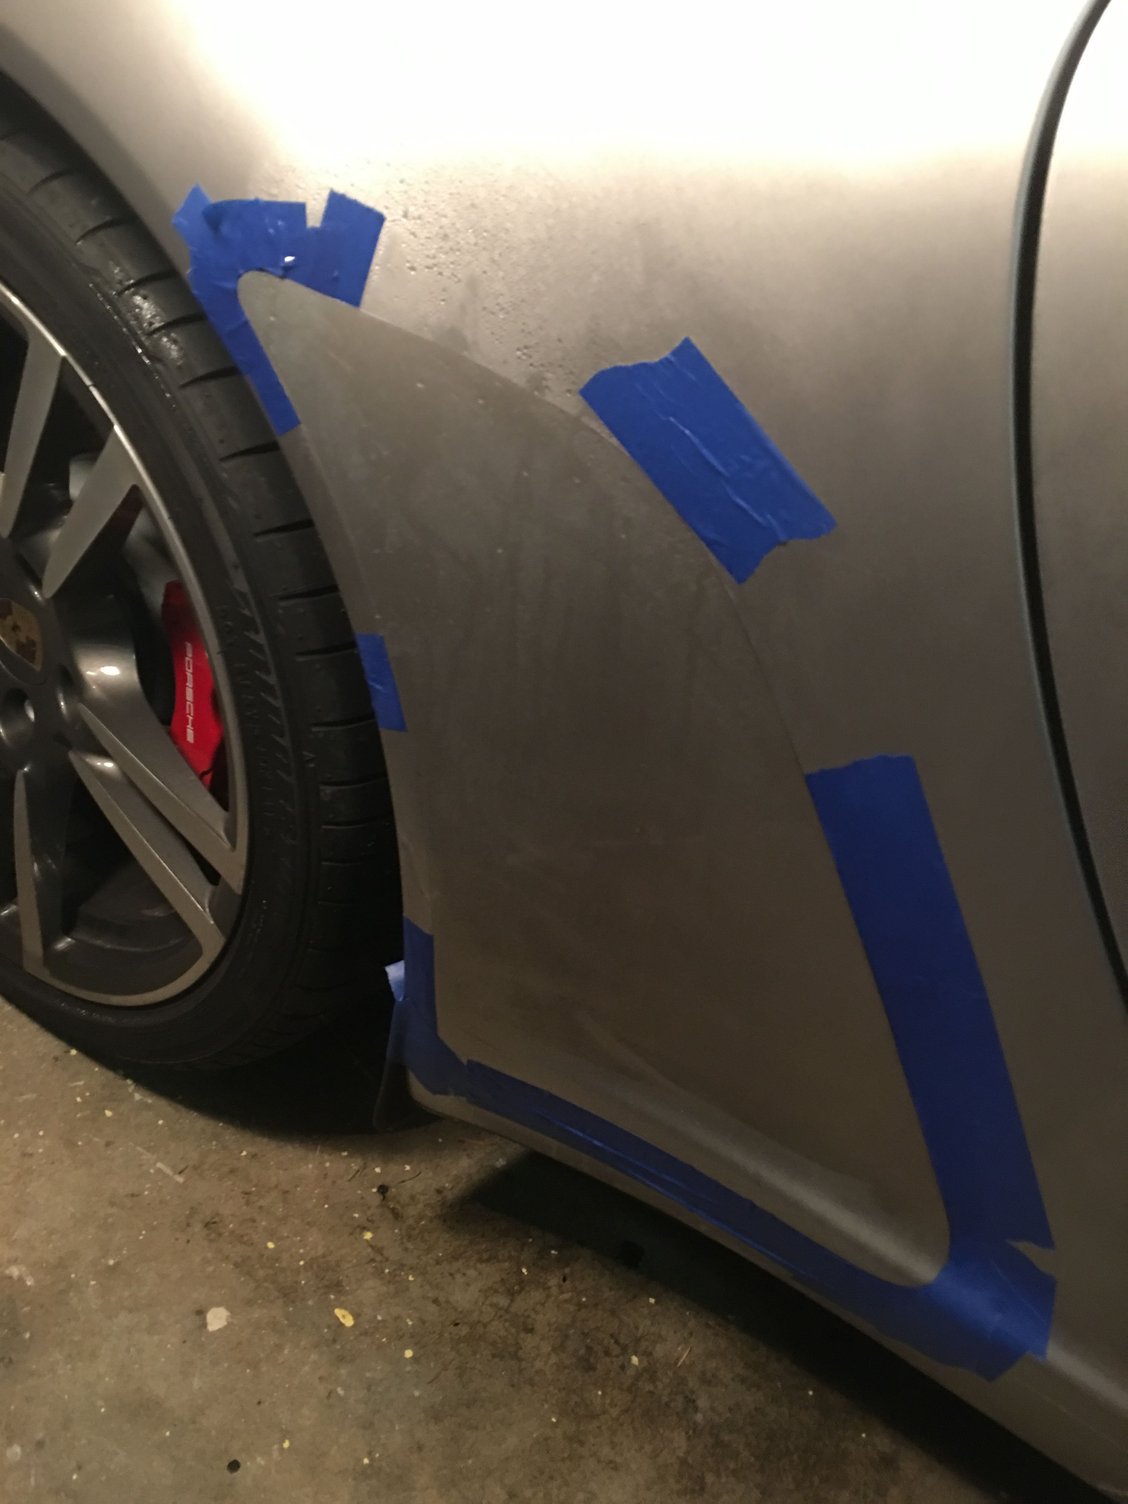
Used painter's tape to mark where the new stone guard should be located:
You can pick up the steamer at Target or Amazon for $35; cheap and works great:
Easy does it...
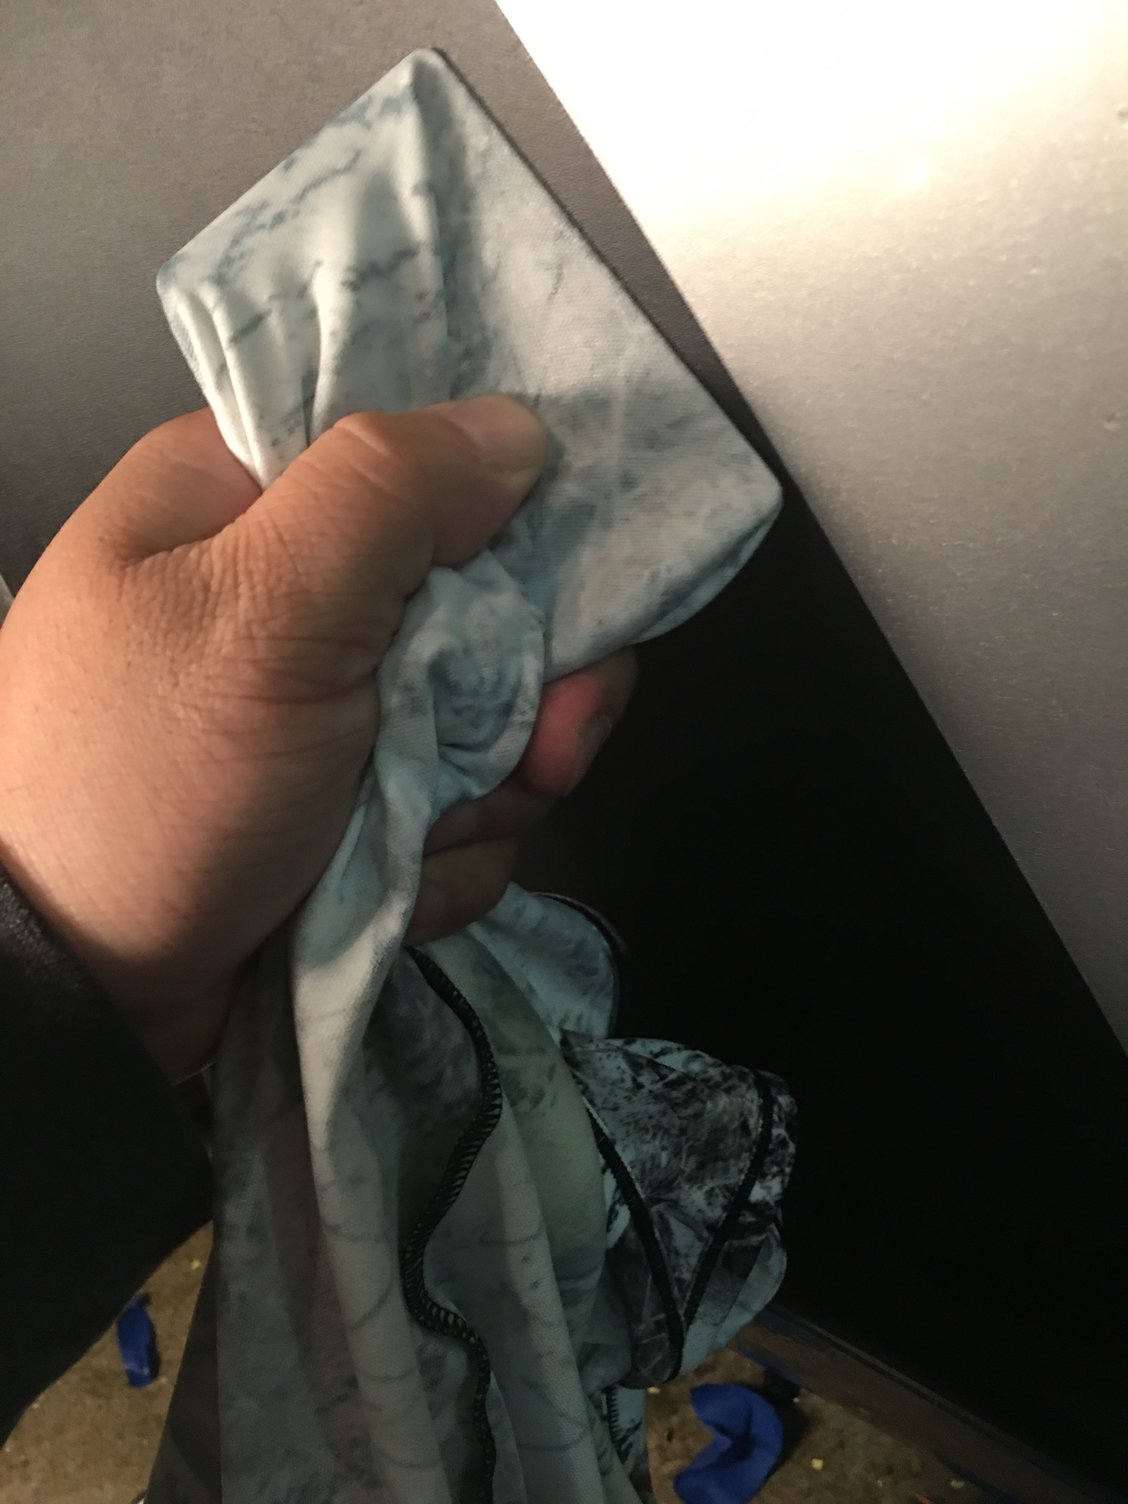
Getting all the soap/water mixture out...wrapped the credit card with a soft cloth so as to not scratch the new stone guard:
I took my time with it since I did not want to damage the paint. It was actually pretty easy with the Conair handheld fabric steamer, and it left little to no adhesive residue to clean up. I got the tip for the steamer from here and from a removal video on YouTube.
Used painter's tape to mark where the new stone guard should be located:
You can pick up the steamer at Target or Amazon for $35; cheap and works great:
Easy does it...
Getting all the soap/water mixture out...wrapped the credit card with a soft cloth so as to not scratch the new stone guard:
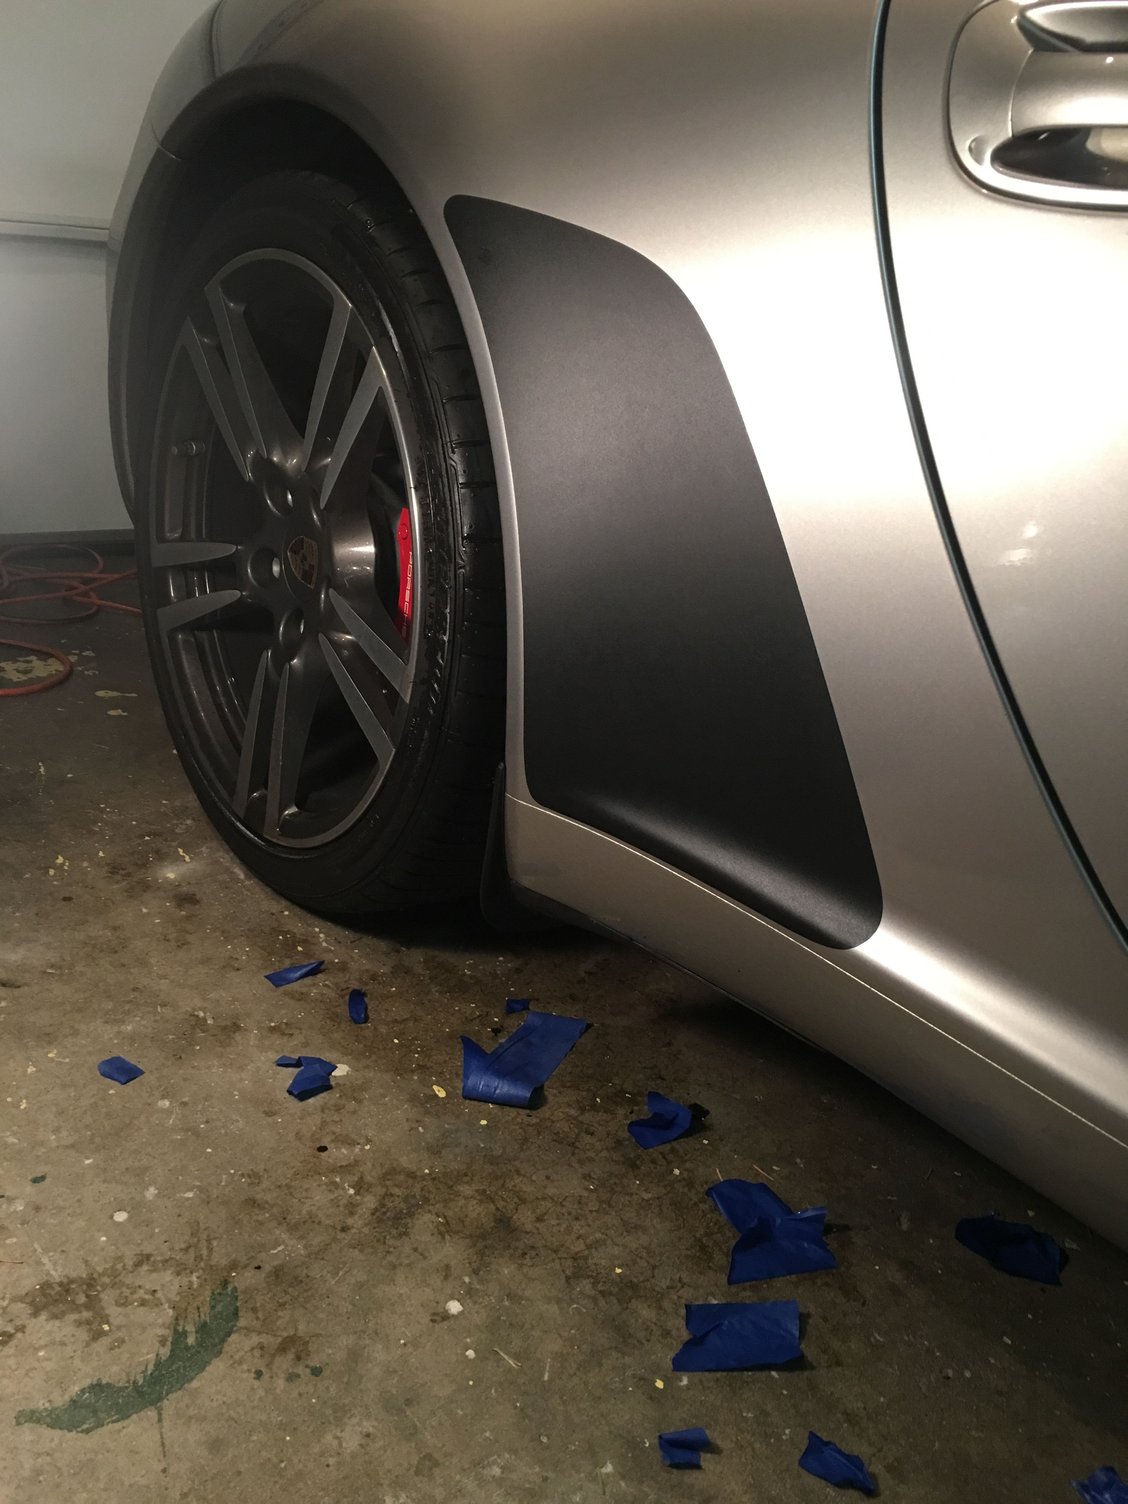
Voila!
Well done sir! So nice to see someone do this themselves! No reason to pay a shop WAY too much money to do it. I'm seriously thinking of doing black on mine when it's time to change as well.The steamer was a great and cheap solution!
Well done sir! So nice to see someone do this themselves! No reason to pay a shop WAY too much money to do it. I'm seriously thinking of doing black on mine when it's time to change as well.The steamer was a great and cheap solution!
Thanks man. The info on the forums definitely helped me get there quicker. Looking forward to seeing when you do yours.
Leather parts weren't cheap but they were a nice upgrade to the shiny/scratched plastic they replaced. I'm having Porsche replace the door handle surrounds this week. I took the door panel off but it looks like the current pieces have plastic welds on the back. I'll update once completed. Cheers!
Well done sir! So nice to see someone do this themselves! No reason to pay a shop WAY too much money to do it. I'm seriously thinking of doing black on mine when it's time to change as well.The steamer was a great and cheap solution!
Leather parts weren't cheap but they were a nice upgrade to the shiny/scratched plastic they replaced. I'm having Porsche replace the door handle surrounds this week. I took the door panel off but it looks like the current pieces have plastic welds on the back. I'll update once completed. Cheers!
Looks very nice. A couple years back I did a DIY post on replacing the door spears melting the original welds and replacing them with screws from the back side to fasten the new ones. The screw method is great because you can independently adjust the tension of how the spear fits to the panel at all the attachment points. It's not too difficult and would probably save you a good bit of money over having the dealer do it.
If you're interested, I can recap the process. I think the photos are on my home PC though so wouldn't be able to share those until Tuesday.
I picked up a '12 997 4S this weekend and I will be selling my '09 997 Carrera. Currently, both cars are in the garage with their rear ends removed as I'm swapping over my ceramic coated Fisters, Sharkwerks X pipe, Fabspeed intake and exhaust tips. Always fun to work on two cars at the same time.

 12-29-2016, 08:09 PM