When you click on links to various merchants on this site and make a purchase, this can result in this site earning a commission. Affiliate programs and affiliations include, but are not limited to, the eBay Partner Network.
The Overly Detailed Guide to Installing a 997 Center Radiator Kit (and Grill Screens)
A few weeks ago I installed a center radiator on my 2006 997.1. I wanted to share the writeup and results.
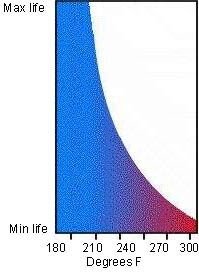
The "Why": Oil Temp vs Engine Life
A center radiator is cheap preventive maintenance for all 997s. Elephant Racing published a blog post on Oil Temp vs Engine Life and it concluded that 180-210F was the optimal oil temp for maximum engine life. When temperatures start rising above that viscosity drops, metal-to-metal contact begins, and engine wear is greatly accelerated. Enough said.
My avg highway driving oil temp was 210 to 225F with Motul 8100 (an oil that Jake Raby has said runs hot). As soon as I was in the fun zone above 4k RPM I was at 225F. And if I was ripping the hills along the coast I was hitting 240-245F. I know guys run way hotter at the track but I still didn't like it. I could see my oil pressure drop when running above 225F and it would always freak me out a little. Plus, I daily drive my car so I was seeing those temps everyday vs every few months on the track.
The Real Reason Why
I hadn't broken anything lately and needed a project. Plus it looks cool :-)
The Results
Its a pretty dramatic oil temp drop. I would say around 15F. My highway temps are now 200-205F and I really need to hammer it to get up to 220F, and it drops back down quickly. I haven't had any back road rips yet but will report back when I do.
I've also seen no change in warmup time. I live 4.5 miles from the 101 and that was always exactly what I needed to get my oil temp to 200. Not being able to take part in my morning onramp ritual would have been a major bummer.
Some cardboard and a sharpie to make templates for the intake
Bucket for coolant
50/50 Porsche coolant and distilled water (1 Gal is enough)
Jackstands (2x)
T25, T27 drive bit sockets (you have a lot of these so using an electric driver saves a ton of time)
7" T25 Torx screwdriver (you need this to get the T25 that sits behind the sidemarker. I repeat you can NOT use a t25 socket driver for this. The hole is very small and it won't fit)
Magnetic extension pickup tool (to position the T25 behind the sidemarker)
One of those magnetic blocks to magnetize the T25 screwdriver (this greatly simplifies placing the T25 behind the side maker)
A gasket pick with a hooked tip (you need this to pull out two clips that hold the bumper on)
Vacuum and compressed air to clean out the rads
Heavy cloth to set the bumper on.
A long thin punch of some sort (chopsticks are too wide, I tried :-). This needs to be small enough to fit through the grill mesh to push the center rad air intake up while installing the bumper.
Steps
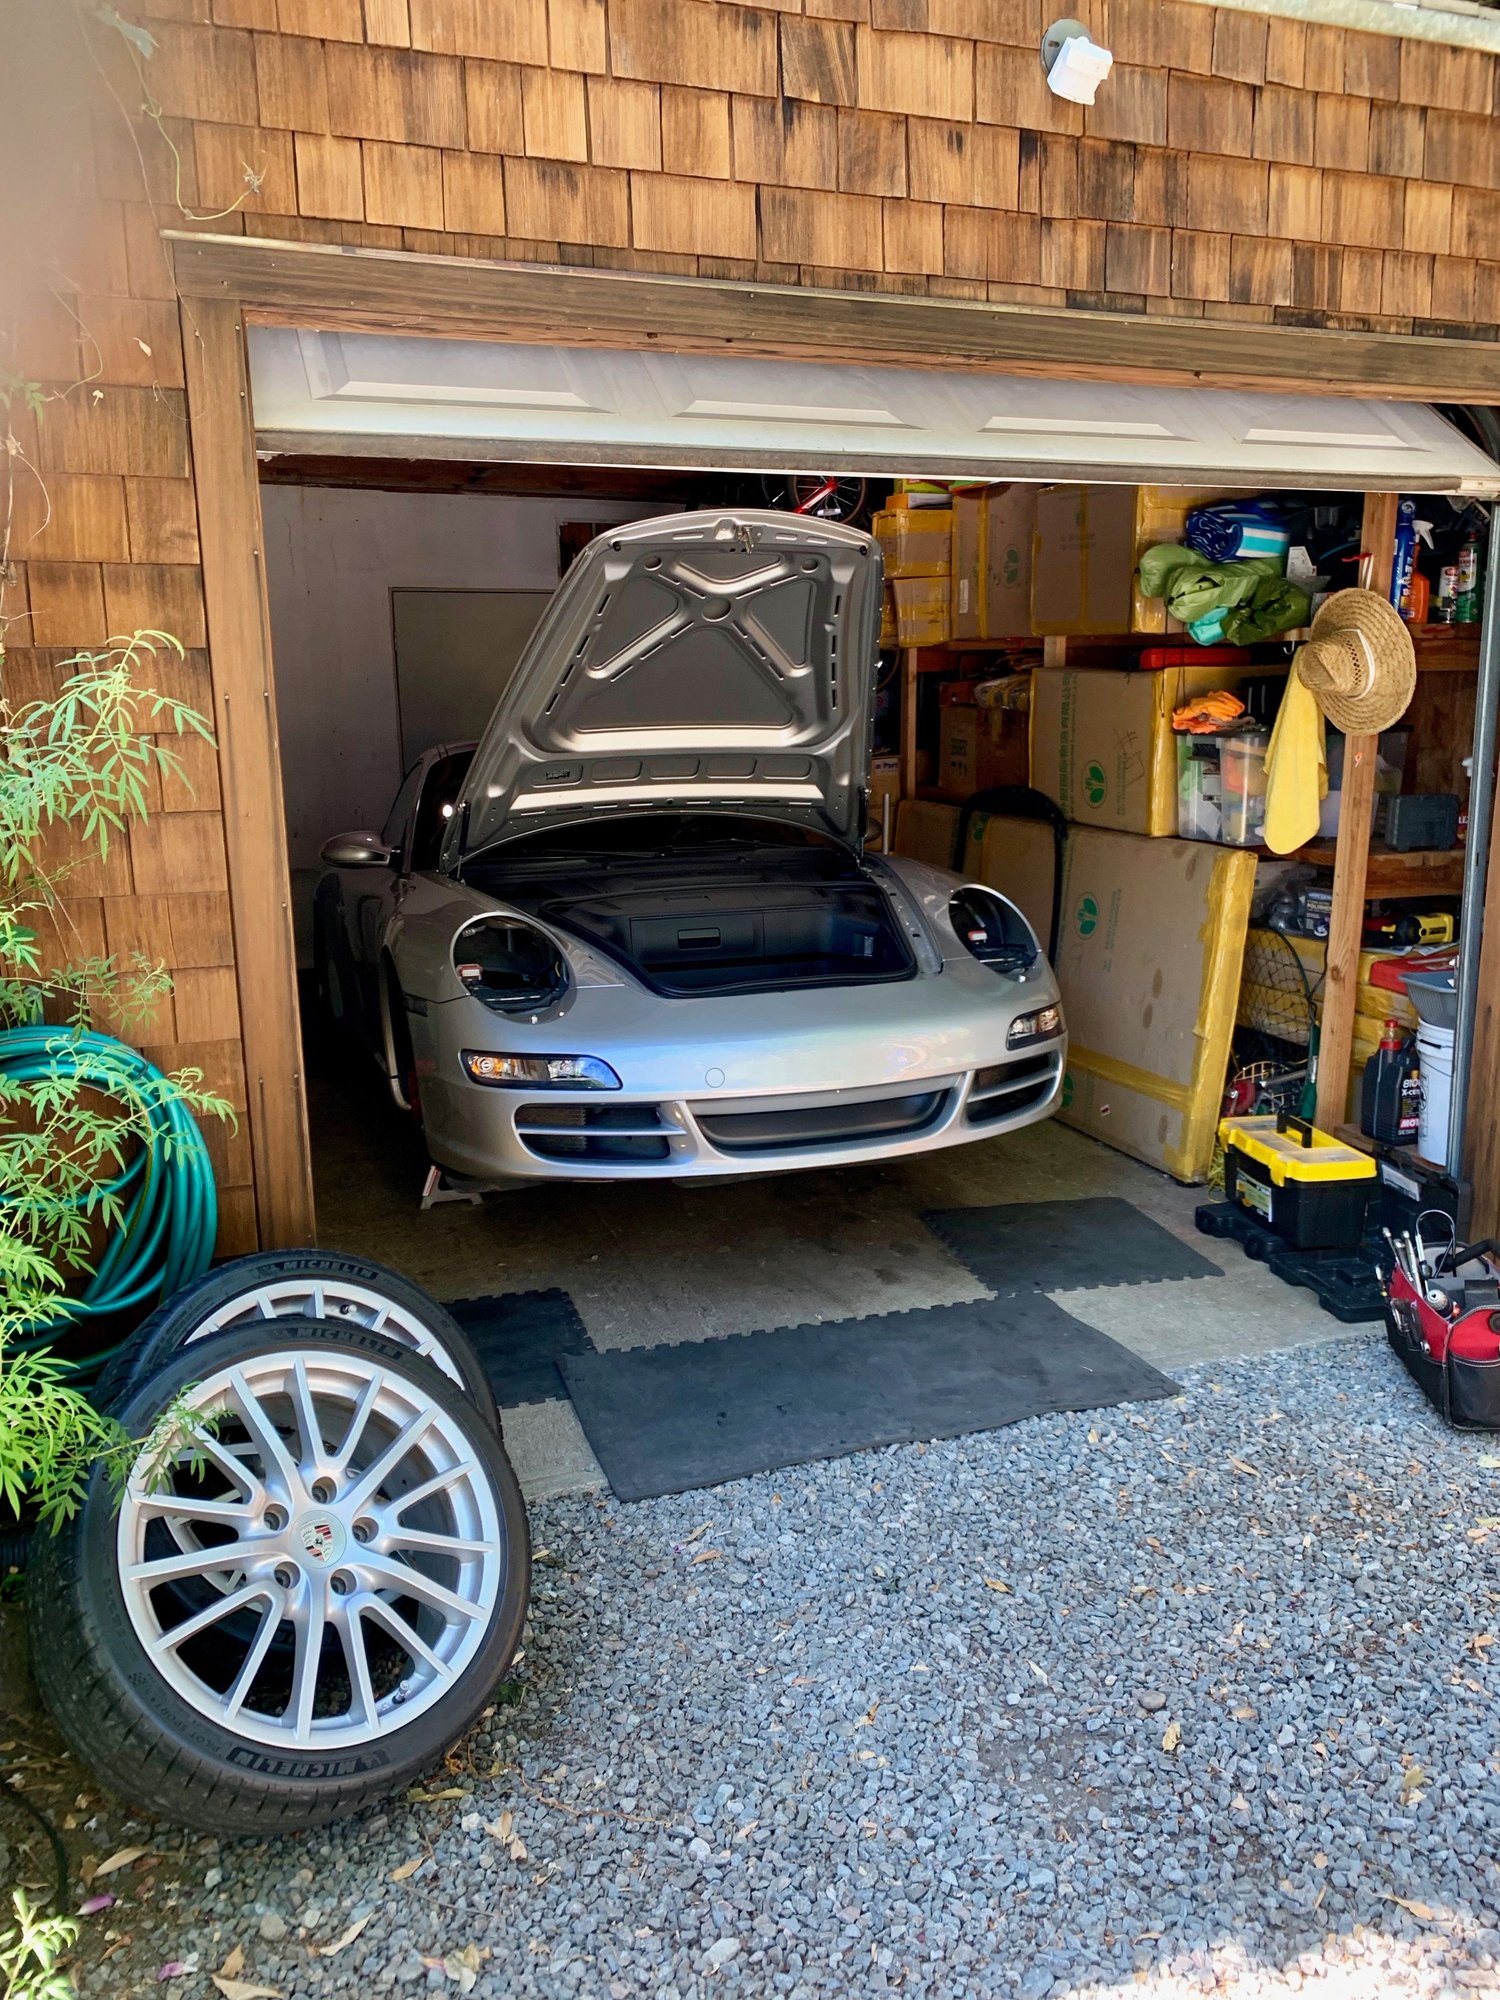
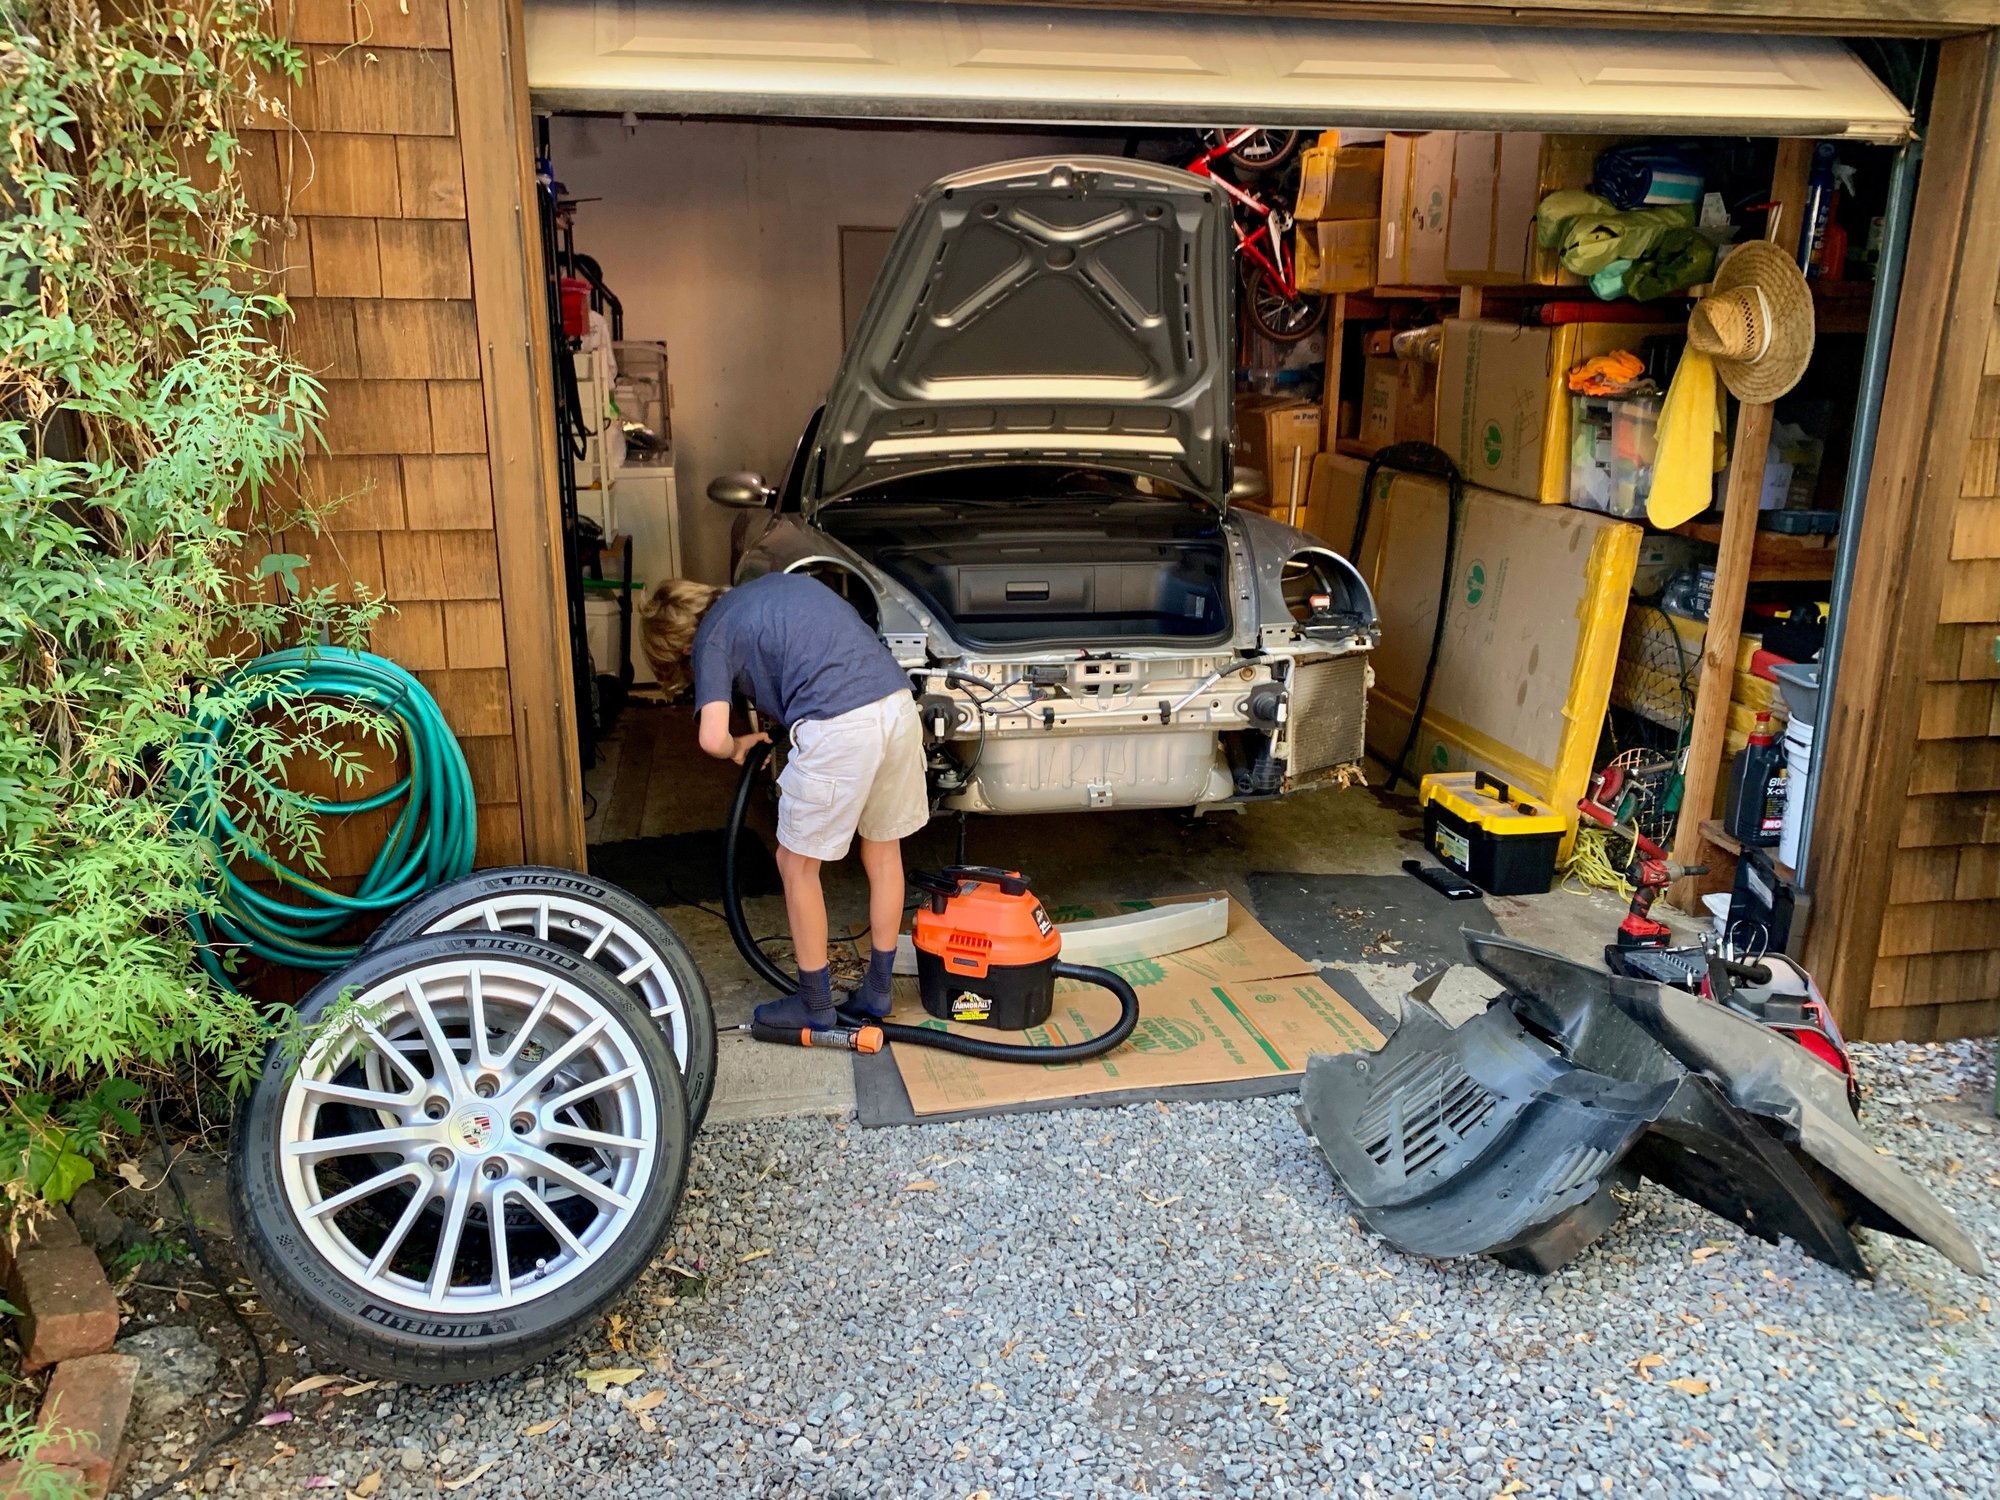
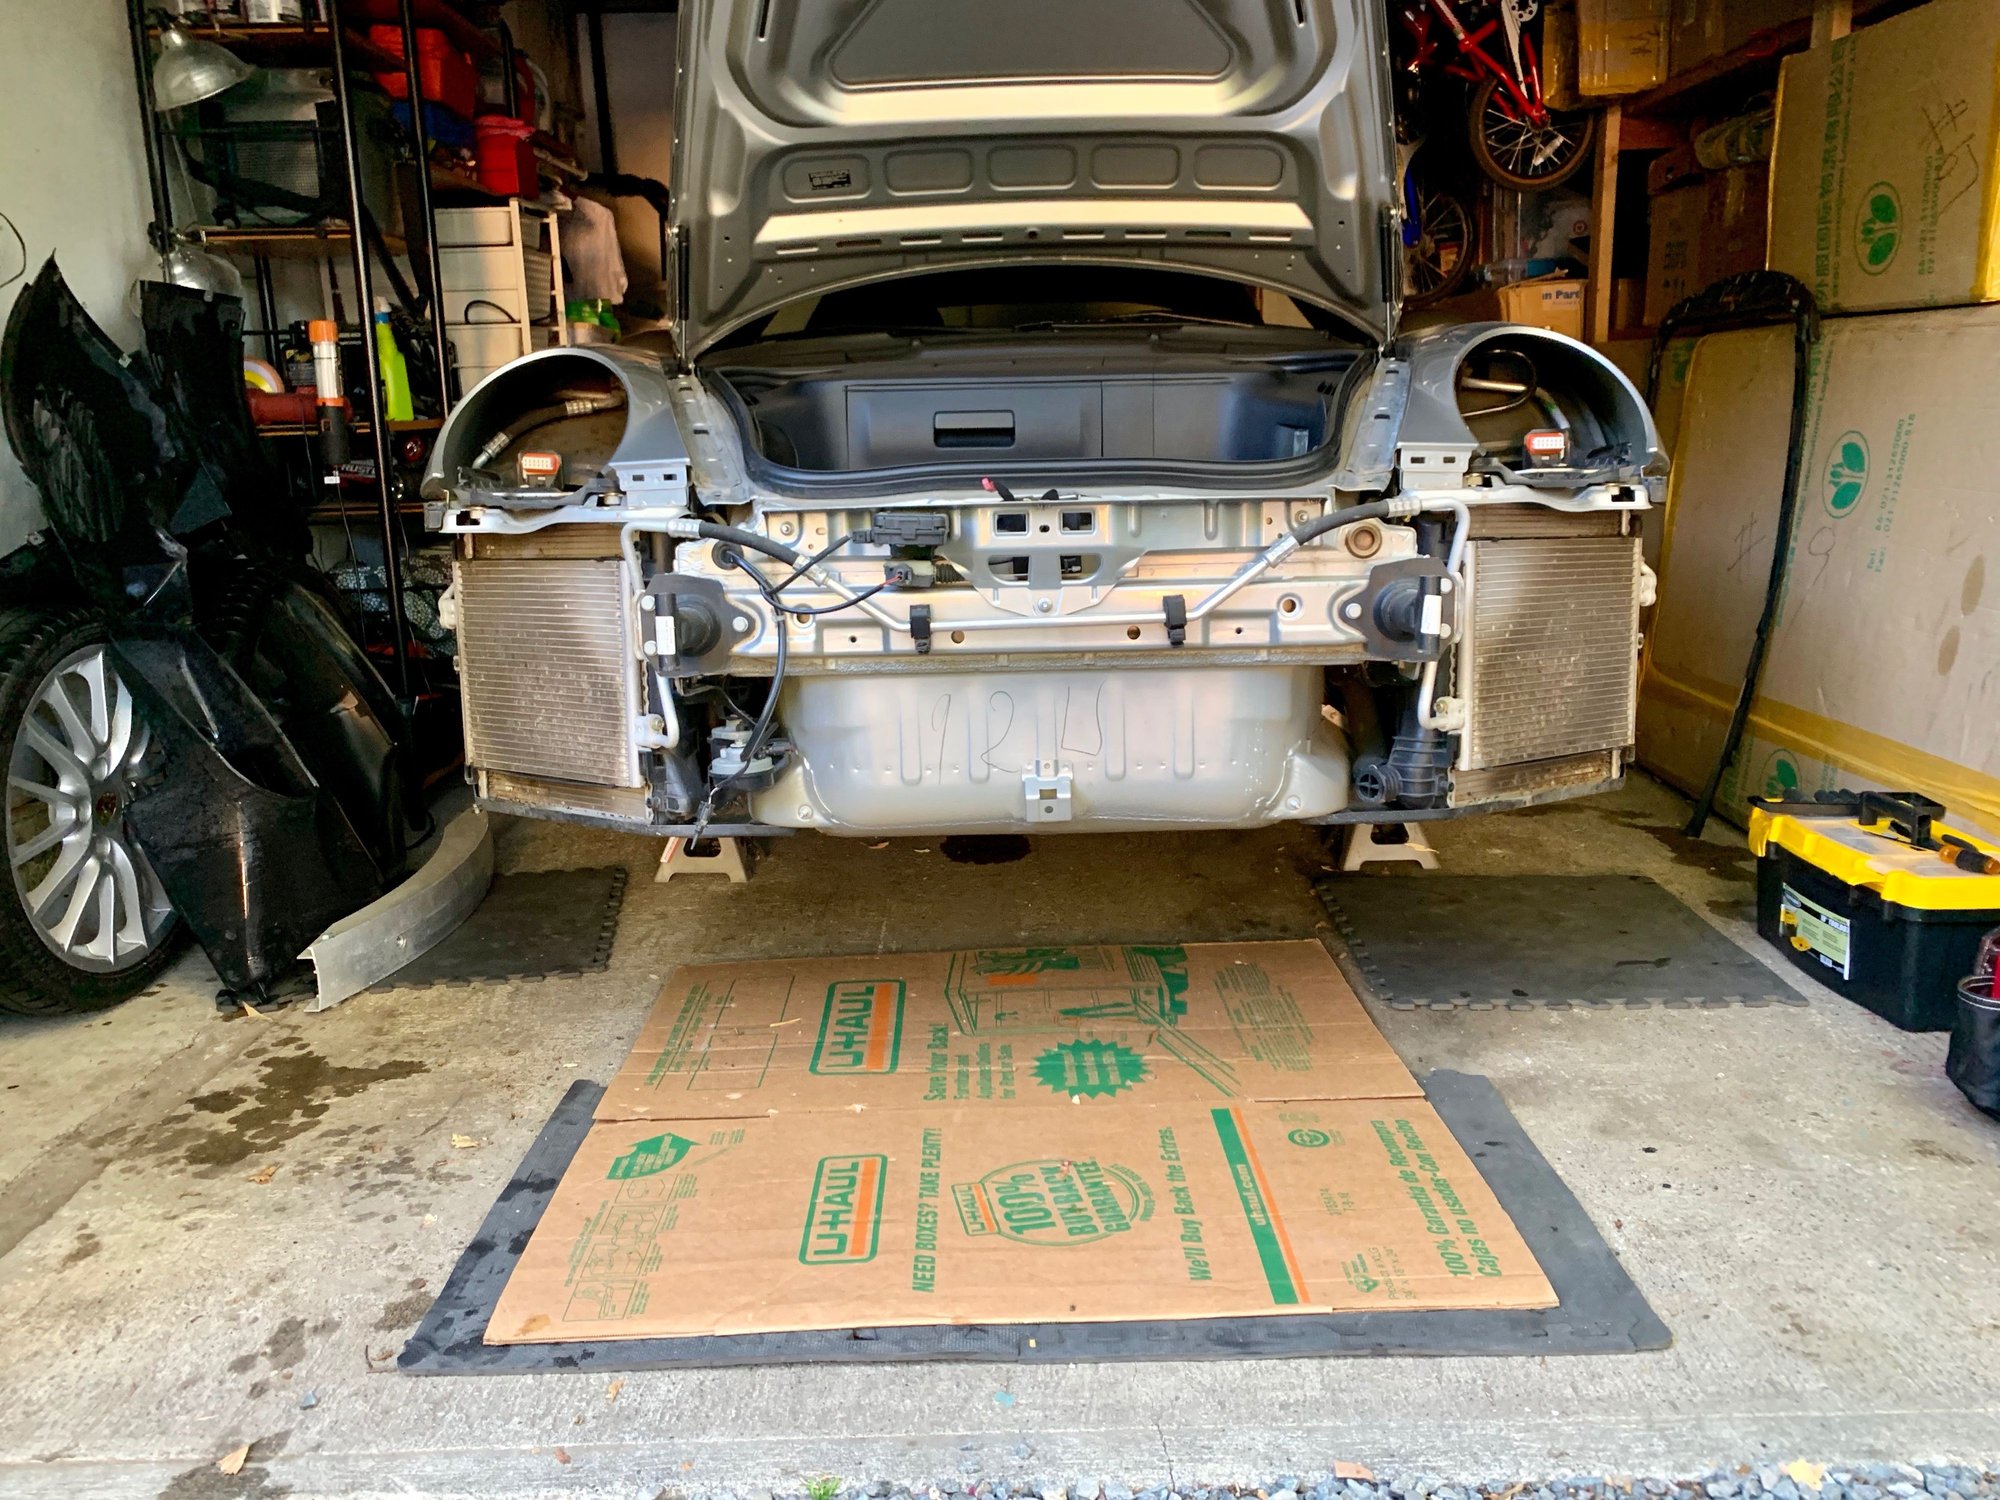
1.Get the front of the car up on 2 jack stands and take the two front tires off. This will give you room to work. I would also recommend putting rubber mats down as you are going to be crawling around in the wheel wells and under the nose of the car.
2. Remove the front headlights. These are easy to remove. Just take the key from your repair kit, unclip the carpet on the side of your frunk and pull it back, remove the rubber grommet and insert the key into the hole. Turn counter clockwise (I think) and you will see the headlight move up and out. Then just carefully slide it out. You do not need to remove the foglights, although some do.
4. Remove the plastic liner around the frunk lid. This just has Velcro holding it down so you can pull it up. Its in three pieces but mine came out as one piece. Just be careful not to scratch the paint and slowly guide the front of it out from under the rubber frunk gasket.
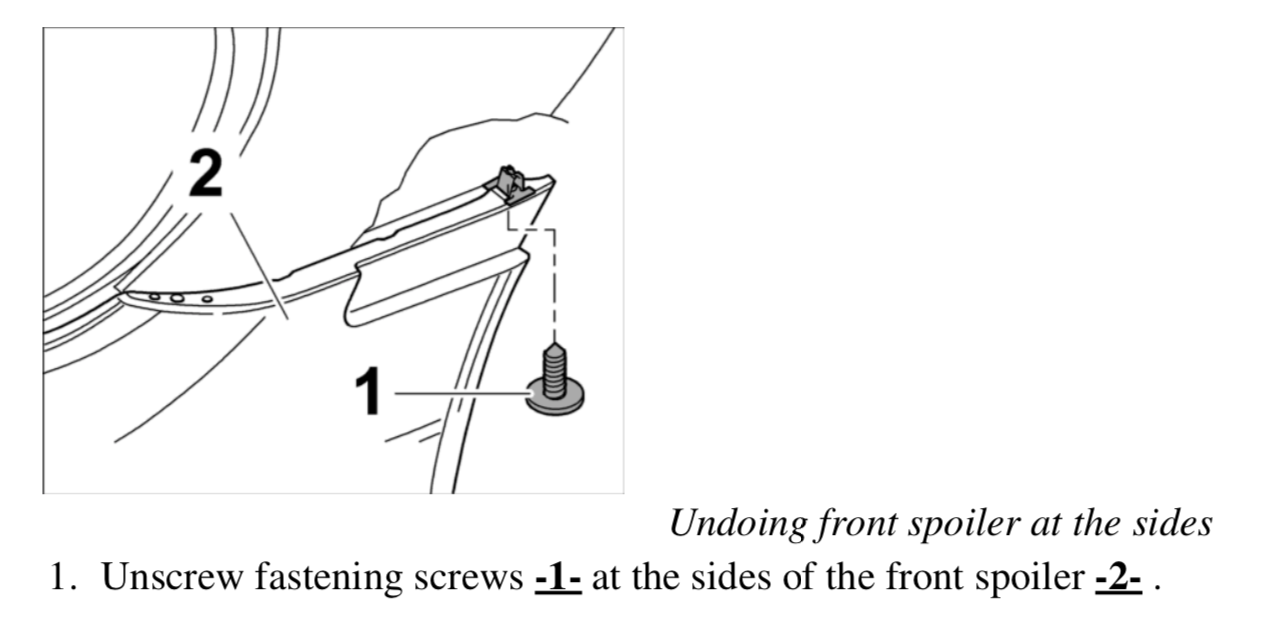
5. Remove the side markers. To remove push them towards the rear of the car and then slide the front out. Dont pull them out directly or you will bend the spring clip.
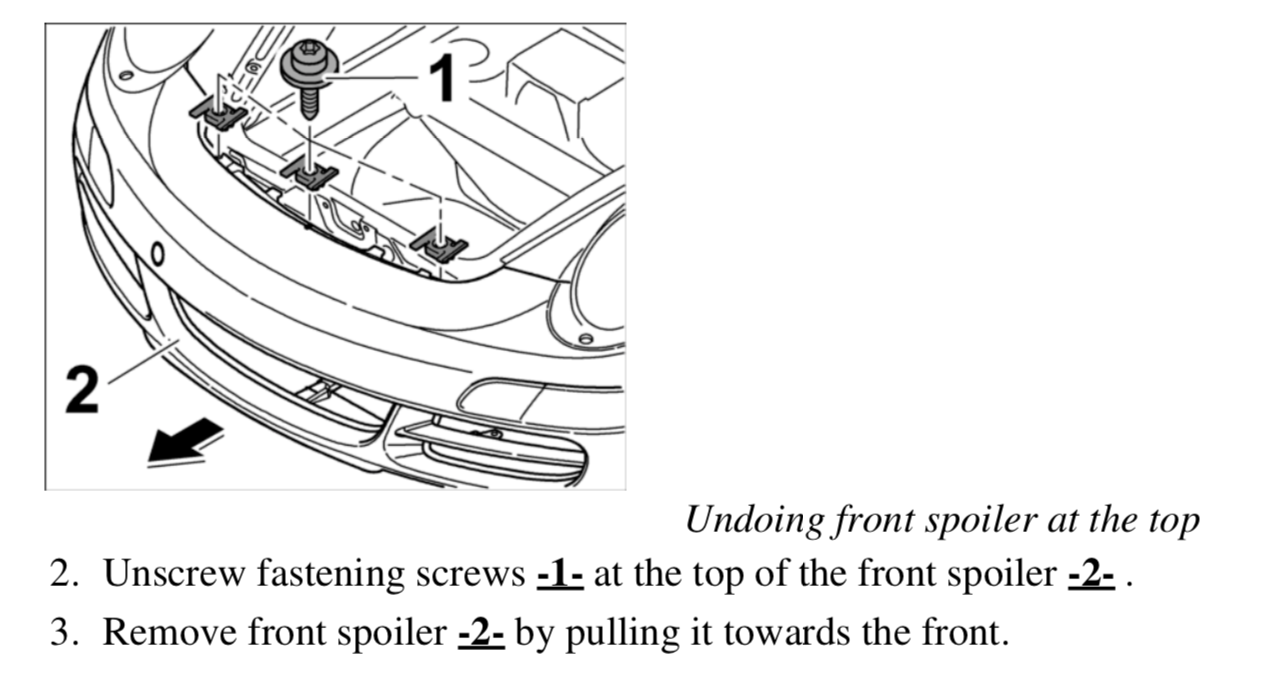
6. Now start removing the T25s that hold the bumper in place:
You have 3 under the front frunk liner, along the bumper
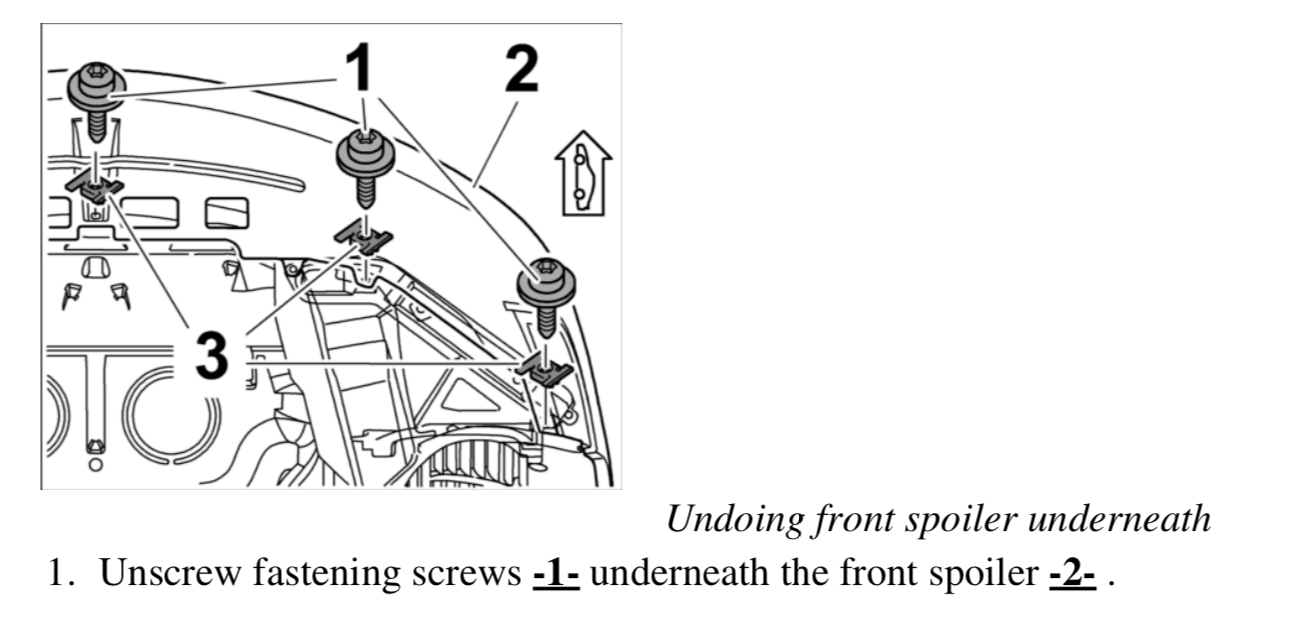
You have 2 under the car in each wheel well (4 total): one on the corner and one right in front of the tire
You have 1 under the middle of the bumper
You have one right behind each sidemarker
You have one in inside each sidemarker, which is a pain to get too. You need a T25 screwdriver for this and a magnetic pickup tool.
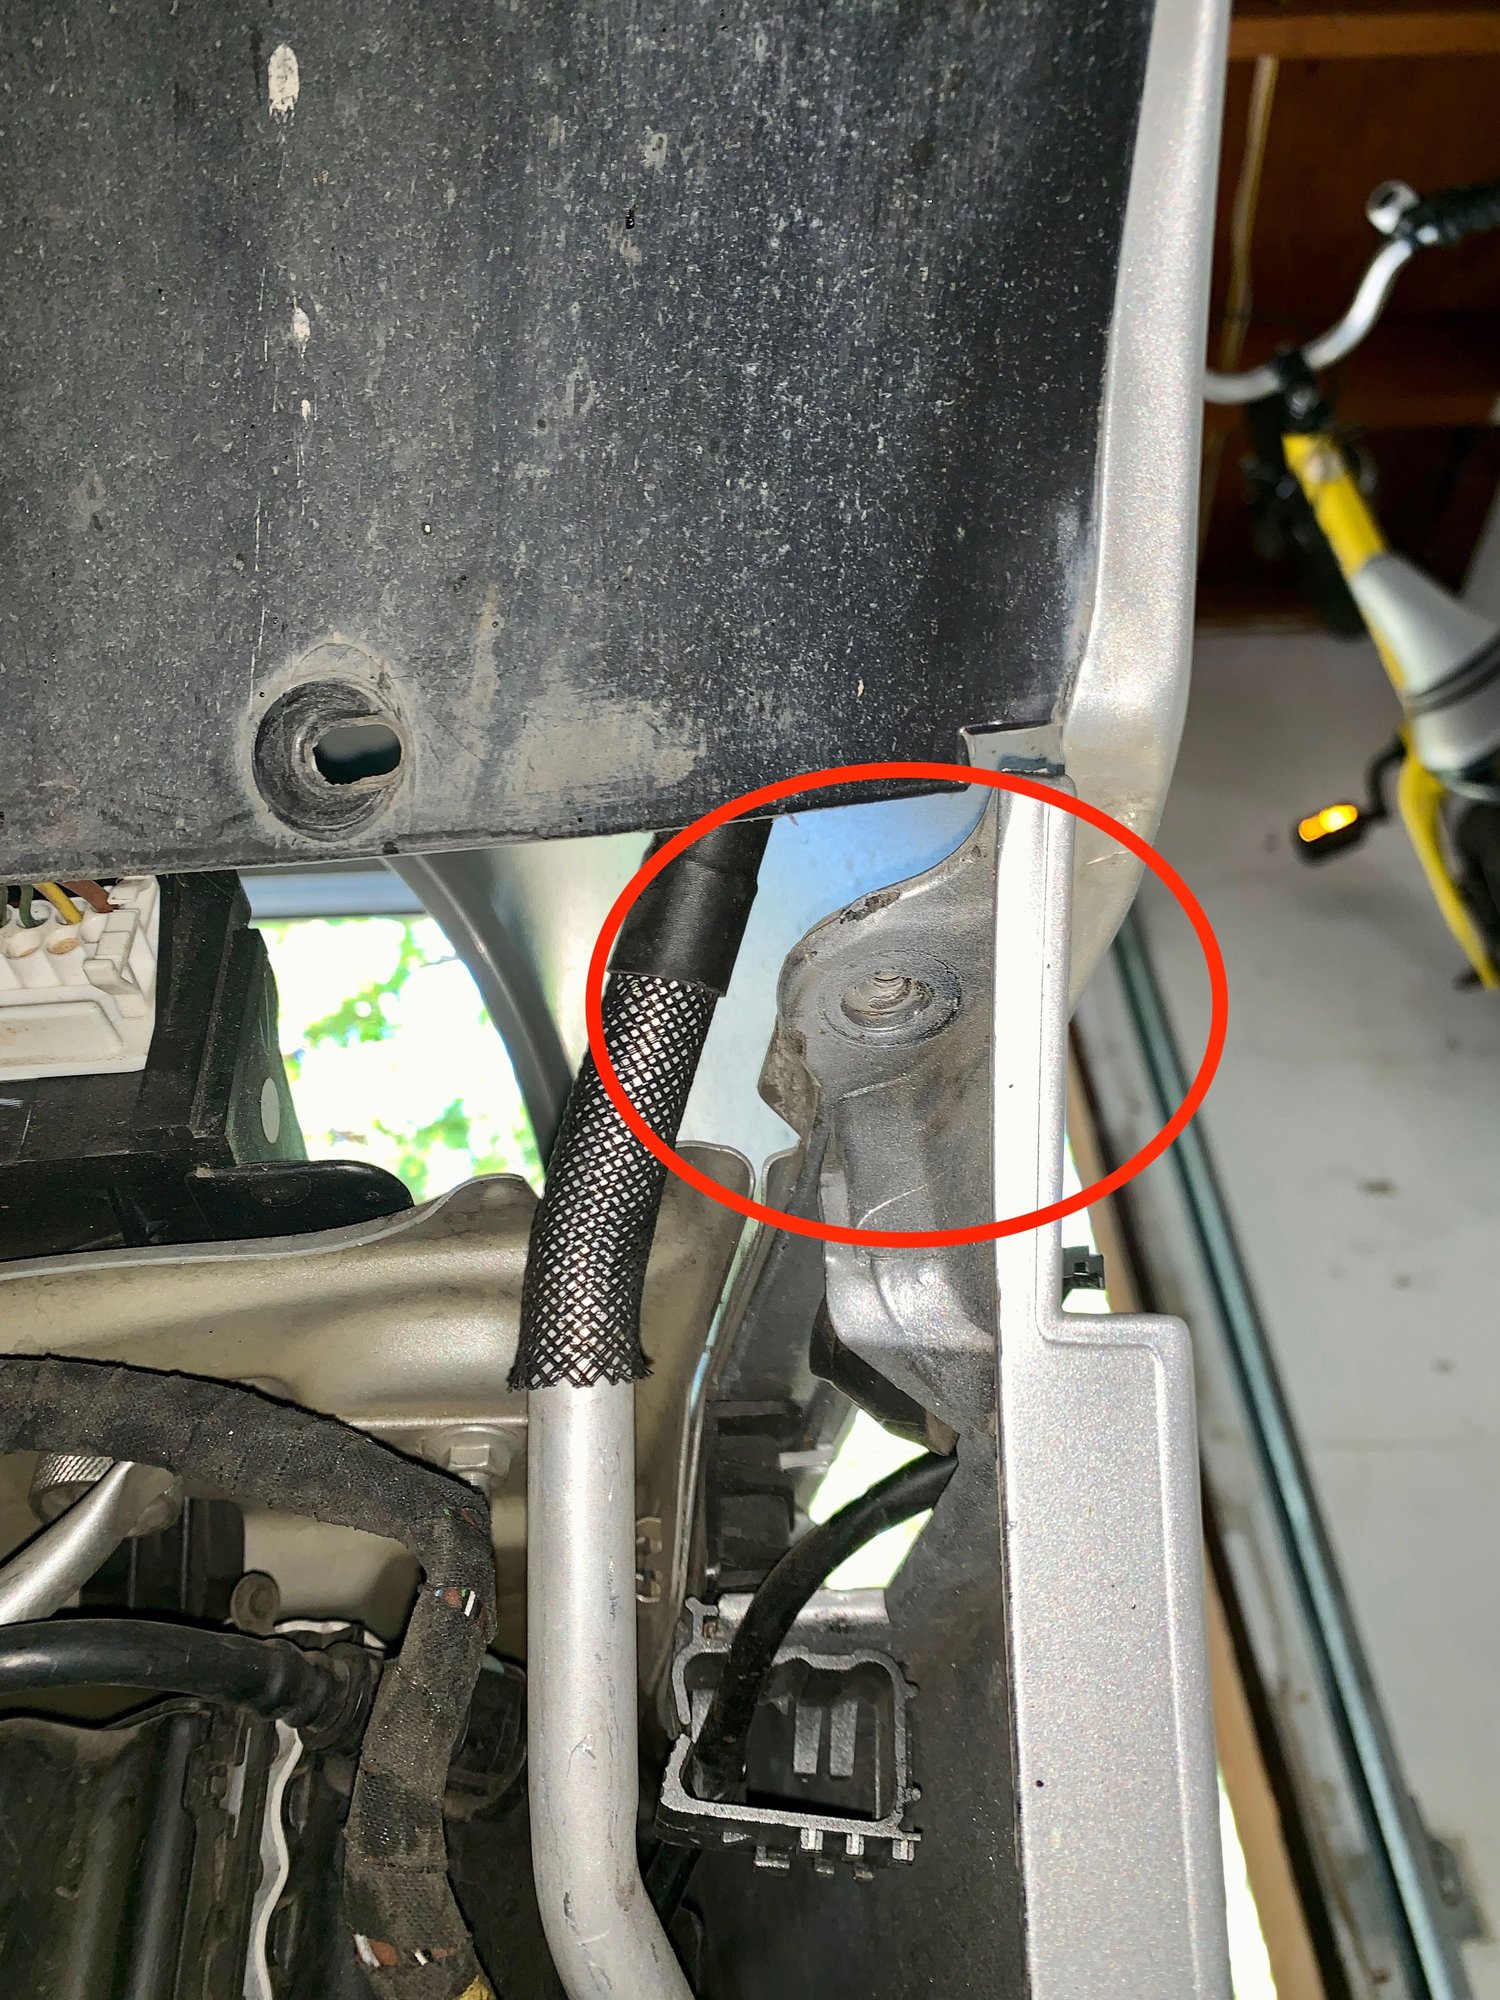
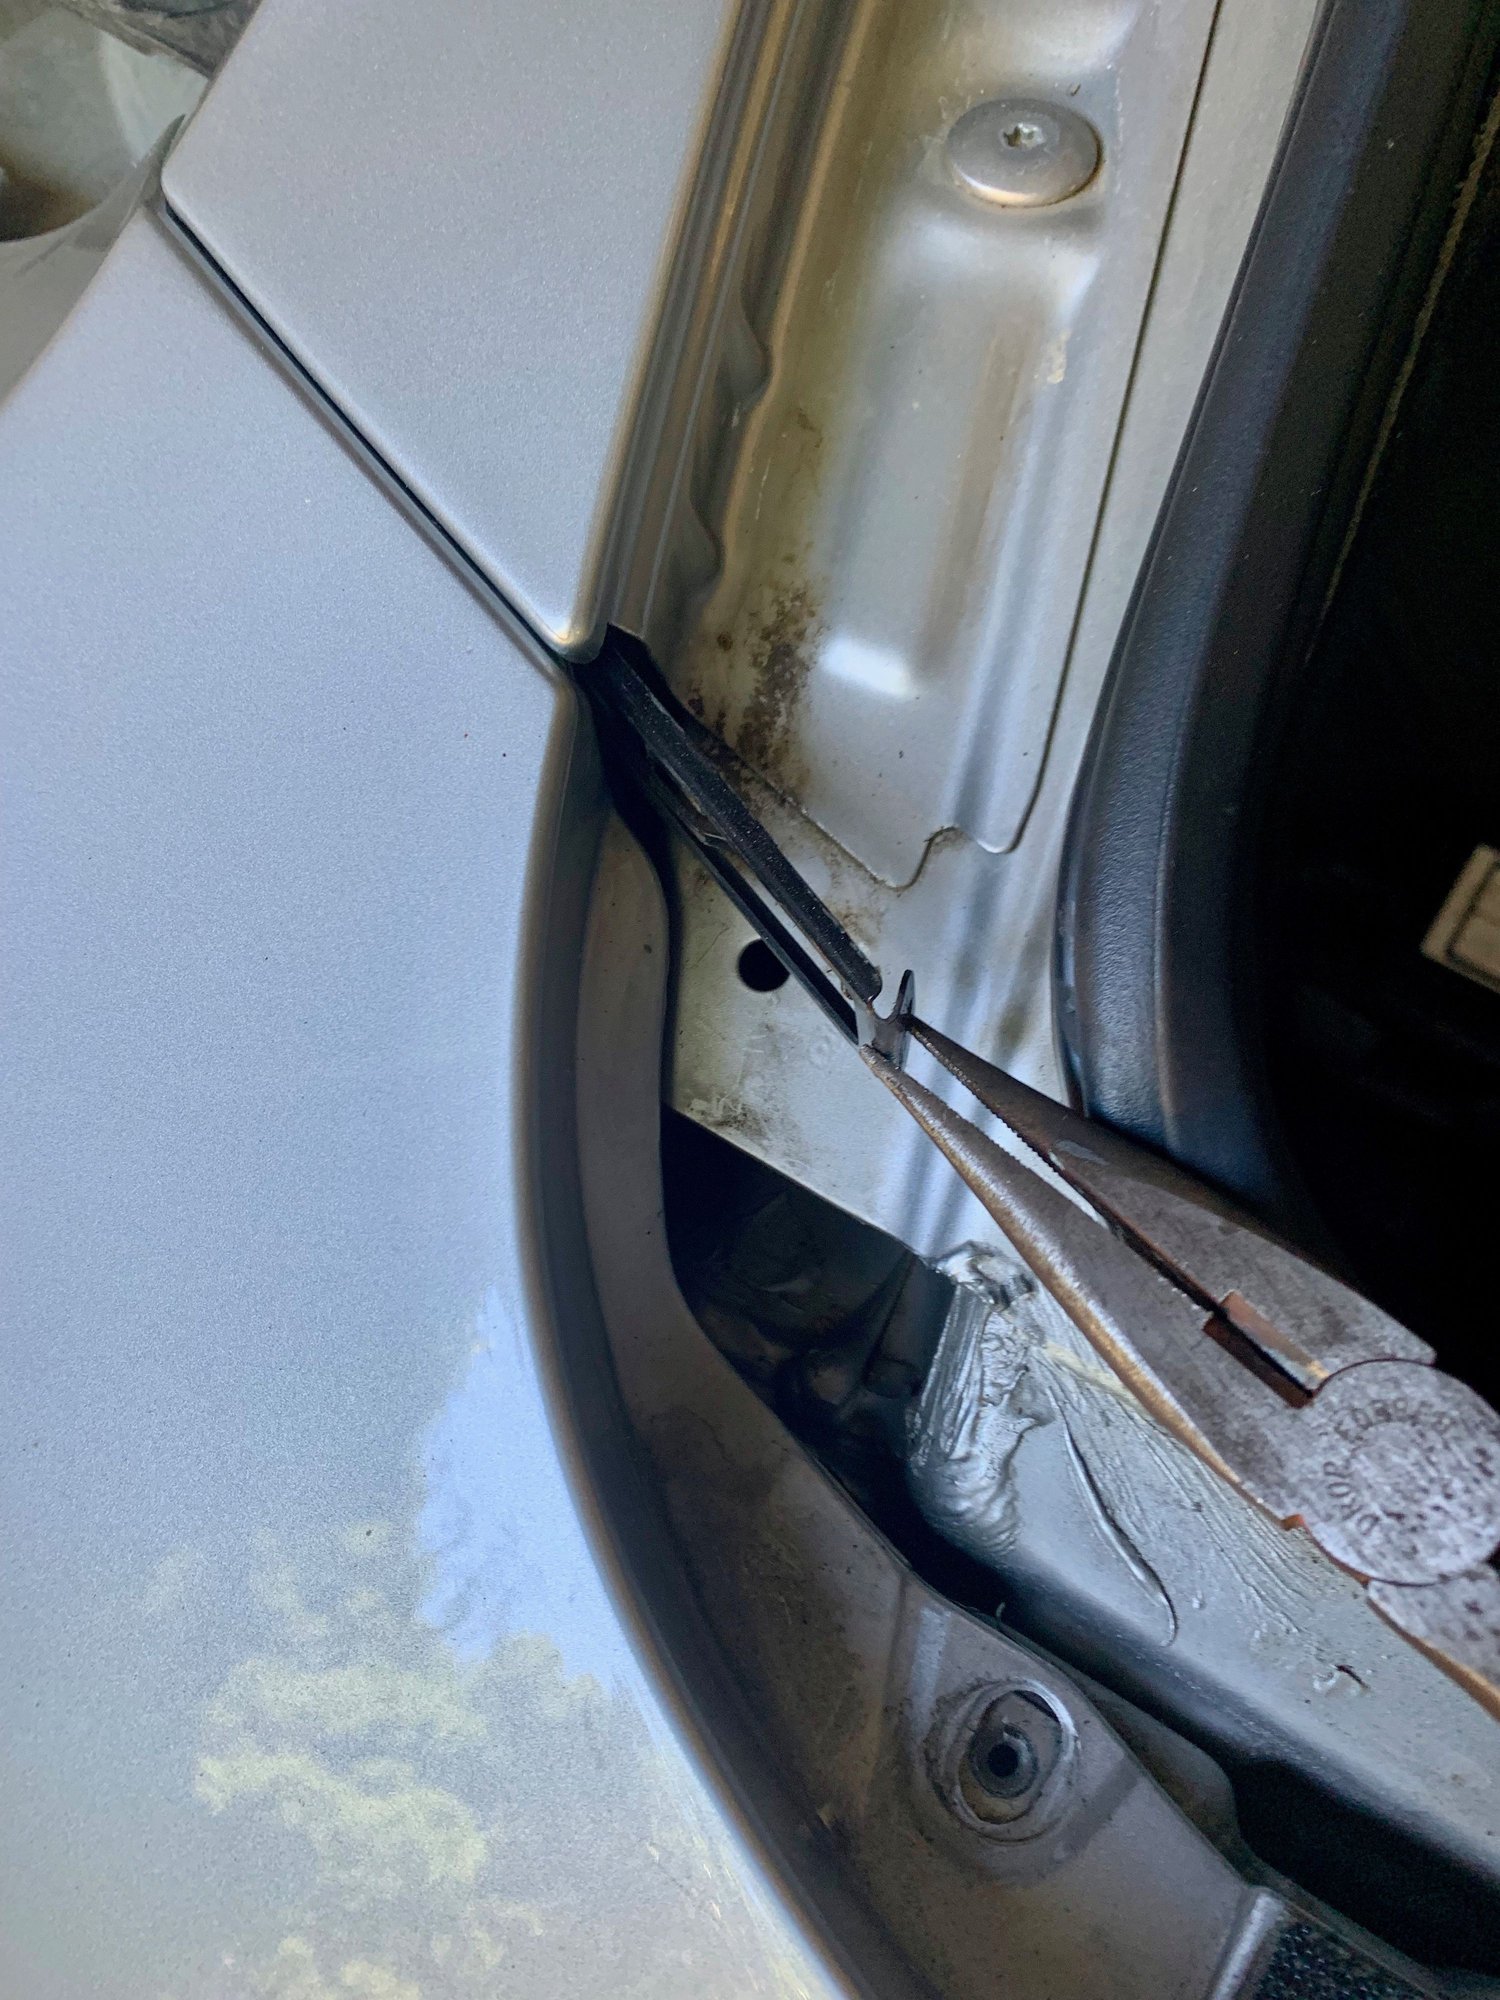
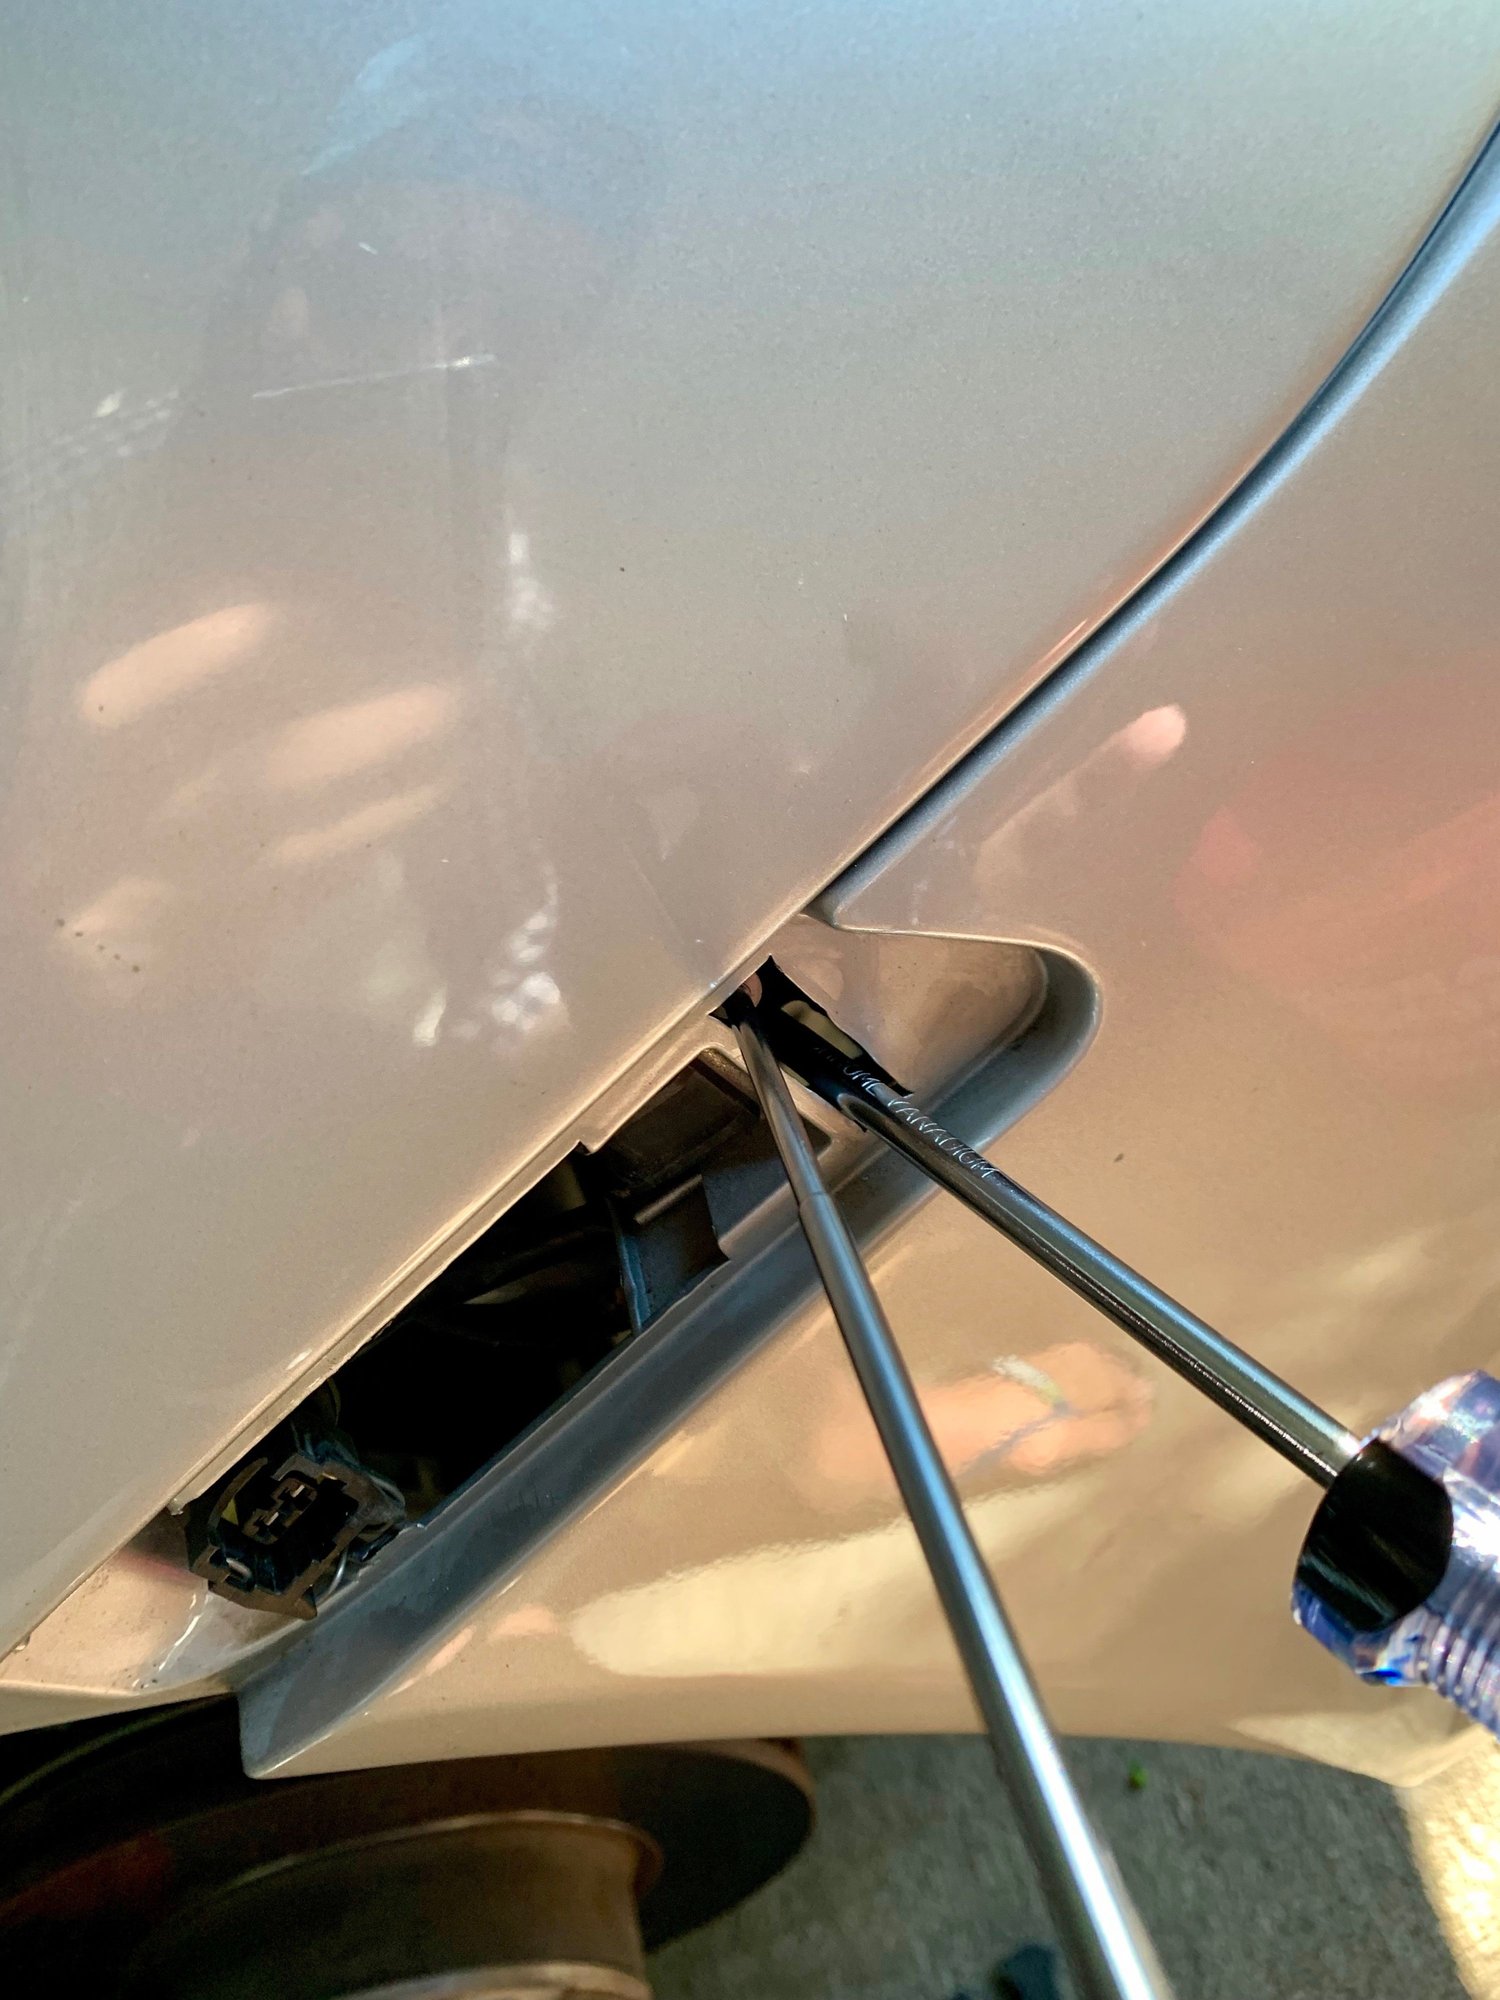
7. Pull out the clips (shims?)next to each headlight. The sit right between the bumper and the body and you can see the clip with a small hole in it. Use a gasket pick to pull it our, or needle nose pliers. You need to pull on these fairly hard to slide them out so be careful you dont lose your grip and scratch any paint.
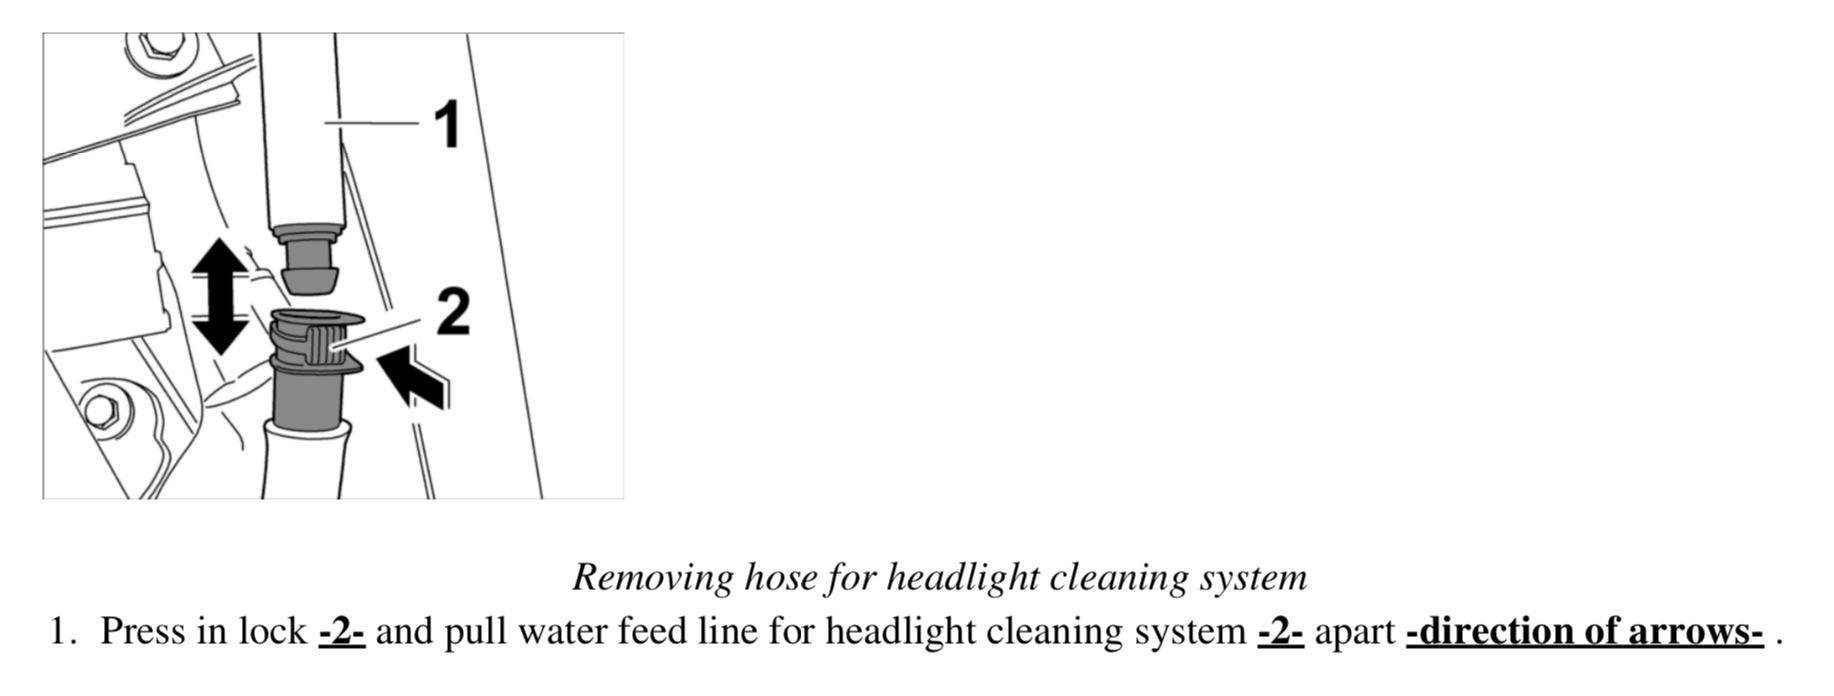
8. Remove the headlight washer hose in the driver side wheel well. The hose sits in a plastic bracket to hold it in place. Remove it from the bracket do get a better handle on it. Then remove the plastic clip that holds the two hoses together. Slide it back to release it and then the two ends of the hose can be pulled apart.
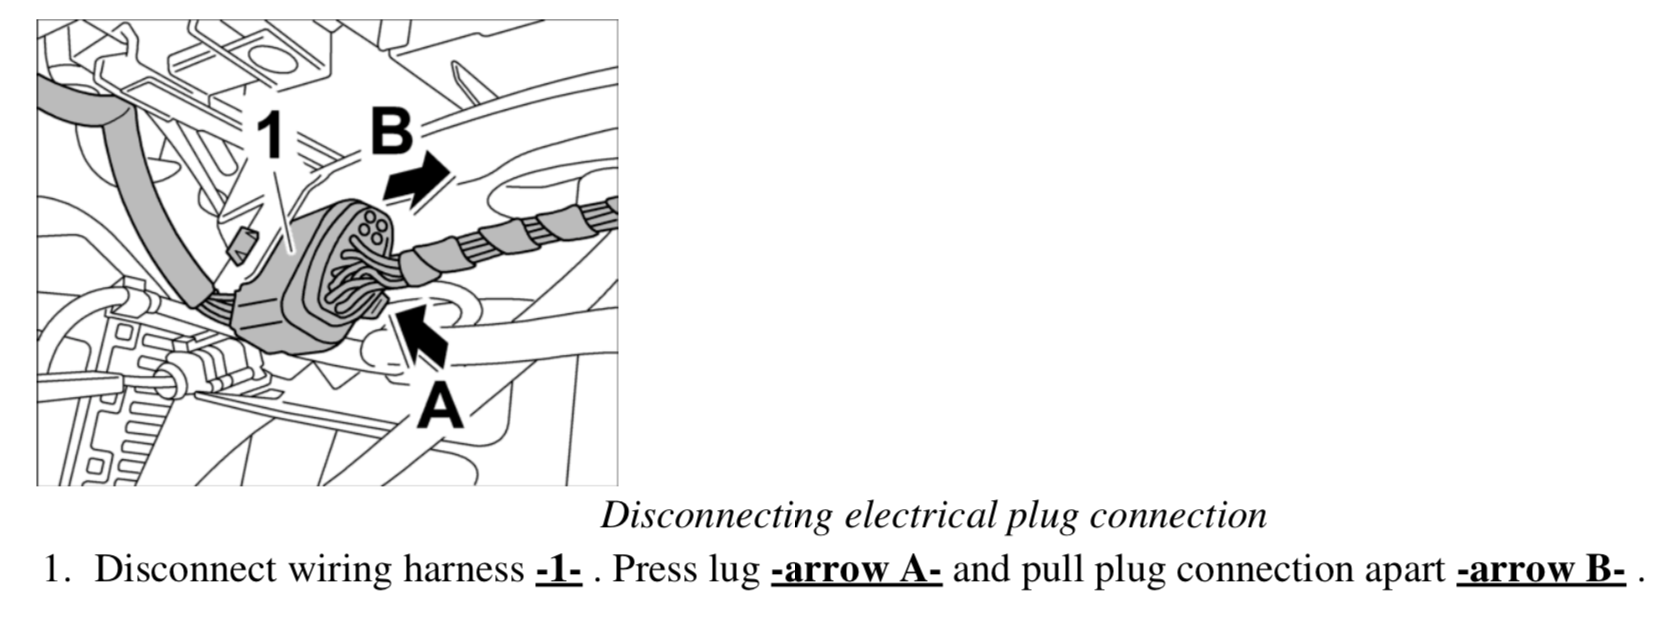
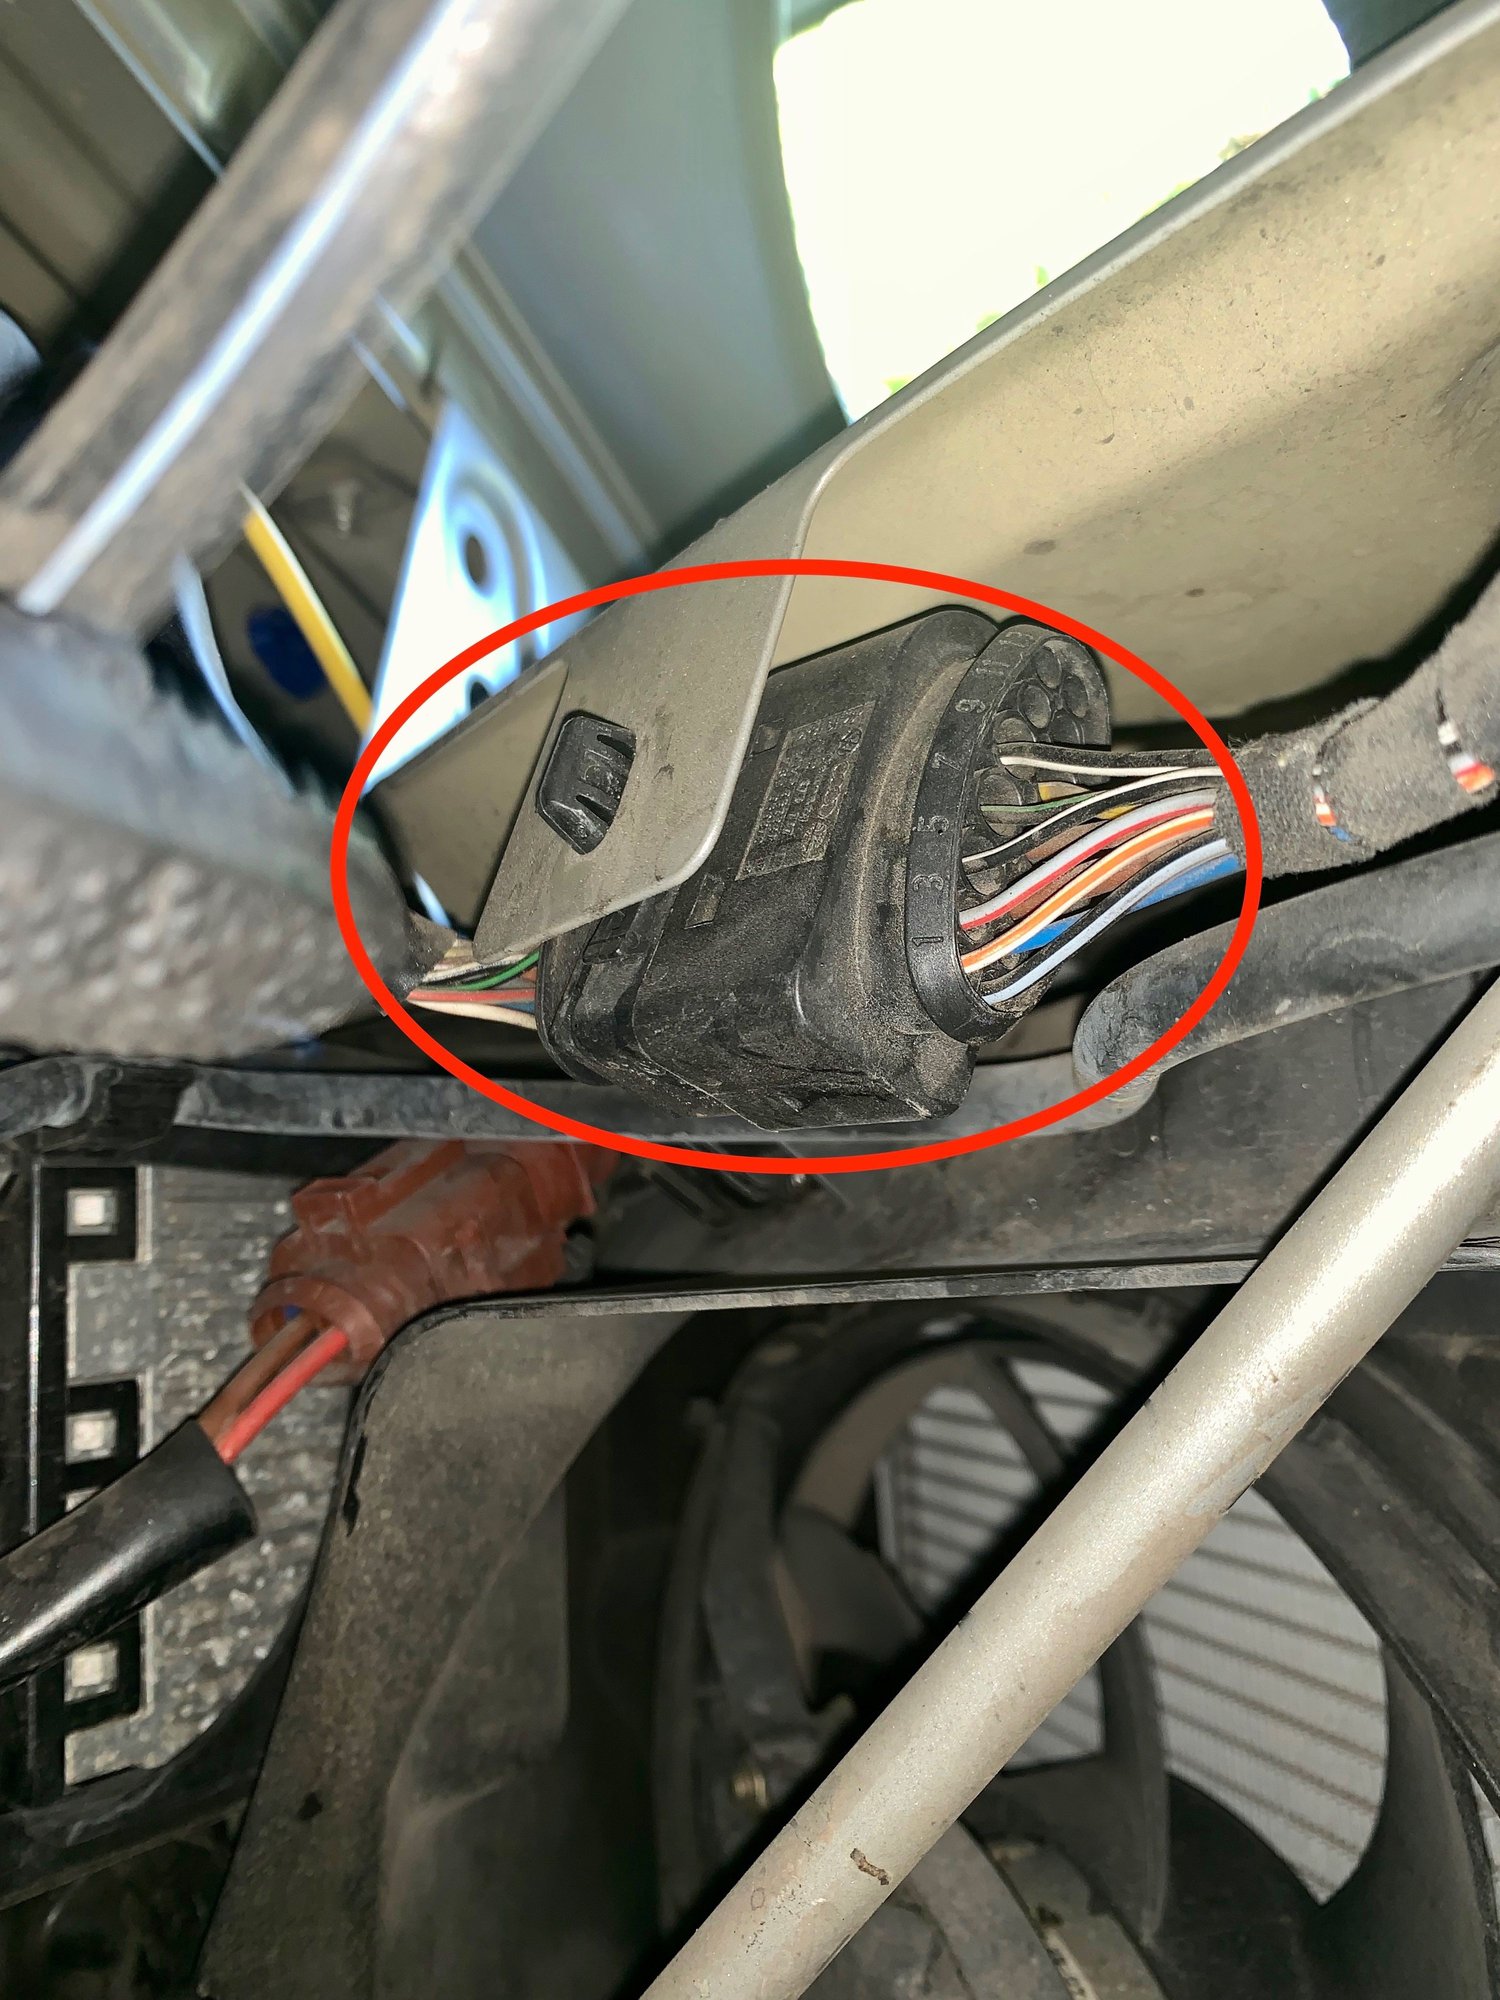
9. Now go over into the passenger wheel well and unclip the cable for the headlights. Its mounted in a bracket right behind the headlight. You need to reach in there and fiddle with it to get it to release. Somebody hopefully has better instructions than that, because I thought it was a pain in the ***. You are in an awkward position and the clip is facing away from you so you cant really see what you are doing.
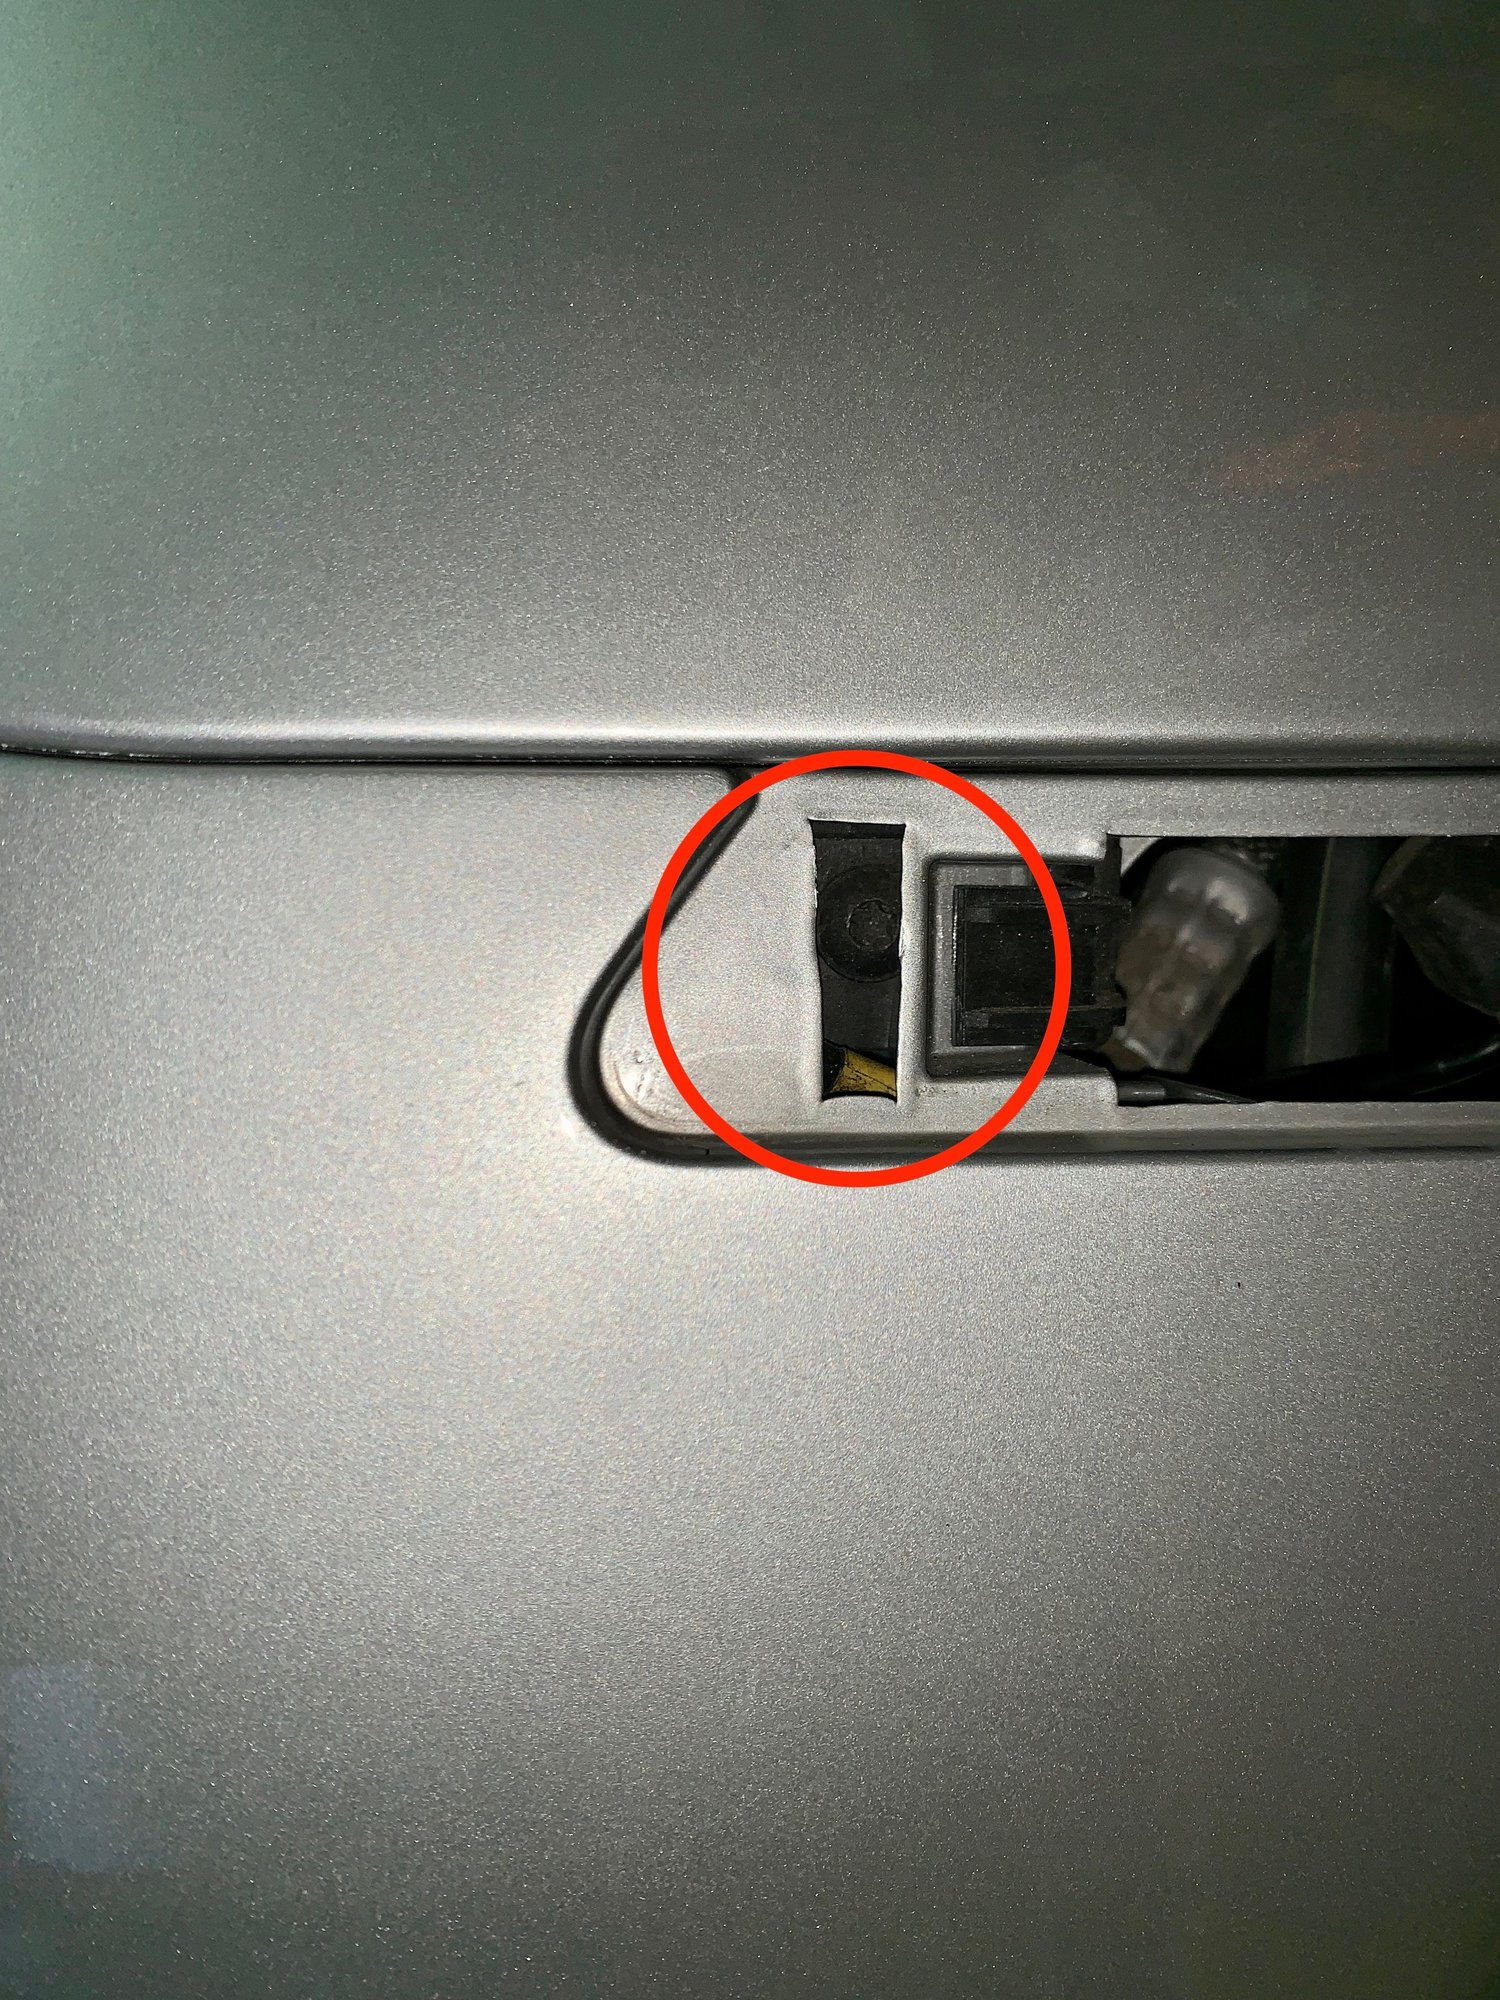
10. There is one last step to get your bumper clear and that is to pull out the black plastic clips inside the sidemarker. Those just hold the corner of the bumper in place a little. They aren't screwed in so you just have to fiddle to pull them back a bit. The bumper then slides out along a black plastic track on each side.
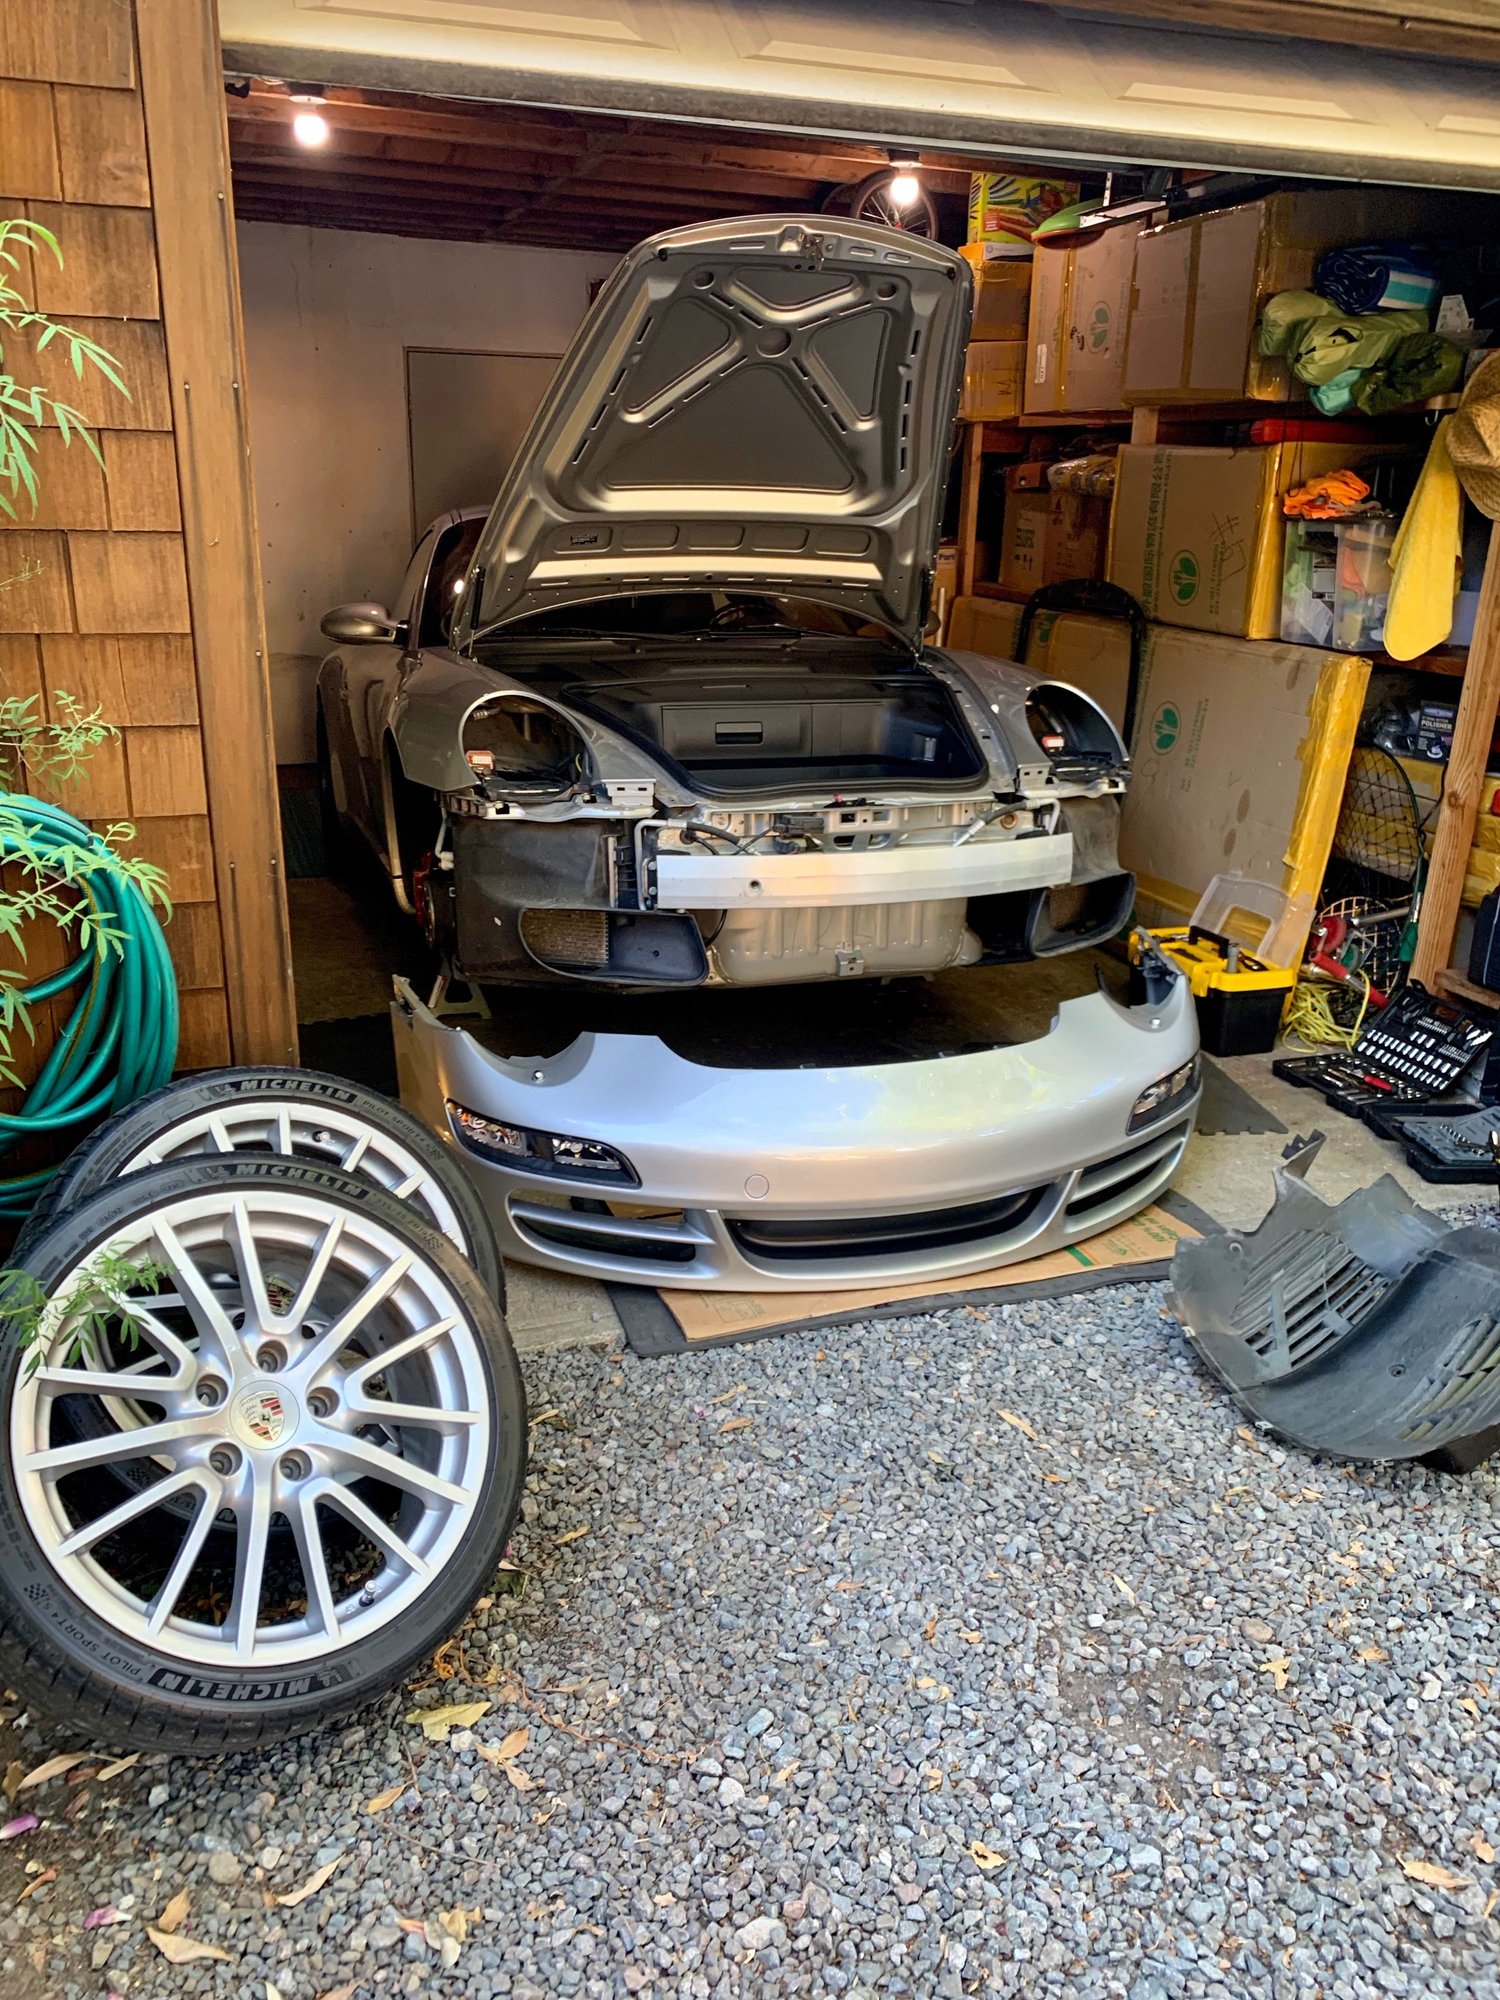
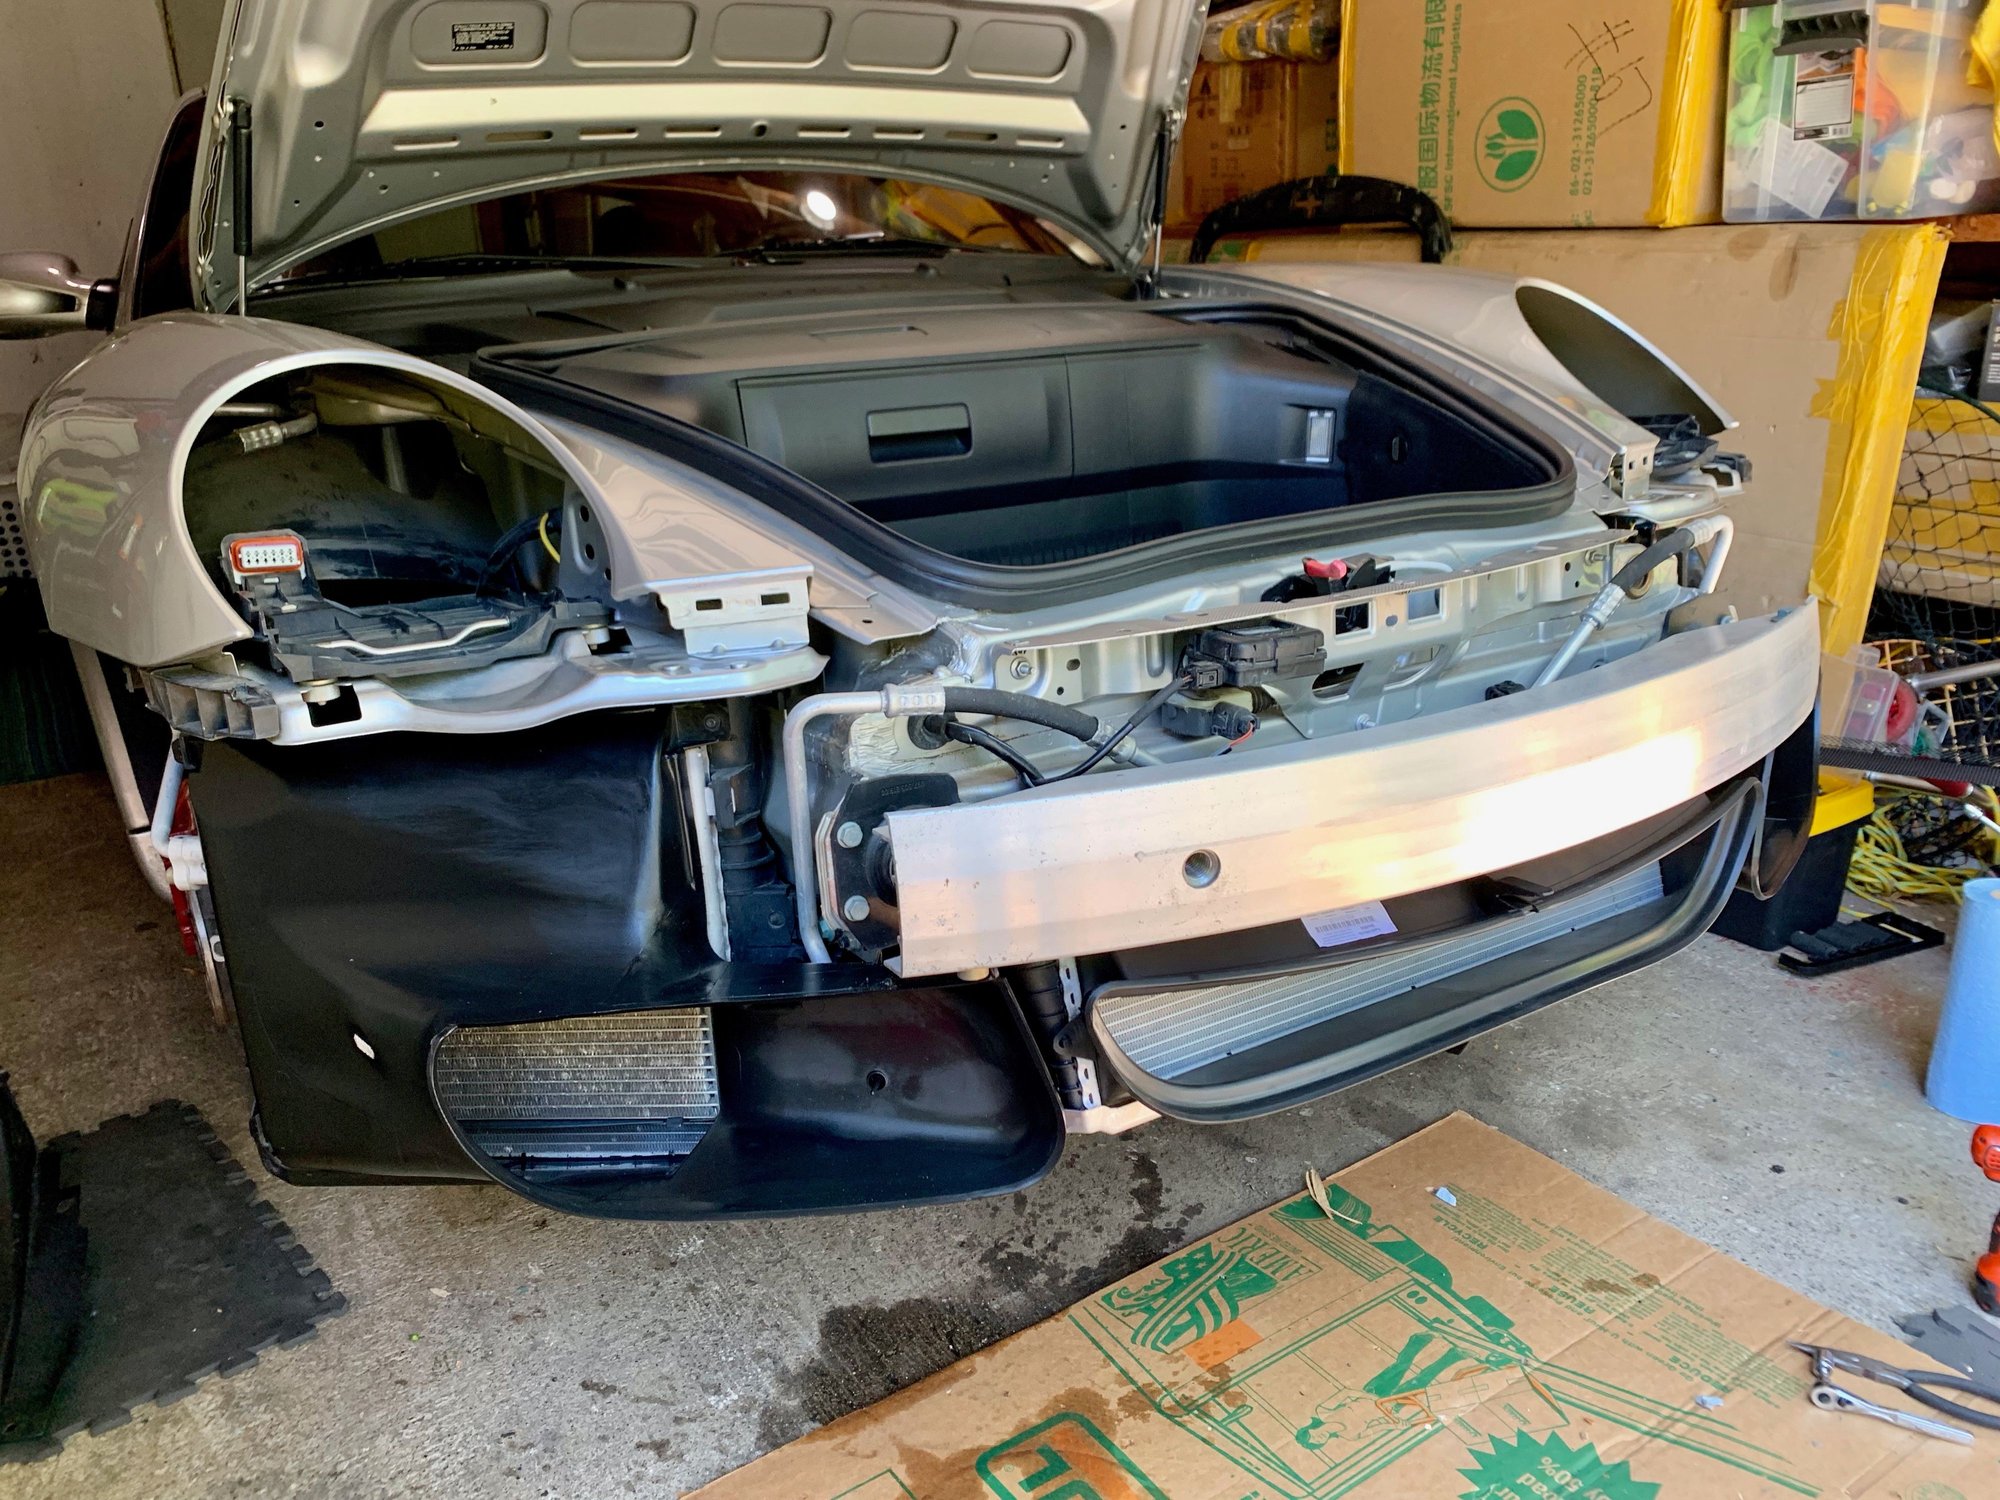
11. Now your bumper is free and clear. Grab each corner near the wheel well and headlight to jiggle it a little to make sure its free. Then slide it out and inch or two along the black plastic track. Now do the same on the other side. Then grab the center of the bumper and start pulling towards you. Make sure you have a heavy blanket or cardboard to place it on safely. Its not heavy so you can do it by yourself. However just work slowly so you dont drop it or scratch the paint. Its ok to rest the underside of the bumper on cardboard but I would not rest the nose on cardboard for fear of scratching the paint.
Once you have it off set the bumper aside and out of the way so you aren't tripping over it.
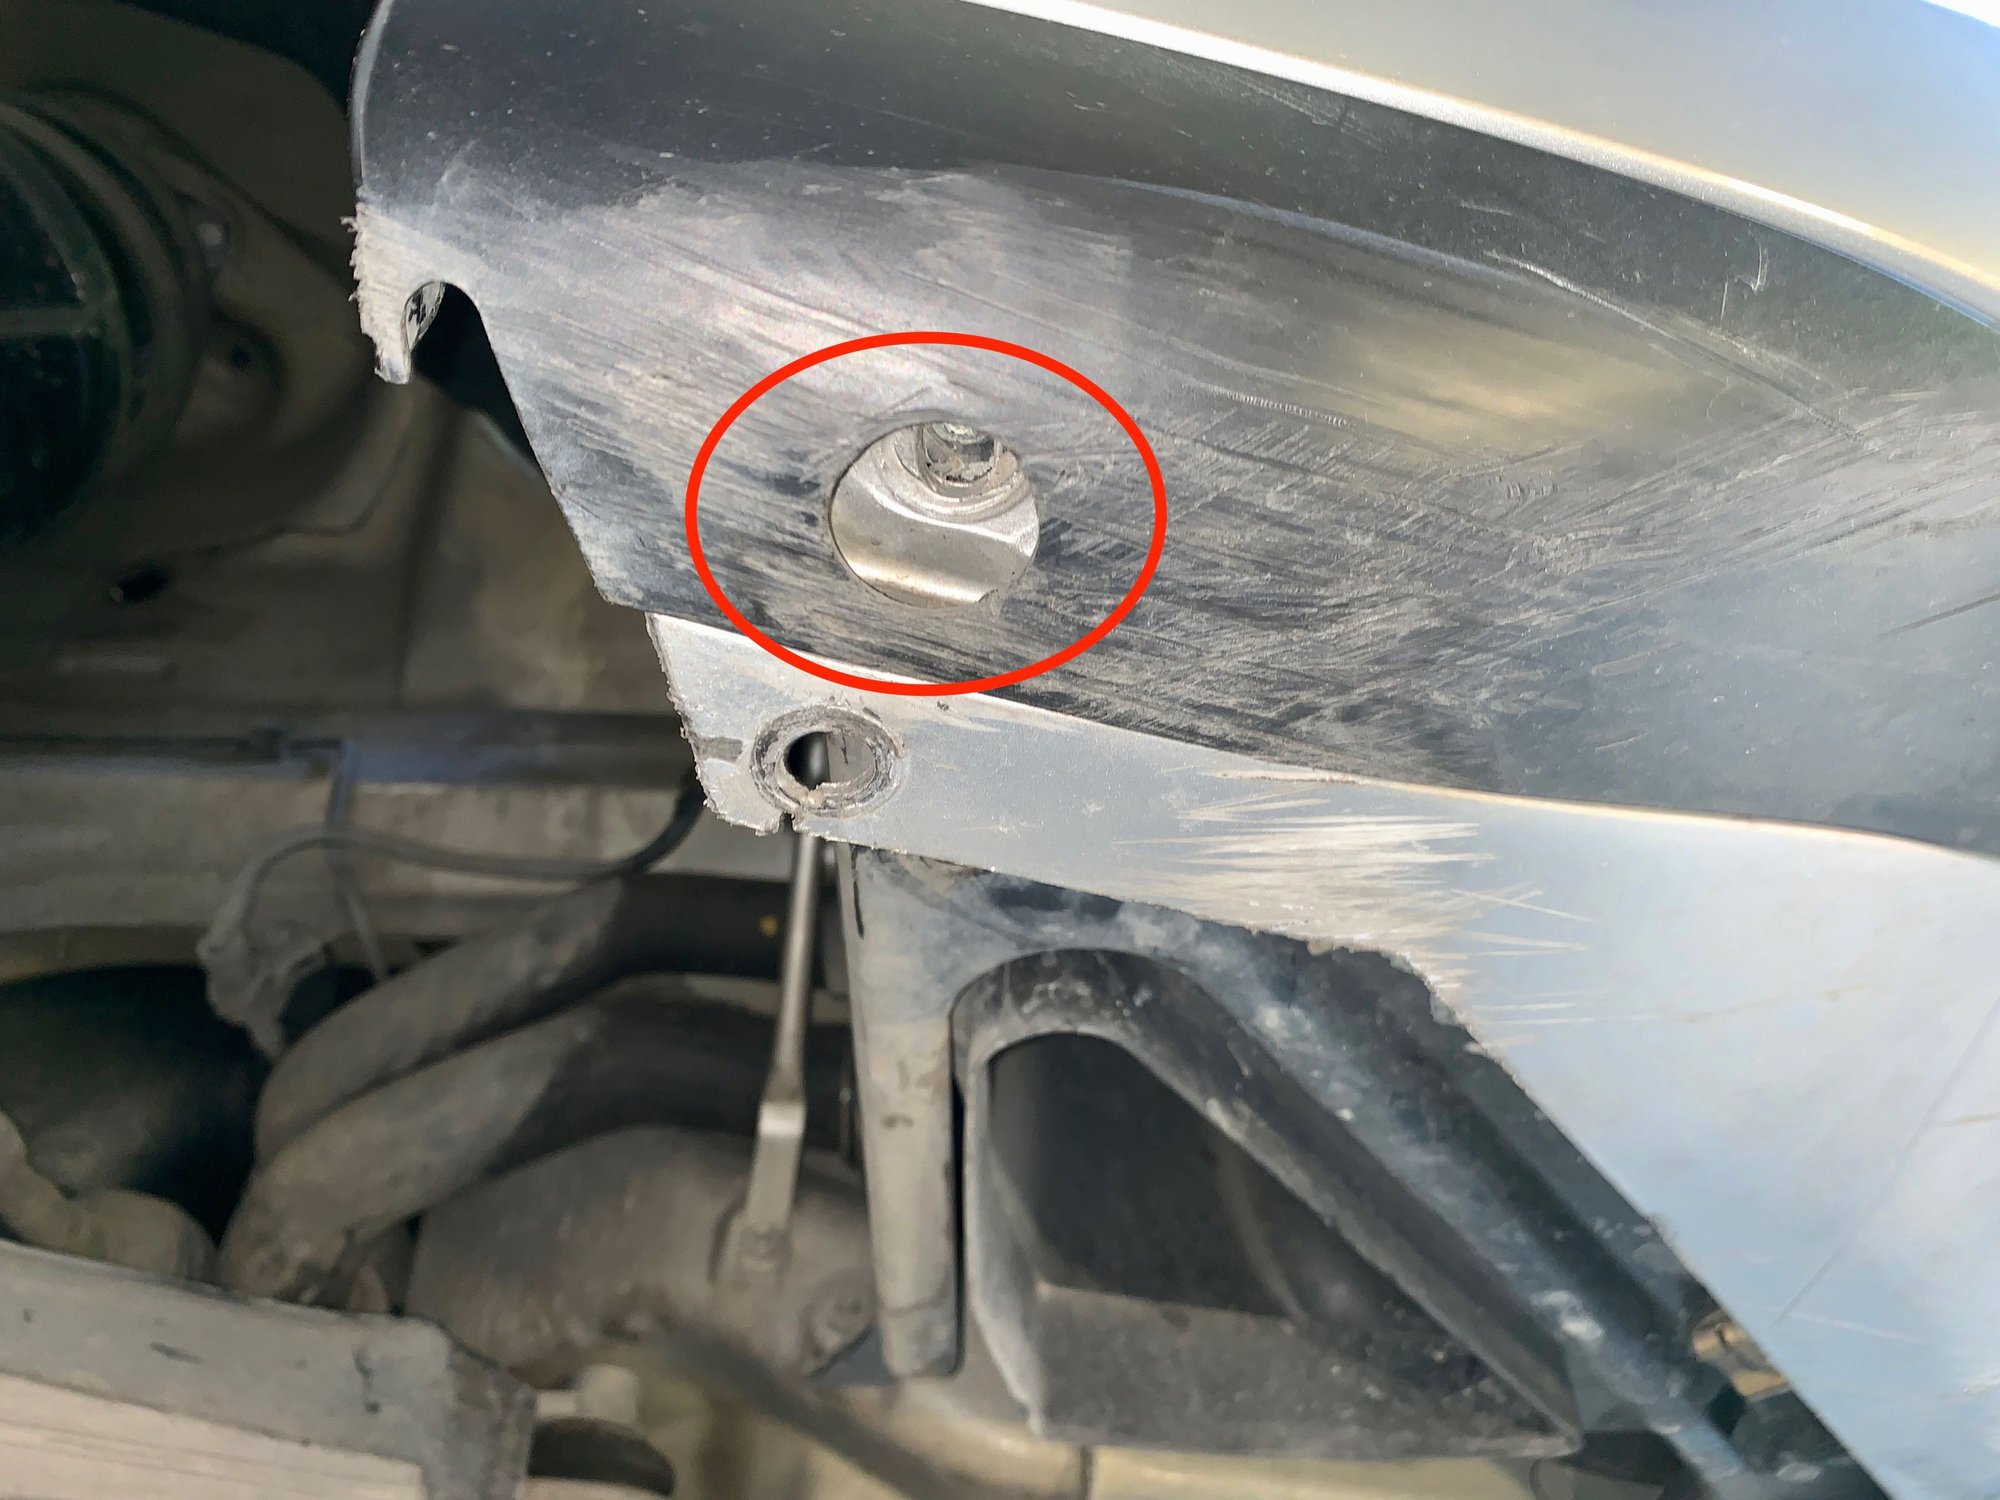
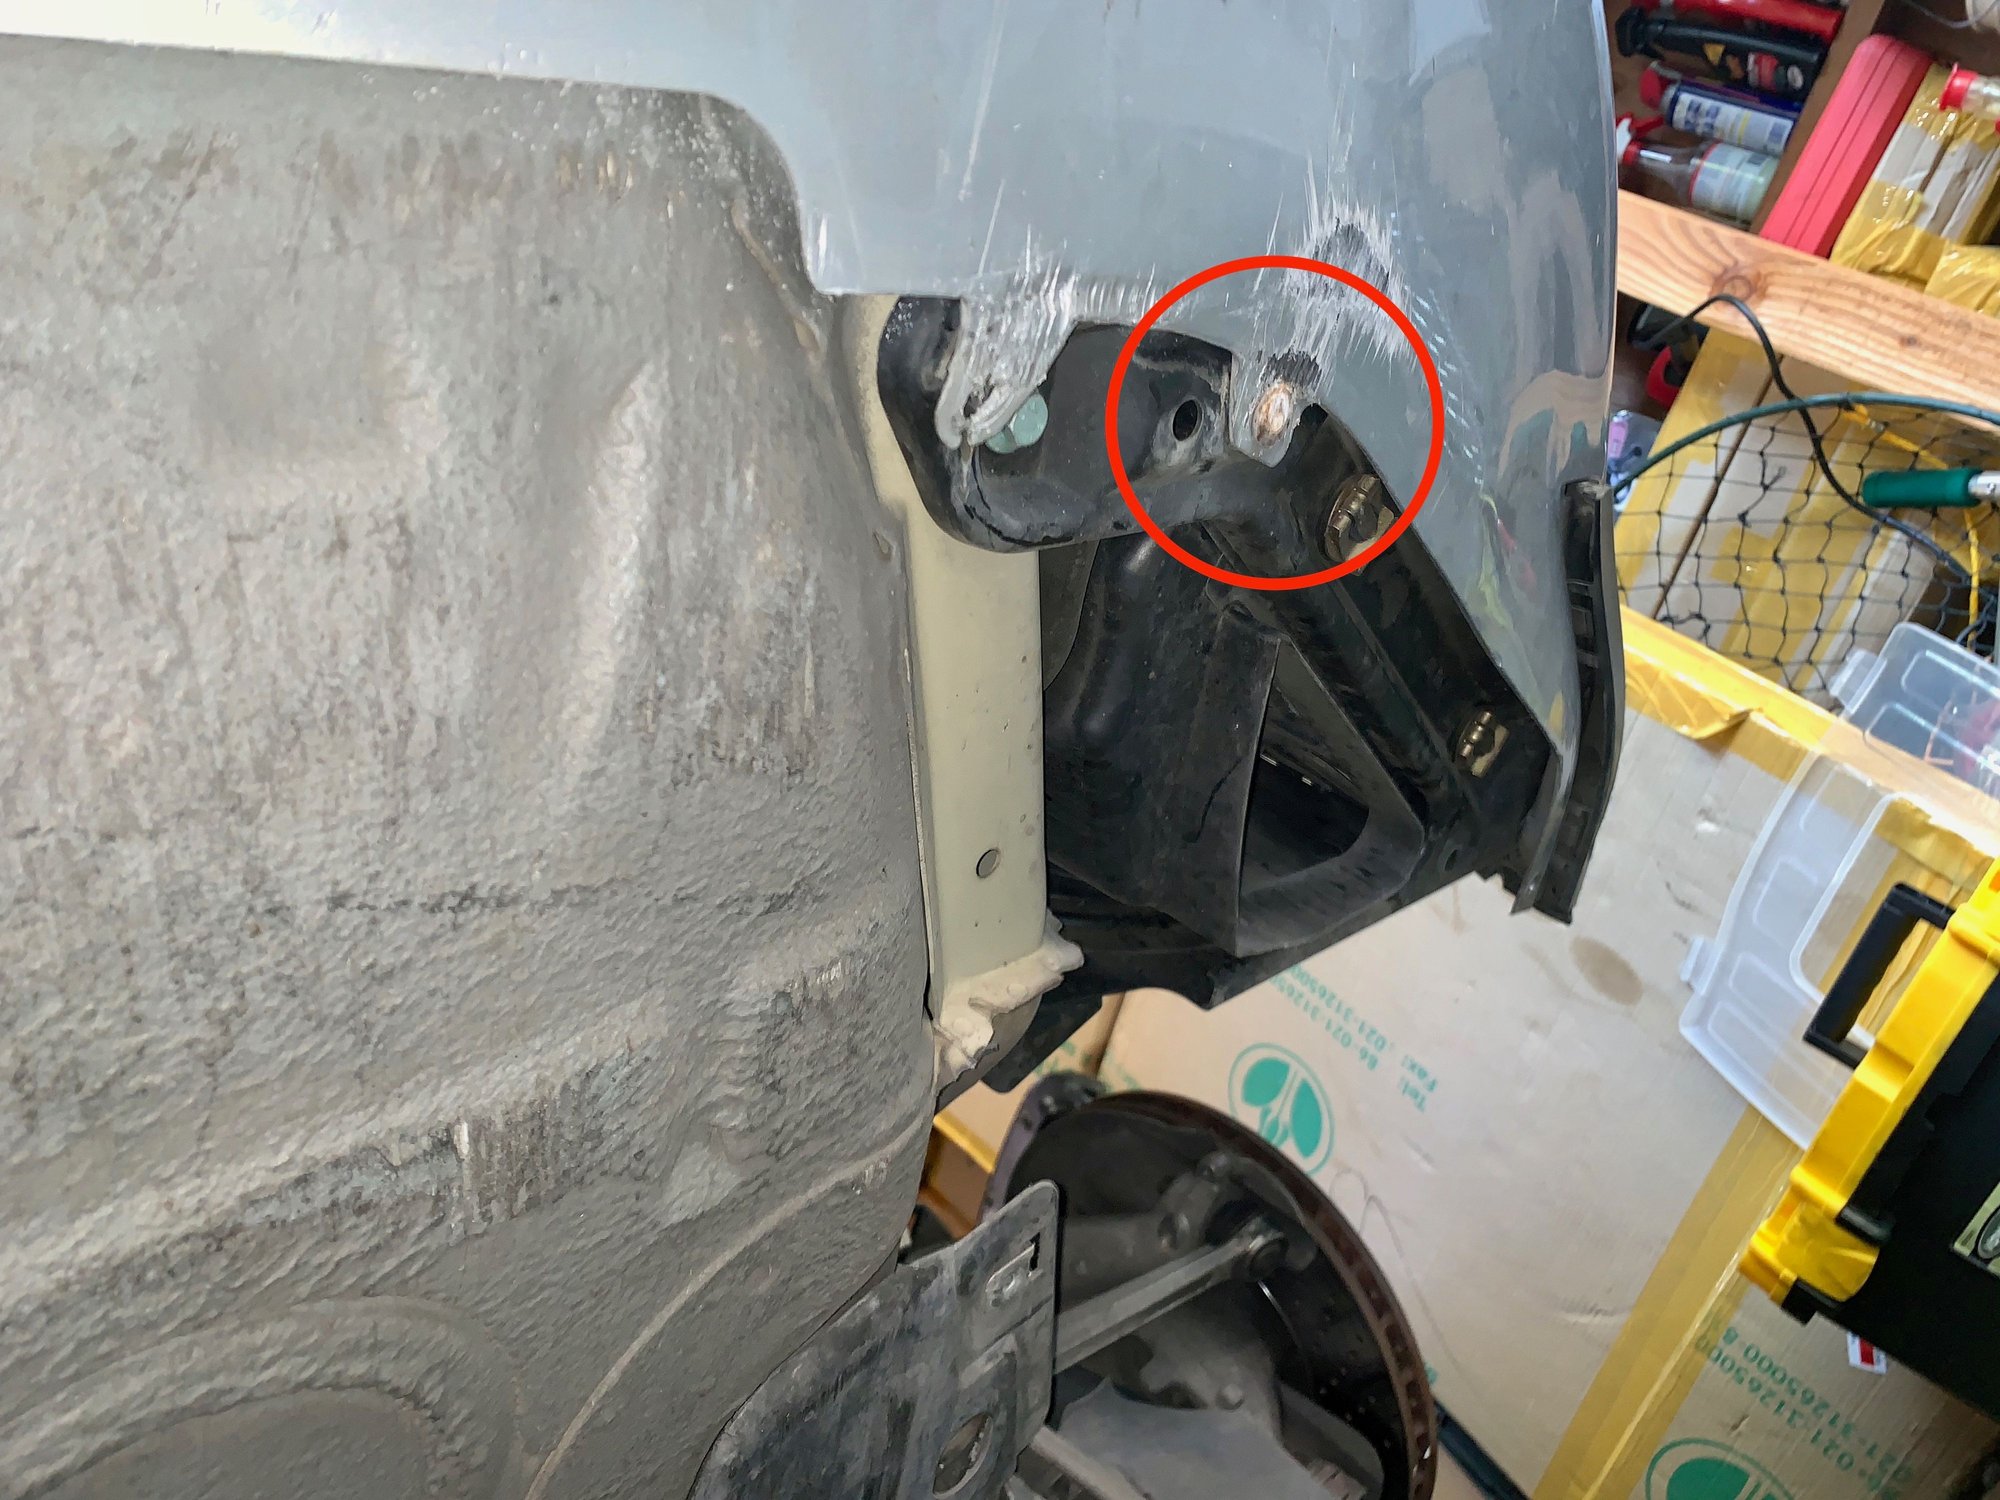
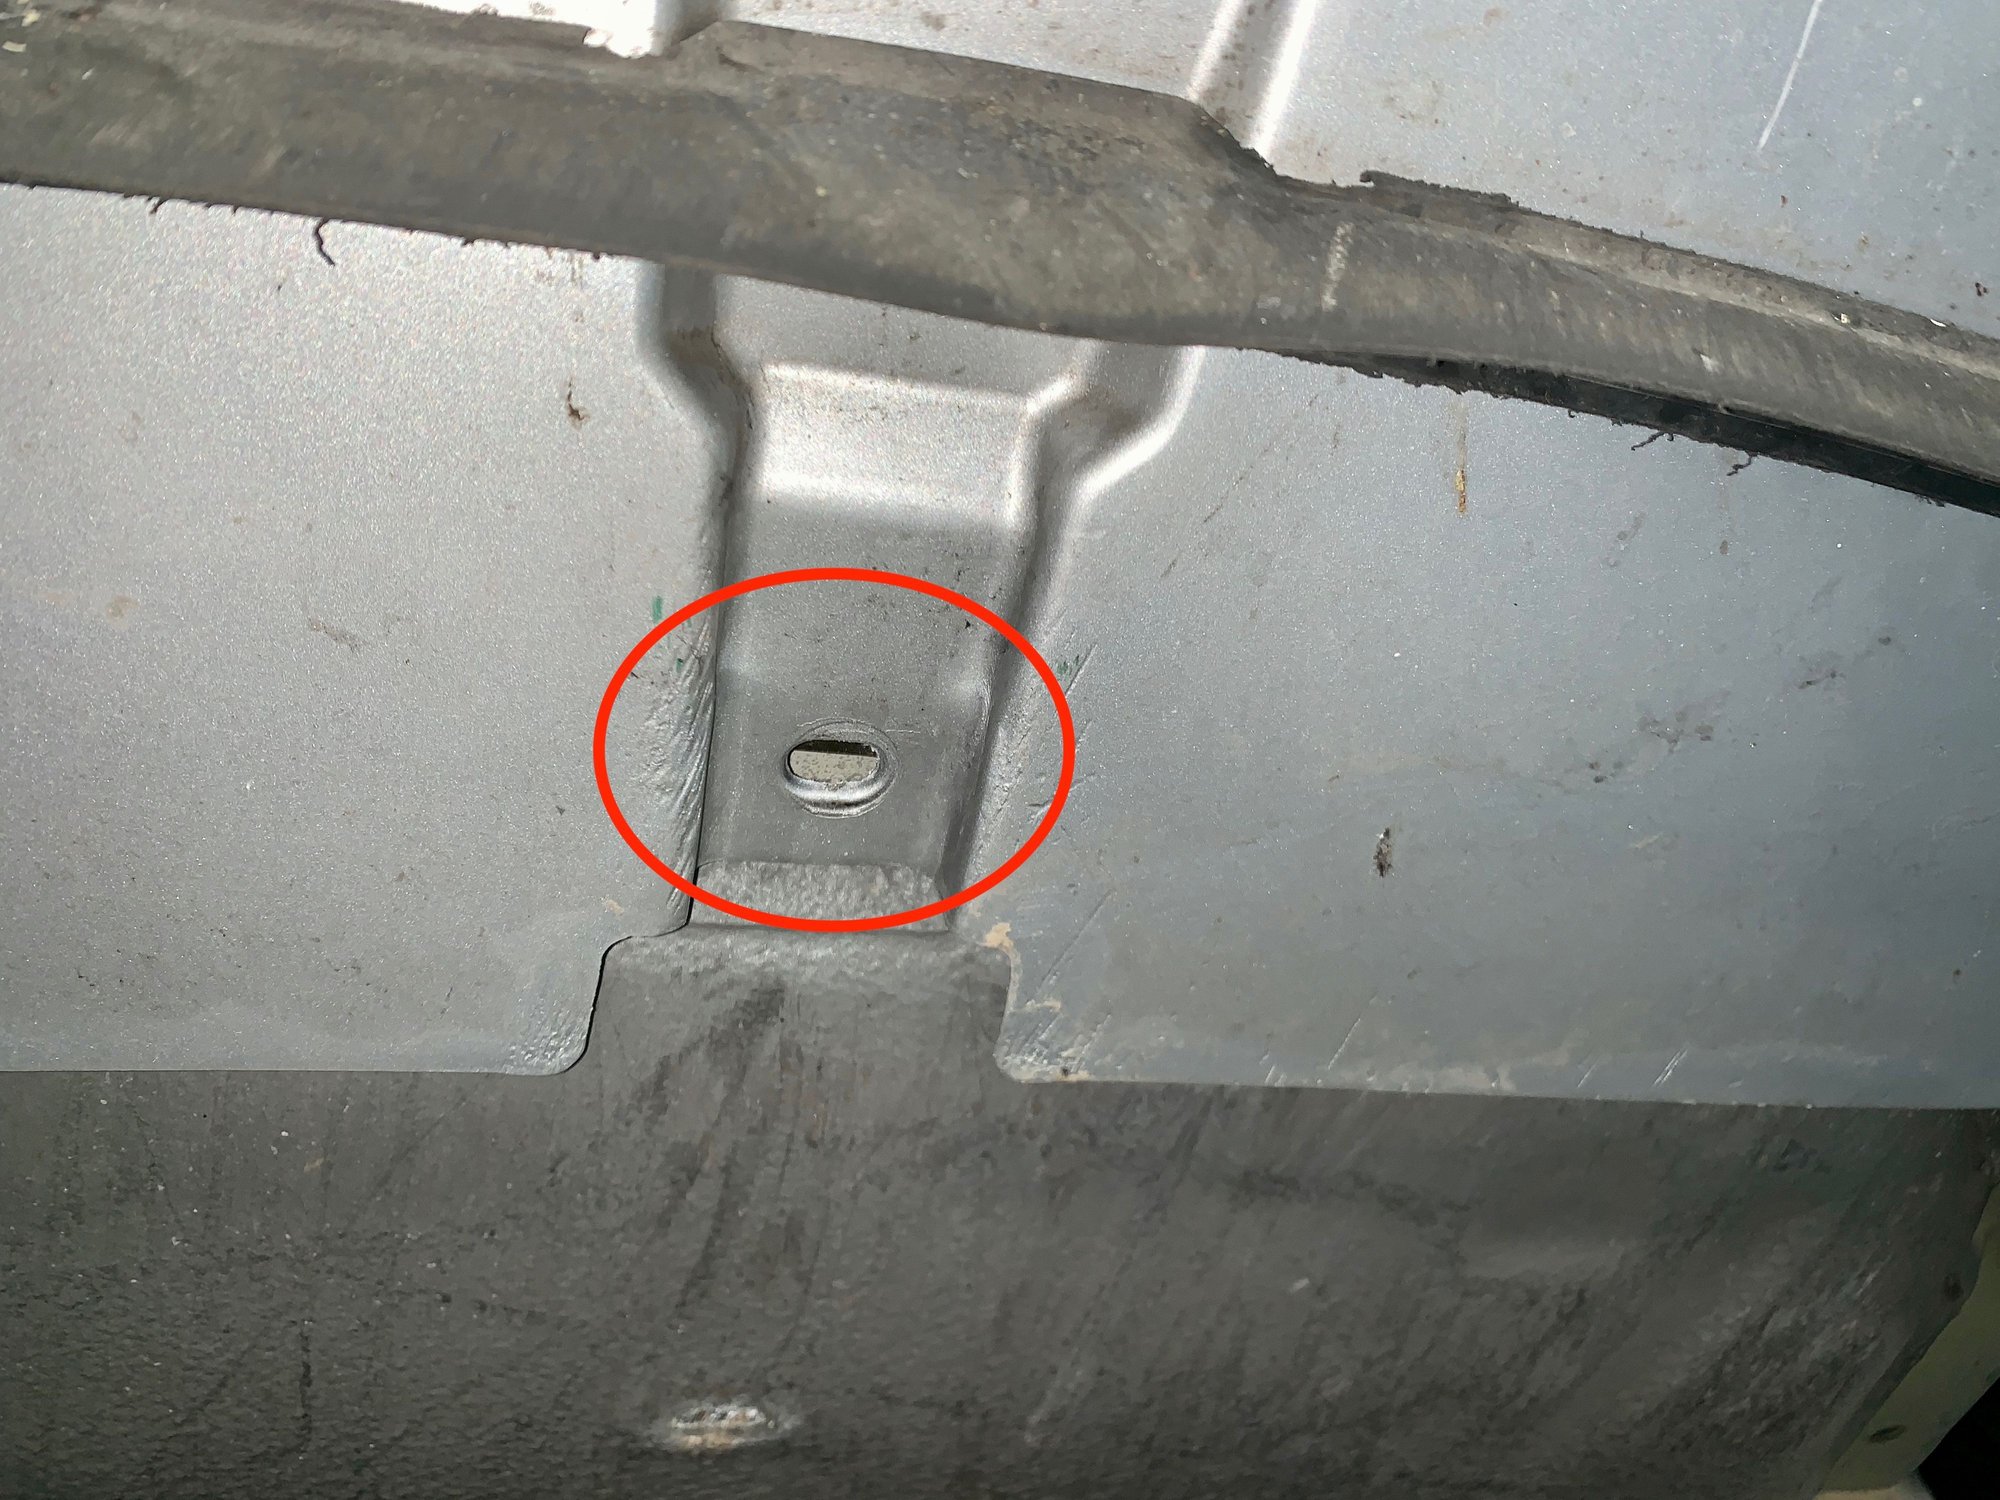
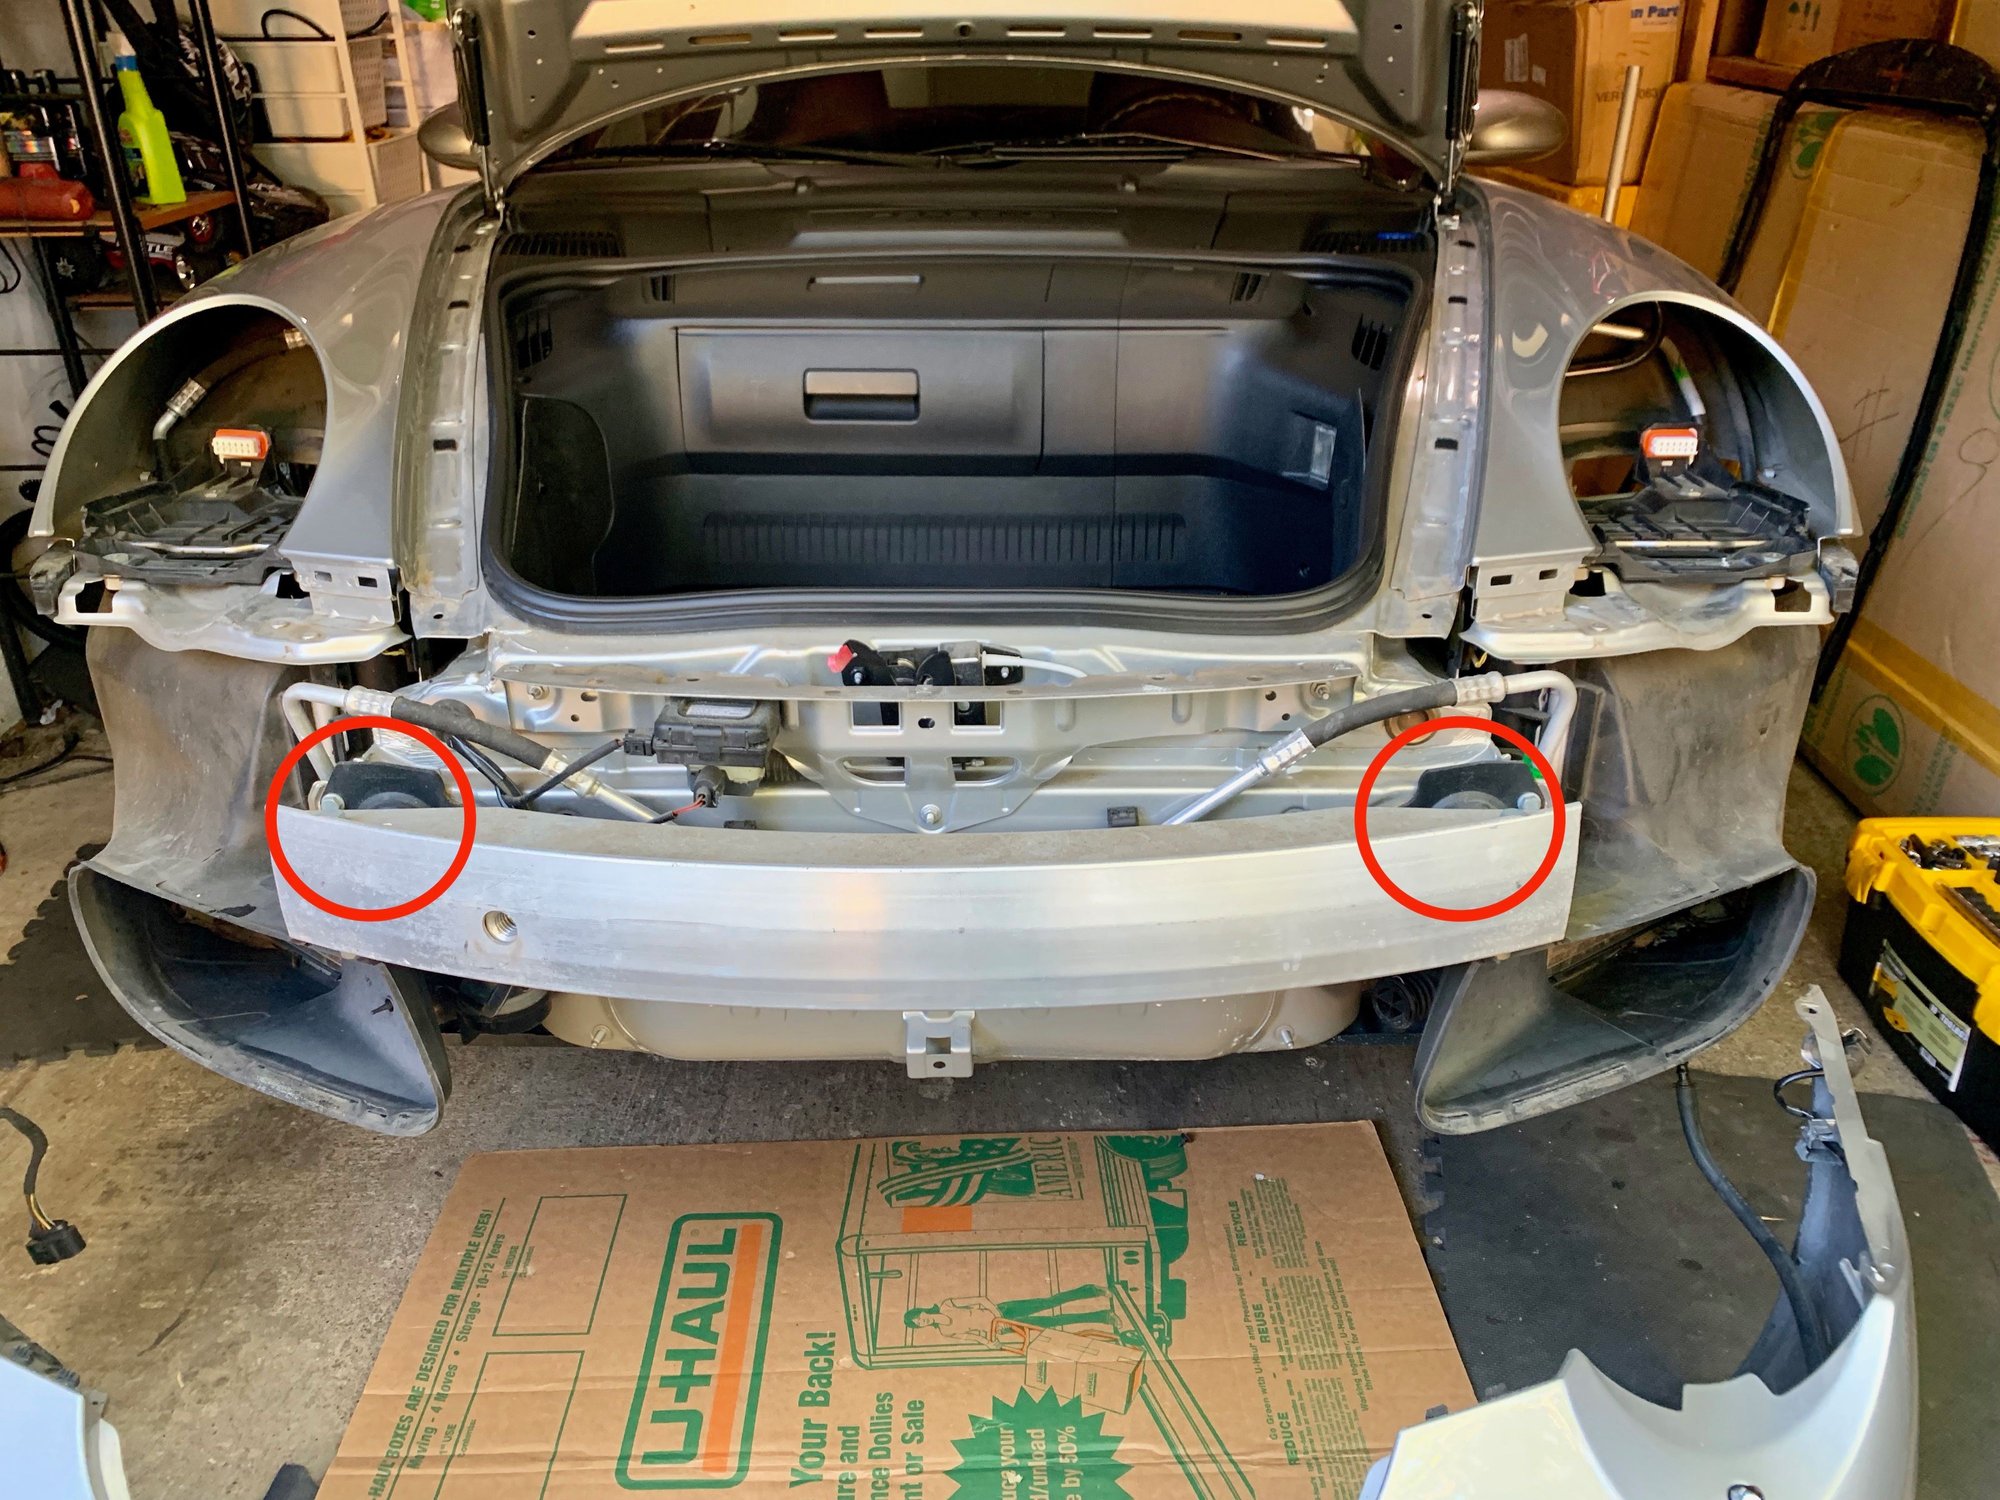
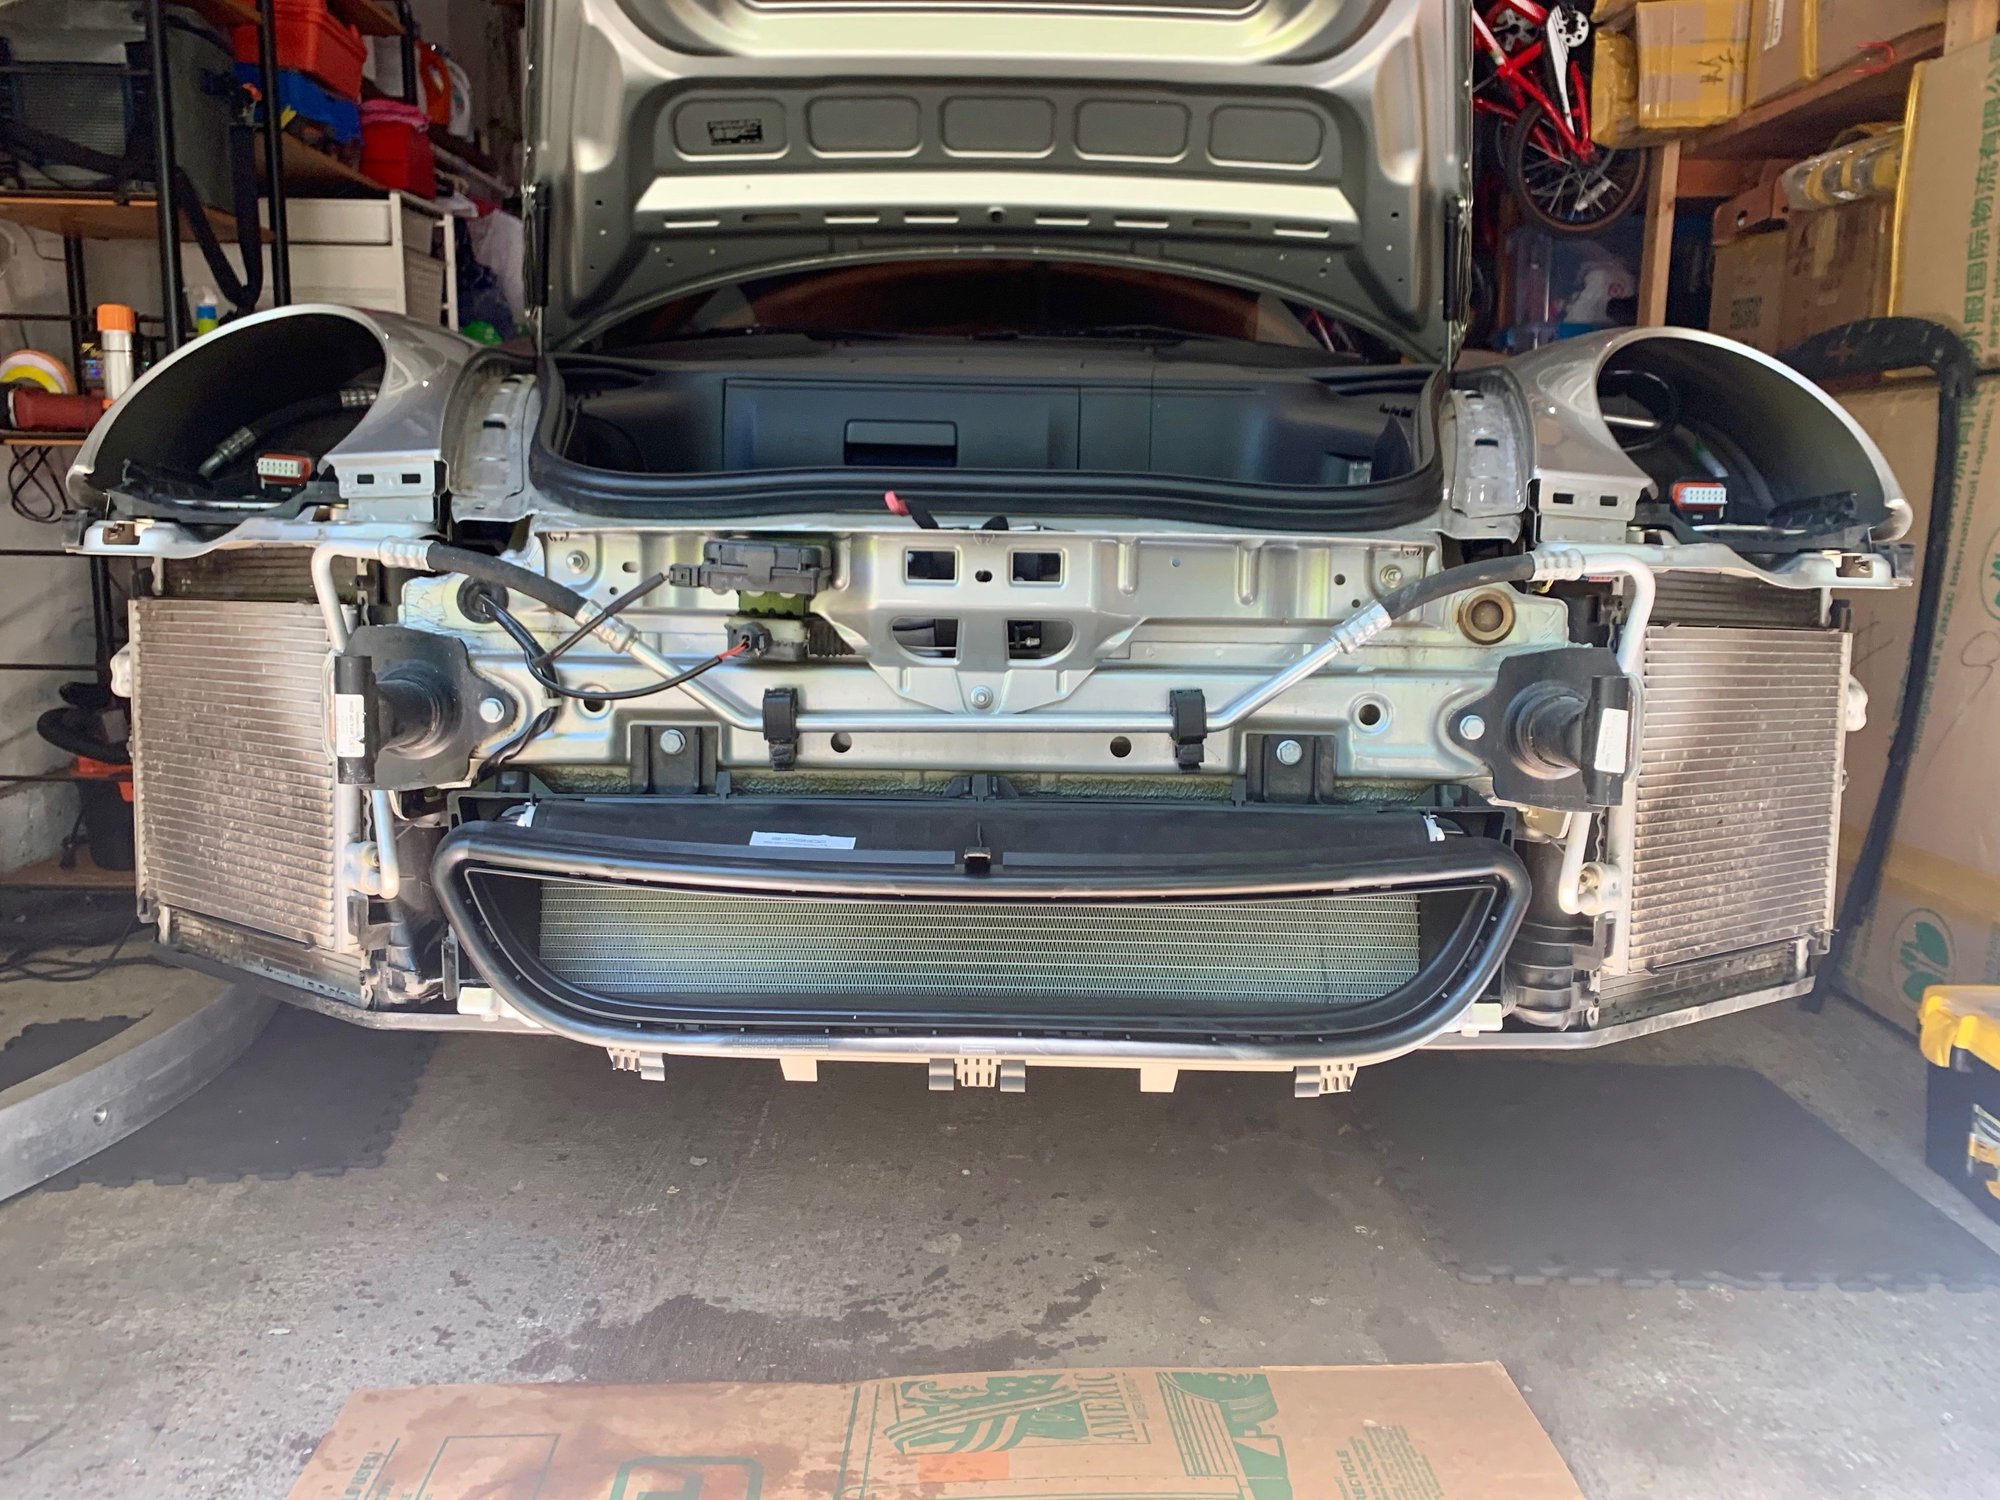
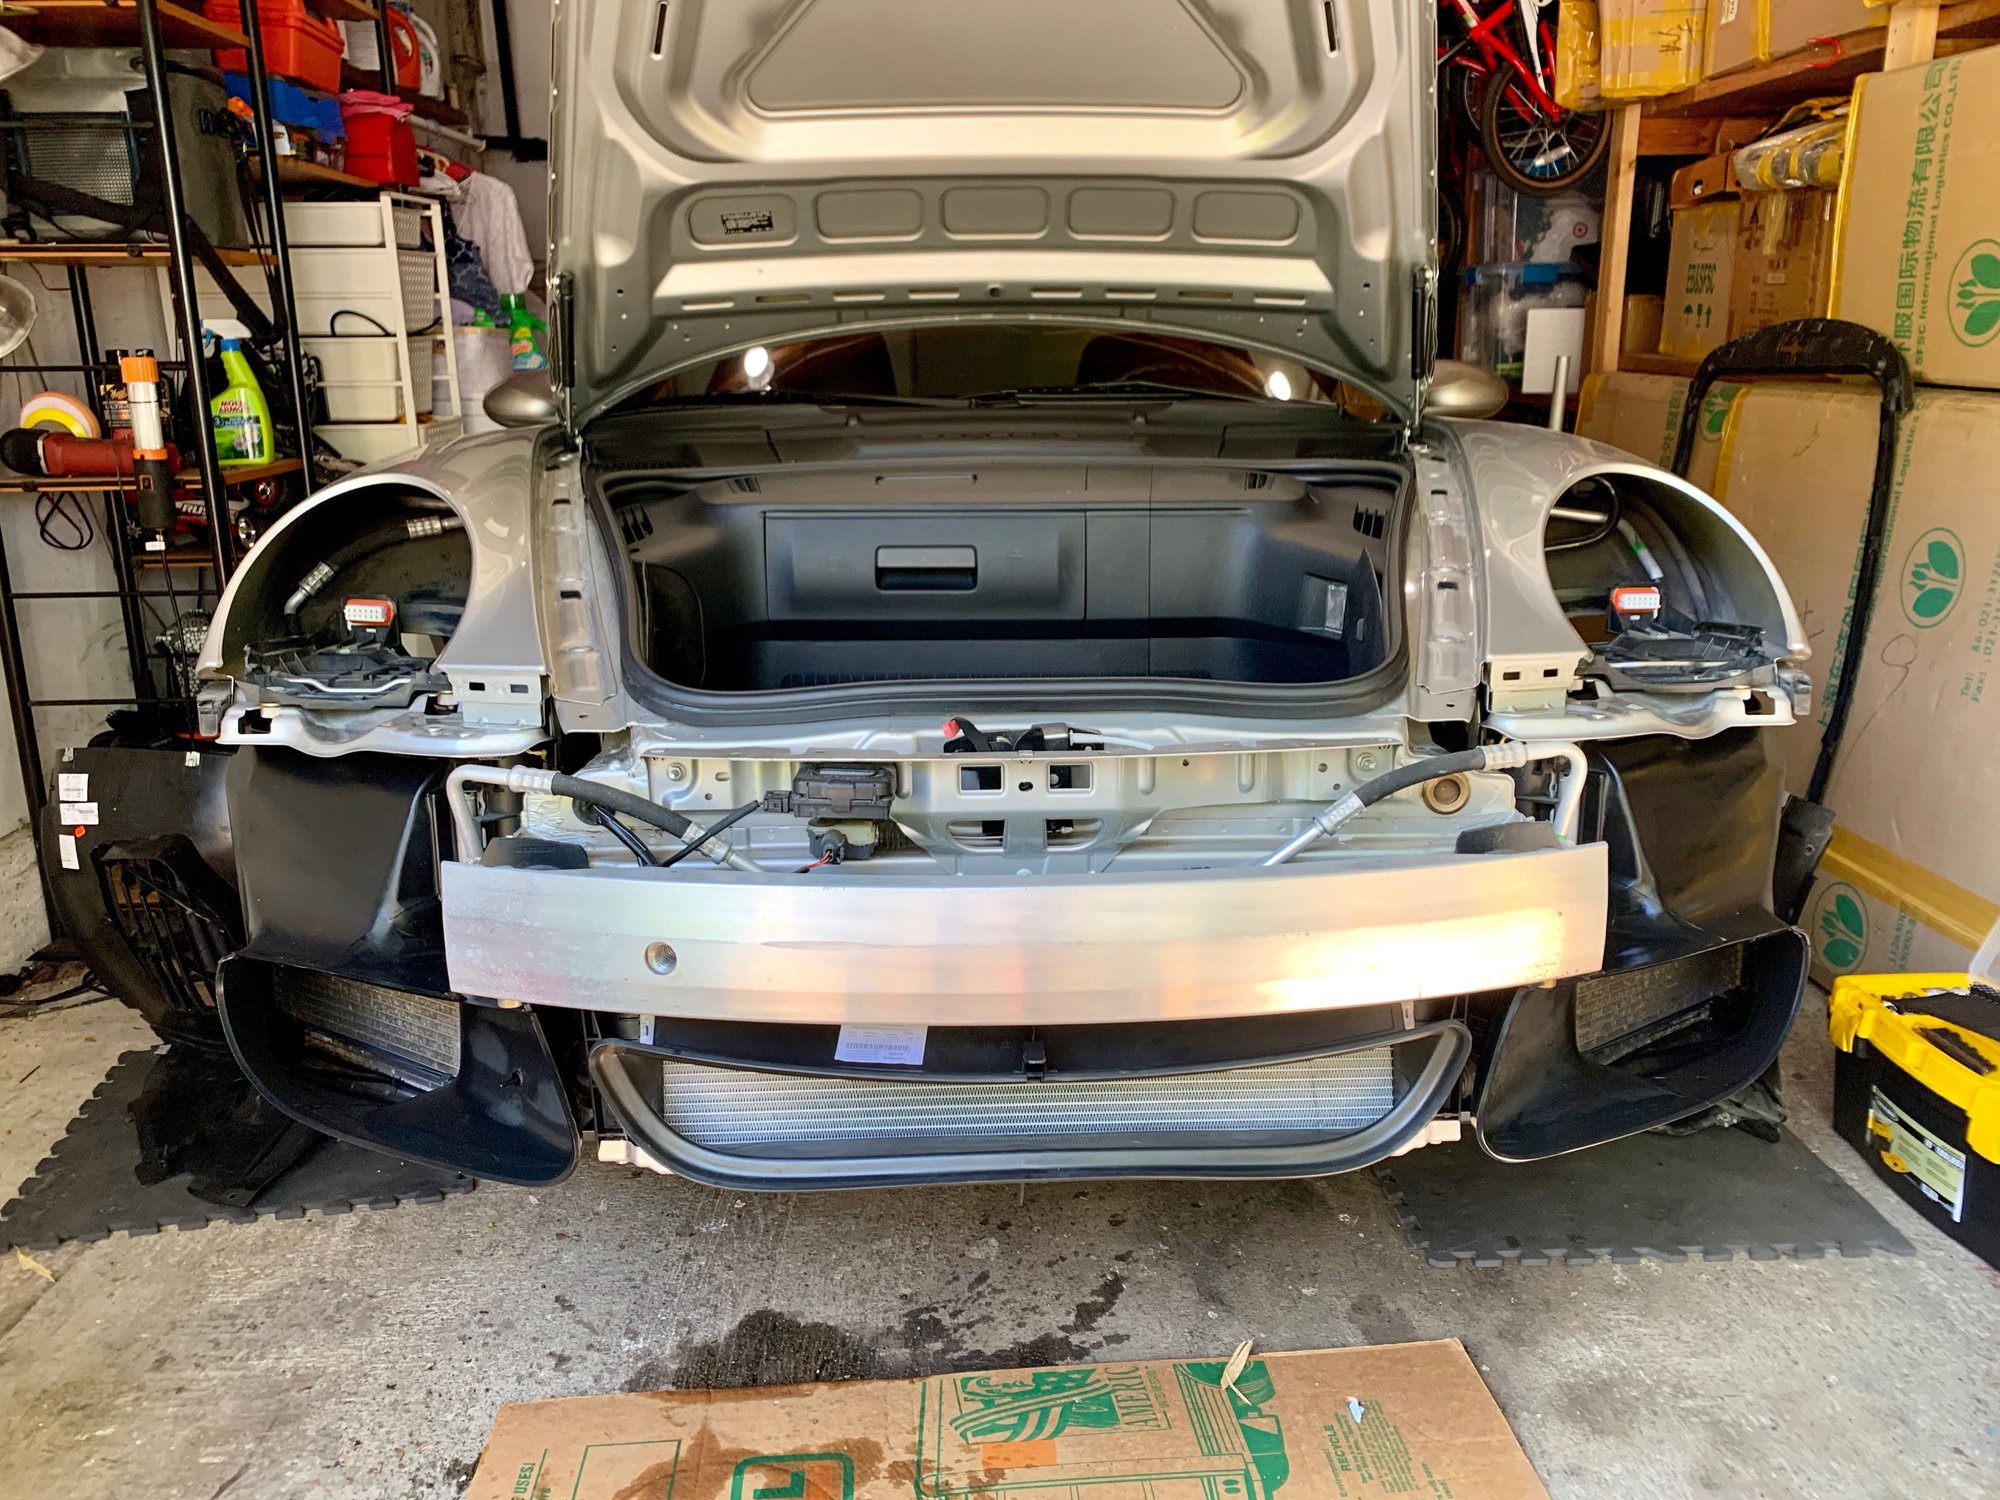
12. Next take off the aluminum bumper rail. Thats just two bolts on either side. An impact wrench makes quick work of them. The bumper rail then slides straight off the supports.
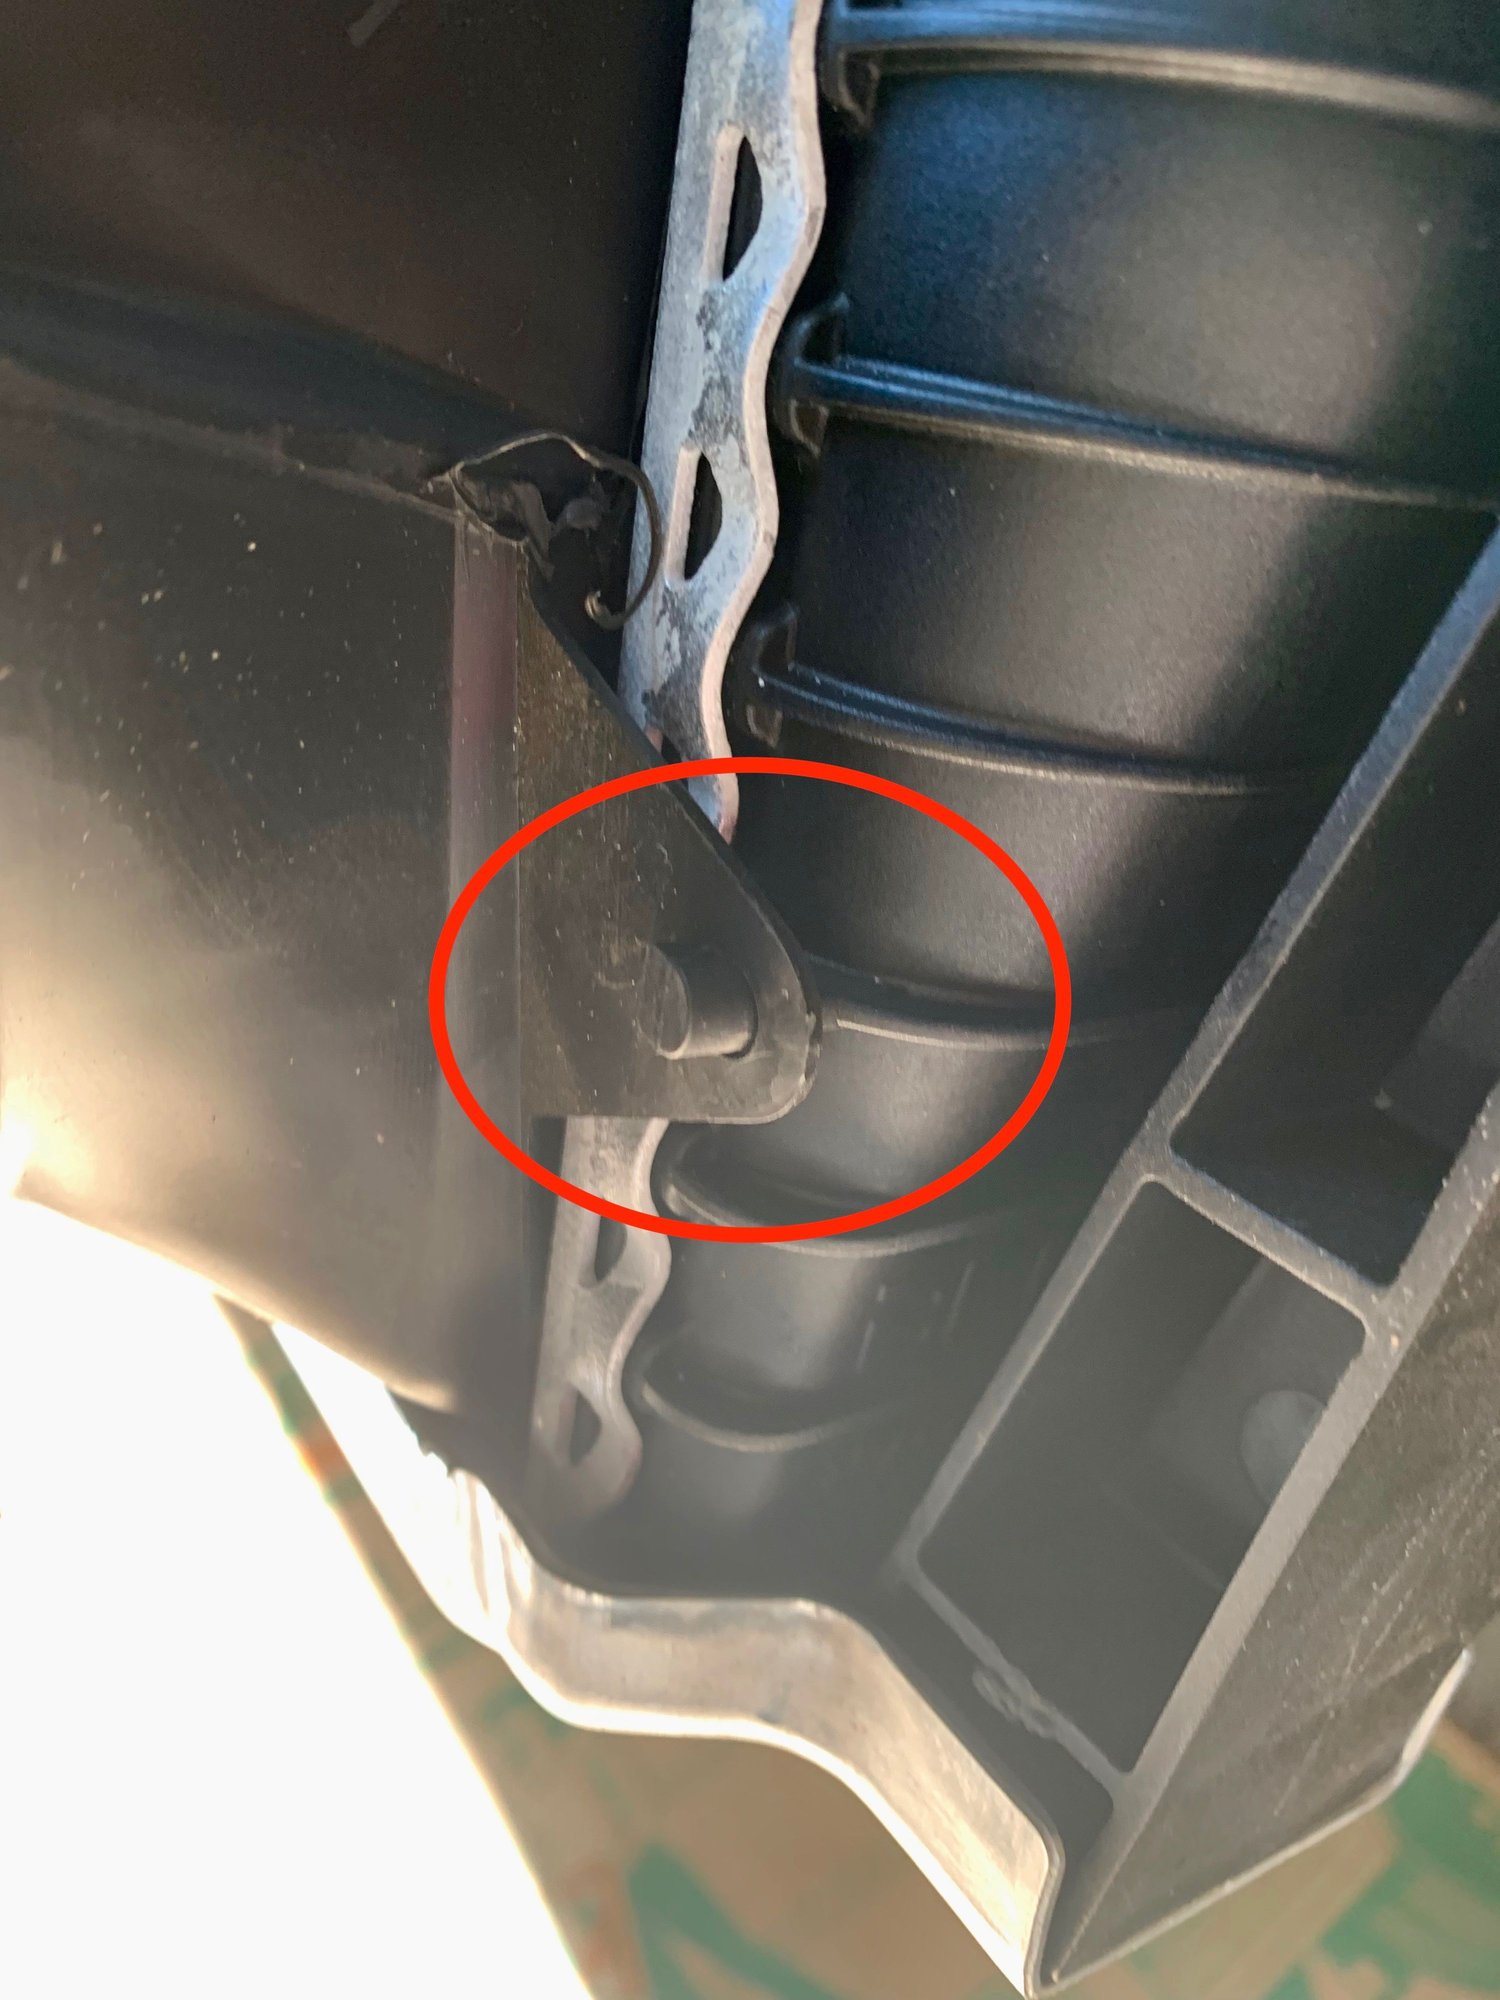
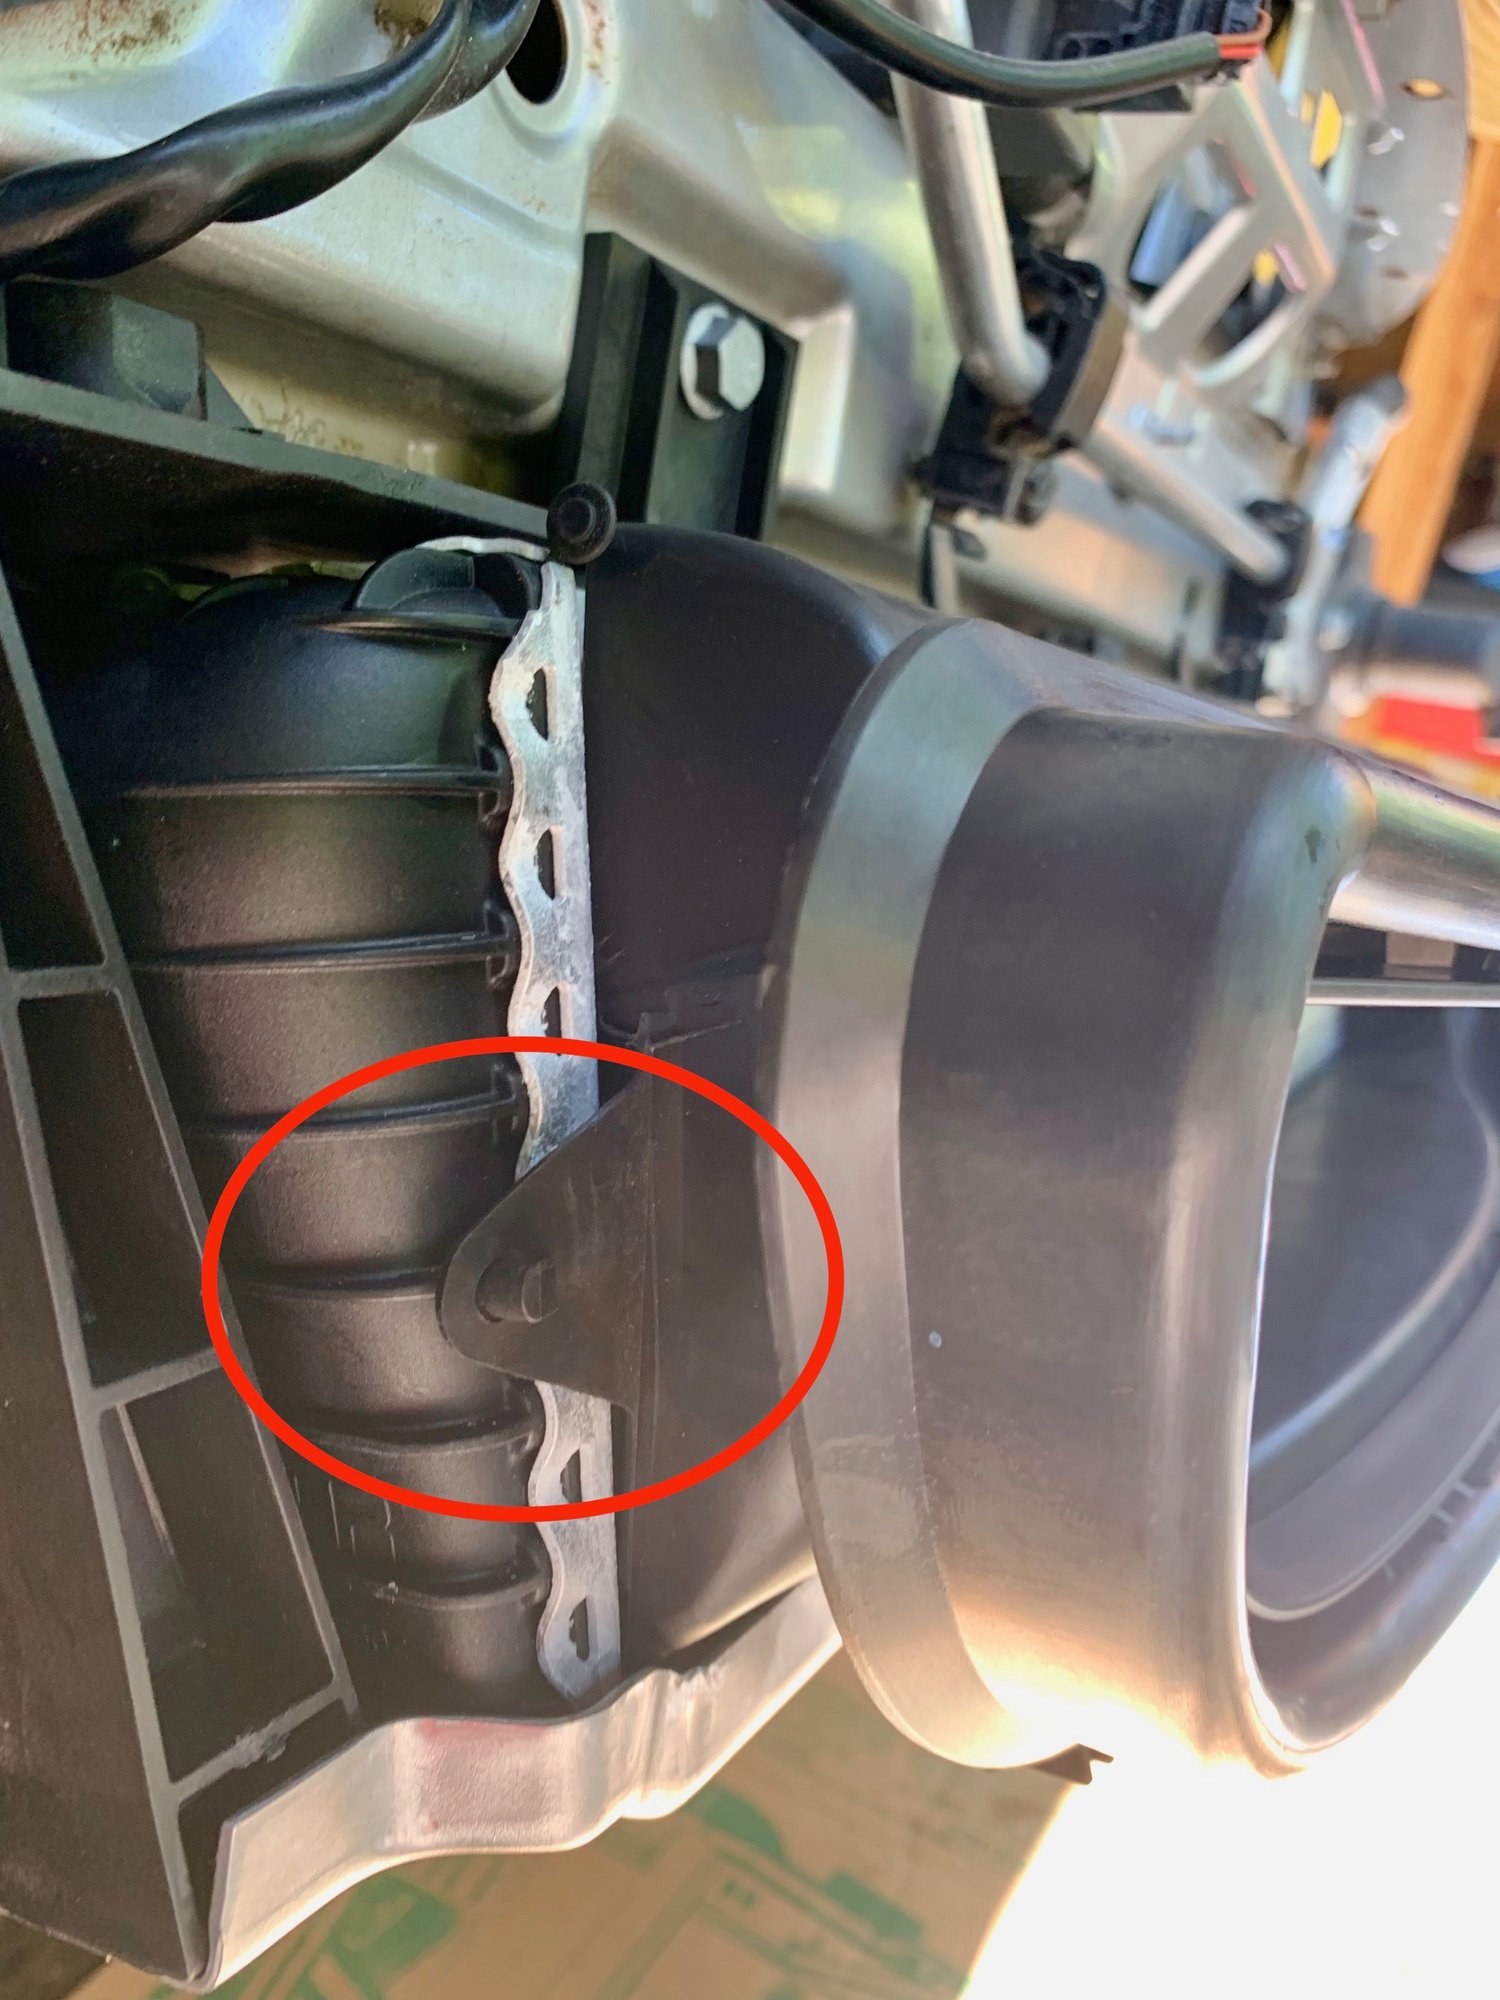
13. Next remove the 3 T25s holding each black plastic radiator intake on. I dont have a picture but they are easy to see. Once those are removed just pull it out a little towards you, and slide it out of the two clips on the backside (nearest the wheel).
Before you take off the passenger air intake, make sure to unclip the temperature sensor. Once you unscrew the intake just pull it off slowly to expose the cable behind it. Then you can squeeze the clip to remove it from the sensor.
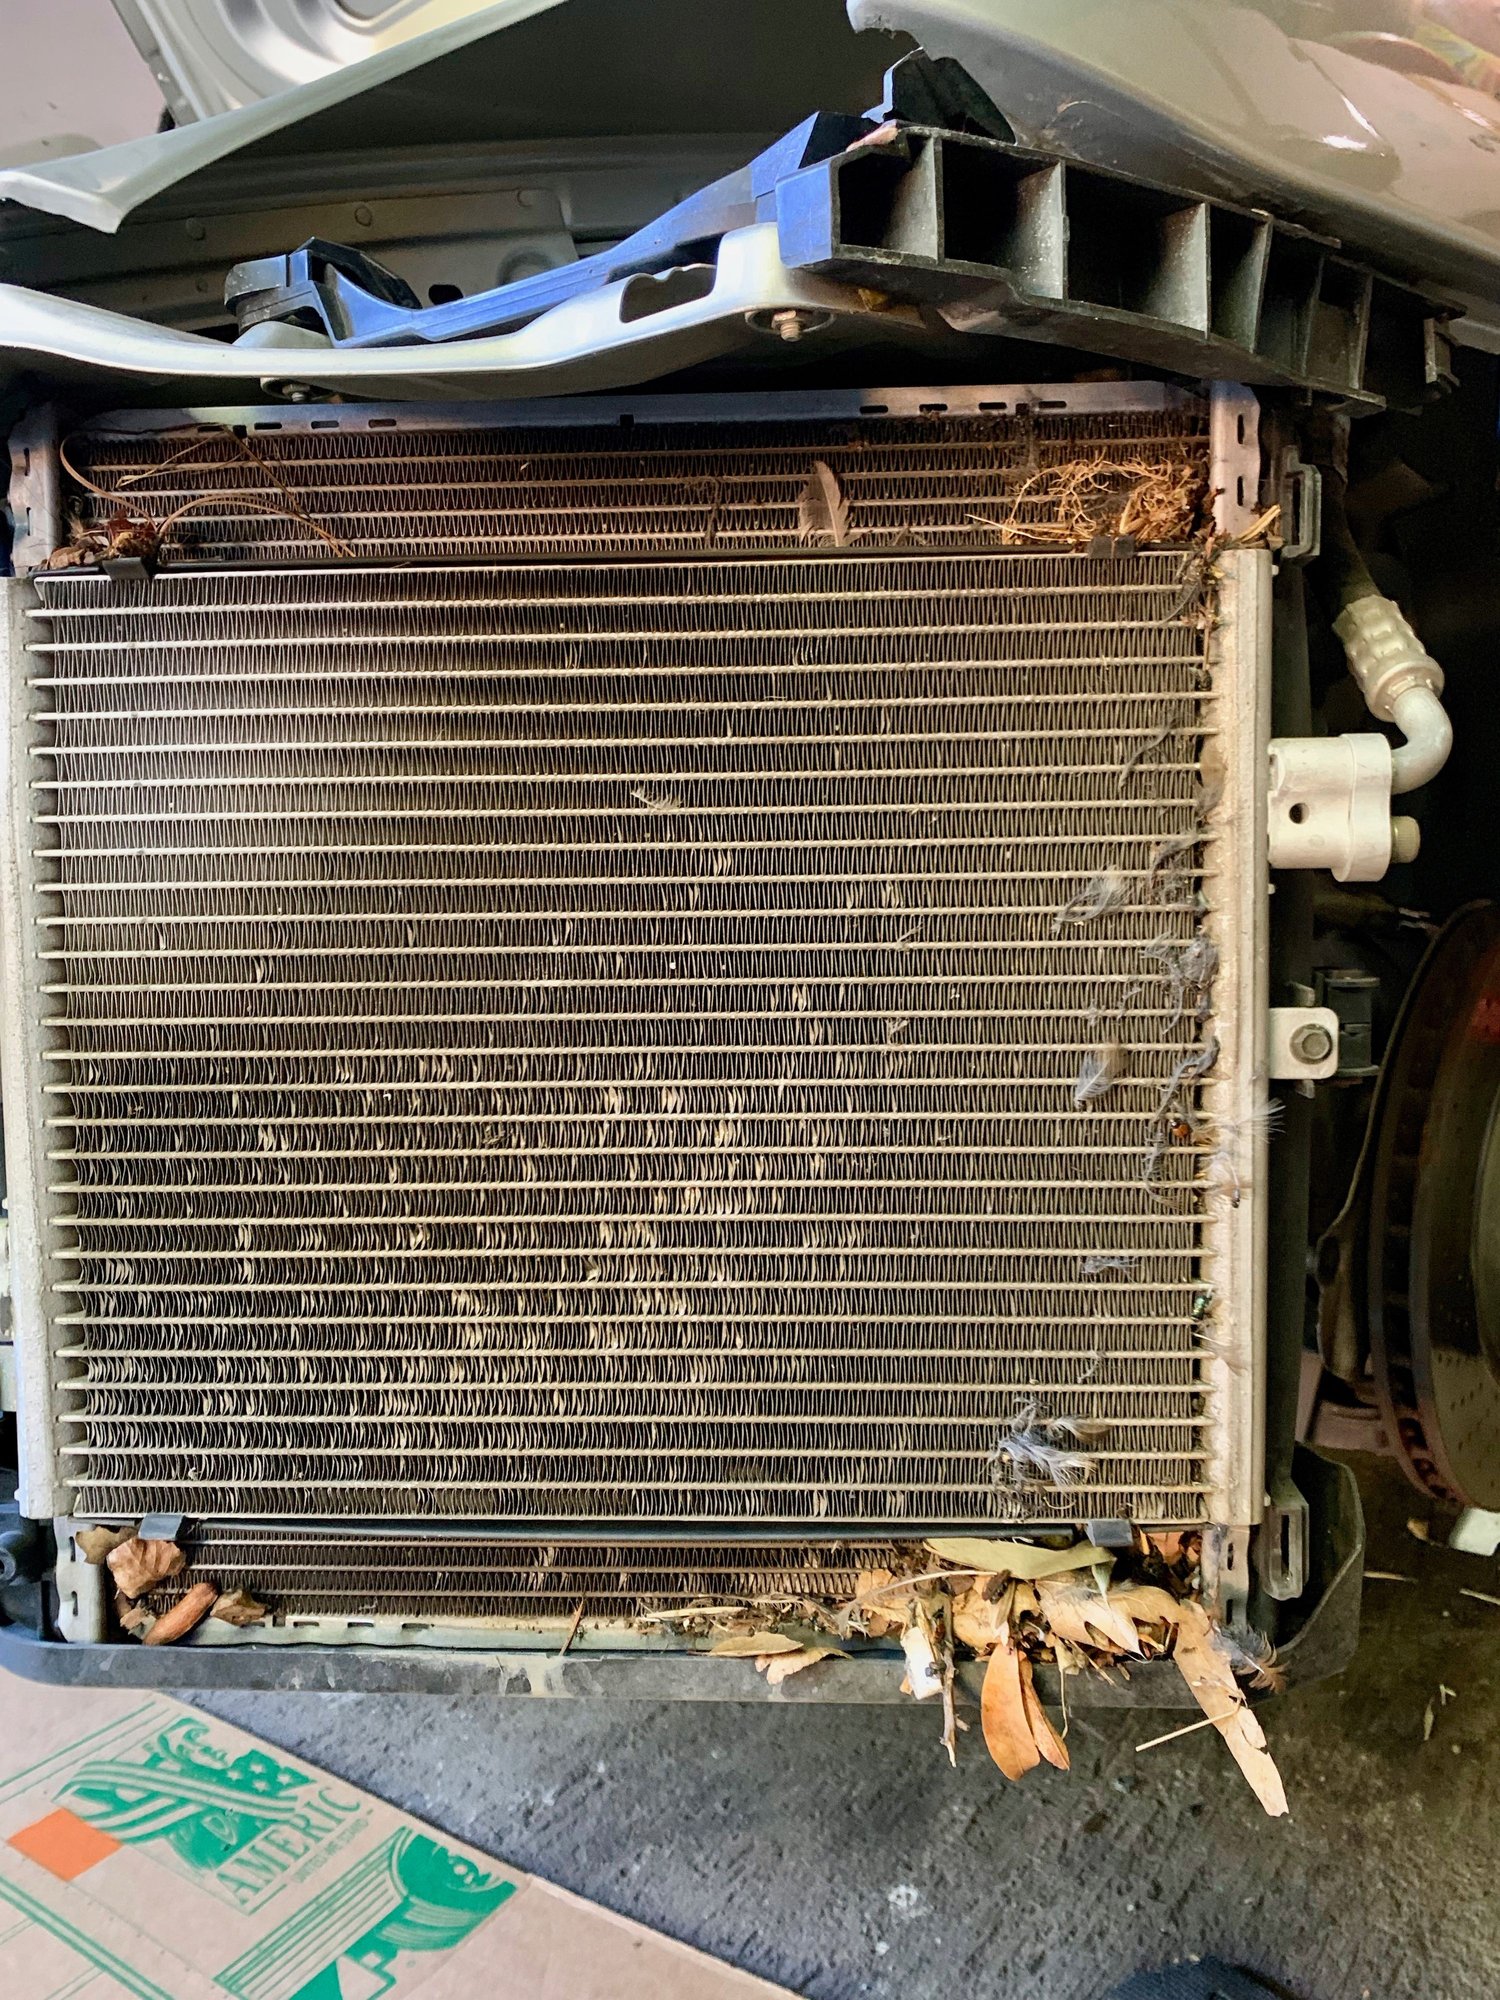
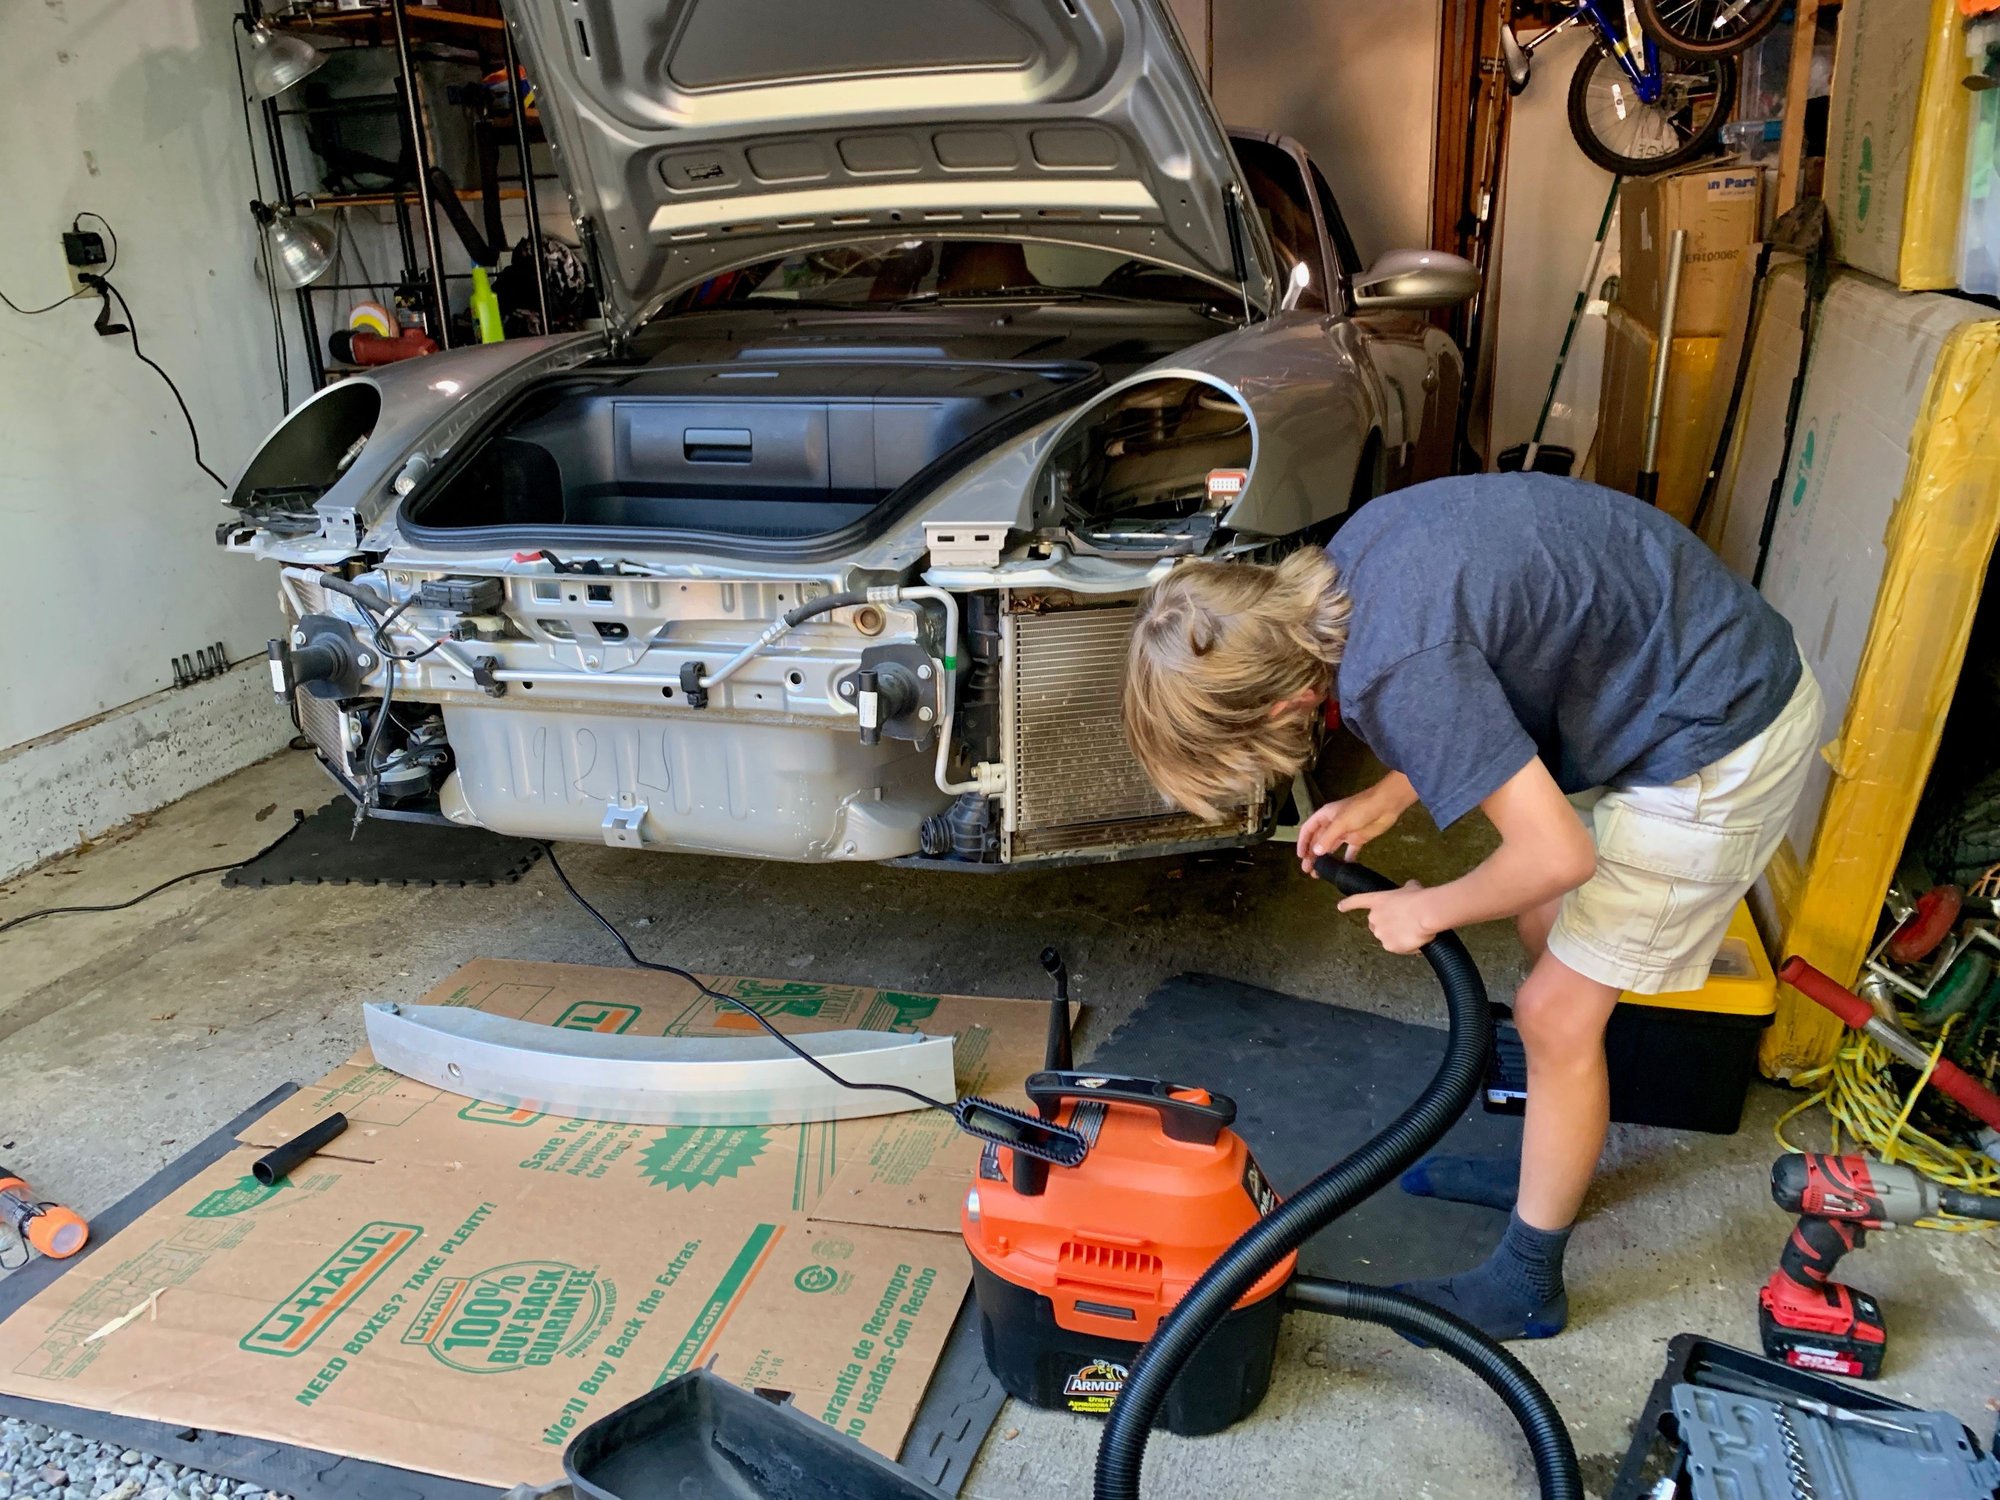
14. A ton of crap will fall out of each so have your assistant vacuum it up and clean out the radiators.
14. Now take a couple minutes to answer questions from your wife or neighbors when they walk by to inspect your handiwork, like "what in the hell are you doing...?" :-)
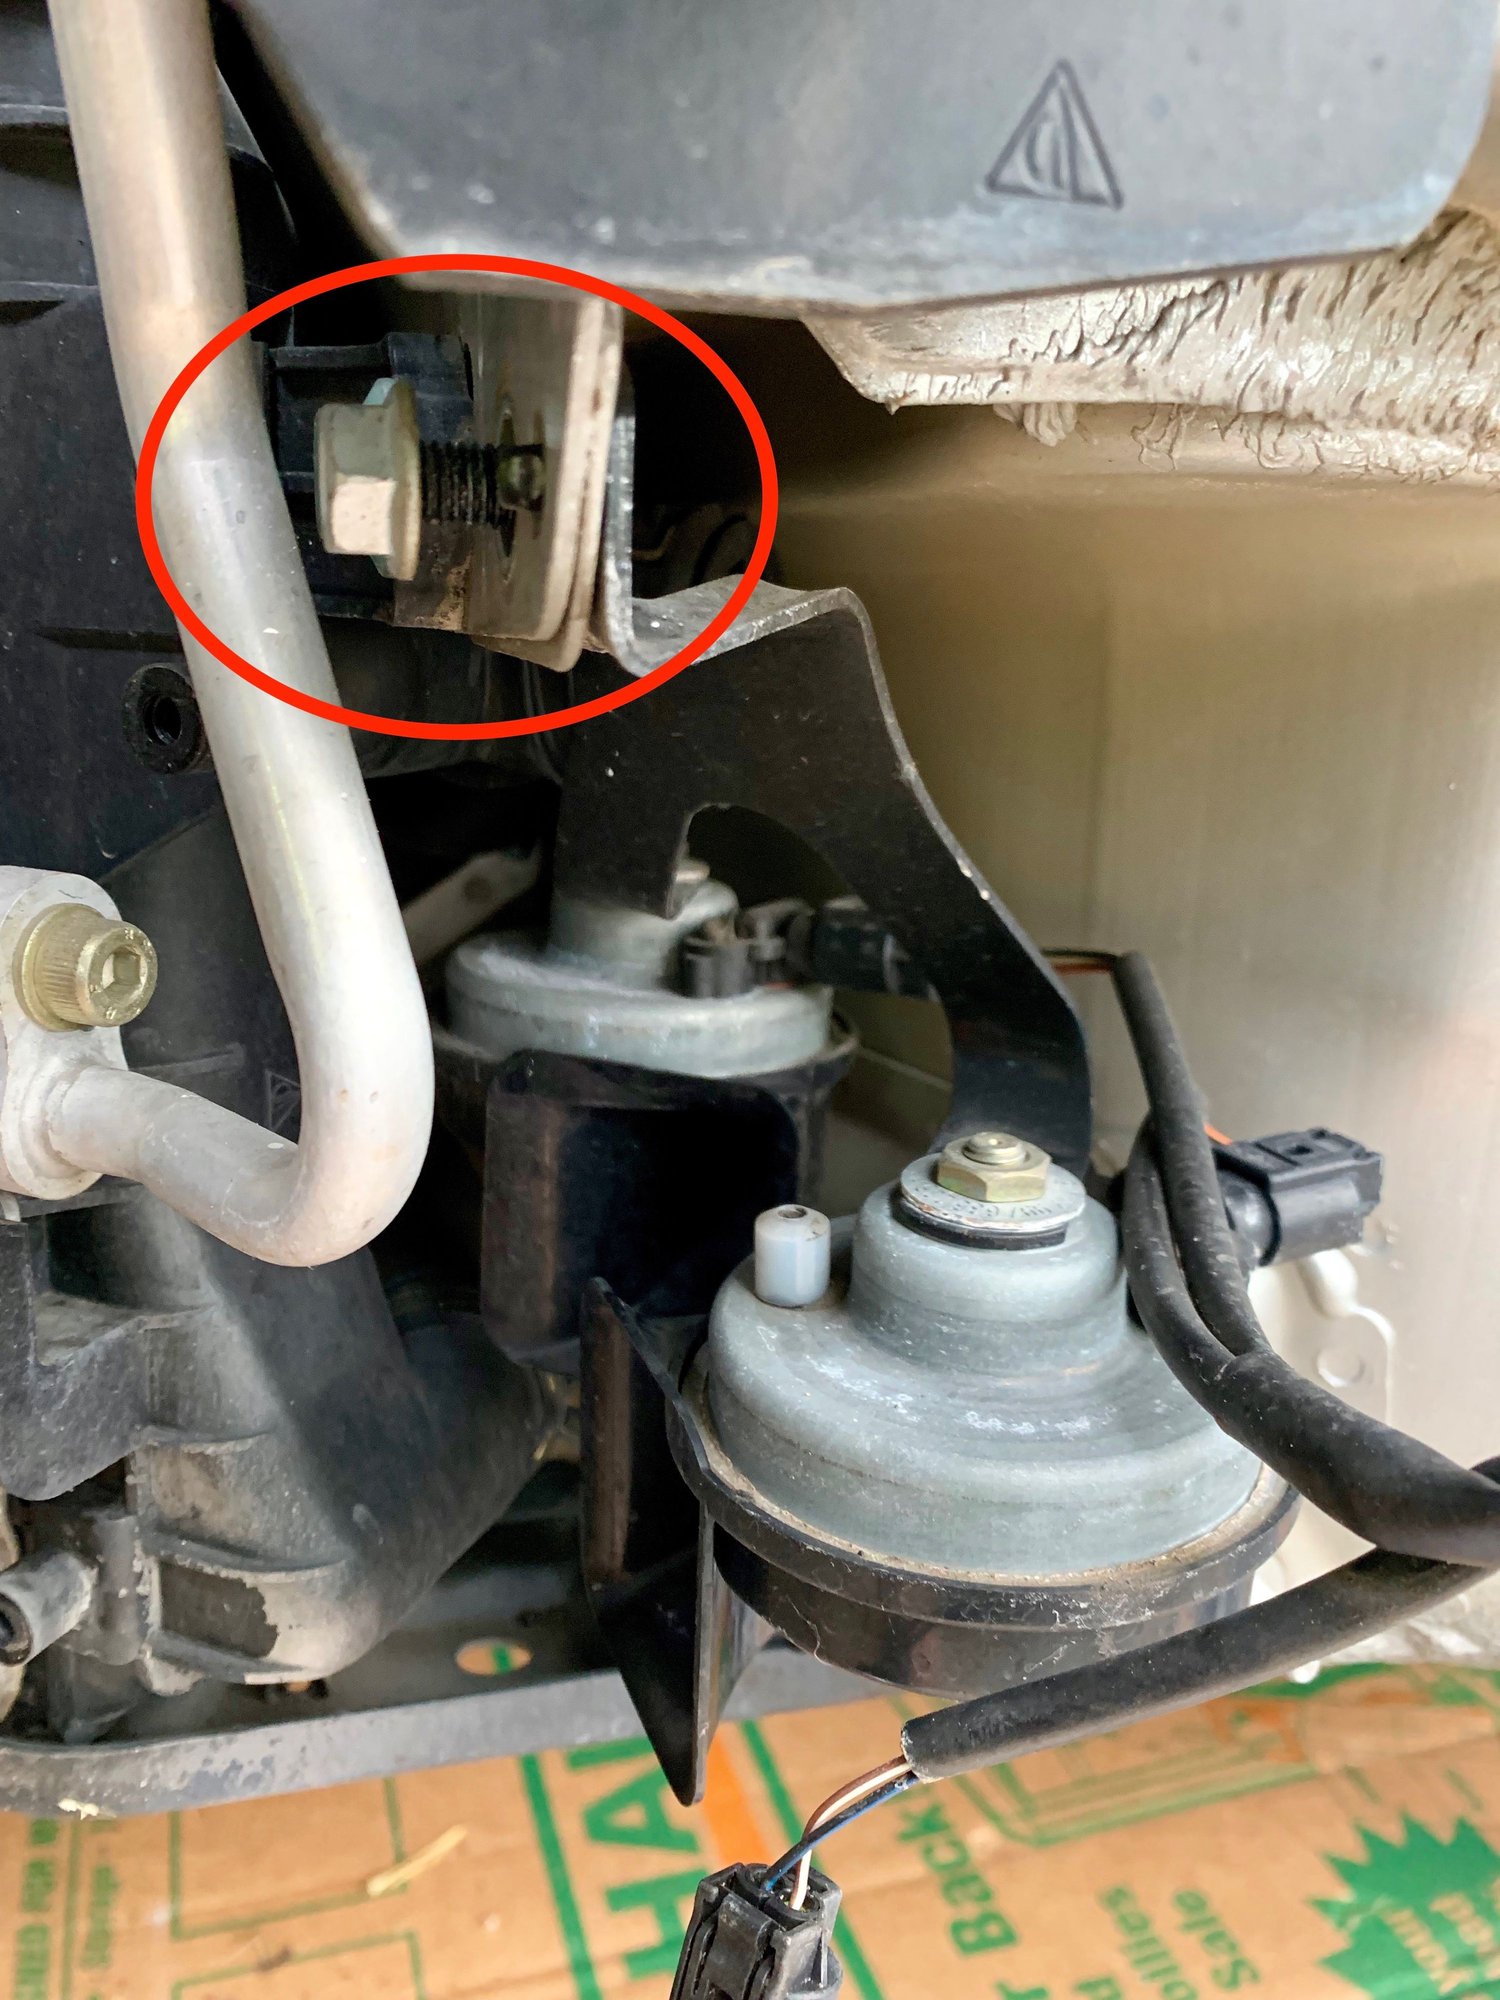
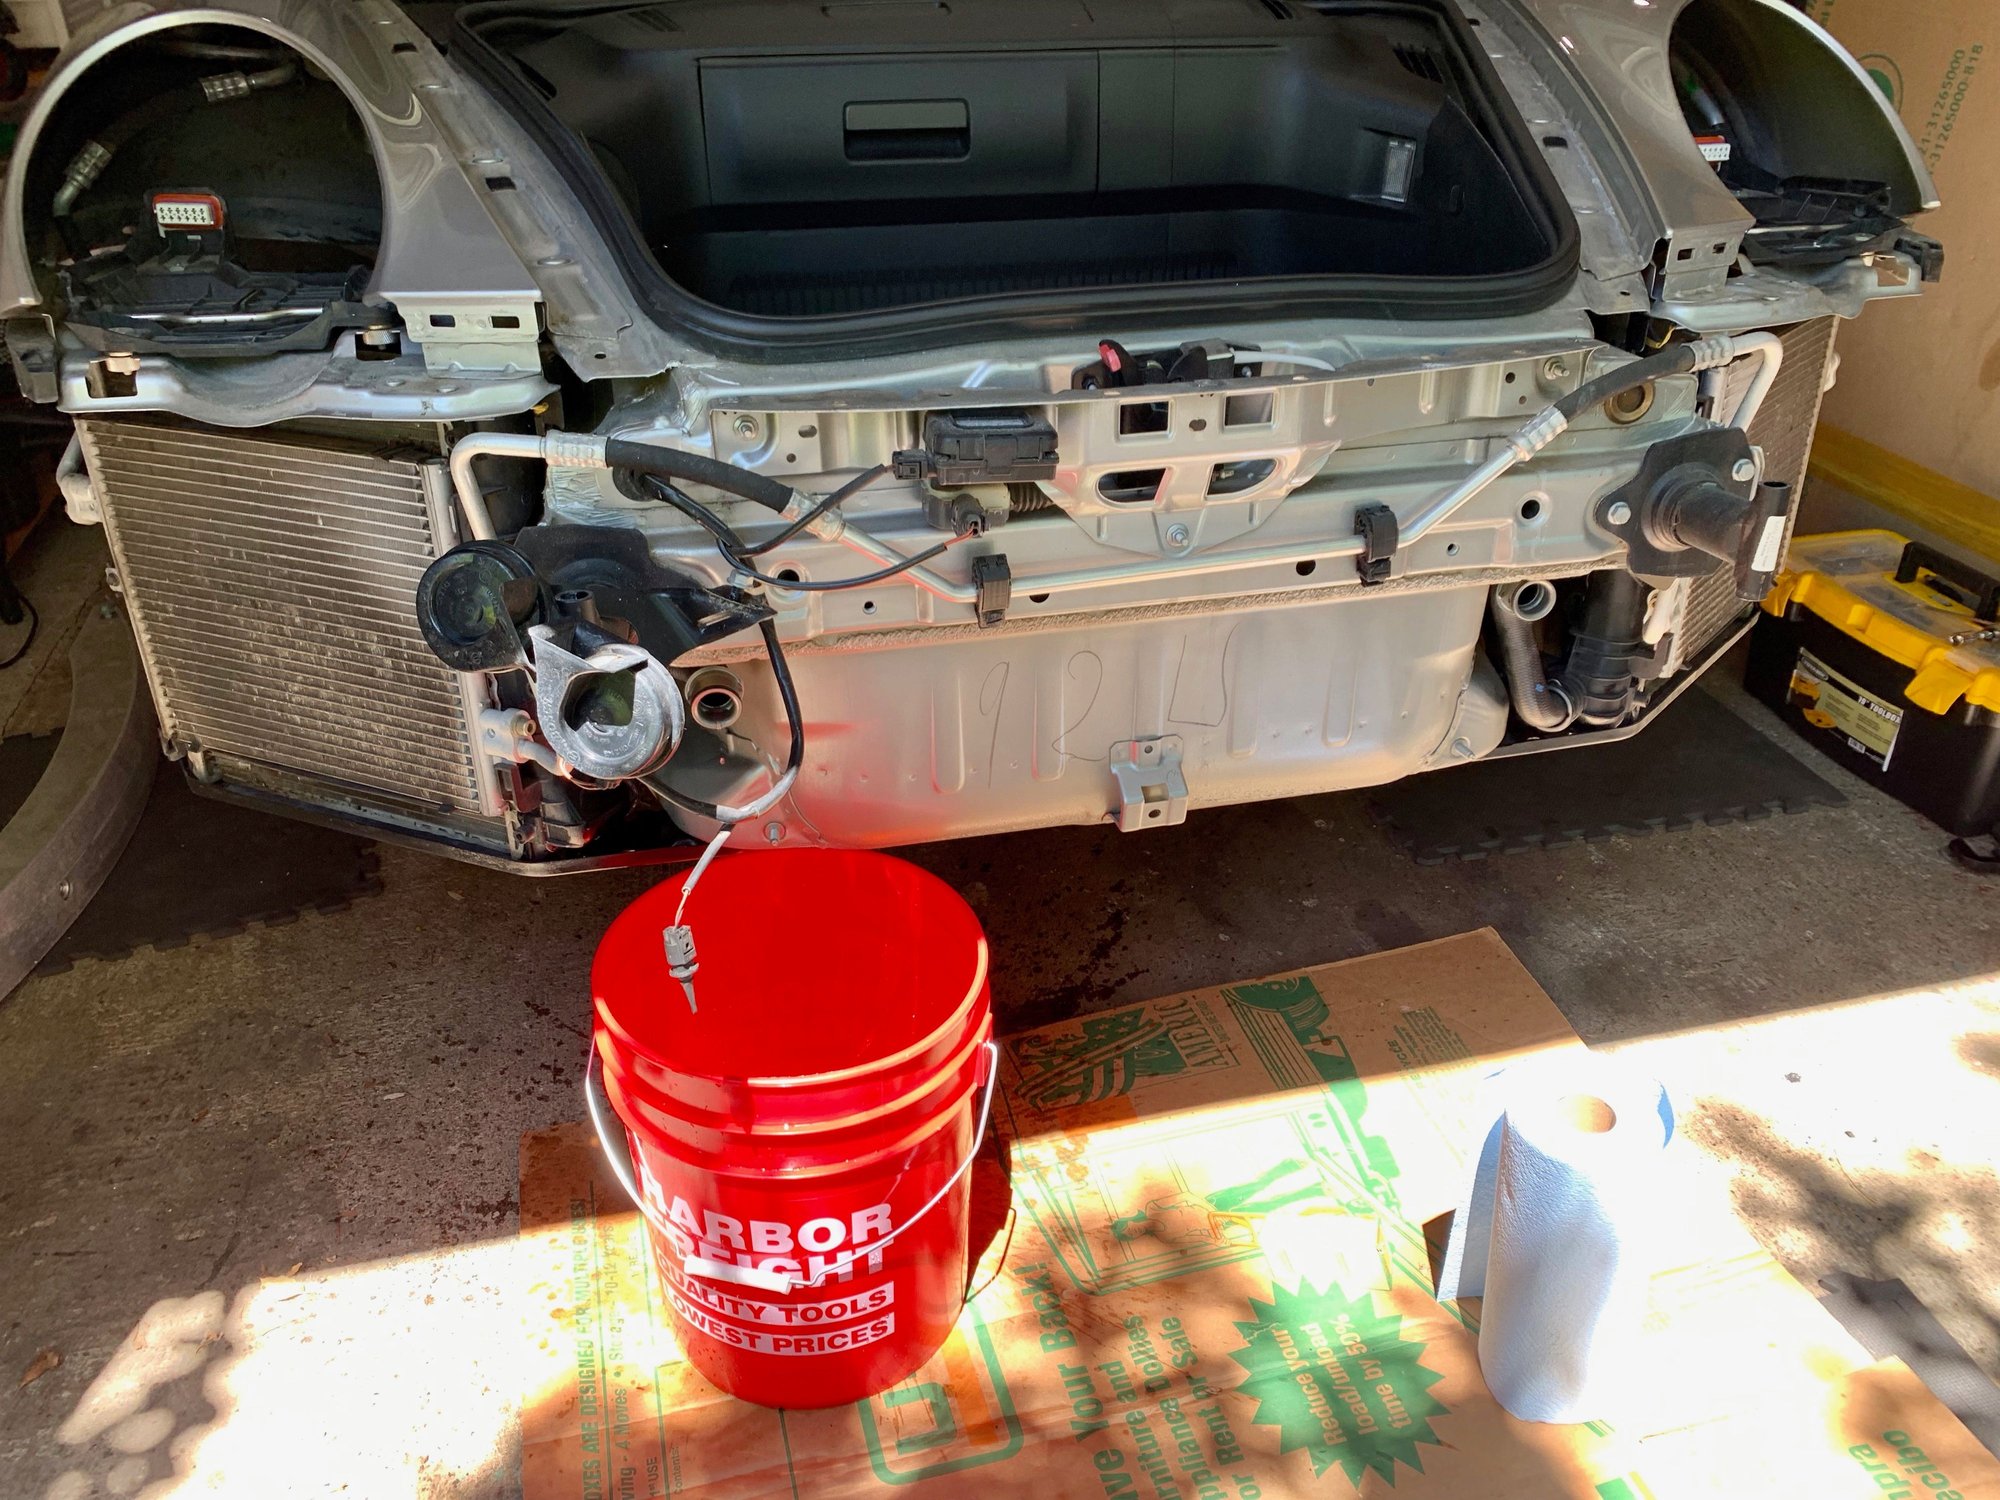
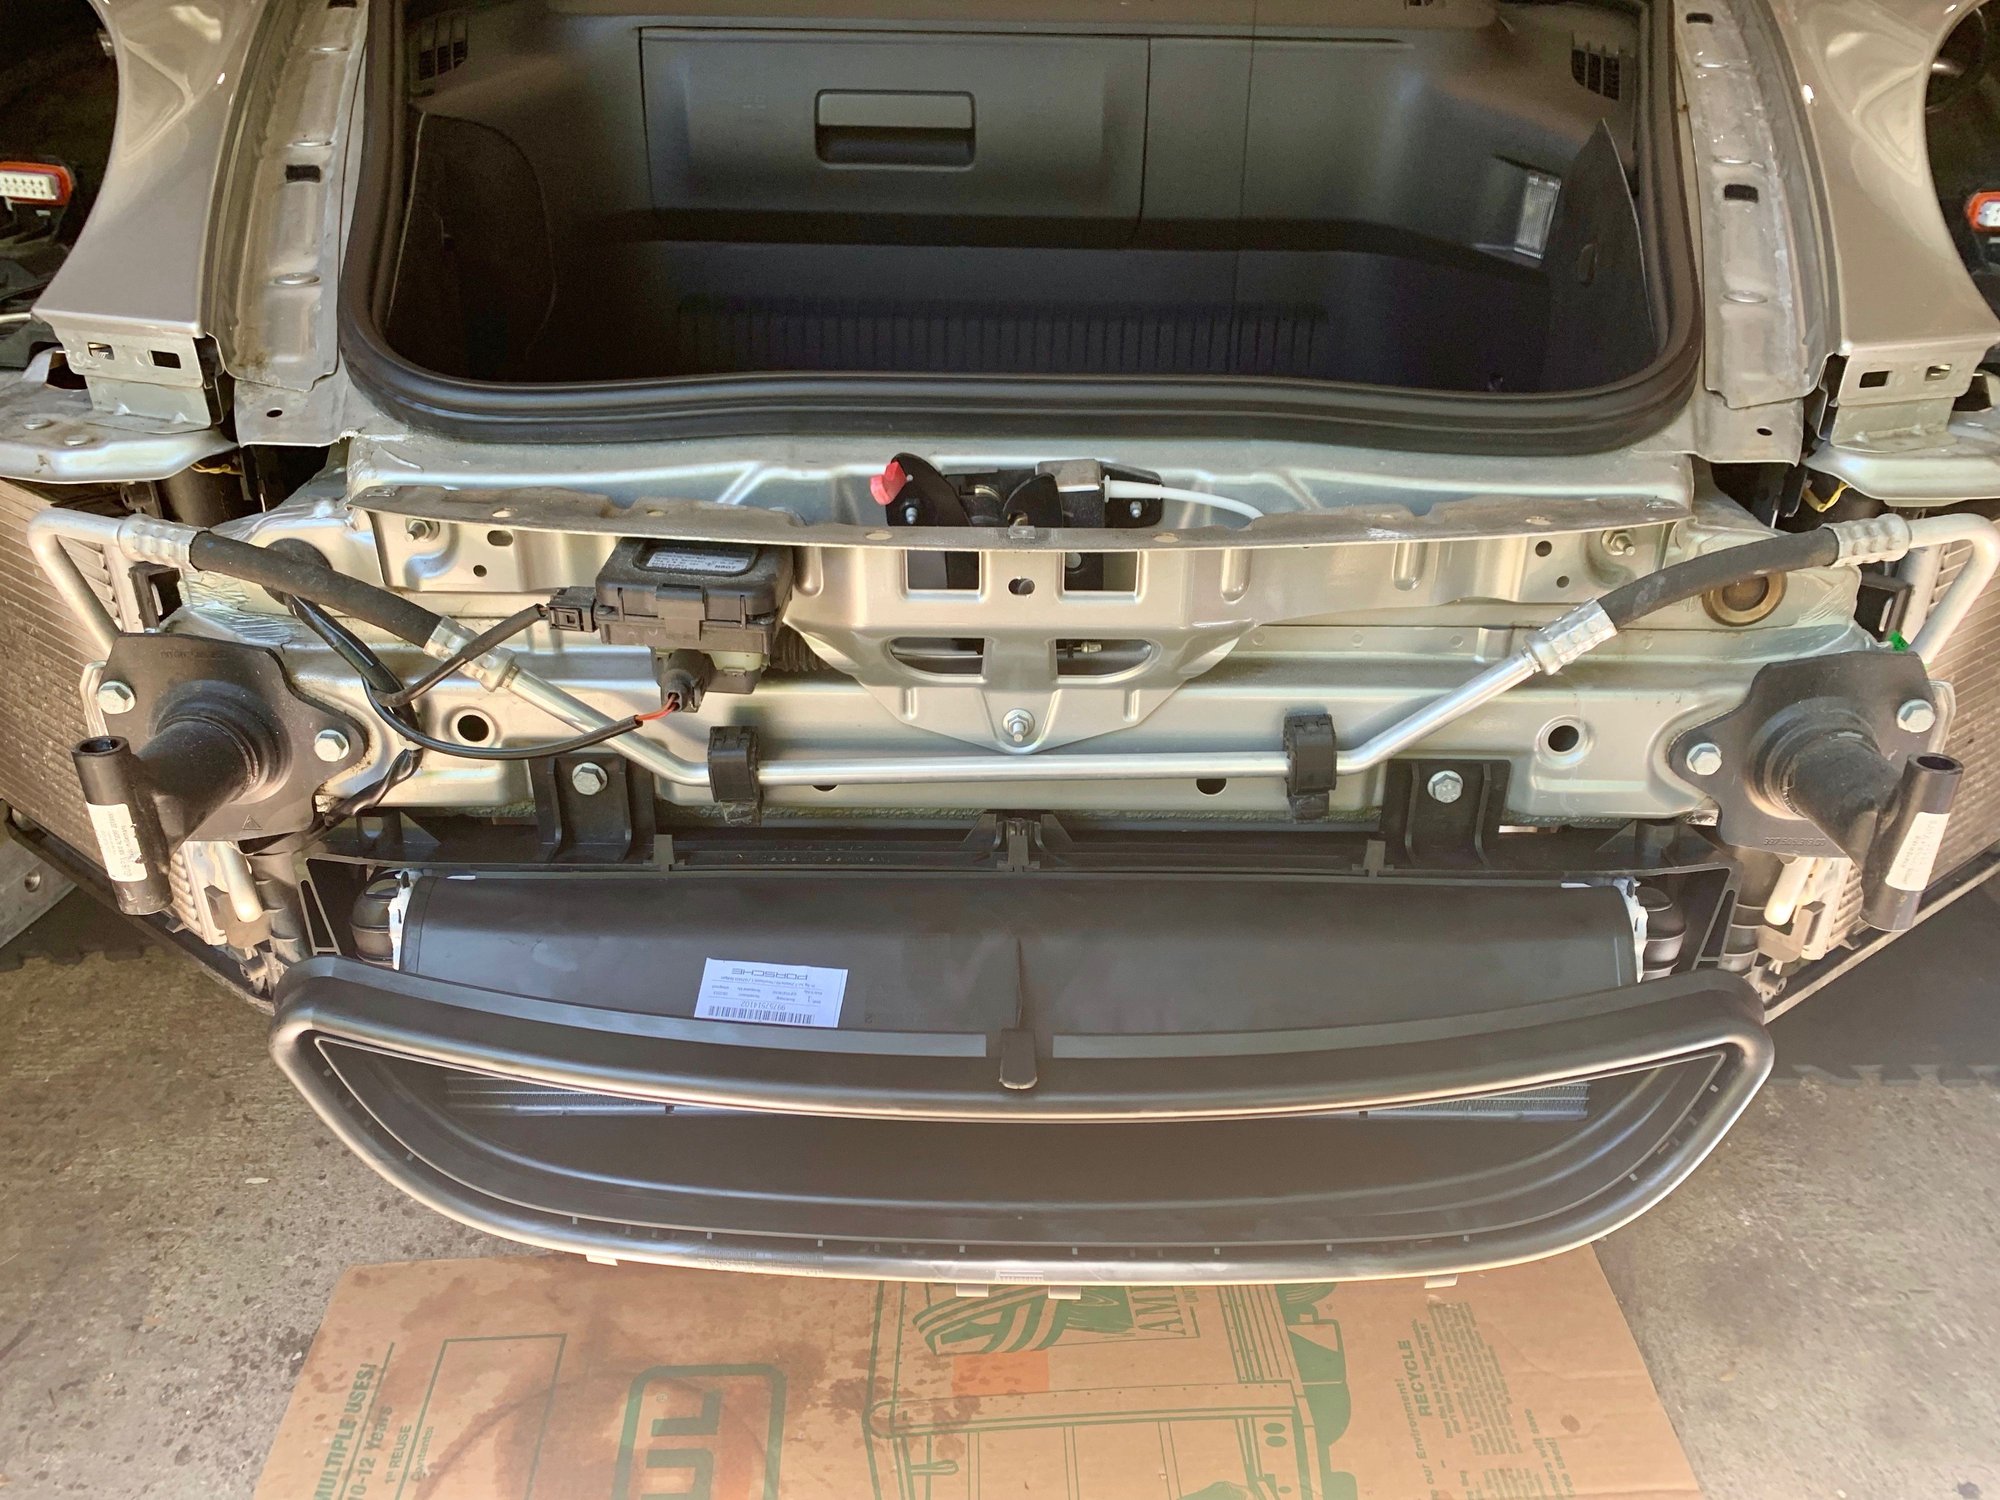
15. Unbolt your horn to get it out of the way. It makes attaching the coolant hose on the passenger side easier. Its just one bolt and the whole bracket will come off. Then hang it over the bumper mount to keep it out of the way.
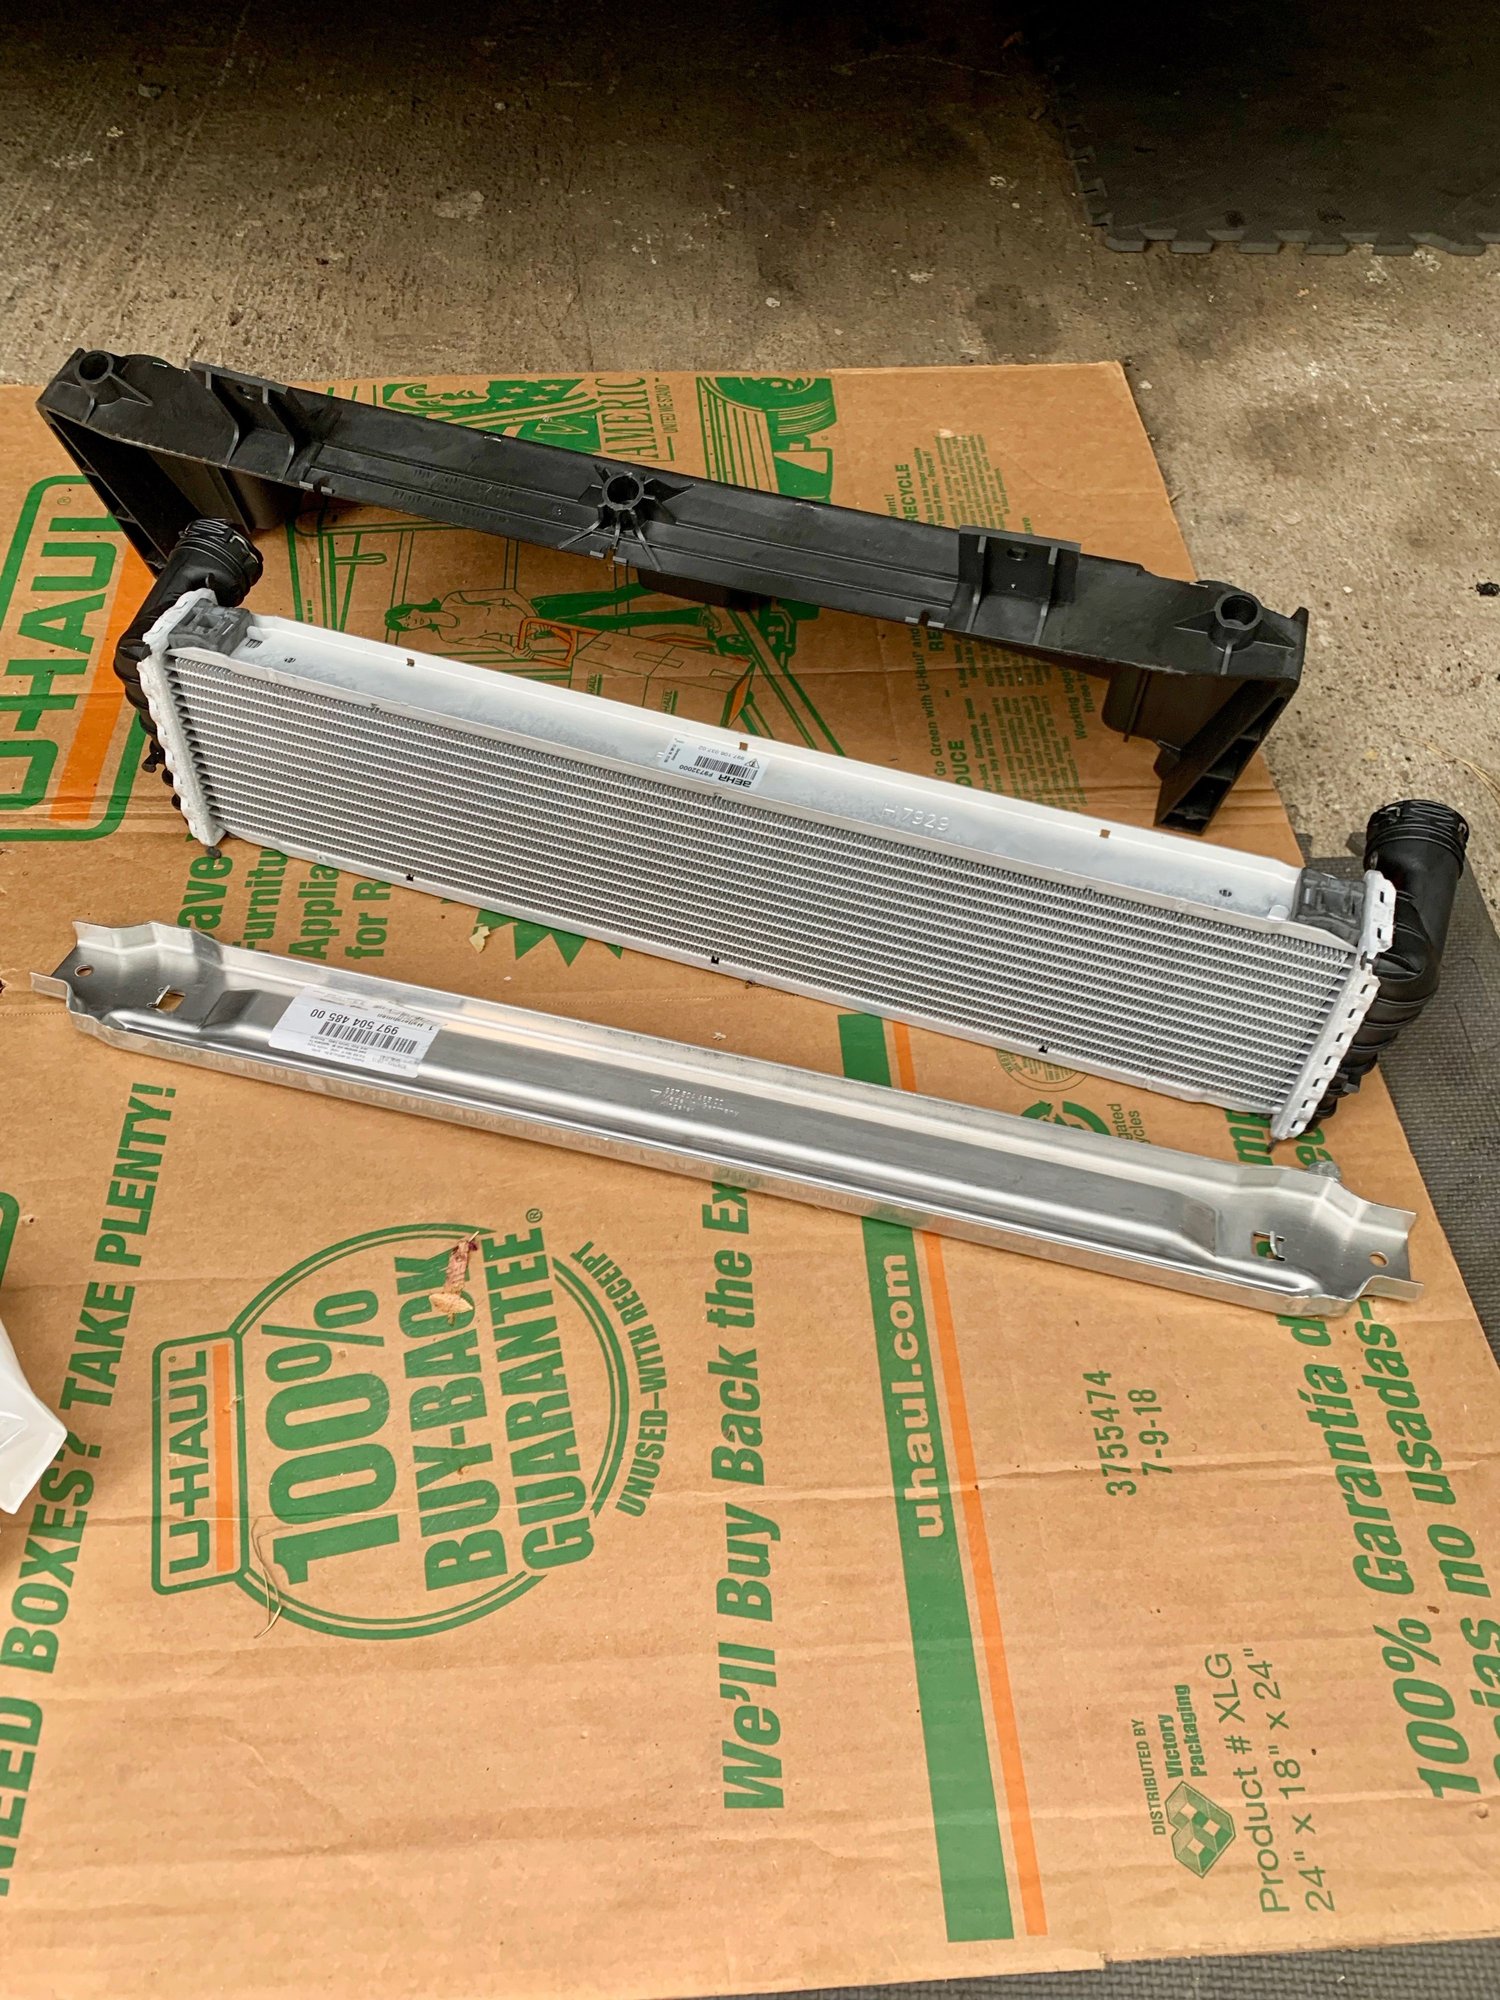
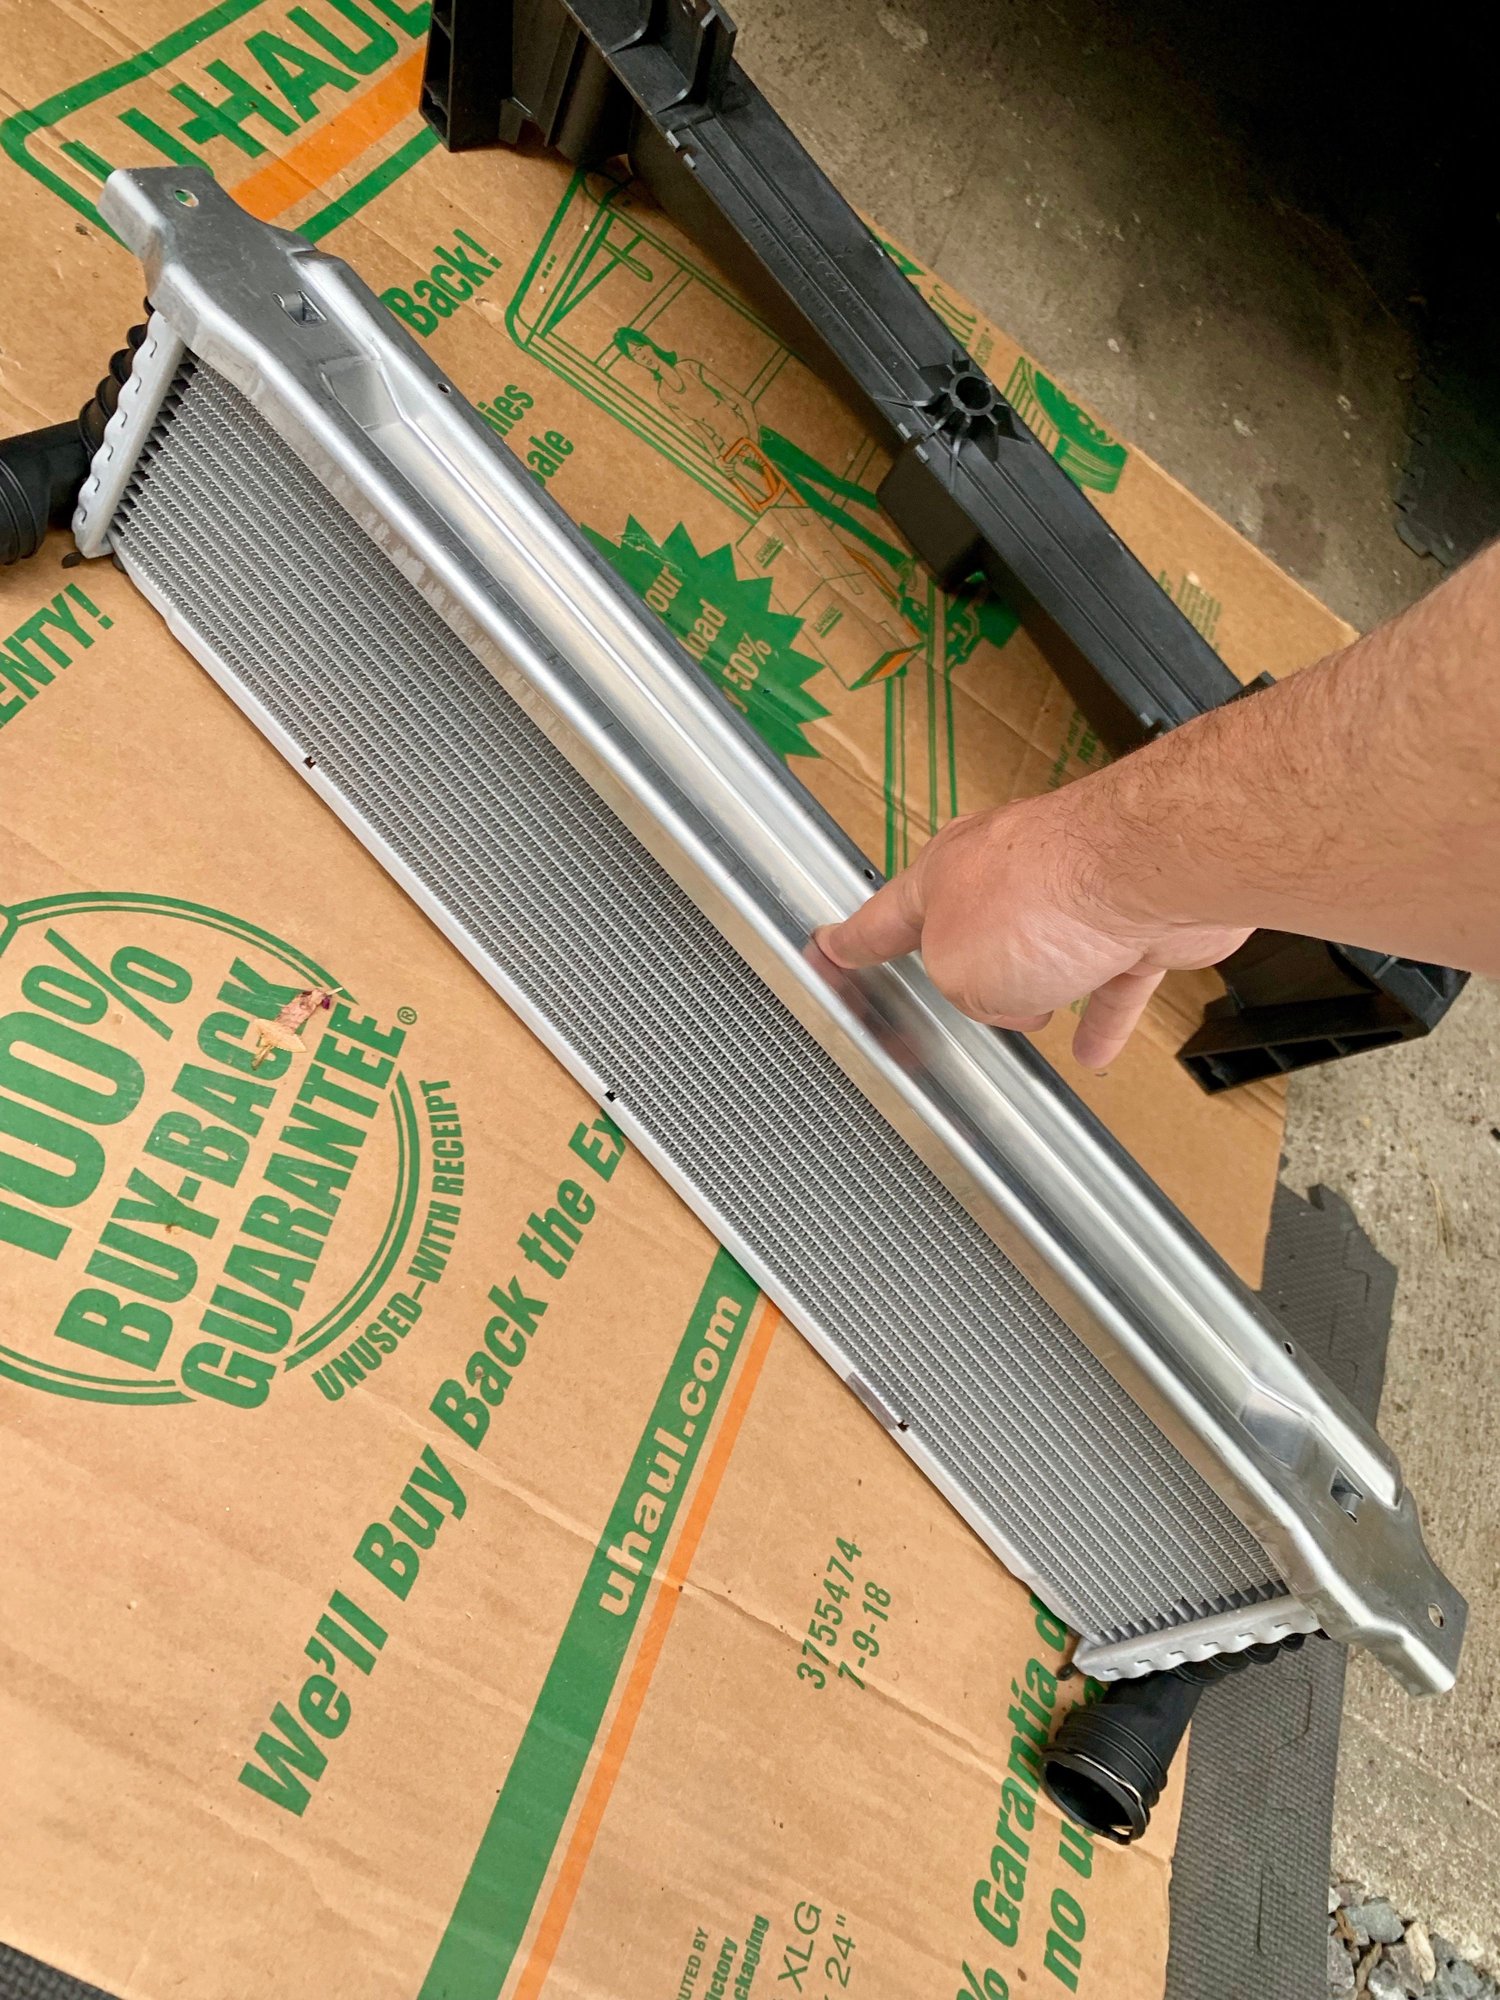
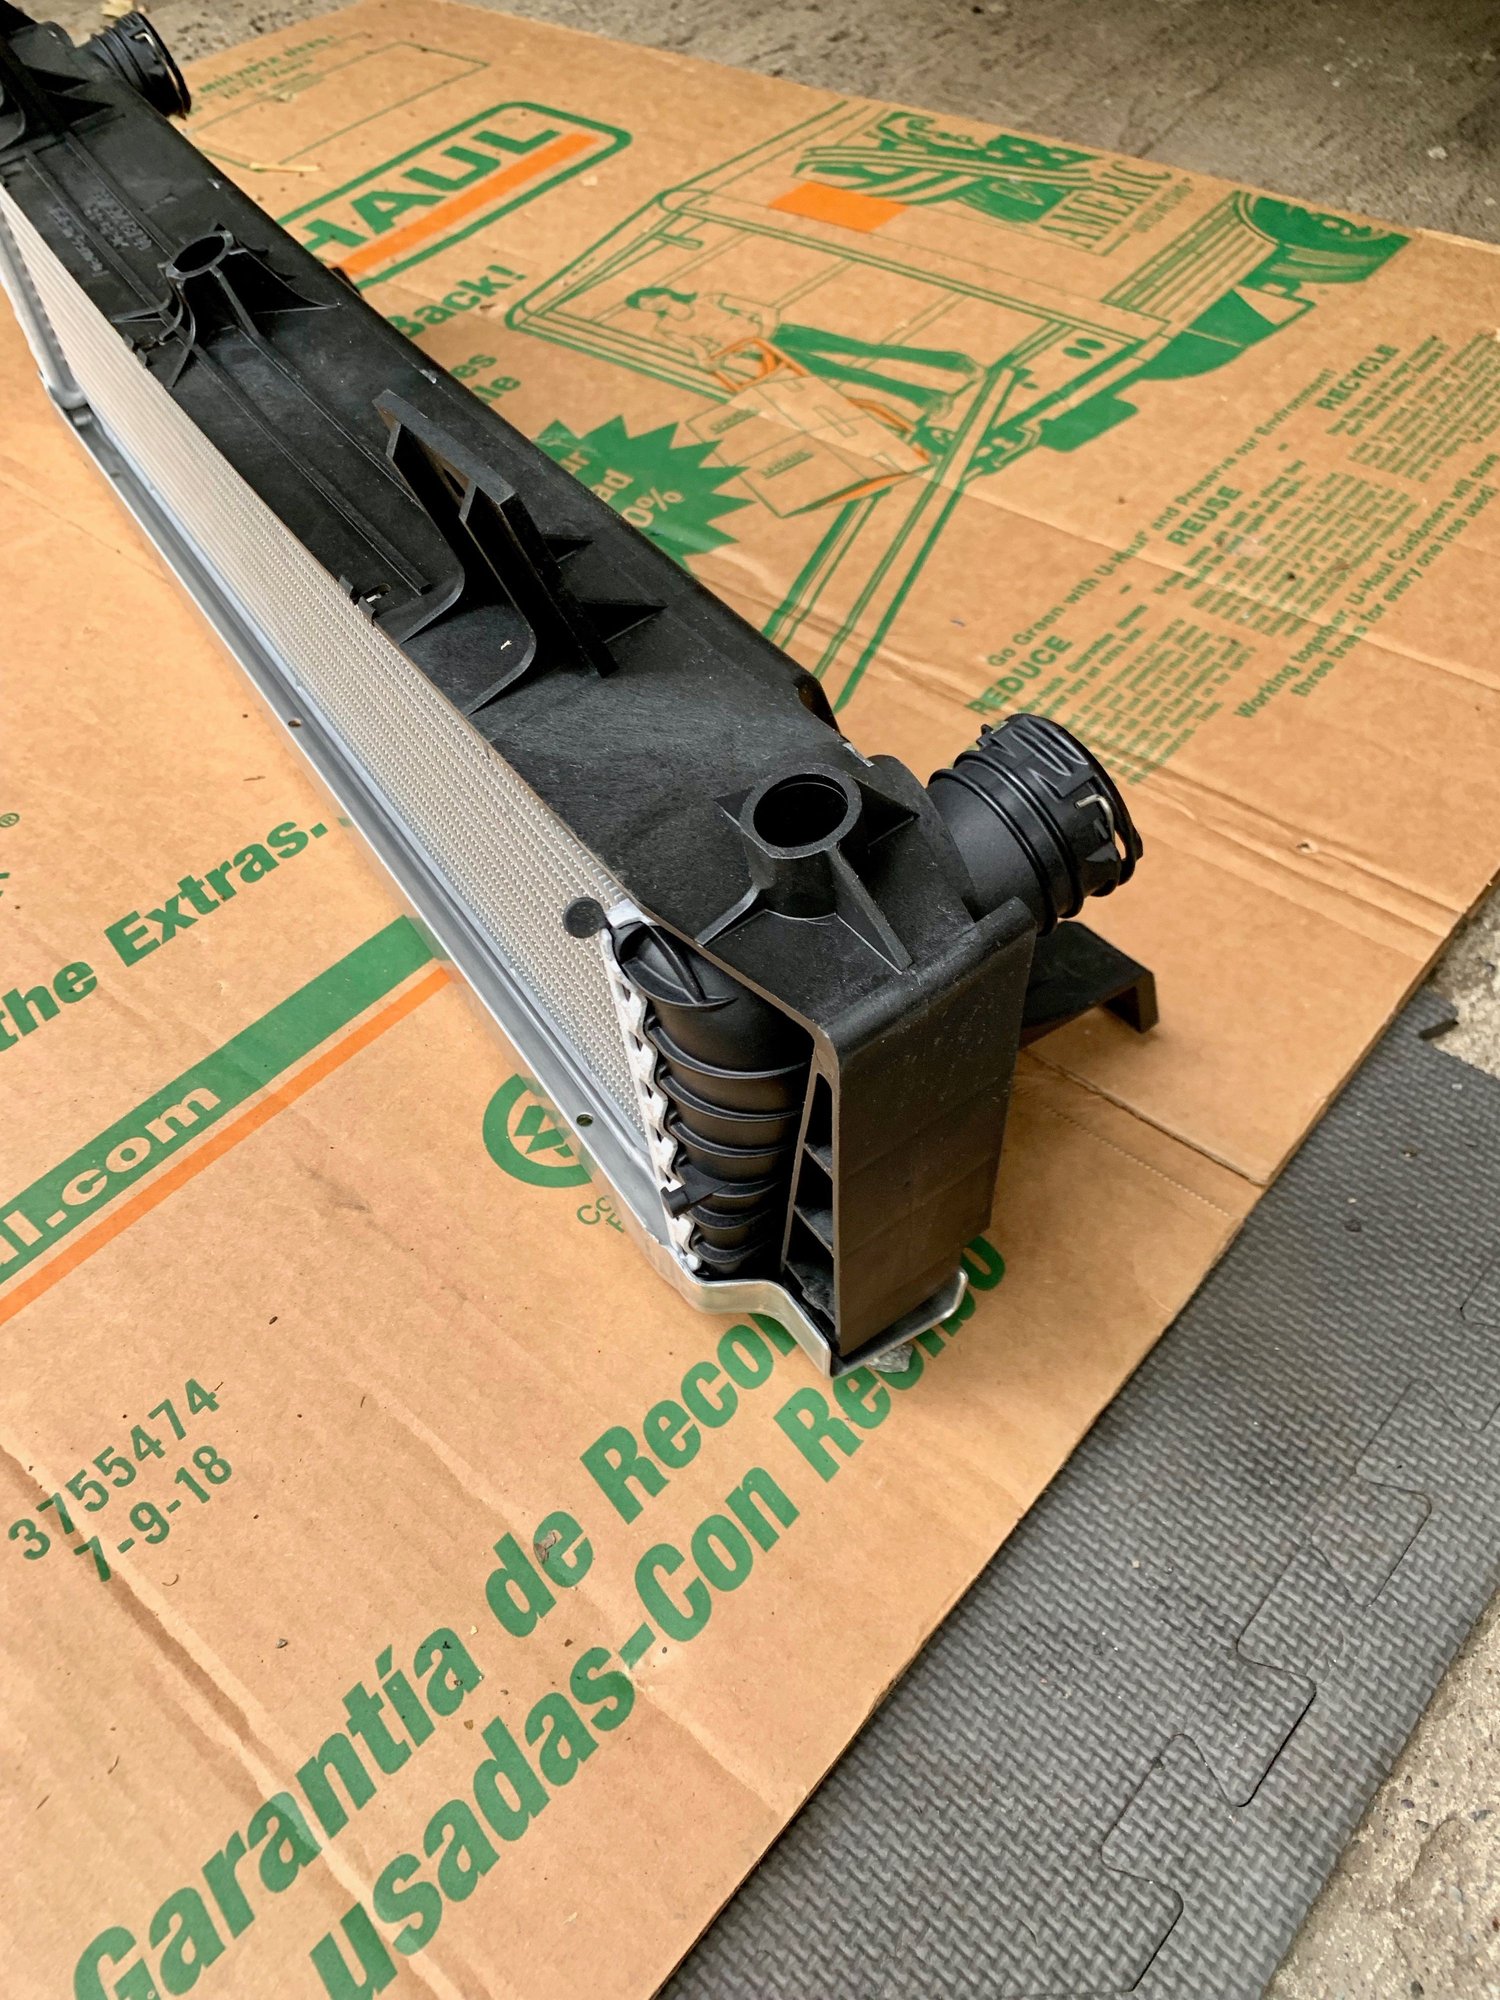
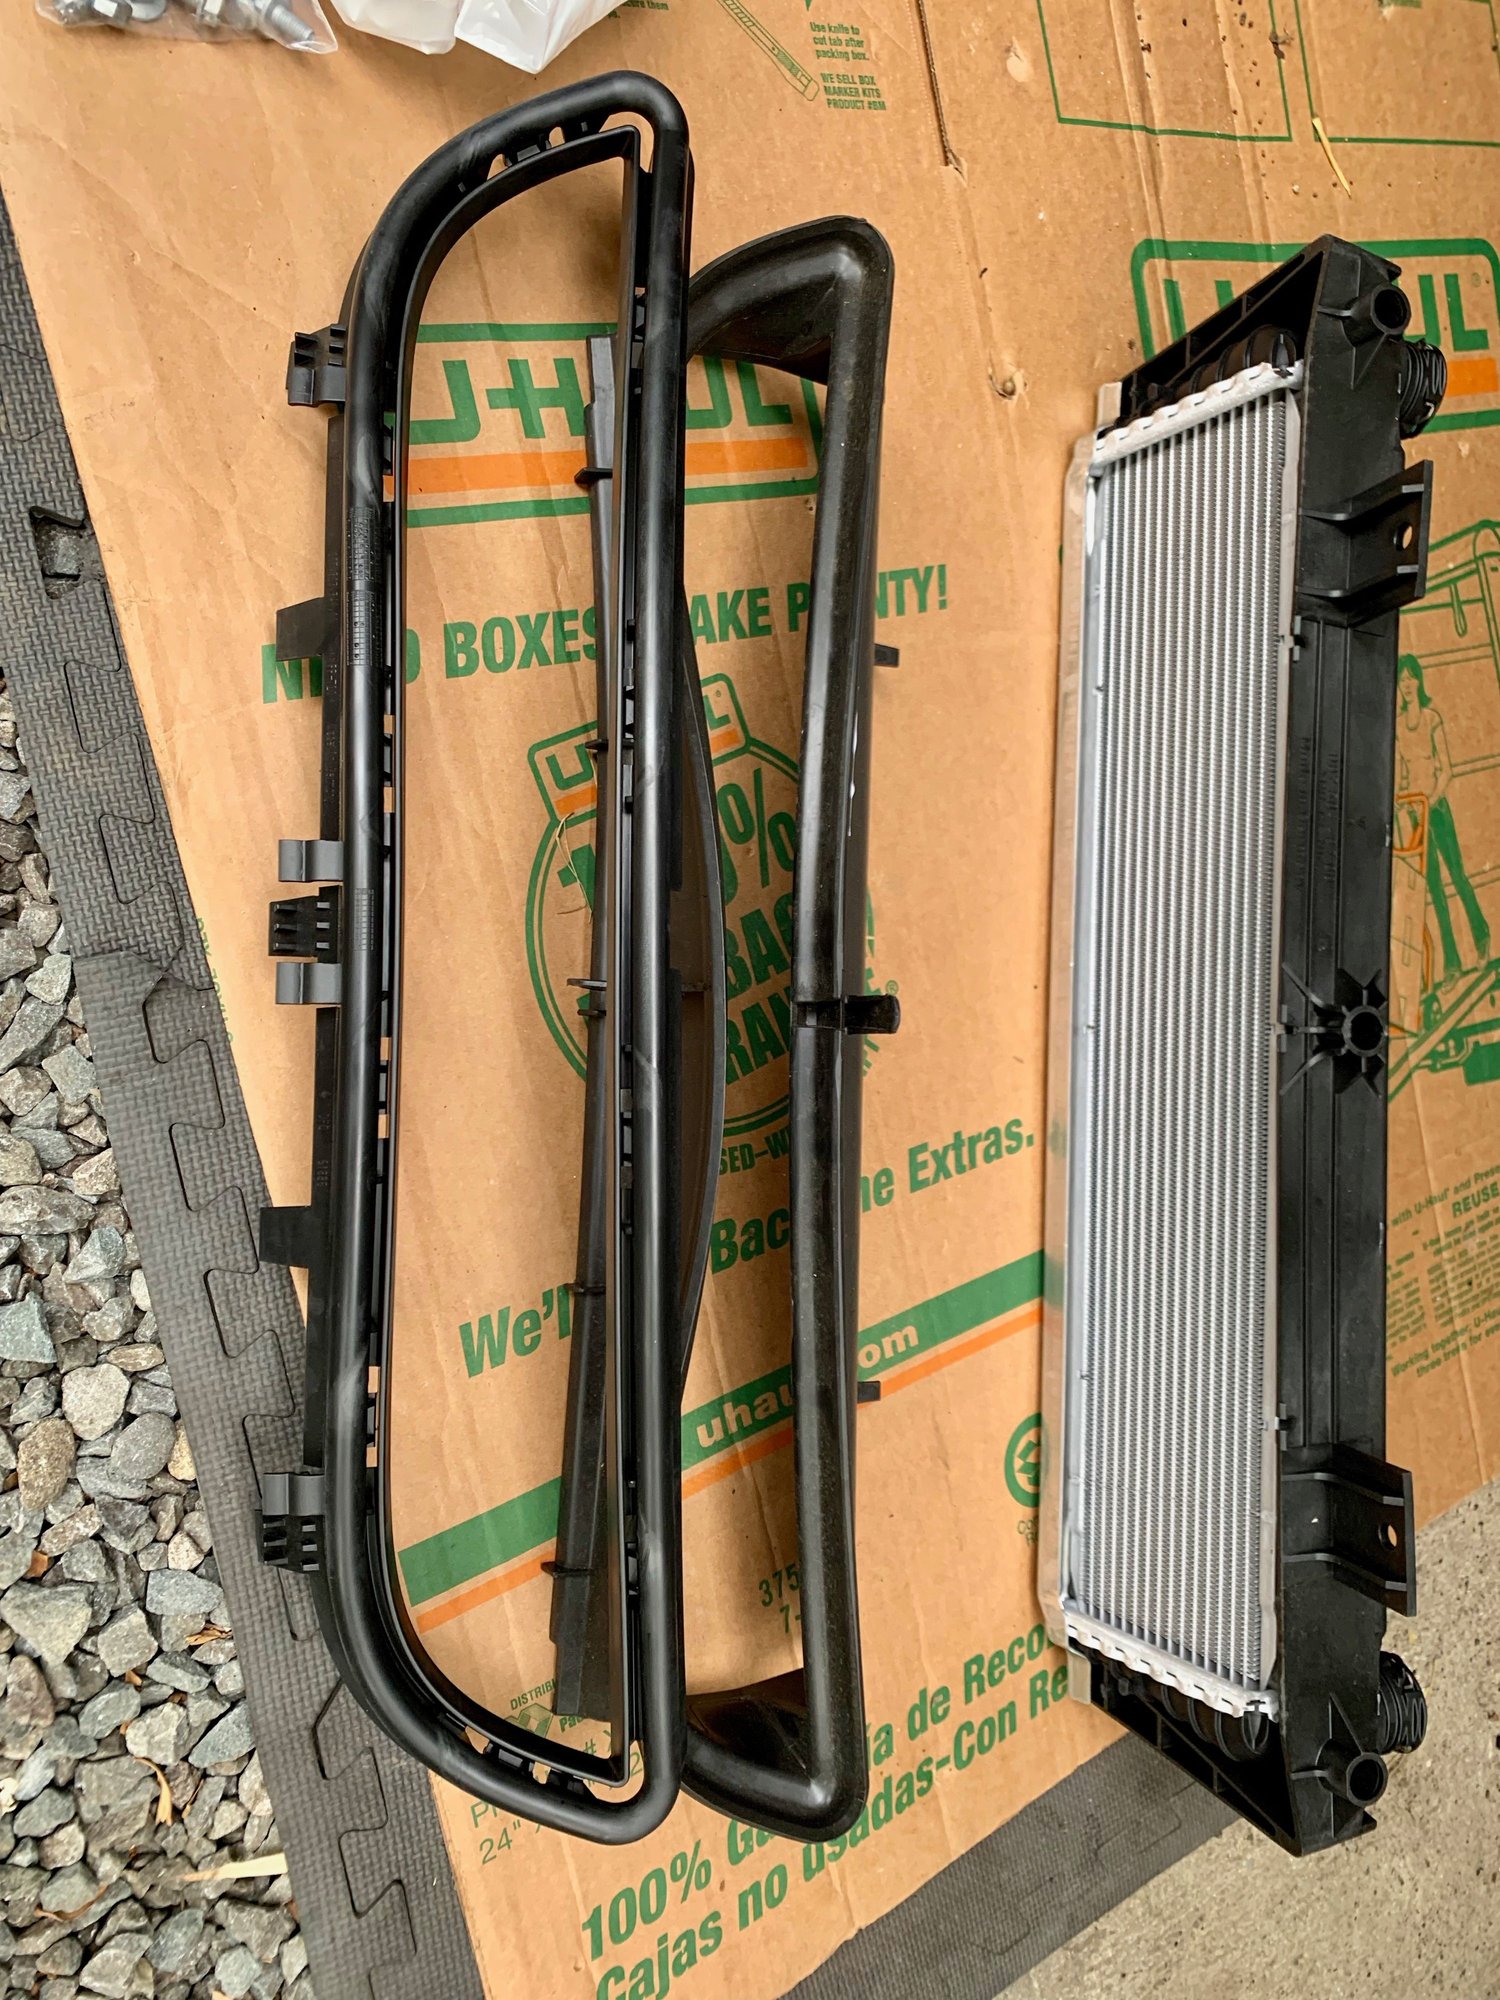
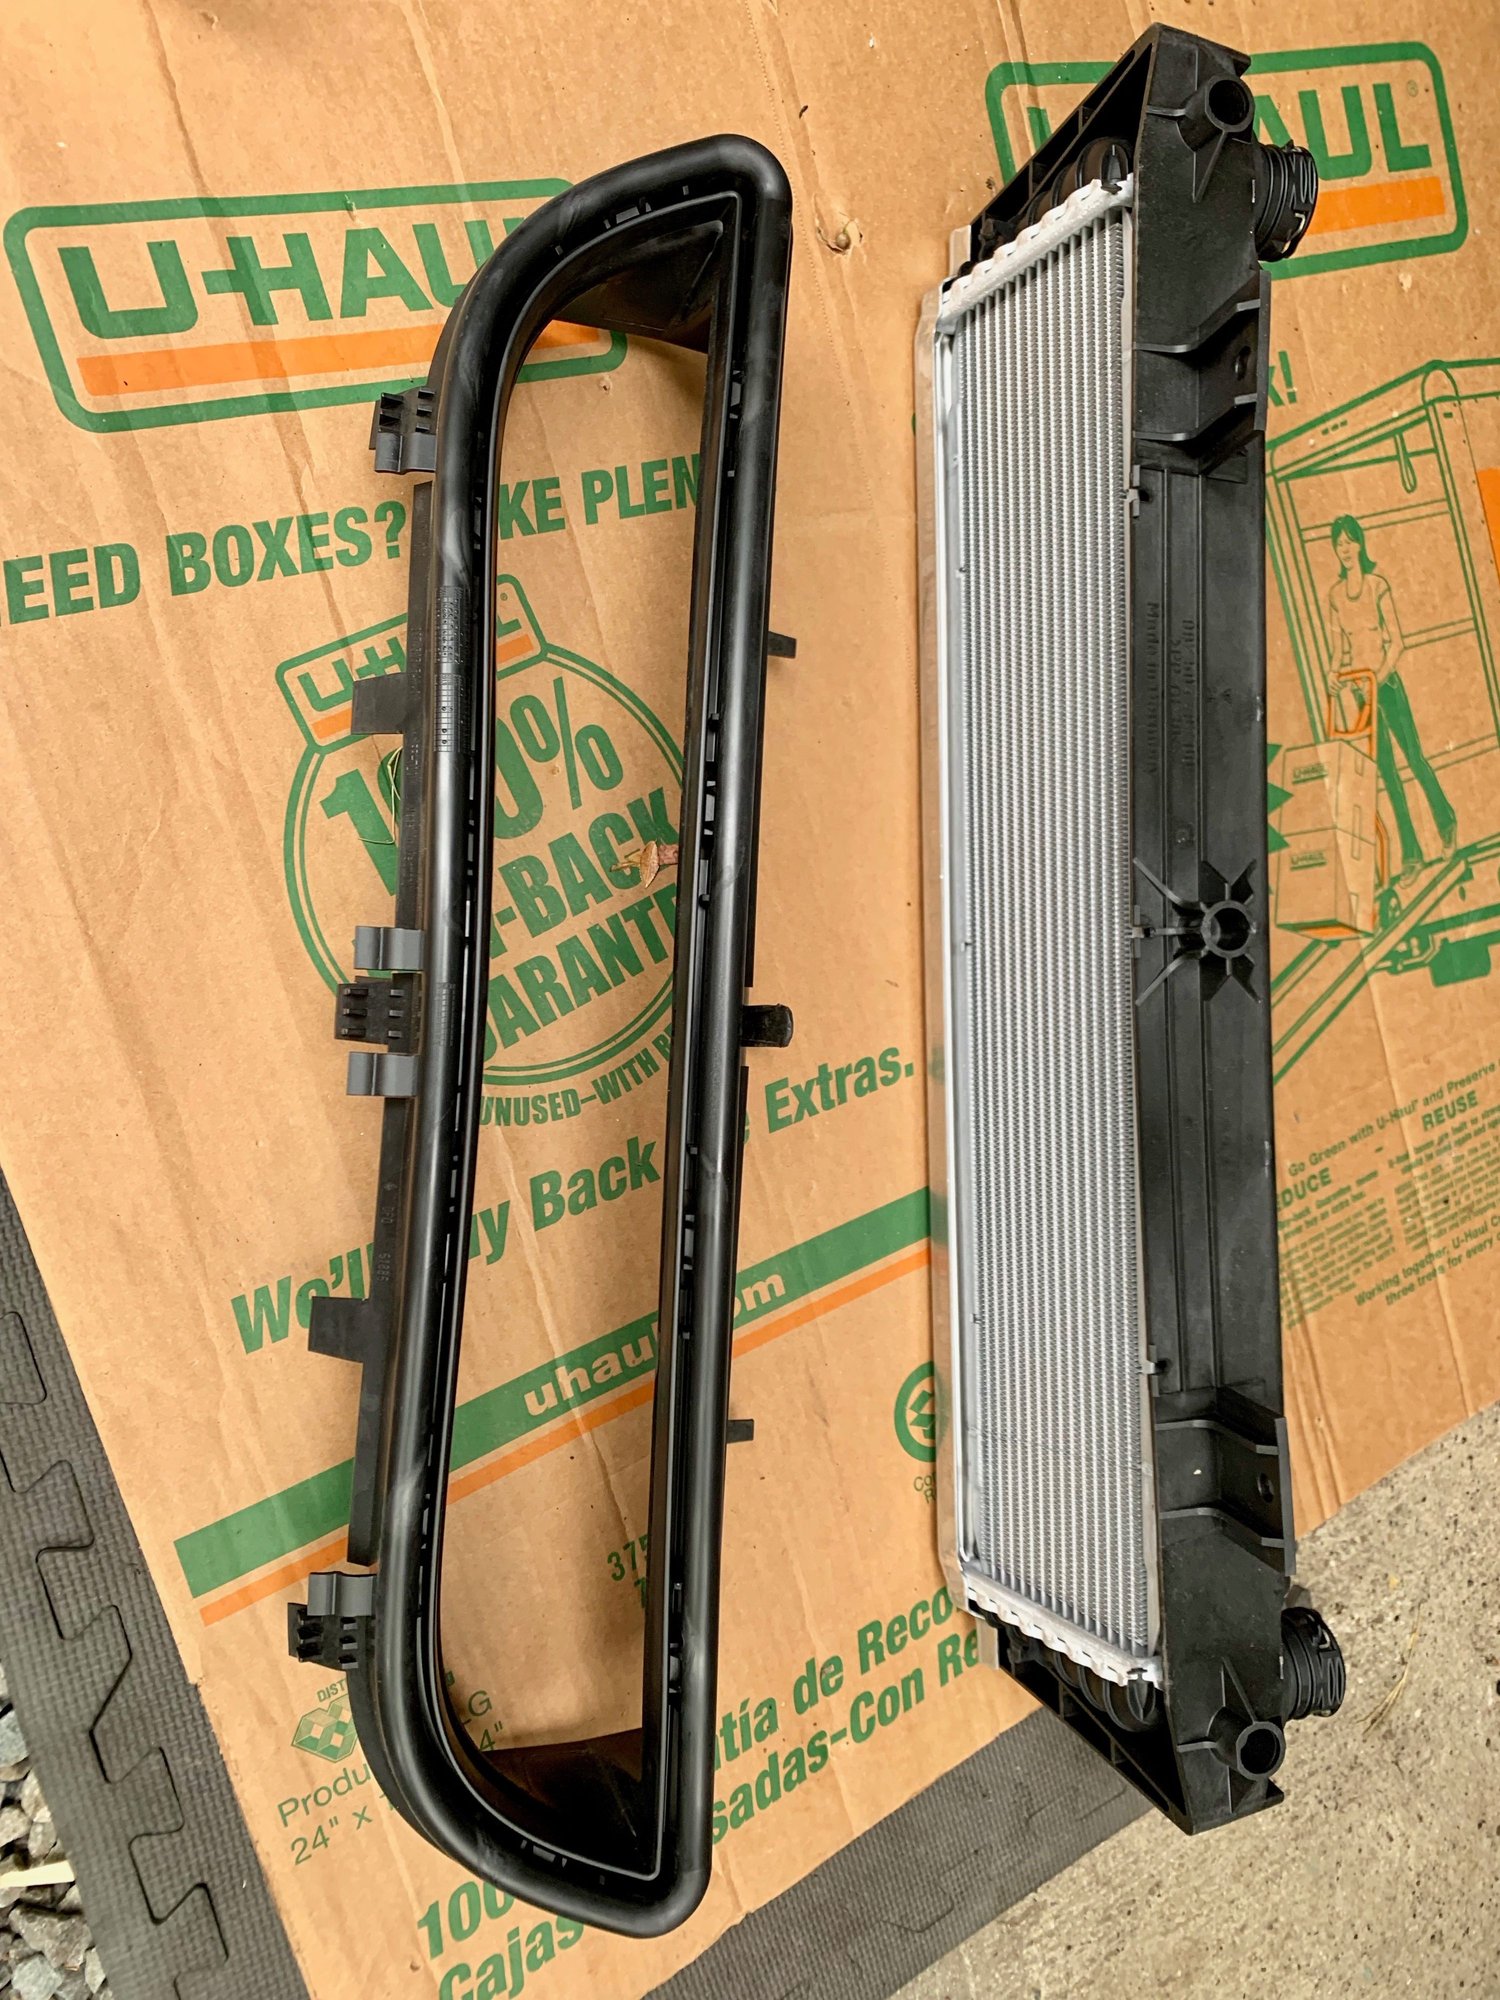
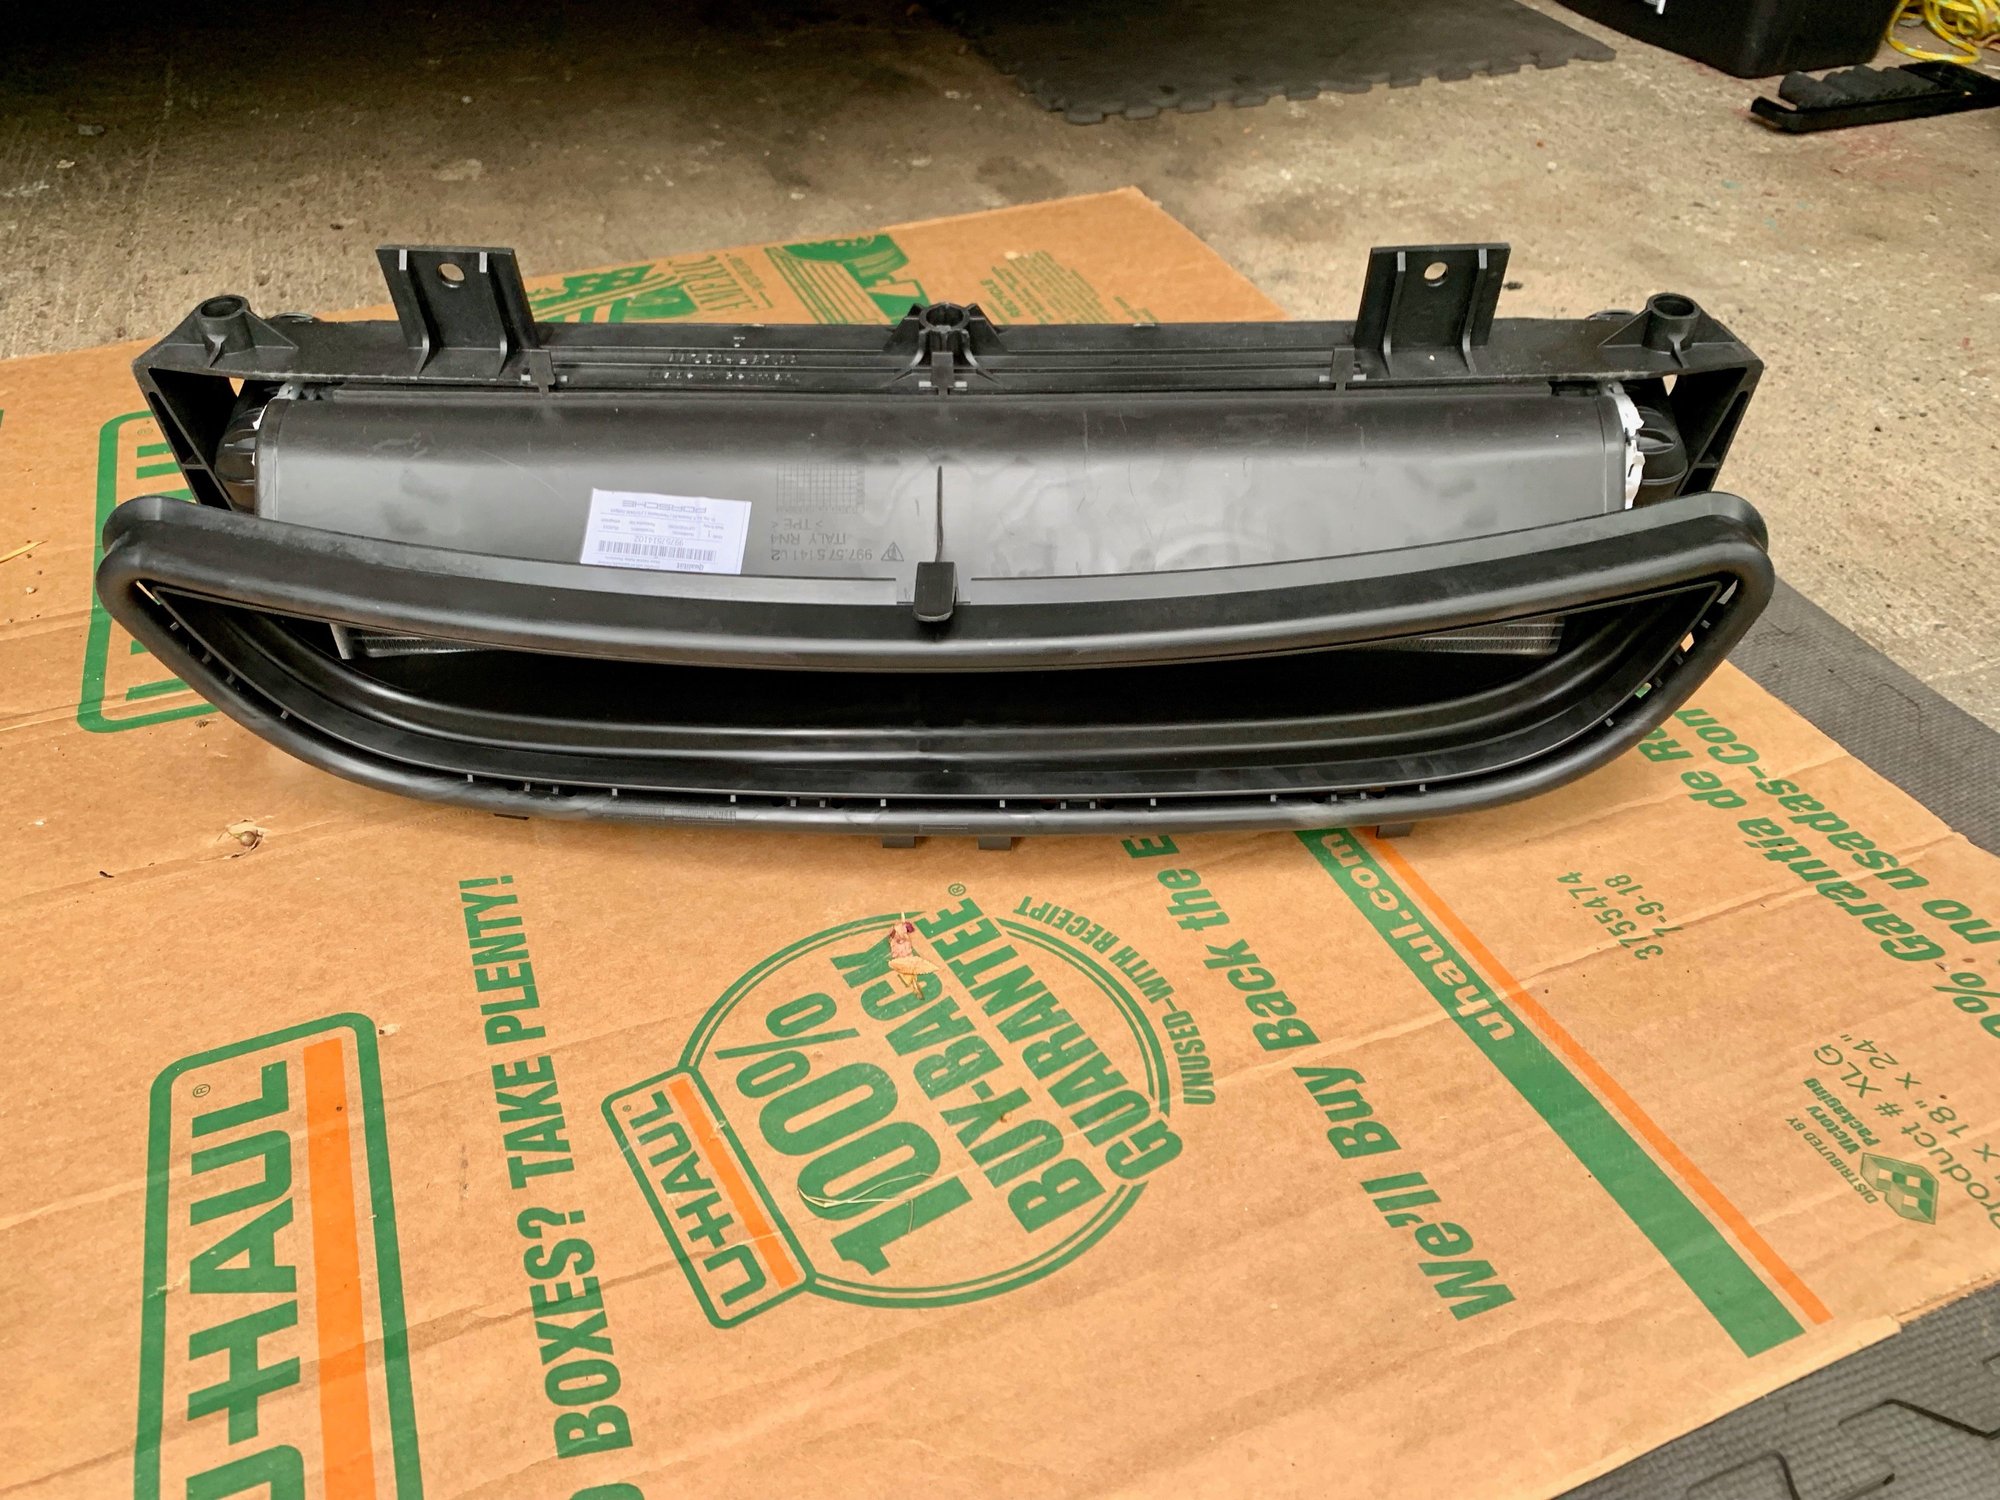
17. Now start assembling the center radiator kit to see how it fits together. There aren't any instructions with the kit so it took a few minutes of fiddling to figure out how every went together. There are also a bunch of extra bolts and clips in the kit, which make it more confusing. However everything just slots together easily and then just two bolts through the aluminum frame hold it all together.
Once you have it put together you can test fit it on the frame to see where it bolts on and how the coolant pipes connect together.
19. Once you have all the parts ready its time to drain the coolant and install the two pipes. These are plug and play. There are just two bungs that plug the coolant hose you need to remove. Those Germans are thoughtful.
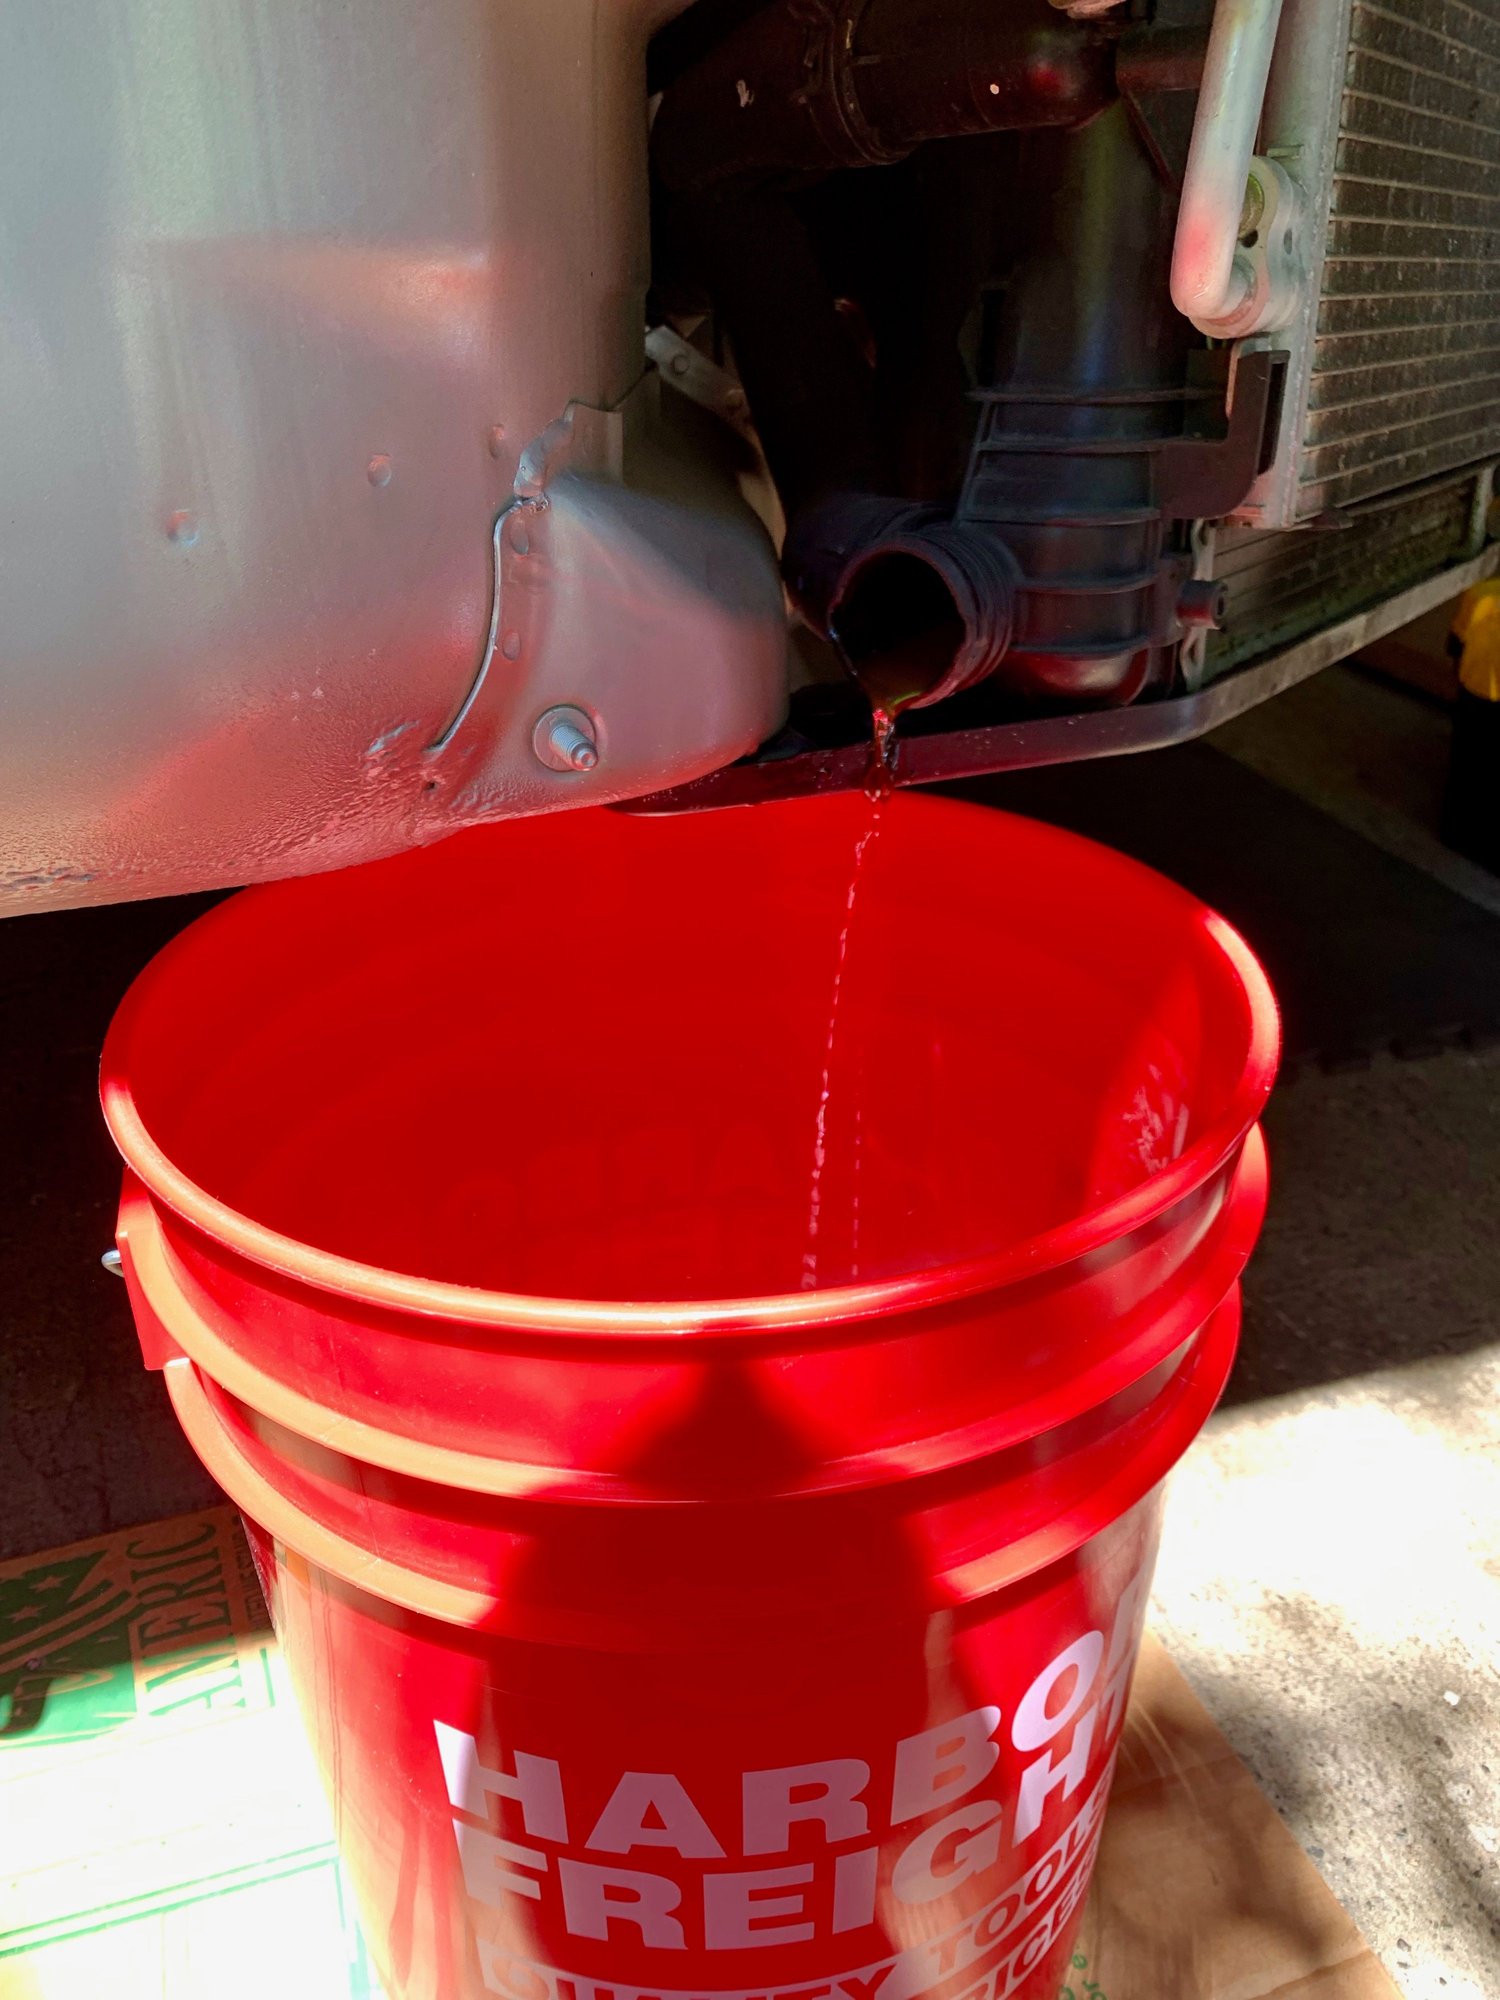
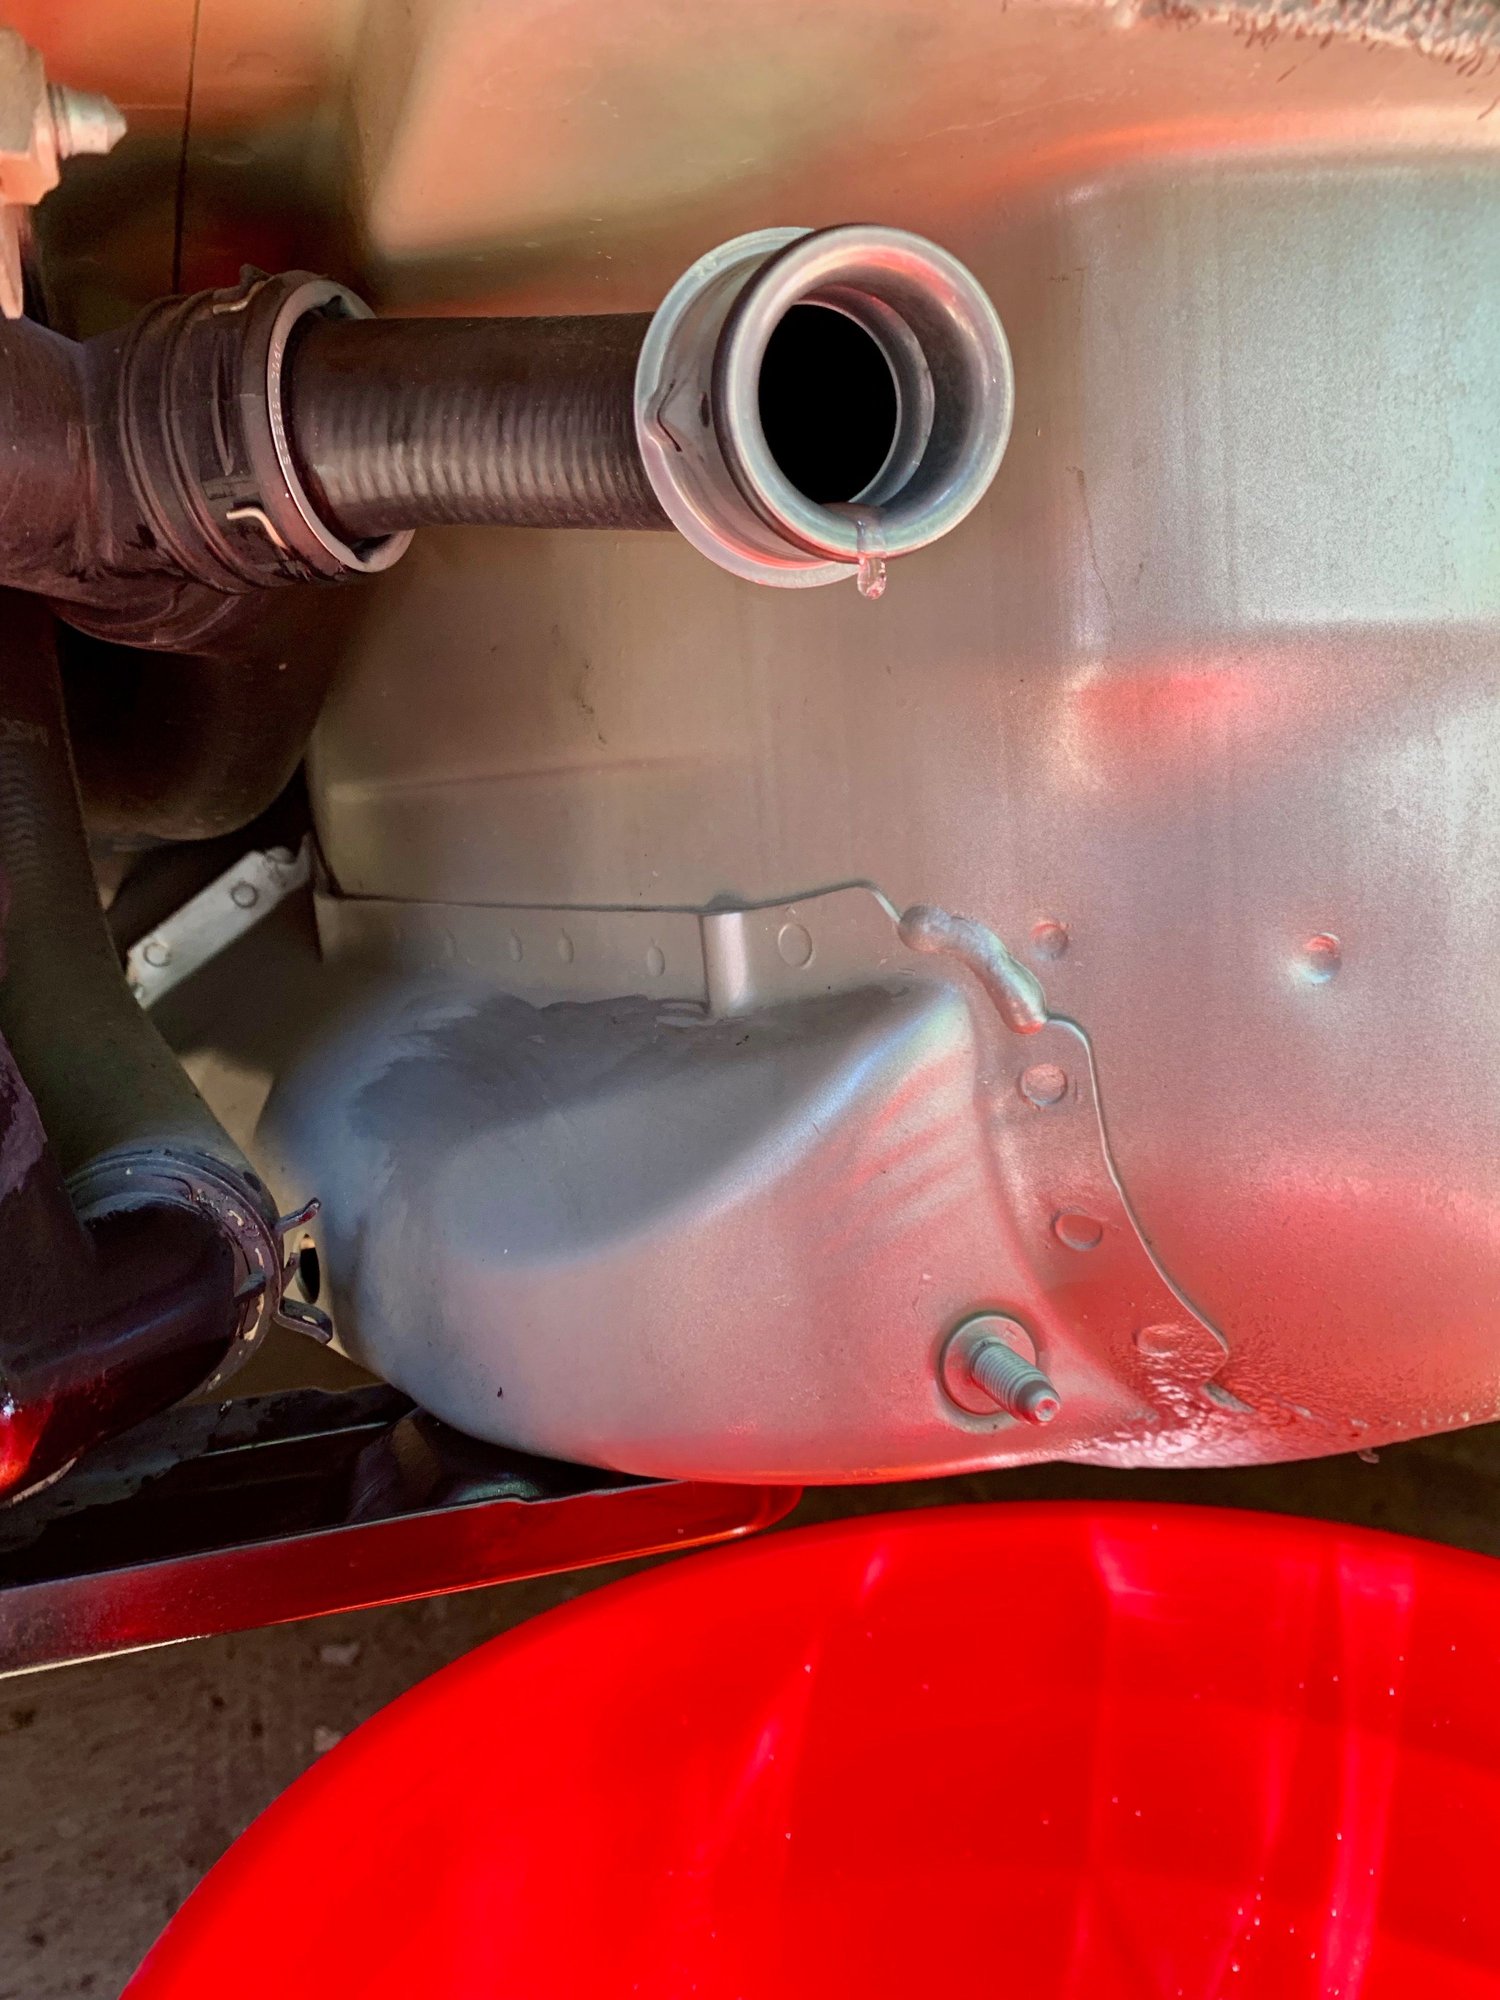
To drain the coolant start with the driver side first as its easier to get to and more will drain from that side, since its lower. There is a metal clip on the top of the hose that holds the bung in place. Just pull it straight up with needle nose pliers to release it. You don't have to pull it completely off. Just pull it up and it will stay in an open position.
Position your bucket under the hose and take needle nose pliers and slowly wiggle the bung back and worth to release it. It will take 30 seconds of wiggling before it finally starts to come out. Once it does you will get a decent size stream of coolant but its pretty controlled so not much will spill out of the bucket. It will take 3 minutes or so for it to stop flowing. Then clean up the area and move onto the passenger side pipe. Repeat the same process. Less will come out of this side.
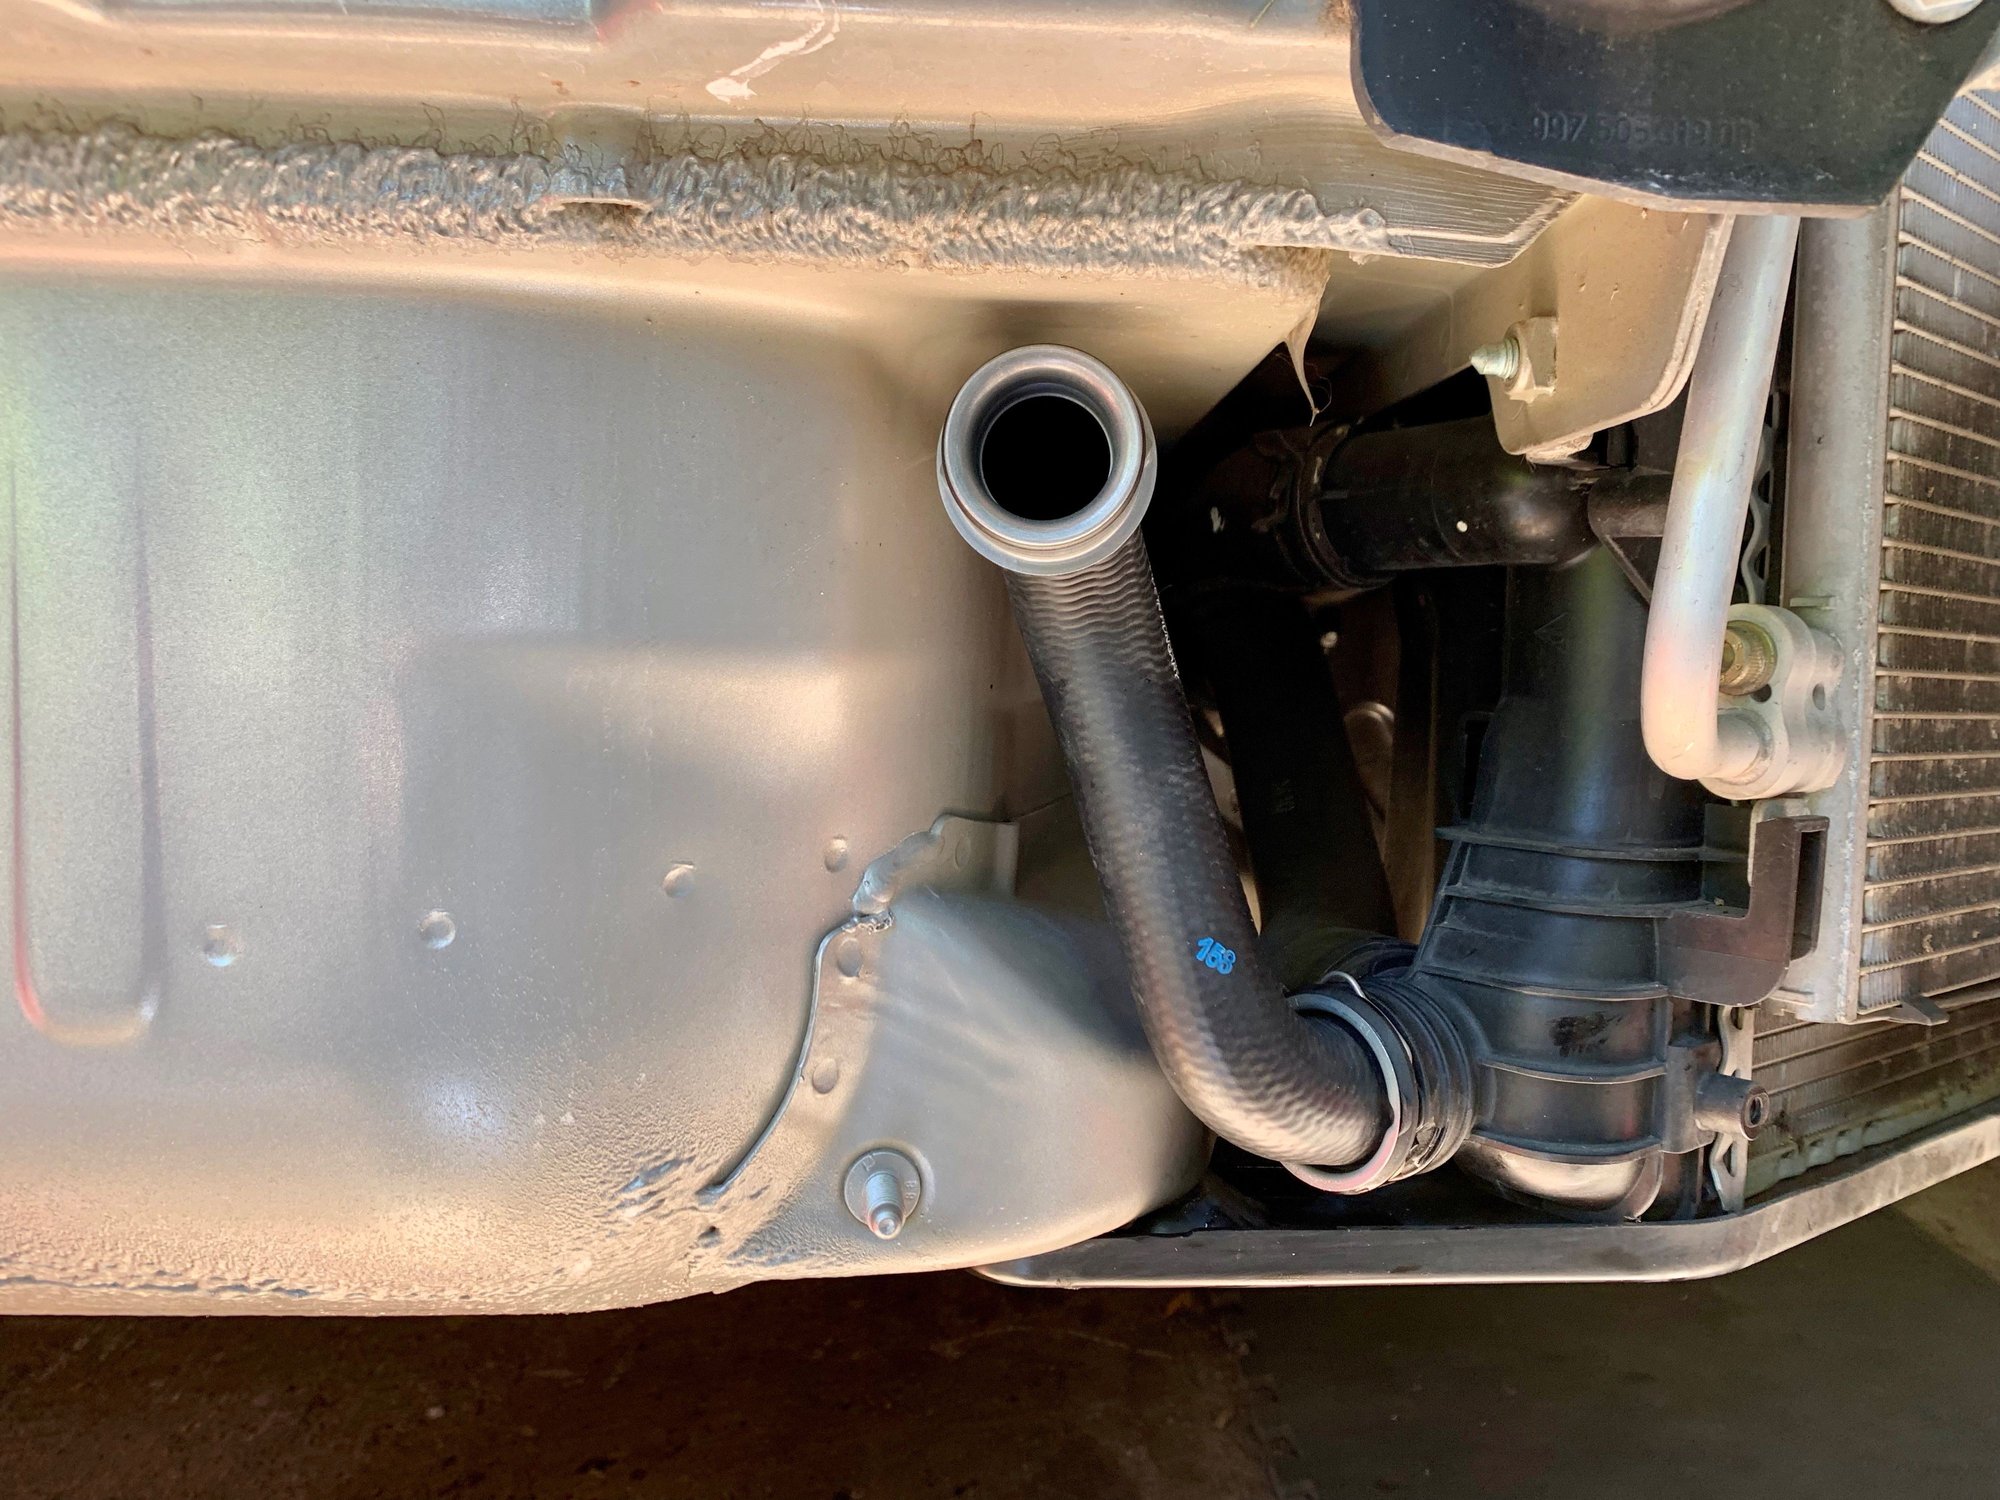
20. Now you install the hoses supplied with the kit. The longer one goes on the driver side and the shorter one goes on the passenger side. Its pretty easy to figure it out. Those slot into the coolant pipes and then you push the clips back in place. Make sure you give them tug to ensure they are properly seated. I read many warnings saying if you didn't have these on correct they would leak, but I had no issue at all. They went on in 60 seconds.
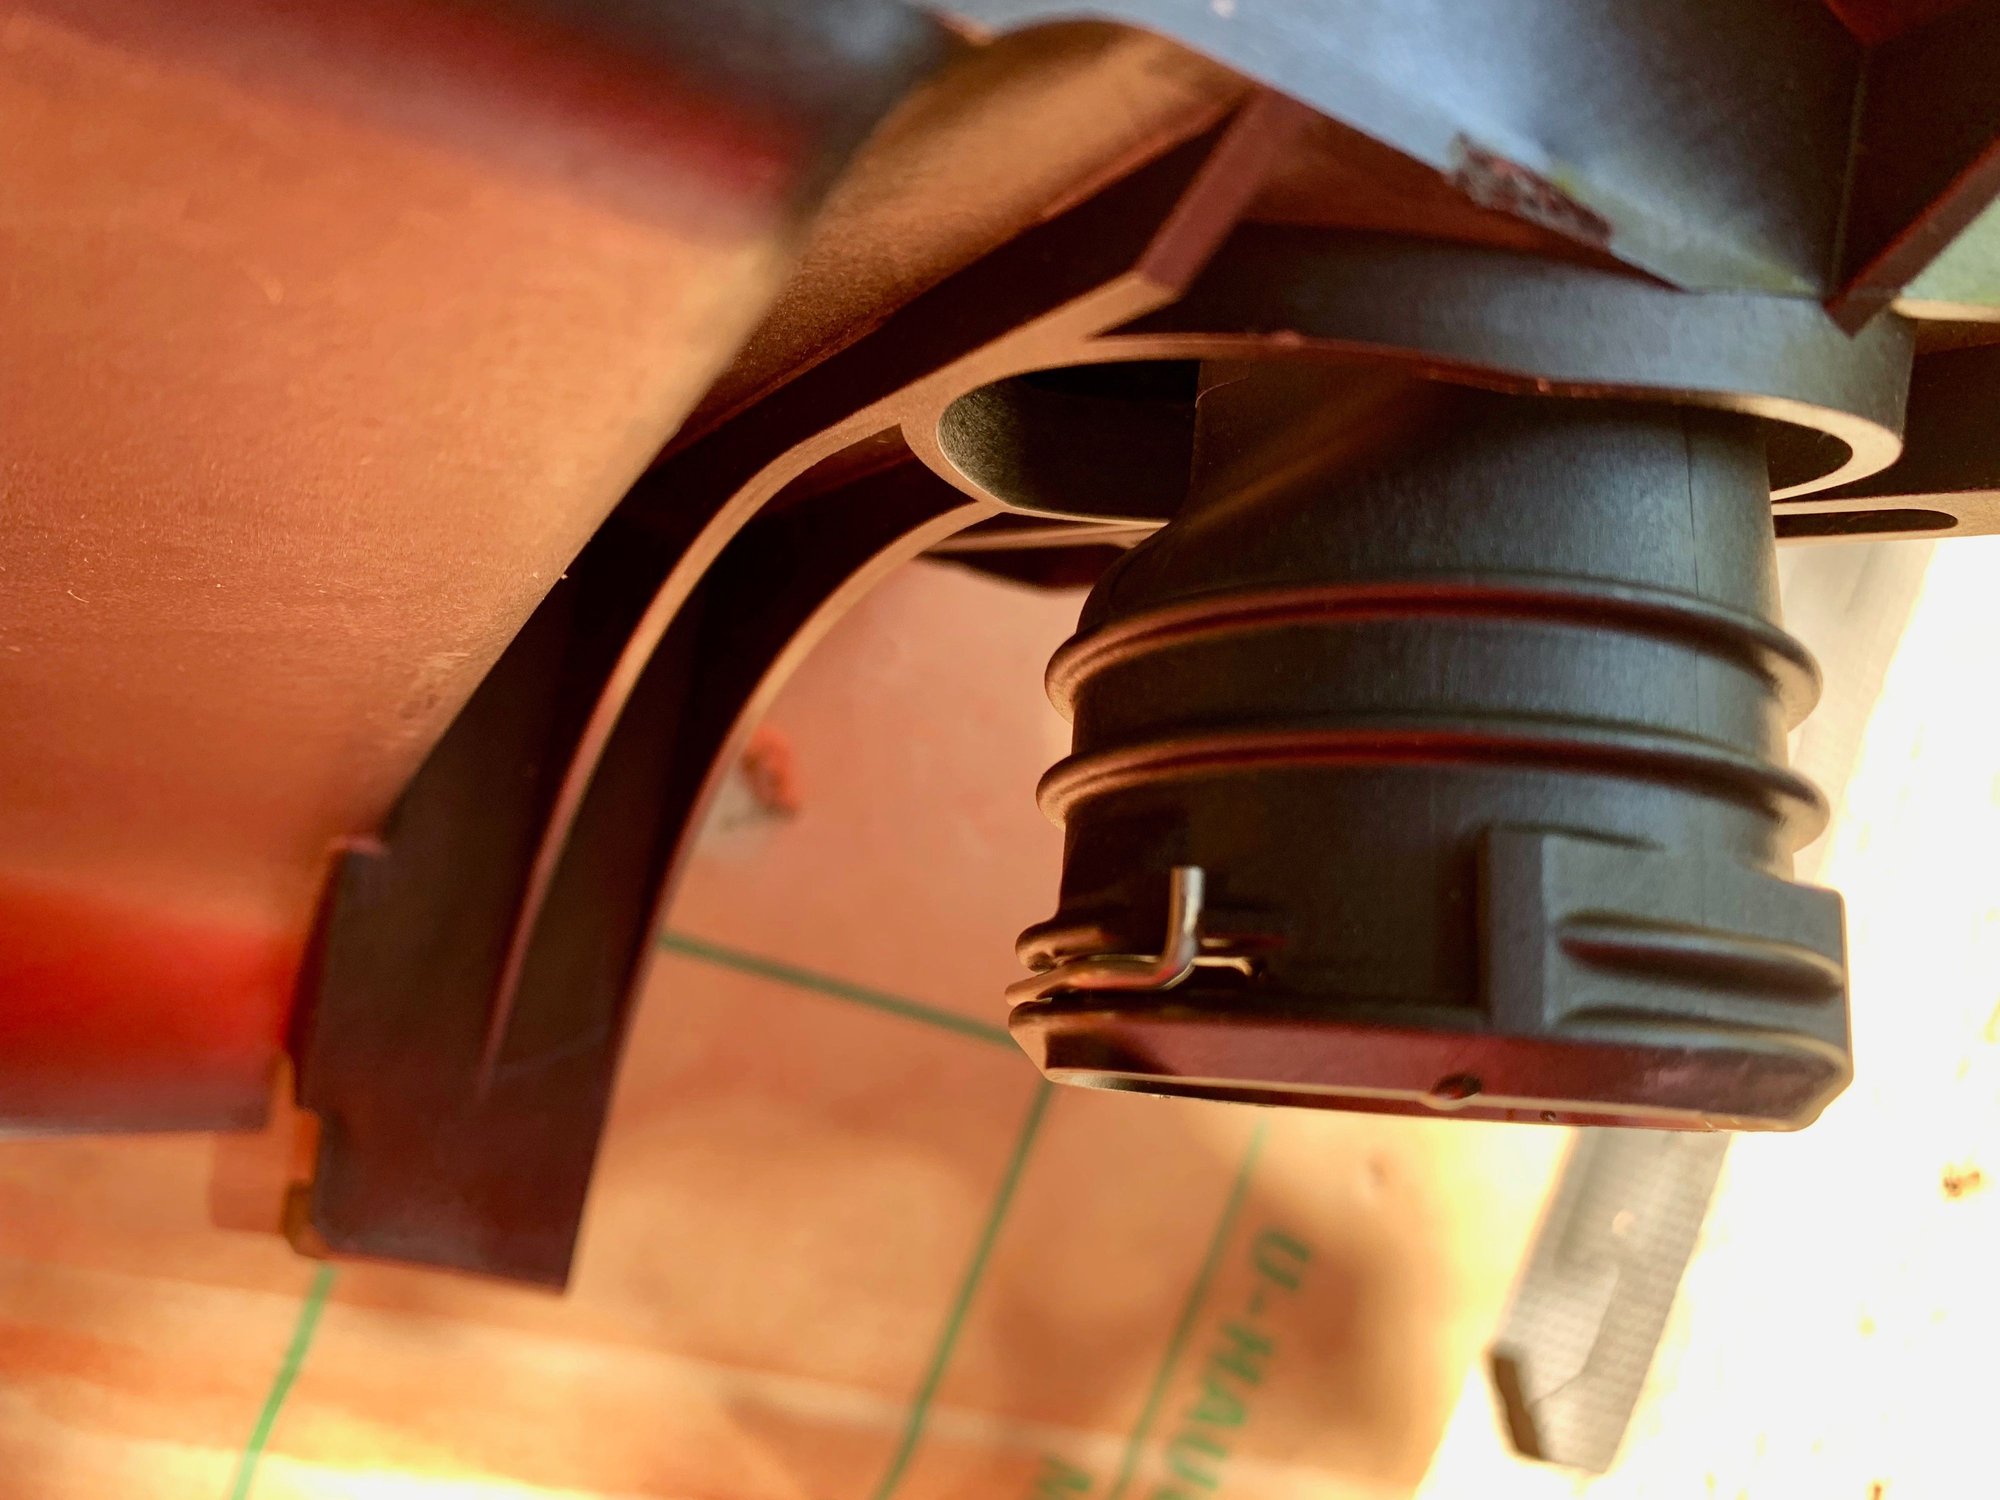
Driver Side Passenger Side This is a picture of the bottom of the hose clip. You can see when you pull it straight out, the L arm rests in a secondary open position. When you push it down the L arm should rest flush with the plastic.
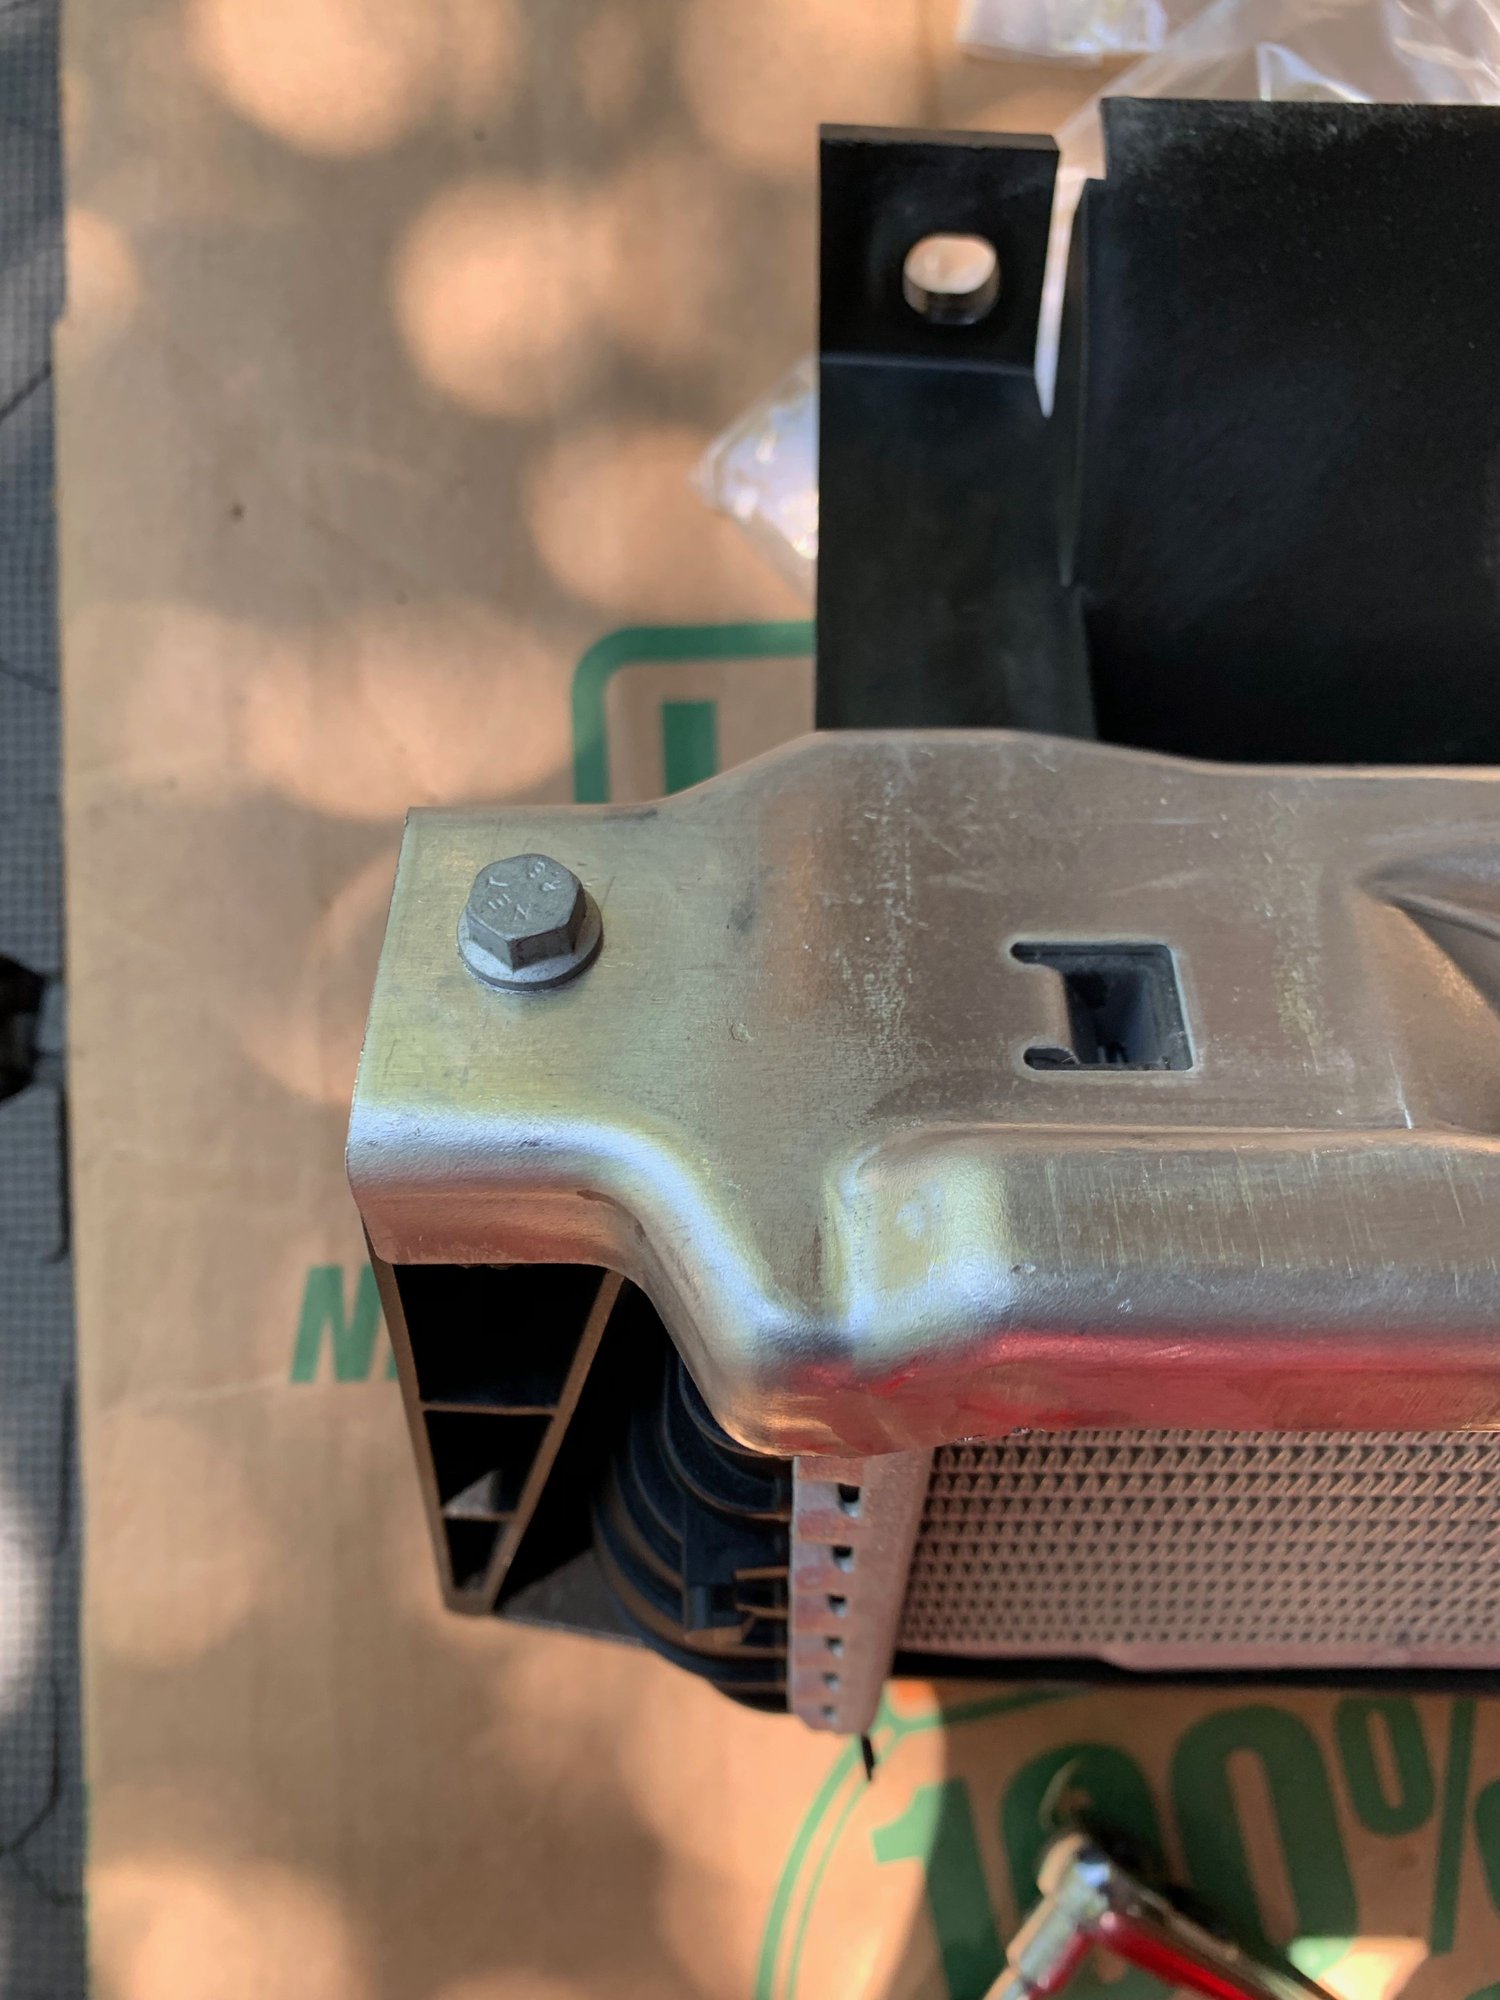
21. Next you can start bolting on the radiator. Thats really easy. Just dry fit it on the bracket while reaching around to push the hose pipes in the back of the radiator. There are two bolts above and two below that hold it in place (all supplied with the kit).
A good tip is to pre-fill the radiator with 50/50 coolant / distilled water to minimize air bubbles. I found white crap floating around inside after this so I flushed it a couple times with distilled water before filling it up again. You just fill up one of the holes and after maybe a half a gallon you will start to see it bubble up from the other hole.
You can see the two top bolts in this photo.
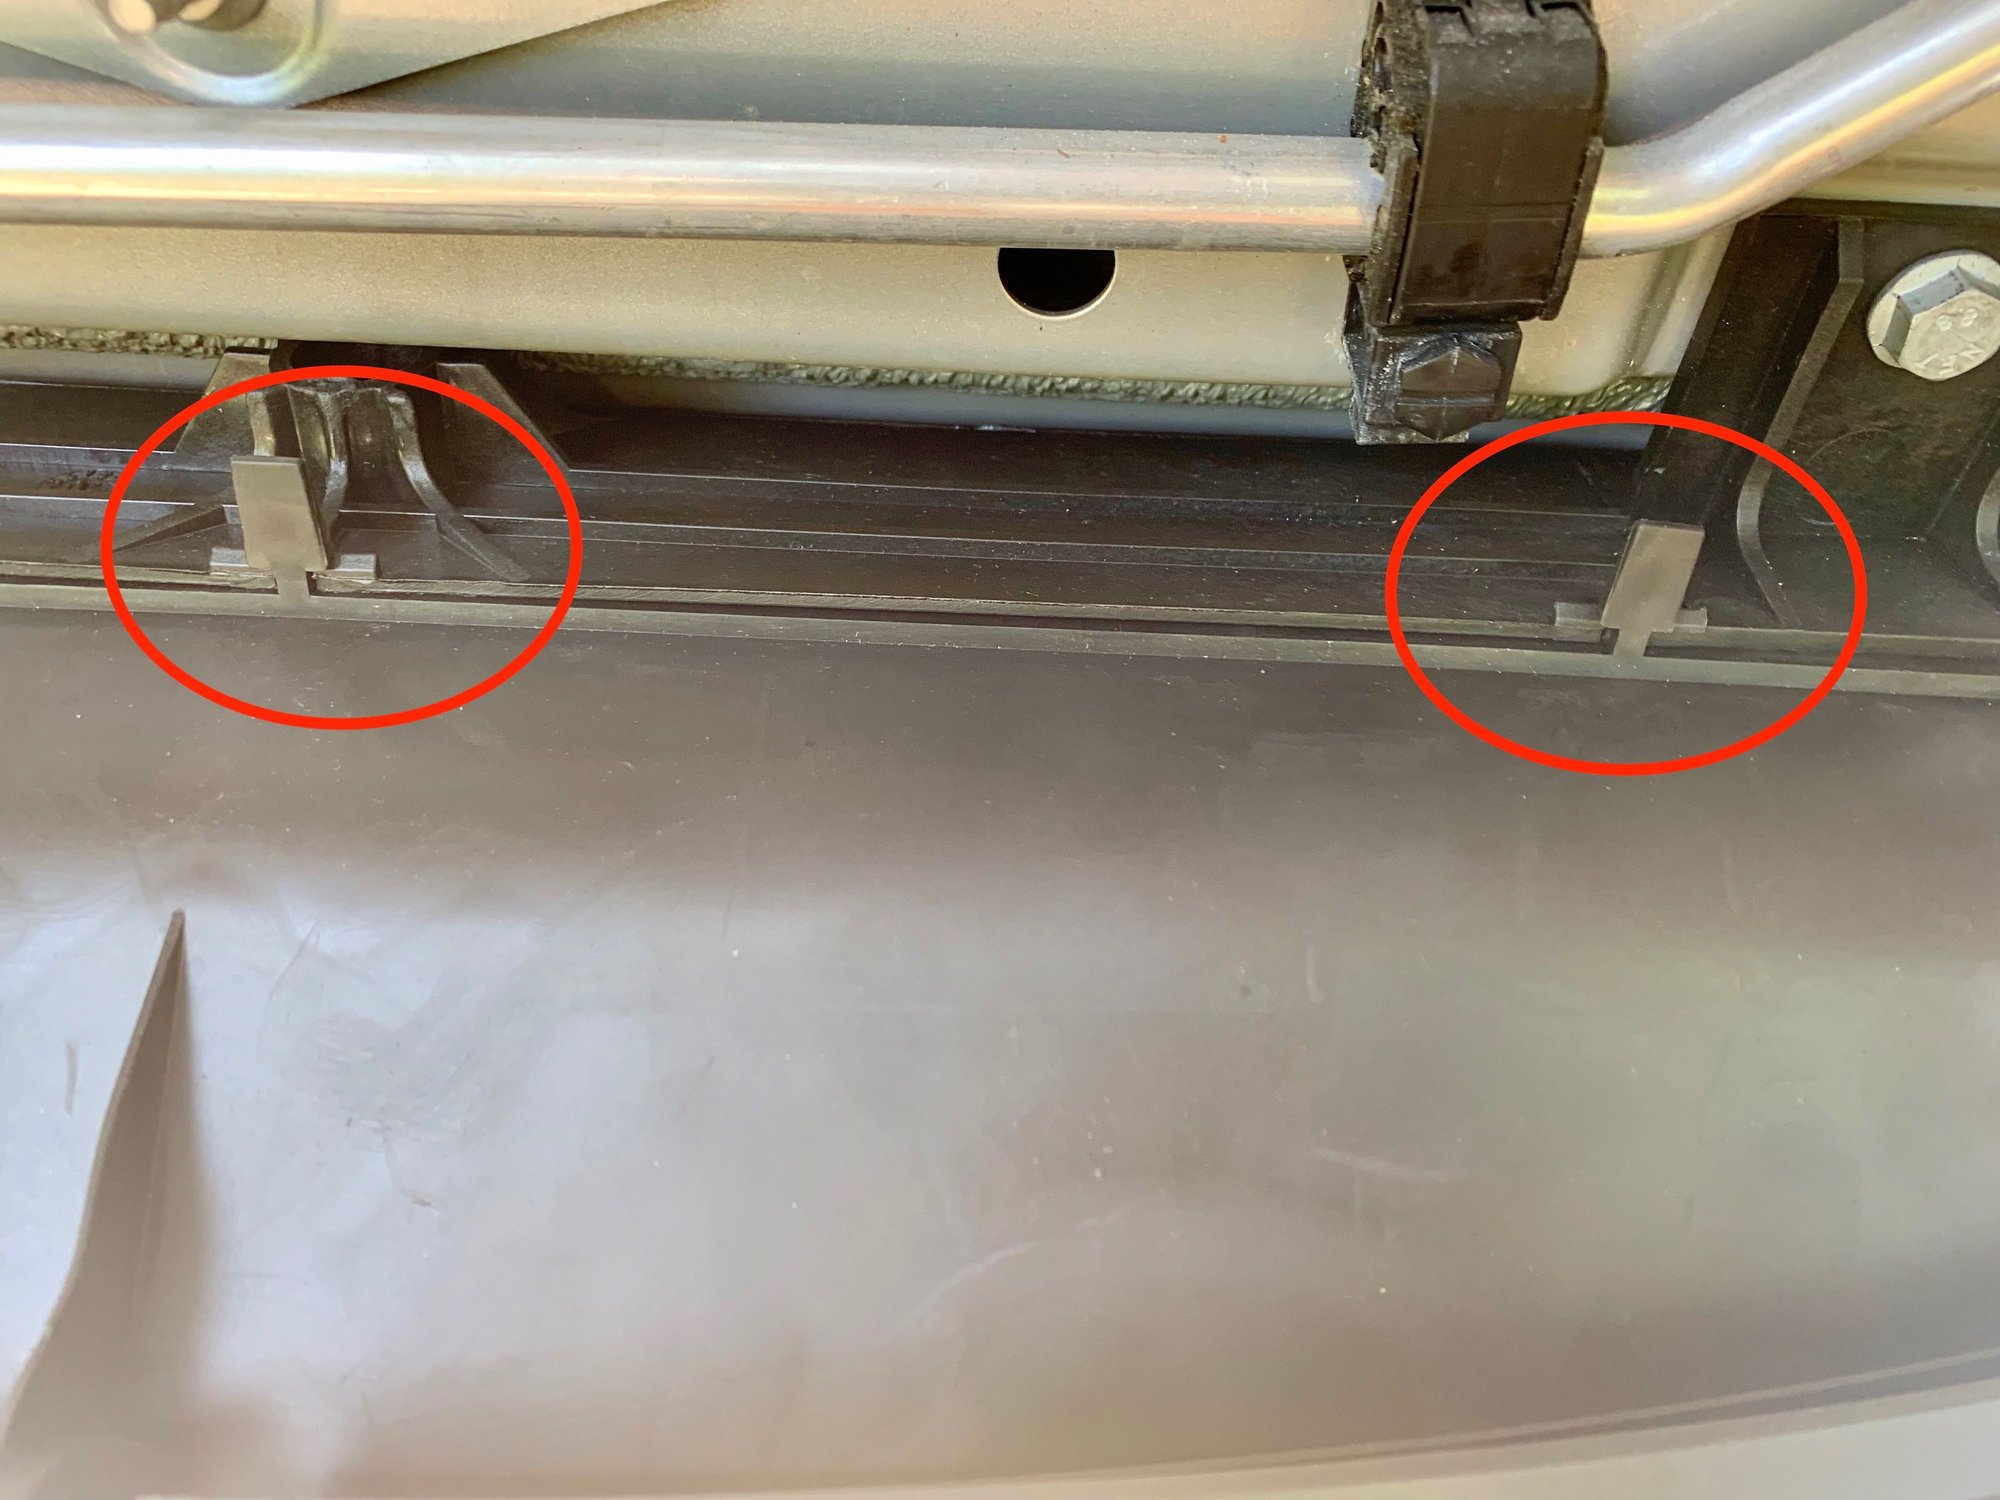
Here you can see the tabs on the top of the radiator intake that clip into the plastic frame behind it.
There are two tabs on the bottom too.
And one on each side.
22. Next use this opportunity to clean up and 303 your air intake, inner fenders, as well as other bits and pieces. I had some surface corrosion on the aluminum bumper rail but it cleaned right off.
23. Next reinstall the aluminum bumper rail and radiator intakes. Both dead simple. Dont forget to reattach the air sensor in the passenger air intake.
24. Now you want to test the system for leaks before buttoning everything back up. Fill up your coolant reservoir to the fill line (less than a half gallon if you have already pre-filled the radiator), screw the cap on but leave the bleeder valve open. Then start up the car and idle it at ~2k rpm until the water temp starts to rise. Then check for leaks below the car and add more coolant as it drops in the reservoir.
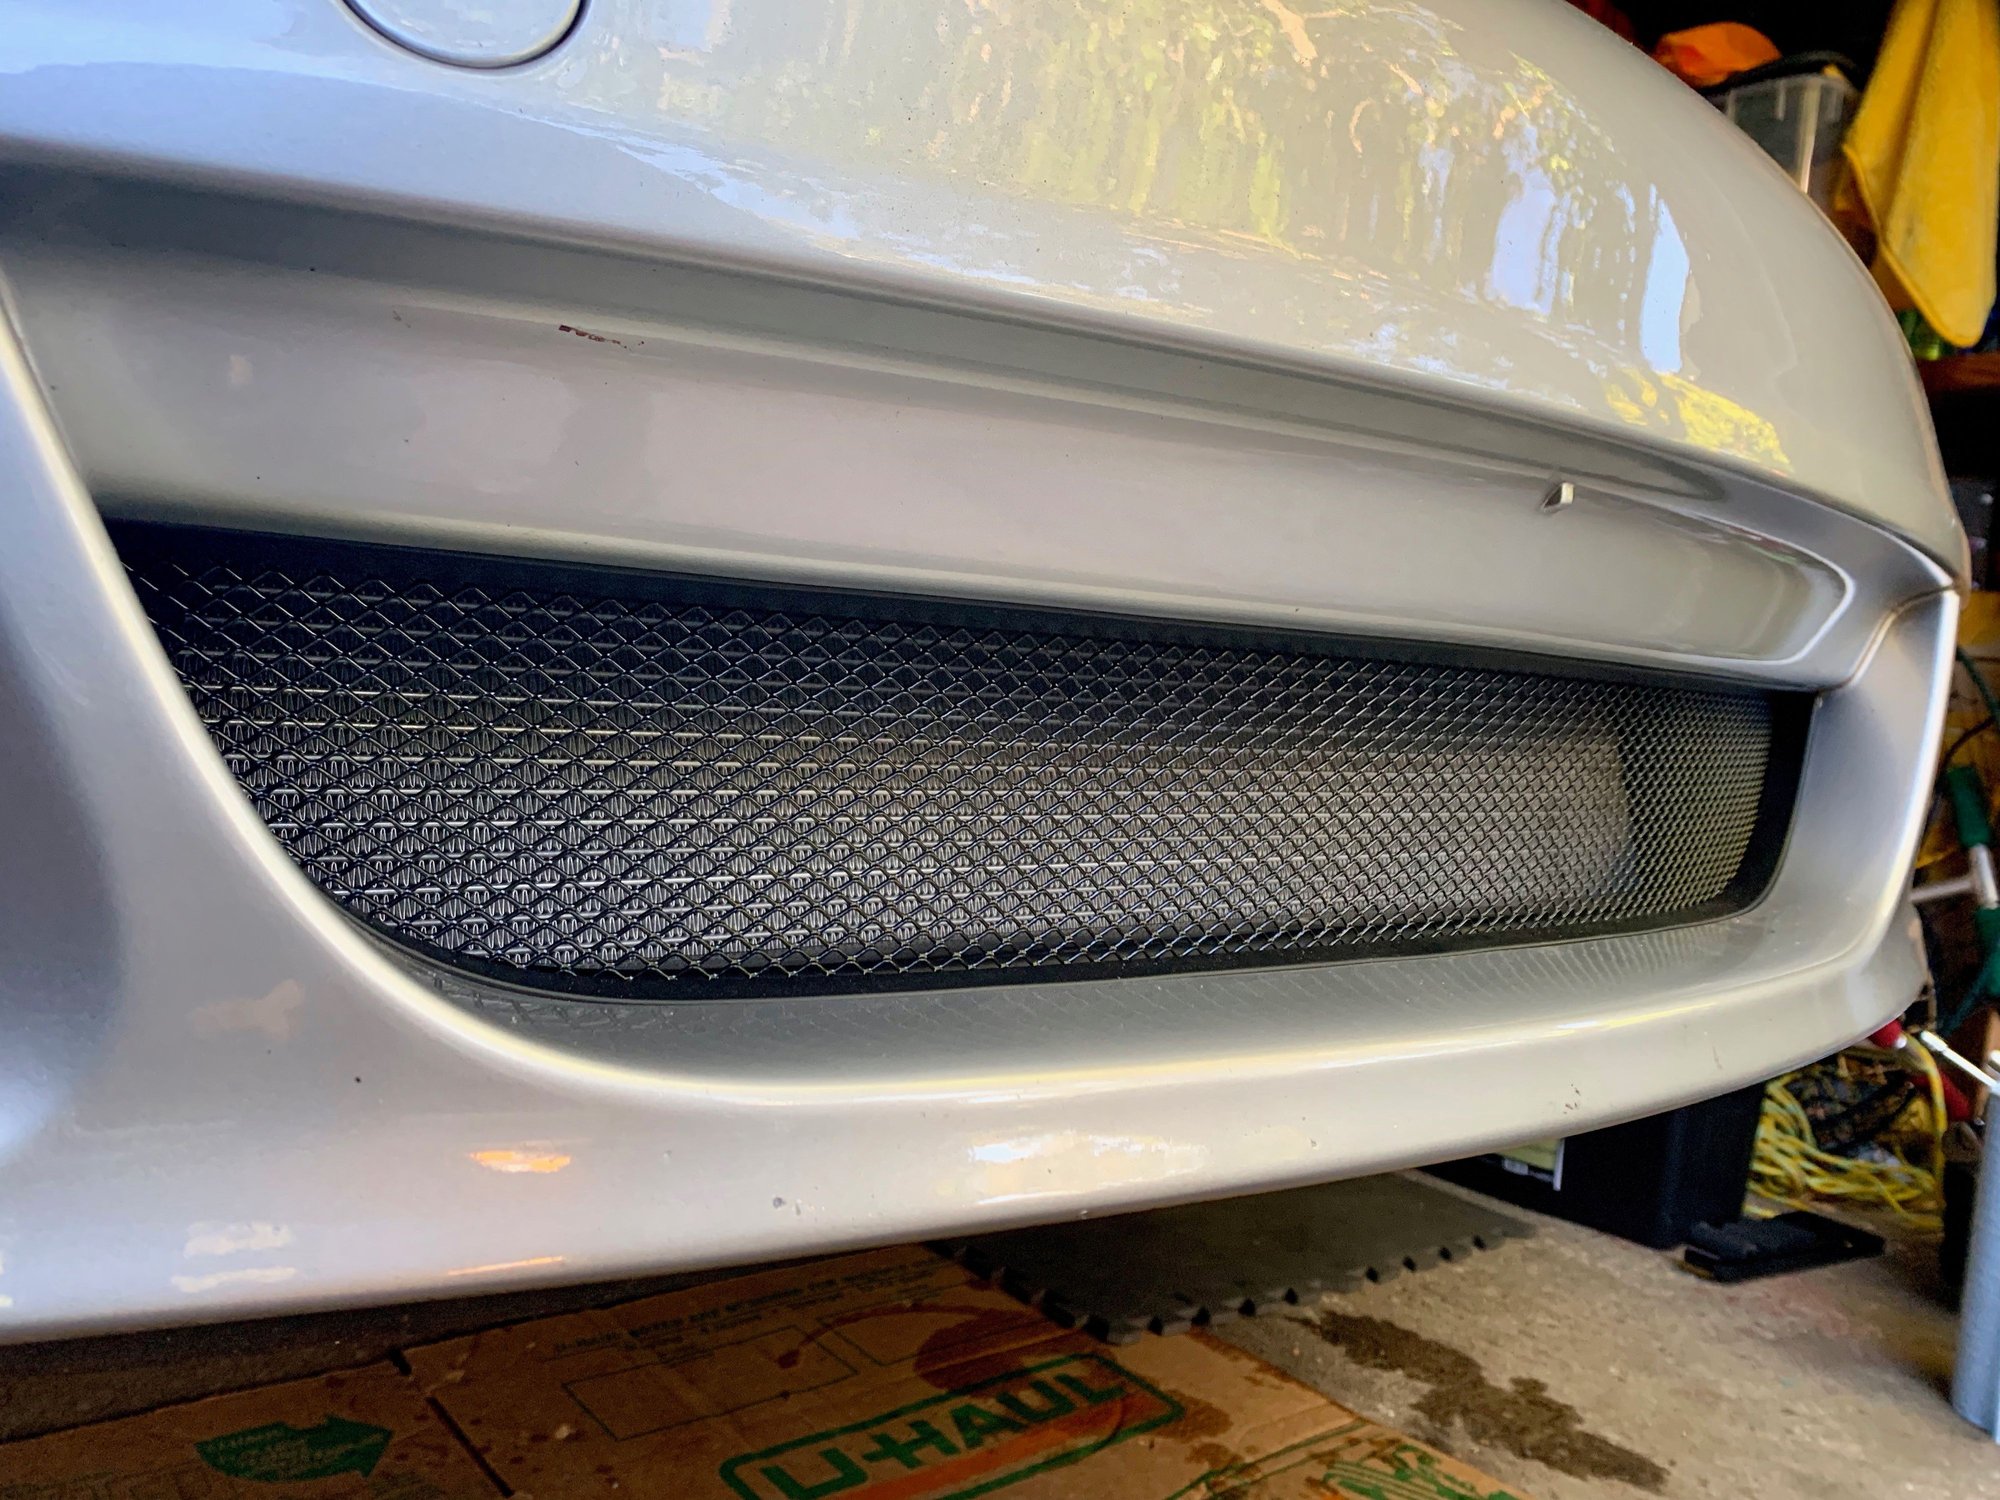
If all is good turn off the car and start on the hard part....installing the grill screens.
25. If you dont want to install grill screens you can skip this step, and save yourself another 2hrs. Another option is to buy the kit from Rennline for $300. At one point I thought that would have been the smarter route vs my $6 DIY job. After doing it once it would only take me 30 minutes the next time. Most of the time was just figuring out how I was going to cut the pieces, where to put the screws, how to ensure it wasn't going to look like ****, and what I was going to do if I screwed it up.
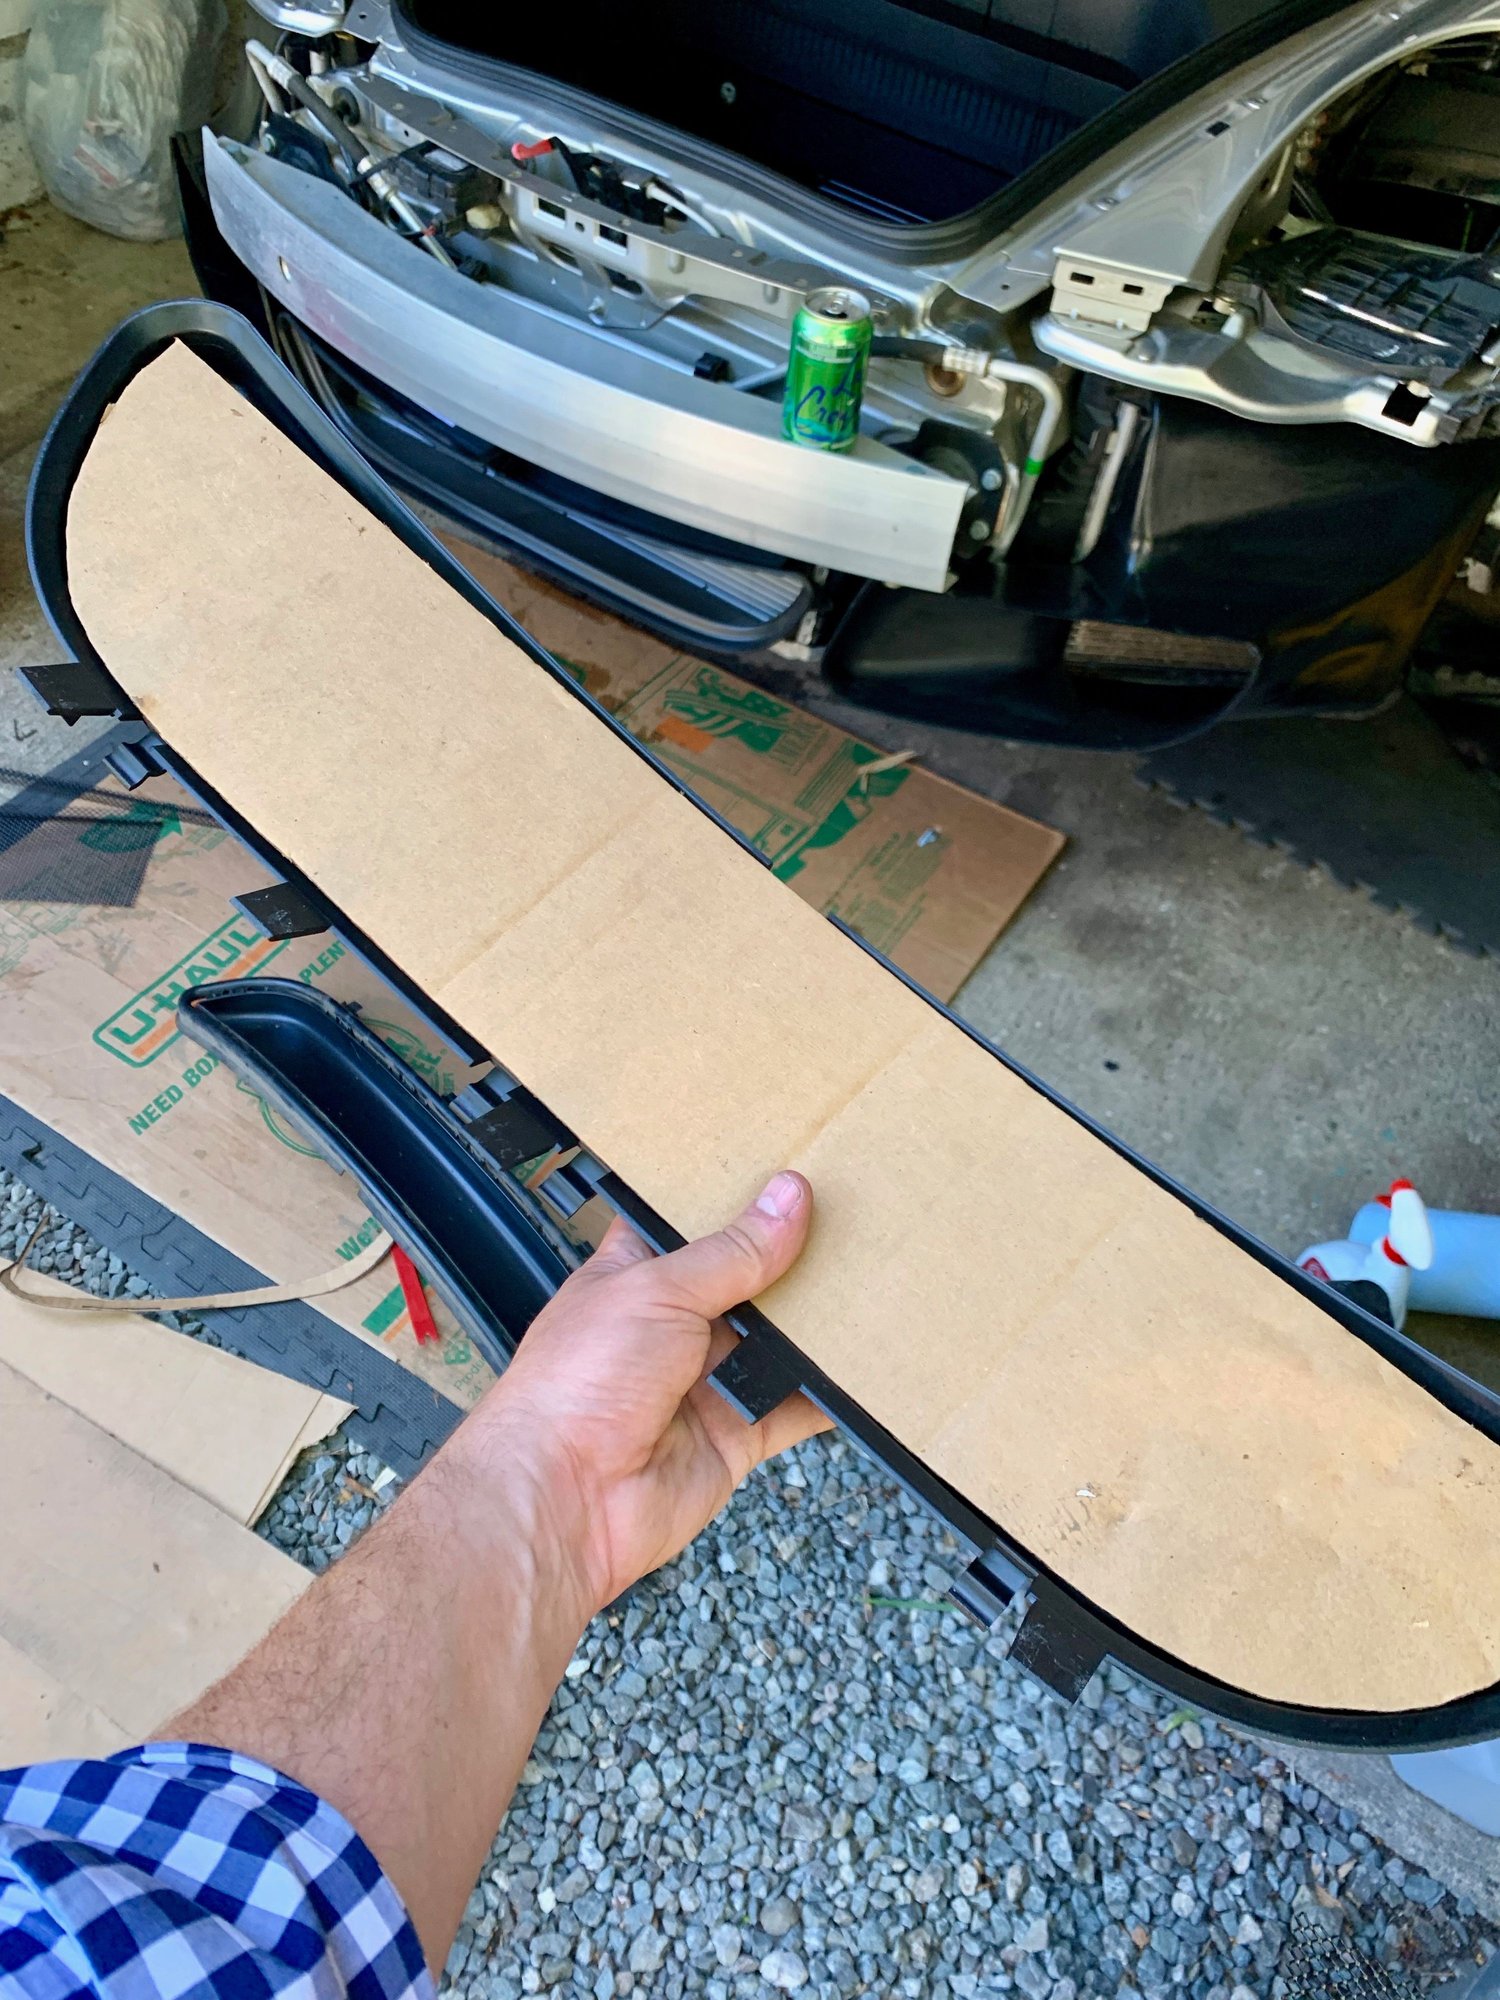
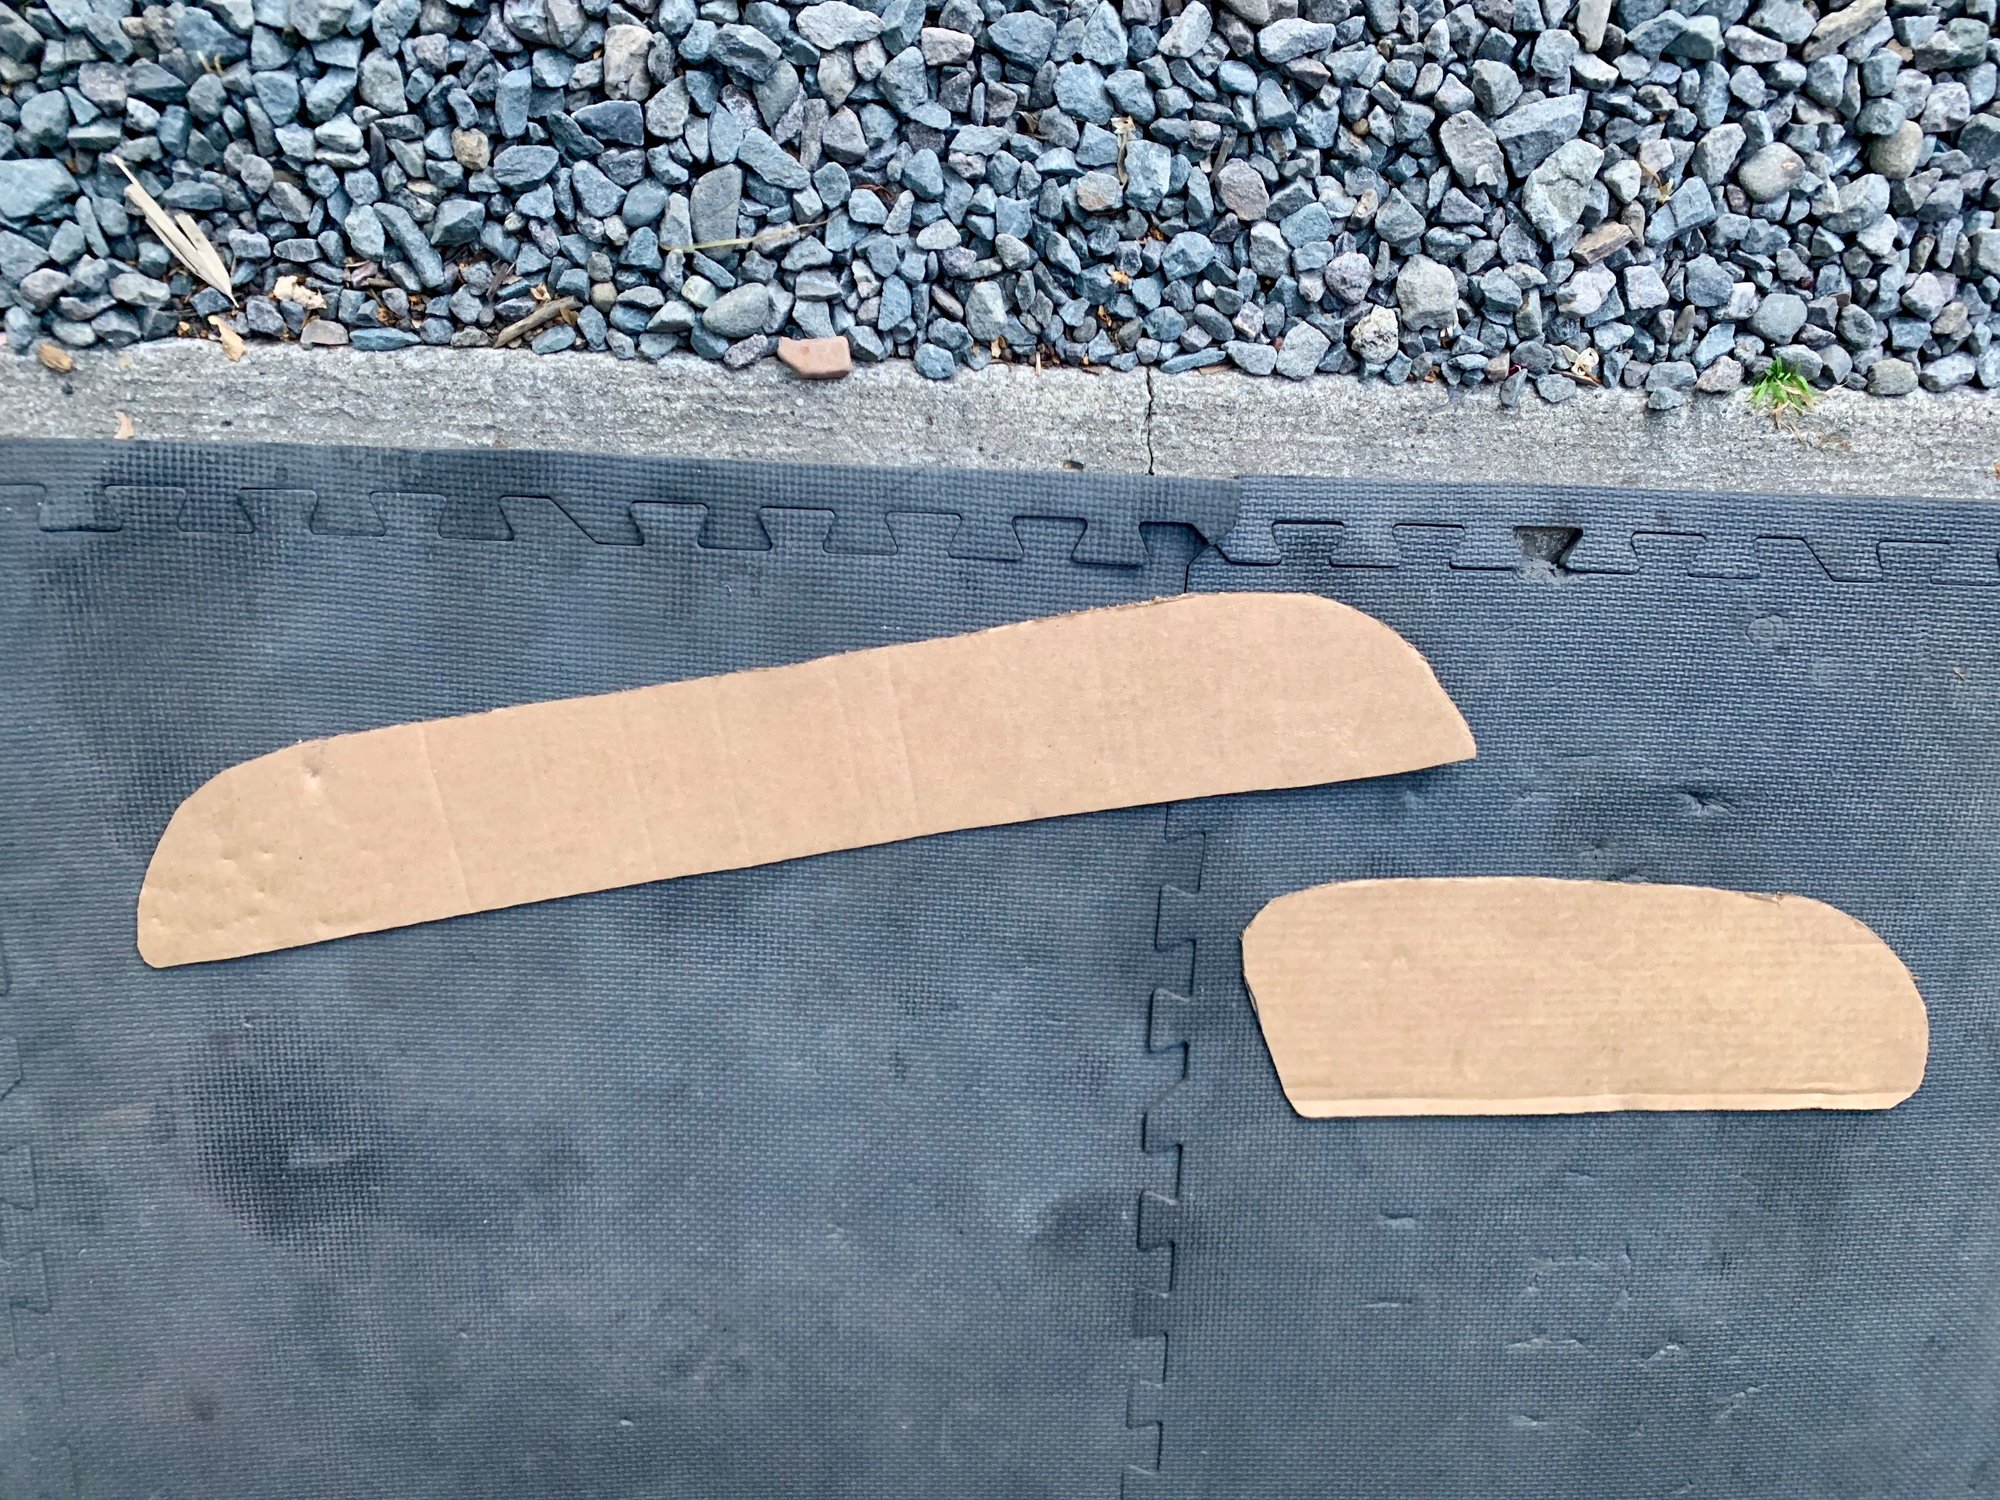
Anyway, first cut out a piece of cardboard about the same size as the center intake. Then trace the outside of it with a sharpie and do your first rough cut. Then you can trim it to the correct side by eye. You want it so the mesh extends over the back of the plastic lip, but not so far that it blocks the air intakes from slotting into the gap.
Next do the first rough cut on the screen using the cardboard template. Its important to have good tin snips for this or you will get a ****ty cut. The bolt on my brand new Harbor Freight snips started to come loose and they would no longer cut. Once tightened they worked fine.
Make it a little big so you can do a test fit and trim off any excess. The worst case is you make it too small and see gaps from the front. Then you need to start over.
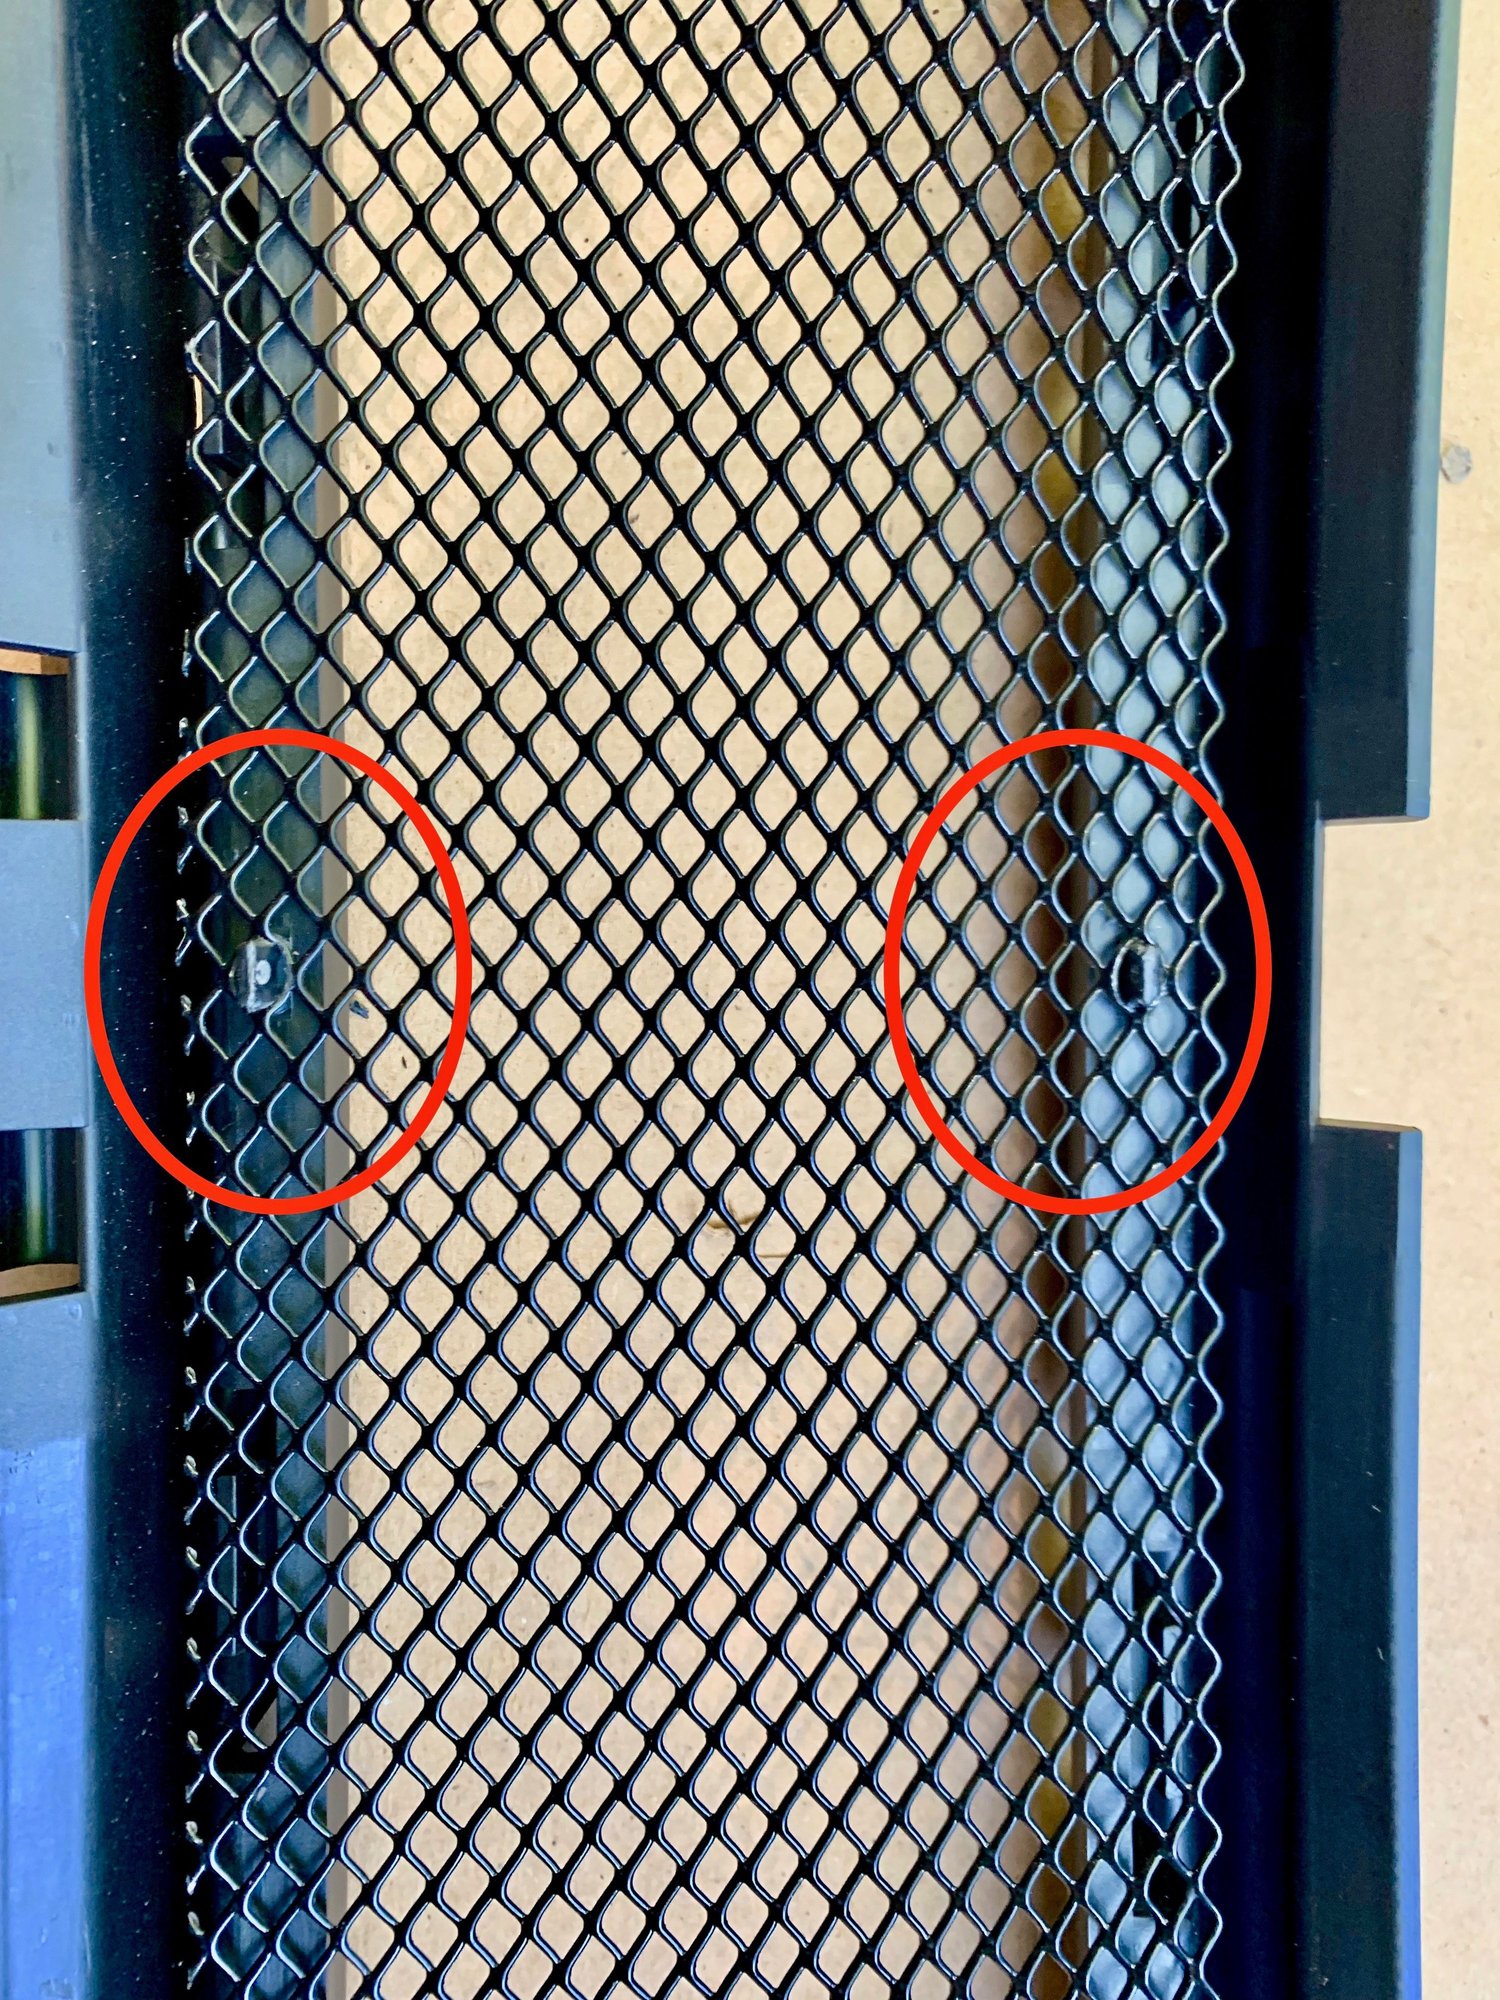
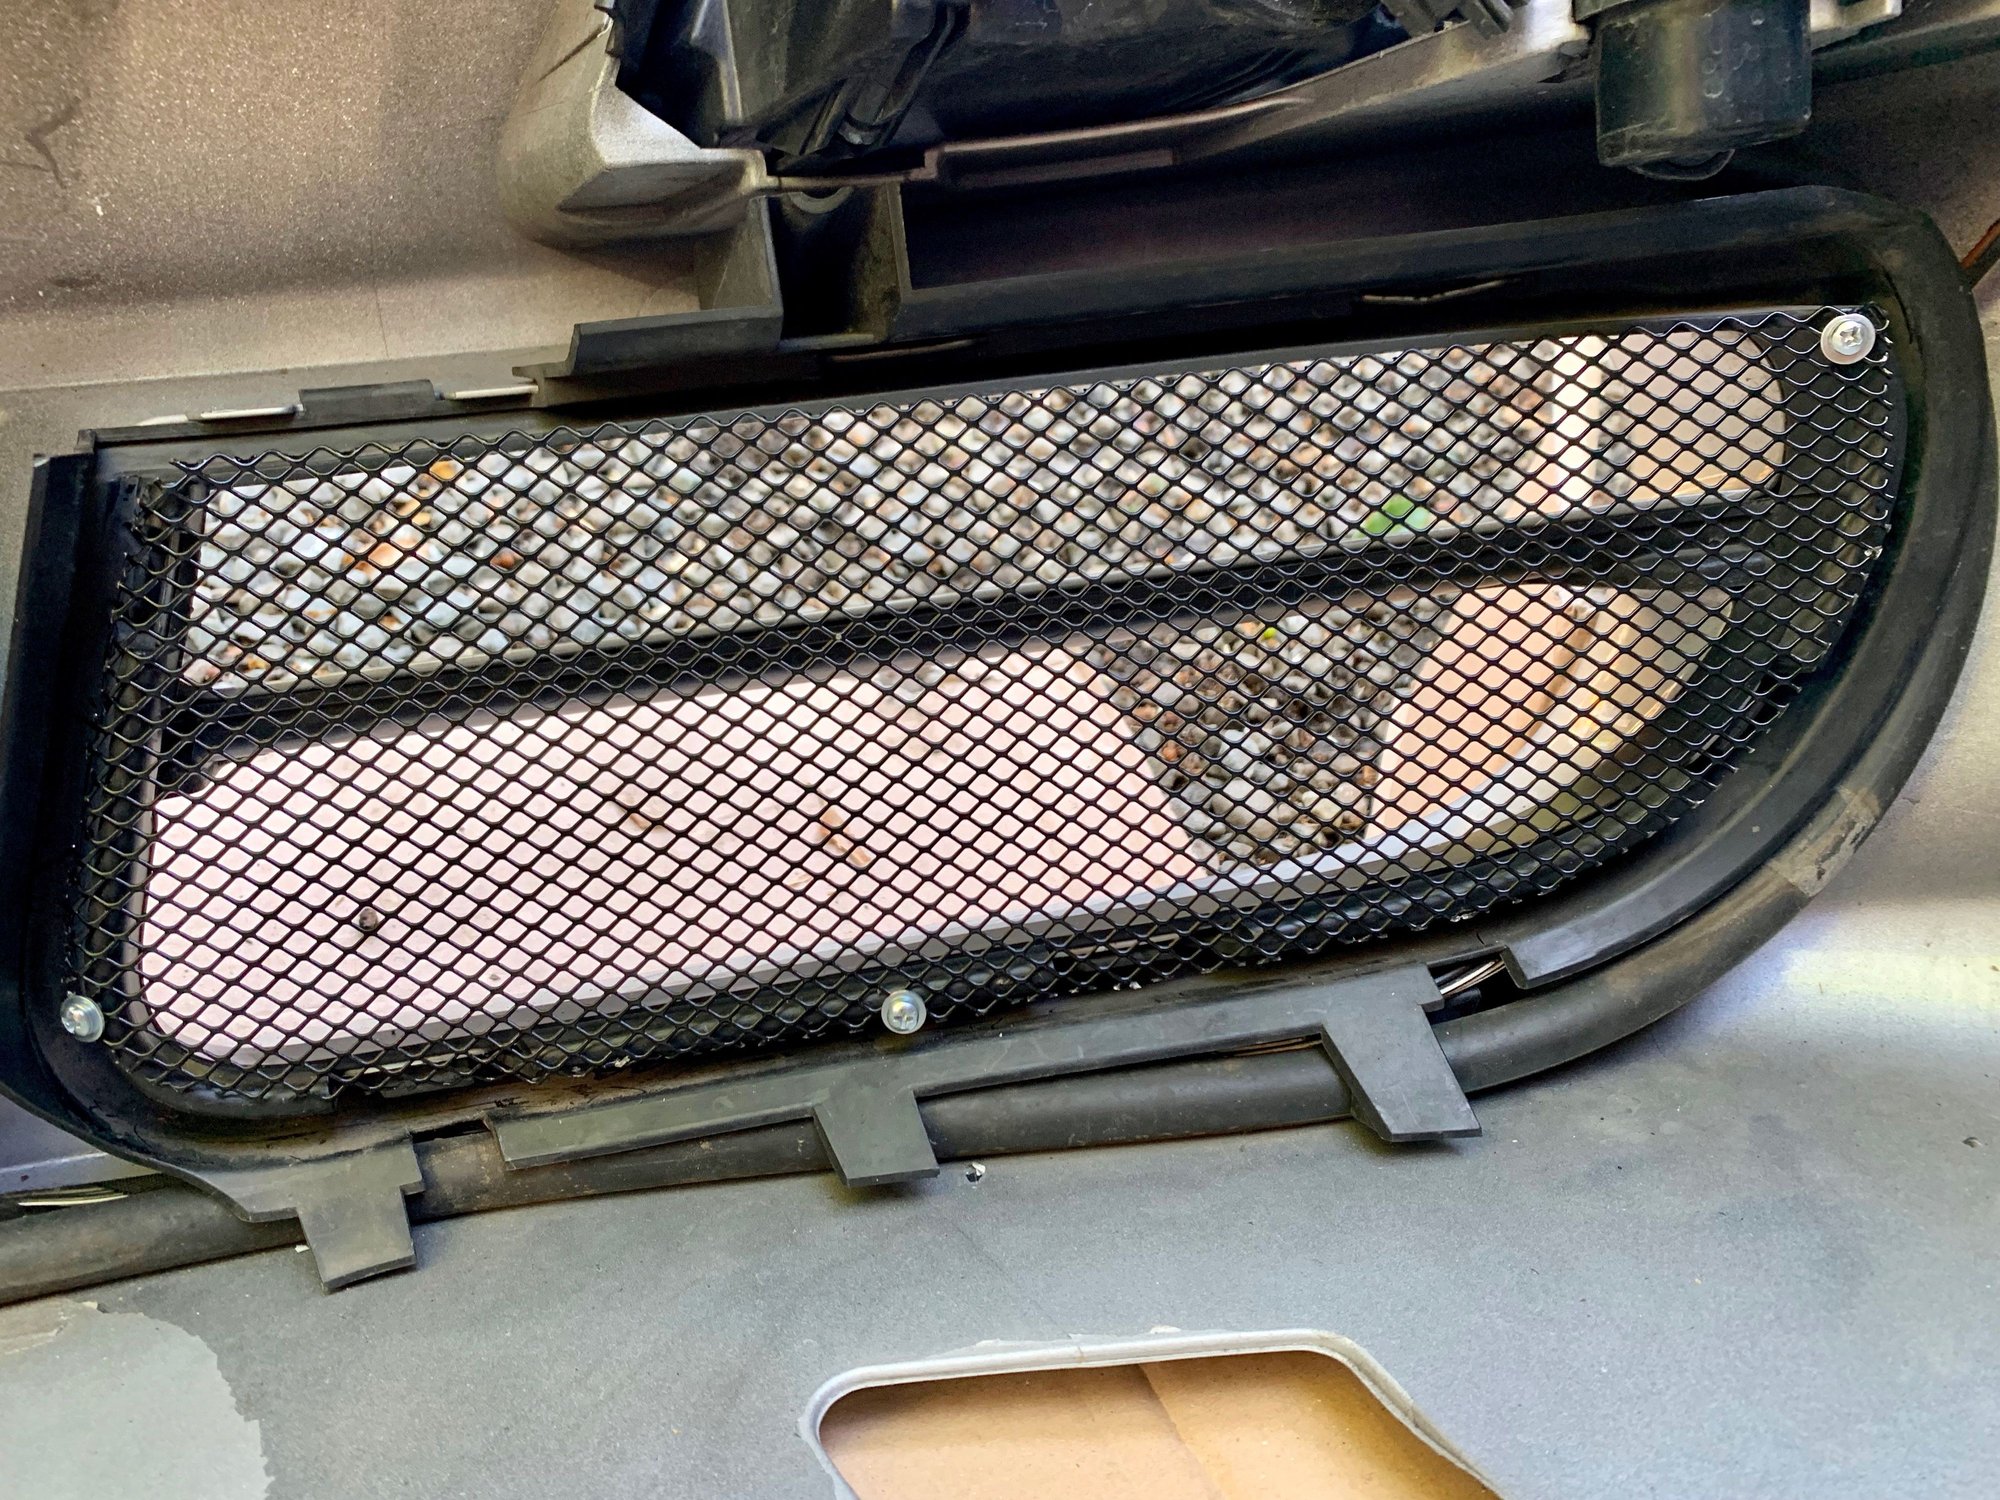
The trick is to have enough screen to overlap the lip and get a screw in the backside that cant be seen, and then use your trim tool to smoosh the excess edges flat so they dont block the intake from slotting in. You will not be able to bend the edges by hand but using the trim tool did it nicely.
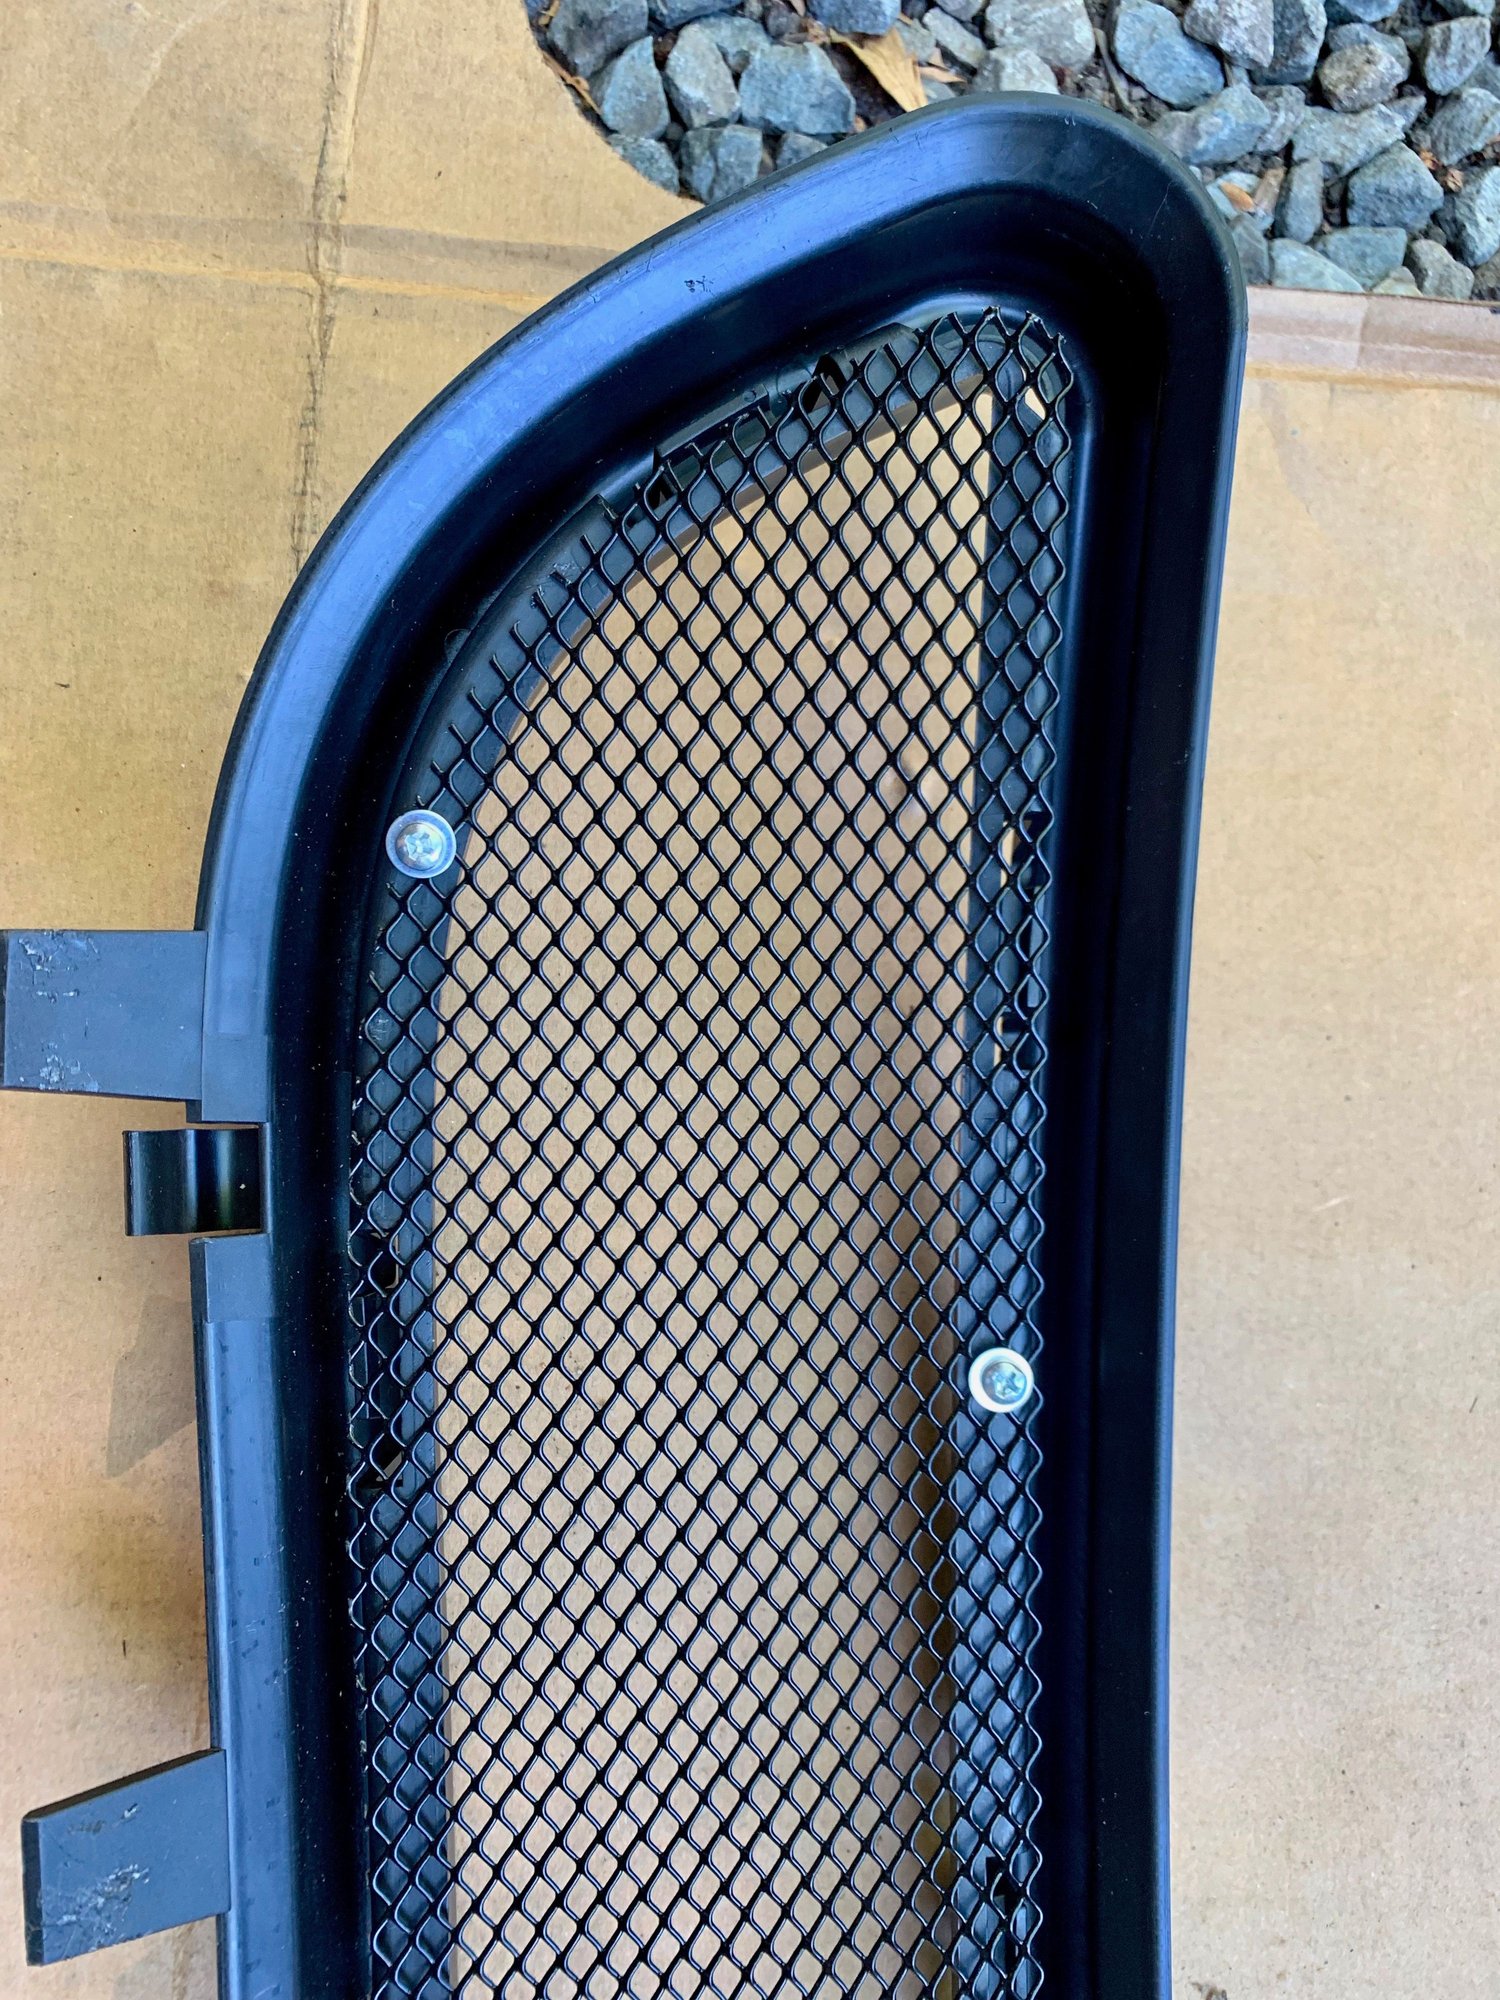
Once you have the piece trimmed to size then form it a bit so it matches the curve. There are two plastic tabs in the middle of the intake that won't allow it to lay flat. Just get a screwdriver tip to widen the mesh in that area and slot the tabs in that widened hole. This actually help hold the mesh in place while screwing it in.
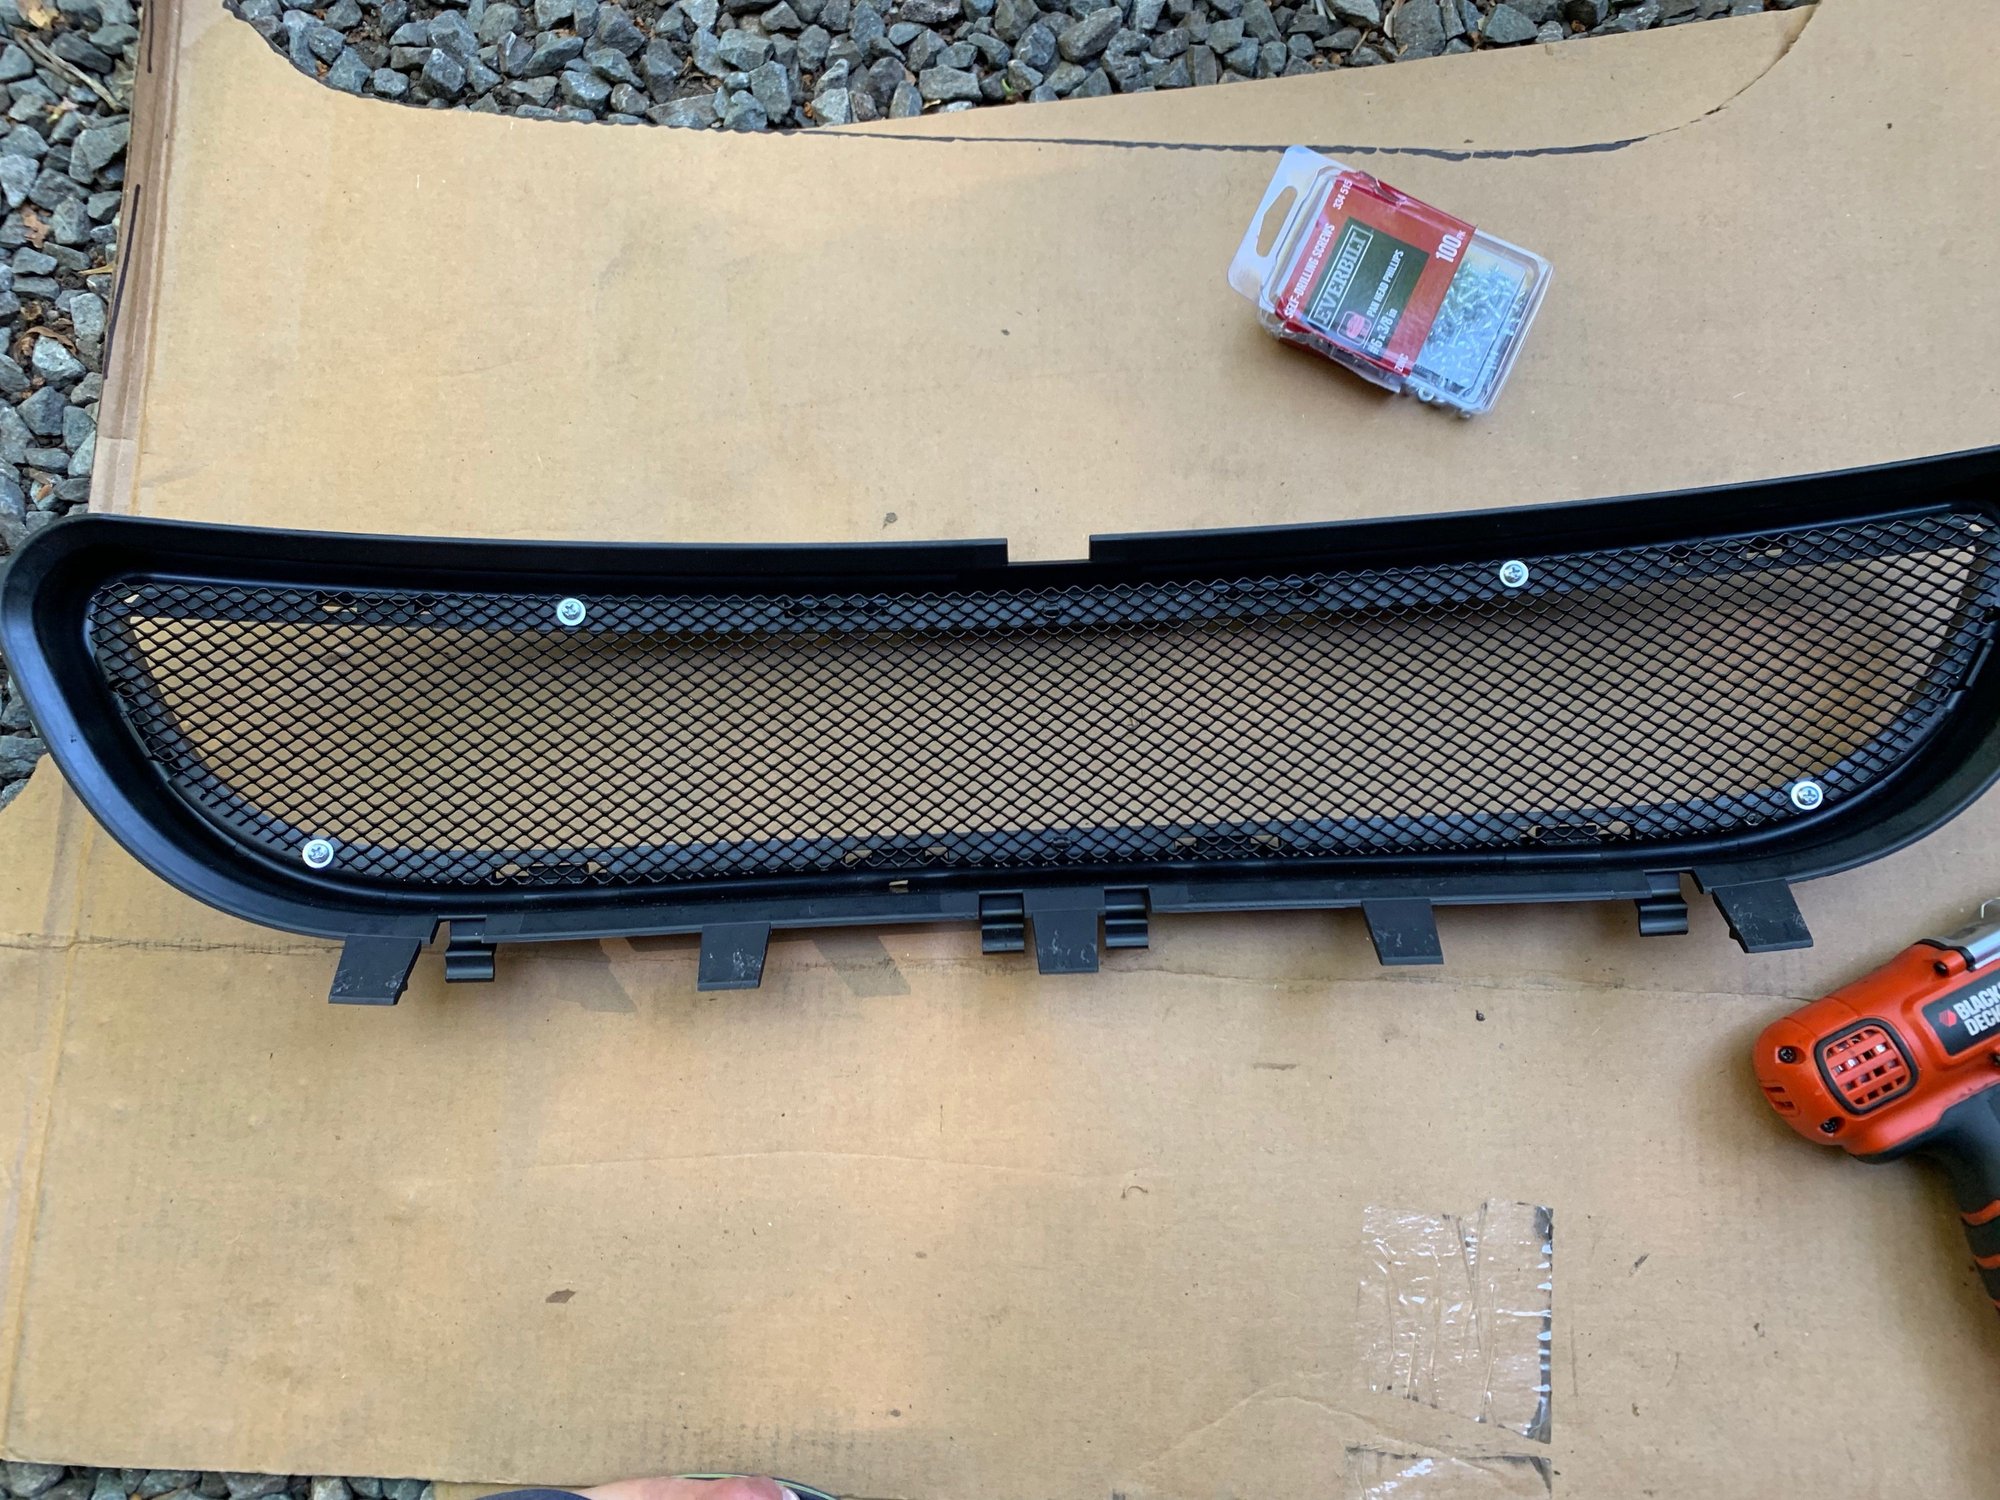
Now put 4 self tapping screws in the corners. You will need good pressure on the drill as the plastic is hard, but eventually they will bite. Its a little tricky the first time but then its pretty easy.
Get the mesh to overlap the inner lip, but not far enough which it blocks the channel behind it. The intake slots into that.
The two plastic tabs in the middle of the center radiator. Light at the end of the tunnel. Until this point I was thinking the project was a lost cause.
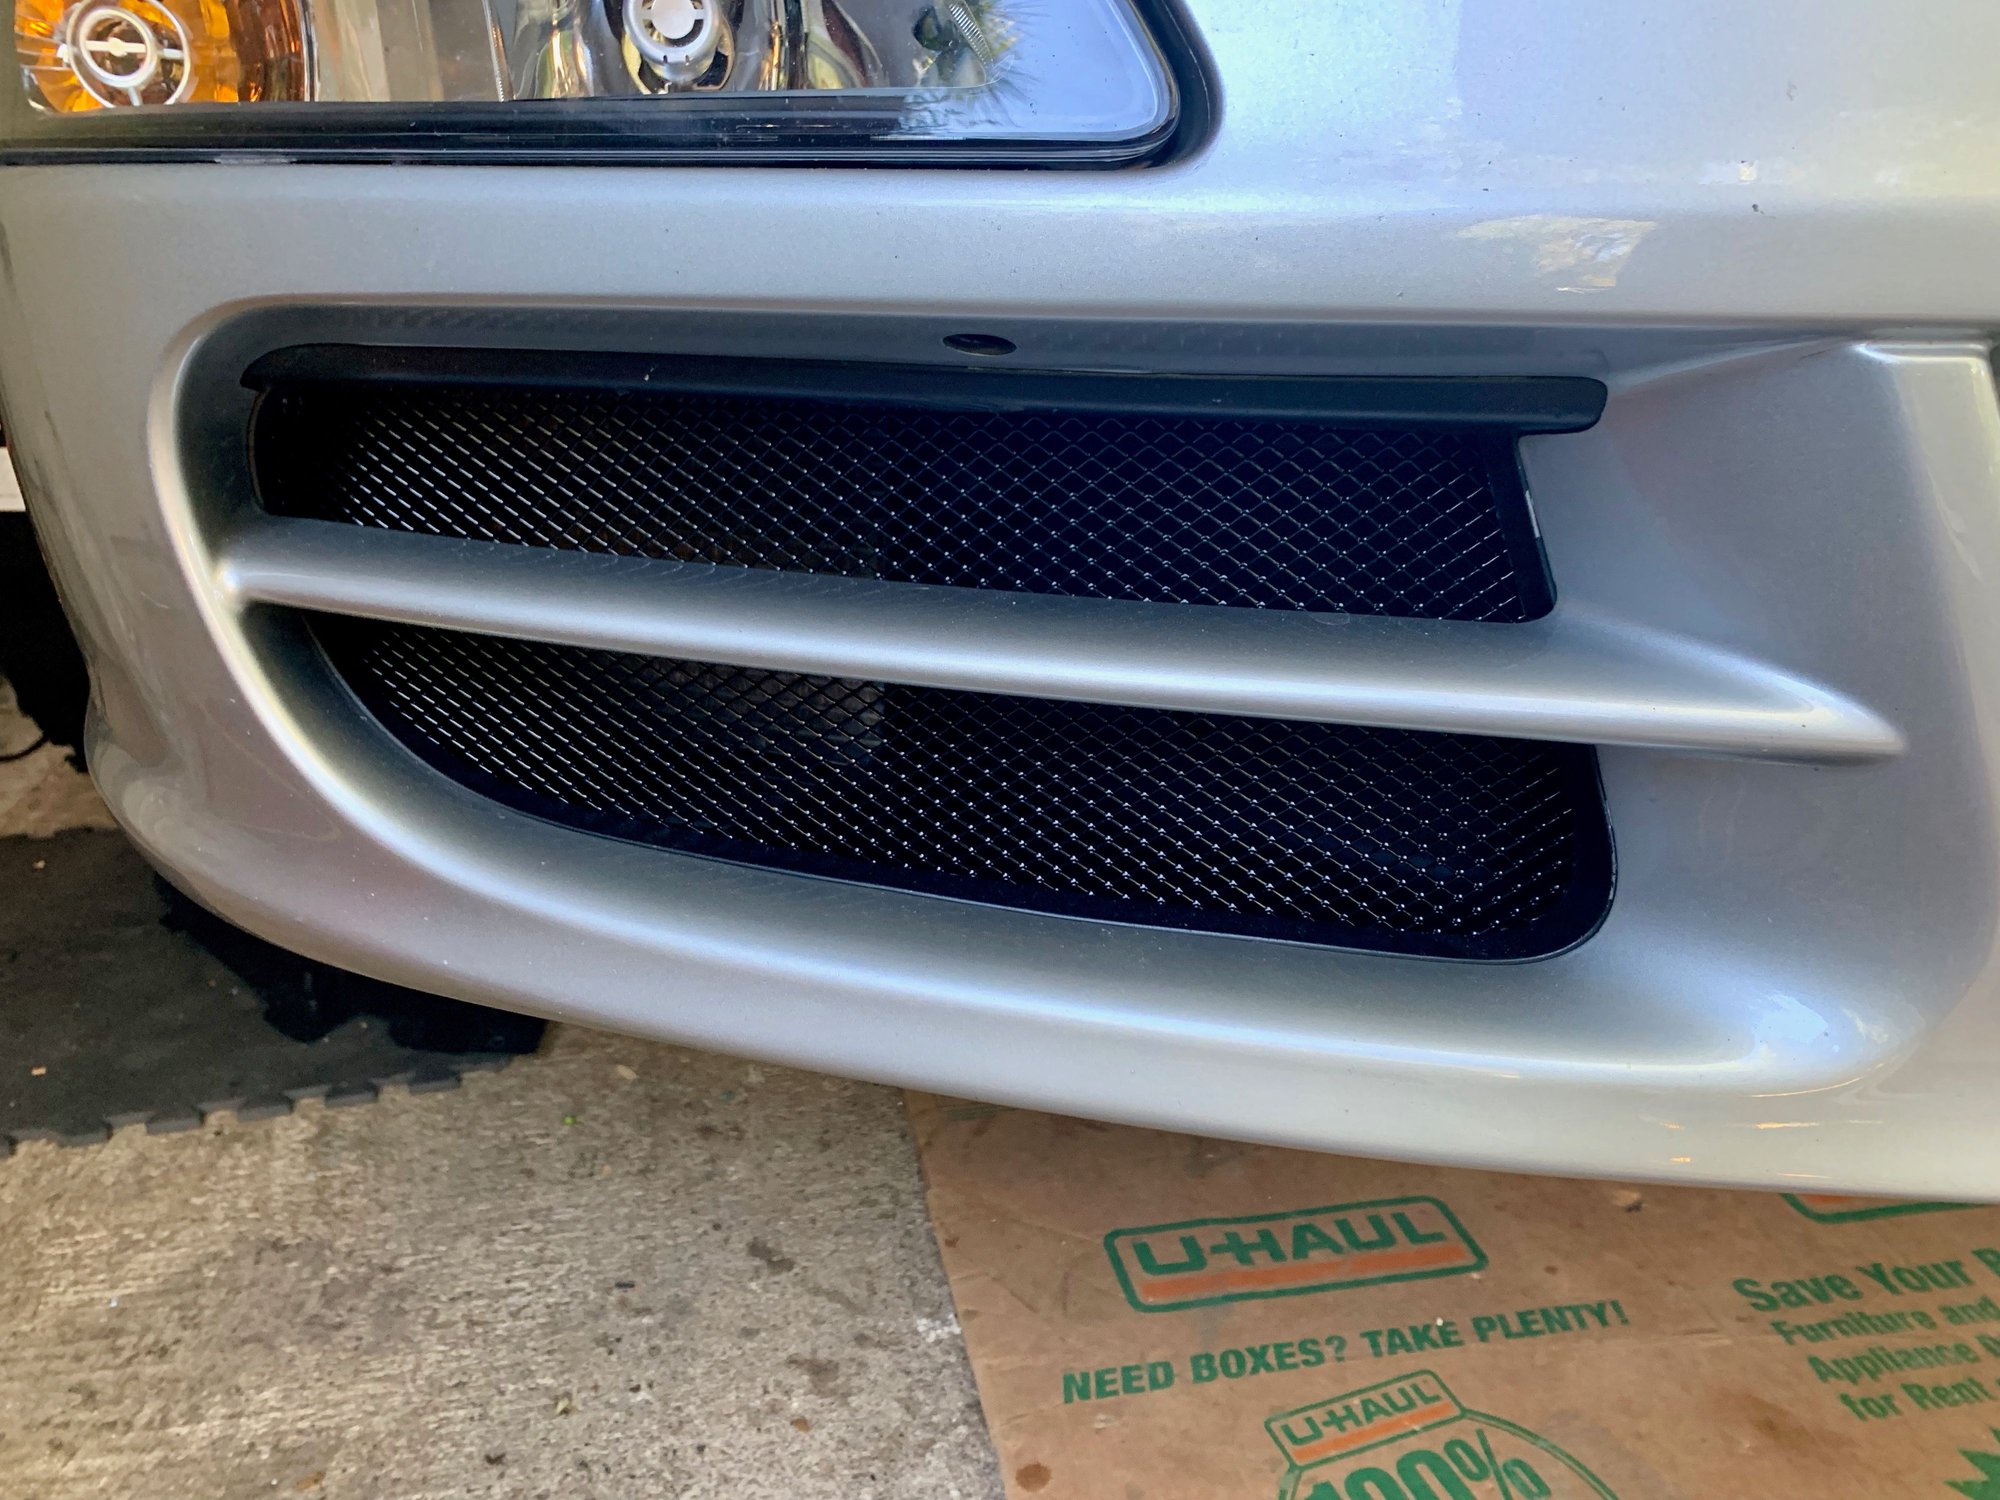
Now do the same for the two side intakes. You only need one template for these as you can just reverse for the other side. I found it was easier to remove the black plastic trim from the bumper (by just releasing the 4 clips) vs trying to install with the bumper in the way.
26. Now reinstall the 3 grills in the bumper. The first step is to remove the old center plug. That's just held on by 4 clips on the top and bottom. You need to move the headlight washer hose out of the way when pulling it out. Then reinstall the new center grill the same way, as well as the two side grills.
27. Next you need to cut 4 air holes along the bottom side of the bumper (under the car). I dont know if these are required but I saw it referenced in one of the write ups. I researched GT3 bumpers and was able to find one on eBay with these these 4 holes cut out, but others didnt have them cut out (I suspect those were aftermarket) I used a rectangular paint thinner can as the template. I did a ****ty job cutting them out with a drill and crappy Dremel, but nobody will see. I will clean it up later. Unfortunately no pics but I will try to find the original reference article, or a picture of a GT3 bumper with the hole placement guide.
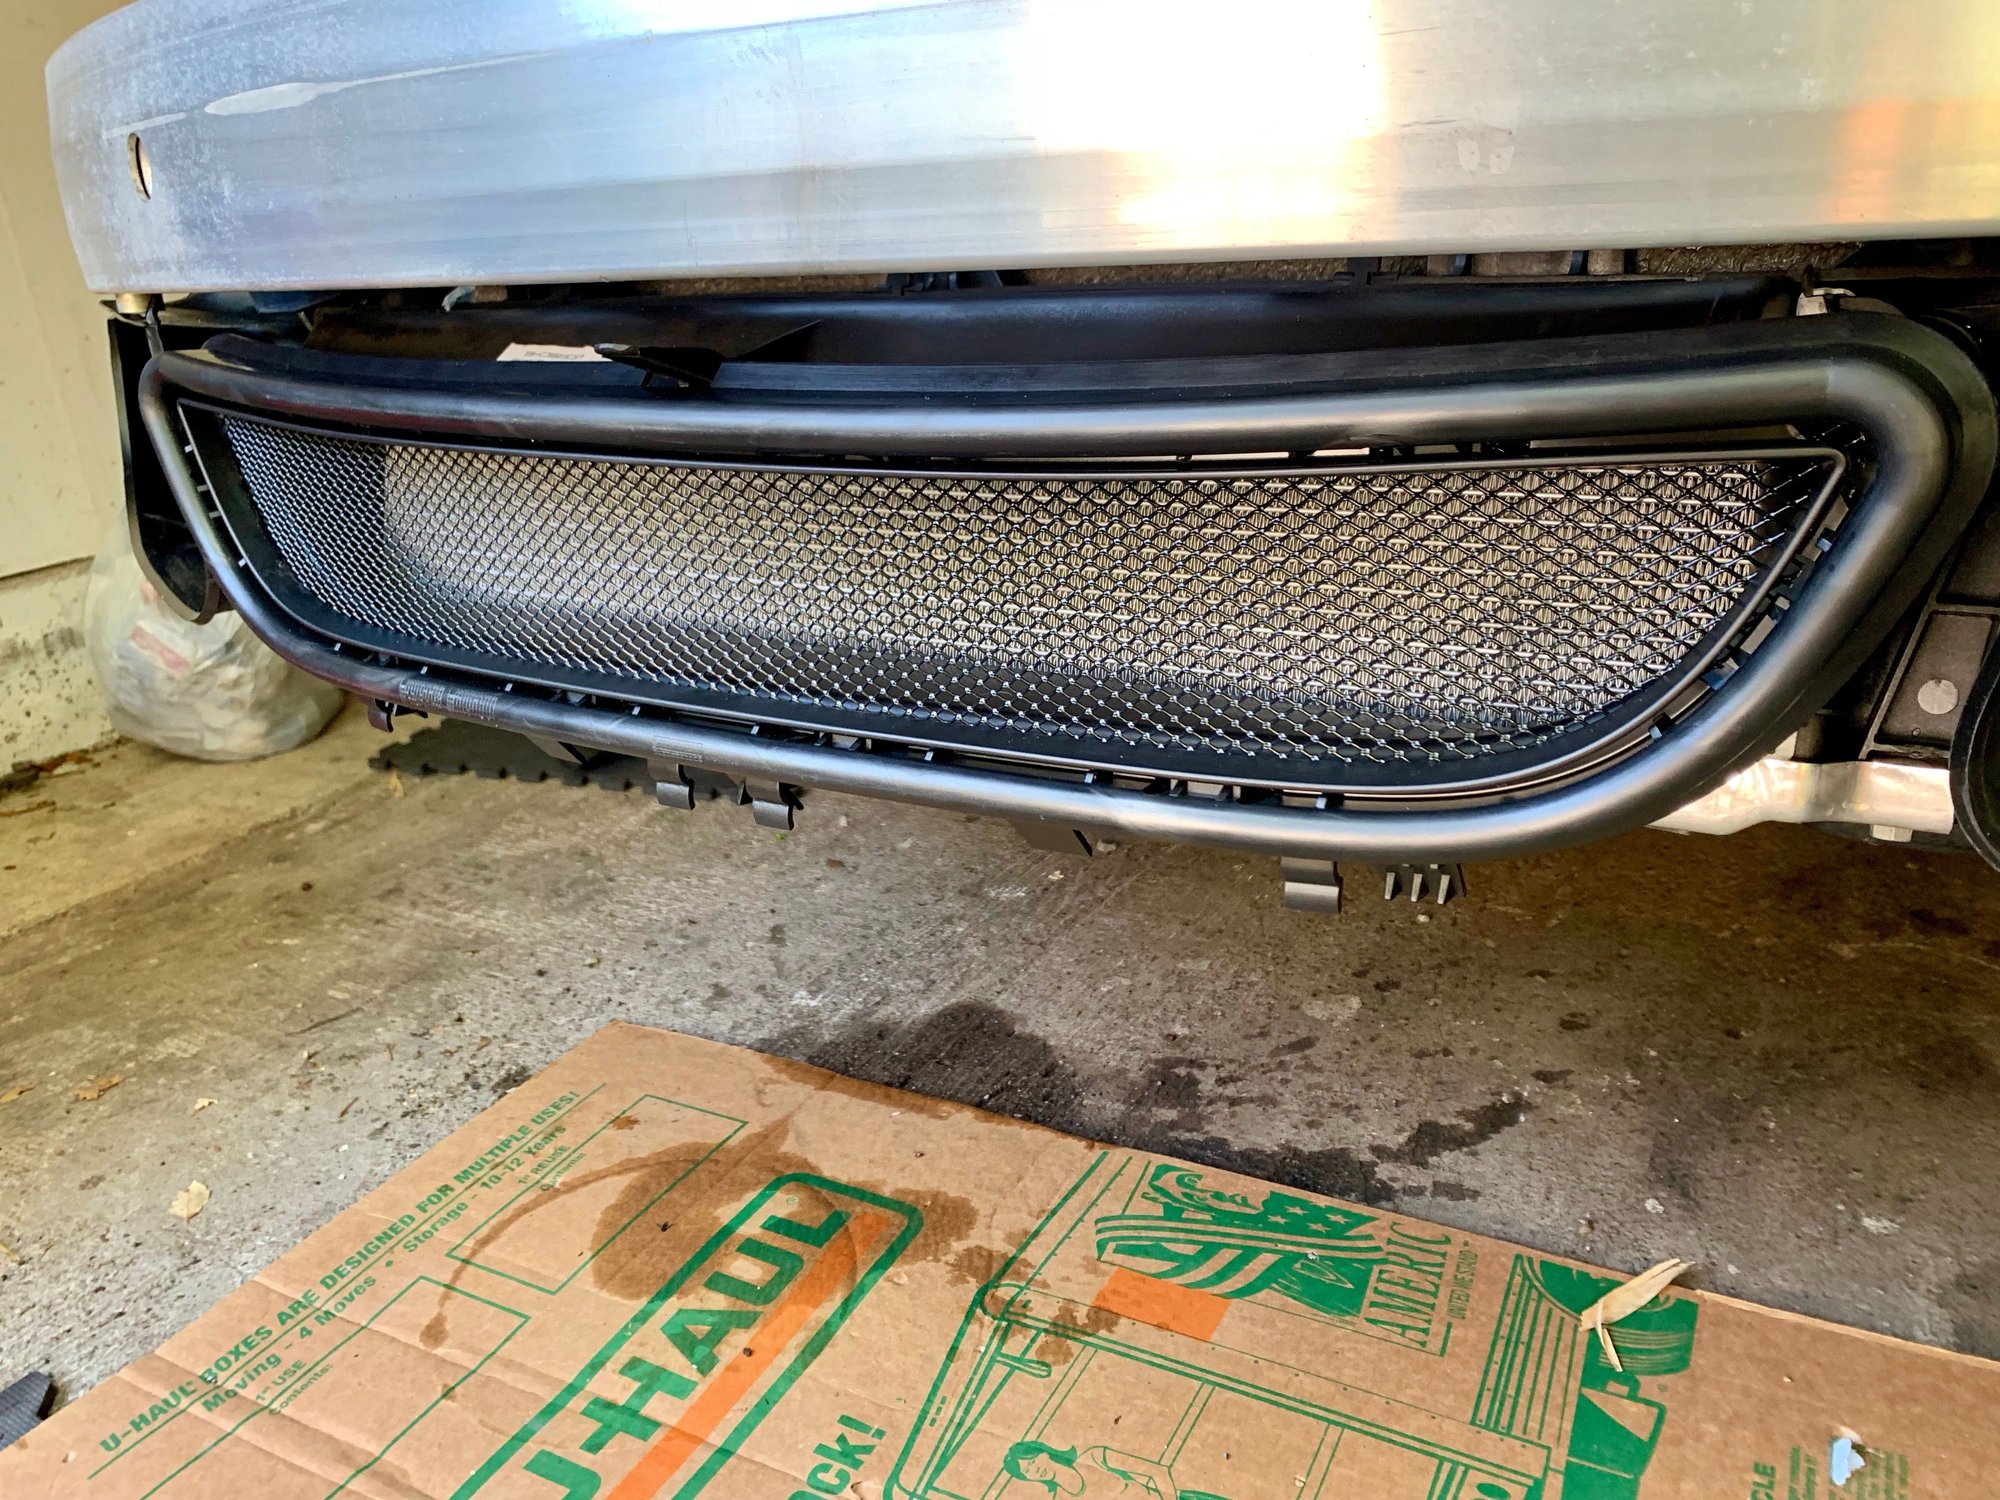
28. Now its time to reinstall the bumper. You want to be very, very careful here not to scratch the paint so move slowly and deliberately. If its not working, dont force it.
First just place it gently so it rests on top of the aluminum bumper rail. Then go to each side and guide it into the black plastic track near the side marker. Once its in those tracks give it a little more pressure to push it on a little more. I then found the best technique was to sit on my butt with my legs under the car and slowly push from each side inch by inch, ensuring it was lined up.
Next comes the hard part if you have installed the grill screens. The bumper will get stuck 1-2" out because the plastic lip of the center air intake droops down and won't slot in properly above the center grill. If you dont have the grill screens you can easily reach in and push it into place. But with grill screen in place there is no way to access it. I found using a long thin punch was the best tool. It could fit between the screen holes with bending it and enabled me to push up on the top of the plastic intake to align it, while I also pushed on the bumper with my chest. You will feel it pop into place and then you can push the bumper on another couple inches until its sitting flush all around.
29. Then install the T25s loosely in the frunk just to ensure its held in place. Then install the rest of the T25s the same way you took them out. I didnt tighten them down until I had the clips reinserted. They seem to snug the bumper up to the body. Be careful pushing these in. Put a rag or something soft around whatever you use to push them back in. You need to use some force and if the tool goes flying you are going to scratch your paint.
30. Save the T25 behind the sidemarker for last, because that is impossible unless you have the right tools and technique. You need to use a magnetic pickup to hold the T25 while you slide it in. You then need to try to get that as close to the hole as possible while you then slide a magnetized T25 screwdriver in to finish the job.
Its a chop stick technique. Easy once you have done it but it took me 15 minutes of debate and a trip to ACE hardware to figure it out the first time.
30. Now reconnect the electrical cable, headlight washer hose, sidemarkers and headlights. Save the fender liners for last. Then make sure all T25s are tight, double check your work and reinstall the frunk liner. And give your front calipers, wheels and suspension bits a clean while you have them off.
31. Once everything is buttoned back up start her up and run at high idle again until the coolant starts to drop. Fill it up then take it for a rip around the block with the bleeder valve open. Check your cabin heat to make sure its working (it won't if you have an air bubble in the system).
I found the coolant was leaking out of the cap. I thought I maybe had an air bubble or some other issue, until I realized I had the original XXX.01 coolant cap that was prone to leaking. It took 13 years for it to give up the ghost. I picked up the new XXX.04 cap at the dealer for $25 and problem solved.
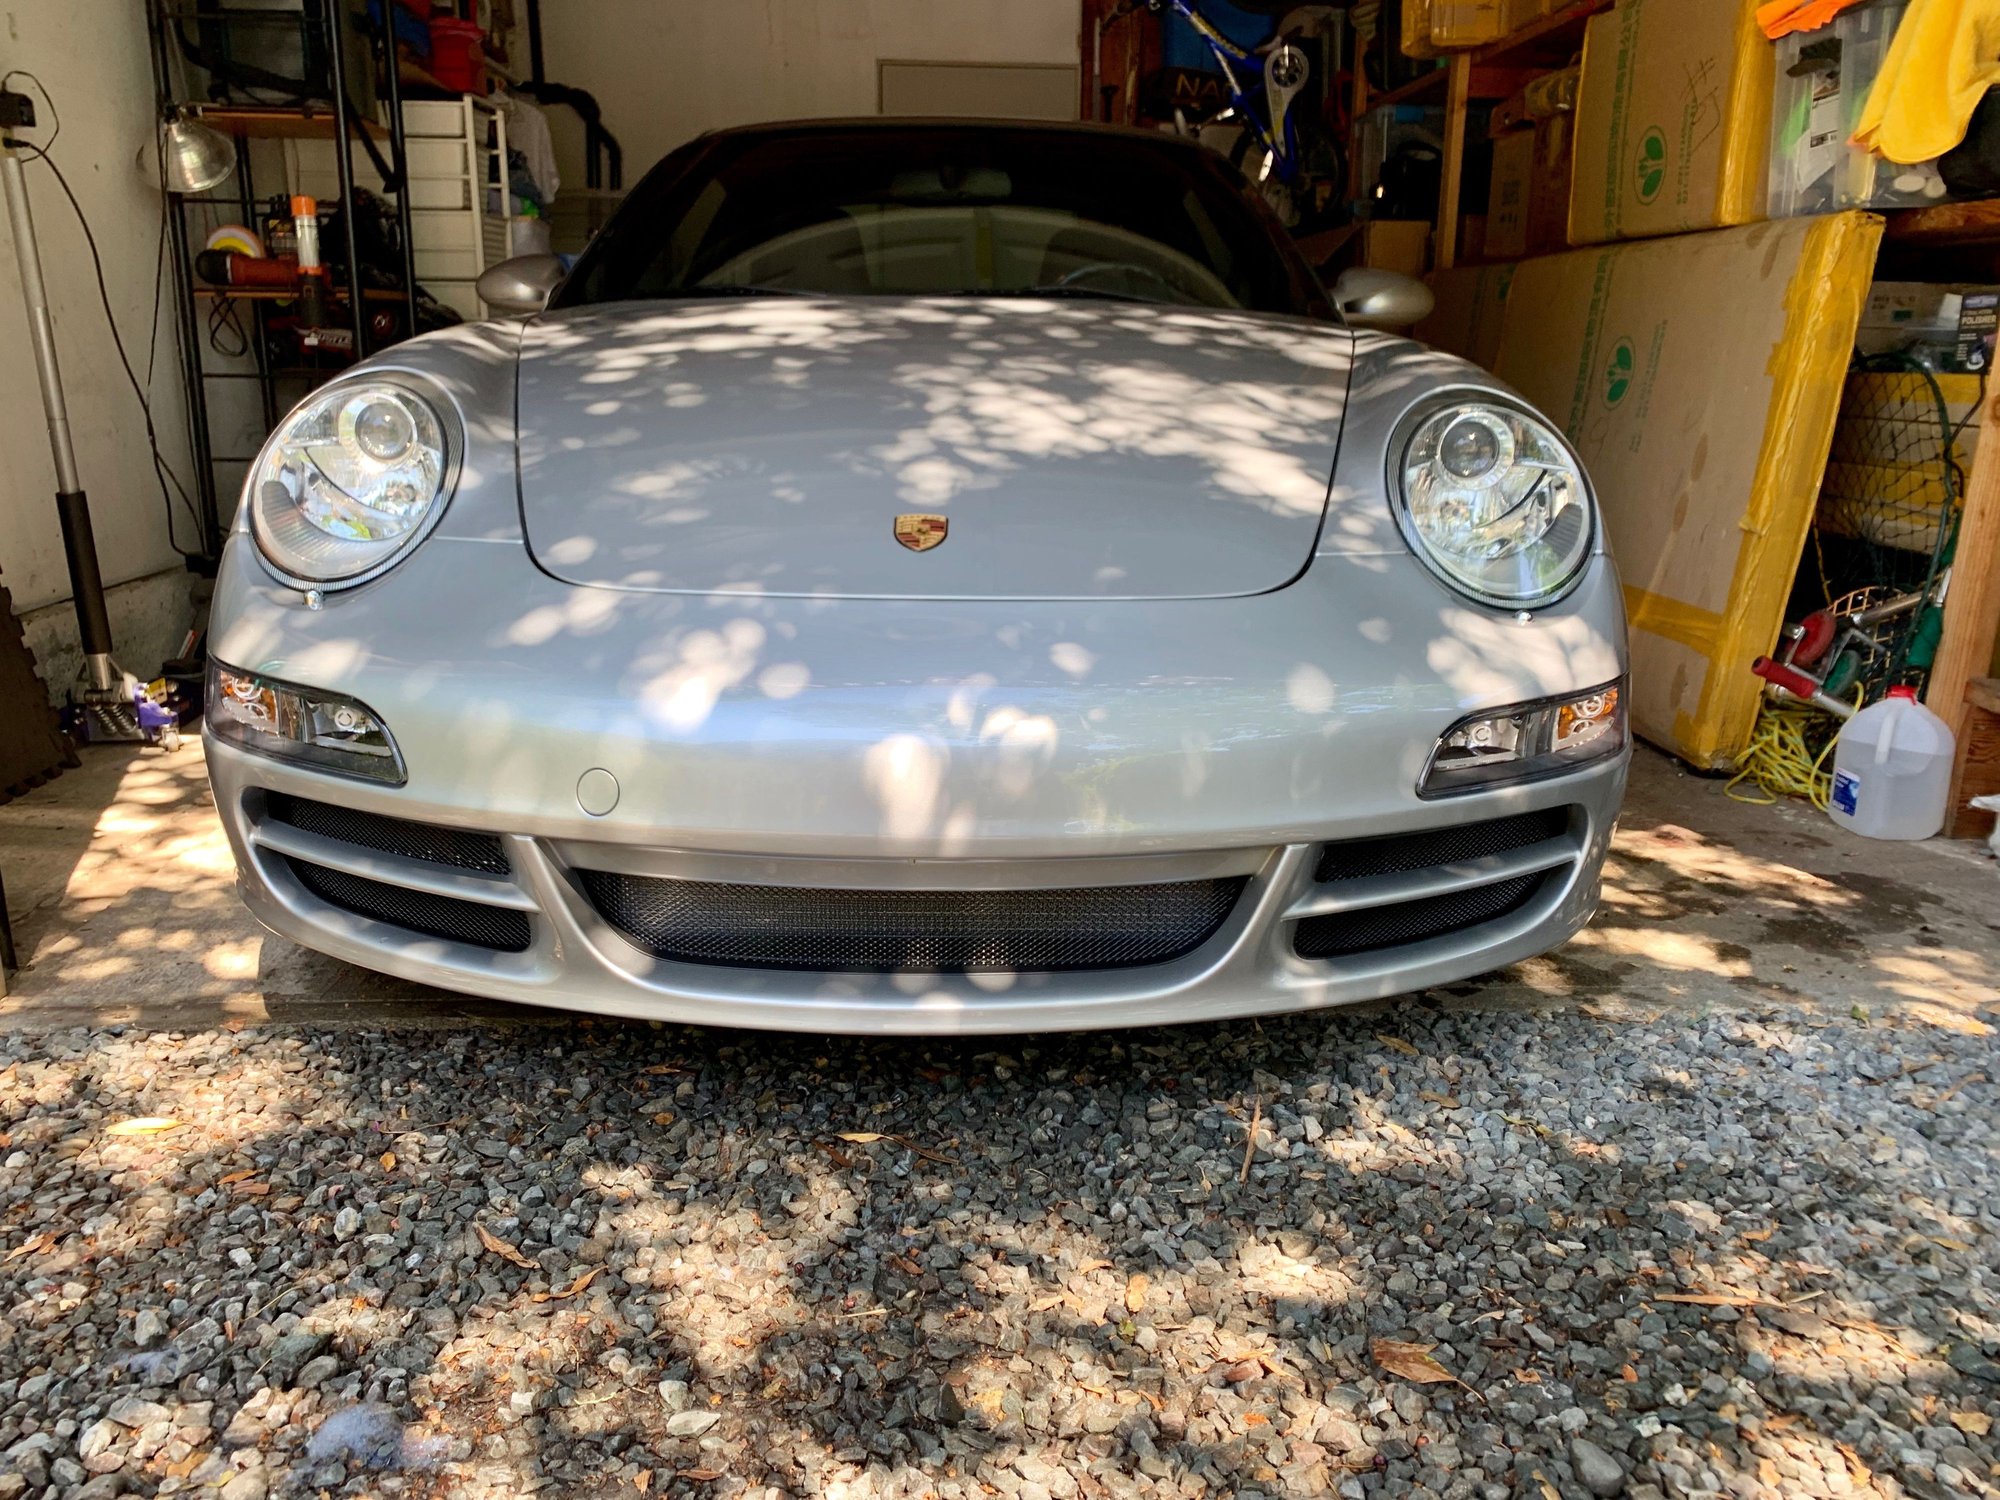
I would recommend the project to all 997 owners. Its good preventive maintenance and makes the car look the way it should have looked from the factory. I always found the fake center intake to feel cheap.
I have confirmed that the major parts in the centre radiator parts in the PET for the 997.1 and 997.2 have the same part numbers. Any idea therefore why there's such a price differential ? Presumably the air ducting may be different perhaps requiring additional ducts/liners. Any idea out there ?
I have confirmed that the major parts in the centre radiator parts in the PET for the 997.1 and 997.2 have the same part numbers. Any idea therefore why there's such a price differential ? Presumably the air ducting may be different perhaps requiring additional ducts/liners. Any idea out there ?
Thanks for any assistance that you can offer.
After a bit of searching it seems that others have purchased the 997.1 kit and used it on a 997.2.. They talk about using the same items in the kit BUT having to either "purchase or fabricate plastic for the side pieces". Anyone done this upgrade and add any insights as to what exactly is required ?
Thx guys. I try to write these while still fresh in my mind...so its mostly stream of conscious. I've always found understanding the small details is what takes half the time and mental anguish on these projects.
Only question I have is on the refill. Are you comfortable that you don’t need to vacuum fill the coolant system?
I spoke to my indy and the lead mechanic and the local dealer about it. They taught me how to do it "the old school" way before the vacuum fill systems. My indy said he would just run the engine at 2-3k rpm with the cap off for e couple minutes until the level dropped, fill up, then take it around the block with the bleeder up, fill up, rinse and repeat. The Porsche mechanic said his old method was to have one guy in the car revving the engine while another guy was filling up the tank and quickly screwing on the cap so coolant didnt explode everywhere when you let off the gas.
I've used it now 3 times for the reservoir replacement, water pump and now this project. All with good success. However I will say I thought I screwed it up this time so brought it over to my indy to check out. I was getting a leak from my cap. I first thought I overfilled it, then I thought I had an air bubble somewhere in the system. Turns out my cap was just bad.
After a bit of searching it seems that others have purchased the 997.1 kit and used it on a 997.2.. They talk about using the same items in the kit BUT having to either "purchase or fabricate plastic for the side pieces". Anyone done this upgrade and add any insights as to what exactly is required ?
I did read the .2 kit was more expensive, but I thought like $600, not $1k. The parts guy at my local dealer told me the prices on their kits had just increased dramatically, which is why I pulled the trigger and bought the kit. I was worried Pelican prices would increase once they get the next batch of inventory in.
I know @Wayne Smith is also looking to do this mod for his .2 so I will research it to see what I can figure out on converting the .1 kit. One quick idea is this: Pelican and Suncoast sell the entire kit but sonnenoemparts.com sells each component separately (at least for the .1). Im wondering if you could buy the .1 kit from Pelican and and just buy the mounting bracket separately for the .2 from Sonnen.
Quick update on this project: I'm calling it a total success. I went out for a rip this weekend on the PCH and I couldn't get the oil temp over 220F, no matter how hard I hammered on it. I was previously running 245F on those stretches, and would back off once I got to that temp.
The PCH is all hairpin twisties and hills (ie cliffs) where you are mostly ins 2nd gear at high rpm. That combo would always get my temps up, presumably because not a lot of air was flowing over the rads.


 08-13-2019, 08:48 PM