When you click on links to various merchants on this site and make a purchase, this can result in this site earning a commission. Affiliate programs and affiliations include, but are not limited to, the eBay Partner Network.
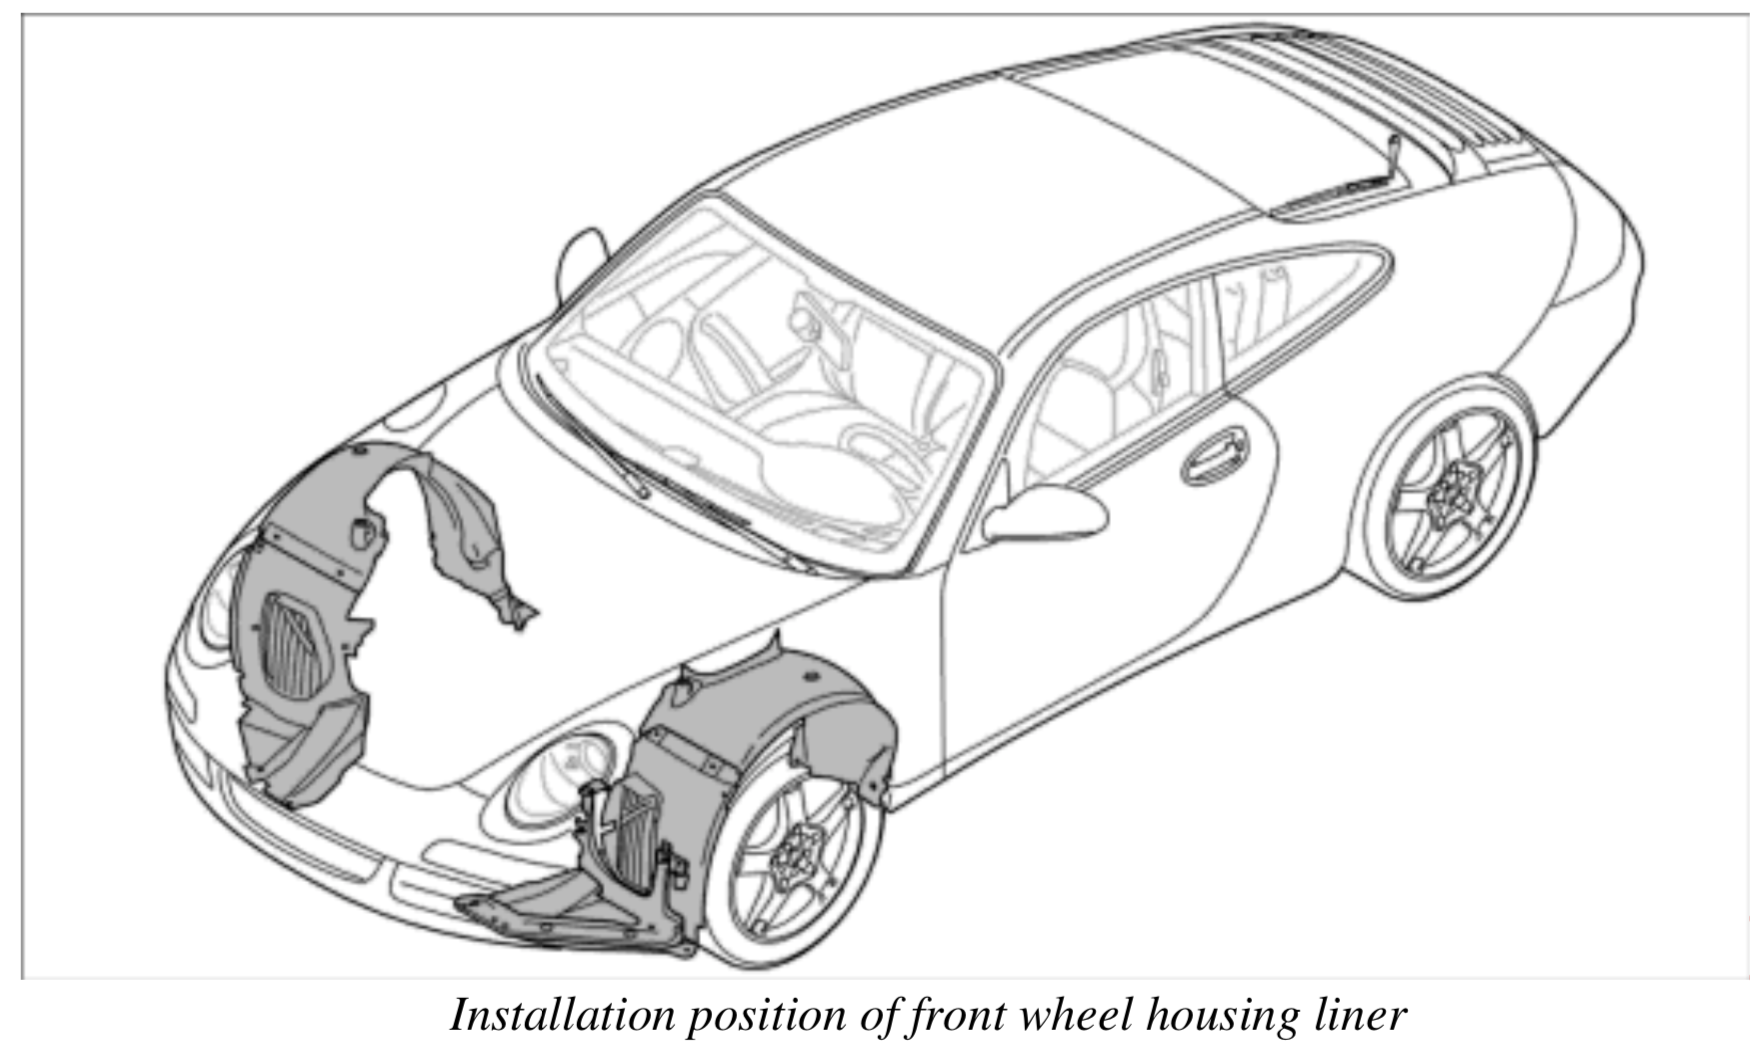
The Bruce's 15min Guide To Replacing Your Front Fender Liners
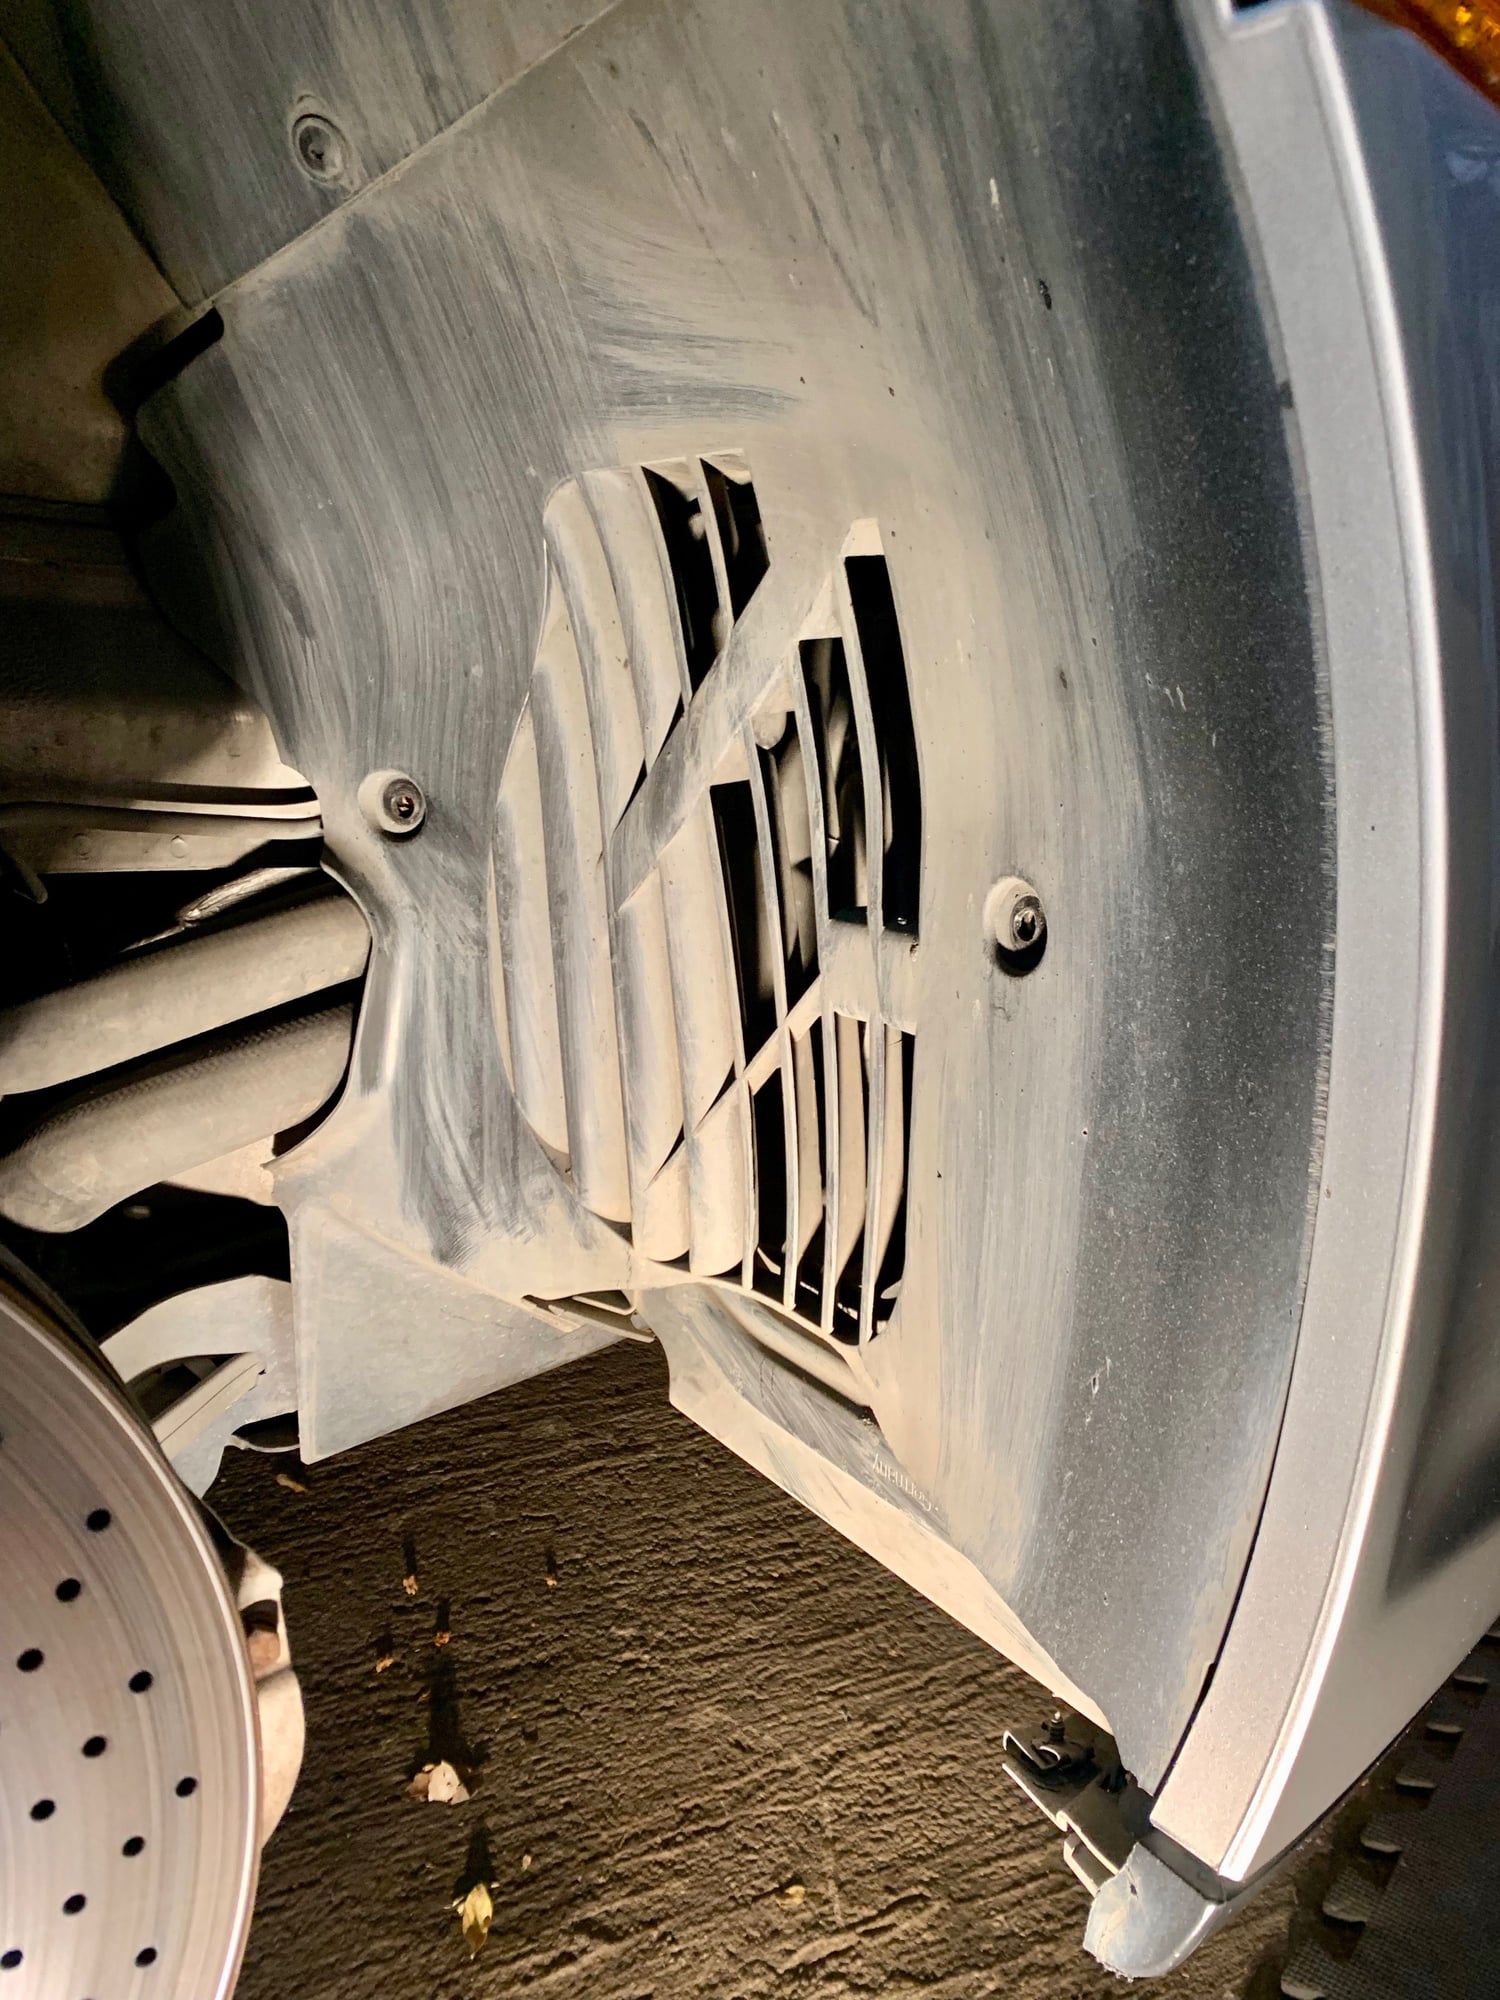
So this is embarrassing. I like to think im pretty fastidious with my 997. But it looks like a land shark ate my front fender liner...
I knew it was cracked when I bought it. I didn't have it high on my list because im lowered and I have a funky driveway so figured it would just crack again. But it appears those cracks grow, and grow, and grow.
I realized something was amiss a few weeks ago when the front radiator fan came on and I had a tornado of dust coming from under the wheel well. I suspect it might have ripped off on Highway 33 at around 120mph. That makes it pretty dangerous if you think about it. Im lucky a hunk of plastic didn't shred the tire, or the radiator fan.
So public service announcement: everybody go out and check your fender liners today. I didn't find any tips on RL about how to install these but its written up in the Workshop Manual.
1. Inspect the plastic air duct and liner between the bumper and front wheels. A lot of times if you scrape it will shred the retention screws so the front won't be totally secured. In my case the entire front section was completely missing...
2. Jack up the front of the car and remove the front wheel.
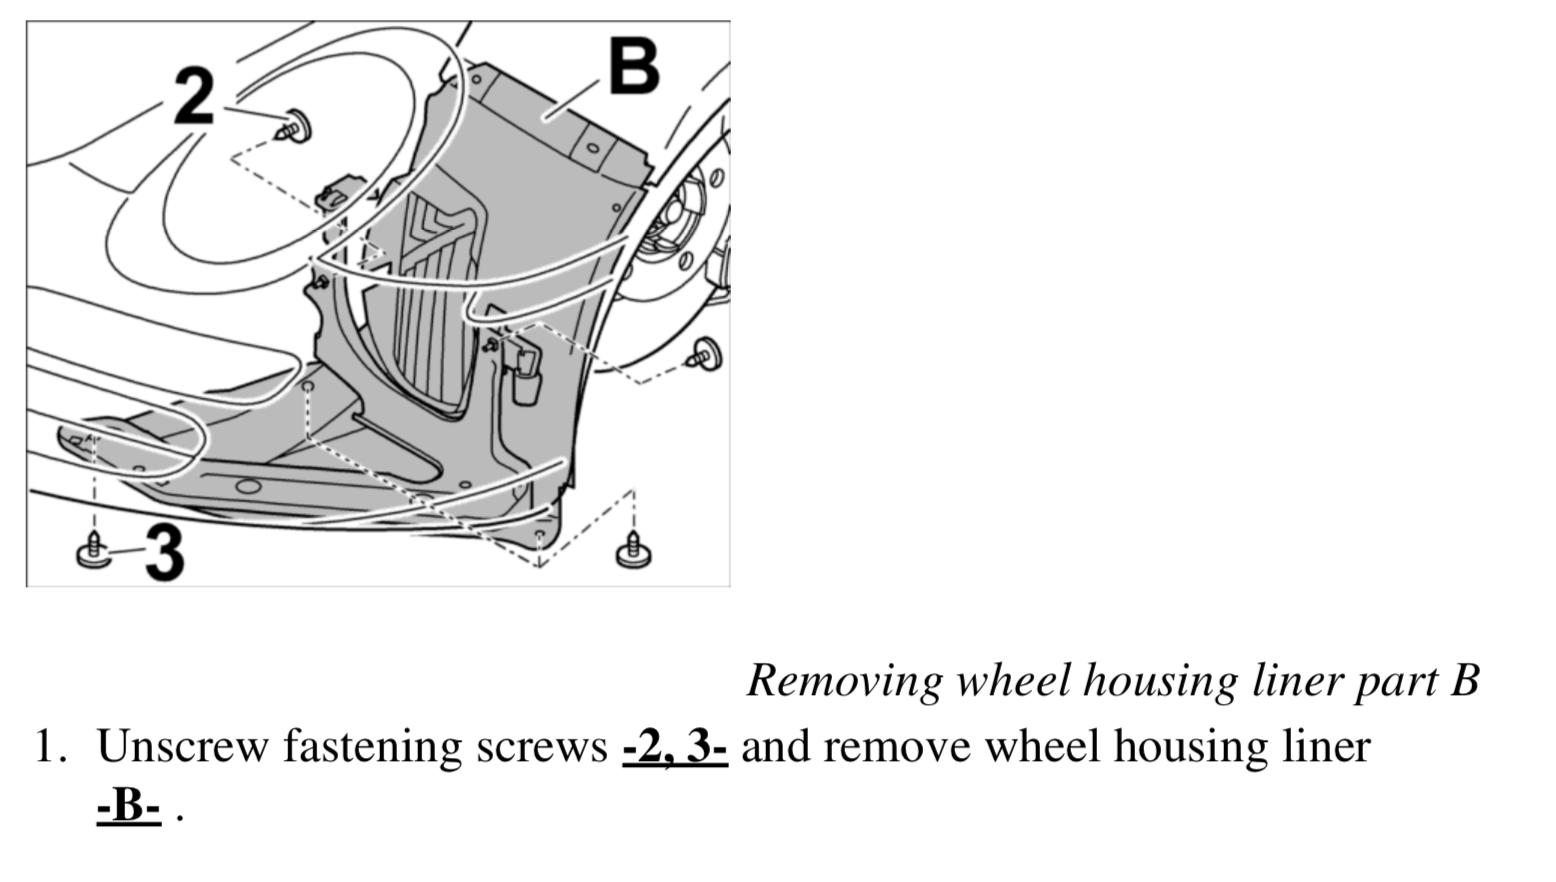
3. There are 7 T25s holding the front liner on. The 2 top ones (B) secure the front liner to the rear liner. Start with the ones under the car and then work back into the wheel well.
4. Once they are all removed pull it out from under the car first to get those tabs out. Then pull the inside of the liner out toward you a bit. Then finally pull it down and toward the wheel carrier. The tabs along the side of the bumper are a little fiddley and you want to be careful not to scratch the bumper.
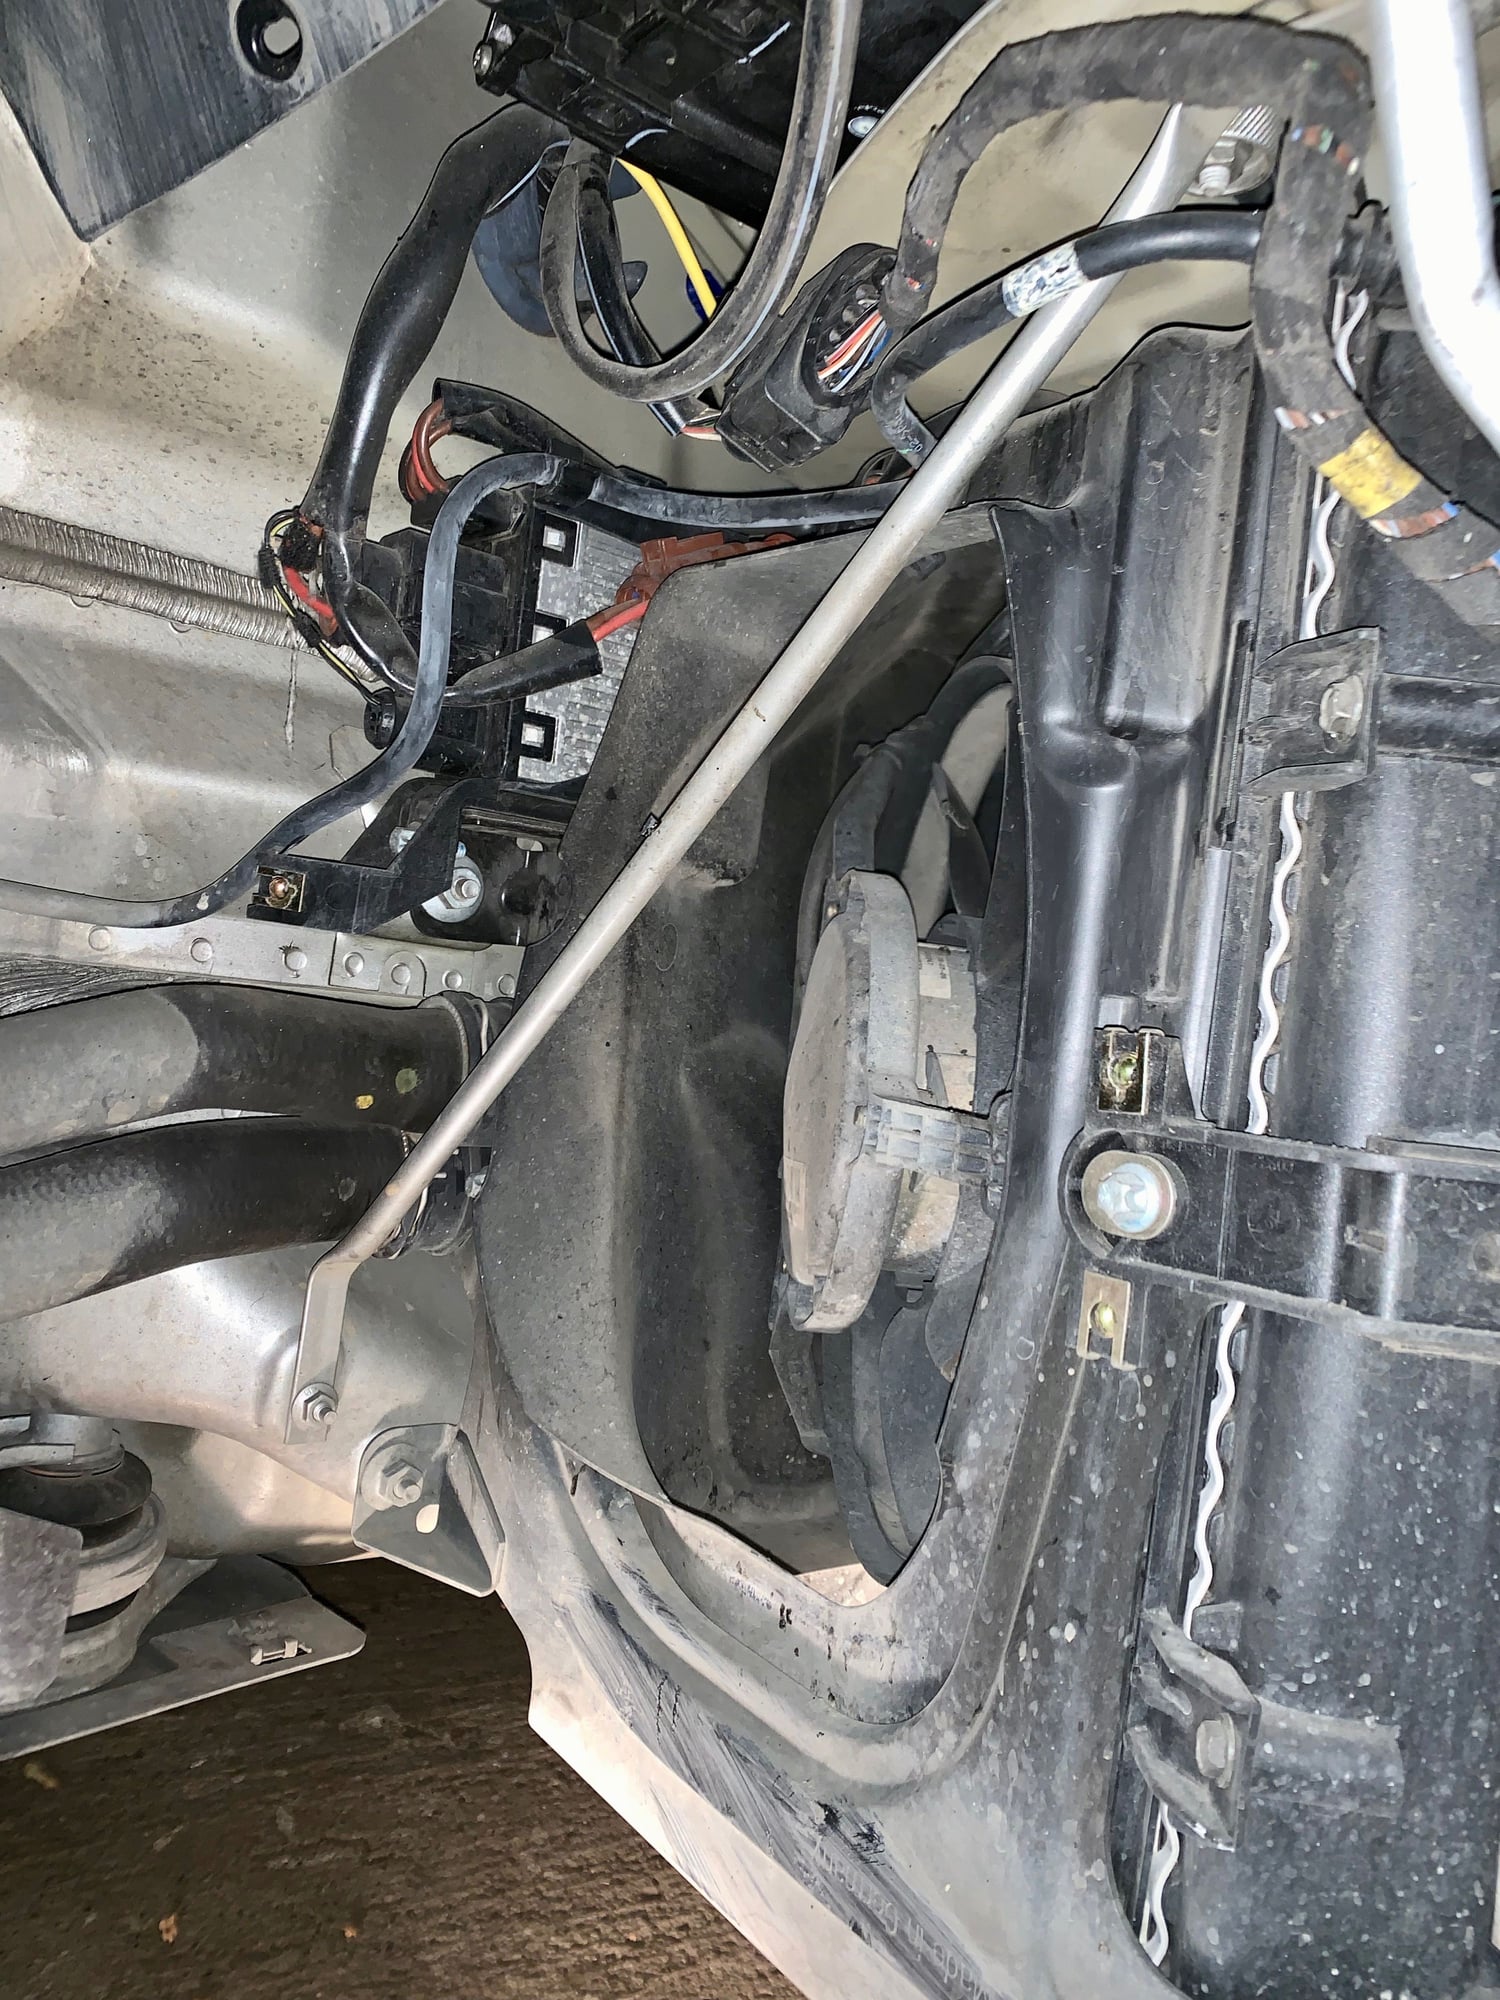
5. Take a minute to inspect your radiator and fan. You dont get many opportunities to see if from the backside.
6. Install goes reverse. Start by sliding the top of the liner under the rear liner. Then you need to push the liner in so the tabs slot in behind the bumper lip (again be careful here. this has the least clearance and you dont want to scrape your paint). Then slot the tabs in under the bumper. Jiggle it a bit to make sure its all lined up correctly. Then start by screwing in the bottom T25s first as those are hardest to see. Then work upward.
7. Of course clean your wheel well and calipers while you are at it.
This is very helpful. Thanks for posting. I actually had a crack in my driver front wheel liner too, and bought the replacement. I had my car in at the dealer at the time, and asked them how much to have the tech install it while the car was with them. They quoted me $210...no joke. I did end up getting them to do it for free, but heck...if they didn�t, I�d be doing the job myself.
It has been done to access the emergency frunk release cable ... on cars that have not been lowered. But it is a bear to do so. A cheap floor jack from Harbor Freight plus wheel chocks will pay for themselves quickly. Add to that a 1/2" drive torque wrench (118 lb ft), a short extension, and a 19 mm socket and you're set.
It has been done to access the emergency frunk release cable ... on cars that have not been lowered. But it is a bear to do so. A cheap floor jack from Harbor Freight plus wheel chocks will pay for themselves quickly. Add to that a 1/2" drive torque wrench (118 lb ft), a short extension, and a 19 mm socket and you're set.
Mostly limited to my building and ability to work on the car in the garage. As in, I think once I get a jack and a tire off, they start to get pissed off... =(
Mostly limited to my building and ability to work on the car in the garage. As in, I think once I get a jack and a tire off, they start to get pissed off... =(


 05-18-2019, 03:38 PM