When you click on links to various merchants on this site and make a purchase, this can result in this site earning a commission. Affiliate programs and affiliations include, but are not limited to, the eBay Partner Network.
What I'm not getting is why all these great DIYs are not getting added to the forum DIY Index? I've seen authors ask that they be captured but no recent ones have been added?
Just a quick PSA: wrenching in flip flops is a bad idea.
Thx Iceter.
What I'm not getting is why all these great DIYs are not getting added to the forum DIY Index? I've seen authors ask that they be captured but no recent ones have been added?
Thx for the reminder. I just posted some recent DIYs in the pinned thread but I think admins need to update/edit the other section. Unfortunately I've never seen any activity from the admins and dont know who actually owns or runs this site...
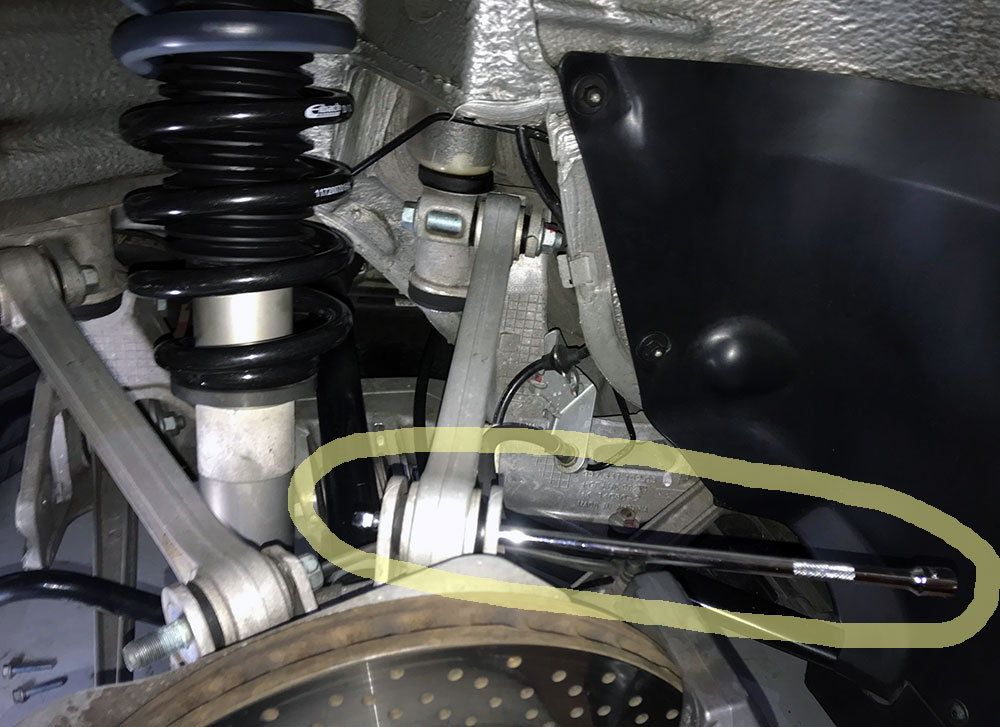
awesome! Great write up Bruce. I always stressed to those doing lowering springs to make sure and swap in new front mounts, since I had some go bad already, and the new ones do add a nice touch to the handling since they also take abuse from steering angles. Had not really considered the rear strut mounts, but now it is on my list! Great resource you have given us.
Quick update: I was out today and can now hear my driver side mount needs to be replaced as well. The passenger-side mount was louder so must have masked the rattle from the driver side.
I've also figured out the best way to diagnose a bad strut mount. Find a long curving road that has some rough pavement and bumps. Drive 30-50mph in each direction to load up one side of the suspension and then the other. You should be able to isolate which side the noise its coming from. Front or rear is a bit more obvious but ive noticed that a bad rear mount sounds more like a muffled rattle. From the videos Ive seen bad front mounts make more of a pronounced knocking noise.
@Wayne Smith we need to schedule part 2 of the series soon :-). I think we can do the next one in 1.5hrs.
@bstmusic for rears or fronts? seems reasonable. parts would be ~$300 and maybe they billed 3-4hrs per side.
Rears. Only one was broken, but my mechanic decided to go ahead and replace both at the same time. By working with his colleague, they were able to change them out without having to disassemble the entire system. This meant he didn't have to do an alignment, thus saving me the cost of alignment (2x) and another procedure when the 2nd strut failed. And I can detect a pretty significant improvement in the ride.
Super helpful Bruce - I followed this guide completely to change my rear springs and this makes pretty easy work of it. Small tip, and maybe obvious but doing this job myself it was a little tricky to get the control arms lined back up. What I found made easier work of it was using a 1/4" extension I had handy to help line up the holes on one side while pushing in the bolt on the other. Made pushing the bolt through smooth without needing to hammer in and possibly damage the threads. I had a floor jack under the carrier as well to help adjust the angles as well.
Btw - well done on the wheel wells. I thought I cleaned mine while I was doing the job but you've taken it next level. Looks brand new.
Wayne wouldn't have had the patience for my cleaning detail. Indeed I didn't mess around - even took off the plastic fender covers and cleaned behind them! Hah - I enjoyed just seeing how it all was put together and what was behind them - and made it easier to clean the plastic liners with them outside of the wheel well. I'm normally not this nutty with cleaning but really did just take my time with the job and had fun with it. Of course today I went out and roads were partially wet and the concours looks is now gone.


 11-11-2018, 03:27 PM