When you click on links to various merchants on this site and make a purchase, this can result in this site earning a commission. Affiliate programs and affiliations include, but are not limited to, the eBay Partner Network.
I finally got around to doing this and used the cdc location method. Only issue was couldn’t figure out the cdc power connection how to release the clip from the unit. This made wire splicing tricky but I managed.
Does anyone have any instructions on how to use with a CDR24 head unit? How to switch between Bluetooth and USB etc…. The only videos I was able to find online had the larger display of the pcm unit with cdc menus that the CDR24 doesn’t have. I was able to press cd6 and it recognized Bluetooth and my phone which is basically all I wanted, but it I ever wanted to put in a usb drive I’m not sure how I would select this and play the files.
I am confused as well.
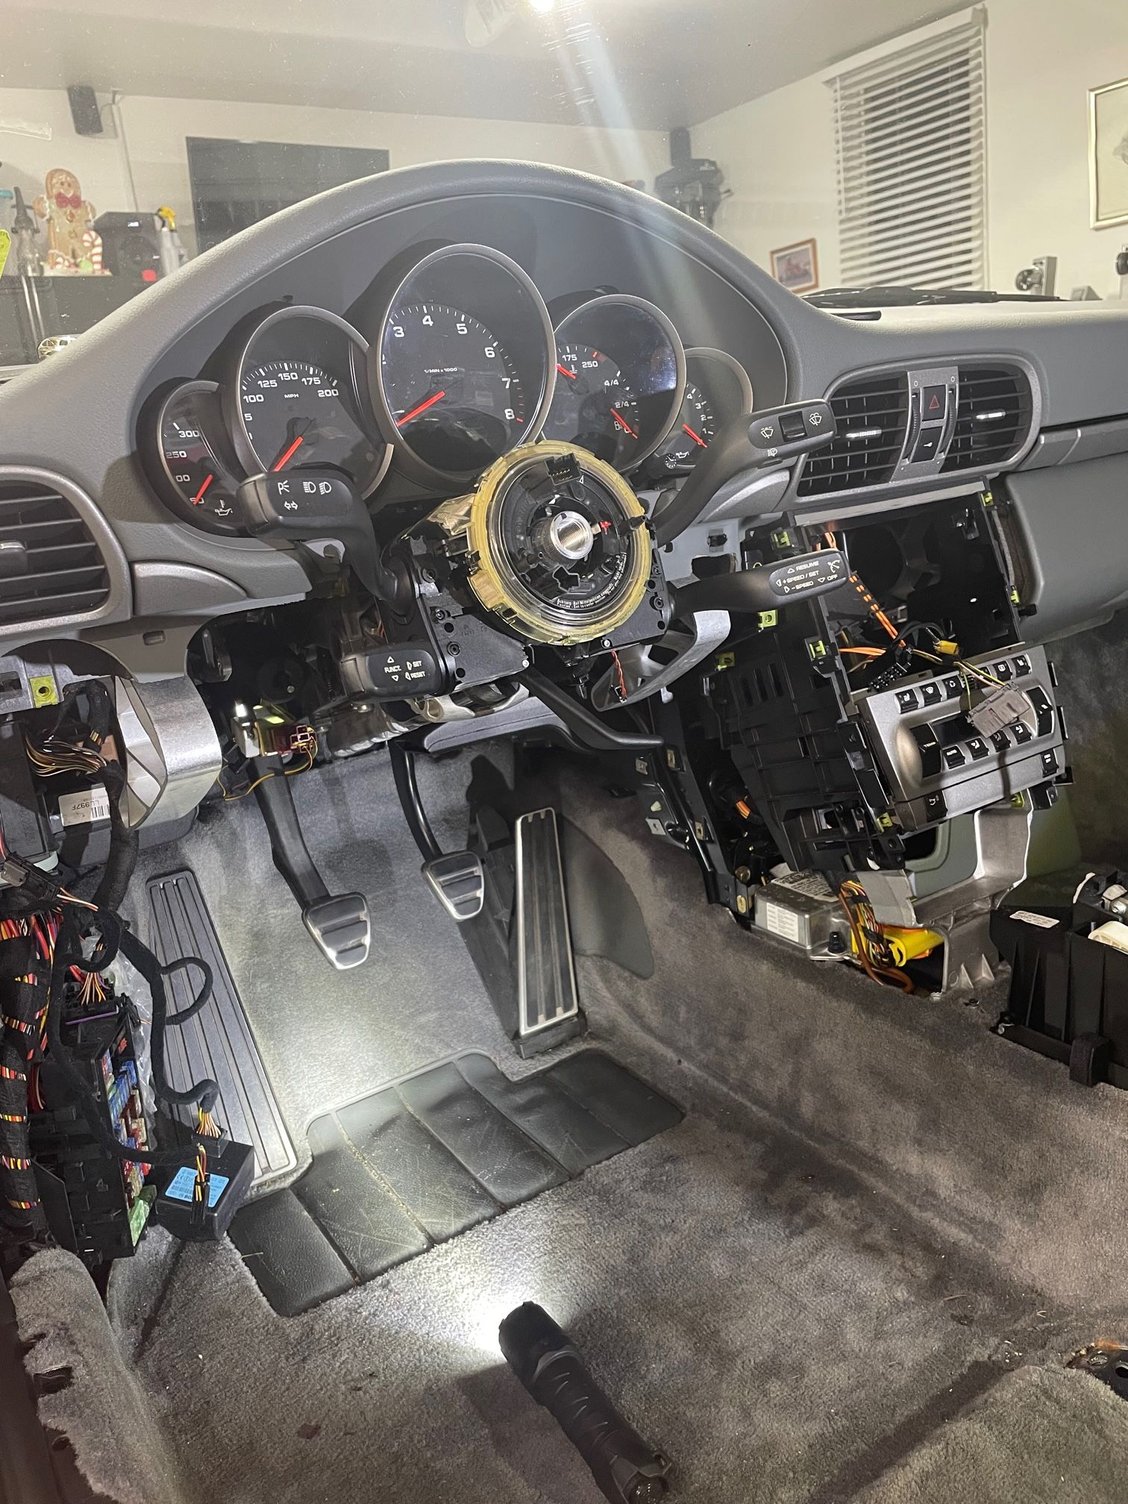
I looked in my 997.1 earlier today and found that there are 3 torx screws (like this one below) right above the pedals that allows you to remove the trim panel that sits above the pedals.
The area where your red circle is would not fit the MR12Volt. So I am guessing the PO installed above the trim and ran the wires though the steering column. A lot of us installed the MR12Volt above the similar panel on the passenger side. I think folks are confused because the unit would not fit in the area you think it is installed.
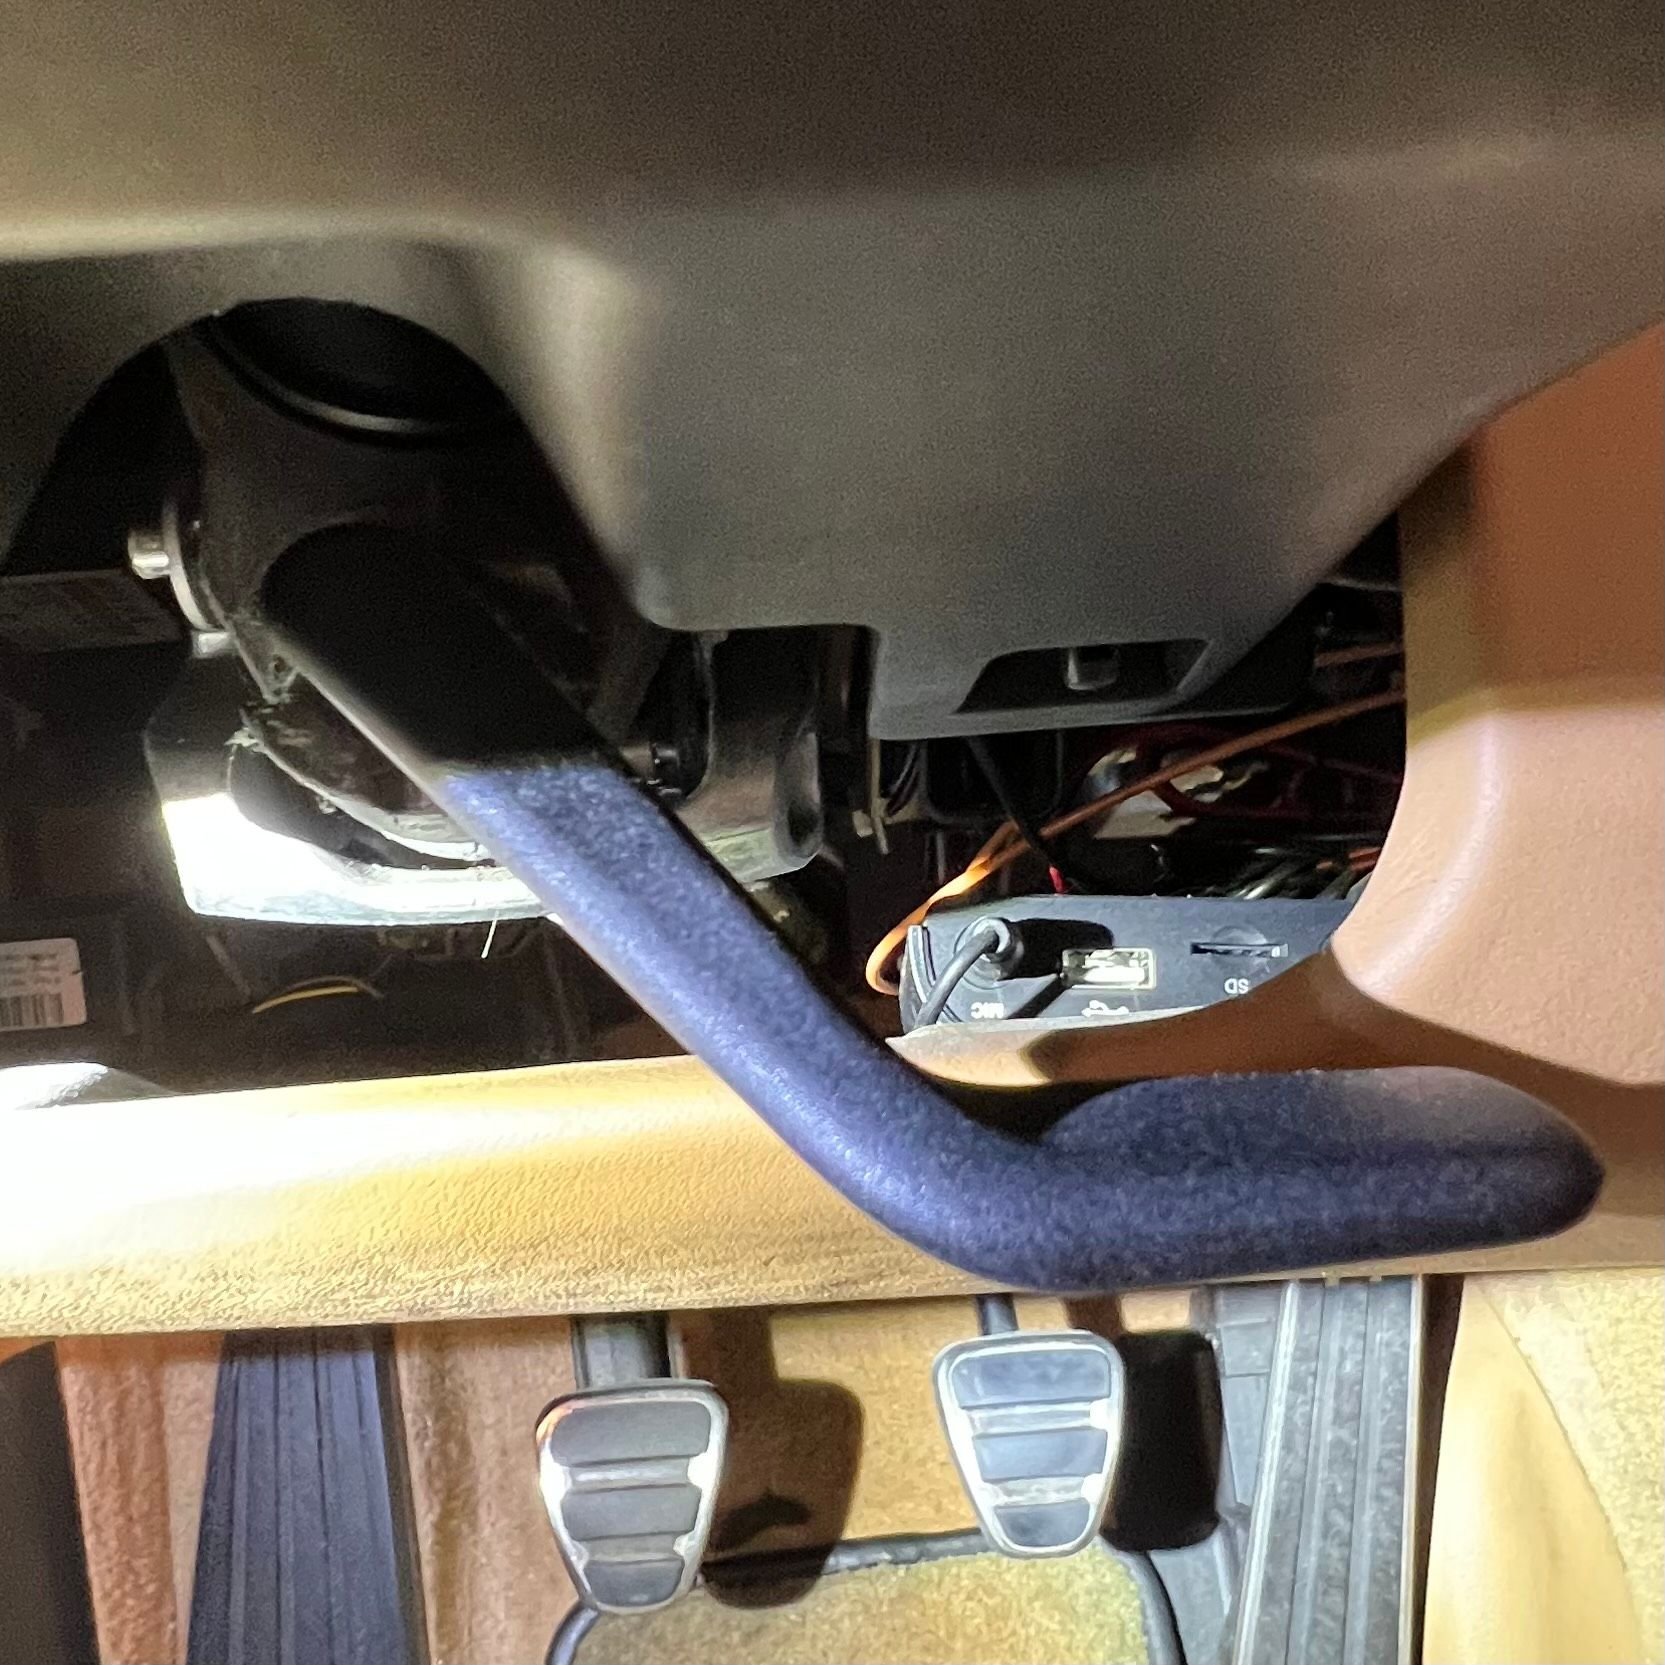
Okay, sorry for the delay. @8KaboveMSL , here is a better photo from my vehicle. To get the proper angle, I had to move the steering wheel up as far as it would go, aim a flashlight, and hold the camera right up under the wheel. As you can see, the Mr12Volt is in fact in the area I was trying to describe. So in order to install the wired Enfig mic I wanted to purchase to replace the poor one previously installed, I will need access to this area to run the wiring. I can open the spot above the wheel where the mic goes, but I was asking how to remove the lower trim in this photo where the Mr12Volt and the wiring is sitting. However the photo might look to you, there is not enough room with that trim in place to get hands in there to run wiring or even to reach the Mr12Volt... Thanks again!
Okay, sorry for the delay. @8KaboveMSL , here is a better photo from my vehicle. To get the proper angle, I had to move the steering wheel up as far as it would go, aim a flashlight, and hold the camera right up under the wheel. As you can see, the Mr12Volt is in fact in the area I was trying to describe. So in order to install the wired Enfig mic I wanted to purchase to replace the poor one previously installed, I will need access to this area to run the wiring. I can open the spot above the wheel where the mic goes, but I was asking how to remove the lower trim in this photo where the Mr12Volt and the wiring is sitting. However the photo might look to you, there is not enough room with that trim in place to get hands in there to run wiring or even to reach the Mr12Volt... Thanks again!
That�s a clever place to put it. . . Hadn�t seen that done on this thread.
I think you can get at that area from underneath. There is a trim/panel that extends from just underneath where the MR12Volt is installed towards the pedals. There are (I think) 3 screws that hold it in place. You just need to get underneath the steering wheel and look up. Flashlight should help you find the screws. If you remove that trim panel you should at least be able to reach your hand in there to work on it. If it is installed w/ Velcro you may actually be able to pull it out.
It's a bit involved to remove the lower dash panel on the driver's side.
First, you'll need to pull back the weather stripping adjacent to the dash (only pull it off for 8 inches or so). This will allow you to use a trim tool to pry the panel at the left end of the dash. There is a torx screw there that you'll need to remove.
You will need to remove the panel on the left side of the center stack (radio). You first remove the carpeted piece of trim in the footwell. There's one torx screw holding it. Once removed, there are 2 torx screws holding the trim panel. Once removed, give the trim panel a good tug towards you and it will release. You will now see a torx screw behind where the trim panel nested. Remove it.
below the instruments and above the steering column is a small trim panel with a bellows attached to it. Grab the panel in the center and tug. It will come release. Now take the ends and rotate then downwards to remove the trim. The bottom ends of the trim will 'hook' around the instrument cluster surround so pull down on each end to release. Now push the bellow away from the steering column upper surround and remove the trim/bellows. Behind and to the left of where the trim was is another torx screw that you need to remove.
If you take the light switch and turn the **** to the left and then press inwards, you will be able to twist it to the right and it will release from its socket. Remove the wire connector at the back of the light switch. There are 4 torx screws visible. Remove the center top one.
underneath the lower dash panel there are 3 more torx screws to be removed.
There is another torx screw at the lower right side of the lower dash panel that screws to the right into the center stack. Remove it.
You should now be able to pull on the lower dash panel and remove it. The upper part of the lower dash panel snaps into the dash. If you want to fully remove the panel from the car, you'll need to remove the ignition switch bezel with a trim took and release the ring holding the switch into the dash panel, the connector to the footwell light and then use a small screwdriver to release the clips holding the OBDII port which will release upwards into the dash panel.
This is all from fresh memory having removed the panel from my friend's '07 because the steering column in his car was frozen where the tilt/telescope would not move.
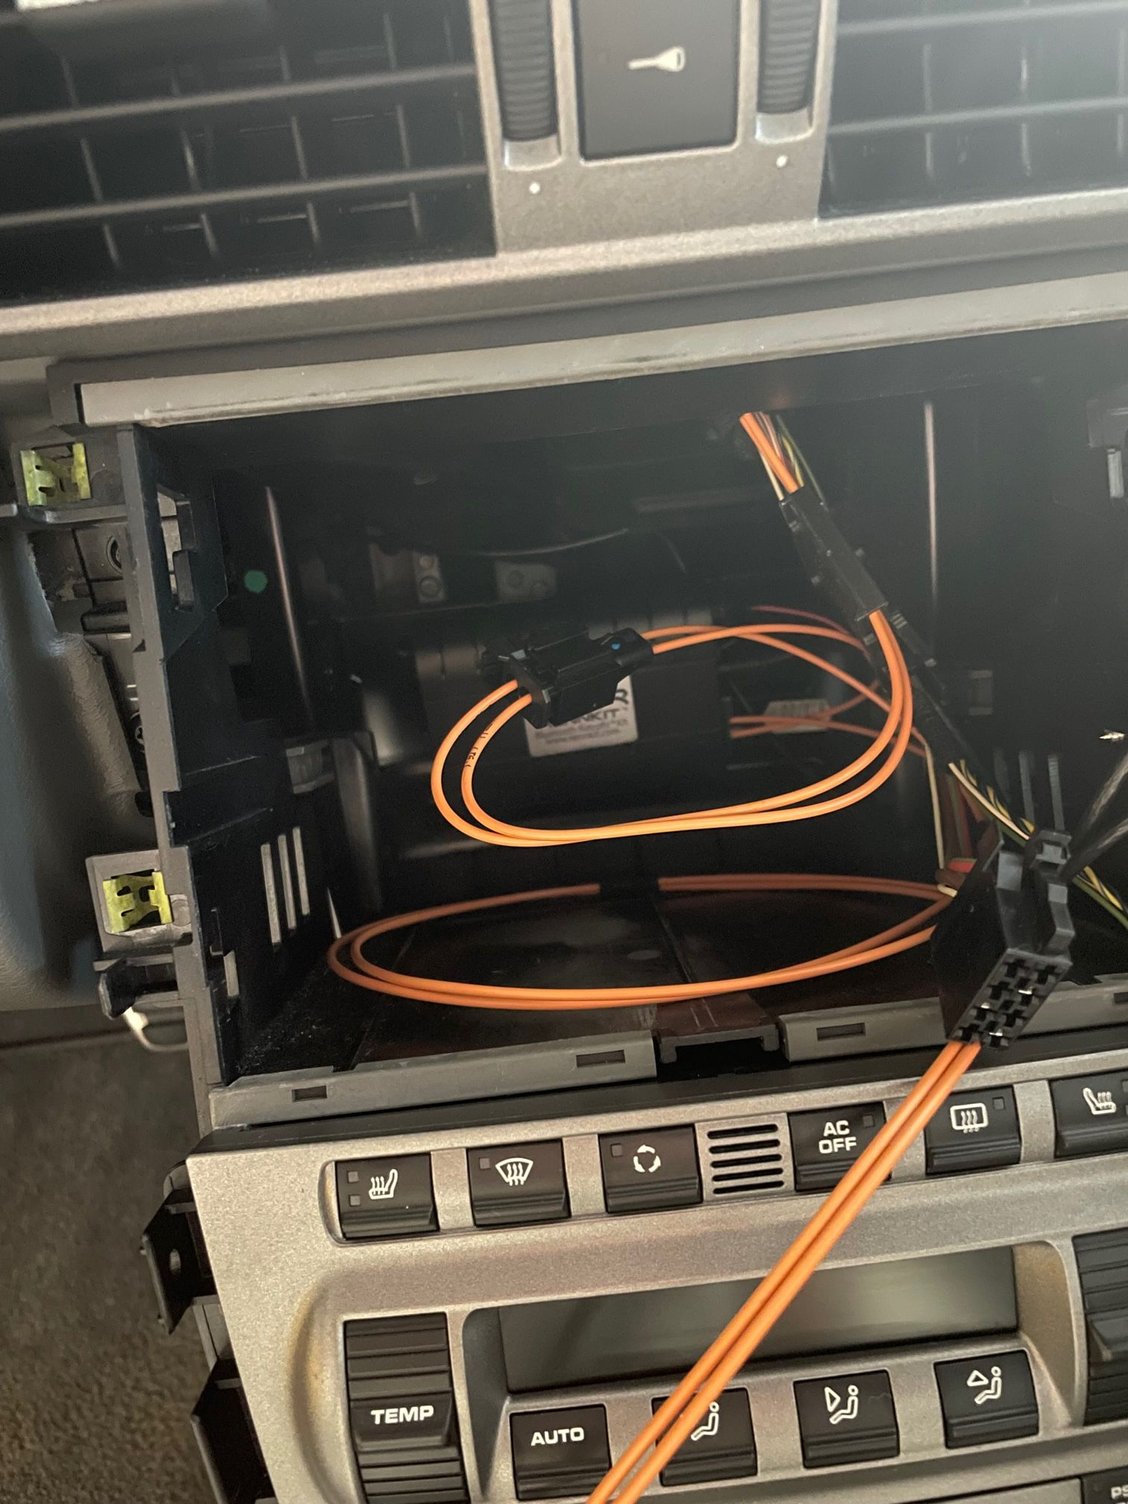
BTW, I mounted my Mr. 12 Volt in the back of the head unit space. I velcro'd it to the back of the nacelle. Just need to release the head unit to access it. And I install the Enfig microphone in my friend's car and it's great. They 3D printed the piece that clips into the steering column surround. Just awesome!
Originally Posted by onnastick
Okay, sorry for the delay. @8KaboveMSL , here is a better photo from my vehicle. To get the proper angle, I had to move the steering wheel up as far as it would go, aim a flashlight, and hold the camera right up under the wheel. As you can see, the Mr12Volt is in fact in the area I was trying to describe. So in order to install the wired Enfig mic I wanted to purchase to replace the poor one previously installed, I will need access to this area to run the wiring. I can open the spot above the wheel where the mic goes, but I was asking how to remove the lower trim in this photo where the Mr12Volt and the wiring is sitting. However the photo might look to you, there is not enough room with that trim in place to get hands in there to run wiring or even to reach the Mr12Volt... Thanks again!
Thank you very much @8KaboveMSL and @gcthree for your responses. It will probably be quite a while before I can get back to this, I am soon to leave home for a few months and won't have the P car with me. Planning to use up most of the gas, keep it in garage, plug it into this CTEK I bought, over-inflate the tires a little bit, and hope for the best. When I get back I'll plan to see about purchasing the Enfig mic and trying to get into this area and will let you know how it goes.
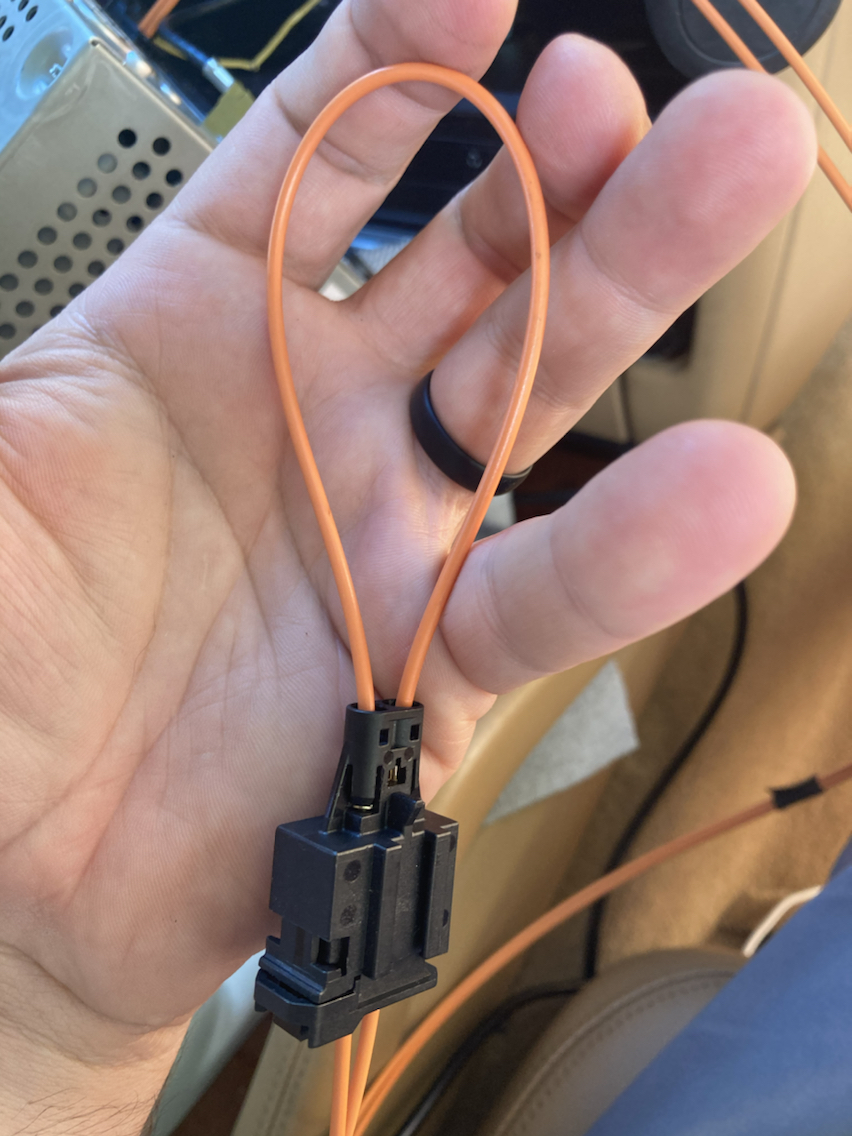
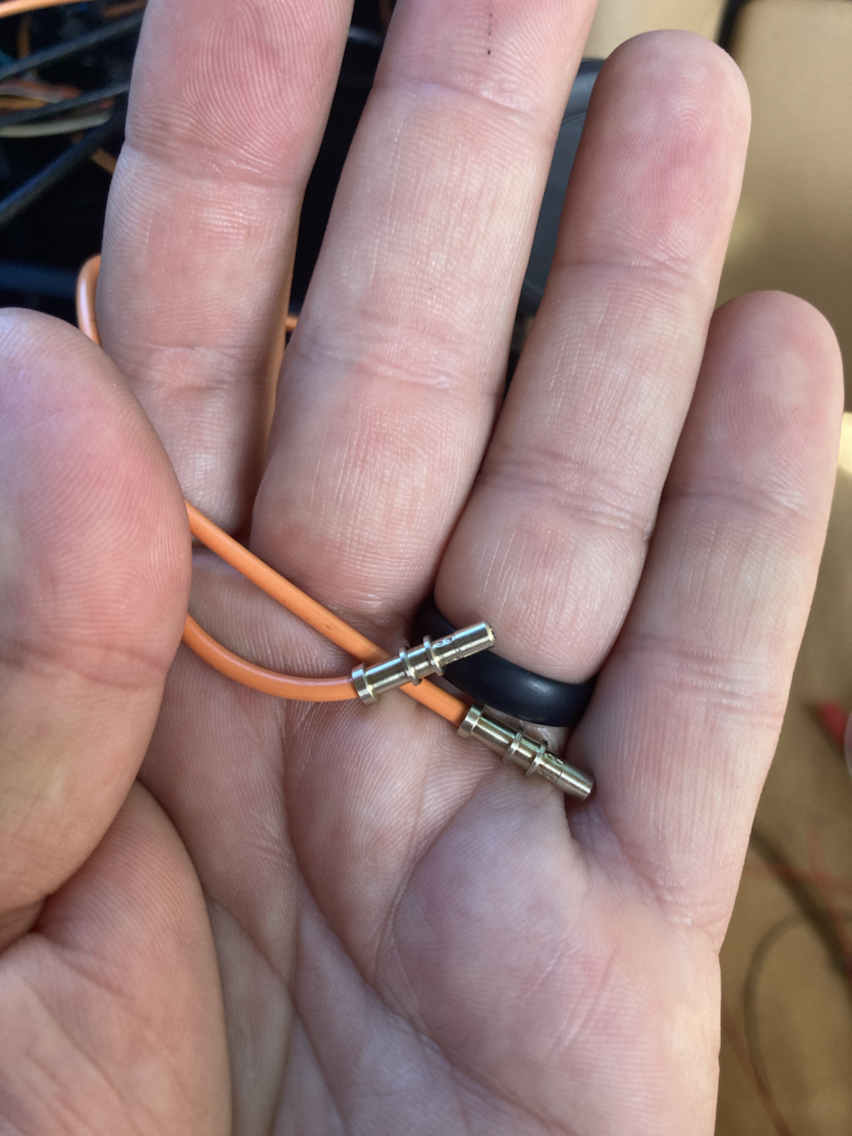
Hi All - just did an install with the rennkit BTR and am having problems with the optic connections. If I leave the unit untouched I can sometimes get it to work, with some crackling in the audio feed sometimes. Then if I move/jiggle/touch the BTR unit the optical feed drops, the leds turn off (the unit turns off) and I get all the error messages of no changer, amplifier, phone etc.
I build hifi amps in my spare time and the power lead is soldered so it has a rock solid power supply. (I am sure it is not power related)
It seems to be a loose "connection" (of which there is no such thing with MOST!), either at the MOST plug into the unit, or the 3 way most loop connector from unit to PCM. Basically if I disturb the MOST plug at the back of the unit it will cut out. Not a robust connection.
Is it possible to get a misalignment at the most plugs that I can fix? I have contacted RENNKIT and he will send me a replacement but I still have to get the core back to him and I live in New Zealand - freight back will cost almost what he will charge me for the core.
I have contacted RENNKIT and he will send me a replacement but I still have to get the core back to him and I live in New Zealand - freight back will cost almost what he will charge me for the core.
sorry, didn�t realize you were a NZ customer. Forget the return of parts.
Today I REMOVED an android headunit. What a mess the PO did with that install. Anyhow, I got the stock Bose back in, and powered on. Everything works EXCEPT the phone. Error comes up and says its unavailable. I have an "extra" MOST line, and dont know what it is for where it goes. Im assuming it is to the phone module. I have not been successful at locating where exactly that module is or how the MOST cable runs to it and Lastly, how it ties into the stock headunit.
I then hooked up the Mr12volt, and everything works fine, until I switch input to bluetooth, then the headunit basically shuts down. occasionally restarts.... Still the phone error of course.
Should I just code out the phone? I have a PIWIS. Is that the cause of the headunit shutting down?
Any insight or directions, would be greatly appreciated.
thanks
cw
Interesting - I'm just having a similar problem, I believe caused by alignment of the most cable.
As for the phone error, you'll get that until you code it out - it looks like you have a factory phone unit installed. It is below the passenger seat (or the RH seat) and needs a fibre loop on it as well. (or you can install the module under there too.)
Thanks. I'll code out the phone. Perhaps the headunit won't **** the bed with that gone.... I'll reply tomorrow with an update.
Thanks. I'll code out the phone. Perhaps the headunit won't **** the bed with that gone.... I'll reply tomorrow with an update.
Cw
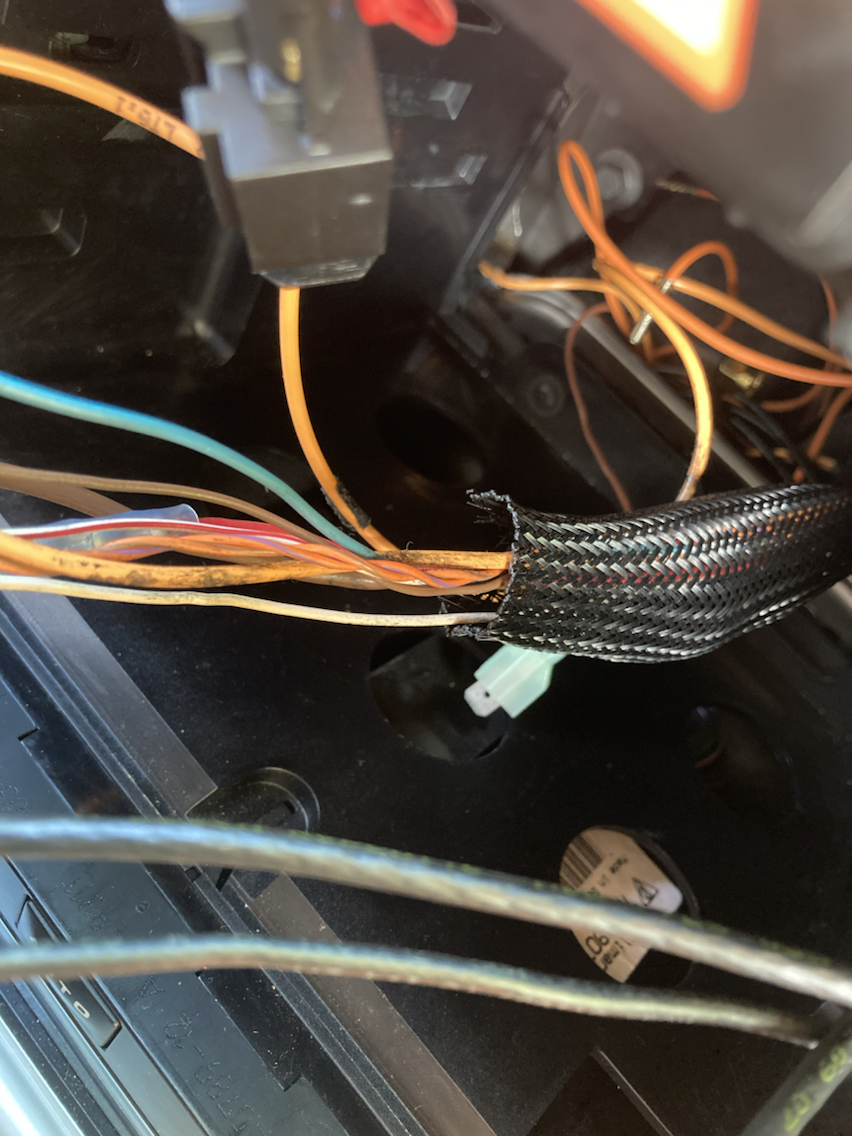
Worked on this today. Could not find how to code out the phone. From my searching, the module needs to be plugged in and working to be coded out. I tried to switch out the optic lines to get it working but it failed. I'm suspecting that the optics I believe to be the phone, are not. The lines I think are the phone have metal ends. The stock ends seem to be plastic. So I don't know what they go to. I guess I'm gonna have to drop the glove box and follow them.
Secondly, the Mr12volt box still ain't working when I replace the loop with the box as it's supposed to be done. To me, that says the box could be faulty as it doesn't seem to return the optic signal. Stereo works with loop. Fails with 12volt.... thoughts? Anyone received a bad box?
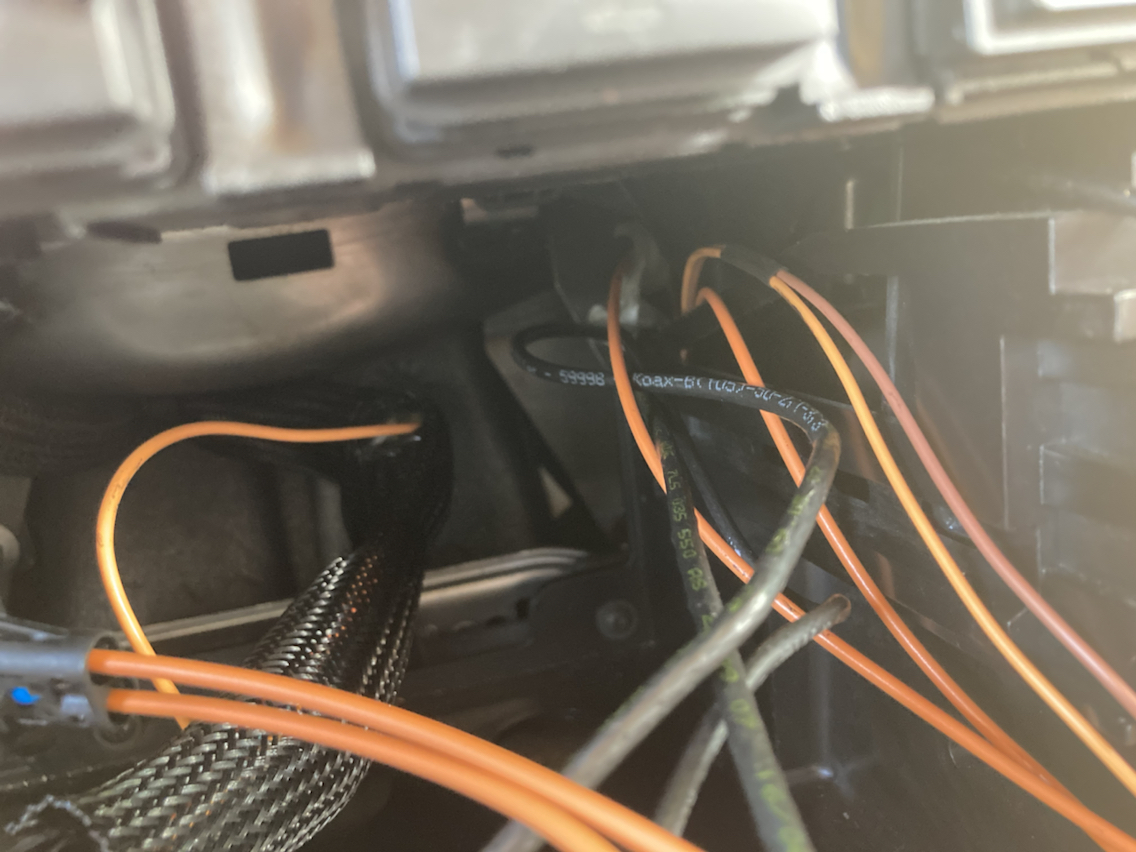
Stock cables coming from central loom
Optical cable coming from right side where the antenna are coming from.
Do you have the Mr. 12v on continuous power? It needs continuous, rather than switched, to work correctly.
I'm pretty sure. I have tested. It's wires going into stock head unit. But not 100%. I haven't found a good picture of the whats constant hot in the fuse panels. I'd like to just use an open slot and the add a fuse thingy....
I'm pretty sure. I have tested. It's wires going into stock head unit. But not 100%. I haven't found a good picture of the whats constant hot in the fuse panels. I'd like to just use an open slot and the add a fuse thingy....
Make sure it's on a continuous power line. I originally connected mine to a switched source, and it didn't work. I'm not sure if it's something about the timing of the unit booting up vs. handshaking on the MOST loop or what, but everything was happy once I put it on a continuous source.


 05-15-2022, 08:24 AM