When you click on links to various merchants on this site and make a purchase, this can result in this site earning a commission. Affiliate programs and affiliations include, but are not limited to, the eBay Partner Network.
Mike Roblin, I'm doing 350mm rotors all the way around but sticking with the stock 996tt rear calipers. So hopefully piston area won't be changed so much by the front GT3 calipers that I feel that I need to upgrade the master cylinder.
What I mean by larger heat sinks is going from the stock 330mm rotors to 350mm rotors...
The GT 6-piston caliper actually has a slightly smaller piston area (~2127 sq mm) than the standard 996 front caliper (~2275 sq mm), so your stock master is fine. In fact, it should help your brake bias by moving it back a bit since the factory bias 1.72 and with the 6-piston caliper in front it lowers to 1.6.
The GT 6-piston caliper actually has a slightly smaller piston area (~2127 sq mm) than the standard 996 front caliper (~2275 sq mm), so your stock master is fine. In fact, it should help your brake bias by moving it back a bit since the factory bias 1.72 and with the 6-piston caliper in front it lowers to 1.6.
Negative...
996TT four piston front brakes have virtually identical piston area as the 996GT six piston calipers. 996GT3 is actually 0.6% larger if you wanna split hairs. Rear calipers are the same size on both...
You sure? I thought the standard fronts are 36/40mm and the GT3 are 28/30/32mm?
I’m sure. It’s 36/44 and 28/32/38. The 380 calipers I’m running are 28/30/32. Porsche finally got the bias right by using those along with the larger rears on the 997GT cars to significantly shift the bias to the rear.
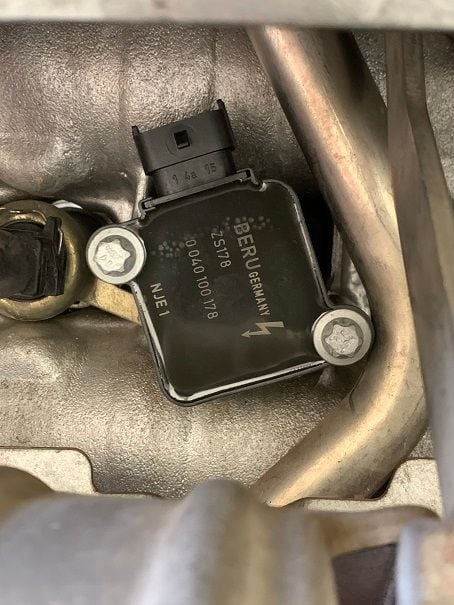
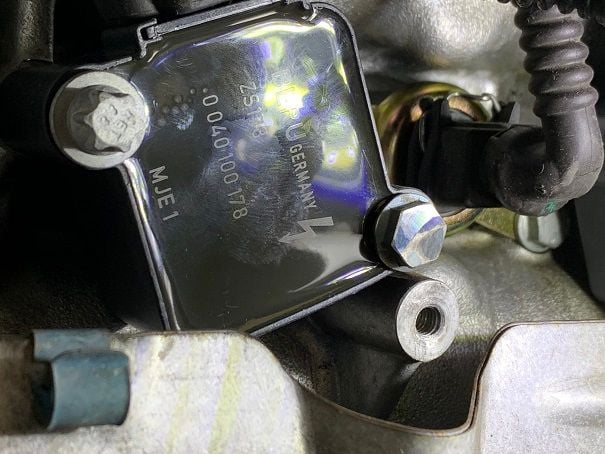
60,000 mile service - including plugs, upgraded coils, new O-rings & brackets for the valve lift solenoids, air filter, fuel filter, oil & filter. Oddly, after putting in 9 quarts, the electronic measurement is in the middle of the acceptable range. No problem fitting the coil next to the dreaded pipe, and I used the Pelican method of handling the shield interference, but I also ground the bold head down a bit, as well as using a fat metric washer on the one shield bolt. Air gap verified, no contact.
Temporary mod for blowing out the spark plug holes. No fitment issues. Hex head bolt ground down a bit.
To shorten the bolt head height. My heat shield was contacting the bolt head AND I wanted to use as thin a washer as possible between the shield and the mounting boss you see right next to the ground-down bolt. I did not want to attempt re-shaping the shield. Not sure you can even get those shields out of there.
To shorten the bolt head height. My heat shield was contacting the bolt head AND I wanted to use as thin a washer as possible between the shield and the mounting boss you see right next to the ground-down bolt. I did not want to attempt re-shaping the shield. Not sure you can even get those shields out of there.
You can also just use 'small head' metric flange bolts instead of grinding down a larger bolt. Commonly used in motorcycle applications, and stocked by my local Ace hardware, YMMV.
The picture below shows a variety of styles, left to right:
Small head flange bolt. What I used on my coil to get the extra clearance, similar to 'grinding' a larger bolt. Typicially uses one size smaller socket than a full size head as well.
Regular head flange bolt.
E-Torx flange bolt, what comes with the coil packs (LARGE head!)
 02-03-2020, 10:10 AM