When you click on links to various merchants on this site and make a purchase, this can result in this site earning a commission. Affiliate programs and affiliations include, but are not limited to, the eBay Partner Network.
I would also love to know the brand/model of your steam cleaner!
As for the unbalanced feeling, definitely feel it at higher speeds without the cup lip, and I don�t even have the rs wing (just the stock blade with the shims that increase the angle and downforce of the wing). I�m guessing with the rs wing and a non-cup front lip, the �wiggly� feeling at speed would be even more pronounced. If you are feeling instability at lower speeds, I would bet that you are due for an LSD rebuild. The stock unit does not last long and causes instability, especially upon hard braking.
One recommendation I just noticed. You need a cup front lip to balance the extra downforce of the rear rs wing. Should help stabilize things ALOT! They are NLA from porsche but there is a vendor currently working up the molds for a reproduction unit.
I just managed to get on in the UK from a guy who had one in his garage!,
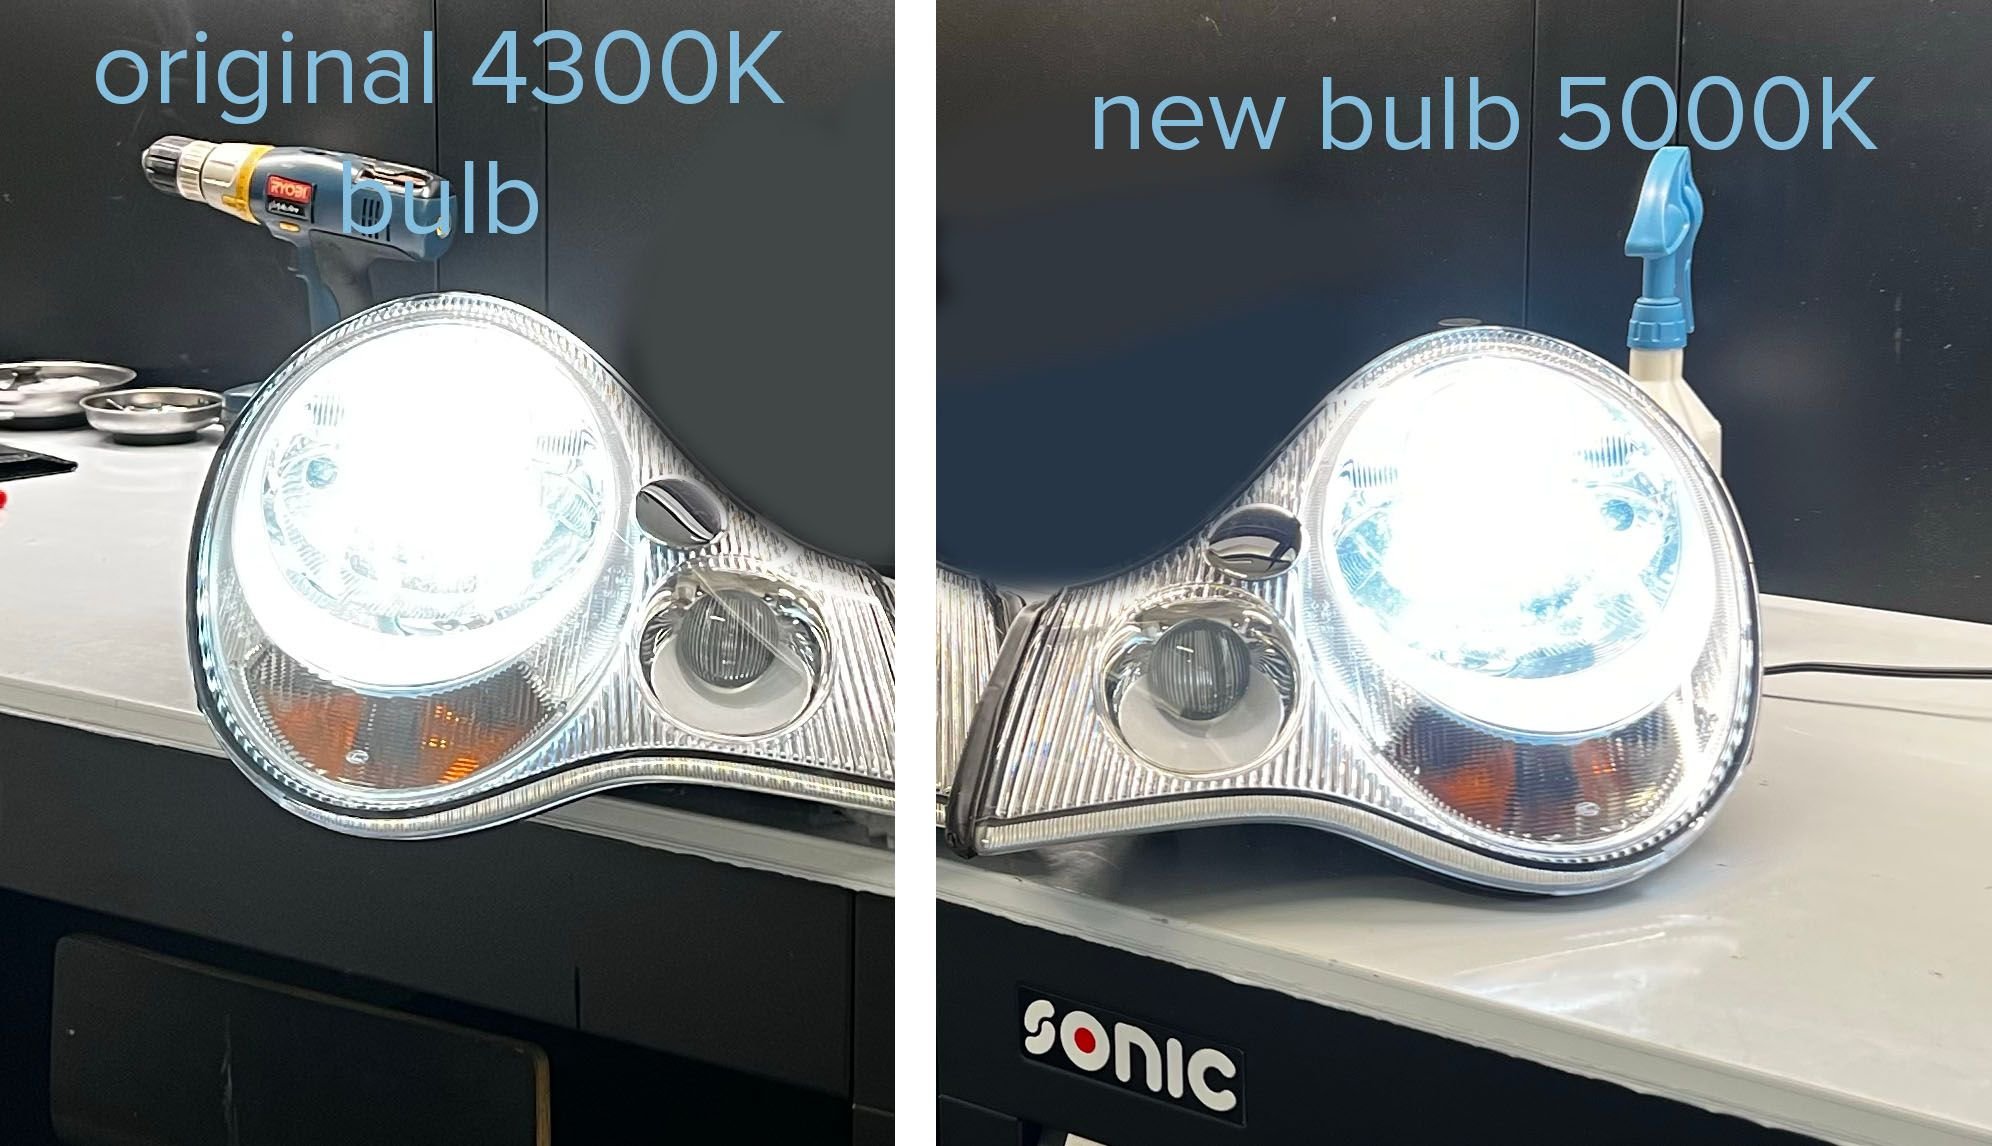
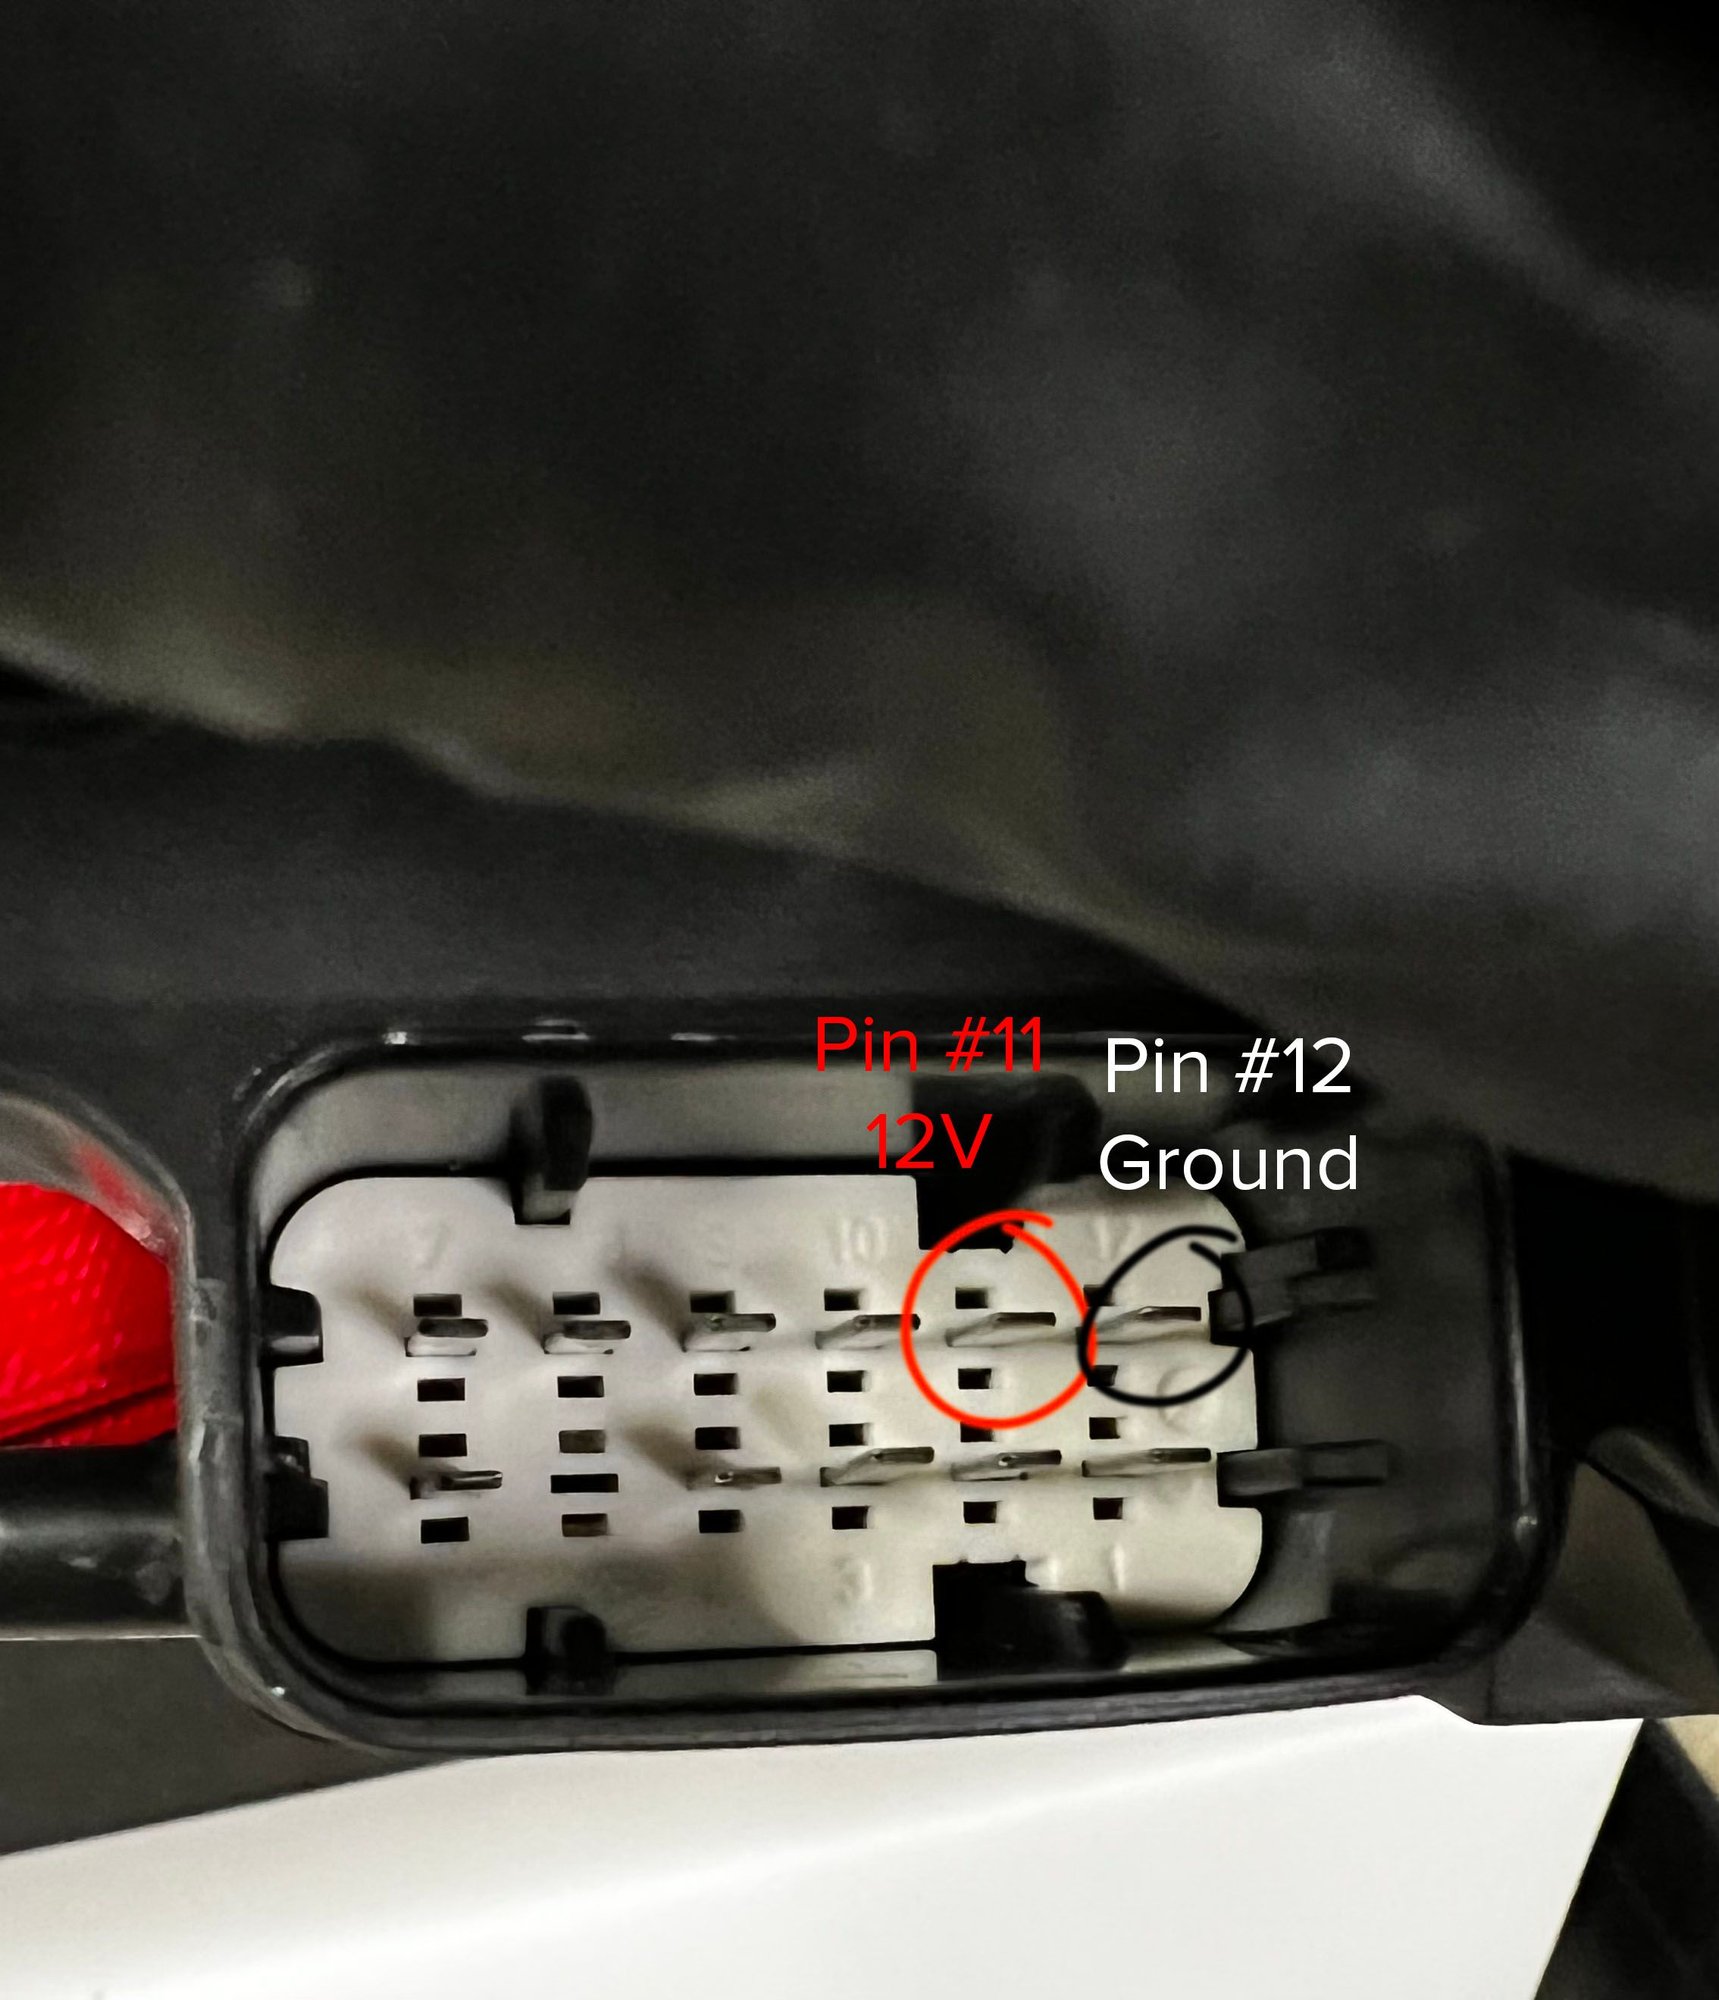
While the front headlights are out for car the detail, I decided to proactively replace the 16 year old Xenon bulbs in each headlight. I believe our cars came with 4300K bulbs from the factory and I decided replaced them with 5000K bulbs. Since they were out on my work top, I hooked up a 12V source to Pin #11 and ground to Pin #12 after asking here on RL and then confirming with the wiring diagram I found in the PIWIS.
Frankly, there wasn’t much of a difference — or at least not one that I could see staring into bright lights. Maybe it will be more noticeable from the other side, but that will have to wait until the car is back together.
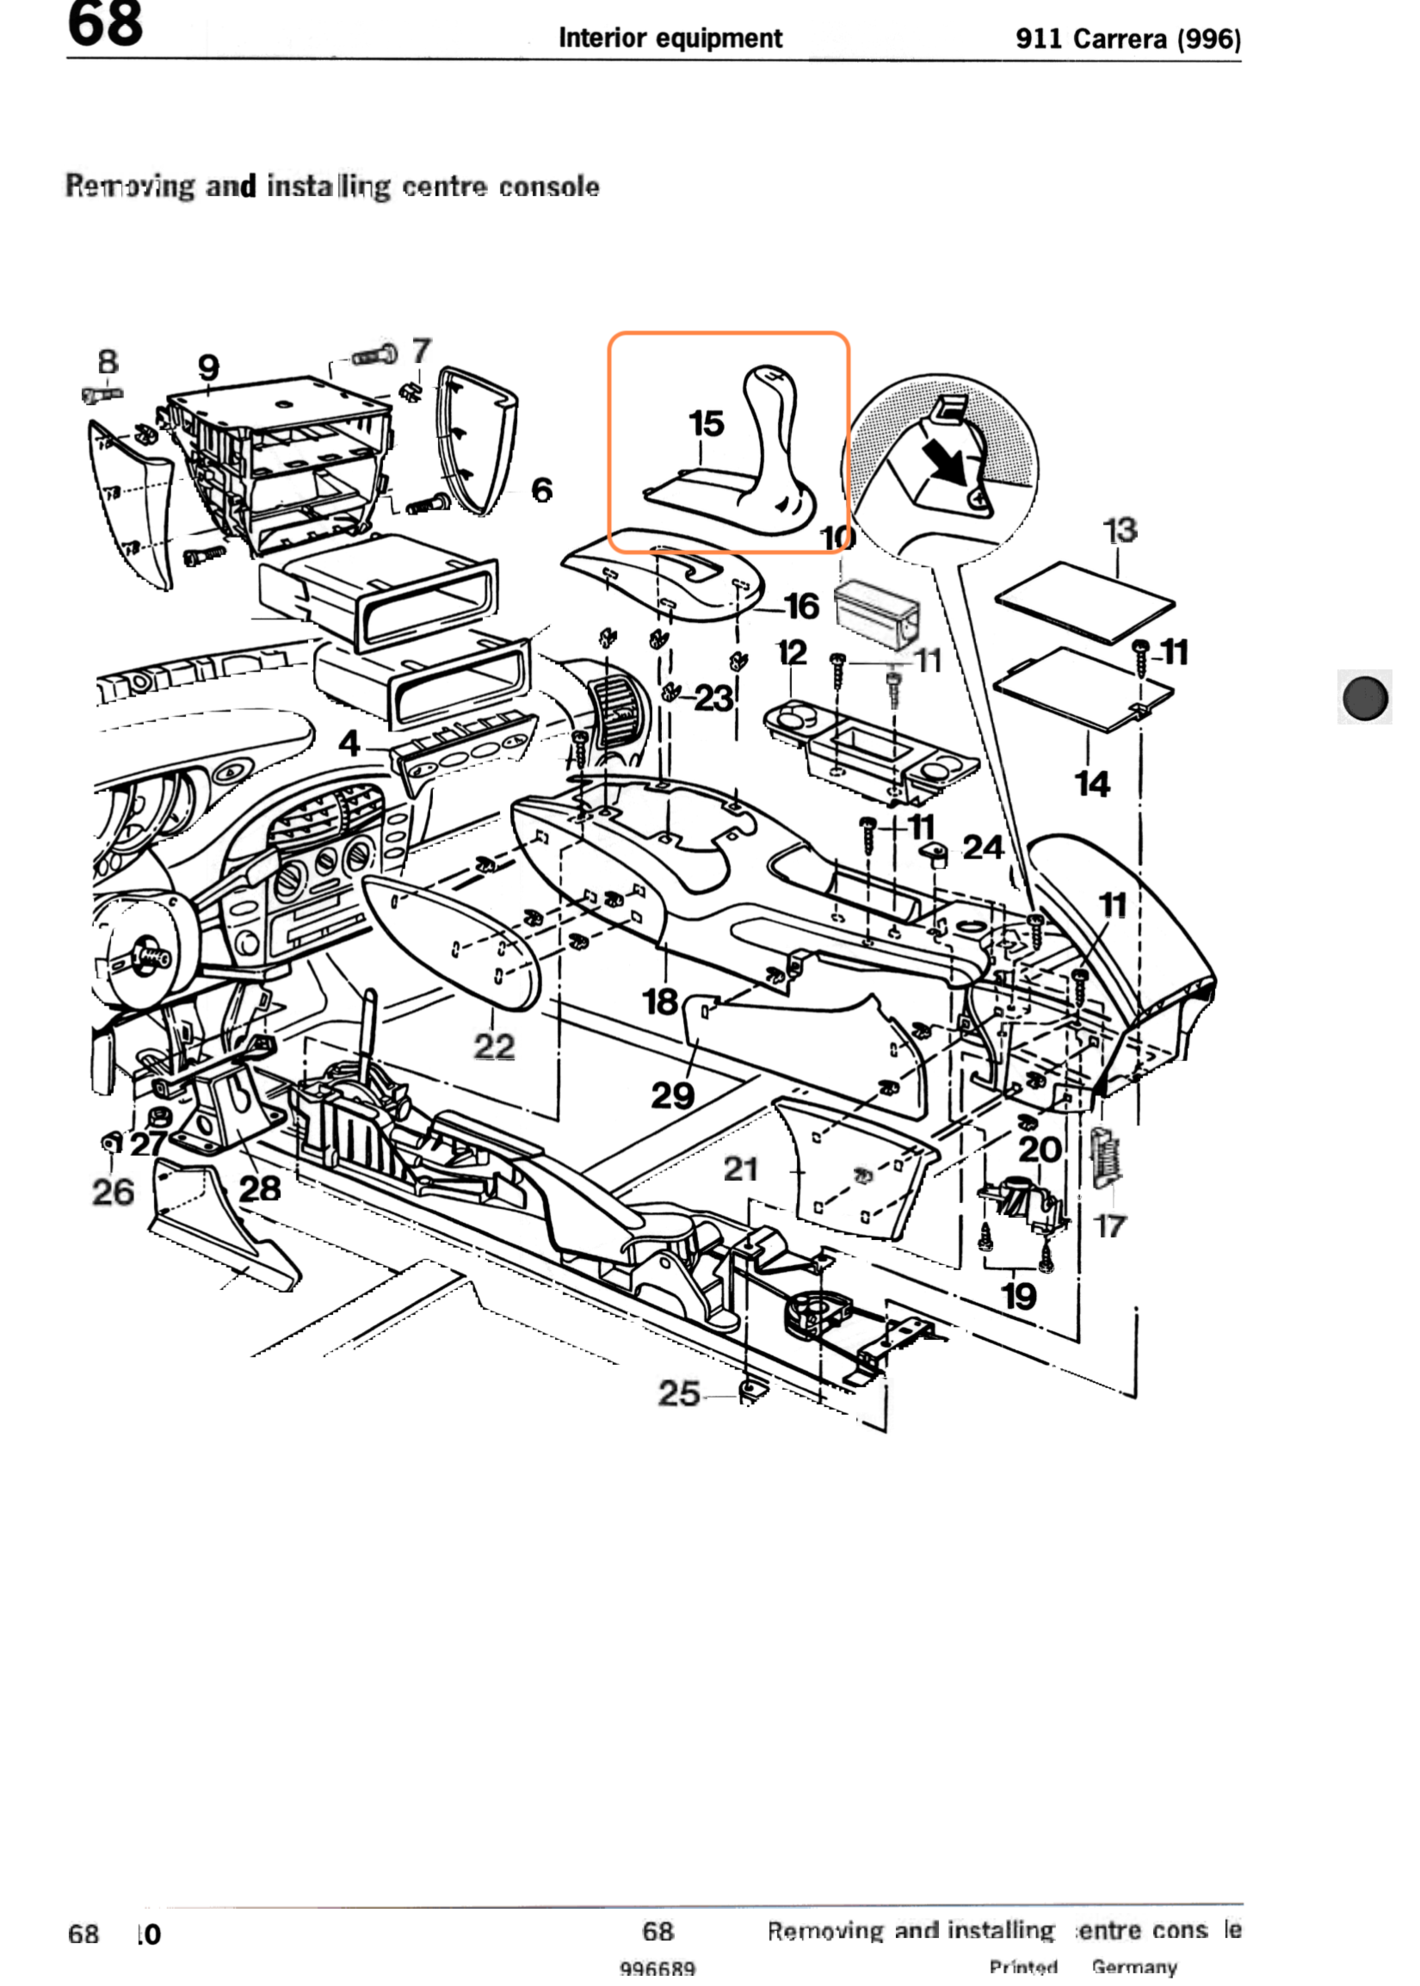
Right before I tackled the exterior, I took stock of the interior making note of any pieces that were worn or damaged (sills, *****, controls, etc.) so I could make a large-ish order knowing the wait time would be significant given some of the parts would need to come from Germany. Boy was I right� but more on that later.
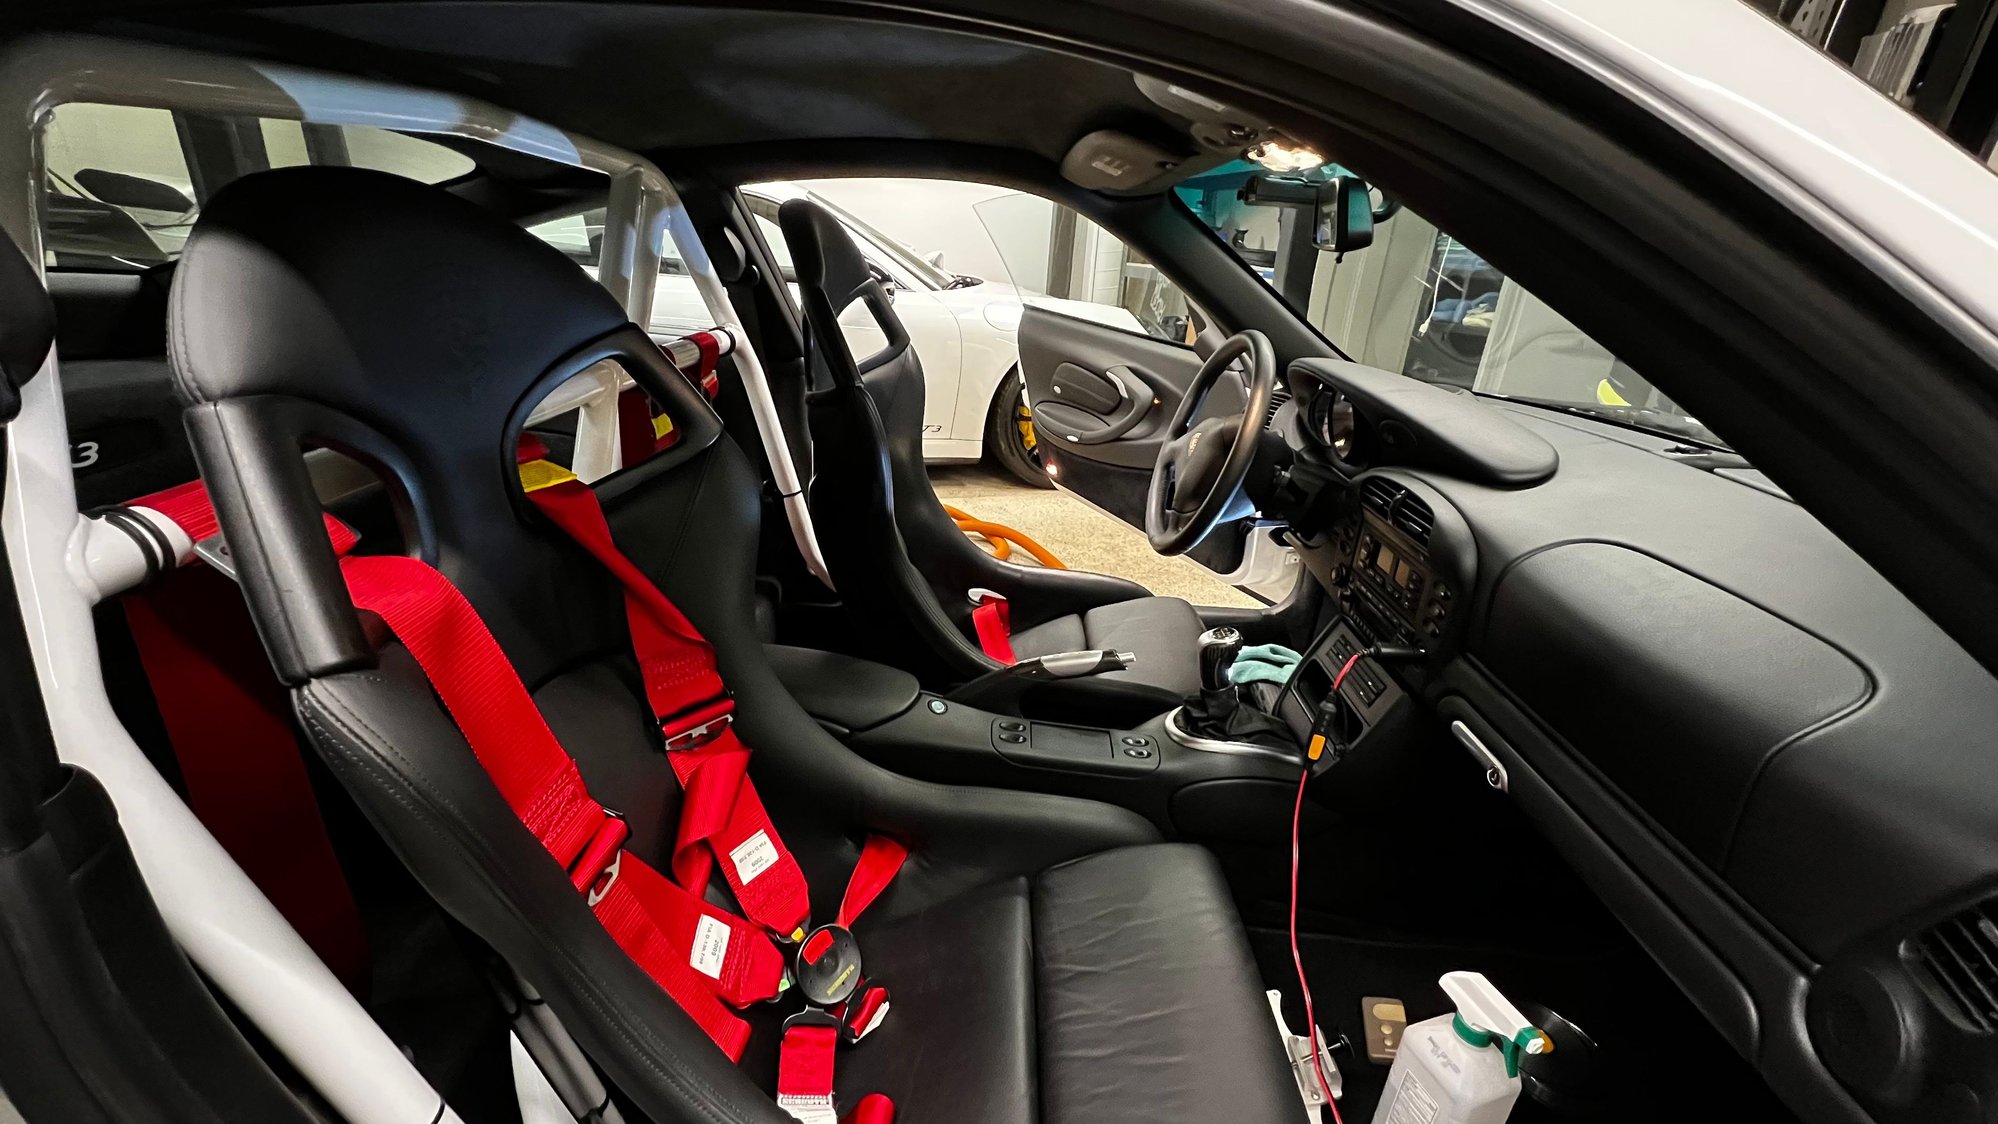
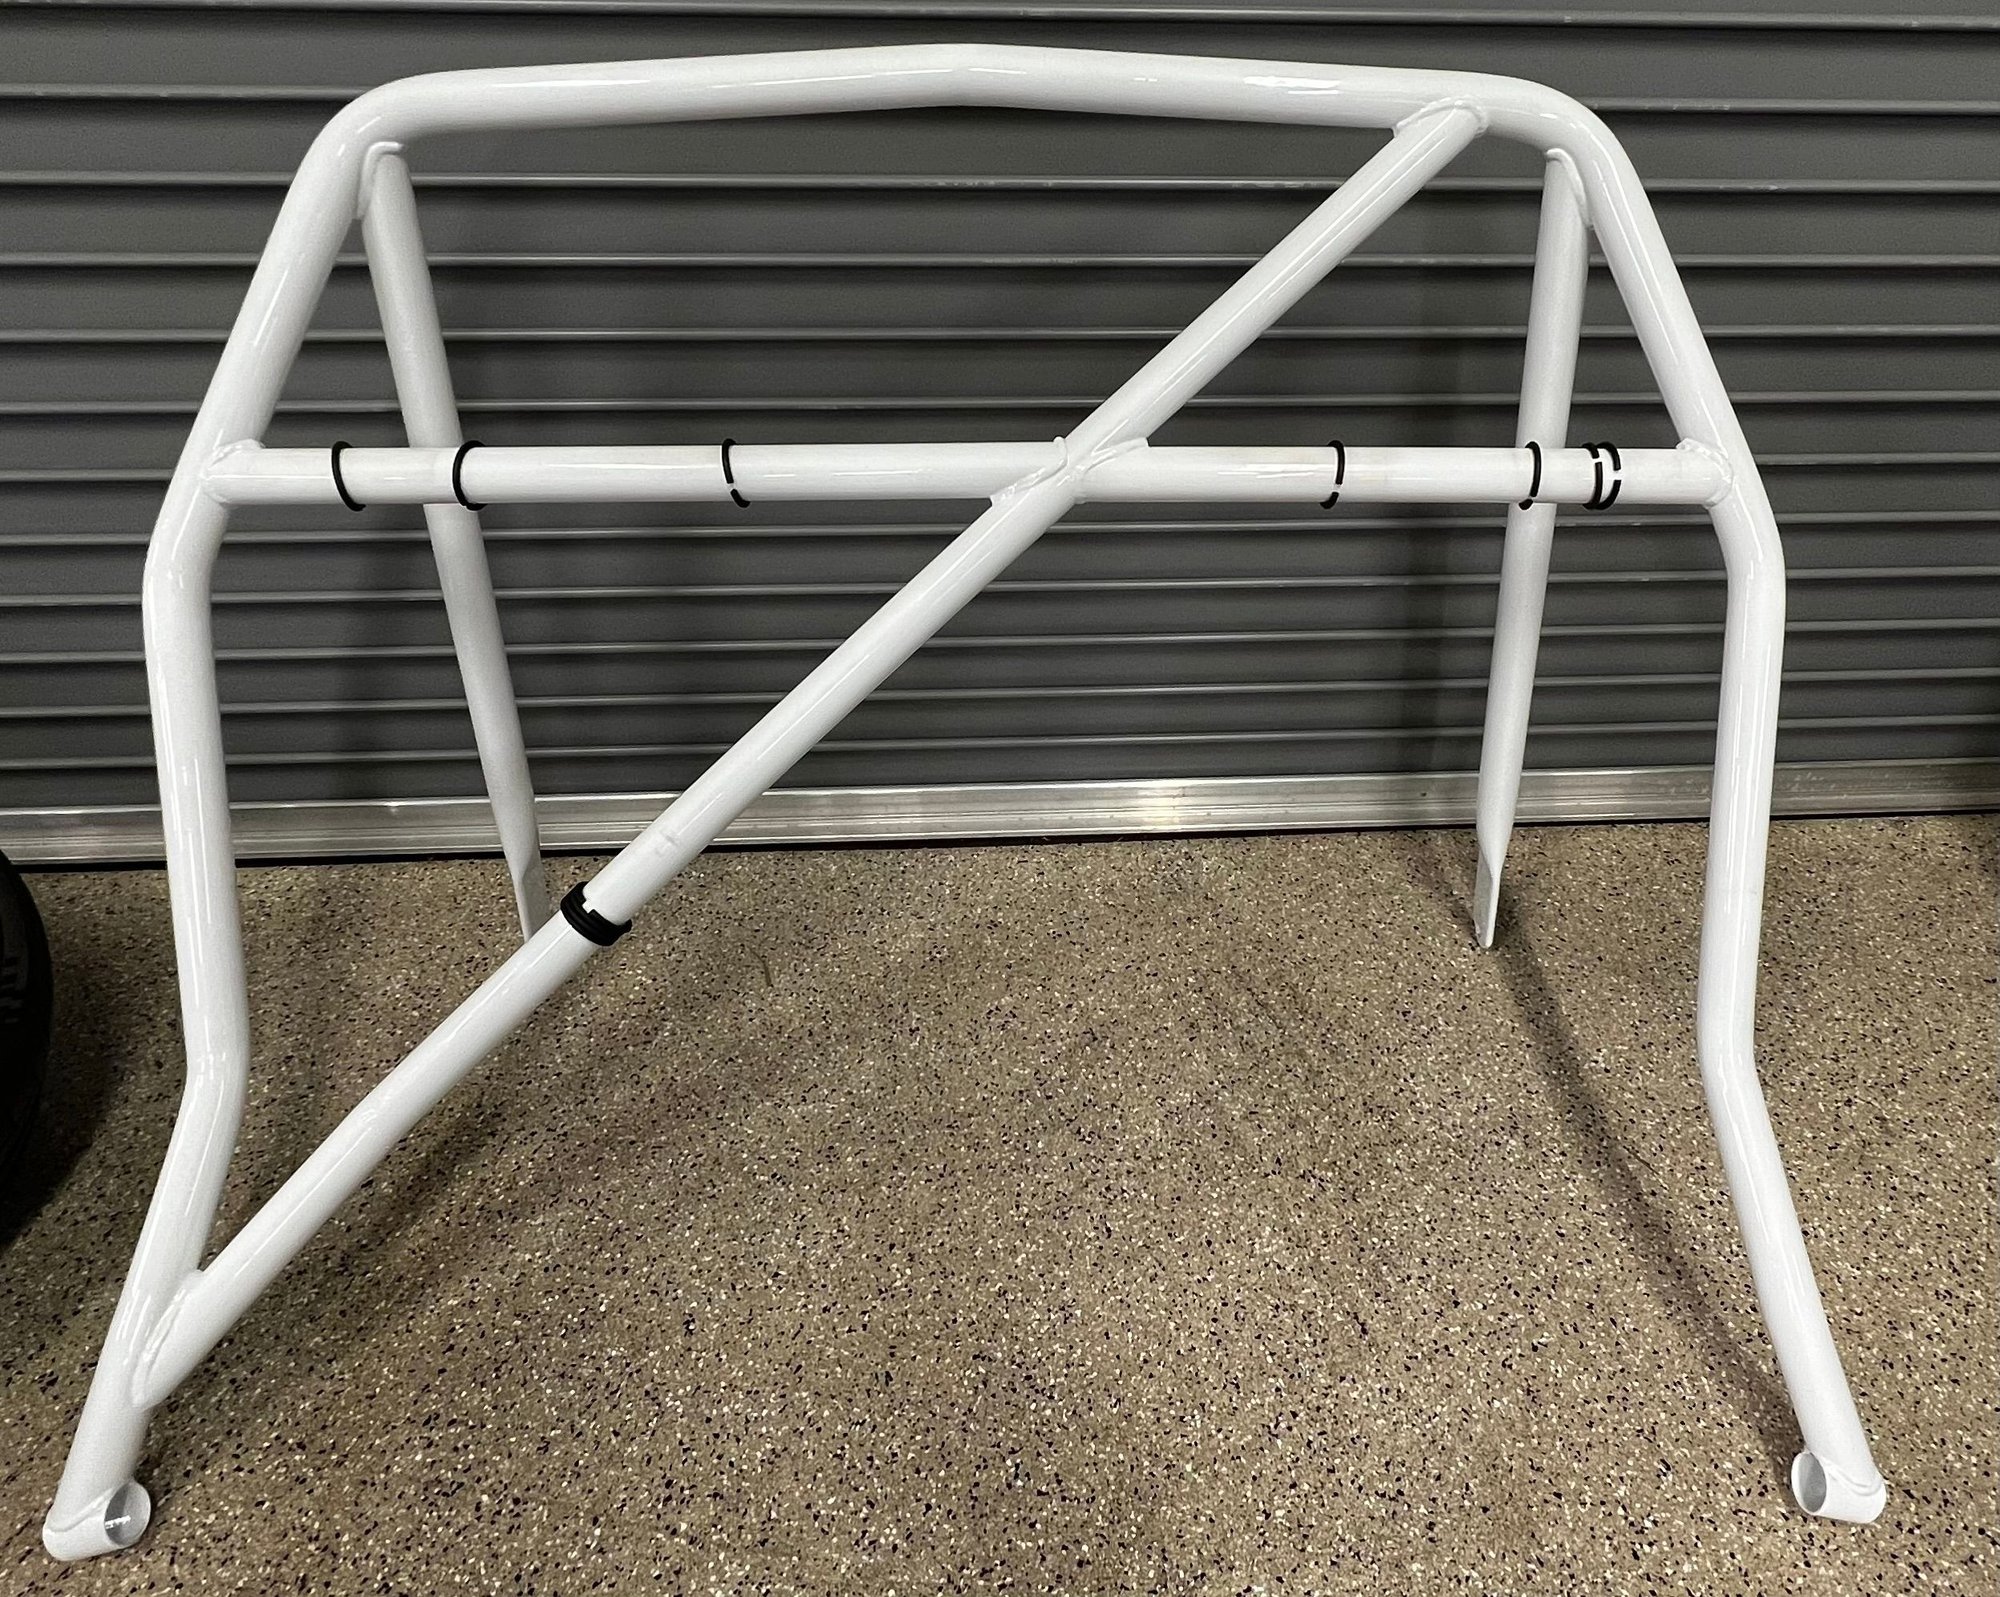
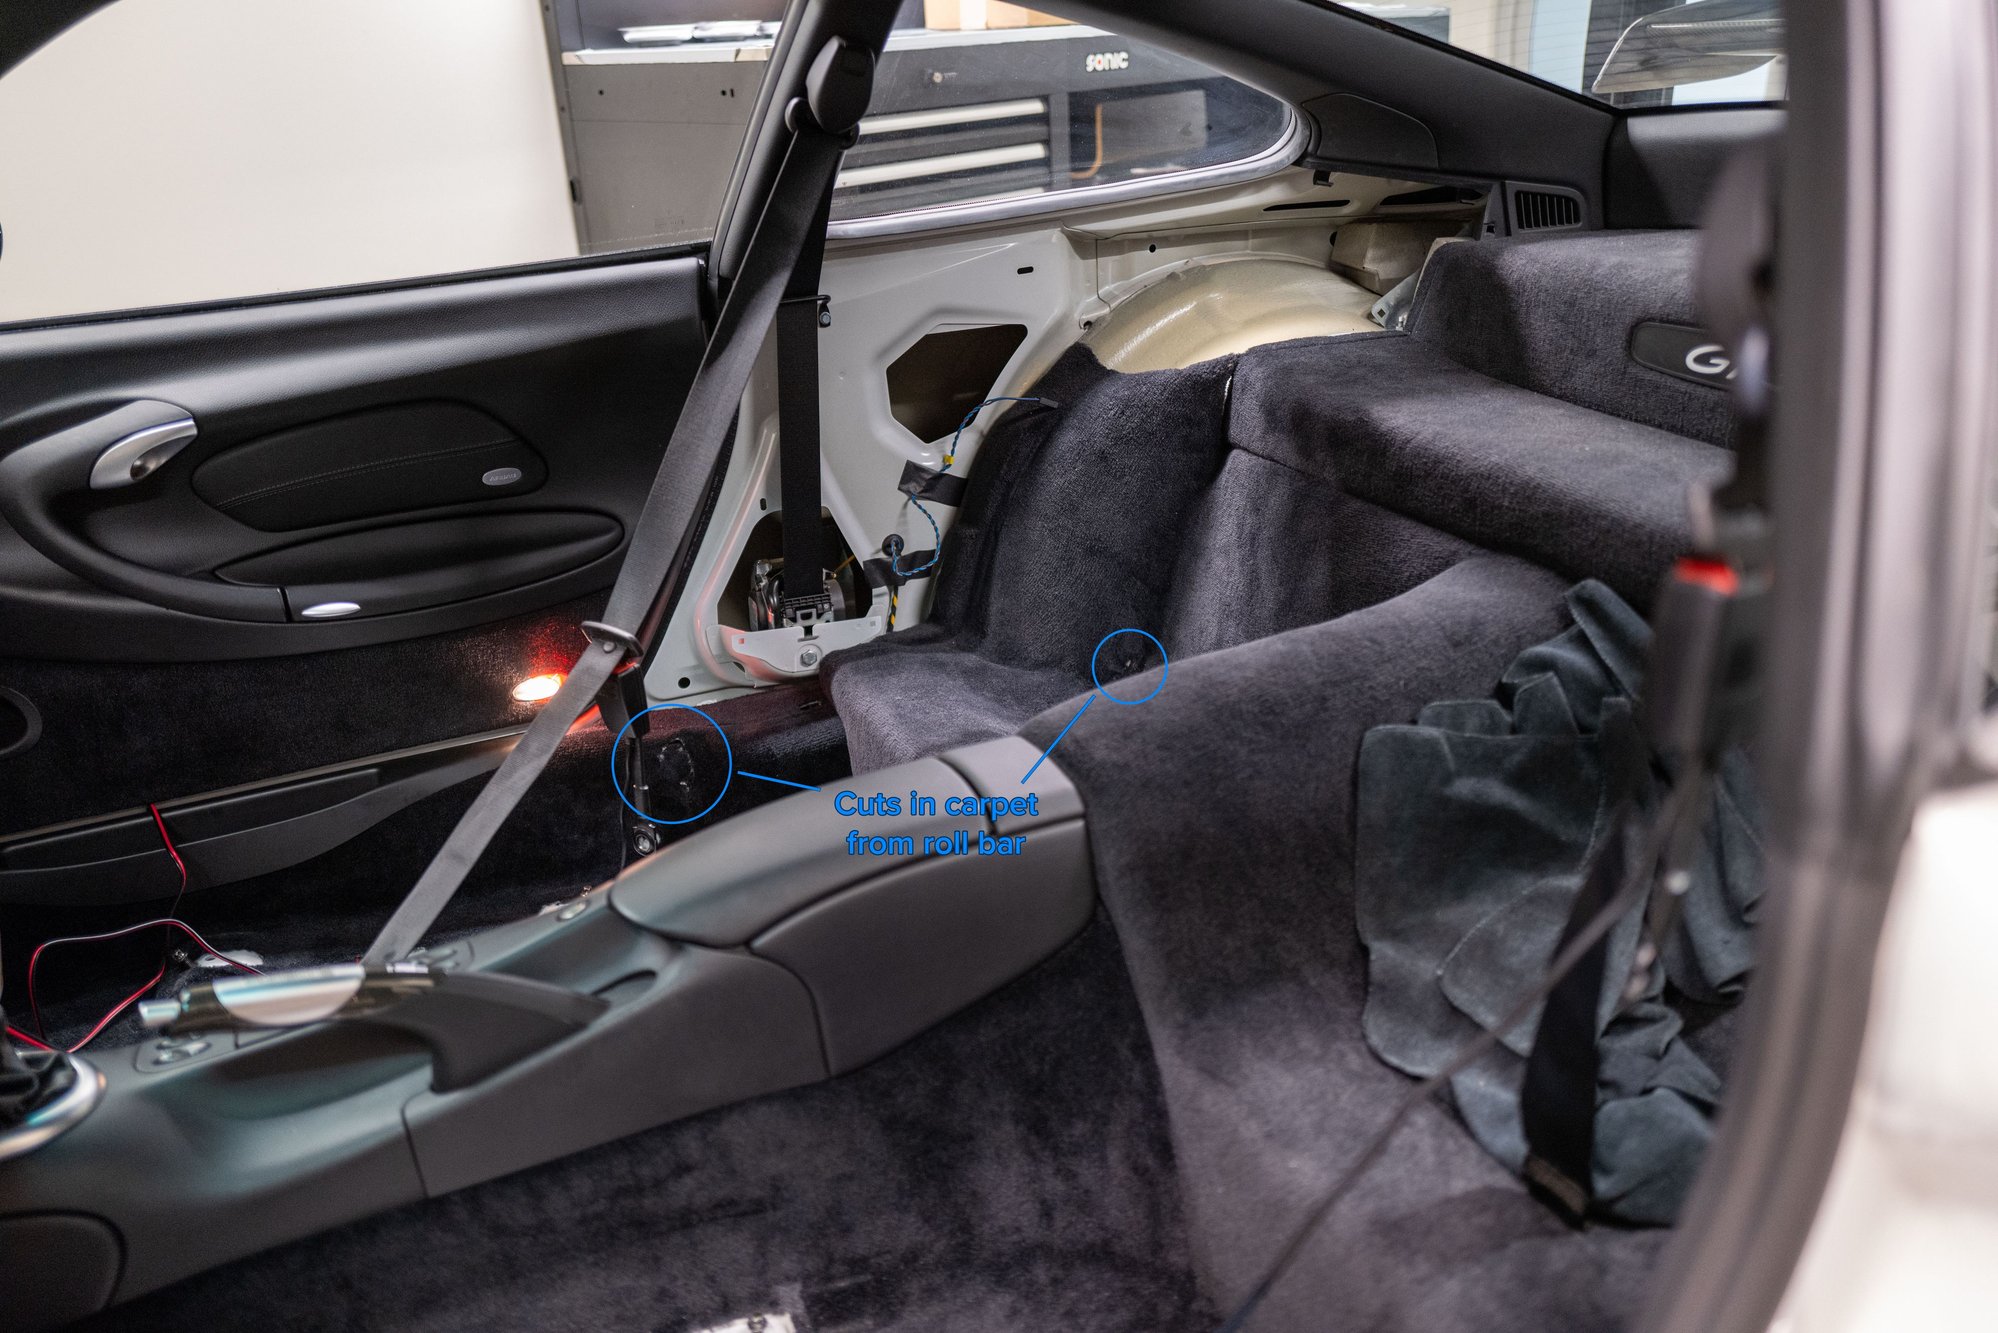
This car will see plenty of mountain roads but not track time, so I removed the roll bar, 6 point harnesses, and the fire extinguisher. Everything was sold to RL�ers. The Euro GT3 seats will go back in, they are fantastic seats.
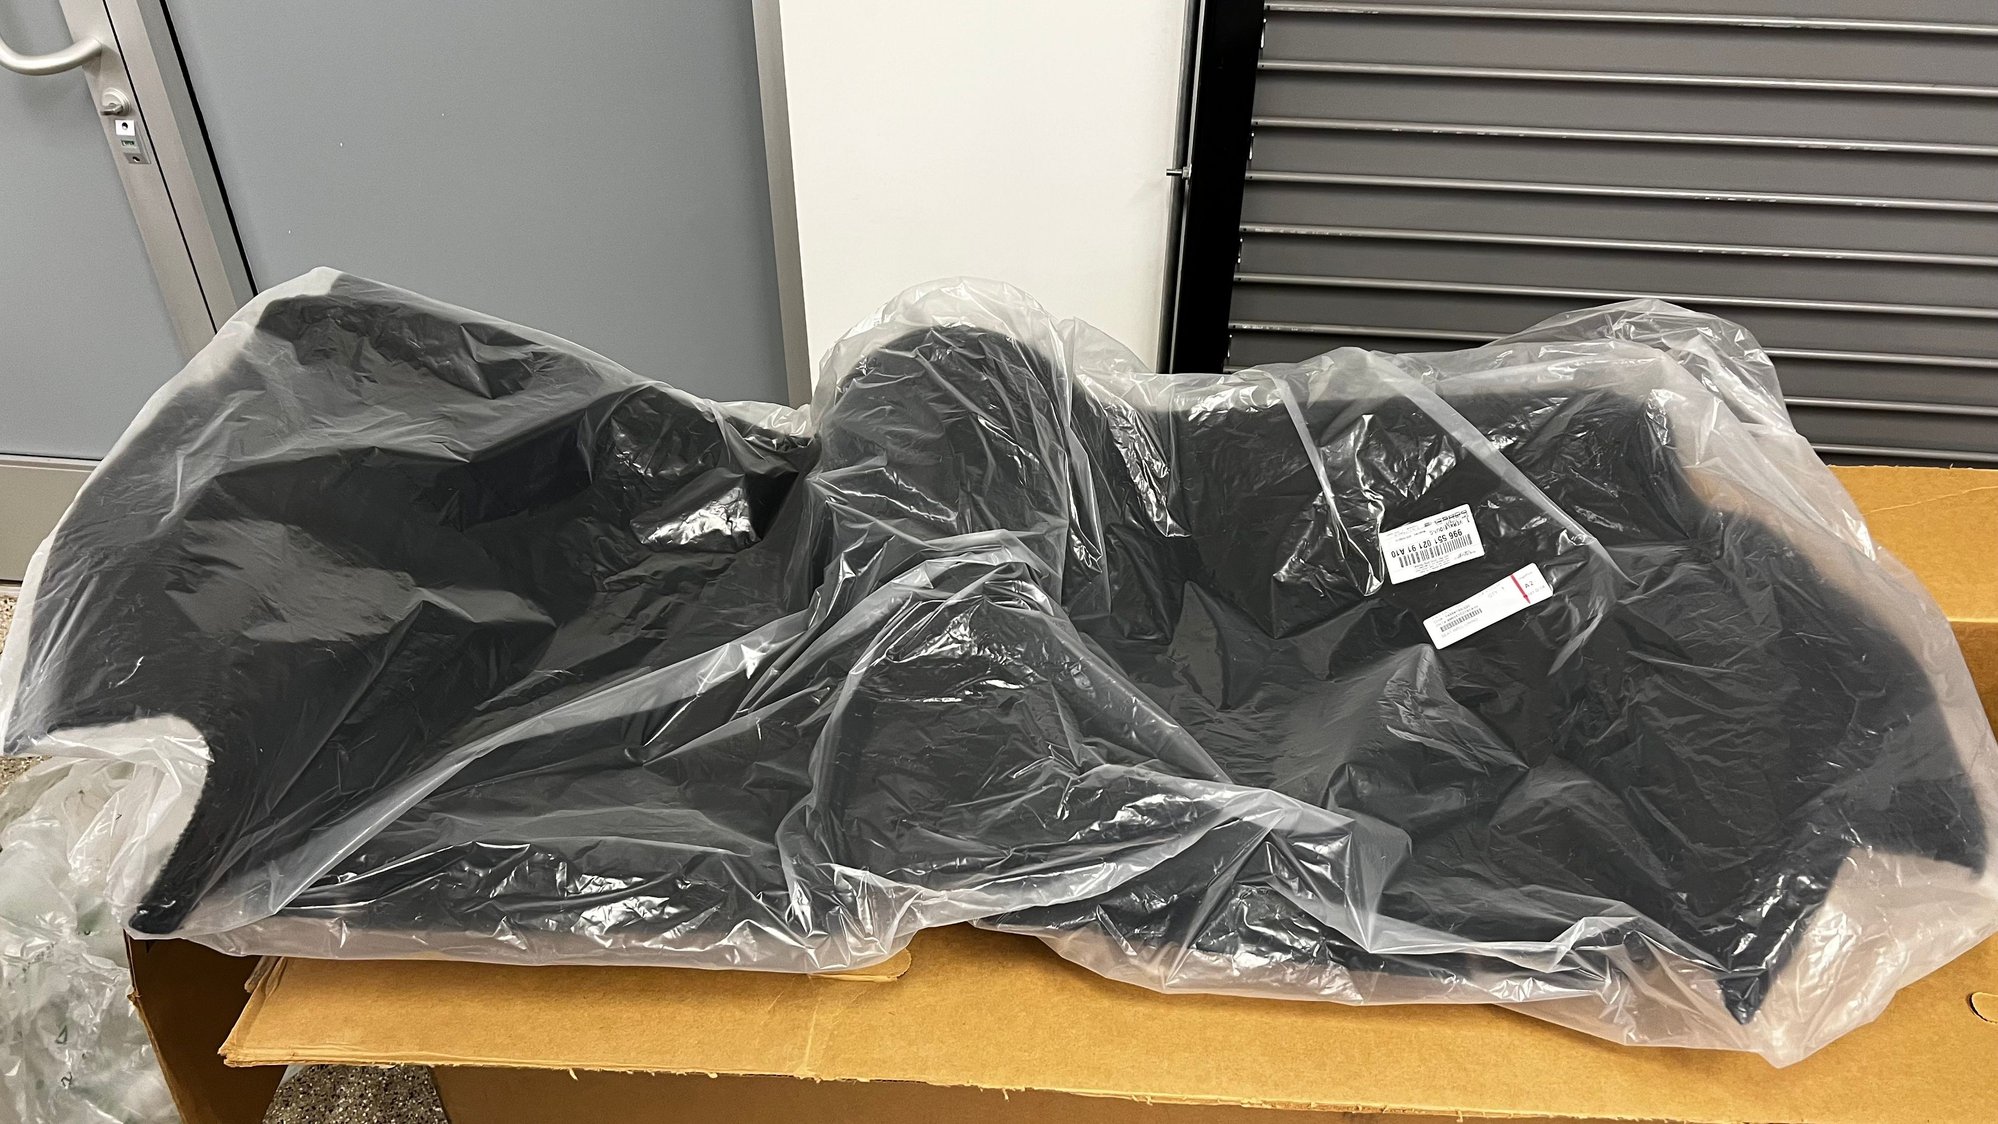
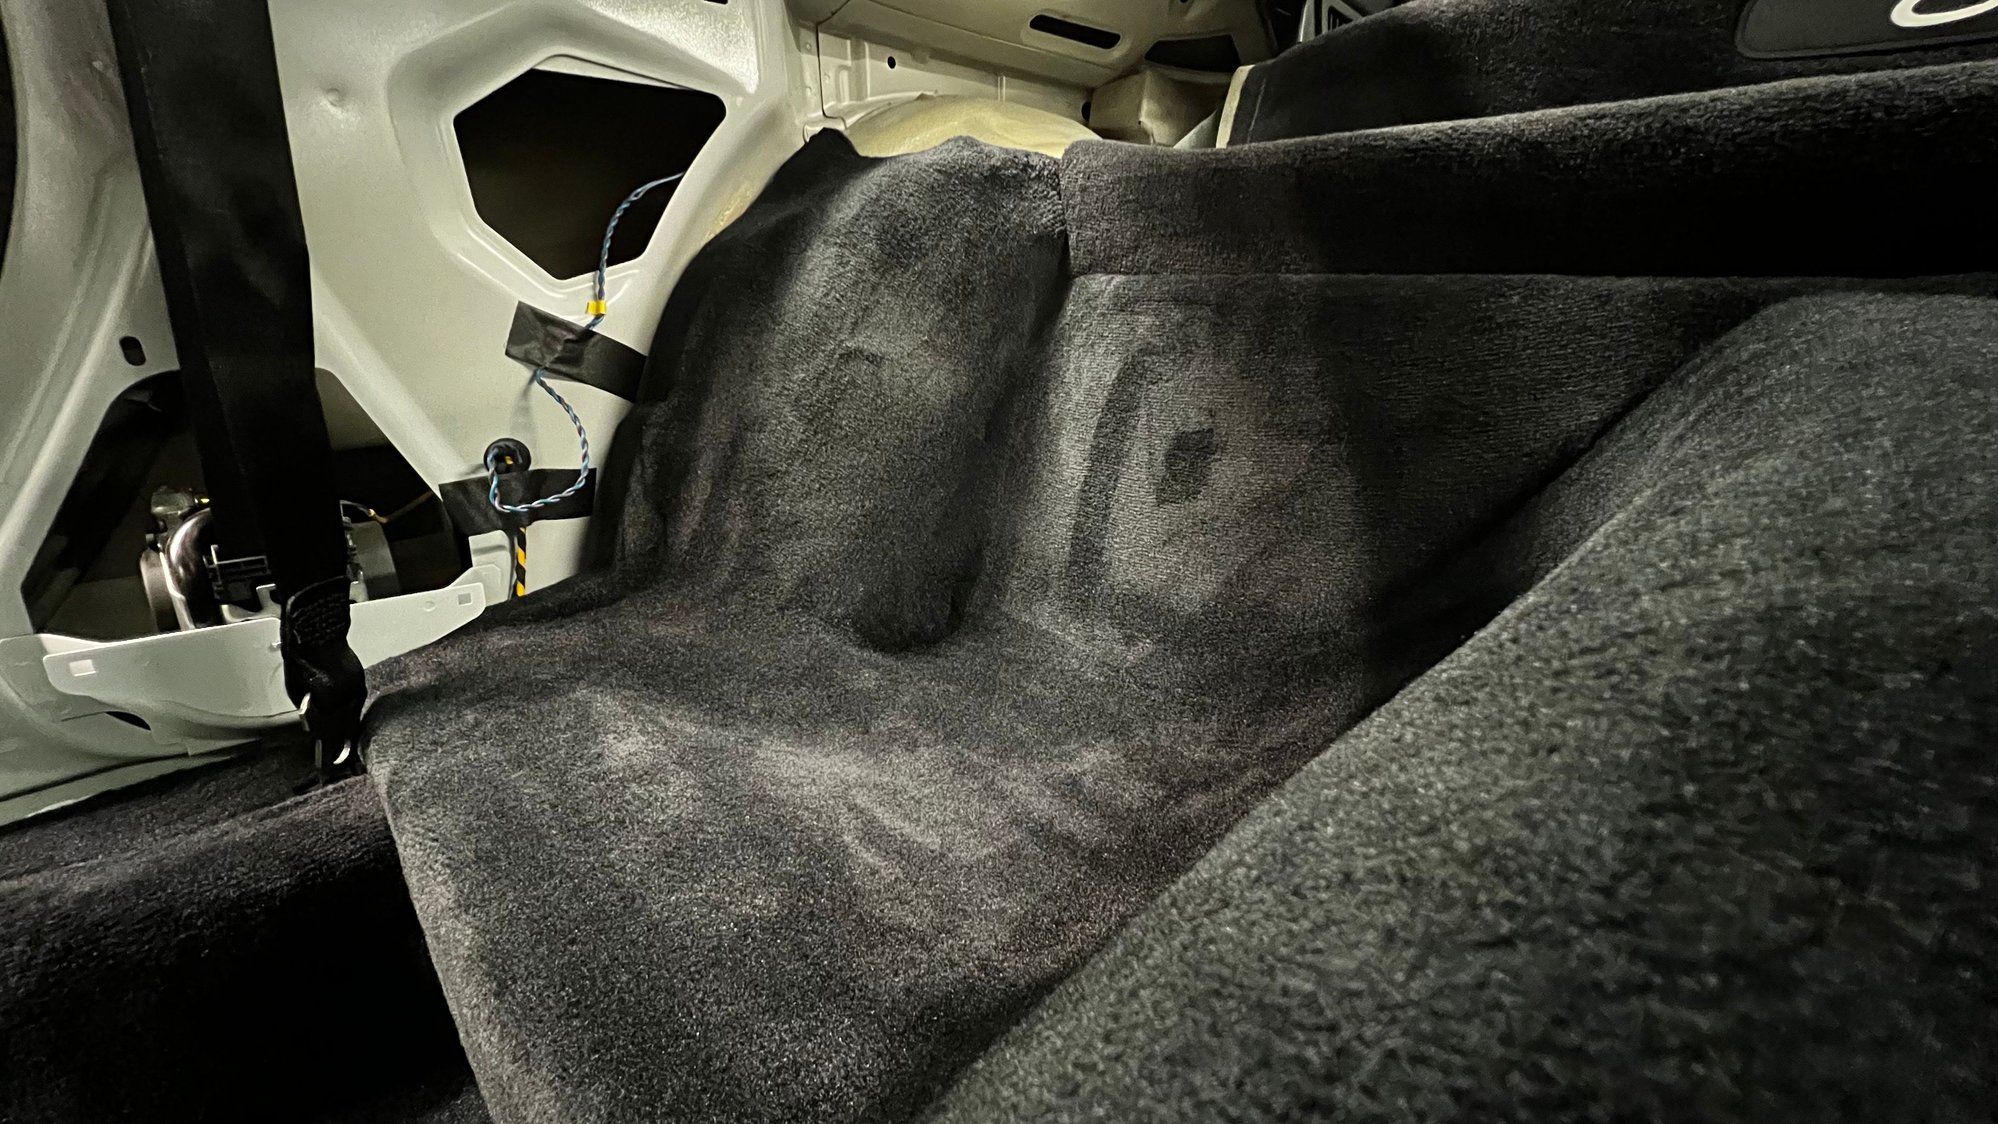
I knew the rear seat well carpet had a hole put in each side for the tequipment roll bar to bolt into, so I had already proactively ordered a new one (which of course had to ship from Germany).
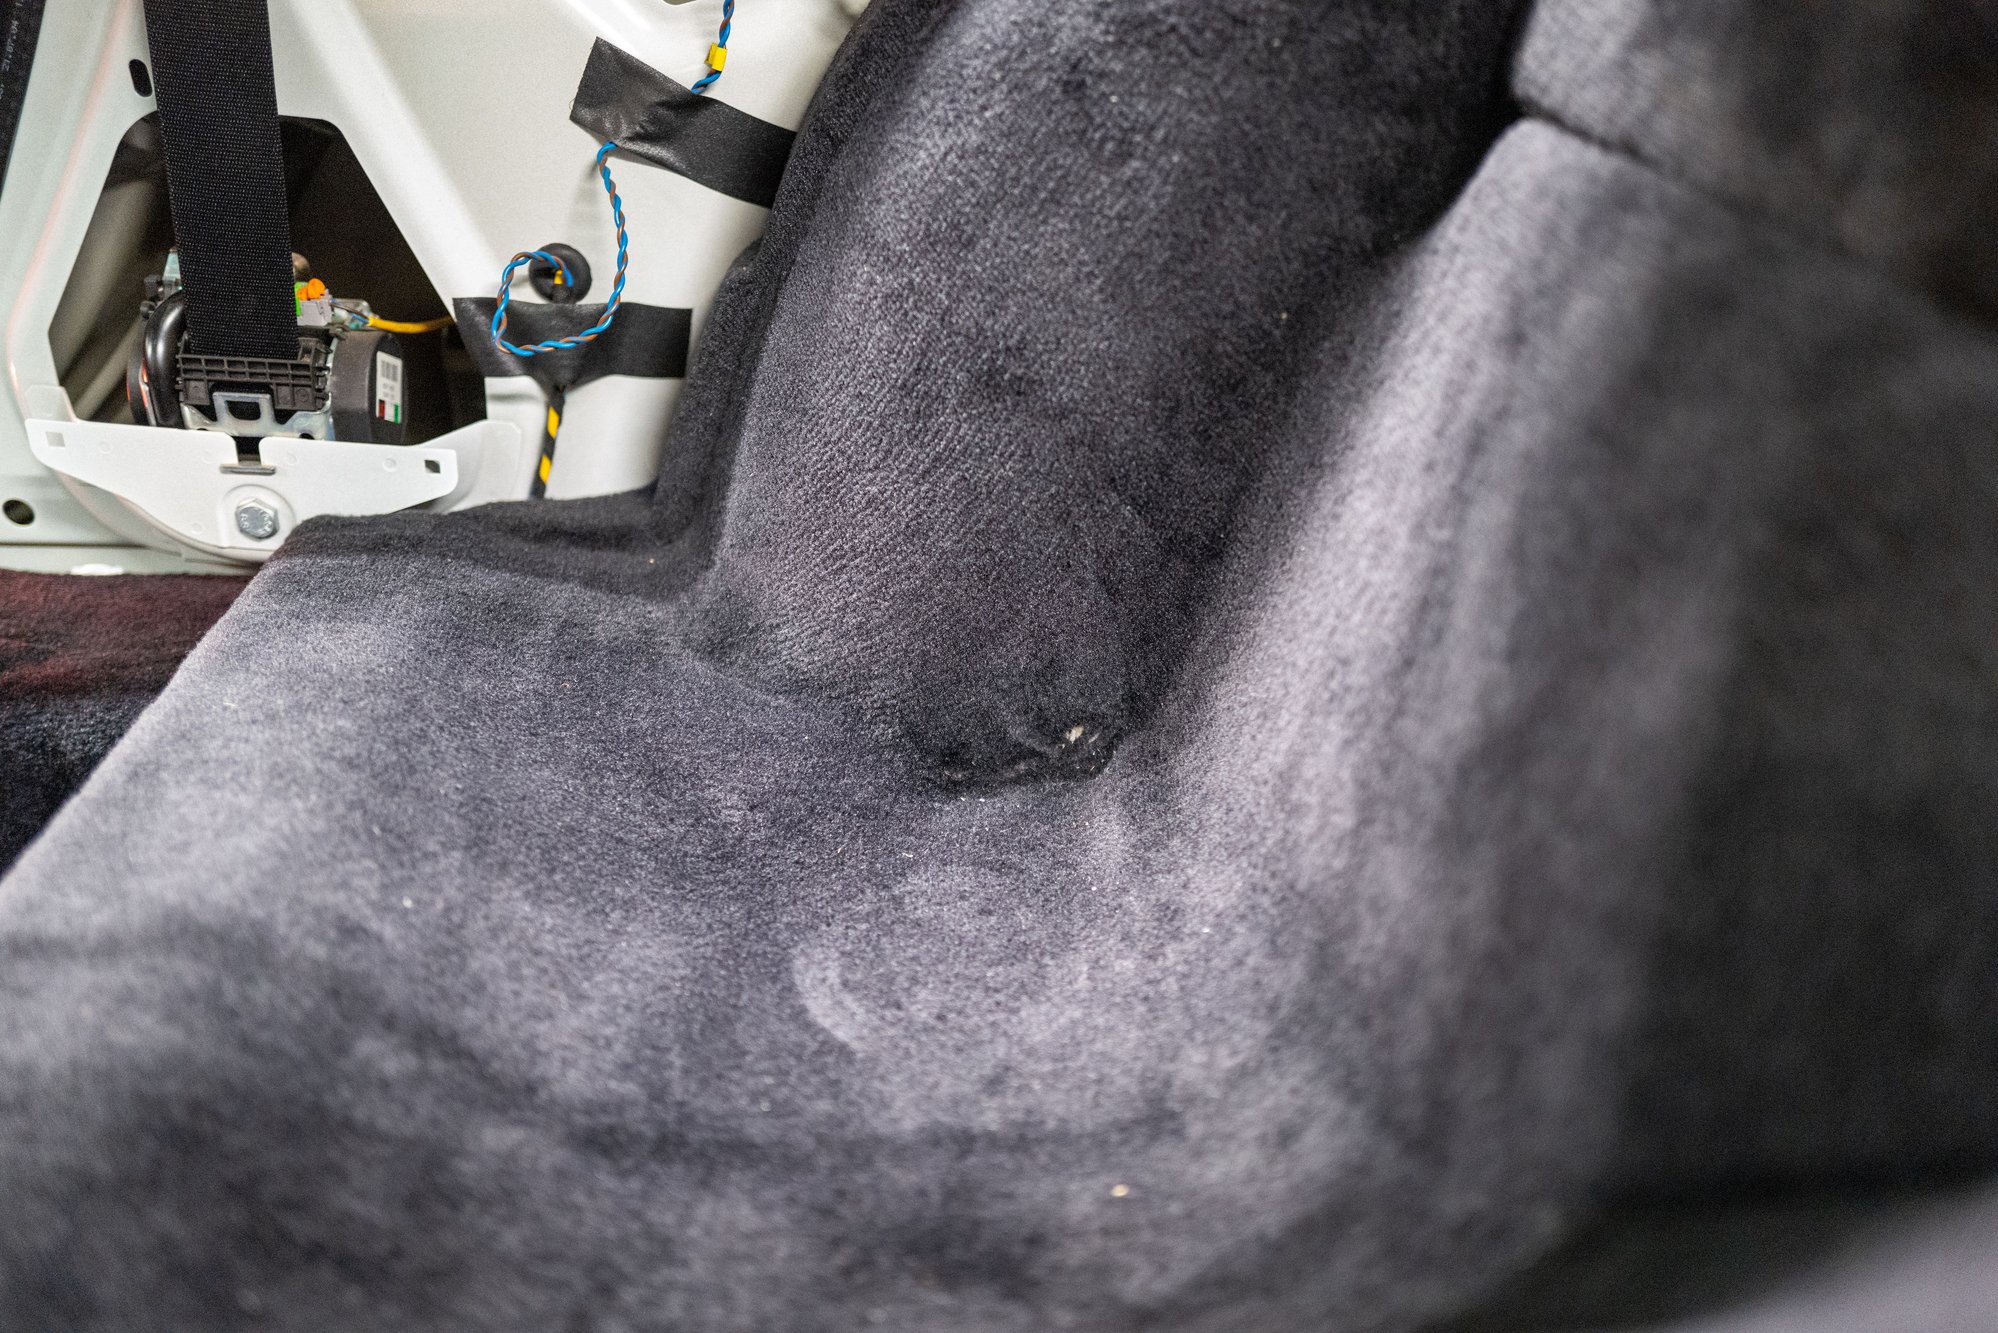
From the few install videos I watched, I knew that the lower sill bracket under the carpet would have been modified to get the lower leg of the roll bar to bolt in correctly. I had assumed when the roll bar was installed that the carpet was pulled back and the bracket neatly trimmed � nope. It seems the installer went with the �crush it� technique, which caused the sharp broken plastic to cut the floor carpet. Cool 😑. Had I caught that initially, I would have ordered a new floor carpet.
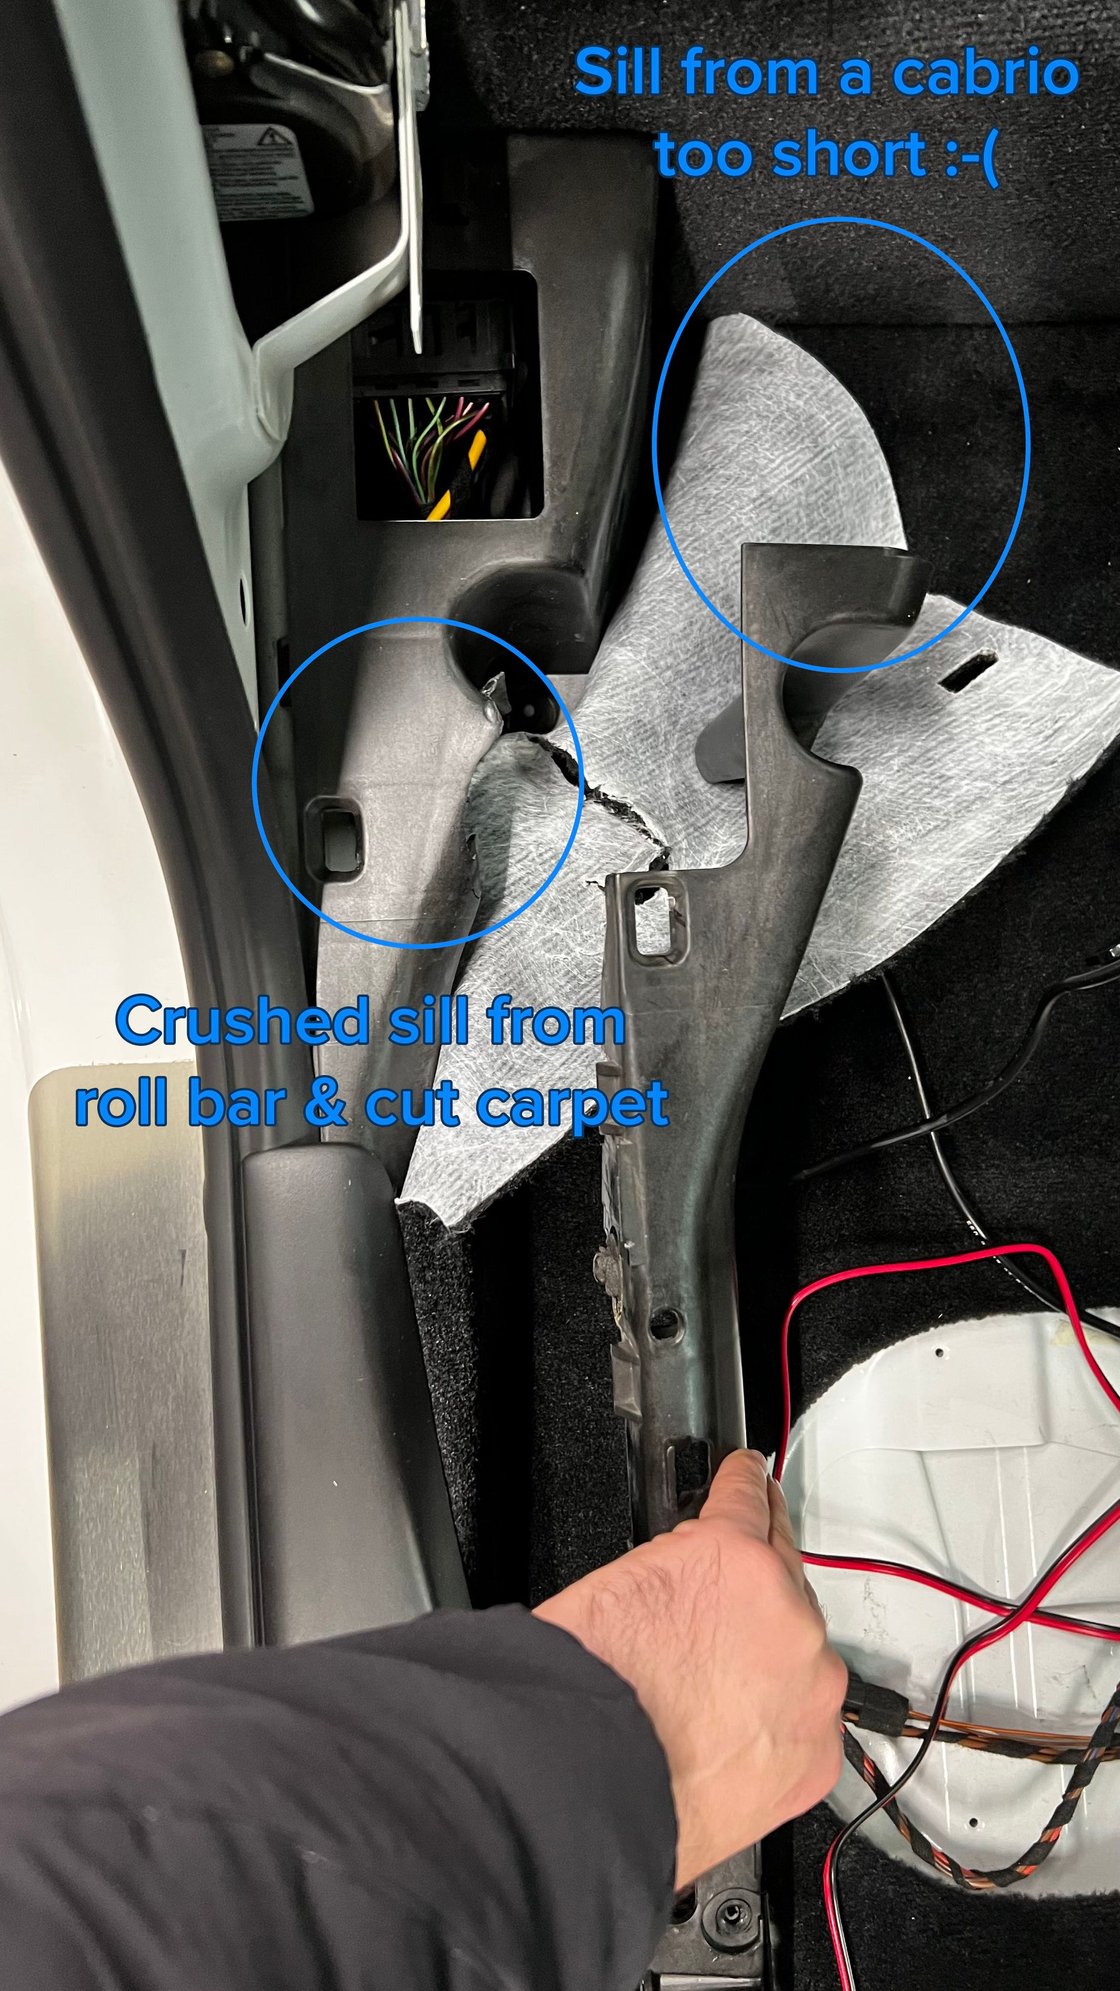
While I was at the salvage yard picking up mirror caps, I also had them pull unmodified sill brackets ($50 for the pair vs. $420 new!) I failed to catch at the time that the brackets for a Cabriolet are shorter, which forced another trip back to the salvage yard to swap them for the right brackets. Hopefully, that will help someone else in the future.
�Itching to get some of these projects done between Christmas and New Year, I had the Parts Dept. split my order into 2 and ship what they had to me, which included the rear seat well carpet (thankfully!). I asked about availability for the floor carpet and was told none are available in the US, and wouldn�t be available from Germany until the end of February at the earliest. Cool 😑. I guess that will have to be a project for later this year.
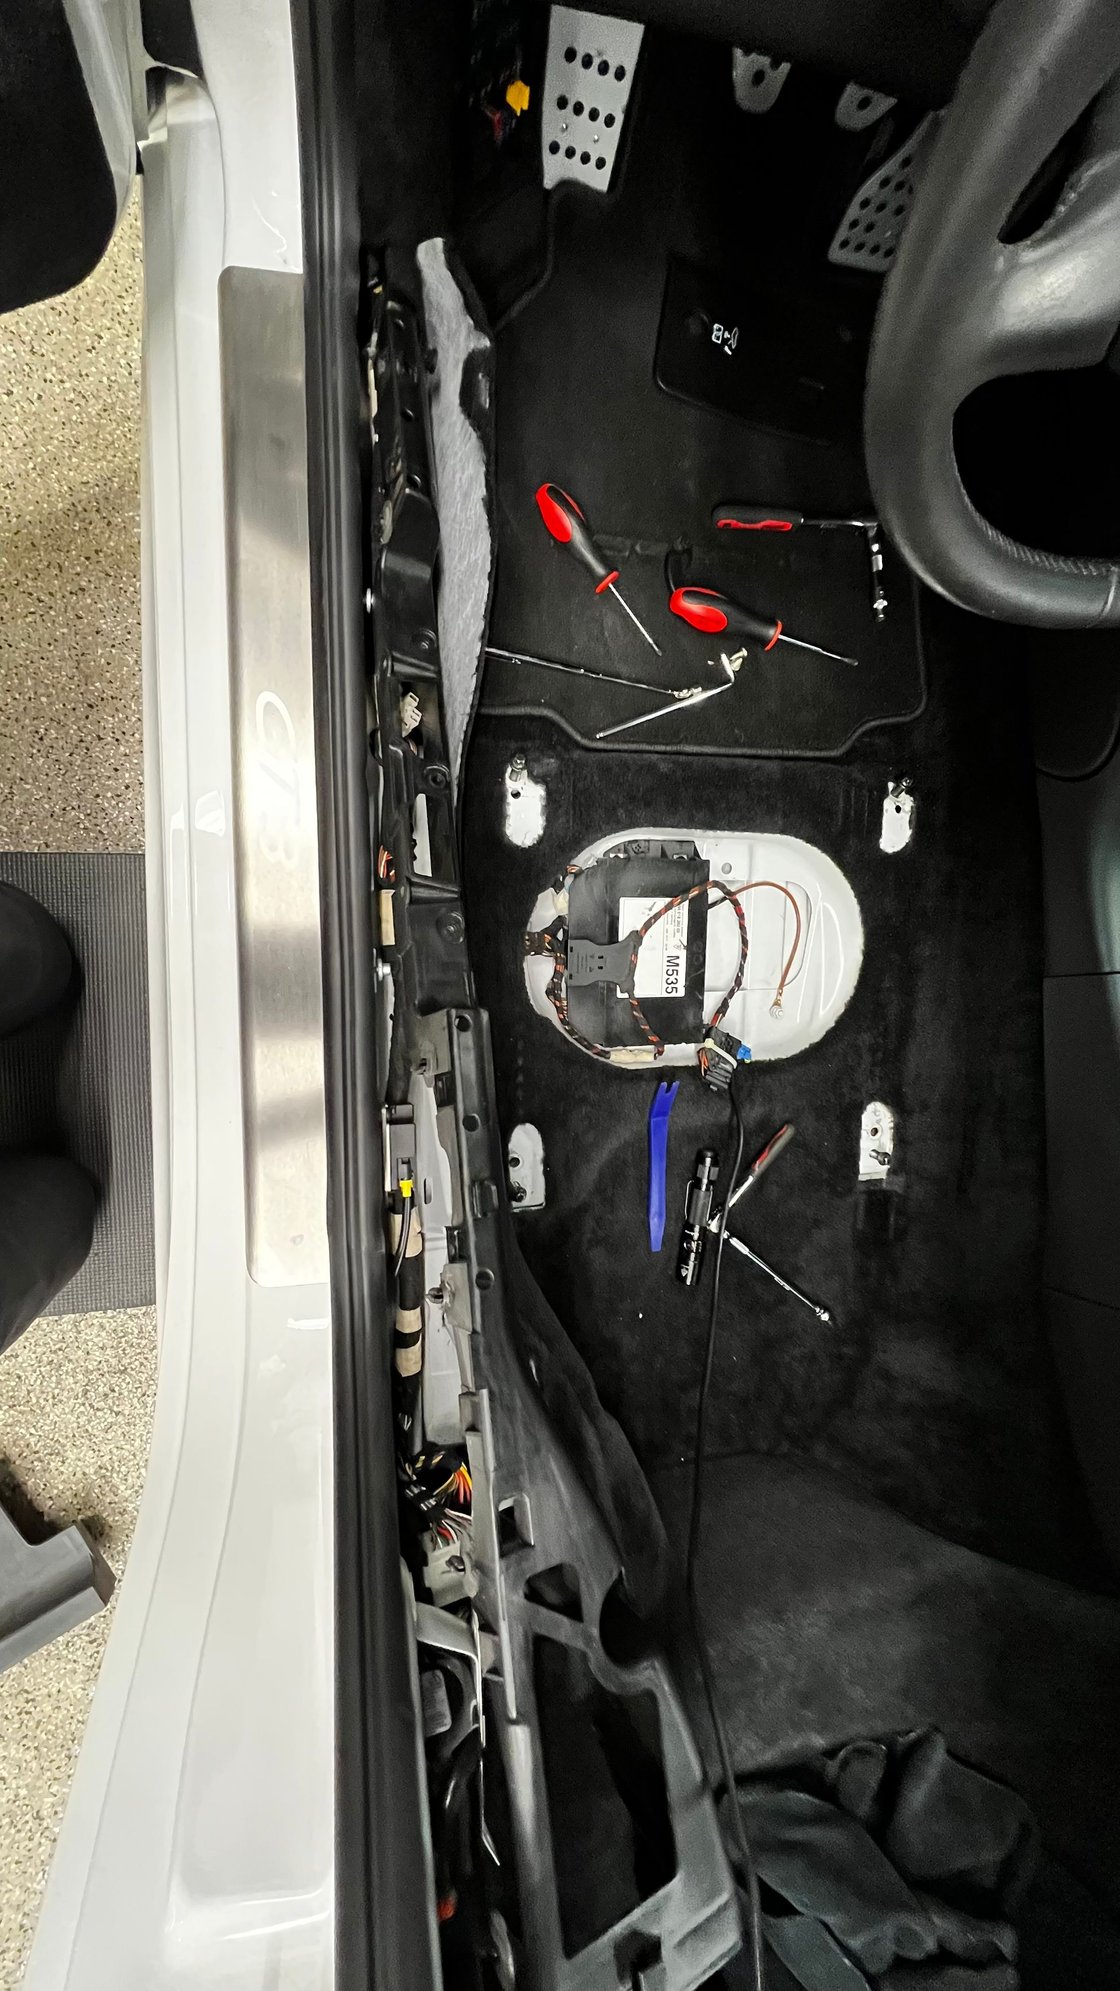
I got the brackets installed and the carpet back in place, but I know it�s going to bother me that the carpet is cut behind the seat.
Part order 1 (of 2) was delivered yesterday. I removed the center console, so I could remove the seat well carpet.
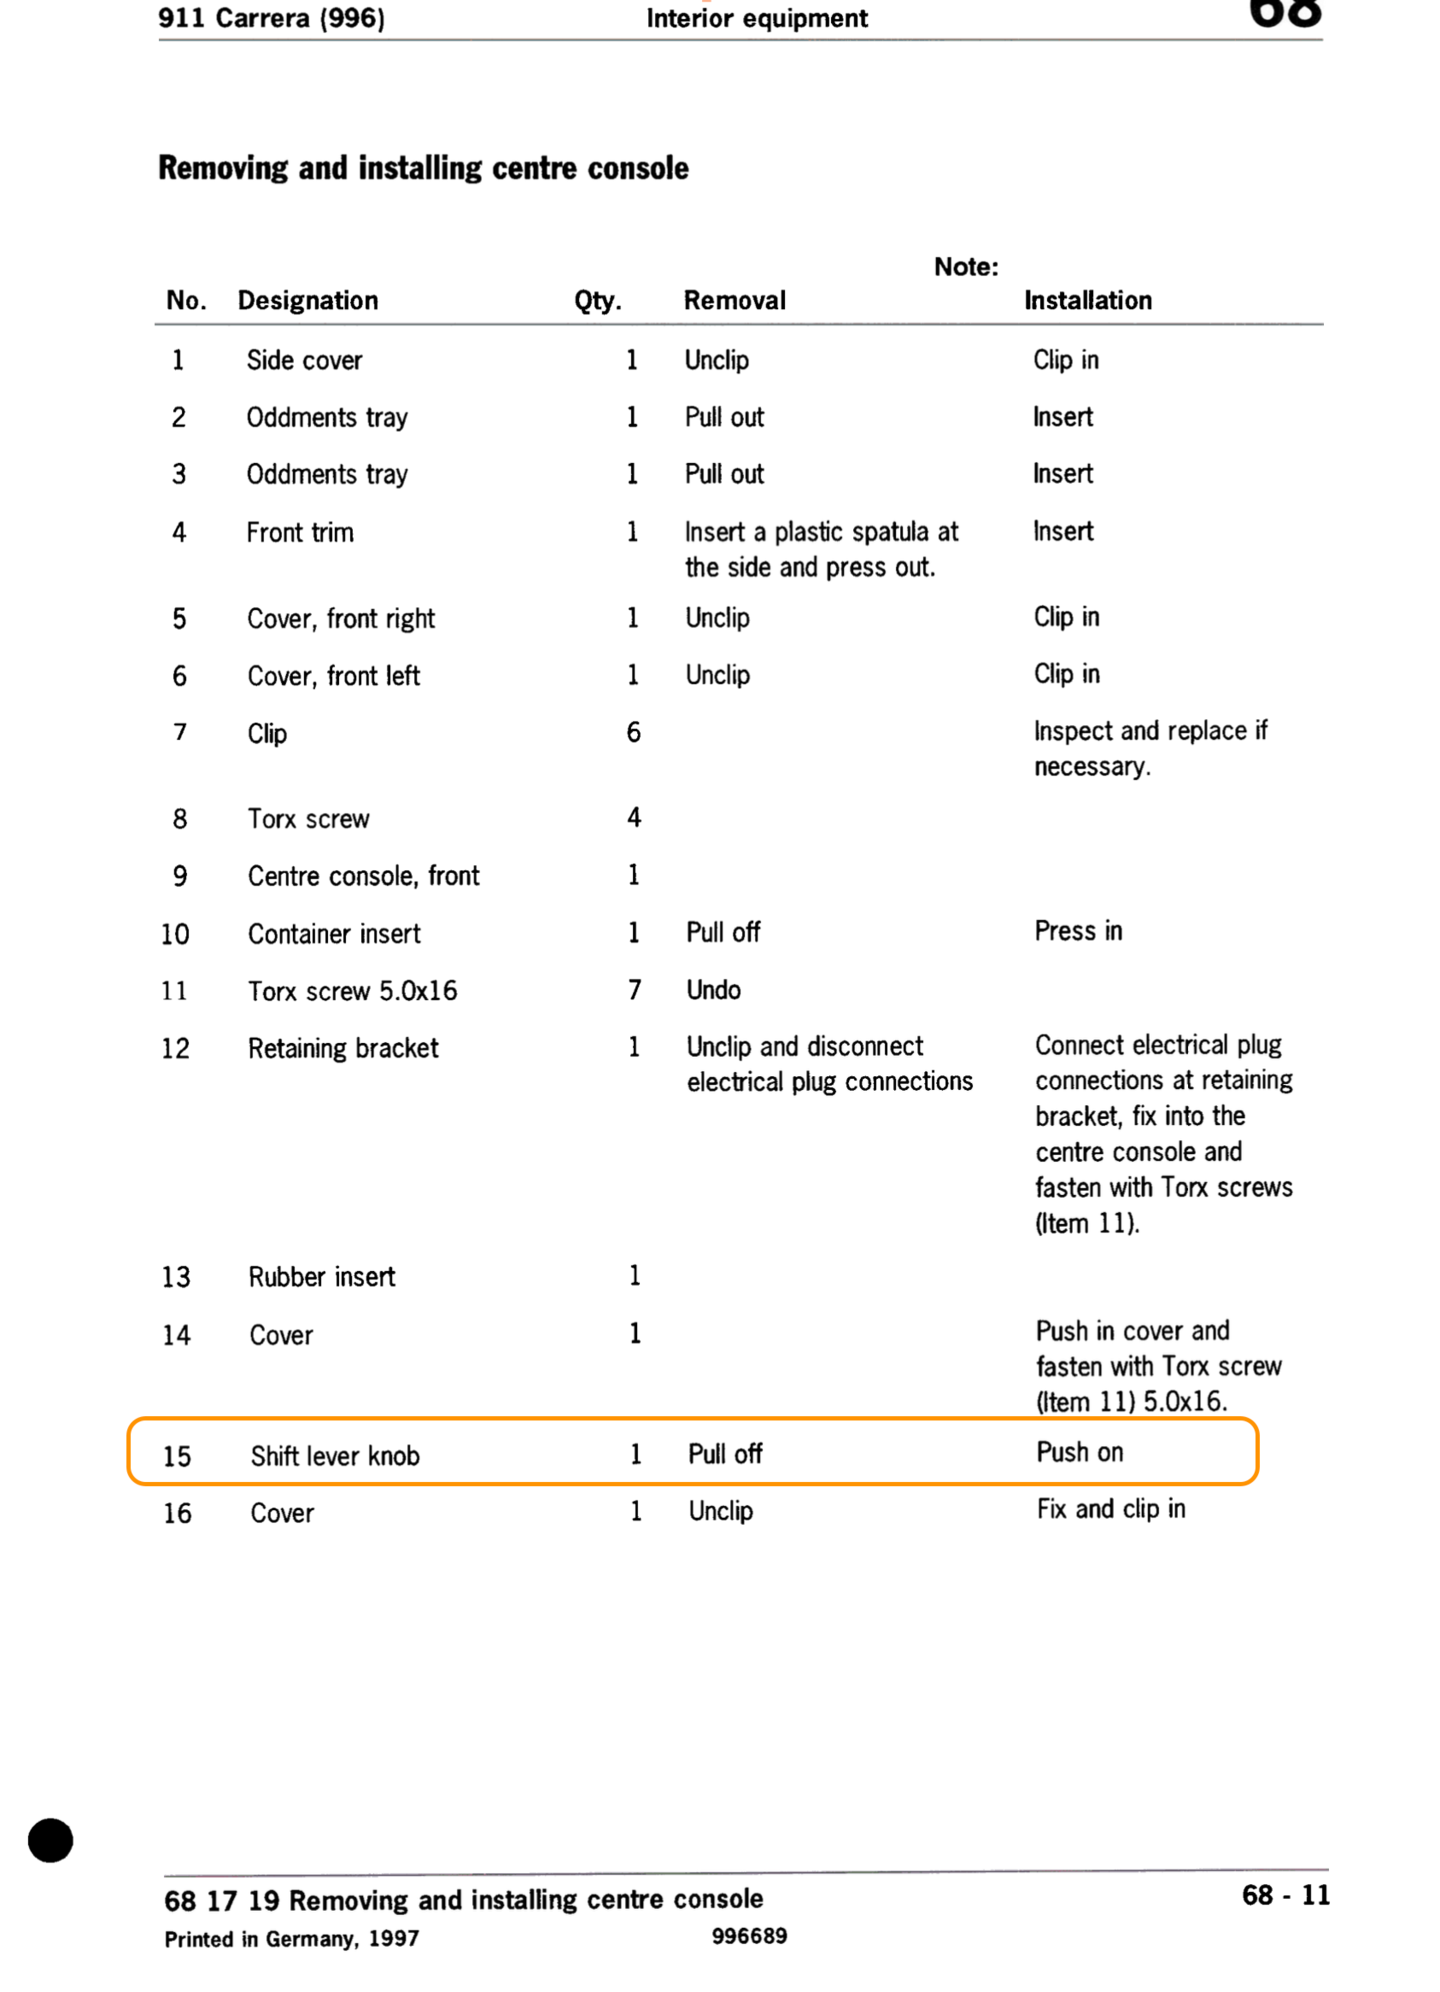
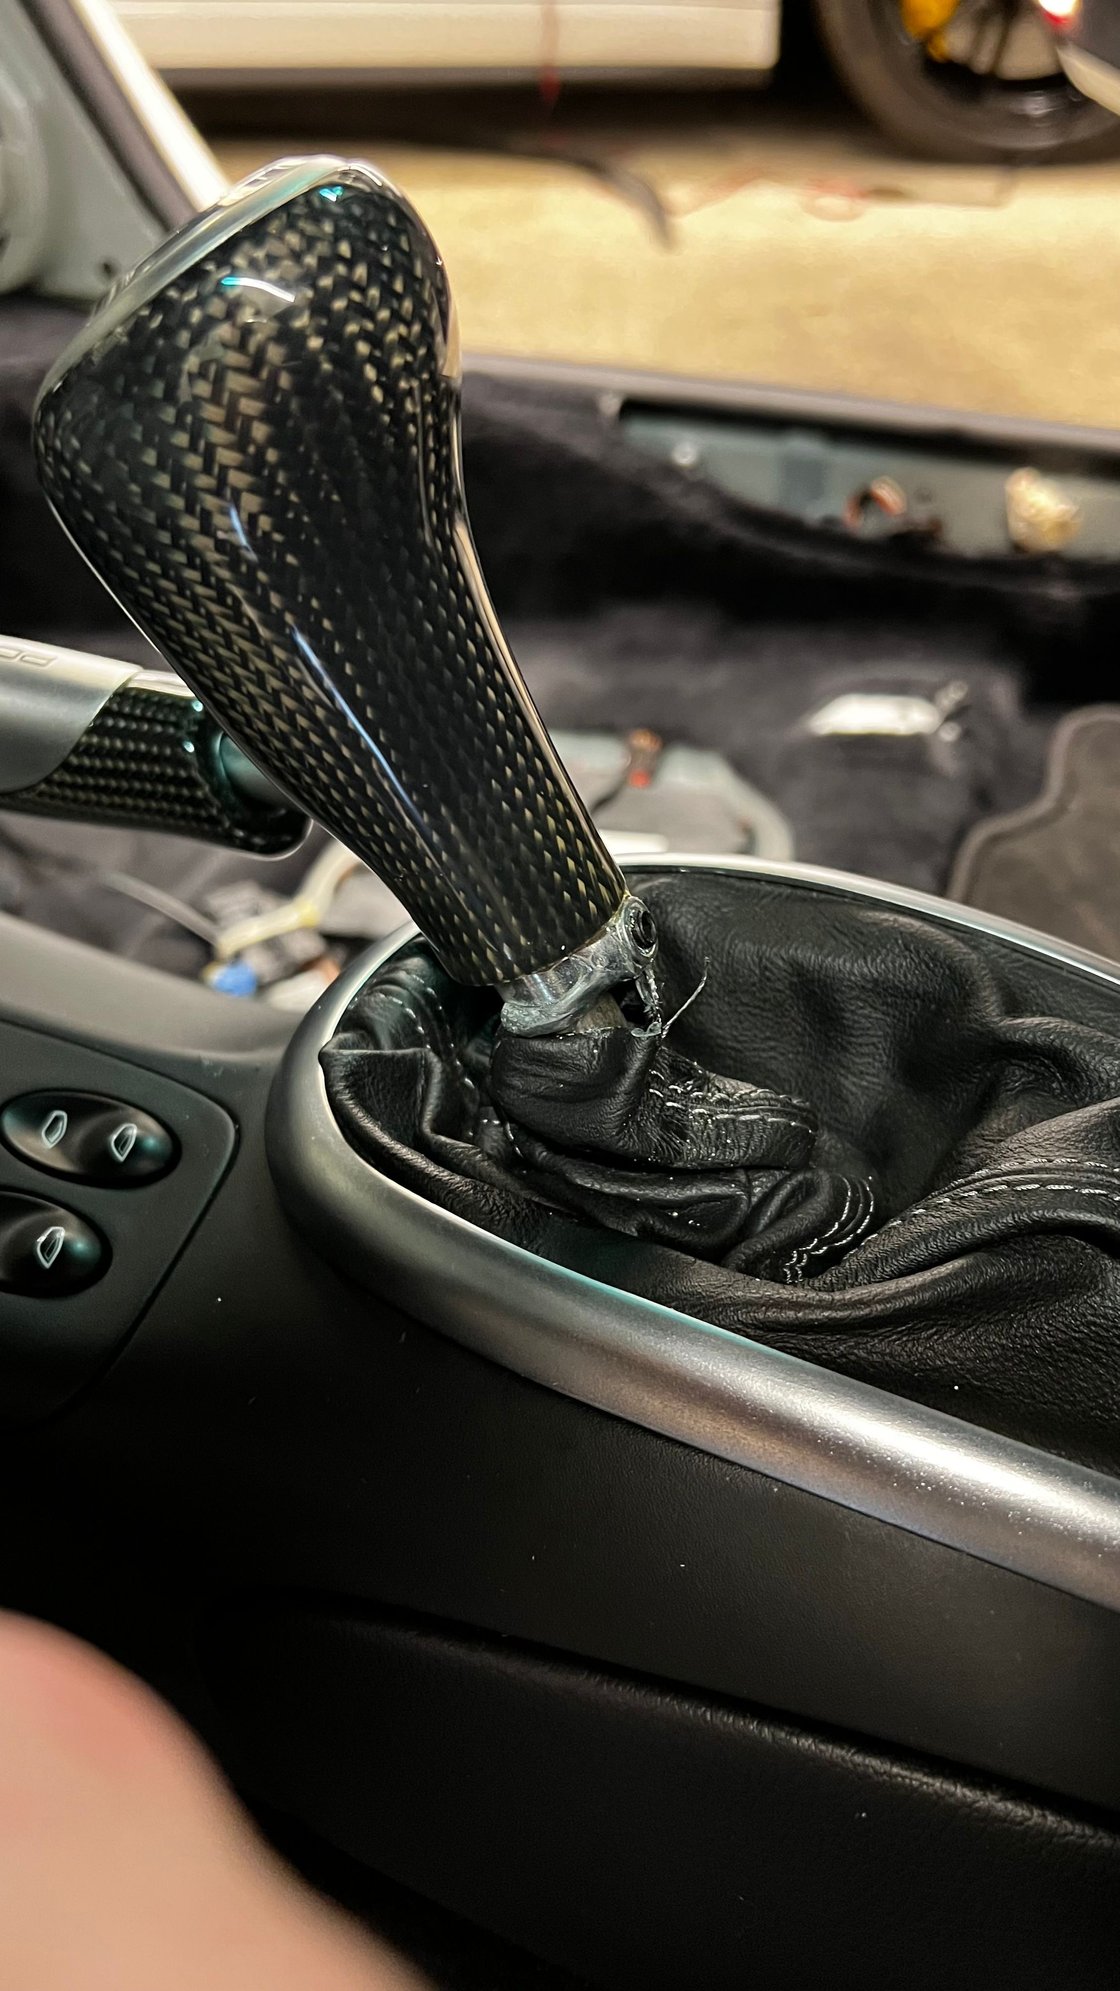
Curiously, the workshop manual says the shift **** should pull off. I tried. It just wouldn�t pull straight off. I learned long ago, that if something seems too hard on a Porsche that I must be doing it wrong. I lifted up the shifter boot trim to find a welded set screw at the bottom of the carbon fiber shift ****. A 3mm allen socket loosened the set screw, and the **** came straight off. I suspect the set screw is unique to the CF shift ****?
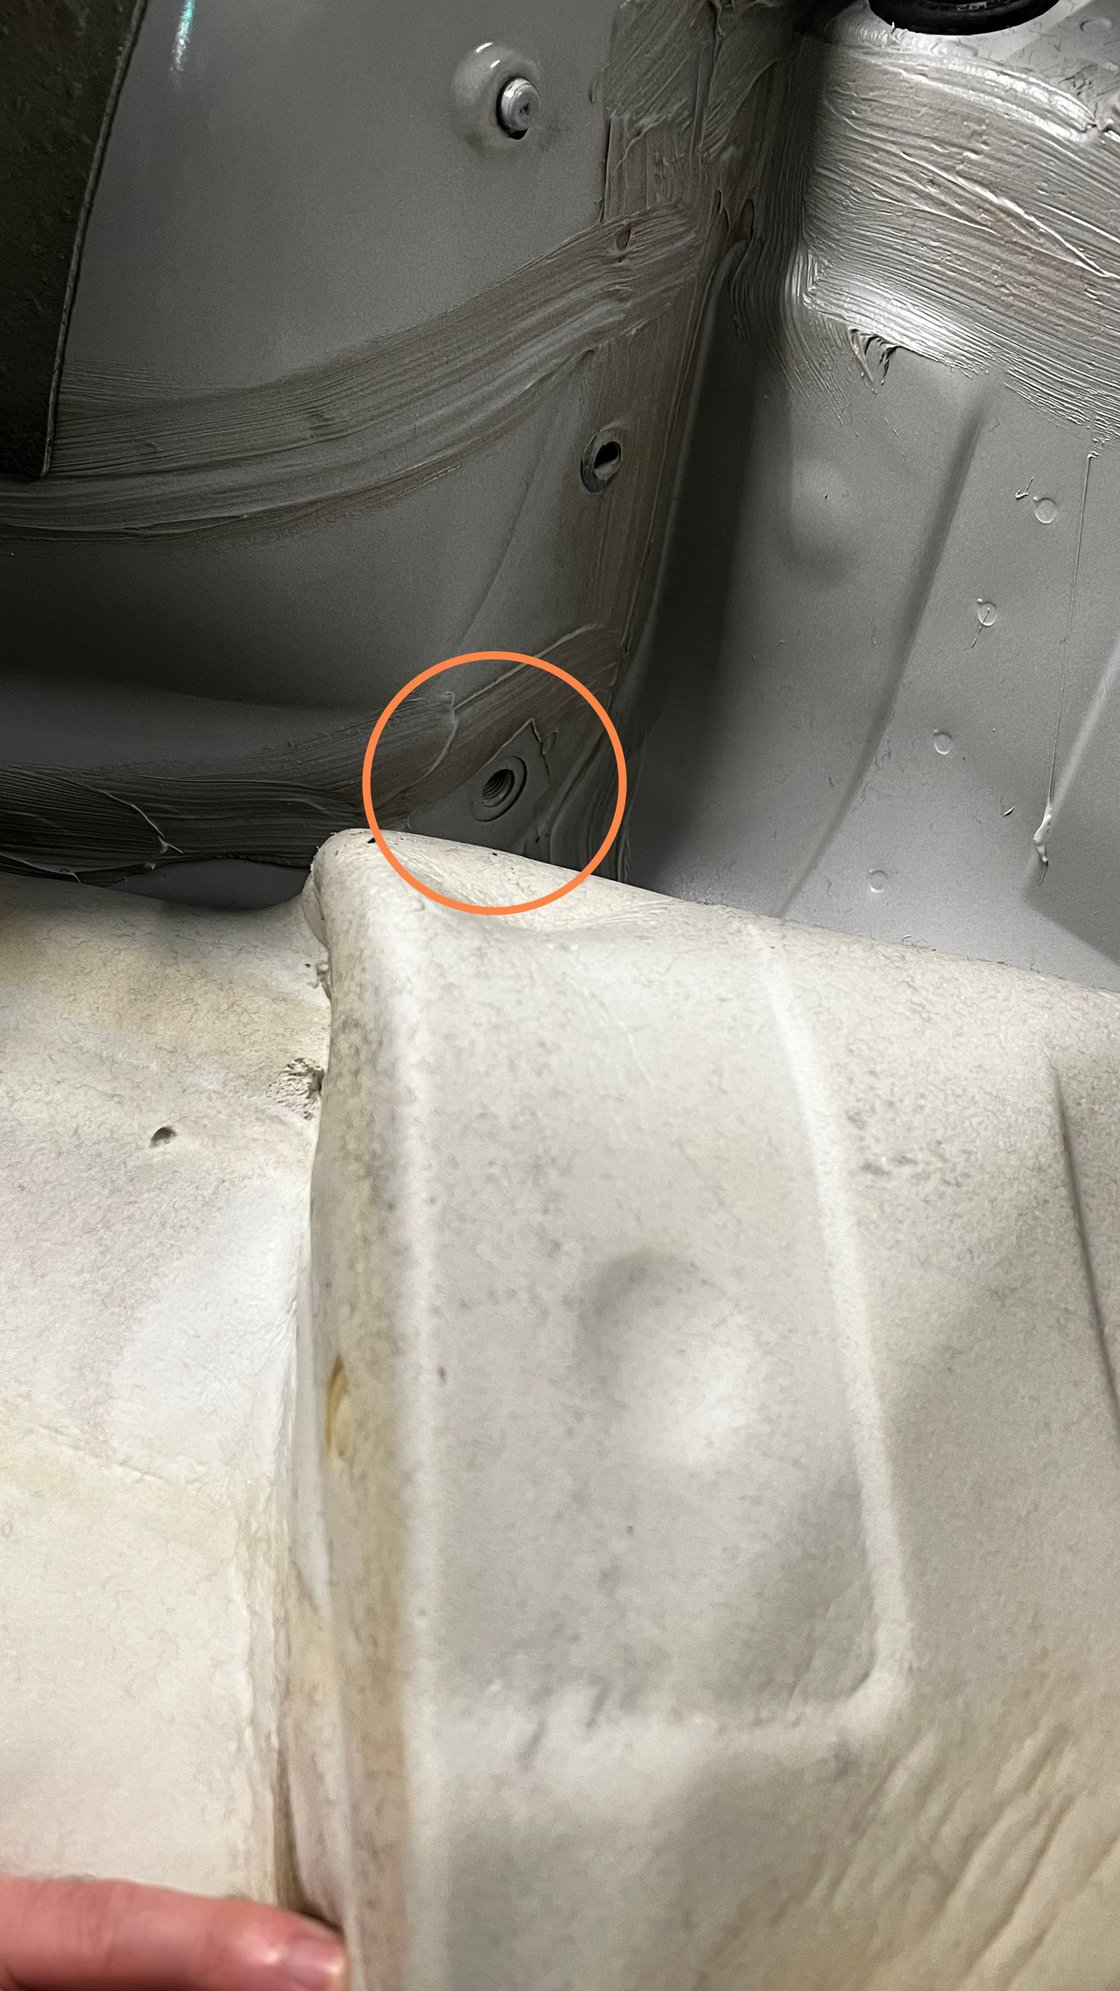
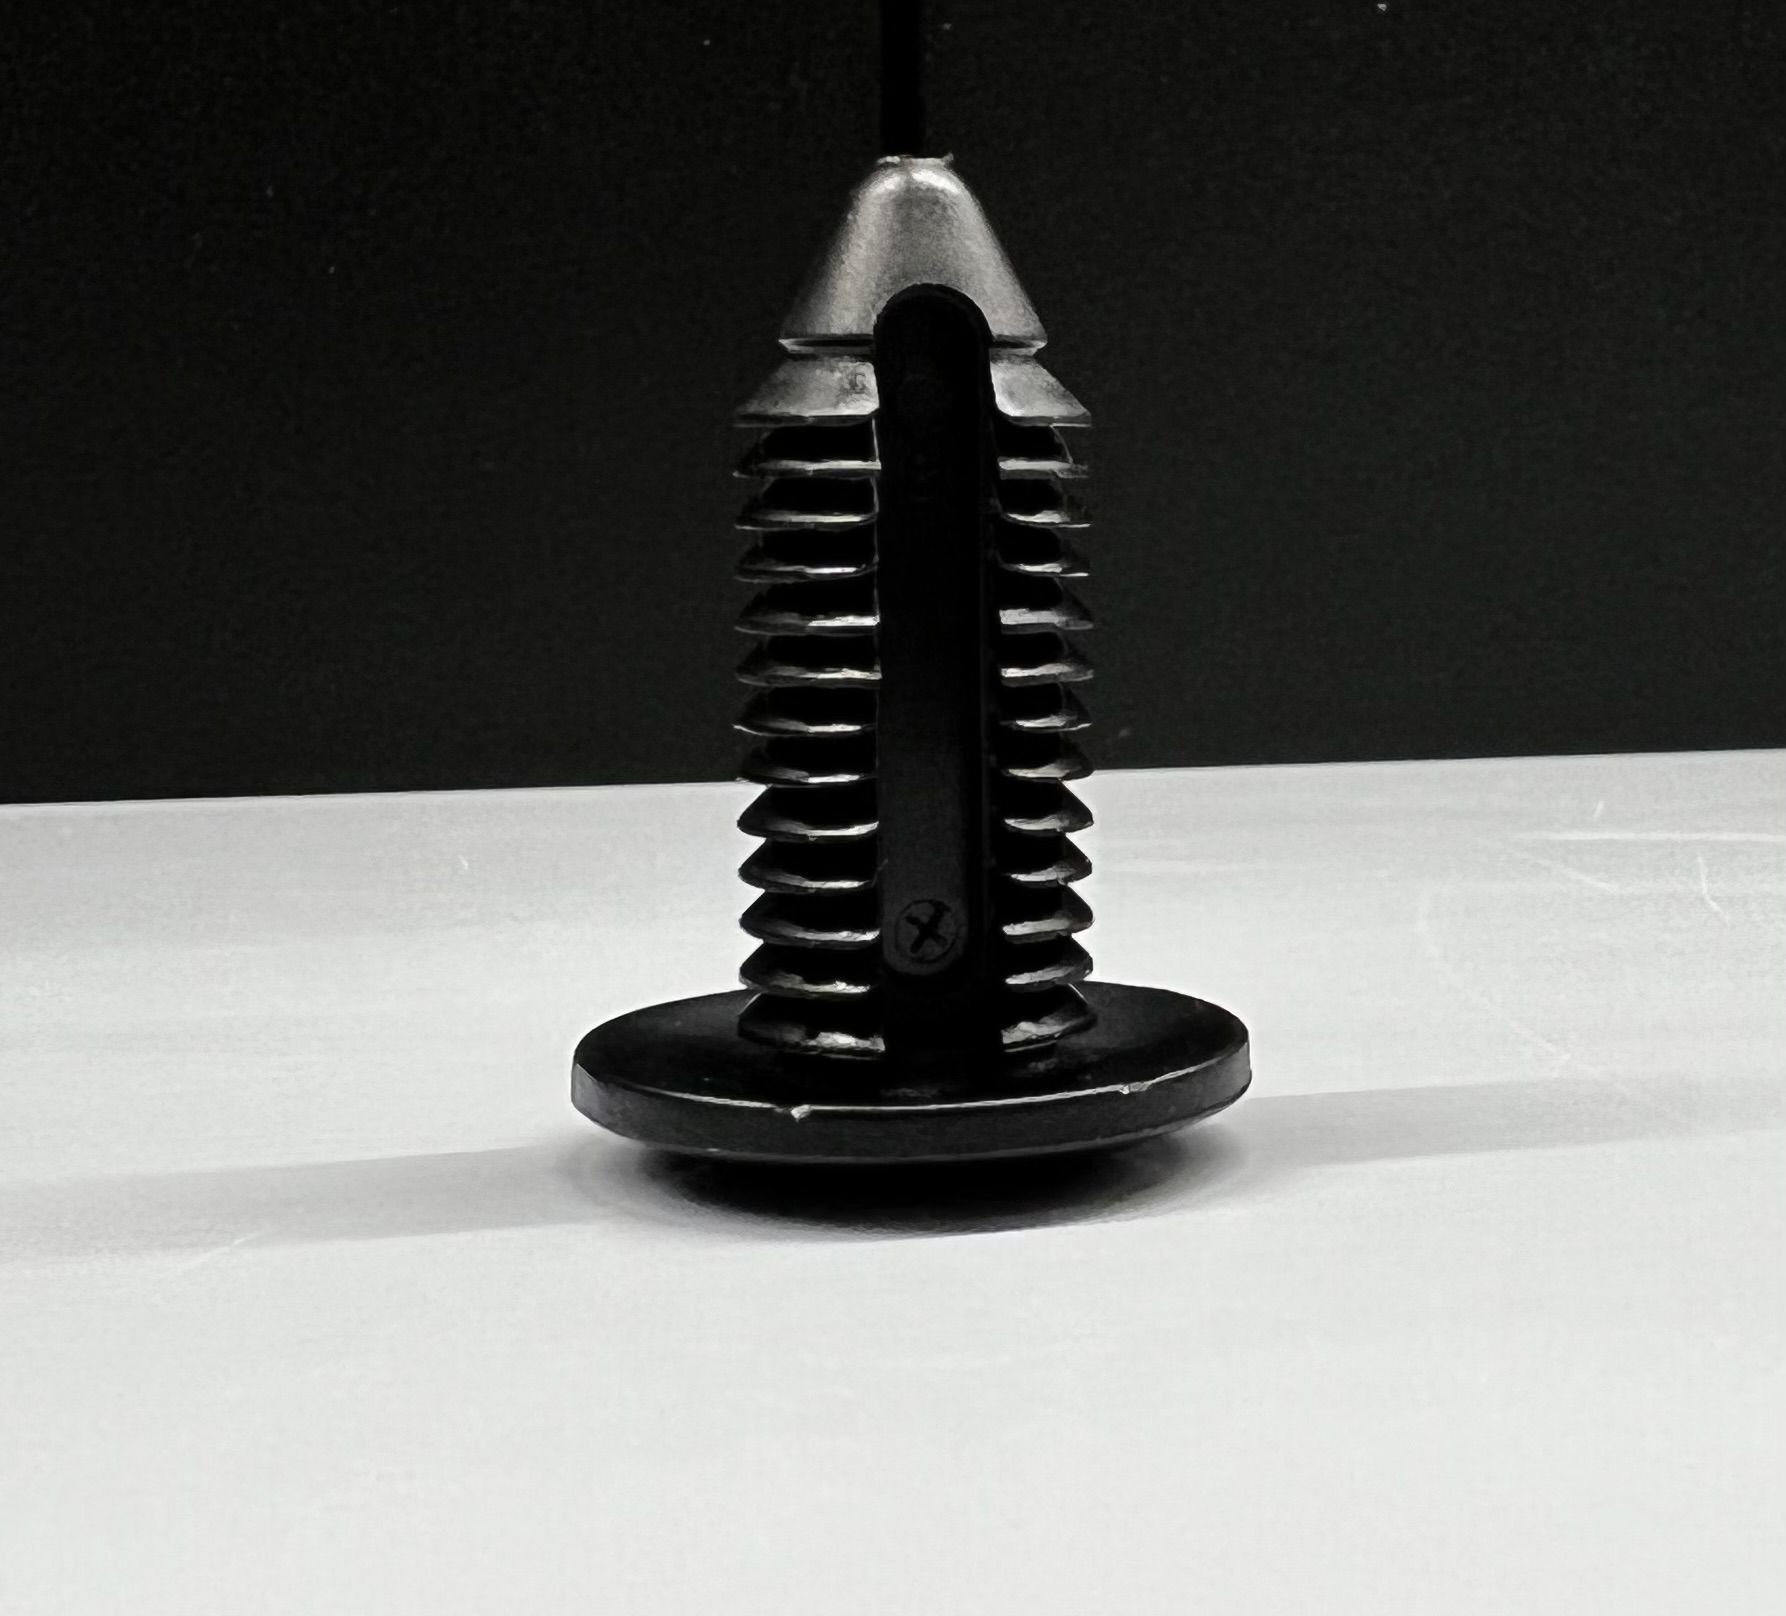
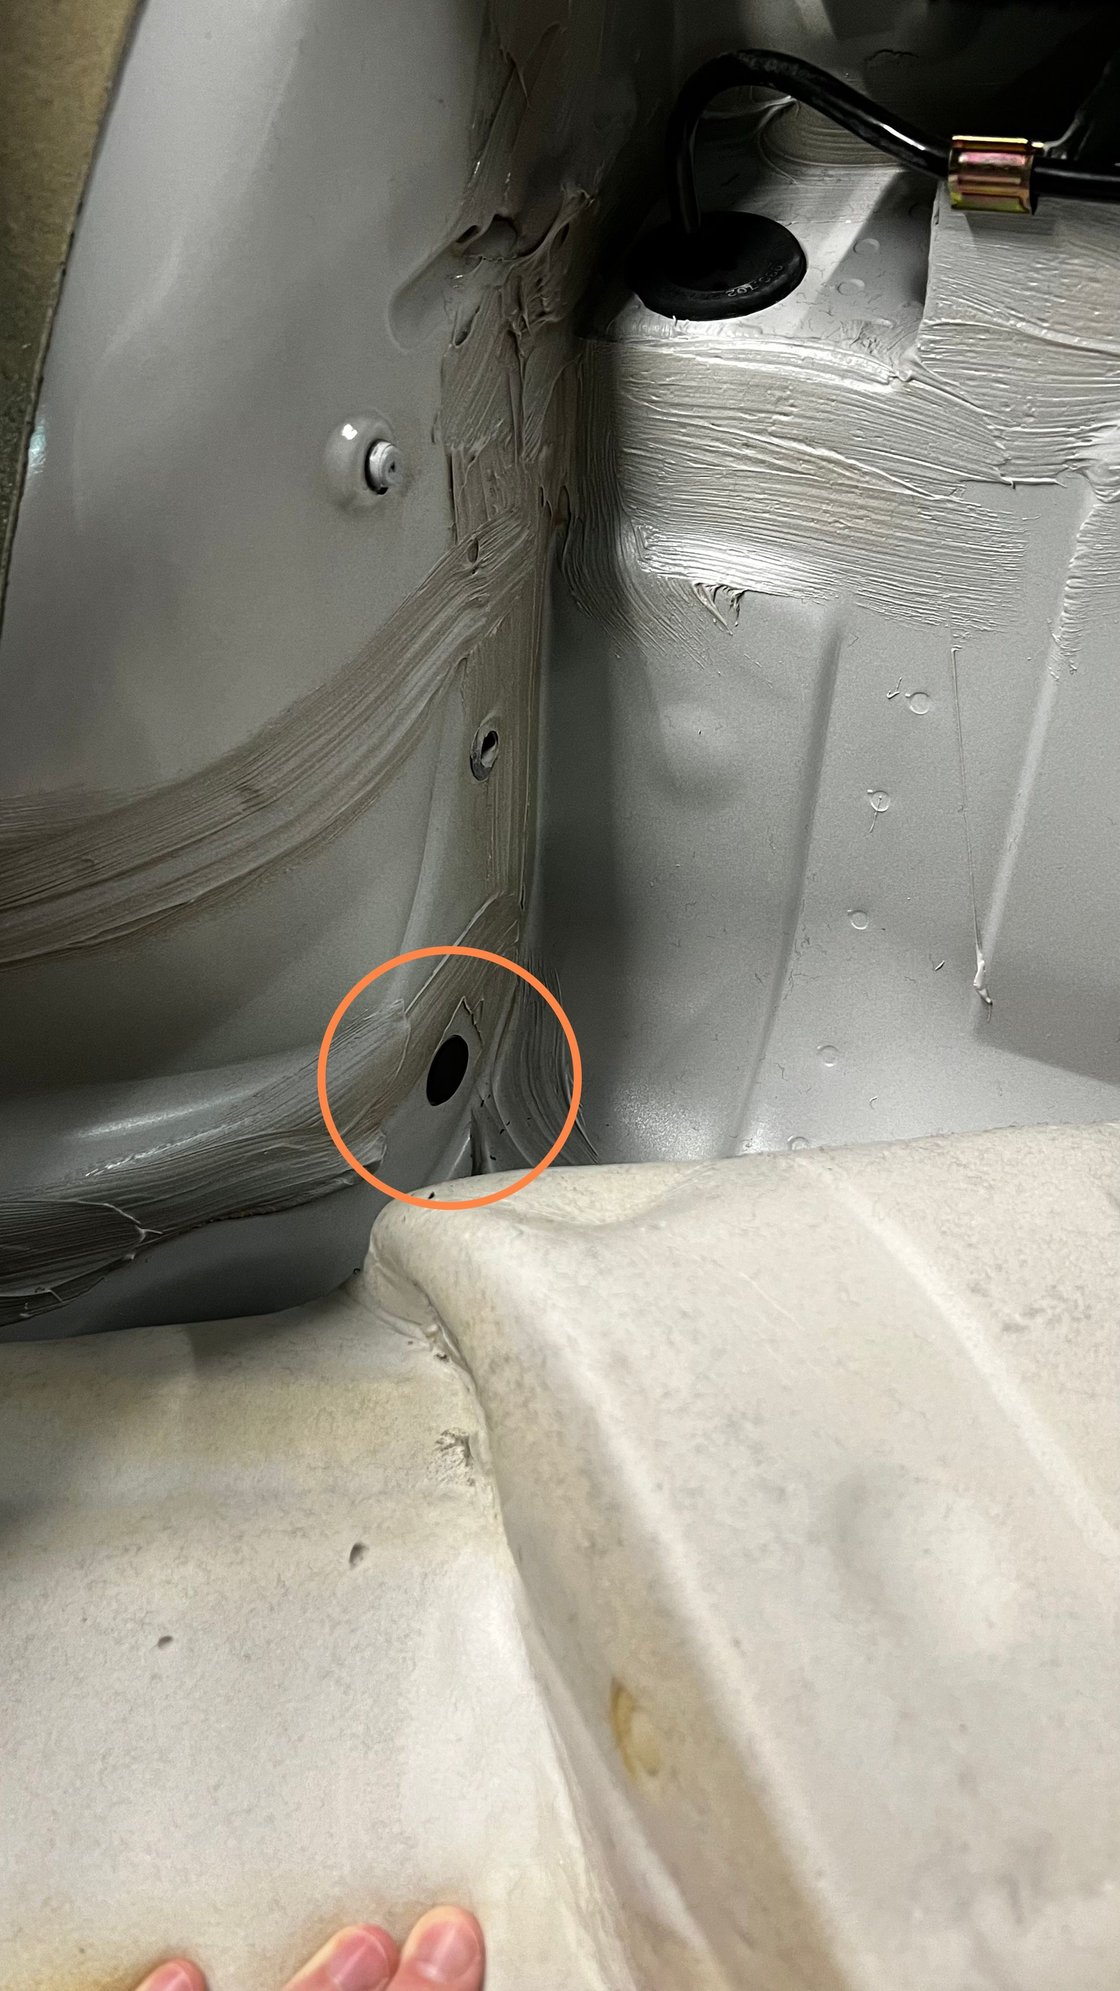
With the console out, I removed the seat well carpet. Though, after watching some roll bar install videos, I discovered that there are supposed to be plastic shanks in the holes under the carpet. @enthusiast , @gt3racerich & @Marv helped me demystify the shank and I ordered a bag of them from McMaster-Carr (https://www.mcmaster.com/90221A422/)
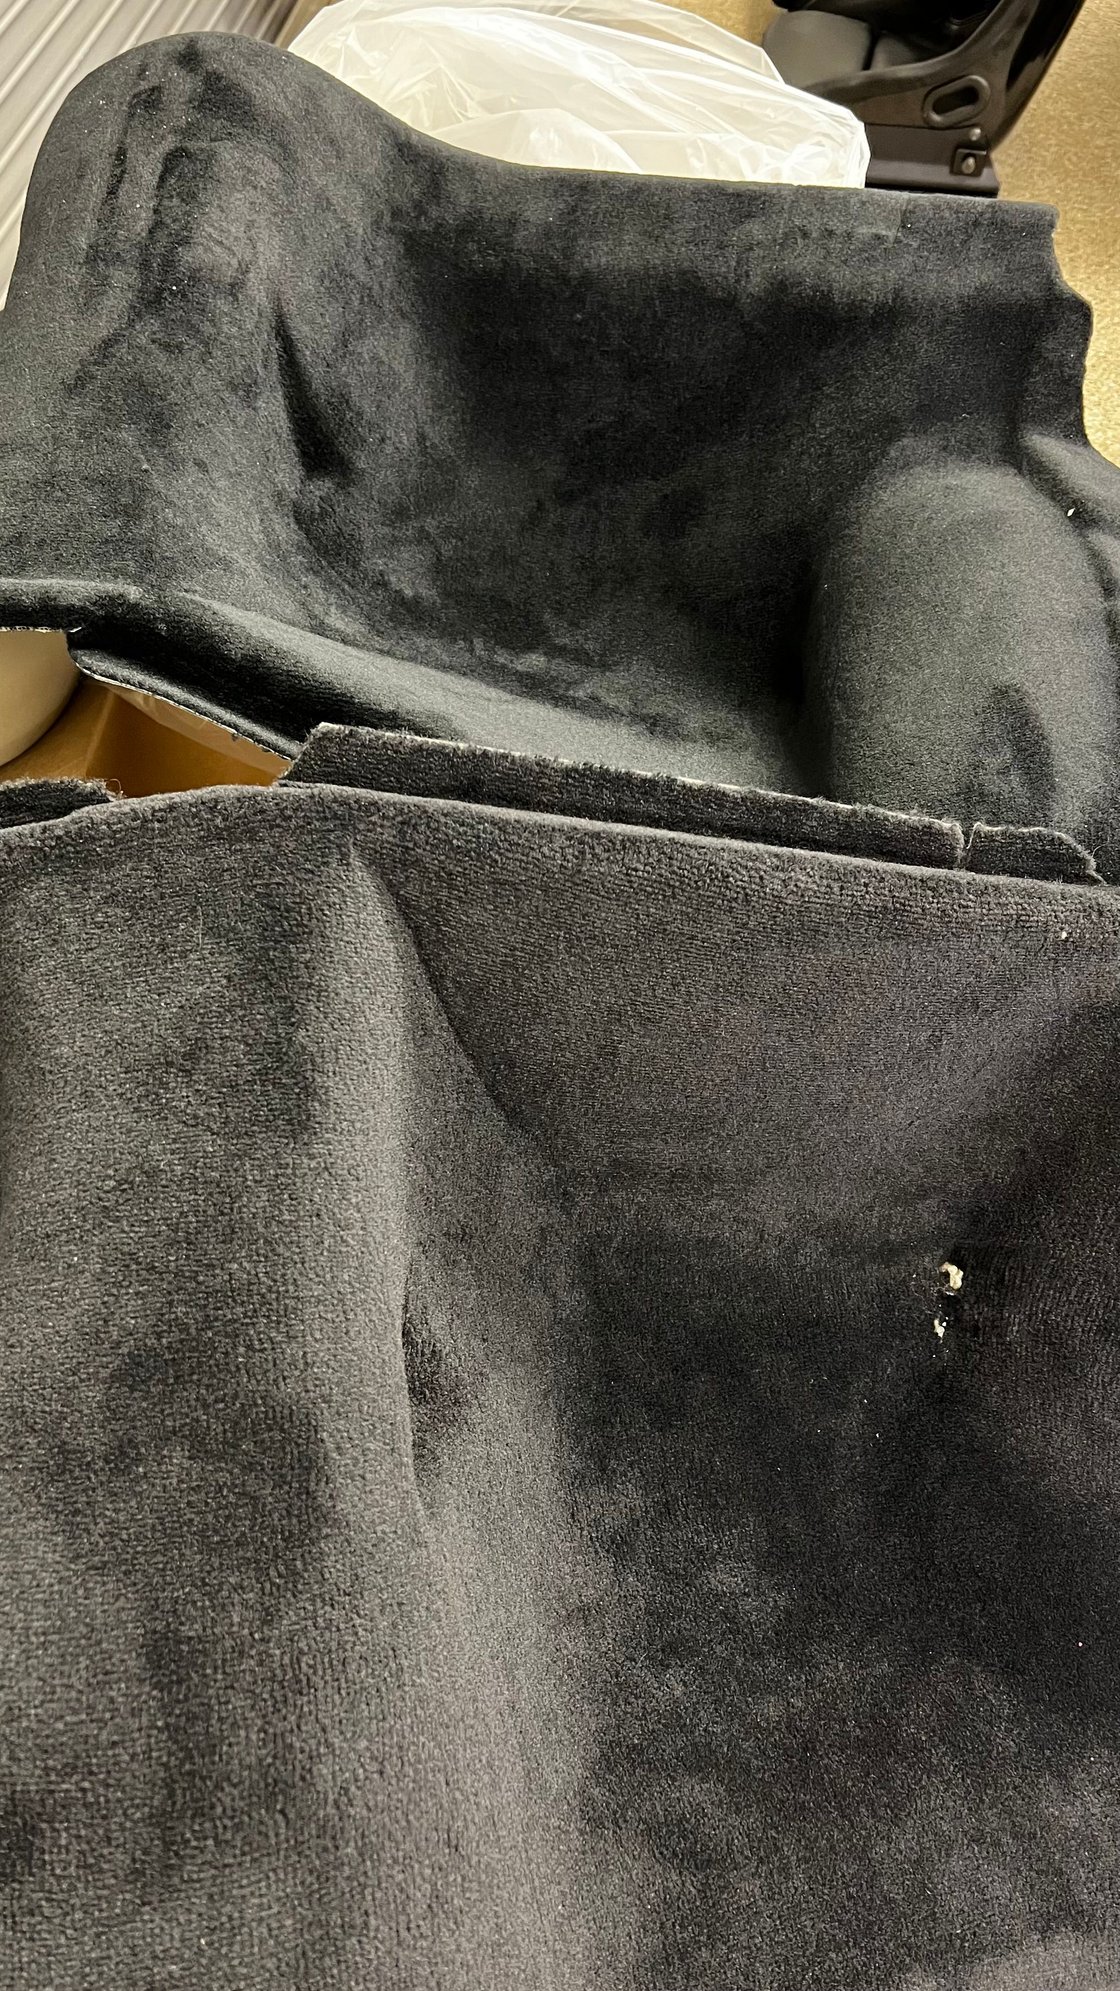
With the old carpet out of the car, I compared it to the new carpet. The color is nearly the same (even though it doesn�t look so in the photo), but the new seat well carpet is slightly more �plush�, and fibers are slightly closer together. It may be an age difference, an updated manufacturing process, or both. You can�t notice a difference if you�re more than 3 ft away, but it does make me want to replace the floor carpeting now.
Installed the new seat well carpet and decided to pause here so I can tackle another interior project over the new few days. More to come�


 12-23-2021, 12:31 AM