Notices
996 Forum 1999-2005
Sponsored by:

Repairing seats with Leatherworld Tech kit

Thread Tools
 
Search this Thread
 
Old 06-20-2017, 05:24 PM
  #1  
Dion Houng-Lee
Instructor
Thread Starter
 
Dion Houng-Lee's Avatar
 
Join Date: May 2017
Posts: 129
Likes: 0
Received 3 Likes on 3 Posts
Default Repairing seats with Leatherworld Tech kit

So my 99 Cab seats have seen better days so rather than replace or even recover, I thought I would give a repair a try as the kit from Leatherworldtech.com was under $100 delivered. (I have no affiliation or interest in the company aside from using their product)

I'll keep posting as I make progress. I removed the seats from the car to make it easier to work on as I needed to also repair a tear and wanted to take apart the seat bottom.

1. The seat rails have plastic covers covering the bolts. The front two are held on with two phillips heads and just slide off. The rear two are just clipped on. You will need an E12 socket to remove the bolts.

2. To remove the bottom cushion there are two white plastic tabs to pull the plugs out and pop them out.

3. Take the two small screws out of the seat adjustment panel and pop off the controls and push up and out to get the face off. Then detach the electrical connector from the panel (wedge a couple small flat heads in the tabs and it pops off)

4. Detach the electrical connectors from under the seat and cut the zip ties.

5. The bottom seat then lifts up from the front and pull it out.

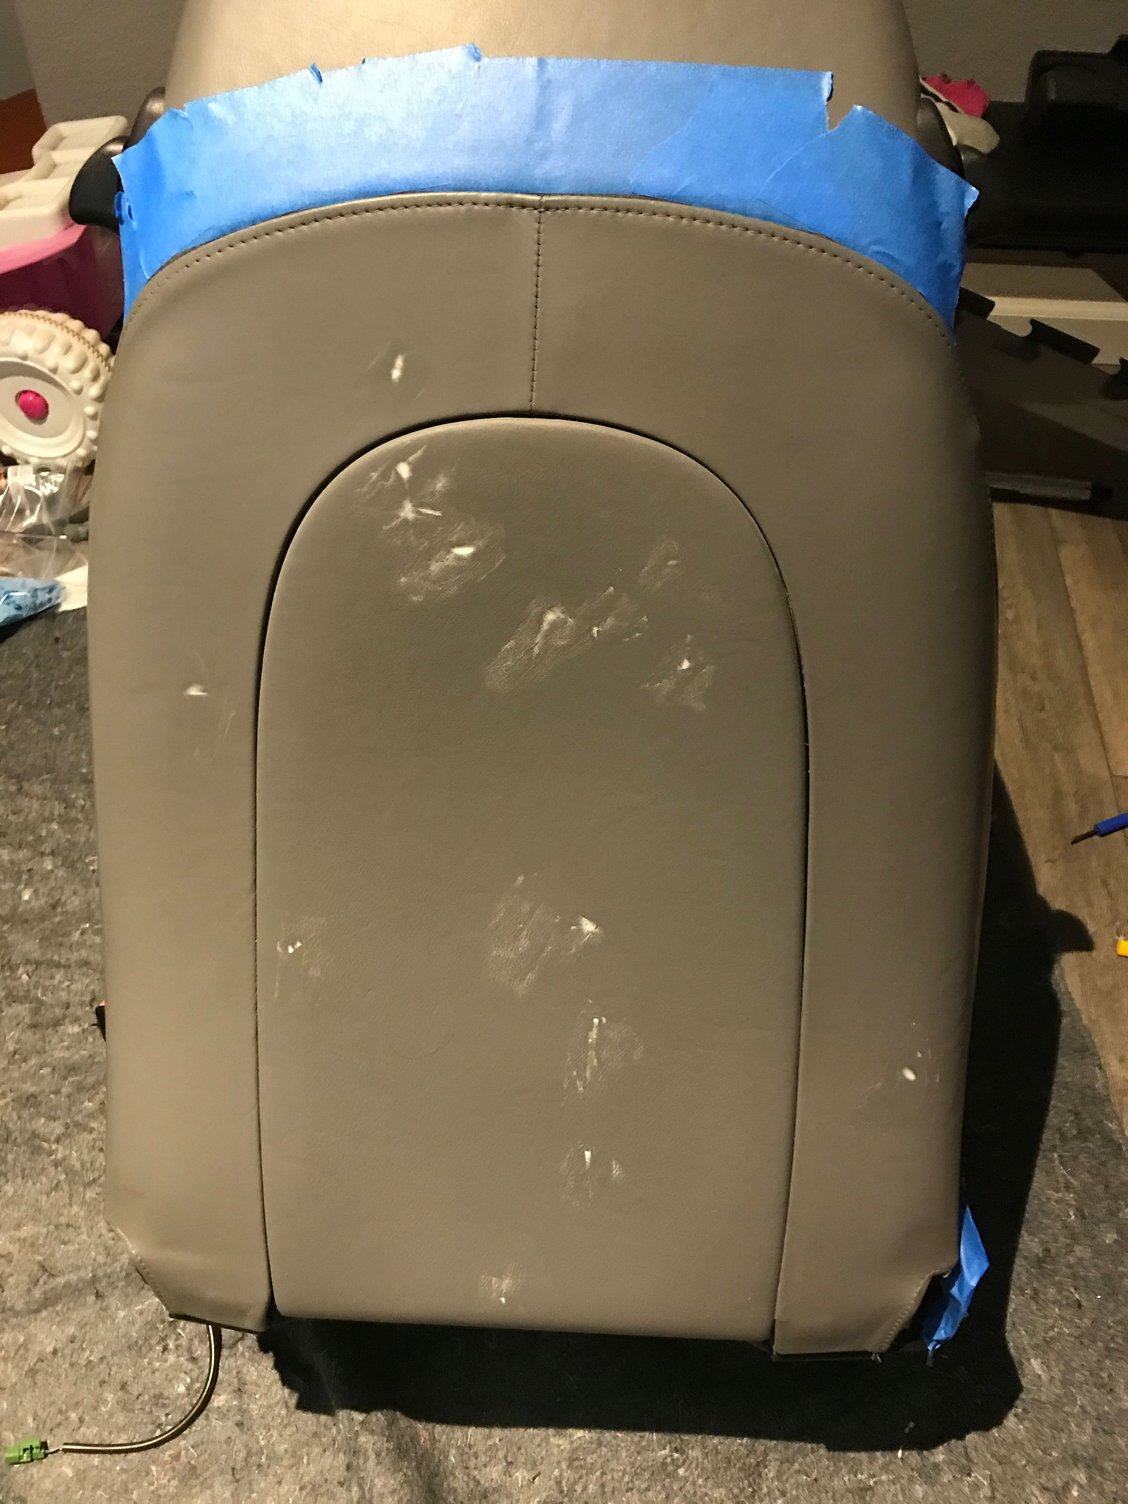
I posted a couple of pics of the current seat condition which has a lot of cracks.

6. the middle seat back comes out by pulling out the black rail from the back of the seat at the bottom which loosens up the piece. The go to the front of the seat and the top has three clips in the pic so it just requires you to pull up.

Last pick shows some of the filler I applied from the kit. More to come as I fill and sand.
Attached Images          
Old 06-21-2017, 01:15 AM
  #2  
wyovino
Rennlist Member
 
wyovino's Avatar
 
Join Date: Jun 2010
Posts: 3,562
Received 634 Likes on 344 Posts
Default

My seats need some TLC as well. I recently had one small piece of leather replaced on the left side of the driver's backrest - $450. If I remember correctly the piece was 4 inches by 22 inches. I don't think a repair kit would have worked on it. I'm anxious to follow along as you do this.
Old 06-21-2017, 02:02 AM
  #3  
Dion Houng-Lee
Instructor
Thread Starter
 
Dion Houng-Lee's Avatar
 
Join Date: May 2017
Posts: 129
Likes: 0
Received 3 Likes on 3 Posts
Default

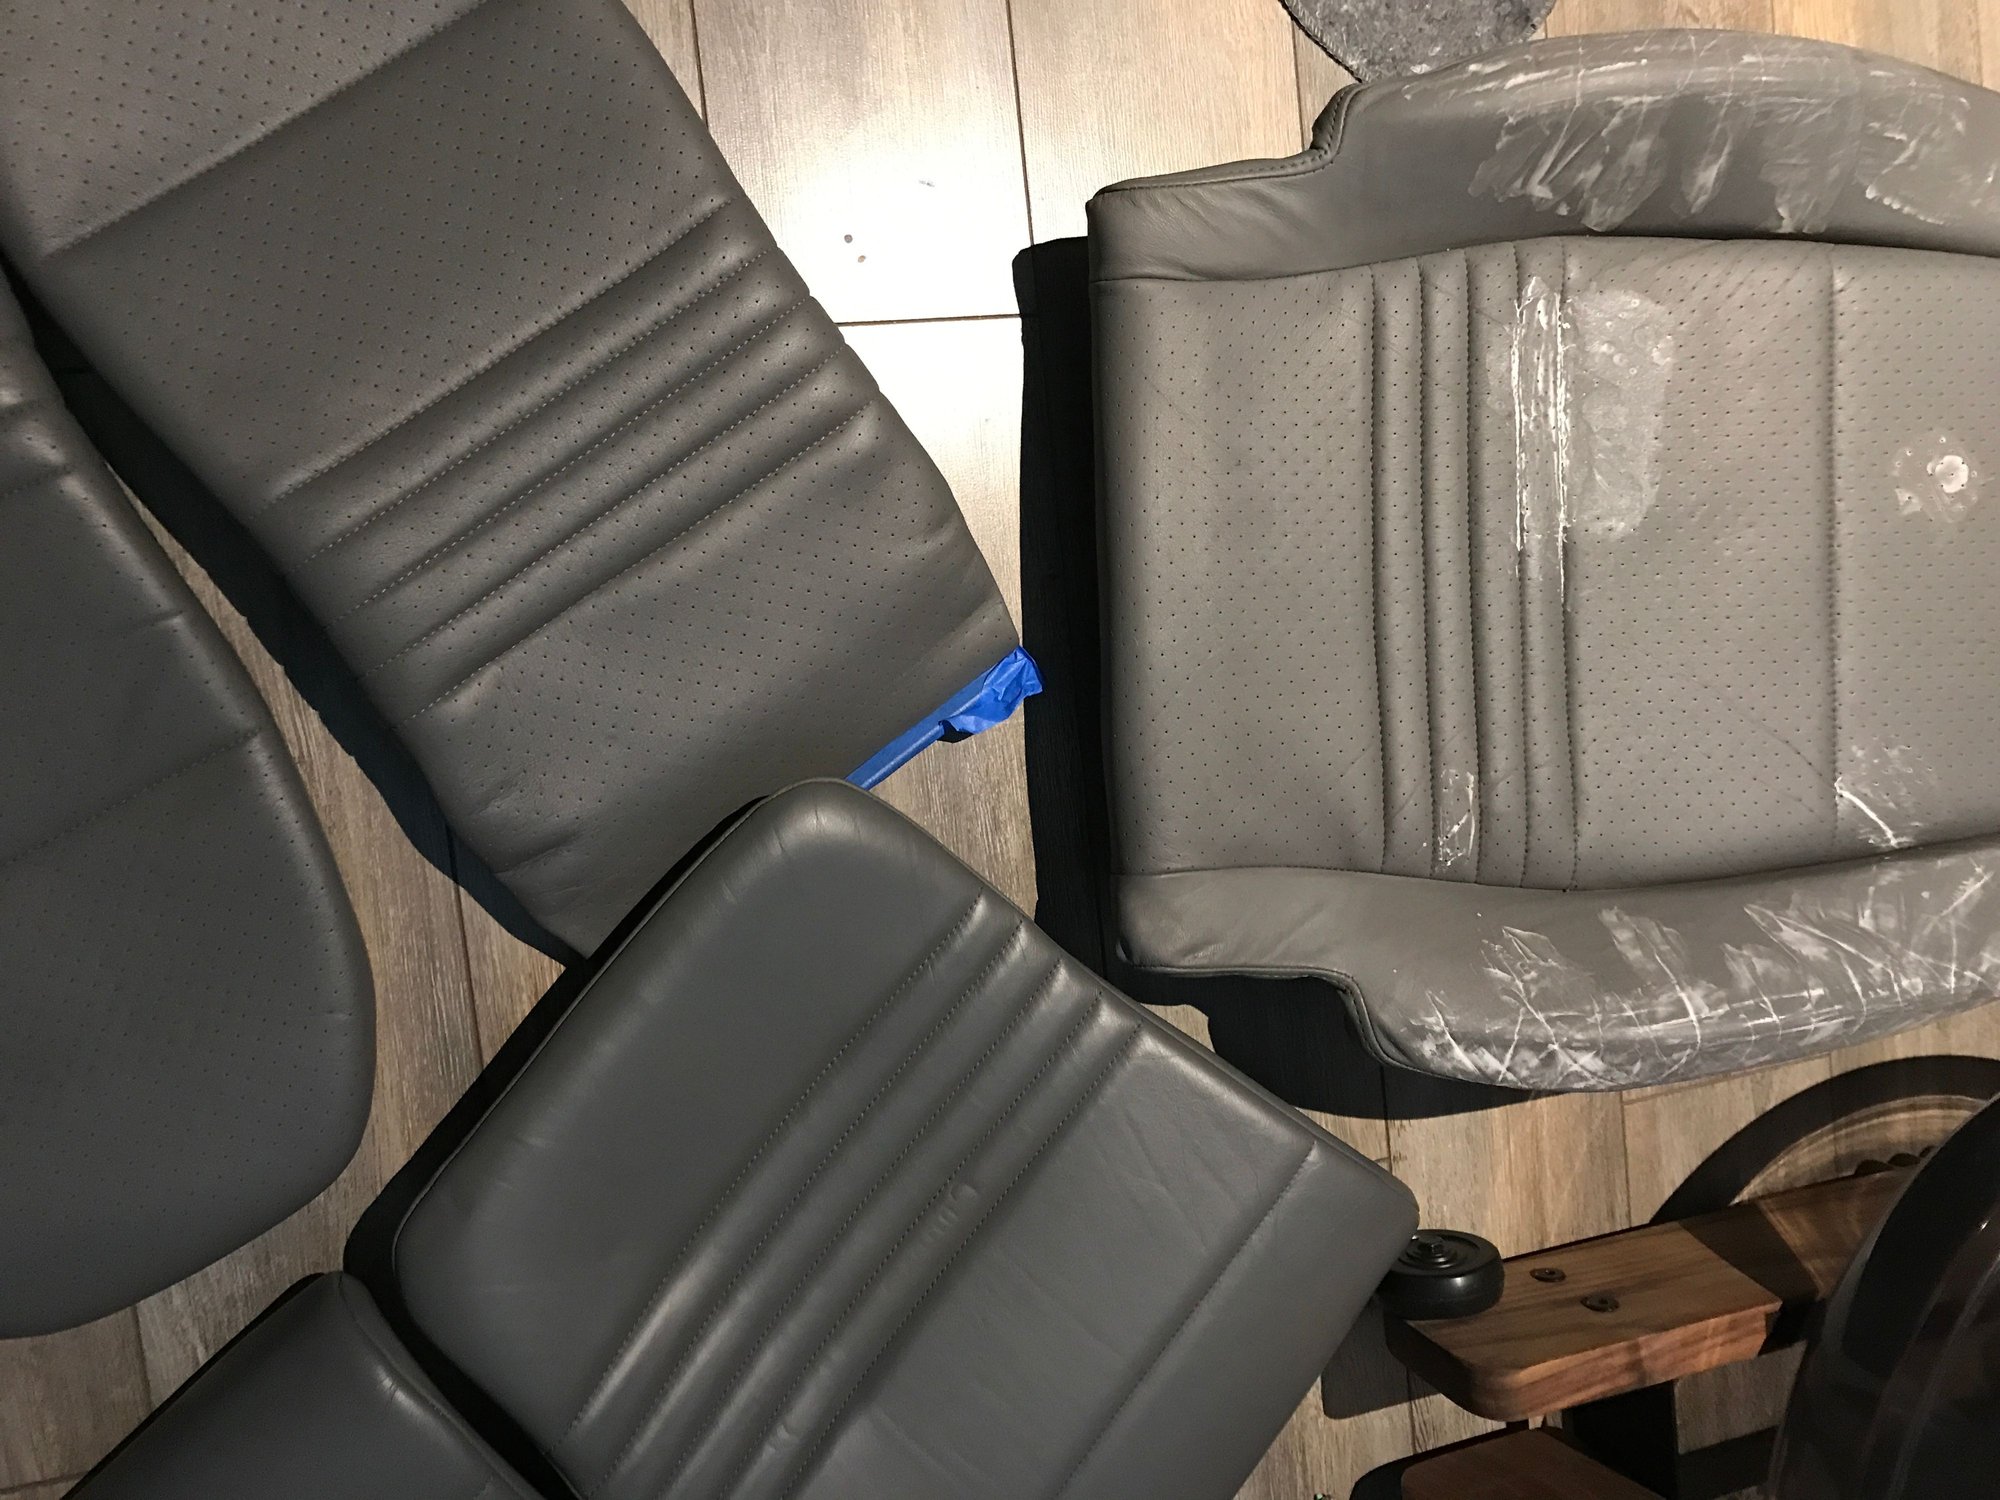
Another coat of the filler and here is a pic of the soft backs being touched up. My rears didn't need to be colored but the kit came with a great cleaner and sealant that I used on them. The finish looks new now. Soft backs being filled
Notice the difference in finish?
The following users liked this post:
peterp (12-06-2021)
Old 06-21-2017, 09:37 AM
  #4  
dporto
Rennlist Member
 
dporto's Avatar
 
Join Date: Oct 2014
Location: L.I. NY
Posts: 6,790
Received 1,169 Likes on 797 Posts
Default

Looking good! Are you spraying on the finish or using the sponge on method?
Old 06-21-2017, 09:48 AM
  #5  
Botsy67
Rennlist Member
 
Botsy67's Avatar
 
Join Date: Apr 2006
Location: Albany NY
Posts: 790
Likes: 0
Received 26 Likes on 22 Posts
Default

Very nice indeed, would be interested as well, and see how well you can completely remove all the cracks on the seat bottom and back side-bolsters. Thanks for sharing your DIY, cheers,
Old 06-21-2017, 11:53 AM
  #6  
cbracerx
Rennlist Member
 
cbracerx's Avatar
 
Join Date: Nov 2005
Location: New Hope, PA
Posts: 2,411
Received 401 Likes on 262 Posts
Default

Subscribed. I am in the middle of adding heat to seats that did not have them, and it requires major disassembly. Not that hard really, and if a replacement section needed to be added you could save money by DIY the covers.
Old 06-21-2017, 12:02 PM
  #7  
Elumere
Rennlist Member
 
Elumere's Avatar
 
Join Date: Mar 2016
Location: Los Angeles, CA
Posts: 289
Received 49 Likes on 28 Posts
Default

I'm curious how it holds up over time.

Thanks and following.
Old 06-21-2017, 12:34 PM
  #8  
dporto
Rennlist Member
 
dporto's Avatar
 
Join Date: Oct 2014
Location: L.I. NY
Posts: 6,790
Received 1,169 Likes on 797 Posts
Default

I did mine with the leatherworld kit over two years ago and it has held up very well... see here for the whole story https://rennlist.com/forums/996-foru...therworld.html
Old 06-21-2017, 12:51 PM
  #9  
Dion Houng-Lee
Instructor
Thread Starter
 
Dion Houng-Lee's Avatar
 
Join Date: May 2017
Posts: 129
Likes: 0
Received 3 Likes on 3 Posts
Default

You know a car geek when you get up at 4am without an alarm clock to put the first coat on before work
Old 06-21-2017, 12:58 PM
  #10  
Elumere
Rennlist Member
 
Elumere's Avatar
 
Join Date: Mar 2016
Location: Los Angeles, CA
Posts: 289
Received 49 Likes on 28 Posts
Default

Originally Posted by dporto
I did mine with the leatherworld kit over two years ago and it has held up very well... see here for the whole story https://rennlist.com/forums/996-foru...therworld.html
Perfect, thanks!

As my side bolster looks about the same as yours did pre-restoration, I'm about to order a kit.

So, low gloss or semi gloss? As this is rather subjective to judge..
Old 06-21-2017, 01:11 PM
  #11  
zak996
Instructor
 
zak996's Avatar
 
Join Date: Jul 2015
Location: Uxbridge
Posts: 192
Likes: 0
Received 1 Like on 1 Post
Default

Nice write up so far! Please keep us posted with pics and details.
Old 06-21-2017, 01:36 PM
  #12  
dporto
Rennlist Member
 
dporto's Avatar
 
Join Date: Oct 2014
Location: L.I. NY
Posts: 6,790
Received 1,169 Likes on 797 Posts
Default

I went with the low gloss because I figured that just the act of sitting on the seats they'd get sort of polished/burnished by the fabric contact. Same with the steering wheel and e-brake handle...It was a little different/dull initially, but that's exactly what happened - the sheen is a perfect match now
Old 06-21-2017, 03:30 PM
  #13  
Hotrodaxel1976
Racer
 
Hotrodaxel1976's Avatar
 
Join Date: May 2017
Location: All Over
Posts: 322
Likes: 0
Received 1 Like on 1 Post
Default

I'm planning on this project as soon as my car returns. I read you can cover all those holes for the heated vented seats, but it's time consuming to poke the holes back with a toothpick
Old 06-21-2017, 03:59 PM
  #14  
808Bill
Rennlist Member
 
808Bill's Avatar
 
Join Date: Dec 2016
Location: Kauai
Posts: 8,053
Received 807 Likes on 545 Posts
Default

Old 06-21-2017, 04:35 PM
  #15  
frisbee91
Three Wheelin'
 
frisbee91's Avatar
 
Join Date: Apr 2010
Location: Delaware, USA
Posts: 1,689
Likes: 0
Received 70 Likes on 53 Posts
Default

Subscribed. My seats look just like yours. I refinished my shift **** with leatherworldtech products a few years ago, and it's held up well.

The seats seemed like too much work, but now I'm rethinking it. Can't wait to see more.


Quick Reply: Repairing seats with Leatherworld Tech kit


All times are GMT -3. The time now is 12:35 PM.